1
2
IMPORTANT SAFEGUARDS
When using electrical appliances, basic safety precautions should always
be followed, including the following:
❑ READ ALL INSTRUCTIONS BEFORE USING THIS IRON.
❑ Use iron only for its intended use.
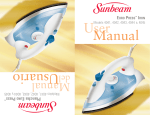
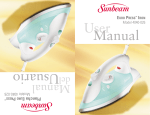
Steam Iron
USER MANUAL
❑ To protect against risk of electric shock, do not immerse the iron in
water or other liquids.
❑ The iron should always be turned to “OFF” before plugging or
unplugging from outlet. Never yank cord to disconnect from outlet;
instead, grasp plug and pull to disconnect.
❑ Do not allow cord to touch hot surfaces. Let iron cool completely
before putting away. Loop cord loosely around iron when storing.
❑ Always disconnect iron from electrical outlet when filling with water
or emptying and when not in use.
❑ Do not operate iron with a damaged cord or if the iron has been
dropped or damaged. To avoid the risk of electric shock, do not
disassemble the iron. Take it to an authorized service center for
examination and/or repair. Incorrect reassembly can cause a risk of
electric shock when the iron is used.
❑ Close supervision is necessary for any appliance being used by or near
children. Do not leave iron unattended while connected or on an
ironing board.
❑ Burns can occur from touching hot metal parts, hot water or steam.
Use caution when you turn a steam iron upside down – there may be
hot water in the reservoir.
❑ If the iron is not operating normally, disconnect from the power supply
and have the iron serviced by an authorized service center.
❑ Your SUNBEAM® iron is designed to rest on the heel rest. Do not leave
the iron unattended. Do not set the iron on an unprotected surface,
even if it is on its heel rest.
Model
3980
SAVE THESE INSTRUCTIONS
3
2
IMPORTANT SAFEGUARDS
When using electrical appliances, basic safety precautions should always
be followed, including the following:
❑ READ ALL INSTRUCTIONS BEFORE USING THIS IRON.
❑ Use iron only for its intended use.
Steam Iron
USER MANUAL
❑ To protect against risk of electric shock, do not immerse the iron in
water or other liquids.
❑ The iron should always be turned to “OFF” before plugging or
unplugging from outlet. Never yank cord to disconnect from outlet;
instead, grasp plug and pull to disconnect.
❑ Do not allow cord to touch hot surfaces. Let iron cool completely
before putting away. Loop cord loosely around iron when storing.
❑ Always disconnect iron from electrical outlet when filling with water
or emptying and when not in use.
❑ Do not operate iron with a damaged cord or if the iron has been
dropped or damaged. To avoid the risk of electric shock, do not
disassemble the iron. Take it to an authorized service center for
examination and/or repair. Incorrect reassembly can cause a risk of
electric shock when the iron is used.
❑ Close supervision is necessary for any appliance being used by or near
children. Do not leave iron unattended while connected or on an
ironing board.
❑ Burns can occur from touching hot metal parts, hot water or steam.
Use caution when you turn a steam iron upside down – there may be
hot water in the reservoir.
❑ If the iron is not operating normally, disconnect from the power supply
and have the iron serviced by an authorized service center.
❑ Your SUNBEAM® iron is designed to rest on the heel rest. Do not leave
the iron unattended. Do not set the iron on an unprotected surface,
even if it is on its heel rest.
Model
3980
SAVE THESE INSTRUCTIONS
3
W ELCOME
Congratulations on your purchase of a SUNBEAM® iron! Sunbeam
has designed your iron to provide the utmost in quality, ease of use
and convenience. Sunbeam offers you an iron to fit your lifestyle:
SUNBEAM® irons offer the following features:
❑
SPRAY MIST® – Provides a fine mist of water to dampen fabrics
for creases or to remove wrinkles from heavy fabrics.
TABLE
OF
C ONTENTS
Important Safeguards . . . . . . . . . . . . . . . Inside Cover
Welcome . . . . . . . . . . . . . . . . . . . . . . . . . . . . . . . . 3
Table of Contents . . . . . . . . . . . . . . . . . . . . . . . . . . 4
❑
Large Water Fill Hole – Allows you to fill the water reservoir faster
while reducing water spills and drips.
❑
Comfortable Ergonomic Handle – Provides a more comfortable grip
and easy handling.
Dry Ironing . . . . . . . . . . . . . . . . . . . . . . . . . . . . . . 6
❑
Temperature Indicator Light – Lights when Iron is heating up.
Steam Ironing . . . . . . . . . . . . . . . . . . . . . . . . . . . . 7
❑
Adjustable Steam Dial – Adjusts steam level for difficult ironing
needs. For dry ironing, turn dial to DRY.
Using the Iron’s Special Features . . . . . . . . . . . . . . 7
Features of Your Iron . . . . . . . . . . . . . . . . . . . . . . . 5
Filling the Water Reservoir . . . . . . . . . . . . . . . . . . 6
SPRAY MIST® . . . . . . . . . . . . . . . . . . . . . . . . . . . . . . 7
❑
Soleplate – Has full-length button grooves for added convenience
when ironing shirts and blouses.
Caring for Your Iron After Use . . . . . . . . . . . . . . . . 7
Turning Off Your Iron . . . . . . . . . . . . . . . . . . . . . . 7
SPECIAL INSTRUCTIONS
Storing Your Iron
......................... 8
❑ This is a 1100-Watt appliance. To avoid a circuit overload, do not
operate another high wattage appliance on the same circuit.
Maintaining Your Iron . . . . . . . . . . . . . . . . . . . . . . 8
❑ If an extension cord is absolutely necessary, a 10-ampere cord should
be used. Cords rated for less amperage may overheat. Care should be
taken to arrange the cord so that it cannot be pulled or tripped over.
Cleaning the Soleplate . . . . . . . . . . . . . . . . . . . . . 8
Ironing Tips . . . . . . . . . . . . . . . . . . . . . . . . . . . . . . 9
For Products Purchased in the United States
To reduce the risk of electrical shock, this appliance has a polarized plug
(one blade is wider than the other). This plug fits a polarized outlet only
one way; if the plug does not fit fully into the outlet, reverse the plug.
If it still does not fit, contact a qualified electrician. Do not attempt to
defeat this safety feature.
4
Ironing Guide . . . . . . . . . . . . . . . . . . . . . . . . . . . . 10
One-Year Limited Warranty . . . . . . . . . . . . . . . . . . 11
How to Obtain Warranty Service
. . . . . . . . . . . . . 11
5
W ELCOME
Congratulations on your purchase of a SUNBEAM® iron! Sunbeam
has designed your iron to provide the utmost in quality, ease of use
and convenience. Sunbeam offers you an iron to fit your lifestyle:
SUNBEAM® irons offer the following features:
❑
SPRAY MIST® – Provides a fine mist of water to dampen fabrics
for creases or to remove wrinkles from heavy fabrics.
TABLE
OF
C ONTENTS
Important Safeguards . . . . . . . . . . . . . . . Inside Cover
Welcome . . . . . . . . . . . . . . . . . . . . . . . . . . . . . . . . 3
Table of Contents . . . . . . . . . . . . . . . . . . . . . . . . . . 4
❑
Large Water Fill Hole – Allows you to fill the water reservoir faster
while reducing water spills and drips.
❑
Comfortable Ergonomic Handle – Provides a more comfortable grip
and easy handling.
Dry Ironing . . . . . . . . . . . . . . . . . . . . . . . . . . . . . . 6
❑
Temperature Indicator Light – Lights when Iron is heating up.
Steam Ironing . . . . . . . . . . . . . . . . . . . . . . . . . . . . 7
❑
Adjustable Steam Dial – Adjusts steam level for difficult ironing
needs. For dry ironing, turn dial to DRY.
Using the Iron’s Special Features . . . . . . . . . . . . . . 7
Features of Your Iron . . . . . . . . . . . . . . . . . . . . . . . 5
Filling the Water Reservoir . . . . . . . . . . . . . . . . . . 6
SPRAY MIST® . . . . . . . . . . . . . . . . . . . . . . . . . . . . . . 7
❑
Soleplate – Has full-length button grooves for added convenience
when ironing shirts and blouses.
Caring for Your Iron After Use . . . . . . . . . . . . . . . . 7
Turning Off Your Iron . . . . . . . . . . . . . . . . . . . . . . 7
SPECIAL INSTRUCTIONS
Storing Your Iron
......................... 8
❑ This is a 1100-Watt appliance. To avoid a circuit overload, do not
operate another high wattage appliance on the same circuit.
Maintaining Your Iron . . . . . . . . . . . . . . . . . . . . . . 8
❑ If an extension cord is absolutely necessary, a 10-ampere cord should
be used. Cords rated for less amperage may overheat. Care should be
taken to arrange the cord so that it cannot be pulled or tripped over.
Cleaning the Soleplate . . . . . . . . . . . . . . . . . . . . . 8
Ironing Tips . . . . . . . . . . . . . . . . . . . . . . . . . . . . . . 9
For Products Purchased in the United States
To reduce the risk of electrical shock, this appliance has a polarized plug
(one blade is wider than the other). This plug fits a polarized outlet only
one way; if the plug does not fit fully into the outlet, reverse the plug.
If it still does not fit, contact a qualified electrician. Do not attempt to
defeat this safety feature.
4
Ironing Guide . . . . . . . . . . . . . . . . . . . . . . . . . . . . 10
One-Year Limited Warranty . . . . . . . . . . . . . . . . . . 11
How to Obtain Warranty Service
. . . . . . . . . . . . . 11
5
FEATURES
OF
YOUR STEAM IRON
1
You must fill the water reservoir with water to use the SPRAY MIST® feature
and to get steam out of your iron.
Tip: Sunbeam tests each iron at the factory to ensure that they function
correctly. The test may leave a small, harmless amount of water within
the water reservoir.
3
9
Filling the Water Reservoir
Before you fill the water reservoir, please consider the following:
4
❑
While this iron was designed for use with tap water, very hard water
will reduce the performance of the iron. If your water is very hard,
Sunbeam recommends that you use tap water the first time, then
consider using demineralized or distilled water for subsequent use.
You should use tap water once a month, however, to maintain the
iron’s optimal steam performance.
❑
Do not use water that has passed through a home water softening
system. This type of water contains minerals that will decrease the
performance and shorten the life of your iron. Use demineralized
or distilled water, instead.
8
2
7
6
1. SPRAY MIST® Button
2. Temperature Indicator Light
5
10
Important: When not ironing, always set the Steam dial to DRY and
the Fabric Select dial to OFF.
To fill the water reservoir:
1. Make sure the iron is unplugged and that the Fabric Select dial is
set to OFF and the Steam dial is set to DRY. Fill the water reservoir
with tap water until it reaches the maximum fill level (4.4 ounces).
WARNING: To prevent the risk of burns, be careful when filling a hot iron
with water. Hot metal parts, hot water and steam can cause injuries.
3. Power Cord
4. Heel Rest
Dry Ironing
5. Large Water Reservoir
1. Plug the cord into a 120-Volt AC outlet.
6. Fabric/Temperature Select Dial
8. Easy-to-Fill Water Tank
3. Turn the Fabric Select dial to the Dry ironing fabric setting you desire
(Silk or Synthetics) and allow the iron to heat for 2 minutes.
While the iron is heating, make sure it is sitting on its heel rest
on a stable, protected surface.
9. Adjustable Steam Dial
4. The Temperature Indicator Light will remain lit until iron reaches
appropriate temperature.
7. Soleplate
10. Steam Vents
6
2. Make sure that the Steam dial is set to Dry.
Tip: Refer to the Ironing Guide on Page 10 for the recommended setting
for your fabric.
7
FEATURES
OF
YOUR STEAM IRON
1
You must fill the water reservoir with water to use the SPRAY MIST® feature
and to get steam out of your iron.
Tip: Sunbeam tests each iron at the factory to ensure that they function
correctly. The test may leave a small, harmless amount of water within
the water reservoir.
3
9
Filling the Water Reservoir
Before you fill the water reservoir, please consider the following:
4
❑
While this iron was designed for use with tap water, very hard water
will reduce the performance of the iron. If your water is very hard,
Sunbeam recommends that you use tap water the first time, then
consider using demineralized or distilled water for subsequent use.
You should use tap water once a month, however, to maintain the
iron’s optimal steam performance.
❑
Do not use water that has passed through a home water softening
system. This type of water contains minerals that will decrease the
performance and shorten the life of your iron. Use demineralized
or distilled water, instead.
8
2
7
6
1. SPRAY MIST® Button
2. Temperature Indicator Light
5
10
Important: When not ironing, always set the Steam dial to DRY and
the Fabric Select dial to OFF.
To fill the water reservoir:
1. Make sure the iron is unplugged and that the Fabric Select dial is
set to OFF and the Steam dial is set to DRY. Fill the water reservoir
with tap water until it reaches the maximum fill level (4.4 ounces).
WARNING: To prevent the risk of burns, be careful when filling a hot iron
with water. Hot metal parts, hot water and steam can cause injuries.
3. Power Cord
4. Heel Rest
Dry Ironing
5. Large Water Reservoir
1. Plug the cord into a 120-Volt AC outlet.
6. Fabric/Temperature Select Dial
8. Easy-to-Fill Water Tank
3. Turn the Fabric Select dial to the Dry ironing fabric setting you desire
(Silk or Synthetics) and allow the iron to heat for 2 minutes.
While the iron is heating, make sure it is sitting on its heel rest
on a stable, protected surface.
9. Adjustable Steam Dial
4. The Temperature Indicator Light will remain lit until iron reaches
appropriate temperature.
7. Soleplate
10. Steam Vents
6
2. Make sure that the Steam dial is set to Dry.
Tip: Refer to the Ironing Guide on Page 10 for the recommended setting
for your fabric.
7
Steam Ironing
S TORING Y OUR I RON
1. Follow the instructions for “Filling the Water Reservoir” on Page 6.
1. Allow the iron to cool.
2. Plug the cord into a 120-Volt AC outlet.
2. If you do not use your iron on a daily basis, empty the water reservoir
after each use for a longer iron life. To do so, turn the iron upside
down to allow water to flow from the fill hole. Shake the iron gently
to remove trapped water drops.
3. Turn the Fabric Select dial to the Steam ironing fabric setting
you desire (Linen, Cotton or Wool) and allow the iron to heat
for 2 minutes. While the iron is heating, make sure it is sitting
on its heel rest on a stable, protected surface.
3. Loosely loop the power cord together and store the iron on its heel rest.
Tip: Refer to the Ironing Guide on Page 10 for the recommended setting
for your fabric.
Important: Wrapping the cord around the iron too tightly can damage
the cord.
4. After the iron has heated (2 minutes), turn the Steam dial to the
appropriate steam setting.
Tip: When not ironing, always set the Steam dial to DRY and the Fabric
Select dial to OFF.
5. The Temperature Indicator Light remains on until the iron reaches
the appropriate temperature.
How To Use the Special Functions
SPRAY MIST
Maintaining Your Iron
C LEANING
THE
S OLEPLATE
®
Clean the soleplate if starch or other residue accumulate.
®
The SPRAY MIST feature dampens the fabric to aid in removing wrinkles
from heavy fabrics and for setting creases.
To use the SPRAY MIST® feature:
Press the SPRAY MIST® button firmly.
Caring for Your Iron After Use
To clean the Soleplate:
1. Allow the iron to cool and then wipe it with a soft, damp cloth.
WARNING: DO NOT use abrasive cleansers, scouring pads or
vinegar to clean the soleplate, this will damage the finish.
2. Run the iron over an all-cotton cloth to remove any residue.
T URNING O FF Y OUR I RON
1. Turn the Steam dial to DRY and the Fabric Select dial to OFF.
2. Unplug the iron from the power source.
WARNING: NEVER yank the power cord when unplugging the iron,
this can damage the cord.
8
9
Steam Ironing
S TORING Y OUR I RON
1. Follow the instructions for “Filling the Water Reservoir” on Page 6.
1. Allow the iron to cool.
2. Plug the cord into a 120-Volt AC outlet.
2. If you do not use your iron on a daily basis, empty the water reservoir
after each use for a longer iron life. To do so, turn the iron upside
down to allow water to flow from the fill hole. Shake the iron gently
to remove trapped water drops.
3. Turn the Fabric Select dial to the Steam ironing fabric setting
you desire (Linen, Cotton or Wool) and allow the iron to heat
for 2 minutes. While the iron is heating, make sure it is sitting
on its heel rest on a stable, protected surface.
3. Loosely loop the power cord together and store the iron on its heel rest.
Tip: Refer to the Ironing Guide on Page 10 for the recommended setting
for your fabric.
Important: Wrapping the cord around the iron too tightly can damage
the cord.
4. After the iron has heated (2 minutes), turn the Steam dial to the
appropriate steam setting.
Tip: When not ironing, always set the Steam dial to DRY and the Fabric
Select dial to OFF.
5. The Temperature Indicator Light remains on until the iron reaches
the appropriate temperature.
How To Use the Special Functions
SPRAY MIST
Maintaining Your Iron
C LEANING
THE
S OLEPLATE
®
Clean the soleplate if starch or other residue accumulate.
®
The SPRAY MIST feature dampens the fabric to aid in removing wrinkles
from heavy fabrics and for setting creases.
To use the SPRAY MIST® feature:
Press the SPRAY MIST® button firmly.
Caring for Your Iron After Use
To clean the Soleplate:
1. Allow the iron to cool and then wipe it with a soft, damp cloth.
WARNING: DO NOT use abrasive cleansers, scouring pads or
vinegar to clean the soleplate, this will damage the finish.
2. Run the iron over an all-cotton cloth to remove any residue.
T URNING O FF Y OUR I RON
1. Turn the Steam dial to DRY and the Fabric Select dial to OFF.
2. Unplug the iron from the power source.
WARNING: NEVER yank the power cord when unplugging the iron,
this can damage the cord.
8
9
Ironing Tips
❑
Always read garment labels and follow the manufacturer’s ironing
instructions.
❑
Sort the articles to be ironed according to the type of fabric.
❑
❑
❑
❑
You should first iron garments requiring low temperature (e.g., silks
and synthetics) to avoid damaging them with an iron that is too hot.
If you are unsure of the fabric content of the garment, test a
small area, such as a seam or facing, before ironing a visible area.
Start with a low temperature and gradually increase the heat
to find the best setting.
When changing the temperature from a high setting to a low setting,
allow approximately 5 minutes for the lower temperature to be reached.
When steam ironing, use long, slow passes over the fabric. This will
allow the steam to penetrate the fabric while allowing the heat of
the soleplate to dry out the moisture.
I RONING G UIDE
Fabric
Steam Setting Fabric Setting Ironing Recommendations
Acrylic
Dry
Synthetic
Iron garment inside out.
Acetate
Dry
Synthetic
Iron garment inside out while still damp.
Viscose
Dry
Synthetic
Iron garment inside out or use an ironing cloth*
to prevent shine marks.
Nylon
Dry
Synthetic
Mainly dry iron; steam may be used under garment
manufacturer’s instructions.
Polyester Dry
Synthetic
Iron garment inside out while still damp.
Rayon
Dry
Synthetic
Iron garment inside out while still damp.
Silk
Dry
Silk
Iron garment inside out.
Wool
Medium Steam Wool
Iron garment inside out or use an ironing cloth.*
Wool
Blends
Medium Steam Wool
Iron garment inside out or use an ironing cloth.*
Cotton
Blends
Medium Steam Cotton
Follow garment manufacturer’s instructions.
Use setting for the fiber requiring the lowest setting.
❑
To iron linens, turn garment inside out. Be careful not to use an iron
that is too hot because the lining may melt or stick to the soleplate.
❑
To iron zippers, use an ironing cloth or make sure the zipper is closed
and iron over the flap. Never iron directly over an unprotected zipper.
Corduroy Medium Steam Cotton
❑
Use the Ironing Guide on Page 10 to select the best setting and
method for the fabric you plan to iron.
Cotton
High Steam
Cotton
Iron dark fabrics inside out to prevent shine marks.
Linen
High Steam
Linen
Iron garment inside out or use an ironing cloth*
to prevent shine marks (especially on dark fabrics).
Denim
High Steam
Linen
Use the SPRAY MIST® feature and/or the
SHOT OF STEAM® feature for deeper penetration
to remove wrinkles.
Iron garment inside out or use an ironing cloth*
and then brush the garment with your hand to raise
the texture of the fabric.
*An ironing cloth is a cotton, dry-cleaned cloth that you place over the garment you are
ironing to prevent the fabric from looking shiny.
10
11
Ironing Tips
❑
Always read garment labels and follow the manufacturer’s ironing
instructions.
❑
Sort the articles to be ironed according to the type of fabric.
❑
❑
❑
❑
You should first iron garments requiring low temperature (e.g., silks
and synthetics) to avoid damaging them with an iron that is too hot.
If you are unsure of the fabric content of the garment, test a
small area, such as a seam or facing, before ironing a visible area.
Start with a low temperature and gradually increase the heat
to find the best setting.
When changing the temperature from a high setting to a low setting,
allow approximately 5 minutes for the lower temperature to be reached.
When steam ironing, use long, slow passes over the fabric. This will
allow the steam to penetrate the fabric while allowing the heat of
the soleplate to dry out the moisture.
I RONING G UIDE
Fabric
Steam Setting Fabric Setting Ironing Recommendations
Acrylic
Dry
Synthetic
Iron garment inside out.
Acetate
Dry
Synthetic
Iron garment inside out while still damp.
Viscose
Dry
Synthetic
Iron garment inside out or use an ironing cloth*
to prevent shine marks.
Nylon
Dry
Synthetic
Mainly dry iron; steam may be used under garment
manufacturer’s instructions.
Polyester Dry
Synthetic
Iron garment inside out while still damp.
Rayon
Dry
Synthetic
Iron garment inside out while still damp.
Silk
Dry
Silk
Iron garment inside out.
Wool
Medium Steam Wool
Iron garment inside out or use an ironing cloth.*
Wool
Blends
Medium Steam Wool
Iron garment inside out or use an ironing cloth.*
Cotton
Blends
Medium Steam Cotton
Follow garment manufacturer’s instructions.
Use setting for the fiber requiring the lowest setting.
❑
To iron linens, turn garment inside out. Be careful not to use an iron
that is too hot because the lining may melt or stick to the soleplate.
❑
To iron zippers, use an ironing cloth or make sure the zipper is closed
and iron over the flap. Never iron directly over an unprotected zipper.
Corduroy Medium Steam Cotton
❑
Use the Ironing Guide on Page 10 to select the best setting and
method for the fabric you plan to iron.
Cotton
High Steam
Cotton
Iron dark fabrics inside out to prevent shine marks.
Linen
High Steam
Linen
Iron garment inside out or use an ironing cloth*
to prevent shine marks (especially on dark fabrics).
Denim
High Steam
Linen
Use the SPRAY MIST® feature and/or the
SHOT OF STEAM® feature for deeper penetration
to remove wrinkles.
Iron garment inside out or use an ironing cloth*
and then brush the garment with your hand to raise
the texture of the fabric.
*An ironing cloth is a cotton, dry-cleaned cloth that you place over the garment you are
ironing to prevent the fabric from looking shiny.
10
11
1-YEAR LIMITED WARRANTY
Sunbeam Products, Inc. (“Sunbeam”) warrants that for a period of ONE year from
the date of purchase, this product will be free from defects in material and
workmanship. Sunbeam, at its option, will repair or replace this product or any
component of the product found to be defective during this warranty period.
Replacement will be made with a new or remanufactured product or component.
If the product is no longer available, replacement may be made with a similar
product of equal or greater value. This is your exclusive warranty.
This warranty is valid for the original retail purchaser from the date of initial
retail purchase and is not transferable. Keep the original sales receipt. Proof of
purchase is required to obtain warranty performance. Sunbeam dealers, service
centers or retail stores selling Sunbeam products do not have the right to alter,
modify or any way change the terms and conditions of this warranty.
This warranty does not cover normal wear of parts or damage resulting from any
of the following: negligent use or misuse of the product, use on improper voltage
or current, use contrary to the operating instructions, disassembly, repair or
alteration by anyone other than Sunbeam or an Authorized Service Center.
Further, the warranty does not cover Acts of God, such as fire, flood, hurricanes
and tornadoes.
Sunbeam shall not be liable for any incidental or consequential damages caused
by the breach of any express or implied warranty. Except to the extent prohibited
by applicable law, any implied warranty of merchantability or fitness for a
particular purpose is limited in duration to the duration of the above warranty.
Some states, provinces or jurisdictions do not allow the exclusion or limitation
of incidental or consequential damages or limitations on how long an implied
warranty lasts, so the above limitations of exclusion may not apply to you.
This warranty gives you specific legal rights and you may have the rights
that vary by state, province and/or jurisdiction.
D O N OT S END T HIS P RODUCT
OF
P URCHASE
www.sunbeam.com
D O N OT S END P RODUCT
TO THE
A BOVE A DDRESS
©2001 Sunbeam Products, Inc. All rights reserved.
SUNBEAM® and SPRAY MIST® are registered trademarks of Sunbeam Products, Inc.
Distributed by Sunbeam Products, Inc.
Boca Raton, FL 33431
Printed in China
12
P LACE
For product questions:
Sunbeam Consumer Service
P. O. Box 948389
Maitland, FL 32794-8389
1.800.458.8407
How to Obtain Warranty Service
Please, DO NOT RETURN THIS PRODUCT TO THE PLACE OF PURCHASE. Take the
product to an authorized Sunbeam service center. You can find the nearest
authorized Sunbeam service center by calling 1 800 458-8407, or by visiting
our website at www.sunbeam.com. If an authorized Sunbeam service center
is not conveniently located, attach a tag to the product that includes your name,
address, daytime telephone number and description of the problem. Include a
copy of the original sales receipt. Carefully package the tagged product with
the sales receipt and send either by UPS or Parcel Post with shipping and
insurance prepaid to the authorized Sunbeam service center address.
TO THE
P. N. 108304
1-YEAR LIMITED WARRANTY
Sunbeam Products, Inc. (“Sunbeam”) warrants that for a period of ONE year from
the date of purchase, this product will be free from defects in material and
workmanship. Sunbeam, at its option, will repair or replace this product or any
component of the product found to be defective during this warranty period.
Replacement will be made with a new or remanufactured product or component.
If the product is no longer available, replacement may be made with a similar
product of equal or greater value. This is your exclusive warranty.
This warranty is valid for the original retail purchaser from the date of initial
retail purchase and is not transferable. Keep the original sales receipt. Proof of
purchase is required to obtain warranty performance. Sunbeam dealers, service
centers or retail stores selling Sunbeam products do not have the right to alter,
modify or any way change the terms and conditions of this warranty.
This warranty does not cover normal wear of parts or damage resulting from any
of the following: negligent use or misuse of the product, use on improper voltage
or current, use contrary to the operating instructions, disassembly, repair or
alteration by anyone other than Sunbeam or an Authorized Service Center.
Further, the warranty does not cover Acts of God, such as fire, flood, hurricanes
and tornadoes.
Sunbeam shall not be liable for any incidental or consequential damages caused
by the breach of any express or implied warranty. Except to the extent prohibited
by applicable law, any implied warranty of merchantability or fitness for a
particular purpose is limited in duration to the duration of the above warranty.
Some states, provinces or jurisdictions do not allow the exclusion or limitation
of incidental or consequential damages or limitations on how long an implied
warranty lasts, so the above limitations of exclusion may not apply to you.
This warranty gives you specific legal rights and you may have the rights
that vary by state, province and/or jurisdiction.
D O N OT S END T HIS P RODUCT
OF
P URCHASE
www.sunbeam.com
D O N OT S END P RODUCT
TO THE
A BOVE A DDRESS
©2001 Sunbeam Products, Inc. All rights reserved.
SUNBEAM® and SPRAY MIST® are registered trademarks of Sunbeam Products, Inc.
Distributed by Sunbeam Products, Inc.
Boca Raton, FL 33431
Printed in China
12
P LACE
For product questions:
Sunbeam Consumer Service
P. O. Box 948389
Maitland, FL 32794-8389
1.800.458.8407
How to Obtain Warranty Service
Please, DO NOT RETURN THIS PRODUCT TO THE PLACE OF PURCHASE. Take the
product to an authorized Sunbeam service center. You can find the nearest
authorized Sunbeam service center by calling 1 800 458-8407, or by visiting
our website at www.sunbeam.com. If an authorized Sunbeam service center
is not conveniently located, attach a tag to the product that includes your name,
address, daytime telephone number and description of the problem. Include a
copy of the original sales receipt. Carefully package the tagged product with
the sales receipt and send either by UPS or Parcel Post with shipping and
insurance prepaid to the authorized Sunbeam service center address.
TO THE
P. N. 108304
PRECAUCIONES IMPORTANTES
Al usar la plancha, siempre se deben tomar precauciones de seguridad,
incluidas las siguientes:
❑ LEA TODAS LAS INSTRUCCIONES ANTES DE USAR ESTA PLANCHA.
❑ Utilice la plancha sólo para su uso indicado.
Plancha de Vapor
MANUAL
DE INSTRUCCIONES
❑ Para protegerse contra el riesgo de descarga eléctrica, no sumerja
la plancha en agua u otros líquidos.
❑ La plancha siempre debe estar en la posición de apagado (OFF)
antes de conectarla o desconectarla del tomacorriente. Nunca tire
del cable para desconectar la plancha del tomacorriente;
para desconectar la plancha, sujete y tire del enchufe.
❑ No permita que el cable toque superficies calientes. Deje
que la plancha se enfríe completamente antes de guardarla.
Enrolle sin apretar el cable alrededor de la plancha para guardarla.
❑ Siempre desconecte la plancha del tomacorriente para llenarla
con agua, para vaciar el agua y cuando no esté en uso.
❑ No haga funcionar la plancha con el cable dañado, ni tampoco si dejó
caer la plancha o si ésta sufrió daño. Para evitar el riesgo de descarga
eléctrica no desarme la plancha. Llévela a un Centro de Servicio
Autorizado para que sea examinada y/o reparada. Un reensamblaje
incorrecto de la plancha puede causar riesgo de descarga eléctrica
al usarla.
❑ Cualquier artefacto eléctrico usado por niños, o cerca de niños,
requiere una vigilancia cuidadosa. No deje la plancha desatendida
mientras esté conectada o sobre una tabla de planchar.
❑ El contacto con piezas metálicas calientes, agua caliente o vapor puede
causar quemaduras. Tenga cuidado cuando invierta la posición de una
plancha de vapor ya que puede contener agua caliente en el depósito.
❑ Si la plancha no funciona normalmente, desconéctela de la fuente
de alimentación eléctrica y llévela a un centro de servicio autorizado
para que sea examinada.
❑ La plancha SUNBEAM® ha sido diseñada para que descanse sobre
su talón de apoyo. No deje la plancha desatendida. No coloque
la plancha sobre una superficie desprotegida, aunque lo haga sobre
su talón de apoyo.
Modelo
3980
CONSERVE ESTAS INSTRUCCIONES
15
B IENVENIDO
¡Felicitaciones por la Compra de su Plancha SUNBEAM®!
Sunbeam ha diseñado su plancha para brindar la máxima calidad,
facilidad de uso y conveniencia.
Planchas SUNBEAM® ofrecen las siguientes funciones:
Í NDICE
Precauciones Importantes . . . . . . . . . . Cubierta Interior
❑
SPRAY MIST® – Proporciona un fino vapor de agua a fin de humedecer
la tela para planchar pliegues o para retirar arrugas de telas gruesas.
❑
Orificio Grande para Llenado de Agua – Permite llenar el depósito
de agua más rápidamente y reduce los derrames y goteos de agua.
❑
Acepta Agua de Caño – Elimina la necesidad de tener agua destilada
para planchar.
Cómo Llenar el Depósito de Agua . . . . . . . . . . . . . . 6
Cómodo Mango Ergonómico – Proporciona un agarre más cómodo
y facilita la manipulación.
Planchando en Seco . . . . . . . . . . . . . . . . . . . . . . . . . 6
❑
Luz Indicadora de Temperatura – Se enciende cuando la plancha
se está calentando.
Planchando al Vapor . . . . . . . . . . . . . . . . . . . . . . . . . 7
❑
Disco de Vapor Ajustable – Controla el nivel de vapor para aquellas
telas difíciles de planchar. Para planchar en seco, gire el disco de
Vapor en la posición de planchado en seco.
Cómo Usar las Funciones Especiales de la Plancha . . 7
❑
❑
Suela – Cuenta con ranuras a todo lo largo, para planchar al vapor
fácilmente por debajo de los botones de camisas y blusas.
Bienvenido . . . . . . . . . . . . . . . . . . . . . . . . . . . . . . . . . 3
Índice . . . . . . . . . . . . . . . . . . . . . . . . . . . . . . . . . . . . . 4
Información Sobre la Plancha . . . . . . . . . . . . . . . . . . 5
SPRAY MIST® . . . . . . . . . . . . . . . . . . . . . . . . . . . . . . . 7
Cómo Cuidar la Plancha Después del Uso . . . . . . . . . 7
Cómo Apagar la Plancha . . . . . . . . . . . . . . . . . . . . . . 8
INSTRUCCIONES ESPECIALES
❑ Éste es un aparato de 1100 vatios. Para evitar sobrecargar el circuito,
no haga funcionar otro aparato de alta potencia en el mismo circuito.
❑ Si es absolutamente necesario usar un cable de extensión, se debe usar
un cable de 10 amperios. Los cables de amperaje menor pueden
sobrecalentarse. Asegúrese de que el cable no esté colocado
donde pueda ser pisado u ocasionar un tropiezo.
Para Productos Comprados en los Estados Unidos
Para reducir el riesgo de descarga eléctrica, este aparato tiene un enchufe
polarizado (una clavija es más ancha que la otra). Este enchufe entra en
un tomacorriente polarizado de una sola manera; si el enchufe no entra
completamente en el tomacorriente, voltee el enchufe. Si todavía no
entra, comuníquese con un electricista competente. No desactive esta
función de seguridad.
16
Cómo Guardar la Plancha . . . . . . . . . . . . . . . . . . . . . 8
Mantenimiento de la Plancha . . . . . . . . . . . . . . . . . . 8
Limpieza de la Placa de Base . . . . . . . . . . . . . . . . . . . 8
Recomendaciones para el Planchado . . . . . . . . . . . . 9
Guía de Planchando . . . . . . . . . . . . . . . . . . . . . . . . . 10
Garantía Limitada de Un Año . . . . . . . . . . . . . . . . . . 11
Cómo Obtener el Servicio de la Garantía . . . . . . . . . 11
17
B IENVENIDO
¡Felicitaciones por la Compra de su Plancha SUNBEAM®!
Sunbeam ha diseñado su plancha para brindar la máxima calidad,
facilidad de uso y conveniencia.
Planchas SUNBEAM® ofrecen las siguientes funciones:
Í NDICE
Precauciones Importantes . . . . . . . . . . Cubierta Interior
❑
SPRAY MIST® – Proporciona un fino vapor de agua a fin de humedecer
la tela para planchar pliegues o para retirar arrugas de telas gruesas.
❑
Orificio Grande para Llenado de Agua – Permite llenar el depósito
de agua más rápidamente y reduce los derrames y goteos de agua.
❑
Acepta Agua de Caño – Elimina la necesidad de tener agua destilada
para planchar.
Cómo Llenar el Depósito de Agua . . . . . . . . . . . . . . 6
Cómodo Mango Ergonómico – Proporciona un agarre más cómodo
y facilita la manipulación.
Planchando en Seco . . . . . . . . . . . . . . . . . . . . . . . . . 6
❑
Luz Indicadora de Temperatura – Se enciende cuando la plancha
se está calentando.
Planchando al Vapor . . . . . . . . . . . . . . . . . . . . . . . . . 7
❑
Disco de Vapor Ajustable – Controla el nivel de vapor para aquellas
telas difíciles de planchar. Para planchar en seco, gire el disco de
Vapor en la posición de planchado en seco.
Cómo Usar las Funciones Especiales de la Plancha . . 7
❑
❑
Suela – Cuenta con ranuras a todo lo largo, para planchar al vapor
fácilmente por debajo de los botones de camisas y blusas.
Bienvenido . . . . . . . . . . . . . . . . . . . . . . . . . . . . . . . . . 3
Índice . . . . . . . . . . . . . . . . . . . . . . . . . . . . . . . . . . . . . 4
Información Sobre la Plancha . . . . . . . . . . . . . . . . . . 5
SPRAY MIST® . . . . . . . . . . . . . . . . . . . . . . . . . . . . . . . 7
Cómo Cuidar la Plancha Después del Uso . . . . . . . . . 7
Cómo Apagar la Plancha . . . . . . . . . . . . . . . . . . . . . . 8
INSTRUCCIONES ESPECIALES
❑ Éste es un aparato de 1100 vatios. Para evitar sobrecargar el circuito,
no haga funcionar otro aparato de alta potencia en el mismo circuito.
❑ Si es absolutamente necesario usar un cable de extensión, se debe usar
un cable de 10 amperios. Los cables de amperaje menor pueden
sobrecalentarse. Asegúrese de que el cable no esté colocado
donde pueda ser pisado u ocasionar un tropiezo.
Para Productos Comprados en los Estados Unidos
Para reducir el riesgo de descarga eléctrica, este aparato tiene un enchufe
polarizado (una clavija es más ancha que la otra). Este enchufe entra en
un tomacorriente polarizado de una sola manera; si el enchufe no entra
completamente en el tomacorriente, voltee el enchufe. Si todavía no
entra, comuníquese con un electricista competente. No desactive esta
función de seguridad.
16
Cómo Guardar la Plancha . . . . . . . . . . . . . . . . . . . . . 8
Mantenimiento de la Plancha . . . . . . . . . . . . . . . . . . 8
Limpieza de la Placa de Base . . . . . . . . . . . . . . . . . . . 8
Recomendaciones para el Planchado . . . . . . . . . . . . 9
Guía de Planchando . . . . . . . . . . . . . . . . . . . . . . . . . 10
Garantía Limitada de Un Año . . . . . . . . . . . . . . . . . . 11
Cómo Obtener el Servicio de la Garantía . . . . . . . . . 11
17
CARACTERÍSTICAS
DE
SU PLANCHA
1
3
9
4
8
2
Debe llenar el depósito de agua para usar la función SPRAY MIST®
y para que salga vapor de la plancha.
Recomendación: Sunbeam prueba cada plancha en la fábrica para
asegurar su correcto funcionamiento. Esta prueba puede dejar una
pequeña cantidad de agua en el depósito, lo cual no dañará la plancha.
Antes de llenar el depósito de agua, tenga en cuenta lo siguiente:
❑ Aunque esta plancha ha sido diseñada para usarse con agua de caño,
el agua de caño, cuando es muy dura, reduce el rendimiento de la
plancha. Si el agua en su localidad es muy dura, Sunbeam recomienda
que use agua de caño la primera vez que use la plancha y luego
considere usar agua desmineralizada o agua destilada para los usos
subsiguientes. Sin embargo, debe usar agua de caño una vez al mes
para obtener un rendimiento óptimo de la plancha a vapor.
❑ No use agua que haya pasado a través de un sistema residencial para
suavización del agua. Este tipo de agua contiene minerales que
disminuyen el rendimiento y acortan la vida útil de la plancha.
En este caso, use agua desmineralizada o destilada.
Importante: Cuando no use la plancha, siempre coloque el control del vapor
(Steam) está en la posición DRY (seco) y el disco selector de tela (Fabric) en la
posición OFF (apagado).
Para llenar el depósito de agua:
7
3. Cordón
1. Asegúrese de que la plancha esté desconectada y que el disco selector
de tela (Fabric) está en la posición OFF (apagado) y el control del
vapor (Steam) está en la posición DRY (seco). Llene el depósito de
agua con agua de caño hasta que llegue al nivel de llenado máximo
(4.4 onzas).
ADVERTENCIA: Para evitar el riesgo de quemaduras, tenga cuidado al
llenar una plancha caliente con agua. Las partes metálicas calientes,
el agua caliente y el vapor pueden causar lesiones corporales.
4. Parador
Planchando en Seco
6
5
1. Botón SPRAY MIST®
2. Luz Indicadora de Temperatura
5. Ventana par Ver la Cantidad de Agua
6. Dial de Temperatura para Diferentes
Clases de Tela
7. Base Inferior
8. Tanque pare el Agua Facil de Llenar
9. Dial Variable para el Vapor
10. Salideros del Vapor
18
10
Cómo Llenar el Depósito de Agua
1. Enchufe el cable en un tomacorriente de CA de 120 voltios
(in México, 127 voltios). Se encenderá el indicador de encendido.
2. Asegúrese de que el control del vapor (Steam) esté en la posición DRY
(seco).
3. Gire el disco selector de tela (Fabric) en la posición deseada para
planchando en seco (Silk [seda] o Synthetics [tela sintética]) y deje que
la plancha se caliente durante 2 minutos. Mientras la plancha se está
calentando, asegúrese de que esté apoyada sobre su talón de apoyo,
encima de una superficie estable y protegida.
4. La Luz Indicadora de Temperatura se mantendrá iluminada hasta que
la plancha alcance la temperatura apropiada.
Sugerencia: Consulte la Guía de Planchado en la Página 10 para conocer
el nivel de temperatura adecuado para su tela.
19
CARACTERÍSTICAS
DE
SU PLANCHA
1
3
9
4
8
2
Debe llenar el depósito de agua para usar la función SPRAY MIST®
y para que salga vapor de la plancha.
Recomendación: Sunbeam prueba cada plancha en la fábrica para
asegurar su correcto funcionamiento. Esta prueba puede dejar una
pequeña cantidad de agua en el depósito, lo cual no dañará la plancha.
Antes de llenar el depósito de agua, tenga en cuenta lo siguiente:
❑ Aunque esta plancha ha sido diseñada para usarse con agua de caño,
el agua de caño, cuando es muy dura, reduce el rendimiento de la
plancha. Si el agua en su localidad es muy dura, Sunbeam recomienda
que use agua de caño la primera vez que use la plancha y luego
considere usar agua desmineralizada o agua destilada para los usos
subsiguientes. Sin embargo, debe usar agua de caño una vez al mes
para obtener un rendimiento óptimo de la plancha a vapor.
❑ No use agua que haya pasado a través de un sistema residencial para
suavización del agua. Este tipo de agua contiene minerales que
disminuyen el rendimiento y acortan la vida útil de la plancha.
En este caso, use agua desmineralizada o destilada.
Importante: Cuando no use la plancha, siempre coloque el control del vapor
(Steam) está en la posición DRY (seco) y el disco selector de tela (Fabric) en la
posición OFF (apagado).
Para llenar el depósito de agua:
7
3. Cordón
1. Asegúrese de que la plancha esté desconectada y que el disco selector
de tela (Fabric) está en la posición OFF (apagado) y el control del
vapor (Steam) está en la posición DRY (seco). Llene el depósito de
agua con agua de caño hasta que llegue al nivel de llenado máximo
(4.4 onzas).
ADVERTENCIA: Para evitar el riesgo de quemaduras, tenga cuidado al
llenar una plancha caliente con agua. Las partes metálicas calientes,
el agua caliente y el vapor pueden causar lesiones corporales.
4. Parador
Planchando en Seco
6
5
1. Botón SPRAY MIST®
2. Luz Indicadora de Temperatura
5. Ventana par Ver la Cantidad de Agua
6. Dial de Temperatura para Diferentes
Clases de Tela
7. Base Inferior
8. Tanque pare el Agua Facil de Llenar
9. Dial Variable para el Vapor
10. Salideros del Vapor
18
10
Cómo Llenar el Depósito de Agua
1. Enchufe el cable en un tomacorriente de CA de 120 voltios
(in México, 127 voltios). Se encenderá el indicador de encendido.
2. Asegúrese de que el control del vapor (Steam) esté en la posición DRY
(seco).
3. Gire el disco selector de tela (Fabric) en la posición deseada para
planchando en seco (Silk [seda] o Synthetics [tela sintética]) y deje que
la plancha se caliente durante 2 minutos. Mientras la plancha se está
calentando, asegúrese de que esté apoyada sobre su talón de apoyo,
encima de una superficie estable y protegida.
4. La Luz Indicadora de Temperatura se mantendrá iluminada hasta que
la plancha alcance la temperatura apropiada.
Sugerencia: Consulte la Guía de Planchado en la Página 10 para conocer
el nivel de temperatura adecuado para su tela.
19
Planchando al Vapor
CÓMO GUARDAR
1.
1.
Deje que la plancha se enfríe.
2.
Si no va a usar la plancha diariamente, vacíe el depósito de agua después
de cada uso para obtener una mayor vida útil de la plancha. Para hacerlo,
invierta la posición de la plancha para permitir que el agua salga por el
orificio de llenado. Sacuda suavemente la plancha para retirar las gotas
de agua que hayan quedado atrapadas.
3.
Enrolle el cable de alimentación sueltemente alrededor de su base y guarde
la plancha sobre su talón de apoyo.
Siga las instrucciones de la sección “Cómo Llenar el Depósito de Agua”
descritas en la Página 6.
2. Enchufe el cable en un tomacorriente de CA de 120 voltios.
3. Gire el disco selector de tela (Fabric) en la posición deseada para
planchando al vapor (Linen [lino], Cotton [algodón] o Wool [lana)
y deje que la plancha se caliente durante 2 minutos. Mientras la
plancha se está calentando, asegúrese de que esté apoyada sobre
su talón de apoyo, encima de una superficie estable y protegida.
Recomendación: Consulte la Guía de Planchado en la Página 10 para
obtener información sobre la selección recomendada para su tela.
4. Después de que la plancha se ha calentado (2 minutos), gire el disco
de Vapor al nivel adecuado de vapor.
5. La Luz Indicadora de Temperatura se mantiene encendida hasta que
la plancha alcanza la temperatura apropiada.
LA
PLANCHA
Importante: El enrollar el cable demasiado apretado alrededor de la plancha
puede dañar el cable.
Recomendación: Cuando no vaya a planchar, siempre establezca el disco
selector del vapor (Steam) en la posición DRY (seco) y el disco selector de tela
(Fabric) en la posición OFF (apagado).
Cómo Usar las Funciones Especiales
Mantenimiento de la Plancha
SPRAY MIST®
L IMPIEZA
La función SPRAY MIST® humedece la tela para ayudar a eliminar las arrugas de
las telas gruesas y asentar pliegues.
Limpie la placa de base si se acumula almidón u otros residuos.
DE LA
P LACA
DE
B ASE
Para limpiar la Placa de Base:
Para usar la función SPRAY MIST®:
Presione firmemente el botón SPRAY MIST®.
Cómo Cuidar la Plancha Después del Uso
CÓMO APAGAR
LA
PLANCHA
1.
Gire el disco selector del vapor (Steam) en la posición DRY (seco) y
el disco selector de tela (Fabric) en la posición OFF (apagado).
2.
Desenchufe la plancha de la fuente de alimentación.
1. Deje que la plancha se enfríe y luego límpiela con un paño suave
y húmedo.
ADVERTENCIA: NO use limpiadores abrasivos, almohadillas raspadoras
abrasivas ni vinagre para limpiar la placa de base, ya que esto dañará
el acabado.
2. Pase la plancha sobre un paño de algodón exclusivamente para
retirar los residuos.
ADVERTENCIA: NUNCA tire del cable de alimentación cuando
desconecte la plancha, ya que esto puede dañar el cable.
20
21
Planchando al Vapor
CÓMO GUARDAR
1.
1.
Deje que la plancha se enfríe.
2.
Si no va a usar la plancha diariamente, vacíe el depósito de agua después
de cada uso para obtener una mayor vida útil de la plancha. Para hacerlo,
invierta la posición de la plancha para permitir que el agua salga por el
orificio de llenado. Sacuda suavemente la plancha para retirar las gotas
de agua que hayan quedado atrapadas.
3.
Enrolle el cable de alimentación sueltemente alrededor de su base y guarde
la plancha sobre su talón de apoyo.
Siga las instrucciones de la sección “Cómo Llenar el Depósito de Agua”
descritas en la Página 6.
2. Enchufe el cable en un tomacorriente de CA de 120 voltios.
3. Gire el disco selector de tela (Fabric) en la posición deseada para
planchando al vapor (Linen [lino], Cotton [algodón] o Wool [lana)
y deje que la plancha se caliente durante 2 minutos. Mientras la
plancha se está calentando, asegúrese de que esté apoyada sobre
su talón de apoyo, encima de una superficie estable y protegida.
Recomendación: Consulte la Guía de Planchado en la Página 10 para
obtener información sobre la selección recomendada para su tela.
4. Después de que la plancha se ha calentado (2 minutos), gire el disco
de Vapor al nivel adecuado de vapor.
5. La Luz Indicadora de Temperatura se mantiene encendida hasta que
la plancha alcanza la temperatura apropiada.
LA
PLANCHA
Importante: El enrollar el cable demasiado apretado alrededor de la plancha
puede dañar el cable.
Recomendación: Cuando no vaya a planchar, siempre establezca el disco
selector del vapor (Steam) en la posición DRY (seco) y el disco selector de tela
(Fabric) en la posición OFF (apagado).
Cómo Usar las Funciones Especiales
Mantenimiento de la Plancha
SPRAY MIST®
L IMPIEZA
La función SPRAY MIST® humedece la tela para ayudar a eliminar las arrugas de
las telas gruesas y asentar pliegues.
Limpie la placa de base si se acumula almidón u otros residuos.
DE LA
P LACA
DE
B ASE
Para limpiar la Placa de Base:
Para usar la función SPRAY MIST®:
Presione firmemente el botón SPRAY MIST®.
Cómo Cuidar la Plancha Después del Uso
CÓMO APAGAR
LA
PLANCHA
1.
Gire el disco selector del vapor (Steam) en la posición DRY (seco) y
el disco selector de tela (Fabric) en la posición OFF (apagado).
2.
Desenchufe la plancha de la fuente de alimentación.
1. Deje que la plancha se enfríe y luego límpiela con un paño suave
y húmedo.
ADVERTENCIA: NO use limpiadores abrasivos, almohadillas raspadoras
abrasivas ni vinagre para limpiar la placa de base, ya que esto dañará
el acabado.
2. Pase la plancha sobre un paño de algodón exclusivamente para
retirar los residuos.
ADVERTENCIA: NUNCA tire del cable de alimentación cuando
desconecte la plancha, ya que esto puede dañar el cable.
20
21
Recomendaciones para el Planchado
❑
Siempre lea las etiquetas de la prenda y siga las instrucciones de
planchando del fabricante.
❑
Clasifique las prendas que va a planchar según el tipo de tela.
❑
❑
❑
❑
❑
❑
❑
Primero debe planchar las prendas que requieren baja temperatura
(por ejemplo, las prendas de seda y tela sintética) a fin de evitar
dañarlas con una plancha que esté demasiado caliente.
Si no está seguro de cuál es el contenido de la tela de una prenda,
pruebe planchando un área pequeña, como por ejemplo una costura
o guarnición, antes de planchar un área visible. Empiece con una
temperatura baja y auméntela gradualmente hasta encontrar la
temperatura apropiada.
Cuando cambie la temperatura de un valor alto a un valor bajo, deje
pasar aproximadamente 5 minutos para llegar a la temperatura menor.
Cuando planche al vapor, utilice pasadas largas y lentas de la plancha
sobre la tela. Esto permitirá que el vapor penetre en la tela y que el
calor de la placa de base seque la humedad.
Para planchar prendas de lino, voltee de adentro para afuera la
prenda. Tenga cuidado de no usar una plancha demasiado caliente
porque el forro puede fusionarse o adherirse a la placa de base.
Para planchar cremalleras, use un paño de planchar o asegúrese de
que la cremallera esté cerrada y planche sobre la solapa. Nunca
planche directamente sobre una cremallera desprotegida.
Use la Guía de Planchado que se proporciona en la Página 10 para
seleccionar el mejor método y regulación para la tela que va a planchar.
GUÍA
DE
PLANCHADO
Tela
Selección de Vapor Selección de Tela Recomendaciones de Planchado
Acrílico
Dry (Seco)
Synthetic
(Sintética)
Planche la prenda por el revés.
Acetato
Dry (Seco)
Synthetic
(Sintética)
Planche la prenda por el revés
mientras está húmeda.
Viscosa
Dry (Seco)
Synthetic
(Sintética)
Planche la prenda principalmente en
o seco; se puede usar vapor según las
instrucciones del fabricante de la prenda.
Nylon
Dry (Seco)
Synthetic
(Sintética)
Planche la prenda por el revés
mientras está húmeda.
Poliéster
Dry (Seco)
Synthetic
(Sintética)
Planche la prenda por el revés
mientras está húmeda.
Rayón
Dry (Seco)
Synthetic
(Sintética)
Planche la prenda por el revés.
Seda
Dry (Seco)
Silk (Seda)
Planche la prenda por el revés. Use un paño
de planchar* para evitar marcas brillosas.
Lana
Medium Steam
(Vapor Médio)
Wool (Lana)
Planche la prenda por el revés
o use un paño de planchar.*
Combinaciones Medium Steam
de Lana
(Vapor Médio)
Wool (Lana)
Planche la prenda por el revés
o use un paño de planchar.*
Combinaciones Medium Steam
de Algodón
(Vapor Médio)
Cotton
(Algodón)
Siga las instrucciones del fabricante de
la prenda. Use la selección que corresponde
a la fibra que requiere la selección más baja.
Corduroy
Medium Steam
(Vapor Médio)
Cotton
(Algodón)
Planche la prenda por el revés o use un
paño de planchar* y luego cepille la prenda
con la mano para levantar la textura de la tela.
Algodón
High Steam
(Vapor Alto)
Cotton
(Algodón)
Planche las telas oscuras por el revés
para evitar marcas brillosas.
Lino
High Steam
(Vapor Alto)
Linen (Lino)
Planche la prenda por el revés o use
un paño de planchar* para evitar marcas
brillosas (especialmente en telas oscuras).
Dril
High Steam
(Vapor Alto)
Linen (Lino)
Use la función SPRAY MIST® y/o la
función SHOT OF STEAM® a fin de lograr
una penetración más profunda para
eliminar las arrugas.
*Un paño de planchar es una tela de algodón limpiada en seca que se coloca
sobre la prenda que se está planchando para evitar que se vea brillosa.
22
23
Recomendaciones para el Planchado
❑
Siempre lea las etiquetas de la prenda y siga las instrucciones de
planchando del fabricante.
❑
Clasifique las prendas que va a planchar según el tipo de tela.
❑
❑
❑
❑
❑
❑
❑
Primero debe planchar las prendas que requieren baja temperatura
(por ejemplo, las prendas de seda y tela sintética) a fin de evitar
dañarlas con una plancha que esté demasiado caliente.
Si no está seguro de cuál es el contenido de la tela de una prenda,
pruebe planchando un área pequeña, como por ejemplo una costura
o guarnición, antes de planchar un área visible. Empiece con una
temperatura baja y auméntela gradualmente hasta encontrar la
temperatura apropiada.
Cuando cambie la temperatura de un valor alto a un valor bajo, deje
pasar aproximadamente 5 minutos para llegar a la temperatura menor.
Cuando planche al vapor, utilice pasadas largas y lentas de la plancha
sobre la tela. Esto permitirá que el vapor penetre en la tela y que el
calor de la placa de base seque la humedad.
Para planchar prendas de lino, voltee de adentro para afuera la
prenda. Tenga cuidado de no usar una plancha demasiado caliente
porque el forro puede fusionarse o adherirse a la placa de base.
Para planchar cremalleras, use un paño de planchar o asegúrese de
que la cremallera esté cerrada y planche sobre la solapa. Nunca
planche directamente sobre una cremallera desprotegida.
Use la Guía de Planchado que se proporciona en la Página 10 para
seleccionar el mejor método y regulación para la tela que va a planchar.
GUÍA
DE
PLANCHADO
Tela
Selección de Vapor Selección de Tela Recomendaciones de Planchado
Acrílico
Dry (Seco)
Synthetic
(Sintética)
Planche la prenda por el revés.
Acetato
Dry (Seco)
Synthetic
(Sintética)
Planche la prenda por el revés
mientras está húmeda.
Viscosa
Dry (Seco)
Synthetic
(Sintética)
Planche la prenda principalmente en
o seco; se puede usar vapor según las
instrucciones del fabricante de la prenda.
Nylon
Dry (Seco)
Synthetic
(Sintética)
Planche la prenda por el revés
mientras está húmeda.
Poliéster
Dry (Seco)
Synthetic
(Sintética)
Planche la prenda por el revés
mientras está húmeda.
Rayón
Dry (Seco)
Synthetic
(Sintética)
Planche la prenda por el revés.
Seda
Dry (Seco)
Silk (Seda)
Planche la prenda por el revés. Use un paño
de planchar* para evitar marcas brillosas.
Lana
Medium Steam
(Vapor Médio)
Wool (Lana)
Planche la prenda por el revés
o use un paño de planchar.*
Combinaciones Medium Steam
de Lana
(Vapor Médio)
Wool (Lana)
Planche la prenda por el revés
o use un paño de planchar.*
Combinaciones Medium Steam
de Algodón
(Vapor Médio)
Cotton
(Algodón)
Siga las instrucciones del fabricante de
la prenda. Use la selección que corresponde
a la fibra que requiere la selección más baja.
Corduroy
Medium Steam
(Vapor Médio)
Cotton
(Algodón)
Planche la prenda por el revés o use un
paño de planchar* y luego cepille la prenda
con la mano para levantar la textura de la tela.
Algodón
High Steam
(Vapor Alto)
Cotton
(Algodón)
Planche las telas oscuras por el revés
para evitar marcas brillosas.
Lino
High Steam
(Vapor Alto)
Linen (Lino)
Planche la prenda por el revés o use
un paño de planchar* para evitar marcas
brillosas (especialmente en telas oscuras).
Dril
High Steam
(Vapor Alto)
Linen (Lino)
Use la función SPRAY MIST® y/o la
función SHOT OF STEAM® a fin de lograr
una penetración más profunda para
eliminar las arrugas.
*Un paño de planchar es una tela de algodón limpiada en seca que se coloca
sobre la prenda que se está planchando para evitar que se vea brillosa.
22
23
GARANTÍA LIMITADA
DE
1 AÑO
Sunbeam Products Inc. (“Sunbeam”) garantiza que, por un período de UN año
a partir de la fecha de compra, este producto estará libre de defectos en el
material y en su fabricación. Bajo la opinión de Sunbeam, reparará o repondrá
este producto o cualquier componente del mismo si se encuentra defectuoso
durante el periodo de garantía. La reposición se hará con un producto o un
componente nuevo o refabricado. Si el producto ya no está disponible, la
reposición se hará con un producto similar de igual o mayor valor. Esta es su
garantía exclusiva.
Esta garantía es válida para el comprador original a partir de la fecha de compra
inicial y no es transferible. Guarde el recibo de compra original. La prueba de
compra es requerida para obtener los servicios de garantía. Los vendedores de
productos Sunbeam, los centros de servicio o tiendas que vendan productos
Sunbeam no tienen el derecho de alterar, modificar o realizar ningún otro
cambio a los términos y condiciones de esta garantía.
Esta garantía no cubre el desgaste por uso normal o daños de partes como resultado
de lo siguiente: uso negligente o mala utilización del producto, uso con una
corriente eléctrica o un voltaje inadecuados, uso contrario a las instrucciones de
operación, desensambles, reparaciones o alteraciones que no sean hechas por
Sunbeam o por un Centro de Servicio Autorizado. Además, la garantía no cubre
desastres naturales tales como incendios, inundaciones, huracanes y tornados.
Sunbeam Products Inc. no se hace responsable por ningún daño emergente o
incidental causado por el rompimiento de cualquier garantía expresa o implícita.
Excepto al alcance prohibido por la ley aplicable, cualquier garantía implícita de
comercialización o arreglo para un propósito particular, está limitada en duración
de la garantía antes mencionada. Algunos estados, provincias o jurisdicciones
no permiten la exclusión o limitación de daños emergentes o incidentales,
o limitaciones en la duración de una garantía implícita, así que las limitaciones
o exclusiones pueden no ser aplicables para usted. Esta garantia le da a usted
derechos legales específicos y puede tener otros derechos que varían por estado,
provincia y/o jurisdicción.
NO DEVUELVA ESTE PRODUCTO
LO
COMPRÓ
Sunbeam Consumer Service
P. O. Box 948389
Maitland, FL 32794-8389
1.800.458.8407
www.sunbeam.com
NO ENVÍE
EL
PRODUCTO
A LA
DIRECCIÓN ANTERIOR
©2001 Sunbeam Products, Inc. Todos los derechos reservados.
SUNBEAM® y SPRAY MIST® son marcas registradas de Sunbeam Products, Inc.
Distribuido por Sunbeam Products, Inc.
Boca Raton, FL 33431
Impreso en China
24
LUGAR DONDE
Para preguntas sobre los productos:
Cómo Obtener los Servicios de la Garantía
Favor, NO REGRESE ESTE PRODUCTO AL LUGAR DE COMPRA. Lleve este producto
a un centro de servicio autorizado Sunbeam. Usted puede encontrar el centro de
servicio autorizado Sunbeam más cercano llamando al 1 800 458-8407, o visita
el nuestro website a www.sunbeam.com. Si un centro de servicio no se encuentra
convenientemente localizado cerca de usted, pegue una etiqueta al producto
que incluya su nombre, dirección, teléfono donde se encuentra durante el día
y descripción del problema. Incluya una copia del recibo original de compra.
Empaque cuidadosamente el producto etiquetado con el precio e incluya el recibo
de compra. Envíelo ya sea por el servicio de paquetería UPS o por correo, con los
gastos de envío y seguro prepagados, a la dirección del centro de servicio
autorizado Sunbeam.
AL
P. N. 108304
Notas
NO DEVUELVA ESTE PRODUCTO
AL
LUGAR DONDE
LO
COMPRÓ
Para preguntas sobre los productos:
Sunbeam Consumer Service
P. O. Box 948389
Maitland, FL 32794-8389
1.800.458.8407
www.sunbeam.com
NO ENVÍE
EL
PRODUCTO
A LA
DIRECCIÓN ANTERIOR
©2001 Sunbeam Products, Inc. Todos los derechos reservados.
SUNBEAM® es una marca registrada de Sunbeam Products, Inc.
Distribuido por Sunbeam Products, Inc.
Boca Raton, FL 33431
Impreso en China
20
P. N. 108319
GARANTÍA LIMITADA
DE
1 AÑO
Sunbeam Products Inc. (“Sunbeam”) garantiza que, por un período de UN año
a partir de la fecha de compra, este producto estará libre de defectos en el
material y en su fabricación. Bajo la opinión de Sunbeam, reparará o repondrá
este producto o cualquier componente del mismo si se encuentra defectuoso
durante el periodo de garantía. La reposición se hará con un producto o un
componente nuevo o refabricado. Si el producto ya no está disponible, la
reposición se hará con un producto similar de igual o mayor valor. Esta es su
garantía exclusiva.
Esta garantía es válida para el comprador original a partir de la fecha de compra
inicial y no es transferible. Guarde el recibo de compra original. La prueba de
compra es requerida para obtener los servicios de garantía. Los vendedores de
productos Sunbeam, los centros de servicio o tiendas que vendan productos
Sunbeam no tienen el derecho de alterar, modificar o realizar ningún otro
cambio a los términos y condiciones de esta garantía.
Esta garantía no cubre el desgaste por uso normal o daños de partes como resultado
de lo siguiente: uso negligente o mala utilización del producto, uso con una
corriente eléctrica o un voltaje inadecuados, uso contrario a las instrucciones de
operación, desensambles, reparaciones o alteraciones que no sean hechas por
Sunbeam o por un Centro de Servicio Autorizado. Además, la garantía no cubre
desastres naturales tales como incendios, inundaciones, huracanes y tornados.
Sunbeam Products Inc. no se hace responsable por ningún daño emergente o
incidental causado por el rompimiento de cualquier garantía expresa o implícita.
Excepto al alcance prohibido por la ley aplicable, cualquier garantía implícita de
comercialización o arreglo para un propósito particular, está limitada en duración
de la garantía antes mencionada. Algunos estados, provincias o jurisdicciones
no permiten la exclusión o limitación de daños emergentes o incidentales,
o limitaciones en la duración de una garantía implícita, así que las limitaciones
o exclusiones pueden no ser aplicables para usted. Esta garantia le da a usted
derechos legales específicos y puede tener otros derechos que varían por estado,
provincia y/o jurisdicción.
NO DEVUELVA ESTE PRODUCTO
LO
COMPRÓ
Sunbeam Consumer Service
P. O. Box 948389
Maitland, FL 32794-8389
1.800.458.8407
www.sunbeam.com
NO ENVÍE
EL
PRODUCTO
A LA
DIRECCIÓN ANTERIOR
©2001 Sunbeam Products, Inc. Todos los derechos reservados.
SUNBEAM® y SPRAY MIST® son marcas registradas de Sunbeam Products, Inc.
Distribuido por Sunbeam Products, Inc.
Boca Raton, FL 33431
Impreso en China
24
LUGAR DONDE
Para preguntas sobre los productos:
Cómo Obtener los Servicios de la Garantía
Favor, NO REGRESE ESTE PRODUCTO AL LUGAR DE COMPRA. Lleve este producto
a un centro de servicio autorizado Sunbeam. Usted puede encontrar el centro de
servicio autorizado Sunbeam más cercano llamando al 1 800 458-8407, o visita
el nuestro website a www.sunbeam.com. Si un centro de servicio no se encuentra
convenientemente localizado cerca de usted, pegue una etiqueta al producto
que incluya su nombre, dirección, teléfono donde se encuentra durante el día
y descripción del problema. Incluya una copia del recibo original de compra.
Empaque cuidadosamente el producto etiquetado con el precio e incluya el recibo
de compra. Envíelo ya sea por el servicio de paquetería UPS o por correo, con los
gastos de envío y seguro prepagados, a la dirección del centro de servicio
autorizado Sunbeam.
AL
P. N. 108304