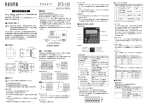
1
3-204-427-01 (1) Sampling Function Software 取扱説明書 JP Operating Instructions GB DASK-S704 2000 Sony Corporation 2 (JP) 日本語 目次 概要 .............................................................................................. 4 サンプリングの基本手順 .............................................................. 5 ブロック図 .................................................................................... 6 サンプリング時の内部ブロック図 ......................................................... 6 コンパイル時の内部ブロック図 ............................................................ 6 サンプリングの接続例 .................................................................. 7 アナログ接続の例 ................................................................................ 7 デジタル接続の例 ................................................................................ 8 DASK-S704の起動..................................................................... 9 DRE-S777 の電源を入れるときに起動する.......................................... 9 サンプリングリバーブソフトウェアの「GoToSample」から 起動する ........................................................................................ 11 JP リハーサル(Rehearsal).......................................................... 13 サンプリング(Sampling)........................................................ 14 コンパイル(Compile).............................................................. 20 音源のグラフィックを割り当てる......................................................... 26 独自のインパルスレスポンスをコンパイルする.................................. 27 メモリースティックの交換(Change MS).............................. 28 セットアップ画面(SETUP).................................................... 29 SETUP 画面の操作 ............................................................................ 29 SETUP 画面で設定・調整可能な項目 ............................................. 30 リバーブプログラムの再生 ........................................................ 32 リバーブモードとサンプリング時の配置 ................................... 33 エラーメッセージ ....................................................................... 35 本機の性能を保持するために(使用上のご注意)....................... 36 メモリースティックの使用上のご注意 ................................................. 36 メモリースティックの取り扱い上のご注意 .......................................... 36 CD-ROM の取り扱い上のご注意 ....................................................... 36 3 (JP) 日 本 語 概要 サンプリングファンクションソフトウェアDASK-S704は、 ソニーサンプリングデジタルリバーブ DRE-S777専用のソフトウェアです。DASK-S704を使うと、空間や鉄板リバーブなどお好き な場所の残響をサンプリングして、メモリースティック1)に記録できます。 ソフトウェアの概要は以下のとおりです。 優れたSN比を実現する同期加算方式のサンプリング 音源にTSP2)信号を用いてDA 変換 tスピーカー再生 tマイク収音 tAD 変換 tサン プリングというプロセスを繰り返し、毎回得られるサンプリングデータを同期させて加算し、 その平均値をサンプリングする同期加算方式を採用しています。繰り返し回数が多いほど 響き成分に対してのノイズレベルを下げることができるため、高 SN 比が得られます。 通常は、繰り返し回数を16 回に設定します。暗騒音が多い室内や戸外でサンプリングす るときは、繰り返し回数を32 回または 64 回にします。32 回にすると、16 回のときよりSN 比 が約 3 dB 改善されます。64 回にすると、16 回のときよりSN 比が約 6 dB 改善されます。 サンプリング周波数44.1∼96.0 kHzに対応 次の3 種類のサンプリングモードに対応しており、空間の残響時間に応じて適切なものが 選べます。 • Fs/5.5sec:サンプリング周波数 44.1 kHzまたは 48.0 kHz で 5.5 秒間のサンプリング • Fs/11sec:サンプリング周波数 44.1 kHzまたは 48.0 kHz で 11 秒間のサンプリング • 2Fs/5.5sec:サンプリング周波数 88.2 kHzまたは 96.0 kHz で 5.5 秒間のサンプリング 教会など、残響時間の長い空間のサンプリングには、Fs/11secを選びます。11 秒間のサ ンプリングされた波形のうち、最初から5.5 秒間の波形がコンパイルされます。 ご注意 Fs/11secまたは 2Fs/5.5sec でサンプリング /コンパイルするためには、拡張 DSP DABKS703(別売り)が必要です。 64 MBのメモリースティックに最大42のリバーブプログラムを保管可能 DASK-S704でサンプリングやコンパイルしたデータは、付属のメモリースティックや市販の 16 MB、32 MB、64 MB のメモリースティックに保管することができます。 各データのサイズは、Fs/5.5sec でサンプリングしたデータが約 2 MB、Fs/11secまたは 2Fs/5.5sec でサンプリングしたデータが約 4 MB、コンパイルした Fs データが約 1.5 MB、 2Fs データが約 3 MB です。 コンパイルしたFsデータだけを市販の64 MBのメモリースティックに保管すると、最大で42 種類のリバーブプログラムが保管できます。 付属のメモリースティックでは、24 MBをサンプリング/コンパイルしたデータの保管に利用 できます。 .......................................................................................................................................................................................................................................................... 1) メモリースティックは、ソニー株式会社の商標です。 2) TSPは Time Stretched Pulse(タイム・ストレッチト・パルス)の略です。 4 (JP) サンプリングの基本手順 サンプリングの基本手順は以下のとおりです。 ( )内は、この説明書でその項目を説明しているページです。 サンプリングの現場にて 1 マイク、スピーカーを設置する。 (7 ページ) x 2 DASK-S704を起動する。 (9 ページ) x 3 SETUP 画面 でサンプリング周波数やサンプリング時間(Fs/Period)、繰り返し回数 (Repeat)を設定する。 (14 ページ) x 4 リハーサル: マイクからの入力レベルを調整する。 (13 ページ) x 5 サンプリング:リバーブデータを記録する。 (14 ページ) x 6 サンプリングしたデータをメモリースティックに書き込む。 (17 ページ) スタジオなどにて 7 サンプリングしたデータをメモリースティックから呼び出す。 (20 ページ) x 8 コンパイル: サンプリングしたデータを加工してリバーブプログラムの形式にする。 (20 ページ) x 9 コンパイルしたリバーブプログラムをメモリースティックに書き込む。 (25 ページ) x 0 サンプリングリバーブソフトウェア (Version 2.0)のCD-ROMを使ってリバーブプログラ ムを再生する。 (32 ページ) 5 (JP) ブロック図 サンプリング時の内部ブロック図 サンプリング時の入力から出力までのブロック図です。 出力部 入力部 Meter Meter AD Memory TSP GEN DI DO DSP Memory Stick コンパイル時の内部ブロック図 コンパイル時のブロック図です。 Meter Memory Stick DA DSP DO Memory 6 (JP) DA サンプリングの接続例 サンプリング時の接続例を下記に示します。 ご注意 • マイクやスピーカーはできるだけ高性能で周波数特性の優れたものをご使用ください。 • できるだけ環境ノイズの少ない状態でサンプリングを行ってください。 アナログ接続の例 別売りのA/DコンバーターDABK-S701とD/AコンバーターDABK-S702をDRE-S777のコ ネクターパネルに取り付けて、接続します。 ホール スピーカー1 ステージ スピーカー2 マイク1 マイク2 ANALOG IN CH1 ANALOG IN CH2 マイクアンプ A/DコンバーターDABK-S701 CH-1 CH-1 CH-3 CH-2 ANALOG IN CH-2 IN IN ANALOG OUT CH-4 ANALOG OUT DIGITAL OUT OUT1 OUT2 WORD SYNC MIDI RS-232C IN OUT/THR D/AコンバーターDABK-S702 ANALOG OUT CH1 パワーアンプ ANALOG OUT CH2 設定のしかた 上記の接続をしたときは、DASK-S704 の SETUP 画面で次のように設定します。 • Input Sel: AD • Clock Sel: Internal 48.0/96.0 kHz、または Internal 44.1/88.2 kHz ご注意 Fs/11secまたは 2Fs/5.5sec でサンプリング / コンパイルするときは、拡張 DSP DABKS703(別売り)をDRE-S777に取り付けてください。 7 (JP) サンプリングの接続例 デジタル接続の例 DRE-S777に標準装備されたDIGITAL IN、DIGITAL OUT 1 端子に接続します。 ホール スピーカー1 ステージ スピーカー2 マイク1 マイク2 マイクアンプ A/Dコンバーター DIGITAL IN CH-1 CH-2 CH-1 ANALOG IN CH-2 CH-3 ANALOG OUT CH-4 ANALOG OUT IN IN DIGITAL OUT OUT1 OUT2 WORD SYNC MIDI RS-232C IN OUT/THR DIGITAL OUT 1 D/Aコンバーター パワーアンプ 設定のしかた 上記の接続をしたときは、DASK-S704 の SETUP 画面で次のように設定します。 • Input Sel: Digital • Clock Sel: AES(DI) 48.0/96.0 kHz、または AES(DI) 44.1/88.2 kHz ご注意 Fs/11secまたは 2Fs/5.5sec でサンプリング / コンパイルするときは、拡張 DSP DABKS703(別売り)をDRE-S777に取り付けてください。 8 (JP) DASK-S704の起動 サンプリングファンクションソフトウェアDASK-S704を起動するには、2とおりの方法がありま す。 • DRE-S777 の電源を入れるときに起動する方法 • DRE-S777またはDASK-S701/S702/S703などのサンプリングリバーブソフトウェアを使用 中、その SETUP 画面の「GoToSample」から起動する方法 DRE-S777の電源を入れるときに起動する DASK-S704 のCD-ROMとメモリースティックをDRE-S777に入れ、DRE-S777 の電源を入 れます。 1 メモリースティック裏面の誤消去防止スイッチが左側の位置にある(LOCK の位置で ない)ことを確かめる。 誤消去防止スイッチ LOCK ご注意 誤消去防止スイッチをLOCK の位置(右側)にすると、メモリースティックは正常に動 作しません。必ず上記の位置に設定してください。 2 メモリースティックをDRE-S777に付属の PCカードアダプターに入れ、MEMORY CARD 挿入口へ差し込む。 矢印を左上に PCカードアダプター(付属) メモリースティック 3 DRE-S777 のPOWERスイッチを押して電源を入れる。 4 DRE-S777 のZキーを押す。 CDトレイが前へ出てきます。 (続く) 9 (JP) DASK-S704の起動 5 CD-ROMを入れ、CDトレイの前面または Zキーを軽く押して閉める。 ラベル面を上に DRE-S777が起動し、サンプリングファンクションソフトウェアDASK-S704がロードされま す。 ローディングには約3分間かかります。ローディングが終わるとDASK-S04の初期画面 が表示されます。 Rehearsal Sampling Compile Change MS SAMPLE MS:xxxxxxxx 24MB Available Fs/Period=Fs/5.5sec Repeat =16 Input =AD Clock =Internal 48.0 kHz Enter メモリースティックの取り出しかた 1 2 PCカードアダプターのEJECTボタンを押す。 メモリースティックを取り出す。 EJECTボタン 2 1 再度入れるには メモリースティックをPCカードアダプターのスロットに差し込みます。 ご注意 ・メモリースティックやPCアダプターを抜くことができるのは、電源が切れているときや、表 示窓に「Please change MS.」などメモリースティックの交換を指示するメッセージが出た ときに限ります。 これ以外の場合は、絶対にメモリースティックやPCカードアダプターを抜 かないでください。記録したデータが壊れることがあります。 ・メモリースティックを入れてすぐに取り出さないでください。入れたメモリースティックを認 識するまでに約5秒かかるため、メモリースティックを入れてすぐに取り出すと、誤動作に よりシステムが停止することがあります。システムが停止した場合は、電源を入れ直して ください。 10 (JP) サンプリングリバーブソフトウェアの「GoToSample」から起動する DRE-S777またはDASK-S701/S702/S703などのCD-ROMを入れてサンプリングリバーブ ソフトウェア(Version 2.0)を使用中に、SETUP 画面の「GoToSample」からDASK-S704 を起動することができます。 1 サンプリングリバーブソフトウェアのSETUP 画面で「GoToSample」を反転させる。 DRE-S777またはDASK-S701/S702/S703のSETUP画面 GoToSample Licence PreDelay Serial Sel Service SETUP 2 : : : ms : RS232C [ : 9600] Enter F4キーを押す。 ポップアップ画面に「Go To Sampling CDROM?」と表示されます。 3 F4キーを押す。 「Please change DASK-S704 CDROM and MS」と表示されます。 4 DASK-S704 のメモリースティックとCD-ROMに入れ換える。 ◆ CD-ROMとメモリースティックの入れかた、取り出しかたは、 「DRE-S777の電源を入れるとき に起動する」 (9 ページ)をご覧ください。 5 F4キーを押す。 サンプリングファンクションソフトウェアDASK-S704がロードされます。 ローディングには約3分間かかります。 ローディングが終わるとDASK-S704の初期画面 が表示されます。 Rehearsal Sampling Compile Change MS SAMPLE MS:xxxxxxxx 24MB Available Fs/Period=Fs/5.5sec Repeat =16 Input =AD Clock =Internal 48.0 kHz Enter ご注意 • メモリースティックを交換したとき、新しいメモリースティックを認識できないと「Please insert MS」の表示が出ます。この場合は、もう1 回 F4キーを押してください。 • DASK-S704に付属のメモリースティック以外のメモリースティックを入れると、 「Licence code error Please change Licence MS」と表示されます。正しいメモリースティックと交 換し、F4キーを押してください。 11 (JP) DASK-S704の起動 DASK-S704の初期画面の表示 1 2 3 4 Rehearsal Sampling Compile Change MS SAMPLE MS:xxxxxxxx 24MB Available Fs/Period=Fs/5.5sec Repeat =16 Input =AD Clock =Internal 48.0 kHz Enter 0 5 6 7 8 9 qa メニュー部 1 Rehearsal:リハーサルを実行する。 2 Sampling:サンプリングを実行する。 3 Compile:コンパイルを実行する。 4 Change MS:メモリースティックを交換する。 現在の設定状態 5 使用中のメモリースティックの型名と使用可能な容量 6 サンプリング周波数とサンプリング時間(SETUP 画面の Fs/Period で設定) 7 サンプリングの繰り返し回数(SETUP 画面の Repeat で設定) 8 入力(SETUP 画面の Input Sel で設定) 9 クロック方式(SETUP 画面のClock Sel で設定) 画面の種類 0 SAMPLE 画面表示 ファンクションキー表示 qa F4キー表示 12 (JP) リハーサル(Rehearsal) リハーサルでは、サンプリングを行う場所にマイクとスピーカーをサンプリング時と同様に設 置して、マイクからの入力レベルを調整します。 マイクからの入力レベルができるだけ 0 dBに近づくように調整してください。 1 DASK-S704を起動して、DASK-S704 の初期画面を表示する。 ◆ 起動のしかたは、9 ページをご覧ください。 2 ジョグダイヤルを回し、 「Rehearsal」を反転させる。 Rehearsal Sampling Compile Change MS SAMPLE 3 MS:xxxxxxxx 24MB Available Fs/Period=Fs/5.5sec Repeat =16 Input =AD Clock =Internal 48.0 kHz Enter F4キーを押す。 「Loading CDROM/MS」が表示された後、 「Start Rehearsal?」が表示されます。 Rehearsal Sampling Compile Change MS SAMPLE 4 Start Rehearsal ? Exit Enter F4キーを押す。 「Please wait for a few seconds.」が表示された後、次の画面が表示され、スピーカー からTSP(Time Stretched Pulse)信号が出力されます。 レベルメーター 入力側 出力側 Rehearsal Repeat TSP Sampling until F4 Compile Change MS SAMPLE PeakHold Exit 5 IN OUT 1 2 DV 1 2 0 -6 -20 -35 -60 Enter スピーカーから出力されるTSP 信号の音圧が 100 dB(A) SPL 程度になるよう、パ ワーアンプのゲインを調整する。 ご注意 TSP 信号は出力レベルが高いため、パワーアンプのゲインを上げ過ぎてスピーカーを 破損させないよう、ご注意ください。 6 レベルメーターの入力側の振れができるだけ 0 dBに近づくように、マイクアンプでマ イクからの入力レベルを調整する。 出力側のレベルが瞬間的に振り切れることがありますが、問題はありません。 • レベルメーターのピーク値を保持するには、F2キー(PeakHold)を押して PeakHold 表示を反転させます。 7 レベル調整が終わったら、F4キーを押す。 「Please wait for a few seconds.」が表示された後、初期画面に戻ります。 13 (JP) サンプリング(Sampling) リハーサルでマイクからの入力レベルを調整した後、実際に残響のサンプリングを行いま す。 ご注意 サンプリングする空間の環境ノイズは残響に重畳されて記録されます。できるだけ環境ノイ ズの少ない状態でサンプリングを行ってください。サンプリング中に飛行機や車の音、人の 声、鳥のさえずりなどが聞こえたときは、サンプリングをやり直してください。 1 DASK-S704 の初期画面でサンプリング条件を確認する。 変更する必要があれば、SETUP 画面で変更します。 サンプリング周波数とサンプリング時間 Rehearsal Sampling Compile Change MS SAMPLE MS:xxxxxxxx 24MB Available Fs/Period=Fs/5.5sec Repeat =16 Input =AD Clock =Internal 48.0 kHz Enter サンプリングの繰り返し回数 サンプリング周波数とサンプリング時間:通常はFs/5.5secか2Fs/5.5secに設定 します。教会など、残響時間が長い空間のサンプリングを行うときは、Fs/11secに 設定してサンプリングを行い、いったんコンパイルを実行し、サンプリング結果を 確認して調整してください。 繰り返し回数:通常は16に設定します。ノイズが多い戸外などの場合、いったんコ ンパイルを実行し、サンプリング結果を確認して調整してください。 また、デジタルリバーブの音をサンプリングする場合など、同期加算によるノイズ レベルの低減が不要な場合は、1に設定します。 ご注意 Fs/11secまたは2Fs/5.5secでサンプリングするには、拡張DSP DABK-S703(別売り) が必要です。 ◆ SETUP 画面の設定のしかたは、29 ページをご覧ください。 2 ジョグダイヤルを回し、 「Sampling」を反転させる。 Rehearsal Sampling Compile Change MS SAMPLE 3 MS:xxxxxxxx 24MB Available Fs/Period=Fs/5.5sec Repeat =16 Input =AD Clock =Internal 48.0 kHz Enter F4キーを押す。 「Loading CDROM/MS」が表示された後、 「Start sampling?」が表示されます。 Rehearsal Sampling Compile Change MS SAMPLE 14 (JP) Start sampling ? Exit Enter 4 F4キーを押す。 「Please wait for a few seconds.」が表示された後、サンプリングが実行されます。ス ピーカーからTSP(Time Stretched Pulse)信号が出力され、設定した回数だけサン プリングを繰り返します。 Rehearsal Now sampling Sampling 12/16 Compile Change MS SAMPLE PeakHold Exit IN OUT 1 2 DV 1 2 0 -6 -20 -35 -60 Enter 繰り返し回数 サンプリングが終了すると、 「Finish sampling Please wait for a few seconds.」と表 示された後、次の画面に切り換わります。 Rehearsal Save sampled data to Sampling MS [xxxxxxxx]? Compile or Change MS and Press F2 Change MS SAMPLE Change MS Exit Enter 5 サンプリングしたデータを保管するメモリースティックを指定する。 現在使用中のメモリースティックに保管するか、別のメモリースティックに保管するか を選びます。 現在使用中のメモリースティックの型名 Rehearsal Save sampled data to Sampling MS [xxxxxxxx]? Compile or Change MS and Press F2 Change MS SAMPLE Change MS Exit Enter 現在使用中のメモリースティックに保管するとき F4 キーを押します。メモリースティック内のメモリーリストが表示されます。 手順 6 へ進んでください。 別のメモリースティックに保管するとき 1 別のメモリースティックと入れ換える。 2 F2キーを押す。 「Checking MS Please wait for a few minutes.」が表示されてから、手順 5 の画 面に切り換わります。 3 F4キーを押す。 メモリースティック内のメモリーリストが表示されます。 手順 6 へ進んでください。 ご注意 • 使用中のメモリースティックの容量が足りないときは、手順5の画面の代わりに「No Space on MS[xxxxxxxx] Delete files or Change MS and Press F2」のメッセージ が表示されます。メモリースティック内の不要ファイルを消去するか、別のメモリース ティックに入れ換えてください。 ◆ 詳しくは、 「メモリースティックの容量が足りないときは」 (18 ページ)をご覧ください。 • 市販の新品のメモリースティックに入れ換えると、 「This MS is new Press F4 and enter name of MS」と表示されます。メモリースティックに名前をつけてください。 ◆ 詳しくは、 「新品のメモリースティックに名前をつけるには」 (19 ページ)をご覧ください。 (続く) 15 (JP) サンプリング(Sampling) 6 ジョグダイヤルでサンプリングしたデータを保管するメモリー番号を選び、メモリーラ ベルをつける。 メモリーラベルが「ーーーーーーーーーーー」と表示されているメモリー番号にデータ を保管できます。 メモリー番号 Rehearsal Sampling Compile Change MS SAMPLE メモリーラベル (01)---------------------(02)---------------------(03)---------------------(04)---------------------(03) Exit Enter 新しいメモリーラベル名をつけるときは 1 ジョグダイヤルでデータを保管したいメモリー番号を反転させる。 2 F4キーを押す。 メモリーラベル入力画面が表示されます。 手順 7 へ進んでください。 すでにあるメモリーラベル名の一部を変更してラベル名をつけるときは 1 ジョグダイヤルでコピーしたいラベル名を反転させる。 2 F2キー(Copy)を押す。 画面の最下段に選んだラベル名が表示されます。 (最下段のメモリー番号は、 この 段階では空欄です。) 3 ジョグダイヤルでデータを保管したいメモリー番号を反転させる。 最下段に選んだメモリー番号が表示されます。 4 F4キーを押す。 メモリーラベル入力画面が表示されます。 手順 7 へ進んでください。 ご注意 メモリーラベルが「ーーーーーーーーーー」以外のメモリー番号には、すでにデータが 保管されています。このようなメモリー番号を選んで F4キーを押すと、 「This file can’t be overwritten. Please select another file. OK?」と表示されます。F4キーを押 すと、メモリーリストに戻ります。 16 (JP) 7 メモリーラベルを入力する。 メモリーラベル入力画面で最大 22 文字を入力することができます。 (ここでつけたラベル名は、サンプリングリバーブソフトウェアで再生するときの音源 とリバーブプログラム名となります。ただし、コンパイル時に変更することもできます ので、この段階では、コンパイル時に判別しやすいラベルをつけておきます。) ! I &()*+-./<=>? 0123456789 abcdefghijklmnopqrstuvwxyz ABCDEFGHIJKLMNOPQRSTUVWXYZ @ Rehearsal Sampling Compile Change MS SAMPLE (03) t Delete メモリー番号 Enter メモリーラベル入力エリア 文字を入力するには:ジョグダイヤルで文字を選んで反転させ、F2キーを押しま す。選んだ文字が確定して、カーソルが次の文字に進みます。 スペースを入力するには: 文字列の 1 行目の右端(9の右側)のスペースを選 び、F2キーを押します。 入力した文字を消すには: F2キーを押して消したい文字までカーソルを移動し てからF3キーを押します。 8 メモリーラベルの入力が終わったら、F4キーを押す。 「Save this file?」と表示されます。 Rehearsal Sampling Compile Change MS SAMPLE 9 Save this file? (03)Church A 1:C12 No Exit Enter サンプリングしたデータを保管するには、F4キーを押す。 「Saving MS」と表示され、サンプリングしたデータがメモリースティックに保管されま す。保管が終了すると、初期画面に戻ります。 これでサンプリングは終了です。 • データを保管せず、メモリースティックを交換したいときは、F4キーの代わりにF2 キー(No)を押します。手順 5 のメモリースティックの指定に戻ります。 • データを保管せずに初期画面に戻るには、F4キーの代わりに F3キー(Exit)を押 します。 17 (JP) サンプリング(Sampling) メモリースティックの容量が足りないときは Rehearsal No space on MS[xxxxxxxx] Sampling Delete files or Compile Change MS and Press F2 Change MS SAMPLE Change MS No Delete メモリースティックの容量が足りないときは、サンプリングやコンパイルの途中で上記のメッ セージが表示されます。別のメモリースティックと交換するか、メモリースティック内の不要 データを消去してください。 別のメモリースティックと交換するには 1 容量の十分残っているメモリースティックと入れ換える。 2 F2キー(Change MS)を押す。 ご注意 メモリースティックを交換したとき、新しいメモリースティックを認識できないと「Please insert MS」の表示が出ます。この場合は、もう1 回 F2キーを押してください。 不要データを消去するには 1 F4キー(Delete)を押す。 SETUP 画面が表示されます。 2 F2キーを押して、消去したいデータの種類を選ぶ。 F2キーを押すたびに、Fs Compiled、2Fs Compiled、Sampledと表示され、消去でき るデータのメモリー番号とラベル名が表示されます。 Fs Compiled、2Fs Compiledはコンパイルしたデータ、Sampledはサンプリングした データを示します。 GoToReverb Fs/Period (03)Church A C:12 Repeat File Rename MS SETUP Fs Compiled Exit Delete データの種類 3 ジョグダイヤルで消去したいメモリーラベルを反転させ、F4キーを押す。 「Delete this file?」と表示されます。 4 消去するときは、F4キーを押す。 消去が実行され、残ったデータのリストが表示されます。 • 消去を取り止めるときは、F4キーの代わりにF3キー(Esc)を押します。手順2の画面 に戻ります。 • 他のデータも消去したいときは、手順 2 ∼ 4を繰り返します。 5 消去を終了するには、F3キー(Exit)を押す。 もとの画面に戻ります。サンプリングやコンパイルを継続してください。 18 (JP) 新品のメモリースティックに名前をつけるには Rehearsal This MS is new. Press F4 Sampling and enter name of MS. Compile Change MS SAMPLE Change MS Exit Enter サンプリングやコンパイルの途中で新品のメモリースティックを入れると、上記のメッセージ が表示されます。メモリースティックに名前をつけてください。 1 F4キーを押す。 メモリースティック名称入力画面が表示されます。 ! I &()*+-./<=>? 0123456789 abcdefghijklmnopqrstuvwxyz ABCDEFGHIJKLMNOPQRSTUVWXYZ @ Rehearsal Sampling Compile Change MS SAMPLE Ms name t Delete Enter メモリースティック名称入力エリア 2 メモリースティックの名前(最大 8 文字)を入力する。 ◆ 入力のしかたは、メモリーラベルの入力と同じです。17 ページの手順 7をご覧ください。 3 F4キーを押す。 もとの画面に戻ります。サンプリングやコンパイルを継続してください。 19 (JP) コンパイル(Compile) コンパイルでは、サンプリングしたデータを加工して、サンプリングリバーブソフトウェアで再 生できるリバーブプログラムの形式にします。 コンパイルはサンプリングの現場以外で行うこともできますが、初めての現場の場合、サン プリング後にコンパイルを実行して仕上がりを確認し、必要ならばより適した条件で再度サ ンプリングを行うことをおすすめします。 1 DASK-S704を起動して、DASK-S704 の初期画面を表示する。 Rehearsal Sampling Compile Change MS SAMPLE 2 MS:xxxxxxxx 24MB Available Fs/Period=Fs/5.5sec Repeat =16 Input =AD Clock =Internal 48.0 kHz Enter コンパイルしたいサンプリングデータが DASK-S704 以外のメモリースティックに保管 されているときは、メニューから「Change MS」を選んで、メモリースティックを交換 する。 (サンプリングデータが現在使用中のメモリースティックに入っているときは、この手 順をとばします。) ◆ 詳しくは、 「メモリースティックの交換」 (28 ページ)をご覧ください。 3 ジョグダイヤルを回し、 「Compile」を反転させる。 Rehearsal Sampling Compile Change MS SAMPLE 4 MS:xxxxxxxx 24MB Available Fs/Period=Fs/5.5sec Repeat =16 Input =AD Clock =Internal 48.0 kHz Enter F4キーを押す。 メモリースティック内のサンプリングデータがリスト表示されます。 Rehearsal Sampling Compile Change MS SAMPLE (03)Church A 1:C12 Please select sampled file. No Exit Enter ◆ 独自のインパルスレスポンスをコンパイルすることもできます。詳しくは、 「独自のインパルスレ スポンスをコンパイルする」 (27 ページ)をご覧ください。 5 ジョグダイヤルでコンパイルしたいサンプリングデータを反転させ、F4キーを押す。 「Compile this file?」と表示されます。 Rehearsal Sampling Compile Change MS SAMPLE Compile this file? (03)Church A C:12 Fs/5.5sec file No Exit Enter ご注意 Fs/11secまたは 2Fs/5.5sec でサンプリングしたデータをコンパイルするには、拡張 DSP DABK-S703(別売り)が必要です。 20 (JP) 6 F4キーを押し、ジョグダイヤルでコンパイルしたいデータの種類を選ぶ。 2Fs/5.5sec でサンプリングしたときのみ、Fs、2Fs、2Fs & Fs から選ぶことができま す。 (Fs/5.5secまたは Fs/11sec でサンプリングしたときは、この画面は表示されま せん。手順 7に進んでください。) Please Select Output File Rehearsal Sampling Compile Change MS SAMPLE 7 Fs 2Fs 2Fs & Fs Exit No Enter F4キーを押す。 コンパイルが実行されます。 「Loading CDROM/MS」が表示された後、 「Compiling Fs (または 2Fs) data. Please wait for a few minutes.」と表示されます。コンパイルには数分かかります。 Rehearsal Sampling Compile Change MS SAMPLE Compiling Fs data. Please wait for a few minutes. No Exit Enter コンパイルが終了すると、 「Loading CDROM/MS」が表示された後、次の画面が表 示されます。 Rehearsal Sampling Compile Change MS SAMPLE Detected direct sound are L=[ 10.00m] R=[ 10.00m] Apply these values? No Exit Enter L=[xxx.xx m]、R=[xxx.xx m]は、サンプリング時に左右のマイクに入力された直接音 の音源(スピーカー)までの距離を表します。この数値を参考にして、直接音以前の 音を削除するかどうかを選びます。 8 直接音以前のデータを削除するときは、F4キーを押す。 削除せず、サンプリングしたデータをそのまま使うときは F2キー(No)を押す。 判断のヒント • 鉄板リバーブをサンプリングしたときは直接音以前のデータを削除しないでください。 • スピーカーをステレオマイクの中央においてサンプリングしたのにL、Rの数値が大き く異なるときは、サンプリング時に周りのノイズが大きく直接音を検出できなかった可 能性があります。直接音以前のデータを削除してコンパイルした場合と、削除せずコ ンパイルした場合のインパルスレスポンスを聴き比べて (手順10) 、 インパルスの定位 がはっきりしているほうをリバーブプログラムとして残してください。 9 F4キーを押す。 サンプリングしたデータの情報が表示されます。 この情報を参考に、サンプリングし直すかどうかを判断します。 リバーブタイム Rehearsal Sampling Compile Change MS SAMPLE フェードアウト開始までの時間 Reverb Time = 3.3sec Fadeout start = 4.5sec Noise Level = -11dB Listen impulse response? No Exit Enter (続く) ノイズレベル 21 (JP) コンパイル(Compile) 判断のヒント • Noise Levelが 0 ∼ -60 dB のときは、SETUP 画面の「Repeat」を「32」または「64」 に設定してサンプリングし直すことをおすすめします。 リピート回数を「16」から「32」 に変更すると、SN 比が約 3 dB 改善されます。 「16」から「64」に変更すると、SN 比 が約 6 dB 改善されます。 • Fadeout startが4.0 sec 以上のときは、SETUP 画面の「Fs/Period」を「Fs/11sec」 に設定してサンプリングし直すことをおすすめします。 ご注意 表示されるリバーブタイムの数値は、音源のホールなどが公表している残響時間とは 異なることがあります。 10F4キーを押す。 インパルスレスポンスが出力され、コンパイルの結果が確認できます。 • インパルスレスポンスを聴かないときは、F4キーの代わりにF2キー(No)を押します。 リバーブプログラム名入力画面が表示されます。手順 11 へ進んでください。 ご注意 • インパルスレスポンスは出力レベルが高いため、パワーアンプのゲインを上げ過ぎて スピーカーを破損させないよう、ご注意ください。 • 外部同期で動作中、サンプリング周波数の+8 %を超えるクロック信号を入力すると、 動作が止まったり、ノイズが出たりします。この場合は、適正なクロック信号を入力し て F3キー(Exit)を押し、コンパイルをやり直してください。 インパルスレスポンス出力中は次の画面が表示されます。 レベルメーター 出力レベル Listening impulse Rehearsal response until F4. Sampling Compile Output =[ 0.0]dB Change MS SAMPLE PeakHold Exit IN OUT 1 2 DV 1 2 0 -6 -20 -35 -60 Enter • 出力レベルを調整するには、ジョグダイヤルを回します。 (0.0∼ 30.0 dBに調整可) • レベルメーターのピーク値を保持するには、F2キー(PeakHold)を押して PeakHold 表示を反転させます。 11コンパイルの結果がよければ、F4キーを押す。 「Finish compiling」の表示後、リバーブプログラム名入力画面が表示されます。 12コンパイルしたデータにリバーブプログラム名をつける。 サンプリング時に入力した名前が表示されますので、必要に応じて修正します。 ここでつけた名前が、サンプリングリバーブソフトウェアでリバーブプログラムを選ぶ ときに音源名とリバーブプログラム名として表示されます。 ! I &()*+-./<=>? 0123456789 abcdefghijklmnopqrstuvwxyz ABCDEFGHIJKLMNOPQRSTUVWXYZ (03)[Church A ] [1:C12 ] t Delete Enter @ Rehearsal Sampling Compile Change MS SAMPLE 音源名 22 (JP) リバーブプログラム名 ◆ 入力のしかたはメモリーラベルの入力のしかたと同じです。17ページの手順7をご覧ください。 13コンパイルしたリバーブプログラムに音源のグラフィックとマイク/スピーカーの位置 のグラフィックを割り当てる。 1F4キーを押す。 Jog pictureが点滅し、音源のグラフィックの選択画面になります。 O O O O [(03)Church A ] ] SAMPLE [1:C12 Jog picture[ Enter 2ジョグダイヤルで音源のグラフィックを選ぶ。 ◆ 選択できるグラフィックの種類は、 「DASK-S704に付属している音源のグラフィック」 (26 ページ)をご覧ください。 ◆ 独自のグラフィックを作成して割り当てることもできます。詳しくは、 「独自の音源グラフィッ クを割り当てるには」 (26 ページ)をご覧ください。 3F4キーを押す。 Jog micが点滅し、マイク/スピーカー位置のグラフィックの選択画面になります。 O O [(03)Church A ] SAMPLE [1:C12 ] Jog mic Esc Enter 4ジョグダイヤルでマイク/スピーカー位置のグラフィックを選ぶ。 • マイク/スピーカー位置のグラフィックを入れないときは、F3キー(Esc)キーを 押します。 5F4キーを押す。 Complete?が点滅します。 O O [(03)Church A ] SAMPLE [1:C12 ] Complete ? No Enter 14コンパイルを終了するときは、F4キーを押す。 次の画面が表示されます。 Rehearsal Save Fs data to Sampling MS [xxxxxxxx]? Compile or Change MS and Press F2 Change MS SAMPLE Change MS Exit Enter • リバーブプログラム名やグラフィックを変更するときは、F4キーの代わりに F3キー (No)を押します。手順 12 のリバーブプログラム名入力画面に戻ります。 (続く) 23 (JP) コンパイル(Compile) 15コンパイルしたリバーブプログラムを保管するメモリースティックを選ぶ。 現在使用中のメモリースティックに保管するか、別のメモリースティックに保管するか を選びます。 現在使用中のメモリースティックの型名 Rehearsal Save Fs data to Sampling MS [xxxxxxxx]? Compile or Change MS and Press F2 Change MS SAMPLE Change MS Exit Enter 現在使用中のメモリースティックに保管するとき F4 キーを押します。メモリースティック内のメモリーリストが表示されます。 手順 16 へ進んでください。 別のメモリースティックに保管するとき 1 別のメモリースティックと入れ換える。 2 F2キーを押す。 「Checking MS Please wait for a few minutes.」が表示されてから、手順15 の画 面に切り換わります。 3 F4キーを押す。 メモリースティック内のメモリーリストが表示されます。 手順 16 へ進んでください。 ご注意 • 使用中のメモリースティックの容量が足りないときは、手順15の画面の代わりに「No Space on MS[xxxxxxxx] Delete files or Change MS and Press F2」のメッセージ が表示されます。メモリースティック内の不要ファイルを消去するか、別のメモリース ティックに入れ換えてください。 ◆ 詳しくは、 「メモリースティックの容量が足りないときは」 (18 ページ)をご覧ください。 • 市販の新品のメモリースティックに入れ換えると、 「This MS is new Press F4 and enter name of MS」と表示されます。メモリースティックに名前をつけてください。 ◆ 詳しくは、 「新品のメモリースティックに名前をつけるには」 (19 ページ)をご覧ください。 16ジョグダイヤルでコンパイルしたリバーブプログラムを保管するメモリー番号を選ぶ。 メモリーラベルが「ーーーーーーーーーー」と表示されているメモリー番号に保管でき ます。 メモリー番号 メモリーラベル (01)---------------------Rehearsal (02)---------------------Sampling (03)Church A 1:C12 (04)---------------------Compile Change MS Please select output file. SAMPLE Exit Enter 24 (JP) ご注意 メモリーラベルが「ーーーーーーーーーー」以外のメモリー番号には、すでにデータが 保管されています。このようなメモリー番号を選んで手順 17 で F4キーを押すと、 「This file can’t be overwritten. Please select another file. OK?」と表示されます。 F4キーを押すと、メモリーリストに戻ります。 17F4キーを押す。 「Save this file?」と表示されます。 Rehearsal Sampling Compile Change MS SAMPLE Save this file? (03)Church A 1:C12 No Exit Enter 18データを保管するには、F4キーを押す。 「Saving MS」と表示され、リバーブプログラムがメモリースティックに保管されます。 保管が終了すると、初期画面に戻ります。 これでコンパイルは終了です。 • リバーブプログラム名やグラフィックを変更するときは、F4キーの代わりにF2キー (No)を押します。手順 12 のリバーブプログラム名入力画面に戻ります。 • データを保管せずに初期画面に戻るには、F4キーの代わりにF3キー(Exit)を押 します。 25 (JP) コンパイル(Compile) 音源のグラフィックを割り当てる DASK-S704を使ってサンプリング、コンパイルしたリバーブプログラムには、サンプリング リバーブソフトウェアでそのリバーブプログラムを選択するときに表示される音源グラフィック と、マイク/スピーカー位置のグラフィックを割り当てることができます。音源のグラフィック に関しては、あらかじめDASK-S704に付属しているグラフィックだけでなく、ご自分で作成 した独自のグラフィックも割り当てることができます。 DASK-S704に付属している音源のグラフィック 大ホール 中ホール 小ホール 教会 スタジオ 鉄板 洞くつ 山 峡谷 サンプル (s777.bmp) 表示なし(黒地) (black.bmp) 独自の音源グラフィックを割り当てるには 音源のグラフィックデータは、DASK-S704 のメモリースティックの「¥mssony¥pro¥dres777¥picture」の下の階層に保管されています。 上記のサンプルデータ(s777.bmp)や表示なしデータ(black.bmp)を参考に独自のグラ フィックをビットマップデータとして作成し、 メモリースティックのこの階層に保管することによ り、音源のグラフィックとして割り当てることができます。 メモリースティックに独自のグラフィックデータを保管し、DASK-S704を再起動すると、Jog pictureとして選択できます。 26 (JP) 独自のインパルスレスポンスをコンパイルする ご自分で作成したインパルスレスポンスをDASK-S704でコンパイルして、 リバーブプログラ ムとして利用することができます。 1 以下の条件でインパルスレスポンスを作成する。 ・ステレオフォーマットのWAVEファイル ・サンプリングビット:16 bitまたは 24 bit ・サンプリング周波数:44.1 kHz、48.0 kHz、88.2 kHzまたは 96.0 kHz 2 作成したインパルスレスポンスをDASK-S704 のメモリースティックに保管する。 メモリースティックの「¥mssony¥pro¥dre-s777¥wave]の下層に「xx.wav」として保 管します。 「xx」には、00 ∼ 99までの 10 進数を指定します。この数字がメモリー番 号となります。 (例:¥mssony¥pro¥dre-s777¥wave¥04.wav) 3 インパルスレスポンスをコンパイルする。 メモリースティックに保管したインパルスレスポンスは、20 ページの手順 4 でメモリー スティック内のサンプリングデータをリスト表示したとき、ファイル名としてつけたメモ リー番号で表示されます。メモリーラベルには「WAVE file」と表示されます。この ファイルを選択してコンパイルしてください。 Rehearsal Sampling Compile Change MS SAMPLE (03)WAVE file (04)WAVE file (03)Church A 1:C12 Please select sampled file. No Exit Enter ご注意 独自のインパルスレスポンスを選択した場合、直接音の検出(21 ページの手順7)はでき ません。 27 (JP) メモリースティックの交換(Change MS) 初期画面のメニューから「Change MS」を指定することにより、電源を切らずにメモリース ティックを交換することができます。 1 DASK-S704 の初期画面を表示する。 2 ジョグダイヤルを回し、 「Change MS」を反転させる。 Rehearsal Sampling Compile Change MS SAMPLE 3 MS:xxxxxxxx 24MB Available Fs/Period=Fs/5.5sec Repeat =16 Input =AD Clock =Internal 48.0 kHz Enter F4キーを押す。 次の画面が表示されます。 Rehearsal Please Change MS Sampling and Press F4 Compile Change MS SAMPLE Change MS Exit Enter 4 メモリースティックを入れ換える。 5 F4キーを押す。 「Checking MS Please wait for a few minutes.」が表示された後、初期画面に戻りま す。 ご注意 • メモリースティックを交換したとき、新しいメモリースティックを認識できないと「Please insert MS」の表示が出ます。この場合は、もう1 回 F4キーを押してください。 • 市販の新品のメモリースティックに入れ換えると、 「This MS is new Press F4 and enter name of MS」と表示されます。メモリースティックに名前をつけてください。 ◆ 詳しくは、 「新品のメモリースティックに名前をつけるには」 (19 ページ)をご覧ください。 28 (JP) セットアップ画面(SETUP) SETUP 画面では、入力方式(Input Sel)やクロック方式(Clock Sel)などシステム全体 の設置にかかわる設定や、サンプリング周波数 / 時間(Fs/Period)や繰り返し回数 (Repeat)を初めとするさまざまな設定を行います。設定した情報は、DASK-S704 のメモ リースティックに自動的に書き込まれます。 SETUP画面の操作 1 F1キーを押して SETUP 画面を表示する。 GoToReverb Fs/Period Repeat File Rename MS SETUP : :Fs/5.5sec :16 : :xxxxxxxx Enter 現在の設定状態が表示されます。 2 ジョグダイヤルを回して、設定したい項目を反転させる。 GoToReverb Fs/Period Repeat File Rename MS SETUP : :Fs/5.5sec :16 : :xxxxxxxx Enter SETUP画面には、2ページあります。 ジョグダイヤルを左に回してページの最下段まで 達すると、自動的に次のページが表示されます。右に回して最上段まで達すると、自 動的に前ページが表示されます。 ◆ SETUP画面の各ページと項目について詳しくは、 「SETUP画面で設定・調整可能な項目」 (30 ページ)をご覧ください。 3 F4キーを押す。 選択項目がポップアップして表示されます。 *印が現在の設定を示します。 GoToReverb Fs/Period Repeat File Rename MS SETUP : :Fs-5.5sec * Fs/5.5sec :16 Fs/11sec : 2Fs/5.5sec :xxxxxxxx Exit Enter または、ポップアップ画面にその後の操作が指示されます。 GoToReverb Fs/Period Repeat File Rename MS SETUP 4 : :Fs-5.5sec :16 Go To Reverb CDROM? : :xxxxxxxx Enter Exit ジョグダイヤルを回して希望の選択項目を反転させるか数値を変更し、F4キーを押 す。または、画面上の指示に従って操作する。 ポップアップ画面を閉じるには 選択が終わったらF3キー(Exit)を押してください。 29 (JP) セットアップ画面(SETUP) SETUP画面で設定・調整可能な項目 ページ1 GoToReverb Fs/Period Repeat File Rename MS SETUP : :Fs/5.5sec :16 : :xxxxxxxx Enter 項目 可変範囲 機能 GoToReverb –– DASK-S704を使ってサンプリングしたリバーブプログラムや、DRE-S777またはサン プリングリバーブソフトウェアDASK-S701/S702/S703などのCD-ROMに保管されて いるリバーブプログラムを再生する。 ◆ 詳しくは、 「リバーブプログラムの再生」 (32ページ)をご覧ください。 Fs/Period Fs/5.5sec Fs/11sec 2Fs/5.5sec サンプリング周波数とサンプリング時間を選択する。 Fs/5.5sec:サンプリング周波数44.1 kHzまたは48.0 kHzで5.5秒間のサンプリング Fs/11sec:サンプリング周波数44.1 kHzまたは48.0 kHzで11秒間のサンプリング 2Fs/5.5sec:サンプリング周波数88.2 kHzまたは96.0 kHzで5.5秒間のサンプリング ご注意 Fs/11secまたは2Fs/5.5secでサンプリングするには、拡張DSP DABK-S703(別売り) が必要です。 Repeat 1 16 32 64 サンプリングの繰り返し回数を選択する。通常は、16に設定する。ノイズが多いとき は繰り返し回数を32または64にしてサンプリングする。 1はデジタルリバーブの信号をサンプリングする場合に使う。 File –– メモリースティック内のファイルを表示し、そのデータを消去する。 1 Fileを選択すると、ポップアップ画面に消去できるメモリーリストが表示される。 2 F2キーを押す。 消去できるデータの種類がSampled(サンプリングデータ) 、Fs compiled(コンパイ ルしたFsデータ) 、2Fs compiled(コンパイルした2Fsデータ)と切り換わり、相当 するデータが表示される。 3 ジョグダイヤルで消去したいメモリー番号を反転させ、F4キーを押す。「Delete this file?」と表示される。 4 F4キーを押すと消去される。 消去しないときは、F3キーを押すとSETUP画面に戻る。 Rename MS –– メモリースティックの名前を変更する。 1 Rename MSを選択すると、 「Rename MS. Press F4 and enter name of MS」と表示さ れる。 2 F4キーを押す。 MS name入力画面が出るので、変更したい名前を入力する。 3 F4キーを押す。 ご注意 メモリースティックの名前を変更すると、そのメモリースティックに保管されている リバーブプログラムは、新しいものとして認識されます。一度保管されているリバー ブプログラムをロードしたことのあるメモリースティックは、名前を変更しないでく ださい。 30 (JP) ページ2 GoToReverb LCD Ctl LCD Dim Input Sel Clock Sel SETUP : :Contrast[44] :Back Light Dim[ ON ] :AD :Internal 48.0 kHz Enter 項目 可変範囲 機能 LCD Ctl Contrast 0∼63 表示窓のコントラストを調整する。 調整がダイレクトに表示窓に反映される。 LCD Dim Back light Dim ON、OFF 表示窓の照明を暗くするディマーのON/OFFを設定する。 調整がダイレクトに表示窓に反映される。 Input Sel Digital AD 入力を選択する。 Digital: DRE-S777のDIGITAL IN端子からの入力 AD: DRE-S777に取り付けたA/DコンバーターDABK-S701のANALOG IN端子からの入 力 ご注意 ADを選択するには、A/DコンバーターDABK-S701(別売り)が必要です。 Clock Sel Internal Word AES (DI) 44.1 kHz/88.2 kHz 48.0 kHz/96.0 kHz クロック方式を選択する。選択後にF3キーを押すと、設定が切り換わる。 クロック信号(Internal、Word、AES(DI))から1つと、サンプリング周波数(44.1 kHz/88.2 kHz*, 48.0 kHz/96.0 kHz*)から1つを選ぶ。 Internal: DRE-S777に内蔵の水晶発振器によるクロック信号 Word: DRE-S777のWORD SYNC IN端子に入力したワードシンク信号 AES(DI): DRE-S777のDIGITAL IN端子に入力した信号に含まれているクロック信号 * 88.2 kHz、96.0 kHzは、Fs/Periodが2Fs/5.5secのときのみ表示されます。 ご注意 SETUP 画面で File または Rename MS 以外の設定を変更した後、F1 キーを押して SAMPLE画面に切り換えたとき、DASK-S704のメモリースティックに変更した情報が自動的 に書き込まれます。このため、DASK-S704のメモリースティックが入っていないと 「Licence code error Please change Licence MS」の表示が出ます。DASK-S704のメモリースティッ クと入れ換え、F4キーを押してください。 31 (JP) リバーブプログラムの再生 DASK-S704を使ってサンプリングし、メモリースティックに保管したリバーブプログラムは、 DRE-S777やDASK-S701/S702/S703のサンプリングリバーブソフトウェア(Version 2.0) を 使って再生します。 DASK-S704の「GoToReverb」からサンプリングリバーブソフトウェアに切り換える 1 DASK-S704 のSETUP 画面で「GoToReverb」を選択する。 GoToReverb Fs/Period Repeat File Rename MS SETUP 2 : :Fs/5.5sec :16 : :xxxxxxxx Enter F4キーを押す。 「Go To Reverb CDROM?」と表示されます。 GoToReverb Fs/Period Repeat File Rename MS SETUP 3 : :Fs-5.5sec :16 Go To Reverb CDROM? : :xxxxxxxx Enter Exit F4キーを押す。 次の画面が表示され、CDトレイが開きます。 F4キーは点滅します。 GoToReverb Fs/Period Repeat File Rename MS SETUP 4 : :Fs-5.5sec :16 Please change CDROM/MS : to DRE-S777 Ver 2.0 or DASK-S70x series Ver 2.0 :xxxxxxxx Close CDROM DRE-S777または DASK-S701/S702/S703 のCD-ROMとそのライセンスコードが記 録されているメモリースティックを入れ、F4キーを押す。 CDトレイが閉じ、サンプリングリバーブソフトウェアが起動します。 5 DRE-S777 の取扱説明書の「リバーブ画面 /リバーブプログラムを選ぶ / 別のCDROMまたは別のメモリースティックのリバーブプログラムを選ぶ」に従って、メモ リースティックを入れ換え、リバーブプログラムを再生する。 ご注意 DRE-S777または DASK-S701 のVersion 1.0 の CD-ROM では動作しません。 電源を入れ直してサンプリングリバーブソフトウェアに切り換える いったんDRE-S777の電源を切り、DRE-S777またはDASK-S701/S702/S703のCD-ROM とそのライセンスコードが記録されているメモリースティックに入れ換えて、電源を入れ直し ます。 その後、DRE-S777の取扱説明書の「リバーブ画面/リバーブプログラムを選ぶ/別のCDROMまたは別のメモリースティックのリバーブプログラムを選ぶ」に従って、メモリース ティックを入れ換え、リバーブプログラムを再生します。 32 (JP) リバーブモードとサンプリング時の配置 DASK-S704でサンプリング、 コンパイルしたリバーブプログラムには、 「モノラル入力−ステ レオ出力モード (Mono in Stereo out) 」のサンプリングデータしか含まれていません。従っ て、通常はサンプリングリバーブソフトウェアのリバーブモードを「Mono in Stereo out」に 設定してください。 ただし、サンプリング時に下記のようにスピーカーとマイクを配置してサンプリングすること により、そのデータを組み合わせて 「モノラル入力−4チャンネル出力モード (Mono in 4ch out)」や「ステレオ入力−ステレオ出力モード(Stereo in Stereo out) 」の効果を得ること ができます。 Mono in 4ch outの効果を得るには サンプリング時 DASK-S704を使って2 種類のサンプリングを行う。 • サンプリングC12:スピーカーCの位置でマイクを前方に向け(マイク1、2) 、サンプリング する。 • サンプリングC56:スピーカーCの位置でマイクを後方に向け(マイク5、6) 、サンプリング する。 リバーブプログラム再生時 1 サンプリングリバーブソフトウェアのSETUP 画面で Rev modeを「Split in 4ch out」に 設定する。 2 REVERB 画面で SPLIT CH1-2にサンプリング C12を、SPLIT CH3-4にサンプリング データC56をロードする。 サンプリング時の配置 再生時のブロック図 DRE-S777 C CH1 C 1 O O CH1 C12 CH2 2 CH3 C O 5O 1 2 6 CH2 C56 CH4 5 6 Rev mode: Split in 4ch out 33 (JP) リバーブモードとサンプリング時の配置 Stereo in Stereo outの効果を得るには サンプリング時 DASK-S704を使って2 種類のサンプリングを行う。 • サンプリングL12:スピーカーLの位置でマイクを前方に向け(マイク1、2) 、サンプリング する。 • サンプリングR12:スピーカーRの位置でマイクを前方に向け(マイク1、2) 、サンプリング する。 リバーブプログラム再生時 1 DRE-S777にミキサーを接続する。 2 サンプリングリバーブソフトウェアのSETUP 画面で Rev modeを「Split in 4ch out」に 設定する。 3 REVERB 画面で SPLIT CH1-2にサンプリング L12を、SPLIT CH3-4にサンプリング データR12をロードし、外部ミキサーを通す。 サンプリング時の配置 再生時のブロック図 DRE-S777 L 外部ミキサー R CH1 L 1 O O CH1 L12 1 CH2 2 CH3 R CH2 R12 2 CH4 Rev mode: Split in 4ch out 34 (JP) エラーメッセージ エラーが起きると、表示窓に以下のエラーメッセージが反転表示されます。 エラーメッセージ 原 因 対 処 Please insert MS メモリースティックが入っていない、またはメモ メモリースティックを入れて、F2キーまたはF4キーを押 す。 リースティックが認識されていない。 Licence code error Please change Licence MS DASK-S704のメモリースティックが入っていな い。 DASK-S704に付属のメモリースティックを入れる。 No Space on MS[xxxxxxxx] Delete files or Change MS and Press F2 メモリースティックの容量が足りない。 別のメモリースティックと交換するか、不要データを消 去する。 (18ページ参照) This file can’t be overwritten. すでにデータが保管されているメモリー番号を選 Please select another file. OK? んでいる。 メモリーラベルが「ーーーーーーーーーー」のメモリー 番号を選び、F4キーを押す。 This MS is new 名前のついていないメモリースティックを入れた。 メモリースティックに名前をつける。(19ページ参照) Press F4 and enter name of MS デジタル入力信号のエラー表示 表示窓左下の、SAMPLE、SETUPの文字とエラー内容を示す下記の表示が交互に点滅し ます。同時に F1キーが赤で点灯または点滅します。 Rehearsal Sampling Compile Change MS SAMPLE MS:xxxxxxxx 24MB Available Fs/Period=Fs/5.5sec Repeat =16 Input =AD Clock =Internal 48.0 kHz Enter Y Sync エラー表示 エラー表示 原 因 対 処 Sync Clock SelでWordまたはAES(DI)が選択されてい るときに、クロック信号の周波数がサンプリング 周波数の-12.5%から+8%の範囲外である。 適切なクロック信号を入力する。 Valid Validity Bitのエラー。 正しいデジタル信号を入力する。 Slip 入力信号がクロックと同期していない。 正しいデジタル信号を入力する。 CRC CRC Bitのエラー。 正しいデジタル信号を入力する。 Parity Parity Bitのエラー。 正しいデジタル信号を入力する。 Bphase Bi-phase Codingのエラー 正しいデジタル信号を入力する。 Unlock デジタル入力信号がロックしていない。 正しいデジタル信号を入力する。 ご注意 • 外部同期で動作するとき、サンプリング周波数の+8 %を超えるクロック信号を入力すると Syncエラー表示が出ますが、+8 %以内のクロック信号に変更してもSlipエラー表示が出 ることがあります。この場合は、クロック入力をいったん外してから、入れ直してください。 • リハーサルやサンプリング、 コンパイル中に一瞬Syncエラー表示が出ることがありますが、 クロックを切り換えているためで、故障ではありません。 35 (JP) 本機の性能を保持するために(使用上のご注意) メモリースティックの使用上のご注意 • メモリースティックやPCアダプターを抜くことができるのは、以下 の場合に限ります。 CD-ROMの取り扱い上のご注意 • 文字の書かれていない面(再生面)に手を触れないように持っ てください。 — 電源が切れているとき • 表面に紙やシールを貼らないでください。 —「Please change CDROM/MS.」 、 「Please change MS.」な • 直射日光が当たるところなど、温度の高いところ、湿度の高いと ど、メモリ−スティック交換のメッセージが出たとき これ以外は、絶対にメモリースティックやPCカードアダプターを抜 かないでください。記録したデータが壊れることがあります。 • 付属のメモリースティックまたは別売りのサンプリングリバーブソフ トウェアに付属のメモリースティックが壊れた場合は、ソニーの サービス担当者にお問い合わせください。 • メモリースティック裏面の誤消去防止スイッチをLOCKにすると、 メモリースティックへの記録やデータの消去ができません。スイッ チは常に LOCKと反対側の位置にしてお使いください。 • メモリースティックのデータをパソコンなどで消さないでください。 動作が保証できなくなります。 メモリースティックの取り扱い上の ご注意 • メモリースティック裏面の端子部には手や金属で触れないでくだ さい。 • メモリースティックには専用ラベル以外は貼らないでください。 • PCカードアダプターのメモリースティック挿入口やコネクター部に ゴミや異物が入らないようご注意ください。 • 強い衝撃を与えたり、曲げたり、落としたりしないでください。 • 分解したり、改造したりしないでください。 • 水に濡らさないでください。 • 以下のような場所でのご使用や保存は避けてください。 — 高温になった車の中や炎天下など気温の高いところ — 直射日光のあたるところ — 湿気の多い場所や腐食性のあるところ — 静電気や電気的ノイズの影響を受けるところ • 持ち運びや保管の際は、CD-ROMジャケット内のメモリースティッ ク収納ケースに入れてください。 36 (JP) ころには置かないでください。 • ケースに入れて保存してください。ケースに入れずに重ねたり、 立てかけておくと変形の原因になります。 • 指紋やほこりによるディスクの汚れは、柔らかい布でディスクの中 心から外側へ向かって軽くふきとってください。 • 汚れがひどいときは、水ですこし湿らせた柔らかい布でふいた 後、さらに乾いた布で水気をふきとってください。 • ベンジンやレコードクリーナー、静電気防止剤などは、ディスクを 傷めることがありますので、使わないでください。 English Table of Contents Overview ............................................................................. 2 Basic Procedures of Sampling ......................................... 3 Block Diagrams ................................................................. 4 Block Diagram for Sampling .................................................. 4 Block Diagram for Compiling ................................................4 Connection Examples for Sampling ................................ 5 Analog Connection .................................................................5 Digital Connection ..................................................................6 Starting the DASK-S704 .................................................... 7 Starting the DASK-S704 by Turning on the Power of the DRE-S777 ....................................................................7 Starting the DASK-S704 Using the “GoToSample” Function of the Sampling Reverb Software .......................9 Rehearsal ......................................................................... 11 GB Sampling .......................................................................... 12 English Compiling ......................................................................... 18 Assigning the Reverb Source Graphic ..................................24 Compiling Your Particular Impulse Response......................25 Changing the Memory Stick ........................................... 26 SETUP Display ................................................................. 27 Basic Operation of the SETUP Display ................................27 The Items Available in the SETUP Display ......................... 28 Reproducing the Reverb Program ................................. 30 Reverb Modes and Arrangement during Sampling ...... 31 Error Messages ................................................................ 33 Precautions ...................................................................... 34 1(GB) Overview The DASK-S704 Sampling Function Software is software specially designed for Sony DRE-S777 Sampling Digital Reverb. Using the DASKS704, you can sample the reverberation of your favorite acoustic space or plate reverb, and store the sampled data in the Memory Stick TM 1). Synchronized addition sampling with excellent signal-to-noise ratio The DASK-S704 uses the TSP (Time Stretched Pulse) signal as a reverb source for sampling. The DASK-S704 repeats the process of D/A conversion of the TSP signal, output from speakers, pick up from microphones and sampling. It adds sampled data to synchronization repeatedly, then samples the average value of the added data. With this method, the more times the repetition is carried out, the more the noise level against the reverb element is reduced, and thus higher the signal-tonoise ratio. Normally, set the repeat to 16 times. When you perform sampling outdoors or indoors with much background noise, set the repeat to 32 or 64 times. Changing the repeat from 16 to 32 times improves the signal-tonoise ratio by about 3 dB; changing from 16 to 64 by about 6 dB. Sampling frequency from 44.1 to 96.0 kHz available You can select the following three sampling modes to match the reverberation of a sampling space. • Fs/5.5sec: Sampling period of 5.5 seconds with 44.1 or 48.0 kHz sampling frequency • Fs/11sec: Sampling period of 11 seconds with 44.1 or 48.0 kHz sampling frequency • 2Fs/5.5sec: Sampling period of 5.5 seconds with 88.2 or 96.0 kHz sampling frequency When you perform sampling in an acoustic space with a longer reverberation time, such as a church, select Fs/11sec. Although sampling is performed for 11 seconds, the sampled data obtained for the first 5.5 seconds is used for compiling. Note When you sample/compile with Fs/11sec or 2Fs/5.5sec, you need the optional DABK-S703 expansion DSP. Storing up to 42 reverb programs in a 64 MB Memory Stick You can store the sampled or compiled data in the supplied Memory Stick or commercially available Memory Sticks of 16 MB, 32 MB or 64 MB. The data file size is about 2 MB for Fs/5.5sec sampled data, about 4 MB for Fs/11sec or 2Fs/5.5sec sampled data, about 1.5 MB for Fs/5.5sec Fs compiled data and about 3 MB for 2Fs compiled data. If you store compiled Fs data only, a commercially available 64 MB Memory Stick is capable of storing up to 42 reverb programs. The supplied Memory Stick has a 24 MB area for storing the sampled/ compiled data. ........................................................................................................................................................................................................ 1) Memory Stick TM is a trademark of Sony Corporation. 2(GB) Basic Procedures of Sampling The basic procedures for sampling follow below. You can find the detailed explanation for each step on the pages in parentheses. In the acoustic space where you sample 1 Install the microphones and speakers. (page 5) x 2 Start running the DASK-S704. (page 7) x 3 Set the sampling frequency/period (Fs/Period), and repeat times (Repeat) on the SETUP display. (page 12) x 4 Rehearsal: Adjust the input level from the microphones. (page 11) x 5 Sampling: Record the reverb data. (page 12) x 6 Write the sampled data on the Memory Stick. (page 15) In the recording studio, etc. 7 Recall the sampled data from the Memory Stick. (page 18) x 8 Compile: Work on the sampled data to form the reverb program. (page 18) x 9 Write the compiled reverb program data on the Memory Stick. (page 23) x 0 Reproduce the reverb program using the sampling reverb software CDROM (Version 2.0). (page 30) 3(GB) Block Diagrams Block Diagram for Sampling Sampling from input to output. Input section Output section Meter Meter AD Memory TSP GEN DI DO DSP Memory Stick Block Diagram for Compiling Compiling. Meter Memory Stick DA DSP DO Memory 4(GB) DA Connection Examples for Sampling Following are connection examples for sampling. Notes • Use microphones and speakers having as high performance as possible and excellent frequency response. • Perform the sampling in situations with as little background noise as possible. Analog Connection For this connection, install the optional DABK-S701 A/D converter and DABK-S702 D/A converter to the connector panel of the DRE-S777. Hall Speaker 1 Stage Speaker 2 Mic 1 Mic 2 ANALOG IN CH1 ANALOG IN CH2 Microphone amplifier DABK-S701 A/D converter CH-1 CH-1 CH-3 CH-2 ANALOG IN CH-2 IN IN ANALOG OUT CH-4 ANALOG OUT DIGITAL OUT OUT1 OUT2 WORD SYNC MIDI RS-232C IN OUT/THR DABK-S702 D/A converter ANALOG OUT CH1 Power amplifier ANALOG OUT CH2 Setting up When the equipment is connected as above, set the items on the SETUP display of the DASK-S704 as follows: • Input Sel: AD • Clock Sel: Internal 48.0/96.0 kHz or Internal 44.1/88.2 kHz Note When sampling/compiling with Fs/11sec or 2Fs/5.5sec, install the DABKS703 expansion DSP (optional) to the DRE-S777. 5(GB) Connection Examples for Sampling Digital Connection For this connection, use the DIGITAL IN and DIGITAL OUT 1 connectors equipped with the DRE-S777 as standard. Hall Speaker 1 Stage Speaker 2 Mic 1 A/D converter Mic 2 Microphone amplifier DIGITAL IN CH-1 CH-1 CH-3 CH-2 ANALOG IN CH-2 IN IN ANALOG OUT CH-4 ANALOG OUT DIGITAL OUT OUT1 OUT2 WORD SYNC MIDI RS-232C IN OUT/THR DIGITAL OUT 1 D/A converter Power amplifier Setting up When the equipment is connected as above, set the items on the SETUP display of the DASK-S704 as follows: • Input Sel: Digital • Clock Sel: AES(DI) 48.0/96.0 kHz or AES(DI) 44.1/88.2 kHz Note When sampling/compiling with Fs/11sec or 2Fs/5.5sec, install the DABKS703 expansion DSP (optional) to the DRE-S777. 6(GB) Starting the DASK-S704 There are two ways to start the DASK-S704 Sampling Function Sofware: • Starting when you turn on the power of the DRE-S777 • Starting using the “GoToSample” function on the SETUP display of the DRE-S777 or DASK-S701/S702/S703 sampling reverb software Starting the DASK-S704 by Turning on the Power of the DRE-S777 Insert the CD-ROM and the Memory Stick supplied with the DASK-S704 into the DRE-S777 and turn on the power of the DRE-S777 as follows: 1 Make sure that the erasure prevention switch at the rear of the Memory Stick is set to the left position (not the LOCK position). Erasure prevention switch LOCK Note If the erasure prevention switch is set to LOCK (right position), the Memory Stick does not operate. Be sure to set the switch to the position as illustrated above. 2 Insert the Memory Stick into the PC card adapter supplied with the DRE-S777 and insert them into the MEMORY CARD insertion slot of the DRE-S777. With the arrow on the top-left corner PC card adapter (supplied) Memory Stick 3 4 Press the POWER switch on the DRE-S777 to turn it on. Press the Z key on the DRE-S777. The CD tray opens. (continued) 7(GB) Starting the DASK-S704 5 Insert the CD-ROM, and lightly press the front end of the CD tray or the Z key to close the tray. With the label facing up The DRE-S777 starts running and the DASK-S704 Sampling Function Software is loaded from the CD-ROM. The loading is complete within about 3 minutes. After loading, the DASK-S704 initial display appears. Rehearsal Sampling Compile Change MS SAMPLE MS:xxxxxxxx 24MB Available Fs/Period=Fs/5.5sec Repeat =16 Input =AD Clock =Internal 48.0 kHz Enter Removing the Memory Stick 1 2 Press the EJECT button on the PC card adapter. Remove the Memory Stick. EJECT button 2 1 To use the Memory Stick again Reinsert it into the slot of the PC card adapter. Notes • You can remove the Memory Stick or the PC card adapter in the following cases only: — When the DRE-S777 is turned off. — When a message on the display indicates changing the Memory Stick, such as “Please change MS.” To avoid damaging the data in the Memory Stick, do not remove the Memory Stick or the PC card adapter in other cases. • Do not remove the Memory Stick immediately after it is inserted. As it will take about five seconds for the unit to recognize the inserted Memory Stick, quick removal of the Memory Stick will cause an error, freezing the system. If the system is stopped, turn off the power and turn it on again. 8(GB) Starting the DASK-S704 Using the “GoToSample” Function of the Sampling Reverb Software When you use the DRE-S777 or DASK-S701/S702/S703 sampling reverb software (Version 2.0) CD-ROM, you can start the DASK-S704 from “GoToSample” on the SETUP display of the sampling reverb software. 1 Highlight “GoToSample” on the SETUP display of the sampling reverb software. SETUP display of the DRE-S777 or DASK-S701/S702/S703 GoToSample Licence PreDelay Serial Sel Service SETUP : : : ms : RS232C [ : 9600] Enter 2 Press the F4 key. “Go To Sampling CDROM?” is displayed in a pop-up window. 3 Press the F4 key. “Please change DASK-S704 CDROM and MS” is displayed. 4 Change the Memory Stick and CD-ROM to those supplied with the DASK-S704. To insert/remove the CD-ROM and Memory Stick, see “Starting the DASKS704 by Turning on the Power of the DRE-S777” on page 7. 5 Press the F4 key. The DASK-S704 Sampling Function Software is loaded from the CDROM. The loading is complete within about 3 minutes. After loading, the DASK-S704 initial display appears. Rehearsal Sampling Compile Change MS SAMPLE MS:xxxxxxxx 24MB Available Fs/Period=Fs/5.5sec Repeat =16 Input =AD Clock =Internal 48.0 kHz Enter Notes • When a Memory Stick is changed, “Please insert MS” message may appear if the DRE-S777 cannot recognize the Memory Stick. In this case, press the F4 key again. • If you insert a Memory Stick which is not the DASK-S704 Memory Stick, “Licence code error Please change Licence MS” is displayed. Change to the DASK-S704 Memory Stick, then press the F4 key. 9(GB) Starting the DASK-S704 Initial display of the DASK-S704 1 2 3 4 Rehearsal Sampling Compile Change MS SAMPLE MS:xxxxxxxx 24MB Available Fs/Period=Fs/5.5sec Repeat =16 Input =AD Clock =Internal 48.0 kHz Enter 0 5 6 7 8 9 qa Menu section 1 Rehearsal: Performs rehearsal. 2 Sampling: Performs sampling. 3 Compile: Performs compiling. 4 Change MS: Changes the Memory Stick. Current setttings 5 Name of the Memory Stick in use and available capacity 6 Sampling frequency and sampling period (set with “Fs/Period” on the SETUP display) 7 Sampling repeat times (set with “Repeat” on the SETUP display) 8 Input selection (set with “Input Sel” on the SETUP display) 9 Clock format (set with “Clock Sel” on the SETUP display) Display mode 0 SAMPLE display indicator Function key indicator qa F4 key function 10(GB) Rehearsal Before sampling space reverberation, you should rehearse to adjust the input level from microphones. For the rehearsal, install the microphones and speakers in the same positions as those for sampling. Adjust the input level from the microphones to a level as approximate to 0 dB as possible. 1 Start the DASK-S704 and show the initial display. For starting the DASK-S704, see page 7. 2 Turn the jog dial to highlight “Rehearsal.” Rehearsal Sampling Compile Change MS SAMPLE 3 MS:xxxxxxxx 24MB Available Fs/Period=Fs/5.5sec Repeat =16 Input =AD Clock =Internal 48.0 kHz Enter Press the F4 key. “Loading CDROM/MS” is displayed, then “Start Rehearsal?” appears. Rehearsal Sampling Compile Change MS SAMPLE 4 Start Rehearsal ? Exit Enter Press the F4 key. “Please wait for a few seconds.” is displayed, then the following display appears. The TSP (Time Stretched Pulse) signal is output from the speakers. Level meter Input meter Output meter Rehearsal Repeat TSP Sampling until F4 Compile Change MS SAMPLE PeakHold Exit 5 IN OUT 1 2 DV 1 2 0 -6 -20 -35 -60 Enter Adjust the gain on the power amplifier so that the output sound pressure of the speakers is about 100 dB(A) SPL. Note The TSP signal output level is very high. To avoid damaging the speakers, adjust the gain of the power amplifier carefully. 6 Adjust the input level from the microphones on the microphone amplifier so that the input level approximates 0 dB as much as possible. The output meter may deflect over its maximum reading intermittently. This is not a problem. • To hold the peak value on the level meter, press the F2 key (PeakHold) to highlight the PeakHold indicator. 7 To finish the level adjustment, press the F4 key. “Please wait for a few seconds.” is displayed, then the initial display returns. 11(GB) Sampling After the microphone input level has been adjusted in rehearsal, perform sampling of the reverberation. Note The background noise in the sampling space will be recorded over the reberveration. When sampling, choose a situation with as little background noise as possible. If noise occurs during sampling, i.e. noise from a plane, car, human voice, bird voice, etc., retry sampling from the beginning. 1 Confirm the sampling conditions on the initial display of the DASKS704. If necessary, change the conditions on the SETUP display. Sampling frequency and period Rehearsal Sampling Compile Change MS SAMPLE MS:xxxxxxxx 24MB Available Fs/Period=Fs/5.5sec Repeat =16 Input =AD Clock =Internal 48.0 kHz Enter Sampling repeat times Sampling frequency and period: Normally set to Fs/5.5sec or 2Fs/ 5.5sec. When sampling in a space with a long reberveration time such as a church, set it to Fs/11sec and perform sampling. Compile the sampled data once to check the sampling result, then check if the setting is to be changed or not. Sampling repeat times: Normally set to 16. When sampling outdoors where there is usually much background noise, perform sampling with the setting at 16, compile the sampled data once to check the sampling result, then check if the setting is to be changed or not. Set to 1 when sampling digital reverb sound or when noise level reduction by the synchronized addition is not required. Note The DABK-S703 expansion DSP (optional) is required when sampling with the Fs/11sec or 2Fs/5.5sec setting. For setting on the SETUP display, see page 27. 2 Turn the jog dial to highlight “Sampling.” Rehearsal Sampling Compile Change MS SAMPLE 3 MS:xxxxxxxx 24MB Available Fs/Period=Fs/5.5sec Repeat =16 Input =AD Clock =Internal 48.0 kHz Enter Press the F4 key. “Loading CDROM/MS” is displayed, then “Start sampling?” appears. Rehearsal Sampling Compile Change MS SAMPLE 12(GB) Start sampling ? Exit Enter 4 Press the F4 key. “Please wait for a few seconds.” is displayed, and sampling is performed. The TSP (Time Stretched Pulse) signal is output, and sampling is repeated by the set repeat times. Rehearsal Now sampling Sampling 12/16 Compile Change MS SAMPLE PeakHold Exit IN OUT 1 2 DV 1 2 0 -6 -20 -35 -60 Enter Sampling repeat times When sampling is completed, “Finish sampling Please wait for a few seconds.” is displayed. Then the following display appears. Rehearsal Save sampled data to Sampling MS [xxxxxxxx]? Compile or Change MS and Press F2 Change MS SAMPLE Change MS Exit Enter 5 Assign the Memory Stick in which you want to store the sampled data. Select the Memory Stick in use or another Memory Stick. Name of the Memory Stick in use Rehearsal Save sampled data to Sampling MS [xxxxxxxx]? Compile or Change MS and Press F2 Change MS SAMPLE Change MS Exit Enter To store in the Memory Stick in use Press the F4 key. The memory list of the Memory Stick is displayed. Proceed to step 6. To store in another Memory Stick 1 Change the Memory Stick to another one. 2 Press the F2 key. “Checking MS Please wait for a few minutes.” is displayed, then the display in step 5 appears. 3 Press the F4 key. The memory list of the Memory Stick is displayed. Proceed to step 6. Notes • If the capacity of the Memory Stick in use is not sufficient, “No Space on MS[xxxxxxxx] Delete files or Change MS and Press F2” is displayed. Delete unnecessary files in the Memory Stick or change the Memory Stick. For details, see “If the memory capacity of the Memory Stick is not sufficient” on page 16. • If you insert a new Memory Stick, “This MS is new Press F4 and enter name of MS” is displayed. Name the Memory Stick. For details, see “To name a new Memory Stick” on page 17. (continued) 13(GB) Sampling 6 Turn the jog dial to select the memory number to store the sampled data and set a memory label. You can store the data to a memory number indicated with “----------.” Memory number Rehearsal Sampling Compile Change MS SAMPLE Memory label (01)---------------------- (02)---------------------- (03)---------------------- (04)---------------------- (03) Exit Enter To set a new memory label 1 Turn the jog dial to highlight a memory number in which you want to store the data. 2 Press the F4 key. The memory label setting menu is displayed. Proceed to step 7. To modify an existing memory label 1 Turn the jog dial to highlight the memory label you want to copy. 2 Press the F2 key (Copy). The selected memory label is displayed in the bottom line of the display. (No memory number is displayed in the bottom line at this stage.) 3 Turn the jog dial to highlight the memory number in which you want to store the data. The memory number is now displayed in the bottom line. 4 Press the F4 key. The memory label setting menu is displayed. Proceed to step 7. Note Data has been stored in the memory numbers with memory labels other than “----------.” If you select a memory number with data and press the F4 key, “The file can’t be overwritten. Please select another file. OK?” is displayed. Press the F4 key to return to the memory list display. Set a memory label. A memory label of up to 22 characters can be set on the memory label setting menu. (The memory label will be displayed as the reverb source and reverb program indicators when you select the reverb program with the sampling reverb software. As you can change the memory label during compiling, you may set a temporary label at this stage.) ! I &()*+-./<=>? 0123456789 abcdefghijklmnopqrstuvwxyz ABCDEFGHIJKLMNOPQRSTUVWXYZ @ 7 Rehearsal Sampling Compile Change MS SAMPLE (03) t Memory number 14(GB) Delete Enter Memory label input area To input a character: Select the desired character using the jog dial and press the F2 key. The cursor in the memory label input area moves to the next position. To insert a space: Press the F2 key, or select space at the right end of the first line of the character map (next to 9). To delete an input character: Press the F2 key repeatedly to highlight the character you want to delete, then press the F3 key. 8 After setting the memory label, press the F4 key. “Save this file?” is displayed. Rehearsal Sampling Compile Change MS SAMPLE 9 Save this file? (03)Church A 1:C12 No Exit Enter Press the F4 key to store the sampled data. “Saving MS” is displayed, and the sampled data is stored in the Memory Stick. When storage is finished, the initial display returns. The sampling is now complete. • To change the Memory Stick before storing the sampled data, press the F2 key in place of the F4 key. Memory Stick assignment procedure (step 5) is resumed. • To return to the initial display without storing the sampled data, press the F3 key (Exit) in place of the F4 key. 15(GB) Sampling If the memory capacity of the Memory Stick is not sufficient Rehearsal No space on MS[xxxxxxxx] Sampling Delete files or Compile Change MS and Press F2 Change MS SAMPLE Change MS No Delete If the capacity of the Memory Stick is not sufficient for sampling or compiling, the message above is displayed. In this case, change the Memory Stick to another one or delete unnecessary data in the Memory Stick. To change to another Memory Stick 1 Change the Memory Stick to another one having sufficient capacity. 2 Press the F2 key (Change MS). Note When a Memory Stick is changed, “Please insert MS” message may appear if the DRE-S777 cannot recognize the Memory Stick. In this case, press the F2 key again. To delete unnecessary data 1 Press the F4 key (Delete). The SETUP display appears. 2 Press the F2 key to select the data to be deleted. Each time the F2 key is pressed, Fs Compiled, 2Fs Compiled and Sampled are displayed in sequence, and the memory numbers and memory labels of the selected data type are displayed. Fs Compiled and 2Fs Compiled indicate the compiled data, and Sampled indicates the sampled data. GoToReverb Fs/Period (03)Church A C:12 Repeat File Rename MS SETUP Fs Compiled Exit Delete Data type 3 Turn the jog dial to highlight the memory label to be deleted, and press the F4 key. “Delete this file?” is displayed. 4 To delete the data, press the F4 key. Deleting is performed and the remaining data list is displayed. • To cancel deleting, press the F3 key (Esc) in place of the F4 key. The display in step 2 returns. • To delete other data, repeat steps 2 to 4. 5 To finish deleting, press the F3 key (Exit). The previous display returns, and you can continue sampling or compiling. 16(GB) To name a new Memory Stick Rehearsal This MS is new. Press F4 Sampling and enter name of MS. Compile Change MS SAMPLE Change MS Exit Enter If you insert a new Memory Stick during sampling or compiling, the message above is displayed. In this case, name the Memory Stick. 1 Press the F4 key. The MS name setting menu is displayed. Rehearsal Sampling Compile Change MS SAMPLE ! I &()*+-./<=>? 0123456789 abcdefghijklmnopqrstuvwxyz ABCDEFGHIJKLMNOPQRSTUVWXYZ @ Ms name t Delete Enter MS name input area 2 Set a name for the Memory Stick of up to 8 characters. The input method is the same as that for the memory label. See step 7 on page 14. 3 Press the F4 key. The previous display returns, and you can continue sampling or compiling. 17(GB) Compiling After sampling the reverberation, the sampled data should be compiled to form a reverb program so that it can be reproduced using the sampling reverb software. You may perform compiling in a different place from the sampling site, such as a recording studio. However, we recommend that you perform compiling on site, immediately after sampling, especially when you have sampled reverberation of that place for the first time. By compiling the data, you can confirm the result of sampling and, if required, you can retry sampling under better conditions. 1 Start the DASK-S704 and show the initial display. Rehearsal Sampling Compile Change MS SAMPLE 2 MS:xxxxxxxx 24MB Available Fs/Period=Fs/5.5sec Repeat =16 Input =AD Clock =Internal 48.0 kHz Enter When sampled data is stored in a Memory Stick other than the DASKS704, select “Change MS” in the menu section of the initial display, and change the Memory Stick. (Skip this step if sampled data is stored in the Memory Stick in use.) For details, see “Changing the Memory Stick” on page 26. 3 Turn the jog dial to highlight “Compile.” Rehearsal Sampling Compile Change MS SAMPLE 4 MS:xxxxxxxx 24MB Available Fs/Period=Fs/5.5sec Repeat =16 Input =AD Clock =Internal 48.0 kHz Enter Press the F4 key. Sampled data list in the Memory Stick is displayed. Rehearsal Sampling Compile Change MS SAMPLE (03)Church A 1:C12 Please select sampled file. No Exit Enter You can compile your particular impulse response. For details, see “Compiling Your Particular Impulse Response” on page 25. 5 Turn the jog dial to highlight the sampled data you want to compile, then press the F4 key. “Compile this file?” is displayed. Rehearsal Sampling Compile Change MS SAMPLE Compile this file? (03)Church A C:12 Fs/5.5sec file No Exit Enter Note The DABK-S703 expansion DSP (optional) is required when compiling the data which has been sampled with the Fs/11sec or 2Fs/ 5.5sec sampling frequency/period. 18(GB) 6 Press the F4 key, and select the type of data using the jog dial. You can select Fs, 2Fs or 2Fs & Fs when you have sampled with 2Fs/ 5.5sec. (Skip this step when you have sampled with Fs/5.5sec or Fs/ 11sec. Proceed to step 7.) Please Select Output File Rehearsal Sampling Compile Change MS SAMPLE 7 No Fs 2Fs 2Fs & Fs Exit Enter Press the F4 key. Compiling is performed. “Loading CDROM/MS” is displayed, then “Compiling Fs (or 2Fs) data. Please wait for a few minutes.” appears. It takes several minutes to compile. Rehearsal Sampling Compile Change MS SAMPLE Compiling Fs data. Please wait for a few minutes. No Exit Enter When compiling is finished, “Loading CDROM/MS” is displayed, then the following display appears. Rehearsal Sampling Compile Change MS SAMPLE Detected direct sound are L=[ 10.00m] R=[ 10.00m] Apply these values? No Exit Enter L=[xxx.xx m] and R=[xxx.xx m] show the distance between the direct sound source (speakers) and the left and right microphones while sampling. Using these values as reference, judge if the sound data prior to the direct sound should be deleted or not. 8 To delete the data prior to the direct sound, press the F4 key To retain the whole sampled data without deleting, press the F2 key (No). Tips for judgement • For the plate reverb, do not delete the data prior to the direct sound. • When value L greatly differs from value R even though the speaker was located in the center of the stereo microphones while sampling, the direct sound could not be detected due to background noise. In this case, first compile the sampled data in two ways: deleting the data prior to the direct sound, and not deleting the data, check both impulse responses in step 10, then keep the one with the clearer impulse position as the reverb program. (continued) 19(GB) Compiling 9 Press the F4 key. The sampled data information is displayed. Using the information as reference, judge if sampling should be performed again or not. Reverb time Rehearsal Sampling Compile Change MS SAMPLE Period after which fade-out starts Reverb Time = 3.3sec Fadeout start = 4.5sec Noise Level = -11dB Listen impulse response? No Exit Enter Noise level Tips for judgement • If Noise Level value is between 0 and -60 dB, change the Repeat setting on the SETUP display to 32 or 64 and perform sampling again. Changing Repeat from 16 to 32 will improve the signal-to-noise ratio by approximately 3 dB. Changing Repeat from 16 to 64 will improve it by approximately 6 dB. • If Fadeout start value is more than 4.0 sec, change the Fs/Period setting on the SETUP display to Fs/11sec and perform sampling again. Note The Reverb Time shown may be different from the value which the hall or other reverb source place announces publically. 10Press the F4 key. The impulse response is output, and you can confirm the compile result. • When you do not want to listen to the impulse response, press the F2 key (No) in place of the F4 key. The reverb program name setting menu appears. Proceed to step 11. Notes • The impulse response output level is very high. To avoid damaging the speakers, adjust the gain of the power amplifier carefully. • When operating with external sync, if you input a clock signal exceeding +8 % of the sampling frequency, the operation may stop or a noise may occur. In this case, input a correct clock signal and press the F3 key (Exit). Then, retry compiling from the beginning. The following display appears when the impulse response is output. Output level Listening impulse Rehearsal response until F4. Sampling Compile Output =[ 0.0]dB Change MS SAMPLE PeakHold Exit Level meter IN OUT 1 2 DV 1 2 0 -6 -20 -35 -60 Enter • To adjust the output level, turn the jog dial. 0.0 to 30.0 dB can be set. • To hold the peak value on the level meter, press the F2 key (PeakHold) to highlight the PeakHold indicator. 20(GB) 11If the compile result is satisfactory, press the F4 key. “Finish compiling” is displayed, then the reverb program name setting menu appears. 12Set a reverb program name to the compiled data. The name set during sampling is displayed. If necessary, change the name. The name set at this stage is the final name, and will be displayed as the reverb source name and the reverb program name when you select the reverb program on the sampling reverb software. ! I &()*+-./<=>? 0123456789 abcdefghijklmnopqrstuvwxyz ABCDEFGHIJKLMNOPQRSTUVWXYZ (03)[Church A ] [1:C12 ] t Delete Enter @ Rehearsal Sampling Compile Change MS SAMPLE Reverb source name Reverb program name The input method is the same as that for the memory label. See step 7 on page 14. 13Assign the reverb source graphic and mic/speaker arrangement graphic to the reverb program. 1 Press the F4 key. “Jog picture” flashes, and the reverb source graphic setting display appears. O O O O [(03)Church A ] ] SAMPLE [1:C12 Jog picture[ Enter 2 Turn the jog dial to select the reverb source graphic. For the graphics to be selected, see “Reverb source graphics supplied with the DASK-S704” on page 24. You can assign your particular graphic. For details, see “To assign your particular reverb source graphic” on page 24. 3 Press the F4 key. “Jog mic” flashes, and the mic/speaker arrangement setting display appears. O O [(03)Church A ] SAMPLE [1:C12 ] Jog mic Esc Enter 4 Turn the jog dial to select the mic/speaker arrangement graphic. • When you do not want to assign any mic/speaker arrangement graphic, press the F3 key (Esc) to skip this step. (continued) 21(GB) Compiling 5 Press the F4 key. “Complete?” flashes. O O [(03)Church A ] SAMPLE [1:C12 ] Complete ? No Enter 14To finish compiling, press the F4 key. The following display appears. Rehearsal Save Fs data to Sampling MS [xxxxxxxx]? Compile or Change MS and Press F2 Change MS SAMPLE Change MS Exit Enter • To change the reverb program name or the assigned graphics, press the F3 key (No) in place of the F4 key. The reverb program name setting menu in step 12 returns. 15Assign the Memory Stick in which you want to store the compiled reverb program. Select the Memory Stick in use or another Memory Stick. Name of the Memory Stick in use Rehearsal Save Fs data to Sampling MS [xxxxxxxx]? Compile or Change MS and Press F2 Change MS SAMPLE Change MS Exit Enter To store in the Memory Stick in use Press the F4 key. The memory list of the Memory Stick is displayed. Proceed to step 16. To store in another Memory Stick 1 Change the Memory Stick to another one. 2 Press the F2 key. “Checking MS Please wait for a few minutes.” is displayed, then the display in step 15 appears. 3 Press the F4 key. The memory list of the Memory Stick is displayed. Proceed to step 16. Notes • If the capacity of the Memory Stick in use is not sufficient, “No Space on MS[xxxxxxxx] Delete files or Change MS and Presss F2” is displayed. Delete unnecessary files in the Memory Stick or change the Memory Stick. For details, see “If the memory capacity of the Memory Stick is not sufficient” on page 16. • If you insert a new Memory Stick, “This MS is new Press F4 and enter name of MS” is displayed. Name the Memory Stick. For details, see “To name a new Memory Stick” on page 17. 22(GB) 16Turn the jog dial to select the memory number in which to store the compiled reverb program data. You can store the data to a memory number indicated with “----------.” Memory number Memory label (01)---------------------- Rehearsal (02)---------------------- Sampling (03)Church A 1:C12 (04)---------------------- Compile Change MS Please select output file. SAMPLE Exit Enter Note Data has been stored in the memory numbers with memory labels other than “----------.” If you select a memory number with data and press the F4 key in step 17, “The file can’t be overwritten. Please select another file. OK?” is displayed. Press the F4 key to return to the memory list display. 17Press the F4 key. “Save this file?” is displayed. Rehearsal Sampling Compile Change MS SAMPLE Save this file? (03)Church A 1:C12 No Exit Enter 18Press the F4 key to store the reverb program data. “Saving MS” is displayed, and the reverb program data is stored in the Memory Stick. When storage is finished, the initial display returns. The compiling is now complete. • To change the reverb program name or the assigned graphics, press the F2 key (No) in place of the F4 key. The reverb program name setting menu (step 12) returns. • To return to the initial display without storing the data, press the F3 key (Exit) in place of the F4 key. 23(GB) Compiling Assigning the Reverb Source Graphic You can assign your favorite reverb source graphic and mic/speaker arrangement graphic to the reverb program you sampled and compiled using the DASK-S704. The assigned graphics are displayed when you select the reverb program using the sampling reverb software. The DASK-S704 is supplied with the following reverb source graphics. In addtion to these graphics, you can create your particular graphic and assign it. Reverb source graphics supplied with the DASK-S704 Large hall Medium hall Small hall Church Studio Plate Cave Mountain Canyon Sample graphic (s777.bmp) Black background (black.bmp) To assign your particular reverb source graphic The supplied reverb source graphic data are stored in the directory below “\mssony\pro\dre-s777\picture” in the Memory Stick. Create your particular graphic in bitmap format based on the data of the sample graphic (s777.bmp) or the black background (black.bmp) above, then store it in the specified directory in the Memory Stick. After storing your graphic data in the Memory Stick, restart the DASKS704. Then you can select the graphic in the compiling procedure as Jog picture. 24(GB) Compiling Your Particular Impulse Response You can compile the impulse response you have produced and form a reverb program using the DASK-S704. 1 Produce the impulse response in the following conditions: • WAVE file in the stereo format • Sampling bit: 16 bits or 24 bits • Sampling frequency: 44.1 kHz, 48.0 kHz, 88.2 kHz or 96.0 kHz 2 Store the impulse response in the DASK-S704 Memory Stick. Store the data with a file name of “xx. wav” in the directory below “\mssony\pro\dre-s777\wave” of the Memory Stick. Assign a decimal number between 00 and 99 for “xx.” “xx” will be the memory number. (e.g. \mssony\pro\dre-s777\wave\04.wav) 3 Compile the impulse response. When you display the sampled data list in the Memory Stick in step 4 on page 18, the impulse response data is shown with the memory number assigned as the file name. “WAVE file” is displayed as the memory label. Select this data when you compile. Rehearsal Sampling Compile Change MS SAMPLE (03)WAVE file (04)WAVE file (03)Church A 1:C12 Please select sampled file. No Exit Enter Note The direct sound detection does not function for your particular impulse response (step 7 on page 19). 25(GB) Changing the Memory Stick You can change the Memory Stick without turning off the power, using “Change MS” on the initial display. 1 2 Show the initial display of the DASK-S704. Turn the jog dial to highlight “Change MS.” Rehearsal Sampling Compile Change MS SAMPLE 3 MS:xxxxxxxx 24MB Available Fs/Period=Fs/5.5sec Repeat =16 Input =AD Clock =Internal 48.0 kHz Enter Press the F4 key. The following display appears. Rehearsal Please Change MS Sampling and Press F4 Compile Change MS SAMPLE Change MS Exit Enter 4 5 Change the Memory Stick as required. Press the F4 key. “Checking MS Please wait for a few minutes.” is displayed, then the initial display resumes. Notes • When a Memory Stick is changed, “Please insert MS” message may appear if the DRE-S777 cannot recognize the Memory Stick. In this case, press the F4 key again. • If you insert a new Memory Stick, “This MS is new Press F4 and enter name of MS” is displayed. Name the Memory Stick. For details, see “To name a new Memory Stick” on page 17. 26(GB) SETUP Display On the SETUP display, you must select the input (Input Sel) and the clock format (Clock Sel) to correspond to your system configuration. The SETUP display also allows setting/adjusting of various items such as the sampling frequency/period (Fs/Period) and the repeat times (Repeat). The set/adjusted data are automatically stored in the DASK-S704 Memory Stick. Basic Operation of the SETUP Display 1 Press the F1 key to show the SETUP display. GoToReverb Fs/Period Repeat File Rename MS SETUP : :Fs/5.5sec :16 : :xxxxxxxx Enter The current settings are displayed. 2 Turn the jog dial to highlight the item you want to set/adjust. GoToReverb Fs/Period Repeat File Rename MS SETUP : :Fs/5.5sec :16 : :xxxxxxxx Enter The SETUP display consists of two pages. If you turn the jog dial further counterclockwise when the bottom item is highlighted, the next page, if present, appears automatically. If you turn it further clockwise when the top item is highlighted, the previous page appears automatically. For details on the menu items on each page of the SETUP display, see “The Items Available in the SETUP Display” on page 28. 3 Press the F4 key. The setting options appear in a pop-up window. The * symbol indicates the current setting. GoToReverb Fs/Period Repeat File Rename MS SETUP : :Fs-5.5sec * Fs/5.5sec :16 Fs/11sec : 2Fs/5.5sec :xxxxxxxx Exit Enter Or, the operating instruction is displayed in a pop-up window. GoToReverb Fs/Period Repeat File Rename MS SETUP 4 : :Fs-5.5sec :16 Go To Reverb CDROM? : :xxxxxxxx Enter Exit Turn the jog dial to highlight the option you want to set/adjust or to change the value. Or, operate following the instruction on the diplay. To close the pop-up window Press the F3 key (Exit) after selecting the option. 27(GB) SETUP Display The Items Available in the SETUP Display Page 1 GoToReverb Fs/Period Repeat File Rename MS SETUP : :Fs/5.5sec :16 : :xxxxxxxx Enter Item Setting range Function GoToSample –– Reproduces the reverb programs sampled using the DASK-S704 or those stored in the CD-ROM supplied with the DRE-S777 or DASK-S701/S702/ S703 sampling reverb software. For details, see “Reproducing the Reverb Program” on page 30. Fs/Period Fs/5.5sec Fs/11sec 2Fs/5.5sec Selects the sampling frequency and sampling period. Fs/5.5sec: To sample for 5.5 seconds with the 44.1 or 48.0 kHz sampling frequency Fs/11sec: To sample for 11 seconds with the 44.1 or 48.0 kHz sampling frequency 2Fs/5.5sec: To sample for 5.5 seconds with the 88.2 or 96.0 kHz sampling frequency Note The DABK-S703 expansion DSP (optional) is required for sampling with Fs/ 11sec or 2Fs/5.5sec. Repeat 1 16 32 64 Selects the sampling repeat times. Normally set to 16. If there is much background noise, set it to 32 or 64. 1 is for sampling the digital reverb signal. File –– Displays and deletes the files in the Memory Stick. 1 Select “File,” and the memory list is displayed in a pop-up window, showing the files which can be deleted. 2 Press the F2 key. The display changes Sampled (sampled data), Fs compiled (Fs data compiled), or 2Fs compiled (2Fs data compiled). The data of the selected type are displayed. 3 Highlight the data you want to delete using the jog dial, and press the F4 key. “Delete this file?” is displayed. 4 To delete, press the F4 key. To cancel deleting, press the F3 key. The SETUP display returns. Rename MS –– Changes the name of the Memory Stick. 1 Select “Rename MS.” “Rename MS. Press F4 and enter name of MS” is displayed. 2 Press the F4 key, and set a new name in the the MS name setting menu. 3 Press the F4 key. Note If you change the name of the Memory Stick, the unit recognizes the reverb programs in the Memory Stick as new programs. Do not rename the Memory Stick whose reverb programs have been loaded previously. 28(GB) Page 2 GoToReverb LCD Ctl LCD Dim Input Sel Clock Sel SETUP : :Contrast[44] :Back Light Dim[ ON ] :AD :Internal 48.0 kHz Enter Item Setting range Function LCD Ctl Contrast 0 to 63 Adjusts the contrast of the display. The adjusted value is directly reflected on the display. LCD Dim Back light Dim ON, OFF Turns on/off the dimmer of the display. The setting is directly reflected on the display. Input Sel Digital AD Selects the input. Digital: Input from the DIGITAL IN connector of the DRE-S777 AD: Input from the ANALOG IN connector of the DABK-S701 A/D converter installed in the DRE-S777 Note The DABK-S701 A/D converter (optional) is required for selecting AD. Clock Sel Internal Word AES (DI) 44.1 kHz/88.2 kHz 48.0 kHz/96.0 kHz Selects the clock format. After selecting the option, press the F3 key to apply the new clock format. Select one of the clock signals: Internal, Word or AES (DI), and one of the sampling frequencies: 44.1 kHz/88.2 kHz* or 48.0 kHz/96.0 kHz*. Internal: Clock signal from the built-in quartz oscillator Word: Word sync signal input to the WORD SYNC IN connector of the DRE-S777 AES (DI): Clock signal included in the signal input to the DIGITAL IN connector of the DRE-S777 * 88.2 kHz and 96.0 kHz are displayed only when the Fs/Period is 2Fs/5.5sec. Note When you change the setting on the SETUP display except File or Rename MS and press the F1 key to select the SAMPLE display, the changed data is automatically written on the DASK-S704 Memory Stick. Therefore, if the DASK-S704 Memory Stick is not inserted, “Licence code error Please change Licence MS” message appears. Change to the DASK-S704 Memory Stick and press the F4 key. 29(GB) Reproducing the Reverb Program To reproduce the reverb program which you sampled using the DASKS704 and stored in the Memory Stick, use the DRE-S777 or DASK-S701/ S702/S703 sampling reverb software (Version 2.0). To start the sampling reverb software from “GoToReverb” on the DASK-S704 1 On the SETUP display of the DASK-S704, highlight “GoToReverb.” GoToReverb Fs/Period Repeat File Rename MS SETUP 2 Enter Press the F4 key. “Go To Reverb CDROM?” is displayed. GoToReverb Fs/Period Repeat File Rename MS SETUP 3 : :Fs/5.5sec :16 : :xxxxxxxx : :Fs-5.5sec :16 Go To Reverb CDROM? : :xxxxxxxx Enter Exit Press the F4 key. The following display appears, and the CD tray opens. The F4 key flashes. GoToReverb Fs/Period Repeat File Rename MS SETUP : :Fs-5.5sec :16 Please change CDROM/MS : to DRE-S777 Ver 2.0 or DASK-S70x series Ver 2.0 :xxxxxxxx Close CDROM 4 Change the CD-ROM to the DRE-S777 or DASK-S701/S702/S703, and the Memory Stick to the one that holds the correct licence code. Then press the F4 key. The CD tray closes and the sampling reverb software starts. 5 Change the Memory Stick and select the reverb program, following the instructions in “Selecting a reverb program stored in another CD-ROM or another Memory Stick/Selecting the Reverb Program/REVERB Display” of the DRE-S777 Operating Instructions. Note This function does not work with the DRE-S777 or DASK-S701 CD-ROM Version 1.0. To start the sampling reverb software by turning on the power of the DRE-S777 Turn off the power of the DRE-S777, change the CD-ROM to the DRES777 or DASK-S701/S702/S703, and the Memory Stick to the one that holds the correct licence code. Then turn on the power again. Then change the Memory Stick and select the reverb program, following the instructions in “Selecting a reverb program stored in another CD-ROM or another Memory Stick/Selecting the Reverb Program/REVERB Display” of the DRE-S777 Operating Instructions. 30(GB) Reverb Modes and Arrangement during Sampling The reverb program sampled and compiled using the DASK-S704 includes the sampling data of “Mono in Stereo out” mode only. Therefore, when you reproduce the reverb program, normally set the reverb mode to “Mono in Stereo out.” However, if you arrange the speaker and microphone positions as in the following examples when you sample, you can obtain “Mono in 4ch out” or “Stereo in Stereo out” effects by combining the sampled data. To obtain the “Mono in 4ch out” effect When sampling Perform two types of sampling using the DASK-S704. • Sampling C12: Set the speaker in position C and direct microphones 1 and 2 forward. • Sampling C56: Set the speaker in position C and direct microphones 5 and 6 backward. When reproducing the reverb program 1 Set the Rev mode to “Split in 4ch out” on the SETUP display of the sampling reverb software. 2 On the REVERB display, load the sampling C12 data to SPLIT CH1-2, and the sampling C56 data to SPLIT CH3-4. Mic/speaker arrangement when sampling Block diagram for reproduction DRE-S777 C CH1 1 O O C CH1 C12 CH2 2 CH3 O 5O 6 C CH2 C56 CH4 1 2 5 6 Rev mode: Split in 4ch out 31(GB) Reverb Modes and Arrangement during Sampling To obtain the “Stereo in Stereo out” effect When sampling Perform two types of sampling using the DASK-S704. • Sampling L12: Set the speaker in position L and direct microphones 1 and 2 forward. • Sampling R12: Set the speaker in position R and direct microphones 1 and 2 forward. When reproducing the reverb program 1 Connect an external mixer to the DRE-S777. 2 Set the Rev mode to “Split in 4ch out” on the SETUP display of the sampling reverb software. 3 On the REVERB display, load the sampling L12 data to SPLIT CH1-2, and the sampling R12 data to SPLIT CH3-4, then output the data through the external mixer. Block diagram for reproduction Mic/speaker arrangement when sampling DRE-S777 L External mixer R CH1 1 O O L CH1 L12 1 CH2 2 CH3 R CH2 R12 2 CH4 Rev mode: Split in 4ch out 32(GB) Error Messages If an error occurs, the error message appears in the display window. Error message Cause Countermeasure Please insert MS Insert a Memory Stick and press the F2 key or F4 No Memory Stick is inserted or the inserted Memory Stick is not recognized. key. Licence code error Please change Licence MS The DASK-S704 Memory Stick is not inserted. Insert the Memory Stick supplied with the DASKS704. No Space on MS[xxxxxxxx] Delete files or Change MS and Press F2 The memory capacity of the Memory Stick is not sufficient. Change the Memory Stick to another one or delete unnecessary data. (page 16) This file can’t be overwritten. Please select another file. OK? You selected a memory number with data stored. Select a memory number with “----------” memory label and press the F4 key. You inserted a Memory Stick not named. Name the Memory Stick. (page 17) This MS is new Press F4 and enter name of MS Error indicators for the input digital signal When an error occurs on the input digital signal, the word SAMPLE or SETUP and an error indicator flash alternately. Simultaneously, the F1 key lights or flashes in red. Rehearsal Sampling Compile Change MS SAMPLE MS:xxxxxxxx 24MB Available Fs/Period=Fs/5.5sec Repeat =16 Input =AD Clock =Internal 48.0 kHz Enter Y Sync Error indicator Error indicator Cause Countermeasure Sync When Word or AES (DI) sync is selected Input an appropriate clock signal. with Clock Sel, the clock signal frequency is outside the range between -12.5 % and +8 % of the sampling frequency. Valid Error of the validity bit Input a correct digital signal. Slip The input signal is not synchronized with the clock. Input a correct digital signal. CRC Error of the CRC bit Input a correct digital signal. Parity Error of the parity bit Input a correct digital signal. Bphase Error of the bi-phase coding Input a correct digital signal. Unlock The digital input signal is not locked. Input a correct digital signal. Notes • When operating with external sync, if you input a clock signal exceeding +8 % of the sampling frequency, the Sync error indicator is displayed. Even if you change the clock signal to a correct signal, the Slip error indicator may appear. In this case, disconnect the clock input, and reconnect it. • The Sync error indicator may appear during rehearsal, sampling or compiling when the clock is switched. This is not a problem. 33(GB) Precautions On use of the Memory Stick On handling the CD-ROM • You can remove the Memory Stick or the PC card adapter in the following cases only: — When the power is turned off. — When a message on the display window indicates changing the Memory Stick such as “Please change CDROM/MS.” and “Please change MS.” To avoid damaging the data stored in the Memory Stick, do not remove the Memory Stick or the PC card adapter in other cases. • If the Memory Stick supplied with this software or those supplied with optional Sampling Reverb Software CD-ROMs is damaged, consult your authorized Sony dealer. • Do not set the erasure prevention switch at the rear of the Memory Stick to the LOCK position. If you did, writing and deleting the data on the Memory Stick could not be performed. • Do not delete the data in the Memory Stick using a personal computer, etc. The operation of such a Memory Stick is not guaranteed. • Handle the disc by its edge. Do not touch the surface. • Do not stick paper or tape on the disc. • Do not expose the disc to direct sunlight, heat sources or moisture. • After using, store the disc in its case. • Clean fingerprints or dust accumulated on the disc with a cleaning cloth wiping from the center out. • Do not use solvents such a benzine, thinner, commercially available cleaners or anti-static spray intended for vinyl LPs. On handling the Memory Stick • Do not touch the connector at the rear of the Memory Stick with hand or metal. • Do not stick paper or tape on the surface of the Memory Stick. Only the specified label is suitable. • Avoid inserting dust or foreign objects into the Memory Stick insertion slot or the connector on the PC card adapter. • Do not expose the Memory Stick to mechanical shock or bend or drop it. • Do not disassemble or modify the Memory Stick. • Avoid use or storage of the Memory Stick in a place subject to heat sources, direct sunlight, excessive dust, corrosion, static noise or electrical noise. • Carry or store the Memory Stick in its holder which is attached to the CD-ROM jacket. 34(GB) 35(GB) ソニー株式会社 東京都品川区北品川6-7-35 〒141-0001 ソニーマーケティング株式会社 ホームAV&コミニュケーションマーケティング本部 オーディオMK部 サウンドクリエーション課 東京都港区高輪4-10-18 〒108-0074 電話 03-5792-2730 Sony Corporation 72 Printed in Japan