1
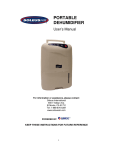
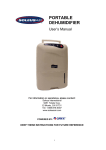
65-pint Portable
Dehumidifier
Owner’s Manual
Model # CFM-65
Sales Inquiries: 800-934-9194
For information or assistance, please contact:
Soleus International
9451 Telstar Ave.
El Monte, CA 91731
Tel: 888-876-5387
www.soleusair.com
KEEP THESE INSTRUCTIONS FOR FUTURE REFERENCE
WARNING: READ THIS OWNER’S MANUAL CAREFULLY BEFORE USE.
1
INTRODUCTION
Thank you for choosing a Soleus Air Dehumidifier. This owner’s manual will provide you with valuable
information necessary for the proper care and maintenance of your new dehumidifier. If properly
maintained, your Soleus Air Dehumidifier will give you many years of trouble free operation. Please
take a few moments to read the instructions thoroughly and familiarize yourself with all the operational
aspects of this dehumidifier.
For easy reference, please attach a copy of your sales slip/receipt to this page, along with the following
information that is located on the manufacturers nameplate located on the rear panel of the unit.
Model Number: _______________________________________
Serial Number: _______________________________________
Date of Purchase: _____________________________________
Dealer’s Name and Address: ____________________________
____________________________
____________________________
KEEP THESE INSTRUCTIONS FOR FUTURE REFERENCE
This symbol denotes a caution or warning.
2
IMPORTANT SAFETY INSTRUCTIONS
NOTE: The WARNING instructions issued in this manual are not meant to cover all possible conditions
and situations that may occur. It must be understood that common sense, caution and care are factors
that must be used when installing, maintaining, or operating the dehumidifier. Failure to install, maintain,
and/or operate the equipment according to the manufacturer’s instructions may result in conditions which
can produce bodily injury and/or property damage. Contact your dealer, service agent or the
manufacturer about any problems or conditions you do not fully understand.
FOR YOUR SAFETY – To reduce the risk of fire or explosion, do not store or use gasoline or other
flammable vapors or liquids in the vicinity of this dehumidifier.
ELECTRICAL SERVICE INFORMATION – To reduce the risk of fire, electric shock or personal injury, all
wiring and grounding must conform to the latest edition of Local and National Electrical Codes. It is the
customer’s responsibility to have the wiring and fuses checked by a qualified electrician to make sure
adequate electrical power is available.
GROUNDING INSTRUCTIONS – Improper connection of the equipment-grounding conductor can result
in a risk of electrical shock. Check with a qualified electrician or servicemen if you are in doubt as to
whether your appliance outlets are properly grounded.
This dehumidifier must be grounded. In the event of a malfunction or breakdown, grounding will reduce
the risk of electrical shock by providing a path of least resistance for electrical current. This dehumidifier
is equipped with a cord having an equipment-grounding conductor and 3 prong grounded plug. The plug
must be connected into an outlet that is properly installed and grounded in accordance with all local
codes and ordinances.
Do not modify the plug provided with the dehumidifier. If it will not fit the outlet, have a proper outlet
installed by a qualified electrician.
If the household electrical supply does not meet specifications, or if you are not sure your home has an
effective ground, have a qualified electrician or your local electrical utility company check it and correct
any problems.
•
•
•
•
•
All wiring must comply with local and national electrical codes and be installed by a
qualified electrician. If you have any questions regarding the following instructions,
contact a qualified electrician.
Check available power supply and resolve any wiring problems BEFORE installation
and operation of this unit.
For your safety and protection, this unit is grounded through the power cord plug
when plugged into a matching wall outlet. If you are not sure whether the wall outlets
in your home are properly grounded, please consult a qualified electrician. DO NOT
USE PLUG ADAPTERS OR EXTENSION CORDS.
The manufacturer’s nameplate is located on the rear with technical data specific to
this unit.
To avoid the possibility of personal injury always disconnect the power supply to the
unit, before installing and/or servicing
NOTE: Specifications are subject to change without notice, for further improvements.
3
SPECIFICATIONS
•
•
•
Model
CFM-65
Power Supply
115V, 60Hz
Capacity
65 pints/day
(33 liters/day)
Power Consumption
600W
Water Tank Capacity
11.6 pints (automatic shutdown at ~ 10.6 pints)
[5.5 liters (automatic shutdown at ~ 5 liters)]
Weight
49.5 lbs
Dimensions (WxDxH)
15.8” x 12.6” x 28.4”
The dehumidification capacity is rated at a room temperature of 86°F with a relative humidity of 80%.
If specifications are improved after this printing, the product nameplate will reflect the new
specifications.
The operational temperature is in the range of 36°F to 98°F. If the room temperature is outside of
this range, the unit will not operate normally.
SAFETY WARNINGS
When using the unit, please observe the following safety precautions:
1.
2.
3.
4.
5.
6.
7.
8.
9.
Unplug the power supply cord before cleaning or storage.
Do not submerge the unit in water or place the unit close to water.
Do not set the unit close to heat-generating devices or near flammable and dangerous materials.
Never put your fingers or objects into the intake or discharge ducts.
Do not sit or stand on the unit.
Discard water that has collected in the tank as required.
Do not operate the dehumidifier in a closed area such as inside a closet, as it may cause a fire.
Do not use the unit near edible items, objects of art, or scientific materials.
For continuous drain option, install drain piping at a downhill grade to make sure that condensed
water can be drained continuously.
10. If the power supply cord is damaged, it must be replaced by the manufacturer or a qualified
service agent.
4
PRODUCT DIAGRAM
FRONT
BACK
5
OPERATING INSTRUCTIONS
Control Panel
•
Power Button
Press the button once to start operation, press it again to stop operation.
•
Mode Button
Press to select Auto Mode, Manual Mode, or Fan Mode.
•
Fan Button
Press to select high, medium, or low fan speed.
•
Adjust Humidity/Timer Buttons
Press in Manual Mode to set desired humidity. When using the timer, press to select the
desired hours.
•
Timer On Button
When unit is plugged in but powered off, press this button for auto start.
•
Timer Off Button
When the unit is powered on, press this button for auto off.
•
Swing Button
Press the button once for the louver to swing, press it again and the louver will return to its
vertical position.
LED Display
•
Water Full Icon
When the drainage tank is full, the water full icon will turn on and
the unit will beep to alert theep to 9 6 9175999 0.96002 reh92 m0m( l98.04001 3 1y2745 1T.20001 135.2 5337967
•
Fan Speed Icon
The icon will spin at speeds respective to low, high, or medium, indicating low, high, or
medium fan speed.
•
Manual Mode Icon
The room humidity can be set from 25-80%. Fan speed can be set to low, medium, or high.
The compressor will cycle on and off to maintain the set humidity.
•
Auto Mode Icon
Room humidity is set at 40% automatically. Under this mode, the unit will operate at high fan
speed only.
•
Fan Mode Icon
In this mode the compressor does not run and unit does not dehumidify. The fan can be set at
low, medium, or high to provide ventilation.
NOTE:
1. In normal operation, LED Display shows room humidity, press the up or down arrow to see the
set humidity.
2. When the unit is plugged in but powered off, the LED Display shows room humidity.
OPERATION
1. Power On the Unit
• Plug the power cord into a properly grounded outlet.
• The LED display shows room humidity.
• Press ON/OFF button to turn on the unit.
2. Select a Mode
• Press the MODE button repeatedly to select the desired mode.
• In Manual Mode, the humidity can be set using the Adjust Humidity Buttons.
3. Timer Option
• Auto on/off timer can be used in Auto, Manual, and Fan Mode.
4. Stop Operation
• Press the ON/OFF button to stop dehumidification.
• Never stop the unit by unplugging the power cord.
7
DRAINING THE COLLECTED WATER
When the drainage tank is full, “
” in the LED display will turn on and the unit beeps to alert the user
and operation will stop automatically. The water then needs to be emptied from the drainage tank.
Emptying the Drainage Tank
1. Lightly press on the sides of
the tank with both hands and
pull out gently.
2. Carefully discard the
collected water.
NOTE:
1. Do not remove the styrofoam packing from the float on the unit. The float on the unit will no longer be
able to detect the water level correctly without the styrofoam packing, and water may leak from the
water tank. This can cause electrical shock and/or short circuits.
2. If the drainage tank is dirty, wash it with cold or lukewarm water. Do not use detergent, scouring
pads, chemically treated dust cloths, gasoline, benzene, thinner, or other solvents, as these can
scratch and damage the tank and cause water leakage.
3. When replacing the drainage tank, press the tank firmly into place with both hands. If the tank is not
positioned properly, the WATER FULL sensor will be activated, and the dehumidifier will not operate.
4. If the drainage tank is removed while the unit is in operation, or immediately after operation has
stopped, water that is still in the cooling unit may drip out onto the base plate. Always wait at least 30
minutes before removing the drainage tank to avoid drips. (If water has dripped, wipe it up.)
5. Do not drink the water collected in the drainage tank.
Continuous Water Drainage
The unit features a continuous drainage port. By attaching the included 12-inch hose, the water in the
drainage tank can be continuously drained out of the port on the unit. NOTE: When setting up the
equipment for continuous drainage, always stop operation first and unplug the power supply plug.
1. Remove the plug from the drainage port on the back of the unit. Attach the included hose and run to a
gravity drain. You may need additional hose to run the water to a gravity drain. Check the hose
periodically to make sure it is still connected and has not been obstructed.
2. The drain hose must always lie flat and maintain a downhill grade to make sure that collected water
can be drained out with the force of gravity.
8
Moving the Dehumidifier
1. Drain the water.
2. Lift up the handle and tilt the unit back.
3. Move the unit by rolling on the back casters.
NOTE:
1. If the floor is made of a material that scratches easily, or if the floor is uneven, lift the unit off the floor
and move it. Avoid rolling the unit if the floor has shag carpeting. This can damage the surface of
the carpet.
2. Tilt it within range of 20 to 30 degrees. (If you tilt the unit too far, you may scratch the floor or water
may leak.)
3. Be careful that the power supply cord does not get pinched under the unit.
Clearance
Maintain the minimum clearance around
the dehumidifier when the unit is operating
as shown in the figure at right.
MAINTENANCE
Cleaning the Dehumidifier
To Clean the Body
Clean the body of the unit by wiping with a soft damp cloth. You may use a mild detergent if necessary.
• Gasoline benzene, thinners, scouring powder, chemically treated dust cloths, and detergents
may damage the main unit and should not be used.
To Clean the Air Filter
1. Remove the Air Filter
Grasp the filter panel at the top and pull towards you to remove.
2. Clean the Air Filter
Run a vacuum cleaner lightly over the surface of the filter to remove dirt. If the air filter is
exceptionally dirty, wash it with warm water and a mild cleanser. Dry thoroughly.
3. Replace the Air Filter
Insert the lower tabs of the air filer panel into the slots on the main unit and press into place
until you hear the tabs click into place.
9
Storing the Dehumidifier
Properly store the unit when it is not being used for an extended period of time
1. Fold up the power supply cord and secure it to the holder.
2. Discard any water left in the drainage tank and wipe away any remaining water with a cloth.
3. Clean the air filter.
4. Store the unit upright in its original packaging to keep it free of dust. Store in a cool and dry place.
TROUBLESHOOTING
If a condition listed below occurs, please check the following items before calling
customer service.
Problem
The unit does not operate.
Possible Cause
Solution
Has the power cord been
disconnected?
Plug the power cord into the outlet.
Is ‘
‘displayed on the LED?
(The tank is full or in a wrong
position.)
Discard the water in the drainage
tank and then reposition the tank.
Is the temperature of the room
above 90°F or below 41°F?
The protection device is activated
and the unit cannot be started.
Is the intake duct or discharge
duct obstructed?
Remove the obstruction from the
discharge duct or intake duct.
Is the air filter clogged?
Clean the air filter as instructed
under “Cleaning the Dehumidifier.”
Is the air filter clogged?
Clean the air filter as instructed
under “Cleaning the Dehumidifier.”
Is the unit tilted or unsteady?
Move the unit to a stable, sturdy
location.
Is the air filter clogged?
Clean the air filter as instructed
under “Cleaning the Dehumidifier.”
The dehumidifying function
does not work.
No air is discharged.
Operation is noisy.
10
WARRANTY
One Year Limited Warranty
Soleus International Inc. warrants the accompanying Soleus Air CFM-65 Dehumidifier to be free of
defects in material and workmanship for the applications specified in its operation instruction for a period
of ONE (1) year from the date of original retail purchase in the United States.
If the humidifier exhibits a defect in normal use, Soleus International Inc. will, at its option, either repair
or replace it, free of charge within a reasonable time after the dehumidifier is returned during the warranty
period.
As a condition to any warranty service obligation, the consumer must present this Warranty Certificate
along with a copy of the original purchase invoice.
THIS WARRANTY DOES NOT COVER:
1) Damage, accidental or otherwise, to the air conditioner while in the possession of a consumer not
caused by a defect in material or workmanship.
2) Damage caused by consumer misuse, tampering, or failure to follow the care and special handling
provisions in the instructions.
3) Damage to the finish of the case, or other appearance parts caused by wear.
4) Filter.
5) Damage caused by repairs or alterations of the dehumidifier by anyone other than authorized by
Soleus International Inc.
6) Freight and Insurance cost for the warranty service.
ALL IMPLIED WARRANTIES, INCLUDING ANY IMPLIED WARRANTY OF MERCHANT ABILITY ARE
LIMITED TO ONE-YEAR DURATION OF THIS EXPRESS LIMITED WARRANTY. SOLEUS
INTERNATIONAL INC. DISCLAIMS ANY LIABILITY FOR CONSEQUENTIAL OR INCIDENTAL
DAMAGES AND IN NO EVENT SHALL SOLEUS INTERNATIONAL INC’S LIABILITY EXCEED THE
RETAIL VALUE OF THE DEHUMIDIFIER FOR BREACH OF ANY WRITTEN OR IMPLIED WARRANTY
WITH RESPECT TO THIS DEHUMIDIFIER.
DISCLAIMER
All information and the technical specifications presented in this user’s manual are the presentation of the
manufacturer.
Soleus International has not conducted independent tests for the information and the specifications
presented here within.
For Warranty, Technical Support and Customer Service
Please Call (888) 876-5387
Or Write to:
Soleus International Inc.
9451 Telstar Ave.
El Monte, CA 91731 USA
www.soleusair.com
Sales Inquiries: 800-934-9194
11