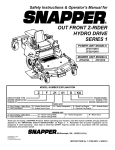
1
Safety Instructions & Operator’s Manual for
PRO HYDRO
WALK BEHIND MOWERS
MID-SIZE
SERIES 1
POWER UNIT
MODELS
MOWER UNIT
MODELS
SPLH141KW
SPLH151KH
SPLH171KW
SPLH231KHE
SPA361
SPA481
SPA521
SPA611
Model SPLH141KW shown
MODEL NUMBER EXPLANATION
S
P
L
H
14
MODEL DESIGNATION
MODEL TYPE
MODEL OPTION
DRIVE SYSTEM TYPE
S – Snapper Commercial Model
P – Pro Mid Size Model
L - Loop Type Handle Model
H – Hydro Drive System
A – Adjustable Cutting Deck
1
KW
ENGINE TYPE
SERIES DESIGNATION
ENGINE HP
ENGINE HORSE POWER
14 – 14.0 Engine HP
15 – 15.0 Engine HP
17 – 17.0 Engine HP
23 – 23.0 Engine HP
CUTTING DECK WIDTH
36 – 36” Cutting Deck
48 – 48” Cutting Deck
52 – 52” Cutting Deck
61 – 61” Cutting Deck
1 - Series Designation
KW – Kawasaki Engine
KH – Kohler Engine
E – Electric Starting
Thank you for buying a SNAPPER Product! Before operating your PRO WALK BEHIND, read this manual
carefully and pay particular attention to the “IMPORTANT SAFETY INSTRUCTIONS” on Pages 2 - 4. Remember
that all power equipment can be dangerous if used improperly. Also keep in mind that SAFETY requires careful
use in accordance with the operating instructions and common sense!
COPYRIGHT © 2000
SNAPPER INC.
ALL RIGHTS RESERVED
MANUAL No. 7-3682 (I.R. 5/16/00)
IMPORTANT SAFETY INSTRUCTIONS
WARNING: This powerful cutting machine is capable of amputating hands and feet and can throw objects that
can cause injury and damage! Failure to comply with the following SAFETY instructions could result in serious
injury or death to the operator or other persons. The owner of the machine must understand these instructions
and must allow only persons who understand these instructions to operate machine. Each person operating the
machine must be of sound mind and body and must not be under the influence of any substance, which might
impair vision, dexterity or judgment. If you have any questions pertaining to your machine which your dealer
cannot answer to your satisfaction, call or write the Customer Service Department at SNAPPER, McDonough,
Georgia 30253. Phone: (1-800-935-2967).
PROTECTION FOR CHILDREN
PREPARATION
Tragic accidents can occur if the operator is not alert
to the presence of children. Children are often
attracted to the machine and the mowing activity.
Never assume that children will remain where you last
saw them.
1. KEEP children out of the mowing area and under
the watchful care of a responsible adult.
2. DO NOT allow children in yard when machine is
operated (even with the blades OFF).
3. DO NOT allow children or others to ride on
machine or on attachments (even with the blades
OFF). They may fall and be seriously injured.
4. DO NOT allow pre-teenage children to operate or
service the machine. Local regulations may
restrict the age of the operator.
5. ALLOW only adults or responsible teenagers with
mature judgment under close adult supervision to
operate machine.
6. DO NOT operate blades in reverse. STOP BLADES.
LOOK and SEE behind and down for children, pets
and hazards before and while backing.
7. USE EXTRA CARE when approaching blind
corners, shrubs, trees, or other objects that may
obscure vision.
1.
2.
3.
4.
5.
SLOPE OPERATION
1. Slopes are a major factor related to slip and fall
accidents, which can result in severe injury. All
slopes require extra caution and slow speed. If
you feel uneasy on a slope, DO NOT mow it.
2. Mow across slopes, never up and down. Exercise
extreme CAUTION when changing directions on
slopes. Practice operation of machine on slopes
with blades off.
3. Use extra care with grass catchers or other
attachments: these affect the handling and the
stability of the machine.
4. DO NOT use tow behind attachments on slopes.
5. AVOID uphill starts.
6. Turf conditions can affect the machine’s stability.
DO NOT operate machine under any condition
where traction, steering or stability is doubtful.
6.
7.
8.
9.
10.
Read, understand and follow instructions and
warnings in this manual and on the machine,
engine, and attachments. Know the controls and
the proper use of the machine before starting. If
the operators or mechanics cannot read English, it is
the owner’s responsibility to explain this material to
them.
Only mature, responsible persons shall operate
the machine and only after proper instruction. The
owner is responsible for training the operators.
Further, the owner/operator can prevent and/or is
responsible for accidents or injuries occurring to
themselves, other people or property.
Data indicates that operators age 60 and above,
are involved in a large percentage of mowerrelated injuries. These operators should evaluate
their ability to operate the mower safely enough to
protect themselves and others from serious injury.
Handle fuel with extra care. Fuels are flammable
and vapors are explosive. Use only an approved
fuel container. DO NOT remove fuel cap or add
fuel with engine running. Add fuel outdoors only
with engine stopped and cool. Clean spilled fuel
from machine. DO NOT smoke.
Practice operation of machine with BLADES OFF
to learn controls and develop skills.
Check the area to be mowed and remove all
objects such as toys, wire, rocks, limbs and other
objects that could cause injury if thrown by blade
or interfere with mowing.
Evaluate the terrain to determine what accessories
and attachments are needed to properly and safely
perform the job. Only use accessories and
attachments approved by SNAPPER
Keep people and pets out of mowing area.
Immediately, STOP blades, STOP engine, and Stop
machine if anyone enters the area.
DO NOT operate machine unless all shields,
deflectors, switches, blade controls and other
safety devices are in place and functioning
properly.
Make sure all safety decals are clearly legible.
Replace if damaged.
IMPORTANT SAFETY INSTRUCTIONS
PREPARATION
OPERATION
(Continued From Previous Page)
11. Protect yourself when mowing and wear
appropriate clothing including safety glasses, long
pants, ear protection, hardhat and substantial
footwear with good traction. Long hair, loose
clothing or jewelry may get tangled in moving
parts.
12. Know how to STOP blades and engine quickly in
preparation for emergencies.
13. Use extra care when loading or unloading the
machine into a trailer or truck.
14. Check grass catcher components frequently for
signs of wear or deterioration and replace as
needed to prevent injury from thrown objects
going through weak or worn spots.
(Continued From Previous Column)
12. Before cleaning, repairing, or inspecting make
certain blades, engine and all moving parts have
STOPPED. Remove key and secure spark plug
wire away from spark plug key to prevent
accidental starting.
13. STOP MACHINE on level ground, engage parking
brake (if equipped) and make sure engine and
blades have stopped before leaving the operator’s
position for any reason including removing grass
catcher or unclogging mower to prevent injury to
hands or feet.
14. Blades must be OFF except when cutting grass.
Set blades in highest position when mowing over
rough ground.
15. Keep hands and feet away from rotating blades
underneath deck.
16. DO NOT operate machine without entire grass
catcher or guards in place. DO NOT point
discharge at people, passing cars, windows or
doors.
17. Slow down before turning.
18. Watch out for traffic when near or crossing
roadways.
19. Move motion control levers SLOWLY to maintain
control during speed and directional changes.
20. DO NOT operate engine in enclosed areas. Engine
exhaust gases contain carbon monoxide, a deadly
poison.
OPERATION
1. DO NOT put hands or feet near or under rotating
parts. Keep clear of the discharge area while the
engine is running.
2. BEFORE STARTING ENGINE, blades must be OFF
and Traction Levers LOCKED in the Traction Lock
position.
3. Stop Blades when crossing gravel drive, walks,
and under any conditions where thrown objects
might be a hazard.
4. DO NOT raise deck with the blades running.
5. Mow only in daylight or good artificial light.
6. USE EXTRA CARE when approaching blind
corners, shrubs, trees or other objects that may
obscure vision.
7. DO NOT operate the machine while under the
influence of alcohol or drugs.
8. After striking a foreign object or if the mower
vibrates abnormally, STOP the blades and engine.
Remove the key. Disconnect and secure the spark
plug wire. Inspect the mower for any damage and
repair the damage.
9. DO NOT operate machine near drop offs, ditches,
embankments, washouts culverts, fences and
protruding objects. STAY ALERT for holes and
other hidden hazards. Tall grass can hide
obstacles.
10. DO NOT operate machine on wet grass. Always be
sure of your footing while operating machine,
especially while backing up. Keep a firm grip on
the handle. Walk: never run. Slipping and falling
could cause injury.
11. DO NOT leave the machine with the engine
running. STOP BLADES, STOP ENGINE and
REMOVE KEY before leaving the operator position
for any reason.
MAINTENANCE
1. Shut off fuel while storing or transporting. DO
NOT store machine or fuel container inside where
fumes may reach an open flame, spark or pilot
light such as in a water heater, furnace, clothes
dryer or other gas appliance. Allow engine to cool
before storing machine in an enclosure. Store fuel
container out of the reach of children in a well
ventilated, unoccupied building.
2. Clean grass and debris from engine, mufflers,
drives and cutting units to help prevent fires.
Clean up fuel, oil and excess grease.
3. When draining fuel tank, drain fuel into an
approved container outdoors and away from open
flame.
4. Check brakes frequently (if equipped); adjust,
repair or replace as needed.
5. Keep all bolts, nuts and screws properly tight.
Check that all cotter pins are in proper position.
6. Always provide adequate ventilation when running
engine. Exhaust gases contain carbon monoxide,
an odorless and deadly poison.
3
IMPORTANT SAFETY INSTRUCTIONS
MAINTENANCE
(Continued From Previous Page)
7. Disconnect
battery
before
performing
maintenance or service. Cranking engine could
cause injury. Disconnect negative (black) cable
from battery first and positive (red) last.
Reconnect positive first and negative last.
Charge battery in an open well ventilated area,
free from spark and flames. Unplug charger
before connecting or disconnecting from
battery. Wear protective clothing and insulated
gloves.
8. Park machine on level ground. DO NOT work
under machine without safety blocks.
9. Service engine and clean, adjust or repair only
when engine and blades are stopped. Remove
key. Remove spark plug wire(s) from spark
plug(s) and secure wire(s) away from spark
plug(s).
10. DO NOT change engine governor speed
settings or overspeed engine. DO NOT make
adjustments with the engine running.
11. Lubricate machine at intervals specified in
manual to prevent controls from binding.
12. Mower blades are sharp and can cut. Wrap the
blades or wear heavy leather gloves and use
CAUTION when handling them. DO NOT
straighten or weld blades, only replace them.
13. DO NOT test for spark by grounding spark plug
next to spark plug hole; spark plug could ignite
gas exiting engine.
14. Carefully release pressure from components
with stored energy.
15. Have machine serviced by an authorized
SNAPPER dealer at least once a year and have
the dealer install any new safety devices. DO
NOT allow untrained personnel to service the
machine.
16. Use only genuine SNAPPER replacement parts
to assure that original standards are
maintained.
4
TABLE OF CONTENTS
IMPORTANT SAFETY INSTRUCTIONS...................................................................................2-4
TABLE OF CONTENTS................................................................................................................5
SECTION 1 - FAMILIARIZATION .................................................................................................6
SECTION 2 – SAFETY MESSAGES, SYMBOLS AND CONTROLS .....................................7-10
Safety Messages and Symbols ..................................................................................7-9
Engine Controls............................................................................................................10
Blade and Traction Controls .......................................................................................10
TO ROLL MACHINE - Pressure Relief Valve Adjustment .........................................10
SECTION 3 - OPERATING INSTRUCTIONS........................................................................11-17
Pre-Start Checklist .......................................................................................................11
Hydraulic Oil Reservoir................................................................................................11
Engine Oil......................................................................................................................11
Before Operating ..........................................................................................................11
Stopping ........................................................................................................................12
Starting and Operating ................................................................................................12
Traction Speed Control................................................................................................13
Reverse Speed..............................................................................................................13
Mower Operation .....................................................................................................13-14
Mowing and Turning on Hillsides...............................................................................14
Handle Height Adjustment......................................................................................14-15
Cutting Height Adjustment (Fixed Decks) .................................................................16
Adjusting Caster Wheels (Fixed Decks).....................................................................16
Adjusting Blade on Cutter Spindle (Fixed Decks).....................................................16
Adjusting Fixed Deck Attachment ..............................................................................17
Cutting Height Adjustments for Adjustable Deck Attachments ..............................17
SECTION 4 - SERVICE..........................................................................................................18-23
Engine Troubleshooting ..............................................................................................18
Service & Lubrication Information.........................................................................19-20
Maintenance Replacement Parts ................................................................................20
Electric Clutch Adjustment..........................................................................................21
Hydraulic Systems Adjustments & Service ...............................................................21
Pump/Motor Replacement ...........................................................................................21
Hydraulic Pump Belt Removal & Installation........................................................21-22
Replacement Parts .......................................................................................................22
Machine Speed Control Ranges .................................................................................22
Traction Control Neutral Adjustment .........................................................................23
SECTION 5 - MOWER ATTACHMENT SERVICE ................................................................24-26
36” CUTTING DECK
Cutting Deck Belt Removal & Installation..................................................................24
48”, 52”, & 61” CUTTING DECK
Cutting Deck Belt Removal & Installation..................................................................24
Cutting Deck Spindle Belt Removal & Installation.............................................. 24-25
CUTTING BLADE SERVICE
Blade Inspection...........................................................................................................25
Blade Removal & Sharpening .....................................................................................25
MOWER SPINDLES
Field Serviceable Spindles, Bearing Replacement ...................................................26
SECTION 6 - BATTERY SERVICE & TESTING .................................................................. 27-28
WARRANTY................................................................................................................................29
PRIMARY MAINTENANCE................................................................................................... 30-33
5
SECTION 1 - FAMILIARIZATION
RIGHT HAND
TRACTION
LEVER
SPEED
CONTROL
LEVER
LEFT HAND
TRACTION
LEVER
OPERATOR’S PRESENCE
CONTROL (OPC)
BLADE CLUTCH
CONTROL SWITCH
ENGINE SPEED CONTROL
FUEL FILLER CAP
NEUTRAL
LATCH
FUEL TANK
STARTER ROPE
KEY
SWITCH
HYDRAULIC
PUMPS (Not
Shown)
AIR FILTER
FILL/CHECK CAP
(Hydraulic Reservoir)
REAR TIRES
DECK HEIGHT
ADJUSTING
CRANK
ELECTRIC CLUTCH
COVER
RETAINING
KNOBS
FUEL SHUT-OFF
VALVE (Not Shown)
HYDRAULIC
DRIVE MOTOR
(Behind Each Rear
Wheel)
CASTER
WHEEL
ASSEMBLY
FRONT
TIRES
DISCHARGE
DEFLECTOR
COVER
MUFFLER
DECK
(48” Shown)
FIGURE 1.1
1.2 NOMENCLATURE
It is recommended that all operator’s of this equipment
become thoroughly familiar with the controls,
components, and operation of this machine before
operating. Specific details involving the engine are found
in the separate engine owner’s manual. Study these
manuals before operating and keep both handy for future
reference. For the nearest SNAPPER dealer in your area,
check the yellow pages under the heading LAWN
MOWERS. For engine parts and service, look for the
engine manufacturer’s dealers under the heading,
ENGINES – gasoline.
1.1 INTRODUCTION
This manual has been prepared for the operator’s of the
SNAPPER PRO HYDRO WALK BEHIND MOWER. It’s
purpose, aside from recommending standard operating
procedures and routine service requirements, is to
promote SAFETY through the use of accepted operating
practices. Read, Understand and Follow the IMPORTANT
SAFETY INSTRUCTIONS on Pages 2 thru 4 of this
manual and All SAFETY messages on the PRO HYDRO
WALK BEHIND MOWER and its attachments before
operating. SNAPPER recommends returning the machine
to an authorized SNAPPER dealer annually for inspection
and addition of any new devices which might upgrade the
safety of the mower.
6
SECTION 2 – SAFETY MESSAGES AND SYMBOLS
! IMPORTANT SAFETY AND OPERATING INSTRUCTIONS !
READ, UNDERSTAND AND FOLLOW INSTRUCTIONS AND WARNINGS IN
THIS MANUAL, AND ON THE MACHINE, ENGINE AND ATTACHMENTS.
8
SECTION 2 – SAFETY MESSAGES AND SYMBOLS
FORWARD
BLADES ENGAGED “ON”
FAST
BLADE SWITCH
SPEED
RANGE
SETTING
SLOW
LEFT TRACTION LEVER
SQUEEZE FOR LEFT TURN
BLADES DISENGAGED “OFF”
RIGHT TRACTION LEVER
SQUEEZE FOR RIGHT TURN
ENGINE
“STOP”
ENGINE
“RUN”
LATCHED
FAST
KEY SWITCH
SPEED
RANGE
SETTING
ENGINE
“START”
ENGINE SPEED
CONTROL
UNLATCHED
SLOW
NEUTRAL LATCH
USE TO LATCH
TRACTION
LEVERS IN
NEUTRAL
READ
OPERATOR’S
MANUAL
8
SECTION 2 – SAFETY MESSAGES AND SYMBOLS
DANGER! ROTATING BLADES
KEEP CHILDREN AND OTHERS OUT OF MOWING AREA
ENGINE AND COMPONENTS ARE HOT.
ALLOW ALL PARTS TO COOL BEFORE
ADJUSTING OR WORKING ON MACHINE
DANGER! ROTATING BLADES
9
SECTION 2 - CONTROLS
Before operating, become familiar with all the
controls (See Figure 2.1A) and how to use them.
Know beforehand how to STOP the Right Hand
and Left Hand Traction Wheel Drives, the Mower
Blades, and the Engine in preparation for a
possible emergency.
2.2 BLADE AND TRACTION CONTROLS
1.
2.
3.
4.
5.
2.1 ENGINE CONTROLS A. Engine Speed Control
B. Keyswitch
C. Operator’s Presence Control (OPC)
D. Engine Recoil Starter Handle (Not shown)
Blade Clutch Control Switch
R.H. Traction Lever
L.H. Traction Lever
Neutral Latch
Speed Control Lever
WARNING
Neutral Latch is not intended to be used as a park
brake. DO NOT park machine on slopes.
WARNING
WARNING
When the Operator’s Presence Control (OPC) is
released, the machine will continue to operate a few
feet. DO NOT use this Operator’s Presence Control
(OPC) to routinely stop the machine.
To avoid sudden and unexpected turning, both
Traction Controls must be moved the same way
when starting or stopping machine motion.
(C) OPERATOR’S PRESENCE
CONTROL (OPC)
(AT REAR HANDLEBAR)
(1) BLADE CLUTCH
CONTROL SWITCH
(3) LEFT HAND
TRACTION LEVER
(2) RIGHT HAND
TRACTION LEVER
(4) NEUTRAL LATCH
(A)ENGINE SPEED CONTROL
(B) KEY SWITCH
HANDLEBAR
(1) BLADE CLUTCH
CONTROL SWITCH
(5) SPEED
CONTROL LEVER
VIEW OF CONTROL PANEL
(Rear of Machine) FROM
OPERATOR’S POSITION
(B) KEY SWITCH
FIGURE 2.1A
IMPORTANT:
TO ROLL MACHINE,
TURN BOTH PRESSURE
RELIEF VALVES
COUNTER-CLOCKWISE
1/2 TURN
To roll the machine without the
engine running, turn both pressure relief valves
counter-clockwise 1/2 turn. Turn valves clockwise to
tighten for machine operation.
PRESSURE RELIEF
VALVE
RIGHT
HAND
PUMP
LEFT HAND
PUMP
PRESSURE RELIEF
VALVE
10
FIGURE 2.1B
SECTION 3 - OPERATING INSTRUCTIONS
3.1 PRE-START CHECKLIST
WARNING
IMPORTANT: Before starting your SNAPPER Pro
Hydro machine, the hydraulic reservoir and engine
MUST be filled to the proper level with oil.
Use approved fuel container. DO NOT smoke near
open fuel container. DO NOT fill fuel tank indoors or
when engine is running. Allow engine to cool for at
least ten minutes before refilling. Wipe off any
spilled fuel before starting engine. DO NOT run
engine indoors.
3.1.1. HYDRAULIC OIL RESERVOIR: Use SAE 10W30 oil. Fill reservoir with oil until the level comes to
within 1-1/2 inches from the top of the filler neck.
Check on level surface with engine off. See Figure 3.1.
7. Add fuel to tank after pushing the machine outside
where FUMES can be dissipated. Make sure Fuel
Tank Cap is tightened after refueling. (Refer to
Engine Owner’s Manual for Fuel specifications).
Make the following checks and perform the services as
required before each start-up.
OIL FILL
LINE
3.1.3. BEFORE OPERATING
Be thoroughly familiar with ALL controls and know how
to use them before operating the mower. Know
beforehand how to STOP the Traction Drive Wheel
Motors, Mower Blades and Engine in preparation for a
possible emergency.
1-1/2”
HYDRAULIC OIL
RESERVOIR
IMPORTANT: FLUID LEVEL MUST
BE ABOVE TOP OF BAFFLE.
RESERVOIR CAPACITY IS ONE (1)
GALLON. DO NOT OVERFILL.
FIGURE 3.1
3.1.2. ENGINE OIL: Add oil as needed to bring up to,
but not over, the FULL mark. Refer to the Engine
Owner’s Manual for oil specifications.
1. If required, make cutting height adjustments. Refer
to Section “CUTTING HEIGHT ADJUSTMENT”.
2. Check tires and add air as needed to bring pressure
to 25 PSI in front tires and 12-15 PSI in rear tires.
3. Check Guards, Deflectors and Belt Covers to make
sure all are in place and secure.
4. Check condition of Cutter Deck Belt(s). If damaged,
replace before operating machine. Refer to Section
“CUTTER DECK BELT REMOVAL”.
5. Clean Interior and Exterior surfaces of Cutting Deck
and clean Engine of any accumulation of dirt, grass,
oil, etc. Keep Engine Air Intake Screens and Cooling
Fins clear at ALL times.
6. Check Engine Oil Reservoir and add oil as needed to
bring level up to but not over the FULL mark. (Refer
to Engine Owner’s Manual for oil specifications).
11
SECTION 3 - OPERATING INSTRUCTIONS
3.2 STOPPING
CHOKE
CONTROL
KNOB
IMPORTANT: Squeezing both Traction Levers back past
Neutral position will cause the machine to back up.
1. Squeeze both Traction Controls simultaneously
towards handle bar until both are in Neutral.
Manually engage the Neutral Latch. See Figure 3.2.
LEFT HAND
TRACTION
LEVER
RIGHT HAND
TRACTION
LEVER
FUEL TANK
& HANDLE
SUPPORT
BRACKET
PULL OUT
TO CHOKE
POSITION
OUTLINE OF REAR
WHEEL
(Left Side Shown)
FIGURE 3.3
NEUTRAL LATCH
CHOKE
POSITION
FIGURE 3.2
2. Move Blade Clutch Control Switch to OFF position.
3. Move Engine Speed Control to SLOW (Turtle)
Position.
4. Stop Engine by turning Keyswitch to STOP position.
Always park machine on level surface. Remove key.
ENGINE
SPEED
CONTROL
FAST
(Rabbit)
POSITION
3.3 STARTING AND OPERATING
3.3.1. ENGINE - START ENGINE AS FOLLOWS:
1. Turn Fuel Tank Shut-Off Valve ON.
2. Move Blade Clutch Control Switch to OFF position.
3. Be sure Right Hand and Left Hand Traction Levers are
latched in NEUTRAL position.
4. Pull Choke Control Knob, if so equipped, (shown
attached to Fuel Tank and Handle Support Bracket on
Left Hand side of machine) all the way out to CHOKE
position. See Figure 3.3.
5. Move Engine Speed Control to “FAST/CHOKE”
position, if so equipped. See Figure 3.4.
6. (Manual Start Models) Turn Keyswitch to RUN position.
7. (Manual Start Models) Pull Starter Rope until Engine
starts.
8. (Electric Start Models) Hold Operators Presence
Control against handlebar. Turn key to the “START”
position until engine starts. NOTE: If after 5 seconds of
cranking the engine and it does not start, release the
key, make sure the blade switch control is in the OFF
position and Traction Levers are latched in the Neutral
position. Attempt starting again after waiting for
approximately 20 seconds.
9. Push Choke Control Knob all the way in and move
Engine Speed Control to “FAST” position.
SLOW
(Turtle)
POSITION
FIGURE 3.4
WARNING
DO NOT leave machine with the engine running. STOP
engine. STOP blades. Latch both Traction Levers in
the Neutral position. Move Speed Control to slow.
Remove key.
WARNING
DO NOT park machine on slopes.
13
SECTION 3 - OPERATING INSTRUCTIONS
WARNING
WARNING
The SNAPPER Pro Hydro Mowers have a Transport
Speed, which allows the machine to travel forward at a
speed of 6 MPH - it is NOT to be used while walking! Use
the Transport Speed ONLY when the machine is
equipped with a Riding Sulky! DO NOT make sharp
turns at high speed! The machine has “zero-turn”
capability; DO NOT use “zero-turn” at high speed.
During initial training time with machine, it is advised
that the Operator(s) practice with the Speed Control
Lever in the slowest travel speed position and Blade
Engagement Switch in the OFF position
The tighter the Traction Levers are squeezed back
towards the handlebar, the faster the machine will
move in reverse. Use extreme CAUTION when
reversing machine!
3.4.2. REVERSE SPEED
1. Hold Operator’s Presence Control (OPC) against
handlebar.
2. Move Blade Control Switch to OFF position.
3. To reverse direction of the machine, stop machine travel
by squeezing both Traction Controls back to the Neutral
position and move the Neutral Latch to engage and hold
both Traction Levers in Neutral.
4. To start machine movement, simultaneously squeeze
both Traction Levers SLOWLY back towards the
handlebar, allowing machine to start reverse movement.
See Figure 3.6.
5. To STOP reverse movement of machine, return both
Traction Levers to Neutral and engage the Neutral Latch.
3.4 TRACTION SPEED CONTROL
3.4.1. FORWARD SPEED
1. Hold Operator’s Presence Control (OPC) against
handlebar.
2. Move Speed Control Lever forward slightly, selecting
a slow travel speed.
3. While holding both Traction Levers in the neutral
position, release Neutral Latch Lever by squeezing
both Traction Levers slightly rearward.
4. Simultaneously (and slowly), release both Traction
Levers. Machine will begin to move forward.
5. Adjust Speed Control Lever to a comfortable travel
speed. See Figure 3.5.
6. Proceed to go forward while allowing the machine to
travel in a straight line. If the machine tracks towards
the LEFT or RIGHT, it can be brought back to a
straight path by moving the Speed Control Lever in
the desired direction of travel. See Figure 3.5.
7. Squeeze the appropriate Traction Lever to turn the
machine either LEFT or RIGHT. If either Traction
Lever is squeezed tightly against the handlebar, it will
cause the machine to quickly spin around or zero turn
to that side - BE CAREFUL!
SLOWLY SQUEEZE BOTH TRACTION LEVERS
BACK TOWARDS THE HANDLEBAR AT THE SAME
TIME TO START REVERSE MOVEMENT
MOVE SPEED CONTROL LEVER TO
THE LEFT OR RIGHT TO ADJUST
MOWER FOR STRAIGHT TRAVEL
NEUTRAL
LATCH
FIGURE 3.6
WARNING
Start mowing with a slow ground speed.
3.5 MOWER OPERATION
1. Hold Operator’s Presence Control (OPC) against
handlebar.
2. Move Engine Speed Control to the FAST (Rabbit)
position. See Figure 3.4.
3. Move Blade Control Switch to ON position.
4. Move Speed Control Lever forward, selecting a slow
travel speed.
FIGURE 3.5
WARNING
DO NOT operate blades in reverse. STOP blades. LOOK
and SEE behind and down for children, pets and
hazards before and while backing.
14
SECTION 3 - OPERATING INSTRUCTIONS
3.5 MOWER OPERATION (Continued from
3.7 HANDLE HEIGHT ADJUSTMENT
Previous Page)
5. While holding both Traction Levers in the neutral
position, release the Neutral Latch by squeezing both
Traction Levers slightly rearward.
6. Simultaneously (and slowly), release both Traction
Levers. Machine will begin to move forward.
7. Adjust Speed Control Lever to a comfortable travel
speed.
8. Proceed to go forward while allowing machine to
travel in a straight line. If the machine has a tendency
to track towards the LEFT or RIGHT, it can be
brought back to a straight path by moving Speed
Control Lever in the desired direction of travel. See
Figure 3.5.
9. Squeeze the appropriate Traction Lever to turn the
machine either LEFT or RIGHT.
10. If either Traction Lever is squeezed tightly against
the handlebar, it will cause the corresponding wheel
to reverse direction and “zero-turn” the machine. BE
CAREFUL!
For operator comfort the height of the handlebars are
adjustable to five different positions. The handle height
adjustment procedure is sensitive and the following
procedures and WARNINGS must be followed very
carefully.
WARNING
Several steps of the handle bar height adjustment
procedure require that the engine be started.
Exercise
extreme
CAUTION
when
making
adjustments while the engine is running to avoid
HOT engine components, rotating components, run
over or entrapment types of injuries.
IMPORTANT: To complete this procedure, a steel rod
5/16” diameter and 20” long will be required. DO NOT
begin this procedure without it.
WARNING
WARNING
DO NOT attempt any maintenance, adjustments or
service with the engine running. Stop engine. Stop
blades. Latch Traction Levers in neutral. Move
Speed Control lever to SLOW. Remove key.
Disconnect spark plug wires from spark plugs and
secure wires away from spark plugs. Engine and
components are HOT. Avoid serious burns, allow all
parts to cool before working on machine.
DO NOT use Rider Attachment (Sulky) on slopes! DO
NOT park machine on slopes.
3.6 MOWING AND TURNING ON HILLSIDES
1. Always mow hillsides starting at bottom of hill. Mow
across slopes, never up and down. Exercise
CAUTION when changing directions on slopes. DO
NOT MOW STEEP SLOPES. See Figure 3.7.
2. Hillside mowing is accomplished by squeezing
Traction Lever on the UPHILL SIDE of machine. This
helps prevent side slipping of mower.
3. When turning mower on hillsides, always turn toward
the UPHILL SIDE of mower for better control and
balance.
STEP 1: Move machine to smooth level place. Raise
rear of machine just high enough for drive wheels to
clear the floor and be able to rotate freely. Block machine
securely to prevent it from falling.
STEP 2: Place both Traction Levers in the Neutral
position and engage Neutral Latch. See Figure 3.8.
SQUEEZE TRACTION LEVER ON
UP-HILL SIDE OF MOWER
JAM NUT
TRACTION
CONTROL
ARMS
NEUTRAL
LATCH
SELF LOCK
COTTER PIN
SWIVEL
SWIVEL
* ALWAYS START AT BOTTOM OF HILL!
* ALWAYS MOW ACROSS HILL - NEVER
UP & DOWN.
ALWAYS TURN
MOWER TOWARD
HILL
TRACTION CONTROL
RODS
FIGURE 3.7
FIGURE 3.8
(Continued on Next Page)
15
SECTION 3 - OPERATING INSTRUCTIONS
STEP 7: Adjust swivel (Clockwise or CounterClockwise) until the pin on the swivel aligns perfectly
with the hole in the traction control arm. The traction
control lever must be held in the Neutral Latch position
when making this adjustment. Complete this adjustment
for both left and right swivels. Carefully reattach and
secure swivels to control arms. Tighten swivel jam nuts.
IMPORTANT: Both the left and the right swivels must
be installed in the same traction control arm speed
range setting. Mid range (middle hole) setting is
recommended.
STEP 8: Remove steel rod from shift lever arms.
STEP 9: Check to insure machine is securely blocked.
Start engine. Drive wheels should not rotate with both
Traction Levers latched in the Neutral position. If no
rotation is observed the handlebar adjustment
procedure is complete. If wheels do rotate proceed to
next step. STOP ENGINE.
STEP 10: Wheel rotation will be stopped by adjusting
the eccentric on the pump arms on the right and left
pumps. Turning the eccentric slightly clockwise or
counter-clockwise will synchronize the pump and
traction controls for Neutral. See Figure 3.11. To turn
the eccentric, first loosen the bolt in the pump control
arm and the nut and bolt fastening the eccentric to the
pump control arm. With both Traction Levers latched in
Neutral, start engine. Turn eccentric slightly clockwise
or counter-clockwise until wheels stop rotating. Tighten
control arm bolts and eccentric nut and bolts. Check for
wheel rotation. Repeat eccentric adjustment if needed.
3.7 HANDLE HEIGHT ADJUSTMENT
(Continued from previous page)
STEP 3: Insert rod (5/16” diameter x 20” long) through
alignment holes in the left and right traction control shift
lever arms and the tank support bracket. The rod
should pass through both the left and right traction
control shift lever arms. See Figure 3.9.
LEFT & RIGHT TRACTION
CONTROL SHIFT LEVER ARMS
ROD
TANK SUPPORT BRACKETS
FIGURE 3.9
STEP 4: Disconnect the swivel from the right and left
traction control arms and loosen swivel jam nuts. See
Figure 3.8.
STEP 5: Loosen the upper bolt and nut on right and
left side of Mower which holds Handlebar to Support
Bracket. Remove the lower bolt and nut on each side.
Retain this hardware. See Figure 3.10.
TRACTION
CONTROL SHIFT
LEVER ARM
HANDLEBAR
LOOSEN UPPER
BOLT & NUT
LOOSEN BOLT
CONNECTED TO CONTROL
ARM
LOOSEN BOLT & NUT THAT
CONNECTS ECCENTRIC TO CONTROL
ARM
ROTATE ECCENTRIC
CLOCKWISE OR COUNTERCLOCKWISE
FUEL
TANK/HANDLEBAR
SUPPORT BRACKET
SHOWN IN PHANTOM
LEFT SIDE OF MACHINE SHOWN
REMOVE LOWER
BOLT & NUT
FIGURE 3.11
FIGURE 3.10
STEP 6: Pivot the Handlebar up or down and reinsert
bolt and nut into desired hole position on each side.
Tighten both upper and lower bolts and nuts on each
side to 35 to 45 ft. lbs.
16
SECTION 3 - OPERATING INSTRUCTIONS
NOTE: Remove (or add) Spacers by rotating slots so
they align with the flat area on Caster Shaft.
3.8 CUTTING HEIGHT ADJUSTMENT
(Fixed Decks)
The Mower has three methods of adjusting cutting
height listed as follows:
1. Moving position of BLADE on cutter spindle shaft.
2. Moving position of CASTER WHEEL on support.
3. Moving position of MOWER DECK on power unit.
SLOT
WARNING
SPACERS
DO NOT attempt any maintenance, adjustments or
service with the engine running. Stop engine. Stop
blades. Latch Traction Controls in neutral. Move
Speed Control lever to SLOW. Remove key.
Disconnect spark plug wires from spark plugs and
secure wires away from spark plugs. Engine and
components are HOT. Avoid serious burns, allow all
parts to cool before working on machine.
FLAT
AREA
NOTE! THOSE SPACERS
REMOVED FROM BOTTOM
OF CASTER SHOULD BE
REINSTALLED AT TOP
BEFORE INSERTING
RETAINER PIN.
FIGURE 3.13
3.10 ADJUSTING BLADE ON CUTTER PINDLE
To change cutting height of Blades, move the Spacers from
under the Cutter Housing to above the Cutter Housing
Pulley. Each Spacer moved above the Cutter Housing
Pulley will provide an additional 1/4” of cutting height. DO
NOT PUT ANY SPACERS BELOW BLADE! See Figure
3.14.
3.9 ADJUSTING CASTER WHEELS
The Caster Wheel Assembly has four (4) 1/2” and one
(1) 1/4” thick spacer. The 1/4” thick spacer always stays
on the stop side of the caster support tube. The 1/2”
thick spacers are used to adjust the cutting height.
When placed above or below Caster Support Tube,
they raise or lower cutting height in 1/2” increments,
thus providing a “Quick-Adjust” method. The deck
mounting has to be changed to correspond to the caster
repositioning. Refer to Section “ADJUSTING FIXED
DECK ATTACHMENT”.
1. Remove the Retainer Pin from Caster Shaft. See
Figure 3.12.
CUTTER
HOUSING
SPACERS ON
BOTTOM
CASTER
SUPPORT
TUBE
CASTER SHAFT
SPACERS ON
TOP
CUTTER
HOUSING
PULLEY
BLADE
FIGURE 3.14
NOTE: Changing the cutting height of Blades DOES
NOT change the Deck ground clearance. If an
undesirable cutting pattern results, then cutting height
adjustment MUST be made by adjusting Mower Deck
height and Caster Wheels.
Install Blades (Air-Lift UP) with retaining hardware as
shown below and tighten to 70-80 ft. lbs.
See Figure 3.15.
AIR LIFT
RETAINER
PIN
HEIGHT
ADJUSTING
SPACERS
BLADE
CASTER WHEEL
ASSEMBLY
BEVELED
WASHER
FIGURE 3.12
2. Lift Caster Support Tube while adding or removing
the bottom Spacer. See Figure 3.13.
MOUNTING
BOLT
TIGHTEN TO 70-80
FOOT POUNDS
FIGURE 3.15
17
SECTION 3 - OPERATING INSTRUCTIONS
3.11 ADJUSTING FIXED DECK ATTACHMENT
SPACERS (4)
The Mower Deck has four different positions for
attaching it to the power unit. The lowest setting
provides a cutting height range from 1 1/2” to 2 1/2”, the
middle low cut from 2 1/4” to 3 1/4”, the middle high cut
from 3” to 4”, and the highest cut from 3 3/4” to 4 3/4”.
Make sure the Spacers on the Caster Wheels are
moved UP or DOWN as shown below to correspond
with the bolt positions to keep the Mower Deck level.
Once a desired cutting height is reached, attach the
Mower Deck to the power unit by installing 3 bolts on
each side in selected height of cut holes. Tighten the
bolts from 70 to 80 foot pounds torque.
HIGH CUT: 3-3/4” TO 4-3/4”
FIGURE 3.16 (D)
3.12 CUTTING HEIGHT ADJUSTMENTS FOR
ADJUSTABLE DECK ATTACHMENTS
SIDE PROFILE OF MACHINE
FIGURE 3.16A
1. The Mower Deck should be mounted in the lowest
holes (low cut) on the power unit.
2. To adjust height of cut, turn both Cranks (located on
right hand and left hand side of deck) clockwise to
raise the Mower Deck and counter-clockwise to
lower the Mower Deck. Observe the height of cut
decal located on the side of the Mower Deck
mounting plates and move the height of cut pointers
in the same desired position. See Figure 3.17.
3. If pointers are in the correct position and you still
have an uneven cut, follow the instructions as listed
below to correct the problem:
A. Rotate outer Blades to point toward the sides of
the Mower Deck (make sure Mower is on level
surface).
B. Measure the distance from Blade tip to the
ground. Measure both outside Blades. This
measurement should be the same as what the
height of cut pointer reads on both sides.
C. If measurement is NOT the same, then bend both
height of cut pointers UP or DOWN to read the
same as Blade tip measurements.
POWER UNIT
SPACERS (4)
BLACK DOTS
REPRESENT
BOLT ANCHOR
CASTER
WHEEL
CUTTING
DECK
REAR
WHEE
L
LOW CUT: 1-1/2” TO 2-1/2”
FIGURE 3.16B
SPACERS (3)
SPACER (1)
MIDDLE LOW CUT: 2-1/4” TO 31/4”
FIGURE 3.16C
CRANK
TURN CLOCKWISE TO
RAISE DECK
SPACER (1)
REAR
EDGE OF
CUTTING
DECK
SPACERS (3)
HEIGHT
OF CUT
DECAL
MIDDLE HIGH CUT: 3” TO 4”
HEIGHT OF CUT
POINTER
(48”, 52”, & 61” Models)
FIGURE 3.16 (A,B,C)
FIGURE 3.17
18
MOWER DECK
MOUNTING
BRACKET
SECTION 4 - ENGINE TROUBLESHOOTING
SYMPTOM PROBLEM
SOLUTION
Engine
does not
start..
Key OFF.
Fuel Tank empty.
Fuel Shut-Off Closed.
Engine Throttle Control not at FAST
(Rabbit) position.
Choke NOT closed.
Spark Plug Wire loose or disconnected.
Blade Clutch Switch in ON position.
Spark Plug bad.
Dirty Air Filter.
Traction Controls not Latched in Neutral.
Turn Key to Run.
12
Fill Fuel Tank.
11
Open Fuel Shut-Off.
12
Put Engine Throttle Control to FAST (Rabbit) 12
position.
Put Throttle Control in CHOKE position.
12
Connect Spark Plug Wire.
(See Engine Manual)
Move Blade Clutch switch to OFF position.
6
Install new Spark Plug.
(See Engine Manual)
Clean Air Filter.
(See Engine Manual)
Move Traction Controls to NEUTRAL &
12
Engage Neutral Latch Lever
Engine
Starts Hard
or Loses
Power.
Dirt or water Fuel Tank.
Air Filter dirty.
Spark Plug not gapped correctly.
Spark Plug bad.
Drain and clean Fuel Tank, fill with fresh
Fuel.
Clean or install new Air Filter.
Check and set Spark Plug gap.
Install new Spark Plug.
Engine
Runs
Erratically.
Spark Plug bad.
Spark Plug not gapped correctly.
Fuel Filter plugged or dirty.
Install new Spark Plug.
Check and gap spark plug gap.
Replace Fuel Filter.
(See Engine Manual)
(See Engine Manual)
Engine
Idles Poorly.
Dirty Air Filter.
Fuel Filter plugged
Clean or replace Filter.
Replace Fuel Filter.
(See Engine Manual)
Engine
Overheats.
Engine Oil low in Crankcase.
Cooling Fins & Flywheel Screen Clogged.
Add Oil.
Clean Fins & Screen
(See Engine Manual)
Machine
Vibrates
Excessive.
Blade Mounting Bolts loose.
Blade out of balance.
Engine Mounting Bolts loose.
Tighten Blade Mounting Bolts.
Sharpen and balance Blade.
Tighten Mounting Bolts.
16, 25
25
(See Engine Manual)
Engine
Dies.
Mowing grass too tall.
Mowing too fast.
Adjust cutting height.
Reduce travel speed.
19
PAGE
11
(See Engine Manual)
(See Engine Manual)
(See Engine Manual)
16, 17
13
SECTION 4 - SERVICE & LUBRICATION INFORMATION
TRACTION LEVERS
Lubricate each with 1-2 shots of
grease every 25 hours of operation.
CONTROLS & LINKAGES
Before each mowing period, coat all wear
points, hinge points and sliding parts with
medium duty oil.
INTERLOCK SWITCHES
Inspect switches for ease
of operation.
IN-LINE FUEL FILTER
(Not Illustrated)
Replace every 100
ENGINE
Change Oil Filter after first 5 hours of
operation. Change engine oil every 25
hours under normal conditions or daily
under extreme dusty conditions. Change
Filter every 50 hours of operation.
HYDRAULIC OIL
Use SAE 10W-30 Oil.
Clean AIR FILTER Foam Element
every 25 hours. Service PAPER
ELEMENT every 100 hours.
HYDRAULIC FILTER
Change Hydraulic Oil and Filter
after first 25 hours of operation.
Thereafter, change Hydraulic Oil
and Filter every 200 hours
(monthly).
REAR TIRES - Check tire
pressure before each mowing
period. Inflate to 12-15 psi.
CUTTER SHAFT
SPINDLES
Lubricate each with two
(2) SHOTS of bearing
grease daily.
MOTOR HUBS - Lubricate
Motor Hubs with Anti-Seize
Compound when replacing
Wheel Hubs.
CUTTER DECK
BELT(S)
Check for cracks or
wear.
DEFLECTOR
Lubricate hinge
points as required.
FRONT WHEEL BUSHINGS
& CASTER SHAFTS
Lubricate with bearing grease
weekly.
HYDRAULIC HOSES & FITTINGS
Check daily for leaks, cracks,
kinks, and other signs of wear.
MOWER BLADES
Check for tightness every 25
hours of operation. Tighten
capscrews to 75 foot pounds.
MOWING DECK
At end of each mowing period,
remove grass and debris from
under mowing deck and above
rear SAFETY Shield.
FRONT TIRES
Check tire pressure before
each mowing period. Inflate to
25 PSI.
FIGURE 4.1
20
SECTION 4 - SERVICE & LUBRICATION INFORMATION
HOURS
BREAK-IN
8 HOURS
(Daily)
40 HOURS
(Weekly)
200 HOURS
(Monthly)
PROCEDURE
COMMENTS
Check all fasteners for proper tightness
Change Engine Oil and Filter at 5 hours .............................. See engine manual
Change Hydraulic Oil and Filter at 25 hours ........................ Use SAE 10W-30.
Reservoir capacity 1 Gal.
Check/Change Engine Oil ................................................... Change oil if extreme dusty conditions
Clean Air Filter...................................................................... More often if needed
Clean Blower screen ............................................................ More often if needed
Remove Debris from under Belt Cover ................................ More often if needed
Sharpen Cutter Blades ......................................................... Tighten Cap Screw to 70 - 80 ft. lbs.
Grease Cutter Spindle Bearings........................................... Use Chevron SRI Grease (NLGI2).
Check Hydraulic Reservoir................................................... Add oil if needed
Check Tire Pressure ............................................................ Add or adjust as Required
Check Safety Interlock System ............................................ Inspect Switches for ease of Operation
Grease Traction Control Levers ........................................... General Purpose Grease
Inspect Traction Lock for Wear ............................................ Replace if Worn
Change Engine Oil ............................................................... More often if needed
Replace Air Filter.................................................................. More often if needed
Grease Caster Wheel Bearings ........................................... General Purpose Grease
Grease Caster Wheel Pivot.................................................. General Purpose Grease
Grease Idler Arm Pivots ....................................................... General Purpose Grease
Fuel Filter ............................................................................. Replace with Snapper P/N 1-4359
Check all Fasteners for Proper tightness ............................. See Torque Specifications
Change Engine Oil Filter ...................................................... See Engine Manual
Clean and Adjust Spark Plugs ............................................. See Engine Manual
Check Belt Tension .............................................................. See Operator’s Manual
Lube Controls and Linkages ................................................ Use Medium Duty Oil
Change Hydraulic Oil and Filter ........................................... Use SAE 10W-30 Oil.
Reservoir capacity 1 Gal.
GREASE
DAILY
GREASE ZERK LOCATION
1 on the Hydro Pump Belt Idler Arm Pivot
1 on each Spindle Housing (Total of 2 on 36” Deck & 3 on 48”, 52”, 48”, & 61” Decks)
1 on each Idler Arm Pivot (Total of 1 on 36” Deck & 2 on 48”, 52”, 48”, & 61” Decks)
1 on each Caster Support Arm (Total of 2)
1 on each Caster Wheel (Total of 2)
1 on each Traction Control Lever (Total of 2)
X
X
X
X
X
MAINTENANCE/REPLACEMENT PARTS
MAINTENANCE PARTS
36” Cutter Blade (Requires Two Blades)
48” Cutter Blade (Requires Three Blades)
52” Cutter Blade (Requires Three Blades)
61” Cutter Blade (Requires Three Blades)
36” Deck Engine to Cutting Deck Belt
48” Deck Engine to Cutting Deck Belt
48” Deck Spindle to Spindle Belt
52” Deck Engine to Cutting Deck Belt
52” Deck Spindle to Spindle Belt
61” Deck Engine to Cutting Deck Belt
61” Deck Spindle to Spindle Belt
Parts Manual for Pro Hydro Series 1
21
GREASE
WEEKLY
X
2-9246
2-9247
2-9246
2-9251
2-9255
2-9262
2-9261
2-9267
2-9266
2-9269
2-9268
06926
SECTION 4 – SERVICE
2. Before removing parts from the Hydraulic System, check
to make sure another part of the machine is not causing
the problem. Look for:
A. Loose Drive Belt.
B. Improperly set or bad Idler Pulley.
C. Loose or lost set screws and/or sheared Keys in Pulleys.
D. Pump Release loose.
E. Oil saturated Drive Belts.
F. Loose Drive Arms on Pumps.
WARNING
Once blades are disengaged, they should come to a
complete stop in 7 seconds or less. If the blades
continue to rotate after 7 seconds, the electric
clutch must be checked. Replacement of electric
clutch may be necessary. Return machine to dealer
for replacement. DO NOT CONTINUE to operate
mower if blades fail to stop in 7 seconds.
4.2.2. PUMP/MOTOR REPLACEMENT
1. Should it become necessary to replace a Pump or Motor,
it is recommended that the affected Pump or Motor be
replaced as a set (both Pump and Motor). Generally,
when a Pump or Motor is bad, it will affect the associated
Pump or Motor.
2. Relieve all pressure in the system and disconnect Spark
Plug(s). See Figure 4.3.
3. Replace the affected component(s).
4.1 ELECTRIC CLUTCH ADJUSTMENT
The Pro Hydro Mowers are equipped with an Electric Blade
Control. The cutter blades should STOP within 7 seconds
after the BLADE SWITCH is moved to “OFF” position. If
blade stopping time exceeds 7 seconds, check the clutch air
gap setting as follows:
1. With the Ignition Switch moved to “STOP” and the Blade
Switch moved to “OFF”, locate the three air gap check
“SLOTS” as shown in Figure 4.2.
ADJUST AIR GAP TO
BE .010 TO .012.
TURN PRESSURE RELIEF
VALVE ON EACH PUMP
COUNTER-CLOCKWISE
TO RELEIVE SYSTEM
PRESSURE.
ADJUSTING NUT
LEFT HAND
PUMP
RIGHT HAND
PUMP
CLUTCH
FIGURE 4.2
FIGURE 4.3
2. Insert a feeler gauge into each of the three slots.
3. The clearance in each slot should be NO MORE than
.010 to .012.
4. If adjustment is required, keep feeler gauge in slot and
turn the adjusting nut until the gap is correct.
5. Adjust all three slots.
4.2.3. HYDRAULIC PUMP BELT REMOVAL
1. STOP ENGINE! Loosen and remove Nut from under the
Spring Tensioner for Hydraulic Belt Idler Tensioner.
Remove Spring from Bolt. See Figure 4.4.
HYDRAULIC
PUMP BELT
4.2 HYDRAULIC SYSTEM ADJUSTMENTS
& SERVICE
4.2.1. GENERAL HYDRAULIC SERVICING
1. The Hydraulic Oil and Filter should be changed after the
initial 25 hours of use and after every 200 hours of use.
Drain both compartments of the hydraulic reservoir
completely. Replace filter using genuine Snapper
replacement only.
Fill reservoir using 1 gallon of SAE10W-30 oil.
Operate machine for several minutes.
Check oil level. Reservoir is properly filled when level is 11/2” from the top of the filler neck. See Figure 3.1.
BOLT
SPRING TENSIONER
REMOVE NUT
NOTE: Always clean the Cap and surrounding area before
checking Oil Level or adding Oil. The Hydraulic Oil Tank is
FULL when the Oil is 1-1/2” from the top of the filler neck as
shown in Figure 3.1.
FIGURE 4.4
22
SECTION 4 - SERVICE
4.2.3. HYDRAULIC PUMP BELT REMOVAL (Continued)
2. Loosen Nut on Belt Guide at rear of Engine Pulley
and remove Cutter Deck Belt from Engine Pulley.
3. Remove Hydraulic Pump Belt.
4.2.4. HYDRAULIC PUMP BELT INSTALLATION
1. STOP ENGINE! Place Hydraulic Belt on Engine and
Pump Pulleys.
2. Attach Idler Spring to Bolt and reattach Nut to Bolt.
3. Place Cutter Deck Belt on Engine Pulley.
4.2.5. REPLACEMENT PARTS
To retain the quality of your Machine, use genuine
SNAPPER replacement parts only. Contact your local
SNAPPER Dealer for parts and service and service
assistance. For the correct part or information for your
Machine, always mention Model and Serial Number of
Power Unit and mower Attachment. We recommend
returning your Machine to an authorized SNAPPER
Dealer on a yearly basis for inspection and addition of
any new devices which might upgrade the performance
and SAFETY of your Machine.
For the nearest
SNAPPER Dealer, check the yellow pages under the
heading, LAWN MOWERS. For Engine Parts and
Service, look for the Engine Manufacturer’s Dealers
under the heading, ENGINES - GASOLINE.
HIGH SPEED
0 - 6 MPH
MEDIUM SPEED
0 - 4.2 MPH
SWIVEL
LOW SPEED
0 - 2.5 MPH
TRACTION
CONTROL
ROD
WARNING
SELF LOCK
COTTER PIN
DO NOT attempt any maintenance adjustments or
service with the engine running. Stop engine. Stop
blades. Latch Traction Levers in neutral. Move
Speed Control lever to SLOW. Remove key.
Disconnect spark plug wires from spark plugs and
secure wires away from spark plugs. Engine and
components are HOT. Avoid serious burns, allow all
parts to cool before working on machine.
TRACTION CONTROL ARM
FIGURE 4.5
NOTE: All Mid-Size Machines should be tilted with
Engine Carburetor side UP.
WARNING
The SNAPPER Pro Hydro Mowers have a Transport
Speed, which allows the machine to travel forward at a
speed of 6 MPH - it is NOT to be used while walking! Use
the Transport Speed ONLY when the machine is
equipped with a Riding Sulky! DO NOT make sharp
turns at high speed! The machine has “zero-turn”
capability; DO NOT use “zero-turn” at high speed.
During initial training time with machine, it is advised
that the Operator(s) practice with the Speed Control
Lever in the slowest travel speed position and Blade
Engagement Switch in the OFF position
4.3 MACHINE SPEED CONTROL RANGES
4.3.1. TO CHANGE MACHINE SPEED RANGES
1. Move Traction Control Levers and Neutral Latch
Lever into neutral.
2. Turn Key to STOP position and remove Key from
Ignition Switch.
3. Remove Hairpins from Swivels on Traction Control
Arms on Right and Left Hand side. See Figure 4.5.
4. Push Swivel out from each Traction Control Arm and
insert Swivel into newly selected speed range. (No
adjustment should be necessary to maintain neutral
setting after changing speed range.) If machine does
require adjustment Refer to Section “TRACTION
CONTROL NEUTRAL ADJUSTMENT”.
5. Start the Engine and resume using the Machine at
the newly selected speed range.
23
SECTION 4 - SERVICE
4.4 TRACTION
CONTROL
ADJUSTMENT
9. Wheel rotation will be stopped by adjusting the
eccentric on the pump arms on the right and left
pumps. Turning the eccentric slightly clockwise or
counter-clockwise will synchronize the pump and
traction controls for Neutral. See Figure 3.11. To
turn the eccentric, first loosen the bolt in the pump
control arm and the nut and bolt fastening the
eccentric to the pump control arm. With both
Traction Levers latched in Neutral, start engine.
Turn eccentric slightly clockwise or counterclockwise until wheels stop rotating. Tighten control
arm bolts and eccentric nut and bolts. Check for
wheel rotation. Repeat eccentric adjustment if
needed.
NEUTRAL
The Traction Control Neutral Adjustment
procedure is sensitive. The following steps and
WARNINGS must be followed very carefully.
WARNING
Several steps of the Neutral Adjustment procedure
require that the engine be started. Exercise extreme
CAUTION while making adjustments while engine is
running to avoid HOT engine components, rotating
components, run over or entrapment types of
injuries.
IMPORTANT: To complete this procedure a steel
rod 5/16” diameter and 20” long will be required.
DO NOT begin this procedure without it.
1. Place machine on smooth level surface. Stop
engine and remove keys.
2. Raise rear of machine just high enough for rear
wheels to clear ground. Block machine securely.
3. Latch both Traction Levers in Neutral.
4. Insert rod (5/16” diameter x 20” long) through
alignment holes in the left and right traction control
shift lever arms and the tank support bracket. The
rod should pass through both the left and right
traction control shift lever arms. See Figure 3.9.
5. Disconnect left & right swivels from the left and
right traction control arms and loosen swivel jam
nuts. See Figure 3.8.
6. Adjust swivel (Clockwise or Counter-Clockwise)
until the pin on the swivel aligns perfectly with the
hole in the traction control arm. The Traction Lever
must be held in the Neutral Latch position when
making this adjustment. Complete this adjustment
for both left and right swivels. Carefully reattach
and secure swivels to control arms. Tighten swivel
jam nuts. IMPORTANT: Both the left and the right
swivels must be installed in the same traction
control arm speed range setting. Mid range
(middle hole) setting is recommended.
7. Remove steel rod from shift lever arms.
8. Check to insure machine is securely blocked.
Start engine. Drive wheels should not rotate with
both Traction Levers latched in the Neutral
position. If no rotation is observed the adjustment
procedure is complete. If wheels do rotate proceed
to next step. STOP ENGINE.
24
SECTION 5 - MOWER ATTACHMENT SERVICE
5.1 CUTTER DECK BELT REMOVAL &
INSTALLATION
RIGHT
HAND
SPINDLE
PULLEY
5.1.1. 36” CUTTING DECK BELT REMOVAL
1. Move Mower onto a smooth, level surface. Turn
Ignition Key to STOP position, remove Key,
disconnect Spark Plug Wire and secure Wire away
from Spark Plug.
2. Remove Mower deck belt cover.
3. Remove Idler Tension Spring and swing Idler away
from belt.
4. Remove old belt from Spindle Pulleys and Electric
Clutch Pulley. See Figure 5.1.
ELECTRIC CLUTCH
REMOVE
BELT
ELECTRIC
CLUTCH
REMOVE BELT
RIGHT HAND
IDLER TENSION
SPRING
IDLER
PULLEY
LEFT
HAND
SPINDLE
PULLEY
IDLER
PULLEY
CENTER SPINDLE
PULLEY
FIGURE 5.2
2. Route new belt around right and left hand Spindle
Pulleys as shown in Figure 5.2.
3. Move Idler against belt and reattach right hand Idler
Tension Spring.
IDLER
TENSION
SPRING
5.1.5. SPINDLE
TO
SPINDLE
DECK
BELT
REMOVAL - 48”, 52”, & 61” CUTTING DECKS
1. Move Mower onto a smooth, level surface. Turn
Ignition Key to STOP position, remove Key,
disconnect Spark Plug Wire and secure Wire away
from Spark Plug.
2. Remove Mower deck belt cover.
3. Remove right hand Idler Spring and swing Idler
away from belt.
4. Remove old belt from center and right hand Spindle
Pulleys. See Figure 5.2.
5. Remove Left hand Idler Spring and swing Idler
away from belt.
6. Remove old belt from left hand Spindle Pulley and
center Pulley bottom groove. See Figure 5.3.
SPINDLE
PULLEYS
FIGURE 5.1
5.1.2. 36” CUTTING DECK BELT INSTALLATION
1. Route new belt to Electric Clutch Pulley.
2. Route new belt around Spindle Pulleys as shown in
Figure 5.1.
3. Move Idler against belt and reattach Idler Tension
Spring.
IDLER
PULLEY
5.1.3.
48”, 52”, & 61” CUTTING DECK BELT
REMOVAL
1. Move Mower onto a smooth, level surface. Turn
Ignition Key to STOP position, remove Key,
disconnect Spark Plug Wire and secure Wire away
from Spark Plug.
2. Remove Mower deck belt cover.
3. Remove right hand Idler Tension Spring and swing
Idler away from belt. See Figure 5.2.
LEFT SPINDLE
PULLEY
REMOVE
BELT
SPINDLE
PULLEY
(CENTER)
5.1.4.
48”, 52”, & 61” CUTTING DECK
BELT INSTALLATION
1. Route new belt for 48” cutting deck, for 52” cutting
deck, and for 61” cutting decks, to Electric Clutch
Pulley.
LEFT
HAND
IDLER
TENSION
SPRING
FIGURE 5.3
25
SECTION 5 - MOWER ATTACHMENT SERVICE
5.1.5. SPINDLE
TO
SPINDLE
DECK
BELT
INSTALLATION - 48”, 52”, & 61” CUTTING DECKS
1. Route new belt for 48” cutting deck, 52” cutting deck,
and 61” cutting decks, onto bottom groove of center
Spindle Pulley and left hand Spindle Pulley. See
Figure 5.3.
2. Install cutting deck belt according to CUTTING
DECK BELT INSTALLATION.
4. Refer to the STANDARD BLADE REPLACEMENT
chart above for correct SNAPPER replacement
Blades.
5. Should Blades be in acceptable condition, sharpen
at 22 to 28 degrees. See Figure 5.5.
5.2 CUTTING BLADE SERVICE
BLADE
HEAVY END
OF BLADE
22º to 28º
Check Blades at frequent intervals to insure they are
securely tightened and in good condition. Replace if
chipped, bent, or notched. See Figure 5.4 for Blade
wear limits.
BLADE TIP
1/64”
NEW BLADE
ORIGINAL CUTTING EDGE
FIGURE 5.5
NOTE: When sharpening Blades, leave 1/64” untouched.
Razor sharp Blades will chip easily and dull quickly.
Commercial balancers are available and should be used in
accordance with the manufacturer’s instructions.
WEAR LIMIT
(NOTCH STARTS)
6. Balance each Blade after sharpening by grinding
metal from the heavy end of the blade.
7. Place the Blade mounting bolt into Blade and place
Blade spacers over bolt. Make certain each blade is
installed with the same amount of spacers removed.
8. Install Blade mounting bolt with spacers and blade
into spindle.
9. Install an equal amount of Blade spacers onto each
Blade mounting bolt.
10. Install the Blade mounting nut on each Blade
mounting bolt. See Figure 5.6.
11. Torque each Blade mounting bolt and nut to 70 - 80
foot-pounds.
DANGEROUS
CONDITION!
DO NOT USE ON MOWER!
REPLACE WITH NEW
FIGURE 5.4
1. Use the following chart for ordering replacement
Blades for the 36”, 48”, 52” and 61” cutting decks.
STANDARD BLADE REPLACEMENT
36” DECK
48” DECK
52” DECK
61” DECK
2-9246
2-9247
2-9246
2-9251
AIR LIFT
HEIGHT
ADJUSTING
SPACERS
5.2.1. BLADE REMOVAL AND SHARPENING
1. Move the Mower to a smooth, level surface, turn the
Ignition Key to STOP position, remove Key,
disconnect Spark Plug Wire from Spark Plug and
secure Wire away from Plug.
2. Remove Blades.
BLADE
BEVELED
WASHER
WARNING
Take NOTE of the number of Blade Spacers that
are under the Blade Mounting Nuts and on the
Spindle side of the Blade.
MOUNTING
BOLT
TIGHTEN TO 70-80
FOOT POUNDS
3. Clean and inspect each Blade for excessive wear
and damage. See Figure 5.4 for Blade wear limits.
FIGURE 5.6
26
SECTION 5 - MOWER ATTACHMENT SERVICE
5.3 MOWER SPINDLES (Field Serviceable Spindles)
BEARING REPLACEMENT
In the event that a spindle bearing requires
replacement, the SNAPPER Field Serviceable
Spindles have been designed so that no special
tools or presses are required.
1. Remove belt. Loosen blade nut and remove.
Allow blade bolt, washer, blade and four spacers to
drop down out of the spindle housing.
See Figure 5.7.
REMOVE NUT
5. Thoroughly clean all parts removing all old
contaminated grease.
6. Install new bottom bearing first.
NOTE: The bearing is sealed/shielded on one side
only. The bottom bearing must be installed with the
sealed/shielded side DOWN.
7. Insert spindle shaft up through the bottom
bearing. Slide spacer down over spindle shaft.
8. Install new top bearing. Install the top bearing
with the seal/shield UP.
9. Slide circular retaining ring down spindle shaft
until it fully locks into groove on shaft.
10. Place spindle pulley and spacer on top of
spindle shaft.
11. Reinstall blade bolt, washer, blade and four
spacers.
12. Torque blade bolt and nut to 70 to 80 ft. lbs.
REMOVE BELT
FROM SPINDLE
REMOVE BLADE
BOLT
IMPORTANT: Spindle housing must be filled
with grease before operating mower. Failure to
fill housing will cause premature bearing failure.
FIGURE 5.7
13. Pump grease into spindle housing until grease
purges from vent on housing.
14. After the first 5 hours of operation, grease
spindle housing to insure it is full, then every 25
hours.
2. Remove spindle pulley from spindle shaft.
3. Locate circular retaining ring on spindle shaft at
top bearing. Remove retaining ring. Allow spindle
shaft to drop out of housing.
4. Top and bottom bearings are now removable.
Pull out on inner race to slide bearing from housing.
See Figure 5.8.
PULLEY
BEARING
SEAL UP
RETAINING RING
BEARING
SPINDLE
HOUSING
INNER RACE
BEARING SEAL
DOWN
BEARING
SPINDLE
SHAFT
FIGURE 5.8
27
SECTION 6 - BATTERY SERVICE & TESTING
2. A hydrometer measures the specific gravity of each
cell. The specific gravity tells the degree of charge;
generally, a specific gravity of about 1.265 to 1.280
indicates full charge. A reading of 1.230 to 1.260
indicates the battery should be charged before
testing. The chart on the next page shows the charge
level as measured by syringe float hydrometer, digital
voltmeter and five ball hydrometer.
WARNING
Shield the positive terminal with terminal cover
located on battery harness. This prevents metal from
touching the positive terminal, which could cause
sparks. Cables must be connected to battery
terminals in the proper position. RED (Positive) cable
must go to the ( + ) terminal. BLACK (Negative) cable
must go to the ( - ) terminal.
WARNING
6.1 BATTERY REMOVAL
1.
2.
3.
4.
The electrolyte (acid) produces a highly explosive
gas. Keep all sparks, flame and fire away from area
when charging battery or when handling electrolyte
or battery. Electrolyte (acid) is a highly corrosive
liquid. Wear eye protection. Wash affected areas
immediately after having eye or skin contact with
electrolyte (acid). Battery acid is corrosive. Rinse
empty acid containers with water and mutilate before
discarding. If acid is spilled on battery, bench, or
clothing, etc., Flush with clear water and neutralize
with baking soda.
Remove battery retainer.
Slide terminal cover away from positive terminal.
Observe and note cable positions on battery
Disconnect
cables
from
battery
terminals,
disconnecting BLACK (Negative) cable first, then
disconnect RED (Positive) last. Retain mounting bolts
and nuts.
6.2 BATTERY INSTALLATION
1. Position battery into battery compartment.
2. Connect cables to battery terminals. Connect RED
(Positive) cable first. Connect BLACK (Negative)
cable last.
3. Reinstall battery retainer and positive terminal cover.
6.3 BATTERY SERVICE
1. Remove battery.
2. Place battery in a well ventilated area on a level
surface.
3. Using distilled water, refill cells as required to cover
cell plates of which can also be seen through the
plastic battery case.
4. With cell caps removed, connect battery charger to
battery terminals. RED to positive (+) terminal and
BLACK to negative (-) terminal.
5. Slow charge battery at 1 amp for 10 hours. An
alternative fast charge should be no more than 2.5
amps for four hours.
6. If battery will not accept charge or is partially charged
after 10 hours of charging at 1 amp, replace with
new battery.
6.4 BATTERY TESTING
There are two types of battery tests: Unloaded and
Loaded. The unloaded test is the procedure that will be
discussed. It’s the simplest and most commonly used.
An unloaded test is made on a battery without
discharging current. To perform unloaded testing, check
charge condition using either a hydrometer or voltmeter.
1. Using a voltmeter, voltage readings appear instantly
to show the state of charge. Remember to hook the
positive lead to the battery’s positive terminal, and the
negative lead to the negative terminal.
28
SECTION 6 - BATTERY SERVICE & TESTING
WARNING
6.5 NEW BATTERY PREPARATION
DO NOT attempt to service or charge the battery
while it is installed in the machine. DO NOT use
“BOOST” chargers on the battery.
1. Remove battery from carton.
2. Place battery in a well ventilated area on a level nonconcrete surface.
3. Remove battery cell caps. Fill cells as required with
electrolyte (purchased separately) to proper level. Fill
to 3/16” above cell plates. Filling battery with
electrolyte will bring the battery to 80% charged
state.
4. With cell caps removed, connect battery charger to
battery terminals; RED to positive (+) and BLACK to
negative (-) terminal.
5. Slow charge the battery at 1 amp for 2 hours to bring
the battery to full charge.
6. After charging, check level of electrolyte and add as
needed to bring level to 3/16” above cell plates.
7. Reinstall cell caps.
8. Install battery into power unit.
9. Connect positive (+) cable (red) first, from wiring
harness to the positive terminal (+) on battery using
bolt and nut provided in hardware bag. Connect
negative (-) cable (black) last, to negative
terminal (-) on battery using bolt and nut. Apply a
small amount of grease over terminals to prevent
corrosion.
10. Install battery retainer and positive terminal cover.
IMPORTANT: 3/16” above cell plates is the recommended
level. DO NOT place anything in battery other than
specified electrolyte.
WARNING
DO NOT OVERFILL!
WARNING
Shield the positive terminal with terminal cover
located on battery harness. This prevents metal
from touching the positive terminal, which could
cause sparks. Cables must be connected to battery
terminals in the proper position. RED (Positive)
cable must go to the ( + ) terminal. BLACK (Negative)
cable must go to the ( - ) terminal.
Battery Condition Chart
State of Charge
100% Charged w/ Sulfate Stop
100% Charged
75% Charged
50% Charged
25% Charged
0% Charged
Syringe Hydrometer
1.280
1.265
1.210
1.160
1.120
Less than 1.100
29
Digital Voltmeter
12.80v
12.60v
12.40v
12.10v
11.90v
Less than 11.80v
Five Ball Hydrometer
Five Balls Floating
Four Balls Floating
Three Balls Floating
Two Balls Floating
One Ball Floating
Zero Balls Floating
2 YEAR LIMITED WARRANTY
For two (2) years from purchase date for the original purchaser's use, SNAPPER, through any authorized
SNAPPER dealer will replace, free of charge (except for taxes where applicable), any part or parts found upon
examination by the factory at McDonough, Georgia, to be defective in material or workmanship or both.
®
SNAPPER FIELD SERVICEABLE SPINDLES and their components used on SNAPPER PRO Mid Size walks
®
and SNAPPERZRIDER ride on commercial equipment have a three (3) year limited warranty against defects
in material or workmanship or both.
All transportation costs incurred by the purchaser in submitting material to an authorized SNAPPER dealer for
replacement under this warranty must be paid by the purchaser.
This warranty does not apply to engines and their components, and batteries, as these items are warranted
separately. This warranty does not apply to parts that have been damaged by accident, alteration, abuse,
improper lubrication, normal wear, or other cause beyond the control of SNAPPER. This warranty does not
cover any machine or component that has been altered or modified, changing safety, performance, or durability.
Batteries have a one (1) year prorated warranty period with free replacement if required during the first ninety
(90) days from the original purchase date. SNAPPER will not be responsible for any installation cost incurred.
The battery warranty only covers original equipment batteries and does not cover damage to the battery or
machine caused by neglect or abuse, destruction by fire, explosion, freezing, overcharging, improper
maintenance, or use of improper electrolyte.
There is no other express warranty.
DISCLAIMER OF WARRANTY
Implied warranties, including those of merchantability and fitness for a particular purpose, are limited to
two (2) years from purchase date for the original purchaser's use, and up to the extent permitted by law
and all implied warranties are excluded. This is the exclusive remedy. Liabilities for consequential
damages, under any and all warranties are excluded.
Some states do not allow limitations on how long an implied warranty lasts, or do not allow the
exclusion or limitation of incidental or consequential damages, so the above limitation or exclusion may
not apply to you.
This warranty gives you specific legal rights, and you may also have other rights which vary from state to state.
WARNING: THE USE OF REPLACEMENT PARTS OTHER THAN GENUINE SNAPPER PARTS MAY
IMPAIR THE SAFETY OF SNAPPER PRODUCTS AND WILL VOID ANY LIABILITY AND WARRANTY BY
SNAPPER ASSOCIATED WITH THE USE OF SUCH PARTS.
IMPORTANT: Please fill out the attached SNAPPER Product Registration Card immediately and mail to:
Snapper’s Product Registration Center, P.O. Box 1379, McDonough, Georgia. 30253
30
PRIMARY MAINTENANCE
31
PRIMARY MAINTENANCE
32
PRIMARY MAINTENANCE
33
PRIMARY MAINTENANCE
34
SERVICE NOTES
______________________________________________________________________________
______________________________________________________________________________
______________________________________________________________________________
______________________________________________________________________________
______________________________________________________________________________
______________________________________________________________________________
______________________________________________________________________________
______________________________________________________________________________
______________________________________________________________________________
______________________________________________________________________________
______________________________________________________________________________
______________________________________________________________________________
______________________________________________________________________________
______________________________________________________________________________
______________________________________________________________________________
______________________________________________________________________________
______________________________________________________________________________
______________________________________________________________________________
______________________________________________________________________________
______________________________________________________________________________
______________________________________________________________________________
______________________________________________________________________________
______________________________________________________________________________
______________________________________________________________________________
______________________________________________________________________________
______________________________________________________________________________
______________________________________________________________________________
______________________________________________________________________________
______________________________________________________________________________
______________________________________________________________________________
______________________________________________________________________________
______________________________________________________________________________
______________________________________________________________________________
______________________________________________________________________________
______________________________________________________________________________
______________________________________________________________________________
______________________________________________________________________________
______________________________________________________________________________
______________________________________________________________________________
______________________________________________________________________________
______________________________________________________________________________
______________________________________________________________________________
______________________________________________________________________________
______________________________________________________________________________
______________________________________________________________________________
______________________________________________________________________________
______________________________________________________________________________
______________________________________________________________________________
35
SERVICE NOTES
______________________________________________________________________________
______________________________________________________________________________
______________________________________________________________________________
______________________________________________________________________________
______________________________________________________________________________
______________________________________________________________________________
______________________________________________________________________________
______________________________________________________________________________
______________________________________________________________________________
______________________________________________________________________________
______________________________________________________________________________
______________________________________________________________________________
______________________________________________________________________________
______________________________________________________________________________
______________________________________________________________________________
______________________________________________________________________________
______________________________________________________________________________
______________________________________________________________________________
______________________________________________________________________________
______________________________________________________________________________
______________________________________________________________________________
______________________________________________________________________________
______________________________________________________________________________
______________________________________________________________________________
______________________________________________________________________________
______________________________________________________________________________
______________________________________________________________________________
______________________________________________________________________________
______________________________________________________________________________
______________________________________________________________________________
______________________________________________________________________________
______________________________________________________________________________
______________________________________________________________________________
______________________________________________________________________________
______________________________________________________________________________
______________________________________________________________________________
______________________________________________________________________________
______________________________________________________________________________
______________________________________________________________________________
______________________________________________________________________________
______________________________________________________________________________
______________________________________________________________________________
______________________________________________________________________________
______________________________________________________________________________
______________________________________________________________________________
______________________________________________________________________________
______________________________________________________________________________
______________________________________________________________________________
36
Safety Instructions & Operator’s Manual for
PRO HYDRO MID-SIZE WALK
BEHIND MOWERS SERIES 1
IMPORTANT
Snapper products are built using engines that meet or exceed all applicable emissions requirements on the
date manufactured. The labels on those engines contain very important emissions information and critical
safety warnings. Read, Understand, and Follow all warnings and instructions in this manual, the engine
manual, and on the machine, engine and attachments. If you have any questions about your Snapper product,
contact your local authorized Snapper dealer or contact Snapper Customer Service at Snapper, McDonough,
GA. 30253. Phone: (1-800-935-2967).
WARNING
BATTERY POSTS, TERMINALS AND RELATED ACCESSORIES CONTAIN LEAD AND LEAD COMPOUNDS,
CHEMICALS KNOWN TO THE STATE OF CALIFORNIA TO CAUSE CANCER AND BIRTH DEFECTS OR OTHER
REPRODUCTIVE HARM. WASH HANDS AFTER HANDLING.
WARNING
ENGINE EXHAUST, SOME OF ITS CONSTITUENTS, AND CERTAIN VEHICLE COMPONENTS CONTAIN OR
EMIT CHEMICALS KNOWN TO THE STATE OF CALIFORNIA TO CAUSE CANCER OR OTHER
REPRODUCTIVE HARM.
COPYRIGHT © 2000
SNAPPER INC.
ALL RIGHTS RESERVED
MANUAL No. 7-3682 (I.R. 5/16/00)
37