1
SECTION 3.
CONFIGURATION
PRINTER DIP SWITCH CONFIGURATION
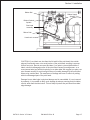
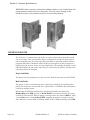
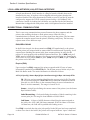
DIP Switch Panels
There are two DIP switches (DSW2 and DSW3) located inside the cover. These
switches can be used to set:
• Thermal transfer or direct thermal mode
• Label sensor enable/disable
• Head check mode
• Hex dump mode
• Single Job or Multi-Job Receive buffer
• Operation mode
In addition, a third DIP switch is located on the RS232 Serial Adapter module and is
used to set the RS232C transmit/receive parameters
Each switch is an eight section toggle switch. The ON position is always to the top. To
set the switches, first power the unit Off, then position the DIP switches. Finally, after
placing the switches in the desired positions, power the printer back on. The switch
settings are read by the printer electronics during the power up sequence. They will
not become effective until the power is cycled.
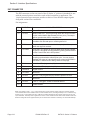
RS232 Transmit/Receive Setting (located on RS232 I/F Module)
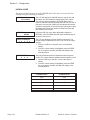
Data Bit Selection (DSW1-1). This switch sets the printer to receive either 7 or 8
bit data bits for each byte transmitted.
DSW1
DSW1-1
SETTING
Off
8 data bits
On
7 data bits
ON
OFF
1
2
3
4
5
6
7
8
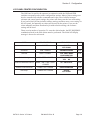
Parity Selection (DSW1-2, DSW1-3). These switches select the type of parity
used for error detection.
DSW1-2
DSW1-3
SETTING
Off
Off
No Parity
Off
On
Even
On
Off
Odd
On
On
Not Used
SATO CL Series “e” Printers
PN 9001074 Rev. B
DSW1
ON
OFF
1
2
3
4
5
6
7
8
Page 3-1