1
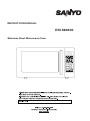
INSTRUCTION MANUAL
EM-S8600S
Stainless Steel Microwave Oven
PRECAUTIONS TO AVOID
POSSIBLE EXPOSURE TO
EXCESSIVE MICROWAVE
ENERGY
(a) Do not attempt to operate this oven with the door open since open-door operation can result in harmful exposure to microwave energy. It is important not to defeat or tamper with the safety interlocks.
(b) Do not place any object between the oven front face and the door or allow soil or cleaner residue to accumulate on sealing surfaces.
(c) Do not operate the oven if it is damaged. It is particularly important that the oven door close properly and that there is no damage to the:
(1) DOOR (bent)
(2) HINGES AND LATCHES (broken or loosened)
(3) DOOR SEALS AND SEALING SURFACES
(d) The oven should not be adjusted or repaired by anyone except properly qualified service personnel.
SPECIFICATIONS
Model:
EM-S8600S
Power Source:
AC 120V, 60Hz
Power Consumption:
1500 W Maximum Output:
1000 W
Oven Capacity:
1.0 Cu. Ft.
Turntable Diameter:
31.4 cm (12 3/8”)
Outside Dimensions: (w x h x d)
51.7 x 14.1 x 30 cm (20 3/16 x 17 3/8 x 12”)
Weight:
Approx. 20 kg (44.1 lb.)
Specifications subject to change without notice.
-2-
Thank you for choosing SANYO. Please read all instructions carefully to obtain maximum
benefit of your product. Questions? Our toll free number is 1-800-263-2244, 9am - 5pm,
Monday to Friday (Eastern time).
TABLE OF CONTENTS
SAFETY
Proper and Safe Use of Your Oven........................................................4
Important Safety Instructions .................................................................5
Grounding Instructions ...........................................................................6
Utensils ..................................................................................................6
SETTING UP YOUR OVEN
Names of Oven Parts and Accessories..................................................8
Turntable Installation .............................................................................8
Installation .............................................................................................9
OPERATION
Control Panel and Features .................................................................10
Setting Clock ........................................................................................11
Child Lock-Out .....................................................................................11
Kitchen Timer .......................................................................................12
Time Cooking .......................................................................................12
+30 Sec ...............................................................................................12
Memory Cooking .................................................................................13
Power Level Setting Guide ..................................................................13
Direct Access Cooking ....................................................................14-16
Weight Defrost .....................................................................................16
Time Defrost ........................................................................................16
Defrosting Chart ..................................................................................17
COOKING GUIDE
Cooking Principles and Techniques .....................................................18
MAINTENANCE
Troubleshooting ...................................................................................19
Questions and Answers .......................................................................20
Cleaning ...............................................................................................20
WARRANTY ..........................................................................................................21
QUICK REFERENCE ............................................................................................22
-3-
SAFETY
PROPER AND SAFE USE OF YOUR OVEN
• The oven must be on a leveled surface.
• The turntable and turntable roller rest must be in the oven during cooking.
• Place the cookware gently on the turntable and handle it carefully to avoid possible breakage.
•
Do not heat baby bottles or baby food in the microwave oven. Uneven heating may occur and could cause physical injury.
• Do not heat narrow-necked containers, such as syrup bottles.
• Incorrect use of browning dish may cause the turntable to break.
• Do not attempt to deep-fry in your microwave oven.
• Use carefully when cooking food in the microwave oven to avoid burning due to excessive cooking.
•
• Use only the specified bag size when using Direct Access Popcorn.
•
Failure to maintain the oven in a clean condition could lead to deterioration that
could adversely affect the life of the appliance and possibly result in a hazardous situation.
•
The oven has several built-in safety switches to ensure that the power remains off when the door is open. Do not tamper with these switches.
•
Do not operate the microwave oven empty. Operating the oven with no food or food that is extremely low in moisture
can cause fire, charring or sparking.
Do not do home canning in this microwave oven as it is impossible to
be sure all contents of the jar have reached boiling temperature.
• Do not use this microwave oven for commercial purposes. This microwave oven is made for household use only.
•
• Do not cook bacon directly on the turntable. Excessive local heating of the turntable may cause it to break.
• Do not remove feet from the bottom of the oven.
-4-
To prevent eruptive boiling of hot liquids and beverages or scalding yourself, stir liquid before placing the container in the
oven and again halfway through cooking
time. Let stand in the oven for a short time and stir again before removing the container.
IMPORTANT SAFETY INSTRUCTIONS
When using electrical appliances, basic safety precautions should be followed,
including the following:
WARNING - To reduce the risk of burns, electric shock, fire, injury to persons or exposure to excessive microwave energy:
1. Read all instructions before using the appliance.
2.
Read and follow the specific “PRECAUTIONS TO AVOID POSSIBLE EXPOSURE TO EXCESSIVE MICROWAVE ENERGY” on page 2.
3. As with most cooking appliances, close supervision is necessary to reduce the risk of a fire in the oven cavity.
If materials inside the oven ignite:
• Keep the oven door closed
• Turn the oven off, and
• Disconnect the power cord or shut off power at the fuse or circuit breaker panel.
7.
Use this appliance only for its intended use as described in the manual. Do not use corrosive chemicals or vapors in this appliance. This oven is specifically designed to heat or cook food. It is not designed for industrial or laboratory use.
8. As with any appliance, close supervision is
necessary when used by children.
9.
Do not operate this oven if it has a damaged cord or plug, if it is not working
properly or if it has been damaged or dropped.
10.This appliance should be serviced only by
qualified service technicians. Contact the nearest authorized service facility for examination, repair or adjustment.
Keep in mind the following rules at all
times:
11.Do not cover or block any vents on the oven.
a.
Do not overcook food. Carefully attend the
appliance when paper, plastic, or other combustible materials are placed inside the oven to facilitate cooking.
12.Do not store or use this appliance outdoors.
b.
Do not use the oven cavity for storage purposes. Do not store combustible items
such as bread, cookies, paper products,
etc. inside the oven. If lightning strikes the power line, the oven may turn on by itself.
c. Remove wire twist-ties and metal handles from paper or plastic containers/bags before placing them in the oven.
4.
This oven must be grounded. Connect only to properly grounded outlet. See “GROUNDING INSTRUCTIONS” on page 6.
5. Install or locate this oven only in accordance with the provided installation instructions.
6.
Some products such as whole eggs, water with oil or fat, sealed containers and closed glass jars may explode and therefore should not be heated in this oven.
13.Do not use this oven near water, near a kitchen sink, in a wet basement or near a swimming pool, or similar locations.
14.Do not immerse cord or plug in water.
15.Keep cord away from heated surfaces.
16.Do not let cord hang over edge of table or counter.
17.When cleaning door and oven surfaces that meet when door is closed, use only mild, non abrasive soaps or detergents applied with a sponge or soft cloth. (See “Cleaning” instructions on page 20.)
18.Liquids, such as water, coffee, or tea are able to be overheated beyond the boiling point without appearing to be boiling.
Visible bubbling or boiling when the
container is removed from the microwave oven is not always present. This could result in very hot liquids suddenly boiling over when the container is disturbed or a spoon or other utensil is inserted into the liquid.
SAVE THESE INSTRUCTIONS
-5-
GROUNDING INSTRUCTIONS
To reduce the risk of injury to persons:
DANGER
Electric Shock Hazard
• Touching some of the internal component scan cause
serious personal injury or
death. Do not disassemble this appliance.
WARNING
Electric Shock Hazard
• Improper use of the
grounding can result in
electric shock. Do not plug into an outlet until appliance is properly installed and
grounded.
Three-pronged (grounding)
plug
Properly polarized and
grounded outlet
This appliance must be grounded. In the event of an electrical short circuit, grounding reduces the risk of electric
shock by providing an escape wire for the electric current.
This appliance is equipped with a cord having a grounding
wire with a grounding plug. The plug must be plugged into
an outlet that is properly installed and grounded. Consult
a qualified electrician or service person if the grounding
instructions are not completely understood or if doubt
exists as to whether the appliance is properly grounded. If
it is necessary to use an extension cord, use only a 3-wire
extension cord that has a 3-pronged grounding plug, and
a 3-slot receptacle that will accept the plug on the appliance.
•
A short power-supply cord is provided to reduce the risks resulting from becoming entangled in or tripping over a longer cord.
•
Longer cord sets or extension cords maybe used if care is exercised in their use.
•
If a long cord or extension cord is used:
1)The marked electrical rating of the cord set or extension cord should be at least as great as the electrical rating of the appliance.
2)The extension cord must be a grounding-type 3-wire cord, and
3)The longer cord should be arranged so that it will not drape over the counter top or tabletop where it can be pulled on by children or tripped over unintentionally.
UTENSILS
See following page for further instructions “Materials you
can use in microwave oven or to be avoided in Personal Injury Hazard
microwave oven.”
• Tightly-closed utensils could Utensil Test:
explode. Closed containers
1. Fill a microwave-safe container with 1 cup of cold
should be opened and water (250 ml) along with the utensil in question.
plastic pouches pierced before cooking.
2. Cook on maximum power (PL 10) for 1 minute.
CAUTION
3. Carefully feel the utensil. If the empty utensil is warm, do not use it for microwave cooking. Do not exceed 1 minute testing time.
CAUTION:
1. Do not use plastic containers for testing.
2. Some containers and dishware may be warm (or hot) in only one area. Do not use a container that becomes warm anywhere.
-6-
Materials you can use in microwave oven
Utensils
Aluminum foil
Browning dish
Dinnerware
Glass jars
Glassware
Oven cooking
bags
Paper plates
and cups
Paper towels
Parchment
paper
Plastic
Plastic wrap
Thermometers
Wax paper
Remarks
Shielding only. Small smooth pieces can be used to cover thin parts of meat
or poultry to prevent over cooking. Arcing can occur if foil is too close to oven
walls. The foil should be at least 1 inch (2.5 cm) away from oven walls.
Follow manufacturer’s instructions. The bottom of browning dish must be at
least 3/16 inch (5 mm) above the turntable. Incorrect usage may cause the
turntable to break.
Microwave-safe only. Follow manufacturer’s instructions. Do not use cracked or
chipped dishes.
Always remove lid. Use only to heat food until just warm. Most glass jars are not
heat resistant and may break.
Heat-resistant oven glassware only. Make sure there is no metallic trim. Do not
use cracked or chipped dishes.
Follow manufacturer’s instructions. Do not close with metal tie. Make slits to
allow steam to escape.
Use for short-term cooking/warming only. Do not leave oven
unattended while cooking.
Use to cover food for reheating and absorbing fat. Use with supervision for
short-term cooking only. Do not use recycled paper towels, they may contain
metal and could ignite.
Use as a cover to prevent splattering or a wrap for steaming.
Follow the manufacturer’s instructions. Only use items labeled “Microwave
Safe”. Some plastic containers soften as the food inside gets hot. “Boiling bags”
and tightly closed plastic bags should be slit, pierced or vented as
directed by package.
Microwave-safe only. Use to cover food during cooking to retain moisture. Do
not allow plastic wrap to touch food.
Microwave-safe only (meat and candy thermometers).
Use as a cover to prevent splattering and to retain moisture.
Materials to be avoided in microwave oven
Utensils
Aluminum tray
Remarks
May cause arcing. Transfer food into microwave-safe dish.
Food carton with May cause arcing. Transfer food into microwave-safe dish.
metal handle
Metal or metaltrimmed utensils
Metal twist ties
Paper bags
Plastic foam
cups
Wood
Metal shields the food from microwave energy. Metal trim may cause arcing.
May cause arcing and could cause a fire in the oven.
May cause a fire in the oven.
Plastic foam may melt or contaminate the liquid inside when exposed to
high temperature.
Wood will dry out when used in the microwave oven and may split or crack.
-7-
SET UP
NAMES OF OVEN PARTS AND ACCESSORIES
Remove the oven and all materials from the carton and oven cavity. Your oven
comes with the following accessories:
1 Turntable
1 Turntable roller rest
1 Instruction Manual
Interior
Control panel
Door
light
Cabinet
Door Safety Locks
Shuts off oven power if door is
opened during operation.
Door Handle
• Pull handle gently to open door.
• When you open the door during cooking process, the cooking stops but the program will not be canceled. Touch START to resume cooking.
TURNTABLE INSTALLATION
•
•
•
•
Turntable
Roller rest
Hub (underside)
Receptacle
1. Remove any tape covering receptacle.
2 Place the roller rest on the cavity bottom.
3. Place the turntable on top of the roller rest as shown in the diagram. Make sure the turntable hub is securely locked in
the receptacle.
-8-
Never place the turntable upside down. The turntable should never be restricted.
Both turntable and roller rest must always be used during cooking.
All food and containers of food are always placed on the turntable for cooking.
If turntable or roller rest cracks or breaks, contact your nearest
authorized service center for more information regarding replacement.
INSTALLATION
Remove all packing material and accessories. Examine the oven for any damage such
as dents or broken door. Do not install if oven is damaged. Do not remove the light brown
Mica cover that is attached inside the oven cavity to protect the magnetron.
NOTE: This unit is not designed for 50 Hz or any circuit other than a 120-volt/ 60-Hz AC
circuit. This oven is designed for counter top installation.
Counter top Installation
1. Select a level surface that provides enough open space for the in take and/or outlet vents.
3"
3"
3"
OPEN
A minimum clearance of 3 inches
is required between the oven and
any adjacent wall. One side must
be open.
• Leave a minimum clearance of 3 inches above the oven.
• Do not remove the legs from the bottom of the oven.
• Blocking the intake and/or outlet openings can damage the oven.
• Place the oven as far away from radios and TV’s as possible. Operation of microwave oven may cause interference to your radio or TV.
• If the cabinet is covered with a protective film, remove the film.
2. Plug your oven into a standard
120-volt / 60-Hz household outlet.
Be sure the electrical circuit is at least 15 amperes and that your microwave oven is the only appliance on the circuit.
WARNING: Do not install oven over a range
cook top or other heat-producing appliance.
If installed near or over a heat source, the
oven could be damaged and the warranty
would be void.
-9-
OPERATION
CONTROL PANEL AND FEATURES
(1)
DISPLAY WINDOW
Shows cooking time in minutes and seconds during cooking. Shows clock time when oven is not in use.
(2) POWER
Use to set power levels other than 100%
(PL 10).
(3) DIRECT ACCESS KEYPADS
Pre programmed to cook or reheat popular foods with minimal number of steps.
(4) KITCHEN TIMER
Use as a timer.
(5) MEMORY
Use to save favorite cooking programs.
(6) WEIGHT DEFROST Pre programmed to defrost by weight.
(7) CLOCK
Use to set the clock.
(8) TIME DEFROST
Use to defrost by time.
(9) NUMBER KEYPADS
Use to enter time or weight and
express cook.
(10) AM/PM
Use to choose AM or PM when set clock.
(11) STOP/CLEAR
Press once: Stops oven
Press twice: Stops oven and
clears all prior settings.
(12) START/+30 SEC.
Press START/+30SEC. after entry to start oven.
Use to add 30 seconds to TIME COOKING, DIRECT ACCESS and TIME DEFROST programs.
The oven will beep 5 times to
indicate the completion of a
program.
-10-
SETTING CLOCK
To set the correct time of day, follow the steps below. Example: To set 3:15:
Step
Procedure
Keypad
1
Press CLOCK.
lights and a tone will sound. The display will
show “00:00” with the first “0” flashing.
CLOCK
2
Press 0, 3, 1 and 5 to enter time of day. You must press 4 numbers
to set the clock (2 for the hour and 2 for minutes).
When entering hours 1-9, a zero must be entered first.
03:15
3
Press AM/PM to choose AM or PM.
AM/PM
4
Press CLOCK.
turns off and the display will show the present
time. The colon will remain flashing
CLOCK
Note :• If the clock (or display) shows any abnormality, unplug the oven from the AC
outlet. Plug it in again and then reset the clock.
• When power resumes after a power interruption, reset the clock following the
instructions above.
• The display will show “0:00” if the clock is not set.
• If the clock is not set within 1 minute of pressing “CLOCK” or STOP/CLEAR is pressed, the display will return to “0:00”.
CHILD LOCK-OUT
The oven has a safety feature which prevents use by children. The feature locks the operation of the oven until canceled.
To set:
Step
1
Procedure
Press and hold STOP/CLEAR for 3 seconds. A tone will sound and the
lights. The display will show
.
Keypad
STOP/
CLEAR
To cancel:
Step
1
Procedure
Press and hold STOP/CLEAR for 3 seconds. A tone will sound and the
turns off.
Keypad
STOP/
CLEAR
STOPPING THE OVEN WHILE IN OPERATION
1. You can stop the oven by pressing STOP/CLEAR once or by opening the door.
2. You can resume cooking by closing the door and pressing START.
3. Press STOP/CLEAR twice to stop the oven and clear all settings.
-11-
KITCHEN TIMER
To set kitchen timer for 2 minutes:
Step
Procedure
Keypad
1
Press KITCHEN TIMER.
lights and a tone will sound. The display will show “ 00:00” with the first “0” flashing.
KITCHEN TIMER
2
Enter desired time. You must press 4 numbers to set the timer (2 for
the minutes and 2 for the seconds).
When entering 1-9 minutes, a zero must be entered first.
02:00
3
Press START/+30SEC. lights and flashes. The display will show
the time remaining.
START/+30SEC.
Note: • Five beeps indicate the KITCHEN TIMER is finished.
• Press STOP/CLEAR to cancel KITCHEN TIMER.
•The maximum time that can be set is 99 minutes 99 seconds.
TIME COOKING
This basic microwave cooking method allows you to cook food for a desired time. In addition
to 100% (PL 10) power level, you can select different microwave power from 9 levels, 1-9
(10-90% of total power level).
Example: To cook at 80% power level for 20 minutes:
Step
Procedure
Keypad
1
Enter a cooking time in minutes and seconds. Enter 2, 0, 0,and 0.
20:00
2
Press POWER 1-10 times.
indicator lights.
High power symbol
lights when 8-10 power
levels are entered.
%
POWER
100 %
90 %
80 %
70 %
60 %
50 %
40 %
30 %
20 %
10 %
(Press POWER
three times)
Low power symbol
lights when 1-7 power
levels are entered.
3
Press
once
twice
3 times
4 times
5 times
6 times
7 times
8 times
9 times
10 times
Power
Level
PL10
PL9
PL8
PL7
PL6
PL5
PL4
PL3
PL2
PL1
Press START/+30SEC.
+ or will flash while cooking.
(PL 8 appears in
the display)
START/+30SEC.
Nota • The maximum time that can be set is 99 minutes 99 seconds.
•If no power is entered, the power level will always be 100% (PL10).
+30 SEC.
This feature provides 2 functions :
• You may quickly start TIME COOKING by pressing START/+30 SEC. The maximum time that can be set is 99 minutes 59 seconds.
• You can add extra time while using TIME COOKING, DIRECT ACCESS and TIME
DEFROST programs. Press START/+30 SEC. while cooking is in progress to add time
in 30 second increments. This feature may not used with the
WEIGHT DEFROST program.
-12-
MEMORY COOKING
You can enter five cooking programs to be saved in MEMORY. Each program can have up
to 2 cooking stages, as some recipes require different stages of cooking at various power
levels to get better results. Each stage can be programmed with a different time
and power level.
To set a MEMORY cooking program:
Step
1
Procedure
Press MEMORY 1-5 times to input a cooking program.
2
Follow steps 1 & 2 for TIME COOKING for the first stage (do not
POWER
press start).
(Press POWER two
Example: To cook for 10 minutes at 90% power level for first stage. times) PL 9 appears
in the display
+
or
indicators light.
10:00
Enter cooking time and power level for the second stage.
POWER
Example: To cook for 3 minutes at 20% power level for second
(Press POWER nine
stage.
times) PL 2 appears
in the display
+
or
indicators light.
3:00
3
4
Press MEMORY to save the program.
Keypad
MEMORY
MEMORY
To start a MEMORY cooking program:
Step
1
Procedure
Press MEMORY 1-5 times to access saved programs.
Keypad
MEMORY
2
Press START/+30SEC.
+ or will flash while cooking.
START/+30SEC.
Note : • When START/+30SEC. is pressed, the display will count down remaining cooking time in Stage 1. The oven will beep and start Stage 2.
• Five beeps indicate the MEMORY program is finished.
POWER LEVEL SETTING GUIDE
100 % • Cooking poultry, vegetables,
(PL10) and most casseroles.
• Boiling water.
• Preheating a browning dish.
90 %
• Reheating rice and pasta.
(PL9)
50 %
(PL5)
• Cooking custards and pasta.
• Cooking rump roast, ham, veal, lamb.
40 %
(PL4)
• Cooking less tender cuts of meat
in liquid or slow-cooking dishes.
• Completing the cooking cycle of less tender roasts.
80 %
(PL8)
• Reheating precooked or
prepared food quickly.
• Cooking fish.
• Cooking cheese dishes.
30 %
(PL3)
• Cooking scrambled eggs.
• Baking cakes.
10 %
(PL1)
• Completing the cooking cycle of casseroles, stews, sauces.
• Manual defrosting.
• Softening chocolate.
• Clarifying butter.
• Heating breads, rolls, pancakes,
tacos, tortillas, French toast.
• Softening cream cheese, butter.
• Keeping casseroles warm.
70 %
(PL7)
60 %
(PL6)
20 %
(PL2)
-13-
DIRECT ACCESS COOKING
The eight DIRECT ACCESS keys are preprogrammed to cook or reheat a variety of popular
foods with a minimum number of steps.
POPCORN
Place prepackaged popcorn bag into oven. (49, 85 or 99 g) (1,75, 3 or 3,5 oz)
Step
1
2
Procedure
Press POPCORN once for 49 g (1.75 oz).
Press POPCORN twice for 89 g (3 oz).
Press POPCORN three times for 99 g (3.5 oz).
indicators lights
Press START/+30SEC.
indicator turns off. will flash while cooking.
Keypad
POPCORN
START/+30SEC.
You may reset the POPCORN cooking time when using other bag sizes.
Example: to set cooking time of 3 minutes 30 seconds:
Step
1
Procedure
Press POPCORN once to reset 49 g (1.75 oz).
Press POPCORN twice to reset 89 g (3 oz).
Press POPCORN three times for 99 g (3.5 oz).
indicators light.
Keypad
POPCORN
2
Press MEMORY. Enter new cooking time.
You must enter 3 numbers. (1 for minutes and 2 for seconds)
indicator turns off.
Press MEMORY again to save new cooking time.
MEMORY
3:30
3
MEMORY
Note: • You may return to the preprogrammed POPCORN cooking time by pressing POPCORN for more than 3 seconds. A tone will sound and “POP” will appear in display.
POTATO
Place 1 - 3 medium size potatoes in oven.
Step
1
2
Procedure
Press POTATO once for 1 potato, approx. 225 g (8 oz).
Press POTATO twice for 2 potatoes, approx. 453 g (16 oz).
Press POTATO three times for 3 potatoes, approx. 680 g (24 oz).
indicators light.
Press START/+30SEC.
will flash while cooking.
Keypad
POTATO
START/+30SEC.
PIZZA
Place 1-3 slices of refrigerated pizza in oven.
Step
1
2
Procedure
Press PIZZA once for 1 slice (6 oz).
Press PIZZA twice for 2 slices (9 oz).
Press PIZZA three times for 3 slices (12 oz).
indicators light.
Press START/+30SEC.
indicator turns off. will flash while cooking.
-14-
Keypad
PIZZA
START/+30SEC.
BEVERAGE
Place 1-3 cups in oven.
Step
1
2
Procedure
Press BEVERAGE once for 1 cup.
Press BEVERAGE twice for 2 cups.
Press BEVERAGE three times for 3 cups.
indicators light.
Press START/+30SEC.
will flash while cooking. indicator turns off.
Keypad
BEVERAGE
START/+30SEC.
SOUP
This feature can be used to reheat soup.
Step
1
2
Procedure
Press SOUP once for 1 serving, approx. 118 ml (4 oz).
Press SOUP twice for 2 servings, approx. 354 ml (12 oz).
Press SOUP three times for 3 servings, approx. 236 ml (8 oz).
Press SOUP four times for 4 servings, approx. 473 ml (16 oz).
indicators light.
Press START/+30SEC.
indicator turns off. will flash while cooking.
Keypad
SOUP
START/+30SEC.
DINNER PLATE
This feature can be used to reheat precooked foods placed on a dinner plate.
Step
1
2
Procedure
Press DINNER PLATE once for 1 serving, approx. 255 g (9 oz).
Press DINNER PLATE twice for 2 servings, approx. 340 g (12 oz).
Press DINNER PLATE three times for 3 servings, approx. 510 g
(18 oz).
indicators light.
Press START/+30SEC.
indicator turns off. will flash while cooking.
Keypad
DINNER PLATE
START/+30SEC.
FRESH VEGETABLE
This feature can be used to cook fresh vegetables.
Step
1
Procedure
Press FRESH VEGETABLE once for 113 g (4 oz).
Press FRESH VEGETABLE twice for 226 g (8 oz).
Press FRESH VEGETABLE three times for 453 g (16 oz).
indicators light.
Keypad
FRESH
VEGETABLE
2
Press START/+30SEC.
indicator turns off. will flash while cooking.
START/+30SEC.
FROZEN VEGETABLE
This feature can be used to cook frozen vegetables.
Step
1
2
Procedure
Press FROZEN VEGETABLE once for 113 g (4 oz).
Press FROZEN VEGETABLE twice for 226 g (8 oz).
Press FROZEN VEGETABLE three times for 453 g (16 oz).
indicators light.
Press START/+30SEC.
indicator turns off. will flash while cooking.
-15-
Keypad
FROZEN
VEGETABLE
START/+30SEC.
DIRECT ACCESS COOKING/REHEATING GUIDE
Item
Special Notes
Popcorn
Unfold the bag and place in oven according to package directions.
Do not leave the oven unattended when popping popcorn.
Potato
Pierce skin with a fork. Place on a paper towel. Arrange in a circular
pattern with heavier ends pointing toward the outer edge of turntable. Let stand approximately 10 minutes after cooking.
Pizza
Place cooked slices of pizza on paper towel or paper plates. Follow
package instructions for cooking frozen pizza.
Beverage Place cups or mugs with liquids in oven uncovered. Stir after reheating. Be careful when handling or drinking liquids immediately out of
oven as contents will be hot.
Soup
Cover food with plastic wrap. Allow to stand, covered, for a few
minutes after reheating.
Dinner
Place food on microwave-safe plate and cover.
Plate
Fresh
Wash and cut into slices, cubes, etc. Place in bowl or dish adding 1
Vegetable tablespoon of water per serving. Cover. Let stand, covered, for approx. 2 minutes after cooking.
Frozen
Follow package directions for adding water. Place in bowl or dish
Vegetable and cover. Let stand, covered, for approx. 2 minutes after cooking.
Starting
Temp.
Room
Room
Refrigerated
Room/Refrigerated
Refrigerated
Refrigerated
Refrigerated
Frozen
WEIGHT DEFROST
WEIGHT DEFROST allows you to easily defrost foods by eliminating guesswork in determining defrosting time. Follow the steps below for easy defrosting.
Step
1
2
3
Procedure
Press WEIGHT DEFROST. The display will show dEF 1.
indicators light.
Enter food weight. Weight must be entered in ounces. Use chart to
convert pounds into ounces. The weight range is between 4-100oz.
Example: To defrost 31/2pounds, enter 56 ounces.
indicator lights.
Press START/+30SEC.
indicator turns off.
will flash while defrosting.
Keypad
WEIGHT DEFROST
56
START/+30SEC.
Converting pounds into ounces:
LBS
OZ
.25
4
.50
8
1.0
16
1.5
24
2.0
32
2.5
40
3.0
48
3.5
56
4.0
64
4.5
72
5.0
80
5.5
88
6.0
96
TIME DEFROST
TIME DEFROST allows you to defrost foods based on time.
Step
1
Procedure
Press TIME DEFROST. The display will show dEF 2.
indicators light.
2
Enter desired defrosting time. Enter 1-2 numbers for minutes and 2 4:25
numbers for seconds.
Example: To defrost for 4 minutes 25 seconds.
Press START/+30SEC.
START/+30SEC.
will flash while defrosting.
3
Note: • The maximum time that can be set is 99 minutes 99 seconds.
-16-
Keypad
TIME DEFROST
DEFROSTING CHART
Item
During Defrosting
Standing Time
Ground beef
Turn over. Remove defrosted portion.
5-10 minutes
Liver
Drain Liquid. Separate pieces.
10-15 minutes
Roasts
Turn over. Cover ends with foil.
20-40 minutes
Sirloin steak
Turn over.
5-10 minutes
Rib or T-bone
Turn over.
10-20 minutes
Flank Steak
Turn over.
5-10 minutes
Stewing meat
Break apart.
5-10 minutes
Ground pork
Turn over. Remove defrosted portion.
5-10 minutes
Bacon
Defrost in original wrapper. Turn over.
3-5 minutes
Chops
Separate and turn over.
5-10 minutes
Ribs
Turn over.
10-20 minutes
Roasts
Turn over. Cover end with foil.
20-40 minutes
Ground lamb
Turn over. Remove defrosted portion.
5-10 minutes
Chops
Separate. Turn over.
5-10 minutes
Ribs
Turn over.
10-20 minutes
Roasts
Turn over. Cover end with foil.
20-40 minutes
Chicken, whole
Turn over. Cover ends with foil. Rinse under cold
water after defrosting.
15-30 minutes
Pieces
Separate. Turn over.
10 -15 minutes
Cornish hens
Turn over. Cover ends with foil. Rinse under cold
water after defrosting.
15-30 minutes
Crabmeat, Shrimp
Break apart.
5-10 minutes
Fish fillets
Turn over. Rearrange. Rinse under cold water to
separate after defrosting.
5-10 minutes
Steaks
Turn over.
5 -10 minutes
Scallops
Break apart. Remove defrosted seafood.
5 -10 minutes
Beef
Pork
Lamb
Poultry
Fish and Seafood
FAST STARTING
In waiting state, instant cooking at 100% power level can be started by selecting a cooking time from 1 to 6 minutes by pressing number pads 1 to 6. Press “START/+30SEC”
to increase the cooking time.
-17-
COOKING GUIDE
COOKING PRINCIPLES AND TECHNIQUES
Advantages of microwave cooking are speed
and efficiency. For warming, heating, and
defrosting, nothing compares. Here are a few
tips that will make microwaving easier and more
enjoyable.
Microwave Cooking Principles
Because microwave cooking requires only
one-quarter to one-third the time of conventional
cooking, cooking principles become even more
important.
Quantity
In microwave cooking, the cooking time is
dependent on the amount of food in the oven.
If you double the recipe, plan on doubling the
cooking time.
Density
Dense foods, such as potatoes, need more
cooking time as they take longer for microwave
energy to penetrate and for the heat to be conducted through them.
Shape and Size
Cut food into uniform shapes and sizes for
even cooking in the microwave. When cooking
irregular shapes (such as chicken pieces), place
the thicker parts to the outer edge of the dish.
Moisture, Sugar and Fat Food high in moisture,
sugar or fat cook faster. Add a minimum of liquid
to moisten foods.
An excess amount of water slows cooking.
Starting Temperature
Frozen or refrigerated foods take longer to microwave than food at room temperature.
foods near the outer edge of the dish when
reheating.
Covering:
Most foods will cook and reheat better when
covered. Pierce plastic wrap to vent steam.
Stirring:
Stirring foods help them cook more quickly and evenly.
Turning Over:
To promote more even cooking, turn large, solid
items such as roasts or baked potatoes over
halfway through the cooking time.
Shielding:
Use small, smooth strips of aluminum foil to
prevent corners, thin or bony areas from overcooking.
Standing Time:
Foods continue cooking even after removal from
the oven. Standing time is necessary to allow
foods to complete cooking/defrosting.
Converting Recipes:
Microwave recipes will likely call for less liquid
and cooking time.
Microwave Thermometers:
A microwave-safe thermometer can be used to
achieve the best results. Insert the thermometer
carefully and properly into the food. The guide
below gives suggested thermometer readings
for meat and poultry. Keep in mind that standing
time is essential for most food to reach its proper
serving temperature.
Delicate Ingredients
Delicate foods such as eggs, cheese, mayonnaise, etc., cook very quickly, and should
be watched carefully.
Guide to Internal Temperatures
140°F (60°C)
150°F (66°C)
Microwave Cooking Techniques
Arranging:
Arrange food in a circular pattern, with denser,
thicker items at the edge of the dish.
160°F (71°C)
165°F (74°C)
Piercing:
Pierce the membrane of foods such as eggs,
oysters, snails, sausages, livers, clams and
whole vegetables, so they do not burst.
170°F (77°C)
185°F (85°C)
Reheating:
Cooked food reheats extremely well by using
a low level of microwave energy. Place denser
-18-
Rare beef
Vegetables, hot
drinks, soups,
casseroles
Medium beef,
lamb, veal
Well-done beef,
lamb
Whole fish
Well-done pork,
poultry pieces or
roasted bird
MAINTENANCE
TROUBLESHOOTING
Check your problem by using the chart below and try the solutions for each problem. If the
microwave oven still does not work properly, contact the nearest authorized service center.
TROUBLE
POSSIBLE CAUSE
POSSIBLE REMEDY
Oven will not
start.
• Electrical cord for oven is not plugged in.
• Door is open.
• Wrong operation is set.
• Plug into the outlet.
• Close the door and try
again.
• Check instructions.
Arcing or
sparking.
• Materials to be avoided in microwave oven were used.
• The oven is operated when empty.
• Spilled food remains in the cavity.
• Use microwave-safe
cookware only.
• Do not operate with oven
empty.
• Clean cavity with wet towel.
Unevenly
cooked foods.
• Materials to be avoided in microwave
oven were used.
• Food is not defrosted completely.
• Cooking time, power level is not suitable.
• Food is not turned or stirred.
• Use microwave-safe
cookware only.
• Completely defrost food.
• Use correct cooking time,
power level.
• Turn or stir food.
Overcooked
foods.
• Cooking time, power level is not suitable.
• Use correct cooking time,
power level.
Under cooked
foods.
• Materials to be avoided in microwave
oven were used.
• Food is not defrosted completely.
• Oven ventilation ports are restricted.
• Cooking time, power level is not suitable.
• Use microwave-safe
cookware only.
• Completely defrost food.
• Check to see that oven
ventilation ports are not
restricted.
• Use correct cooking time,
power level.
Improper
defrosting.
• Materials to be avoided in microwave
oven were used.
• Cooking time, power level is not suitable.
• Food is not turned or stirred.
• Use microwave-safe
cookware only.
• Use correct cooking time,
power level.
• Turn or stir food.
-19-
QUESTIONS AND ANSWERS
Q.
A. Q. A. Q. A. Q. A. Q. A. Q. A. Q. A. When the oven is plugged into a wall outlet for the first time, it does not work properly. What is wrong?
The microcomputer used in the oven control may temporarily become scrambled and fail to function as programmed. Unplug the oven from the wall outlet and then plug it back
in. The microcomputer will then reset for proper functioning.
Why is there noise coming from the turntable when the oven is turned on?
This noise occurs when the turntable roller rest and cavity bottom are dirty. Clean the
turntable roller rest cavity bottom. Frequent cleaning of these parts should eliminate or
reduce the noise.
Why is there noise coming from the oven when reducing power?
When cooking with a power other than maximum (PL 10), the oven cycles to obtain the
lower power level. The clicking noise can be heard when the oven cycles on and off. This
is normal.
Why is there steam coming out of the air exhaust vent?
Steam is produced during cooking. The microwave oven has been made to vent this steam.
What is wrong when the oven light will not glow?
There may be several reasons why the oven light will not glow. The light bulb has burned out or START/+30SEC. has not been pressed.
Why do eggs sometimes pop?
The egg yolk may pop because of steam build-up inside the membrane. Pierce the
membrane with a toothpick before cooking it. Never microwave eggs in the shell since they may explode.
How are boil-overs avoided?
Use a larger utensil than usual for cooking. If you open the oven door or touch
STOP/CLEAR, the food will stop boiling.
CLEANING
Wipe the oven inside and outside with a soft
cloth and a mild detergent solution. Then
rinse and wipe dry. For best drying results,
use a cloth specially designed for stainless steel surfaces. The cloth can
be found at most kitchen accessory and
hardware stores. This should be done on a
weekly basis, more often if needed. Never
use cleaning powders or rough pads. Excessive oil splatters on the inside top will
be difficult to remove if left for many days.
Wipe splatters with a wet paper towel, especially after cooking chicken or bacon.
REMOVABLE PARTS
The following parts may be removed as
described. They should be washed in warm
(not hot) water with a mild detergent and a
soft cloth. Once they are clean, rinse them
well and dry with a soft cloth. Never use
cleaning powders, steel wool or rough pads.
•
•
The turntable may be cleaned at the
sink. Be careful not to chip or scratch the
edges as this may cause the turntable to break during use.
The turntable roller rest should be cleaned regularly.
SPECIAL CARE
For best performance and safety, the inner
door panel and the oven front frame should
be free of food or grease buildup. Wipe them
often with a mild detergent. Then rinse and
wipe dry. Never use cleaning powders or
rough pads. After cleaning the control panel,
press STOP/CLEAR to clear any entries that
might have been entered accidentally while
cleaning the panel.
-20-
WARRANTY
WARRANTY APPLICATION
New, unused SANYO Microwave Oven
purchased in Canada through a SANYO
authorized dealer are warranted against
manufacturing defects in materials and workmanship for ONE YEAR for parts and
labor from the date of purchase by the original
retail purchaser. This Warranty only applies
in favor of the original retail purchaser of the
warranted product.
You also are responsible for the cost of any
MAINTENANCE necessary in respect of the product.
SANYO CANADA INC.’S RESPONSIBILITY
During the warranty period, SANYO Canada
Inc. will repair, or at our option, replace a
Microwave Oven which shows evidence of a
manufacturing defect in materials or workmanship.
Replacement PARTS are warranted for the
remaining portion of the warranty period.
LIMITATIONS
(a) SANYO Canada Inc. reserves the right to change or improve the design of the model of the product warranted hereunder without incurring any obligation to make any modifications to or to install any improvements in or on the product.
(b) In the event shall SANYO Canada Inc. or any of its Authorized Dealers be liable for special or consequential damage arising for the use of this product.
WHAT IS NOT COVERED
(a) Microwave Ovens purchased outside Canada.
(b) Microwave Ovens purchased in a used condition.
(c) Problems due to product set-up and installation.
(d) Adjustments that are outlined in the Operating manual.
(e) Consumable or removable items such as light bulbs, glass trays, turntable rollers and metal grill rack.
(f) Damage in or due to transportation.
(g) Damage due to improper maintenance, accident, abuse, misuse or negligence.
(h) Damage caused by lightning and power surge.
ORIGINAL RETAIL PURCHASER’S
RESPONSIBILITY
You, the original retail purchaser, must present your original, dated bill-of-sale together
with this warranty to SANYO Canada Inc. or
to an authorized SANYO Canada Inc. or to an
authorized SANYO Service Depot when you
make a claim under this Warranty.
WARRANTY BECOMES VOID
This Warranty becomes void if the product’s
serial numbers are altered or removed of if
any repair to the product is made by other
than SANYO Canada Inc. or an authorized
SANYO Service Depot.
STATUTORY WARRANTIES
The above provisions do not preclude the
operation of any applicable provincial statute
which in certain circumstances may not allow
some of the limitations and exclusions described in this Warranty. Where any terms of
this Warranty are prohibited by such a statute,
they shall be deemed null and void but the remainder of this warranty shall remain in effect.
HOW TO OBTAIN WARRANTY SERVICE
Please contact the SANYO Authorized Dealer
from whom the product was purchased or
contact us directly at:
SANYO Canada Inc.
1-300 Applewood Cres.
Concord, ON L4K 5C7
1-800-263-2244
(905) 760-9944
www.sanyo.ca
You, the original retail purchaser, are responsible for any costs of TRANSPORTING the
product to and from SANYO Canada Inc. or
an authorized SANYO Service Depot.
-21-
QUICK REFERENCE
CLOCK
1. Press CLOCK.
2. Press numbers to set time. When entering hours 1-9, a zero must be entered first.
3. Press CLOCK.
MEMORY
To set:
1. Press MEMORY.
2. Follow steps 1 & 2 for TIME COOKING for the first stage.
3. Enter cooking time and power level for second stage.
4. Press MEMORY.
To start:
1. Press MEMORY 1-5 times
2. Press START/+30SEC..
CHILD LOCK-OUT
To set:
1. Press and hold STOP/CLEAR for 3 seconds.
To cancel:
1. Press and hold STOP/CLEAR for 3 seconds.
KITCHEN TIMER
1. Press (KITCHEN) TIMER.
2. Enter desired time.
When entering 1-9 minutes, a zero must be entered first.
3. Press START/+30SEC.
TIME COOKING
1. Enter a cooking time in minutes and
seconds.
2. Press POWER 1-10 times until desired power level appears in display (PL 1- PL 10). PL 10 is the maximum power level and the default setting.
3. Press START/+30SEC.
DIRECT ACCESS
1. Press POPCORN, POTATO, PIZZA,
BEVERAGE, REHEAT, DINNER PLATE, FRESH or FROZEN
VEGETABLE 1-4 times until desired quantity or weight appears.
2. Press START/+30SEC..
3. You many add time by pressing START/+30SEC. while cooking is in progress.
WEIGHT DEFROST
1. Press WEIGHT DEFROST.
2. Enter food weight in ounces.
3. Press START/+30SEC..
+30 SEC.
1. To quickly start TIME COOKING, press START/+30SEC. until desired cooking time is reached.
2. You can add time to TIME COOKING, DIRECT ACCESS and TIME DEFROST programs by pressing START/+30SEC.
while cooking is in progress.
TIME DEFROST
1. Press TIME DEFROST.
2. Enter desired defrosting time.
3. Press START/+30SEC.
SANYO Canada Inc.
Concord, Ontario L4K 5C7
www.sanyo.ca
-22-