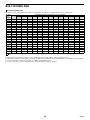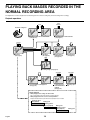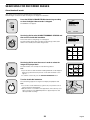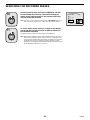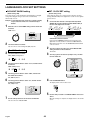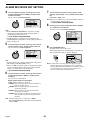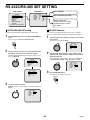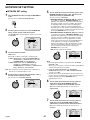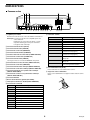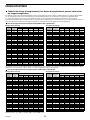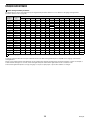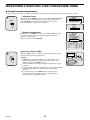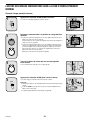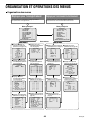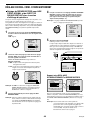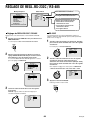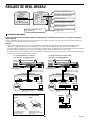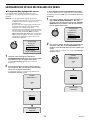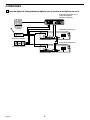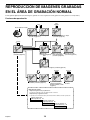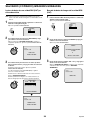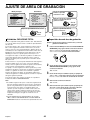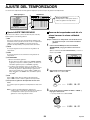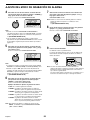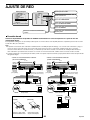
1
L8HAA/US (DSR-3000 GB) 2001. 11. 21
Digital Video Recorder
DSR-3000
Instruction Manual
English
GB
Manuel d’instructions
Français
F
Manual de Instrucciones
Español
E
About this manual
Before installing and using this unit, please read
this manual carefully. Be sure to keep it handy for
later reference.
À propos de ce manuel
Avant d’installer et d’utiliser cet appareil, veuillez
lire ce manuel attentivement. Assurez-vous de le
garder à portée de la main pour référence
ultérieure.
Acerca de este manual
Antes de instalar y usar este aparato, lea
detenidamente este manual. Asegúrese de
guardarlo a mano para futuras referencias.
PRECAUTION
Declaration of Conformity
CAUTION
Model Number
Trade Name
Responsible party
Address
DSR-3000
SANYO
SANYO FISHER COMPANY
21605 Plummer Street,
Chatsworth, California 91311
Telephone No.
: (818) 998-7322
• This device complies with Part 15 of the FCC Rules.
Operation is subject to the following two conditions:
(1) this device may not cause harmful interference,
and
(2) this device must accept any interference
received, including interference that may
cause undesired operation.
RISK OF ELECTRIC SHOCK
DO NOT OPEN
CAUTION:
TO REDUCE THE RISK OF ELECTRIC SHOCK,
DO NOT REMOVE COVER (OR BACK).
NO USER-SERVICEABLE PARTS INSIDE.
REFER SERVICING TO QUALIFIED SERVICE PERSONNEL.
WARNING: To reduce the risk of fire or electric
shock, do not expose this appliance to rain or
moisture.
CAUTION: Changes or modifications not expressly
approved by the manufacturer may void the user’s
authority to operate this equipment.
:
:
:
:
Location
The lightning flash with arrowhead symbol, within
an equilateral triangle, is intended to alert the user
to the presence of uninsulated “dangerous voltage”
within the product’s enclosure that may be of
sufficient magnitude to constitute a risk of electric
shock to persons.
For safe operation and satisfactory performance of your
unit, keep the following in mind when selecting a place for
its installation:
• Shield it from direct sunlight and keep it away from
sources of intense heat.
• Avoid dusty or humid places.
• Avoid places with insufficient ventilation for proper heat
dissipation. Do not block the ventilation holes at the top
and bottom of the unit. Do not place the unit on a
carpet because this will block the ventilation holes.
• Install the unit in a horizontal position only.
• Avoid locations subject to strong vibrations.
• Avoid moving the unit between cold and hot locations.
• Do not place the unit directly on top of a monitor TV, as
this may cause playback or recording problems.
The exclamation point within an equilateral triangle
is intended to alert the user to the presence of
important operating and maintenance (servicing)
instructions in the literature accompanying the
product.
This equipment has been tested and found to comply with the limits
for a Class B digital device, pursuant to part 15 of the FCC Rules.
These limits are designed to provide reasonable protection against
harmful interference in a residential installation. This equipment
generated, uses and can radiate radio frequency energy and, if not
installed and used in accordance with the instructions, may cause
harmful interference to radio communications. However, there is no
guarantee that interference will not occur in a particular installation.
If this equipment does cause harmful interference radio or television
reception, which can be determined by turning the equipment off
and on, the user is encouraged to try to correct the interference by
one or more of the following measures:
Reorient or relocate the receiving antenna.
Increase the separation between the equipment and receiver.
Connect the equipment into an outlet on a circuit different
from that to which the receiver is connected.
Consult the dealer or an experienced radio/TV technician for help.
Avoiding Electrical Shock and Fire
•
•
•
•
•
•
•
•
For the customers in Canada
Do not handle the power cord with wet hands.
Do not pull on the power cord when disconnecting it
from an AC wall outlet. Grasp it by the plug.
If any liquid is spilled on the unit, unplug the power
cord immediately and have the unit inspected at a
factory-authorised service centre.
Do not place anything directly on top of this unit.
SERVICE
This class B digital apparatus complies with Canadian
ICES-003.
This unit is a precision instruments and if treated with
care, will provide years of satisfactory performance.
However, in the event of a problem, the owner is advised
not to attempt to make repairs or open the cabinet.
Servicing should always be referred to your dealer or
Sanyo Authorized Service Centre.
CAUTION
Danger of explosion if battery is incorrectly replaced.
Replace only with the same or equivalent type
recommended by the manufacturer.
Discard used batteries according to the manufacture’s
instructions.
English
1
CONTENTS
MAIN FEATURES . . . . . . . . . . . . . . . . . . . . . . . . . . . . . . . . . . . . . . . . . . . . .
ACCESSORIES. . . . . . . . . . . . . . . . . . . . . . . . . . . . . . . . . . . . . . . . . . . . . . .
PART NAMES . . . . . . . . . . . . . . . . . . . . . . . . . . . . . . . . . . . . . . . . . . . . . . . .
Front panel . . . . . . . . . . . . . . . . . . . . . . . . . . . . . . . . . . . . . . . . . . . . . . . . . . .
Rear panel . . . . . . . . . . . . . . . . . . . . . . . . . . . . . . . . . . . . . . . . . . . . . . . . . . .
CONNECTIONS . . . . . . . . . . . . . . . . . . . . . . . . . . . . . . . . . . . . . . . . . . . . . .
Basic connections. . . . . . . . . . . . . . . . . . . . . . . . . . . . . . . . . . . . . . . . . . . . .
System control connections . . . . . . . . . . . . . . . . . . . . . . . . . . . . . . . . . . . .
Connecting a remote control circuit . . . . . . . . . . . . . . . . . . . . . . . . . . . . . .
Digital multiplexer connections . . . . . . . . . . . . . . . . . . . . . . . . . . . . . . . . . .
Dgital series connections . . . . . . . . . . . . . . . . . . . . . . . . . . . . . . . . . . . . . . .
BUILT-IN HARD DISK . . . . . . . . . . . . . . . . . . . . . . . . . . . . . . . . . . . . . . . . .
Hard disk . . . . . . . . . . . . . . . . . . . . . . . . . . . . . . . . . . . . . . . . . . . . . . . . . . . .
Recording speed tables . . . . . . . . . . . . . . . . . . . . . . . . . . . . . . . . . . . . . . . .
Operating display . . . . . . . . . . . . . . . . . . . . . . . . . . . . . . . . . . . . . . . . . . . . .
RECORDING IMAGES IN THE NORMAL RECORDING AREA . . . . . . . . .
Normal recording. . . . . . . . . . . . . . . . . . . . . . . . . . . . . . . . . . . . . . . . . . . . . .
Timer recording . . . . . . . . . . . . . . . . . . . . . . . . . . . . . . . . . . . . . . . . . . . . . . .
RECORDING IMAGES IN THE ALARM RECORDING AREA . . . . . . . . . .
Alarm recording. . . . . . . . . . . . . . . . . . . . . . . . . . . . . . . . . . . . . . . . . . . . . . .
Pre-alarm recording . . . . . . . . . . . . . . . . . . . . . . . . . . . . . . . . . . . . . . . . . . .
4
4
5
5
6
7
7
7
7
8
8
10
10
11
13
14
14
15
17
17
18
PLAYING BACK IMAGES RECORDED IN THE NORMAL RECORDING
AREA . . . . . . . . . . . . . . . . . . . . . . . . . . . . . . . . . . . . . . . . . . . . . . . . . . . . 19
SEARCHING FOR RECORDED IMAGES . . . . . . . . . . . . . . . . . . . . . . . . . . 24
SAVING (COPYING) RECORDED IMAGES . . . . . . . . . . . . . . . . . . . . . . . . 33
A Copying images to the hard disk archive area . . . . . . . . . . . . . . . . . . . . . 34
B Copying images from archive area to a CompactFlash card . . . . . . . . . . 35
C Copying images from the archive area to a DDS (DAT) drive or CD-R
drive . . . . . . . . . . . . . . . . . . . . . . . . . . . . . . . . . . . . . . . . . . . . . . . . . . . . . . . . 37
MENU FLOW CHART AND MENU OPERATIONS . . . . . . . . . . . . . . . . . . . 40
MENU flow . . . . . . . . . . . . . . . . . . . . . . . . . . . . . . . . . . . . . . . . . . . . . . . . . . . 40
Basic menu screen operations . . . . . . . . . . . . . . . . . . . . . . . . . . . . . . . . . . 41
Operations while a sub-menu screen is displayed . . . . . . . . . . . . . . . . . . 41
LANGUAGE/CLOCK SET SETTINGS . . . . . . . . . . . . . . . . . . . . . . . . . . . . . 42
Setting the language . . . . . . . . . . . . . . . . . . . . . . . . . . . . . . . . . . . . . . . . . . .
CLOCK SET settings . . . . . . . . . . . . . . . . . . . . . . . . . . . . . . . . . . . . . . . . . . .
DAYLIGHT SAVING setting . . . . . . . . . . . . . . . . . . . . . . . . . . . . . . . . . . . . .
EXT. CLOCK SET setting . . . . . . . . . . . . . . . . . . . . . . . . . . . . . . . . . . . . . . .
VIDEO INPUT SET SETTING . . . . . . . . . . . . . . . . . . . . . . . . . . . . . . . . . . . .
MULTIPLEXER setting . . . . . . . . . . . . . . . . . . . . . . . . . . . . . . . . . . . . . . . . .
VIDEO INPUT setting. . . . . . . . . . . . . . . . . . . . . . . . . . . . . . . . . . . . . . . . . . .
RECORDING AREA SET SETTING . . . . . . . . . . . . . . . . . . . . . . . . . . . . . . .
TOTAL CAPACITY display . . . . . . . . . . . . . . . . . . . . . . . . . . . . . . . . . . . . . .
Resetting each recording area . . . . . . . . . . . . . . . . . . . . . . . . . . . . . . . . . . .
AREA FULL RESET setting . . . . . . . . . . . . . . . . . . . . . . . . . . . . . . . . . . . . .
2
42
42
43
43
44
44
44
45
45
45
46
English
CONTENTS
RECORDING CONDITIONS SET SETTING . . . . . . . . . . . . . . . . . . . . . . . . 47
Recording settings for digital series connection (maximum 3 units) . . . 47
Setting NORMAL RECORDING AREA OVERWRITE and REMAINING
DISK WARNING on the operating display section . . . . . . . . . . . . . . . . . . . 48
NORMAL REC MODE SET SETTING . . . . . . . . . . . . . . . . . . . . . . . . . . . . . 49
NORMAL REC MODE SET setting . . . . . . . . . . . . . . . . . . . . . . . . . . . . . . . . 49
TIMER SET SETTING . . . . . . . . . . . . . . . . . . . . . . . . . . . . . . . . . . . . . . . . . . 50
TIMER SET setting. . . . . . . . . . . . . . . . . . . . . . . . . . . . . . . . . . . . . . . . . . . . . 50
Timer reservations every day at the same time with the same image
quality . . . . . . . . . . . . . . . . . . . . . . . . . . . . . . . . . . . . . . . . . . . . . . . . . . . . . . . 50
Timer reservations spanning more than 24 hours . . . . . . . . . . . . . . . . . . . 52
HOLIDAY SET SETTING . . . . . . . . . . . . . . . . . . . . . . . . . . . . . . . . . . . . . . . 53
HOLIDAY SET setting . . . . . . . . . . . . . . . . . . . . . . . . . . . . . . . . . . . . . . . . . . 53
ALARM REC MODE SET SETTING. . . . . . . . . . . . . . . . . . . . . . . . . . . . . . . 54
ALARM REC MODE SET setting . . . . . . . . . . . . . . . . . . . . . . . . . . . . . . . . .
Pre-alarm recording setting . . . . . . . . . . . . . . . . . . . . . . . . . . . . . . . . . . . . .
Alarm trigger setting . . . . . . . . . . . . . . . . . . . . . . . . . . . . . . . . . . . . . . . . . . .
Built-in motion sensor settings . . . . . . . . . . . . . . . . . . . . . . . . . . . . . . . . . .
DISPLAY SET SETTING. . . . . . . . . . . . . . . . . . . . . . . . . . . . . . . . . . . . . . . .
DISPLAY SET setting . . . . . . . . . . . . . . . . . . . . . . . . . . . . . . . . . . . . . . . . . .
VIDEO LOSS SET setting . . . . . . . . . . . . . . . . . . . . . . . . . . . . . . . . . . . . . . .
RS-232C/RS-485 SET SETTING . . . . . . . . . . . . . . . . . . . . . . . . . . . . . . . . .
RS-232C/RS-485 SET setting . . . . . . . . . . . . . . . . . . . . . . . . . . . . . . . . . . . .
RS-232C Selection. . . . . . . . . . . . . . . . . . . . . . . . . . . . . . . . . . . . . . . . . . . . .
RS-485 Selection . . . . . . . . . . . . . . . . . . . . . . . . . . . . . . . . . . . . . . . . . . . . . .
54
56
57
57
59
59
59
60
60
60
61
62
BUZZER SET SETTING . . . . . . . . . . . . . . . . . . . . . . . . . . . . . . . . . . . . . . . .
SECURITY LOCK SET SETTING. . . . . . . . . . . . . . . . . . . . . . . . . . . . . . . . . 63
A
B
C
D
Operating privileges and security lock . . . . . . . . . . . . . . . . . . . . . . . . . . . .
Administrator password setting . . . . . . . . . . . . . . . . . . . . . . . . . . . . . . . . .
User password setting . . . . . . . . . . . . . . . . . . . . . . . . . . . . . . . . . . . . . . . . .
Recording and playback operating privilege setting . . . . . . . . . . . . . . . .
Security lock setting . . . . . . . . . . . . . . . . . . . . . . . . . . . . . . . . . . . . . . . . . .
NETWORK SET SETTING . . . . . . . . . . . . . . . . . . . . . . . . . . . . . . . . . . . . . .
Network connection . . . . . . . . . . . . . . . . . . . . . . . . . . . . . . . . . . . . . . . . . . .
NETWORK SET setting . . . . . . . . . . . . . . . . . . . . . . . . . . . . . . . . . . . . . . . . .
PASSWORD SET setting . . . . . . . . . . . . . . . . . . . . . . . . . . . . . . . . . . . . . . .
HDD SET SETTING . . . . . . . . . . . . . . . . . . . . . . . . . . . . . . . . . . . . . . . . . . .
HDD SET setting . . . . . . . . . . . . . . . . . . . . . . . . . . . . . . . . . . . . . . . . . . . . . .
Adding a hard disk . . . . . . . . . . . . . . . . . . . . . . . . . . . . . . . . . . . . . . . . . . . .
63
63
64
65
65
66
66
67
68
69
69
69
70
POWER FAILURE/USED TIME DISPLAY . . . . . . . . . . . . . . . . . . . . . . . . . .
SAVING MENU SETTING DETAILS . . . . . . . . . . . . . . . . . . . . . . . . . . . . . . 71
Saving to a CompactFlash card . . . . . . . . . . . . . . . . . . . . . . . . . . . . . . . . . . 71
Loading saved menu settings . . . . . . . . . . . . . . . . . . . . . . . . . . . . . . . . . . . 72
INTERFACE SPECIFICATIONS . . . . . . . . . . . . . . . . . . . . . . . . . . . . . . . . . . 73
SPECIFICATIONS. . . . . . . . . . . . . . . . . . . . . . . . . . . . . . . . . . . . . . . . . . . . . 76
English
3
MAIN FEATURES
ACCESSORIES
This digital video recorder can be used to store images recorded by a
monitoring camera onto its built-in hard disk.
• Equipped with a large-capacity 3.5-inch hard disk drive.
• Recording and playback of images can be carried out using digital
signals from a multiplexer.
• Playback can be carried out at the same time as recording.
• Alarm recording tracks movements of suspicious individuals.
• Timer recording lets you record different sessions each day.
• Pre-alarm recording records the images immediately before an alarm.
• Audio recording and playback are also possible at recording rates of
0.02 – 0.1 sec (field), 0.03 – 0.2 sec (frame).
• Has a built-in motion detector function that can trigger alarm
recording when movement is detected.
• Recorded images can be copied using CompactFlash cards.
• Includes a variety of search functions.
☞ Alarm searching using an alarm event list or thumbnail alarm
images
☞ Time and date searches based on recording date and time
☞ Motion sensor detecting by searching for the movement of a
suspicious individual
• A zoom function allows images being played back to be enlarged for
display, when using without a multiplexer.
• Images can be captured by field or by frame.
• The image quality mode can be selected from five modes for both
field and frame.
• Three levels of security lock are available.
• A PCMCIA-compatible network card can be used to carry out
network control. Multi access for up to four users.
• Includes an RS-232C interface for computer control.
• Connection to a system controller (sold separately) is possible using
an RS-485 interface.
• PC card-type SCSI cards can be used to backup to DDS (DAT)
drives and CD-Rs. However, special software is required to play back
images backed up to a CD-R.
• Menu settings can be uploaded to and downloaded from a
CompactFlash card.
Power cord
Fixer power cord tie
Hard disk protection
If any hard disk format errors are found when the power is turned
on, the whole hard disk is checked automatically. If any further
problems are found with the hard disk, the POWER indicator
flashes. Please contact the place of purchase if you need to
reformat the hard disk or make backups of any images. The hard
disk is very sensitive to dust, vibration and shocks, and it should
not be used in places near sources of magnetic fields. Be sure to
observe the following points in order to prevent any loss of data.
• Do not subject the digital video recorder to shocks.
• Do not use the digital video recorder in places where it will be
subjected to vibration or places which are unstable.
• Do not disconnect the power cord while recording or playback
is in progress.
• Do not use in places which are subject to rapid changes in
temperature (changes of around 10°C in an hour).
• If the digital video recorder is moved to a place with a large
difference in temperature or a high level of humidity,
condensation may form. If the digital video recorder is used
with condensation inside it, operating problems may occur.
• Do not install the digital video recorder in places which are
constantly vibrating, such as vehicles or trains.
The hard disk and cooling fan are consumables.
•
Setting-up environment
Leave a space of at least 5 cm between the digital video recorder and
other nearby objects.
Ventilation holes are located at both sides and on the base of the digital
video recorder. Do not allow these ventilation holes to be covered when
setting up the recorder.
Furthermore, avoid using the digital video recorder in places with poor
ventilation.
These parts should generally be replaced after 2 years of use
(for the hard disk) or 3 years of use (for the cooling fan) at
normal temperatures of 25°C. These periods of time are
intended as guides only, and are not a guarantee of product
performance.
For important recordings
•
•
•
4
Always check whether a recording has been recorded properly.
In case a recording was not recorded properly with this unit
because of faulty connections with other equipment or a
correct playback is not possible, any claims for compensation
will be declined.
For important recordings, it is recommended to make a
periodical backup copy for protection against loss from any
malfunction or accident.
English
PART NAMES
Front panel
2
3
4
5
7 6 FGJK
MENU
EXIT/OSD
PLAY/STOP
ZOOM
SEARCH
FRAME/FIELD
STILL
CHANNEL
COPY
REC/STOP
TIMER
C
1
POWER
FULL
ALARM FULL
LOCK
ALARM
N
AR
LE
SHUTTLE
JOG
EN
TE
R
O
SHUTTLE HOLD
ALARM
P
8 9 IH M L
1 POWER indicator
G SEARCH FRAME/FIELD button and indicator
• During recording or when stopped
Flashes quickly (4 Hz) for a hard disk error and flashes slowly for a
fan error. Illuminates when the power cord plug is inserted into a wall
outlet. Flashes when there is a problem with the hard disk or fan.
2 FULL indicator
•
Flashes when overwriting is set to off and the remaining space in the
normal recording area of the hard disk drops to 1%*. (* This can be
changed using the menu settings.)
H COPY button and indicator
3 ALARM FULL indicator
Used to copy images to the archive area of the hard disk or to a
CompactFlash card or microdrive.
The indicator illuminates during copying.
Flashes when overwriting is set to off and the remaining space in the
alarm recording area of the hard disk drops to 1%*. (* This can be
changed using the menu settings.)
4 LOCK indicator
I TIMER button and indicator
Illuminates when the security lock is engaged and operations are locked.
If a button is pressed while the lock is engaged, the buzzer sounds
and the indicator illuminates.
When the button is pressed when recording is stopped, the digital
video recorder switches to timer recording standby mode, and when
the setting time is reached, timer recording starts.
J PLAY/STOP button and indicator
5 ALARM indicator
When the button is pressed, the indicator illuminates and playback of
images in the normal recording area starts.
If pressed during playback, playback stops.
Illuminates during pre-alarm recording.
Flashes during alarm recording.
6 MENU button and indicator
K STILL button and indicator
Used to display the menu screens (setting screens).
When this button is pressed during playback, the indicator illuminates
and playback pauses. If it is pressed again, playback resumes.
7 ZOOM button and indicator
Used to display the zoom screen during playback.
The indicator illuminates when the zoom screen is displayed.
This does not operate when a multiplexer is connected.
L SHUTTLE HOLD button and indicator
This locks the speed for playback and frame advance.
The indicator illuminates while locked.
8 CHANNEL button and indicator
M ALARM buttons (û ALARM ù)
If the digital video recorder is connected to a Sanyo multiplexer that
allows decoding of channel information (camera numbers), channels
can be specified so that only those channels are played back. The
indicator illuminates during playback. The CHANNEL button can only
be used during still mode.
When these buttons are pressed during playback, playback skips to
the previous or next alarm recording.
N Jog (inner) and shuttle (outer) dials
• During playback
9 REC/STOP button and indicator
Use to start normal recording.
The indicator illuminates during recording.
If the button is pressed for 2 seconds or more during recording,
recording stops and the indicator switches off.
•
F EXIT/OSD button and indicator
• When a menu screen is displayed
•
The jog dial changes the playback speed.
The shuttle dial fast-forwards and rewinds.
Menu screens
The jog dial moves the cursor and changes settings.
The shuttle dial accepts settings.
O CompactFlash card slot
Insert a CompactFlash card or microdrive here.
The main menu or sub-menu is exited.
During recording or playback
When the button is pressed during recording or playback,
superimposed information such as time and date and alarm
status changes in the following order:
Displayed at top-left → Displayed at bottom-left → Displayed at
top-right → Displayed at bottom-right → Off.
The indicator illuminates while information is displayed.
English
When the button is pressed during recording or when the digital
video recorder is stopped, the indicator illuminates and search
playback is possible.
During playback
When the button is pressed during playback, the indicator
illuminates and the mode change to frame/field playback mode.
P MENU RESET button
Reinitializes menu settings.
5
PART NAMES
Rear panel
2 3 4
O
ALARM
C CLOCK
RE ADJUST
RESET
ON UT
ALARM ALARM N O
OUT
C IN
C IN OUT
IN
IN
VIDEO
LOOP OUT
OUT
IN
DIGITAL
OUT
SUB IN
C
SUB OUT
A
RS232C
RS485
IN
LOOP OUT
S-VIDEO
5 6 7 8 9 F GHIJ
T
K
LMN
Pin
C
ALARM IN
Pin
Alarm input
Alarm reset input
Alarm output
NON REC OUT
Non-rec output
CLOCK ADJUST IN
CLOCK ADJUST OUT
Ground
Clock sync input (See page 43.)
Clock sync output (See page 43.)
WARNING OUT
HDD error warning output
FULL
HDD space warning output
ALARM OUT
9 VIDEO LOOP OUT terminal
F VIDEO OUT terminal
G DIGITAL VIDEO IN terminal
H DIGITAL VIDEO OUT terminal
I DIGITAL VIDEO SUB IN terminal
J DIGITAL VIDEO SUB OUT terminal
K RS-232C terminal
L ALL RESET button
M RS-485 termination switch
N Control connector
Signal
Ground
ALARM RESET
ALARM OUT
C
Images being input to the S-VIDEO IN terminal take priority.
Alarm recording area space warning
output
P AC power socket (AC IN~)
Securely insert the accessory power cord here.
Q Power cord holder
Secure the power cord to the holder using the accessory cord tie as
shown in the illustration.
Signal
C
Ground
A
RS-485 connector*
B
RS-485 connector*
C
Ground
Remote control input
Ground
NC
Spare
NC
Spare
C
Q
C
OU
O Alarm connector
2 MIC IN terminal
3 AUDIO IN terminal
4 AUDIO OUT terminal
5 S-VIDEO IN terminal
6 S-VIDEO LOOP OUT terminal
7 S-VIDEO OUT terminal
8 VIDEO IN terminal
SW OUT
SW
OFF
Connect a recommended network card or SCSI card here.
Note: The PC card slot is for 16 bit 5 V cards only.
Do not use 32 bit card bus types of card, as they may damage
the PC card slot of the digital video recorder.
C
C REMOTE C NC NC C
RS485
TERMINATE
ON
ALL
RESET
B
OUT
1 PC card slot
REMOTE
C
AC IN
FULL
OUT
PC Card SLOT
1
G
NIN
RM
AR UT ALA LL
W O
FU
AUDIO
MIC
IN
EJECT
P
Ground
Switching output
Ground
* Used for twisted-pair cable connection.
6
English
CONNECTIONS
Be sure to carefully read the Instruction Manuals for all equipment being connected to the digital video recorder.
If the connections are incorrect, smoke or operating malfunctions may result.
Basic connections
Video camera (sold separately)
MIC
IN
C IN OUT
AC IN
FULL
AUDIO
IN
OUT
VIDEO
LOOP OUT
OUT
DIGITAL
OUT
SUB IN
C
SUB OUT
A
RS232C
RS485
IN
LOOP OUT
S-VIDEO
B C REMOTE C NC NC C
RS485
TERMINATE
ON
ALL
RESET
C
T
IN
OU
PC Card SLOT
SW
IN
EJECT
CLOCK
ADJUST
W
AR
OU NIN
T G
AL
FU A R
LL M
ALARM
RESET
ALARM ALARM
OUT
C IN
NO
N
OU RE
T C
Microphone input
OFF
OUT
Computer
S-VIDEO IN
connector
VIDEO IN
connector
TV monitor
(sold separately)
TV monitor
(sold separately)
System control connections
Connecting a remote control circuit
Use a twisted-pair cable (sold separately) to connect a system controller
to control terminals A, B and C (ground) of the digital video recorder.
Connect signal A to signal A and signal B to signal B.
If a remote control circuit is constructed as shown in the illustration and
connected to the REMOTE control input terminals of the control
connector, the digitao video recorder can be operated by remote control.
Push and insert cables
220Ω
SW 1: REC STOP
220Ω
SW 2: PLAY STOP
A
C REMOTE C NC NC C
RS485
TERMINATE
ON
ALL
RESET
300Ω
C
SW 3: PAUSE
T
OU
RS485
B
SW
C
32C
360Ω
SW 4: SEARCH
470Ω
OFF
SW 5: CHANNEL
680Ω
RS485
B
C REMOTE C NC NC C
RS485
TERMINATE
ON
ALL
RESET
SW 6: PLAY
C
820Ω
T
OU
To signal B
To signal A
A
SW
Twisted-pair cable
C
SW 7: REC
1.2kΩ
OFF
SW 8: MENU
Ground
1.8kΩ
RS-485 connector
SW 9 : EXIT/OSD
SW: Switch
2.2kΩ
SW 10 : JOG j
3.3kΩ
Note: The remote control cable should
be no more than 5 m long.
System controller (sold separately)
SW 11 : JOG l
4.7kΩ
SW 12 : SHUTTLE c
7.5kΩ
SW 13 : SHUTTLE d
13kΩ
SW 14 : ZOOM
27kΩ
SW 15 : COPY
68kΩ
SW 16 : TIMER
English
7
CONNECTIONS
Digital multiplexer connections
Connect to a multiplexer (MPX-CD163 or CD93) that allows digital connections.
(When necessary)
Alarm input
ALARM
C CLOCK
RE ADJUST
RESET
ON UT
ALARM ALARM N O
OUT
C IN OUT
C IN
AC IN
FULL
AUDIO
MIC
IN
IN
OUT
IN
EJECT
G
NIN
RM
AR UT ALA LL
W O
FU
VIDEO
LOOP OUT
OUT
PC Card SLOT
DIGITAL
OUT
SUB IN
IN
C
A
RS232C
SUB OUT
RS485
IN
1
2
3
4
5
6
7
8
9
13
10
14
11
15
12
16
LOOP OUT
S-VIDEO
B C REMOTE C NC NC C
RS485
TERMINATE
ON
ALL
RESET
SW
C
OU
T
OFF
OUT
✱ STP (Shielded Twisted Pair) Cable
(straight-type CAT-5, 3 m or less)
DIGITAL OUT
DIGITAL IN
Alarm output
TV monitor (sold separately)
Ground (C)
Multiplexer (sold separately)
Dgital series connections
Up to three digital video recorders can be connected digitally for recording images in series.
A Digital connection of multiplexers in series
Multiplexer (sold separately)
1
2
3
4
5
6
7
8
9
13
10
14
11
15
12
16
CLOCK
ADJUST
C IN OUT
AC IN
FULL
AUDIO
IN
OUT
VIDEO
LOOP OUT
OUT
LOOP OUT
S-VIDEO
DIGITAL
OUT
SUB IN
C
SUB OUT
A
RS232C
B C REMOTE C NC NC C
RS485
TERMINATE
ON
ALL
RESET
C
T
IN
RS485
IN
OU
PC Card SLOT
SW
IN
EJECT
NO
N
OU RE
T C
ALARM
RESET
ALARM ALARM
OUT
C IN
MIC
IN
W
AR
OU NIN
T G
ALA
FU R
LL M
Digital video recorder (main)
TV monitor
(sold separately)
OFF
OUT
CLOCK
ADJUST
C IN OUT
AC IN
FULL
AUDIO
IN
OUT
VIDEO
LOOP OUT
OUT
LOOP OUT
S-VIDEO
DIGITAL
OUT
SUB IN
C
SUB OUT
A
RS232C
B C REMOTE C NC NC C
RS485
TERMINATE
ON
ALL
RESET
C
T
IN
RS485
IN
OU
PC Card SLOT
SW
IN
EJECT
NO
N
OU RE
T C
ALARM
RESET
ALARM ALARM
OUT
C IN
MIC
IN
W
AR
OU NIN
T G
ALA
FU R
LL M
Digital video recorder (sub 1)
Amplifier
(sold separately)
OFF
OUT
CLOCK
ADJUST
C IN OUT
AC IN
FULL
AUDIO
IN
OUT
VIDEO
LOOP OUT
OUT
LOOP OUT
S-VIDEO
OUT
DIGITAL
OUT
SUB IN
C
SUB OUT
A
RS232C
B
C REMOTE C NC NC C
RS485
TERMINATE
ON
ALL
RESET
C
T
IN
RS485
IN
OU
PC Card SLOT
SW
IN
EJECT
NO
N
OU RE
T C
ALARM
RESET
ALARM ALARM
OUT
C IN
MIC
IN
W
AR
OU NIN
T G
ALA
FU R
LL M
Digital video recorder (sub 2)
Amplifier
(sold separately)
OFF
Note: For digital connections a shielded type LAN cable (Shielded Twisted Pair) must be used.
When digital video recorders are connected digitally in series, the digital input and output terminals can be used to transmit video signals,
control signals and switching signals. However audio signals cannot be transmitted in the same way, so if audio signals also need to be
recorded, connect the audio input terminals via an amplifier as shown in the connection diagram.
8
English
CONNECTIONS
B Digital connection of digital video recorders with multiplexer function in series
Digital video recorders
with multiplexer function
(sold separately)
2
3
4
5
6
7
8
9
13
10
14
11
15
12
16
MENU
EXIT/OSD
ZOOM
SEARCH
SEQUENCE
COPY
PLAY/STOP
C
1
POWER
FULL
1
9
ALARM FULL
2
10
3
11
LOCK
4
5
12
13
ALARM
6
14
7
15
8
AR
LE
SHUTTLE
JOG
EN
TE
R
STILL
QUAD MULTI
16
SHUTTLE LOCK
MON2 PLUS
REC/STOP
TIMER
ALARM
TV monitor
(sold separately)
CLOCK
ADJUST
C IN OUT
AC IN
FULL
AUDIO
IN
OUT
VIDEO
LOOP OUT
OUT
IN
DIGITAL
OUT
SUB IN
C
SUB OUT
A
RS232C
RS485
IN
LOOP OUT
S-VIDEO
B C REMOTE C NC NC C
RS485
TERMINATE
ON
ALL
RESET
C
T
OU
PC Card SLOT
SW
IN
Amplifier
(sold separately)
EJECT
NO
N
OU RE
T C
ALARM
RESET
ALARM ALARM
OUT
C IN
MIC
IN
W
AR
OU NIN
T G
ALA
FU R
LL M
Digital video recorder (sub 1)
OFF
OUT
(sold separately)
ALARM
RESET
ALARM ALARM
OUT
C IN
MIC
IN
IN
FULL
OUT
VIDEO
LOOP OUT
OUT
OUT
DIGITAL
OUT
SUB IN
C
SUB OUT
A
RS232C
(sold separately)
9
B
C REMOTE C NC NC C
RS485
TERMINATE
ON
ALL
RESET
OFF
C
T
OU
IN
RS485
LOOP OUT
S-VIDEO
SW
PC Card SLOT
IN
English
CLOCK
ADJUST
C IN OUT
AUDIO
IN
EJECT
NO
N
OU RE
T C
Amplifier
(sold separately)
W
AR
OU NIN
T G
ALA
FU R
LL M
Digital video recorder (sub 2)
AC IN
BUILT-IN HARD DISK
Hard disk
A Normal recording area
•
Recording areas
•
The recording areas on the hard disk (normal recording area: 80%,
alarm recording area: 19%, archive area: 1%) are established
automatically when the power for the digital video recorder is turned on.
Images are recorded in the normal recording area when the REC/STOP
button is pressed, and they are recorded in the alarm recording area
when an alarm occurs. This is called the default condition, and the
following detailed settings can be confirmed in the sections on
“RECORDING IMAGES IN THE NORMAL RECORDING AREA” and
“RECORDING IMAGES IN THE ALARM RECORDING AREA” which
are explained later. Furthermore, settings such as the recording areas
and picture quality can be changed using the menu screens.
1%
B Alarm recording area
ALARM REC MODE SET menu settings are required.
• Alarm recording is enabled when ALARM RECORDING is set. When
a suspicious person is detected by the switch or motion sensor that
is connected to the alarm input terminal, an alarm is recorded in the
alarm recording area.
• Pre-alarm recording is enabled when PRE-ALARM RECORDING is
set. Pre-alarm recording repeatedly records the same images as for
normal recording in the alarm recording area, and overwrites these
images after the set time interval, until an alarm is detected. When
pre-alarm recording is set, the image immediately before an alarm
occurred can be recorded.
C Archive area
B Alarm
recording
area
When the REC/STOP button is pressed while monitoring is in
progress, images are recorded in the normal recording area.
When start and end times are entered for each day of the week and
are then enabled, timer recording is automatically carried out in the
normal recording area between the times that have been set.
80%
19%
C Archive area
A Normal recording area
This is the area for copying important images from the normal recording
area and the alarm recording area. The size of the archive area can be
set to a maximum of 10 GB (12.5% of total capacity when using an
80-GB hard disk, 6.25% of total capacity when using an 160-GB hard
disk) by changing the size of the normal recording area or the alarm
recording area.
Hard disk recording areas
Menu screen (initial setting)
A Setting screen for normal recording area picture quality,
This can be displayed by pressing the MENU button.
<RECORDING AREA SET>
TOTAL CAPACITY
NORMAL RECORDING AREA
AREA FULL RESET ->
ALARM RECORDING AREA
AREA FULL RESET ->
ARCHIVE AREA
AREA FULL RESET ->
: 80GB
: 80 %
A A
: 19 %
B B
:
C
1%
recording speed, etc.
<NORMAL REC MODE SET>
PICTURE QUALITY
: ENHANCED
FRAME/FIELD RECORDING : FIELD
AUDIO RECORDING
: OFF
REC CYCLE : 0.10SEC ( 54H)
1
2
3
4
CAUTION : WHEN THE AREA SETTING IS CHANGED.
THE WHOLE AREA WILL BE INITIALIZED !
1 Picture quality: ENHANCED
B Setting screen for alarm recording area picture quality,
Picture quality can be selected from five options.
The recording speed changes in accordance with the picture
quality selected.
recording speed, etc.
<ALARM REC MODE SET>
PICTURE QUALITY
: ENHANCED
FRAME/FIELD RECORDING : FIELD
AUDIO RECORDING
: OFF
ALARM RECORDING
: OFF
REC CYCLE : 0.10SEC. DURATION: 1SEC
PRE-ALARM RECORDING : ¤¤¤
REC CYCLE : ¤¤¤ SEC. DURATION: ¤¤¤
=> (46400 ALARMS CAN BE RECORDED)
ALARM TRIGGER
: ALARM
MOTION SENSOR
->
2 Recording method: Can be set to FRAME or FIELD.
The recording speed changes in accordance with the method
selected.
3 Audio recording: Can be set to ON or OFF.
4 Recording speed: Shows the recording interval and the
recording time.
Refer to the recording speed table for further details.
1
2
3
5
4
5 Alarm recording setting: Can be set to ON or OFF.
When alarm recordings are to be made, select a setting such as
MODE1 for the OFF setting. The recording speed and alarm
duration will be displayed
10
English
BUILT-IN HARD DISK
Recording speed tables (The recording time may vary depending on the images being recorded.)
These recording speed tables show the recording times for various picture quality and frame/field settings when recording in the normal recording area
of the hard disk (80 GB). They do not include audio recording settings.
The recording times for the normal recording area and the alarm recording area represent the recording time values given in the recording speed tables,
multiplied by the percentages for the normal recording area and alarm recording area that have been set using the recording area setting menu commands.
When recording with an 80-GB hard disk at 100% capacity
Field recording
Recording
Recording
Rate
Cycle (SEC)
(field/sec)
60.00
0.02
30.00
0.03
20.00
0.05
15.00
0.07
10.00
0.10
7.50
0.13
6.00
0.17
5.00
0.20
4.29
0.23
3.75
0.27
3.33
0.30
3.00
0.33
2.73
0.37
2.31
0.43
2.00
0.50
1.67
0.60
1.43
0.70
1.25
0.80
1.11
0.90
1.00
1
0.50
2
0.33
3
0.25
4
0.20
5
0.10
10
0.05
20
0.03
30
Frame recording
Recording
Recording
Rate
Cycle (SEC)
(frame/sec)
30.00
0.03
15.00
0.07
10.00
0.10
7.50
0.13
5.00
0.20
3.75
0.27
3.00
0.33
2.50
0.40
2.14
0.47
1.88
0.53
1.67
0.60
1.50
0.67
1.36
0.73
1.15
0.87
1.00
1.00
0.83
1.20
0.71
1.40
0.63
1.60
0.56
1.80
0.50
2
0.25
4
0.17
6
0.13
8
0.10
10
0.05
20
0.03
40
0.02
60
RECORDING TIME
BASIC
NORMAL
ENHANCED
FINE
SUPER FINE
21H
42H
63H
85H
127H
170H
212H
255H
297H
340H
382H
425H
468H
553H
638H
765H
893H
1021H
1148H
1276H
2553H
3829H
5106H
6382H
12765H
25531H
38296H
15H
30H
45H
60H
90H
120H
150H
180H
210H
241H
271H
301H
331H
391H
452H
542H
632H
723H
813H
904H
1808H
2712H
3616H
4521H
9042H
18084H
27126H
11H
22H
33H
45H
67H
90H
113H
135H
158H
180H
203H
226H
248H
293H
339H
406H
474H
542H
610H
678H
1356H
2034H
2712H
3390H
6781H
13563H
20345H
8H
16H
24H
32H
49H
65H
82H
98H
115H
131H
147H
164H
180H
213H
246H
295H
345H
394H
443H
493H
986H
1479H
1972H
2466H
4932H
9864H
14796H
6H
12H
18H
24H
37H
49H
62H
74H
87H
99H
112H
124H
137H
162H
187H
224H
261H
299H
336H
374H
748H
1122H
1496H
1870H
3741H
7483H
11224H
The tables below are recording time tables provided for reference if the total capacity of the hard disk has been increased to 160 GB. (Contact the
place of purchase for details on increasing the capacity of the hard disk.)
When recording with a 160-GB hard disk at 100% capacity
Field recording
Recording
Recording
Rate
Cycle (SEC)
(field/sec)
60.00
0.02
30.00
0.03
20.00
0.05
15.00
0.07
10.00
0.10
7.50
0.13
6.00
0.17
5.00
0.20
4.29
0.23
3.75
0.27
3.33
0.30
3.00
0.33
2.73
0.37
2.31
0.43
2.00
0.50
1.67
0.60
1.43
0.70
1.25
0.80
1.11
0.90
1.00
1
0.50
2
0.33
3
0.25
4
0.20
5
0.10
10
0.05
20
0.03
30
Frame recording
Recording
Recording
Rate
Cycle (SEC)
(frame/sec)
30.00
0.03
15.00
0.07
10.00
0.10
7.50
0.13
5.00
0.20
3.75
0.27
3.00
0.33
2.50
0.40
2.14
0.47
1.88
0.53
1.67
0.60
1.50
0.67
1.36
0.73
1.15
0.87
1.00
1.00
0.83
1.20
0.71
1.40
0.63
1.60
0.56
1.80
0.50
2
0.25
4
0.17
6
0.13
8
0.10
10
0.05
20
0.03
40
0.02
60
RECORDING TIME
BASIC
NORMAL
ENHANCED
FINE
SUPER FINE
42H
85H
127H
170H
255H
340H
425H
510H
595H
680H
765H
851H
936H
1106H
1276H
1531H
1787H
2042H
2297H
2553H
5106H
7659H
10212H
12765H
25531H
51062H
76593H
30H
60H
90H
120H
180H
241H
301H
361H
421H
482H
542H
602H
663H
783H
904H
1085H
1265H
1446H
1627H
1808H
3616H
5425H
7233H
9042H
18084H
36168H
54253H
22H
45H
67H
90H
135H
180H
226H
271H
316H
361H
406H
452H
497H
587H
678H
813H
949H
1085H
1220H
1356H
2712H
4069H
5425H
6781H
13563H
27126H
40690H
16H
32H
49H
65H
98H
131H
164H
197H
230H
263H
295H
328H
361H
427H
493H
591H
690H
789H
887H
986H
1972H
2959H
3945H
4932H
9864H
19728H
29592H
12H
24H
37H
49H
74H
99H
124H
149H
174H
199H
224H
249H
274H
324H
374H
448H
523H
598H
673H
748H
1496H
2244H
2993H
3741H
7483H
14966H
22449H
Reference: 24H = 1 day, 168H = 1 week, 720H = 1 month, 8760H = 1 year
English
11
RECORDING TIME
BASIC
NORMAL
ENHANCED
FINE
SUPER FINE
42H
85H
127H
170H
255H
340H
425H
510H
595H
680H
765H
851H
936H
1106H
1276H
1531H
1787H
2042H
2297H
2553H
5106H
7659H
10212H
12765H
25531H
51062H
76593H
30H
60H
90H
120H
180H
241H
301H
361H
421H
482H
542H
602H
663H
783H
904H
1085H
1265H
1446H
1627H
1808H
3616H
5425H
7233H
9042H
18084H
36168H
54253H
22H
45H
67H
90H
135H
180H
226H
271H
316H
361H
406H
452H
497H
587H
678H
813H
949H
1085H
1220H
1356H
2712H
4069H
5425H
6781H
13563H
27126H
40690H
16H
32H
49H
65H
98H
131H
164H
197H
230H
263H
295H
328H
361H
427H
493H
591H
690H
789H
887H
986H
1972H
2959H
3945H
4932H
9864H
19728H
29592H
12H
24H
37H
49H
74H
99H
124H
149H
174H
199H
224H
249H
274H
324H
374H
448H
523H
598H
673H
748H
1496H
2244H
2993H
3741H
7483H
14966H
22449H
BUILT-IN HARD DISK
Pre-alarm recording time
This table shows the recording times for pre-alarm recording. Refer to this table when setting pre-alarm recording. (See page 18.)
Recording
Recording
Rate
Cycle (SEC)
(field/sec)
60.00
0.02
30.00
0.03
20.00
0.05
15.00
0.07
10.00
0.10
7.50
0.13
6.00
0.17
5.00
0.20
4.29
0.23
3.75
0.27
3.33
0.30
3.00
0.33
2.73
0.37
2.31
0.43
2.00
0.50
1.67
0.60
1.43
0.70
1.25
0.80
1.11
0.90
1.00
1
Recording time (Time display on menu screen; s: seconds, m: minutes))
2s (2s)
3s (3s)
5s (5s)
10s (10s)
20s (20s)
40s (40s)
60s (1m)
m
m
m
m
m
m
m
m
m
m
m
m
m
m
m
m
m
m
m
m
m
m
m
m
m
m
m
m
m
m
m
m
m
m
m
m
m
m
m
m
m
m
m
m
m
m
m
m
m
m
m
m
m
m
m
m
m
m
m
m
m
m
120s (2m) 180s (3m) 240s (4m) 300s (5m) 600s (10m) 900s (15m)
m
m
m
m
m
m
m
m
m
m
m
m
m
m
m
m
m
m
m
m
m
m
m
m
m
m
m
m
m
m
m
m
m
m
m
m
m
m
m
m
m
m
m
m
m
m
m
m
m
m
m
m
m
m
m
m
m
m
m
m
m
m
m
m
m
m
m
m
m
m
m
m
m
m
m
m
m
m
m
m
m
m
m
m
m
m
m
m
m
m
m
m
m
m
m
m
m
m
m
m
m
m
m
m
m
m
m
m
m
m
m
m
m
m
m
m
m
m
m
m
: Default setting value, recording cycle: 0.1 second (10 FPS), Recording time: 1 minute
The alarm duration menu setting can only be set to a recording time that is possible with the current recording rate setting.
In addition, when setting the recording rate, it can only be set within the range allowed by the current alarm duration. For example, if the alarm duration
is set to 3 seconds, the recording rate can only be set to 0.02 seconds or 0.03 seconds.
If a slower recording rate is set, the setting will not be accepted until the alarm duration is changed.
12
English
BUILT-IN HARD DISK
When the power for the digital video recorder is turned on, the operating display appears in the upper-left corner of the monitor screen. This operating
display shows information which is essential for operation, such as the date, time, picture quality and recording speed.
12
3
4 5
4CH
100%
01-01-01 ALARM 0000
00:00:00 EN 0.10SEC
6
7
Operating display
DISK ERROR (1)
01-01-01 ALARM 0000
00:00:00 EN 0.10SEC
DISK ERROR (1)
9
8
Operating display
Insert the power cord into a wall outlet and turn on the power.
The POWER indicator illuminates, and after approximately 15 seconds, the EXIT/OSD indicator illuminates. The camera images appear on the
monitor, and the operating display appears in the top-left corner of the screen.
Note:
• If the clock has not been set, the WARNING screen for setting the clock appears. If any operating button is pressed, the WARNING screen will
disappear, but recording and playback will not be possible until the clock has been set, so you will need to set the clock first. (See page 42.)
• If you press the EXIT/OSD button repeatedly, you can change the display position for the operating display or make it disappear.
1 Camera number display
6 Time display
Connect the digital video recorder to a multiplexer that is capable of
decoding Sanyo’s channel information (camera number) and press
the CHANNEL button. The number of the specified camera appear in
the display during playback.
When the digital video recorder is first turned on, the time appears as
00:00:00, and the time starts counting after the date has been set.
The digital video recorder uses the date and time to control recording
and playback, so if the date and time have not been set, the correct
images cannot be retrieved. Make sure that you use the menus to
set the correct time.
2 Date display
When the digital video recorder is first turned on, the date appears as
01-01-01 (month, day, year). Make sure that you use the menus to
set the correct date.
7 Picture quality display
This shows the picture quality for images that are recorded on the
hard disk. The default setting is EN (Enhanced). The display
changes when the picture quality is changed using the NORMAL
REC MODE SET menu item.
• BA: Basic
• NO: Normal
• EN: Enhanced
• FI: Fine
• SF: Super Fine
3 Operating symbol display
These symbols appear during recording and playback.
a : Recording
e : Fast forward
c : Playback
f : Rewind
d : Reverse playback h : Stopped
hc : Slow playback
dh : Slow reverse playback
Note: If recording and playback are being carried out at the same
time, the playback symbol (c) appears.
8 Recording speed display
4 Amount of recording area remaining
This displays the recording speed for images that are recorded on
the hard disk. The default setting is 0.10 SEC (during field recording).
The display changes when the picture quality and recording method
are changed using the NORMAL REC MODE SET menu item.
If overwriting has been disabled (OVERWRITE: OFF) in the normal
recording area or alarm recording area, the amount of space
remaining appears as a percentage. You can change the amount of
recording area remaining using the RECORDING CONDITIONS SET
menu item. (See page 48.)
9 Hard disk error display
This display appears if an error occurs with the hard disk.
• DISK ERROR: This appears when two hard disks or an expansion
hard disk has been installed, and an error had
occurred with either one of the hard disks.
• DISK ERROR (1): This appears when an error has occurred with
DISK 1 (MASTER).
• DISK ERROR (2): This appears when an error has occurred with
DISK 2 (SLAVE).
5 Alarm display and alarm number display
When an alarm setting is made using the ALARM REC MODE SET
menu item, The following display appears in the alarm display.
However, the PRE display appears when pre-alarm recording has
been set. When an alarm occurs, the PRE is replaced by ALARM
and the number of alarms also appears. The alarm display shows the
cumulative number of alarms.
• If ALARM RECORDING is set: ALARM appears.
ALARM flashes while an alarm is being recorded.
• If PRE-ALARM RECORDING is set: PRE appears.
• When playing images from the archive area: ARCHIV appears.
Note: During recording with this unit, playing back, copying
and transferring pictures is possible. However,
because of the recording priority the response of the
other operations becomes slower.
English
13
RECORDING IMAGES IN THE
NORMAL RECORDING AREA
Monitored images
are recorded.
Normal recording
Images can be recorded in the normal recording area while they are being monitored.
If the time has not been set, the digital video recorder cannot make recordings. Be sure to set the time. (See page 42.)
Setting the time
1
MENU
Press the MENU button to display the LANGUAGE/CLOCK SET menu, and set
the date and time. After the setting has been made, press the EXIT/OSD button,
the date and time appear in the operating display. (See page 42.)
<MAIN MENU 1>
1.LANGUAGE/CLOCK SET
2.VIDEO INPUT SET
3.RECORDING AREA SET
4.RECORDING CONDITIONS SET
->
->
->
->
<LANGUAGE/LANGUE/IDIOMA>
ENGLISH
<CLOCK SET>
01-01-2001 MON 00:00:00
S
S
Press the REC/STOP button.
2
REC/STOP
“a” appears in the operating display and the images being monitored are
recorded in the normal recording area. Recording onto the hard disk proceeds
automatically (default setting) according to the following settings. The settings
can be changed between long-period recording and high-quality recording in five
steps. (See page 49.)
• Hard disk recording areas:
Normal recording area: 80%
Alarm recording area: 19%
Archive area: 1%
• Picture quality: EN (Enhanced)
• Recording method: Field
• Recording speed: 0.10 seconds (54H)
Note: Playback is possible during recording. When the PLAY/STOP button is
pressed during recording, “c” appears in the operating display and
images are played back from the point where recording began. (See page
20.)
10-26-01
10:48:38 EN 0.10SEC
10-26-01
11:02:28 EN 0.10SEC
Recording start time
Press and hold the REC/STOP button for 3 seconds or more.
3
The “a” in the operating display disappears and recording stops.
REC/STOP
Note: When the remaining area in the normal recording area drops below the
set amount, the FULL indicator on the front panel flashes. If recording
continues under these conditions, the recording area becomes full and
recording stops. In the RECORDING AREA SET settings, carry out the
AREA FULL RESET operation for the normal recording area.
Recording will then be possible from the beginning again. (See page 48.)
14
POWER
FULL
ALARM FULL
LOC
English
RECORDING IMAGES IN THE NORMAL RECORDING AREA
Timer recording
The monitored images can be recorded automatically by setting start and end times for each day of the week.
1 Setting the time
1
MENU
<MAIN MENU 1>
1.LANGUAGE/CLOCK SET
2.VIDEO INPUT SET
3.RECORDING AREA SET
4.RECORDING CONDITIONS SET
Press the MENU button to display the LANGUAGE/CLOCK SET menu, and set
the date and time. After the setting has been made, press the EXIT/OSD button,
the date and time appear in the operating display. (See page 42.)
->
->
->
->
<LANGUAGE/LANGUE/IDIOMA>
ENGLISH
<CLOCK SET>
01-01-2001 MON 00:00:00
S
S
2 Set the timer.
<MAIN MENU 1>
1.LANGUAGE/CLOCK SET
2.VIDEO INPUT SET
3.RECORDING AREA SET
4.RECORDING CONDITIONS SET
5.NORMAL REC MODE SET
6.TIMER SET
Press the MENU button to display the TIMER SET menu, and then set the start
and end times for timer recording. (See page 50.)
Then press the EXIT/OSD button.
WEEK
SUN
MON
TUE
WED
<TIMER SET>
STOP REC CYCLE
--:-- 0.10SEC (
--:-- 0.10SEC (
--:-- 0.10SEC (
--:-- 0.10SEC (
Press the TIMER button.
2
TIMER
The TIMER indicator illuminates and the digital video recorder switches to timer
recording standby mode.
Note:
• If SET in the TIMER SET menu is not set to “ON”, or if the timer settings are
not made correctly, an alarm will sound when the TIMER button is pressed.
• The TIMER indicator illuminates when the timer setting has been made
correctly.
• When the timer setting time is reached, the TIMER indicator and the REC
indicator illuminate and timer recording starts.
• If you press the TIMER button during timer recording, the TIMER indicator
and the REC indicator switch off and timer recording stops.
English
START
--:---:---:---:--
15
10-05-01
17:30:25 EN 0.10SEC
->
->
->
->
->
->
54H)
54H)
54H)
54H)
SET
OFF
OFF
OFF
OFF
Timer recording starts when the timer setting time is
reached.
3
“a” appears in the operating display and the images being monitored are
recorded in the normal recording area. Recording onto the hard disk proceeds
automatically (default setting) according to the following settings. The settings
can be changed between long-period recording and high-quality recording in five
steps. (See page 49.)
• Hard disk recording areas:
Normal recording area: 80%
Alarm recording area: 19%
Archive area: 1%
• Picture quality: EN (Enhanced)
• Recording method: Field
• Recording speed: 0.10 seconds (54H)
10-05-01
19:30:00 EN 0.10SEC
Note: Playback is possible during recording. When the PLAY/STOP button is
pressed during recording, c appears in the operating display and images
are played back from the point where recording began. (See page 20.)
Timer recording stops when the set end time is reached.
4
TIMER
The TIMER indicator swithes off and the recording symbol (a) disappears from
the operating display and recording stops.
Note:
• Press the TIMER button to stop timer recording. Timer recording then stops.
• When the remaining area in the normal recording area drops below the set
amount, the FULL indicator on the front panel flashes. If recording continues
under these conditions, the recording area becomes full and recording stops.
In the RECORDING AREA SET settings, carry out the AREA FULL RESET
operation for the normal recording area.
Recording will then be possible from the beginning again. (See page 48.)
16
POWER
FULL
ALARM FULL
LOC
English
RECORDING IMAGES IN THE
ALARM RECORDING AREA
Alarm images are
recorded
Alarm recording
1 Setting the time
1
MENU
Press the MENU button to display the LANGUAGE/CLOCK SET menu, and set
the date and time. After the setting has been made, press the EXIT/OSD button,
the date and time appear in the operating display. (See page 42.)
<MAIN MENU 1>
1.LANGUAGE/CLOCK SET
2.VIDEO INPUT SET
3.RECORDING AREA SET
4.RECORDING CONDITIONS SET
->
->
->
->
<LANGUAGE/LANGUE/IDIOMA>
ENGLISH
<CLOCK SET>
01-01-2001 MON 00:00:00
S
S
2 Set alarm recording.
•
•
•
Press the MENU button to display the ALARM REC MODE SET menu from
the MAIN MENU screen. Then change the ALARM RECORDING setting to
the desired alarm recording setting (MODE1, 2, 3 or 4) and change the
ALARM TRIGGER setting. (See page 54 ~ 56.)
Press the MENU button, to display the BUZZER SET menu from the MAIN
MENU 2 screen, and change the ALARM setting to “ON”. (See page 62.)
Press the EXIT/OSD button to return to the normal screen.
<ALARM REC MODE SET>
PICTURE QUALITY
: ENHANCED
FRAME/FIELD RECORDING : FIELD
AUDIO RECORDING
: OFF
ALARM RECORDING
: MODE1
REC CYCLE : 0.10SEC. DURATION: 1SEC
PRE-ALARM RECORDING : ¤¤¤
REC CYCLE : ¤¤¤ SEC. DURATION: ¤¤¤
=> (46400 ALARMS CAN BE RECORDED)
ALARM TRIGGER
: ALARM
MOTION SENSOR
->
Suspicious person detection
2
ALARM
When an alarm occurs, “ALARM” appears in the operating display, the ALARM
indicator flashes and alarm recording (a symbol) starts. Alarm images are
recorded in the alarm recording area. Furthermore, the number of alarms in the
operating display is increased by one each time an alarm occurs.
10-05-01 ALARM 0001
18:10:25 EN 0.10SEC
Note: Normal recording and timer recording stop when an alarm occurs during
normal recording or timer recording.
3
Ending alarm recording
Recording ends after the end of the alarm duration period (default setting: 1 sec).
The “a” and ALARM displays stop flashing and recording stops.
Note: When the remaining area in the alarm recording area reaches 1%, the
ALARM FULL indicator on the front panel flashes. If recording is continued
under these conditions, the recording area is filled and the recording
stops. In the RECORDING AREA SET settings, carry out the AREA FULL
RESET operation for the alarm recording area.
Overwriting will be canceled and recording will be possible from the
beginning again. (See page 48.)
English
The number of
alarms is counted.
17
POWER
FULL
ALARM FULL
LOC
RECORDING IMAGES IN THE ALARM
RECORDING AREA
Pre-alarm images
are recorded
Monitored images
are recorded
Pre-alarm recording
Setting the time
1
MENU
Press the MENU button to display the LANGUAGE/CLOCK SET menu, and set
the date and time. After the setting has been made, press the EXIT/OSD button,
the date and time appear in the operating display. (See page 42.)
<MAIN MENU 1>
1.LANGUAGE/CLOCK SET
2.VIDEO INPUT SET
3.RECORDING AREA SET
4.RECORDING CONDITIONS SET
->
->
->
->
<LANGUAGE/LANGUE/IDIOMA>
ENGLISH
<CLOCK SET>
01-01-2001 MON 00:00:00
S
S
Set pre-alarm recording.
2
REC/STOP
ALARM
Press the MENU button to display the ALARM REC MODE SET menu. Set
ALARM RECORDING to the desired alarm recording setting (example: MODE1).
The *** setting for PRE-ALARM RECORDING will be set to “OFF”, so change it
to “ON”. (See page 56.)
Press the EXIT/OSD button to return to the normal screen. “PRE” appears in the
operating display, the ALARM indicator illuminates and pre-alarm recording
starts (the a mark does not appear).
The same monitored image as in the normal recording area is recorded
repeatedly in the alarm recording area.
Recording onto the hard disk proceeds automatically (default setting) according
to the following settings. The settings can be changed between long-period
recording and high-quality recording in five steps. (See page 49.)
• Hard disk recording areas:
Normal recording area: 80%
Alarm recording area: 19%
Archive area: 1%
• Picture quality: EN (Enhanced)
• Recording method: Field
• Recording speed: 0.10 seconds (54H)
<ALARM REC MODE SET>
PICTURE QUALITY
: ENHANCED
FRAME/FIELD RECORDING : FIELD
AUDIO RECORDING
: OFF
ALARM RECORDING
: MODE1
REC CYCLE : 0.10SEC. DURATION: 1SEC
PRE-ALARM RECORDING : ¤¤¤
REC CYCLE : ¤¤¤ SEC. DURATION: ¤¤¤
=> (46400 ALARMS CAN BE RECORDED)
ALARM TRIGGER
: ALARM
MOTION SENSOR
->
10-05-01 PRE 0000
18:10:25 EN 0.10SEC
When an alarm is received, pre-alarm recording stops
automatically and the alarm images are recorded.
3
The “PRE” disappears from the operating display, “ALARM” flashes and the
ALARM indicator flashes.
ALARM
Note:
• When the remaining area in the alarm recording area reaches 1%, the
ALARM FULL indicator on the front panel flashes. If recording is continued
under these conditions, the recording area is filled and the recording stops.
In the RECORDING AREA SET settings, carry out the AREA FULL RESET
operation for the normal recording area.
Recording will then be possible from the beginning again. (See page 48.)
• Refer to the recording speed tables for details on the pre-alarm recording
speeds. (See page 12.)
18
10-06-01 ALARM 0000
09:30:15 EN 0.10SEC
POWER
FULL
ALARM FULL
LOC
English
PLAYING BACK IMAGES RECORDED IN THE
NORMAL RECORDING AREA
The digital video recorder can play back recorded images in the normal recording area (normal recording, timer recording).
Playback operations
SEARCH
FRAME/FIELD
ALARM
Normal recording area
b Skipping to the previous or next alarm
(See page 25.)
b Switching between frame and field
(See page 23.)
STILL
PLAY/STOP
b Playback
(See page 20.)
b Still image
(See page 22.)
ZOOM
b Frame advance
(forward/reverse)
(See page 22.)
b Slow playback
(See page 20.)
b Zooming images (See page 21.)
SHUTTLE HOLD
Fast forward/fast rewind playback
(See page 20.)
Locking speed for
fast forward/rewind
playback
(See page 20.)
SHUTTLE HOLD
Releasing speed
lock
Normal playback
• When playing back recordings for the first time:
The recorded images will be played back from the beginning.
• When playing back for the second or subsequent time:
Playback will start from the point where the last playback session ended.
(Starting point for
first playback)
Ending point
(Starting point for
second playback)
Ending point
(Starting point for
third playback)
English
19
Ending point
PLAYING BACK IMAGES RECORDED IN THE NORMAL RECORDING
AREA
Playback
Press the PLAY/STOP button.
1
PLAY/STOP
c appears in the operating display and the images recorded in the normal
recording area are played back.
Note:
• Image playback starts from the point (time) that the recording started.
If there is no starting position, or if a reset has been made, the oldest
recorded image is played back.
• When playback is finished, playback mode is automatically paused.
The pause (h) symbol appears in the operating display and the STILL
indicator illuminates.
• If playback has been carried out at least once, playback will start from the
position where the last playback session ended.
10-26-01
11:02:50 EN 0.10SEC
Press the PLAY/STOP button again.
2
Playback stops.
PLAY/STOP
11-20-01
04:00:00 EN 0.10SEC
Note: If playback is started just as recording is being carried out, recording will
have priority, so that the playback images may be paused momentarily.
Fast forward/rewind playback
Turn the shuttle dial clockwise (or counterclockwise) during
playback.
1
When the shuttle dial is turned clockwise, e appears in the operating display
and fast forward playback starts. If it is turned counterclockwise, f appears in
the operating display and rewind playback starts.
When you release the shuttle dial, normal playback resumes.
11-17-01
02:38:00 EN 0.10SEC
Changing the playback speed
2
(Fast forward/slow playback)
1 Turn the jog dial clockwise.
Fast forward playback starts and e appears in the operating display.
2 Turn the jog dial counterclockwise.
Slow playback starts and hc appears in the operating display.
3 Return to normal playback.
Turn the jog dial clockwise. c appears in the operating display.
(Rewind/slow playback)
1 Turn the shuttle dial counterclockwise (fix at rewind).
d will be displayed, so press the SHUTTLE HOLD button. The SHUTTLE HOLD indicator will illuminate and the
rewind playback speed will be fixed at the current speed.
SHUTTLE HOLD
2 Turn the jog dial counterclockwise.
The speed becomes faster than for normal rewind playback, and f appears in the operating display.
3 Turn the jog dial clockwise.
Slow rewind playback starts and dh appears in the operating display.
4 Return to normal playback.
Turn the jog dial counterclockwise. c appears in the operating display.
20
English
PLAYING BACK IMAGES RECORDED IN THE NORMAL RECORDING
AREA
Zooming the image during playback
Press the ZOOM button during playback.
1
The zoom frame (blue) appears in the center of the screen.
ZOOM
Move the zoom frame to the position where the image is to
be enlarged.
2
•
•
Turn the shuttle dial.
3
The area inside the zoom frame is enlarged (2x).
11-17-01
02:36:00 EN 0.10SEC
Press the ZOOM button (to cancel zooming).
4
The image zooming is canceled and normal playback continues.
ZOOM
English
Turn the jog dial clockwise to move the zoom frame to the right.
Turn it counterclockwise to move the zoom frame to the left.
Turn the shuttle dial clockwise to change to vertical movement. Then turn the
jog dial clockwise to move the zoom frame upward and turn it
counterclockwise to move the zoom frame downward.
Move the zoom frame to the position to be enlarged.
Note:
• The display cannot be enlarged even while monitoring a camera image.
• The ZOOM button cannot be selected, when a multiplexer is used as a video
input.
• The picture quality becomes coarser when the image is zoomed.
21
11-17-01
02:36:00 EN 0.10SEC
PLAYING BACK IMAGES RECORDED IN THE NORMAL RECORDING
AREA
Viewing still images
Press the STILL button during playback.
1
h appears in the operating display and a still image is displayed.
11-17-01
02:38:00 EN 0.10SEC
STILL
Press the STILL button once more.
2
Still mode is canceled.
11-17-01
02:38:20 EN 0.10SEC
STILL
Frame advance (forward/reverse)
1
Turn the jog dial clockwise (or counterclockwise) in still
mode.
Turn the jog dial clockwise to advance the still image by one frame (one field).
Turn it counterclockwise to rewind the still image by one frame (one field).
17-11-01
02:50:08 EN 0.10SEC
Note: If the jog dial is turned quickly, the frame feed speed also increases.
During the following operations the picture may appear
distorted or momentarily frozen. This is normal and not a
malfunction.
• During the continuous playback from the normal and the
alarm recording area, the picture may be distorted when
the recording area is switched.
• When playing back during an alarm recording, during
continuous playback from the normal and alarm
recording area, during normal playback or when using
the fast forward/rewind playback the picture may appear
momentarily frozen.
22
English
PLAYING BACK IMAGES RECORDED IN THE NORMAL RECORDING
AREA
Selecting a camera image channel for playback
When the digital video recorder has been connected to a multiplexer (sold separately) and camera images have been recorded, you can specify the
channel (camera number) for the images recorded and play them back.
Press the CHANNEL button while playback is paused.
1
CHANNEL
The screen for selecting the camera number for cameras connected to the
multiplexer appears.
PLEASE SELECT CHANNEL
-- CHANNEL
CHANGE WITH JOG. SET WITH SHUTTLE
Use the jog dial to specify the channel (example: camera 4).
2
PLEASE SELECT CHANNEL
4 CHANNEL
CHANGE WITH JOG. SET WITH SHUTTLE
Turn the shuttle dial clockwise.
3
“c” appears in the operating display, and playback of images from the specified
channel starts.
Note:
• If the digital video recorder is not connected to a multiplexer that allows
decoding of channel information (camera numbers), channels can not be
specified for playback.
• When this operation is carried out, only the specified channel is played back,
and so other channels are not displayed.
• When a channel is selected, the multiplexer title information and date
information may not be fully displayed in some cases.
Switching between frame and field playback
1
Press the SEARCH FRAME/FIELD button while frame
recording images are being played back.
SEARCH
FRAME/FIELD
The screen changes between frame and field playback each time the button is
pressed.
Note:
• Switching between frame and field playback is only possible when images
that have been recorded in frame mode are being played back.
• When playing back of frame recording images that contain rapid movement,
instability may occur in the images.
English
23
CH4
10-27-01
13:38:33 SF 0.26SEC
SEARCHING FOR RECORDED IMAGES
Images that have been recorded in the alarm recording area and in the archive area can be played back. Furthermore, images can also be searched
for by recording date and time, and you can also search for moving objects that have been detected by a motion sensor during image playback.
a Alarm search (See page 25.)
Archive area
NO
0108
0107
0106
0105
0104
0103
0102
0101
Alarm image search and playback
<ALARM SEARCH>
DATE TIME
TOTAL ALARM
12-20 05:37
0234
12-19 14:23
12-16 11:13
12-16 16:13
12-15 10:13
12-13 15:19
12-13 11:15
12-13 11:13
MOVE:JOG
SELECT:SHUTTLE
Preview display
Alarm recording area
Single-screen display
a Alarm image thumbnail search (See page 26.)
Alarm image thumbnail search and
playback
0109
0108
0107
0106
0105
0104
0103
0102
0101
Thumbnail display
Single-screen display
a Time/date search (See page 27.)
<TIME DATE SEARCH>
RECORDING TOP : 12-15-01 08:00
RECORDING END : 12-22-01 17:00
Searching and playing back recorded
images by date/time
SEARCH :
DATE TIME
12-20-01 05:37
PREVIEW ->
VIEW
->
CHANGE:JOG SET:SHUTTLE
Preview display
SEARCH
FRAME/FIELD
Single-screen display
a Archive area search (See page 29.)
<SEARCH>
ALARM SEARCH
ALARM THUMBNAIL SEARCH
TIME DATE SEARCH
ARCHIVE AREA SEARCH
MOTION DETECTION SEARCH
MOVE:JOG
->
->
->
->
->
NO
0108
0107
0106
0105
0104
0103
0102
0101
Playing back images saved (copied) in
the archive area
SELECT:SHUTTLE
<ARCHIVE AREA SEARCH>
DATE START
CAPACITY
12-20 05:37
TOTAL - 1024MB
12-19 14:23
USED - 400MB
12-16 11:13
12-16 16:13
12-15 10:13
12-13 15:19
12-13 11:15
12-13 11:13
MOVE:JOG
SELECT:SHUTTLE
Preview display
Single-screen display
Searching for and playing back moving
objects detected by a motion sensor
a Motion detection search (See page 30.)
<MOTION DETECTION SEARCH>
SEARCH FROM : NORMAL
/ CHANNEL : 4
START :
10-28-01 08:00
END :
10-28-01 20:00
MOTION SENSOR ->
PREVIEW
->
VIEW
->
MOVE:JOG
SELECT:SHUTTLE
-
-
- - - ú
- ú
- ú
- - - LEVEL :
ú
ú
ú
6
ú
ú
ú
-
- - - - - - - - EXIT
-
-
Date/time search of an image Motion sensor setting
for motion detection
24
<MOTION DETECTION SEARCH>
SEARCH FROM : NORMAL
/ CHANNEL : 4
START :
10-28-01 10:00
END :
10-28-01 20:00
MOTION SENSOR ->
PREVIEW
->
VIEW
->
MOVE:JOG
SELECT:SHUTTLE
Preview display
Single-screen display
English
SEARCHING FOR RECORDED IMAGES
Alarm search
All alarm recording images in the alarm recording area can be searched for and played back. If pre-alarm images have is recorded, the images
immediately before the alarms can also be played back.
1
Press the SEARCH FRAME/FIELD button during recording
or when the digital video recorder is stopped.
SEARCH
FRAME/FIELD
The SEARCH screen appears.
<SEARCH>
ALARM SEARCH
ALARM THUMBNAIL SEARCH
TIME DATE SEARCH
ARCHIVE AREA SEARCH
MOTION DETECTION SEARCH
MOVE:JOG
2
SELECT:SHUTTLE
Use the jog dial to select ALARM SEARCH and then turn the
shuttle dial clockwise.
1
The ALARM SEARCH screen appears.
NO
008
007
006
005
004
003
002
001
<ALARM SEARCH>
DATE TIME
TOTAL ALARMS
12-20 05:37
0010
12-19 14:23
12-16 11:13
12-16 16:13
12-15 10:13
12-13 15:19
12-13 11:15
12-13 11:13
MOVE:JOG
SELECT:SHUTTLE
NO
008
007
006
005
004
003
002
001
<ALARM SEARCH>
DATE TIME
TOTAL ALARM
12-20 05:37
0234
12-19 14:23
12-16 11:13
12-16 16:13
12-15 10:13
12-13 15:19
12-13 11:15
12-13 11:13
MOVE:JOG
SELECT:SHUTTLE
1 NO: Alarm number appears.
2 DATE/TIME: The date and time that the alarm was received and the images
were recorded appears.
3 TOTAL ALARM: The total number of alarm images recorded appears.
Use the jog dial to move the cursor in order to select the
images to be played back.
3
->
->
->
->
->
The selected alarm image appears in the preview screen.
Note:
• Up to eight items of alarm information can be displayed on the ALARM
SEARCH screen. When the jog dial is turned, the previous or next alarm
information screen appears.
• To end this search mode, press the SEARCH FRAME/FIELD button.
2
3
Turn the shuttle dial clockwise.
4
The preview image appears in a single-screen display and playback starts.
Note:
• You can also use the shuttle dial or jog dial to carry out operations such as
pausing and fast-forward playback.
• Alarm search starts playback from the image that was recorded at the instant
the alarm occurred, so if you are viewing pre-alarm images, use the shuttle
operations to carry out rewind playback.
11-18-01 ALARM 0004
25:03:12 EN 0.10SEC
Alarm search 2
Press an ALARM skip button during playback.
1
ALARM
•
•
If you press the û button, playback skips to the previous alarm image.
If you press the ù button, playback skips to the next alarm image.
Note: When playing back using alarm search, the playback will pause at the
start and at the end of each alarm recording. Use the ALARM skip buttons
to play back previous and subsequent alarm recordings.
English
25
11-18-01 ALARM 0004
25:03:12 EN 0.10SEC
SEARCHING FOR RECORDED IMAGES
Alarm thumbnail search
Alarm images can be searched for and played back from thumbnails.
All alarm images recorded in the alarm recording area are displayed as thumbnails.
1
Press the SEARCH FRAME/FIELD button during recording
or when the digital video recorder is stopped.
SEARCH
FRAME/FIELD
The SEARCH screen appears.
<SEARCH>
ALARM SEARCH
ALARM THUMBNAIL SEARCH
TIME DATE SEARCH
ARCHIVE AREA SEARCH
MOTION DETECTION SEARCH
MOVE:JOG
2
Use the jog dial to select ALARM THUMBNAIL SEARCH and
then turn the shuttle dial clockwise.
The last nine alarm recording images recorded appear.
The alarm number appears with each alarm recording image, and the alarm
number of the currently-selected alarm image flashes.
->
->
->
->
->
SELECT:SHUTTLE
<SEARCH>
ALARM SEARCH
ALARM THUMBNAIL SEARCH
TIME DATE SEARCH
ARCHIVE AREA SEARCH
MOTION DETECTION SEARCH
->
->
->
->
->
MOVE:JOG SELECT:SHUTTLE SEARCH:EXIT
3
0108
0107
0106
0105
0104
0103
0102
0101
0109
0108
0107
0106
0105
0104
0103
0102
0101
Use the jog dial to move the cursor in order to select the
images to be played back.
The alarm number of the currently-selected alarm image flashes.
Note:
• Up to nine items of alarm information including thumbnails can be displayed.
When the jog dial is turned, the previous or next alarm information screen
appears.
• To end this search mode, press the SEARCH FRAME/FIELD button.
4
0109
Turn the shuttle dial clockwise.
The selected image appears in a single-screen display and playback starts.
Note:
• You can also use the shuttle dial or jog dial to carry out operations such as
pausing and fast-forward playback.
• Only the contents of each alarm can be played back, in the same way as for
alarm searching. Use the ALARM skip buttons to play back previous and
subsequent alarm recordings.
26
11-18-01 ALARM 0003
25:02:00 EN 0.10SEC
English
SEARCHING FOR RECORDED IMAGES
Time/date search
The recording date and time for images in the normal recording area (normal recording and timer recording images) and in the alarm recording area of
the hard disk can be specified and the images can be played back.
1
Press the SEARCH FRAME/FIELD button during recording
or when the digital video recorder is stopped.
SEARCH
FRAME/FIELD
<SEARCH>
ALARM SEARCH
ALARM THUMBNAIL SEARCH
TIME DATE SEARCH
ARCHIVE AREA SEARCH
MOTION DETECTION SEARCH
The SEARCH screen appears.
MOVE:JOG
2
Use the jog dial to select TIME DATE SEARCH and then turn
the shuttle dial clockwise.
SELECT:SHUTTLE
<SEARCH>
ALARM SEARCH
ALARM THUMBNAIL SEARCH
TIME DATE SEARCH
ARCHIVE AREA SEARCH
MOTION DETECTION SEARCH
The TIME DATE SEARCH screen appears.
1 RECORDING TOP: The date and time of the first recorded image is
displayed.
->
->
->
->
->
->
->
->
->
->
2 RECORDING END: The date and time of the latest (most recently) recorded
image is displayed.
MOVE:JOG
3 SEARCH: Enter the date and time to be displayed in this area.
4 PREVIEW: A preview image appears.
5 VIEW: The selected image appears on the monitor as a single-screen image.
1
2
3
4
5
SELECT:SHUTTLE
<TIME DATE SEARCH>
RECORDING TOP :
10-25-01 08:00
RECORDING END :
10-28-01 17:00
SEARCH :
DATE TIME
10-25-01 08:00
PREVIEW ->
VIEW
->
CHANGE:JOG SET:SHUTTLE
3
Example: To search for 8 pm on 26 October 2001
1 Turn the jog dial clockwise and select “10”.
2 Turn the shuttle dial clockwise, and then use the jog dial to change “25” to
“26”.
3 Turn the shuttle dial clockwise and select “01”.
4 Turn the shuttle dial clockwise, and then use the jog dial to change “08” to
“20”.
SEARCH :
DATE TIME
10-26-01 20:00
PREVIEW ->
VIEW
->
CHANGE:JOG SET:SHUTTLE
5 Turn the shuttle dial clockwise and select “00”. Then turn the shuttle dial.
The cursor moves to PREVIEW.
English
<TIME DATE SEARCH>
RECORDING TOP :
10-25-01 08:00
RECORDING END :
10-28-01 17:00
27
SEARCHING FOR RECORDED IMAGES
Turn the shuttle dial clockwise
4
A search display appears while searching is in progress, and then a preview
screen showing the date and time entered appears.
Note: If there are no images that match the time exactly, the image closest to
the selected time range is displayed.
<TIME DATE SEARCH>
RECORDING TOP :
11-05-00 08:00
RECORDING END :
12-22-00 17:00
SEARCH :
DATE TIME
11-17-01 02:36:10
PREVIEW ->
VIEW
->
CHANGE:JOG SET:SHUTTLE
5
Use the jog dial to select VIEW, and then turn the shuttle
dial clockwise.
The preview image is displayed and played back in a single-screen.
11-17-01
02:36:10 EN 0.10SEC
Note:
• A single-screen image can be displayed when date and time are entered and
VIEW is selected, even without displaying a preview.
• You can also use the shuttle dial or jog dial to carry out operations such as
pausing and fast-forward playback.
28
English
SEARCHING FOR RECORDED IMAGES
Archive area search
You can play back images that have been saved (copied) in the archive area.
1
Press the SEARCH FRAME/FIELD button during recording
or when the digital video recorder is stopped.
SEARCH
FRAME/FIELD
The SEARCH screen appears.
<SEARCH>
ALARM SEARCH
ALARM THUMBNAIL SEARCH
TIME DATE SEARCH
ARCHIVE AREA SEARCH
MOTION DETECTION SEARCH
MOVE:JOG
2
Use the jog dial to select ARCHIVE AREA SEARCH and then
turn the shuttle dial clockwise.
The ARCHIVE AREA SEARCH screen appears.
1 NO: The archive number is displayed.
2 DATE: The date of the recorded image is displayed.
3 START: The start time of the recorded image is displayed.
4 TOTAL: The total capacity of the archive area is displayed.
5 USED: The recorded part of the archive area is displayed.
3
Use the jog dial to move the cursor in order to select the
images to be played back.
The selected alarm image appears in the preview screen.
Note:
• Up to eight items of information can be displayed in the ARCHIVE AREA
SEARCH screen.
When the jog dial is turned, the previous or next archive screen appears.
• To end this search mode, press the SEARCH FRAME/FIELD button.
4
Note:
• A single-screen image can be displayed when the cursor is moved to the
image to be played back and the shuttle dial is turned clockwise, even without
displaying a preview.
• You can also use the shuttle dial or jog dial to carry out operations such as
pausing and fast-forward playback.
English
SELECT:SHUTTLE
<SEARCH>
ALARM SEARCH
ALARM THUMBNAIL SEARCH
TIME DATE SEARCH
ARCHIVE AREA SEARCH
MOTION DETECTION SEARCH
12 3
29
->
->
->
->
->
45
MOVE:JOG <ARCHIVE
SELECT:SHUTTLE
SEARCH:EXIT
AREA SEARCH>
NO DATE START
CAPACITY
0108 12-20 05:37
TOTAL - 1024MB
0107 12-19 14:23
USED - 400MB
0106 12-16 11:13
0105 12-16 16:13
0104 12-15 10:13
0103 12-13 15:19
0102 12-13 11:15
0101 12-13 11:13
MOVE:JOG
SELECT:SHUTTLE
NO
0108
0107
0106
0105
0104
0103
0102
0101
<ARCHIVE AREA SEARCH>
DATE START
CAPACITY
12-20 05:37
TOTAL - 1024MB
12-19 14:23
USED - 400MB
12-16 11:13
12-16 16:13
12-15 10:13
12-13 15:19
12-13 11:15
12-13 11:13
MOVE:JOG
SELECT:SHUTTLE
Turn the shuttle dial clockwise.
The selected image appears in a single-screen display and playback starts.
->
->
->
->
->
11-18-01 ALARM 0004
25:03:12 EN 0.10SEC
SEARCHING FOR RECORDED IMAGES
Motion detection search
When a motion sensor is set for images recorded in the normal recording area (normal recording and timer recording images) or for images recorded
in the alarm recording area of the hard disk, you can search for images that have changed because of the entry of a suspicious person, for instance,
and play back only those images.
Note:
• If carrying out motion detection searches of multiplexer images, change the setting for MULTIPLEXER in the VIDEO INPUT SET menu to
something other than “NO USE”.
• If the digital video recorder is connected to a Sanyo multiplexer that allows decoding of channel information (camera numbers), channels can be
specified so that only images from those channels are searched for. If any other type of multiplexer is connected, this setting is not possible.
1
Press the SEARCH FRAME/FIELD button during recording
or when the digital video recorder is stopped.
SEARCH
FRAME/FIELD
The SEARCH screen appears.
<SEARCH>
ALARM SEARCH
ALARM THUMBNAIL SEARCH
TIME DATE SEARCH
ARCHIVE AREA SEARCH
MOTION DETECTION SEARCH
MOVE:JOG
2
Use the jog dial to select MOTION DETECTION SEARCH and
then turn the shuttle dial clockwise.
3
Use the jog dial to select SEARCH FROM and then turn the
shuttle dial clockwise.
The MOTION DETECTION SEARCH screen appears.
The ALARM display flashes.
->
->
->
->
->
SELECT:SHUTTLE
<SEARCH>
ALARM SEARCH
ALARM THUMBNAIL SEARCH
TIME DATE SEARCH
ARCHIVE AREA SEARCH
MOTION DETECTION SEARCH
->
->
->
->
->
<MOTION DETECTION SEARCH>
SEARCH FROM : ALARM
START : -------- --:-END
: -------- --:-CHANNEL
: --
START PREVIEW ->
MOVE:JOG
4
Use the jog dial to select the recording area (example:
NORMAL), and then turn the shuttle dial clockwise.
The cursor moves to CHANNEL.
Note: If the setting for MULTIPLEXER in the VIDEO INPUT SET menu is set to
“NO USE”, the cursor will move to START PREVIEW.
<MOTION DETECTION SEARCH>
SEARCH FROM : NORMAL
START : 10-28-01 08:00
END
: 10-28-01 20:00
CHANNEL
5
The cursor moves to START PREVIEW.
: --
START PREVIEW ->
Examples of recording area selection:
• ALARM: Only images in the alarm recording area are searched.
• NORMAL: Only images in the normal recording area are searched.
• ALARM & NORMAL: Images in both the alarm recording area and the
normal recording area are searched.
Turn the shuttle dial clockwise, use the jog dial to select the
camera number (example: 4), and then turn the shuttle dial
clockwise.
SELECT:SHUTTLE
MOVE:JOG
SELECT:SHUTTLE
<MOTION DETECTION SEARCH>
SEARCH FROM : NORMAL
START : 10-28-01 08:00
END
: 10-28-01 20:00
CHANNEL
:4
START PREVIEW ->
MOVE:JOG
30
SELECT:SHUTTLE
English
SEARCHING FOR RECORDED IMAGES
6
Turn the shuttle dial clockwise.
<MOTION DETECTION SEARCH>
SEARCH FROM : NORMAL
START : 10-28-01 08:00
END
: 10-28-01 20:00
The screen changes and the preview screen for camera number 4 appears.
1 START: The date and time for the first image in the selected recording area
appears.
You can also select the screen which has a motion sensor set.
CHANNEL
2 END: The date and time for the last image in the selected recording area
appears.
One hour is added to the time that is displayed.
You can also select the screen which has a motion sensor set.
5 VIEW: The selected image appears on the monitor as a single-screen image
in a normal screen.
7
Turn the shuttle dial clockwise.
Use the jog dial to set the START date and time (example: 10.00 am on the
current day) for the motion sensor setting, and then turn the shuttle dial
clockwise.
The image for the specified time appears in the preview screen, and the cursor
moves to the END date and time setting location.
SEARCHING
MOVE:JOG
3 MOTION SENSOR: The motion sensor appears.
4 PREVIEW: The selected start point appears.
If you turn the shuttle dial clockwise, you can check the images
up until the end point.
:4
START PREVIEW ->
SELECT:SHUTTLE
<MOTION DETECTION SEARCH>
SEARCH FROM : NORMAL
/ CHANNEL : 4
START :
10-28-01 08:00
END :
10-28-01 10:00
MOTION SENSOR ->
PREVIEW
->
VIEW
->
MOVE:JOG
1
2
3
4
5
SELECT:SHUTTLE
<MOTION DETECTION SEARCH>
SEARCH FROM : NORMAL
/ CHANNEL : 4
START :
10-28-01 08:00
END :
10-28-01 20:00
MOTION SENSOR ->
PREVIEW
->
VIEW
->
MOVE:JOG
SELECT:SHUTTLE
<MOTION DETECTION SEARCH>
SEARCH FROM : NORMAL
/ CHANNEL : 4
START :
10-28-01 10:00
END :
10-28-01 20:00
MOTION SENSOR ->
PREVIEW
->
VIEW
->
MOVE:JOG
8
9
English
SELECT:SHUTTLE
Turn the shuttle dial clockwise.
Use the jog dial to set the END date and time (example: 8.00 pm on the current
day) for the motion sensor setting, and then turn the shuttle dial clockwise.
The cursor moves to MOTION SENSOR.
<MOTION DETECTION SEARCH>
SEARCH FROM : NORMAL
/ CHANNEL : 4
START :
10-28-01 10:00
END :
10-28-01 20:00
MOTION SENSOR ->
PREVIEW
->
VIEW
->
MOVE:JOG
SELECT:SHUTTLE
Turn the shuttle dial clockwise.
The motion sensor setting screen appears.
Set the motion sensor to cover the area where you would like movement to be
observed.
Move the cursor to EXIT and turn the shuttle dial clockwise. The display returns
to the MOTION DETECTION SEARCH screen. Refer to page 58 for details on
motion sensor settings.
31
-
-
- - - ú
- ú
- ú
- - - LEVEL :
ú
ú
ú
6
ú
ú
ú
-
- - - - - - - - EXIT
-
-
SEARCHING FOR RECORDED IMAGES
10
2
1
Note: If no motion sensor settings have been made, “NOT FOUND” appears, so
make sure that the motion sensor settings have been made correctly.
11
2
1
Use the jog dial to move the cursor to PREVIEW, and then
turn the shuttle dial clockwise. The screen showing the
motion sensor settings appear in the preview screen each
time the shuttle dial is turned.
<MOTION DETECTION SEARCH>
SEARCH FROM : NORMAL
/ CHANNEL : 4
START :
10-28-01 10:00
END :
10-28-01 20:00
MOTION SENSOR ->
PREVIEW
->
VIEW
->
MOVE:JOG
SELECT:SHUTTLE
To view a motion sensor setting in a single-screen display,
use the jog dial to move the cursor to VIEW and then turn
the shuttle dial clockwise.
The display changes from the specified image to normal playback.
Note: When using a multiplexer and the camera number has been specified as a
channel when carrying out motion detector searches, only images for the
specified camera number will be played back. For playback of all cameras
the playback has first to be switched off and then switched on again.
Furthermore, the multiplexer title information and date information may not
be fully displayed at this time in some cases.
32
English
SAVING (COPYING) RECORDED IMAGES
Important images that have been recorded onto the normal recording area or alarm recording area can be copied to a CompactFlash card or to the
archive area of the hard disk.
A Copying images to the hard disk archive area
Copying
Copying
Alarm
recording
Alarm
area
Alarm
recording
recording
area
area
Archive area
Normal
recording area
Normal
Normal
recording area
recording area
Hard disk
B Copying images from archive area to a CompactFlash card
Automatic copying
Automatic copying
Archive area
Alarm
recording
Alarm
area
Alarm
recording
recording
area
area
Normal
recording area
Normal
Normal area
recording
recording area
Hard disk
CompactFlas
hCard
Microd
rive
CF card or microdrive
C Copying images from the archive area to a DDS (DAT) drive or CD-R drive
Copying
Copying
Alarm
recording
Alarm
area
Alarm
recording
recording
area
area
Archive area
Normal
recording area
Normal
Normal
recording area
recording area
EJECT
S-VIDEO
SCSI
Hard disk
DDS (DAT) drive or
CD-R drive
(sold separately)
Note:
• Copied images are stored as a single picture.
• If you are downloading images to a CompactFlash card, the images are automatically saved in the archive area, and they are then copied from the
archive area to the CompactFlash card. The images will no longer remain in the archive area.
• If the archive area has become full, use the AREA FULL RESET setting for the archive area in the RECORDING AREA SET menu to delete
unneeded images.
English
33
SAVING (COPYING) RECORDED IMAGES
A Copying images to the hard disk archive
area
1
6
Play back the images in the normal recording area or alarm
recording area that is to be copied, and pause playback at the
image that is to be copied. (See page 22.)
PLAY/STOP
STILL
Use the jog dial to select the SECONDS setting, and then
turn the shuttle dial clockwise.
• PICTURES: Specify the number of images to be copied.
• SECONDES: Specify the number of seconds of images to be
copied.
• MINUTES: Specify the number of minutes of images to be
copied (up to 60 minutes).
The cursor moves to START.
COPY TO : ARCHIVE AREA
HOW MANY : 10 PICTURES
Example: To copy 10 seconds of images starting from a selected
image
2
START
7
While the image to be copied is displayed as a still image,
press the COPY button.
The copy screen appears.
->
Turn the shuttle dial clockwise.
Copying of images to the archive area starts. When copying is
complete, “COPY FINISHED” appears.
COPY
COPY TO : ARCHIVE AREA
COPY TO : ARCHIVE AREA
HOW MANY : 1 PICTURES
START
HOW MANY : 10 PICTURES
->
START
FORMAT COMPACT FLASH ->
CHANGE WITH JOG. SET WITH SHUTTLE
3
->
Note: If you press the COPY button while copying is in progress,
copying is canceled.
Use the jog dial to select COPY TO and then turn the shuttle
dial clockwise.
The ARCHIVE AREA display flashes.
COPY TO : ARCHIVE AREA
HOW MANY : 1 PICTURES
START
->
FORMAT COMPACT FLASH ->
CHANGE WITH JOG. SET WITH SHUTTLE
4
Use the jog dial to select ARCHIVE AREA and then turn the
shuttle dial clockwise.
The cursor moves to HOW MANY.
COPY TO : ARCHIVE AREA
HOW MANY : 1 PICTURES
START
5
->
Turn the shuttle dial clockwise, use the jog dial to change
the setting to “10”, and then turn the shuttle dial clockwise.
The cursor moves to PICTURES.
34
English
SAVING (COPYING) RECORDED IMAGES
B Copying images from archive area to a
CompactFlash card
3
Insert a CompactFlash card into the CompactFlash slot on the
front panel.
When inserting the CompactFlash card, make sure that the direction of
insertion is correct.
A microdrive can also be used for copying images.
Use the jog dial to select COMPACIT FLASH and then turn
the shuttle dial clockwise.
The cursor moves to HOW MANY.
COPY TO : COMPACT FLASH
HOW MANY : 1 PICTURES
(Inserting)
1
4
Turn the shuttle dial clockwise, use the jog dial to change
the setting to “ 10” , and then turn the shuttle dial clockwise.
The cursor moves to PICTURES.
2
COPY TO : COMPACT FLASH
HOW MANY : 10 PICTURES
3
5
(Removing)
3
Use the jog dial to select the SECONDS setting, and then
turn the shuttle dial clockwise.
• PICTURES: Specify the number of images to be copied.
• SECONDES: Specify the number of seconds of images to be
copied.
• MINUTES: Specify the number of minutes of images to be
copied (up to 60 minutes).
2
COPY TO : COMPACT FLASH
1
1
HOW MANY : 10 SECONDS
Note:
• The limit to the number of images that can be copied is 40000.
Copying ends when 40000 images have been copied.
• When copying alarm recordings, they can only be copied one at a
time.
Display an image from the archive area as a still image, and
then press the COPY button.
The copying screen appears.
Refer to page 29 for details on playing back images from the
archive area.
6
COPY
The COPY indicator illuminates, the COPY TO : COMPACT
FLASH screen appears and copying of images to the
CompactFlash card starts.
When copying is complete, “COPYING COMPLETE” appears.
COPY TO : ARCHIVE AREA
HOW MANY : 1 PICTURES
START
Turn the shuttle dial clockwise.
->
FORMAT COMPACT FLASH ->
CHANGE WITH JOG. SET WITH SHUTTLE
COPY TO : COMPACT FLASH
2
HOW MANY : 10 SECONDS
Use the jog dial to select COPY TO and then turn the shuttle
dial clockwise.
The ARCHIVE AREA display flashes.
START
Note:
• If copying images directly from the normal recording area or alarm
recording area to a CompactFlash card, the same images will also
be copied to the archive area. However, the images are deleted
after they have been copied.
• If you press the COPY button while copying is in progress, copying
is canceled.
COPY TO : ARCHIVE AREA
HOW MANY : 1 PICTURES
START
->
FORMAT COMPACT FLASH ->
CHANGE WITH JOG. SET WITH SHUTTLE
English
->
35
SAVING (COPYING) RECORDED IMAGES
Formatting CompactFlash cards
You can format CompactFlash cards and microdrives by selecting
“FORMAT COMPACTFLASH”.
You can only use a CompactFlash card that has been formatted to
FAT16 specifications. FAT32 formatted cards cannot be recognized.
IMPORTANT INFORMATION
Copying camera images to the archive recording
area or to a CompactFlash card
When the Digital Video Recorder is connected to a multiplexer
(including multiplexers from other manufacturers such as Robot,
DM and Sony), you can copy images from a specified camera
that have been recorded by the Digital Video Recorder to the
archive area or to a CompactFlash card.
1) Multiplexer operation
Press the VCR button and display the split screen.
2) Digital Video Recorder operation
Specify the camera channel to be copied by means of the
procedure in “Selecting a camera image channel for
playback” on page 23.
3) Multiplexer operation
Press the camera select button for the selected camera to
display the images for that camera in a single screen.
4) Digital Video Recorder operation
• If copying images to the archive recording area
Carry out the procedure in “Copying images to the
hard disk area” on page 34.
• If copying images from the archive recording area to a
CompactFlash card
Carry out the procedure in “Copying images from the
archive area to a CompactFlash card” on page 35.
“COPYING” will be displayed on each screen, and
copying will then start. When copying is complete,
“COPY FINISHED” will be displayed.
COPY TO : ARCHIVE AREA
HOW MANY : 20 PICTURES
START
->
FORMAT COMPACT FLASH ->
CHANGE WITH JOG. SET WITH SHUTTLE
CompactFlash recording area
COMPACT FLASH
SANYO
02032101
1
2
IMG00001
3
IMG00002
3
00000001.JPG
00000002.JPG
00000003.JPG
IMG00003
3
INDEX.HTM
4
1 A SANYO folder is created in the root directory.
2 Sub-folders for holding the copied images are created in
sequence in the SANYO folder.
3 Sub-folders are created within the date/time folder with names
Note:
starting from IMG00001. Each sub-folder can hold 200 images.
4 To view the file listing using a computer, use a browser such
If you copy images to the archive recording area of a Digital
Video Recorder or to a CompactFlash card without specifying
the camera channel with the Digital Video Recorder in step 2
above, all camera images from the multiplexer will be copied.
The copying function in this special screen can only be carried
out by multiplexers for which the Digital Video Recorder can
directly decode the multiplexer’s ID information. The multiplexer
interchangeability list is given below.
as Internet Explorer 5.0 or later to open the INDEX.HTM files.
The JPEG files can be played back as a slideshow.
Note:
• JPG images are recorded as field images, so that when they are
viewed using the normal image viewer, they are compressed by
1/2 in the vertical direction. Make sure that you view them using the
INDEX.HTM file.
• When frame recording images are copied to a CompactFlash card,
the images are copied separately as two field images, so that
frame playback is not possible when viewing these images using a
computer.
• Images that have been copied onto a CompactFlash card contain
codes for detecting file tampering, and these codes can be
recognized by computer software applications that can detect file
tampering. Contact the place of purchase for details.
A. Multiplexers that can be directly decoded
Sanyo, Robot, DM, Sony
B. Multiplexers that only allow decoding by the multiplexer
Pelco, Kalatel, ATV, Ultrak
36
English
SAVING (COPYING) RECORDED IMAGES
Backing up
C Copying images from the archive area
to a DDS (DAT) drive or CD-R drive
All of the data in the archive area can be backed up on a DDS (DAT)
drive.
☞ Connecting to a drive
1
Insert a recommended SCSI card for connecting the DDS (DAT)
drive into the PC card slot at the rear of the digital video recorder.
Images from the archive area can be copied to the DDS (DAT) drive,
and images recorded on the DDS (DAT) drive can also be copied to
the archive area.
• Recommended SCSI card
Manufacturer: ADAPTEC
Model No.: Slim SCSI 1460
• Recommended DDS-3 type DDS (DAT) drive
Manufacturer: Hewlett Packard
Model No.: Super Store dat 24e
• Recommended CD-R drive
Manufacturer: YAMAHA
Model: CRW2200SX-VK
COPY
2
To DIGITAL IN/OUT terminal of multiplexer
DIGITAL IN
Press the COPY button during recording or when the digital
video recorder is stopped.
The ARCHIVE SET screen appears.
DIGITAL OUT
<ARCHIVE SET>
BACK UP
->
RESTORE
->
ERASE
->
Use the jog dial to select BACK UP and then turn the shuttle
dial clockwise.
“ARCHIVING TO DDS(DAT) !” appears, and copying then starts.
• If you press the COPY button while copying is in progress,
copying is canceled.
• When copying is completed, “ ARCHIVE FINISHED!”
appears. Press any button to return to the normal screen.
01-01-01
00:00:00 EN 0.10SEC
ARCHIVING TO DDS(DAT) !
1
DDS (DAT) drive or
CD-R drive
(sold separately)
3
2
<PRESS COPY TO ABORT>
Note:
• When data is converted for storage on a DDS (DAT) drive, the
conversion process may result in an increase in the size of the
data. If copying images onto a 12 GB tape, it may only be possible
to copy about 10 GB of data.
• It will take approximately 4 hours to copy 10 GB of data onto a
DDS (DAT) drive.
Inserting an SCSI card (sold separately)
(Installed)
(Removed)
3
1
3
2
You can slide the knob to lock
the card.
1
2
Return the knob after
unlocking.
Note:
• The PC card slot is for 16-bit 5 V cards only.
Do not use 32-bit card bus types of card, as they may damage the
PC card slot of the digital video recorder.
• Check that the direction of insertion is correct when inserting the
SCSI card.
• If an SCSI card or DDS (DAT) drive other than the ones
recommended is used, correct operation cannot be guaranteed.
• The compatible CD-R drive is a YAMAHA SCSI CD-R/RW drive, and
the media must be CD-R discs only. CD-RW discs cannot be used.
* DDS (Digital Data Strage)/DAT (Digital Audio Tape).
English
37
SAVING (COPYING) RECORDED IMAGES
Reading data from a DDS (DAT) drive into the
archive area
Deleting DDS (DAT) drive image data
1
Note: All of the previously recorded images in the archive area are
deleted when images are transferred in this way.
1
Press the COPY button during recording or when the digital
video recorder is stopped.
The ARCHIVE SET screen appears.
COPY
COPY
<ARCHIVE SET>
BACK UP
->
RESTORE
->
ERASE
->
<ARCHIVE SET>
BACK UP
->
RESTORE
->
ERASE
->
2
2
Press the COPY button during recording or when the digital
video recorder is stopped.
The ARCHIVE SET screen appears.
Use the jog dial to select RESTORE and then turn the shuttle
dial clockwise.
The message “LISTING DATA !” appears. When playback is
complete, the RESTORE FROM DDS (DAT) screen appears.
Use the jog dial to select ERASE and then turn the shuttle
dial clockwise.
The WARNING screen appears.
<WARNING>
STORED DATA ON DDS(DAT) WILL BE ERASED !
ARE YOU SURE ?
NO
01-01-01
08:00:00 EN 0.10SEC
CHANGE WITH JOG, SET WITH SHUTTLE
LISTING DATA !
<PRESS COPY TO ABORT>
3
3
Use the jog dial to select the data to be read into the archive
area, and then turn the shuttle dial clockwise.
Reading of data starts. The RESTORE FROM DDS (DAT) screen
appears.
The image data on the DDS (DAT) drive is then saved into the
archive area.
When all data has been read into the archive area, “RESTORE
FINISHED!” appears.
When you play back the images in the archive area, the image
data that has been read can be played back.
<RESTORE FROM
NO DATE
TIME
0001 12-13-2001 11:13
0002 12-15-2001 10:15
0003 12-17-2001 10:15
Use the jog dial to change “ NO” to “ YES” , and then turn the
shuttle dial clockwise.
“ERASING MEDIUM!” appears, and when erasing of data from
the tape has been completed, “ERASING FINISHED!” appears.
01-01-01
08:00:00 EN 0.10SEC
ERASING MEDIUM !
DDS(DAT)>
SIZE
3.0GB
2.0GB
2.0GB
STORED DATA ON HDD WILL BE ERASED !
01-01-01
08:00:00 EN 0.10SEC
RESTORING FROM DDS(DAT) !
<PRESS COPY TO ABORT>
38
English
SAVING (COPYING) RECORDED IMAGES
Copying images to a CD-R drive
Use the jog dial to select “ SECONDS” , and then turn the
5 shuttle
dial clockwise.
viewing the still image to be copied from the archive
1 While
area, press the COPY button.
The cursor moves to “START”.
• PICTURES: The specified number of images are copied
starting from the current image.
• SECONDS: The specified number of seconds of images are
copied, starting from the current image.
• MINUTES: The specified number of minutes of images are
coped, starting from the current image.
• EVENTS: The specified number of events are copied, starting
from the current image.
The COPY screen appears.
Refer to page 29 for details on playing back images in the archive
area.
COPY
COPY TO : ARCHIVE AREA
HOW MANY : 20 PICTURES
START
->
COPY TO : CD-R
FORMAT COMPACT FLASH ->
CHANGE WITH JOG. SET WITH SHUTTLE
HOW MANY : 10 SECONDS
Use the jog dial to select “ COPY TO” , and then turn the shuttle
2 dial
clockwise.
Note:
• Each time a copy operation is carried out, the images are copied to
the archive area event by event as a single group. The capacity of the
archive area can be set as desired up to a maximum limit of 10 GB.
• Only images from the archive area can be copied to a CD-R drive.
Images cannot be copied directly from the normal recording area or
alarm recording area to a CD-R.
• Depending on the duration of each event, it may not be possible to
copy all of the events specified. (The maximum amount of data that
can be copied is 495 MB.)
• In the case of the EVENTS setting, if you select the “>60” setting,
copying will continue until the CD-R becomes full.
The “ARCHIVE AREA” display flashes.
COPY TO : ARCHIVE AREA
HOW MANY : 20 PICTURES
START
->
FORMAT COMPACT FLASH ->
CHANGE WITH JOG. SET WITH SHUTTLE
6 Turn the shuttle dial clockwise.
Use the jog dial to select “ CD-R” , and then turn the shuttle dial
3 clockwise.
The COPY indicator illuminates, “COPY TO: CD-R” appears on the
screen and copying to the CD-R starts.
When copying is finished, “COPY FINISHED” appears.
The cursor moves to “HOW MANY”.
COPY TO : CD-R
COPY TO : CD-R
HOW MANY : 20 PICTURES
HOW MANY : 10 SECONDS
the shuttle dial clockwise, use the jog dial to set the
4 Turn
number of images to "10", and then turn the shuttle dial
Note:
• At normal writing speed, it will take approximately 70 minutes or
more to fill the CD-R.
• The files are not written in a general file format. You will need
special computer application software. Contact the place of
purchase for further details.
• Images cannot be copied back from the CD-R drive the digital
video recorder. In addition, once images have been copied to a
CD-R drive, the CD-R disk is closed and further copying of files to
that disc will not be possible.
• The copying operation cannot be cancelled while copying is in
progress.
• If the storage capacity becomes filled while copying is in progress,
the error message “CD-R FULL” appears, and the details of the
last image that was copied are displayed.
clockwise.
The cursor moves to “PICTURES”.
COPY TO : CD-R
HOW MANY : 10 PICTURES
English
39
MENU FLOW CHART AND MENU
OPERATIONS
MENU flow
Settings for recording
Settings for operating environment
Main menu 1 contains settings that deal mainly with recording.
Main menu 2 contains settings that deal mainly with the
operating environment.
Main menu 1
<MAIN MENU 1>
1.LANGUAGE/CLOCK SET
2.VIDEO INPUT SET
3.RECORDING AREA SET
4.RECORDING CONDITIONS SET
5.NORMAL REC MODE SET
6.TIMER SET
7.HOLIDAY SET
8.ALARM REC MODE SET
TO MAIN MENU 2
MOVE LINES WITH JOG. SELECT WITH
Main menu 2
<MAIN MENU 2>
1.DISPLAY/VIDEO LOSS SET
2.RS-232C/RS-485 SET
3.BUZZER SET
4.SECURITY LOCK SET
5.NETWORK SET
6.HDD SET
7.POWER FAILURE/USED TIME
->
->
->
->
->
->
->
->
->
SHUTTLE
->
->
->
->
->
->
->
TO MAIN MENU 1
->
MOVE LINES WITH JOG. SELECT WITH SHUTTLE
Sub-menus
b Language, clock and daylight
saving settings (See page 42, 43.)
<VIDEO INPUT SET>
MULTIPLEXER
: NO USE
VIDEO INPUT
: ANALOG
b Recording area settings
(See page 45.)
: 80GB
: 80 %
: 19 %
1%
CAUTION : WHEN THE AREA SETTING IS CHANGED.
THE WHOLE AREA WILL BE INITIALIZED !
b Recording settings
(See page 47.)
<RECORDING CONDITIONS
DIGITAL SERIES RECORDING
TOTAL NUMBER
RECORDING NUMBER
NORMAL RECORDING AREA
OVERWRITE
ALARM RECORDING AREA
OVERWRITE
REMAINING DISK WARNING
<DISPLAY SET>
DATE
: ON
TIME
: ON
QUALITY
: ON
REC CYCLE
: ON
ALARM COUNT : ON
ALARM TYPE : ON
<VIDEO LOSS SET>
VIDEO LOSS : ON
b Multiplexer and video input
settings (See page 44.)
:
b Operating display settings
(See page 59.)
<NORMAL REC MODE SET>
PICTURE QUALITY
: ENHANCED
FRAME/FIELD RECORDING : FIELD
AUDIO RECORDING
: OFF
REC CYCLE :
0.10 SEC ( 54H)
<LANGUAGE/LANGUE/IDIOMA>
ENGLISH
<CLOCK SET>
01-01-2002 TUE 00:00:00
<DAYLIGHT SAVING>
MODE :
USE
WEEK MONTH TIME
ON 1ST-SUN 04 02:00
OFF LST-SUN 10 02:00
<EXT.CLOCK SET>
ADJUST.TIME
01:00
<RECORDING AREA SET>
TOTAL CAPACITY
NORMAL RECORDING AREA
AREA FULL RESET ->
ALARM RECORDING AREA
AREA FULL RESET ->
ARCHIVE AREA
AREA FULL RESET ->
b Normal recording area
settings (See page 49.)
SET>
: OFF
: ¤¤
: ¤¤
: ON
: ON
: ¤¤
b Timer settings
(See page 50.)
WEEK
SUN
MON
TUE
WED
THU
FRI
SAT
DLY
START
--:---:---:---:---:---:---:---:--
b RS-232C/RS-485 communication
settings (See page 60.)
<TIMER SET>
STOP REC CYCLE
--:-- 0.10SEC (
--:-- 0.10SEC (
--:-- 0.10SEC (
--:-- 0.10SEC (
--:-- 0.10SEC (
--:-- 0.10SEC (
--:-- 0.10SEC (
--:-- 0.10SEC (
54H)
54H)
54H)
54H)
54H)
54H)
54H)
54H)
<RS-232C/RS-485 SET>
CONTROL
: RS-232C
DATA SPEED : 19200
STATUS INFO : ¤¤¤
ALARM INFO : ¤¤¤
ADDRESS
: ¤¤¤
SET
OFF
OFF
OFF
OFF
OFF
OFF
OFF
OFF
<HOLIDAY
-----------------------------------------
SET>
11.
12.
13.
14.
15.
16.
17.
18.
19.
20.
<NETWORK
LAN CARD
:
NETWORK CONTROL :
IP ADDRESS
:
SUBNET MASK
:
GATEWAY
:
PORT
:
ID
:
ID1
:
ID2
:
ID3
:
SET>
LAN1
OFF
192.168. 0. 1
255.255.255. 0
0. 0. 0. 0
00080
PASSWORD (4-8)
1111---2222---3333----
b Hard disk settings
(See page 69.)
<HDD SET>
DISK1
: 80GB
DISK2
: ---GB
DISK INITIALIZE
->
CAUTION : ALL RECORDING WILL BE ERASED!
MIRRORING
: OFF
PLAYBACK DRIVE : ¤¤¤
CAUTION : RECORDING SPEED WILL BE
LIMITED BY MIRRORING!
b Buzzer settings
(See page 62.)
b Holiday settings
(See page 53.)
1.
2.
3.
4.
5.
6.
7.
8.
9.
10.
b Network settings
(See page 66.)
<BUZZER SET>
ALARM
:
DISK FULL
:
DISK ERROR :
LOCK WARNING :
KEY IN
:
NON REC
:
-----------------------------------------
OFF
ON
ON
ON
OFF
OFF
b Power failure/used time
settings (See page 70.)
<POWER FAILURE/USED TIME>
POWER FAILURE
#003 FAILURE ----- --:-RECOVER ----- --:-USED TIME
DISK1 USE : 00000H
DISK2 USE : -----H
POWER
: 00000H
FIRMWARE :
MAIN 1.00-00 / SUB 1.00-00
b Security lock settings
(See page 63.)
b Alarm recording settings
(See page 54.)
<SECURITY LOCK SET>
LEVEL PASSWORD(4-8) USE
ADMIN
-------- OFF
USER
-------- OFF
REC CONTROL
: ADMIN
<ALARM REC MODE SET>
PICTURE QUALITY
: ENHANCED
FRAME/FIELD RECORDING : FIELD
AUDIO RECORDING
: OFF
ALARM RECORDING
: OFF
REC CYCLE : 0.10SEC. DURATION: 1SEC
PRE-ALARM RECORDING : ¤¤¤
REC CYCLE : ¤¤¤ SEC. DURATION: ¤¤¤
=> (46400 ALARMS CAN BE RECORDED)
ALARM TRIGGER
: ALARM
MOTION SENSOR
->
40
English
MENU FLOW CHART AND MENU OPERATIONS
Basic menu screen operations
1
4
Press the MENU button.
The MAIN MENU 1 screen appears. If you press the MENU
button once more, the MAIN MENU 2 screen appears.
MENU
<MAIN MENU 1>
1.LANGUAGE/CLOCK SET
2.VIDEO INPUT SET
3.RECORDING AREA SET
4.RECORDING CONDITIONS SET
5.NORMAL REC MODE SET
6.TIMER SET
7.HOLIDAY SET
8.ALARM REC MODE SET
TO MAIN MENU 2
MOVE LINES WITH JOG. SELECT WITH
Press the EXIT/OSD button.
The display returns to the normal screen.
EXIT/OSD
->
->
->
->
->
->
->
->
->
SHUTTLE
Operations while a sub-menu screen is
displayed
If you press the MENU button while a sub-menu screen is displayed,
you can check the settings in the sub-menu screens.
MENU
<VIDEO INPUT SET>
MULTIPLEXER
: NO USE
VIDEO INPUT
: ANALOG
<MAIN MENU 2>
1.DISPLAY/VIDEO LOSS SET
2.RS-232C/RS-485 SET
3.BUZZER SET
4.SECURITY LOCK SET
5.NETWORK SET
6.HDD SET
7.POWER FAILURE/USED TIME
->
->
->
->
->
->
->
MENU
TO MAIN MENU 1
->
MOVE LINES WITH JOG. SELECT WITH SHUTTLE
Note: If you repeatedly press the MENU button, the screen toggles
between MAIN MENU 1 and MAIN MENU 2. Furthermore, you
can also select “TO MAIN MENU 2” or “TO MAIN MENU 1” in
the respective menu screens to display the other menu screen.
2
<RECORDING AREA SET>
TOTAL CAPACITY
NORMAL RECORDING AREA
AREA FULL RESET ->
ALARM RECORDING AREA
AREA FULL RESET ->
ARCHIVE AREA
AREA FULL RESET ->
Turn the jog dial to the left or right to move the cursor to the
menu items.
The selected item is highlighted.
: 80GB
: 80 %
: 19 %
:
1%
CAUTION : WHEN THE AREA SETTING IS CHANGED.
THE WHOLE AREA WILL BE INITIALIZED !
MENU
<MAIN MENU 1>
1.LANGUAGE/CLOCK SET
2.VIDEO INPUT SET
3.RECORDING AREA SET
4.RECORDING CONDITIONS SET
5.NORMAL REC MODE SET
6.TIMER SET
7.HOLIDAY SET
8.ALARM REC MODE SET
TO MAIN MENU 2
MOVE LINES WITH JOG. SELECT WITH
3
->
->
->
->
->
->
->
->
->
SHUTTLE
<RECORDING CONDITIONS
DIGITAL SERIES RECORDING
TOTAL NUMBER
RECORDING NUMBER
NORMAL RECORDING AREA
OVERWRITE
ALARM RECORDING AREA
OVERWRITE
Turn the shuttle dial clockwise.
The sub-menu appears.
REMAINING DISK WARNING
SET>
: OFF
: ¤¤
: ¤¤
: ON
: ON
: ¤¤
<VIDEO INPUT SET>
MULTIPLEXER
: NO USE
VIDEO INPUT
: ANALOG
Note: You can display menus even while images are being recorded
in one of the recording areas. In such cases, the recording
symbol <a> appears on the screen. The menus can only be
displayed at this time; the settings cannot be changed.
English
41
LANGUAGE/CLOCK SET SETTINGS
This sub-menu lets you set the language for menu screens, the date and time that appear on the screen at all times, and summer
time. It also includes a function that lets you synchronize the time settings when more than one device is connected.
Note: Recording is not possible if the time has not been set.
Main menu 1
<MAIN MENU 1>
1.LANGUAGE/CLOCK SET
2.VIDEO INPUT SET
3.RECORDING AREA SET
4.RECORDING CONDITIONS SET
5.NORMAL REC MODE SET
6.TIMER SET
7.HOLIDAY SET
8.ALARM REC MODE SET
TO MAIN MENU 2
MOVE LINES WITH JOG. SELECT WITH
->
->
->
->
->
->
->
->
->
SHUTTLE
Sub-menus
Sets the language.
<LANGUAGE/LANGUE/IDIOMA>
ENGLISH
<CLOCK SET>
01-01-2002 TUE 00:00:00
<DAYLIGHT SAVING>
MODE :
USE
WEEK MONTH TIME
ON 1ST-SUN 04 02:00
OFF LST-SUN 10 02:00
<EXT.CLOCK SET>
ADJUST.TIME
01:00
Sets the date and time.
Set summer time.
Synchronizes the time for multiple devices.
Setting the language
CLOCK SET settings
The menus can be displayed in one of several languages (English,
French and Spanish). The default language setting is English.
1
Press the MENU button to select LANGUAGE/CLOCK SET,
and then turn the shuttle dial clockwise.
The LANGUAGE/LANGUE/IDIOMA sub-menu appears, and the
cursor is moves to “ENGLISH”.
MENU
2
(default setting: 01-01-2002 TUE 00:00:00)
You should always set the date and time correctly. This digital video
recorder includes the recording time with recorded images, and uses
this time for playback and searching.
Example: To set the date and time to 8.30 a.m. on 22 May 2002
1
<LANGUAGE/LANGUE/IDIOMA>
ENGLISH
<CLOCK SET>
01-01-2002 TUE 00:00:00
<DAYLIGHT SAVING>
MODE :
USE
WEEK MONTH TIME
ON 1ST-SUN 04 02:00
OFF LST-SUN 10 02:00
<EXT.CLOCK SET>
ADJUST.TIME
01:00
When the cursor is at the date and time setting, turn the
shuttle dial clockwise.
“01” flashes.
<LANGUAGE/LANGUE/IDIOMA>
ENGLISH
<CLOCK SET>
01-01-2002 TUE 00:00:00
<DAYLIGHT SAVING>
MODE :
USE
WEEK MONTH TIME
ON 1ST-SUN 04 02:00
OFF LST-SUN 10 02:00
<EXT.CLOCK SET>
ADJUST.TIME
01:00
Turn the shuttle dial clockwise.
“ENGLISH” flashes.
2
<LANGUAGE/LANGUE/IDIOMA>
ENGLISH
<CLOCK SET>
01-01-2002 TUE 00:00:00
Turn the jog dial to select “05: month”, and then turn the
shuttle dial clockwise.
The cursor moves to the “01” month setting and flashes.
2
3
05-01-2002 TUE 00:00:00
1
Turn the jog dial to select the language (example:
“FRANCAIS”), and then turn the shuttle dial clockwise.
The language is switched to French and the cursor moves to the
date and time.
2
1
3
<REFGL.LANGUE>
FRANCAIS
<REGL.HORLOGE>
01-01-2002 MAR 00:00:00
<HEURE D’ETE>
MODE :
ARRET
SEMAIN MOIS HEURE
ON 1ER-DIM 04 02:00
OFF DER-DIM 10 02:00
<REGL.HORLOGE EXTERNE>
REGL.DE L’HEURE
01:00
Use the same procedure to set the day (22), year (2002), hour
(08), minutes (30) and seconds.
After the seconds have been set, the cursor moves to the
ADJUST TIME setting for “EXT. CLOCK SET”, and counting
starts from zero seconds.
Note: Time stops during clock setting.
42
English
LANGUAGE/CLOCK SET SETTINGS
DAYLIGHT SAVING setting
EXT. CLOCK SET setting
(default setting: USE)
This can be used to set the starting time and ending time for daylight
saving. When daylight saving is set, the time is automatically
advanced by one hour.
(default setting: 01:00)
If more than two devices are connected at the same time, the time
settings (ADJUST TIME) for the digital video recorder are also applied
to these devices.
Example: To start daylight saving at 2.00 a.m. on the first Sunday
in April, and end it at 2.00 a.m. on the 4th Sunday in
October
1
1
When the cursor is at the MODE setting, turn the shuttle dial
clockwise.
“USE” flashes.
ALARM
C CLOCK
RE ADJUST
RESET
ON UT
ALARM ALARM N O
OUT
C IN
C IN OUT
<DAYLIGHT SAVING>
MODE :
USE
WEEK MONTH TIME
ON 1ST-SUN 04 02:00
OFF LST-SUN 10 02:00
<EXT.CLOCK SET>
ADJUST.TIME
01:00
2
3
6
2
02:00
3
1ST-SUN
04
LST-SUN
04
NG
NI
RM
AR UT ALA LL
W O
FU
FULL
2nd unit
Turn the jog dial to move the cursor to the ADJUST TIME
setting, and then turn the shuttle dial.
“01” flashes.
Turn the jog dial to set the hours (example: “ 05” ), and then
turn the shuttle dial.
02:00
2
1
Turn the jog dial clockwise to select “ LST” , and then turn the
shuttle dial.
“SUN” (WEEK) flashes.
ON
5
04
FULL
ALARM
C CLOCK
RE ADJUST
RESET
ON UT
ALARM ALARM N O
OUT
C IN
C IN OUT
CLOCK SET connection method:
Connect the C (COMMON) terminals of the first and second
digital video recorder, and then connect the CLOCK ADJUST
OUT terminal of the first one to the CLOCK ADJUST IN terminal
of the second one.
Turn the shuttle dial clockwise.
“LST” (WEEK) setting flashes.
ON
4
1ST-SUN
NG
NI
RM
AR UT ALA LL
W O
FU
1st unit
Turn the shuttle dial clockwise.
The cursor moves to the starting time (ON) entry line.
ON
Connect the other devices to the input terminal (CLOCK
ADJUST IN) and output terminal (CLOCK ADJUST OUT) at
the rear of the digital video recorder.
02:00
Turn the jog dial clockwise to select “ SUN” , and then turn
the shuttle dial clockwise.
“04” (MONTH) flashes.
<LANGUAGE/LANGUE/IDIOMA>
ENGLISH
<CLOCK SET>
01-01-2002 TUE 00:00:00
<DAYLIGHT SAVING>
MODE :
USE
WEEK MONTH TIME
ON 1ST-SUN 04 02:00
OFF LST-SUN 10 02:00
<EXT.CLOCK SET>
ADJUST.TIME
01:00
<EXT.CLOCK SET>
ADJUST.TIME
05:00
4
Turn the jog dial clockwise to select “ 04” , and then turn the
shuttle dial clockwise.
“02” (TIME) flashes.
Press the EXIT/OSD button.
The display returns to the normal screen.
EXIT/OSD
2
1
<DAYLIGHT SAVING>
MODE :
USE
WEEK MONTH TIME
ON LST-SUN 04 02:00
OFF LST-SUN 10 02:00
<EXT.CLOCK SET>
ADJUST.TIME
01:00
5
7
Use the same procedure to set the end of summer time.
The cursor moves to ADJUST TIME.
English
43
Use the same procedure to set ADJUST TIME for the second
device.
When the settings are complete, the display returns to the normal
screen.
VIDEO INPUT SET SETTING
If you select a multiplexer (sold separately) that is connected to the digital video recorder, you can set the type of image input (digital or analog).
Main menu 1
<MAIN MENU 1>
1.LANGUAGE/CLOCK SET
2.VIDEO INPUT SET
3.RECORDING AREA SET
4.RECORDING CONDITIONS SET
5.NORMAL REC MODE SET
6.TIMER SET
7.HOLIDAY SET
8.ALARM REC MODE SET
TO MAIN MENU 2
MOVE LINES WITH JOG. SELECT WITH
->
->
->
->
->
->
->
->
->
SHUTTLE
Sub-menus
<VIDEO INPUT SET>
MULTIPLEXER
: NO USE
VIDEO INPUT
: ANALOG
Sets the manufacturer of the connected
multiplexer.
Sets the video input.
MULTIPLEXER setting
VIDEO INPUT setting
(default setting: NO USE)
1
Press the MENU button to select VIDEO INPUT SET, and then
turn the shuttle dial clockwise.
The VIDEO INPUT SET sub-menu appears, and the cursor
moves to MULTIPLEXER.
1
<VIDEO INPUT SET>
MULTIPLEXER
: SANYO
VIDEO INPUT
: ANALOG
Turn the shuttle dial clockwise.
“NO USE” flashes.
2
<VIDEO INPUT SET>
MULTIPLEXER
: NO USE
VIDEO INPUT
: ANALOG
3
When the cursor is at the VIDEO INPUT setting, turn the
shuttle dial clockwise.
“ANALOG” flashes.
<VIDEO INPUT SET>
MULTIPLEXER
: NO USE
VIDEO INPUT
: ANALOG
MENU
2
(default setting: ANALOG)
This sets whether the image signals that are being input to the video
input terminals of this digital video recorder are digital or analog.
Turn the jog dial to select the MULTIPLEXER setting
(example: “ SANYO” ), and then turn the shuttle dial
clockwise.
Display examples:
• NO USE: When not using a multiplexer
• SANYO: When using a Sanyo multiplexer
• OTHERS1: When using a Sony multiplexer
• OTHERS2: When using a Robot or DM multiplexer
The cursor moves to VIDEO INPUT.
2
Turn the jog dial to select “ DIGITAL (example)” , and then
turn the shuttle dial.
The cursor moves to MULTIPLEXER.
Note:
• Select this if a Sanyo digital transport multiplexer (MPX-CD163
or CD93) has been connected digitally.
• When making a multiplexer and a digital connection, first
connect the VIDEO OUT connector of this unit to the monitor,
and then set the input signal to “DIGITAL”.
2
<VIDEO INPUT SET>
MULTIPLEXER
: SANYO
VIDEO INPUT
: DIGITAL
1
3
<VIDEO INPUT SET>
MULTIPLEXER
: SANYO
VIDEO INPUT
: ANALOG
Press the EXIT/OSD button.
The display returns to the normal screen.
EXIT/OSD
1
Note: The multiplexers specified by SANYO and OTHERS1 are
capable of decoding channel information. Accordingly, you can
record images from these multiplexers using this digital video
recorder, and then use the digital video recorder’s CHANNEL
button to select a camera number (channel information) for
playback.
Note:
• If the MULTIPLEXER setting is set to something other than “NO
USE”, SENSOR cannot be selected as the ALARM TRIGGER in
the ALARM REC MODE SET menu.
When using a multiplexer, use the motion sensor function of the
multiplexer.
• If using a multiplexer manufactured by SANYO or some other
manufacturer in analog connection mode, connect the SW OUT
terminal at the rear of this unit to the SW IN terminal of the
multiplexer. This is not necessary if using a SANYO multiplexer in
digital connection mode.
44
English
RECORDING AREA SET SETTING
Main menu 1
<MAIN MENU 1>
1.LANGUAGE/CLOCK SET
2.VIDEO INPUT SET
3.RECORDING AREA SET
4.RECORDING CONDITIONS SET
5.NORMAL REC MODE SET
6.TIMER SET
7.HOLIDAY SET
8.ALARM REC MODE SET
TO MAIN MENU 2
MOVE LINES WITH JOG. SELECT WITH
Sub-menus
->
->
->
->
->
->
->
->
->
SHUTTLE
<RECORDING AREA SET>
TOTAL CAPACITY
NORMAL RECORDING AREA
AREA FULL RESET ->
ALARM RECORDING AREA
AREA FULL RESET ->
ARCHIVE AREA
AREA FULL RESET ->
Displays the total hard
disk capacity.
: 80GB
: 80 %
: 19 %
:
Sets the capacity of the normal
recording area.
1%
Normal
recording
area
CAUTION : WHEN THE AREA SETTING IS CHANGED.
THE WHOLE AREA WILL BE INITIALIZED !
Sets the capacity of the archive area.
Sets the capacity of the alarm recording
area.
Archive area
Alarm
recording
area
TOTAL CAPACITY display
Resetting each recording area
This shows the total recording capacity of the hard disk. This display
cannot be changed except when the hard disk capacity itself is
changed.
With the initial hard disk setting, the normal recording area takes up
80%, the alarm recording area takes up 19% and the archive area
takes up 1% of the disk capacity. The upper limit is 10 GB (12.5% of
total capacity when using an 80-GB hard disk, 6.25% of total capacity
when using an 160-GB hard disk), so you cannot set a value greater
than this.
The assignment of space to each recording area is displayed as a
percentage of the total. The normal recording area and alarm
recording area together can be set to a maximum of 99% of the total
space.
The archive area cannot be set manually. It is forcibly assigned to a
minimum of 1%. Accordingly, if the normal recording area and the
alarm recording area are set to a total of 85%, the archive area will be
automatically set to 15%.
For example, if the normal recording area is set to 0% and the alarm
recording area is set to 99%, normal recording images will not be
saved onto the hard disk. Only alarm recording images will be saved.
The recording capacity for each recording area should be assigned
according to the requirements of the particular recording location.
If an additional hard disk is added, the increased capacity will be
included in the TOTAL CAPACITY display.
Example: Set the normal recording area to 50% and the alarm
recording area to 49%
Note:
• If you change the assignment of space to each recording area of
the hard disk while recording is in progress, the images which have
been recorded up until that point will be erased. This is because
the hard disk itself is initialized during this operation, so be very
careful when making this kind of setting. If you need to change the
sizes of the recording areas for some reason, make sure that you
make a backup copy of the images on some other medium such as
a computer.
• When the MIRRORING of the HDD SET setting has been set to
“ON”, the TOTAL CAPACITY display of RECORDING AREA SET
shows a smaller value for the hard disk capacity.
4
1
Press the MENU button to select RECORDING AREA SET,
and then turn the shuttle dial clockwise.
The RECORDING AREA SET sub-menu appears, and the cursor
moves to NORMAL RECORDING AREA.
MENU
2
3
5
Use the jog dial to move the cursor to the NORMAL
RECORDING AREA setting, and then turn the shuttle dial
clockwise.
“80%” flashes.
Use the jog dial to change the setting, for example from
“ 80%” to “ 50%” , and then turn the shuttle dial clockwise
The cursor moves to ALARM RECORDING AREA.
Turn the shuttle dial clockwise.
“35%” flashes.
Turn the jog dial to change the setting, for example from 34%
to 49%, and then turn the shuttle dial clockwise.
The cursor moves to AREA FULL RESET.
<RECORDING AREA SET>
TOTAL CAPACITY
NORMAL RECORDING AREA
AREA FULL RESET ->
ALARM RECORDING AREA
AREA FULL RESET ->
ARCHIVE AREA
AREA FULL RESET ->
: 80GB
: 49 %
: 40 %
:
2%
CAUTION : WHEN THE AREA SETTING IS CHANGED.
THE WHOLE AREA WILL BE INITIALIZED !
English
45
RECORDING AREA SET SETTING
6
2
Turn the shuttle dial counterclockwise.
The screen changes to show a “WARNING” display. This is a
message to warn you that the hard disk is about to be reinitialized.
Use the jog dial to move the cursor to the AREA FULL
RESET → setting for the NORMAL RECORDING AREA, and
then turn the shuttle dial clockwise.
“NO” flashes on the WARNING screen.
<WARNING>
<RECORDING AREA SET>
TOTAL CAPACITY
NORMAL RECORDING AREA
AREA FULL RESET ->
ALARM RECORDING AREA
AREA FULL RESET ->
ARCHIVE AREA
AREA FULL RESET ->
THIS CHANGE WILL INITIALIZE THE DISK.
ALL RECORDING WILL BE ERASED.
ARE YOU SURE ?
NO
CHANGE WITH JOG. SET WITH SHUTTLE
7
: 80GB
: 80 %
: 19 %
: 1%
CAUTION : WHEN THE AREA SETTING IS CHANGED.
THE WHOLE AREA WILL BE INITIALIZED !
To reinitialize the hard disk, turn the jog dial to display
“ YES” , and then turn the shuttle dial clockwise.
The RECORDING AREA SET screen appears and the recording
capacities for each area are changed.
<WARNING>
AREA FULL RESET
NORMAL RECORDING AREA
ARE YOU SURE ?
<WARNING>
NO
THIS CHANGE WILL INITIALIZE THE DISK.
ALL RECORDING WILL BE ERASED.
ARE YOU SURE ?
CHANGE WITH JOG. SET WITH SHUTTLE
YES
3
CHANGE WITH JOG. SET WITH SHUTTLE
Note: If you turn the shuttle dial clockwise when “NO” is selected, the
RECORDING AREA SET screen appears and the recording
capacities return to their previous settings. The hard disk is not
reinitialized in this case.
Use the jog dial to change “ NO” to “ YES” , and then turn the
shuttle dial clockwise.
The NORMAL RECORDING AREA is set to single overwriting.
AREA FULL RESET setting
When the normal recording area and alarm recording area of the hard
disk become full, the images in the recording areas will be
automatically overwritten, starting from the oldest images that have
been recorded.
However, you can change this setting to prevent overwriting of images
when the recording areas become full, at times such as when you
want to check or edit the recorded images. In this case you need to
specify each time that you want images to be overwritten in each
recording area. The following procedure describes the method of
doing this.
1
4
5
NORMAL RECORDING AREA
OVERWRITE
ALARM RECORDING AREA
OVERWRITE
REMAINING DISK WARNING
Press the EXIT/OSD button.
The display returns to the normal screen.
EXIT/OSD
Set the OVERWRITE setting for the NORMAL RECORDING
AREA or ALARM RECORDING AREA to “ OFF” in the
RECORDING CONDITIONS SET menu.
<RECORDING CONDITIONS
DIGITAL SERIES RECORDING
TOTAL NUMBER
RECORDING NUMBER
Follow the same procedure to make the setting for the
ALARM RECORDING AREA.
Note:
• For overwriting to be carried out automatically, change the
OVERWRITE setting for the NORMAL RECORDING AREA or
ALARM RECORDING AREA to “ON”.
• If AREA FULL RESET is carried out, the normal recording area,
alarm recording area and archive area will all be reinitialized, and it
will no longer be possible to play back any images that have
already been recorded.
SET>
: OFF
: **
: **
: ON
: ON
: **
This setting can be used to display the remaining recording area
of the hard disk on the screen. At the same time, the FULL or
ALARM FULL indicator at the front of the digital video recorder
will flash.
When writing to the hard disk is complete, you can use playback
operations to check the recordings.
46
English
RECORDING CONDITIONS SET SETTING
This lets you make settings and set overwriting permissions for each recording area when multiple digital video recorders (up to a
maximum of three) are connected for series recording.
Main menu 1
<MAIN MENU 1>
1.LANGUAGE/CLOCK SET
2.VIDEO INPUT SET
3.RECORDING AREA SET
4.RECORDING CONDITIONS SET
5.NORMAL REC MODE SET
6.TIMER SET
7.HOLIDAY SET
8.ALARM REC MODE SET
TO MAIN MENU 2
MOVE LINES WITH JOG. SELECT WITH
->
->
->
->
->
->
->
->
->
SHUTTLE
Sub-menus
<RECORDING CONDITIONS
DIGITAL SERIES RECORDING
TOTAL NUMBER
RECORDING NUMBER
NORMAL RECORDING AREA
OVERWRITE
ALARM RECORDING AREA
OVERWRITE
REMAINING DISK WARNING
Sets series recording.
SET>
: OFF
: **
: **
Sets the number of digital video recorders
connected.
Sets the number of units connected.
: ON
: ON
Sets overwriting for the normal recording
area.
: **
Sets overwriting for the alarm recording
area.
Sets the remaining space warning for the
recording areas.
Recording settings for digital series
connection (maximum 3 units)
1
4
Connect the digital video recorders using the digital input
and output terminals of each digital video recorder.
(See page 8.)
<RECORDING CONDITIONS
DIGITAL SERIES RECORDING
TOTAL NUMBER
RECORDING NUMBER
Note:
• Use a straight-type STP (shielded twisted pair) Ethernet cable to
connect the digital video recorders. Each cable should not be any
longer than 3 meters.
• If using alarm input, input the same alarm signal to all digital video
recorders.
2
<RECORDING CONDITIONS
DIGITAL SERIES RECORDING
TOTAL NUMBER
RECORDING NUMBER
NORMAL RECORDING AREA
OVERWRITE
ALARM RECORDING AREA
OVERWRITE
REMAINING DISK WARNING
3
5
Press the MENU button to select RECORDING CONDITIONS
SET, and then turn the shuttle dial clockwise.
The RECORDING CONDITIONS SET sub-menu appears, and
the cursor moves DIGITAL SERIES RECORDING.
MENU
SET>
: OFF
: **
: **
6
: ON
: ON
: **
English
SET>
: ON
: 2
: 1
Turn the shuttle dial clockwise, use the jog dial to set the
total number of digital video recorders connected (example:
3), and then turn the shuttle dial clockwise.
The cursor moves to RECORDING NUMBER.
<RECORDING CONDITIONS
DIGITAL SERIES RECORDING
TOTAL NUMBER
RECORDING NUMBER
SET>
: ON
: 3
: 1
Turn the shuttle dial clockwise, use the jog dial to set the
connection number (example: 1), and then turn the shuttle
dial clockwise.
The cursor moves to OVERWRITE.
Note:
• The digital video recorder which is used as the main unit should
always have its connection number set to 1.
• Do not skip or overlap numbers when making the settings.
• If NETWORK CONTROL in the NETWORK SET menu has been
set to “ON”, DIGITAL SERIES RECORDING cannot be selected.
Conversely, if DIGITAL SERIES RECORDING has been set to
“ON”, NETWORK CONTROL cannot be set to “ON”.
• The VIDEO INPUT SET for VIDEO INPUT of the second and
subsequent digital video recorder must be set to DIGITAL.
Turn the shuttle dial clockwise.
“OFF” flashes.
<RECORDING CONDITIONS
DIGITAL SERIES RECORDING
TOTAL NUMBER
RECORDING NUMBER
Use the jog dial to change the setting to “ ON” , and then turn
the shuttle dial clockwise.
The cursor moves to TOTAL NUMBER.
SET>
: OFF
: **
: **
47
RECORDING CONDITIONS SET SETTING
Setting NORMAL RECORDING AREA
OVERWRITE and REMAINING DISK
WARNING on the operating display
section
4
Note: The REMAINING DISK WARNING setting can be between 1%
(default setting) and 10%.
When the recording areas of the hard disk become full, you can set
whether old images are to overwritten, or whether recording should
stop. If recording is set to stop, the current percentage of free space
remaining on the hard disk will appear on the operating display
section. You can use [REMAINING DISK WARNING] to specify the
amount of free space remaining.
1
NORMAL RECORDING AREA
OVERWRITE
ALARM RECORDING AREA
OVERWRITE
REMAINING DISK WARNING
1
NORMAL RECORDING AREA
OVERWRITE
ALARM RECORDING AREA
OVERWRITE
REMAINING DISK WARNING
SET>
: OFF
: **
: **
5
: ON
: ON
: **
SET>
: OFF
: **
: **
: OFF
: OFF
: 5%
Press the EXIT/OSD button.
The display returns to the normal screen.
When the remaining disk space in each area reaches 5%, it is
displayed in the operating display section. The FULL (for normal
recording area) or ALARM FULL (for alarm recording area)
FULL
ALARM FULL
indicator on the front of the digital video
recorder
flashes.
FULL
ALARM FULL
FULL
ALARM FULL
EXIT/OSD
Use the jog dial to select the setting (example: OFF), and
then turn the shuttle dial clockwise.
REMAINING DISK WARNING changes from ** to 1%.
Display examples:
• OFF: When the normal recording area becomes full, recording
stops.
• ON: When the normal recording area becomes full, images are
overwritten automatically starting from the earliest
recorded images.
<RECORDING CONDITIONS
DIGITAL SERIES RECORDING
TOTAL NUMBER
RECORDING NUMBER
NORMAL RECORDING AREA
OVERWRITE
ALARM RECORDING AREA
OVERWRITE
REMAINING DISK WARNING
POWER
LOCK
5%
01-01-01
00:00:00 EN 0.10SEC
FULL
ALARM FULL
SET>
: OFF
: **
: **
Relationship between RECORDING AREA SET
and OVERWRITE
FULL
: OFF
ALARM FULL
: ON
<RECORDING AREA SET>
TOTAL CAPACITY
NORMAL RECORDING AREA
AREA FULL RESET ->
ALARM RECORDING AREA
AREA FULL RESET ->
ARCHIVE AREA
AREA FULL RESET ->
: 1%
Note: If “OFF” is selected, the REMAINING DISK WARNING setting
shows the percentage of hard disk space remaining that triggers
the FULL or ALARM FULL indicator to start flashing.
3
<RECORDING CONDITIONS
DIGITAL SERIES RECORDING
TOTAL NUMBER
RECORDING NUMBER
2
When the cursor is at the OVERWRITE setting, turn the
shuttle dial clockwise.
“ON” flashes.
<RECORDING CONDITIONS
DIGITAL SERIES RECORDING
TOTAL NUMBER
RECORDING NUMBER
2
When the cursor is at the REMAINING DISK WARNING
setting, turn the shuttle dial clockwise, and then use the jog
dial to set the display value for the amount of disk space
remaining (example: “ 5” ).
: 80GB
: 80 %
SET>
: OFF
: **
: **
: 19 %
:
1%
CAUTION : WHEN THE AREA SETTING IS CHANGED.
THE WHOLE AREA WILL BE INITIALIZED !
Follow the same procedure to make the setting (OFF) for the
ALARM RECORDING AREA.
<RECORDING CONDITIONS
DIGITAL SERIES RECORDING
TOTAL NUMBER
RECORDING NUMBER
NORMAL RECORDING AREA
OVERWRITE
ALARM RECORDING AREA
OVERWRITE
REMAINING DISK WARNING
: ON
: ON
: **
If the normal recording area and alarm recording area become full,
select AREA FULL RESET for the normal recording area or alarm
recording area in the RECORDING AREA SET menu. (See page 46.)
Note: Make the settings separately for each item in the menu, even if
making a digital connection. The OVERWRITE settings for
second and subsequent units must match the setting for the first
unit.
Note: No audio input is provided from the digital video input terminals.
Audio signals can be input as analog signals via the audio input
terminals (such as the MIC terminal). For details on
CONNECTIONS, see page 8.
48
English
NORMAL REC MODE SET SETTING
Main menu 1
<MAIN MENU 1>
1.LANGUAGE/CLOCK SET
2.VIDEO INPUT SET
3.RECORDING AREA SET
4.RECORDING CONDITIONS SET
5.NORMAL REC MODE SET
6.TIMER SET
7.HOLIDAY SET
8.ALARM REC MODE SET
TO MAIN MENU 2
MOVE LINES WITH JOG. SELECT WITH
Sub-menus
Sets the image quality.
<NORMAL REC MODE SET>
PICTURE QUALITY
: ENHANCED
FRAME/FIELD RECORDING : FIELD
AUDIO RECORDING
: OFF
REC CYCLE : 0.10 SEC ( 54H)
->
->
->
->
->
->
->
->
->
SHUTTLE
Sets the recording method
(frame or field).
Sets audio recording.
Sets the recording rate (recording speed).
Numbers in brackets indicate the possible
recording times.
NORMAL REC MODE SET setting
5
This lets you set the recording quality, recording method (frame or
field), audio recording and recording speed for the normal recording
area.
1
<NORMAL REC MODE SET>
PICTURE QUALITY
: SUPER FINE
FRAME/FIELD RECORDING : FRAME
AUDIO RECORDING
: ON
REC CYCLE : A0.20 SEC ( 108H)
Press the MENU button to select NORMAL REC MODE SET,
and then turn the shuttle dial clockwise.
The NORMAL REC MODE SET sub-menu appears, and the
cursor moves to PICTURE QUALITY.
MENU
2
Note:
• Audio recording can be set when the REC CYCLE setting is from
0.02 to 0.10 (FIELD) or 0.03 to 0.20 (FRAME).
• When set to “ON”, the letter “A” (audio recording indicator) appears
in front of the REC CYCLE recording rate. This is because the
audio recordings are also made in the normal recording area, so
that the image recording capacity of the normal recording area is
reduced.
<NORMAL REC MODE SET>
PICTURE QUALITY
: ENHANCED
FRAME/FIELD RECORDING : FIELD
AUDIO RECORDING
: OFF
REC CYCLE : 0.10 SEC ( 54H)
Turn the shuttle dial clockwise.
“ENHANCED” flashes.
6
<NORMAL REC MODE SET>
PICTURE QUALITY
: ENHANCED
FRAME/FIELD RECORDING : FIELD
AUDIO RECORDING
: OFF
REC CYCLE : 0.10 SEC ( 54H)
Display examples: Picture quality selection
• BASIC (BA): (15 KB)
• NORMAL (NO): (22 KB)
• ENHANCED (EN): (30 KB)
• FINE (FI): (42 KB)
• SUPER FINE (SF): (56 KB)
3
<NORMAL REC MODE SET>
PICTURE QUALITY
: SUPER FINE
FRAME/FIELD RECORDING : FRAME
AUDIO RECORDING
: ON
REC CYCLE : A0.13 SEC ( 72H)
Use the jog dial to change select the image quality (example:
“ SUPER FINE” ), and then turn the shuttle dial clockwise.
The cursor moves to FRAME/FIELD RECORDING.
7
Press the EXIT/OSD button.
The display returns to the normal screen.
EXIT/OSD
Turn the shuttle dial clockwise, use the jog dial to set frame
or field recording (example: FRAME), and then turn the
shuttle dial clockwise.
The cursor moves to AUDIO RECORDING.
<NORMAL REC MODE SET>
PICTURE QUALITY
: SUPER FINE
FRAME/FIELD RECORDING : FRAME
AUDIO RECORDING
: OFF
REC CYCLE : 0.20 SEC ( 108H)
English
Turn the shuttle dial clockwise, use the jog dial to set the
recording speed (example: “ 0.13” ), and then turn the shuttle
dial.
The cursor moves to PICTURE QUALITY.
Note: The field and frame recording speeds vary depending on the
PICTURE QUALITY setting. Refer to the Recording speed table
for details. (See page 11.)
<NORMAL REC MODE SET>
PICTURE QUALITY
: SUPER FINE
FRAME/FIELD RECORDING : FIELD
AUDIO RECORDING
: OFF
REC CYCLE : 0.20 SEC ( 108H)
4
Turn the shuttle dial clockwise, use the jog dial to set audio
recording (example: “ ON” ), and then turn the shuttle dial.
The cursor moves to REC CYCLE.
49
TIMER SET SETTING
Use the timer function of the digital video recorder to set the times for timer recording.
Main menu 1
<MAIN MENU 1>
1.LANGUAGE/CLOCK SET
2.VIDEO INPUT SET
3.RECORDING AREA SET
4.RECORDING CONDITIONS SET
5.NORMAL REC MODE SET
6.TIMER SET
7.HOLIDAY SET
8.ALARM REC MODE SET
TO MAIN MENU 2
MOVE LINES WITH JOG. SELECT WITH
->
->
->
->
->
->
->
->
->
SHUTTLE
3
2
1
6
Sub-menus
WEEK
SUN
MON
TUE
WED
THU
FRI
SAT
DLY
START
--:---:---:---:---:---:---:---:--
<TIMER SET>
STOP REC CYCLE
--:-- 0.10SEC (
--:-- 0.10SEC (
--:-- 0.10SEC (
--:-- 0.10SEC (
--:-- 0.10SEC (
--:-- 0.10SEC (
--:-- 0.10SEC (
--:-- 0.10SEC (
54H)
54H)
54H)
54H)
54H)
54H)
54H)
54H)
SET
OFF
OFF
OFF
OFF
OFF
OFF
OFF
OFF
4
5
TIMER SET setting
Sets the timer.
The timer must be set when carrying out
timer recording.
Timer reservations every day at the same
time with the same image quality
This sets the starting time and stopping time for each day, and also
sets the recording speed.
Example: Timer recording every day from 8:30 a.m. to 6:30 p.m.
at the same recording speed
1 WEEK
This selects the day for the timer setting. While a day is flashing
another day can be selected. The 7th line (SAT) and 8th line (DLY)
are used for setting a timer recording for a period of more than 24
hours.
1
2 START
Press the MENU button to select TIMER SET, and then turn
the shuttle dial clockwise.
The TIMER SET sub-menu appears, and the cursor moves to
SUN.
This is used to enter the starting time for timer recording.
MENU
3 STOP
WEEK
SUN
MON
TUE
WED
THU
FRI
SAT
DLY
This is used to enter the stopping time for timer recording.
4 REC CYCLE
•
•
Sets the recording speed.
The initial setting is for FIELD (0.10SEC) recording. If the
setting is changed to frame recording, the recording speed
becomes 0.20SEC.
The numbers in brackets are the result of automatic calculation
of the available time based on the recording method, picture
quality and audio recording settings. The maximum value that
can be displayed is 9999H. If the available time is 10000H or
more, the display appears as 9999 .
5 SET
2
START
--:---:---:---:---:---:---:---:--
<TIMER SET>
STOP REC CYCLE
--:-- 0.10SEC (
--:-- 0.10SEC (
--:-- 0.10SEC (
--:-- 0.10SEC (
--:-- 0.10SEC (
--:-- 0.10SEC (
--:-- 0.10SEC (
--:-- 0.10SEC (
54H)
54H)
54H)
54H)
54H)
54H)
54H)
54H)
SET
OFF
OFF
OFF
OFF
OFF
OFF
OFF
OFF
Turn the shuttle dial clockwise.
“SUN” flashes in the WEEK column.
*
Set to “ON” when using timer recording.
Set to “OFF” when not using timer recording.
6 For setting a timer recording of more than 24 hours.
Use this line for a timer recording of more than 24 hours.
SUN --:-- --:--
Note: The picture quality, frame/field recording and audio
recording settings for timer recording will be the settings
used for recording in the normal recording area.
3
Use the jog dial to change from “ SUN” to “ DLY” , and then
turn the shuttle dial.
“– – ” (hours) flashes in the START column.
DLY --:-- --:--
50
0.10SEC ( 54H) OFF
0.10SEC ( 54H) OFF
English
TIMER SET SETTING
4
10 Press the EXIT/OSD button.
Use the jog dial to change from “– –” to “ 08” , and then turn
the shuttle dial clockwise.
“– – ” (minutes) flashes in the START column.
The display returns to the normal screen.
EXIT/OSD
DLY 08:-- --:--
5
Use the jog dial to change from “– –” to “ 18” , and then turn
the shuttle dial clockwise.
“– – ” (minutes) flashes in the STOP column.
0.10SEC ( 54H) OFF
0.10SEC ( 54H) OFF
Use the jog dial to set the recording speed to “ 0.13” (72H),
and then turn the shuttle dial clockwise.
“OFF” flashes in the SET column.
DLY 08:30 18:30
0.13SEC ( 72H) OFF
Note: The image quality for timer recording will be the image quality
that was set by PICTURE QUALITY in the NORMAL REC
MODE SET sub-menu.
Example: The recording will be SUPER FINE. Then recording
speed the same as the speed previously set.
9
Use the jog dial to change “ OFF” to “ ON” , and then turn the
shuttle dial clockwise.
The cursor moves to MON.
WEEK
DLY
MON
TUE
WED
THU
FRI
SAT
DLY
English
START
08:30
--:---:---:---:---:---:---:--
<TIMER SET>
STOP REC CYCLE
18:30 0.13SEC (
--:-- 0.10SEC (
--:-- 0.10SEC (
--:-- 0.10SEC (
--:-- 0.10SEC (
--:-- 0.10SEC (
--:-- 0.10SEC (
--:-- 0.10SEC (
72H)
54H)
54H)
54H)
54H)
54H)
54H)
54H)
SHUTTLE
JOG
EN
TE
R
MENU
RESET
Use the jog dial to change from “– –” to “ 30” , and then turn
the shuttle dial clockwise.
“0.10” (recording speed) flashes in the REC CYCLE column.
DLY 08:30 18:30
8
0.10SEC ( 54H) OFF
R
EA
CL
DLY 08:30 18:--
7
0.10SEC ( 54H) OFF
Use the jog dial to change from “– –” to “ 30” , and then turn
the shuttle dial clockwise.
“– – ” (hours) flashes in the STOP column.
DLY 08:30 --:--
6
Note:
• If you want to use different days, times, and recording speeds for
timer recording, select the respective WEEK column and make the
required settings.
• If timer reservations overlap each other, the one that starts first will
have priority.
• To delete all timer reservations (including time settings), press the
MENU RESET button of the front panel.
SET
ON
OFF
OFF
OFF
OFF
OFF
OFF
OFF
51
TIMER SET SETTING
Timer reservations spanning more than
24 hours
6
To make 24-hour timer reservations, use lines 7 (SAT) and 8 (DLY) of
the menu screen.
Example: To set timer recording from 10.30 a.m. on Monday to
8.30 p.m. on Wednesday
1
2
4
START
--:---:---:---:---:---:---:---:--
<TIMER SET>
STOP REC CYCLE
--:-- 0.10SEC (
--:-- 0.10SEC (
--:-- 0.10SEC (
--:-- 0.10SEC (
--:-- 0.10SEC (
--:-- 0.10SEC (
--:-- 0.10SEC (
--:-- 0.10SEC (
54H)
54H)
54H)
54H)
54H)
54H)
54H)
54H)
7
8
SET
OFF
OFF
OFF
OFF
OFF
OFF
OFF
OFF
9
0.10SEC ( 54H) OFF
Use the jog dial to change from “– –” to “ 30” , and then turn
the shuttle dial clockwise.
“0.10” (recording speed) flashes in the REC CYCLE column.
0.10SEC ( 54H) OFF
Use the jog dial to change from “ 0.10” to “ 0.17” (90H), and
then turn the shuttle dial clockwise.
“OFF” flashes in the SET column.
WED ¤¤:¤¤ 20:30
0.17SEC ( 90H) OFF
10 Use the jog dial to change from “ OFF” to “ ON” , and then turn
Use the jog dial to change from “– –” to “ 10” , and then turn
the shuttle dial clockwise.
“– – ” (minutes) flashes in the START column.
the shuttle dial clockwise.
The cursor moves to the first line.
Use the jog dial to change from “– –” to “ 30” , and then turn
the shuttle dial clockwise.
“– – ” (hours) flashes in the STOP column.
MON 10:30 --:--
0.10SEC ( 54H) OFF
Use the jog dial to change from “– –” to “ 20” , and then turn
the shuttle dial clockwise.
“– – ” (minutes) flashes in the STOP column.
WED ¤¤:¤¤ 20:30
Use the jog dial to change from “ SAT” to “ MON” , and then
turn the shuttle dial clockwise.
“– – ” (hours) flashes in the START column.
MON --:-- --:--
3
WED ¤¤:¤¤ --:--
Use the jog dial to move the cursor to the 7th line (SAT), and
then turn the shuttle dial.
“SAT” flashes in the WEEK column.
WEEK
SUN
MON
TUE
WED
THU
FRI
SAT
DLY
Use the jog dial to change from “ TUE” to “ WED” , and then
turn the shuttle dial clockwise.
“– – ” (hours) flashes in the STOP column.
MON 10:30 ¤¤:¤¤
WED ¤¤:¤¤ 20:30
¤¤¤SEC (¤¤¤¤¤) ¤¤¤
0.17SEC ( 90H) ON
11 Press the EXIT/OSD button.
0.10SEC ( 54H) OFF
The display returns to the normal screen.
5
EXIT/OSD
Use the jog dial to change from “– –” to “ **” , and then turn
the shuttle dial clockwise.
The DLY setting on the 8th line automatically changes to the
following day (TUE) of the weekday indicated in the 7th line
changed to “TUE”. Parts which do not need to be set appear with
a “*” symbol.
MON 10:30 ¤¤:¤¤
TUE ¤¤:¤¤ --:--
¤¤¤SEC (¤¤¤¤¤) ¤¤¤
---SEC (----H) OFF
52
English
HOLIDAY SET SETTING
Main menu 1
<MAIN MENU 1>
1.LANGUAGE/CLOCK SET
2.VIDEO INPUT SET
3.RECORDING AREA SET
4.RECORDING CONDITIONS SET
5.NORMAL REC MODE SET
6.TIMER SET
7.HOLIDAY SET
8.ALARM REC MODE SET
TO MAIN MENU 2
MOVE LINES WITH JOG. SELECT WITH
Sub-menus
1.
2.
3.
4.
5.
6.
7.
8.
9.
10.
->
->
->
->
->
->
->
->
->
SHUTTLE
<HOLIDAY
-----------------------------------------
SET>
11.
12.
13.
14.
15.
16.
17.
18.
19.
20.
Sets an ordinary day to a holiday.
-----------------------------------------
HOLIDAY SET setting
3
Days such as designated national holidays and company holidays are
treated in the same way as normal weekdays. Naturally timer
recording is carried out in the same way for these days, but if you set
the HOLIDAY SET setting to “SET:ON” in the menu timer settings and
then specify the dates for the holidays in this menu screen, the same
sort of timer reservations can be made for holidays.
1. 11---
Note: For a timer setting make sure that you make the time settings
for Sunday (SUN) before changing SET to “ON”.
WEEK
SUN
MON
TUE
WED
THU
FRI
SAT
DLY
START
08:00
--:---:---:---:---:---:---:--
<TIMER SET>
STOP REC CYCLE
18:00 0.10SEC (
--:-- 0.10SEC (
--:-- 0.10SEC (
--:-- 0.10SEC (
--:-- 0.10SEC (
--:-- 0.10SEC (
--:-- 0.10SEC (
--:-- 0.10SEC (
54H)
54H)
54H)
54H)
54H)
54H)
54H)
54H)
Use the jog dial to change from “– –” to “ 11” , and then turn
the shuttle dial clockwise.
“– – ” (day) flashes in the line 1.
4
SET
ON
OFF
OFF
OFF
OFF
OFF
OFF
OFF
Use the jog dial to change from “– –” to “ 17” , and then turn
the shuttle dial clockwise.
The cursor moves to the line 2.
2
1. 11-17
2. -----
1
Example: To set 17 November as a holiday
1
MENU
1.
2.
3.
4.
5.
2
5
6
Press the MENU button to select HOLIDAY SET, and then
turn the shuttle dial clockwise.
The HOLIDAY SET sub-menu appears, and the cursor moves to
the line 1.
<HOLIDAY
---------------------
SET>
11.
12.
13.
14.
15.
Press the EXIT/OSD button.
The display returns to the normal screen.
EXIT/OSD
---------------------
Turn the shuttle dial clockwise.
“– – ” (month) flashes in the line 1.
1. -----
English
Follow the same procedure to set other holiday dates.
53
ALARM REC MODE SET SETTING
Main menu 1
<MAIN MENU 1>
1.LANGUAGE/CLOCK SET
2.VIDEO INPUT SET
3.RECORDING AREA SET
4.RECORDING CONDITIONS SET
5.NORMAL REC MODE SET
6.TIMER SET
7.HOLIDAY SET
8.ALARM REC MODE SET
TO MAIN MENU 2
MOVE LINES WITH JOG. SELECT WITH
Sets the image quality.
Sets the recording method (frame or field).
->
->
->
->
->
->
->
->
SHUTTLE
Sets audio recording.
Sets alarm recording.
Sets the recording rate (recording speed) and the alarm time
duration.
Sub-menus
Sets pre-alarm recording.
<ALARM REC MODE SET>
PICTURE QUALITY
: ENHANCED
FRAME/FIELD RECORDING : FIELD
AUDIO RECORDING
: OFF
ALARM RECORDING
: OFF
REC CYCLE : 0.10SEC. DURATION: 1SEC
PRE-ALARM RECORDING : ¤¤¤
REC CYCLE : ¤¤¤ SEC. DURATION: ¤¤¤
=> (46400 ALARMS CAN BE RECORDED)
ALARM TRIGGER
: ALARM
MOTION SENSOR
->
Sets the recording rate (recording speed) and the alarm time
duration for pre-alarm recording.
Sets the alarm trigger.
Sets the motion sensors (alarm).
ALARM REC MODE SET setting
3
This lets you set the recording quality, recording method (frame or
field), audio recording and recording speed for the alarm recording
area.
1
2
Note: The maximum number of images that can be recorded based
on the various alarm recording settings is shown below.
=> (25600 ALARMS CAN BE RECORDED)
Press the MENU button to select ALARM REC MODE SET,
and then turn the shuttle dial clockwise.
The ALARM REC MODE SET sub-menu appears, and the cursor
moves to PICTURE QUALITY.
MENU
Use the jog dial to select the image quality (example:
“ SUPER FINE” ), and then turn the shuttle dial clockwise.
The cursor moves to FRAME/FIELD RECORDING.
(Image quality settings)
• BASIC (BA): (15 KB)
• NORMAL (NO): (22 KB)
• ENHANCED (EN): (30 KB)
• FINE (FI): (42 KB)
• SUPER FINE (SF): (56 KB)
<ALARM REC MODE SET>
PICTURE QUALITY
: ENHANCED
FRAME/FIELD RECORDING : FIELD
AUDIO RECORDING
: OFF
ALARM RECORDING
: OFF
REC CYCLE : 0.10SEC. DURATION: 1SEC
PRE-ALARM RECORDING : ¤¤¤
REC CYCLE : ¤¤¤ SEC. DURATION: ¤¤¤
=> (46400 ALARMS CAN BE RECORDED)
ALARM TRIGGER
: ALARM
MOTION SENSOR
->
<ALARM REC MODE SET>
PICTURE QUALITY
: SUPER FINE
FRAME/FIELD RECORDING : FIELD
AUDIO RECORDING
: OFF
ALARM RECORDING
: OFF
REC CYCLE : 0.10SEC. DURATION: 1SEC
PRE-ALARM RECORDING : ¤¤¤
REC CYCLE : ¤¤¤ SEC. DURATION: ¤¤¤
Turn the shuttle dial clockwise.
“ENHANCED” flashes.
<ALARM REC MODE SET>
PICTURE QUALITY
: ENHANCED
FRAME/FIELD RECORDING : FIELD
AUDIO RECORDING
: OFF
ALARM RECORDING
: OFF
REC CYCLE : 0.10SEC. DURATION: 1SEC
54
English
ALARM REC MODE SET SETTING
4
7
Turn the shuttle dial clockwise, use the jog dial to set the
recording method (example: “ FRAME” ), and then turn the
shuttle dial clockwise.
The cursor moves to AUDIO RECORDING.
Note: When the recording speed is selected, the maximum number of
recordings appears after it in brackets.
=> (17066 ALARMS CAN BE RECORDED)
<ALARM REC MODE SET>
PICTURE QUALITY
: SUPER FINE
FRAME/FIELD RECORDING : FRAME
AUDIO RECORDING
: OFF
ALARM RECORDING
: OFF
REC CYCLE : 0.20SEC. DURATION: 1SEC
PRE-ALARM RECORDING : ¤¤¤
8
Note:
• When FRAME/FIELD RECORDING is selected, the recording
speed appears in REC CYCLE and the maximum number of
recordings appears after it in brackets.
=> (30721 ALARMS CAN BE RECORDED)
• The field and frame recording speeds vary depending on the
PICTURE QUALITY setting. Refer to the Recording speed table for
details. (See page 11.)
5
Turn the shuttle dial clockwise, use the jog dial to set audio
recording (example: “ ON” ), and then turn the shuttle dial.
The cursor moves to ALARM RECORDING.
9
Press the EXIT/OSD button.
The display returns to the normal screen.
Alarm settings appear in the operating display section. When an
alarm is triggered, the number of alarms is displayed.
EXIT/OSD
01-01-01 ALARM 0000
05:53:44 SF 0.13SEC
Note:
• Audio recording can be set when the REC CYCLE setting is 0.10
SEC (FIELD) or 0.20 SEC (FRAME) or more.
• When set to “ON”, the letter “A” (audio recording indicator) appears
in front of the REC CYCLE recording speed, and the maximum
number of recordings appears after it in brackets.
=> (25166 ALARMS CAN BE RECORDED)
Note: If another alarm occurs while alarm recording is in progress,
alarm recording continues with images for the second alarm
being recorded from the point where the second alarm occurred.
If several alarms have occurred at the same time, they are
treated as a single alarm until the alarms stop.
Turn the shuttle dial clockwise, use the jog dial to set alarm
recording mode (example: “ MODE1” ), and then turn the
shuttle dial.
The cursor moves to REC CYCLE.
Display example: Alarm recording settings
• OFF: Alarm recording is not carried out.
• MODE1: Alarm recording is always carried out regardless of
the timer recording settings.
• MODE2: Alarm recording is only carried out when timer
recording is in progress.
• MODE3: Alarm recording is only carried out when timer
recording is not in progress
• MODE4: Alarm recording is carried out only during the times
set by the timer. This cannot be used for normal
recording.
Note: If alarm recording is set to a setting such as MODE1,
PRE-ALARM RECORDING setting will be enabled (“***” will
change to “OFF”).
English
Use the jog dial to set the recording time duration (example:
“ 5” ), and then turn the shuttle dial.
The cursor moves to PRE-ALARM RECORDING.
<ALARM REC MODE SET>
PICTURE QUALITY
: SUPER FINE
FRAME/FIELD RECORDING : FRAME
AUDIO RECORDING
: ON
ALARM RECORDING
: MODE1
REC CYCLE : A0.13SEC. DURATION: 5SEC
PRE-ALARM RECORDING : OFF
REC CYCLE : ¤¤¤ SEC. DURATION: ¤¤¤
=> (03355 ALARMS CAN BE RECORDED)
ALARM TRIGGER
: ALARM
MOTION SENSOR
->
<ALARM REC MODE SET>
PICTURE QUALITY
: SUPER FINE
FRAME/FIELD RECORDING : FRAME
AUDIO RECORDING
: ON
ALARM RECORDING
: OFF
REC CYCLE : A0.20SEC. DURATION: 1SEC
PRE-ALARM RECORDING : ¤¤¤
REC CYCLE : ¤¤¤ SEC. DURATION: ¤¤¤
6
Turn the shuttle dial clockwise, use the jog dial to set the
recording speed (example: “ 0.13” ), and then turn the shuttle
dial.
DURATION of “1SEC” flashes.
55
ALARM REC MODE SET SETTING
Pre-alarm recording setting
1
6
Use the jog dial to move the cursor to the ALARM
RECORDING setting, and then turn the shuttle dial clockwise.
“OFF” flashes.
REC CYCLE : A0.13SEC.
PRE-ALARM RECORDING :
REC CYCLE : A0.20SEC.
=> (02844 ALARMS CAN
ALARM TRIGGER
:
MOTION SENSOR
<ALARM REC MODE SET>
PICTURE QUALITY
: SUPER FINE
FRAME/FIELD RECORDING : FRAME
AUDIO RECORDING
: ON
ALARM RECORDING
: OFF
REC CYCLE : A0.13SEC. DURATION: 5SEC
PRE-ALARM RECORDING : ¤¤¤
REC CYCLE : ¤¤¤ SEC. DURATION: ¤¤¤
2
7
Use the jog dial to change the “ OFF” setting to some other
mode (example: MODE1), and then turn the shuttle dial
clockwise.
The PRE-ALARM RECORDING setting changes from “***” to
“OFF”.
The cursor moves to REC CYCLE.
4
5
Note:
• Pre-alarm recording continues for the length of time specified by
the DURATION setting before an alarm signal is input. When
playing back images that have been recorded during pre-alarm
recording, use the alarm search (SEARCH FRAME/FIELD button)
operations. Images will be played back from the point that the
alarm occurred, so use the shuttle operations to carry out rewind
playback.
• If pre-alarm recording is being carried out in FIELD (recording rate)
mode, the cycle speed for the recording cycle settings will become
slower, and the 0.02 second and 0.03 second settings cannot be
selected.
MODE1
DURATION: 5SEC
OFF
DURATION: ¤¤¤
BE RECORDED)
ALARM
->
Recording
Recording
Rate
Cycle (SEC)
(field/sec)
60.00
0.02
30.00
0.03
20.00
0.05
15.00
0.07
10.00
0.10
7.50
0.13
6.00
0.17
Use the jog dial to change from “ OFF” to “ ON” , and then turn
the shuttle dial clockwise.
The cursor moves to REC CYCLE.
PRE-ALARM RECORDING :
REC CYCLE : A0.20SEC.
=> (02960 ALARMS CAN
ALARM TRIGGER
:
MOTION SENSOR
BASIC
15 kB
21H
42H
63H
85H
127H
170H
212H
PICT
NORMAL E
22 kB
15H
30H
45H
60H
90H
120H
150H
• If carrying out normal alarm recording and pre-alarm recording at
ON
DURATION: 1SEC
BE RECORDED)
ALARM
->
•
Turn the shuttle dial clockwise, use the jog dial to set the
recording speed (example: “ A0.20” ), and then turn the
shuttle dial clockwise.
The cursor moves to the “1SEC” setting for DURATION and
flashes.
PRE-ALARM RECORDING :
REC CYCLE : A0.20SEC.
=> (02844 ALARMS CAN
ALARM TRIGGER
:
MOTION SENSOR
Press the EXIT/OSD button.
The display returns to the normal screen.
“PRE” appears in the operating display section. When an alarm is
triggered, the display switches to “ALARM”.
01-01-01 PRE 0000
06:46:15 SF 0.26SEC
Use the jog dial to move the cursor to the PRE-ALARM
RECORDING setting, and then turn the shuttle dial clockwise.
“OFF” flashes.
ALARM RECORDING
:
REC CYCLE :A0.13SEC.
PRE-ALARM RECORDING :
REC CYCLE : ¤¤¤ SEC.
=> (03355 ALARMS CAN
ALARM TRIGGER
:
MOTION SENSOR
DURATION: 5SEC
ON
DURATION: 5SEC
BE RECORDED)
ALARM
->
EXIT/OSD
<ALARM REC MODE SET>
PICTURE QUALITY
: SUPER FINE
FRAME/FIELD RECORDING : FRAME
AUDIO RECORDING
: ON
ALARM RECORDING
: MODE1
REC CYCLE : A0.13SEC. DURATION: 5SEC
PRE-ALARM RECORDING : OFF
REC CYCLE : ¤¤¤ SEC. DURATION: ¤¤¤
=> (03355 ALARMS CAN BE RECORDED)
ALARM TRIGGER
: ALARM
MOTION SENSOR
->
3
Use the jog dial to set the recording time duration (example:
“ 5SEC” ), and then turn the shuttle dial clockwise.
The cursor moves to ALARM TRIGGER.
ON
DURATION: 1SEC
BE RECORDED)
ALARM
->
56
the same time, no audio signals will be recorded with the pre-alarm
recording images.
If using the digital video recorder together with a multiplexer, the
switching signal from the multiplexer will be output in accordance
with the digital video recorder’s recording timing for normal
recording if pre-alarm recording and normal recording are being
carried out at the same time. Because of this, if the recording cycle
for pre-alarm recording is shorter than the recording cycle setting
for normal recording, pre-alarm recording images from one camera
may be continuously recorded. On the other hand, if the recording
cycle for pre-alarm recording is longer than the recording cycle
setting for normal recording, camera images may not be recorded
at all during normal recording, so this setting should not be made.
English
ALARM REC MODE SET SETTING
Alarm trigger setting
1
Built-in motion sensor settings
The monitor screen (-: 8x10) can be displayed on the monitor screen
so that detection of suspicious people (alarms) can be carried out
more easily. The default setting is for all motion sensors to be “OFF”,
so that they cannot detect the movement of objects.
Use the jog dial to move the cursor to the ALARM TRIGGER
setting.
PRE-ALARM RECORDING :
REC CYCLE : A0.13SEC.
=> (01677 ALARMS CAN
ALARM TRIGGER
:
MOTION SENSOR
ON
DURATION: 5SEC
BE RECORDED)
ALARM
->
A OFF (-)
C
B
2
Turn the shuttle dial clockwise, use the jog dial to select the
method of detecting suspicious people (example:
“ SENSOR” ), and then turn the shuttle dial.
The cursor moves to MOTION SENSOR.
PRE-ALARM RECORDING :
REC CYCLE : A0.13SEC.
=> (01677 ALARMS CAN
ALARM TRIGGER
:
MOTION SENSOR
(-)
-
ú
-
- - - - - - - - LEVEL :
OFF
-
- - - - - - - - EXIT
-
E
-
<ALARM REC MODE SET>
PICTURE QUALITY
: ENHANCED
FRAME/FIELD RECORDING : FIELD
AUDIO RECORDING
: OFF
ALARM RECORDING
: OFF
REC CYCLE : 0.10 SEC. DURATION: 5SEC
PRE-ALARM RECORDING : ¤¤¤
REC CYCLE : ¤¤¤ SEC. DURATION: ¤¤¤
=> (46400 ALARMS CAN BE RECORDED)
ALARM TRIGGER
: ALARM
MOTION SENSOR
->
D
ON
DURATION: 5SEC
BE RECORDED)
SENSOR
->
Motion sensor screen
Use the jog dial to move the cursor to MOTION SENSOR, and then
turn the shuttle dial clockwise.
The motion sensor screen appears over the normal screen.
Display examples: Alarm recording trigger settings
• ALARM: Alarm recording is carried out when an external
alarm (when a switch is connected to the ALARM IN terminals
at the rear of the unit for open/close operation occurs).
• SENSOR: Alarm recording is only carried out when the motion
sensor detects a moving object. Refer to motion sensor
settings.
• ALARM AND SENSOR: Alarm recording is carried out when
there is a response from both an external alarm and a built-in
motion sensor.
• ALARM OR SENSOR: Alarm recording is carried out when
there is a response from either an external alarm or a built-in
motion sensor.
Note:
• MOTION SENSOR settings must be made if SENSOR, ALARM
AND SENSOR or ALARM OR SENSOR is selected.
• The digital video recorder’s built-in motion sensor cannot be used if
a multiplexer is connected to the digital video recorder.
• If using the built-in sensor of a multiplexer, the alarm output should
be directed to the alarm input of the digital video recorder in order
to record alarms.
• If you stop recording while alarm recording that has been triggered
by a motion sensor is in progress, move the cursor to the ALARM
REC MODE SET setting in menu 1 and then turn the shuttle dial
clockwise. The motion sensor screen appears, so use this screen
to change the LEVEL setting to “OFF”.
English
A O N (ú)
57
A
When the sensors are set to “OFF” (-) and the shuttle dial is
turned clockwise, the sensor is changed to “ON” (ú). The setting
switches between “ON” and “OFF” each time the shuttle dial is
turned clockwise.
B
When the jog dial is turned counterclockwise, the cursor moves
past “EXIT” and “LEVEL: OFF”, and then moves again from the
bottom to the top.
C
When the jog dial is turned clockwise and the cursor reaches the
bottom, it moves past “LEVEL: OFF” and “EXIT” and then moves
to the top.
D
The sensitivity can be adjusted when the sensor is set to “ON”
(ú). Turn the jog dial to select “LEVEL: OFF”, turn the shuttle dial
clockwise, and then turn the jog dial to adjust the sensitivity.
(OFF 1 – 10: The sensitivity increases as the number becomes
lower.)
E
If the cursor is at “EXIT” and the shuttle dial is turned clockwise,
the display returns to the ALARM REC MODE SET screen.
ALARM REC MODE SET SETTING
1
4
Use the jog dial to move the cursor to the MOTION SENSOR
setting, and then turn the shuttle dial clockwise.
The motion sensor screen appears on the normal screen.
PRE-ALARM RECORDING :
REC CYCLE : A0.13SEC.
=> (01677 ALARMS CAN
ALARM TRIGGER
:
MOTION SENSOR
-
-
- - - - - - - - LEVEL :
OFF
Turn the shuttle dial clockwise twice.
This completes the motion sensor settings, and the display is
returned to the ALARM REC MODE SET screen.
ON
DURATION: 5SEC
BE RECORDED)
ALARM
->
-
- - - - - - - - EXIT
-
-
-
5
-
- - - ú
- ú
- ú
- - - LEVEL :
ú
ú
ú
6
ú
ú
ú
-
- - - - - - - - EXIT
-
-
Press the EXIT/OSD button.
The display returns to the normal screen.
EXIT/OSD
2
Turn the jog dial to set the sensor position, and then turn the
shuttle dial clockwise.
Since the sensor goes from OFF [-] to ON [ú], use the same
procedure to set the sensor ON.
-
3
-
- - - ú
- ú
- ú
- - - LEVEL :
ú
ú
ú
OFF
ú
ú
ú
-
- - - - - - - - EXIT
-
Note: Change the ALARM setting for the ALARM set item in the
BUZZER SET menu in MAIN MENU 2 to “ON”.
-
Use the jog dial to move the cursor to “ LEVEL: OFF” , turn
the shuttle dial clockwise, and then use the jog dial to set the
sensitivity (example: “ 6” ).
Display examples: Sensitivity settings
• OFF: Sensor does not operate
• 1 to 10: Sensor operates (the lower the value, the greater the
sensitivity)
-
-
- - - ú
- ú
- ú
- - - LEVEL :
ú
ú
ú
6
ú
ú
ú
-
- - - - - - - - EXIT
-
-
Note: You can check the sensitivity in the setting screen. When an
alarm is detected, the buzzer (a beeping noise) sounds. If the
sensitivity is too strong, an alarm can be triggered by variations
in light. Make the setting that is appropriate for the area being
monitored.
58
English
DISPLAY SET SETTING
Main menu 2
<MAIN MENU 2>
1.DISPLAY/VIDEO LOSS SET
2.RS-232C/RS-485 SET
3.BUZZER SET
4.SECURITY LOCK SET
5.NETWORK SET
6.HDD SET
7.POWER FAILURE/USED TIME
Sub-menus
Displays the date on the monitor screen.
<DISPLAY SET>
DATE
: ON
TIME
: ON
QUALITY
: ON
REC CYCLE
: ON
ALARM COUNT : ON
ALARM TYPE : ON
->
->
->
->
->
->
->
Displays the time on the monitor screen.
Displays the image quality on the monitor
screen.
<VIDEO LOSS SET>
VIDEO LOSS : ON
TO MAIN MENU 1
->
MOVE LINES WITH JOG. SELECT WITH SHUTTLE
Displays the recording rate (recording
speed) on the monitor screen.
For an example of the display, please refer to
the operating display section. (See page 13.)
Displays the number of alarms on the
monitor screen.
Displays the alarm types on the monitor
screen.
DISPLAY SET setting
6
The date and time that have been set using the CLOCK SET and
other settings can be displayed on the monitor screen during recording
and playback. The default setting is for all displays to be “ON”, so all
setting items in this menu appear on the screen. You can turn the
displays off if required.
1
Press the MENU button twice and display the MAIN MENU 2
screen.
The cursor moves to DISPLAY/VIDEO LOSS SET.
MENU
2
If necessary, follow the same procedure (steps 3 and 4) to
change the ON/OFF settings.
• QUALITY (OFF): The picture quality mode does not appear
during recording and playback.
• REC CYCLE (OFF): The recording cycle does not appear
during recording and playback.
• ALARM COUNT (OFF): The current number of alarms does
not appear.
• ALARM TYPE (OFF): The type of alarm recording does not
appear.
Note:
• If ALARM RECORDING in the ALARM REC MODE SET menu has
been set to “OFF”, ALARM COUNT and ALARM TYPE do not
appear. (See page 54.)
• When set to “ON”
• ALARM appears in the operating display during alarm recording.
• PRE appears in the operating display during pre-alarm
recording.
• ARCHIV appears when playing back images in the archive area.
Turn the shuttle dial clockwise.
The DISPLAY SET sub-menu appears, and the cursor moves to
DATE.
7
<DISPLAY SET>
DATE
: ON
TIME
: ON
QUALITY
: ON
REC CYCLE
: ON
ALARM COUNT : ON
ALARM TYPE : ON
Press the EXIT/OSD button.
The display returns to the normal screen.
EXIT/OSD
<VIDEO LOSS SET>
VIDEO LOSS : ON
3
4
5
VIDEO LOSS SET setting
Turn the shuttle dial clockwise.
“ON” flashes. If you use the jog dial to change it to “OFF”, the
date display disappears from the screen.
Use the jog dial to move the cursor to VIDEO LOSS, and then turn
the shuttle dial clockwise.
“ON” flashes. If the camera images are lost when this setting is active,
“VIDEO LOSS !” appears on the screen.
Turn the shuttle dial clockwise.
The cursor moves to TIME.
Turn the shuttle dial clockwise.
“ON” flashes. If you use the jog dial to change it to “OFF”, the
time display disappears from the screen.
English
59
RS-232C/RS-485 SET SETTING
Main menu 2
<MAIN MENU 2>
1.DISPLAY/VIDEO LOSS SET
2.RS-232C/RS-485 SET
3.BUZZER SET
4.SECURITY LOCK SET
5.NETWORK SET
6.HDD SET
7.POWER FAILURE/USED TIME
Sub-menus
Selects CONTROL.
<RS-232C/RS-485 SET>
CONTROL
: RS-232C
DATA SPEED : 19200
STATUS INFO : ***
ALARM INFO : ***
ADDRESS
: ***
->
->
->
->
->
->
->
Sets communication environment.
Setting for RS-485 only
• Enables transmission of status.
• Enable transmission of alarm.
TO MAIN MENU 1
->
MOVE LINES WITH JOG. SELECT WITH SHUTTLE
• Sets address.
RS-232C/RS-485 SET setting
RS-232C Selection
Settings related to RS-232C and RS-485 serial communication.
1
For connection of the RS-232C terminal of the unit to a computer,
please use a special RS-232C cable (sold separately). (See page 7.)
Press the MENU button twice to display the MAIN MENU 2
screen.
The cursor moves to DISPLAY/VIDEO LOSS SET.
1
Turn the jog dial to select RS-232C, and then turn the shuttle
dial clockwise.
The cursor moves to DATA SPEED.
MENU
<RS-232C/RS-485 SET>
CONTROL
: RS-232C
DATA SPEED : 19200
STATUS INFO : ***
ALARM INFO : ***
ADDRESS
: ***
2
Use the jog dial to move the cursor to the RS-232C/RS-485
SET settings, and then turn the shuttle dial clockwise.
The RS-232C/RS-485 SET sub-menu appears, and the cursor
moves to CONTROL.
<MAIN MENU 2>
1.DISPLAY/VIDEO LOSS SET
2.RS-232C/RS-485 SET
3.BUZZER SET
4.SECURITY LOCK SET
5.NETWORK SET
6.HDD SET
2
->
->
->
->
->
->
Turn the shuttle dial clockwise, use the jog dial to select a
communication speed (example: “ 19200” ), and then turn the
shuttle dial clockwise.
This completes the setting and the cursor moves to CONTROL.
• Communication speeds: 2400, 4800, 9600 and 19200
<RS-232C/RS-485 SET>
CONTROL
: RS-232C
DATA SPEED : 19200
STATUS INFO : ***
ALARM INFO : ***
ADDRESS
: ***
<RS-232C/RS-485 SET>
CONTROL
: RS-232C
DATA SPEED : 19200
STATUS INFO : ***
ALARM INFO : ***
ADDRESS
: ***
3
Press the EXIT/OSD button.
The display returns to the normal screen.
EXIT/OSD
3
Turn the shuttle dial clockwise.
“RS-232C” flashes. Use the jog dial to select either RS-232C or
RS-485.
<RS-232C/RS-485 SET>
CONTROL
: RS-232C
DATA SPEED : 19200
STATUS INFO : ***
ALARM INFO : ***
ADDRESS
: ***
60
English
RS-232C/RS-485 SET SETTING
RS-485 Selection
5
Connect the RS-485 control terminals (A and B) of the digital video
recorder in series with other devices such as a controller, multiplexer
or another digital video recorder. (See page 7.)
1
Turn the shuttle dial clockwise, use the jog dial to select an
address (example: “ 37” ), and then turn the shuttle dial
clockwise.
This completes the setting and the cursor moves to CONTROL.
Note: The range of valid addresses for this unit is from 0 to 127. If
more than one digital video recorder is connected, be careful
that same addresses are not repeated.
• Address item: 0 to 127
Turn the shuttle dial clockwise, use the jog dial to select
RS-485, and then turn the shuttle dial clockwise.
The cursor moves to DATA SPEED.
The STATUS INFO, ALARM INFO and ADDRESS settings can
be changed.
<RS-232C/RS-485 SET>
CONTROL
: RS-485
DATA SPEED : 19200
STATUS INFO : ON
ALARM INFO : ON
ADDRESS
: 000
<RS-232C/RS-485 SET>
CONTROL
: RS-485
DATA SPEED : 19200
STATUS INFO : ON
ALARM INFO : ON
ADDRESS
: 000
2
<RS-232C/RS-485 SET>
CONTROL
: RS-485
DATA SPEED : 19200
STATUS INFO : ON
ALARM INFO : ON
ADDRESS
: 37
Turn the shuttle dial clockwise, use the jog dial to select a
communication speed (example: “ 19200” ), and then turn the
shuttle dial clockwise.
• Communication speeds: 2400, 4800, 9600 and 19200
The cursor moves to STATUS INFO.
6
<RS-232C/RS-485 SET>
CONTROL
: RS-485
DATA SPEED : 19200
STATUS INFO : ON
ALARM INFO : ON
ADDRESS
: 000
3
4
EXIT/OSD
Turn the shuttle dial clockwise, use the jog dial to select
status information (example: “ ON” ), and then turn the shuttle
dial clockwise.
• ON: Status information will be transmitted.
The cursor moves to ALARM INFO.
Turn the shuttle dial clockwise, use the jog dial to select
alarm information (example: “ ON” ), and then turn the shuttle
dial clockwise.
• ON: Alarm information will be transmitted.
The cursor moves to ADDRESS.
English
Press the EXIT/OSD button.
The display returns to the normal screen.
61
BUZZER SET SETTING
Main menu 2
<MAIN MENU 2>
1.DISPLAY/VIDEO LOSS SET
2.RS-232C/RS-485 SET
3.BUZZER SET
4.SECURITY LOCK SET
5.NETWORK SET
6.HDD SET
7.POWER FAILURE/USED TIME
Sub-menus
<BUZZER SET>
ALARM
:
DISK FULL
:
DISK ERROR :
LOCK WARNING :
KEY IN
:
NON REC
:
->
->
->
->
->
->
->
Sets the buzzer to sound during alarms.
OFF
ON
ON
ON
OFF
OFF
Sets the buzzer to sound when there is
no recording space left.
Sets the buzzer to sound when there is a
problem with the hard disk.
TO MAIN MENU 1
->
MOVE LINES WITH JOG. SELECT WITH SHUTTLE
Sets the buzzer to sound when the
security lock is engaged.
Sets the buzzer to sound when not
recording.
Sets the buzzer to sound when an
operating button is pressed.
The buzzer can be made to sound as a warning during an alarm and
when the hard disk becomes full.
1
3
Press the MENU button twice and display the MAIN MENU 2
screen.
The cursor moves to DISPLAY/VIDEO LOSS SET.
4
MENU
Turn the shuttle dial clockwise.
“OFF” flashes. Use the jog dial to change the setting to “ON” or
“OFF”.
ON: The buzzer will sound when an alarm is triggered.
If necessary, follow the same procedure to change the
buzzer setting (ON/OFF).
• DISK FULL (ON):
Sets whether the buzzer sounds when disk overwriting
is off and the hard disk is nearly full.
• DISK ERROR (ON):
2
Sets whether the buzzer sounds when there is a hard
disk error.
Use the jog dial to move the cursor to the BUZZER SET
setting, and then turn the shuttle dial clockwise.
The BUZZER SET sub-menu appears, and the cursor moves to
ALARM.
<BUZZER SET>
ALARM
:
DISK FULL
:
DISK ERROR :
LOCK WARNING :
KEY IN
:
NON REC
:
• LOCK WARNING (ON):
When the security lock is engaged and a locked button
is pressed, the buzzer sounds.
Note: When an item is set to “ON”, the buzzer sounds twice at an
interval of about 0.5 seconds.
• KEY IN (ON):
OFF
ON
ON
ON
OFF
OFF
Sets the buzzer to sound each time an operating button
is pressed.
• NON REC (ON):
Sets the buzzer to sound when recording stops by itself
and when another person deliberately stops recording.
5
Press the EXIT/OSD button.
The display returns to the normal screen.
EXIT/OSD
62
English
SECURITY LOCK SET SETTING
Passwords for this digital video recorder can be set by the Administrator or the User or both. Setting passwords enables privileges to
be set for recording and playback operations. After the security lock has been set, if someone other than the password setter touches
an operating button on the unit, the buzzer will sound and a password must be entered. Therefore, be sure to make a note of the
password.
Main menu 2
<MAIN MENU 2>
1.DISPLAY/VIDEO LOSS SET
2.RS-232C/RS-485 SET
3.BUZZER SET
4.SECURITY LOCK SET
5.NETWORK SET
6.HDD SET
7.POWER FAILURE/USED TIME
Sub-menus
Sets the Administrator level and User
level security locks.
<SECURITY LOCK SET>
LEVEL PASSWORD(4-8) USE
ADMIN
-------- OFF
USER
-------- OFF
REC CONTROL
: ADMIN
->
->
->
->
->
->
->
TO MAIN MENU 1
->
MOVE LINES WITH JOG. SELECT WITH SHUTTLE
Operating privileges and security lock
3
A Administrator password setting
Example: To set the password to “123456AB”
1
ADMIN
--------
OFF
Press the MENU button twice to display the MAIN MENU 2
screen.
The cursor moves to DISPLAY/VIDEO LOSS SET.
4
MENU
2
Turn the shuttle dial clockwise.
The first password entry bar flashes.
Use the jog dial to display “ 1” , and then turn the shuttle dial.
The second password entry bar flashes.
• The characters that can be used in the password are: 0, 1, ...
9, A, B, C, ... Z
ADMIN
Use the jog dial to move the cursor to the SECURITY LOCK
SET setting, and then turn the shuttle dial clockwise.
The SECURITY LOCK SET sub-menu appears, and the cursor
moves to ADMIN.
5
<SECURITY LOCK SET>
LEVEL PASSWORD(4-8) USE
ADMIN
-------- OFF
USER
-------- OFF
REC CONTROL
: ADMIN
6
English
12------
OFF
Repeat this procedure to continue entering “ 3456AB” , and
then turn the shuttle dial clockwise.
The cursor moves to “OFF” and flashes.
<SECURITY LOCK SET>
LEVEL PASSWORD(4-8) USE
ADMIN
123456AB OFF
USER
-------- OFF
REC CONTROL
: ADMIN
63
OFF
Use the jog dial to display “ 2” , and then turn the shuttle dial.
The third password entry bar flashes.
ADMIN
Note:
• “LEVEL PASSWORD (4-8) USE” is a title and cannot be changed.
• If ADMIN is set to “OFF”, the user password cannot be set.
• The password can consist of between four and eight alphanumeric
characters.
1-------
SECURITY LOCK SET SETTING
7
B User password setting
Use the jog dial to change the setting to “ ON” , and then turn
the shuttle dial clockwise.
The cursor moves to USER.
Example: To set the password to “AB123456”
1
<SECURITY LOCK SET>
LEVEL PASSWORD(4-8) USE
ADMIN
123456AB ON
USER
-------- OFF
REC CONTROL
: ADMIN
Use the jog dial to move the cursor to USER, and then turn
the shuttle dial clockwise.
The first password entry bar flashes.
USER
8
Set User password.
Carry out B User password setting. If the User setting is not to
be done, this is complete.
Use the jog dial to move the cursor to REC CONTROL and carry
out the recording and playback operating privilege setting.
(See page 65.)
2
Note: If setting a 4-character password, leave the 5th character as "-"
and then turn the shuttle dial clockwise.
A-------
OFF
Use the jog dial to display “ B” , and then turn the shuttle dial.
The third password entry bar flashes.
USER
4
OFF
Use the jog dial to display “ A” , and then turn the shuttle dial.
The second password entry bar flashes.
• The characters that can be used in the password are: 0, 1, ...
9, A, B, C, ... Z
USER
3
--------
AB------
OFF
Repeat this procedure to continue entering “ 123456” , and
then turn the shuttle dial clockwise.
The cursor moves to “OFF” and flashes.
<SECURITY LOCK SET>
LEVEL PASSWORD(4-8) USE
ADMIN
123456AB ON
USER
AB123456 OFF
REC CONTROL
: ADMIN
5
Use the jog dial to change the setting to “ ON” , and then turn
the shuttle dial clockwise.
The cursor moves to REC CONTROL.
Carry out the recording and playback operating privilege
setting. (See page 65.)
<SECURITY LOCK SET>
LEVEL PASSWORD(4-8) USE
ADMIN
-------- OFF
USER
AB123456 ON
REC CONTROL
: ADMIN
64
English
SECURITY LOCK SET SETTING
C Recording and playback operating privilege
D Security lock setting
setting
1
Selection of operating privilege
The available operations vary depending on the ON/OFF and
ADMIN/USER settings.
Selection
conditions
LEVEL PASSWORD(4-8) USE
ADMIN
123456AB ON
USER
AB123456 ON
REC CONTROL
: ADMIN
ADMIN
123456AB ON
USER
AB123456 ON
REC CONTROL
: USER
ADMIN
123456AB ON
USER
-------- OFF
REC CONTROL
: ADMIN
ADMIN
123456AB ON
USER
-------- OFF
REC CONTROL
: USER
ADMIN
-------- OFF
USER
-------- OFF
REC CONTROL
: ADMIN
ADMIN
-------- OFF
USER
-------- OFF
REC CONTROL
: USER
At the normal monitoring screen, press and hold the
SUHTTLE HOLD button for approximately 3 seconds.
The LOCK indicator at the front panel illuminates and the buzzer
sounds. The security lock is then set.
Details of operation
SHUTTLE HOLD
All operations are locked. When the user
password is entered at the password entry
screen, only playback operations can be
carried out. When the Administrator password
is entered, all operations can be carried out.
All operations are locked. When the user
password is entered at the password entry
screen, only playback and recording operations
can be carried out. When the Administrator
password is entered, all operations can be
carried out.
Recording and menu operations are locked.
Playback operations are not locked. When the
Administrator password is entered, all
operations can be carried out.
Menu operation is locked. Recording and
playback operations are not locked. When the
Administrator password is entered at the
password entry screen, all operations can be
carried out.
Security lock is not engaged (default setting).
LOCK
POWER
2
FULL
ALARM FULL
LOCK
Press any operating button to check the security lock.
The password entry screen appears.
LOCK
The screen display disappears after 5 seconds.
REC/STOP
SECURITY LOCKED !
PLEASE ENTRE YOUR PASSWORD
--------
CHANGE WITH JOG. SET WITH SHUTTLE
3
Security lock is not engaged (default setting).
Use the jog dial and the shuttle dial to enter the password,
and then turn the shuttle dial clockwise once more.
The LOCK indicator goes off and the display returns to the
normal screen.
Note: Enter the password (example: “123456AB”) that was entered as
the Administrator or User password setting.
1
Use the jog dial to move the cursor to REC CONTROL.
<SECURITY LOCK SET>
LEVEL PASSWORD(4-8) USE
ADMIN
123456AB ON
USER
AB123456 ON
REC CONTROL
: ADMIN
1
2
3
SECURITY LOCKED !
PLEASE ENTRE YOUR PASSWORD
********
LOCK
LOCK
LOCK
CHANGE WITH JOG. SET WITH SHUTTLE
2
Turn the shuttle dial clockwise, and then use the jog dial to
select “ ADMIN” or “ USER” .
This completes the setting.
<SECURITY LOCK SET>
LEVEL PASSWORD(4-8) USE
ADMIN
123456AB ON
USER
AB123456 ON
REC CONTROL
: ADMIN
3
Press the EXIT/OSD button.
The display returns to the normal screen.
EXIT/OSD
English
65
NETWORK SET SETTING
Main menu 2
<MAIN MENU 2>
1.DISPLAY/VIDEO LOSS SET
2.RS-232C/RS-485 SET
3.BUZZER SET
4.SECURITY LOCK SET
5.NETWORK SET
6.HDD SET
7.POWER FAILURE/USED TIME
Sub-menus
<NETWORK
LAN CARD
:
NETWORK CONTROL :
IP ADDRESS
:
SUBNET MASK
:
GATEWAY
:
PORT
:
ID
:
ID1
:
ID2
:
ID3
:
->
->
->
->
->
->
->
TO MAIN MENU 1
->
MOVE LINES WITH JOG. SELECT WITH SHUTTLE
Sets LAN card.
SET>
LAN1
OFF
192.168. 0. 1
255.255.255. 0
0. 0. 0. 0
00080
PASSWORD (4-8)
1111---2222---3333----
Sets NETWORK control.
Enter IP ADDRESS.
Enter SUBNET MASK.
Enter GATEWAY.
Sets the three levels of user passwords.
Sets the port.
Network connection
Insert a recommended PCMCIA-compatible Ethernet card into the PC card slot at the rear of the digital video recorder.
This will enable you to view images on this unit and make menu settings through the network (LAN) from a personal computer. ID1,
ID2 or ID3 and passwords are required.
Note:
• Up to four computers can be connected simultaneously to the DVR main unit. However, if four computers are already connected
and then another computer is connected at a user level that is higher than the user levels that are currently being used, any users
who are logged on at lower levels will be forcibly logged off, and the computer being connected at the higher level will have priority.
If all four computers that are already connected are connected at user level ID1, the last user to connect will be disconnected.
• The PC card slot is for 16 bit 5 V cards only. Do not use 32 bit card bus types of card, as they may damage the PC card slot of the
digital video recorder.
• When connecting directly to the computer
(without using an Ethernet hub)
• When connecting via an intranet (using an Ethernet hub)
1 – 16
1 – 16
Main monitor
Main monitor
1
2
3
4
5
6
7
8
5
6
7
8
9
13
10
14
11
15
12
16
9
13
1
10
14
11
15
12
16
TV monitor
(sold separately)
DIGITAL IN
2
3
4
TV monitor
(sold separately)
DIGITAL OUT
DIGITAL IN
DIGITAL OUT
✱ STP (shielded twisted pair) Cable
(straight-type CAT-5, 3 m or less)
DIGITAL IN
DIGITAL OUT
DIGITAL IN
Computer
1
2
✱ STP (shielded twisted pair) Cable
(straight-type CAT-5, 3 m or less)
Ethernet switching hub
1
3
2
Always use a cross-type
Ethernet cable.
DIGITAL OUT
Computer
3
Always use a straighttype Ethernet cable.
Computer
Intranet
Inserting the recommended LAN card
(Installed)
(Removed)
3
1
2
Ethernet switching hub
3
Locking can be carried out
easily by sliding the knob.
1
2
Return the knob after
unlocking.
66
English
NETWORK SET SETTING
NETWORK SET setting
1
5
Press the MENU button twice to display the MAIN MENU 2
screen.
The cursor moves to DISPLAY/VIDEO LOSS SET.
MENU
2
Use the jog dial to move the cursor to the NETWORK SET
setting, and then turn the shuttle dial clockwise.
The NETWORK SET sub-menu appears, and the cursor moves
to LAN CARD.
<NETWORK SET>
LAN CARD
: LAN1
NETWORK CONTROL : OFF
IP ADDRESS
: 192.168. 0. 1
SUBNET MASK
: 255.255.255. 0
GATEWAY
: 0. 0. 0. 0
PORT
: 00080
ID
: PASSWORD (4-8)
GUEST
: 1111---USER
: 2222---ADMIN
: 3333----
3
<NETWORK SET>
LAN CARD
: LAN1
NETWORK CONTROL : ON (DISPLAY:ON)
IP ADDRESS
: 192.168. 0. 1
SUBNET MASK
: 255.255.255. 0
GATEWAY
: 0. 0. 0. 0
PORT
: 00080
Turn the shuttle dial clockwise.
“LAN1” flashes.
Select LAN1 or LAN2 to suit the type of card being used.
• LAN1: COREGA FEther PCC-TXD “CG-FEPCCTXD” type
(10/100 BASE-T) or COREGA FEther II PCC-TXD
“CG-FE2PCCTXD” type (10/100 BASE-T)
• LAN2: COREGA Ether PCC-TD “CG-EPCCTD” type
(10 BASE-T) or COREGA Ether II PCC-TD
“CG-E2PCCTD” type (10 BASE-T) or COREGA Ether II
PCC-T (10 BASE-T) or D-Link DE-660
Note:
• Control through the network is not possible unless NETWORK
CONTROL is ON.
When you are connected to a network, it should be switched OFF if
control from the network is not required.
• If DIGITAL SERIES RECORDING in the RECORDING
CONDITIONS SET menu is set to “ON”, NETWORK CONTROL
cannot be set to “ON”.
• The main unit cannot be operated while network operations are in
progress. However, the digital video recorder can be disconnected
from the network by pressing the EXIT/OSD button for
approximately 3 seconds.
Note: Correct operation cannot be guaranteed if a LAN card other
than the one recommended above is used.
4
Turn the shuttle dial clockwise and use the jog dial to select
NETWORK CONTROL (example: “ ON” ), and then turn the
shuttle dial clockwise to set (DISPLAY: ON).
The cursor moves to IP ADDRESS.
• NETWORK CONTROL: ON (DISPLAY: ON) When DISPLAY
is set to ON, the characters “NETWORK CONTROL” are
displayed on the digital video recorder’s monitor output all the
time during a network connection. In addition, when images
are being played back from the network, the digital video
recorder’s monitor output also shows the playback images.
The digital video recorder cannot be operated during a network
connection. However, you can disconnect from the network by
pressing the EXIT/OSD button for 3 seconds.
• NETWORK CONTROL: ON (DISPLAY: OFF) When DISPLAY
is set to OFF, the characters “NETWORK CONTROL” are not
displayed on the digital video recorder’s monitor output during
a network connection. In addition, when images are being
played back from the network, the digital video recorder’s
monitor output shows live images. The PLAY/STOP indicator
on the digital video recorder does not illuminate during
playback. (Recording is possible.) The digital video recorder
cannot be operated during a network connection. However,
you can disconnect from the network by pressing the
EXIT/OSD button for 3 seconds.
• OFF: Network operations are disabled.
Use the jog dial to select the LAN card (example: “ LAN1” ),
and then turn the shuttle dial clockwise.
The cursor moves to NETWORK CONTROL.
6
<NETWORK SET>
LAN CARD
: LAN1
NETWORK CONTROL : OFF
IP ADDRESS
: 192.168. 0. 1
SUBNET MASK
: 255.255.255. 0
GATEWAY
: 0. 0. 0. 0
PORT
: 00080
Turn the shuttle dial clockwise and use the jog dial and
shuttle dial to display the IP ADDRESS (example:
“ 192.168.0.1” ), and then turn the shuttle dial clockwise.
With the final shuttle dial movement, the cursor moves to
SUBNET MASK.
<NETWORK SET>
LAN CARD
: LAN1
NETWORK CONTROL : ON (DISPLAY:ON)
IP ADDRESS
: 192.168. 0. 1
SUBNET MASK
: 255.255.255. 0
GATEWAY
: 0. 0. 0. 0
PORT
: 00080
7
English
67
Turn the shuttle dial clockwise and use the jog dial and
shuttle dial to display the SUBNET MASK (example:
“ 255.255.255.0” ), and then turn the shuttle dial clockwise.
With the final shuttle dial movement, the cursor moves to
GATEWAY.
<NETWORK SET>
LAN CARD
: LAN1
NETWORK CONTROL : ON (DISPLAY:ON)
IP ADDRESS
: 192.168. 0. 1
SUBNET MASK
: 255.255.255. 0
GATEWAY
: 0. 0. 0. 0
PORT
: 00080
NETWORK SET SETTING
8
4
Turn the shuttle dial clockwise and use the jog dial and
shuttle dial to display the GATEWAY (example:
“ 192.168.0.1” ), and then turn the shuttle dial clockwise.
With the final shuttle dial operation, the cursor moves to the
PORT setting of “80”.
Repeat this procedure to continue entering “ 123456” , and
then turn the shuttle dial clockwise.
The cursor moves to ID2.
PORT
ID
ID1
ID2
ID3
Note: When connecting this unit to a network, check the IP
ADDRESS, SUBNET MASK and GATEWAY settings with the
LAN Network Administrator.
9
5
Turn the shuttle dial clockwise, use the jog dial to enter the
PORT number (example: “ 90"), and then turn the shuttle dial
clockwise.
You can set any port number you wish within the range of 1 to
65535.
6
Note: If the port number is set to something other than the default
setting of “80”, type in the port number after the “:” in the IP
address.
:
:
:
:
:
00080
PASSWORD (4-8)
AB123456
2222---3333----
As required, use the same procedure to set passwords for
ID2 and ID3, and then turn the shuttle dial clockwise.
The cursor moves to LAN CARD.
Press the EXIT/OSD button.
The display returns to the normal screen.
EXIT/OSD
PASSWORD SET setting
For network connection there are three access levels, each of which
has a password. Each password can consist of a combination of 4 to 8
alphanumeric symbols.
7
Note: The cursor cannot be moved to ID or PASSWORD (4-8).
Example: Set AB123456 as the ID1 password.
1
Computer operation
Refer to the separate Manual for Remote Operation by Network
Connection.
Use the jog dial to move the cursor to ID1, and then turn the
shuttle dial clockwise.
The initial digit 1 of the password entry flashes.
• The characters that can be used in the password are: 0, 1 ... 9,
A, B ... Z
PORT
ID
ID1
ID2
ID3
:
:
:
:
:
00080
PASSWORD (4-8)
1111---2222---3333----
Note:
• ID1: This level can only observe a live image through the network.
• ID2: This level can observe a live image and play back and search
recorded images through the network.
• ID3: This level allows all digital video recorder operations and
settings to be carried out.
2
Use the jog dial to display “ A” , and then turn the shuttle dial.
The second digit 1 flashes.
ID1
3
: A111----
Use the jog dial to display “ B” , and then turn the shuttle dial.
The third digit 1 flashes.
ID1
: AB11----
68
English
HDD SET SETTING
Main menu 2
<MAIN MENU 2>
1.DISPLAY/VIDEO LOSS SET
2.RS-232C/RS-485 SET
3.BUZZER SET
4.SECURITY LOCK SET
5.NETWORK SET
6.HDD SET
7.POWER FAILURE/USED TIME
->
->
->
->
->
->
->
TO MAIN MENU 1
->
MOVE LINES WITH JOG. SELECT WITH SHUTTLE
Sub-menus
Initializes hard disk.
<HDD SET>
DISK1
: 80GB
DISK2
: ---GB
DISK INITIALIZE
->
CAUTION : ALL RECORDING WILL BE ERASED!
Records mirroring.
MIRRORING
: OFF
PLAYBACK DRIVE : ¤¤¤
CAUTION : RECORDING SPEED WILL BE
LIMITED BY MIRRORING!
Sets the hard disk reading.
HDD SET setting
4
This displays the hard disk capacity for disk 1 (standard) and disk 2
(standard or added).
Use the jog dial to select YES, and then turn the shuttle dial.
The “HDD INITIALIZING!” screen appear and the hard disk is
initialized. Then the display is returned to the HDD SET screen.
Note: Before adding a hard disk, it is important to backup recorded
images on a media such as a CompactFlash card.
1
Press the MENU button twice to display the MAIN MENU 2
screen.
The cursor moves to DISPLAY/VIDEO LOSS SET.
HDD INITIALIZING !
MENU
5
2
EXIT/OSD
Use the jog dial to move the cursor to the HDD SET settings,
and then turn the shuttle dial clockwise.
The HDD SET sub-menu appears, and the cursor moves to DISK
INITIALIZE.
<HDD SET>
DISK1
: 80GB
DISK2
: ---GB
DISK INITIALIZE
->
CAUTION : ALL RECORDING WILL BE ERASED!
Adding a hard disk
Consult your dealer about adding a hard disk. In the case of an
addition, use an additional hard disk unit (sold separately).
If adding another hard disk, be sure to initialize the hard disks. When
this is done, both hard disks will be initialized, so that any existing data
on the original hard disk will be cleared.
MIRRORING
: OFF
PLAYBACK DRIVE : ***
CAUTION : RECORDING SPEED WILL BE
LIMITED BY MIRRORING!
3
Press the EXIT/OSD button.
The display returns to the normal screen.
Reference: HDD SET screen
• MIRRORING: When a hard disk is added, or if a 160 GB hard disk
is installed, it is possible to record the same images on two hard
disks. This means that even if an image write error occurs you will
be able to read from an area where there is no write error. Note
that if mirroring is specified, the upper limit of recording speed will
be limited.
• PLAYBACK DRIVE: After MIRRORING has been set, you will be
able to specify which of the two hard disks is to be used for reading
the recorded image.
With mirroring setting, if an error has occurred in the playback
image, switch from the hard disk in current use (DISK1) to (DISK2).
• Copying data from DISK 1 to DISK 2: The recording data on
DISK 1 can be copied to DISK 2. Select “NEXT” and then turn the
shuttle dial clockwise. The copy screen appears. It may take
several hours to copy all of the data.
Turn the shuttle dial clockwise.
A WARNING screen appears and then “NO” flashes.
<WARNING>
THIS CHANGE WILL INITIALIZE THE DISK.
ALL RECORDING WILL BE ERASED.
ARE YOU SURE ?
NO
CHANGE LINES WITH JOG. SELECT WITH SHUTTLE
English
69
POWER FAILURE/USED TIME DISPLAY
Main menu 2
<MAIN MENU 2>
1.DISPLAY/VIDEO LOSS SET
2.RS-232C/RS-485 SET
3.BUZZER SET
4.SECURITY LOCK SET
5.NETWORK SET
6.HDD SET
7.POWER FAILURE/USED TIME
<POWER FAILURE/USED TIME>
POWER FAILURE
#020 FAILURE ----- --:-RECOVER ----- --:--
->
->
->
->
->
->
->
USED TIME
DISK1 USE : 00000H
DISK2 USE : -----H
POWER
: 00000H
TO MAIN MENU 1
->
MOVE LINES WITH JOG. SELECT WITH SHUTTLE
1
Sub-menus
FIRMWARE :
MAIN 1.00-00 / SUB 1.00-00
1
2
3
4
5
6
About the sub-menu
Press the MENU button twice to display the MAIN MENU 2
screen.
The cursor moves to DISPLAY/VIDEO LOSS SET.
1 FAILURE
Shows the date/time when a power failure occurred.
The number of power failures appears at the left. (example: #020)
When the number exceeds 999 it returns to 000.
MENU
2 RECOVER
Shows the date/time when power was restored.
3 DISK1 USE
2
Shows the total hard disk 1 usage time.
Use the jog dial to move the cursor to the POWER
FAILURE/USED TIME settings, and then turn the shuttle dial
clockwise.
The POWER FAILURE/USED TIME sub-menu appears.
Check the date/time of a power failure or the usage time of hard
disks, etc.
4 DISK2 USE
Shows the total hard disk 2 usage time.
5 POWER
Shows the total usage time for this unit.
6 FIRMWARE
Shows the current firmware version.
<POWER FAILURE/USED TIME>
POWER FAILURE
#001 FAILURE 06-15 20:30
RECOVER 06-15 21:30
USED TIME
DISK1 USE :
DISK2 USE :
POWER
:
FIRMWARE :
3
00060H
-----H
00060H
MAIN 1.00-00 / SUB 1.00-00
Press the EXIT/OSD button.
The display returns to the normal screen.
EXIT/OSD
70
English
SAVING MENU SETTING DETAILS
The details of menu settings can be saved (copied) onto a CompactFlash card, and settings which have been saved onto a
CompactFlash card can be retrieved (loaded) into the digital video recorder. This function can be used to make the same settings
easily or several digital video recorders.
1
Saving to a CompactFlash card
Display main menu 1, and then press the SHUTTLE HOLD
button for 3 seconds or more.
The COPY MENU SETTINGS screen appears.
MENU
<COPY MENU SETTINGS>
DVR TYPE VER. SA01-00
SAVE MENUS TO CF
<COPY MENU SETTINGS>
1
SHUTTLE HOLD
2
SAVE MENUS TO CF
->
LOAD MENUS FROM CF
->
COPY RECORDING AREA SETTINGS: NO
DVR TYPE VER. SA01-00
->
* IF YOU COPY RECORDING AREA SETTINGS,
HARD DISK WILL BE INITIALIZED!
LOAD MENUS FROM CF
->
COPY RECORDING AREA SETTINGS: NO
* IF YOU COPY RECORDING AREA SETTINGS,
HARD DISK WILL BE INITIALIZED!
1
1 Save menu settings onto a CompactFlash card
This saves menu setting details onto a CompactFlash card.
2
2 Load menu settings from CompactFlash card
This loads menu settings from a CompactFlash card into the
digital video recorder.
Turn the jog dial to select SAVE MENUS TO CF, and then
turn the shuttle dial clockwise.
The WARNING screen will appear to let you confirm the saving.
To save the settings, use the jog dial to display “ YES” , and
then turn the shuttle dial clockwise.
Saving will then start. When saving is complete, SAVING
FINISHED ! will be displayed. A file called MENUCOPY.TXT will
be created in the CompactFlash card directory.
<WARNING>
SAVE MENUS TO CF!!
CONTINU?
YES
<COPY MENU SETTINGS>
SAVING FINISHED!
SAVE MENUS TO CF
->
LOAD MENUS FROM CF
->
COPY RECORDING AREA SETTINGS: NO
* IF YOU COPY RECORDING AREA SETTINGS,
HARD DISK WILL BE INITIALIZED!
English
71
SAVING MENU SETTING DETAILS
☞ If copying the recording area settings
Loading saved menu settings
This describes how to copy the recording area settings.
Normally you should set COPY RECORDING AREA SETTINGS to
“NO”.
This procedure loads menu setting details that have been saved onto
a CompactFlash card into the digital video recorder.
Note: When loading the settings into the digital video recorder, you
can select whether to load recording area settings also.
If you read different menu settings into a digital video recorder
which already has images recorded onto its hard disk, the
recording areas will be automatically initialized, and all images
that have already been recorded will be lost. Therefore, you
should normally select “NO” for the COPY RECORDING AREA
SETTINGS item. If you select “YES” and then load the menu
settings, it will cause the hard disk initialization to start, and so
the administrator’s password entry screen will appear.
1
To copy the settings, use the jog dial to set COPY
RECORDING AREA SETTINGS to “ YES” and turn the jog dial
to select “ LOAD MENUS FROM CF” , and then turn the
shuttle dial clockwise.
<COPY MENU SETTINGS>
DVR TYPE VER. SA01-00
SAVE MENUS TO CF
<COPY MENU SETTINGS>
->
LOAD MENUS FROM CF
->
COPY RECORDING AREA SETTINGS: YES
DVR TYPE VER. SA01-00
SAVE MENUS TO CF
* IF YOU COPY RECORDING AREA SETTINGS,
HARD DISK WILL BE INITIALIZED!
->
LOAD MENUS FROM CF
->
COPY RECORDING AREA SETTINGS: NO
2
* IF YOU COPY RECORDING AREA SETTINGS,
HARD DISK WILL BE INITIALIZED!
1
2
Turn the jog dial to select LOAD MENUS FROM CF, and then
turn the shuttle dial clockwise.
The WARNING screen will appear to let you confirm the loading.
To copy the settings, use the jog dial to select “ YES” in the
WARNING screen, and then turn the shuttle dial clockwise.
Copying will then start. When copying is complete, LOADING
FINISHED!! will be displayed.
<WARNING>
LOAD MENUS FROM CF!!
HARD DISK WILL BE INITIALIZED !
To load the settings, use the jog dial to display “ YES” , and
then turn the shuttle dial clockwise.
Loading will then start. When saving is complete, LOADING
FINISHED!! will be displayed.
CONTINU?
YES
<WARNING>
LOAD MENUS FROM CF!!
CONTINU?
YES
LOADING FROM CF!
<COPY MENU SETTINGS>
LOADING FROM CF!
LOADING FINISHED!!
<COPY MENU SETTINGS>
LOADING FINISHED!!
72
English
INTERFACE SPECIFICATIONS
RS-232C
9-pin connector specifications
1 2 3 4 5
6 7 8 9
Pin No.
Signal
Operation
Signal direction
1
–
–
–
2
RXD
Receive data
Computer → Digital video recorder
3
TXD
Transmit data
Digital video recorder → Computer
4
–
–
–
5
GND
Ground
–
6
–
–
–
7
RTS
Request to send
Digital video recorder → Computer
8
–
–
–
9
–
–
–
Data format
Mode
Asynchronous
Character length
8 bits
Data transmit speed
2400, 4800, 9600, 19200 bps
Parity
None
Stop bit
1
Communication protocol
Communication is carried out in units of 1 byte. After the computer transmits one byte of data, it waits for a response from
the digital video recorder, and then transmits the next byte of data.
To start sending commands, an ON (F6) command is sent. The digital video recorder will continue to receive commands
until an OFF (F7) command is sent to stop. The digital video recorder sends an ACK (OA) each time it receives a
command.
See Table 4 - Command Table on page 75.
RS-485
Data format
Mode
Asynchronous
Character length
8 bits
Data transmit speed
2400, 4800, 9600, 19200 bps
Parity
None
Stop bit
1
Communication protocol
A proprietary Sanyo protocol (SSP: Security Serial Protocol) is used. It is recommended that a special controller be used.
Contact the place of purchase for further details on obtaining a special controller.
English
73
INTERFACE SPECIFICATIONS
RS485 termination switch settings (RS485 TERMINATE)
Termination setting
If several unit are being connected together, termination settings must also be made.
• Set the RS485 termination switch on the rear panel to ON, and set the termination switch of the last device in the series to ON.
• Be sure to set the RS485 termination switches of all devices in between (devices other than the first and last in the series) to OFF.
Note: If the termination settings are not correct, data will be reflected by either end of the series and this will affect the transmission of
other data, so that the data that is transmitted to each device will not be correct.
(Example)
ON
System controller
RS485
POWER
12V DC IN
ON
A
GND
B
AB
OFF
ADDRESS
1 2 3
Termination switch
1
0
TERMINATE
OFF
RS485
TERMINATE
ON
Multiplexer
OFF
RS485
TERMINATE
ON
Digital video recorder
OFF
ON
Termination switch
Time lapse VCR
OFF
74
English
INTERFACE SPECIFICATIONS
Command Table (Table 4)
The following table shows all of the commands that can be processed by the digital video recorder.
If a command sent does not correspond to a digital video recorder function, the command is received but no operation is carried out.
Upper bit
0
1
2
3
4
5
6
7
Lower bit
0
TIMER ON/OFF
1
2
3
SHIFT←
SHIFT→
4
SHIFT↑
SHIFT↓
5
SHIFT+
/RP UP
6
SHIFT–
/RP DOWN
MENU
7
8
SECURITY
LOCK ON
9
A
ACK
B
NAK
PLAY
SEARCH
C
GROUP SET
D
GROUP
CHECK
E
GROUP
CLEAR
F
Upper bit
8
9
A
STOP
STILL
B
C
D
E
F
Lower bit
0
CLOCK
ADJUST
1
MENU RESET
2
3
4
5
ZOOM (MPX)
6
7
STATUS
SENSE
8
MENU
UPLOAD
CLOCK
DOWNLOAD
9
A
REC
B
REC/DUB
REQUEST
FF/ALARM F
C
CHANNEL
D
COPY
E
OSD/EXIT
F
REW/ALARM R
*RS-485 SEND
START
*RS-485 RCV
CMF.
STATUS LOG2
STATUS LOG1
: Command for RS-485 only.
English
MENU
DOWNLOAD
75
REC STOP
SPECIFICATIONS
Hard disk capacity
Television System
Picture Resolution
Compression
Picture Quality
Recording Type
Recording Speed
Recording Area
Playback
Zoom
Search Mode
• Time/Date Search
• Alarm Search
• Alarm Thumbnail Search
• Archive Area Search
• Smart Motion Search
Menu Language
Clock settings
Video input terminal
S- video input terminal
:
:
:
:
:
:
:
:
:
:
80 GB or 160 GB
NTSC color signal standard
720 x 240 (Field), 720 x 480 (Frame)
M-JPEG
5 Levels (Basic, Normal, Enhanced, Fine, Super Fine)
Frame or Field Recording
27 Levels.
Normal Recording Area, Alarm Recording Area, Archive Area
Playback, Still, Search
2 Times Zoom Function
:
:
:
:
:
:
:
:
:
Digital input terminal
Digital SUB input terminal
Audio input terminal
Microphone input terminal
Video output terminal
S- video output terminal
:
:
:
:
:
:
Loop out terminal
S- video loop out terminal
:
:
Digital output terminal
Digital SUB output terminal
Audio output terminal
Compact Flash Slot
PC Card Slot
RS-232C terminal
Control connectors
• RS-485 terminal
• Remote Control terminal
• Alarm in terminal
• Alarm out terminal
• Alarm reset terminal
• SW out terminal
• NON Rec out terminal
• Clock Adjust in terminal
• Clock Adjust out terminal
• Warning out terminal
• Disk Full out terminal
• Alarm Full out terminal
Power
Power consumption
Operating environment
Dimensions
Weight
:
:
:
:
:
:
Search by time and date
Search by alarm event list
Search by alarm event thumbnails
Search Archive Area with event list
Search by specifying a motion sensor
English/French/Spanish
Year/month/day/hours/minutes/seconds
1.0 Vp-p/75 Ω, unbalanced, BNC x 1
Separate YC signals, DIN connector (S terminal) x 1
Y signal: 1.0 Vp-p/75 Ω, unbalanced, synchronous; C signal: 0.286 Vp-p/75 Ω, unbalanced
RJ-45 x1
RJ-45 x1
–8dBs, 27 kΩ unbalanced, RCA pin jack x 1
–60dBs 10kΩ unbalanced, 3.5mm mini jack
1.0 Vp-p/75 Ω, unbalanced, BNC x 1
Separate YC signals, DIN connector (S terminal) x 1
Y signal: 1.0 Vp-p/75 Ω, unbalanced, synchronous; C signal: 0.286 Vp-p/75 Ω, unbalanced
1.0 Vp-p/75 Ω, unbalanced, BNC x 1
Separate YC signals, DIN connector (S terminal) x 1
Y signal: 1.0 Vp-p/75 Ω, unbalanced, synchronous; C signal: 0.286 Vp-p/75 Ω, unbalanced
RJ-45 x1
RJ-45 x1
–8dBs, 600 Ω unbalanced, RCA pin jack x 1
Compact Flash Type 2 (Front)
PCMCIA Type 2 (Rear) for SCSI or Ethernet card
D- SUB 9pin (for PC)
:
:
:
:
:
:
:
:
:
:
:
:
:
:
:
:
:
Push lock (3 terminals: A, B, C (GND))
1 input for resister alley switch
1 input (Normal Open Low level active)
1 output (Normal 5V Low level active)
1 input (Normal Open Low level active)
1 output (Normal 5V Low level active)
1 output (Normal 5V Low level active)
1 input (Normal Open Low level active)
1 output (Normal 5V Low level active)
1 output (Normal 5V Low level active)
1 output (Normal 5V Low level active)
1 output (Normal 5V Low level active)
AC 120V, 60 Hz
26 W 400 mA
Temperature: 5°C to 40°C, Humidity: 10 to 80%
420 (W) x 86 (H) x 364.5 (D) mm
Approx. 5.5 kg
Products are subject to change in design and specifications without notice and without incurring any obligation.
76
English
SANYO INDUSTRIAL
DIGITAL VIDEO RECORDER WARRANTY
OBLIGATIONS
In order to obtain warranty service, the product must be delivered to and picked up from an Authorized Sanyo Service Center at the user’s expense,
unless specifically stated otherwise in this warranty. The names and addresses of Authorized Sanyo Service Centers may be obtained by calling the
toll-free number listed below.
For product operation, authorized service center referral, service assistance or problem resolution, call
CUSTOMER INFORMATION 1-800-421-5013
Weekdays 8:30 AM – 5:00 PM Pacific Time
For accessories and/or parts, call
PARTS ORDER INFORMATION 1-800-726-9662
Weekdays 8:30 AM – 5:00 PM Pacific Time
THIS WARRANTY IS VALID ONLY ON SANYO PRODUCTS PURCHASED OR RENTED IN THE UNITED STATES OF AMERICA, EXCLUDING ALL
U.S. TERRITORIES AND PROTECTORATES. THIS WARRANTY APPLIES ONLY TO THE ORIGINAL RETAIL PURCHASER OR END-USER. THE
ORIGINAL DATED BILL OF SALE, SALES SLIP OR RENTAL AGREEMENT MUST BE SUBMITTED TO THE AUTHORIZED SANYO SERVICE
CENTER AT THE TIME WARRANTY SERVICE IS REQUESTED.
Subject to the OBLIGATIONS above and EXCLUSIONS below, SANYO Fisher Company warrants this SANYO product against defects in materials
and workmanship for the periods specified below. SFC will repair or replace (at its option) the product and any of its parts which fail to conform to this
warranty. The warranty period commences on the date the product was first purchased or rented at retail.
LABOR
PARTS
3 YEARS
3 YEARS
EXCLUSIONS
This warranty does not cover (A) the adjustment of customer-operated controls as explained in the appropriate model’s instruction manual, or (B) the
repair of any product whose serial number has been altered, defaced or removed.
This warranty shall not apply to the cabinet or cosmetic parts, batteries or routine maintenance.
This warranty does not apply to uncrating, setup, installation, removal of the product for repair or reinstallation of the product after repair.
This warranty does not apply to repairs or replacements necessitated by any cause beyond the control of SFC including, but not limited to, any
malfunction, defect or failure caused by or resulting from the use of any products operated outside of the operating temperature ranges stated in our
product specification, (i.e., between 41 and 104 degrees Farenheit or between 5 and 40 degrees Celsius), unauthorized service or parts, improper
maintenance, operation contrary to furnished instructions, shipping or transit accidents, modification or repair by the user, abuse, misuse, neglect,
accident, incorrect power line voltage, fire, flood or other Acts of God, or normal wear and tear.
SFC does not guarantee that recorded pictures or information will be maintained on any product sent in for repair or replacement.
The foregoing is in lieu of all other expressed warranties and SFC does not assume or authorize any party to assume for it any other obligation or
liability.
SFC DISCLAIMS ALL OTHER WARRANTIES EXPRESS OR IMPLIED, WITH REGARD TO THIS PRODUCT (INCLUDING THE WARRANTIES OF
MERCHANTABILITY AND FITNESS). IN NO EVENT SHALL SFC BE LIABLE FOR ANY SPECIAL, INCIDENTAL OR CONSEQUENTIAL DAMAGES
ARISING FROM THE OWNERSHIP OR USE OF THIS PRODUCT OR FOR ANY DELAY IN THE PERFORMANCE OF ITS OBLIGATIONS UNDER
THIS WARRANTY DUE TO CAUSES BEYOND ITS CONTROL. SFC’S LIABILITY FOR ANY AND ALL LOSSES AND DAMAGES RESULTING
FROM ANY CAUSE WHATSOEVER, ARISING OUT OF OR IN CONNECTION WITH THE SALE, USE OR OWNERSHIP OF THIS PRODUCT
INCLUDING WARRANTOR’S NEGLIGENCE, ALLEGED DAMAGED OR DEFECTIIVE GOODS, WHETHER SUCH DEFECTS ARE DISCOVERABLE
OR LATENT, SHALL IN NO EVENT EXCEED THE PURCHASE PRICE OF THE PRODUCT.
ATTENTION
For your protection in the event of theft or loss of this product, please fill in the information below for you own personal records.
Model No.
_____________________________________________
Date of Purchase
Where Purchased
_______________________________________
Serial No.
______________________________________________
(Located on back or bottom side of unit.)
Purchase Price
_________________________________________
_________________________________________________________________________________________________
L8HAA/US (DSR-3000 F) 2001. 11. 21
Manuel d’instructions
Français
F
PRÉCAUTIONS
Déclaration de conformité
ATTENTION
Numéro de modèle :
Marque de commerce :
Partie responsable :
Adresse
:
DSR-3000
SANYO
SANYO FISCHER COMPANY
21605 Plummer Street,
Chatsworth, california 91311
Téléphone
: (818) 998-7322
• Cet appareil est conforme à la Partie 15 des
règlements du FCC. Le fonctionnement est sujet
aux deux conditions suivantes:
(1) Cet appareil ne doit pas causer d’interférences
nuisibles, et
(2) cet appareil doit accepter toute interférence
reçue, incluant toute interférence qui risque de
causer un mauvais fonctionnement.
RISQUE DE CHOC
ÉLECTRIQUE NE PAS OUVRIR
ATTENTION:
POUR RÉDUIRE LE RISQUE DE CHOC
ÉLECTRIQUE, NE RETIREZ PAS LE COUVERCLE (OU LE
COUVERCLE ARRIÈRE). AUCUNE PIÈCE RÉPARABLE PAR
L’UTILISATEUR À L’INTÉRIEUR. POUR TOUTE RÉPARATION
ADRESSEZ-VOUS À UN PERSONNEL QUALIFIÉ.
PRUDENCE: Pour éviter le risque d’incendie ou
de choc électrique, n’exposez pas cette unité à la
pluie ou à l’humidité.
ATTENTION: Les changements ou modifications
non spécifiquement approuvés par Sanyo peuvent
annuler le droit de l’utilisateur de faire fonctionner cet
appareil.
Emplacement
Pour un fonctionnement sûr et un rendement optimal de votre
appareil, tenez compte des points suivants lors du choix d’un
emplacement pour son installation:
Protégez-le des rayons directs du soleil et tenez-le éloigné
des sources de chaleur intense.
Évitez les endroits poussiéreux ou humides.
Évitez les endroits ou la ventilation est insuffisante pour
assurer une bonne dissipation de la chaleur. Ne bloquez pas
les ouvertures pour la ventilation situées sur le dessus et en
dessous de l’appareil. Ne placez pas l’appareil sur un tapis
car cela obstrue les ouvertures pour la ventilation.
Installez toujours l’appareil en position horizontale.
Évitez les endroits soumis à de fortes vibrations.
Ne déplacez pas l’appareil d’un endroit froid à un endroit
chaud ou vice-versa.
Ne placez pas l’appareil directement sur un moniteur TV afin
d’éviter des problèmes d’interférences.
La flèche en forme d’éclair, dans un triangle, avertit
l’utilisateur de la présence d’une “tension
dangereuse” non isolée à l’intérieur de l’appareil
qui peut être d’une force suffisante pour constituer
un risque de choc électrique aux personnes.
•
•
•
Le point d’exclamation dans un triangle avertit
l’utilisateur de la présence d’instructions
d’utilisation et d’entretien (réparation) importantes
dans la littérature accompagnant l’appareil.
Pour les utilisateurs au Canada
•
•
•
Cet appareil numérique est conforme à la
réglementation canadienne ICES-003.
•
ATTENTION
Danger d’explosion si la pile n’est pas remplacée
correctement.
Ne remplacer que par une pile du même type ou l’équivalent
tel que recommandé par le fabricant.
Mettre les piles usées au rebut en suivant les instructions du
fabricant.
Protection contre les risques d’incendie
ou de choc électrique
•
•
•
•
Ne manipulez pas le cordon d’alimentation avec les mains
humides.
Pour débrancher le cordon d’alimentation de la prise de
courant, tenez-le par la fiche.
Si un liquide est renversé sur l’appareil, débranchez
immédiatement le cordon d’alimentation et faites inspecter
l’appareil par un centre de service agréé.
Ne placez pas d’objet directement sur l’appareil.
ENTRETIEN
Cet appareil est un instrument de précision et si traité avec
soins, il donnera satisfaction pendant de longues années.
Cependant, en cas de problème, il est recommandé au
propriétaire de ne pas essayer d’y faire des réparations ou
d’ouvrir le boîtier. Les réparations doivent toujours être confiées
à votre revendeur ou à un Centre de service Sanyo autorisé.
Français
1
TABLE DES MATIERES
CARACTÉRISTIQUES PRINCIPALES . . . . . . . . . . . . . . . . . . . . . . . . . . . . . . . . . .
ACCESSOIRES . . . . . . . . . . . . . . . . . . . . . . . . . . . . . . . . . . . . . . . . . . . . . . . . . . . . .
NOMS DES PIECES . . . . . . . . . . . . . . . . . . . . . . . . . . . . . . . . . . . . . . . . . . . . . . . . .
Panneau avant . . . . . . . . . . . . . . . . . . . . . . . . . . . . . . . . . . . . . . . . . . . . . . . .
Panneau arrière . . . . . . . . . . . . . . . . . . . . . . . . . . . . . . . . . . . . . . . . . . . . . . .
BRANCHEMENTS . . . . . . . . . . . . . . . . . . . . . . . . . . . . . . . . . . . . . . . . . . . . . . . . . .
Branchements de base . . . . . . . . . . . . . . . . . . . . . . . . . . . . . . . . . . . . . . . . .
Branchements pour la commande du système . . . . . . . . . . . . . . . . . . . . .
Branchement d’un circuit de commande à distance . . . . . . . . . . . . . . . . .
Branchements numériques au multiplexeur. . . . . . . . . . . . . . . . . . . . . . . .
Branchements numériques en série . . . . . . . . . . . . . . . . . . . . . . . . . . . . . .
DISQUE DUR INTÉGRÉ . . . . . . . . . . . . . . . . . . . . . . . . . . . . . . . . . . . . . . . . . . . . . .
Disque dur . . . . . . . . . . . . . . . . . . . . . . . . . . . . . . . . . . . . . . . . . . . . . . . . . . .
Tableaux de vitesse d’enregistrement . . . . . . . . . . . . . . . . . . . . . . . . . . . .
Affichage d’opérations . . . . . . . . . . . . . . . . . . . . . . . . . . . . . . . . . . . . . . . . .
4
4
5
5
6
7
7
7
7
8
8
10
10
11
13
ENREGISTREMENT D’IMAGES DANS LA ZONE D’ENREGISTREMENT
NORMAL . . . . . . . . . . . . . . . . . . . . . . . . . . . . . . . . . . . . . . . . . . . . . . . . . . . . . . . 14
Enregistrement normal . . . . . . . . . . . . . . . . . . . . . . . . . . . . . . . . . . . . . . . . . 14
Enregistrement par programmateur . . . . . . . . . . . . . . . . . . . . . . . . . . . . . . 15
ENREGISTREMENT D’IMAGES DANS LA ZONE D’ENREGISTREMENT
D’ALARME . . . . . . . . . . . . . . . . . . . . . . . . . . . . . . . . . . . . . . . . . . . . . . . . . . . . . 17
Enregistrement d’alarme . . . . . . . . . . . . . . . . . . . . . . . . . . . . . . . . . . . . . . . 17
Enregistrement de pré-alarme . . . . . . . . . . . . . . . . . . . . . . . . . . . . . . . . . . . 18
LECTURE DES IMAGES ENREGISTRÉES DANS LA ZONE
D’ENREGISTREMENT NORMAL. . . . . . . . . . . . . . . . . . . . . . . . . . . . . . . . . . . . 19
RECHERCHE D’IMAGES ENREGISTRÉES . . . . . . . . . . . . . . . . . . . . . . . . . . . . . . 24
SAUVEGARDE (COPIE) DES IMAGES ENREGISTRÉES . . . . . . . . . . . . . . . . . . . 33
A Copie d’images sur la zone d’archive du disque dur . . . . . . . . . . . . . . . . 34
B Copie d’images de la zone d’archive sur une carte CompactFlash . . . . 35
C Copie d’images de la zone d’archives à un lecteur DDS (DAT) ou à
un lecteur de disque compact enregistrable . . . . . . . . . . . . . . . . . . . . . . . 37
ORGANISATION ET OPÉRATIONS DES MENUS . . . . . . . . . . . . . . . . . . . . . . . . . 40
Organisation des menus. . . . . . . . . . . . . . . . . . . . . . . . . . . . . . . . . . . . . . . . 40
Opérations de base d’écran de menu . . . . . . . . . . . . . . . . . . . . . . . . . . . . . 41
Opérations lorsqu’un écran de sous-menu est affiché . . . . . . . . . . . . . . . 41
RÉGLAGES DE REGL.LANGUE/HORLOGE . . . . . . . . . . . . . . . . . . . . . . . . . . . . . 42
Réglage de la langue. . . . . . . . . . . . . . . . . . . . . . . . . . . . . . . . . . . . . . . . . . . 42
Réglages de REGL.HORLOGE . . . . . . . . . . . . . . . . . . . . . . . . . . . . . . . . . . . 42
Réglage de HEURE D’ETE . . . . . . . . . . . . . . . . . . . . . . . . . . . . . . . . . . . . . . 43
Réglage de REGL. HORLOGE EXTERNE . . . . . . . . . . . . . . . . . . . . . . . . . . 43
RÉGLAGE DE REGL.ENTREE VIDEO . . . . . . . . . . . . . . . . . . . . . . . . . . . . . . . . . . 44
Réglage de MULTIPLEXEUR . . . . . . . . . . . . . . . . . . . . . . . . . . . . . . . . . . . . 44
Réglage de ENTREE VIDEO . . . . . . . . . . . . . . . . . . . . . . . . . . . . . . . . . . . . . 44
RÉGLAGE DE REGL.AIRE D’ENREGISTREMENT . . . . . . . . . . . . . . . . . . . . . . . . 45
Affichage de la capacité totale . . . . . . . . . . . . . . . . . . . . . . . . . . . . . . . . . . . 45
Remise à zéro de chaque zone d’enregistrement . . . . . . . . . . . . . . . . . . . 45
Réglage de REINITIALISATION . . . . . . . . . . . . . . . . . . . . . . . . . . . . . . . . . . 46
2
Français
TABLE DES MATIERES
RÉGLAGE DE REGL.COND. D’ENREGISTREMENT. . . . . . . . . . . . . . . . . . . . . . . 47
Réglages d’enregistrement pour le branchement en série numérique
(maximum 3 unités). . . . . . . . . . . . . . . . . . . . . . . . . . . . . . . . . . . . . . . . . . . . 47
Réglage de REENREGISTRER pour AIRE D’ENR. NORMAL et de
AVERT. DE DISQUE RESTANT dans la section d’affichage
d’opérations . . . . . . . . . . . . . . . . . . . . . . . . . . . . . . . . . . . . . . . . . . . . . . . . . . 48
RÉGLAGE DE REGL.MODE D’ENR.NORMAL. . . . . . . . . . . . . . . . . . . . . . . . . . . . 49
Réglage de REGL.MODE D’ENR.NORMAL . . . . . . . . . . . . . . . . . . . . . . . . . 49
RÉGLAGE DE REGL.TIMER . . . . . . . . . . . . . . . . . . . . . . . . . . . . . . . . . . . . . . . . . . 50
Réglage de REGL.TIMER . . . . . . . . . . . . . . . . . . . . . . . . . . . . . . . . . . . . . . . 50
Réservations de programmateur chaque jour à la même heure avec la
même qualité d’image . . . . . . . . . . . . . . . . . . . . . . . . . . . . . . . . . . . . . . . . . . 50
Réservations de programmateur sur plus de 24 heures . . . . . . . . . . . . . . 52
RÉGLAGE DE REGL.CONGE . . . . . . . . . . . . . . . . . . . . . . . . . . . . . . . . . . . . . . . . . 53
Réglages de REGL.CONGE . . . . . . . . . . . . . . . . . . . . . . . . . . . . . . . . . . . . . 53
RÉGLAGE DE REGL.MODE D’ENR. D’ALARME. . . . . . . . . . . . . . . . . . . . . . . . . . 54
Réglage de REGL.MODE D’ENR. D’ALARME . . . . . . . . . . . . . . . . . . . . . . . 54
Réglage d’enregistrement de pré-alarme . . . . . . . . . . . . . . . . . . . . . . . . . . 56
Réglage de déclenchement d’alarme . . . . . . . . . . . . . . . . . . . . . . . . . . . . . 57
Réglages du détecteur de mouvement intégré. . . . . . . . . . . . . . . . . . . . . . 57
RÉGLAGES DE REGL.AFFICHAGE . . . . . . . . . . . . . . . . . . . . . . . . . . . . . . . . . . . . 59
Réglages de REGL.AFFICHAGE . . . . . . . . . . . . . . . . . . . . . . . . . . . . . . . . . 59
Réglage de REGL. PERTE SIGNAL . . . . . . . . . . . . . . . . . . . . . . . . . . . . . . . 59
RÉGLAGE DE REGL.RS-232C / RS-485. . . . . . . . . . . . . . . . . . . . . . . . . . . . . . . . . 60
Réglage de REGL.RS-232C / RS-485 . . . . . . . . . . . . . . . . . . . . . . . . . . . . . . 60
RS-232C . . . . . . . . . . . . . . . . . . . . . . . . . . . . . . . . . . . . . . . . . . . . . . . . . . . . . 60
RS-485 . . . . . . . . . . . . . . . . . . . . . . . . . . . . . . . . . . . . . . . . . . . . . . . . . . . . . . 61
RÉGLAGE DE REGL.AVERTISSEUR . . . . . . . . . . . . . . . . . . . . . . . . . . . . . . . . . . . 62
RÉGLAGE DE REGL.VERROU DE SECURITE . . . . . . . . . . . . . . . . . . . . . . . . . . . 63
Privilèges d’opérations et verrou de sécurité. . . . . . . . . . . . . . . . . . . . . . . 63
A Réglage du mot de passe d’administrateur . . . . . . . . . . . . . . . . . . . . . . . . 63
B Réglage du mot de passe d’utilisateur. . . . . . . . . . . . . . . . . . . . . . . . . . . . 64
C Réglage des privilèges d’opérations pour l’enregistrement et la
lecture . . . . . . . . . . . . . . . . . . . . . . . . . . . . . . . . . . . . . . . . . . . . . . . . . . . . . . 65
D Réglage du verrou de sécurité . . . . . . . . . . . . . . . . . . . . . . . . . . . . . . . . . . 65
RÉGLAGE DE REGL.RESEAU . . . . . . . . . . . . . . . . . . . . . . . . . . . . . . . . . . . . . . . . 66
Connexion de réseau . . . . . . . . . . . . . . . . . . . . . . . . . . . . . . . . . . . . . . . . . . 66
Réglage de REGL.RESEAU . . . . . . . . . . . . . . . . . . . . . . . . . . . . . . . . . . . . . 67
Réglage de REGLAGE DE MOT DE PASSE . . . . . . . . . . . . . . . . . . . . . . . . 68
RÉGLAGE DE REGL.DISQUE DUR . . . . . . . . . . . . . . . . . . . . . . . . . . . . . . . . . . . . 69
Réglage de REGL.DISQUE DUR. . . . . . . . . . . . . . . . . . . . . . . . . . . . . . . . . . 69
Ajout d’un disque dur . . . . . . . . . . . . . . . . . . . . . . . . . . . . . . . . . . . . . . . . . . 69
RÉGLAGE DE PANNE COURANT/DUREE UTIL. . . . . . . . . . . . . . . . . . . . . . . . . . 70
SAUVEGARDE DES DÉTAILS DES RÉGLAGES DES MENUS . . . . . . . . . . . . . . 71
Sauvegarde à une carte CompactFlash . . . . . . . . . . . . . . . . . . . . . . . . . . . 71
Chargement des réglages des menus. . . . . . . . . . . . . . . . . . . . . . . . . . . . . 72
SPÉCIFICATIONS D’INTERFACE . . . . . . . . . . . . . . . . . . . . . . . . . . . . . . . . . . . . . . 73
FICHE TECHNIQUE . . . . . . . . . . . . . . . . . . . . . . . . . . . . . . . . . . . . . . . . . . . . . . . . . 76
Français
3
CARACTÉRISTIQUES
PRINCIPALES
ACCESSOIRES
Cet enregistreur vidéo numérique peut être utilisé pour sauvegarder des
images enregistrées par une caméra de surveillance sur son disque dur
intégré.
• Équipé d’un disque dur de 3,5 po. De grande capacité.
• L’enregistrement et la lecture des images peuvent être effectués en
utilisant les signaux numériques d’un multiplexeur.
• La lecture peut être effectuée pendant l’enregistrement.
• L’enregistrement d’alarme détecte les mouvements des personnes
suspectes.
• L’enregistrement par programmateur vous permet d’enregistrer
différentes sessions chaque jour.
• L’enregistrement de pré-alarme enregistre les images
immédiatement avant une alarme.
• L’enregistrement et la lecture audio sont aussi possibles aux taux
d’enregistrement 0,02 – 0,1 sec (champ), 0,03 – 0,2 sec (image).
• Possède une fonction de détecteur de mouvement intégré qui peut
déclencher l’enregistrement d’alarme lorsqu’un mouvement est
détecté.
• Les images enregistrées peuvent être copiées en utilisant des cartes
CompactFlash.
• Inclut plusieurs fonctions de recherche.
☞ Recherche d’alarme en utilisant une liste d’événement d’alarme
ou des croquis d’images d’alarme
☞ Recherche de l’heure et de la date selon la date et l’heure
d’enregistrement
☞ Détection de détecteur de mouvement en recherchant un
mouvement suspect
• Une fonction de zoom permet l’agrandissement de l’affichage des
images de lecture, lorsqu’un multiplexeur n’est pas utilisé.
• Les images peuvent être capturées par champ ou par image.
• Le mode de qualité d’image peut être sélectionné parmi cinq modes
pour le mode de champ et d’image.
• Trois niveaux de verrou de sécurité sont disponibles.
• Une carte réseau compatible PCMCIA peut être utilisée pour
effectuer la commande sur réseau. Accès multiple pour jusqu’à
quatre utilisateurs.
• Inclut une interface RS-232C pour la commande par ordinateur.
• Le branchement à un contrôleur de système (vendu séparément) est
possible à l’aide d’une interface RS-485.
• Des cartes SCSI type carte PC peuvent être utilisées pour la
sauvegarde à des lecteurs DDS (DAT) et à des disques compacts
inscriptibles. Cependant, un logiciel spécial est requis pour faire la
lecture des images sauvegardées à un disque compact inscriptible.
• Les réglages des menus peuvent être sauvegardés et chargés d’une
carte CompactFlash.
Cordon d’alimentation
Attache pour cordon
d’alimentation
Protection du disque dur
Si des erreurs de formatage du disque dur sont trouvées lorsque
l’appareil est allumé, le disque dur au complet est vérifié
automatiquement. Si tout autre problème est trouvé sur le disque
dur, l’indicateur POWER clignote. Adressez-vous au revendeur si
vous devez reformater le disque dur ou faire des copies de
sauvegarde de certaines images. Le disque dur est très sensible
à la poussière, à la vibration et aux chocs, et il ne devrait pas être
utilisé dans des endroits proches de sources de champs
magnétiques. Assurez-vous d’observer les points suivants afin
d’éviter toute perte de données.
• Ne soumettez pas l’enregistreur vidéo numérique à des chocs.
• N’utilisez pas l’enregistreur vidéo numérique dans des
endroits instables ou sujets à des vibrations.
• Ne débranchez pas le cordon d’alimentation de l’alimentation
pendant l’enregistrement ou la lecture.
• N’utilisez pas l’enregistreur vidéo numérique dans des
endroits où la température peut changer soudainement
(changements de plus de 10°C en une heure).
• Si l’enregistreur vidéo numérique est déplacé à un endroit où
le niveau d’humidité est élevé ou sujet à de grandes
fluctuations du niveau d’humidité, de la condensation peut se
former à l’intérieur. Si l’enregistreur vidéo numérique est
utilisé avec de la condensation à l’intérieur, cela peut causer
un mauvais fonctionnement.
• N’installez pas l’enregistreur vidéo numérique dans des
endroits qui vibrent constamment, comme des véhicules ou
des trains.
Le disque dur et le ventilateur de
refroidissement sont des pièces consommables.
•
Environnement d’installation
Ces pièces devraient généralement être remplacées après 2
ans (pour le disque dur) ou 3 ans (pour le ventilateur de
refroidissement) de fonctionnement à une température
normale de 25°C. Ces périodes de remplacement sont un
guide seulement et il n’est pas garanti que les performances
seront maintenues pendant toute la période.
Pour les enregistrements importants
Laissez un espace d’au moins de 5 cm entre l’enregistreur vidéo
numérique et autres objets voisins.
Des trous de ventilation sont situés sur les deux côtés et sur la base de
l’enregistreur vidéo numérique. Ne laissez pas ces trous de ventilation
être couverts lors de l’installation de l’enregistreur.
De plus, évitez d’utiliser l’enregistreur vidéo numérique dans des
endroits où la ventilation est mauvaise.
•
•
•
4
Vérifiez si l’enregistrement a été enregistré correctement.
Si un enregistrement n’a pas été enregistré correctement
avec cette unité suite à des branchements incorrects avec
d’autres appareils ou si une lecture adéquate n’est pas
possible, toute réclamation de compensation sera refusée.
Pour les enregistrements importants il est recommandé de
faire périodiquement une copie de sauvegarde pour une
protection contre la perte due à tout problème de
fonctionnement ou accident.
Français
NOMS DES PIECES
Panneau avant
2
3
4
5
POWER
FULL
ALARM FULL
LOCK
ALARM
7 6 FGJK
MENU
EXIT/OSD
PLAY/STOP
ZOOM
SEARCH
FRAME/FIELD
STILL
C
1
CHANNEL
COPY
REC/STOP
TIMER
N
AR
LE
SHUTTLE
JOG
EN
TE
R
O
SHUTTLE HOLD
ALARM
P
8 9 IH M L
1 Indicateur d’alimentation (POWER)
G Bouton et indicateur de recherche d’image ou champ
(SEARCH FRAME/FIELD)
• Pendant l’enregistrement ou à l’arrêt
Si le bouton est pressé pendant l’enregistrement ou lorsque
l’enregistreur vidéo numérique est arrêté, l’indicateur s’allume et
la lecture par recherche est possible.
• Pendant la lecture
Si le bouton est pressé pendant la lecture, l’indicateur s’allume et
le mode change au mode de lecture d’image/champ.
Clignote rapidement (4 Hz) pour indiquer une erreur du disque dur et
clignote lentement pour indiquer un problème du ventilateur.
S’allume lorsque la fiche du cordon d’alimentation est insérée dans
une prise de courant secteur. Clignote lorsqu’il y a un problème du
disque dur ou du ventilateur de refroidissement.
2 Indicateur de zone d’enregistrement normal pleine (FULL)
Clignote lorsque l’écrasement du disque dur est désactivé et l’espace
restant dans la zone d’enregistrement normal du disque dur baisse à
1%*. (* Ceci peut être changé en utilisant les réglages des menus.)
H Bouton et indicateur de copie (COPY)
3 Indicateur de zone d’enregistrement d’alarme pleine (ALARM FULL)
Utilisé pour copier des images à la zone d’archives du disque dur, à
une carte CompactFlash ou à une carte Microdrive.
L’indicateur s’allume pendant la copie.
Clignote lorsque l’écrasement du disque dur est désactivé et l’espace
restant dans la zone d’enregistrement d’alarme du disque dur baisse à
1%*. (* Ceci peut être changé en utilisant les réglages des menus.)
I Bouton et indicateur de programmateur (TIMER)
4 Indicateur de verrou de sécurité (LOCK)
Si le bouton est pressé lorsque l’enregistrement est arrêté,
l’enregistreur vidéo numérique commute au mode d’attente
d’enregistrement par programmateur, et lorsque l’heure réglée est
atteinte, l’enregistrement par programmateur commence.
S’allume lorsque le verrou de sécurité est engagé et les opérations
sont verrouillées.
Si un bouton est pressé pendant que le verrou est engagé, le vibreur
retentit et allumage s’allume.
J Bouton et indicateur de lecture/arrêt (PLAY/STOP)
5 Indicateur d’alarme (ALARM)
Lorsque le bouton est pressé, l’indicateur s’allume et la lecture des
images dans la zone d’enregistrement normal commence.
Si pressé pendant la lecture, la lecture s’arrête.
S’allume pendant l’enregistrement de pré-alarme.
Clignote pendant l’enregistrement d’alarme.
K Bouton et indicateur d’image fixe (STILL)
6 Bouton et indicateur de menu (MENU)
Si ce bouton est pressé pendant la lecture, l’indicateur s’allume et la
lecture fait une pause. S’il est pressé de nouveau, la lecture reprend.
Utilisé pour afficher les écrans de menu (écrans de réglage).
7 Bouton et indicateur de zoom (ZOOM)
L Bouton et indicateur de maintien de cadran de navette
Utilisé pour afficher l’écran de zoom pendant la lecture.
L’indicateur s’allume lorsque l’écran de zoom est affiché.
Ne fonctionne pas lorsqu’un multiplexeur est branché.
(SHUTTLE HOLD)
Ceci verrouille la vitesse pour la lecture et l’avance d’image.
L’indicateur s’allume pendant que la vitesse est verrouillée.
8 Bouton et indicateur de canal (CHANNEL)
M Boutons d’alarme (û ALARM ù)
Si l’enregistreur vidéo numérique est connecté à un multiplexeur Sanyo
qui permet le décodage de l’information de canal (numéros de
caméra), les canaux peuvent être indiqués de sorte que seuls ces
canaux soient lus. L’indicateur s’allume pendant la lecture. Le bouton
CHANNEL ne peut être utilisé que pendant le mode d’arrêt sur image.
Lorsque ces boutons sont pressés pendant la lecture, la lecture
passe à l’enregistrement d’alarme précédent ou suivant.
N Cadrans de taquage (intérieur) et de navette (extérieur)
• Pendant la lecture
9 Bouton et indicateur d’enregistrement/arrêt (REC/STOP)
Utilisé pour commencer l’enregistrement normal.
L’indicateur s’allume pendant l’enregistrement.
Si le bouton est pressé pendant 2 secondes ou plus pendant
l’enregistrement, l’enregistrement s’arrête et l’indicateur s’éteint.
•
F Bouton et indicateur de sortie/affichage à l’écran (EXIT/OSD)
• Lorsqu’un écran de menu est affiché
•
O Logement pour carte CompactFlash
Insérez une carte CompactFlash ou une carte Microdrive ici.
Le menu principal ou le sous-menu est quitté.
Pendant l’enregistrement ou la lecture
Lorsque le bouton est pressé pendant l’enregistrement ou la
lecture, l’information superposée telle que le l’heure et la date, et
le statut d’alarme change dans l’ordre suivant:
Affichée en haut à gauche → Affichée en bas à gauche → Affichée en
haut à droite → Affichée en bas à droite → Non affichée.
L’indicateur s’allume pendant que l’information est affichée.
Français
Le cadran de taquage change la vitesse de lecture.
Le cadran de navette avance rapidement et rebobine.
Écrans de menu
Le cadran de taquage déplace le curseur et change les réglages.
Le cadran de navette entre les réglages.
P Bouton de réinitialisation (MENU RESET)
Réinitialise les réglages des menus.
5
NOMS DES PIECES
Panneau arrière
ALARM
RESET
ALARM ALARM
OUT
C IN
MIC
IN
AC IN
FULL
OUT
OUT
DIGITAL
OUT
SUB IN
C
SUB OUT
A
RS232C
RS485
IN
LOOP OUT
S-VIDEO
B
C REMOTE C NC NC C
RS485
TERMINATE
ON
ALL
RESET
Q
C
T
OU
IN
SW
VIDEO
LOOP OUT
PC Card SLOT
1
C IN OUT
AUDIO
IN
IN
EJECT
CLOCK
ADJUST
P
W
AR
OU NIN
T G
AL
FU AR
LL M
O
NO
N
OU RE
T C
2 3 4
OFF
OUT
5 6 7 8 9 F GHIJ
1 Logement pour carte PC
K
LMN
O Connecteur d’alarme
Branchez une carte de réseau ou une carte SCSI recommandée ici.
Remarque: La fente pour carte PC n’est compatible qu’avec des
cartes 16 bits 5 V.
N’utilisez pas de cartes à bus type 32 bits, car elles
risquent d’endommager la fente pour carte PC de
l’enregistreur vidéo numérique.
Broche
C
ALARM IN
ALARM RESET
ALARM OUT
2 Connecteur d’entrée de micro (MIC IN)
3 Connecteur d’entrée audio (AUDIO IN)
4 Connecteur de sortie audio (AUDIO OUT)
5 Connecteur d’entrée S-Video (S-VIDEO IN)
6 Connecteur de boucle de sortie S-Video (S-VIDEO LOOP OUT)
7 Connecteur de sortie S-Video (S-VIDEO OUT)
8 Connecteur d’entrée vidéo (VIDEO IN)
NON REC OUT
C
CLOCK ADJUST IN
CLOCK ADJUST OUT
Les images entrées au connecteur S-VIDEO IN ont la priorité.
9 Connecteur de boucle de sortie vidéo (VIDEO LOOP OUT)
F Connecteur de sortie vidéo (VIDEO OUT)
G Connecteur d’entrée vidéo numérique (DIGITAL VIDEO IN)
H Connecteur de sortie vidéo numérique (DIGITAL VIDEO OUT)
I Connecteur d’entrée de sous-système vidéo numérique
Signal
Masse
Entrée d’alarme
Entrée de réinitialisation d’alarme
Sortie d’alarme
Sortie de non-enregistrement
Masse
Entrée de synchronisation d’horloge
(référez-vous à la page 43.)
Sortie de synchronisation d’horloge
(référez-vous à la page 43.)
WARNING OUT
Sortie d’avertissement d’erreur du
disque dur
FULL
Sortie d’avertissement d’espace du
disque dur
ALARM OUT
Sortie d’avertissement d’espace de
zone d’enregistrement d’alarme
P Prise d’alimentation CA (AC IN~)
Insérez fermement le cordon d’alimentation fourni ici.
Q Support de cordon d’alimentation
(DIGITAL VIDEO SUB IN)
Fixer le cordon d’alimentation au support à l’aide de l’attache comme
illustré.
J Connecteur de sortie de sous-système vidéo numérique
(DIGITAL VIDEO SUB OUT)
K Connecteur RS-232C
L Bouton de réinitialisation générale (ALL RESET)
M Interrupteur de terminaison RS-485 (RS485 TERMINATE)
N Connecteur de commande
Broche
Signal
C
A
Masse
Connecteur RS-485*
B
Connecteur RS-485*
C
Masse
REMOTE
C
Entrée de télécommande
Masse
NC
De rechange
NC
De rechange
C
SW OUT
C
Masse
Sortie de commutation
Masse
* Utilisé pour branchement à l’aide d’un câble à paires torsadées.
6
Français
BRANCHEMENTS
Assurez-vous de bien lire le manuel d’instructions de chaque appareil branché à l’enregistreur vidéo numérique.
Si les branchements sont incorrects, cela peut causer de la fumée ou un mauvais fonctionnement.
Branchements de base
Caméra vidéo (vendue séparément)
C IN OUT
AC IN
FULL
AUDIO
MIC
IN
IN
OUT
VIDEO
LOOP OUT
OUT
DIGITAL
OUT
SUB IN
C
SUB OUT
A
RS232C
RS485
IN
LOOP OUT
S-VIDEO
B C REMOTE C NC NC C
RS485
TERMINATE
ON
ALL
RESET
C
T
IN
OU
PC Card SLOT
SW
IN
EJECT
CLOCK
ADJUST
W
AR
OU NIN
T G
AL
FU A R
LL M
ALARM
RESET
ALARM ALARM
OUT
C IN
NO
N
OU RE
T C
Entrée de microphone
OFF
OUT
Ordinateur
Connecteur
S-VIDEO IN
Moniteur TV
(vendu séparément)
Connecteur
VIDEO IN
Moniteur TV
(vendu séparément)
Branchements pour la commande du
système
Branchement d’un circuit de commande à
distance
Utilisez un câble à paires torsadées (vendu séparément) pour brancher
un contrôleur de système aux connecteurs de commande A, B et C
(masse) de l’enregistreur vidéo numérique. Branchez le signal A au
signal A et le signal B au signal B.
Si un circuit de commande à distance est assemblé comme illustré et
branché aux connecteurs d’entrée de commande à distance REMOTE
du connecteur de commande, l’enregistreur vidéo numérique numérique
peut être commandé à distance.
Poussez et insérez les câbles
220Ω
SW 1: REC STOP
220Ω
A
300Ω
T
RS485
SW 2: PLAY STOP
C
OU
32C
C REMOTE C NC NC C
RS485
TERMINATE
ON
ALL
RESET
SW
C
B
SW 3: PAUSE
360Ω
SW 4: SEARCH
OFF
470Ω
SW 5: CHANNEL
680Ω
Câble à paires torsadées
C
A
SW 6: PLAY
C
820Ω
T
Masse
C REMOTE C NC NC C
RS485
TERMINATE
ON
ALL
RESET
OU
RS485
B
SW
Au signal B
Au signal A
SW 7: REC
1.2kΩ
OFF
SW 8: MENU
Connecteur RS-485
1.8kΩ
SW 9 : EXIT/OSD
2.2kΩ
SW: Interrupteur
SW 10 : JOG j
3.3kΩ
SW 11 : JOG l
Remarque: Le câble de télécommande
ne devrait pas dépasser 5 m
de long.
Contrôleur de système
(vendu séparément)
4.7kΩ
SW 12 : SHUTTLE c
7.5kΩ
SW 13 : SHUTTLE d
13kΩ
SW 14 : ZOOM
27kΩ
SW 15 : COPY
68kΩ
SW 16 : TIMER
Français
7
BRANCHEMENTS
Branchements numériques au multiplexeur
Branchez à un multiplexeur (MPX-CD163 ou CD93) qui permet les branchements numériques.
(Si nécessaire)
Entrée d'alarme
ALARM
C CLOCK
RE ADJUST
RESET
ON UT
ALARM ALARM N O
OUT
C IN OUT
C IN
AC IN
FULL
AUDIO
MIC
IN
IN
OUT
IN
EJECT
G
NIN
RM
AR UT ALA LL
W O
FU
VIDEO
LOOP OUT
OUT
PC Card SLOT
IN
DIGITAL
OUT
SUB IN
C
A
RS232C
SUB OUT
RS485
IN
1
2
3
4
5
6
7
8
9
13
10
14
11
15
12
16
LOOP OUT
S-VIDEO
B C REMOTE C NC NC C
RS485
TERMINATE
ON
ALL
RESET
SW
C
OU
T
OFF
OUT
✱ Câble blindé à paires torsadées
(Type droit CAT-5, 3 m ou moins)
DIGITAL OUT
DIGITAL IN
Sortie d’alarme
Moniteur TV
(vendu séparément)
Masse (C)
Multiplexeur (vendu séparément)
Branchements numériques en série
Jusqu’à trois enregistreurs vidéo numériques peuvent être branchés numériquement pour l’enregistrement d’images en série.
A Connexion numérique de multiplexeurs en série
Multiplexeur (vendu séparément)
1
2
3
4
5
6
7
8
9
13
10
14
11
15
12
16
CLOCK
ADJUST
C IN OUT
AC IN
FULL
AUDIO
IN
OUT
VIDEO
LOOP OUT
OUT
LOOP OUT
S-VIDEO
DIGITAL
OUT
SUB IN
C
SUB OUT
A
RS232C
B
C REMOTE C NC NC C
RS485
C
TERMINATE
ON
ALL
RESET
T
IN
RS485
IN
OU
PC Card SLOT
SW
IN
EJECT
NO
N
OU RE
T C
ALARM
RESET
ALARM ALARM
OUT
C IN
MIC
IN
W
AR
OU NIN
T G
ALA
FU R
LL M
Enregistreur vidéo numérique (principal)
Moniteur TV
(vendu séparément)
OFF
OUT
CLOCK
ADJUST
C IN OUT
AC IN
FULL
AUDIO
IN
OUT
VIDEO
LOOP OUT
OUT
LOOP OUT
S-VIDEO
DIGITAL
OUT
SUB IN
C
SUB OUT
A
RS232C
B
C REMOTE C NC NC C
RS485
C
TERMINATE
ON
ALL
RESET
T
IN
RS485
IN
OU
PC Card SLOT
SW
IN
EJECT
NO
N
OU RE
T C
ALARM
RESET
ALARM ALARM
OUT
C IN
MIC
IN
W
AR
OU NIN
T G
ALA
FU R
LL M
Enregistreur vidéo numérique (secondaire 1)
Amplificateur
(vendu séparément)
OFF
OUT
CLOCK
ADJUST
C IN OUT
AC IN
FULL
AUDIO
IN
OUT
VIDEO
LOOP OUT
OUT
LOOP OUT
S-VIDEO
OUT
DIGITAL
OUT
SUB IN
C
SUB OUT
A
RS232C
B C REMOTE C NC NC C
RS485
TERMINATE
ON
ALL
RESET
C
T
IN
RS485
IN
OU
PC Card SLOT
SW
IN
EJECT
NO
N
O U RE
T C
ALARM
RESET
ALARM ALARM
OUT
C IN
MIC
IN
W
AR
OU NIN
T G
ALA
FU R
LL M
Enregistreur vidéo numérique (secondaire 2)
Amplificateur
(vendu séparément)
OFF
Remarque: Un câble de réseau blindé (blindé à paires torsadées) doit être utilisé pour les branchements numériques.
Lorsque des enregistreurs vidéo numériques sont branchés numériquement en série, les connecteurs d’entrée et de sortie numériques
peuvent être utilisés pour transmettre les signaux vidéo, les signaux de commande et les signaux de commutation. Cependant les signaux
audio ne peuvent pas être transmis de la même manière, et donc si des signaux audio doivent aussi être enregistrés, branchez les
connecteurs d’entrée audio par l’intermédiaire d’un amplificateur comme indiqué par le diagramme des branchements.
8
Français
BRANCHEMENTS
B Connexion numérique d’enregistreurs vidéo numériques avec fonction multiplexeur en
série
Enregistreurs vidéo numériques avec
fonction multiplexeur
(vendu séparément)
2
3
5
6
7
4
8
9
13
10
14
11
15
12
16
MENU
EXIT/OSD
ZOOM
SEARCH
SEQUENCE
COPY
PLAY/STOP
C
1
POWER
FULL
ALARM FULL
LOCK
ALARM
1
2
3
4
5
6
7
8
QUAD MULTI
9
10
11
12
13
14
15
16
MON2 PLUS
REC/STOP
TIMER
AR
LE
SHUTTLE
JOG
EN
TE
R
STILL
SHUTTLE LOCK
ALARM
Moniteur TV
(vendu séparément)
IN
AC IN
FULL
OUT
VIDEO
LOOP OUT
OUT
LOOP OUT
S-VIDEO
DIGITAL
OUT
SUB IN
C
SUB OUT
A
RS232C
B
C REMOTE C NC NC C
RS485
C
TERMINATE
ON
ALL
RESET
T
IN
RS485
IN
OU
PC Card SLOT
SW
EJECT
CLOCK
ADJUST
C IN OUT
AUDIO
IN
Amplificateur
(vendu séparément)
NO
N
OU RE
T C
ALARM
RESET
ALARM ALARM
OUT
C IN
MIC
IN
W
AR
OU NIN
T G
ALA
FU R
LL M
Enregistreur vidéo numérique (secondaire 1)
OFF
OUT
(vendu séparément)
ALARM
RESET
ALARM ALARM
OUT
C IN
MIC
IN
FULL
OUT
VIDEO
LOOP OUT
OUT
DIGITAL
OUT
SUB IN
C
SUB OUT
A
RS232C
(vendu séparément)
9
B
C REMOTE C NC NC C
RS485
TERMINATE
ON
ALL
RESET
OFF
C
T
OUT
OU
IN
RS485
LOOP OUT
S-VIDEO
SW
PC Card SLOT
IN
Français
CLOCK
ADJUST
C IN OUT
AUDIO
IN
IN
EJECT
NO
N
OU RE
T C
Amplificateur
(vendu séparément)
W
AR
OU NIN
T G
ALA
FU R
LL M
Enregistreur vidéo numérique (secondaire 2)
AC IN
DISQUE DUR INTÉGRÉ
Disque dur
A Zone d’enregistrement normal
•
Zones d’enregistrement
•
Les zones d’enregistrement sur le disque dur (zone d’enregistrement
normal: 80%, zone d’enregistrement d’alarme: 19%, zone d’archives:
1%) sont établies automatiquement lorsque l’enregistreur vidéo
numérique est allumé. Les images sont enregistrées dans la zone
d’enregistrement normal lorsque le bouton REC/STOP est pressé, et
elles sont enregistrées dans la zone d’enregistrement d’alarme
lorsqu’une alarme se produit. Ceci s’appelle la condition par défaut, et
les réglages détaillés suivants peuvent être confirmés dans les sections
“ENREGISTREMENT D’IMAGES DANS LA ZONE
D’ENREGISTREMENT NORMAL” et “ENREGISTREMENT D’IMAGES
DANS LA ZONE D’ENREGISTREMENT D’ALARME” ci-après dans ce
manuel. De plus, des réglages tels que les zones d’enregistrement et la
qualité d’image peuvent être changés à l’aide des écrans de menus.
1%
B Zone d’enregistrement d’alarme
Les réglages du menu REGL.MODE D’ENR. D’ALARME sont requis.
• L’enregistrement d’alarme est activé lorsque ENR.D’ALARME est
réglé. Lorsqu’une activité suspecte est détectée par le contacteur ou
le détecteur de mouvement branché au connecteur d’entrée
d’alarme, une alarme est enregistrée dans la zone d’enregistrement
d’alarme.
• L’enregistrement de pré-alarme est activé lorsque
ENREGISTREMENT PRE-ALARME est réglé. L’enregistrement de
pré-alarme enregistre de manière répétée les mêmes images que
pour l’enregistrement normal dans la zone d’enregistrement
d’alarme, et écrase ces images après l’intervalle de temps réglé,
jusqu’à ce qu’une alarme soit détectée. Lorsque l’enregistrement de
pré-alarme est activé, l’image juste avant qu’une alarme se produise
peut être enregistrée.
C Zone d’archives
B Zone
d’enregistrement
enregistrement
d’alarme
alarme
80%
19%
Lorsque le bouton REC/STOP est pressé pendant la surveillance,
les images sont enregistrées dans la zone d’enregistrement normal.
Lorsque des heures de début et de fin sont entrées pour chaque jour
de la semaine, puis sont activées, l’enregistrement par
programmateur est automatiquement fait dans la zone
d’enregistrement normal suivant les heures réglées.
A Zone d’enregistrement
enregistrement normal
C Zone d’archives
Ceci est la zone pour copier les images importantes de la zone
d’enregistrement normal et de la zone d’enregistrement d’alarme. La
taille de la zone d’archives peut être réglée à un maximum de 10 Go
(12,5% de la capacité totale du disque dur de 80 Go, 6,25% de la
capacité totale du disque dur de 160 Go) en changeant la taille de la
zone d’enregistrement normal ou de la zone d’enregistrement d’alarme.
Zones d’enregistrement du disque dur
Écran de menu (réglage initial)
A Écran de réglage pour la qualité d’image, la vitesse
d’enregistrement, etc. de la zone d’enregistrement normal
Ceci peut être affiché en appuyant sur le bouton MENU.
<REGL.AIRE D'ENREGISTREMENT>
CAPACITE TOTALE
: 80GB
AIRE D'ENR. NORMAL
: 80 %
REINITIALISATION
->
AIRE D'ENR. ALARME
: 19 %
REINITIALISATION
->
AIRE D'ARCHIVES
: 1%
REINITIALISATION
->
<REGL.MODE D'ENR.NORMAL>
QUALITE D'IMAGE
: STANDARD
ENR.TRAME/IMAGE
: TRAME
ENREGISTREMENT AUDIO : NON
CYCLE D'ENR. : 0.10SEC ( 54H)
A A
B B
1
2
3
4
C
ATTENTION:LORSQUE LE REGLAGE D'AIRE EST CHANGE.
L'AIRE AU COMPLET EST REINITIALISEE!
1 Qualité d’image: STANDARD
B Écran de réglage pour la qualité d’image, la vitesse
La qualité d’image peut être sélectionnée parmi cinq options.
La vitesse d’enregistrement change selon la qualité d’image
sélectionnée.
d’enregistrement, etc. de la zone d’enregistrement d’alarme
<REGL.MODE D'ENR. D'ALARME>
QUALITE D'IMAGE
: STANDARD
ENR.TRAME/IMAGE
: TRAME
ENREGISTREMENT AUDIO : NON
ENR.D'ALARME
: NON
CYCLE D'ENR. 0.10 SEC.
DUREE : 1SEC
ENREGISTREMENT PRE-ALARME: ¤¤¤
CYCLE D'ENR. ¤¤¤ SEC.
DUREE : ¤¤¤
=>(46400 ALARMES PEUVENT ETRE ENREGISTREES)
DECLENCHEMENT ALAEME : ALARME
DETECTEUR DE MOUVEMENT ->
2 Méthode d’enregistrement: Peut être réglée à IMAGE ou
TRAME.
La vitesse d’enregistrement change selon la méthode sélectionnée.
3 Enregistrement audio: Peut être réglé à OUI ou NON.
4 Vitesse d’enregistrement: Affiche l’intervalle
d’enregistrement et la durée d’enregistrement.
Référez-vous au Tableaux des vitesses d’enregistrement pour
plus de détails.
1
2
3
5
4
5 Réglages d’enregistrement d’alarme: Peut être réglé à OUI
ou NON.
Lorsque des enregistrements d’alarme seront faits, sélectionnez un
réglage tel que MODE1 pour le réglage NON. La vitesse
d’enregistrement et la durée d’alarme seront affichées.
10
Français
DISQUE DUR INTÉGRÉ
Tableaux de vitesse d’enregistrement (Les durées d’enregistrement peuvent varier selon
les images enregistrées.)
Ces tableaux de vitesse d’enregistrement indiquent les durées d’enregistrement suivant les diverses qualités d’image et les réglages d’image/champ
lors de l’enregistrement dans la zone d’enregistrement normal du disque dur (80 Go). Ils n’incluent pas les réglages d’enregistrement audio.
Les durées d’enregistrement pour la zone d’enregistrement normal et la zone d’enregistrement d’alarme représentent les valeurs de durée
d’enregistrement indiquées dans les tableaux de vitesse d’enregistrement, multipliées par les pourcentages pour la zone d’enregistrement normal et la
zone d’enregistrement d’alarme qui ont été réglés en utilisant les commandes du menu de réglage de zone d’enregistrement.
Lors de l’enregistrement avec un disque dur de 80 Go à 100% capacité libre
Enregistrement de champ
Taux
Taux
d’enregistrement d’enregistrement
(champ/sec.)
(sec.)
60.00
30.00
20.00
15.00
10.00
7.50
6.00
5.00
4.29
3.75
3.33
3.00
2.73
2.31
2.00
1.67
1.43
1.25
1.11
1.00
0.50
0.33
0.25
0.20
0.10
0.05
0.03
0.02
0.03
0.05
0.07
0.10
0.13
0.17
0.20
0.23
0.27
0.30
0.33
0.37
0.43
0.50
0.60
0.70
0.80
0.90
1
2
3
4
5
10
20
30
Enregistrement d’image
DURÉE D’ENREGISTREMENT
DE BASE
NORMALE
STANDARD
BONNE
TRES BONNE
21H
42H
63H
85H
127H
170H
212H
255H
297H
340H
382H
425H
468H
553H
638H
765H
893H
1021H
1148H
1276H
2553H
3829H
5106H
6382H
12765H
25531H
38296H
15H
30H
45H
60H
90H
120H
150H
180H
210H
241H
271H
301H
331H
391H
452H
542H
632H
723H
813H
904H
1808H
2712H
3616H
4521H
9042H
18084H
27126H
11H
22H
33H
45H
67H
90H
113H
135H
158H
180H
203H
226H
248H
293H
339H
406H
474H
542H
610H
678H
1356H
2034H
2712H
3390H
6781H
13563H
20345H
8H
16H
24H
32H
49H
65H
82H
98H
115H
131H
147H
164H
180H
213H
246H
295H
345H
394H
443H
493H
986H
1479H
1972H
2466H
4932H
9864H
14796H
6H
12H
18H
24H
37H
49H
62H
74H
87H
99H
112H
124H
137H
162H
187H
224H
261H
299H
336H
374H
748H
1122H
1496H
1870H
3741H
7483H
11224H
Taux
d’enregistrement
(image/sec.)
Taux
d’enregistrement
(sec.)
30.00
15.00
10.00
7.50
5.00
3.75
3.00
2.50
2.14
1.88
1.67
1.50
1.36
1.15
1.00
0.83
0.71
0.63
0.56
0.50
0.25
0.17
0.13
0.10
0.05
0.03
0.02
0.03
0.07
0.10
0.13
0.20
0.27
0.33
0.40
0.47
0.53
0.60
0.67
0.73
0.87
1.00
1.20
1.40
1.60
1.80
2
4
6
8
10
20
40
60
DURÉE D’ENREGISTREMENT
DE BASE
NORMALE
STANDARD
BONNE
TRES BONNE
21H
42H
63H
85H
127H
170H
212H
255H
297H
340H
382H
425H
468H
553H
638H
765H
893H
1021H
1148H
1276H
2553H
3829H
5106H
6382H
12765H
25531H
38296H
15H
30H
45H
60H
90H
120H
150H
180H
210H
241H
271H
301H
331H
391H
452H
542H
632H
723H
813H
904H
1808H
2712H
3616H
4521H
9042H
18084H
27126H
11H
22H
33H
45H
67H
90H
113H
135H
158H
180H
203H
226H
248H
293H
339H
406H
474H
542H
610H
678H
1356H
2034H
2712H
3390H
6781H
13563H
20345H
8H
16H
24H
32H
49H
65H
82H
98H
115H
131H
147H
164H
180H
213H
246H
295H
345H
394H
443H
493H
986H
1479H
1972H
2466H
4932H
9864H
14796H
6H
12H
18H
24H
37H
49H
62H
74H
87H
99H
112H
124H
137H
162H
187H
224H
261H
299H
336H
374H
748H
1122H
1496H
1870H
3741H
7483H
11224H
Les tableaux ci-dessous sont des tableaux de durée d’enregistrement comme référence si la capacité totale du disque dur a été augmentée à 160 Go.
(Adressez-vous au revendeur pour plus de détails sur comment augmenter la capacité du disque dur.)
Lors de l’enregistrement avec un disque dur de 160 Go à 100% capacité libre
Enregistrement de champ
Taux
d’enregistrement
(champ/sec.)
Taux
d’enregistrement
(sec.)
60.00
30.00
20.00
15.00
10.00
7.50
6.00
5.00
4.29
3.75
3.33
3.00
2.73
2.31
2.00
1.67
1.43
1.25
1.11
1.00
0.50
0.33
0.25
0.20
0.10
0.05
0.03
0.02
0.03
0.05
0.07
0.10
0.13
0.17
0.20
0.23
0.27
0.30
0.33
0.37
0.43
0.50
0.60
0.70
0.80
0.90
1
2
3
4
5
10
20
30
Enregistrement d’image
DURÉE D’ENREGISTREMENT
DE BASE
NORMALE
STANDARD
BONNE
TRES BONNE
42H
85H
127H
170H
255H
340H
425H
510H
595H
680H
765H
851H
936H
1106H
1276H
1531H
1787H
2042H
2297H
2553H
5106H
7659H
10212H
12765H
25531H
51062H
76593H
30H
60H
90H
120H
180H
241H
301H
361H
421H
482H
542H
602H
663H
783H
904H
1085H
1265H
1446H
1627H
1808H
3616H
5425H
7233H
9042H
18084H
36168H
54253H
22H
45H
67H
90H
135H
180H
226H
271H
316H
361H
406H
452H
497H
587H
678H
813H
949H
1085H
1220H
1356H
2712H
4069H
5425H
6781H
13563H
27126H
40690H
16H
32H
49H
65H
98H
131H
164H
197H
230H
263H
295H
328H
361H
427H
493H
591H
690H
789H
887H
986H
1972H
2959H
3945H
4932H
9864H
19728H
29592H
12H
24H
37H
49H
74H
99H
124H
149H
174H
199H
224H
249H
274H
324H
374H
448H
523H
598H
673H
748H
1496H
2244H
2993H
3741H
7483H
14966H
22449H
Référence: 24H = 1 jour, 168H = 1 semaine, 720H = 1 mois, 8760H = 1 an
Français
11
Taux
d’enregistrement
(image/sec.)
Taux
d’enregistrement
(sec.)
30.00
15.00
10.00
7.50
5.00
3.75
3.00
2.50
2.14
1.88
1.67
1.50
1.36
1.15
1.00
0.83
0.71
0.63
0.56
0.50
0.25
0.17
0.13
0.10
0.05
0.03
0.02
0.03
0.07
0.10
0.13
0.20
0.27
0.33
0.40
0.47
0.53
0.60
0.67
0.73
0.87
1.00
1.20
1.40
1.60
1.80
2
4
6
8
10
20
40
60
DURÉE D’ENREGISTREMENT
DE BASE
NORMALE
STANDARD
BONNE
TRES BONNE
42H
85H
127H
170H
255H
340H
425H
510H
595H
680H
765H
851H
936H
1106H
1276H
1531H
1787H
2042H
2297H
2553H
5106H
7659H
10212H
12765H
25531H
51062H
76593H
30H
60H
90H
120H
180H
241H
301H
361H
421H
482H
542H
602H
663H
783H
904H
1085H
1265H
1446H
1627H
1808H
3616H
5425H
7233H
9042H
18084H
36168H
54253H
22H
45H
67H
90H
135H
180H
226H
271H
316H
361H
406H
452H
497H
587H
678H
813H
949H
1085H
1220H
1356H
2712H
4069H
5425H
6781H
13563H
27126H
40690H
16H
32H
49H
65H
98H
131H
164H
197H
230H
263H
295H
328H
361H
427H
493H
591H
690H
789H
887H
986H
1972H
2959H
3945H
4932H
9864H
19728H
29592H
12H
24H
37H
49H
74H
99H
124H
149H
174H
199H
224H
249H
274H
324H
374H
448H
523H
598H
673H
748H
1496H
2244H
2993H
3741H
7483H
14966H
22449H
DISQUE DUR INTÉGRÉ
Durée d’enregistrement pré-alarme
Ce tableau affiche les durées d’enregistrement pour l’enregistrement pré-alarme. Référez-vous à ce tableau lors du réglage d’enregistrement
pré-alarme. (Référez-vous à la page 18.)
Taux
Taux
d’enregistrement d’enregistrement
(champ/sec.)
(sec.)
60.00
0.02
30.00
0.03
20.00
0.05
15.00
0.07
10.00
0.10
7.50
0.13
6.00
0.17
5.00
0.20
4.29
0.23
3.75
0.27
3.33
0.30
3.00
0.33
2.73
0.37
2.31
0.43
2.00
0.50
1.67
0.60
1.43
0.70
1.25
0.80
1.11
0.90
1.00
1
Durée d’enregistrement (affichage de la durée sur l’écran de menu; s: secondes, m: minutes))
2s (2s)
3s (3s)
5s (5s)
10s (10s)
20s (20s)
40s (40s)
60s (1m)
120s (2m)
180s (3m)
240s (4m)
300s (5m)
m
m
m
m
m
m
m
m
m
m
m
m
m
m
m
m
m
m
m
m
m
m
m
m
m
m
m
m
m
m
m
m
m
m
m
m
m
m
m
m
m
m
m
m
m
m
m
m
m
m
m
m
m
m
m
m
m
m
m
m
m
m
m
m
m
m
m
m
m
m
m
m
m
m
m
m
m
m
m
m
m
m
m
m
m
m
m
m
m
m
m
m
m
m
m
m
m
m
m
m
m
m
m
m
m
m
m
m
m
m
m
m
m
m
m
m
m
m
m
m
m
m
m
m
m
m
m
m
m
m
m
m
m
m
m
m
m
m
m
m
m
m
600s (10m) 900s (15m)
m
m
m
m
m
m
m
m
m
m
m
m
m
m
m
m
m
m
m
m
m
m
m
m
m
m
m
m
m
m
m
m
m
m
m
m
m
m
m
m
: Valeur de réglage par défaut, cycle d’enregistrement: 0,1 seconde (10 FPS), durée d’enregistrement: 1 minute
Le réglage de durée d’alarme du menu peut seulement être fait à une durée d’enregistrement qui est compatible avec le réglage courant du taux
d’enregistrement.
De plus, lors du réglage du taux d’enregistrement, il peut seulement être réglé dans la plage permise par la durée d’alarme courante. Par exemple, si
la durée d’alarme est réglée à 3 secondes, le taux d’enregistrement peut seulement être réglé à 0,02 seconde ou à 0,03 seconde.
Si un taux d’enregistrement plus bas est réglé, le réglage ne sera pas accepté jusqu’à ce que la durée d’alarme soit changée.
12
Français
DISQUE DUR INTÉGRÉ
Lorsque l’enregistreur vidéo numérique est allumé, l’affichage d’opérations apparaît dans le coin supérieur gauche de l’écran de moniteur. Cet
affichage d’opérations indique l’information qui est essentielle pour le fonctionnement, telle que la date, l’heure, la qualité d’image et la vitesse
d’enregistrement.
12
3
4 5
4CH
100%
01-01-01 ALARME 0000
00:00:00 SD 0.10SEC
6
7
Affichage d’opérations
ERREUR DU DISQUE (1)
01-01-01 ALARME 0000
00:00:00 SD 0.10SEC
ERREUR DU DISQUE (1)
9
8
Affichage d’opérations
Insérez le cordon d’alimentation dans une prise murale et allumez l’appareil.
L’indicateur POWER s’allume, puis après 15 secondes environ l’indicateur EXIT/OSD s’allume. Les images de caméra apparaissent sur le moniteur et
l’affichage d’opérations apparaît dans le coin supérieur gauche de l’écran.
Remarque:
• Si l’horloge n’a pas été réglée, l’écran AVERTISSEMENT pour le réglage de l’horloge apparaît. Si un des boutons d’opération est pressé, l’écran
AVERTISSEMENT disparaîtra, mais l’enregistrement et la lecture ne seront pas possibles jusqu’à ce que l’horloge soit réglée, il faut donc régler
l’horloge en premier. (Référez-vous à la page 42.)
• Si vous appuyez sur le bouton EXIT/OSD à plusieurs reprises, vous pouvez changer la position de l’affichage d’opérations ou le faire disparaître.
1 Affichage du numéro de caméra
6 Affichage de l’heure
Branchez l’enregistreur vidéo numérique à un multiplexeur capable
de décoder l’information de canal de Sanyo (le numéro de caméra)
et appuyez sur le bouton CHANNEL. Le numéro de la caméra
spécifiée apparaît sur l’affichage pendant la lecture.
Lorsque l’enregistreur vidéo numérique est allumé la première fois,
l’heure affichée est 00:00:00, et l’heure commence à compter après
la date soit réglée. L’enregistreur vidéo numérique utilise la date et
l’heure pour commander l’enregistrement et la lecture, donc si la
date et l’heure n’ont pas été réglées, les images correctes ne
peuvent pas être retrouvées. Assurez-vous d’utiliser les menus pour
régler l’heure correcte.
2 Affichage de la date
Lorsque l’enregistreur vidéo numérique est allumé la première fois,
la date affichée est 01-01-01 (mois, jour, année). Assurez-vous
d’utiliser les menus pour régler la date correcte.
7 Affichage de la qualité d’image
Ceci indique la qualité d’image pour les images enregistrées sur le
disque dur. Le réglage par défaut est SD (qualité améliorée).
L’affichage change lorsque la qualité d’image est changée à l’aide
de l’élément de menu REGL.MODE D’ENR.NORMAL.
• DB: Qualité de base
• NO: Qualité normale
• SD: Qualité améliorée
• BO: Haute qualité
• TB: Qualité à haute résolution
3 Affichage de symboles d’opérations
Ces symboles apparaissent pendant l’enregistrement et la lecture.
a : Enregistrement
e : Avance rapide
c : Lecture
f : Rebobinage
d : Lecture arrière
h : Arrêt
hc : Lecture au ralenti dh : Lecture au ralenti arrière
Remarque: Si l’enregistrement et la lecture sont effectués en même
temps, le symbole de lecture (c) apparaît.
4 Quantité restante de zone d’enregistrement
8 Affichage de la vitesse d’enregistrement
Si l’écrasement a été désactivé (REENREGISTRER: NON) dans la
zone d’enregistrement normal ou la zone d’enregistrement d’alarme,
la quantité d’espace restante apparaît comme pourcentage. Vous
pouvez changer la quantité de zone d’enregistrement restante en
utilisant l’élément de menu REGL.COND. D’ENREGISTREMENT.
(Référez-vous à la page 48.)
Ceci indique la vitesse d’enregistrement pour les images
enregistrées sur le disque dur. Le réglage par défaut est 0.10 SEC.
(pendant l’enregistrement de champ). L’affichage change lorsque la
qualité d’image et la méthode d’enregistrement sont changées à
l’aide de l’élément de menu REGL.MODE D’ENR.NORMAL.
9 Affichage d’erreur du disque dur
5 Affichage d’alarme et affichage de numéro d’alarme
Cet affichage apparaît lorsqu’il y a une erreur du disque dur.
• ERREUR DU DISQUE: Ceci apparaît quand deux disques durs ou
un disque dur d’expansion ont été installés, et qu’une erreur s’est
produite sur l’un ou l’autre des disques durs.
• ERREUR DU DISQUE (1): Ceci apparaît lorsqu’une erreur s’est
produite sur le DISQUE 1 (MAÎTRE).
• ERREUR DU DISQUE (2): Ceci apparaît lorsqu’une erreur s’est
produite sur le DISQUE 2 (ESCLAVE).
Lorsqu’un réglage d’alarme est fait en utilisant l’élément De menu
REGL.MODE D’ENR. D’ALARME, l’affichage suivant apparaît dans
l’affichage d’alarme.
Cependant, l’affichage PRE apparaît lorsque l’enregistrement de
pré-alarme a été réglé. Lorsqu’une alarme se produit, PRE est
remplacé par ALARME et le nombre d’alarmes apparaît également.
L’affichage d’alarme indique le nombre cumulatif d’alarmes.
• Si ENR.D’ALARME est réglé: ALARME apparaît.
ALARME clignote pendant qu’une alarme est enregistrée.
• Si ENREGISTREMENT PRE-ALARME est réglé: PRE apparaît.
• Lors de la lecture d’images de la zone d’archives: ARCHIV
apparaît.
Français
Remarque: Pendant l’enregistrement à l’aide de cet
appareil, la lecture, la copie et le transfert
d’images sont possibles. Cependant, étant
donné que l’enregistrement aura la priorité, la
réponse des autres opérations peut être ralentie.
13
ENREGISTREMENT D’IMAGES DANS LA
ZONE D’ENREGISTREMENT NORMAL
Les images
visionnées sont
enregistrées.
Enregistrement normal
Les images peuvent être enregistrées dans la zone d’enregistrement normal pendant qu’elles sont visionnées.
Si l’heure n’a pas été réglée, l’enregistreur vidéo numérique ne peut pas faire d’enregistrements. Assurez-vous de régler l’heure. (Référez-vous à la
page 42.)
Réglage de l’heure
1
MENU
Appuyez sur le bouton MENU pour afficher le menu REGL.LANGUE/HORLOGE,
puis réglez la date et l’heure. Après que le réglage soit fait, appuyez sur le
bouton EXIT/OSD, puis la date et l’heure apparaissent dans la section
d’affichage d’opérations. (Référez-vous à la page 42.)
<MENU PRINCIPAL 1>
1.REGL.LANGUE/HORLOGE
2.REGL.ENTREE VIDEO
3.REGL.AIRE D'ENREGISTREMENT
4.REGL.COND.D'ENREGISTREMENT
->
->
->
->
<REGL.LANGUE>
FRANCAIS
<REGL.HORLOGE>
01-01-2001 LUN 00:00:00
HEURE D'ETE
Appuyez sur le bouton REC/STOP.
2
REC/STOP
“a” apparaît dans la section d’affichage d’opérations et les images visionnées
sont enregistrées dans la zone d’enregistrement normal. L’enregistrement sur le
disque dur est fait automatiquement (réglage par défaut) selon les réglages
suivants. Les réglages peuvent être changés entre l’enregistrement de longue
durée et l’enregistrement de haute qualité en cinq étapes. (Référez-vous à la
page 49.)
• Zones d’enregistrement du disque dur:
Zone d’enregistrement normal: 80%
Zone d’enregistrement d’alarme: 19%
Zone d’archives: 1%
• Qualité d’image: SD (qualité améliorée)
• Méthode d’enregistrement: Champ
• Vitesse d’enregistrement: 0,10 secondes (54H)
10-26-01
10:48:38 SD 0.10SEC
10-26-01
11:02:28 SD 0.10SEC
Heure de début d’enregistrement
Remarque: La lecture est possible pendant l’enregistrement. Lorsque le bouton
PLAY/STOP est pressé pendant l’enregistrement, “c” apparaît
dans la section d’affichage d’opérations et les images sont lues à
partir du point où l’enregistrement a commencé. (Référez-vous à la
page 20.)
Maintenez le bouton REC/STOP enfoncé pendant 3
secondes ou plus.
3
REC/STOP
Le symbole “a” dans la section d’affichage d’opérations disparaît et
l’enregistrement s’arrête.
Remarque: Lorsque l’espace restant dans la zone d’enregistrement normal
baisse sous le montant réglé, l’indicateur FULL sur le panneau
avant clignote. Si l’enregistrement continue dans ces conditions, la
zone d’enregistrement se remplit et l’enregistrement s’arrête. Dans
les réglages REGL.AIRE D’ENREGISTREMENT, effectuez les
opérations REINITIALISATION pour la zone d’enregistrement
normal. L’enregistrement sera alors de nouveau possible à partir du
début. (Référez-vous à la page 48.)
14
POWER
FULL
ALARM FULL
LOC
Français
ENREGISTREMENT D’IMAGES DANS LA ZONE D’ENREGISTREMENT NORMAL
Enregistrement par programmateur
Les images visionnées peuvent être enregistrées automatiquement en réglant des heures de début et de fin pour chaque jour de la semaine.
1 Réglage de l’heure
1
MENU
Appuyez sur le bouton MENU pour afficher le menu REGL.LANGUE/HORLOGE,
puis réglez la date et l’heure. Après que le réglage soit fait, appuyez sur le
bouton EXIT/OSD, puis la date et l’heure apparaissent dans la section
d’affichage d’opérations. (Référez-vous à la page 42.)
<MENU PRINCIPAL 1>
1.REGL.LANGUE/HORLOGE
2.REGL.ENTREE VIDEO
3.REGL.AIRE D'ENREGISTREMENT
4.REGL.COND.D'ENREGISTREMENT
->
->
->
->
<REGL.LANGUE>
FRANCAIS
<REGL.HORLOGE>
01-01-2001 LUN 00:00:00
HEURE D'ETE
2 Réglez le programmateur.
Appuyez sur le bouton MENU pour afficher le menu REGL.TIMER, puis réglez
les heures de début et de fin pour l’enregistrement par programmateur.
(Référez-vous à la page 50.)
Appuyez ensuite sur le bouton EXIT/OSD.
<MENU PRINCIPAL 1>
1.REGL.LANGUE/HORLOGE
2.REGL.ENTREE VIDEO
3.REGL.AIRE D'ENREGISTREMENT
4.REGL.COND.D'ENREGISTREMENT
5.REGL.MODE D'ENR.NORMAL
6.REGL.TIMER
->
->
->
->
->
->
<REGL.TIMER>
SEM MARCHE ARRET CYCLE D'ENR
DIM 02:00 12:00 0.10SEC ( 54H)
LUN --:-- --:-- 0.10SEC ( 54H)
MAR --:-- --:-- 0.10SEC ( 54H)
MER --:-- --:-- 0.10SEC ( 54H)
SC
Appuyez sur le bouton TIMER.
2
TIMER
L’indicateur TIMER s’allume et l’enregistreur vidéo numérique passe en mode
d’attente d’enregistrement par programmateur.
Remarque:
• Si MODE dans le menu REGL.TIMER n’est pas réglé à “OUI”, ou si les
réglages du programmateur ne sont pas faits correctement, une alarme
retentira lorsque le bouton TIMER est pressé.
• L’indicateur TIMER s’allume lorsque le réglage du programmateur a été fait
correctement.
• Lorsque l’heure du réglage du programmateur est atteinte, l’indicateur TIMER
et l’indicateur REC s’allument et l’enregistrement par programmateur
commence.
• Si vous appuyez sur le bouton TIMER pendant l’enregistrement par
programmateur, l’indicateur TIMER et l’indicateur REC s’éteignent et
l’enregistrement par programmateur s’arrête.
Français
15
10-05-01
17:30:25 SD 0.10SEC
MODE
NON
NON
NON
NON
O
ENREGISTREMENT D’IMAGES DANS LA ZONE D’ENREGISTREMENT NORMAL
L’enregistrement par programmateur commence lorsque
l’heure de début réglée est atteinte.
3
“a” apparaît dans la section d’affichage d’opérations et les images visionnées
sont enregistrées dans la zone d’enregistrement normal. L’enregistrement sur le
disque dur est fait automatiquement (réglage par défaut) selon les réglages
suivants. Les réglages peuvent être changés entre l’enregistrement de longue
durée et l’enregistrement de haute qualité en cinq étapes. (Référez-vous à la
page 49.)
• Zones d’enregistrement du disque dur:
Zone d’enregistrement normal: 80%
Zone d’enregistrement d’alarme: 19%
Zone d’archives: 1%
• Qualité d’image: SD (qualité améliorée)
• Méthode d’enregistrement: Champ
• Vitesse d’enregistrement: 0,10 secondes (54H)
10-05-01
19:30:00 SD 0.10SEC
Remarque: La lecture est possible pendant l’enregistrement. Lorsque le bouton
PLAY/STOP est pressé pendant l’enregistrement, c apparaît dans
la section d’affichage d’opérations et les images sont lues à partir
du point où l’enregistrement a commencé. (Référez-vous à la page
20.)
L’enregistrement par programmateur s’arrête lorsque
l’heure de fin réglée est atteinte.
4
TIMER
L’indicateur TIMER s’éteint et le symbole d’enregistrement (a) disparaît de
l’affichage d’opérations et l’enregistrement s’arrête.
Remarque:
• Appuyez sur le bouton TIMER pour arrêter l’enregistrement par
programmateur. L’enregistrement par programmateur s’arrête alors.
• Lorsque l’espace restant dans la zone d’enregistrement normal baisse sous
le montant réglé, l’indicateur FULL sur le panneau avant clignote. Si
l’enregistrement continue dans ces conditions, la zone d’enregistrement se
remplit et l’enregistrement s’arrête. Dans les réglages REGL.AIRE
D’ENREGISTREMENT, effectuez les opérations REINITIALISATION pour la
zone d’enregistrement normal. L’enregistrement sera alors de nouveau
possible à partir du début. (Référez-vous à la page 48.)
16
POWER
FULL
ALARM FULL
LOC
Français
ENREGISTREMENT D’IMAGES DANS LA
ZONE D’ENREGISTREMENT D’ALARME
Les images
d’alarme sont
enregistrées.
Enregistrement d’alarme
1 Réglage de l’heure
1
MENU
Appuyez sur le bouton MENU pour afficher le menu REGL.LANGUE/HORLOGE,
puis réglez la date et l’heure. Après que le réglage soit fait, appuyez sur le
bouton EXIT/OSD, puis la date et l’heure apparaissent dans la section
d’affichage d’opérations. (Référez-vous à la page 42.)
<MENU PRINCIPAL 1>
1.REGL.LANGUE/HORLOGE
2.REGL.ENTREE VIDEO
3.REGL.AIRE D'ENREGISTREMENT
4.REGL.COND.D'ENREGISTREMENT
->
->
->
->
<REGL.LANGUE>
FRANCAIS
<REGL.HORLOGE>
01-01-2001 LUN 00:00:00
HEURE D'ETE
2 Réglez l’enregistrement d’alarme.
•
•
•
Appuyez sur le bouton MENU pour afficher le menu REGL.MODE D’ENR.
D’ALARME dans l’écran MENU PRINCIPAL. Changez ensuite le réglage de
ENR.D’ALARME au réglage d’enregistrement d’alarme désiré (MODE1, 2, 3
ou 4) et changez le réglage de DECLENCHEMENT ALARME. (Référez-vous
à la page 54 – 56.)
Appuyez sur le bouton MENU pour afficher le menu REGL. AAVERTISSEUR
de l’écran MENU PRINCIPAL 2, puis changez le réglage de ALARME à
“OUI”. (Référez-vous à la page 62.)
Appuyez sur le bouton EXIT/OSD pour revenir à l’écran normal.
<REGL.MODE D'ENR. D'ALARME>
QUALITE D'IMAGE
: STANDARD
ENR.TRAME/IMAGE
: TRAME
ENREGISTREMENT AUDIO : NON
ENR.D'ALARME
: MODE1
CYCLE D'ENR. 0.10 SEC. DUREE : 1SEC
ENREGISTREMENT PRE-ALARME: ¤¤¤
CYCLE D'ENR. ¤¤¤ SEC. DUREE : ¤¤¤
=>(46400 ALARMES PEUVENT ETRE ENREGISTREES)
DECLENCHEMENT ALAEME : ALARME
DETECTEUR DE MOUVEMENT ->
Détection d’activité suspecte
2
ALARM
Lorsqu’une alarme se produit, “ALARME” apparaît dans la section d’affichage
d’opérations, l’indicateur ALARM clignote et l’enregistrement d’alarme
commence (symbole a). Les images d’alarme sont enregistrées dans la zone
d’enregistrement d’alarme. De plus, le nombre d’alarmes dans la section
d’affichage d’opérations est incrémenté de un à chaque fois qu’une alarme se
produit.
10-05-01 ALARME 0001
18:10:25 SD 0.10SEC
Le nombre d’alarmes
est compté.
Remarque: L’enregistrement normal et l’enregistrement par programmateur
s’arrêtent lorsqu’une alarme se produit pendant l’enregistrement
normal ou l’enregistrement par programmateur.
3
Pour arrêter l’enregistrement d’alarme
L’enregistrement s’arrête à fin de la durée d’enregistrement d’alarme (réglage
par défaut: 1 sec.). Le symbole “a” et l’affichage ALARME arrêtent de clignoter
et l’enregistrement s’arrête.
Remarque: Lorsque l’espace restant dans la zone d’enregistrement d’alarme
atteint 1%, l’indicateur ALARM FULL sur le panneau avant clignote.
Si l’enregistrement est continué dans ces conditions, la zone
d’enregistrement se remplit et l’enregistrement s’arrête. Dans les
réglages REGL.AIRE D’ENREGISTREMENT, effectuez les
opérations REINITIALISATION pour la zone d’enregistrement
d’alarme. L’écrasement sera annulé et l’enregistrement sera alors
de nouveau possible à partir du début. (Référez-vous à la page 48.)
Français
17
POWER
FULL
ALARM FULL
LOC
ENREGISTREMENT D’IMAGES DANS LA ZONE
D’ENREGISTREMENT D’ALARME
Les images de
pré-alarme sont
enregistrées.
Les images
visionnées sont
enregistrées.
Enregistrement de pré-alarme
Réglage de l’heure
1
MENU
Appuyez sur le bouton MENU pour afficher le menu REGL.LANGUE/HORLOGE,
puis réglez la date et l’heure. Après que le réglage soit fait, appuyez sur le
bouton EXIT/OSD, puis la date et l’heure apparaissent dans la section
d’affichage d’opérations. (Référez-vous à la page 42.)
<MENU PRINCIPAL 1>
1.REGL.LANGUE/HORLOGE
2.REGL.ENTREE VIDEO
3.REGL.AIRE D'ENREGISTREMENT
4.REGL.COND.D'ENREGISTREMENT
->
->
->
->
<REGL.LANGUE>
FRANCAIS
<REGL.HORLOGE>
01-01-2001 LUN 00:00:00
HEURE D'ETE
Réglez l’enregistrement de pré-alarme.
2
REC/STOP
ALARM
Appuyez sur le bouton MENU pour afficher le menu REGL.MODE D’ENR.
D’ALARME. Réglez ENR.D’ALARME au réglage d’enregistrement d’alarme
désiré (exemple: MODE1). Le réglage *** pour ENREGISTREMENT
PRE-ALARME sera réglé à “NON” , il faut donc le changer à “OUI”.
(Référez-vous à la page 56.)
Appuyez sur le bouton EXIT/OSD pour revenir à l’écran normal. “PRE” apparaît
dans la section d’affichage d’opérations, l’indicateur ALARM s’allume et
l’enregistrement de pré-alarme commence (le symbole “a” n’apparaît pas).
La même image visionnée que celle enregistrée dans la zone d’enregistrement
normal est enregistrée de manière répétée dans la zone d’enregistrement
d’alarme.
L’enregistrement sur le disque dur est fait automatiquement (réglage par défaut)
selon les réglages suivants. Les réglages peuvent être changés entre
l’enregistrement de longue durée et l’enregistrement de haute qualité en cinq
étapes. (Référez-vous à la page 49.)
• Zones d’enregistrement du disque dur:
Zone d’enregistrement normal: 80%
Zone d’enregistrement d’alarme: 19%
Zone d’archives: 1%
• Qualité d’image: SD (qualité améliorée)
• Méthode d’enregistrement: Champ
• Vitesse d’enregistrement: 0,10 secondes (54H)
Lorsqu’une alarme est reçue, l’enregistrement de
pré-alarme s’arrête automatiquement et les images d’alarme
sont enregistrées.
3
ALARM
“PRE” disparaît de l’affichage d’opérations, “ALARME” clignote et l’indicateur
ALARM clignote.
Remarque:
• Lorsque l’espace restant dans la zone d’enregistrement d’alarme atteint 1%,
l’indicateur ALARM FULL sur le panneau avant clignote. Si l’enregistrement
est continué dans ces conditions, la zone d’enregistrement se remplit et
l’enregistrement s’arrête.
Dans les réglages REGL.AIRE D’ENREGISTREMENT, effectuez les
opérations REINITIALISATION pour la zone d’enregistrement normal.
L’écrasement sera annulé et l’enregistrement sera alors de nouveau possible
à partir du début. (Référez-vous à la page 48.)
• Référez-vous aux tableaux de vitesse d’enregistrement pour les détails sur
les vitesses d’enregistrement pré-alarme. (Référez-vous à la page 12.)
18
<REGL.MODE D'ENR. D'ALARME>¤
QUALITE D'IMAGE
: STANDARD
ENR.TRAME/IMAGE
: TRAME
ENREGISTREMENT AUDIO : NON
ENR.D'ALARME
: MODE1
CYCLE D'ENR. 0.10 SEC. DUREE : 1SEC
ENREGISTREMENT PRE-ALARME: ¤¤¤
CYCLE D'ENR. ¤¤¤ SEC. DUREE : ¤¤¤
=>(46400 ALARMES PEUVENT ETRE ENREGISTREES)
DECLENCHEMENT ALAEME : ALARME
DETECTEUR DE MOUVEMENT ->
10-05-01 PRE 0000
18:10:25 SD 0.10SEC
10-06-01 ALARME 0000
09:30:15 SD 0.10SEC
POWER
FULL
ALARM FULL
LOC
Français
LECTURE DES IMAGES ENREGISTRÉES DANS LA
ZONE D’ENREGISTREMENT NORMAL
L’enregistreur vidéo numérique peut faire la lecture des images enregistrées dans la zone d’enregistrement normal (enregistrement normal,
enregistrement par programmateur).
Opérations de lecture
SEARCH
FRAME/FIELD
ALARM
Zone d’enregistrement
normal
b Saut à l’alarme précédente ou suivante
(référez-vous à la page 25.)
b Commutation entre image et champ
(référez-vous à la page 23.)
STILL
PLAY/STOP
b Lecture
(référez-vous à
la page 20.)
Image fixe (référezvous à la page 22.)
ZOOM
Recherche d’image
(avant/arrière)
(référez-vous à la
page 22.)
Lecture au ralenti
(référez-vous à la
page 20.)
b Zoom des images (référez-vous à la page 21.)
SHUTTLE HOLD
Lecture rapide avant/arrière
(référez-vous à la page 20.)
Verrouillage de la vitesse
pour la lecture rapide
avant/arrière (référezvous à la page 20.)
SHUTTLE HOLD
Annulation du
verrou de vitesse
Lecture normale
• Lors de la lecture d'enregistrements pour la première fois:
Les images enregistrées seront lues à partir du début.
• Lors de la lecture d'enregistrements pour la seconde fois ou les fois suivantes:
La lecture commencera à partir du point où la dernière session de lecture a terminé.
(Point de départ pour
la première lecture)
Point d’arrêt
(Point de départ pour
la deuxième lecture) Point d’arrêt
(Point de départ pour
la troisième lecture) Point d’arrêt
Français
19
LECTURE DES IMAGES ENREGISTRÉES DANS LA ZONE D’ENREGISTREMENT
NORMAL
Lecture
Appuyez sur le bouton PLAY/STOP.
1
PLAY/STOP
c apparaît dans la section d’affichage d’opérations et les images enregistrées
dans la zone d’enregistrement normal sont lues.
Remarque:
• La lecture d’image commence à partir du point (heure) où l’enregistrement a
commencé.
S’il n’y a pas de position de départ, ou si une réinitialisation a été faite, la
lecture commencera avec l’enregistrement le plus ancien.
• Lorsque la lecture est terminée, le mode de lecture passe à pause
automatiquement.
Le symbole de pause (h) apparaît dans la section d’affichage d’opérations et
l’indicateur STILL s’allume.
• Si la lecture a été effectuée au moins une fois, la lecture commencera à partir
de la position où la dernière session de lecture a terminé.
10-26-01
11:02:50 SD 0.10SEC
Appuyez sur le bouton REC/STOP de nouveau.
2
La lecture s’arrête.
PLAY/STOP
11-20-01
04:00:00 SD 0.10SEC
Remarque: Si la lecture est commencée pendant que l’enregistrement est
effectué, l’enregistrement aura la priorité, et donc les images de
lecture peuvent être pausées momentanément.
Lecture rapide avant/arrière
Tournez le cadran de navette dans le sens des aiguilles
d’une montre (ou dans le sens contraire des aiguilles d’une
montre) pendant la lecture.
1
11-17-01
02:38:00 SD 0.10SEC
Lorsque le cadran de navette est tourné dans le sens des aiguilles d’une montre,
e apparaît dans la section d’affichage d’opérations et la lecture rapide avant
commence. S’il est tourné dans le sens contraire des aiguilles d’une montre, f
apparaît dans la section d’affichage d’opérations et la lecture rapide arrière
commence.
Lorsque vous relâchez le cadran de navette, la lecture normale reprend.
Changement de vitesse de lecture
2
(Lecture rapide avant/Lecture au ralenti)
1 Tournez le cadran de taquage dans le sens des aiguilles d’une montre.
La lecture avance rapide commence et e apparaît dans la section d’affichage d’opérations.
2 Tournez le cadran de taquage dans le sens contraire des aiguilles d’une montre.
La lecture au ralenti commence et hc apparaît dans la section d’affichage d’opérations.
3 Revenez à la lecture normale.
Tournez le cadran de taquage dans le sens des aiguilles d’une montre. c apparaît dans la section d’affichage d’opérations.
(Lecture rapide arrière/Lecture au ralenti)
1 Tournez le cadran de navette dans le sens contraire des aiguilles d’une montre (fixé à la lecture rapide arrière).
d sera affiché, appuyez sur le bouton SHUTTLE HOLD. L’indicateur SHUTTLE HOLD s’allume et la vitesse de
lecture rapide arrière sera fixée à la vitesse courante.
2 Tournez le cadran de taquage dans le sens contraire des aiguilles d’une montre.
SHUTTLE HOLD
La vitesse est plus rapide que pour la lecture rapide arrière normale et f apparaît dans la section d’affichage d’opérations.
3 Tournez le cadran de taquage dans le sens des aiguilles d’une montre.
La lecture au ralenti arrière commence et dh apparaît dans la section d’affichage d’opérations.
4 Revenez à la lecture normale.
Tournez le cadran de taquage dans le sens contraire des aiguilles d’une montre. c apparaît dans la section
d’affichage d’opérations.
20
Français
LECTURE DES IMAGES ENREGISTRÉES DANS LA ZONE D’ENREGISTREMENT
NORMAL
Zoom de l’image pendant la lecture
Appuyez sur le bouton ZOOM pendant la lecture.
1
Le cadre de zoom (bleu) apparaît au centre de l’écran.
ZOOM
Déplacez le cadre de zoom à la position où l’image doit être
agrandie.
2
•
•
Tournez le cadran de taquage dans le sens des aiguilles d’une montre pour
déplacer le cadre de zoom vers la droite.
Tournez-le dans le sens contraire des aiguilles d’une montre pour déplacer le
cadre de zoom vers la gauche.
Tournez le cadran de navette dans le sens des aiguilles d’une montre pour
changer à un déplacement vertical. Puis tournez le cadran de taquage dans
le sens des aiguilles d’une montre pour déplacer le cadre de zoom vers le
haut et tournez-le dans le sens contraire des aiguilles d’une montre pour
déplacer le cadre de zoom vers le bas.
Déplacez le cadre de zoom à la position à agrandir.
Tournez le cadran de navette dans le sens des aiguilles
d’une montre.
3
La zone à l’intérieur du cadre de zoom est agrandie (2x).
11-17-01
02:36:00 SD 0.10SEC
Appuyez sur le bouton ZOOM (pour annuler le zoom).
4
Le zoom de l’image est annulé et la lecture normale continue.
ZOOM
Français
Remarque:
• L’affichage ne peut pas être agrandi pendant le visionnement d’une image de
caméra.
• Le bouton ZOOM ne peut pas être sélectionné, lorsqu’un multiplexeur est
utilisé comme entrée vidéo.
• La qualité d’image diminue lorsque l’image est agrandie.
21
11-17-01
02:36:00 SD 0.10SEC
LECTURE DES IMAGES ENREGISTRÉES DANS LA ZONE D’ENREGISTREMENT
NORMAL
Visionnement d’images fixes
Appuyez sur le bouton STILL pendant la lecture.
1
STILL
h apparaît dans la section d’affichage d’opérations et une image fixe est
affichée.
11-17-01
02:38:00 SD 0.10SEC
Appuyez sur le bouton STILL de nouveau.
2
Le mode d’image fixe est annulé.
11-17-01
02:38:20 SD 0.10SEC
STILL
Recherche d’image (avant/arrière)
1
Tournez le cadran de taquage dans le sens des aiguilles
d’une montre (ou dans le sens contraire des aiguilles d’une
montre) en mode d’image fixe.
11-17-01
02:50:08 SD 0.10SEC
Tournez le cadran de taquage dans le sens des aiguilles d’une montre pour
avancer l’image fixe d’une image (d’un champ).
Tournez-le dans le sens contraire des aiguilles d’une montre pour reculer l’image
fixe d’une image (d’un champ).
Remarque: Si le cadran de taquage est tourné rapidement, la vitesse de source
d’image augmente aussi.
Lors des opérations suivantes, l’image peut être déformée
ou gelée momentanément. Ceci est normal et n’indique
pas une anomalie.
• Lors de la lecture continue à partir de la zone
d’enregistrement normal et de la zone d’enregistrement
d’alarme, l’image peut être déformée lorsque la zone
d’enregistrement est commutée.
• Lors de la lecture pendant un enregistrement d’alarme,
pendant la lecture continue à partir de la zone
d’enregistrement normal et de la zone d’enregistrement
d’alarme, pendant la lecture normale ou lors de
l’utilisation de la lecture rapide avant/arrière l’image peut
être gelée momentanément.
22
Français
LECTURE DES IMAGES ENREGISTRÉES DANS LA ZONE D’ENREGISTREMENT
NORMAL
Sélection d’un canal d’image de caméra pour la lecture
Lorsque l’enregistreur vidéo numérique a été branché à un multiplexeur (vendu séparément) et des images de caméra ont été enregistrées, vous
pouvez spécifier le canal (le numéro de caméra) pour les images enregistrées et en faire la lecture.
Appuyez sur le bouton CHANNEL pendant une pause de
lecture.
1
CHANNEL
L’écran de sélection du numéro de caméra pour les caméras branchées au
multiplexeur apparaît.
SELECTIONNER CANAL
-- CANAL
CADRAN POUR DEPLACER. NAVETTE POUR SELECTIONNER
Tournez le cadran de taquage pour spécifier le canal
(exemple: caméra 4).
2
SELECTIONNER CANAL
4 CANAL
CADRAN POUR DEPLACER. NAVETTE POUR SELECTIONNER
Tournez le cadran de navette dans le sens des aiguilles
d’une montre.
3
“c” apparaît dans la section d’affichage d’opérations, et la lecture des images du
canal spécifié commence.
Remarque:
• Si l’enregistreur vidéo numérique n’est pas branché à un multiplexeur qui
permet le décodage de l’information de canal (numéros de caméra), des
canaux ne peuvent pas être spécifiés pour la lecture.
• Lorsque cette opération est exécutée, seul le canal spécifié est lu et les
autres canaux ne sont pas affichés.
• Lorsqu’un canal est sélectionné, l’information de titre et l’information de date
du multiplexeur ne peuvent être affichées en entier selon les cas.
Commutation entre la lecture d’image et de champ
1
Appuyez sur le bouton SEARCH FRAME/FIELD pendant que
des images d’enregistrement par image sont lues.
SEARCH
FRAME/FIELD
L’écran commute entre la lecture d’image et de champ à chaque fois que le
bouton est pressé.
Remarque:
• La commutation entre la lecture d’image et de champ est seulement possible
lorsque des images enregistrées en mode d’image sont lues.
• Lors de la lecture d’images d’enregistrement par image qui contiennent des
mouvements rapides, une instabilité peut se produire dans les images.
Français
23
CH 4
10-27-01
13:38:33 TB 0.26SEC
RECHERCHE D’IMAGES ENREGISTRÉES
Les images enregistrées dans la zone d’enregistrement d’alarme et dans la zone d’archives peuvent être lues. De plus, les images peuvent aussi être
recherchées par leur date et heure d’enregistrement, et vous pouvez aussi rechercher les objets mobiles qui ont été détectés par un détecteur de
mouvement pendant la lecture de l’image.
a Recherche d’alarme (référez-vous à la page 25.)
Zone d’archives
NO
0108
0107
0106
0105
0104
0103
0102
0101
CADRAN
Recherche et lecture d’image d’alarme
<RECHERCHE D'ALARME>
JOUR HEURE
TOTAL D'ALARMES
12-20 05:37
0234
12-19 14:23
12-16 11:13
12-16 16:13
12-15 10:13
12-13 15:19
12-13 11:15
12-13 11:13
POUR DEPLACER. NAVETTE POUR SELECTIONNER
Affichage de
prévisualisation
Affichage 1 écran
a Recherche d’image d’alarme à l’aide de croquis
(référez-vous à la page 26.)
Zone d’enregistrement
d’alarme
Recherche et lecture d’image d’alarme
avec des croquis
0109
0108
0107
0106
0105
0104
0103
0102
0101
Affichage de croquis
Affichage 1 écran
a Recherche selon la date/heure
(référez-vous à la page 27.)
<RECHERCHE HEURE/JOUR>
DEBUT ENR. : 12-15-01 08:00
FIN ENR. : 12-22-01 17:00
Recherche et lecture d’images
enregistrées selon la date/heure
RECHERCHE :
JOUR
HEURE
12-20-01 05:37
VISUALISATION ->
AFFICHAGE
->
CADRAN POUR DEPLACER. NAVETTE POUR SELECTIONNER
Affichage de
prévisualisation
SEARCH
FRAME/FIELD
Affichage 1 écran
a Recherche de zone d’archives
(référez-vous à la page 29.)
<RECHERCHE>
RECHERCHE D'ALARME
RECHERCHE VIGNETTES AL.
RECHERCHE HEURE/JOUR
RECHERCHE ARCHIVES
RECHERCHE DET.MOUV.
->
->
->
->
->
NO
0108
0107
0106
0105
0104
0103
0102
0101
CADRAN
Lecture d’images sauvegardées
(copiées) dans la zone d’archives
CADRAN POUR DEPLACER. NAVETTE POUR SELECTIONNER
<RECHERCHE ARCHIVES>
JOUR START
CAPACITE
12-20 05:37
TOTALE - 1024MB
12-19 14:23
UTILISEE - 400MB
12-16 11:13
12-16 16:13
12-15 10:13
12-13 15:19
12-13 11:15
12-13 11:13
POUR DEPLACER. NAVETTE POUR SELECTIONNER
Affichage de
prévisualisation
Recherche et lecture d’enregistrements
d’objets mobiles détectés par un
détecteur de mouvement
Affichage 1 écran
a Recherche par détecteur de mouvement (référez-vous à la page 30.)
<RECHERCHE DETECTION DE MOUVEMENT>
RECHERCHE DANS: NORMALE
/ CANAL : 4
@
DEBUT :
10-28-01 08:00
FIN :
10-28-01 20:00
DET. DE MOUVEMENT ->
PREVISUALISATION ->
VISUALISATION
->
CADRAN POUR DEPLACER. NAVETTE POUR SELECTIONNER
Recherche selon la
date/heure d’une image
pour la détection de
mouvement
-
-
- - - ú
- ú
- ú
- - - NIVEAU :
ú
ú
ú
6
ú
ú
ú
-
- - - - - - - - SORTIR
-
-
Réglage du détecteur
de mouvement
24
<RECHERCHE DETECTION DE MOUVEMENT>
RECHERCHE DANS: NORMALE
/ CANAL : 2
@
DEBUT :
10-28-01 10:00
FIN :
10-28-01 20:00
DET. DE MOUVEMENT ->
PREVISUALISATION ->
VISUALISATION
->
CADRAN POUR DEPLACER. NAVETTE POUR SELECTIONNER
Affichage de
prévisualisation
Affichage 1 écran
Français
RECHERCHE D’IMAGES ENREGISTRÉES
Recherche d’alarme
Toutes les images d’enregistrement d’alarme dans la zone d’enregistrement d’alarme peuvent être recherchées et lues. Si des images de pré-alarme
ont été enregistrées, les images enregistrées juste avant les alarmes peuvent aussi être lues.
1
SEARCH
FRAME/FIELD
Appuyez sur le bouton SEARCH FRAME/FIELD pendant
l’enregistrement ou lorsque l’enregistreur vidéo numérique
est arrêté.
<RECHERCHE>
RECHERCHE D'ALARME
RECHERCHE VIGNETTES AL.
RECHERCHE HEURE/JOUR
RECHERCHE ARCHIVES
RECHERCHE DET.MOUV.
L’écran RECHERCHE apparaît.
->
->
->
->
->
CADRAN POUR DEPLACER. NAVETTE POUR SELECTIONNER
Utilisez le cadran de taquage pour sélectionner
“ RECHERCHE D’ALARME” , puis tournez le cadran de
navette dans le sens des aiguilles d’une montre.
2
L’écran RECHERCHE D’ALARME apparaît.
1 NO: Le numéro d’alarme apparaît.
2 JOUR/HEURE: La date et l’heure à laquelle l’alarme a été reçue et les
images ont été enregistrées apparaissent.
1
2
3
<RECHERCHE D'ALARME>
NO JOUR HEURE
TOTAL D'ALARMES
008 12-20 05:37
0010
007 12-19 14:23
006 12-16 11:13
005 12-16 16:13
004 12-15 10:13
003 12-13 15:19
002 12-13 11:15
001 12-13 11:13
CADRAN POUR DEPLACER. NAVETTE POUR SELECTIONNER
3 TOTAL D’ALARMES: Le nombre total d’images d’alarme enregistrées
apparaît.
Utilisez le cadran de taquage pour déplacer le curseur afin
de sélectionner les images à lire.
3
L’image de l’alarme sélectionnée apparaît dans l’écran de prévisualisation.
Remarque:
• Jusqu’à huit éléments d’information d’alarme peuvent être affichés sur l’écran
RECHERCHE D’ALARME. Lorsque le cadran de taquage est tourné, l’écran
d’information d’alarme précédent ou suivant apparaît.
• Pour arrêter ce mode de recherche, appuyez sur le bouton SEARCH
FRAME/FIELD.
Tournez le cadran de navette dans le sens des aiguilles
d’une montre.
4
L’image de prévisualisation apparaît dans un affichage 1 écran et la lecture
commence.
<RECHERCHE D'ALARME>
NO JOUR HEURE
TOTAL D'ALARMES
008 12-20 05:37
0234
007 12-19 14:23
006 12-16 11:13
005 12-16 16:13
004 12-15 10:13
003 12-13 15:19
002 12-13 11:15
001 12-13 11:13
CADRAN POUR DEPLACER. NAVETTE POUR SELECTIONNER
11-18-01 ALARME 0004
25:03:12 SD 0.10SEC
Remarque:
• Vous pouvez également utiliser le cadran de navette ou le cadran de taquage
pour effectuer des opérations telles que la pause et la lecture rapide avant.
• La recherche d’alarme commence la lecture à partir de l’image enregistrée au
point où l’alarme s’est produite, et donc pour visionner des images de
pré-alarme, utilisez les opérations de navette pour faire une lecture vers
l’arrière.
Recherche d’alarme 2
Appuyez sur un bouton ALARME pendant la lecture.
1
•
ALARM
•
Si vous appuyez sur le bouton û, la lecture saute à l’image d’alarme
précédente.
Si vous appuyez le bouton ù, la lecture saute à l’image d’alarme suivante.
Remarque: Lors de la lecture à l’aide de la recherche d’alarme, la lecture fera
une pause au début et à la fin de chaque enregistrement d’alarme.
Utilisez sur les boutons ALARM pour faire la lecture
d’enregistrements précédents et suivants.
Français
25
11-18-01 ALARME 0004
25:03:12 SD 0.10SEC
RECHERCHE D’IMAGES ENREGISTRÉES
Recherche d’alarme par croquis
Les images d’alarme peuvent être recherchées et lues à partir de croquis.
Toutes les images d’alarme enregistrées dans la zone d’enregistrement d’alarme sont affichées sous forme de croquis (petites images).
1
SEARCH
FRAME/FIELD
Appuyez sur le bouton SEARCH FRAME/FIELD pendant
l’enregistrement ou lorsque l’enregistreur vidéo numérique
est arrêté.
<RECHERCHE>
RECHERCHE D'ALARME
RECHERCHE VIGNETTES AL.
RECHERCHE HEURE/JOUR
RECHERCHE ARCHIVES
RECHERCHE DET.MOUV.
L’écran RECHERCHE apparaît.
->
->
->
->
->
CADRAN POUR DEPLACER. NAVETTE POUR SELECTIONNER
2
Utilisez le cadran de taquage pour sélectionner
“ RECHERCHE VIGNETTES AL.” , puis tournez le cadran de
navette dans le sens des aiguilles d’une montre.
<RECHERCHE>
RECHERCHE D'ALARME
RECHERCHE VIGNETTES AL.
RECHERCHE HEURE/JOUR
RECHERCHE ARCHIVES
RECHERCHE DET.MOUV.
Les neuf dernières images d’enregistrement d’alarme enregistrées apparaissent.
Le numéro d’alarme apparaît avec chaque image d’enregistrement d’alarme et le
numéro d’alarme de l’image d’alarme sélectionnée clignote.
->
->
->
->
->
CADRAN POUR DEPLACER. NAVETTE POUR SELECTIONNER
3
0108
0107
0106
0105
0104
0103
0102
0101
0109
0108
0107
0106
0105
0104
0103
0102
0101
Utilisez le cadran de taquage pour déplacer le curseur afin
de sélectionner les images à lire.
Le numéro d’alarme de l’image d’alarme sélectionnée clignote.
Remarque:
• Jusqu’à neuf éléments d’information d’alarme incluant les croquis peuvent
être affichés. Lorsque le cadran de taquage est tourné, l’écran précédent ou
suivant d’information d’alarme apparaît.
• Pour arrêter ce mode de recherche, appuyez sur le bouton SEARCH
FRAME/FIELD.
4
0109
Tournez le cadran de navette dans le sens des aiguilles
d’une montre.
L’image sélectionnée apparaît dans un affichage 1 écran et la lecture commence.
11-18-01 ALARME 0003
25:02:00 SD 0.10SEC
Remarque:
• Vous pouvez également utiliser le cadran de navette ou le cadran de taquage
pour effectuer des opérations telles que la pause et la lecture rapide avant.
• Seul le contenu de chaque alarme peut être lu, de la même manière que
pour la recherche d’alarme. Utilisez sur les boutons ALARM pour faire la
lecture d’enregistrements précédents et suivants.
26
Français
RECHERCHE D’IMAGES ENREGISTRÉES
Recherche par heure/date
Il est possible de spécifier la date et l’heure d’enregistrement des images dans la zone d’enregistrement normal (images d’enregistrement normal et
d’enregistrement par programmateur), et d’effectuer la lecture des images.
1
SEARCH
FRAME/FIELD
Appuyez sur le bouton SEARCH FRAME/FIELD pendant
l’enregistrement ou lorsque l’enregistreur vidéo numérique
est arrêté.
<RECHERCHE>
RECHERCHE D'ALARME
RECHERCHE VIGNETTES AL.
RECHERCHE HEURE/JOUR
RECHERCHE ARCHIVES
RECHERCHE DET.MOUV.
L’écran RECHERCHE apparaît.
->
->
->
->
->
CADRAN POUR DEPLACER. NAVETTE POUR SELECTIONNER
2
Utilisez le cadran de taquage pour sélectionner
“ RECHERCHE HEURE/JOUR” , puis tournez le cadran de
navette dans le sens des aiguilles d’une montre.
<RECHERCHE>
RECHERCHE D'ALARME
RECHERCHE VIGNETTES AL.
RECHERCHE HEURE/JOUR
RECHERCHE ARCHIVES
RECHERCHE DET.MOUV.
L’écran RECHERCHE HEURE/JOUR apparaît.
1 DEBUT ENR.: La date et l’heure de la première image enregistrée
->
->
->
->
->
apparaissent.
2 FIN ENR.: La date et l’heure des images enregistrées en dernier (images les
CADRAN POUR DEPLACER. NAVETTE POUR SELECTIONNER
plus récentes) apparaissent.
3 RECHERCHE: Entrez la date et l’heure à afficher dans cette zone.
4 VISUALISATION: Une image de prévisualisation apparaît.
5 AFFICHAGE: L’image sélectionnée apparaît sur le moniteur sous forme
d’image à 1 écran.
1
2
3
4
5
<RECHERCHE HEURE/JOUR>
DEBUT ENR. : 10-25-01 08:00
FIN ENR. : 10-28-01 17:00
RECHERCHE :
JOUR
HEURE
10-25-01 14:53
VISUALISATION ->
AFFICHAGE
->
CADRAN POUR DEPLACER. NAVETTE POUR SELECTIONNER
3
Exemple: Pour rechercher 8pm le 26 octobre 2001
1 Tournez le cadran de navette dans le sens des aiguilles d’une montre et
sélectionnez “10”.
2 Tournez le cadran de navette dans le sens des aiguilles d’une montre, puis
faites passer “25” à “26” à l’aide du cadran de taquage.
3 Tournez le cadran de navette dans le sens des aiguilles d’une montre et
sélectionnez “01”.
4 Tournez le cadran de navette dans le sens des aiguilles d’une montre, puis
faites passer “08” à “20” à l’aide du cadran de taquage.
5 Tournez le cadran de navette dans le sens des aiguilles d’une montre et
sélectionnez “00”. Ensuite, tournez le cadran de navette.
Le curseur vient se placer sur VISUALISATION.
Français
27
<RECHERCHE HEURE/JOUR>
DEBUT ENR. : 10-25-01 08:00
FIN ENR. : 10-28-01 17:00
RECHERCHE :
JOUR
HEURE
10-26-01 14:53
VISUALISATION ->
AFFICHAGE
->
CADRAN POUR DEPLACER. NAVETTE POUR SELECTIONNER
RECHERCHE D’IMAGES ENREGISTRÉES
Tournez le cadran de navette dans le sens des aiguilles
d’une montre.
4
Un affichage de recherche apparaît pendant que la recherche est en cours, puis
un écran de prévisualisation montrant la date et l’heure entrées apparaît.
Remarque: S’il n’y a aucune image correspondant exactement à l’heure, l’image
la plus proche de la plage de temps sélectionnée apparaît.
<RECHERCHE HEURE/JOUR>
DEBUT ENR. : 11-05-00 08:00
FIN ENR. : 12-22-00 17:00
RECHERCHE :
JOUR
HEURE
11-17-01 02:36:10
VISUALISATION ->
AFFICHAGE
->
CADRAN POUR DEPLACER. NAVETTE POUR SELECTIONNER
5
Sélectionnez AFFICHAGE à l’aide du cadran de taquage,
puis tournez le cadran de navette dans le sens des aiguilles
d’une montre.
11-17-01
02:36:10 SD 0.10SEC
L’image de prévisualisation apparaît et est lue dans un 1 écran.
Remarque:
• Une image à 1 écran peut être affichée lorsque la date et l’heure sont entrées
et que AFFICHAGE est sélectionné, même sans afficher de prévisualisation.
• Vous pouvez également utiliser le cadran de navette ou le cadran de taquage
pour effectuer des opérations telles que la pause et la lecture rapide avant.
28
Français
RECHERCHE D’IMAGES ENREGISTRÉES
Recherche de zone d’archive
Il est possible d’effectuer la lecture d’images qui ont été sauvegardées (copiées) dans la zone d’archive.
1
SEARCH
FRAME/FIELD
Appuyez sur le bouton SEARCH FRAME/FIELD pendant
l’enregistrement ou lorsque l’enregistreur vidéo numérique
est arrêté.
L’écran RECHERCHE apparaît.
<RECHERCHE>
RECHERCHE D'ALARME
RECHERCHE VIGNETTES AL.
RECHERCHE HEURE/JOUR
RECHERCHE ARCHIVES
RECHERCHE DET.MOUV.
->
->
->
->
->
CADRAN POUR DEPLACER. NAVETTE POUR SELECTIONNER
2
Utilisez le cadran de taquage pour sélectionner
“ RECHERCHE ARCHIVES” , puis tournez le cadran de
navette dans le sens des aiguilles d’une montre.
L’écran RECHERCHE ARCHIVES apparaît.
1
2
3
4
5
3
NO: Le numéro d’archive apparaît.
12 3
JOUR: La date de l’image enregistrée apparaît.
START: L’heure de départ de l’image enregistrée apparaît.
TOTALE: La capacité totale de la zone d’archive apparaît.
UTILISEE: La partie enregistrée de la zone d’archive apparaît.
Utilisez le cadran de taquage pour déplacer le curseur afin
de sélectionner les images à lire.
L’image de l’alarme sélectionnée apparaît dans l’écran de prévisualisation.
Remarque:
• Il est possible de faire apparaître jusqu’à huit éléments d’informations dans
l’écran RECHERCHE ARCHIVES.
Quand le cadran de taquage est tourné, l’écran d’archives précédent ou
suivant apparaît.
• Pour arrêter ce mode de recherche, appuyez sur le bouton SEARCH
FRAME/FIELD.
4
Tournez le cadran de navette dans le sens des aiguilles
d’une montre.
L’image sélectionnée apparaît dans un affichage 1 écran et la lecture commence.
Remarque:
• Une image à 1 écran peut être affichée lorsque le curseur est placé sur
l’image à lire et que le cadran de navette est tourné dans le sens des
aiguilles d’une montre, même sans afficher de prévisualisation.
• Vous pouvez également utiliser le cadran de navette ou le cadran de taquage
pour effectuer des opérations telles que la pause et la lecture rapide avant.
Français
<RECHERCHE>
RECHERCHE D'ALARME
RECHERCHE VIGNETTES AL.
RECHERCHE HEURE/JOUR
RECHERCHE ARCHIVES
RECHERCHE DET.MOUV.
29
->
->
->
->
->
45
CADRAN POUR DEPLACER.
NAVETTE
POUR SELECTIONNER
<RECHERCHE
ARCHIVES>
NO JOUR START
CAPACITE
0108 12-20 05:37
TOTALE - 1024MB
0107 12-19 14:23
UTILISEE - 400MB
0106 12-16 11:13
0105 12-16 16:13
0104 12-15 10:13
0103 12-13 15:19
0102 12-13 11:15
0101 12-13 11:13
CADRAN POUR DEPLACER. NAVETTE POUR SELECTIONNER
<RECHERCHE ARCHIVES>
NO JOUR START
CAPACITE
0108 12-20 05:37
TOTALE - 1024MB
0107 12-19 14:23
UTILISEE - 400MB
0106 12-16 11:13
0105 12-16 16:13
0104 12-15 10:13
0103 12-13 15:19
0102 12-13 11:15
0101 12-13 11:13
CADRAN POUR DEPLACER. NAVETTE POUR SELECTIONNER
11-18-01 ALARME 0004
25:03:12 SD 0.10SEC
RECHERCHE D’IMAGES ENREGISTRÉES
Recherche de détection de mouvement
Lorsqu’un détecteur de mouvement est réglé pour des images enregistrées dans la zone d’enregistrement normal (images d’enregistrement normal et
d’enregistrement par programmateur) ou pour des images enregistrées dans la zone d’enregistrement d’alarme du disque dur, vous pouvez
rechercher les images qui ont changé en raison d’une activité suspecte, par exemple, et faire la lecture ces images uniquement.
Remarque:
• Si vous effectuez des recherches de détection de mouvement d’images de multiplexeur, faites passer le réglage de MULTIPLEXEUR dans le menu
REGL.ENTREE VIDEO à une option autre que “NON”.
• Si l’enregistreur vidéo numérique est connecté à un multiplexeur Sanyo qui permet de décoder des informations de canaux (numéros de caméras),
vous pouvez spécifier des canaux de manière que seules les images provenant de ces canaux soient recherchées. Si un autre type de multiplexeur
est connecté, il est impossible d’utiliser ce réglage.
1
SEARCH
FRAME/FIELD
Appuyez sur le bouton SEARCH FRAME/FIELD pendant
l’enregistrement ou lorsque l’enregistreur vidéo numérique
est arrêté.
<RECHERCHE>
RECHERCHE D'ALARME
RECHERCHE VIGNETTES AL.
RECHERCHE HEURE/JOUR
RECHERCHE ARCHIVES
RECHERCHE DET.MOUV.
L’écran RECHERCHE apparaît.
->
->
->
->
->
CADRAN POUR DEPLACER. NAVETTE POUR SELECTIONNER
2
Utilisez le cadran de taquage pour sélectionner
“ RECHERCHE DET. MOUV.” , puis tournez le cadran de
navette dans le sens des aiguilles d’une montre.
<RECHERCHE>
RECHERCHE D'ALARME
RECHERCHE VIGNETTES AL.
RECHERCHE HEURE/JOUR
RECHERCHE ARCHIVES
RECHERCHE DET.MOUV.
L’écran RECHERCHE DETECTION DE MOUVEMENT apparaît.
3
Utilisez le cadran de taquage pour sélectionner
“ RECHERCHE DANS” , puis tournez le cadran de navette
dans le sens des aiguilles d’une montre.
L’affichage ALARME clignote.
->
->
->
->
->
<RECHERCHE DETECTION DE MOUVEMENT>
RECHERCHE DANS : ALARME
DEBUT
: -------- --:-FIN
: -------- --:-CANAL
: --
PREVISUALISATION
->
CADRAN POUR DEPLACER. NAVETTE POUR SELECTIONNER
4
À l’aide du cadran de taquage, sélectionnez la zone
d’enregistrement (exemple: NORMAL), puis tournez le cadran
de navette dans le sens des aiguilles d’une montre.
Le curseur vient se placer sur CANAL.
<RECHERCHE DETECTION DE MOUVEMENT>
RECHERCHE DANS : NORMAL
DEBUT
: 10-28-01 08:00
FIN
: 10-28-01 20:00
CANAL
Remarque: Si le réglage de MULTIPLEXEUR dans le menu REGL.ENTREE
VIDEO est mis sur “NON”, le curseur vient se placer sur
PREVISUALISATION.
: --
PREVISUALISATION
->
CADRAN POUR DEPLACER. NAVETTE POUR SELECTIONNER
Exemples de sélection de zone d’enregistrement:
• ALARME: Seule les images de la zone d’enregistrement d’alarme sont
recherchées.
• NORMAL: Seules les images de la zone d’enregistrement normal sont
recherchées.
• ALARM ET NORMAL: Les images de la zone d’enregistrement d’alarme et
de la zone d’enregistrement normal sont recherchées.
5
Tournez le cadran de navette dans le sens des aiguilles
d’une montre, sélectionnez le numéro de caméra (exemple:
4), puis tournez le cadran de navette dans le sens des
aiguilles d’une montre.
Le curseur vient se placer sur PREVISUALISATION.
<RECHERCHE DETECTION DE MOUVEMENT>
RECHERCHE DANS : NORMAL
DEBUT
: 10-28-01 08:00
FIN
: 10-28-01 20:00
CANAL
:
PREVISUALISATION
4
->
CADRAN POUR DEPLACER. NAVETTE POUR SELECTIONNER
30
Français
RECHERCHE D’IMAGES ENREGISTRÉES
6
Tournez le cadran de navette dans le sens des aiguilles
d’une montre.
L’écran change et l’écran de prévisualisation de la caméra numéro 4 apparaît.
<RECHERCHE DETECTION DE MOUVEMENT>
RECHERCHE DANS : NORMAL
DEBUT
: 10-28-01 08:00
FIN
: 10-28-01 20:00
1 DEBUT: La date et l’heure de la première image de la zone d’enregistrement
CANAL
sélectionnée apparaît.
Vous pouvez aussi sélectionner l’écran dont un détecteur de
mouvement a été réglé.
5 VISUALISATION: L’image sélectionnée apparaît sur le moniteur sous forme
->
RECHERCHE
CADRAN POUR DEPLACER. NAVETTE POUR SELECTIONNER
sélectionnée apparaît.
Une heure est ajoutée à l’heure affichée.
Vous pouvez aussi sélectionner l’écran dont un détecteur de
mouvement a été réglé.
Si vous tournez le cadran de navette dans le sens
des aiguilles d’une montre, vous pouvez vérifier les
images jusqu’au point de fin.
4
PREVISUALISATION
2 FIN: La date et l’heure de la dernière image de la zone d’enregistrement
3 DET. DE MOUVEMENT: Le détecteur de mouvement apparaît.
4 PREVISUALISATION: Le point de départ sélectionné apparaît.
:
<RECHERCHE DETECTION DE MOUVEMENT>
RECHERCHE DANS: NORMAL
/ CANAL : 4
1
2
3
4
5
DEBUT :
10-28-01 08:00
FIN :
10-28-01 10:00
DET. DE MOUVEMENT ->
PREVISUALISATION ->
VISUALISATION
->
CADRAN POUR DEPLACER. NAVETTE POUR SELECTIONNER
d’image à 1 écran dans un écran normal.
7
Tournez le cadran de navette dans le sens des aiguilles
d’une montre.
À l’aide du cadran de taquage, réglez la date et l’heure de départ (DEBUT)
(exemple: 10.00 am dans le jour actuel) pour le réglage du détecteur de
mouvement, puis tournez le cadran de navette dans le sens des aiguilles d’une
montre.
L’image correspondant à l’heure spécifiée apparaît dans l’écran de
prévisualisation, puis le curseur vient se placer sur l’emplacement du réglage de
la date et de l’heure de fin (FIN).
<RECHERCHE DETECTION DE MOUVEMENT>
RECHERCHE DANS: NORMAL
/ CANAL : 4
DEBUT :
10-28-01 08:00
FIN :
10-28-01 20:00
DET. DE MOUVEMENT ->
PREVISUALISATION ->
VISUALISATION
->
CADRAN POUR DEPLACER. NAVETTE POUR SELECTIONNER
<RECHERCHE DETECTION DE MOUVEMENT>
RECHERCHE DANS: NORMAL
/ CANAL : 4
DEBUT :
10-28-01 10:00
FIN :
10-28-01 20:00
DET. DE MOUVEMENT ->
PREVISUALISATION ->
VISUALISATION
->
CADRAN POUR DEPLACER. NAVETTE POUR SELECTIONNER
8
9
Français
Tournez le cadran de navette dans le sens des aiguilles
d’une montre.
À l’aide du cadran de taquage, réglez la date et l’heure de fin (FIN) (exemple:
8.00 pm dans le jour actuel) pour le réglage du détecteur de mouvement, puis
tournez le cadran de navette dans le sens des aiguilles d’une montre.
Le curseur vient se placer sur DET. DE MOUVEMENT.
Tournez le cadran de navette dans le sens des aiguilles
d’une montre.
L’écran de réglage du détecteur de mouvement apparaît.
Réglez le détecteur de mouvement de manière qu’il couvre la zone où vous
voulez observer le mouvement.
Placez le curseur sur SORTIR puis tournez le cadran de navette dans le sens
des aiguilles d’une montre. L’affichage retourne à l’écran RECHERCHE
DETECTION DE MOUVEMENT. Pour plus de détails concernant les réglages du
détecteur de mouvement, reportez-vous à la page 58.
31
<RECHERCHE DETECTION DE MOUVEMENT>
RECHERCHE DANS: NORMAL
/ CANAL : 4
DEBUT :
10-28-01 10:00
FIN :
10-28-01 20:00
DET. DE MOUVEMENT ->
PREVISUALISATION ->
VISUALISATION
->
CADRAN POUR DEPLACER. NAVETTE POUR SELECTIONNER
-
-
- - - ú
- ú
- ú
- - - NIVEAU :
ú
ú
ú
6
ú
ú
ú
-
- - - - - - - - SORTIR
-
-
RECHERCHE D’IMAGES ENREGISTRÉES
10
2
1
À l’aide du cadran de taquage, placez le curseur sur
PREVISUALISATION, puis tournez le cadran de navette
dans le sens des aiguilles d’une montre. L’écran montrant
les réglages du détecteur de mouvement apparaît dans
l’écran de prévisualisation à chaque fois que vous tournez
le cadran de navette.
Remarque: Si aucun réglage du détecteur de mouvement n’a été effectué,
l’indication “NON TROUVEE” apparaît; vous devez donc vérifier que
les réglages du détecteur de mouvement ont été effectués
correctement.
11
2
1
<RECHERCHE DETECTION DE MOUVEMENT>
RECHERCHE DANS: NORMAL
/ CANAL : 4
DEBUT :
10-28-01 10:00
FIN :
10-28-01 20:00
DET. DE MOUVEMENT ->
PREVISUALISATION ->
VISUALISATION
->
CADRAN POUR DEPLACER. NAVETTE POUR SELECTIONNER
Pour visualiser un réglage du détecteur de mouvement dans
un affichage à 1 écran, placez le curseur sur
VISUALISATION à l’aide du cadran de taquage, puis tournez
le cadran de navette dans le sens des aiguilles d’une
montre.
L’affichage passe de l’image spécifiée à la lecture normale.
Remarque: Remarque: Lors de l’utilisation d’un multiplexeur et qu’un numéro de
caméra a été spécifié comme canal lors de recherches par
détecteur de mouvement, seules les images pour le numéro de
caméra spécifié seront lues. Pour la lecture de toutes les caméras,
la lecture doit d’abord être mise hors fonction, puis en fonction de
nouveau. De plus, l’information de titre et l’information de date du
multiplexeur ne peuvent être affichées en entier, à ce moment,
selon les cas.
32
Français
SAUVEGARDE (COPIE) DES IMAGES ENREGISTRÉES
Vous pouvez copier les images importantes qui ont été enregistrées dans la zone d’enregistrement normal ou dans la zone d’enregistrement d’alarme
sur une carte CompactFlash ou sur la zone d’archive du disque dur.
A Copie d’images sur la zone d’archive du disque dur
Copie
Copie
Zone
d’enregistrement Zone d’archives
d’alarme
Zone
d’enregistrement
Zone
d’alarme
d’enregistrement
normal
Zone
d’enregistrement
normal
Disque dur
B Copie d’images de la zone d’archive sur une carte CompactFlash
Copie automatique
Copie automatique
Zone d’archives
Zone
d’enregistrement
d’alarme
Zone
d’enregistrement
Zone
d’alarme
d’enregistrement
normal
Zone
d’enregistrement
Disque
dur
normal
CompactFlas
hCard
Microd
rive
Carte CF ou microlecteur
C Copie d’images de la zone d’archives à un lecteur DDS (DAT) ou à un lecteur de disque
compact enregistrable
Copie
Copie
Zone
d’enregistrement Zone d’archives
d’alarme
Zone
d’enregistrement
Zone
d’alarme
d’enregistrement
normal
Zone
d’enregistrement
normal
EJECT
S-VIDEO
SCSI
Disque dur
Lecteur DDS (DAT) ou lecteur de
disque compact enregistrable
(vendu séparément)
Remarque:
• Les images copiées sont mémorisées sous forme d’image unique.
• Si vous téléchargez des images à une carte CompactFlash, les images sont automatiquement sauvegardées dans la zone d’archives, puis elles
sont copiées de la zone d’archives à la carte CompactFlash. Les images ne seront plus dans la zone d’archives.
• Si la zone d’archive est pleine, utilisez le réglage REINITIALISATION pour la zone d’archive dans le menu REGL.AIRE D’ENREGISTREMENT
pour supprimer les images dont vous n’avez pas besoin.
Français
33
SAUVEGARDE (COPIE) DES IMAGES ENREGISTRÉES
A Copie d’images sur la zone d’archive du
disque dur
1
5
Effectuez la lecture des images dans la zone d’enregistrement
normal ou dans la zone d’enregistrement d’alarme qui doit être
copiée, et arrêtez momentanément la lecture sur l’image que
vous voulez copier. (Reportez-vous à la page 22.)
PLAY/STOP
STILL
6
Exemple: Pour copier dix secondes d’images à partir de l’image
sélectionnée
2
Tournez le cadran de navette dans le sens des aiguilles
d’une montre, faites passer le réglage à “ 10” à l’aide du
cadran de taquage, puis tournez le cadran de navette dans le
sens des aiguilles d’une montre.
Le curseur vient se placer sur IMAGES.
Pendant que l’image à copier est affichée sous forme
d’image fixe, appuyez sur le bouton COPY.
L’écran de copie apparaît alors.
COPY
Sélectionnez l’écran SECONDES à l’aide du cadran de
taquage, puis tournez le cadran de navette dans le sens des
aiguilles d’une montre.
• IMAGES: Spécifiez le nombre d’images à copier.
• SECONDES: Spécifiez le nombre de secondes d’images à
copier.
• MINUTES: Spécifiez le nombre de minutes d’images à copier
(jusqu’à 60 minutes).
Le curseur vient se placer sur DEBUT.
COPIER A?: AIRE D'ARCHIVES
COMBIEN :
DEBUT
1 IMAGES
COPIER A?: AIRE D'ARCHIVES
->
COMBIEN : 10 IMAGES
FORMAT COMPACT FLASH ->
CADRAN POUR DEPLACER. NAVETTE POUR SELECTIONNER
3
7
Utilisez le cadran de taquage pour sélectionner “ COPIER
A?” , puis tournez le cadran de navette dans le sens des
aiguilles d’une montre.
L’affichage AIRE D’ARCHIVES clignote.
Tournez le cadran de navette dans le sens des aiguilles
d’une montre.
La copie des images à la zone d’archives commence. Lorsque la
copie est finie, “COPIE FINIE !” apparaît.
COPIER A?: AIRE D'ARCHIVES
COPIER A?: AIRE D'ARCHIVES
COMBIEN :
DEBUT
COMBIEN : 10 SECONDES
1 IMAGES
DEBUT
->
->
Remarque: Si vous appuyez sur le bouton COPY pendant que la
copie est en cours, la copie sera annulée.
FORMAT COMPACT FLASH ->
CADRAN POUR DEPLACER. NAVETTE POUR SELECTIONNER
4
Utilisez le cadran de taquage pour sélectionner “ AIRE
D’ARCHIVES” , puis tournez le cadran de navette dans le
sens des aiguilles d’une montre.
Le curseur vient se placer sur COMBIEN.
COPIER A?: AIRE D'ARCHIVES
COMBIEN :
1 IMAGES
34
Français
SAUVEGARDE (COPIE) DES IMAGES ENREGISTRÉES
B Copie d’images de la zone d’archive sur
une carte CompactFlash
3
Introduisez une carte CompactFlash dans la fente de carte
CompactFlash du panneau avant.
Lors de l’insertion de la carte CompactFlash, assurez-vous que la
direction d’insertion est correcte.
Une carte Microdrive peut aussi être utilisée pour copier des images.
Utilisez le cadran de taquage pour sélectionner “ COMPACT
FLASH” , puis tournez le cadran de navette dans le sens des
aiguilles d’une montre.
Le curseur vient se placer sur COMBIEN.
COPIER A?: COMPACT FLASH
COMBIEN :
1 IMAGES
(Introduction)
1
4
2
Tournez le cadran de navette dans le sens des aiguilles
d’une montre, faites passer le réglage à “ 10” à l’aide du
cadran de taquage, puis tournez le cadran de navette dans le
sens des aiguilles d’une montre.
Le curseur vient se placer sur IMAGES.
COPIER A?: COMPACT FLASH
3
COMBIEN : 10 IMAGES
(Retrait)
5
3
2
Sélectionnez l’écran SECONDES à l’aide du cadran de
taquage, puis tournez le cadran de navette dans le sens des
aiguilles d’une montre.
• IMAGES: Spécifiez le nombre d’images à copier.
• SECONDES: Spécifiez le nombre de secondes d’images à copier.
• MINUTES: Spécifiez le nombre de minutes d’images à copier
(jusqu’à 60 minutes).
1
COPIER A?: COMPACT FLASH
1
COMBIEN : 10 SECONDES
Affichez une image de la zone d’archive sous forme d’image
fixe, puis appuyez sur le bouton COPY.
L’écran de copie apparaît alors.
Pour plus de détails concernant la lecture d’images de la zone
d’archive, reportez-vous à la page 29.
Remarque:
• La limite du nombre d’images qui peuvent être copiées est de
40000. La copie s’arrête lorsque 40000 images ont été copiées.
• Lors de la copie d’enregistrements d’alarme, ils ne peuvent être
copiés qu’un à la fois.
COPY
COPIER A?: AIRE D'ARCHIVES
COMBIEN :
DEBUT
6
1 IMAGES
->
FORMAT COMPACT FLASH ->
CADRAN POUR DEPLACER. NAVETTE POUR SELECTIONNER
2
Utilisez le cadran de taquage pour sélectionner “ COPIER
A?” , puis tournez le cadran de navette dans le sens des
aiguilles d’une montre.
L’affichage AIRE D’ARCHIVES clignote.
COPIER A?: COMPACT FLASH
COMBIEN : 10 SECONDES
DEBUT
DEBUT
1 IMAGES
->
FORMAT COMPACT FLASH ->
CADRAN POUR DEPLACER. NAVETTE POUR SELECTIONNER
Français
->
Remarque:
• Si vous copiez directement des images de la zone
d’enregistrement normal ou de la zone d’enregistrement d’alarme
sur une carte CompactFlash, ces mêmes images seront aussi
copiées sur la zone d’archive. Cependant, les images sont
effacées après avoir été copiées.
• Si vous appuyez sur le bouton COPY pendant que la copie est en
cours, la copie sera annulée.
COPIER A?: AIRE D'ARCHIVES
COMBIEN :
Tournez le cadran de navette dans le sens des aiguilles
d’une montre.
Le témoin COPY s’allume, l’écran CPIER A?: COMPACT FLASH
apparaît, et la copie des images sur la carte CompactFlash commence.
Lorsque la copie est finie, “COPYING COMPLETE” apparaît.
35
SAUVEGARDE (COPIE) DES IMAGES ENREGISTRÉES
Formatage des cartes CompactFlash
INFORMATION IMPORTANTE
Vous pouvez formater des cartes CompactFlash et Microdrive en
sélectionnant “FORMAT COMPACT FLASH”.
Vous ne pouvez utiliser qu’une carte CompactFlash formatée selon la
spécification FAT16. Les cartes formatées FAT32 ne seront pas
reconnues.
Copie des images de caméra à la zone d’enregistrement
d’archives ou à une carte CompactFlash
Lorsque l’enregistreur vidéo numérique est connecté à un
multiplexeur (y compris les multiplexeurs d’autres fabricants tels
que Robot, DM et Sony), vous pouvez copier les images d’une
caméra spécifiée, enregistrées par l’enregistreur vidéo
numérique, à la zone d’archives ou à une carte CompactFlash.
1) Fonctionnement du multiplexeur
Appuyez sur le bouton VCR pour afficher l’écran divisé.
2) Fonctionnement de l’enregistreur vidéo numérique
Spécifiez le canal de caméra à copier en suivant la méthode
sous “Sélection d’un canal d’image de caméra pour la
lecture” à la page 23.
3) Fonctionnement du multiplexeur
Appuyez sur le bouton de sélection de caméra de la caméra
sélectionnée pour afficher les images de cette caméra dans
un affichage 1 écran.
4) Fonctionnement de l’enregistreur vidéo numérique
• Lors de la copie d’images à la zone d’enregistrement
d’archives
Effectuez la méthode sous “Copie d’images sur la zone
d’archives du disque dur” à la page 34.
• Lors de la copie d’images de la zone d’enregistrement
d’archives à une carte CompactFlash
Effectuez la méthode sous “Copie d’images de la zone
d’archive sur une carte CompactFlash” à la page 35.
“COPYING” est affiché sur chaque écran et la copie
commence. Lorsque la copie est finie, “COPIE FINIE !”
apparaît.
COPIER A : AIRE D'ARCHIVES
COMBIEN : 20 IMAGES
DEBUT
->
FORMAT COMPACT FLASH ->
CADRAN POUR DEPLACER. NAVETTE POUR SELECTIONNER
Zone d’enregistrement de la carte
CompactFlash
COMPACT FLASH
SANYO
02032101
1
2
IMG00001
3
IMG00002
3
00000001.JPG
00000002.JPG
00000003.JPG
IMG00003
3
INDEX.HTM
4
1 Un dossier SANYO est créé dans le répertoire de base.
2 Des sous-dossiers pour conserver les images copiées sont
Remarque:
créés dans l’ordre dans le dossier SANYO.
Si vous copiez des images à la zone d’enregistrement
d’archives d’un enregistreur vidéo numérique ou à une carte
CompactFlash sans indiquer le canal de caméra à l’aide de
l’enregistreur vidéo numérique à l’étape 2 ci-dessus, toutes les
images de caméra du multiplexeur seront copiées.
La fonction de copie dans cet écran spécial ne peut être
effectuée qu’avec les multiplexeurs pour lesquels l’enregistreur
vidéo numérique peut décoder directement l’information
d’identification du multiplexeur. La liste d’interchangeabilité de
multiplexeurs est indiquée ci-dessous.
3 Des sous-dossiers sont créés dans le dossier date/heure
nommés à partir de IMG00001. Chaque sous-dossier peut
contenir jusqu’à 200 images.
4 Pour visualiser la liste des fichiers à l’aide d’un ordinateur,
utilisez un navigateur tel que Internet Explorer 5.0 ou version
ultérieure pour ouvrir les fichiers INDEX.HTM. Les fichiers
JPEG peuvent être lus sous forme de diaporama.
Remarque:
• Les images JPG sont enregistrées comme images de champ, et si
elles sont visualisées à l’aide d’un dispositif de visionnement d’image
standard, elles seront compressées à la moitié de leur taille verticale.
Assurez-vous de les visualiser à l’aide du fichier INDEX.HTM.
• Lorsque des images d’enregistrement d’images sont copiées sur
une carte CompactFlash, les images sont copiées séparément
comme deux images de champ, de manière que la lecture des
images ne puisse pas être effectuée lorsque ces images sont
visualisées en utilisant un ordinateur.
• Les images qui ont été copiées sur une carte CompactFlash
contiennent des codes permettant de détecter toute altération par
manipulation de fichiers, et ces codes peuvent être reconnus par
des programmes de logiciels informatiques capables de détecter
toute altération par manipulation de fichiers. Pour plus de détails,
adressez-vous à votre revendeur.
A. Multiplexeurs qui peuvent être décodés directement
Sanyo, Robot, DM, Sony
B. Multiplexeurs qui ne permettent le décodage que par le
multiplexeur
Pelco, Kalatel, ATV, Ultrak
36
Français
SAUVEGARDE (COPIE) DES IMAGES ENREGISTRÉES
Remarque:
• La fente pour carte PC n’est compatible qu’avec des cartes 16 bits 5 V.
N’utilisez pas de cartes à bus type 32 bits, car elles risquent
d’endommager la fente pour carte PC de l’enregistreur vidéo numérique.
• Vérifiez que la direction d’insertion est correcte lors de l’insertion de la
carte SCSI.
• Si une carte SCSI ou un lecteur DDS (DAT) autres que ceux
recommandés sont utilisés, un fonctionnement correct ne peut pas
être garanti.
• Le lecteur de disque compact enregistrable compatible est un lecteur
CD-R/RW SCSI YAMAHA, et les supports doivent être des disques
compacts enregistrables uniquement. Les disques compacts
réinscriptibles ne peuvent pas être utilisés.
* DDS (Digital Data Storage: Sauvegarde numérique de
données)/DAT (Digital Audio Tape: Cassette audionumérique)
C Copie d’images de la zone d’archives à
un lecteur DDS (DAT) ou à un lecteur de
disque compact enregistrable
☞ Branchement à un lecteur
Insérez une carte SCSI recommandée pour connecter le lecteur
DDS (DAT), dans le logement pour carte PC à l’arrière de
l’enregistreur vidéo numérique.
Les images de la zone d’archive peuvent être copiées sur le lecteur
DDS (DAT), et les images enregistrées sur le lecteur DDS (DAT)
peuvent aussi être copiées sur la zone d’archive.
• Carte SCSI recommandée
Fabricant: ADAPTEC
Numéro de modèle: Slim SCSI 1460
• Lecteur DDS (DAT) type DDS-3 recommandé
Fabricant: Hewlett Packard
Numéro de modèle: Super Store dat 24e
• Lecteur de disque compact enregistrable recommandé
Fabricant: YAMAHA
Modèle: CRW2200SX-VK
Sauvegarde de secours
Vous pouvez effectuer une sauvegarde de secours de toutes les
données de la zone d’archive sur un lecteur DDS (DAT).
1
Au connecteur DIGITAL IN/OUT du multiplexeur
DIGITAL IN
COPY
DIGITAL OUT
1
Lecteur DDS (DAT) ou
lecteur de disque
compact enregistrable
(vendu séparément)
3
2
2
Insertion d'une carte SCSI (vendue séparément)
(Retiré)
(Installé)
<REGL.ARCHIVES>
SAUVEGARDE
->
RESTAURER
->
EFFACER
->
Utilisez le cadran de taquage pour sélectionner
“ SAUVEGARDE” , puis tournez le cadran de navette dans le
sens des aiguilles d’une montre.
L’indication “ARCHIVAGE AU DDS(DAT) !” apparaît, puis la
copie commence.
• Si vous appuyez sur le bouton COPY pendant que la copie
est en cours, la copie sera annulée.
• Lorsque la copie est terminée, “ARCHIVGE FINI !” apparaît.
Appuyez sur n’importe quel bouton pour revenir à l’écran
normal.
01-01-01
00:00:00 SD 0.10SEC
3
1
Appuyez sur le bouton COPY pendant l’envegistrement ou
lorsque l’enregistreur vidéo numérique est arrêté.
L’écran REGL.ARCHIVES apparaît.
ARCHIVAGE AU DDS(DAT) !
3
<PRESSER COPY POUR ANNULER>
2
Vous pouvez faire coulisser le
bouton pour verrouiller la carte.
Français
1
2
Remarque:
• Lorsque des données sont converties pour être sauvegardées sur
un lecteur DDS (DAT), le processus de conversion peut avoir
comme conséquence une augmentation de la taille des données.
Lors de la copie d’images sur une bande de 12 gigaoctets, il peut
seulement être possible de copier environ 10 gigaoctets de
données.
• Il faudra 4 heures environ pour copier 10 gigaoctets de données
sur un lecteur DDS (DAT).
Remettez le bouton à sa
position originale après l’avoir
déverrouillée.
37
SAUVEGARDE (COPIE) DES IMAGES ENREGISTRÉES
Lecture des données d’un lecteur DDS (DAT)
dans la zone d’archive
Suppression des données d’images du lecteur
DDS (DAT)
Remarque: Toutes les images enregistrées auparavant dans la zone
d’archive seront supprimées lorsque les images sont
transférées de cette manière.
1
1
Appuyez sur le bouton COPY pendant l’envegistrement ou
lorsque l’enregistreur vidéo numérique est arrêté.
L’écran REGL.ARCHIVES apparaît.
COPY
2
COPY
<REGL.ARCHIVES>
SAUVEGARDE
->
RESTAURER
->
EFFACER
->
<REGL.ARCHIVES>
SAUVEGARDE
->
RESTAURER
->
EFFACER
->
2
Utilisez le cadran de taquage pour sélectionner
“ RESTAURER” , puis tournez le cadran de navette dans le
sens des aiguilles d’une montre.
Le message “LISTE DES DONNEES !” apparaît. Une fois que la
lecture est terminée, l’écran RESTAURER DE DDS (DAT)
apparaît.
Utilisez le cadran de taquage pour sélectionner “ EFFACER” ,
puis tournez le cadran de navette dans le sens des aiguilles
d’une montre.
L’écran AVERTISSEMENT apparaît.
<AVERTISSEMENT>
01-01-01
08:00:00 SD 0.10SEC
LES DONNEES SUR DDS(DAT) SERONT EFFACEES !
DESIREZ-VOUS CONTINUER ?
NON
LISTE DES DONNEES !
<PRESSER COPY POUR ANNULER>
3
Appuyez sur le bouton COPY pendant l’envegistrement ou
lorsque l’enregistreur vidéo numérique est arrêté.
L’écran REGL.ARCHIVES apparaît.
CADRAN POUR CHANGER. NAVETTE POUR REGLER
3
À l’aide du cadran de taquage, sélectionnez les données à
lire dans la zone d’archive, puis tournez le cadran de navette
dans le sens des aiguilles d’une montre.
La lecture des données commence. L’écran RESTAURER DE
DDS (DAT) apparaît.
Les données d’images du lecteur DDS (DAT) sont alors
sauvegardées dans la zone d’archive.
Lorsque toutes les données ont été lues dans la zone d’archives,
“RESTAURATION FINE !” apparaît.
Lorsque vous effectuez la lecture des images dans la zone
d’archive, les données d’images qui ont été lues peuvent être
reproduites.
À l’aide du cadran de taquage, faites passez “ NON” à “ OUI” ,
puis tournez le cadran de navette dans le sens des aiguilles
d’une montre.
“EFFACEMENT SUPPORT!” apparaît, et lorsque l’effacement
des données de la bande est terminé, “EFFACEMENT FINIE!”
apparaît.
01-01-01
08:00:00 SD 0.10SEC
EFFACEMENT SUPPORT !
<RESTAURER DE DDS(DAT)>
NO DATE
DEBUT TAILLE
0001 12-13-2001 11:13 3.0GB
0002 12-15-2001 10:15 2.0GB
0003 12-17-2001 10:15 2.0GB
LES DONNEES SUR LE DISQUE DUR SERONT EFFACEES!
01-01-01
08:00:00 SD 0.10SEC
RESTAURER DONNEES DU DDS(DAT) !
<PRESSER COPY POUR ANNULER >
38
Français
SAUVEGARDE (COPIE) DES IMAGES ENREGISTRÉES
Copie d’images à un lecteur de disque compact
enregistrable
5 puis
Utilisez le cadran de taquage pour sélectionner “ SECONDES” ,
tournez le cadran de navette dans le sens des aiguilles
d’une montre.
Le curseur passe à “DEBUT”.
• IMAGES: Le nombre spécifié d’images sont copiées à partir de
l’image courante.
• SECONDES: Le nombre spécifié de secondes d’images sont
copiées, à partir de l’image courante.
• MINUTES: Le nombre spécifié de minutes d’images sont
copiées, à partir de l’image courante.
• EVENTS: Le nombre spécifié d’événements sont copiés, à
partir de l’image courante.
1 d’archives,
Pendant le visionnement de l’image fixe à copier de la zone
appuyez sur le bouton COPY.
L’écran COPY apparaît.
Référez-vous à la page 29 pour les détails sur la lecture des
images dans la zone d’archives.
COPY
COPIER A?: AIRE D'ARCHIVES
COMBIEN : 20 IMAGES
DEBUT
->
COPIER A?: CD-R
FORMAT COMPACT FLASH ->
COMBIEN : 10 IMAGES
CADRAN POUR DEPLACER. NAVETTE POUR SELECTIONNER
2 puis
Utilisez le cadran de taquage pour sélectionner “ COPIER A” ,
tournez le cadran de navette dans le sens des aiguilles
Remarque:
• À chaque fois qu’une opération de copie est effectuée, les images
sont copiées à la zone d’archives événement par événement en
tant que groupe. La capacité de la zone d’archives peut être réglée
comme désiré jusqu’à une limite maximum de 10 Go.
• Seules des images de la zone d’archives peuvent être copiées à
un lecteur de disque compact enregistrable. Des images ne
peuvent pas être copiées directement de la zone d’enregistrement
normal ou de la zone d’enregistrement d’alarme à un disque
compact enregistrable.
• Selon la durée de chaque événement, il peut ne pas être possible
de copier tous les événements spécifiés. (La quantité maximale de
données qui peuvent être copiées est de 495 Mo.)
• Lorsque EVENTS est réglé, si vous sélectionnez le réglage “>60”,
la copie se poursuira jusqu’à ce que le disque compact
enregistrable soit plein.
d’une montre.
L’affichage “AIRE D’ARCHIVES” clignote.
COPIER A?: AIRE D'ARCHIVES
COMBIEN : 20 IMAGES
DEBUT
->
FORMAT COMPACT FLASH ->
CADRAN POUR DEPLACER. NAVETTE POUR SELECTIONNER
3 tournez
Utilisez le cadran de taquage pour sélectionner “ CD-R” , puis
le cadran de navette dans le sens des aiguilles d’une
6 Tournez
le cadran de navette dans le sens des aiguilles d’une
montre.
montre.
Le curseur passe à “COMBIEN”.
L’indicateur COPY s’allume, “COPIER A?: CD-R” apparaît sur
l’écran et la copie au disque compact enregistrable commence.
Lorsque la copie est finie, “COPIE FINIE !” apparaît.
COPIER A?: CD-R
COMBIEN : 20 IMAGES
COPIER A?: CD-R
4 Tournez
le cadran de navette dans le sens des aiguilles d’une
montre, utilisez le cadran de taquage pour régler le nombre
COMBIEN : 10 IMAGES
d’images à “ 10” , puis tournez le cadran de navette dans le
sens des aiguilles d’une montre.
Le curseur passe à “IMAGES”.
Remarque:
• À la vitesse d’écriture normale, il faudra environ 70 minutes ou plus
pour remplir le disque compact enregistrable.
• Les fichiers ne sont pas écrits dans un format de fichiers standard.
Vous aurez besoin d’un logiciel spécial. Adressez-vous au
revendeur pour plus de détails.
• Des images ne peuvent pas être copiées du lecteur de disque
compact enregistrable à l’enregistreur vidéo numérique. De plus,
une fois que des images ont été copiées à un lecteur de disque
compact enregistrable, le disque compact enregistrable est fermé
et d’autres copies de fichiers à ce disque ne seront pas possibles.
• L’opération de copie ne peut pas être annulée pendant que la
copie est en cours.
• Si la capacité de stockage se remplit pendant que la copie est en
cours, le message d’erreur “CD-R PLEINE!” apparaît, et les détails
de la dernière image copiée sont affichés.
COPIER A?: CD-R
COMBIEN : 10 IMAGES
Français
39
ORGANISATION ET OPÉRATIONS DES MENUS
Organisation des menus
Réglages pour l’enregistrement
Réglages pour l’environnement de fonctionnement
Le menu principal 1 contient des réglages qui traitent
principalement de l’enregistrement.
Le menu principal 2 contient des réglages qui traitent
principalement de l’environnement de fonctionnement.
Menu principal 1
Menu principal 2
<MENU PRINCIPAL 2>
1.REGL.AFFICHAGE/PERTE SIGNAL
2.REGL.RS-232C / RS-485
3.REGL.AVERTISSEUR
4.REGL.VERROU DE SECURITE
5.REGL.RESEAU
6.REGL.DISQUE DUR
7.PANNE COURANT/DUREE UTIL.
<MENU PRINCIPAL 1>
1.REGL.LANGUE/HORLOGE
->
2.REGL.ENTREE VIDEO
->
3.REGL.AIRE D'ENREGISTREMENT ->
4.REGL.COND.D'ENREGISTREMENT ->
5.REGL.MODE D'ENR.NORMAL
->
6.REGL.TIMER
->
7.REGL.CONGE
->
8.REGL.MODE D'ENR. D'ALARME ->
VERS MENU PRINCIPAL 2
->
CADRAN POUR CHANGER.NAVETTE POUR SELECTIONNER
->
->
->
->
->
->
->
VERS MENU PRINCIPAL 1
->
CADRAN POUR CHANGER.NAVETTE POUR SELECTIONNER
Sous-menus
b Réglages de la langue, de
l’horloge et de l’heure d’été
(Référez-vous à la page 42, 43.)
<REGL.LANGUE>
FRANCAIS
<REGL.HORLOGE>
01-01-2001 LUN 00:00:00
<HEURE D'ETE>
MODE :
ARRET
SEMAINE MOIS HEURE
ON 1ER-DIM 04 02:00
OFF DER-DIM 10 02:00
<REGL.HORLOGE EXTERNE>
REGL.DE L'HEURE 01:00
b Réglages de l’entrée vidéo
et du multiplexeur (Référezvous à la page 44.)
<REGL.ENTREE VIDEO>
MULTIPLEXEUR
: NON
ENTREE VIDEO
: ANALOGIQUE
b Réglages des zones
d’enregistrement (Référezvous à la page 45.)
<REGL.AIRE D'ENREGISTREMENT>
CAPACITE TOTAL
: 80GB
AIRE D'ENR. NORMAL
: 80 %
REINITIALISATION
->
AIRE D'ENR. D'ALARME
: 19 %
REINITIALISATION
->
AIRE D'ARCHIVES
: 1%
REINITIALISATION
->
ATTENTION:LORSQUE LE REGLAGE D'AIRE EST CHANGE.
L'AIRE AU COMPLET EST REINITIALISEE!
b Réglages d’enregistrement
(Référez-vous à la page 47.)
<REGL.COND. D'ENREGISTREMENT>
ENR.SERIE NUMERIQUE
:NON
NOMBRE TOTAL
:¤¤
NUMERO D'ENREGISTREUR :¤¤
AIRE D'ENR.NORMAL
REENREGISTRER
AIRE D'ENR.D'ALARME
REENREGISTRER
AVERT. DE DISQUE RESTANT
:OUI
:OUI
:¤¤
b Réglages des zones
d’enregistrement (Référezvous à la page 49.)
b Réglages de zone d’enregistment b Réglages du réseau
normal (Référez-vous à la page 59.)
(Référez-vous à la page 66.)
<REGL.AFFICHAGE>
DATE
: OUI
HEURE
: OUI
QUALITE
: OUI
CYCLE D'ENR. : OUI
NOMBRE ALARME : OUI
TYPE D'ALARME : OUI
<REGL.MODE D'ENR.NORMAL>
QUALITE D'IMAGE
: STANDARD
ENR.TRAME/IMAGE
: TRAME
ENREGISTREMENT AUDIO : NON
CYCLE D'ENR. : 0.10SEC ( 54H)
<REGL.PERTE SIGNAL>
PERTE SIGNAL : OUI
b Réglages du
programmateur (Référezvous à la page 50.)
SEM
DIM
LUN
MAR
MER
JEU
VEN
SAM
QUOT
MARCHE
--:---:---:---:---:---:---:---:--
<REGL.TIMER>
ARRET CYCLE D'ENR
--:-- 0.10SEC ( 54H)
--:-- 0.10SEC ( 54H)
--:-- 0.10SEC ( 54H)
--:-- 0.10SEC ( 54H)
--:-- 0.10SEC ( 54H)
--:-- 0.10SEC ( 54H)
--:-- 0.10SEC ( 54H)
--:-- 0.10SEC ( 54H)
b Réglage de la communication
RS-232C/RS-485 (Référez-vous
à la page 60.)
<REGL.RS-232C/RS-485>
COMMANDE
: RS-232C
VITESSE DONNERS : 19200
INFO.STATUT
: ¤¤¤
INFO.ALARME
: ¤¤¤
ADRESSE
: ¤¤¤
MODE
NON
NON
NON
NON
NON
NON
NON
NON
<REGL.CONGE>
----11.
----12.
----13.
----14.
----15.
----16.
----17.
----18.
----19.
----20.
b Réglages du disque dur
(Référez-vous à la page 69.)
<REGL.DISQE DUR>
DISQUE1
: 80GB
DISQUE2
: ---GB
INITIALISATION DISQUE ->
ATTENTION : TOUS LES ENREGISTREMENTS
SERONT EFFACES!
MIROIR
: NON
UNITE DE LECTURE : ¤¤¤
ATTENTION : VITESSE D'ENREGISTREMENT
LIMTEE PAR LE MIROIR !
b Réglages du vibreur
(Référez-vous à la page 62.)
b Réglages des vacances
(Référez-vous à la page 53.)
1.
2.
3.
4.
5.
6.
7.
8.
9.
10.
<REGL.RESEAU>
CARTE RESEAU
: LAN1
COMMANDE RESEAU : NON
ADRESSE IP
: 192.168. 0. 1
MASQUE D' ADRESSE : 255.255.255. 0
PASSERELLE
: 0. 0. 0. 0
PORT
: 00080
ID
MOT DE PASSE (4-8)
ID1
: 1111---ID2
: 2222---ID3
: 3333----
<REGL.AVERTISSEUR>
ALARME
:NON
DISQUE PLEIN
:OUI
ERREUR DU DISQUE :OUI
AVERT. DE VERROU :OUI
TOUCHES
:NON
PAS D' ENR.
:NON
-----------------------------------------
b Réglages des pannes de
courant/de la durée d’utilisation
(Référez-vous à la page 70.)
<PANNE COURANT/DUREE UTIL.>
PANNE COURANT
#020 COUPURE ----- --:-RETOUR ----- --:-DUREE UTILISATION
UTIL.DISQUE1 :
UTIL.DISQUE2 :
ALIMENTATION :
00000H
-----H
00000H
FIRMWARE : MAIN 1.00-00 / SUB 1.00-00
b Réglages du verrou de
sécurité (Référez-vous à la
page 63.)
b Réglages d’enregistrement
d’alarme (Référez-vous à la
page 54.)
<REGL.VERROU DE SECURITE>
NIVEAU MOT DE PASSE(4-8) MODE
ADMIN
-------NON
UTIL.
-------NON
COMMANDE ENR.
:
ADMIN
<REGL.MODE D'ENR. D'ALARME>
QUALITE D'IMAGE
: STANDARD
ENR.TRAME/IMAGE
: TRAME
ENREGISTREMENT AUDIO : NON
ENR.D'ALARME
: NON
CYCLE D'ENR.: 0.10SEC. DUREE : 1SEC
ENREGISTREMENT PRE-ALARME: ¤¤¤
CYCLE D'ENR.: ¤¤¤ SEC. DUREE : ¤¤¤
=>(46400 ALARMES PEUVENT ETRE ENREGISTREES)
DECLENCHEMENT ALAEME : ALARME
DETECTEUR DE MOUVEMENT ->
40
Français
ORGANISATION ET OPÉRATIONS DES MENUS
Opérations de base d’écran de menu
1
4
Appuyez sur le bouton MENU.
L’écran MENU PRINCIPAL 1 apparaît. Si vous appuyez sur le
bouton MENU de nouveau, l’écran MENU PRINCIPAL 2 apparaît.
MENU
Appuyez sur le bouton EXIT/OSD.
L’affichage revient à l’écran normal.
EXIT/OSD
<MENU PRINCIPAL 1>
1.REGL.LANGUE/HORLOGE
->
2.REGL.ENTREE VIDEO
->
3.REGL.AIRE D'ENREGISTREMENT ->
4.REGL.COND.D'ENREGISTREMENT ->
5.REGL.MODE D'ENR.NORMAL
->
6.REGL.TIMER
->
7.REGL.CONGE
->
8.REGL.MODE D'ENR. D'ALARME ->
VERS MENU PRINCIPAL 2
->
CADRAN POUR CHANGER.NAVETTE POUR SELECTIONNER
Opérations lorsqu’un écran de
sous-menu est affiché
Si vous appuyez sur le bouton MENU lorsqu’un écran de sous-menu
est affiché, vous pouvez vérifier les réglages des écrans de
sous-menu.
MENU
<REGL.ENTREE VIDEO>
MULTIPLEXEUR
: NON
ENTREE VIDEO
: ANALOGIQUE
<MENU PRINCIPAL 2>
1.REGL.AFFICHAGE/PERTE SIGNAL
2.REGL.RS-232C / RS-485
3.REGL.AVERTISSEUR
4.REGL.VERROU DE SECURITE
5.REGL.RESEAU
6.REGL.DISQUE DUR
7.PANNE COURANT/DUREE UTIL.
->
->
->
->
->
->
->
MENU
VERS MENU PRINCIPAL 1
->
CADRAN POUR CHANGER.NAVETTE POUR SELECTIONNER
Remarque: Si vous appuyez sur le bouton MENU à plusieurs
reprises, l’écran change entre MENU PRINCIPAL 1 et
MENU PRINCIPAL 2. De plus, vous pouvez aussi
sélectionner “VERS MENU PRINCIPAL 2” ou “VERS
MENU PRINCIPAL 1” dans les écrans de menu
respectifs pour afficher l’autre écran de menu.
2
<REGL.AIRE D'ENREGISTREMENT>
CAPACITE TOTALE
: 80GB
AIRE D'ENR. NORMAL
: 80 %
REINITIALISATION
->
AIRE D'ENR. D'ALARME
: 19 %
REINITIALISATION
->
AIRE D'ARCHIVES
: 1%
REINITIALISATION
->
Tournez le cadran de taquage vers la gauche ou la droite
pour placer le curseur sur les éléments du menu.
L’élément sélectionné est mis en évidence.
ATTENTION:LORSQUE LE REGLAGE D'AIRE EST CHANGE.
L'AIRE AU COMPLET EST REINITIALISEE!
MENU
<MENU PRINCIPAL 1>
1.REGL.LANGUE/HORLOGE
->
2.REGL.ENTREE VIDEO
->
3.REGL.AIRE D'ENREGISTREMENT ->
4.REGL.COND.D'ENREGISTREMENT ->
5.REGL.MODE D'ENR.NORMAL
->
6.REGL.TIMER
->
7.REGL.CONGE
->
8.REGL.MODE D'ENR. D'ALARME ->
VERS MENU PRINCIPAL 2
->
CADRAN POUR CHANGER.NAVETTE POUR SELECTIONNER
3
<REGL.COND. D'ENREGISTREMENT>
ENR.SERIE NUMERIQUE
:NON
NOMBRE TOTAL
:¤¤
NUMERO D'ENREGISTREUR :¤¤
AIRE D'ENR.NORMAL
REENREGISTRER
AIRE D'ENR.D'ALARME
REENREGISTRER
AVERT. DE DISQUE RESTANT
:OUI
:OUI
:¤¤
Tournez le cadran de navette dans le sens des aiguilles
d’une montre.
Le sous-menu apparaît.
<REGL.ENTREE VIDEO>
MULTIPLEXEUR
: NON
ENTREE VIDEO
: ANALOGIQUE
Français
Remarque: Vous pouvez afficher des menus même pendant
l’enregistrement d’images dans l’une des zones
d’enregistrement. Dans de tels cas, le symbole
d’enregistrement <a> apparaît sur l’écran. Les menus
peuvent alors seulement être affichés; les réglages ne
peuvent pas être changés.
41
RÉGLAGES DE REGL.LANGUE/HORLOGE
Ce sous-menu vous permet de régler la langue d’affichage des écrans de menu, la date et l’heure qui sont affichées à l’écran et l’heure d’été. Il inclut
aussi une fonction qui vous permet de synchroniser les réglages de l’heure lorsque plusieurs appareils sont connectés ensemble.
Remarque: L’enregistrement n’est pas possible si l’heure n’a pas été réglée.
Menu principal 1
<MENU PRINCIPAL 1>
1.REGL.LANGUE/HORLOGE
->
2.REGL.ENTREE VIDEO
->
3.REGL.AIRE D'ENREGISTREMENT ->
4.REGL.COND.D'ENREGISTREMENT ->
5.REGL.MODE D'ENR.NORMAL
->
6.REGL.TIMER
->
7.REGL.CONGE
->
8.REGL.MODE D'ENR. D'ALARME ->
VERS MENU PRINCIPAL 2
->
CADRAN POUR CHANGER.NAVETTE POUR SELECTIONNER
Sous-menus
Pour le réglage de la langue.
<REGL.LANGUE>
FRANCAIS
<REGL.HORLOGE>
01-01-2002 MAR 00:00:00
<HEURE D'ETE>
MODE :
APRET
SEMAINE MOIS HEURE
ON 1ER-DIM 04 02:00
OFF DER-DIM 10 02:00
<REGL.HORLOGE EXTERNE>
REGL.DE L'HEURE 01:00
Pour le réglage de la date et de l’heure.
Pour le réglage de l’heure d’été.
Pour la synchronisation de l’heure sur
plusieurs appareils connectés ensemble.
Réglage de la langue
Réglages de REGL.HORLOGE
(réglage par défaut: 01-01-2002 MAR 00:00:00)
Vous devriez toujours régler la date et l’heure correctes. Cet
enregistreur vidéo numérique inclut l’heure d’enregistrement avec les
images enregistrées et utilise ces données de l’heure pour la lecture et
la recherche.
Les menus peuvent être affichés dans l’une des langues disponibles
(anglais, français ou espagnol). Le réglage par défaut de la langue est
l’anglais.
1
Appuyez sur le bouton MENU pour sélectionner
REGL.LANGUE/HORLOGE, puis tournez le cadran de navette
dans le sens des aiguilles d’une montre.
Le sous-menu LANGUAGE/LANGUE/IDIOMA apparaît et le
curseur le curseur passe à “ENGLISH”.
MENU
2
Exemple: Pour régler la date et l’heure à 8h30 du matin, le 22 mai
2002
1
<LANGUAGE/LANGUE/IDIOMA>
ENGLISH
<CLOCK SET>
01-01-2002 TUE 00:00:00
<DAYLIGHT SAVING>
MODE :
USE
WEEK MONTH TIME
ON 1ST-SUN 04 02:00
OFF LST-SUN 10 02:00
<EXT.CLOCK SET>
ADJUST.TIME
01:00
Lorsque le curseur est sur le réglage de la date et de l’heure,
tournez le cadran de navette dans le sens des aiguilles d’une
montre.
“01” clignote.
<REGL.LANGUE>
FRANCAIS
<REGL.HORLOGE>
01-01-2002 MAR 00:00:00
<HEURE D’ETE>
MODE :
ARRET
SEMAINE MOIS HEURE
ON 1ER-DIM 04 02:00
OFF DER-DIM 10 02:00
<REGL.HORLOGE EXTERNE>
REGL.DE L’HEURE
01:00
Tournez le cadran de navette dans le sens des aiguilles
d’une montre.
“ENGLISH” clignote.
2
<LANGUAGE/LANGUE/IDIOMA>
ENGLISH
<CLOCK SET>
01-01-2002 TUE 00:00:00
Tournez le cadran de taquage pour sélectionner “ 05: mois” ,
puis tournez le cadran de navette dans le sens des aiguilles
d’une montre.
Le curseur passe au réglage du mois “01” et clignote.
2
3
05-01-2002 MAR 00:00:00
1
Tournez le cadran de taquage pour sélectionner la langue
(exemple: “ FRANCAIS” ) puis tournez le cadran de navette
dans le sens des aiguilles d’une montre.
La langue d’affichage changera au français et le curseur passe
au réglage de la date et de l’heure.
2
1
3
<REGL.LANGUE>
FRANCAIS
<REGL.HORLOGE>
01-01-2002 MAR 00:00:00
<HEURE D’ETE>
MODE :
ARRET
SEMAINE MOIS HEURE
ON 1ER-DIM 04 02:00
OFF DER-DIM 10 02:00
<REGL.HORLOGE EXTERNE>
REGL.DE L’HEURE
01:00
Utilisez la même méthode pour régler le jour (22), l’année
(2002), l’heure (08), les minutes (30) et les secondes.
Lorsque les secondes sont réglées, le curseur passe au réglage
de REGL. DE L’HEURE de “REGL. HORLOGE EXTERNE” et
l’heure commence à compter à partir de zéro secondes.
Remarque: L’horloge s’arrête pendant le réglage.
42
Français
RÉGLAGES DE REGL.LANGUE/HORLOGE
Réglage de HEURE D’ETE
Réglage de REGL. HORLOGE EXTERNE
(réglage par défaut: MODE)
Ceci peut être utilisé pour régler l’heure de début et l’heure de fin de la
période d’heure d’été. Lorsque l’heure d’été est réglée, l’horloge est
automatiquement avancée d’une heure.
(réglage par défaut: 01:00)
Si plus de deux appareils sont connectés en même temps, les
réglages de l’heure (REGL. DE L’HEURE) pour l’enregistreur vidéo
numérique sont aussi appliqués à ces dispositifs.
Exemple: Pour commencer la période de l’heure d’été à 2h00 du
matin le premier dimanche d’avril et la finir à 2h00 du
matin le 4ème dimanche d’octobre
1
1
Lorsque le curseur est sur le réglage de MODE, tournez le
cadran de navette dans le sens des aiguilles d’une montre.
“ARRET” clignote.
ALARM
C CLOCK
RE ADJUST
RESET
ON UT
ALARM ALARM N O
OUT
C IN
C IN OUT
<HEURE D'ETE>
:
ARRET
SEMAINE MOIS HEURE
ON 1ER-DIM 04 02:00
OFF DER-DIM 10 02:00
<REGL.HORLOGE EXTERNE>
REGL.DE L'HEURE 01:00
MODE
2
3
6
1ER-DIM
04
04
FULL
02:00
3
Tournez le cadran de taquage pour déplacer le curseur au
réglage de REGL. DE L’HEURE, puis tournez le cadran de
navette.
“01” clignote.
Tournez le cadran de taquage pour régler les heures
(exemple: “ 05” ), puis tournez le cadran de navette.
02:00
2
<REGL.LANGUE>
FRANCAIS
<REGL.HORLOGE>
01-01-2002 MAR 00:00:00
<HEURE D'ETE>
MODE :
ARRET
SEMAINE MOIS HEURE
ON 1ER-DIM 04 02:00
OFF DER-DIM 10 02:00
<REGL.HORLOGE EXTERNE>
REGL.DE L'HEURE 01:00
02:00
<REGL.HORLOGE EXTERNE>
REGL.DE L'HEURE 05:00
Tournez le cadran de taquage dans le sens des aiguilles
d’une montre pour sélectionner “ DIM” , puis tournez le
cadran de navette dans le sens des aiguilles d’une montre.
Le réglage “04” (MOIS) clignote.
4
Tournez le cadran de taquage dans le sens des aiguilles
d’une montre pour sélectionner “ 04” , puis tournez le cadran
de navette dans le sens des aiguilles d’une montre.
Le réglage “02” (HEURE) clignote.
2
1
7
2
Tournez le cadran de taquage dans le sens des aiguilles
d’une montre pour sélectionner “ DER” , puis tournez le
cadran de navette.
Le réglage “DIM” (SEMAINE) clignote.
DER-DIM
NG
NI
RM
AR UT ALA LL
W O
FU
2ème unité
1
ON
5
04
FULL
ALARM
C CLOCK
RE ADJUST
RESET
ON UT
ALARM ALARM N O
OUT
C IN
C IN OUT
Méthode de connexion pour REGL. HORLOGE:
Branchez les connecteurs C (commun) du premier et du second
enregistreur vidéo numérique, puis connectez le connecteur
CLOCK ADJUST OUT du premier au connecteur CLOCK
ADJUST IN du second.
Tournez le cadran de navette dans le sens des aiguilles
d’une montre.
Le réglage “1ER” (SEMAINE) clignote.
ON
4
1ER-DIM
NG
NI
RM
AR UT ALA LL
W O
FU
1ère unité
Tournez le cadran de navette dans le sens des aiguilles
d’une montre.
Le curseur passe à la ligne de l’heure de début (ON).
ON
Connectez les autres appareils au connecteur d’entrée
(CLOCK ADJUST IN) et au connecteur de sortie (CLOCK
ADJUST OUT) à l’arrière de l’enregistreur vidéo numérique.
EXIT/OSD
<HEURE D'ETE>
:
ARRET
SEMAINE MOIS HEURE
ON DER-DIM 04 02:00
OFF DER-DIM 10 02:00
<REGL.HORLOGE EXTERNE>
REGL.DE L'HEURE 01:00
MODE
5
Utilisez la même méthode pour régler la fin de la période
d’heure d’été.
Le curseur passe au réglage de REGL. DE L’HEURE.
Français
Appuyez sur le bouton EXIT/OSD.
L’affichage revient à l’écran normal.
43
Utilisez la même méthode pour régler REGL. DE L’HEURE
sur le deuxième appareil.
Quand les réglages sont finis, l’affichage revient à l’écran normal.
RÉGLAGE DE REGL.ENTREE VIDEO
Si vous sélectionnez un multiplexeur (vendu séparément) qui est connecté à l’enregistreur vidéo numérique, vous pouvez régler le type d’entrée
d’image (numérique ou analogique).
Menu principal 1
Sous-menus
<REGL.ENTREE VIDEO>
MULTIPLEXEUR
: NON
ENTREE VIDEO
: ANALOGIQUE
<MENU PRINCIPAL 1>
1.REGL.LANGUE/HORLOGE
->
2.REGL.ENTREE VIDEO
->
3.REGL.AIRE D'ENREGISTREMENT ->
4.REGL.COND.D'ENREGISTREMENT ->
5.REGL.MODE D'ENR.NORMAL
->
6.REGL.TIMER
->
7.REGL.CONGE
->
8.REGL.MODE D'ENR. D'ALARME ->
VERS MENU PRINCIPAL 2
->
CADRAN POUR CHANGER.NAVETTE POUR SELECTIONNER
Pour régler le fabricant du multiplexeur
connecté.
Pour régler l’entrée vidéo.
Réglage de MULTIPLEXEUR
Réglage de ENTREE VIDEO
(réglage par défaut: NON)
1
Appuyez sur le bouton MENU pour sélectionner REGL.
ENTREE VIDEO puis tournez le cadran de navette dans le
sens des aiguilles d’une montre.
Le sous-menu REGL.ENTREE VIDEO apparaît et le curseur
passe au réglage de MULTIPLEXEUR.
1
<REGL.ENTREE VIDEO>
MULTIPLEXEUR
: SANYO
ENTREE VIDEO
: ANALOGIQUE
2
Tournez le cadran de navette dans le sens des aiguilles
d’une montre.
“NON” clignote.
<REGL.ENTREE VIDEO>
MULTIPLEXEUR
: NON
ENTREE VIDEO
: ANALOGIQUE
3
Lorsque le curseur est sur le réglage de ENTREE VIDEO, tournez
le cadran de navette dans le sens des aiguilles d’une montre.
“ANALOGIQUE” clignote.
<REGL.ENTREE VIDEO>
MULTIPLEXEUR
: NON
ENTREE VIDEO
: ANALOGIQUE
MENU
2
(réglage par défaut: ANALOGIQUE)
Ceci règle si les signaux d’image qui sont entrés aux connecteurs d’entrée
vidéo de cet enregistreur vidéo numérique sont numériques ou analogiques.
2
Tournez le cadran de taquage pour sélectionner le réglage
de MULTIPLEXEUR (exemple: “ SANYO” ), puis tournez le
cadran de navette dans le sens des aiguilles d’une montre.
Exemples d’affichage:
• NON: Si un multiplexeur n’est pas utilisé
• SANYO: Si un multiplexeur Sanyo est utilisé
• AUTRES1: Si un multiplexeur Sony est utilisé
• AUTRES2: Si un multiplexeur Robot ou DM est utilisé
Le curseur passe à ENTREE VIDEO.
2
Tournez le cadran de taquage pour sélectionner
“ NUMERIQUE” (ex.), puis tournez le cadran de navette.
Le curseur passe à MULTIPLEXEUR.
Remarque:
• Sélectionnez ceci si un multiplexeur de transport numérique
Sanyo (MPX-CD163 ou CD93) a été connecté numériquement.
• Remarque: Lors d’un branchement numérique à un
multiplexeur, branchez d’abord le connecteur VIDEO OUT de
cette unité au moniteur, puis réglez le signal d’entrée à
“NUMERIQUE”.
<REGL.ENTREE VIDEO>
MULTIPLEXEUR
: SANYO
ENTREE VIDEO
: NUMERIQUE
1
3
Appuyez sur le bouton EXIT/OSD.
L’affichage revient à l’écran normal.
EXIT/OSD
<REGL.ENTREE VIDEO>
MULTIPLEXEUR
: SANYO
ENTREE VIDEO
: ANALOGIQUE
1
Remarque:
• Si le réglage de MULTIPLEXEUR est autre que “NON”,
DETECTEUR ne peut pas être sélectionné pour DECLENCHEMENT
ALARME dans le menu REGL. MODE D’ENR. D’ALARME.
Lors de l’utilisation d’un multiplexeur, utilisez la fonction de
détecteur de mouvement du multiplexeur.
• Lors de l’utilisation d’un multiplexeur fabriqué par SANYO ou un
autre en mode de branchement analogique, branchez le
connecteur SW OUT à l’arrière de cette unité au connecteur SW IN
du multiplexeur. Ceci n’est pas nécessaire si vous utilisez un
multiplexeur SANYO en mode de branchement numérique.
Remarque: Les multiplexeurs spécifiés par SANYO et AUTRES1 sont
capables de décoder l’information de canal. Par
conséquent, vous pouvez enregistrer des images de ces
multiplexeurs à l’aide de cet enregistreur à disque dur,
puis utiliser le bouton CHANNEL sur l’enregistreur à
disque dur pour sélectionner un numéro de caméra
(information de canal) lors de la lecture.
44
Français
RÉGLAGE DE REGL.AIRE D’ENREGISTREMENT
Menu principal 1
Sous-menus
<MENU PRINCIPAL 1>
1.REGL.LANGUE/HORLOGE
->
2.REGL.ENTREE VIDEO
->
3.REGL.AIRE D'ENREGISTREMENT ->
4.REGL.COND.D'ENREGISTREMENT ->
5.REGL.MODE D'ENR.NORMAL
->
6.REGL.TIMER
->
7.REGL.CONGE
->
8.REGL.MODE D'ENR. D'ALARME ->
VERS MENU PRINCIPAL 2
->
CADRAN POUR CHANGER.NAVETTE POUR SELECTIONNER
Pour afficher la
capacité totale du
disque dur.
<REGL.AIRE D'ENREGISTREMENT>
CAPACITE TOTALE
: 80GB
AIRE D'ENR. NORMAL
: 80 %
REINITIALISATION
->
AIRE D'ENR. D'ALARME
: 19 %
REINITIALISATION
->
AIRE D'ARCHIVES
: 1%
REINITIALISATION
->
Pour régler la capacité de la zone
d’enregistrement
Zone d’enrenormal.
gistrement
normal
ATTENTION:LORSQUE LE REGLAGE D'AIRE EST CHANGE.
L'AIRE AU COMPLET EST REINITIALISEE!
Pour régler la capacité de la zone
d’archives.
Pour régler la capacité de la zone
d’enregistrement d’alarme.
Zone d’enregistrement
d’alarme
Zone d’archives
Affichage de la capacité totale
Remise à zéro de chaque zone
d’enregistrement
Ceci indique la capacité d’enregistrement totale du disque dur. Cet
affichage ne peut pas être changé à moins que la capacité du disque
dur elle-même soit changée.
Avec le réglage initial du disque dur, la zone d’enregistrement normal
est de 80%, la zone d’enregistrement d’alarme de 19% et la zone
d’archives de 1% de la capacité du disque. La limite maximale est de
10 Go (12,5% de la capacité totale lors de l’utilisation d’un disque dur
de 80 Go, 6,25% de la capacité totale lors de l’utilisation d’un disque
dur de 160 Go), donc vous ne pouvez pas régler une valeur plus
grande que cela.
L’attribution d’espace à chaque zone d’enregistrement est affichée
comme pourcentage du total. La zone d’enregistrement normal et la
zone d’enregistrement d’alarme ensemble peuvent être réglées à un
maximum de 99% de l’espace total.
La zone d’archives ne peut pas être réglée manuellement. Elle sera
obligatoirement assignée un minimum de 1%. Donc, si la zone
d’enregistrement normal et la zone d’enregistrement d’alarme sont
réglées à un total combiné de 85%, la zone d’archives sera
automatiquement réglée à 15%.
Par exemple, si la zone d’enregistrement normal est réglée à 0% et la
zone d’enregistrement d’alarme est réglée à 99%, les images
d’enregistrement normal ne seront pas sauvegardées sur le disque
dur. Seules les images d’enregistrement d’alarme seront
sauvegardées. La capacité d’enregistrement pour chaque zone
d’enregistrement devrait être assignée selon les conditions
particulières d’enregistrement de l’emplacement.
Si un disque dur additionnel est installé, sa capacité sera incluse dans
l’affichage de la CAPACITE TOTALE.
Exemple: Réglage de la zone d’enregistrement normal à 50% et la
zone d’enregistrement d’alarme à 49%
1
Appuyez sur le bouton MENU pour sélectionner REGL.AIRE
D’ENREGISTREMENT, puis tournez le cadran de navette
dans le sens des aiguilles d’une montre.
Le sous-menu REGL.AIRE D’ENREGISTREMENT apparaît et le
curseur passe à AIRE D’ENR.NORMALE.
MENU
2
3
4
Remarque:
• Si vous changez l’attribution de l’espace pour chaque zone
d’enregistrement du disque dur pendant l’enregistrement, les
images déjà enregistrées à ce point sont effacées. Ceci est dû au
fait que le disque dur est initialisé lors de cette opération, et il faut
donc faire attention en faisant ce réglage. Si vous devez changer
les tailles des zones d’enregistrement pour une raison quelconque,
assurez-vous de faire une copie de sauvegarde des images sur un
support externe comme un ordinateur.
• Si MIROIR dans l’écran REGL.DISQUE DUR a été réglé à “OUI”,
l’affichage de CAPACITE TOTALE dans REGL.AIRE
D’ENREGISTREMENT indiquera une valeur moindre que la
capacité du disque dur.
5
Utilisez le cadran de taquage pour déplacer le curseur au
réglage de AIRE D’ENR.NORMAL, puis tournez le cadran de
navette dans le sens des aiguilles d’une montre.
“80%” clignote.
Utilisez le cadran de taquage pour changer le réglage, par
exemple de “ 80%” à “ 50%” , puis tournez le cadran de
navette dans le sens des aiguilles d’une montre.
Le curseur passe à AIRE D’ENR.D’ALARME.
Tournez le cadran de navette dans le sens des aiguilles
d’une montre.
“35%” clignote.
Tournez le cadran de taquage pour changer le réglage, par
exemple de “ 34%” à “ 49%” , puis tournez le cadran de
navette dans le sens des aiguilles d’une montre.
Le curseur passe à REINITIALISATION.
<REGL.AIRE D'ENREGISTREMENT>
CAPACITE TOTALE
: 80GB
AIRE D'ENR. NORMAL
: 49 %
REINITIALISATION
->
AIRE D'ENR. D'ALARME
: 40 %
REINITIALISATION
->
AIRE D'ARCHIVES
: 2%
REINITIALISATION
->
ATTENTION:LORSQUE LE REGLAGE D'AIRE EST CHANGE.
L'AIRE AU COMPLET EST REINITIALISEE!
Français
45
RÉGLAGE DE REGL.AIRE D’ENREGISTREMENT
6
2
Tournez le cadran de navette dans le sens contraire des
aiguilles d’une montre.
L’écran affiche alors l’écran “AVERTISSEMENT”. Ceci est un
message pour vous avertir que le disque dur est sur le point
d’être réinitialisé.
Utilisez le cadran de taquage pour déplacer le curseur au
réglage de REINITIALISATION → pour AIRE D’ENR.NORMAL,
puis tournez le cadran de navette dans le sens des aiguilles
d’une montre.
“NON” clignote sur l’écran “AVERTISSEMENT”.
<AVERTISSEMENT>
<REGL.AIRE D'ENREGISTREMENT>
CAPACITE TOTALE
: 80GB
AIRE D'ENR. NORMAL
: 80 %
REINITIALISATION
->
AIRE D'ENR. D'ALARME
: 19 %
REINITIALISATION
->
AIRE D'ARCHIVES
: 1%
REINITIALISATION
->
REINITIALISATION
AIRE D'ARCHIVES
DESIREZ-VOUS CONTINUER?
NON
ATTENTION:LORSQUE LE REGLAGE D'AIRE EST CHANGE.
L'AIRE AU COMPLET EST REINITIALISEE!
CADRAN POUR CHANGER. NAVETTE POUR REGLER
7
Pour réinitialiser le disque dur, tournez le cadran de taquage
pour sélectionner “ OUI” , puis tournez le cadran de navette
dans le sens des aiguilles d’une montre.
L’écran REGL.AIRE D’ENREGISTREMENT apparaît et les
capacités d’enregistrement pour chaque zone sont changées.
<AVERTISSEMENT>
REINITIALISATION
AIRE D'ENR. NORMAL
DESIREZ-VOUS CONTINUER?
NON
<AVERTISSEMENT>
REINITIALISATION
AIRE D'ARCHIVES
CADRAN POUR CHANGER. NAVETTE POUR REGLER
DESIREZ-VOUS CONTINUER?
3
OUI
CADRAN POUR CHANGER. NAVETTE POUR REGLER
Utilisez le cadran de taquage pour changer “ NON” à “ OUI” ,
puis tournez le cadran de navette dans le sens des aiguilles
d’une montre.
AIRE D’ENR.NORMAL est réglé à un seul écrasement.
Remarque: Si vous tournez le cadran de navette dans le sens des
aiguilles d’une montre quand “NON” est sélectionné,
l’écran REGL.AIRE D’ENREGISTREMENT apparaît et les
capacités d’enregistrement reviennent à leurs réglages
précédents. Dans ce cas, le disque dur n’est pas
réinitialisé.
4
Réglage de REINITIALISATION
Lorsque la zone d’enregistrement normal et la zone d’enregistrement
d’alarme du disque dur sont pleines, les images dans les zones
d’enregistrement seront automatiquement écrasées, à partir des
images les plus anciennes qui ont été enregistrées.
Cependant, vous pouvez changer ce réglage pour empêcher
l’écrasement des images quand les zones d’enregistrement sont
pleines, par exemple lorsque vous désirez vérifier ou éditer les images
enregistrées. Dans ce cas vous devrez spécifier au besoin que vous
voulez que les images soient écrasées dans chaque zone
d’enregistrement. Ce qui suit décrit la méthode pour faire ceci.
1
5
Remarque:
• Pour que l’écrasement soit fait automatiquement, changez le
réglage de REENREGISTRER pour AIRE D’ENR.NORMAL ou
AIRE D’ENR.D’ALARME à “OUI”.
• Si REINITIALISATION est activé, la zone d’enregistrement normal,
la zone d’enregistrement d’alarme et la zone d’archives seront
toutes réinitialisées, et il ne sera plus possible de faire la lecture
des images déjà enregistrées.
<REGL.COND. D'ENREGISTREMENT>
ENR.SERIE NUMERIQUE
:NON
NOMBRE TOTAL
:¤¤
NUMERO D'ENREGISTREUR :¤¤
AVERT. DE DISQUE RESTANT
Appuyez sur le bouton EXIT/OSD.
L’affichage revient à l’écran normal.
EXIT/OSD
Réglez REENREGISTRER pour AIRE D’ENR.NORMAL ou
AIRE D’ENR.D’ALARME à “ NON” dans le menu REGL.COND.
D’ENREGISTREMENT.
AIRE D'ENR.NORMAL
REENREGISTRER
AIRE D'ENR.D'ALARME
REENREGISTRER
Suivez la même méthode pour faire le réglage de AIRE
D’ENR.D’ALARME.
:OUI
:OUI
:¤¤
Ce réglage peut être utilisé pour afficher à l’écran la zone
d’enregistrement restante sur le disque dur. En même temps,
l’indicateur FULL ou ALARM FULL clignotera sur le panneau
avant de l’enregistreur vidéo numérique.
Lorsque l’écriture sur le disque dur est finie, vous pouvez utiliser
les opérations de lecture pour vérifier les enregistrements.
46
Français
RÉGLAGE DE REGL.COND. D’ENREGISTREMENT
Ceci vous permet de faire les réglages et de définir les permissions d’écrasement pour chaque zone d’enregistrement lorsque plusieurs enregistreurs
vidéo numérique (jusqu’à un maximum de trois) sont connectés pour l’enregistrement en série.
Menu principal 1
Sous-menus
Pour régler l’enregistrement en série.
Pour régler le nombre d’enregistreurs vidéo
numérique connectés.
Pour régler le numéro de chaque enregistreur
vidéo numérique.
<REGL.COND. D'ENREGISTREMENT>
ENR.SERIE NUMERIQUE
:NON
NOMBRE TOTAL
:¤¤
NUMERO D'ENREGISTREUR :¤¤
<MENU PRINCIPAL 1>
1.REGL.LANGUE/HORLOGE
->
2.REGL.ENTREE VIDEO
->
3.REGL.AIRE D'ENREGISTREMENT ->
4.REGL.COND.D'ENREGISTREMENT ->
5.REGL.MODE D'ENR.NORMAL
->
6.REGL.TIMER
->
7.REGL.CONGE
->
8.REGL.MODE D'ENR. D'ALARME ->
VERS MENU PRINCIPAL 2
->
CADRAN POUR CHANGER.NAVETTE POUR SELECTIONNER
AIRE D'ENR.NORMAL
REENREGISTRER
AIRE D'ENR.D'ALARME
REENREGISTRER
AVERT. DE DISQUE RESTANT
:OUI
:OUI
Pour régler l’écrasement pour la zone
d’enregistrement normal.
:¤¤
Pour régler l’écrasement pour la zone
d’enregistrement d’alarme.
Pour régler l’avertissement d’espace restant
pour les zones d’enregistrement.
Réglages d’enregistrement pour le
branchement en série numérique
(maximum 3 unités)
1
4
Connectez les enregistreurs vidéo numérique à l’aide des
connecteurs d’entrée et de sortie numériques de chaque
enregistreur vidéo numérique. (référez-vous à la page 8.)
<REGL.COND. D'ENREGISTREMENT>
ENR.SERIE NUMERIQUE
:OUI
NOMBRE TOTAL
:2
NUMERO D'ENREGISTREUR : 1
Remarque:
• Utilisez un câble Ethernet de type droit pour connecter les
enregistreurs vidéo numérique. La longueur de chaque câble ne
devrait pas dépasser 3 mètres.
• Si l’entrée d’alarme est utilisée, entrez le même signal d’entrée
d’alarme à tous les enregistreurs vidéo numériques.
2
AVERT. DE DISQUE RESTANT
6
:OUI
:OUI
:¤¤
Tournez le cadran de navette dans le sens des aiguilles
d’une montre, utilisez le cadran de taquage pour régler le
numéro du branchement (exemple: 1), puis tournez le cadran
de navette dans le sens des aiguilles d’une montre.
Le curseur passe à REENREGISTRER.
Remarque:
• L’enregistreur vidéo numérique utilisé comme unité principale
devrait toujours avoir son numéro de raccordement réglé à 1.
• Ne sautez pas, ni ne superposez pas les chiffres en faisant les
réglages.
• Si COMMANCE RESEAU dans le menu REGL. RESEAU a été
réglé à “OUI”, ENR. SERIE NUMERIQUE ne peut pas être
sélectionné. Réciproquement, si ENR. SERIE NUMERIQUE a été
réglé à “OUI”, COMMANCE RESEAU ne peut pas être réglé à
“OUI”.
• REGL. ENTREE VIDEO de ENTREE VIDEO du second
enregistreur vidéo numérique et suivants doit être réglé à
NUMERIQUE.
Tournez le cadran de navette dans le sens des aiguilles
d’une montre.
“NON” clignote.
<REGL.COND. D'ENREGISTREMENT>
ENR.SERIE NUMERIQUE
:NON
NOMBRE TOTAL
:¤¤
NUMERO D'ENREGISTREUR :¤¤
Français
Tournez le cadran de navette dans le sens des aiguilles
d’une montre, utilisez le cadran de taquage pour régler le
nombre total d’enregistreurs vidéo numérique connectés
(exemple: 3), puis tournez le cadran de navette dans le sens
des aiguilles d’une montre.
Le curseur passe à NUMERO D’ENRGISTREUR.
<REGL.COND. D'ENREGISTREMENT>
ENR.SERIE NUMERIQUE
:OUI
NOMBRE TOTAL
:3
NUMERO D'ENREGISTREUR : 1
<REGL.COND. D'ENREGISTREMENT>
ENR.SERIE NUMERIQUE
:NON
NOMBRE TOTAL
:¤¤
NUMERO D'ENREGISTREUR :¤¤
AIRE D'ENR.NORMAL
REENREGISTRER
AIRE D'ENR.D'ALARME
REENREGISTRER
3
5
Appuyez sur le bouton MENU pour sélectionner
REGL.COND. D’ENREGISTREMENT, puis tournez le cadran
de navette dans le sens des aiguilles d’une montre.
Le sous-menu REGL.COND. D’ENREGISTREMENT apparaît et
le curseur passe à ENR.SERIE NUMERIQUE.
MENU
Utilisez le cadran de taquage pour changer le réglage à
“ OUI” , puis tournez le cadran de navette dans le sens des
aiguilles d’une montre.
Le curseur passe à NOMBRE TOTAL.
47
RÉGLAGE DE REGL.COND. D’ENREGISTREMENT
Réglage de REENREGISTRER pour AIRE
D’ENR. NORMAL et de AVERT. DE
DISQUE RESTANT dans la section
d’affichage d’opérations
4
Lorsque les zones d’enregistrement du disque dur sont pleines, vous
pouvez régler si les vieilles images sont écrasées ou si
l’enregistrement s’arrête. Si l’enregistrement est réglé pour s’arrêter, le
pourcentage actuel d’espace libre restant sur le disque dur apparaîtra
dans la section d’affichage d’opérations. Vous pouvez utiliser [AVERT.
DE DISQUE RESTANT] pour spécifier la quantité d’espace libre
restant.
1
Remarque: Le réglage de AVERT. DE DISQUE RESTANT peut être
entre 1% (réglage par défaut) et 10%.
1
AIRE D'ENR.NORMAL
REENREGISTRER
AIRE D'ENR.D'ALARME
REENREGISTRER
Lorsque le curseur est sur le réglage de REENREGISTRER,
tournez le cadran de navette dans le sens des aiguilles d’une
montre.
“NON” clignote.
AIRE D'ENR.NORMAL
REENREGISTRER
AIRE D'ENR.D'ALARME
REENREGISTRER
AVERT. DE DISQUE RESTANT
AVERT. DE DISQUE RESTANT
5
:OUI
:OUI
:¤¤
:NON
:NON
:5%
Appuyez sur le bouton EXIT/OSD.
L’affichage revient à l’écran normal.
Lorsque l’espace disque restant dans chaque zone atteint 5% il
est affiché dans la section d’affichage d’opérations. L’indicateur
FULL (pour la zone d’enregistrement normal) ou ALARM FULL
(pour la zone d’enregistrement d’alarme) clignote sur le panneau
FULL
ALARM FULL
FULL
ALARM FULL
avant de l’enregistreur vidéo numérique.
EXIT/OSD
Tournez le cadran de taquage pour sélectionner le réglage
(exemple: NON), puis tournez le cadran de navette dans le
sens des aiguilles d’une montre.
AVERT. DE DISQUE RESTANT change de ** à 1%.
Exemples d’affichage:
• NON: Lorsque la zone d’enregistrement normal est pleine,
l’enregistrement s’arrête.
• OUI: Lorsque la zone d’enregistrement normal est pleine, les
images sont écrasées automatiquement à partir des
images les plus anciennes.
POWER
AIRE D'ENR.NORMAL
REENREGISTRER
AIRE D'ENR.D'ALARME
REENREGISTRER
AVERT. DE DISQUE RESTANT
FULL
ALARM FULL
LOCK
5%
01-01-01
00:00:00 SD 0.10SEC
FULL
<REGL.COND. D'ENREGISTREMENT>
ENR.SERIE NUMERIQUE
:NON
NOMBRE TOTAL
:¤¤
NUMERO D'ENREGISTREUR :¤¤
ALARM FULL
Rapport entre REGL.AIRE
D’ENREGISTREMENT et REENREGISTRER
FULL
:NON
:OUI
<REGL.AIRE D'ENREGISTREMENT>
CAPACITE TOTALE
: 80GB
AIRE D'ENR. NORMAL
: 80 %
REINITIALISATION
->
AIRE D'ENR. D'ALARME
: 19 %
REINITIALISATION
->
AIRE D'ARCHIVES
: 1%
REINITIALISATION
->
:1%
Remarque: Si “NON” est sélectionné, le réglage de AVERT. DE
DISQUE RESTANT indique le pourcentage d’espace
disque dur restant qui fera que l’indicateur FULL ou
ALARM FULL commence à clignoter.
3
<REGL.COND. D'ENREGISTREMENT>
ENR.SERIE NUMERIQUE
:NON
NOMBRE TOTAL
:¤¤
NUMERO D'ENREGISTREUR :¤¤
2
<REGL.COND. D'ENREGISTREMENT>
ENR.SERIE NUMERIQUE
:NON
NOMBRE TOTAL
:¤¤
NUMERO D'ENREGISTREUR :¤¤
2
Lorsque le curseur est sur le réglage de AVERT. DE DISQUE
RESTANT, tournez le cadran de navette dans le sens des
aiguilles d’une montre, puis utilisez le cadran de taquage
pour régler la valeur d’affichage à la quantité d’espace
disque restante (exemple: “ 5” ).
ATTENTION:LORSQUE LE REGLAGE D'AIRE EST CHANGE.
L'AIRE AU COMPLET EST REINITIALISEE!
ALARM FULL
<REGL.COND. D'ENREGISTREMENT>
ENR.SERIE NUMERIQUE
:NON
NOMBRE TOTAL
:¤¤
NUMERO D'ENREGISTREUR :¤¤
AIRE D'ENR.NORMAL
REENREGISTRER
AIRE D'ENR.D'ALARME
REENREGISTRER
AVERT. DE DISQUE RESTANT
:OUI
:OUI
:¤¤
Si la zone d’enregistrement normal et la zone d’enregistrement
d’alarme sont pleines, sélectionnez REINITIALISATION pour la zone
d’enregistrement normal ou la zone d’enregistrement d’alarme dans le
menu REGL.AIRE D’ENREGISTREMENT. (Référez-vous à la page
46.)
Suivez la même méthode pour faire le réglage de AIRE
D’ENR.D’ALARME.
Remarque: Faites les réglages séparément pour chaque article du
menu, même si vous faites un branchement numérique.
Les réglages de REENREGISTRER pour la deuxième
unité et suivantes doivent correspondre au réglage pour
la première unité.
Remarque: Aucune entrée audio n’est fournie à partir des
connecteurs d’entrée vidéo numérique. Les signaux audio
peuvent être entrés comme signaux analogiques par
l’intermédiaire des connecteurs d’entrée audio (comme le
connecteur MIC). Pour plus de détails sur les
branchements, référez-vous à la page 8.
48
Français
RÉGLAGE DE REGL.MODE D’ENR.NORMAL
Menu principal 1
<MENU PRINCIPAL 1>
1.REGL.LANGUE/HORLOGE
->
2.REGL.ENTREE VIDEO
->
3.REGL.AIRE D'ENREGISTREMENT ->
4.REGL.COND.D'ENREGISTREMENT ->
5.REGL.MODE D'ENR.NORMAL
->
6.REGL.TIMER
->
7.REGL.CONGE
->
8.REGL.MODE D'ENR. D'ALARME ->
VERS MENU PRINCIPAL 2
->
CADRAN POUR CHANGER.NAVETTE POUR SELECTIONNER
Sous-menus
Pour régler le taux d’enregistrement
(vitesse d’enregistrement).
Les chiffres entre parenthèses indiquent
les durées d'enregistrement possibles.
Réglage de REGL.MODE D’ENR.NORMAL
5
Appuyez sur le bouton MENU pour sélectionner REGL.MODE
D’ENR.NORMAL, puis tournez le cadran de navette dans le
sens des aiguilles d’une montre.
Le sous-menu REGL.MODE D’ENR.NORMAL apparaît et le
curseur passe au réglage de QUALITE D’IMAGE.
MENU
2
Pour régler la méthode d’enregistrement
(image ou champ).
Pour régler l’enregistrement audio.
Ceci vous permet de régler la qualité d’enregistrement, la méthode
d’enregistrement (image ou champ), l’enregistrement audio et la
vitesse d’enregistrement pour la zone d’enregistrement normal.
1
Pour régler la qualité d’image.
<REGL.MODE D'ENR.NORMAL >
QUALITE D'IMAGE
: STANDARD
ENR.TRAME/IMAGE
: TRAME
ENREGISTREMENT AUDIO : NON
CYCLE D'ENR. : 0.10SEC ( 54H)
<REGL.MODE D'ENR.NORMAL>
QUALITE D'IMAGE
: TRES BONNE
ENR.TRAME/IMAGE
: IMAGE
ENREGISTREMENT AUDIO : OUI
CYCLE D'ENR. : A0.20 SEC ( 108H)
<REGL.MODE D'ENR.NORMAL>
QUALITE D'IMAGE
: STANDARD
ENR.TRAME/IMAGE
: TRAME
ENREGISTREMENT AUDIO : NON
CYCLE D'ENR. : 0.10 SEC ( 54H)
Remarque:
• L’enregistrement audio peut être fait lorsque le réglage de CYCLE
D’ENR. est de 0,02 à 0,10 sec (TRAME) ou 0,03 à 0,20 sec
(IMAGE).
• Lorsque réglé à “OUI”, la lettre “A” (indicateur d’enregistrement
audio) apparaît devant le taux d’enregistrement CYCLE D’ENR.
Ceci est dû au fait que les enregistrements audio sont aussi faits
dans la zone d’enregistrement normal, et donc la capacité
d’enregistrement d’images de la zone d’enregistrement normal est
réduite.
Tournez le cadran de navette dans le sens des aiguilles
d’une montre.
“STANDARD” clignote.
<REGL.MODE D'ENR.NORMAL >
QUALITE D'IMAGE
: STANDARD
ENR.TRAME/IMAGE
: TRAME
ENREGISTREMENT AUDIO : NON
CYCLE D'ENR. : 0.10 SEC ( 54H)
6
Exemples d’affichage: Sélection de la qualité d’image
• DE BASE (DB): (15 KB)
• NORMAL (NO): (22 KB)
• STANDARD (SD): (30 KB)
• BONNE (BO): (42 KB)
• TRES BONNE (TB): (56 KB)
3
Tournez le cadran de navette dans le sens des aiguilles
d’une montre, utilisez le cadran de taquage pour régler la
vitesse d’enregistrement (exemple: “ 0.13” ), puis tournez le
cadran de navette.
Le curseur passe à QUALITE D’IMAGE.
Remarque: Les vitesses d’enregistrement de champ et d’image
changent selon le réglage de QUALITE D’IMAGE.
Référez-vous au Tableau des vitesses d’enregistrement
pour plus de détails. (référez-vous à la page 11.)
Utilisez le cadran de taquage pour sélectionner la qualité
d’image (exemple: “ TRES BONNE” ), puis tournez le cadran
de navette dans le sens des aiguilles d’une montre.
Le curseur passe à ENR.TRAME/IMAGE.
<REGL.MODE D'ENR.NORMAL>
QUALITE D'IMAGE
: TRES BONNE
ENR.TRAME/IMAGE
: IMAGE
ENREGISTREMENT AUDIO : OUI
CYCLE D'ENR. : A0.13 SEC ( 72H)
7
<REGL.MODE D'ENR.NORMAL>
QUALITE D'IMAGE
: TRES BONNE
ENR.TRAME/IMAGE
: TRAME
ENREGISTREMENT AUDIO : NON
CYCLE D'ENR. : 0.20 SEC ( 108H)
4
Tournez le cadran de navette dans le sens des aiguilles
d’une montre, utilisez le cadran de taquage pour régler
l’enregistrement audio (exemple: “ OUI” ), puis tournez le
cadran de navette.
Le curseur passe à CYCLE D’ENR..
EXIT/OSD
Tournez le cadran de navette dans le sens des aiguilles
d’une montre, utilisez le cadran de taquage pour régler
l’enregistrement d’image ou de champ (exemple: IMAGE),
puis tournez le cadran de navette dans le sens des aiguilles
d’une montre.
Le curseur passe à ENREGISTREMENT AUDIO.
<REGL.MODE D'ENR.NORMAL>
QUALITE D'IMAGE
: TRES BONNE
ENR.TRAME/IMAGE
: IMAGE
ENREGISTREMENT AUDIO : NON
CYCLE D'ENR. : 0.20 SEC ( 108H)
Français
Appuyez sur le bouton EXIT/OSD.
L’affichage revient à l’écran normal.
49
RÉGLAGE DE REGL.TIMER
Utilisez la fonction de programmateur de l’enregistreur vidéo numérique pour régler les heures pour l’enregistrement par programmateur.
Menu principal 1
<MENU PRINCIPAL 1>
1.REGL.LANGUE/HORLOGE
->
2.REGL.ENTREE VIDEO
->
3.REGL.AIRE D'ENREGISTREMENT ->
4.REGL.COND.D'ENREGISTREMENT ->
5.REGL.MODE D'ENR.NORMAL
->
6.REGL.TIMER
->
7.REGL.CONGE
->
8.REGL.MODE D'ENR. D'ALARME ->
VERS MENU PRINCIPAL 2
->
CADRAN POUR CHANGER.NAVETTE POUR SELECTIONNER
3
2
1
6
Sous-menus
SEM
DIM
LUN
MAR
MER
JEU
VEN
SAM
QUOT
MARCHE
--:---:---:---:---:---:---:---:--
<REGL.TIMER>
ARRET CYCLE D'ENR
--:-- 0.10SEC ( 54H)
--:-- 0.10SEC ( 54H)
--:-- 0.10SEC ( 54H)
--:-- 0.10SEC ( 54H)
--:-- 0.10SEC ( 54H)
--:-- 0.10SEC ( 54H)
--:-- 0.10SEC ( 54H)
--:-- 0.10SEC ( 54H)
MODE
NON
NON
NON
NON
NON
NON
NON
NON
Réglage de REGL.TIMER
4
5
Pour régler le programmateur.
Le programmateur doit être réglé pour faire
l’enregistrement par programmateur.
Réservations de programmateur chaque
jour à la même heure avec la même
qualité d’image
Ceci règle l’heure de début et l’heure de fin pour chaque jour et règle
aussi la vitesse d’enregistrement.
1 SEM
Exemple: Enregistrement par programmateur tous les jours de
8h30 du matin à 6h30 de l’après-midi à la même vitesse
d’enregistrement
Ceci sélectionne le jour pour le réglage du programmateur.
Pendant que le jour clignote un autre jour peut être sélectionné. La
7ème ligne (SAM) et la 8ème ligne (QUOT) sont utilisées pour le
réglage d’un enregistrement par programmateur sur une période
de plus de 24 heures.
1
2 MARCHE
Ceci est utilisé pour régler l’heure de début de l’enregistrement par
programmateur.
Appuyez sur le bouton MENU pour sélectionner
REGL.TIMER, puis tournez le cadran de navette dans le sens
des aiguilles d’une montre.
Le sous-menu REGL.TIMER apparaît et le curseur passe au
réglage de DIM.
3 ARRET
MENU
Ceci est utilisé pour régler l’heure de fin de l’enregistrement par
programmateur.
SEM
DIM
LUN
MAR
MER
JEU
VEN
SAM
QUOT
4 CYCLE D’ENR
•
•
Règle la vitesse d’enregistrement.
Le réglage initial est l’enregistrement de CHAMP (0,10 sec.). Si
le réglage est changé à enregistrement d’image, la vitesse
d’enregistrement sera 0,20 sec.
Les chiffres entre parenthèses sont le résultat du calcul
automatique de la durée disponible selon la méthode
d’enregistrement, la qualité d’image et les réglages
d’enregistrement audio. La valeur maximale qui peut être
affichée est 9999H. Si la durée disponible est de 10000H ou
plus, 9999 est affiché.
5 MODE
2
MARCHE
--:---:---:---:---:---:---:---:--
<REGL.TIMER>
ARRET CYCLE D'ENR
--:-- 0.10SEC ( 54H)
--:-- 0.10SEC ( 54H)
--:-- 0.10SEC ( 54H)
--:-- 0.10SEC ( 54H)
--:-- 0.10SEC ( 54H)
--:-- 0.10SEC ( 54H)
--:-- 0.10SEC ( 54H)
--:-- 0.10SEC ( 54H)
MODE
NON
NON
NON
NON
NON
NON
NON
NON
Tournez le cadran de navette dans le sens des aiguilles
d’une montre.
“DIM” clignote dans la colonne SEM.
*
Réglez à “OUI” lorsque l’enregistrement par programmateur est
utilisé.
Réglez à “NON” lorsque l’enregistrement par programmateur n’est
pas utilisé.
6 Pour régler un enregistrement par programmateur de plus de
DIM --:-- --:--
24 heures.
Utilisez cette ligne pour un enregistrement par programmateur de
plus de 24 heures.
3
Remarque: Les réglages de qualité d’image, de l’enregistrement
d’image/champ et de l’enregistrement audio pour
l’enregistrement par programmateur seront les
réglages utilisés pour enregistrer dans la zone
d’enregistrement normal.
Utilisez le cadran de taquage pour changer de “ DIM” à
“ QUOT” , puis tournez le cadran de navette.
“– – ” (heures) clignote dans la colonne MARCHE.
QUOT --:-- --:--
50
0.10SEC ( 54H) NON
0.10SEC ( 54H) NON
Français
RÉGLAGE DE REGL.TIMER
4
QUOT 08:-- --:--
5
7
MODE
OUI
NON
NON
NON
NON
NON
NON
NON
EXIT/OSD
0.10SEC ( 54H) NON
Remarque:
• Si vous désirez utiliser des jours, des heures et des vitesses
d’enregistrement différents pour l’enregistrement par
programmateur, sélectionnez le jour approprié dans la colonne
SEM et faites les réglages requis.
• Si les réservations de programmateur se chevauchent, celle qui
commence en premier aura la priorité.
• Pour effacer toutes les réservations de programmateur (y compris
les réglages de l’heure), appuyez sur le bouton MENU RESET sur
le panneau avant.
0.10SEC ( 54H) NON
R
EA
CL
0.10SEC ( 54H) NON
SHUTTLE
JOG
EN
TE
R
MENU
RESET
0.13SEC ( 72H) NON
Remarque: La qualité d’image pour l’enregistrement par
programmateur sera la qualité d’image qui a été réglée
par QUALITE D’IMAGE dans le sous-menu REGL.MODE
D’ENR.NORMAL.
Exemple: La qualité sera TRES BONNE. La vitesse
d’enregistrement sera alors la même que la vitesse réglée
précédemment.
Français
<REGL.TIMER>
ARRET CYCLE D'ENR
18:30 0.13SEC ( 72H)
--:-- 0.10SEC ( 54H)
--:-- 0.10SEC ( 54H)
--:-- 0.10SEC ( 54H)
--:-- 0.10SEC ( 54H)
--:-- 0.10SEC ( 54H)
--:-- 0.10SEC ( 54H)
--:-- 0.10SEC ( 54H)
L’affichage revient à l’écran normal.
Utilisez le cadran de taquage pour régler la vitesse
d’enregistrement à “ 0.13” (72H), puis tournez le cadran de
navette dans le sens des aiguilles d’une montre.
“NON” clignote dans la colonne MODE.
QUOT 08:30 18:30
MARCHE
08:30
--:---:---:---:---:---:---:--
10 Appuyez sur le bouton EXIT/OSD.
Utilisez le cadran de taquage pour changer “– –” à “ 30” , puis
tournez le cadran de navette dans le sens des aiguilles d’une
montre.
“0.10” (vitesse d’enregistrement) clignote dans la colonne CYCLE
D’ENR..
QUOT 08:30 18:30
8
0.10SEC ( 54H) NON
Utilisez le cadran de taquage pour changer “– –” à “ 18” , puis
tournez le cadran de navette dans le sens des aiguilles d’une
montre.
“– – ” (minutes) clignote dans la colonne ARRET.
QUOT 08:30 18:--
Utilisez le cadran de taquage pour changer “ NON” à “ OUI” ,
puis tournez le cadran de navette dans le sens des aiguilles
d’une montre.
Le curseur passe à LUN.
SEM
DIM
LUN
MAR
MER
JEU
VEN
SAM
QUOT
Utilisez le cadran de taquage pour changer “– –” à “ 30” , puis
tournez le cadran de navette dans le sens des aiguilles d’une
montre.
“– – ” (heures) clignote dans la colonne ARRET.
QUOT 08:30 --:--
6
9
Utilisez le cadran de taquage pour changer “– –” à “ 08” , puis
tournez le cadran de navette dans le sens des aiguilles d’une
montre.
“– – ” (minutes) clignote dans la colonne MARCHE.
51
RÉGLAGE DE REGL.TIMER
Réservations de programmateur sur plus
de 24 heures
6
Pour faire des réservations de programmateur sur 24 heures, utilisez
les lignes 7 (SAM) et 8 (QUOT) de l’écran de menu.
Exemple: Pour régler l’enregistrement par programmateur du
lundi à 10h30 du matin au mercredi à 8h30 du soir
1
2
4
<REGL.TIMER>
ARRET CYCLE D'ENR
--:-- 0.10SEC ( 54H)
--:-- 0.10SEC ( 54H)
--:-- 0.10SEC ( 54H)
--:-- 0.10SEC ( 54H)
--:-- 0.10SEC ( 54H)
--:-- 0.10SEC ( 54H)
--:-- 0.10SEC ( 54H)
--:-- 0.10SEC ( 54H)
MODE
NON
NON
NON
NON
NON
NON
NON
NON
8
9
0.10SEC ( 54H) NON
Utilisez le cadran de taquage pour changer “– –” à “ 30” , puis
tournez le cadran de navette dans le sens des aiguilles d’une
montre.
“0.10” (vitesse d’enregistrement) clignote dans la colonne CYCLE
D’ENR..
0.10SEC ( 54H) NON
Utilisez le cadran de taquage pour changer “ 0.10” à “ 0.17”
(90H), puis tournez le cadran de navette dans le sens des
aiguilles d’une montre.
“NON” clignote dans la colonne MODE.
MER ¤¤:¤¤ 20:30
0.17SEC ( 90H) NON
10 Utilisez le cadran de taquage pour changer “ NON” à “ OUI” ,
puis tournez le cadran de navette dans le sens des aiguilles
d’une montre.
Le curseur passe à la première ligne.
Utilisez le cadran de taquage pour changer “– –” à “ 30” , puis
tournez le cadran de navette dans le sens des aiguilles d’une
montre.
“– – ” (heures) clignote dans la colonne ARRET.
LUN 10:30 ¤¤:¤¤
MER ¤¤:¤¤ 20:30
0.10SEC ( 54H) NON
¤¤¤SEC (¤¤¤¤¤) ¤¤¤
0.17SEC ( 90H) OUI
11 Appuyez sur le bouton EXIT/OSD.
Utilisez le cadran de taquage pour changer “– –” à “ **” ,
puis tournez le cadran de navette dans le sens des aiguilles
d’une montre.
Le réglage de QUOT sur la 8ème ligne change automatiquement
au jour de la semaine (MAR) suivant celui indiqué à la 7ème
ligne. Les réglages qui ne sont pas nécessaires apparaissent
comme des “*”.
LUN 10:30 ¤¤:¤¤
MAR ¤¤:¤¤ --:--
0.10SEC ( 54H) NON
Utilisez le cadran de taquage pour changer “– –” à “ 20” , puis
tournez le cadran de navette dans le sens des aiguilles d’une
montre.
“– – ” (minutes) clignote dans la colonne ARRET.
MER ¤¤:¤¤ 20:30
Utilisez le cadran de taquage pour changer “– –” à “ 10” , puis
tournez le cadran de navette dans le sens des aiguilles d’une
montre.
“– – ” (minutes) clignote dans la colonne MARCHE.
LUN 10:30 --:--
5
MARCHE
--:---:---:---:---:---:---:---:--
7
Utilisez le cadran de taquage pour changer “ SAM” à “ LUN” ,
puis tournez le cadran de navette dans le sens des aiguilles
d’une montre.
“– – ” (heures) clignote dans la colonne MARCHE.
LUN --:-- --:--
3
MER ¤¤:¤¤ --:--
Utilisez le cadran de taquage pour déplacer le curseur à la
7ème ligne (SAM), puis tournez le cadran de navette.
“SAM” clignote dans la colonne SEM.
SEM
DIM
LUN
MAR
MER
JEU
VEN
SAM
QUOT
Utilisez le cadran de taquage pour changer “ MAR” à “ MER” ,
puis tournez le cadran de navette dans le sens des aiguilles
d’une montre.
“– – ” (heures) clignote dans la colonne ARRET.
L’affichage revient à l’écran normal.
EXIT/OSD
¤¤¤SEC (¤¤¤¤¤) ¤¤¤
---SEC (----H) NON
52
Français
RÉGLAGE DE REGL.CONGE
Menu principal 1
Sous-menus
<MENU PRINCIPAL 1>
1.REGL.LANGUE/HORLOGE
->
2.REGL.ENTREE VIDEO
->
3.REGL.AIRE D'ENREGISTREMENT ->
4.REGL.COND.D'ENREGISTREMENT ->
5.REGL.MODE D'ENR.NORMAL
->
6.REGL.TIMER
->
7.REGL.CONGE
->
8.REGL.MODE D'ENR. D'ALARME ->
VERS MENU PRINCIPAL 2
->
CADRAN POUR CHANGER.NAVETTE POUR SELECTIONNER
1.
2.
3.
4.
5.
6.
7.
8.
9.
10.
<REGL.CONGE>
----11.
----12.
----13.
----14.
----15.
----16.
----17.
----18.
----19.
----20.
Pour régler une journée ordinaire comme
journée de vacances
-----------------------------------------
Réglages de REGL.CONGE
3
Les journées comme les vacances officielles et les vacances de
compagnie sont considérées comme des journées de semaine
normales. Naturellement l’enregistrement par programmateur est
effectué de la même manière pour ces journées, mais si vous réglez
REGL.CONGE à “MODE:OUI” dans le menu des réglages du
programmateur, puis que vous indiquez les dates des vacances dans
ce menu, le même type de réservations de programmateur peut être
fait pour les vacances.
1. 11---
4
Remarque: Pour un réglage de programmateur, assurez-vous que
vous faites les réglages des heures pour dimanche (DIM)
avant de régler MODE à “OUI”.
SEM
DIM
LUN
MAR
MER
JEU
VEN
SAM
QUOT
MARCHE
08:00
--:---:---:---:---:---:---:--
<REGL.TIMER>
ARRET CYCLE D'ENR
18:00 0.10SEC ( 54H)
--:-- 0.10SEC ( 54H)
--:-- 0.10SEC ( 54H)
--:-- 0.10SEC ( 54H)
--:-- 0.10SEC ( 54H)
--:-- 0.10SEC ( 54H)
--:-- 0.10SEC ( 54H)
--:-- 0.10SEC ( 54H)
MODE
OUI
NON
NON
NON
NON
NON
NON
NON
1.
2.
3.
4.
5.
2
<REGL.CONGE>
----11.
----12.
----13.
----14.
----15.
5
6
Suivez la même méthode pour entrer d’autres dates de
vacances.
Appuyez sur le bouton EXIT/OSD.
L’affichage revient à l’écran normal.
EXIT/OSD
---------------------
Tournez le cadran de navette dans le sens des aiguilles
d’une montre.
“– – ” (mois) clignote à la ligne 1.
1. -----
Français
1. 11-17
2. -----
1
Appuyez sur le bouton MENU pour sélectionner
REGL.CONGE, puis tournez le cadran de navette dans le
sens des aiguilles d’une montre.
Le sous-menu REGL.CONGE apparaît et le curseur passe à la
ligne 1.
MENU
Utilisez le cadran de taquage pour changer “– –” à “ 17” , puis
tournez le cadran de navette dans le sens des aiguilles d’une
montre.
Le curseur passe à la ligne 2.
2
Exemple: Pour régler le 17 novembre comme une journée de
vacances
1
Utilisez le cadran de taquage pour changer “– –” à “ 11” , puis
tournez le cadran de navette dans le sens des aiguilles d’une
montre.
“– – ” (jour) clignote à la ligne 1.
53
RÉGLAGE DE REGL.MODE D’ENR. D’ALARME
Menu principal 1
Pour régler la qualité d’image.
<MENU PRINCIPAL 1>
1.REGL.LANGUE/HORLOGE
->
2.REGL.ENTREE VIDEO
->
3.REGL.AIRE D'ENREGISTREMENT ->
4.REGL.COND.D'ENREGISTREMENT ->
5.REGL.MODE D'ENR.NORMAL
->
6.REGL.TIMER
->
7.REGL.CONGE
->
8.REGL.MODE D'ENR. D'ALARME ->
VERS MENU PRINCIPAL 2
->
CADRAN POUR CHANGER.NAVETTE POUR SELECTIONNER
Pour régler la méthode d’enregistrement (image ou champ).
Pour régler l’enregistrement audio.
Pour régler l’enregistrement d’alarme.
Pour régler le taux d’enregistrement (vitesse d’enregistrement)
et la durée de l’alarme.
Sous-menus
Pour régler l’enregistrement de pré-alarme.
<REGL.MODE D'ENR. D'ALARME>
QUALITE D'IMAGE
: STANDARD
ENR.TRAME/IMAGE
: TRAME
ENREGISTREMENT AUDIO : NON
ENR.D'ALARME
: NON
CYCLE D'ENR.: 0.10SEC. DUREE : 1SEC
ENREGISTREMENT PRE-ALARME: ¤¤¤
CYCLE D'ENR.: ¤¤¤ SEC. DUREE : ¤¤¤
=>(46400 ALARMES PEUVENT ETRE ENREGISTREES)
DECLENCHEMENT ALAEME : ALARME
DETECTEUR DE MOUVEMENT ->
Pour régler le taux d’enregistrement (vitesse d’enregistrement)
et la durée de l’alarme pour l’enregistrement de pré-alarme.
Pour régler le déclenchement d’alarme.
Pour régler les détecteurs de mouvement (alarme).
Réglage de REGL.MODE D’ENR.
D’ALARME
3
Ceci vous permet de régler la qualité d’enregistrement, la méthode
d’enregistrement (image ou champ), l’enregistrement audio et la
vitesse d’enregistrement pour la zone d’enregistrement d’alarme.
1
2
Remarque: Le nombre maximum des images qui peuvent être
enregistrées selon les divers réglages d’enregistrement
d’alarme est indiqué ci-dessous.
=> (25600 ALARMES PEUVENT ETRE
ENREGISTREES)
Appuyez sur le bouton MENU pour sélectionner REGL.
MODE D’ENR. D’ALARME, puis tournez le cadran de navette
dans le sens des aiguilles d’une montre.
Le sous-menu REGL.MODE D’ENR. D’ALARME apparaît et le
curseur passe au réglage de QUALITE D’IMAGE.
MENU
Utilisez le cadran de taquage pour sélectionner la qualité
d’image (exemple: “ TRES BONNE” ), puis tournez le cadran
de navette dans le sens des aiguilles d’une montre.
Le curseur passe à ENR.TRAME/IMAGE.
(Réglages de qualité d’image)
• DE BASE(DB): (15 KB)
• NORMAL (NO): (22 KB)
• STANDARD (SD): (30 KB)
• BONNE (BO): (42 KB)
• TRES BONNE (TB): (56 KB)
<REGL.MODE D'ENR. D'ALARME>
QUALITE D'IMAGE
: STANDARD
ENR.TRAME/IMAGE
: TRAME
ENREGISTREMENT AUDIO : NON
ENR.D'ALARME
: NON
CYCLE D'ENR.: 0.10SEC. DUREE : 1SEC
ENREGISTREMENT PRE-ALARME: ¤¤¤
CYCLE D'ENR.: ¤¤¤ SEC. DUREE : ¤¤¤
=>(46400 ALARMES PEUVENT ETRE ENREGISTREES)
DECLENCHEMENT ALAEME : ALARME
DETECTEUR DE MOUVEMENT ->
<REGL.MODE D'ENR. D'ALARME>
QUALITE D'IMAGE
: TRES BONNE
ENR.TRAME/IMAGE
: TRAME
ENREGISTREMENT AUDIO : NON
ENR.D'ALARME
: NON
CYCLE D'ENR.: 0.10SEC. DUREE : 1SEC
ENREGISTREMENT PRE-ALARME: ¤¤¤
CYCLE D'ENR.: ¤¤¤ SEC. DUREE : ¤¤¤
Tournez le cadran de navette dans le sens des aiguilles
d’une montre.
“STANDARD” clignote.
<REGL.MODE D'ENR. D'ALARME>
QUALITE D'IMAGE
: STANDARD
ENR.TRAME/IMAGE
: TRAME
ENREGISTREMENT AUDIO : NON
ENR.D'ALARME
: NON
CYCLE D'ENR.: 0.10SEC. DUREE : 1SEC
54
Français
RÉGLAGE DE REGL.MODE D’ENR. D’ALARME
4
Remarque: Si ENR. D’ALARME est réglé à un réglage tel que
MODE1, le réglage ENREGISTREMENT PRE-ALARME
sera activé (“***” changera à “NON”).
Tournez le cadran de navette dans le sens des aiguilles
d’une montre, utilisez le cadran de taquage pour régler la
méthode d’enregistrement (exemple: “ IMAGE” ), puis tournez
le cadran de navette dans le sens des aiguilles d’une montre.
Le curseur passe à ENREGISTREMENT AUDIO.
7
<REGL.MODE D'ENR. D'ALARME>
QUALITE D'IMAGE
: TRES BONNE
ENR.TRAME/IMAGE
: IMAGE
ENREGISTREMENT AUDIO : NON
ENR.D'ALARME
: NON
CYCLE D'ENR.: 0.20SEC. DUREE : 1SEC
ENREGISTREMENT PRE-ALARME: ¤¤¤
Remarque: Lorsque la vitesse d’enregistrement est sélectionnée, le
nombre maximum d’enregistrements est affiché entre
parenthèses.
=> (17066 ALARMES PEUVENT ETRE
ENREGISTREES)
Remarque:
• Lorsque ENR.TRAME/IMAGE est sélectionné, la vitesse
d’enregistrement est affichée dans CYCLE D’ENR. et le nombre
maximum d’enregistrements est affiché entre parenthèses.
=> (30721 ALARMES PEUVENT ETRE ENREGISTREES)
• Les vitesses d’enregistrement de champ et d’image changent
selon le réglage de QUALITE D’IMAGE. Référez-vous au Tableau
des vitesses d’enregistrement pour plus de détails. (référez-vous à
la page 11.)
5
8
Utilisez le cadran de taquage pour régler la durée
d’enregistrement (exemple: “ 5” ), puis tournez le cadran de
navette.
Le curseur passe à ENREGISTREMENT PRE-ALARME.
<REGL.MODE D'ENR. D'ALARME>
QUALITE D'IMAGE
: TRES BONNE
ENR.TRAME/IMAGE
: IMAGE
ENREGISTREMENT AUDIO : OUI
ENR.D'ALARME
: MODE1
CYCLE D'ENR.: A0.13SEC. DUREE : 5SEC
ENREGISTREMENT PRE-ALARME: NON
CYCLE D'ENR.: ¤¤¤ SEC. DUREE : ¤¤¤
=>(03355 ALARMES PEUVENT ETRE ENREGISTREES)
DECLENCHEMENT ALAEME : ALARME
DETECTEUR DE MOUVEMENT ->
Tournez le cadran de navette dans le sens des aiguilles
d’une montre, utilisez le cadran de taquage pour régler
l’enregistrement audio (exemple: “ OUI” ), puis tournez le
cadran de navette.
Le curseur passe à ENR.D’ALARME.
9
<REGL.MODE D'ENR. D'ALARME>
QUALITE D'IMAGE
: TRES BONNE
ENR.TRAME/IMAGE
: IMAGE
ENREGISTREMENT AUDIO : OUI
ENR.D'ALARME
: NON
CYCLE D'ENR.: A0.20SEC. DUREE : 1SEC
ENREGISTREMENT PRE-ALARME: ¤¤¤
CYCLE D'ENR.: ¤¤¤ SEC. DUREE : ¤¤¤
Remarque:
• L’enregistrement audio peut être fait lorsque le réglage de CYCLE
D’ENR. est 0,10 sec (TRAME) ou 0,20 sec (IMAGE) ou plus.
• Lorsque réglé à “OUI”, la lettre “A” (indicateur d’enregistrement
audio) apparaît devant la vitesse d’enregistrement de CYCLE
D’ENR., et le nombre maximum d’enregistrements est affiché entre
parenthèses.
=> (25166 ALARMES PEUVENT ETRE ENREGISTREES)
6
Tournez le cadran de navette dans le sens des aiguilles
d’une montre, utilisez le cadran de taquage pour régler la
vitesse d’enregistrement (exemple: “ 0.13” ), puis tournez le
cadran de navette.
“1SEC” clignote pour DUREE.
EXIT/OSD
01-01-01 ALARME 0000
05:53:44 TB 0.13SEC
Remarque: Si une autre alarme se produit pendant que
l’enregistrement d’alarme est en cours, l’enregistrement
d’alarme continue avec les images de la deuxième alarme
étant enregistrées à partir du point où la deuxième alarme
s’est produite.
Si plusieurs alarmes se sont produites en même temps,
elles sont traitées comme une seule alarme jusqu’à ce
que les alarmes s’arrêtent.
Tournez le cadran de navette dans le sens des aiguilles
d’une montre, utilisez le cadran de taquage pour régler le
mode d’enregistrement d’alarme (exemple: “ MODE1” ), puis
tournez le cadran de navette.
Le curseur passe à CYCLE D’ENR..
Exemples d’affichage: Réglages d’enregistrement d’alarme
• NON: L’enregistrement d’alarme n’est pas fait.
• MODE1: L’enregistrement d’alarme toujours est effectué
indépendamment des réglages d’enregistrement par
programmateur.
• MODE2: L’enregistrement d’alarme est seulement effectué
pendant l’enregistrement par programmateur est en
cours.
• MODE3: L’enregistrement d’alarme est seulement effectué
pendant l’enregistrement par programmateur n’est
pas en cours.
• MODE4: L’enregistrement d’alarme est effectué seulement
pendant les heures réglées par le programmateur.
Ceci ne peut pas être utilisé pour l’enregistrement
normal.
Français
Appuyez sur le bouton EXIT/OSD.
L’affichage revient à l’écran normal.
Les réglages d’alarme apparaissent dans la section d’affichage
d’opérations. Lorsqu’une alarme est déclenchée, le nombre
d’alarmes est affiché.
55
RÉGLAGE DE REGL.MODE D’ENR. D’ALARME
Réglage d’enregistrement de pré-alarme
1
6
Utilisez le cadran de taquage pour déplacer le curseur au
réglage de ENR.D’ALARME, puis tournez le cadran de
navette dans le sens des aiguilles d’une montre.
“NON” clignote.
CYCLE D'ENR.: A0.13SEC. DUREE : 5SEC
ENREGISTREMENT PRE-ALARME: OUI
CYCLE D'ENR.: A0.20SEC. DUREE : 5SEC
=>(02844 ALARMES PEUVENT ETRE ENREGISTREES)
DECLENCHEMENT ALAEME : ALARME
DETECTEUR DE MOUVEMENT ->
<REGL.MODE D'ENR. D'ALARME>
QUALITE D'IMAGE
: TRES BONNE
ENR.TRAME/IMAGE
: IMAGE
ENREGISTREMENT AUDIO : OUI
ENR.D'ALARME
: NON
CYCLE D'ENR.: A0.13SEC. DUREE : 5SEC
ENREGISTREMENT PRE-ALARME: NON
CYCLE D'ENR.: ¤¤¤ SEC. DUREE : ¤¤¤
2
7
Utilisez le cadran de taquage pour changer le réglage de
“ NON” à un autre mode (exemple: MODE1), puis tournez le
cadran de navette dans le sens des aiguilles d’une montre.
Le réglage de ENREGISTREMENT PRE-ALARME change de
“***” à “NON”.
Le curseur passe à CYCLE D’ENR..
01-01-01 PRE 0000
06:46:15 TB 0.26SEC
Remarque:
• L’enregistrement de pré-alarme se poursuit la durée de temps
spécifiée par le réglage de DUREE avant qu’un signal d’alarme soit
entré. Lors de la lecture d’images enregistrées pendant
l’enregistrement de pré-alarme, utilisez les opérations de recherche
d’alarme (bouton SEARCH FRAME/FIELD). Les images seront
lues à partir du moment où l’alarme s’est produite, et donc utilisez
les opérations de navette pour faire une lecture vers l’arrière.
• Si l’enregistrement de pré-alarme est effectué en mode CHAMP
(taux d’enregistrement), la vitesse pour les réglages de taux
d’enregistrement sera plus lente et les réglages 0,02 seconde et
0,03 seconde ne peuvent pas être sélectionnés.
Utilisez le cadran de taquage pour déplacer le curseur au
réglage de ENREGISTREMENT PRE-ALARME, puis tournez
le cadran de navette dans le sens des aiguilles d’une montre.
“NON” clignote.
ENR.D'ALARME
: MODE1
CYCLE D'ENR.: A0.13SEC. DUREE : 5SEC
ENREGISTREMENT PRE-ALARME: NON
CYCLE D'ENR.: ¤¤¤ SEC. DUREE : ¤¤¤
=>(03355 ALARMES PEUVENT ETRE ENREGISTREES)
DECLENCHEMENT ALAEME : ALARME
DETECTEUR DE MOUVEMENT ->
4
Taux
Taux
d’enregistrement d’enregistrement
(champ/sec.)
(sec.)
60.00
30.00
20.00
15.00
10.00
7.50
6.00
5 00
Utilisez le cadran de taquage pour changer “ NON” à “ OUI” ,
puis tournez le cadran de navette dans le sens des aiguilles
d’une montre.
Le curseur passe à CYCLE D’ENR..
0.02
0.03
0.05
0.07
0.10
0.13
0.17
0 20
QU
DE BASE
15 kB
NORMALE
22 kB
21H
42H
63H
85H
127H
170H
212H
255H
15H
30H
45H
60H
90H
120H
150H
180H
• Si l’enregistrement d’alarme normal et l’enregistrement de
ENREGISTREMENT PRE-ALARME: OUI
CYCLE D'ENR.: A0.20SEC. DUREE : 1SEC
=>(02960 ALARMES PEUVENT ETRE ENREGISTREES)
DECLENCHEMENT ALAEME : ALARME
DETECTEUR DE MOUVEMENT ->
5
Appuyez sur le bouton EXIT/OSD.
L’affichage revient à l’écran normal.
“PRE” apparaît dans la section d’affichage d’opérations.
Lorsqu’une alarme est déclenchée, l’affichage change à
“ALARME”.
EXIT/OSD
<REGL.MODE D'ENR. D'ALARME>
QUALITE D'IMAGE
: TRES BONNE
ENR.TRAME/IMAGE
: IMAGE
ENREGISTREMENT AUDIO : OUI
ENR.D'ALARME
: MODE1
CYCLE D'ENR.: A0.13SEC. DUREE : 5SEC
ENREGISTREMENT PRE-ALARME: NON
CYCLE D'ENR.: ¤¤¤ SEC. DUREE : ¤¤¤
=>(03355 ALARMES PEUVENT ETRE ENREGISTREES)
DECLENCHEMENT ALAEME : ALARME
DETECTEUR DE MOUVEMENT ->
3
Utilisez le cadran de taquage pour régler la durée
d’enregistrement (exemple: “ 5SEC” ), puis tournez le cadran
de navette dans le sens des aiguilles d’une montre.
Le curseur passe à DECLENCHEMENT ALARME.
•
Tournez le cadran de navette dans le sens des aiguilles
d’une montre, utilisez le cadran de taquage pour régler la
vitesse d’enregistrement (exemple: “ A0.20” ), puis tournez le
cadran de navette dans le sens des aiguilles d’une montre.
Le curseur passe au réglage “1SEC” pour DUREE et clignote.
ENREGISTREMENT PRE-ALARME: OUI
CYCLE D'ENR.: A0.20SEC. DUREE : 1SEC
=>(02844 ALARMES PEUVENT ETRE ENREGISTREES)
DECLENCHEMENT ALAEME : ALARME
DETECTEUR DE MOUVEMENT ->
56
pré-alarme sont effectués en même temps, aucun signal audio ne
sera enregistré avec les images d’enregistrement de pré-alarme.
Si l’enregistreur vidéo numérique est utilisé avec un multiplexeur, le
signal de commutation du multiplexeur sera sorti selon la
synchronisation de l’enregistrement de l’enregistreur vidéo
numérique pour l’enregistrement normal, si l’enregistrement de
pré-alarme et l’enregistrement normal sont effectués en même
temps. Pour cette raison, si le taux d’enregistrement pour
l’enregistrement de pré-alarme est plus court que le réglage du
taux d’enregistrement pour l’enregistrement normal, les images
d’enregistrement de pré-alarme d’une caméra peuvent être
enregistrées sans interruption. D’autre part, si le taux
d’enregistrement pour l’enregistrement de pré-alarme est plus long
que le réglage du taux d’enregistrement pour l’enregistrement
normal, les images de caméra ne peuvent pas être enregistrées
pendant l’enregistrement normal, et donc ce réglage ne devrait pas
être fait.
Français
RÉGLAGE DE REGL.MODE D’ENR. D’ALARME
Réglage de déclenchement d’alarme
1
Réglages du détecteur de mouvement
intégré
Utilisez le cadran de taquage pour déplacer le curseur au
réglage de DECLENCHEMENT ALARME.
Les détecteurs de mouvement (-: 8x10) peuvent être affichés sur
l’écran du moniteur afin de faciliter la détection des personnes
suspectes (alarmes). Le réglage par défaut fait que tous les détecteurs
de mouvement sont à “NON”, de sorte qu’ils ne détectent pas le
mouvement des objets.
ENREGISTREMENT PRE-ALARME: OUI
CYCLE D'ENR.: A0.13SEC. DUREE : 5SEC
=>(01677 ALARMES PEUVENT ETRE ENREGISTREES)
DECLENCHEMENT ALAEME : ALARME
DETECTEUR DE MOUVEMENT ->
A NON (-)
A O U I (ú)
C
2
Tournez le cadran de navette dans le sens des aiguilles
d’une montre, utilisez le cadran de taquage pour
sélectionner la méthode de détection des personnes
suspectes (exemple: “ DETECTEUR” ), puis tournez le cadran
de navette.
Le curseur passe à DETECTEUR DE MOUVEMENT.
B
ú
-
- - - - - - - - NIVEAU :
NON
-
- - - - - - - - SORTIR
-
E
-
<REGL.MODE D'ENR. D'ALARME>
QUALITE D'IMAGE
: STANDARD
ENR.TRAME/IMAGE
: TRAME
ENREGISTREMENT AUDIO : NON
ENR.D'ALARME
: NON
CYCLE D'ENR.: 0.10SEC. DUREE : 5SEC
ENREGISTREMENT PRE-ALARME: ¤¤¤
CYCLE D'ENR.: ¤¤¤ SEC. DUREE : ¤¤¤
=>(46400 ALARMES PEUVENT ETRE ENREGISTREES)
DECLENCHEMENT ALAEME : DETECTEUR
DETECTEUR DE MOUVEMENT ->
D
ENREGISTREMENT PRE-ALARME: OUI
CYCLE D'ENR.: A0.13SEC. DUREE : 5SEC
=>(01677 ALARMES PEUVENT ETRE ENREGISTREES)
DECLENCHEMENT ALAEME : DETECTEUR
DETECTEUR DE MOUVEMENT ->
Écran de détecteur de mouvement
Utilisez le cadran de taquage pour déplacer le curseur à DETECTEUR
DE MOUVEMENT, puis tournez le cadran de navette dans le sens des
aiguilles d’une montre.
L’écran de détecteur de mouvement apparaît sur l’écran normal.
Exemples d’affichage: Réglages de déclenchement
d’enregistrement d’alarme
• ALARME: L’enregistrement d’alarme est seulement effectué
lorsqu’une alarme externe est déclenchée (lorsqu’un
commutateur ouvert/fermé connecté aux connecteurs ALARM
IN à l’arrière de l’unité est activé).
• DETECTEUR: L’enregistrement d’alarme est seulement
effectué lorsque le détecteur de mouvement détecte un objet
mobile. Référez-vous aux réglages du détecteur de
mouvement.
• ALARME ET DETECTEUR: L’enregistrement d’alarme est
effectué lorsqu’il y a une réponse d’une alarme externe et d’un
détecteur de mouvement intégré.
• ALARME OU DETECTEUR: L’enregistrement d’alarme est
effectué lorsqu’il y a une réponse d’une alarme externe ou d’un
détecteur de mouvement intégré.
Remarque:
• Les réglages de DETECTEUR DE MOUVEMENT doivent être faits
si DETECTEUR, ALARME ET DETECTEUR ou ALARME OU
DETECTEUR sont sélectionnés.
• Le détecteur de mouvement intégré à l’enregistreur vidéo
numérique ne peut pas être utilisé si un multiplexeur est branché à
l’enregistreur vidéo numérique.
• Si le détecteur intégré du multiplexeur est utilisé, la sortie d’alarme
de ce détecteur devrait être envoyée à l’entrée d’alarme de
l’enregistreur vidéo numérique afin d’enregistrer les alarmes.
• Si vous arrêtez l’enregistrement pendant qu’un enregistrement
d’alarme déclenché par un détecteur de mouvement est en cours,
déplacez le curseur au réglage de REGL.MODE D’ENR.
D’ALARME dans le menu 1, puis tournez le cadran de navette
dans le sens des aiguilles d’une montre. Lorsque l’écran de
détecteur de mouvement apparaît changez le réglage de NIVEAU
à “NON”.
Français
(-)
-
57
A
Lorsque les détecteurs sont réglés à “NON” (-) et le cadran de
navette est tourné dans le sens des aiguilles d’une montre, le
réglage du détecteur est changé à “OUI” (ú). Le réglage
commute entre “OUI” et “NON” à chaque fois que le cadran de
navette est tourné dans le sens des aiguilles d’une montre.
B
Lorsque le cadran de taquage est tourné dans le sens contraire
des aiguilles d’une montre, le curseur dépasse “SORTIR” et
“NIVEAU: NON”, puis revient en haut.
C
Lorsque le cadran de taquage est tourné dans le sens des
aiguilles d’une montre et le curseur atteint le bas, il dépasse
“NIVEAU: NON” et “SORTIR”, puis revient en haut.
D
La sensibilité peut être ajustée lorsque le détecteur est réglé à
“OUI” (ú). Tournez le cadran de taquage pour sélectionner
“NIVEAU: NON”, tournez le cadran de navette dans le sens des
aiguilles d’une montre, puis tournez le cadran de taquage pour
ajuster la sensibilité.
(NON 1 – 10: La sensibilité augmente lorsque le chiffre diminue.)
E
Si le curseur est sur “SORTIR” et le cadran de navette est tourné
dans le sens des aiguilles d’une montre, l’affichage revient à
l’écran REGL.MODE D’ENR. D’ALARME.
RÉGLAGE DE REGL.MODE D’ENR. D’ALARME
1
4
Utilisez le cadran de taquage pour déplacer le curseur au
réglage du détecteur de mouvement, puis tournez le cadran
de navette dans le sens des aiguilles d’une montre.
L’écran DETECTEUR DE MOUVEMENT apparaît sur l’écran
normal.
Tournez le cadran de navette dans le sens des aiguilles
d’une montre deux fois.
Ceci finit les réglages du détecteur de mouvement et l’affichage
revient à l’écran REGL.MODE D’ENR. D’ALARME.
-
ENREGISTREMENT PRE-ALARME: OUI
CYCLE D'ENR.: A0.13SEC. DUREE : 5SEC
=>(01677 ALARMES PEUVENT ETRE ENREGISTREES)
DECLENCHEMENT ALAEME : DETECTEUR
DETECTEUR DE MOUVEMENT ->
-
2
- - - - - - - - NIVEAU :
NON
-
- - - - - - - - SORTIR
-
-
5
-
- - - ú
- ú
- ú
- - - NIVEAU :
ú
ú
ú
NON
ú
ú
ú
-
- - - - - - - - SORTIR
-
- - - ú
- ú
- ú
- - - NIVEAU :
ú
ú
ú
6
ú
ú
ú
-
- - - - - - - - SORTIR
-
-
Appuyez sur le bouton EXIT/OSD.
L’affichage revient à l’écran normal.
EXIT/OSD
Tournez le cadran de taquage pour régler la position du
détecteur, puis tournez le cadran de navette dans le sens
des aiguilles d’une montre.
Étant donné que le détecteur passe de NON [-] à OUI [ú],
utilisez la même méthode pour régler le détecteur à OUI.
-
3
-
-
Remarque: Changez le réglage ALARME pour ALARME dans le
menu REGL.AVERTISSEUR de l’écran MENU
PRINCIPAL 2 à “OUI”.
-
Utilisez le cadran de taquage pour déplacer le curseur à
“ NIVEAU: NON” , tournez le cadran de navette dans le sens
des aiguilles d’une montre, puis utilisez le cadran de
taquage pour régler la sensibilité (exemple: “ 6” ).
Exemples d’affichage: Réglages de sensibilité
• NON: Le détecteur ne fonctionne pas
• 1 à 10: Le détecteur fonctionne (plus la valeur est basse, plus
la sensibilité est grande)
-
-
- - - ú
- ú
- ú
- - - NIVEAU :
ú
ú
ú
6
ú
ú
ú
-
- - - - - - - - SORTIR
-
-
Remarque: Vous pouvez vérifier la sensibilité dans l’écran de réglage.
Lorsqu’une alarme est détectée, le vibreur (un bip) se fait
entendre. Si la sensibilité est trop élevée, une alarme peut
être déclenchée par des variations de lumière. Faites le
réglage approprié selon la zone surveillée.
58
Français
RÉGLAGES DE REGL.AFFICHAGE
Menu principal 2
<MENU PRINCIPAL 2>
1.REGL.AFFICHAGE/PERTE SIGNAL
2.REGL.RS-232C / RS-485
3.REGL.AVERTISSEUR
4.REGL.VERROU DE SECURITE
5.REGL.RESEAU
6.REGL.DISQUE DUR
7.PANNE COURANT/DUREE UTIL.
Sous-menus
Pour afficher la date sur l’écran du moniteur.
<REGL.AFFICHAGE>
DATE
: OUI
HEURE
: OUI
QUALITE
: OUI
CYCLE D'ENR. : OUI
NOMBRE ALARME : OUI
TYPE D'ALARME : OUI
->
->
->
->
->
->
->
Pour afficher l’heure sur l’écran du moniteur.
Pour afficher la qualité d’image sur l’écran du
moniteur.
<REGL.PERTE SIGNAL>
PERTE SIGNAL : OUI
VERS MENU PRINCIPAL 1
->
CADRAN POUR CHANGER.NAVETTE POUR SELECTIONNER
Pour un exemple de l’affichage, référez-vous à la section
d’affichage d’opérations. (Référez-vous à la page 13.)
Pour afficher le nombre d’alarmes sur l’écran
du moniteur.
Pour afficher les types d’alarme sur l’écran du
moniteur.
Réglages de REGL.AFFICHAGE
6
La date et l’heure réglées à l’aide de REGL.HORLOGE et autres
réglages peuvent être affichées sur l’écran du moniteur pendant
l’enregistrement et la lecture. Le réglage par défaut est “OUI” pour
tous les affichages, et donc tous les réglages de ce menu
apparaissent sur l’écran. Au besoin, vous pouvez annuler les
affichages.
1
Appuyez sur le bouton MENU deux fois pour afficher l’écran
MENU PRINCIPAL 2.
Le curseur passe à REGL. AFFICHAGE/PERTE SIGNAL.
Au besoin, suivez la même méthode (étapes 3 et 4) pour
changer les réglages OUI/NON.
• QUALITE (NON): Le mode de qualité d’image n’apparaît pas
pendant l’enregistrement et la lecture.
• CYCLE D’ENR. (NON): Le taux d’enregistrement n’apparaît
pas pendant l’enregistrement et la lecture.
• NOMBRE ALARME (NON): Le nombre courant d’alarmes
n’apparaît pas.
• TYPE D’ALARME (NON): Le type d’enregistrement d’alarme
n’apparaît pas.
Remarque:
• Si ALARM RECORDING dans le menu REGL. MODE D’ENR.
D’ALARME a été réglé à “NON”, ALARM COUNT et ALARM TYPE
n’apparaissent pas. (Référez-vous à la page 54.)
• Lorsque réglé à “OUI”
• ALARME apparaît dans la section d’affichage d’opérations
pendant l’enregistrement d’alarme.
• PRE apparaît dans la section d’affichage d’opérations pendant
l’enregistrement de pré-alarme.
• ARCHIV apparaît lors de la lecture des images de la zone
d’archives.
MENU
2
Pour afficher le taux d’enregistrement (vitesse
d’enregistrement) sur l’écran du moniteur.
Tournez le cadran de navette dans le sens des aiguilles
d’une montre.
Le sous-menu REGL.AFFICHAGE apparaît et le curseur passe
au réglage de DATE.
7
<REGL.AFFICHAGE>
DATE
: OUI
HEURE
: OUI
QUALITE
: OUI
CYCLE D'ENR. : OUI
NOMBRE ALARME : OUI
TYPE D'ALARME : OUI
Appuyez sur le bouton EXIT/OSD.
L’affichage revient à l’écran normal.
EXIT/OSD
<REGL.PERTE SIGNAL>
PERTE SIGNAL : OUI
3
4
5
Réglage de REGL. PERTE SIGNAL
Tournez le cadran de navette dans le sens des aiguilles
d’une montre.
“OUI” clignote. Si vous utilisez le cadran de taquage pour le
changer à “NON”, l’affichage de la date n’apparaîtra pas sur
l’écran.
Utilisez le cadran de taquage pour déplacer le curseur à PERTE
SIGNAL, puis tournez le cadran de navette dans le sens des
aiguilles d’une montre.
“OUI” clignote. Si les images de caméra sont absentes lorsque ce
réglage est activé, “PERTE SIGNAL !” apparaît sur l’écran.
Tournez le cadran de navette dans le sens des aiguilles
d’une montre.
Le curseur passe à HEURE.
Tournez le cadran de navette dans le sens des aiguilles
d’une montre.
“OUI” clignote. Si vous utilisez le cadran de taquage pour le
changer à “NON”, l’affichage de l’heure n’apparaîtra pas sur
l’écran.
Français
59
RÉGLAGE DE REGL.RS-232C / RS-485
Menu principal 2
<MENU PRINCIPAL 2>
1.REGL.AFFICHAGE/PERTE SIGNAL
2.REGL.RS-232C / RS-485
3.REGL.AVERTISSEUR
4.REGL.VERROU DE SECURITE
5.REGL.RESEAU
6.REGL.DISQUE DUR
7.PANNE COURANT/DUREE UTIL.
->
->
->
->
->
->
->
Sous-menus
Pour sélectionner la commande.
<REGL.RS-232C/RS-485>
COMMANDE
: RS-232C
VITESSE DONNEES : 19200
INFO.STATUT
: ¤¤¤
INFO.ALARME
: ¤¤¤
ADRESSE
: ¤¤¤
Pour régler la vitesse de transmission.
Réglages pour RS-485 uniquement
• Pour activer la transmission de
l’information du statut.
VERS MENU PRINCIPAL 1
->
CADRAN POUR CHANGER.NAVETTE POUR SELECTIONNER
• Pour activer la transmission de
l’information d’alarme.
• Pour régler l’adresse.
Réglage de REGL.RS-232C / RS-485
RS-232C
Réglages reliés à la communication en série RS-232C et RS-485.
1
Lors du branchement du connecteur RS-232C de l’unité à un
ordinateur, utilisez un câble RS-232C spécial (vendu séparément).
(Référez-vous à la page 7.)
Appuyez sur le bouton MENU deux fois pour afficher l’écran
MENU PRINCIPAL 2.
Le curseur passe à REGL. AFFICHAGE/PERTE SIGNAL.
1
MENU
2
<REGL.RS-232C/RS-485>
COMMANDE
: RS-232C
VITESSE DONNEES : 19200
INFO.STATUT
: ¤¤¤
INFO.ALARME
: ¤¤¤
ADRESSE
: ¤¤¤
Utilisez le cadran de taquage pour déplacer le curseur au
réglage de REGL.RS-232C / RS-485, puis tournez le cadran
de navette dans le sens des aiguilles d’une montre.
Le sous-menu REGL.RS-232C / RS-485 apparaît et le curseur
passe au réglage de COMMANDE.
<MENU PRINCIPAL 2>
1.REGL.AFFICHAGE/PERTE SIGNAL
2.REGL.RS-232C / RS-485
3.REGL.AVERTISSEUR
4.REGL.VERROU DE SECURITE
5.REGL.RESEAU
6.REGL.DISQUE DUR
Tournez le cadran de taquage pour sélectionner “ RS-232C” ,
puis tournez le cadran de navette dans le sens des aiguilles
d’une montre.
Le curseur passe à VITESSE DONNEES.
2
->
->
->
->
->
->
Tournez le cadran de navette dans le sens des aiguilles
d’une montre, utilisez le cadran de taquage pour
sélectionner une vitesse de transmission (exemple: 19200),
puis tournez le cadran de navette dans le sens des aiguilles
d’une montre.
Ceci complète le réglage et le curseur passe à COMMANDE.
• Vitesses de transmission: 2400, 4800, 9600 et 19200
<REGL.RS-232C/RS-485>
COMMANDE
: RS-232C
VITESSE DONNEES : 19200
INFO.STATUT
: ¤¤¤
INFO.ALARME
: ¤¤¤
ADRESSE
: ¤¤¤
<REGL.RS-232C/RS-485>
COMMANDE
: RS-232C
VITESSE DONNEES : 19200
INFO.STATUT
: ¤¤¤
INFO.ALARME
: ¤¤¤
ADRESSE
: ¤¤¤
3
Appuyez sur le bouton EXIT/OSD.
L’affichage revient à l’écran normal.
EXIT/OSD
3
Tournez le cadran de navette dans le sens des aiguilles
d’une montre.
“RS-232C” clignote. Utilisez le cadran de taquage pour
sélectionner RS-232C ou RS-485.
<REGL.RS-232C/RS-485>
COMMANDE
: RS-232C
VITESSE DONNEES : 19200
INFO.STATUT
: ¤¤¤
INFO.ALARME
: ¤¤¤
ADRESSE
: ¤¤¤
60
Français
RÉGLAGE DE REGL.RS-232C / RS-485
RS-485
5
Branchez les connecteurs de commande RS-485 (A et B) de
l’enregistreur vidéo numérique en série avec d’autres dispositifs tels
qu’un contrôleur, un multiplexeur ou un autre enregistreur vidéo
numérique. (Référez-vous à la page 7.)
1
Tournez le cadran de navette dans le sens des aiguilles
d’une montre, utilisez le cadran de taquage pour
sélectionner une adresse (exemple: “ 37” ), puis tournez le
cadran de navette dans le sens des aiguilles d’une montre.
Ceci complète le réglage et le curseur passe à COMMANDE.
Remarque: La gamme des adresses valides pour cette unité est de 0
à 127. Si plus d’un enregistreur vidéo numérique sont
branchés, faites attention que des adresses ne soient pas
répétées.
• Adresses: 0 à 127
Tournez le cadran de navette dans le sens des aiguilles
d’une montre, utilisez le cadran de taquage pour
sélectionner RS-485, puis tournez le cadran de navette dans
le sens des aiguilles d’une montre.
Le curseur passe à VITESSE DONNEES.
Les réglages de INFO.STATUT, INFO.ALARME et ADRESSE
peuvent être changés.
<REGL.RS-232C/RS-485>
COMMANDE
: RS-485
VITESSE DONNEES : 19200
INFO.STATUT
: OUI
INFO.ALARME
: OUI
ADRESSE
: 000
<REGL.RS-232C/RS-485>
COMMANDE
: RS-485
VITESSE DONNEES : 19200
INFO.STATUT
: OUI
INFO.ALARME
: OUI
ADRESSE
: 000
2
<REGL.RS-232C/RS-485>
COMMANDE
: RS-485
VITESSE DONNEES : 19200
INFO.STATUT
: OUI
INFO.ALARME
: OUI
ADRESSE
: 37
Tournez le cadran de navette dans le sens des aiguilles
d’une montre, utilisez le cadran de taquage pour
sélectionner une vitesse de transmission (exemple: 19200),
puis tournez le cadran de navette dans le sens des aiguilles
d’une montre.
• Vitesses de transmission: 2400, 4800, 9600 et 19200
Le curseur passe à INFO.STATUT.
6
EXIT/OSD
<REGL.RS-232C/RS-485>
COMMANDE
: RS-485
VITESSE DONNEES : 19200
INFO.STATUT
: OUI
INFO.ALARME
: OUI
ADRESSE
: 000
3
4
Tournez le cadran de navette dans le sens des aiguilles
d’une montre, utilisez le cadran de taquage pour
sélectionner la transmission de l’information du statut
(exemple: “ OUI” ), puis tournez le cadran de navette dans le
sens des aiguilles d’une montre.
• OUI: L’information de statut sera transmise.
Le curseur passe à INFO.ALARME.
Tournez le cadran de navette dans le sens des aiguilles
d’une montre, utilisez le cadran de taquage pour
sélectionner la transmission de l’information d’alarme
(exemple: “ OUI” ), puis tournez le cadran de navette dans le
sens des aiguilles d’une montre.
• OUI: L’information d’alarme sera transmise.
Le curseur passe à ADRESSE.
Français
Appuyez sur le bouton EXIT/OSD.
L’affichage revient à l’écran normal.
61
RÉGLAGE DE REGL.AVERTISSEUR
Menu principal 2
<MENU PRINCIPAL 2>
1.REGL.AFFICHAGE/PERTE SIGNAL
2.REGL.RS-232C / RS-485
3.REGL.AVERTISSEUR
4.REGL.VERROU DE SECURITE
5.REGL.RESEAU
6.REGL.DISQUE DUR
7.PANNE COURANT/DUREE UTIL.
Sous-menus
Pour régler la sonnerie du vibreur pendant les
alarmes.
<REGL.AVERTISSEUR>
ALARME
:NON
DISQUE PLEIN
:OUI
ERREUR DU DISQUE :OUI
AVERT. DE VERROU :OUI
TOUCHES
:NON
PAS D' ENR.
:NON
->
->
->
->
->
->
->
Pour régler la sonnerie du vibreur lorsqu’il n’y
a plus d’espace pour l’enregistrement.
Pour régler la sonnerie du vibreur lorsqu’il y a
un problème du disque dur.
VERS MENU PRINCIPAL 1
->
CADRAN POUR CHANGER.NAVETTE POUR SELECTIONNER
Pour régler la sonnerie du vibreur lorsque le
verrou de sécurité est engagé.
Pour régler la sonnerie du vibreur lorsque
l’appareil n’enregistre pas.
Pour régler la sonnerie du vibreur lorsqu’un
bouton d’opération est pressé.
Le vibreur peut retentir comme avertissement pendant une alarme et
lorsque le disque dur est plein.
1
3
Appuyez sur le bouton MENU deux fois pour afficher l’écran
MENU PRINCIPAL 2.
Le curseur passe à REGL. AFFICHAGE/PERTE SIGNAL.
4
MENU
2
Tournez le cadran de navette dans le sens des aiguilles
d’une montre.
“NON” clignote. Utilisez le cadran de taquage pour changer le
réglage à “OUI” ou à “NON”.
OUI: Le vibreur retentit lorsqu’une alarme est déclenchée.
Au besoin, suivez la même méthode pour changer le réglage
du vibreur (OUI/NON).
• DISQUE PLEIN (OUI):
Pour régler si le vibreur retentit lorsque l’écrasement du
disque dur est désactivé et que le disque dur est
presque plein.
• ERREUR DU DISQUE (OUI):
Utilisez le cadran de taquage pour déplacer le curseur au
réglage de REGL.AVERTISSEUR, puis tournez le cadran de
navette dans le sens des aiguilles d’une montre.
Le sous-menu REGL.AVERTISSEUR apparaît et le curseur
passe au réglage de ALARME.
Pour régler si le vibreur retentit lorsqu’il y a une erreur
du disque dur.
• AVERT. DE VERROU (OUI):
Lorsque le verrou de sécurité est engagé et qu’un
bouton verrouillé est pressé, le vibreur retentit.
<REGL.AVERTISSEUR>
ALARME
:NON
DISQUE PLEIN
:OUI
ERREUR DU DISQUE :OUI
AVERT. DE VERROU :OUI
TOUCHES
:NON
PAS D' ENR.
:NON
Remarque: Lorsqu’un article est réglé à “OUI”, le vibreur retentit
deux fois à un intervalle d’environ 0,5 seconde.
• TOUCHES (OUI):
Pour régler la sonnerie du vibreur lorsqu’un bouton
d’opération est pressé.
• PAS D’ENR. (OUI):
Pour régler la sonnerie du vibreur lorsque
l’enregistrement s’arrête de lui-même ou lorsqu’une
personne arrête l’enregistrement délibérément.
5
Appuyez sur le bouton EXIT/OSD.
L’affichage revient à l’écran normal.
EXIT/OSD
62
Français
RÉGLAGE DE REGL.VERROU DE SECURITE
Des mots de passe pour cet enregistreur vidéo numérique peuvent être réglés pour l’administrateur ou pour l’utilisateur, ou pour les deux. Le réglage
de mots de passe permet de régler des privilèges pour les opérations d’enregistrement et de lecture. Lorsque le verrou de sécurité est réglé, si
quelqu’un d’autre que le détenteur du mot de passe touche à un bouton d’opération sur l’appareil, le vibreur retentira et un mot de passe doit être entré.
Il faut par conséquent s’assurer de noter le mot de passe.
Menu principal 2
<MENU PRINCIPAL 2>
1.REGL.AFFICHAGE/PERTE SIGNAL
2.REGL.RS-232C / RS-485
3.REGL.AVERTISSEUR
4.REGL.VERROU DE SECURITE
5.REGL.RESEAU
6.REGL.DISQUE DUR
7.PANNE COURANT/DUREE UTIL.
Sous-menus
Pour régler le niveau d’administrateur et
le niveau d’utilisateur des verrous de
sécurité.
<REGL.VERROU DE SECURITE>
NIVEAU MOT DE PASSE(4-8) MODE
ADMIN
-------NON
UTIL.
-------NON
COMMANDE ENR.
:
ADMIN
->
->
->
->
->
->
->
VERS MENU PRINCIPAL 1
->
CADRAN POUR CHANGER.NAVETTE POUR SELECTIONNER
Privilèges d’opérations et verrou de
sécurité
3
A Réglage du mot de passe d’administrateur
ADMIN
Exemple: Pour régler le mot de passe à “123456AB”
1
--------
NON
Appuyez sur le bouton MENU deux fois pour afficher l’écran
MENU PRINCIPAL 2.
Le curseur passe à REGL. AFFICHAGE/PERTE SIGNAL.
4
MENU
2
Tournez le cadran de navette dans le sens des aiguilles
d’une montre.
La première barre d’entrée du mot de passe clignote.
Utilisez le cadran de taquage pour afficher “ 1” , puis tournez
le cadran de navette.
La seconde barre d’entrée du mot de passe clignote.
• Les caractères qui peuvent être utilisés dans le mot de passe
sont: 0, 1, ... 9, A, B, C, ... Z
ADMIN
Utilisez le cadran de taquage pour déplacer le curseur au
réglage de REGL.VERROU DE SECURITE, puis tournez le
cadran de navette dans le sens des aiguilles d’une montre.
Le sous-menu REGL.VERROU DE SECURITE apparaît et le
curseur passe au réglage de ADMIN.
5
<REGL.VERROU DE SECURITE>
NIVEAU MOT DE PASSE(4-8) MODE
ADMIN
-------NON
UTIL.
-------NON
COMMANDE ENR.
:
ADMIN
6
Français
12------
NON
Répétez cette méthode pour continuer d’entrer “ 3456AB” ,
puis tournez le cadran de navette dans le sens des aiguilles
d’une montre.
Le curseur passe à “NON” et clignote.
<REGL.VERROU DE SECURITE>
NIVEAU MOT DE PASSE(4-8) MODE
ADMIN
123456AB
NON
UTIL.
-------NON
COMMANDE ENR.
:
ADMIN
63
NON
Utilisez le cadran de taquage pour afficher “ 2” , puis tournez
le cadran de navette.
La troisième barre d’entrée du mot de passe clignote.
ADMIN
Remarque:
• “NIVEAU MOT DE PASSE (4-8) MODE” est un titre et ne peut
pas être modifié.
• Si ADMIN est réglé à “NON”, le mot de passe d’utilisateur ne peut
pas être réglé.
• Le mot de passe peut se composer de quatre à huit caractères
alphanumériques.
1-------
RÉGLAGE DE REGL.VERROU DE SECURITE
7
B Réglage du mot de passe d’utilisateur
Utilisez le cadran de taquage pour changer le réglage à
“ OUI” , puis tournez le cadran de navette dans le sens des
aiguilles d’une montre.
Le curseur passe à UTIL..
Exemple: Pour régler le mot de passe à “AB123456”
1
<REGL.VERROU DE SECURITE>
NIVEAU MOT DE PASSE(4-8) MODE
ADMIN
123456AB
OUI
UTIL.
-------NON
COMMANDE ENR.
:
ADMIN
Utilisez le cadran de taquage pour déplacer le curseur à
UTIL., puis tournez le cadran de navette dans le sens des
aiguilles d’une montre.
La première barre d’entrée du mot de passe clignote.
UTIL.
8
Réglez le mot de passe d’utilisateur.
Passez à l’étape B Réglage du mot de passe d’utilisateur. Si
le réglage d’utilisateur ne sera pas fait, le réglage est fini.
Utilisez le cadran de taquage pour déplacer le curseur à
COMMANDE ENR. et exécutez la méthode de réglage des
privilèges d’opérations pour l’enregistrement et la lecture.
(Référez-vous à la page 65.)
2
Remarque: Si un mot de passe de 4 caractères est réglé, laissez le
5ème caractère comme "-", puis tournez le cadran de
navette dans le sens des aiguilles d’une montre.
A-------
NON
Utilisez le cadran de taquage pour afficher “ B” , puis tournez
le cadran de navette.
La troisième barre d’entrée du mot de passe clignote.
UTIL.
4
NON
Utilisez le cadran de taquage pour afficher “ A” , puis tournez
le cadran de navette.
La seconde barre d’entrée du mot de passe clignote.
• Les caractères qui peuvent être utilisés dans le mot de passe
sont: 0, 1, ... 9, A, B, C, ... Z
UTIL.
3
--------
AB------
NON
Répétez cette méthode pour continuer d’entrer “ 123456” ,
puis tournez le cadran de navette dans le sens des aiguilles
d’une montre.
Le curseur passe à “NON” et clignote.
<REGL.VERROU DE SECURITE>
NIVEAU MOT DE PASSE(4-8) MODE
ADMIN
123456AB
OUI
UTIL.
AB123456
NON
COMMANDE ENR.
:
ADMIN
5
Utilisez le cadran de taquage pour changer le réglage à
“ OUI” , puis tournez le cadran de navette dans le sens des
aiguilles d’une montre.
Le curseur passe à COMMANDE ENR..
Exécutez la méthode de réglage des privilèges d’opérations
pour l’enregistrement et la lecture. (Référez-vous à la page 65.)
<REGL.VERROU DE SECURITE>
NIVEAU MOT DE PASSE(4-8) MODE
ADMIN
-------NON
UTIL.
AB123456
OUI
COMMANDE ENR.
:
ADMIN
64
Français
RÉGLAGE DE REGL.VERROU DE SECURITE
C Réglage des privilèges d’opérations pour
D Réglage du verrou de sécurité
l’enregistrement et la lecture
1
Sélection de privilèges d’opérations
Les opérations disponibles changent selon les réglages OUI/NON et
ADMIN/UTIL..
Conditions de
sélection
NIVEAU MOT DE PASSE(4-8)
ADMIN
123456AB
UTIL.
AB123456
COMMANDE ENR.
:
MODE
OUI
OUI
ADMIN
ADMIN
123456AB
UTIL.
AB123456
COMMANDE ENR.
:
OUI
OUI
UTIL
ADMIN
123456AB
UTIL.
-------COMMANDE ENR.
:
OUI
NON
ADMIN
ADMIN
123456AB
UTIL.
-------COMMANDE ENR.
:
OUI
NON
UTIL
ADMIN
-------UTIL.
-------COMMANDE ENR.
:
NON
NON
ADMIN
ADMIN
-------UTIL.
-------COMMANDE ENR.
:
NON
NON
UTIL
1
À l’écran de surveillance normal, maintenez le bouton
SHUTTLE HOLD enfoncé pendant 3 secondes environ.
L’indicateur LOCK sur le panneau avant s’allume et le vibreur
retentit. Le verrou de sécurité est alors engagé.
Détails d’opérations
SHUTTLE HOLD
Toutes les opérations sont verrouillées. Lorsque le
mot de passe d’utilisateur est entré à l’écran d’entrée
de mot de passe, seules les opérations de lecture
peuvent être effectuées. Lorsque le mot de passe
d’administrateur est entré, toutes les opérations
peuvent être effectuées.
Toutes les opérations sont verrouillées. Lorsque le
mot de passe d’utilisateur est entré à l’écran d’entrée
de mot de passe, seules les opérations de lecture et
d’enregistrement peuvent être effectuées. Lorsque le
mot de passe d’administrateur est entré, toutes les
opérations peuvent être effectuées.
Les opérations d’enregistrement et de menu sont
verrouillées. Les opérations de lecture ne sont pas
verrouillées. Lorsque le mot de passe
d’administrateur est entré, toutes les opérations
peuvent être effectuées.
L’opération de menu est verrouillée. Les opérations
d’enregistrement et de lecture ne sont pas
verrouillées. Lorsque le mot de passe
d’administrateur est entré à l’écran d’entrée de mot
de passe, toutes les opérations peuvent être
effectuées.
Le verrou de sécurité n’est pas engagé (réglage par
défaut).
POWER
2
FULL
ALARM FULL
LOCK
LOCK
Appuyez sur n’importe quel bouton pour vérifier le
fonctionnement du verrou de sécurité.
L’écran d’entrée de mot de passe apparaît.
LOCK
L’affichage de l’écran disparaît après 5 secondes.
REC/STOP
VERROU DE SECURITE !
ENTREZ LE MOT DE PASSE
--------
CADRAN POUR CHANGER. NAVETTE POUR REGLER
3
Le verrou de sécurité n’est pas engagé (réglage par
défaut).
Utilisez le cadran de taquage et le cadran de navette pour
entrer le mot de passe, puis tournez le cadran de navette
dans le sens des aiguilles d’une montre une fois de plus.
L’indicateur LOCK s’éteint et l’affichage revient à l’écran normal.
Remarque: Entrez le mot de passe (exemple: “123456AB”) réglé
comme mot de passe d’administrateur ou d’utilisateur.
Utilisez le cadran de taquage pour déplacer le curseur à
COMMANDE ENR..
<REGL.VERROU DE SECURITE>
NIVEAU MOT DE PASSE(4-8) MODE
ADMIN
123456AB
OUI
UTIL.
AB123456
OUI
COMMANDE ENR.
:
ADMIN
1
2
3
VERROU DE SECURITE !
ENTREZ LE MOT DE PASSE
¤¤¤¤¤¤¤¤
LOCK
LOCK
LOCK
CADRAN POUR CHANGER. NAVETTE POUR REGLER
2
Tournez le cadran de navette dans le sens des aiguilles
d’une montre, puis utilisez le cadran de taquage pour
sélectionner “ ADMIN” ou “ UTIL.” .
Ceci complète le réglage.
<REGL.VERROU DE SECURITE>
NIVEAU MOT DE PASSE(4-8) MODE
ADMIN
123456AB
OUI
UTIL.
AB123456
OUI
COMMANDE ENR.
:
ADMIN
3
Appuyez sur le bouton EXIT/OSD.
L’affichage revient à l’écran normal.
EXIT/OSD
Français
65
RÉGLAGE DE REGL.RESEAU
Menu principal 2
<MENU PRINCIPAL 2>
1.REGL.AFFICHAGE/PERTE SIGNAL
2.REGL.RS-232C / RS-485
3.REGL.AVERTISSEUR
4.REGL.VERROU DE SECURITE
5.REGL.RESEAU
6.REGL.DISQUE DUR
7.PANNE COURANT/DUREE UTIL.
Sous-menus
Pour régler la carte de réseau local.
<REGL.RESEAU>
CARTE RESEAU
: LAN1
COMMANDE RESEAU : NON
ADRESSE IP
: 192.168. 0. 1
MASQUE D' ADRESSE : 255.255.255. 0
PASSERELLE
: 0. 0. 0. 0
PORT
: 00080
ID
MOT DE PASSE (4-8)
ID1
: 1111---ID2
: 2222---ID3
: 3333----
->
->
->
->
->
->
->
VERS MENU PRINCIPAL 1
->
CADRAN POUR CHANGER.NAVETTE POUR SELECTIONNER
Pour régler la commande du réseau.
Pour entrer l’adresse IP.
Pour entrer le masque de sous-réseau.
Pour entrer la passerelle.
Regle les trois niveaux des mots de
passe d’utilisateur.
Pour régler le port.
Connexion de réseau
Insérez une carte Ethernet compatible PCMCIA recommandée dans le logement pour carte PC à l’arrière de l’enregistreur
vidéo numérique.
Ceci vous permettra de visionner les images de cette unité et de faire les réglages des menus, via le réseau (réseau local), à partir d’un ordinateur
individuel. ID1, ID2 ou ID3 et des mots de passe sont requis.
Remarque:
• Jusqu’à quatre ordinateurs peuvent être connectés simultanément à l’unité principale d’enregistreur vidéo numérique. Cependant, si quatre
ordinateurs sont déjà connectés et qu’un autre ordinateur est connecté à un niveau d’utilisateur plus élevé que les niveaux d’utilisateur
actuellement utilisés, tout utilisateur connecté à un niveau inférieur sera déconnecté, et l’ordinateur connecté au niveau plus élevé auront la priorité.
Si les quatre ordinateurs déjà connectés le sont au niveau d’utilisateur ID1, le dernier utilisateur connecté sera déconnecté.
• La fente pour carte PC n’est compatible qu’avec des cartes 16 bits 5 V. N’utilisez pas de cartes à bus type 32 bits, car elles risquent d’endommager
la fente pour carte PC de l’enregistreur vidéo numérique.
• Lors du branchement direct à l'ordinateur
(sans utiliser de concentrateur Ethernet)
• Lors du branchement via un réseau intranet
(à l'aide d'un concentrateur Ethernet)
1 – 16
1 – 16
Moniteur
principal
1
2
3
Moniteur
principal
4
1
2
3
4
5
6
7
8
5
6
7
8
9
13
10
14
11
15
12
16
9
13
10
14
11
15
12
16
Moniteur TV
(vendu séparément)
DIGITAL IN
Moniteur TV
(vendu séparément)
DIGITAL OUT
DIGITAL IN
✱ Câble blindé à paires torsadées
(type droit CAT-5, 3 m ou moins)
DIGITAL IN
2
✱ Câble blindé à paires torsadées
(type droit CAT-5, 3 m ou moins)
DIGITAL OUT
DIGITAL IN
Ordinateur
1
2
Assurez-vous de toujours
utiliser un câble Ethernet de
type croisé.
DIGITAL OUT
Concentrateur de
commutation Ethernet
1
3
Ordinateur
3
Assurez-vous de toujours
utiliser un câble Ethernet de
type droit.
Insertion de la carte LAN recommandée
Ordinateur
Réseau
intranet
(Retiré)
(Installé)
3
1
2
DIGITAL OUT
3
Le verrouillage peut être
effectué facilement en
coulissant le bouton.
1
2
Concentrateur de
commutation Ethernet
Remettez le bouton à sa
position originale après l'avoir
déverrouillée.
66
Français
RÉGLAGE DE REGL.RESEAU
• COMMANDE RESEAU:
Réglage de REGL.RESEAU
1
Appuyez sur le bouton MENU deux fois pour afficher l’écran
MENU PRINCIPAL 2.
Le curseur passe à REGL. AFFICHAGE/PERTE SIGNAL.
MENU
2
•
Utilisez le cadran de taquage pour déplacer le curseur au
réglage de REGL.RESEAU, puis tournez le cadran de navette
dans le sens des aiguilles d’une montre.
Le sous-menu REGL.RESEAU apparaît et le curseur passe au
réglage de CARTE RESEAU.
<REGL.RESEAU>
CARTE RESEAU
: LAN1
COMMANDE RESEAU : OUI (AFFICHAGE:OUI)
ADRESSE IP
: 192.168. 0. 1
MASQUE D' ADRESSE : 255.255.255. 0
PASSERELLE
: 0. 0. 0. 0
PORT
: 00080
<REGL.RESEAU>
CARTE RESEAU
: LAN1
COMMANDE RESEAU : NON
ADRESSE IP
: 192.168. 0. 1
MASQUE D' ADRESSE : 255.255.255. 0
PASSERELLE
: 0. 0. 0. 0
3
Remarque:
• La commande par le réseau n’est pas possible à moins que
COMMANDE RESEAU soit réglé à OUI.
Lorsque vous êtes branchés sur un réseau, le réglage devrait être
mis à NON si la commande sur le réseau n’est pas requise.
• Si ENR. SERIE NUMERIQUE dans le menu REGL. COND.
D’ENREGISTREMENT est réglé à “OUI”, COMMANCE RESEAU
ne peut pas être réglé à “OUI”.
• L’unité principale ne peut pas être commandée pendant que des
opérations de réseau sont en cours. Cependant, l’enregistreur
vidéo numérique peut être déconnecté du réseau en appuyant sur
le bouton EXIT/OSD pendant 3 secondes environ.
Tournez le cadran de navette dans le sens des aiguilles
d’une montre.
“LAN1” clignote.
Sélectionnez LAN1 ou LAN2 suivant le type de carte utilisée.
• LAN1: Type COREGA FEther PCC-TXD “CG-FEPCCTXD”
(10/100 BASE-T) ou Type COREGA FEther II
PCC-TXD “CG-FE2PCCTXD” (10/100 BASE-T)
• LAN2: Type COREGA Ether PCC-TD “CG-EPCCTD” (10
BASE-T), Type COREGA Ether II PCC-TD
“CG-E2PCCTD” (10 BASE-T), COREGA Ether II
PCC-T (10 BASE-T) ou D-Link DE-660
6
Remarque: Le fonctionnement correct ne peut pas être garanti si une
carte de réseau local autre que celle recommandée
ci-dessus est utilisée.
4
7
Tournez le cadran de navette dans le sens des aiguilles
d’une montre, puis utilisez le cadran de taquage pour
sélectionner COMMANDE RESEAU (exemple: “ OUI” ), puis
tournez le cadran de navette dans le sens des aiguilles d’une
montre pour régler (AFFICHAGE: OUI).
Le curseur passe à ADRESSE IP.
• COMMANDE RESEAU: OUI (AFFICHAGE: OUI): Si
AFFICHAGE est réglé à OUI, le message “COMMANDE
RESEAU” est affiché sur le moniteur de l’enregistreur vidéo
numérique toute la durée de la connexion au réseau. De plus,
lorsque des images sont lues via le réseau, le moniteur de
l’enregistreur vidéo numérique affiche également les images
de lecture. L’enregistreur vidéo numérique ne peut pas être
commandé pendant une connexion au réseau. Cependant,
vous pouvez vous déconnecter du réseau en appuyant sur le
bouton EXIT/OSD pendant 3 secondes.
Français
Tournez le cadran de navette dans le sens des aiguilles
d’une montre et utilisez le cadran de taquage et le cadran de
navette pour afficher le ADRESSE IP (exemple:
“ 192.168.0.1” ), puis tournez le cadran de navette dans le
sens des aiguilles d’une montre.
Avec le dernier mouvement du cadran de navette, le curseur
passe à MASQUE D’ADRESSE.
<REGL.RESEAU>
CARTE RESEAU
: LAN1
COMMANDE RESEAU : OUI (AFFICHAGE:OUI)
ADRESSE IP
: 192.168. 0. 1
MASQUE D' ADRESSE : 255.255.255. 0
PASSERELLE
: 0. 0. 0. 0
PORT
: 00080
Utilisez le cadran de taquage pour sélectionner la carte de
réseau local (exemple: “ LAN1” ), puis tournez le cadran de
navette dans le sens des aiguilles d’une montre.
Le curseur passe à COMMANDE RESEAU.
<REGL.RESEAU>
CARTE RESEAU
: LAN1
COMMANDE RESEAU : NON
ADRESSE IP
: 192.168. 0. 1
MASQUE D' ADRESSE : 255.255.255. 0
PASSERELLE
: 0. 0. 0. 0
5
OUI (AFFICHAGE: NON): Si
AFFICHAGE est réglé à NON, le message “COMMANDE
RESEAU” n’est pas affiché sur le moniteur de l’enregistreur
vidéo numérique pendant la connexion au réseau. De plus,
lorsque des images sont lues via le réseau, le moniteur de
l’enregistreur vidéo numérique affiche les images directes.
L’indicateur PLAY/STOP sur l’enregistreur vidéo numérique ne
s’allume pas pendant la lecture. (L’enregistrement est
possible.) L’enregistreur vidéo numérique ne peut pas être
commandé pendant une connexion au réseau. Cependant,
vous pouvez vous déconnecter du réseau en appuyant sur le
bouton EXIT/OSD pendant 3 secondes.
NON: Les opérations de réseau sont désactivées.
Tournez le cadran de navette dans le sens des aiguilles
d’une montre et utilisez le cadran de taquage et le cadran de
navette pour afficher le MASQUE D’ADRESSE (exemple:
“ 255.255.255.0” ), puis tournez le cadran de navette dans le
sens des aiguilles d’une montre.
Avec le dernier mouvement du cadran de navette, le curseur
passe à PASSERELLE.
<REGL.RESEAU>
CARTE RESEAU
: LAN1
COMMANDE RESEAU : OUI (AFFICHAGE:OUI)
ADRESSE IP
: 192.168. 0. 1
MASQUE D' ADRESSE : 255.255.255. 0
PASSERELLE
: 0. 0. 0. 0
PORT
: 00080
67
RÉGLAGE DE REGL.RESEAU
8
3
Tournez le cadran de navette dans le sens des aiguilles
d’une montre et utilisez le cadran de taquage et le cadran de
navette pour afficher le PASSERELLE (exemple:
“ 192.168.0.1” ), puis tournez le cadran de navette dans le
sens des aiguilles d’une montre.
Avec le dernier mouvement du cadran de navette, le curseur
passe au réglage “80” de PORT.
ID1
Remarque: Lors de la connexion de cette unité à un réseau, vérifiez
les réglages de l’adresse IP (ADRESSE IP), du masque
de sous-réseau (MASQUE D’ADRESSE) et de la
passerelle (PASSERELLE) avec l’administrateur de
réseau du réseau local.
9
Utilisez le cadran de taquage pour afficher “ B” , puis tournez
le cadran de navette.
Le troisième caractère 1 clignote.
4
Tournez le cadran de navette dans le sens des aiguilles
d’une montre, utilisez le cadran de taquage pour régler le
numéro du PORT (exemple: “ 90” ), puis tournez le cadran de
navette dans le sens des aiguilles d’une montre.
Vous pouvez régler n’importe quel numéro de port désiré entre 1
et 65535.
: AB11----
Répétez cette méthode pour continuer d’entrer “ 123456” ,
puis tournez le cadran de navette dans le sens des aiguilles
d’une montre.
Le curseur passe à ID2.
PORT
ID
ID1
ID2
ID3
Remarque: Si le numéro de port est réglé à autre que le réglage par
défaut “80”, entrez le numéro du port après le “:” dans
l’adresse IP.
5
Réglage de REGLAGE DE MOT DE PASSE
Pour la connexion à un réseau il y a trois niveaux d’accès, dont
chacun a un mot de passe. Chaque mot de passe se compose d’une
combinaison de 4 à 8 symboles alphanumériques.
6
Remarque: Le curseur ne peut pas être déplacé à ID ou MOT DE
PASSE (4-8).
: 00080
MOT DE PASSE (4-8)
: AB123456
: 2222---: 3333----
Au besoin, utilisez la même méthode pour régler les mots de
passe ID2 et ID3, puis tournez le cadran de navette dans le
sens des aiguilles d’une montre.
Le curseur passe à CARTE RESEAU.
Appuyez sur le bouton EXIT/OSD.
L’affichage revient à l’écran normal.
EXIT/OSD
Exemple: Réglage de AB123456 comme mot de passe d’ID1.
1
Utilisez le cadran de taquage pour déplacer le curseur à ID1,
puis tournez le cadran de navette dans le sens des aiguilles
d’une montre.
Le caractère initial 1 de l’entrée de mot de passe clignote.
• Les caractères qui peuvent être utilisés dans le mot de passe
sont: 0, 1 ... 9, A, B ... Z
PORT
ID
ID1
ID2
ID3
7
Commande par ordinateur
Référez-vous au manuel pour la commande à distance sur une
connexion de réseau fourni séparément.
: 00080
MOT DE PASSE (4-8)
: 1111---: 2222---: 3333----
Remarque:
• ID1: Ce niveau peut seulement visionner une image directe, via le
réseau.
• ID2: Ce niveau peut visionner une image directe et faire la lecture
et la recherche d’images enregistrées, via le réseau.
• ID3: Ce niveau permet d’effectuer tous les réglages et opérations
de l’enregistreur vidéo numérique.
2
Utilisez le cadran de taquage pour afficher “ A” , puis tournez
le cadran de navette.
Le deuxième caractère 1 clignote.
ID1
: A111----
68
Français
RÉGLAGE DE REGL.DISQUE DUR
Menu principal 2
<MENU PRINCIPAL 2>
1.REGL.AFFICHAGE/PERTE SIGNAL
2.REGL.RS-232C / RS-485
3.REGL.AVERTISSEUR
4.REGL.VERROU DE SECURITE
5.REGL.RESEAU
6.REGL.DISQUE DUR
7.PANNE COURANT/DUREE UTIL.
->
->
->
->
->
->
->
VERS MENU PRINCIPAL 1
->
CADRAN POUR CHANGER.NAVETTE POUR SELECTIONNER
Sous-menus
Pour initialiser le disque dur.
<REGL.DISQE DUR>
DISQUE1
: 80GB
DISQUE2
: ---GB
INITIALISATION DISQUE ->
ATTENTION : TOUS LES ENREGISTREMENTS
SERONT EFFACES!
Création d’une image miroir des
enregistrements.
MIROIR
: NON
UNITE DE LECTURE : ¤¤¤
ATTENTION : VITESSE D'ENREGISTREMENT
LIMTEE PAR LE MIROIR !
Réglage de REGL.DISQUE DUR
Pour régler la lecture du disque dur.
4
Ceci affiche la capacité du disque dur pour le disque 1 (standard) et le
disque 2 (standard ou ajouté).
Remarque: Avant d’ajouter un disque dur, il est important de faire une
copie de sauvegarde des images enregistrées sur un
support comme une carte CompactFlash.
1
Utilisez le cadran de taquage pour sélectionner OUI, puis
tournez le cadran de navette.
L’écran “INITIALISATION DISQUE !” apparaît et le disque dur
est initialisé. L’affichage revient ensuite à l’écran REGL.DISQUE
DUR.
Appuyez sur le bouton MENU deux fois pour afficher l’écran
MENU PRINCIPAL 2.
Le curseur passe à REGL. AFFICHAGE/PERTE SIGNAL.
INITIALISATION DISQUE !
MENU
5
2
Utilisez le cadran de taquage pour déplacer le curseur au
réglage de REGL.DISQUE DUR, puis tournez le cadran de
navette dans le sens des aiguilles d’une montre.
Le sous-menu REGL.DISQUE DUR apparaît et le curseur passe
au réglage de INITIALISATION DISQUE.
EXIT/OSD
<REGL.DISQE DUR>
DISQUE1
: 80GB
DISQUE2
: ---GB
INITIALISATION DISQUE ->
ATTENTION : TOUS LES ENREGISTREMENTS
SERONT EFFACES!
Ajout d’un disque dur
Consultez votre revendeur concernant l’ajout d’un disque dur. Pour
faire l’ajout, utilisez une unité de disque dur additionnel (vendue
séparément).
Si un disque dur est ajouté, assurez-vous d’initialiser les disques durs.
Lorsque cela est fait, les deux disques durs seront initialisés, de sorte
que toutes les données présentes sur le disque dur initial seront
effacées.
MIROIR
: NON
UNITE DE LECTURE : ¤¤¤
ATTENTION : VITESSE D'ENREGISTREMENT
LIMTEE PAR LE MIROIR !
3
Référence: Écran REGL.DISQUE DUR
• MIROIR: Lorsqu’un disque dur est ajouté, ou si un disque dur de
160 Go est installé, il est possible d’enregistrer la même image sur
deux disques durs. Ceci signifie que même si une erreur d’écriture
d’image se produit vous pourrez lecture de l’image d’une zone
sans erreur. Notez que si l’image miroir est spécifiée, la vitesse
d’enregistrement sera limitée.
• UNITE DE LECTURE: Après avoir réglé la création de l’image
MIROIR, vous pourrez spécifier lequel des deux disques durs doit
être utilisé pour la lecture de l’image enregistrée.
Avec le réglage de création de l’image miroir, si une erreur s’est
produite dans l’image de lecture, commutez l’utilisation du disque
dur (DISQUE1) à (DISQUE2).
• Copie de données du DISQUE 1 au DISQUE 2: Les données
d’enregistrement sur le DISQUE 1 peuvent être copiées au
DISQUE 2. Sélectionnez “ENSUITE”, puis tournez le cadran de
navette dans le sens des aiguilles d’une montre. L’écran de copie
est affiché. La copie de toutes les données peut prendre jusqu’à
plusieurs heures.
Tournez le cadran de navette dans le sens des aiguilles
d’une montre.
Un écran d’avertissement (AVERTISSEMENT) apparaît, puis
“NON” clignote.
<AVERTISSEMENT>
CE CHANGEMENT REINITIALISERA LE DISQUE.
TOUS LES ENREGISTREMENTS SERONT EFFACES
DESIREZ-VOUS CONTINUER?
NON
CADRAN POUR CHANGER. NAVETTE POUR REGLER
Français
Appuyez sur le bouton EXIT/OSD.
L’affichage revient à l’écran normal.
69
RÉGLAGE DE PANNE COURANT/DUREE UTIL.
Menu principal 2
<MENU PRINCIPAL 2>
1.REGL.AFFICHAGE/PERTE SIGNAL
2.REGL.RS-232C / RS-485
3.REGL.AVERTISSEUR
4.REGL.VERROU DE SECURITE
5.REGL.RESEAU
6.REGL.DISQUE DUR
7.PANNE COURANT/DUREE UTIL.
Sous-menus
<PANNE COURANT/DUREE UTIL.>
PANNE COURANT
#020 COUPURE ----- --:-RETOUR ----- --:--
->
->
->
->
->
->
->
DUREE UTILISATION
UTIL.DISQUE1 :
UTIL.DISQUE2 :
ALIMENTATION :
VERS MENU PRINCIPAL 1
->
CADRAN POUR CHANGER.NAVETTE POUR SELECTIONNER
1
FIRMWARE :
00000H
-----H
00000H
MAIN 1.00-00 / SUB 1.00-00
1
2
3
4
5
6
Au sujet du sous-menu
Appuyez sur le bouton MENU deux fois pour afficher l’écran
MENU PRINCIPAL 2.
Le curseur passe à REGL. AFFICHAGE/PERTE SIGNAL.
1 COUPURE
Pour afficher la date/l’heure à laquelle une panne de courant s’est
produite.
Le nombre de pannes d’alimentation apparaît sur la gauche.
(exemple: #020) Lorsque le numéro dépasse 999 il revient à 000.
MENU
2 RETOUR
Pour afficher la date/l’heure à laquelle le courant a été rétabli.
2
3 UTIL.DISQUE1
Affiche la durée totale d’utilisation du disque dur 1.
Utilisez le cadran de taquage pour déplacer le curseur au
réglage de PANNE COURANT/DUREE UTILISATION, puis
tournez le cadran de navette dans le sens des aiguilles d’une
montre.
Le sous-menu PANNE COURANT/DUREE UTIL. apparaît.
Vérifiez la date/l’heure d’une panne de courant ou la durée
d’utilisation des disques durs, etc...
4 UTIL.DISQUE2
Affiche la durée totale d’utilisation du disque dur 2.
5 ALIMENTATION
Affiche la durée totale d’utilisation de cette unité.
6 FIRMWARE (MICROPROGRAMME)
Affiche la version courante du microprogramme.
<PANNE COURANT/DUREE UTIL.>
PANNE COURANT
#001 COUPURE 06-15 20:30
RETOUR 06-15 21:30
DUREE UTILISATION
UTIL.DISQUE1 :
UTIL.DISQUE2 :
ALIMENTATION :
FIRMWARE :
3
00060H
-----H
00060H
MAIN 1.00-00 / SUB 1.00-00
Appuyez sur le bouton EXIT/OSD.
L’affichage revient à l’écran normal.
EXIT/OSD
70
Français
SAUVEGARDE DES DÉTAILS DES RÉGLAGES DES
MENUS
Les détails des réglages des menus peuvent être sauvegardés (copiés) sur une carte CompactFlash, et les réglages qui ont été sauvegardés sur une
carte CompactFlash peuvent être chargés à l’enregistreur vidéo numérique. Cette fonction peut être utilisée pour transférer les réglages facilement à
plusieurs enregistreurs vidéo numériques.
1
Sauvegarde à une carte CompactFlash
Affichez le menu principal 1, puis appuyez sur le bouton
SHUTTLE HOLD pendant 3 secondes ou plus.
L’écran COPIER REGLAGES DES MENUS apparaît.
MENU
<COPIER REGLAGES DES MENUS>
DVR TYPE VER. SA01-00
SAUVEGARDER MENUS SUR LA CF
<COPIER REGLAGES DES MENUS>
CHARGER MENUS DE LA CF
->
COPIER REGLAGES AIRE D`ENR. : NON
DVR TYPE VER. SA01-00
SHUTTLE HOLD
->
1
SAUVEGARDER MENUS SUR LA CF
2
CHARGER MENUS DE LA CF
->
COPIER REGLAGES AIRE D`ENR. : NON
->
* SI VOUS COPIEZ LES REGLAGES
AIRE D`ENR., LE DISQUE DUR SERA INITIALISE!
* SI VOUS COPIEZ LES REGLAGES
AIRE D`ENR., LE DISQUE DUR SERA INITIALISE!
1
1 Sauvegarde des réglages des menus sur une carte
CompactFlash
Ceci sauvegarde les détails des réglages des menus sur une
carte CompactFlash.
2
2 Chargement des réglages des menus d’une carte
CompactFlash
Ceci charge les réglages des menus d’une carte
CompactFlash à l’enregistreur vidéo numérique.
Tournez le cadran de taquage pour sélectionner
SAUVEGARDER MENUS SUR LA CF, puis tournez le cadran
de navette dans le sens des aiguilles d’une montre.
L’écran AVERTISSEMENT apparaîtra pour confirmer la
sauvegarde.
Pour sauvegarder les réglages, tournez le cadran de taquage
pour sélectionner “ OUI” , puis tournez le cadran de navette
dans le sens des aiguilles d’une montre.
La sauvegarde commence. Lorsque la sauvegarde est finie,
SAUVEGARDE FINIE! apparaît. Un fichier nommé
MENUCOPY.TXT sera créé dans le répertoire de carte
CompactFlash.
<AVERTISSEMENT>
SAUVEGARDER MENUS SUR LA CF !
CONTINUER?
OUI
<COPIER REGLAGES DES MENUS>
SAUVEGARDE FINIE !
SAUVEGARDER MENUS SUR LA CF
->
CHARGER MENUS DE LA CF
->
COPIER REGLAGES AIRE D`ENR. : NON
* SI VOUS COPIEZ LES REGLAGES
AIRE D`ENR., LE DISQUE DUR SERA INITIALISE!
Français
71
SAUVEGARDE DES DÉTAILS DES RÉGLAGES DES MENUS
☞ Si les réglages de zone d’enregistrement sont copiés
Chargement des réglages des menus
Cette méthode charge les détails des réglages des menus
sauvegardés sur une carte CompactFlash à l’enregistreur vidéo
numérique.
Ceci décrit comment copier les réglages des zones d’enregistrement.
Normalement sélectionnez “NON” pour l’option COPIER REGLAGES
AIRE D’ENR.
Remarque: Lors du chargement des réglages des menus à
l’enregistreur vidéo numérique, vous pouvez sélectionner
si l’appareil chargera aussi les réglages des zones
d’enregistrement.
Si vous chargez de nouveaux réglages de menus à un
enregistreur vidéo numérique qui a déjà des images
enregistrées sur son disque dur, les zones
d’enregistrement seront initialisées automatiquement et
toutes les images déjà enregistrées seront effacées. Dès
lors, sélectionnez normalement “NON” pour l’option
COPIER REGLAGES AIRE D’ENR. Si vous sélectionnez
“OUI” et chargez les réglages des menus, le disque dur
sera initialisé et l’écran d’entrée du mot de passe de
l’administrateur apparaîtra.
1
Pour copier les réglages, utilisez le cadran de taquage pour
régler COPIER REGLAGES AIRE D’ENR. à “ OUI” , puis
tournez le cadran de taquage pour sélectionner “ CHARGER
MENUS DE LA CF” et tournez le cadran de navette dans le
sens des aiguilles d’une montre.
<COPIER REGLAGES DES MENUS>
DVR TYPE VER. SA01-00
SAUVEGARDER MENUS SUR LA CF
->
CHARGER MENUS DE LA CF
->
COPIER REGLAGES AIRE D`ENR. : OUI
* SI VOUS COPIEZ LES REGLAGES
AIRE D`ENR., LE DISQUE DUR SERA INITIALISE!
<COPIER REGLAGES DES MENUS>
2
DVR TYPE VER. SA01-00
SAUVEGARDER MENUS SUR LA CF
->
CHARGER MENUS DE LA CF
->
COPIER REGLAGES AIRE D`ENR. : NON
* SI VOUS COPIEZ LES REGLAGES
AIRE D`ENR., LE DISQUE DUR SERA INITIALISE!
1
2
Pour copier les réglages, tournez le cadran de taquage pour
sélectionner “ OUI” dans l’écran AVERTISSEMENT, puis
tournez le cadran de navette dans le sens des aiguilles d’une
montre.
La copie commence. Lorsque la copie est finie, CHARGEMENT
TERMINE! apparaît.
<AVERTISSEMENT>
Tournez le cadran de taquage pour sélectionner
SAUVEGARDER MENUS SUR LA CF, puis tournez le cadran
de navette dans le sens des aiguilles d’une montre.
L’écran AVERTISSEMENT apparaîtra pour confirmer le
chargement.
CHARGERMENT DES MENUS DE LA CF !
LE DISQUE DUR SERA INITIALISE!
CONTINUER?
OUI
Pour charger les réglages, tournez le cadran de taquage
pour sélectionner “ OUI” , puis tournez le cadran de navette
dans le sens des aiguilles d’une montre.
Le chargement commence. Lorsque la sauvegarde est finie,
CHARGEMENT TERMINE! apparaît.
CHARGEMENT DE LA CF !
<AVERTISSEMENT>
CHARGERMENT DES MENUS DE LA CF !
CONTINUER?
OUI
<COPIER REGLAGES DES MENUS>
CHARGEMENT TERMINE!
CHARGEMENT DE LA CF !
<COPIER REGLAGES DES MENUS>
CHARGEMENT TERMINE!
72
Français
SPÉCIFICATIONS D’INTERFACE
RS-232C
Spécifications du connecteur à 9 broches
1 2 3 4 5
No. de broche
Signal
Opération
Direction du signal
1
–
–
–
6 7 8 9
2
RXD
Réception des données
Ordinateur → Enregistreur vidéo numérique
3
TXD
Transmission des
données
Enregistreur vidéo numérique → Ordinateur
4
–
–
–
–
5
GND
Masse
6
–
–
–
7
RTS
Demande d’envoi
Enregistreur vidéo numérique → Ordinateur
8
–
–
–
9
–
–
–
Format des données
Mode
Asynchrone
Longueur de caractère
8 bits
Vitesse de transmission des données
2400, 4800, 9600, 19200 bps
Parité
Aucune
Bit d’arrêt
1
Protocole de transmission
La transmission est effectuée en unités de 1 octet. Après que l’ordinateur transmette un octet des données, il attend une
réponse de l’enregistreur vidéo numérique, puis transmet l’octet de données suivant.
Pour commencer à envoyer des commandes, une commande ON (OUI) (F6) est envoyée. L’enregistreur vidéo
numérique continuera de recevoir des commandes jusqu’à ce qu’une commande OFF (NON) (F7) soit envoyée pour
signaler l’arrêt. L’enregistreur vidéo numérique répond ACK (OA) à chaque fois qu’il reçoit une commande.
Référez-vous au Tableau 4 – Tableau des commandes à la page 75.
RS-485
Format des données
Mode
Asynchrone
Longueur de caractère
8 bits
Vitesse de transmission des données
2400, 4800, 9600, 19200 bps
Parité
Aucune
Bit d’arrêt
1
Protocole de transmission
Un protocole Sanyo particulier (SSP: Security Serial Protocol) est utilisé. Il est recommandé d’utiliser un contrôleur
spécial. Adressez-vous au revendeur pour plus de détails sur comment obtenir un contrôleur spécial.
Français
73
SPÉCIFICATIONS D’INTERFACE
Réglages de l’interrupteur de terminaison RS485 (RS485 TERMINATE)
Réglage de terminaison
Si plusieurs enregistreurs à disque dur sont branchés ensemble, les réglages de terminaison doivent également être faits.
• Réglez l’interrupteur de terminaison RS485 sur le panneau arrière à ON (OUI), et réglez l’interrupteur de terminaison du dernier appareil de la série
à ON (OUI).
• Assurez-vous de régler les interrupteurs de terminaison RS485 de tous les appareils intermédiaires (des appareils autres que le premier et le
dernier de la série) à OFF (NON).
Remarque: Si les réglages de terminaison ne sont pas corrects, les données seront reflétées par l’une ou l’autre extrémité de la série et ceci affectera
la transmission d’autres données, et les données qui sont transmises à chaque appareil ne seront pas correctes.
(Exemple)
ON
Contrôleur de système
RS485
POWER
12V DC IN
ON
A
GND
B
AB
OFF
ADDRESS
1 2 3
Interrupteur de terminaison
1
0
TERMINATE
OFF
RS485
TERMINATE
ON
Mulltiplexeur
OFF
RS485
TERMINATE
ON
Enregistreur vidéo numérique
OFF
ON
Magnétoscope timelapse
Interrupteur de terminaison
OFF
74
Français
SPÉCIFICATIONS D’INTERFACE
Tableau des commandes (Tableau 4)
Le tableau suivant indique toutes les commandes qui peuvent être traitées par l’enregistreur vidéo numérique.
Si une commande envoyée ne correspond pas à une fonction de l’enregistreur vidéo numérique, la commande est reçue mais aucune opération n’est
effectuée.
Bit supérieur
Bit inférieur
0
1
2
3
4
5
0
6
7
TIMER ON/OFF
1
2
3
SHIFT←
SHIFT→
4
SHIFT↑
SHIFT↓
5
SHIFT+
/RP UP
6
SHIFT–
/RP DOWN
MENU
7
8
SECURITY
LOCK ON
9
A
ACK
B
NAK
PLAY
SEARCH
C
GROUP SET
D
GROUP
CHECK
E
GROUP
CLEAR
F
Bit supérieur
Bit inférieur
8
9
A
STOP
STILL
B
C
D
E
0
CLOCK
ADJUST
1
MENU RESET
F
2
3
4
5
ZOOM (MPX)
6
7
STATUS
SENSE
8
MENU
UPLOAD
CLOCK
DOWNLOAD
9
A
REC
B
REC/DUB
REQUEST
FF/ALARM F
C
CHANNEL
D
COPY
E
OSD/EXIT
F
REW/ALARM R
*RS-485 SEND
START
*RS-485 RCV
CMF.
STATUS LOG2
STATUS LOG1
: Commande pour RS-485 uniquement
Français
MENU
DOWNLOAD
75
REC STOP
FICHE TECHNIQUE
Capacité du disque dur
Système de télévision
Résolution d’image:
Compression
Qualité d’image
Type d’enregistrement
Vitesse d’enregistrement
Zone d’enregistrement
Lecture
Zoom:
Mode de recherche
• Recherche selon la date/heure
• Recherche d’alarme
• Recherche d’alarme à l’aide de
croquis
• Recherche de zone d’archives
• Recherche de mouvement
Langue de menu
Réglages de l’horloge
Entrée vidéo
Entrée S-Video
:
:
:
:
:
:
:
:
:
:
80 GB ou 160 GB
Basé sur le standard de signal couleur NTSC
720 x 240 (champ), 720 x 480 (image)
M-JPEG
5 Niveaux (qualité de base, qualité normale, qualité améliorée, haute qualité, très haute qualité)
Enregistrement d’image ou de champ
27 niveaux
Zone d’enregistrement normal, Zone d’enregistrement d’alarme, Zone d’archives
Lecture, Image fixe, Recherche
Fonction de zoom 2x
Entrée numérique
Entrée numérique secondaire
Entrée audio
Entrée de microphone
Sortie vidéo
Sortie S-Video
:
:
:
:
:
:
Sortie de boucle
Boucle de sortie S-Video
:
:
Sortie numérique
Sortie numérique secondaire
Sortie audio
Logement pour CompactFlash
Logement pour carte PC
RS-232C
Connecteurs
• RS-485
• Télécommande
• Entrée d’alarme
• Sortie d’alarme
• Réinitialisation d’alarme
• Sortie de commutation
• Sortie de non-enregistrement
• Entrée de réglage d’horloge
• Sortie de réglage d’horloge
• Sortie d’avertissement
• Sortie de disque plein
• Sortie d’alarme pleine
Alimentation
Consommation
Conditions de fonctionnement
Dimensions
Poids
:
:
:
:
:
:
Recherche dans la zone d’archives avec liste d’événements
Recherche en spécifiant un détecteur de mouvement
Anglais/Français/Espagnol
Année/Mois/Jour/Heures/Minutes/Secondes
1,0 Vc-c, 75 Ω, non équilibrée, BNC x 1
Signal Y/C séparés, 1 connecteur DIN (connecteur S)
Signal Y: 1,0 Vc-c/75 Ω, asymétrique, synchrone; Signal C: 0,286 Vc-c/75 Ω, asymétrique
RJ-45 x1
RJ-45 x1
–8 dBs, 27 kΩ non équilibrée (connecteur RCA x 1)
–60 dBs 10 kΩ non équilibrée (mini connecteur de 3,5mm)
1,0 Vc-c, 75 Ω, non équilibrée, BNC x 1
Signal Y/C séparés, 1 connecteur DIN (connecteur S)
Signal Y: 1,0 Vc-c/75 Ω, asymétrique, synchrone; Signal C: 0,286 Vc-c/75 Ω, asymétrique
1,0 Vc-c, 75 Ω, non équilibrée, BNC x 1
Signal Y/C séparés, 1 connecteur DIN (connecteur S)
Signal Y: 1,0 Vc-c/75 Ω, asymétrique, synchrone; Signal C: 0,286 Vc-c/75 Ω, asymétrique
RJ-45 x1
RJ-45 x1
–8 dBs, 600 Ω non équilibrée (connecteur RCA x 1)
CompactFlash Type 2 (avant)
PCMCIA Type 2 (arrière) pour SCSI ou carte Ethernet
D-SUB 9 broches (pour ordinateur)
:
:
:
:
:
:
:
:
:
:
:
:
:
:
:
:
:
Verrou-poussoir, 3 connecteurs (A,B, C (GND))
1 entrée pour commutateur de type à identification basée sur la résistance
1 entrée (normalement ouvert, bas niveau actif)
1 sortie (normal 5V, bas niveau actif)
1 entrée (normalement ouvert, bas niveau actif)
1 sortie (normal 5V, bas niveau actif)
1 sortie (normal 5V, bas niveau actif)
1 entrée (normalement ouvert, bas niveau actif)
1 sortie (normal 5V, bas niveau actif)
1 sortie (normal 5V, bas niveau actif)
1 sortie (normal 5V, bas niveau actif)
1 sortie (normal 5V, bas niveau actif)
CA 120 V, 60 Hz
26 W 400 mA
Température: 5°C à 40 °C, Humidité: 10 à 80 %
420 (l) x 86 (h) x 364,5 (p) mm
Environ 5,5 kg
: Recherche par l’heure et la date de l’enregistrement
: Recherche par liste d’événements d’alarme
: Recherche parmi les croquis d’événements d’alarme
:
:
:
:
:
:
Les spécifications et l’apparence externe de cet appareil sont sujettes à modification sans préavis et sans obligation.
76
Français
GARANTIE DE FIABILITÉ SANYO
ENREGISTREUR VIDÉO NUMÉRIQUE
APPLICATION DE LA GARANTIE
RESTRICTIONS
Les produits vidéo Sanyo achetés neufs et non utilisés au
Canada sont garantis contre les défauts de matériaux et de
fabrication pendant un an pour ce qui est des pièces et
pendant 90 jours pour ce qui est de la main d’oeuvre à
compter de la date d’acquisition par l’acheteur initial.
EXCEPTION: Les têtes vidéo sont garanties pendant 90
jours. Cette garantie ne couvre pas le service à domicile.
Elle s’applique uniquement à l’acheteur au détail initial du
produit couvert par la garantie.
(a) SANYO Canada Inc. se réserve le droit de modifier ou
d’améliorer le concept du modèle du produit faisant
l’objet de la présente garantie sans avoir l’obligation de
modifier de quelque façon que ce soit ou d’installer
quelque amélioration que ce soit dans ou sur le produit
de l’acheteur.
(b) SANYO Canada Inc. ou ses détaillants autorisés ne
seront en aucun cas tenus responsables des
dommages spéciaux ou indirects résultant de
l’utilisation de ce produit.
OBLIGATIONS DE SANYO CANADA INC.
EXCLUSIONS
(a) Sanyo ne garantit pas la disponibilité future des lecteurs
Durant la période de garantie, SANYO Canada Inc. réparera
ou, à sa discrétion, remplacera tout produit vidéo présentant
effectivement un défaut de matériel ou de fabrication.
Les PIÈCES de remplacement sont garanties jusqu’à
l’expiration de la garantie initiale du produit.
LA GARANTIE NE COUVRE PAS:
(a)
(b)
(c)
(d)
(e)
Les produits vidéo achetés à l’extérieur du Canada.
Les produits vidéo achetés usagés.
Les problèmes résultant du déballage et de l’installation.
Les réglages décrits dans le manuel d’instructions.
Les accessoires, y compris antenne, vidéocassettes,
étui de transport et cordons.
(f) Les avaries subies durant le transport ou y étant
attribuables.
(g) Les avaries dues à un entretien incorrect, à un accident,
à un mauvais traitement, à un usage non approprié ou à
la négligence.
OBLIGATIONS DE L’ACHETEUR AU DÉTAIL
INITIAL
Vous, l’acheteur au détail initial, devez présenter votre
facture originale datée et cette garantie à SANYO Canada
Inc. ou à un centre de service Sanyo autorisé lorsque vous
désirez vous prévaloir du recours en garantie.
Vous assumez tous les frais de TRANSPORT occasionnés
par l’expédition du produit à SANYO Canada Inc. ou à un
centre de service Sanyo autorisé et pour son retour. Vous
assumez aussi tous les frais d’ENTRETIEN que le produit
pourrait nécessiter.
de disque dur de 80GB. Dans une telle éventualité,
Sanyo fournira un lecteur de disque dur d’une capacité
égale ou supérieure si un lecteur de disque dur de
rechange est requis sur un numérique vidéo
enregistreur.
(b) Sanyo ne garantit pas les images enregistrées sur tout
enregistreur vidéo numérique retourné pour réparation
ou remplacement.
(c) Sanyo ne garantit aucun enregistreur vidéo numérique
utilisé hors de la norme de température de
fonctionnement de 5 à 40 degrés Celsius (41 à 104
degrés Fahrenheit), telle qu’indiquée dans notre
spécification de produit. Pour assurer un
fonctionnement approprié du système de
refroidissement du produit, le ventilateur ne doit pas
être obstrué.
GARANTIES STATUTAIRES
Les dispositions qui précèdent n’empêchent aucunement
l’opération de lois provinciales qui, dans certaines
circonstances, peuvent interdire certaines des restrictions et
exclusions figurant dans la présente garantie. Dans un tel
cas, les conditions ainsi interdites en vertu de ces lois seront
nulles et sans effets, mais le reste de la présente garantie
demeurera en vigueur.
COMMENT SE PRÉVALOIR DU RECOURS EN
GARANTIE
Veuillez consulter le détaillant Sanyo autorisé qui vous a
vendu le produit ou joindre directement SANYO Canada Inc.:
INVALIDATION DE LA GARANTIE
SANYO Canada Inc.
La présente garantie devient invalide si les numéros de
série du produit sont modifiés ou effacés ou si le produit a
été réparé par quiconque autre que SANYO Canada Inc. ou
un centre de service Sanyo autorisé.
1-300 Applewood Crescent
Concord, Ontario
L4K 5C7
(905) 760-9944
1-800-263-2244
L8HAA/US (DSR-300 E) 2001. 11. 21
Manual de Instrucciones
Español
E
PRECAUCIÓN
Declaración de conformidad
PRECAUCIÓN
Número de modelo
Nombre de la marca
Parte responsable
Dirección
DSR-3000
SANYO
SANYO FISHER COMPANY
21605 Plummer Street
Chatsworth, California 91311
Teléfono
: (818) 998-7322
• Este aparato cumple con la Parte 15 de las
reglamentaciones de la FCC. El funcionamiento
está sujeto a las siguientes dos condiciones:
(1) este dispositivo puede causar interferencias
dañinas, y
(2) este dispositivo puede aceptar cualquier
interferencia recibida, incluyendo interferencias
que pueden causar funcionamiento indeseado.
Riesgo de golpe eléctrico
No abra
PRECAUCIÓN: Para reducir el riesgo de golpes eléctricos,
no quite la cubierta (o la parte trasera).
No existen partes intercambiables por el usuario en el interior.
Consulte a personal calificado por el servicio de este aparato.
ADVERTENCIA: Para evitar incendios o golpes
eléctricos, no exponga este aparato a la lluvia o
humedad.
PRECAUCIÓN: Los cambios o modificaciones no
aprobadas expresamente por el fabricante pueden
anular la autoridad del usuario de usar este aparato.
El símbolo del relámpago dentro del triángulo
equilátero, es para alertar al usuario de la
presencia de voltaje peligroso sin aislación dentro
de la caja del aparato que puede ser lo
suficientemente fuerte como para constituir un
riesgo de golpes eléctricos para las personas.
Ubicación
Para que este aparato funcione segura y
satisfactoriamente, tenga en cuenta lo siguiente al
seleccionar un lugar para instalarlo:
• Protéjalo de los rayos directos del sol y manténgalo alejado
El signo de exclamación dentro del triángulo
equilátero, es para alertar al usuario de la
presencia de importantes instrucciones de
funcionamiento y mantenimiento (servicio) en la
literatura adjunta a este producto.
•
•
Este aparato ha sido probado y se ha comprobado que cumple con
los límites impuestos para un dispositivo digital Clase B, de
acuerdo con la Parte 15 de las reglamentaciones de la FCC. Estos
límites fueron establecidos para proveer suficiente protección
contra las interferencias dañinas en el caso de instalarlo en un
hogar. Este aparato genera, usa y puede irradiar frecuencias de
radio y, si no se instala y usa de acuerdo con estas instrucciones,
podría causar interferencias dañinas a las comunicaciones de
radio. Sin embargo, no se puede garantizar que no vayan a ocurrir
interferencias en algún caso en particular. Si este aparato causa
interferencias dañinas a la recepción de emisoras de radio o
televisión, que se pueden determinar mediante el encendido y
apagado del aparato, el usuario debería de tratar de corregir la
interferencia de acuerdo con alguna de las siguientes medidas:
•
•
•
•
•
•
•
de las fuentes intensas de calor.
Evite lugares polvorientos o húmedos.
Evite los lugares mal ventilados de manera de disipar bien el
calor. No bloquée los orificios de ventilación en la parte de
arriba y abajo del aparato. No coloque el aparato sobre
ningún material que pueda bloquear los orificios de
ventilación.
Instale el aparato sólo en posición horizontal.
Evite los lugares expuestos a fuertes vibraciones.
Evite cambiar el aparato entre lugares fríos y calientes.
No coloque el aparato directamente encima del televisor,
pues podría causar interferencias.
Para evitar golpes eléctricos e incendios
• No sostenga el cable de alimentación con las manos
•
Cambiar la orientación o ubicación de la antena receptora.
Aumentar la separación entre este aparato y el receptor.
Conectar el aparato en un tomacorriente en un circuito diferente del
que se encuentra conectado el receptor.
Consultar por ayuda al distribuidor o un técnico experiente en radio/TV.
•
•
Para clientes en Canadá
•
Este aparato clase B cumple con la norma canadiense
ICES-003.
húmedas.
No tire del cable de alimentación al desconectarlo del
tomacorriente de CA de la pared. Sosténgalo por el enchufe.
Si volcara un líquido sobre el aparato, desenchufe el cable de
alimentación inmediatamente y haga inspeccionar el aparato
en un centro de servicio autorizado por el fabricante.
No coloque nada directamente encima de este aparato.
SERVICIO
Este aparato es un instrumento de precisión que de ser
usado con cuidado le brindará muchos años de uso
satisfactorio. Sin embargo, en el caso de un problema, se
aconseja no intentar repararlo o abrirlo Usted mismo. El
servicio debe ser siempre encomendado a la tienda
donde lo compró o a un centro de servicio autorizado
Sanyo.
PRECAUCIÓN
Podría ocurrir una explosión si la batería es cambiada de
manera incorrecta.
Cambie la batería sólo por una del mismo tipo o equivalente
recomendada por el fabricante.
Deseche las baterías usadas de acuerdo con las
instrucciones del fabricante.
Español
:
:
:
:
1
CONTENIDO
CARACTERÍSTICAS PRINCIPALES . . . . . . . . . . . . . . . . . . . . . . . . . . . . . . . . . . . .
ACCESORIOS . . . . . . . . . . . . . . . . . . . . . . . . . . . . . . . . . . . . . . . . . . . . . . . . . . . . . .
NOMBRES DE LAS PARTES. . . . . . . . . . . . . . . . . . . . . . . . . . . . . . . . . . . . . . . . . .
Panel delantero . . . . . . . . . . . . . . . . . . . . . . . . . . . . . . . . . . . . . . . . . . . . . . .
Panel trasero . . . . . . . . . . . . . . . . . . . . . . . . . . . . . . . . . . . . . . . . . . . . . . . . .
CONEXIONES . . . . . . . . . . . . . . . . . . . . . . . . . . . . . . . . . . . . . . . . . . . . . . . . . . . . . .
Conexiones básicas . . . . . . . . . . . . . . . . . . . . . . . . . . . . . . . . . . . . . . . . . . .
Conexiones de control del sistema . . . . . . . . . . . . . . . . . . . . . . . . . . . . . . .
Conexiones del terminal de control. . . . . . . . . . . . . . . . . . . . . . . . . . . . . . .
Conexiones del multiplexor digital . . . . . . . . . . . . . . . . . . . . . . . . . . . . . . .
Conexiones en serie digitales . . . . . . . . . . . . . . . . . . . . . . . . . . . . . . . . . . .
DISCO DURO INTEGRADO . . . . . . . . . . . . . . . . . . . . . . . . . . . . . . . . . . . . . . . . . . .
Disco duro . . . . . . . . . . . . . . . . . . . . . . . . . . . . . . . . . . . . . . . . . . . . . . . . . . .
Tablas de velocidad de grabación . . . . . . . . . . . . . . . . . . . . . . . . . . . . . . . .
Exhibición de funcionamiento . . . . . . . . . . . . . . . . . . . . . . . . . . . . . . . . . . .
GRABACIÓN DE IMÁGENES EN EL ÁREA DE GRABACIÓN NORMAL. . . . . . .
Grabación normal . . . . . . . . . . . . . . . . . . . . . . . . . . . . . . . . . . . . . . . . . . . . .
Grabación con temporizador . . . . . . . . . . . . . . . . . . . . . . . . . . . . . . . . . . . .
GRABACIÓN DE IMÁGENES EN EL ÁREA DE GRABACIÓN DE ALARMA. . . .
Grabación de alarma . . . . . . . . . . . . . . . . . . . . . . . . . . . . . . . . . . . . . . . . . . .
Grabación de pre-alarma . . . . . . . . . . . . . . . . . . . . . . . . . . . . . . . . . . . . . . .
4
4
5
5
6
7
7
7
7
8
8
10
10
11
13
14
14
15
17
17
18
REPRODUCCIÓN DE IMÁGENES GRABADAS EN EL ÁREA DE
GRABACIÓN NORMAL . . . . . . . . . . . . . . . . . . . . . . . . . . . . . . . . . . . . . . . . . . . 19
BUSCANDO IMÁGENES GRABADAS . . . . . . . . . . . . . . . . . . . . . . . . . . . . . . . . . . 24
SALVANDO (COPIANDO) IMÁGENES GRABADAS . . . . . . . . . . . . . . . . . . . . . . . 33
A Copia de imágenes al área de archivo del disco duro . . . . . . . . . . . . . . . 34
B Copia de imágenes desde el área de archivo a una tarjeta
CompactFlash. . . . . . . . . . . . . . . . . . . . . . . . . . . . . . . . . . . . . . . . . . . . . . . . 35
C Copiar imágenes del área de archivo a una unidad DDS (DAT) o
unidad CD-R . . . . . . . . . . . . . . . . . . . . . . . . . . . . . . . . . . . . . . . . . . . . . . . . . 37
DIAGRAMA DE FLUJO Y FUNCIONES DE LOS MENÚES . . . . . . . . . . . . . . . . . . 40
Flujo de menúes . . . . . . . . . . . . . . . . . . . . . . . . . . . . . . . . . . . . . . . . . . . . . . 40
Funciones básicas de las pantallas de menú. . . . . . . . . . . . . . . . . . . . . . . 41
Funciones mientras se exhibe una pantalla de submenú . . . . . . . . . . . . . 41
AJUSTES DE IDIOMA/RELOJ . . . . . . . . . . . . . . . . . . . . . . . . . . . . . . . . . . . . . . . . . 42
Ajuste de idioma . . . . . . . . . . . . . . . . . . . . . . . . . . . . . . . . . . . . . . . . . . . . . . 42
Ajustes AJUSTE RELOJ . . . . . . . . . . . . . . . . . . . . . . . . . . . . . . . . . . . . . . . . 42
Ajuste AJUSTE HORA DE VERANO . . . . . . . . . . . . . . . . . . . . . . . . . . . . . . 43
Ajuste AJUSTE RELOJ EXTERNO . . . . . . . . . . . . . . . . . . . . . . . . . . . . . . . . 43
AJUSTE DE ENTRADA DE VÍDEO . . . . . . . . . . . . . . . . . . . . . . . . . . . . . . . . . . . . . 44
Ajuste MULTIPLEXOR. . . . . . . . . . . . . . . . . . . . . . . . . . . . . . . . . . . . . . . . . . 44
Ajuste ENTRADA DE VIDEO. . . . . . . . . . . . . . . . . . . . . . . . . . . . . . . . . . . . . 44
AJUSTE DE ÁREA DE GRABACIÓN . . . . . . . . . . . . . . . . . . . . . . . . . . . . . . . . . . . 45
Exhibición CAPACIDAD TOTAL. . . . . . . . . . . . . . . . . . . . . . . . . . . . . . . . . . 45
Reposición de cada área de grabación . . . . . . . . . . . . . . . . . . . . . . . . . . . . 45
Ajuste REPOSICION DE AREA. . . . . . . . . . . . . . . . . . . . . . . . . . . . . . . . . . . 46
2
Español
CONTENIDO
AJUSTE DE LAS CONDICIONES DE GRABACIÓN . . . . . . . . . . . . . . . . . . . . . . . 47
Grabación de ajustes para la conexión en serie digital
(máximo 3 unidades). . . . . . . . . . . . . . . . . . . . . . . . . . . . . . . . . . . . . . . . . . . 47
Ajuste NORMAL RECORDING AREA OVERWRITE y AVISO DE DISCO
RESTANTE en la sección de exhibición de funcionamiento. . . . . . . . . . . 48
AJUSTE DE MODO DE GRABACIÓN NORMAL . . . . . . . . . . . . . . . . . . . . . . . . . . 49
Ajuste AJUSTE GRABACION NORMAL . . . . . . . . . . . . . . . . . . . . . . . . . . . 49
AJUSTE DEL TEMPORIZADOR . . . . . . . . . . . . . . . . . . . . . . . . . . . . . . . . . . . . . . . 50
Ajuste AJUSTE TEMPORIZADOR . . . . . . . . . . . . . . . . . . . . . . . . . . . . . . . . 50
Reservas de temporizador cada día a la misma hora con la misma
calidad de imagen . . . . . . . . . . . . . . . . . . . . . . . . . . . . . . . . . . . . . . . . . . . . . 50
Reservas de temporizador que abarquen más de 24 horas . . . . . . . . . . . 52
AJUSTE DE FERIADOS . . . . . . . . . . . . . . . . . . . . . . . . . . . . . . . . . . . . . . . . . . . . . . 53
Ajustes AJUSTE FESTIVOS . . . . . . . . . . . . . . . . . . . . . . . . . . . . . . . . . . . . . 53
AJUSTE DEL MODO DE GRABACIÓN DE ALARMA . . . . . . . . . . . . . . . . . . . . . . 54
Ajuste AJUSTE GRABACION DE ALARMA . . . . . . . . . . . . . . . . . . . . . . . . 54
Ajuste de grabación de prealarma. . . . . . . . . . . . . . . . . . . . . . . . . . . . . . . . 56
Ajuste del disparador de alarma . . . . . . . . . . . . . . . . . . . . . . . . . . . . . . . . . 57
Ajustes del sensor de movimiento integrado. . . . . . . . . . . . . . . . . . . . . . . 57
AJUSTES DE EXHIBICIÓN . . . . . . . . . . . . . . . . . . . . . . . . . . . . . . . . . . . . . . . . . . . 59
Ajustes AJUSTE EXHIBICION . . . . . . . . . . . . . . . . . . . . . . . . . . . . . . . . . . . 59
Ajuste AJUSTE PERDIDA VIDEO. . . . . . . . . . . . . . . . . . . . . . . . . . . . . . . . . 59
AJUSTE DE RS-232C/RS-485 . . . . . . . . . . . . . . . . . . . . . . . . . . . . . . . . . . . . . . . . . 60
Ajuste RS-232C/RS-485. . . . . . . . . . . . . . . . . . . . . . . . . . . . . . . . . . . . . . . . . 60
Selección de RS-232C. . . . . . . . . . . . . . . . . . . . . . . . . . . . . . . . . . . . . . . . . . 60
Selección de RS-485 . . . . . . . . . . . . . . . . . . . . . . . . . . . . . . . . . . . . . . . . . . . 61
AJUSTE DEL ZUMBADOR . . . . . . . . . . . . . . . . . . . . . . . . . . . . . . . . . . . . . . . . . . . 62
AJUSTE DEL BLOQUEO DE SEGURIDAD . . . . . . . . . . . . . . . . . . . . . . . . . . . . . . 63
Privilegios de funcionamiento y bloqueo de seguridad . . . . . . . . . . . . . . 63
A Ajuste de la contraseña de administrador . . . . . . . . . . . . . . . . . . . . . . . . . 63
B Ajuste de la contraseña de usuario . . . . . . . . . . . . . . . . . . . . . . . . . . . . . . 64
C Ajuste del privilegio de funcionamiento de grabación y reproducción . . . 65
D Ajuste de bloqueo de seguridad . . . . . . . . . . . . . . . . . . . . . . . . . . . . . . . . . 65
AJUSTE DE RED . . . . . . . . . . . . . . . . . . . . . . . . . . . . . . . . . . . . . . . . . . . . . . . . . . . 66
Conexión de red . . . . . . . . . . . . . . . . . . . . . . . . . . . . . . . . . . . . . . . . . . . . . . 66
Ajuste AJUSTE RED . . . . . . . . . . . . . . . . . . . . . . . . . . . . . . . . . . . . . . . . . . . 67
Ajuste AJUSTE D/CONTRASENA . . . . . . . . . . . . . . . . . . . . . . . . . . . . . . . . 68
AJUSTE DEL DISCO DURO . . . . . . . . . . . . . . . . . . . . . . . . . . . . . . . . . . . . . . . . . . 69
AJUSTE HDD . . . . . . . . . . . . . . . . . . . . . . . . . . . . . . . . . . . . . . . . . . . . . . . . . 69
Para agregar un disco duro . . . . . . . . . . . . . . . . . . . . . . . . . . . . . . . . . . . . . 69
EXHIBICIÓN DE FALLA DE ALIMENTACIÓN/TIEMPO USADO . . . . . . . . . . . . . . 70
DETALLES DE LOS AJUSTES DE MENU DE COPIA . . . . . . . . . . . . . . . . . . . . . . 71
Grabación en una tarjeta CompactFlash. . . . . . . . . . . . . . . . . . . . . . . . . . . 71
Cargar ajustes de menú grabados. . . . . . . . . . . . . . . . . . . . . . . . . . . . . . . . 72
ESPECIFICACIONES DEL INTERFAZ . . . . . . . . . . . . . . . . . . . . . . . . . . . . . . . . . . 73
ESPECIFICACIONES . . . . . . . . . . . . . . . . . . . . . . . . . . . . . . . . . . . . . . . . . . . . . . . . 76
Español
3
CARACTERÍSTICAS
PRINCIPALES
ACCESORIOS
Este videograbador digital se puede usar para almacenar imágenes
grabadas por una cámara de monitoreo en su disco duro integrado.
• Está equipado con una unidad de disco duro de 3,5 pulgadas de
gran capacidad.
• La grabación y la reproducción de imágenes se puede realizar
usando señales digitales de un multiplexor.
• La reproducción se puede realizar al mismo tiempo que la grabación.
• La grabación de alarma sigue la pista de los movimientos de
individuos sospechosos.
• La grabación con temporizador le permite grabar diferentes sesiones
cada día.
• La grabación de pre-alarma graba las imágenes inmediatamente
anteriores a una alarma.
• La grabación y reproducción de audio también es posible a tasas de
grabación de 0,02 – 0,1 seg (campo), 0,03 – 0,2 seg (cuadro).
• Cuenta con una función de detección de movimiento integrada que
puede disparar la grabación de alarma cuando se detecta
movimiento.
• Las imágenes grabadas se pueden copiar usando tarjetas
CompactFlash.
• Incluye una variedad de funciones de búsqueda.
☞ La búsqueda de alarmas usando una lista de eventos de alarma
o imágenes de alarma en miniatura
☞ Búsquedas por fecha y hora basadas en la fecha y hora de
grabación
☞ Detección de sensor de movimiento mediante la búsqueda de un
movimiento durante la reproducción.
• Una función de zoom permite que las imágenes reproducidas sean
ampliadas para ser exhibidas, cuando se usan sin un multiplexor.
• Las imágenes se pueden capturar por campo o por cuadro.
• El modo de calidad de imagen se puede seleccionar de entre cinco
modos para ambos, campo y cuadro.
• Están disponibles tres niveles de bloqueo de seguridad.
• Una tarjeta de red compatible con PCMCIA se puede usar para
realizar el control de la red. Acceso múltiple para hasta cuatro
usuarios.
• Incluye un interfaz RS-232C para el control desde un ordenador.
• Es posible la conexión a un controlador de sistema (en venta por
separado) usando un interfaz RS-485.
• Se pueden usar tarjetas SCSI tipo tarjeta PC para respaldar en
unidades DDS (DAT) y CD-Rs.
Sin embargo, se necesita un software especial para reproducir
imágenes respaldadas e un CD-R.
• Los ajustes de menú pueden ser cargados o descargados desde
una tarjeta CompactFlash.
Cable de alimentación
Sujetador de cable
Protección del disco duro
Si se encuentra cualquier error de formato en el disco duro
cuando se conecta la alimentación, todo el disco duro es
verificado automáticamente. Si se encuentra cualquier otro
problema en el disco duro, el indicador POWER destella.
Póngase en contacto con el comercio donde lo compró si debe
reformatear el disco duro o realizar respaldos de cualquier
imagen. El disco duro es muy sensible al polvo, vibraciones y
golpes, y no se debería usar en lugares cercanos a fuentes de
campos magnéticos. Asegúrese de observar los siguientes
puntos a fin de evitar pérdidas de datos.
• No someta el videograbador digital a golpes.
• No use el videograbador digital en lugares donde quedará
sometido a vibraciones o en lugares inestables.
• No desconecte el cable de alimentación mientras la grabación
o la reproducción están en progreso.
• No lo use en lugares sujetos a cambios rápidos de
temperatura (cambios de unos 10°C en una hora).
• Si el videograbador digital se traslada a un lugar con una gran
diferencia de temperatura o un alto nivel de humedad, puede
aparecer condensación. Si el videograbador digital se usa con
condensación dentro, podrían ocurrir problemas de
funcionamiento.
• No instale el videograbador digital en lugares que están
vibrando constantemente, tales como vehículos o trenes.
El disco duro y el ventilador de enfriamiento son
piezas reemplazables.
•
Estas partes generalmente deberán ser cambiadas después
de 2 años de uso (para el disco duro) o 3 años de uso (para
el ventilador de enfriamiento) a temperaturas normales de
25°C. Estos plazos se brindan sólo como guía, y no son una
garantía del rendimiento del producto.
Para grabaciones importantes
•
•
Ambiente de instalación
Deje un espacio de al menos 5 cm entre el videograbador digital y otros
objetos cercanos.
Los orificios de ventilación están ubicados a ambos lados y en la base
del videograbador digital. No permita que estos orificios de ventilación
queden cubiertos cuando instale el grabador.
Además, evite usar el videograbador digital en lugares con poca
ventilación.
•
4
Verifique siempre si ha realizado correctamente las
grabaciones.
En caso de que usando esta unidad no haya podido realizar
correctamente una grabación debido a conexiones
incorrectas con otro equipo o no se pueda reproducir
correctamente una grabación, no se aceptará ningún reclamo
de compensación.
Para grabaciones importantes, se recomienda realizar una
copia de respaldo periódica para protección contra las
pérdidas por malfuncionamiento o accidentes.
Español
NOMBRES DE LAS PARTES
3
4
5
7 6 FGJK
MENU
EXIT/OSD
PLAY/STOP
ZOOM
SEARCH
FRAME/FIELD
STILL
CHANNEL
COPY
REC/STOP
TIMER
C
Panel delantero
1
2
POWER
FULL
ALARM FULL
LOCK
ALARM
N
AR
LE
SHUTTLE
JOG
EN
TE
R
O
SHUTTLE HOLD
ALARM
P
8 9 IH M L
1 Indicador POWER
G Indicador y botón SEARCH FRAME/FIELD
• Durante la grabación o cuando está detenida
Destella rápidamente (4 Hz) para un error de disco duro y destella
lentamente para un error del ventilador.
Se ilumina cuando el enchufe del cable de alimentación se inserta
en un tomacorriente. Destella cuando hay un problema con el disco
duro o el ventilador.
•
2 Indicador FULL
Destella cuando se desactiva la sobreescritura y el espacio restante
en el área de grabación normal del disco duro es menor de 1%*.
(* Esto se puede cambiar usando los ajustes de menú.)
H Indicador y botón COPY
3 Indicador ALARM FULL
Se usa para copiar imágenes a un área de archivo del disco duro o
a una tarjeta CompactFlash o Microdrive.
El indicador se ilumina durante el copiado.
Destella cuando se desactiva la sobreescritura y el espacio restante
en el área de grabación de alarma del disco duro es menor de 1%*.
(* Esto se puede cambiar usando los ajustes de menú.)
I Indicador y botón TIMER
4 Indicador LOCK
Cuando se presiona el botón mientras está detenida la grabación, el
videograbador digital cambia al modo de espera de grabación con
temporizador, y cuando se llega al tiempo ajustado, se inicia la
grabación con temporizador.
Se ilumina cuando se activa el bloqueo de seguridad y las funciones
están bloqueadas.
Si se presiona un botón mientras está activado el bloqueo, suena el
zumbador y se ilumina el indicador.
J Indicador y botón PLAY/STOP
5 Indicador ALARM
Cuando se presiona el botón, se ilumina el indicador y se inicia la
reproducción de imágenes en el área de grabación normal.
Si se presiona durante la reproducción, ésta se detiene.
Se ilumina durante la grabación de pre-alarma.
Destella durante la grabación de alarma.
K Indicador y botón STILL
6 Indicador y botón MENU
Cuando se presiona este botón durante la reproducción, el indicador
se ilumina y la reproducción queda pausada. Si se presiona de
nuevo, se retoma la reproducción.
Se usa para exhibir las pantallas de menú (pantallas de ajuste).
7 Indicador y botón ZOOM
Se usa para exhibir la pantalla de zoom durante la reproducción.
El indicador se ilumina cuando se exhibe la pantalla de zoom.
Esto no funciona cuando hay un multiplexor conectado.
L Indicador y botón SHUTTLE HOLD
Bloquea la velocidad de reproducción y avance de cuadros.
El indicador se ilumina mientras está bloqueado.
8 Indicador y botón CHANNEL
M Botones ALARM (û ALARM ù)
Si el videograbador digital se conecta a un multiplexor Sanyo que permite la
decodificación de información de canal (números de cámara), se pueden
especificar canales de manera que solamente sean reproducidos esos
canales. El indicador se ilumina durante la reproducción. El botón CHANNEL
solamente se puede usar durante el mode de imagen fija.
Cuando se presionan estos botones durante la reproducción, ésta
pasa a la grabación de alarma anterior o a la siguiente.
N Diales de trotar (interior) y correr (exterior)
• Durante la reproducción
9 Indicador y botón REC/STOP
Se usa para iniciar la grabación normal.
El indicador se ilumina durante la grabación.
Si se presiona el botón por 2 segundos o más durante la grabación, se detiene
la grabación y se apaga el indicador.
•
F Indicador y botón EXIT/OSD
• Cuando se exhibe una pantalla de menú
•
El dial de trotar cambia la velocidad de reproducción.
El dial de correr realiza el avance rápido y el rebobinado.
Pantallas de menú
El dial de trotar mueve el cursor y cambia los ajustes.
El dial de correr acepta los ajustes.
O Ranura de la tarjeta CompactFlash
Se cierra el menú principal o submenú.
Durante la grabación o reproducción
Cuando se presiona el botón durante la grabación o reproducción, la
información superpuesta tal como fecha y hora y el estado de la alarma
cambian en el siguiente orden:
Exhibición arriba a la izquierda → Exhibición abajo a la izquierda → Exhibición
arriba a la derecha → Exhibición abajo a la derecha → Apagado.
El indicador se ilumina mientras se exhibe la información.
Español
Cuando se presiona el botón durante la grabación o cuando está
detenido el videograbador digital, el indicador se ilumina y es
posible la búsqueda de una reproducción específica.
Durante la reproducción
Cuando se presiona el botón durante la reproducción, el
indicador se ilumina y el modo cambia al modo de reproducción
de cuadros / marcos.
Inserte aquí una tarjeta CompactFlash o Microdrive.
P Botón MENU RESET
Reinicializa los ajustes de menú.
5
Panel trasero
2 3 4
O
ALARM
C CLOCK
RE ADJUST
RESET
ON UT
ALARM ALARM N O
OUT
C IN
C IN OUT
IN
IN
VIDEO
LOOP OUT
OUT
IN
DIGITAL
OUT
SUB IN
C
SUB OUT
A
RS232C
RS485
IN
LOOP OUT
S-VIDEO
T
K
LMN
Clavija
C
ALARM IN
2 Terminal MIC IN
3 Terminal AUDIO IN
4 Terminal AUDIO OUT
5 Terminal S-VIDEO IN
6 Terminal S-VIDEO LOOP OUT
7 Terminal S-VIDEO OUT
8 Terminal VIDEO IN
Entrada de alarma
Entrada de reposición de alarma
Salida de alarma
NON REC OUT
Salida de no grabación
CLOCK ADJUST IN
9 Terminal VIDEO LOOP OUT
F Terminal VIDEO OUT
G Terminal DIGITAL VIDEO IN
H Terminal DIGITAL VIDEO OUT
I Terminal DIGITAL VIDEO SUB IN
J Terminal DIGITAL VIDEO SUB OUT
K Terminal RS-232C
L Botón ALL RESET
M Interruptor de terminación RS-485 (RS485 TERMINATE)
N Conector de control
Señal
Tierra
ALARM RESET
ALARM OUT
C
Tienen prioridad las imágenes que salen al terminal S-VIDEO IN.
Tierra
Entrada de sincronización de reloj
(Consulte la página 43.)
CLOCK ADJUST OUT
Salida de sincronización de reloj
(Consulte la página 43.)
WARNING OUT
Salida de advertencia de error de
disco duro
FULL
Salida de advertencia de espacio de
disco duro
ALARM OUT
Salida de advertencia de espacio de
área de grabación de alarma
P Enchufe de alimentación de CA (AC IN~)
Inserte firmemente el cable de alimentación accesorio aquí.
Q Sujetador del cable de alimentación
Asegure el cable de alimentación en el sujetador usando el lazo de
cable accesorio como se indican en la figura.
Señal
C
Tierra
A
Conector RS-485*
B
Conector RS-485*
C
Tierra
Entrada del mando a distancia
Tierra
NC
Libre
NC
Libre
C
Tierra
C
Q
C
OU
O Conector de alarma
Conecte aquí una tarjeta de red recomendada o una tarjeta SCSI.
Nota: La ranura de tarjeta PC es sólo para tarjetas de 16 bits y 5 V.
No use tarjetas de tipo bus de 32 bits, porque pueden dañar la
ranura de tarjeta PC del videograbador digital.
SW OUT
SW
OFF
5 6 7 8 9 F GHIJ
Clavija
C REMOTE C NC NC C
RS485
TERMINATE
ON
ALL
RESET
B
OUT
1 Ranura de tarjeta de PC
REMOTE
C
AC IN
FULL
OUT
PC Card SLOT
1
G
NIN
RM
AR UT ALA LL
W O
FU
AUDIO
MIC
IN
EJECT
P
Cambio de salida
Tierra
* Se usa para la conexión de un cable de par trenzado.
6
Español
CONEXIONES
Asegúrese de leer cuidadosamente los manuales de instrucciones de todo el equipamiento que se está conectando al videograbador digital.
Si las conexiones son incorrectas, podría aparecer humo o malfuncionamientos.
Conexiones básicas
Cámara de vídeo (en venta por separado)
MIC
IN
C IN OUT
AC IN
FULL
AUDIO
IN
OUT
VIDEO
LOOP OUT
OUT
DIGITAL
OUT
SUB IN
C
SUB OUT
A
RS232C
RS485
IN
LOOP OUT
S-VIDEO
B C REMOTE C NC NC C
RS485
TERMINATE
ON
ALL
RESET
C
T
IN
OU
PC Card SLOT
SW
IN
EJECT
CLOCK
ADJUST
W
AR
OU NIN
T G
AL
FU A R
LL M
ALARM
RESET
ALARM ALARM
OUT
C IN
NO
N
OU RE
T C
Entrada de micrófono
OFF
OUT
Computadora
Conector
S-VIDEO IN
Monitor de TV
(en venta por separado)
Conector
VIDEO IN
Monitor de TV
(en venta por separado)
Conexiones de control del sistema
Conexiones del terminal de control
Use un cable de par trenzado (en venta por separado) para conectar un
controlador de sistema a los terminales de control A, B y C (tierra) del
videograbador digital. Conecte la señal A a la señal A y la señal B a la
señal B.
Si un circuito de control remoto está armado como se indica en la figura
y conectado a los terminales de entrada REMOTE del conector de
control, se puede usar el videograbador digital mediante control remoto.
Empuje e inserte los cables
220Ω
SW 1: REC STOP
220Ω
SW 2: PLAY STOP
300Ω
A
RS485
C REMOTE C NC NC C
RS485
TERMINATE
ON
ALL
RESET
C
SW 3: PAUSE
360Ω
T
OU
32C
B
SW
C
SW 4: SEARCH
470Ω
SW 5: CHANNEL
OFF
680Ω
RS485
C REMOTE C NC NC C
RS485
TERMINATE
ON
ALL
RESET
SW 6: PLAY
C
820Ω
T
A la señal B
A la señal A
B
OU
Cable de par trenzado
A
SW
C
SW 7: REC
1.2kΩ
OFF
SW 8: MENU
1.8kΩ
Tierra
SW 9 : EXIT/OSD
Conector RS-485
2.2kΩ
SW: Interruptor
Nota: El cable del control remoto no
debería tener más de 5 m de largo.
SW 10 : JOG j
3.3kΩ
SW 11 : JOG l
4.7kΩ
SW 12 : SHUTTLE c
7.5kΩ
SW 13 : SHUTTLE d
13kΩ
Controlador de sistema
(en venta por separado)
SW 14 : ZOOM
27kΩ
SW 15 : COPY
68kΩ
SW 16 : TIMER
Español
7
CONEXIONES
Conexiones del multiplexor digital
Conecte a un multiplexor (MPX-CD163P o CD93P) que permita conexiones digitales.
(Cuando sea necesario)
Entrada de alarma
ALARM
C CLOCK
RE ADJUST
RESET
ON UT
ALARM ALARM N O
OUT
C IN OUT
C IN
AC IN
FULL
AUDIO
MIC
IN
IN
OUT
IN
EJECT
G
NIN
RM
AR UT ALA LL
W O
FU
VIDEO
LOOP OUT
OUT
PC Card SLOT
IN
DIGITAL
OUT
SUB IN
C
A
RS232C
SUB OUT
RS485
IN
1
2
3
4
5
6
7
8
9
13
10
14
11
15
12
16
LOOP OUT
S-VIDEO
B C REMOTE C NC NC C
RS485
TERMINATE
ON
ALL
RESET
SW
C
OU
T
OFF
OUT
✱ Cable STP (Par retorcido blindado)
(CAT-5 tipo devecho, 3 m o menos)
DIGITAL OUT
DIGITAL IN
Salida de alarma
Monitor de TV
(en venta por separado)
Tierra (C)
Multiplexor (en venta por separado)
Conexiones en serie digitales
Se pueden conectar digitalmente hasta tres videograbadores digitales para grabar imágenes en serie.
A Conexión digital en serie de multiplexores
Multiplexor (en venta por separado)
1
2
3
4
5
6
7
8
9
13
10
14
11
15
12
16
CLOCK
ADJUST
C IN OUT
AC IN
FULL
AUDIO
IN
OUT
VIDEO
LOOP OUT
OUT
LOOP OUT
S-VIDEO
DIGITAL
OUT
SUB IN
C
SUB OUT
A
RS232C
B
C REMOTE C NC NC C
RS485
C
TERMINATE
ON
ALL
RESET
T
IN
RS485
IN
OU
PC Card SLOT
SW
IN
EJECT
NO
N
OU RE
T C
ALARM
RESET
ALARM ALARM
OUT
C IN
MIC
IN
W
AR
OU NIN
T G
ALA
FU R
LL M
Videograbador digital (principal)
Monitor de TV
(en venta por separado)
OFF
OUT
CLOCK
ADJUST
C IN OUT
AC IN
FULL
AUDIO
IN
OUT
VIDEO
LOOP OUT
OUT
LOOP OUT
S-VIDEO
DIGITAL
OUT
SUB IN
C
SUB OUT
A
RS232C
B
C REMOTE C NC NC C
RS485
C
TERMINATE
ON
ALL
RESET
T
IN
RS485
IN
OU
PC Card SLOT
SW
IN
EJECT
NO
N
OU RE
T C
ALARM
RESET
ALARM ALARM
OUT
C IN
MIC
IN
W
AR
OU NIN
T G
ALA
FU R
LL M
Videograbador digital (sub 1)
Amplificador
(en venta por separado)
OFF
OUT
CLOCK
ADJUST
C IN OUT
AC IN
FULL
AUDIO
IN
OUT
VIDEO
LOOP OUT
OUT
LOOP OUT
S-VIDEO
OUT
DIGITAL
OUT
SUB IN
C
SUB OUT
A
RS232C
B
C REMOTE C NC NC C
RS485
TERMINATE
ON
ALL
RESET
C
T
IN
RS485
IN
OU
PC Card SLOT
SW
IN
EJECT
NO
N
OU RE
T C
ALARM
RESET
ALARM ALARM
OUT
C IN
MIC
IN
W
AR
OU NIN
T G
ALA
FU R
LL M
Videograbador digital (sub 2)
Amplificador
(en venta por separado)
OFF
Nota: Para conexiones digitales se debe usar un cable LAN de tipo blindado (par retorcido blindado).
Cuando los videograbadores digitales están conectados digitalmente en serie, los terminales de entrada y salida digital pueden ser usados para
transmitir señales de vídeo, señales de control y señales de cambio. Sin embargo, no se pueden transmitir señales de audio de la misma
manera, por lo tanto si también se deben grabar señales de audio, conecte los terminales de entrada de audio mediante un amplificador tal
como se indica en el diagrama de conexión.
8
Español
CONEXIONES
B Conexión digital de videograbadores digitales con la función de multiplexor en serie
Videograbadores digitales con la
función de multiplexor
(en venta por separado)
2
3
4
5
6
7
8
9
13
10
14
11
15
12
16
MENU
EXIT/OSD
ZOOM
SEARCH
SEQUENCE
COPY
PLAY/STOP
C
1
POWER
FULL
ALARM FULL
LOCK
ALARM
1
2
3
4
5
6
7
8
QUAD MULTI
9
10
11
12
13
14
15
16
MON2 PLUS
REC/STOP
TIMER
AR
LE
SHUTTLE
JOG
EN
TE
R
STILL
SHUTTLE LOCK
ALARM
Monitor de TV
(en venta por
separado)
Videograbador digital (sub 1)
ALARM
C CLOCK
RE ADJUST
RESET
ON UT
ALARM ALARM N O
OUT
C IN
C IN OUT
MIC
IN
EJECT
AC IN
FULL
OUT
IN
Amplificador
(en venta por separado)
G
NIN
RM
AR UT ALA LL
W O
FU
AUDIO
IN
VIDEO
LOOP OUT
OUT
PC Card SLOT
IN
DIGITAL
OUT
SUB IN
C
SUB OUT
A
RS232C
RS485
IN
LOOP OUT
S-VIDEO
B
C REMOTE C NC NC C
RS485
SW
TERMINATE
ON
ALL
RESET
C
OU
T
OFF
OUT
(en venta por separado)
Videograbador digital (sub 2)
Amplificador
(en venta por separado)
ALARM
C CLOCK
RE ADJUST
RESET
ON UT
ALARM ALARM N O
OUT
C IN
C IN OUT
MIC
IN
VIDEO
LOOP OUT
PC Card SLOT
OUT
IN
DIGITAL
OUT
SUB IN
C
SUB OUT
A
RS232C
RS485
IN
LOOP OUT
S-VIDEO
OUT
(en venta por separado)
Español
FULL
OUT
IN
EJECT
G
NIN
RM
AR UT ALA LL
W O
FU
AUDIO
IN
9
B C REMOTE C NC NC C
RS485
TERMINATE
ON
ALL
RESET
OFF
SW
C
OU
T
AC IN
DISCO DURO INTEGRADO
Disco duro
A Área de grabación normal
•
Áreas de grabación
Las áreas de grabación del disco duro (área de grabación normal: 80%,
área de grabación de alarma: 19%, área de archivo: 1%) se establecen
automáticamente cuando se conecta la alimentación del videograbador
digital. Las imágenes se graban en el área de grabación normal cuando
se presiona el botón REC/STOP, y se graban en el área de grabación
de alarma cuando ocurre una alarma. A esto se le llama condición por
defecto, y los ajustes detallados a continuación se pueden confirmar en
las secciones sobre “GRABACIÓN DE IMÁGENES EN EL ÁREA DE
GRABACIÓN NORMAL” y “GRABACIÓN DE IMÁGENES EN EL
ÁREA DE GRABACIÓN DE ALARMA” que se explican más adelante.
Además, ajustes tales como las áreas de grabación y la calidad de
imagen se pueden cambiar usando las pantallas de menú.
1%
•
B Área de grabación de alarma
Son necesarios los ajustes del menú AJUSTE GRABACION DE ALARMA.
• La grabación de alarma se activa cuando está ajustado
GRABACION DE ALARMA. Cuando una persona sospechosa es
detectada por el interruptor o el sensor de movimiento que está
conectado al terminal de entrada de alarma, se graba una alarma en
el área de grabación de alarma.
• La grabación de pre-alarma se activa cuando está ajustado
GRABACION SIN ALARMA. La grabación de pre-alarma
repetidamente graba las mismas imágenes que la grabación normal
en el área de grabación de alarma, y sobrescribe esas imágenes
luego de transcurrido el intervalo de tiempo ajustado, hasta que se
detecta una alarma. Cuando está ajustada la grabación de
pre-alarma, se puede grabar la imagen inmediatamente anterior a
una alarma.
C Área de archivo
B Área de
grabación
de alarma
80%
19%
Cuando se presiona el botón REC/STOP mientras el monitoreo está
en progreso, las imágenes se graban en el área de grabación
normal.
Cuando se ingresan las horas de inicio y finalización para cada día
de la semana, y luego se activan, se realiza automáticamente la
grabación con temporizador en el área de grabación normal entre
las horas que han sido ajustadas.
A Área de grabación
n normal
C Área de archivo
Áreas de grabación del disco duro
Esta es el área para copiar imágenes importantes del área de grabación
normal y del área de grabación de alarma. El tamaño del área de
archivo se puede ajustar a un máximo de 10 GB (12,5% de la
capacidad total cuando utiliza un disco duro de 80 GB, 6,25% de la
capacidad total cuando utiliza un disco duro de 160 GB) cambiando el
tamaño del área de grabación normal o del área de grabación de
alarma.
Pantalla de menú (ajuste inicial)
A Pantalla de ajuste de la calidad de imagen del área de
grabación normal, velocidad de grabación, etc.
Se puede exhibir presionando el botón MENU.
<AJUSTE AREA DE GRABACION>
CAPACIDAD TOTAL
: 80GB
AREA DE GRABACION NORMAL
: 80 %
REPOSICION DE AREA ->
AREA DE GRABACION DE ALARMA
: 19 %
REPOSICION DE AREA ->
AREA DE ARCHIVO
: 1%
REPOSICION DE AREA ->
<AJUSTE GRABACION NORMAL>
CALIDAD DE IMAGEN
: MEDIA
GRABACION CUADRO/CAMPO : CAMPO
GRABACION DE AUDIO
: OFF
CICLO DE GRAB. : 0.10 SEG ( 54H)
A A
B B
1
2
3
4
C
CUIDADO : CUANDO SE CAMBIA EL AJUSTE.
TODA EL AREA SERA INICIALIZADA !
1 Calidad de imagen: MEDIA
B Pantalla de ajuste de la calidad de imagen del área de
La calidad de imagen se puede seleccionar de entre cinco
opciones.
La velocidad de grabación cambia según la calidad de imagen
seleccionada.
grabación de alarma, velocidad de grabación, etc.
<AJUSTE GRABACION DE ALARMA>
CALIDAD DE IMAGEN
:MEDIA
GRABACION CUADRO/ CAMPO :CAMPO
GRABACION DE AUDIO
:OFF
GRABACION DE ALARMA
:OFF
CICLO DE GRAB.: 0.10 SEG. DURACION: 1SEG
GRABACION SIN ALARMA :¤¤¤
CICLO DE GRAB.: ¤¤¤ SEG. DURACION: ¤¤¤
=> (SE PUEDEN GRABAR 46400)
DISPARO DE ALARMA
:ALARMA
SENSOR DE MOVIMIENTO
->
2 Método de grabación: Se puede ajustar a CUADRO o CAMPO
(cuadros o campos).
La velocidad de grabación cambia según el método seleccionado.
3 Grabación de audio: Se puede ajustar a ON u OFF.
4 Velocidad de grabación: Exhibe el intervalo de grabación y el
1
2
3
5
4
tiempo de grabación.
Consulte la tabla de velocidad de grabación para obtener más
detalles.
5 Ajuste de grabación de alarma: Se puede ajustar a ON u OFF.
Cuando se van a hacer grabaciones de alarma, seleccione un
ajuste tal como MODO1 para el ajuste OFF. Se exhibirá la
velocidad de grabación y la duración de la alarma.
10
Español
DISCO DURO INTEGRADO
Tablas de velocidad de grabación (El tiempo de grabación puede variar dependiendo de
las imágenes que se están grabando.)
Estas tablas de velocidad de grabación exhiben los tiempos de grabación de diferentes ajustes de calidad de imagen y de cuadros / campos cuando
se graba en el área de grabación normal del disco duro (80 GB). No incluyen los ajustes de grabación de audio.
Los tiempos de grabación para el área de grabación normal y el área de grabación de alarma representan los valores de los tiempos de grabación
indicados en los cuadros de velocidades de grabación, multiplicados por los porcentajes para el área de grabación normal y el área de grabación de
alarma que han sido fijados usando los comandos del menú de ajuste del área de grabación.
Cuando graba en un disco duro de 80 GB con el 100% de su capacidad libre
Grabación de Campos
Tasa de
grabación
(campo/seg.)
Ciclo de
grabación
(seg.)
60.00
30.00
20.00
15.00
10.00
7.50
6.00
5.00
4.29
3.75
3.33
3.00
2.73
2.31
2.00
1.67
1.43
1.25
1.11
1.00
0.50
0.33
0.25
0.20
0.10
0.05
0.03
0.02
0.03
0.05
0.07
0.10
0.13
0.17
0.20
0.23
0.27
0.30
0.33
0.37
0.43
0.50
0.60
0.70
0.80
0.90
1
2
3
4
5
10
20
30
Grabación de cuadros
TIEMPO DE GRABACIÓN
BASICA
NORMAL
MEDIA
ALTA
SUPER ALTA
21H
42H
63H
85H
127H
170H
212H
255H
297H
340H
382H
425H
468H
553H
638H
765H
893H
1021H
1148H
1276H
2553H
3829H
5106H
6382H
12765H
25531H
38296H
15H
30H
45H
60H
90H
120H
150H
180H
210H
241H
271H
301H
331H
391H
452H
542H
632H
723H
813H
904H
1808H
2712H
3616H
4521H
9042H
18084H
27126H
11H
22H
33H
45H
67H
90H
113H
135H
158H
180H
203H
226H
248H
293H
339H
406H
474H
542H
610H
678H
1356H
2034H
2712H
3390H
6781H
13563H
20345H
8H
16H
24H
32H
49H
65H
82H
98H
115H
131H
147H
164H
180H
213H
246H
295H
345H
394H
443H
493H
986H
1479H
1972H
2466H
4932H
9864H
14796H
6H
12H
18H
24H
37H
49H
62H
74H
87H
99H
112H
124H
137H
162H
187H
224H
261H
299H
336H
374H
748H
1122H
1496H
1870H
3741H
7483H
11224H
Tasa de
grabación
(cuadro/seg.)
Ciclo de
grabación
(seg.)
30.00
15.00
10.00
7.50
5.00
3.75
3.00
2.50
2.14
1.88
1.67
1.50
1.36
1.15
1.00
0.83
0.71
0.63
0.56
0.50
0.25
0.17
0.13
0.10
0.05
0.03
0.02
0.03
0.07
0.10
0.13
0.20
0.27
0.33
0.40
0.47
0.53
0.60
0.67
0.73
0.87
1.00
1.20
1.40
1.60
1.80
2
4
6
8
10
20
40
60
TIEMPO DE GRABACIÓN
BASICA
NORMAL
MEDIA
ALTA
SUPER ALTA
21H
42H
63H
85H
127H
170H
212H
255H
297H
340H
382H
425H
468H
553H
638H
765H
893H
1021H
1148H
1276H
2553H
3829H
5106H
6382H
12765H
25531H
38296H
15H
30H
45H
60H
90H
120H
150H
180H
210H
241H
271H
301H
331H
391H
452H
542H
632H
723H
813H
904H
1808H
2712H
3616H
4521H
9042H
18084H
27126H
11H
22H
33H
45H
67H
90H
113H
135H
158H
180H
203H
226H
248H
293H
339H
406H
474H
542H
610H
678H
1356H
2034H
2712H
3390H
6781H
13563H
20345H
8H
16H
24H
32H
49H
65H
82H
98H
115H
131H
147H
164H
180H
213H
246H
295H
345H
394H
443H
493H
986H
1479H
1972H
2466H
4932H
9864H
14796H
6H
12H
18H
24H
37H
49H
62H
74H
87H
99H
112H
124H
137H
162H
187H
224H
261H
299H
336H
374H
748H
1122H
1496H
1870H
3741H
7483H
11224H
Las tablas exhibidas a continuación son las tablas de tiempo de grabación indicadas para referencia si la capacidad total del disco duro ha sido aumentada
hasta 160 GB. (Póngase en contacto con el comercio donde lo compró para obtener detalles sobre como aumentar la capacidad del disco duro.)
Cuando graba en un disco duro de 160 GB con el 100% de su capacidad libre
Grabación de Campos
Tasa de
grabación
(campo/seg.)
Ciclo de
grabación
(seg.)
60.00
30.00
20.00
15.00
10.00
7.50
6.00
5.00
4.29
3.75
3.33
3.00
2.73
2.31
2.00
1.67
1.43
1.25
1.11
1.00
0.50
0.33
0.25
0.20
0.10
0.05
0.03
0.02
0.03
0.05
0.07
0.10
0.13
0.17
0.20
0.23
0.27
0.30
0.33
0.37
0.43
0.50
0.60
0.70
0.80
0.90
1
2
3
4
5
10
20
30
Grabación de cuadros
TIEMPO DE GRABACIÓN
BASICA
NORMAL
MEDIA
ALTA
SUPER ALTA
42H
85H
127H
170H
255H
340H
425H
510H
595H
680H
765H
851H
936H
1106H
1276H
1531H
1787H
2042H
2297H
2553H
5106H
7659H
10212H
12765H
25531H
51062H
76593H
30H
60H
90H
120H
180H
241H
301H
361H
421H
482H
542H
602H
663H
783H
904H
1085H
1265H
1446H
1627H
1808H
3616H
5425H
7233H
9042H
18084H
36168H
54253H
22H
45H
67H
90H
135H
180H
226H
271H
316H
361H
406H
452H
497H
587H
678H
813H
949H
1085H
1220H
1356H
2712H
4069H
5425H
6781H
13563H
27126H
40690H
16H
32H
49H
65H
98H
131H
164H
197H
230H
263H
295H
328H
361H
427H
493H
591H
690H
789H
887H
986H
1972H
2959H
3945H
4932H
9864H
19728H
29592H
12H
24H
37H
49H
74H
99H
124H
149H
174H
199H
224H
249H
274H
324H
374H
448H
523H
598H
673H
748H
1496H
2244H
2993H
3741H
7483H
14966H
22449H
Referencia: 24H = 1 día, 168H = 1 semana, 720H = 1 mes, 8760H = 1 año
Español
11
Tasa de
grabación
(cuadro/seg.)
Ciclo de
grabación
(seg.)
30.00
15.00
10.00
7.50
5.00
3.75
3.00
2.50
2.14
1.88
1.67
1.50
1.36
1.15
1.00
0.83
0.71
0.63
0.56
0.50
0.25
0.17
0.13
0.10
0.05
0.03
0.02
0.03
0.07
0.10
0.13
0.20
0.27
0.33
0.40
0.47
0.53
0.60
0.67
0.73
0.87
1.00
1.20
1.40
1.60
1.80
2
4
6
8
10
20
40
60
TIEMPO DE GRABACIÓN
BASICA
NORMAL
MEDIA
ALTA
SUPER ALTA
42H
85H
127H
170H
255H
340H
425H
510H
595H
680H
765H
851H
936H
1106H
1276H
1531H
1787H
2042H
2297H
2553H
5106H
7659H
10212H
12765H
25531H
51062H
76593H
30H
60H
90H
120H
180H
241H
301H
361H
421H
482H
542H
602H
663H
783H
904H
1085H
1265H
1446H
1627H
1808H
3616H
5425H
7233H
9042H
18084H
36168H
54253H
22H
45H
67H
90H
135H
180H
226H
271H
316H
361H
406H
452H
497H
587H
678H
813H
949H
1085H
1220H
1356H
2712H
4069H
5425H
6781H
13563H
27126H
40690H
16H
32H
49H
65H
98H
131H
164H
197H
230H
263H
295H
328H
361H
427H
493H
591H
690H
789H
887H
986H
1972H
2959H
3945H
4932H
9864H
19728H
29592H
12H
24H
37H
49H
74H
99H
124H
149H
174H
199H
224H
249H
274H
324H
374H
448H
523H
598H
673H
748H
1496H
2244H
2993H
3741H
7483H
14966H
22449H
DISCO DURO INTEGRADO
Tiempo de grabación de prealarma
Este cuadro muestra los tiempos de grabación para grabaciones de prealarmas. Consulte este cuadro cuando ajuste la grabación de prealarma.
(Consulte la página 18.)
Tasa de
grabación
(campo/seg.)
Ciclo de
grabación
(seg.)
2s (2s)
3s (3s)
5s (5s)
10s (10s)
20s (20s)
40s (40s)
60s (1m)
120s (2m)
180s (3m)
240s (4m)
300s (5m)
600s (10m)
900s (15m)
60.00
0.02
m
30.00
0.03
m
m
20.00
0.05
15.00
0.07
m
m
m
m
m
m
m
m
m
m
m
m
m
m
m
m
m
m
m
m
m
m
m
m
m
m
m
m
m
m
m
m
m
m
m
m
m
m
m
m
m
m
m
m
m
m
m
m
m
m
m
m
m
m
m
m
m
m
m
m
m
m
m
m
m
m
m
m
m
m
m
m
m
m
m
m
m
m
m
m
m
m
m
m
m
m
m
m
m
m
m
m
m
m
m
m
m
m
m
m
m
m
m
m
m
m
m
m
m
m
m
m
m
m
m
m
m
m
m
m
m
m
m
m
m
m
m
m
m
m
m
m
m
m
m
m
m
m
m
m
m
m
m
m
m
m
m
m
m
m
m
m
m
m
m
m
m
m
m
m
m
m
m
m
m
m
m
m
m
m
m
m
m
m
m
m
m
m
m
10.00
0.10
7.50
0.13
6.00
0.17
5.00
0.20
4.29
0.23
3.75
0.27
3.33
0.30
3.00
0.33
2.73
0.37
2.31
0.43
2.00
0.50
1.67
0.60
1.43
0.70
1.25
0.80
1.11
0.90
1.00
1
Tiempo de grabación (Exhibición de tiempo en menú en la pantalla; s: segundos, m: minutos)
: Valor de ajuste por defecto, ciclo de grabación: 0,1 segundos (10 CPS), tiempo de grabación: 1 minuto
El ajuste del menú de duración de alarma solo puede ser ajustado a un tiempo de grabación que posible con el ajuste de velocidad de grabación
actual.
Además, cuando se ajusta la velocidad de grabación, sólo se puede ajustar dentro del rango permitido por la duración de alarma actual. Por ejemplo,
si la duración de alarma se ajusta a 3 segundos, la velocidad de grabación sólo se puede ajustar a 0,02 segundos o 0,03 segundos.
Si se ajusta una velocidad de grabación más lenta, el ajuste no será aceptado hasta que se cambie la duración de la alarma.
12
Español
DISCO DURO INTEGRADO
Cuando se conecta la alimentación del videograbador digital, la exhibición de funcionamiento aparece en la esquina superior izquierda de la pantalla
del monitor. Esta exhibición de funcionamiento exhibe información que es esencial para el funcionamiento, tal como la fecha, hora, calidad de imagen
y velocidad de grabación.
12
3
4 5
4CH
100%
01-01-01 ALARMA 0000
00:00:00 ME 0.10SEG
6
7
Exhibición de funcionamiento
ERROR DE DISCO (1)
01-01-01 ALARMA 0000
00:00:00 ME 0.10SEG
ERROR DE DISCO (1)
9
8
Exhibición de funcionamiento
Inserte el cable de alimentación en un tomacorriente y conecte la alimentación.
Se enciende el indicador POWER, y luego de aproximadamente 15 segundos, se enciende el indicador EXIT/OSD. Las imágenes de la cámara
aparecen en el monitor, y la exhibición de funcionamiento aparece en la esquina superior izquierda de la pantalla.
Nota:
• Si no ha ajustado el reloj, aparece la pantalla WARNING para ajuste del reloj. Si se presiona un botón, la pantalla WARNING desaparecerá, pero
no será posible grabar y reproducir hasta que se ajuste el reloj, por lo tanto deberá ajustar primero el reloj. (Consulte la página 42.)
• Si presiona el botón EXIT/OSD repetidamente, puede cambiar la posición de la exhibición de funcionamiento o hacerla desaparecer.
6 Exhibición de la hora
1 Exhibición de número de cámara
Cuando se enciende por primera vez el videograbador digital, la
hora aparece como 00:00:00, y la hora comienza a correr después
que se ha ajustado la fecha. El videograbador digital utiliza la fecha
y la hora para controlar la grabación y la reproducción, por tanto si la
fecha y la hora no han sido ajustadas, no se podrán recuperar las
imágenes correctas. Asegúrese de usar los menúes para ajustar la
hora correcta.
Conecte el videograbador digital a un multiplexor que sea capaz de
decodificar la información de canales de Sanyo (número de cámara)
y presione el botón CHANNEL. El número de la cámara
especificada aparece en la exhibición durante la reproducción.
2 Exhibición de la fecha
Cuando se enciende por primera vez el videograbador digital, la
fecha aparece como 01-01-01 (mes, día, año). Asegúrese de utilizar
los menúes para ajustar la fecha correcta.
7 Exhibición de calidad de imagen
Exhibe la calidad de imagen de las imágenes grabadas en el disco
duro. El ajuste por defecto es ME (mejorada). La exhibición cambia
cuando la calidad de imagen es cambiada usando el elemento de
menú AJUSTE GRABACION NORMAL.
• BA: Básica
• NO: Normal
• ME: Mejorada
• AL: Alta
• SA: Súper Alta
3 Exhibición de símbolo de funcionamiento
Estos símbolos aparecen durante la grabación y la reproducción.
a : Grabando
e : Avance rápido
c : Reproducción
f : Rebobinado
d : Reproducción hacia atrás h : Detenido
hc : Reproducción lenta
dh : Reproducción hacia atrás lenta
Nota: Si se está grabando o reproduciendo al mismo tiempo,
aparece el símbolo de reproducción (c).
8 Exhibición de la velocidad de grabación
4 Espacio restante en el área de grabación
Exhibe la velocidad de grabación de las imágenes grabadas en el
disco duro. El ajuste por defecto es 0,10 SEG (segundos) (durante la
grabación de campos). La exhibición cambia cuando la calidad de la
imagen y el método de grabación son cambiados usando el
elemento de menú AJUSTE GRABACION NORMAL.
Si se ha desactivado la sobreescritura (SOBREESCRIBIR: OFF)
para el área de grabación normal o para el área de grabación de
alarma, la cantidad de espacio restante aparece como un
porcentaje. Usted puede cambiar la cantidad de espacio restante en
el área de grabación usando el elemento de menú AJUSTE COND.
DE GRABACION. (Consulte la página 45.)
9 Exhibición de error de disco duro
Esta exhibición aparece si ocurre un error con el disco duro.
• ERROR DE DISCO: Esto aparece cuando se instalan dos discos
duros o una disco duro de expansión, y ocurre
un error con uno de ambos discos duros.
• ERROR DE DISCO (1): Este aparece cuando ocurre un error
con DISK 1 (PRINCIPAL).
• ERROR DE DISCO (2): Este aparece cuando ocurre un error
con DISK 2 (ESCLAVO).
5 Exhibición de alarma y exhibición del número de alarma
Cuando se realiza un ajuste de alarma usando el elemento de menú
AJUSTE GRABACION DE ALARMA, aparece la siguiente exhibición
en la exhibición de alarma.
Sin embargo, aparece la exhibición PRE cuando ha sido ajustada la
grabación de pre-alarma. Cuando ocurre una alarma, PRE es
reemplazado por ALARMA y también aparece el número de
alarmas. La exhibición de alarma muestra el número acumulado de
alarmas.
• Si está ajustado GRABACION DE ALARMA: Aparece ALARMA.
ALARMA destella mientras se está grabando una alarma.
• Si está ajustado GRABACION SIN ALARMA: Aparece PRE.
• Cuando se reproducen imágenes del área de archivo: Aparece
ARCHIV.
Español
Nota: Durante la grabación con esta unidad, se podrán
reproducir, copiar y transferir imágenes. Sin embargo,
debido a la prioridad de grabación la respuesta a las
otras operaciones se vuelve más lenta.
13
GRABACIÓN DE IMÁGENES EN EL
ÁREA DE GRABACIÓN NORMAL
Se graban las
imágenes
monitoreadas.
Grabación normal
Las imágenes se pueden grabar en el área de grabación normal mientras se están monitoreando.
Si no ha sido ajustada la hora, el videograbador digital no puede realizar grabaciones. Asegúrese de ajustar la hora. (Consulte la página 42.)
Ajuste de la hora
1
MENU
Presione el botón MENU para exhibir el menú AJUSTE IDIOMA/RELOJ, y ajuste
la fecha y la hora. Después de haber realizado el ajuste, presione el botón
EXIT/OSD, la fecha y la hora aparecen en la exhibición de funcionamiento.
(Consulte la página 42.)
1.AJUSTE
2.AJUSTE
3.AJUSTE
4.AJUSTE
<MENU PRINCIPAL 1>
IDIOMA/RELOJ
ENTRADA DE VIDEO
AREA DE GRABACION
COND.DE GRABACION
->
->
->
->
<AJUSTE IDIOMA>
ESPANOL
<AJUSTE RELOJ>
01-01-2001 LUN 00:00:00
AJUSTE HORA DE VERANO
Presione el botón REC/STOP.
2
REC/STOP
“a” aparece en la exhibición de funcionamiento y las imágenes que se está
monitoreando se graban en el área de grabación normal. La grabación en el disco
duro procede automáticamente (ajuste por defecto) según los siguientes ajustes.
Los ajustes se pueden cambiar entre grabación de periodo largo y grabación de
alta calidad en cinco pasos. (Consulte la página 49.)
• Áreas de grabación del disco duro:
Área de grabación normal: 80%
Área de grabación de alarma: 19%
Área de archivo: 1%
• Calidad de imagen: ME (Mejorada)
• Método de grabación: Campo
• Velocidad de grabación: 0,10 segundos (54H)
Nota: La reproducción es posible durante la grabación. Cuando se presiona el
botón PLAY/STOP durante la grabación, aparece “c” en la exhibición de
funcionamiento y se reproducen las imágenes desde el punto donde
comenzó la grabación. (Consulte la página 20.)
10-26-01
10:48:38 ME 0.10SEG
10-26-01
11:02:28 ME 0.10SEG
Hora de inicio de la grabación
Mantenga presionado el botón REC/STOP por 3 segundos o
más.
3
El “a” en la exhibición de funcionamiento desaparece y la grabación se detiene.
REC/STOP
Nota: Cuando el espacio restante en el área de grabación normal cae por
debajo de la cantidad ajustada, el indicador FULL del panel delantero
destella. Si la grabación continúa bajo estas condiciones, el área de
grabación se llena y la grabación se detiene. En los ajustes AJUSTE
AREA DE GRABACION, realice la función REPOSICION DE AREA en el
área de grabación normal. Luego será posible la grabación desde el inicio
de nuevo. (Consulte la página 48.)
14
POWER
FULL
ALARM FULL
LOC
Español
GRABACIÓN DE IMÁGENES EN EL ÁREA DE GRABACIÓN NORMAL
Grabación con temporizador
Las imágenes monitoreadas se pueden grabar automáticamente ajustando las horas de inicio y finalización para cada día de la semana.
1 Ajuste de la hora
1
MENU
Presione el botón MENU para exhibir el menú AJUSTE IDIOMA/RELOJ, y ajuste
la fecha y la hora. Después de haber realizado el ajuste, presione el botón
EXIT/OSD, la fecha y la hora aparecen en la exhibición de funcionamiento.
(Consulte la página 42.)
1.AJUSTE
2.AJUSTE
3.AJUSTE
4.AJUSTE
<MENU PRINCIPAL 1>
IDIOMA/RELOJ
ENTRADA DE VIDEO
AREA DE GRABACION
COND.DE GRABACION
->
->
->
->
<AJUSTE IDIOMA>
ESPANOL
<AJUSTE RELOJ>
01-01-2001 LUN 00:00:00
AJUSTE HORA DE VERANO
2 Ajuste el temporizador.
Presione el botón MENU para exhibir el menú AJUSTE TEMPORIZADOR, y
luego ajuste las horas del inicio y finalización para la grabación con
temporizador. (Consulte la página 50.)
Luego presione el botón EXIT/OSD.
1.AJUSTE
2.AJUSTE
3.AJUSTE
4.AJUSTE
5.AJUSTE
6.AJUSTE
SEM
DOM
LUN
MAR
MIE
<MENU PRINCIPAL 1>
IDIOMA/RELOJ
ENTRADA DE VIDEO
AREA DE GRABACION
COND.DE GRABACION
GRABACION NORMAL
TEMPORIZADOR
<AJUSTE TEMPORIZADOR>
INICIO PARO CICLO DE GRAB.
--:-- --:-- 0.10SEG ( 54H)
--:-- --:-- 0.10SEG ( 54H)
--:-- --:-- 0.10SEG ( 54H)
--:-- --:-- 0.10SEG ( 54H)
SG
Presione el botón TIMER.
2
TIMER
El indicador TIMER se ilumina y el videograbador digital cambia al modo de
espera de grabación con temporizador.
Nota:
• Si SET en el menú AJUSTE TEMPORIZADOR no está ajustado a “ON”, o si
los ajustes del temporizador no se hacen correctamente, sonará una alarma
cuando se presione el botón TIMER.
• El indicador TIMER se ilumina cuando el ajuste del temporizador se ha
realizado correctamente.
• Cuando se llega a la hora de ajuste del temporizador, el indicador TIMER y el
indicador REC se iluminan y se inicia la grabación con temporizador.
• Si presiona el botón TIMER durante la grabación con temporizador, el
indicador TIMER y el indicador REC se apagarán y la grabación con
temporizador se detendrá.
Español
15
->
->
->
->
->
->
10-05-01
17:30:25 ME 0.10SEG
USO
OFF
OFF
OFF
OFF
O
La grabación con temporizador se inicia cuando se llega a
la hora ajustada en el temporizador.
3
“a” aparece en la exhibición de funcionamiento y las imágenes que se está
monitoreando se graban en el área de grabación normal. La grabación en el disco
duro procede automáticamente (ajuste por defecto) según los siguientes ajustes.
Los ajustes se pueden cambiar entre grabación de periodo largo y grabación de
alta calidad en cinco pasos. (Consulte la página 49.)
• Áreas de grabación del disco duro:
Área de grabación normal: 80%
Área de grabación de alarma: 19%
Área de archivo: 1%
• Calidad de imagen: ME (Mejorada)
• Método de grabación: Campo
• Velocidad de grabación: 0,10 segundos (54H)
10-05-01
19:30:00 ME 0.10SEG
Nota: La reproducción es posible durante la grabación. Cuando se presiona el
botón PLAY/STOP durante la grabación, aparece c en la exhibición de
funcionamiento y se reproducen las imágenes desde el punto donde
comenzó la grabación. (Consulte la página 20.)
La grabación con temporizador se detiene cuando se llega a
la hora de finalización ajustada.
4
TIMER
El indicador TIMER se enciende y el símbolo de grabación (a) desaparece de la
exhibición de funcionamiento y la grabación se detiene.
Nota:
• Presione el botón TIMER para detener la grabación con temporizador.
Después se detiene la grabación con temporizador.
• Cuando el espacio restante en el área de grabación normal cae por debajo
de la cantidad ajustada, el indicador FULL del panel delantero destella. Si la
grabación continúa bajo estas condiciones, el área de grabación se llena y la
grabación se detiene. En los ajustes AJUSTE AREA DE GRABACION,
realice la función REPOSICION DE AREA en el área de grabación normal.
Luego será posible la grabación desde el inicio de nuevo. (Consulte la página
48.)
16
POWER
FULL
ALARM FULL
LOC
Español
GRABACIÓN DE IMÁGENES EN EL
ÁREA DE GRABACIÓN DE
ALARMA
Se graban las
imágenes de alarma.
Grabación de alarma
1 Ajuste de la hora
1
MENU
Presione el botón MENU para exhibir el menú AJUSTE IDIOMA/RELOJ, y ajuste
la fecha y la hora. Después de haber realizado el ajuste, presione el botón
EXIT/OSD, la fecha y la hora aparecen en la exhibición de funcionamiento.
(Consulte la página 42.)
1.AJUSTE
2.AJUSTE
3.AJUSTE
4.AJUSTE
<MENU PRINCIPAL 1>
IDIOMA/RELOJ
ENTRADA DE VIDEO
AREA DE GRABACION
COND.DE GRABACION
->
->
->
->
<AJUSTE IDIOMA>
ESPANOL
<AJUSTE RELOJ>
01-01-2001 LUN 00:00:00
AJUSTE HORA DE VERANO
2 Ajuste la grabación de alarma.
•
•
•
Presione el botón MENU para exhibir el menú AJUSTE GRABACION DE
ALARMA en la pantalla MENU PRINCIPAL. Luego cambie el ajuste
GRABACION DE ALARMA al ajuste de grabación de alarma deseado
(MODO1, 2, 3 o 4) y cambie el ajuste DISPARO DE ALARMA. (Consulte la
página 54 – 56.)
Presione el botón MENU, para exhibir el menú AJUSTE ZUMBADOR en la
pantalla MENU PRINCIPAL 2, y cambia el ajuste ALARMA a “ON”. (Consulte
la página 62.)
Presione el botón EXIT/OSD para volver a la pantalla normal.
<AJUSTE GRABACION DE ALARMA>
CALIDAD DE IMAGEN
:MEDIA
GRABACION CUADRO/ CAMPO :CAMPO
GRABACION DE AUDIO
:OFF
GRABACION DE ALARMA
:MODO1
CICLO DE GRAB.: 0.10 SEG. DURACION: 1SEG
GRABACION SIN ALARMA :¤¤¤
CICLO DE GRAB.: ¤¤¤ SEG. DURACION: ¤¤¤
=> (SE PUEDEN GRABAR 46400)
DISPARO DE ALARMA
:ALARMA
SENSOR DE MOVIMIENTO
->
Detección de personas sospechosas
2
ALARM
Cuando ocurre una alarma, aparece “ALARMA” en la exhibición de
funcionamiento, el indicador ALARM destella y se inicia la grabación de alarma
(símbolo a). Se graban las imágenes de alarma en el área de grabación de
alarma. Además, el número de alarmas en la exhibición de funcionamiento
aumenta en uno cada vez que ocurre una alarma.
10-05-01 ALARM 0001
18:10:25 ME 0.10SEG
Nota: La grabación normal y la grabación con temporizador se detienen cuando
ocurre una alarma durante la grabación normal o la grabación con
temporizador.
3
Finalización de la grabación de alarma
La grabación termina luego de finalizar el periodo de duración de alarma (ajuste
por defecto: 1 seg.). Las exhibiciones “a” y ALARMA dejan de destellar y la
grabación se detiene.
Nota: Cuando el espacio restante en el área de grabación de alarma llega al
1%, el indicador ALARM FULL del panel delantero destella. Si la
grabación continúa bajo estas condiciones, el área de grabación se llena
y la grabación se detiene. En los ajustes AJUSTE AREA DE
GRABACION, realice la función REPOSICION DE AREA en el área de
grabación de alarma.
Se cancelará la sobreescritura y se podrá grabar otra vez desde el
comienzo. (Consulte la página 48.)
Español
Se cuenta el número
de alarmas.
17
POWER
FULL
ALARM FULL
LOC
GRABACIÓN DE IMÁGENES EN EL ÁREA DE
GRABACIÓN DE ALARMA
Se graban las
imágenes de prealarma
Se graban las
imágenes
monitoreadas.
Grabación de pre-alarma
Ajuste de la hora
1
MENU
Presione el botón MENU para exhibir el menú AJUSTE IDIOMA/RELOJ, y ajuste
la fecha y la hora. Después de haber realizado el ajuste, presione el botón
EXIT/OSD, la fecha y la hora aparecen en la exhibición de funcionamiento.
(Consulte la página 42.)
1.AJUSTE
2.AJUSTE
3.AJUSTE
4.AJUSTE
<MENU PRINCIPAL 1>
IDIOMA/RELOJ
ENTRADA DE VIDEO
AREA DE GRABACION
COND.DE GRABACION
->
->
->
->
<AJUSTE IDIOMA>
ESPANOL
<AJUSTE RELOJ>
01-01-2001 LUN 00:00:00
AJUSTE HORA DE VERANO
Ajuste la grabación de pre-alarma.
2
REC/STOP
ALARM
Presione el botón MENU para exhibir el menú AJUSTE GRABACION DE
ALARMA. Cambie GRABACION DE ALARMA al ajuste de grabación de alarma
deseado (ejemplo: MODO1). El ajuste *** para GRABACION SIN ALARMA
quedará ajustado a “OFF”, por tanto cámbielo a “ON”. (Consulte la página 56.)
Presione el botón EXIT/OSD para volver a la pantalla normal. Aparece “PRE” en
la exhibición de funcionamiento, el indicador ALARM se ilumina y se inicia la
grabación de pre-alarma (la marca a no aparece).
La misma imagen monitoreada en el área de grabación normal se graba
repetidamente en el área de grabación de alarma.
La grabación en el disco duro procede automáticamente (ajuste por defecto)
según los siguientes ajustes. Los ajustes se pueden cambiar entre grabación de
periodo largo y grabación de alta calidad en cinco pasos. (Consulte la página 49.)
• Áreas de grabación del disco duro:
Área de grabación normal: 80%
Área de grabación de alarma: 19%
Área de archivo: 1%
• Calidad de imagen: ME (Mejorada)
• Método de grabación: Campo
• Velocidad de grabación: 0,10 segundos (54H)
Cuando se recibe una alarma, la grabación de pre-alarma se
detiene automáticamente y se graban las imágenes de
alarma.
3
ALARM
El “PRE” desaparece de la exhibición de funcionamiento, “ALARMA” y el
indicador ALARM destella.
Nota:
• Cuando el espacio restante en el área de grabación de alarma llega al 1%, el
indicador ALARM FULL del panel delantero destella. Si la grabación continúa
bajo estas condiciones, el área de grabación se llena y la grabación se
detiene. En los ajustes AJUSTE AREA DE GRABACION, realice la función
REPOSICION DE AREA en el área de grabación normal. Luego será posible
la grabación desde el inicio de nuevo. (Consulte la página 48.)
• Consulte los cuadros de velocidades de grabación por detalles sobre las
velocidades de grabación de prealarmas. (Consulte la página 12.)
18
<AJUSTE GRABACION DE ALARMA>
CALIDAD DE IMAGEN
:MEDIA
GRABACION CUADRO/ CAMPO :CAMPO
GRABACION DE AUDIO
:OFF
GRABACION DE ALARMA
:MODO1
CICLO DE GRAB.: 0.10 SEG. DURACION: 1SEG
GRABACION SIN ALARMA :¤¤¤
CICLO DE GRAB.: ¤¤¤ SEG. DURACION: ¤¤¤
=> (SE PUEDEN GRABAR 46400)
DISPARO DE ALARMA
:ALARMA
SENSOR DE MOVIMIENTO
->
10-05-01 PRE 0000
18:10:25 ME 0.10SEG
10-06-01 ALARMA 0001
09:30:15 ME 0.10SEG
POWER
FULL
ALARM FULL
LOC
Español
REPRODUCCIÓN DE IMÁGENES GRABADAS
EN EL ÁREA DE GRABACIÓN NORMAL
El videograbador digital puede reproducir imágenes grabadas en el área de grabación normal (grabación normal, grabación con temporizador).
Funciones de reproducción
SEARCH
FRAME/FIELD
ALARM
Área de grabación normal
b Saltar a la alarma anterior o a la siguiente
(Consulte la página 25.)
STILL
PLAY/STOP
b Reproducción
(Consulte la página 20.)
b Cambiar entre cuadros y campos
(Consulte la página 23.)
b Avance de cuadros
b Reproducción lenta
b Imagen fija
(hacia adelante/atrás)
(Consulte la página 20.)
(Consulte la página 22.)
(Consulte la página 22.)
ZOOM
b Acercamiento de imágenes (Consulte la página 21.)
SHUTTLE HOLD
Reproducción rápida hacia adelante/
rebobinado (Consulte la página 20.)
Bloqueo de la velocidad de
reproducción rápida hacia
adelante/ rebobinado (Consulte
la página 20.)
SHUTTLE HOLD
Desbloqueo de la
velocidad
Reproducción normal
• Al reproducir grabaciones por primera vez:
Las imágenes grabadas serán reproducidas desde el comienzo.
• Al reproducir por segunda vez o más:
La reproducción comenzará desde el punto donde terminó la última sesión de reproducción.
(Lugar de comienzo de la
primera reproducción) Fin
(Lugar de comienzo de la
segunda reproducción) Fin
(Lugar de comienzo de la
tercera reproducción)
Fin
Español
19
REPRODUCCIÓN DE IMÁGENES GRABADAS EN EL ÁREA DE
GRABACIÓN NORMAL
Reproducción
Presione el botón PLAY/STOP.
1
PLAY/STOP
Aparece c en la exhibición de funcionamiento y se reproducen las imágenes
grabadas en el área de grabación normal.
Nota:
• La reproducción de imágenes comienza en el punto (hora) en que se inició la
grabación. Si no hay posición de comienzo, o si se ha realizado una
reposición, se reproduce la imagen grabada más antigua.
• Cuando se termina la reproducción, automáticamente se pausa el modo de
reproducción.
Aparece el símbolo de pausa (h) en la exhibición de funcionamiento y el
indicador STILL se ilumina.
• Si la reproducción se ha efectuado al menos una vez, la reproducción
comenzará a partir de la posición donde termino la última sesión de
reproducción.
10-26-01
11:02:50 ME 0.10SEG
Presione de nuevo el botón PLAY/STOP.
2
Se detiene la reproducción.
PLAY/STOP
11-20-01
04:00:00 ME 0.10SEG
Nota: Si la reproducción comienza enseguida que se realiza la grabación, la
grabación tendrá prioridad, de manera que puede ocurrir una pausa
momentánea en la reproducción de las imágenes.
Reproducción rápida hacia adelante/rebobinado
Gire el dial de correr hacia la derecha (o hacia la izquierda)
durante la reproducción.
1
Cuando el dial de correr se gira hacia la derecha, aparece e en la exhibición
de funcionamiento y comienza la reproducción rápida hacia adelante. Si se gira
hacia la izquierda, aparece f en la exhibición de funcionamiento y comienza
la reproducción de rebobinado.
Cuando suelte el dial de correr, se retoma la reproducción normal.
11-17-01
02:38:00 ME 0.10SEG
Cambio de la velocidad de reproducción
2
(Reproducción rápida hacia adelante / lenta)
1 Gire el dial de trotar hacia la derecha.
Comienza la reproducción rápida hacia adelante y aparece e en la exhibición de funcionamiento.
2 Gire el dial de trotar hacia la izquierda.
Comienza la reproducción lenta y aparece hc en la exhibición de funcionamiento.
3 Volver a la reproducción normal.
Gire el dial de trotar hacia la derecha. Aparece c en la exhibición de funcionamiento.
(Reproducción de rebobinado / lenta)
1 Gire el dial de correr hacia la izquierda (fijar rebobinado).
Se exhibirá d, por lo tanto presione el botón SHUTTLE HOLD. Se encenderá el indicador SHUTTLE HOLD y la
velocidad de rebobinado ser fijará en la velocidad actual.
2 Gire el dial de trotar hacia la izquierda.
SHUTTLE HOLD
La velocidad se hace más rápida que en la reproducción de rebobinado normal, y aparece f en la exhibición de
funcionamiento.
3 Gire el dial de trotar hacia la derecha.
Comienza la reproducción de rebobinado lento y aparece dh en la exhibición de funcionamiento.
4 Volver a la reproducción normal.
Gire el dial de trotar hacia la izquierda. Aparece c en la exhibición de funcionamiento.
20
Español
REPRODUCCIÓN DE IMÁGENES GRABADAS EN EL ÁREA DE
GRABACIÓN NORMAL
Acercamiento de la imagen durante la reproducción
Presione el botón ZOOM durante la reproducción.
1
Aparece el marco de zoom (azul) en el centro de la pantalla.
ZOOM
Mueva el marco de zoom a la parte de la imagen que desea
ampliar.
2
•
•
Gire el dial de trotar hacia la derecha para mover el marco de zoom hacia la
derecha.
Gire hacia la izquierda para mover el marco de zoom hacia la izquierda.
Gire el dial de correr hacia la derecha para cambiar el movimiento vertical.
Luego gire el dial de trotar hacia la derecha para mover el cuadro de zoom
hacia arriba y gírelo hacia la izquierda para mover el cuadro de zoom hacia
abajo.
Mueva el marco de zoom a la parte que desea ampliar.
Gire el dial de correr.
3
Se amplía el área que se encuentra dentro del marco de zoom (2x).
11-17-01
02:36:00 ME 0.10SEG
Presione el botón ZOOM (para cancelar el acercamiento).
4
Se cancela el acercamiento de la imagen y continúa la reproducción normal.
ZOOM
Español
Nota:
• La pantalla no se puede ampliar incluso mientras se monitorea una imagen
de cámara.
• No se puede seleccionar el botón ZOOM, cuando se usa un multiplexor
como entrada de vídeo.
• La calidad de imagen se vuelve más gruesa cuando se acerca la imagen.
21
11-17-01
02:36:00 ME 0.10SEG
REPRODUCCIÓN DE IMÁGENES GRABADAS EN EL ÁREA DE
GRABACIÓN NORMAL
Visualización de imágenes fijas
Presione el botón STILL durante la reproducción.
1
Aparece h en la exhibición de funcionamiento y se exhibe una imagen fija.
11-17-01
02:38:00 ME 0.10SEG
STILL
Presione el botón STILL una vez más.
2
Se cancela el modo de imagen fija.
11-17-01
02:38:20 ME 0.10SEG
STILL
Avance de cuadros (hacia adelante/atrás)
1
Gire el dial de trotar hacia la derecha (o hacia la izquierda)
en el modo de imagen fija.
Gire el dial de trotar hacia la derecha para avanzar la imagen fija un cuadro (un
campo).
Gire hacia la izquierda para rebobinar la imagen fija un cuadro (un campo).
11-17-01
02:50:08 ME 0.10SEG
Nota: Si el dial de trotar se gira rápidamente, la velocidad de alimentación de
cuadros también aumenta.
Durante las siguientes operaciones, la imagen ser verá
distorsionada o momentáneamente congelada. Esto es
normal y no es un malfuncionamiento.
• Durante la reproducción continua desde el área de
grabación normal y la alarma, la imagen puede estar
distorsionada cuando se cambia el área de grabación.
• Al reproducir durante una grabación de alarma, durante
la reproducción continua desde el área de grabación
normal y el área de grabación de alarma, durante la
reproducción normal o cuando se usa la reproducción
de avance rápido/rebobinado la imagen puede aparecer
momentáneamente congelada.
22
Español
REPRODUCCIÓN DE IMÁGENES GRABADAS EN EL ÁREA DE
GRABACIÓN NORMAL
Selección de un canal para la reproducción de imágenes de la cámara
Cuando el videograbador digital ha sido conectado a un multiplexor (en venta por separado) y han sido grabadas imágenes de la cámara, usted
puede especificar el canal (número de cámara) de las imágenes grabadas y reproducirlas.
Presione el botón CHANNEL mientras está pausada la
reproducción.
1
CHANNEL
Aparece la pantalla para seleccionar el número de cámara entre las cámaras
conectadas al multiplexor.
SELECCIONAR CANAL
-- CANAL
CAMBIE CON JOG. AJUSTE CON SHUTTLE
Use el dial de trotar para especificar el canal (ejemplo:
cámara 4).
2
SELECCIONAR CANAL
4 CANAL
CAMBIE CON JOG. AJUSTE CON SHUTTLE
Gire el dial de correr hacia la derecha.
3
Aparece “c” en la exhibición de funcionamiento, y comienza la reproducción de
imágenes del canal especificado.
Nota:
• Si el videograbador digital no está conectado a un multiplexor que permita la
decodificación de información de canal (números de cámara), no se puede
especificar canales para la reproducción.
• Cuando se realiza esta operación, sólo se reproduce el canal especificado, y
no se exhibirá ningún otro canal.
• Cuando se seleccione un canal, la información del título del multiplexor y la
información de fecha en algunos casos podría no exhibirse completamente.
Cambio entre reproducción de cuadros y campos
1
Presione el botón SEARCH FRAME/FIELD mientras se están
reproduciendo las imágenes de grabación de cuadros.
SEARCH
FRAME/FIELD
La pantalla cambia entre reproducción de cuadros y campos cada vez que se
presiona el botón.
Nota:
• El cambio entre reproducción de cuadros y campos solamente es posible
cuando se están reproduciendo imágenes que han sido grabadas en el modo
de cuadros.
• Cuando se están reproduciendo imágenes de grabación de cuadros que
contienen movimientos rápidos, podría aparecer inestabilidad en las
imágenes.
Español
23
CH 4
10-27-01
13:38:33 SA 0.26SEG
BUSCANDO IMÁGENES GRABADAS
Se pueden reproducir las imágenes que han sido grabadas en el área de grabación de alarma y en el área de archivo. Además, las imágenes también
se pueden buscar por fecha y hora de grabación, y también se puede buscar objetos en movimiento que hayan sido detectados por un sensor de
movimiento durante la grabación de imágenes.
a Búsqueda de alarma (Consulte la página 25.)
Área de archivo
NO
0108
0107
0106
0105
0104
0103
0102
0101
Búsqueda y reproducción de imágenes
de alarma
<BUSQUEDA DE ALARMA>
FECHA HORA
ALARMA TOTAL
12-20 05:37
0234
12-19 14:23
12-16 11:13
12-16 16:13
12-15 10:13
12-13 15:19
12-13 11:15
12-13 11:13
MOVER:JOG
SELECCIONA:SHUTTLE
Exhibición de
previsualización
Exhibición de
pantalla completa
a Búsqueda de imágenes resumidas de alarma
(Consulte la página 26.)
Área de grabación
de alarma
Búsqueda y reproducción de imágenes
resumidas de alarma
0109
0108
0107
0106
0105
0104
0103
0102
0101
Exhibición de miniatura
Exhibición de
pantalla completa
a Búsqueda por fecha/hora (Consulte la página 27.)
<BUSQUEDA DE FECHA HORA>
COMIENZO DE GRAB. : 12-15-01 08:00
FIN DE GRAB.
: 12-22-01 17:00
Búsqueda y reproducción de imágenes
grabadas por fecha/hora
BUSQUEDA :
FEHCA
HORA
12-20-01 05:37
V.PRELIMINAR ->
VISTA
->
CAMBIAR:JOG
AJUSTAR:SHUTTLE
Exhibición de
previsualización
SEARCH
FRAME/FIELD
Exhibición de
pantalla completa
a Búsqueda en el área de archivo
(Consulte la página 29.)
BUSQUEDA
BUSQUEDA
BUSQUEDA
BUSQUEDA
BUSQUEDA
MOVER:JOG
<BUSQUEDA>
DE ALARMA
D/ALARMA RESUM.
DE HORA/FECHA
DE AREA DE ARCHIVO
D/DETEC.DE MOVIMIENTO
->
->
->
->
->
NO
0108
0107
0106
0105
0104
0103
0102
0101
Reproducción de imágenes grabadas
(copiadas) en el área de archivo
SELECCIONA:SHUTTLE
<BUSQUEDA DE AREA DE ARCHIVO>
FECHA START
CAPACIDAD
12-20 05:37
TOTAL - 1024MB
12-19 14:23
USADA - 400MB
12-16 11:13
12-16 16:13
12-15 10:13
12-13 15:19
12-13 11:15
12-13 11:13
MOVE:JOG
SELECT:SHUTTLE
Exhibición de
previsualización
Exhibición de
pantalla completa
Búsqueda y reproducción de objetos en
movimiento detectados por un sensor
de movimiento
a Búsqueda de detección movimiento (Consulte la página 30.)
<BUSQUEDA D/DETEC. DE MOVIMIENTO>
BUSCA DESDE : NORMAL
/ CANAL : 4
COMIENZO :
10-28-01 08:00
FINAL :
10-28-01 20:00
SENSOR D/MOVIMIENTO ->
V.PRELIMINAR
->
VISTA
->
MOVER:JOG
SELECCIONA:SHUTTLE
Búsqueda por fecha/hora de
una imagen con detección de
movimiento
-
-
- - - ú
- ú
- ú
- - - PEGEL :
ú
ú
ú
6
ú
ú
ú
-
- - - - - - - - BEENDEN
-
Ajuste del sensor de
movimiento
24
-
<BUSQUEDA D/DETEC. DE MOVIMIENTO>
BUSCA DESDE : NORMAL
/ CANAL : 4
COMIENZO :
10-28-01 10:00
FINAL :
10-28-01 20:00
SENSOR D/MOVIMIENTO ->
V.PRELIMINAR
->
VISTA
->
MOVER:JOG
SELECCIONA:SHUTTLE
Exhibición de
previsualización
Exhibición de
pantalla completa
Español
BUSCANDO IMÁGENES GRABADAS
Búsqueda de alarma
Se pueden buscar y reproducir todas las imágenes de grabación de alarma en el área de grabación de alarma. Si han sido grabadas imágenes de
pre-alarma, también se pueden reproducir las imágenes inmediatamente anteriores a las alarmas.
1
Presione el botón SEARCH FRAME/FIELD durante la
grabación o cuando está detenido el videograbador digital.
SEARCH
FRAME/FIELD
BUSQUEDA
BUSQUEDA
BUSQUEDA
BUSQUEDA
BUSQUEDA
Aparece la pantalla BUSQUEDA.
<BUSQUEDA>
DE ALARMA
D/ALARMA RESUM.
DE HORA/FECHA
DE AREA DE ARCHIVO
D/DETEC.DE MOVIMIENTO
MOVER:JOG
2
SELECCIONA:SHUTTLE
Use el dial de trotar para seleccionar BUSQUEDA DE
ALARMA y luego gire el dial de correr hacia la derecha.
1
Aparece la pantalla BUSQUEDA DE ALARMA.
NO
008
007
006
005
004
003
002
001
<BUSQUEDA DE ALARMA>
FECHA HORA
ALARMA TOTAL
12-20 05:37
0010
12-19 14:23
12-16 11:13
12-16 16:13
12-15 10:13
12-13 15:19
12-13 11:15
12-13 11:13
MOVER:JOG
SELECCIONA:SHUTTLE
NO
008
007
006
005
004
003
002
001
<BUSQUEDA DE ALARMA>
FECHA HORA
ALARMA TOTAL
12-20 05:37
0234
12-19 14:23
12-16 11:13
12-16 16:13
12-15 10:13
12-13 15:19
12-13 11:15
12-13 11:13
MOVER:JOG
SELECCIONA:SHUTTLE
1 NO: Aparece el número de alarma.
2 FECHA/HORA: Aparece la fecha y la hora en la cual la alarma fue recibida y
las imágenes fueron grabadas.
3 ALARMA TOTAL: Aparece el número total de imágenes de alarma
2
->
->
->
->
->
3
grabadas.
Use el dial de trotar para mover el cursor a fin de
seleccionar las imágenes que desea reproducir.
3
Aparece la imagen de alarma seleccionada en la pantalla de previsualización.
Nota:
• Hasta 8 elementos de información de alarma se pueden exhibir en la pantalla
BUSQUEDA DE ALARMA. Cuando se gira el dial de trotar, aparece la
pantalla de información de alarma anterior o la siguiente.
• Para terminar este modo de búsqueda, presione el botón SEARCH
FRAME/FIELD.
Gire el dial de correr hacia la derecha.
4
Aparece la imagen de previsualización en una exhibición de pantalla completa y
comienza la reproducción.
11-18-01 ALARMA 0004
25:03:12 ME 0.10SEG
Nota:
• También puede usar el dial de correr o el dial de trotar para realizar
funciones tales como pausar y reproducir rápido hacia delante.
• La búsqueda de alarma comienza la reproducción desde la imagen grabada
en el momento que se dispara la alarma, de manera que si está viendo las
imágenes de pre-alarma, use las operaciones del dial de correr para realizar
la reproducción hacia atrás.
Búsqueda de alarma 2
Presione un botón ALARMA durante la reproducción.
1
ALARM
•
•
Si presiona el botón û, la reproducción salta a la imagen de alarma anterior.
Si presiona el botón ù, la reproducción salta a la imagen de alarma
siguiente.
Nota: Al reproducir usando la búsqueda de alarma, la reproducción se detendrá
al comienzo y al final de cada grabación de alarma. Use los botones de
saltar ALARM para reproducir grabaciones de alarmas anteriores y
subsiguientes.
Español
25
11-18-01 ALARMA 0004
25:03:12 ME 0.10SEG
BUSCANDO IMÁGENES GRABADAS
Búsqueda de miniaturas de alarma
Se pueden buscar y reproducir imágenes de alarma desde las miniaturas.
Todas las imágenes de alarma grabadas en el área de grabación de alarma se exhiben como miniaturas.
1
Presione el botón SEARCH FRAME/FIELD durante la
grabación o cuando está detenido el videograbador digital.
SEARCH
FRAME/FIELD
BUSQUEDA
BUSQUEDA
BUSQUEDA
BUSQUEDA
BUSQUEDA
Aparece la pantalla BUSQUEDA.
<BUSQUEDA>
DE ALARMA
D/ALARMA RESUM.
DE HORA/FECHA
DE AREA DE ARCHIVO
D/DETEC.DE MOVIMIENTO
MOVER:JOG
2
Use el dial de trotar para seleccionar BUSQUEDA
D/ALARMA RESUM. y luego gire el dial de correr hacia la
derecha.
BUSQUEDA
BUSQUEDA
BUSQUEDA
BUSQUEDA
BUSQUEDA
Aparecen las últimas nueve imágenes de grabación de alarma.
Aparece el número de alarma con cada imagen de grabación de alarma, y
destella el número de alarma de la imagen de alarma actualmente seleccionada.
SELECCIONA:SHUTTLE
<BUSQUEDA>
DE ALARMA
D/ALARMA RESUM.
DE HORA/FECHA
DE AREA DE ARCHIVO
D/DETEC.DE MOVIMIENTO
MOVER:JOG
3
->
->
->
->
->
SELECCIONA:SHUTTLE
0109
0108
0107
0106
0105
0104
0103
0102
0101
0109
0108
0107
0106
0105
0104
0103
0102
0101
Use el dial de trotar para mover el cursor a fin de
seleccionar las imágenes que desea reproducir.
Destella el número de alarma de la imagen de alarma actualmente seleccionada.
Nota:
• Se pueden exhibir hasta nueve elementos de información de alarma
incluyendo miniaturas. Cuando se gira el dial de trotar, aparece la pantalla de
información de la alarma anterior o de la siguiente.
• Para terminar este modo de búsqueda, presione el botón SEARCH
FRAME/FIELD.
4
->
->
->
->
->
Gire el dial de correr hacia la derecha.
Aparece la imagen seleccionada en una exhibición de pantalla completa y
comienza la reproducción.
11-18-01 ALARMA 0003
25:02:00 ME 0.10SEG
Nota:
• También puede usar el dial de correr o el dial de trotar para realizar
funciones tales como pausar y reproducir rápido hacia delante.
• Sólo los contenidos de cada alarma pueden ser reproducidas, de la misma
manera para la búsqueda de alarma. Use los botones de saltar ALARM para
reproducir grabaciones de alarmas anteriores y subsiguientes.
26
Español
BUSCANDO IMÁGENES GRABADAS
Búsqueda de fecha/hora
Se puede especificar la fecha y la hora de grabación de imágenes en el área de grabación normal (imágenes de grabación normal y de grabación con
temporizador) y en el área de grabación de alarma del disco duro y se puede reproducir las imágenes.
1
Presione el botón SEARCH FRAME/FIELD durante la
grabación o cuando está detenido el videograbador digital.
SEARCH
FRAME/FIELD
BUSQUEDA
BUSQUEDA
BUSQUEDA
BUSQUEDA
BUSQUEDA
Aparece la pantalla BUSQUEDA.
<BUSQUEDA>
DE ALARMA
D/ALARMA RESUM.
DE HORA/FECHA
DE AREA DE ARCHIVO
D/DETEC.DE MOVIMIENTO
MOVER:JOG
2
Use el dial de trotar para seleccionar BUSQUEDA DE
HORA/FECHA y luego gire el dial de correr hacia la derecha.
BUSQUEDA
BUSQUEDA
BUSQUEDA
BUSQUEDA
BUSQUEDA
Aparece la pantalla BUSQUEDA DE HORA/FECHA.
1 COMIENZO DE GRAB: Se exhibe la fecha y la hora de la primer imagen
grabada.
->
->
->
->
->
SELECCIONA:SHUTTLE
<BUSQUEDA>
DE ALARMA
D/ALARMA RESUM.
DE HORA/FECHA
DE AREA DE ARCHIVO
D/DETEC.DE MOVIMIENTO
->
->
->
->
->
2 FIN DE GRAB.: Se exhibe la fecha y la hora de la última imagen (la más
reciente) .
MOVER:JOG
3 BUSQUEDA: Ingrese la fecha y la hora que desea exhibir en esta área.
4 V.PRELIMINAR: Aparece una imagen de previsualización.
5 VISTA: La imagen seleccionada aparece en el monitor como una imagen de
1
2
3
pantalla completa.
4
5
<BUSQUEDA DE FECHA HORA>
COMIENZO DE GRAB. : 10-25-01 08:00
FIN DE GRAB.
: 10-28-01 17:00
BUSQUEDA :
FEHCA
HORA
10-25-01 08:00
V.PRELIMINAR ->
VISTA
->
CAMBIAR:JOG
3
Ejemplo: Buscar las 8 p.m. del 26 de octubre de 2001
1 Gire el dial de trotar hacia la derecha y seleccione “10”.
2 Gire el dial de correr hacia la derecha, y luego use el dial de trotar para
cambiar “25” a “26”.
3 Gire el dial de correr hacia la derecha y seleccione “01”.
4 Gire el dial de correr hacia la derecha, y luego use el dial de trotar para
cambiar “08” a “20”.
correr.
El cursor se mueve V.PRELIMINAR.
Español
27
AJUSTAR:SHUTTLE
<BUSQUEDA DE FECHA HORA>
COMIENZO DE GRAB. : 10-25-01 08:00
FIN DE GRAB.
: 10-28-01 17:00
BUSQUEDA :
FEHCA
HORA
10-26-01 20:00
V.PRELIMINAR ->
VISTA
->
CAMBIAR:JOG
5 Gire el dial de correr hacia la derecha y seleccione “00”. Luego gire el dial de
SELECCIONA:SHUTTLE
AJUSTAR:SHUTTLE
BUSCANDO IMÁGENES GRABADAS
Gire el dial de correr hacia la derecha.
4
Aparece una exhibición de búsqueda mientras la búsqueda está en progreso, y
luego aparece una pantalla de previsualización exhibiendo la fecha y hora
ingresada.
Nota: Si no hay imágenes que coincidan exactamente con la hora, se exhibe la
imagen más cercana al rango de tiempo seleccionado.
<BUSQUEDA DE FECHA HORA>
COMIENZO DE GRAB. : 11-05-00 08:00
FIN DE GRAB.
: 12-22-00 17:00
BUSQUEDA :
FEHCA
HORA
11-17-01 02:36:10
V.PRELIMINAR ->
VISTA
->
CAMBIAR:JOG
5
Use el dial de trotar para seleccionar VISTA, y luego gire el
dial de correr hacia la derecha.
Se exhibe y se reproduce la imagen de previsualización en pantalla completa.
AJUSTAR:SHUTTLE
11-17-01
02:36:10 ME 0.10SEG
Nota:
• Una imagen de pantalla completa se puede exhibir cuando se ingresan la
fecha y hora y se selecciona VISTA, aún sin exhibir una previsualización.
• También puede usar el dial de correr o el dial de trotar para realizar
funciones tales como pausar y reproducir rápido hacia delante.
28
Español
BUSCANDO IMÁGENES GRABADAS
Búsqueda en el área de archivo
Puede reproducir imágenes que han sido grabadas (copiadas) en el área de archivo.
1
Presione el botón SEARCH FRAME/FIELD durante la
grabación o cuando está detenido el videograbador digital.
SEARCH
FRAME/FIELD
Aparece la pantalla BUSQUEDA.
BUSQUEDA
BUSQUEDA
BUSQUEDA
BUSQUEDA
BUSQUEDA
<BUSQUEDA>
DE ALARMA
D/ALARMA RESUM.
DE HORA/FECHA
DE AREA DE ARCHIVO
D/DETEC.DE MOVIMIENTO
MOVER:JOG
2
Use el dial de trotar para seleccionar BUSQUEDA DE AREA
DE ARCHIVO y luego gire el dial de correr hacia la derecha.
Aparece la pantalla BUSQUEDA DE AREA DE ARCHIVO.
1
2
3
4
5
3
NO: Se exhibe el número de archivo.
<BUSQUEDA>
DE ALARMA
D/ALARMA RESUM.
DE HORA/FECHA
DE AREA DE ARCHIVO
D/DETEC.DE MOVIMIENTO
->
->
->
->
->
12 3
START: Se exhibe la hora de inicio de la imagen grabada.
MOVER:JOG
SELECCIONA:SHUTTLE
<BUSQUEDA DE AREA
DE ARCHIVO>
NO FECHA START
CAPACIDAD
0108 12-20 05:37
TOTAL - 1024MB
0107 12-19 14:23
USADA - 400MB
0106 12-16 11:13
0105 12-16 16:13
0104 12-15 10:13
0103 12-13 15:19
0102 12-13 11:15
0101 12-13 11:13
MOVE:JOG
SELECT:SHUTTLE
TOTAL: Se exhibe la capacidad total del área de archivo.
USADA: Se exhibe la parte grabada del área de archivo.
Use el dial de trotar para mover el cursor a fin de
seleccionar las imágenes que desea reproducir.
Aparece la imagen de alarma seleccionada en la pantalla de previsualización.
NO
0108
0107
0106
0105
0104
0103
0102
0101
Aparece la imagen seleccionada en una exhibición de pantalla completa y
comienza la reproducción.
29
45
<BUSQUEDA DE AREA DE ARCHIVO>
FECHA START
CAPACIDAD
12-20 05:37
TOTAL - 1024MB
12-19 14:23
USADA - 400MB
12-16 11:13
12-16 16:13
12-15 10:13
12-13 15:19
12-13 11:15
12-13 11:13
MOVE:JOG
SELECT:SHUTTLE
Gire el dial de correr hacia la derecha.
Nota:
• Se puede exhibir una imagen en pantalla completa cuando se mueve el
cursor hasta la imagen que se desea reproducir y el dial de correr se gira
hacia la derecha, aún sin exhibir una previsualización.
• También puede usar el dial de correr o el dial de trotar para realizar
funciones tales como pausar y reproducir rápido hacia delante.
Español
SELECCIONA:SHUTTLE
FECHA: Se exhibe la fecha de la imagen grabada.
Nota:
• Se pueden exhibir hasta 8 elementos en la pantalla BUSQUEDA DE AREA
DE ARCHIVO.
Cuando se gira el dial de trotar, aparece la pantalla de archivo anterior o la
siguiente.
• Para terminar este modo de búsqueda, presione el botón SEARCH
FRAME/FIELD.
4
BUSQUEDA
BUSQUEDA
BUSQUEDA
BUSQUEDA
BUSQUEDA
->
->
->
->
->
11-18-01 ALARMA 0004
25:03:12 ME 0.10SEG
BUSCANDO IMÁGENES GRABADAS
Búsqueda de detección movimiento
Cuando se ajusta un sensor de movimiento para las imágenes grabadas en el área de grabación normal (imágenes de grabación normal y de
grabación con temporizador) o para las imágenes grabadas en el área de grabación de alarma del disco duro, usted puede buscar, por ejemplo,
imágenes que hayan cambiado a raíz del ingreso de una persona sospechosa, y reproducir solamente esas imágenes.
Nota:
• Si realiza búsquedas de detección de movimiento de imágenes de multiplexor, cambie el ajuste MULTIPLEXOR en el menú AJUSTE ENTRADA
DE VIDEO a algo diferente a “NO USO”.
• Si el videograbador digital está conectado a un multiplexor Sanyo que permite la decodificación de información de canal (números de cámara), los
canales se pueden especificar de manera que solamente se busquen imágenes de esos canales. Si está conectado a algún otro tipo de
multiplexor, este ajuste no es posible.
1
Presione el botón SEARCH FRAME/FIELD durante la
grabación o cuando está detenido el videograbador digital.
SEARCH
FRAME/FIELD
Aparece la pantalla BUSQUEDA.
BUSQUEDA
BUSQUEDA
BUSQUEDA
BUSQUEDA
BUSQUEDA
<BUSQUEDA>
DE ALARMA
D/ALARMA RESUM.
DE HORA/FECHA
DE AREA DE ARCHIVO
D/DETEC.DE MOVIMIENTO
MOVER:JOG
2
Use el dial de trotar para seleccionar BUSQUEDA D/DETEC.
DE MOVIMIENTO y luego gire el dial de correr hacia la
derecha.
Aparece la pantalla BUSQUEDA D/DETEC. DE MOVIMIENTO.
3
Use el dial de trotar para seleccionar BUSCA DESDE y
luego gire el dial de correr hacia la derecha.
Destella la exhibición ALARMA.
BUSQUEDA
BUSQUEDA
BUSQUEDA
BUSQUEDA
BUSQUEDA
SELECCIONA:SHUTTLE
<BUSQUEDA>
DE ALARMA
D/ALARMA RESUM.
DE HORA/FECHA
DE AREA DE ARCHIVO
D/DETEC.DE MOVIMIENTO
: --
V.PRELIMINAR
->
MOVER:JOG
4
El cursor se mueve hasta CANAL.
Nota: Si el ajuste de MULTIPLEXOR en el menú AJUSTE ENTRADA DE VIDEO se
ajusta a “NO USO”, el cursor se moverá hasta V.PRELIMINAR.
Ejemplo de selección de área de grabación:
• ALARMA: Solamente se buscan imágenes dentro del área de grabación de
alarma.
• NORMAL: Solamente se buscan imágenes dentro del área de grabación
normal.
• ALARMA Y NORMAL: Se buscan imágenes en el área de grabación de
alarma y en el área de grabación normal.
5
Gire el dial de correr hacia la derecha, use el dial de trotar
para seleccionar el número de cámara (ejemplo: 4), y luego
gire el dial de correr hacia la derecha.
El cursor se mueve hasta V.PRELIMINAR.
SELECCIONA:SHUTTLE
<BUSQUEDA D/DETEC. DE MOVIMIENTO>
BUSCA DESDE : NORMAL
COMIENZO : 10-28-01 08:00
FINAL : 10-28-01 20:00
CANAL
: --
V.PRELIMINAR
->
MOVER:JOG
SELECCIONA:SHUTTLE
<BUSQUEDA D/DETEC. DE MOVIMIENTO>
BUSCA DESDE : NORMAL
COMIENZO : 10-28-01 08:00
FINAL : 10-28-01 20:00
CANAL
V.PRELIMINAR
MOVER:JOG
30
->
->
->
->
->
<BUSQUEDA D/DETEC. DE MOVIMIENTO>
BUSCA DESDE : ALARMA
COMIENZO : -------- --:-FINAL : -------- --:-CANAL
Use el dial de trotar para seleccionar el área de grabación (ejemplo:
NORMAL), y luego gire el dial de correr hacia la derecha.
->
->
->
->
->
:
4
->
SELECCIONA:SHUTTLE
Español
BUSCANDO IMÁGENES GRABADAS
6
Gire el dial de correr hacia la derecha.
<BUSQUEDA D/DETEC. DE MOVIMIENTO>
BUSCA DESDE : NORMAL
COMIENZO : 10-28-01 08:00
FINAL : 10-28-01 20:00
La pantalla cambia y aparece la pantalla de previsualización de la cámara
número 4.
1 COMIENZO: Aparece la fecha y hora de la primer imagen en el área de
CANAL
grabación seleccionada.
También puede seleccionar la pantalla que tenga ajustado un
sensor de movimiento.
seleccionada.
Se agrega una hora a la hora exhibida.
También puede seleccionar la pantalla que tenga ajustado un
sensor de movimiento.
Si gira el dial de correr hacia la derecha, puede verificar las
imágenes hasta el punto final.
5 VISTA: La imagen seleccionada aparece en el monitor como una imagen de
pantalla completa en una pantalla normal.
7
Gire el dial de correr hacia la derecha.
Use el dial de trotar para ajustar la fecha y hora de inicio (COMIENZO) (ejemplo:
10.00 a.m. del día de hoy) para el ajuste del sensor de movimiento, y luego gire
el dial de correr hacia la derecha.
Aparece la imagen de la hora especificada en la pantalla de previsualización, y
el cursor se mueve hasta la ubicación del ajuste de fecha y hora de finalización
(FINAL).
4
->
MOVER:JOG
2 FINAL: Aparece la fecha y hora de la última imagen en el área de grabación
3 SENSOR D/MOVIMIENTO: Aparece el sensor de movimiento.
4 V.PRELIMINAR: Aparece el punto de inicio seleccionado.
:
V.PRELIMINAR
BUSCANDO
SELECCIONA:SHUTTLE
<BUSQUEDA D/DETEC. DE MOVIMIENTO>
BUSCA DESDE : NORMAL
/ CANAL : 4
1
2
3
4
5
COMIENZO :
10-28-01 08:00
FINAL :
10-28-01 10:00
SENSOR D/MOVIMIENTO ->
V.PRELIMINAR
->
VISTA
->
MOVER:JOG
SELECCIONA:SHUTTLE
<BUSQUEDA D/DETEC. DE MOVIMIENTO>
BUSCA DESDE : NORMAL
/ CANAL : 4
COMIENZO :
10-28-01 08:00
FINAL :
10-28-01 20:00
SENSOR D/MOVIMIENTO ->
V.PRELIMINAR
->
VISTA
->
MOVER:JOG
SELECCIONA:SHUTTLE
<BUSQUEDA D/DETEC. DE MOVIMIENTO>
BUSCA DESDE : NORMAL
/ CANAL : 4
COMIENZO :
10-28-01 10:00
FINAL :
10-28-01 20:00
SENSOR D/MOVIMIENTO ->
V.PRELIMINAR
->
VISTA
->
MOVER:JOG
SELECCIONA:SHUTTLE
8
9
Español
Gire el dial de correr hacia la derecha.
Use el dial de trotar para ajustar la fecha y hora de finalización (FINAL) (ejemplo:
8.00 p.m. del día de hoy) para el ajuste del sensor de movimiento, y luego gire el
dial de correr hacia la derecha.
El cursor se mueve hasta SENSOR D/MOVIMIENTO.
<BUSQUEDA D/DETEC. DE MOVIMIENTO>
BUSCA DESDE : NORMAL
/ CANAL : 4
COMIENZO :
10-28-01 10:00
FINAL :
10-28-01 20:00
SENSOR D/MOVIMIENTO ->
V.PRELIMINAR
->
VISTA
->
MOVER:JOG
SELECCIONA:SHUTTLE
Gire el dial de correr hacia la derecha.
Aparece la pantalla de ajuste del sensor de movimiento.
Ajuste el sensor de movimiento para cubrir el área donde le gustaría que sea
observado el movimiento.
Mueva el cursor hasta BEENDEN y gire el dial de correr hacia la derecha. La
exhibición vuelve a la pantalla SENSOR DE MOVIMIENTO. Consulte la página
58 para obtener detalles sobre los ajustes del sensor de movimiento.
31
-
-
- - - ú
- ú
- ú
- - - PEGEL :
ú
ú
ú
6
ú
ú
ú
-
- - - - - - - - BEENDEN
-
-
BUSCANDO IMÁGENES GRABADAS
10
2
1
Use el dial de trotar para mover el cursor hasta
V.PRELIMINAR, y luego gire el dial de correr hacia la
derecha. Aparece la pantalla exhibiendo los ajustes del
sensor de movimiento en la pantalla de previsualización
cada vez que se gira el dial de correr.
Nota: Si no se ha realizado ningún ajuste de sensor de movimiento, aparecerá
“NO ENCONTRADAS”, por lo tanto asegúrese de que los ajustes del
sensor de movimiento son realizados correctamente.
11
2
1
<BUSQUEDA D/DETEC. DE MOVIMIENTO>
BUSCA DESDE : NORMAL
/ CANAL : 4
COMIENZO :
10-28-01 10:00
FINAL :
10-28-01 20:00
SENSOR D/MOVIMIENTO ->
V.PRELIMINAR
->
VISTA
->
MOVER:JOG
SELECCIONA:SHUTTLE
Para ver un ajuste del sensor de movimiento en una
exhibición de pantalla completa, use el dial de trotar para
mover el cursor hasta VISTA y luego gire el dial de correr
hacia la derecha.
La exhibición cambia desde la imagen especificada a reproducción normal.
Nota: Cuando use un multiplexor y el número de cámara ha sido especificado
como un canal al realizar búsquedas de detector de movimiento, sólo se
reproducirán las imágenes para el número de cámara especificada. Para
reproducir todas las cámaras la reproducción primero debe ser
desactivada y luego vuelta a activar. Además, la información del título del
multiplexor y la información de fecha en algunos casos podría no
exhibirse completamente.
32
Español
SALVANDO (COPIANDO) IMÁGENES
GRABADAS
Las imágenes importantes que han sido grabadas en el área de grabación normal o en el área de grabación de alarma se pueden copiar a una tarjeta
CompactFlash o al área de archivo del disco duro.
A Copia de imágenes al área de archivo del disco duro
Copiando
Área de
Área
de
grabación
grabación
de alarma
Área
de
de alarma
grabación
de alarma
Copiando
Área de archivo
Área de grabación
Área de grabación
normal
normal
Área de grabación
normal
Disco duro
B Copia de imágenes desde el área de archivo a una tarjeta CompactFlash
Copia automática
Copia automática
Área de archivo
Área de
Área
de
grabación
grabación
de
alarma
Área
de
de alarma
grabación
de alarma
Área de grabación
Área de grabación
normal
normal
Área de grabación
normal
Disco
duro
CompactFlas
hCard
Microd
rive
Tarjeta CF o microdrive
C Copiar imágenes del área de archivo a una unidad DDS (DAT) o unidad CD-R
Copiando
Área de
Área
de
grabación
grabación
de alarma
Área
de
de alarma
grabación
de alarma
Copiando
Área de archivo
EJECT
Área de grabación
Área
de grabación
normal
normal
Área de grabación
normal
S-VIDEO
SCSI
Disco duro
Unidad DDS (DAT) o
unidad CD-R
(en venta por separado)
Nota:
• Las imágenes copiadas se almacenan como una sola fotografía.
• Si está descargando imágenes en una tarjeta CompactFlash, las imágenes se graban automáticamente en el área de archivo, y después son
copiadas del área de archivos a la tarjeta CompactFlash. Las imágenes no permanecerán más en el área de archivo.
• Si el área de archivo se ha llenado, use el ajuste REPOSICION DE AREA para el área de archivo en el menú AJUSTE AREA DE GRABACION
para borrar las imágenes innecesarias.
Español
33
SALVANDO (COPIANDO) IMÁGENES GRABADAS
A Copia de imágenes al área de archivo
del disco duro
1
6
Reproduzca las imágenes del área de grabación normal o del
área de grabación de alarma que va a copiar, y pause la
reproducción en la imagen que desea copiar.
(Consulte la página 22.)
PLAY/STOP
STILL
Use el dial de trotar para seleccionar el ajuste SEGUNDOS, y
luego gire el dial de correr hacia la derecha.
• IMAGENES: Especifique el número de imágenes que desea
copiar.
• SEGUNDOS: Especifique el número de segundos de
imágenes que desea copiar.
• MINUTOS: Especifique el número de minutos de imágenes
que desea copiar (hasta 60 minutos).
El cursor se mueve hasta COMIENZO.
COPIAR A : AREA DE ARCHIVO
CUANTAS : 10 IMAGENES
Ejemplo: Para copiar 10 segundos de imágenes comenzando de
una imagen seleccionada
2
7
Mientras la imagen que desea copiar se exhibe como una
imagen fija, presione el botón COPY.
Aparece la pantalla de copia.
Gire el dial de correr hacia la derecha.
Comienza la copia de las imágenes al área de archivo. Cuando
se termina la copia, aparecerá “COPIA TERMINADA”.
COPY
COPIAR A : AREA DE ARCHIVO
COPIAR A : AREA DE ARCHIVO
CUANTAS :
CUANTAS : 10 SEGUNDOS
1 IMAGENES
COMIENZO ->
COMIENZO ->
FORMATO COMPACT FLASH ->
Nota: Si presiona el botón COPY mientras la copia está en progreso,
la copia se cancela.
CAMBIE CON JOG. AJUSTE CON SHUTTLE
3
Use el dial de trotar para seleccionar COPIAR A y luego gire
el dial de correr hacia la derecha.
Destella la exhibición AREA DE ARCHIVO.
COPIAR A : AREA DE ARCHIVO
CUANTAS :
1 IMAGENES
COMIENZO ->
FORMATO COMPACT FLASH ->
CAMBIE CON JOG. AJUSTE CON SHUTTLE
4
Use el dial de trotar para seleccionar AREA DE ARCHIVO y
luego gire el dial de correr hacia la derecha.
El cursor se mueve hasta CUANTAS.
COPIAR A : AREA DE ARCHIVO
CUANTAS :
5
1 IMAGENES
Gire el dial de correr hacia la derecha, use el dial de trotar
para cambiar el ajuste a “ 10” , y luego gire el dial de correr
hacia la derecha.
El cursor se mueve hasta IMAGENES.
34
Español
SALVANDO (COPIANDO) IMÁGENES GRABADAS
B Copia de imágenes desde el área de
archivo a una tarjeta CompactFlash
3
Inserte una tarjeta CompactFlash en la ranura de CompactFlash
del panel delantero.
Cuando inserte la tarjeta CompactFlash, asegúrese que la dirección
de inserción sea la correcta.
También se puede usar un Microdrive para copiar imágenes.
Use el dial de trotar para seleccionar COMPACT FLASH y
luego gire el dial de correr hacia la derecha.
El cursor se mueve hasta CUANTAS.
COPIAR A : COMPACT FLASH
CUANTAS :
1 IMAGENES
(Insertando)
1
4
2
Gire el dial de correr hacia la derecha, use el dial de trotar
para cambiar el ajuste a “ 10” , y luego gire el dial de correr
hacia la derecha.
El cursor se mueve hasta IMAGENES.
COPIAR A : COMPACT FLASH
CUANTAS : 10 IMAGENES
3
5
(Removiendo)
3
2
1
Use el dial de trotar para seleccionar el ajuste SEGUNDOS, y
luego gire el dial de correr hacia la derecha.
• IMAGENES: Especifique el número de imágenes que desea
copiar.
• SEGUNDOS: Especifique el número de segundos de
imágenes que desea copiar.
• MINUTOS: Especifique el número de minutos de imágenes
que desea copiar (hasta 60 minutos).
COPIAR A : COMPACT FLASH
CUANTAS : 10 SEGUNDOS
1
Exhiba una imagen del área de archivo como una imagen
fija, y luego presione el botón COPY.
Aparece la pantalla de copia.
Consulte la página 29 para obtener detalles sobre la
reproducción de imágenes desde el área de archivo.
Nota:
• El número límite de imágenes que se pueden copiar es 40.000. La
copia termina cuando se han copiado 40.000 imágenes.
• Al copiar grabaciones de alarma, sólo pueden ser copiadas de a
una a la vez.
COPY
6
COPIAR A : AREA DE ARCHIVO
CUANTAS :
1 IMAGENES
El indicador COPY se ilumina, aparece la pantalla COPIAR A :
COMPACT FLASH y comienza la copia de imágenes a la tarjeta
CompactFlash.
Cuando se termina la copia, aparece el mensaje “COPYING
COMPLETE”.
COMIENZO ->
FORMATO COMPACT FLASH ->
CAMBIE CON JOG. AJUSTE CON SHUTTLE
2
Gire el dial de correr hacia la derecha.
Use el dial de trotar para seleccionar COPIAR A y luego gire
el dial de correr hacia la derecha.
Destella la exhibición AREA DE ARCHIVO.
COPIAR A : COMPACT FLASH
CUANTAS : 10 SEGUNDOS
COMIENZO ->
Nota:
• Si copia imágenes directamente desde el área de grabación
normal o el área de grabación de alarma a una tarjeta
CompactFlash, las mismas imágenes serán copiadas desde el
área de archivo. Sin embargo, se borran las imágenes después
que han sido copiadas.
• Si presiona el botón COPY mientras la copia está en progreso, la
copia se cancela.
COPIAR A : AREA DE ARCHIVO
COPY TO : ARCHIVE AREA
CUANTAS : 1 IMAGENES
HOW MANY : 1 PICTURES
COMIENZO ->
START ->
FORMATO COMPACT FLASH ->
CHANGE
WITHCON
SHUTTLE
CAMBIEWITH
CONJOG.
JOG.SET
AJUSTE
SHUTTLE
Español
35
SALVANDO (COPIANDO) IMÁGENES GRABADAS
Formateo de tarjetas CompactFlash
INFORMACIÓN IMPORTANTE
Puede formatear tarjetas CompactFlash y microdrive seleccionando
“FORMATO COMPACT FLASH”.
Solo puede usar una tarjeta CompactFlash que haya sido formateada
a las especificaciones FAT16. Las tarjetas formateadas a FAT32 no
serán reconocidas.
Copiando imágenes de cámara al área de grabación
de archivo o a una tarjeta CompactFlash
Cuando el videograbador digital está conectado a un
multiplexor (incluyendo multiplexores de otros fabricantes como
Robot, DM y Sony), podrá copiar imágenes desde una cámara
especificada que han sido grabadas mediante el videograbador
digital al área de archivo o a una tarjeta CompactFlash.
1) Funcionamiento del multiplexor
Presione el botón VCR para exhibir la pantalla dividida.
2) Funcionamiento del videograbador digital
Especifique el canal de la cámara a copiar mediante el
procedimiento en “Selección de un canal para la
reproducción de imágenes de la cámara” en la página 23.
3) Funcionamiento del multiplexor
Presione el botón de selección de cámara para que la
cámara seleccionada exhiba las imágenes para esa cámara
en una sola pantalla.
4) Funcionamiento del videograbador digital
• Si copia imágenes al área de grabación de archivos
Realice el procedimiento en “Copia de imágenes al
área del disco duro” en la página 34.
• Si copia imágenes desde el área de grabación de
archivo a una tarjeta CompactFlash
Realice el procedimiento en “Copia de imágenes desde
el área de archivo a una tarjeta CompactFlash” en la
página 35.
Se exhibirá “COPIANDO” en cada pantalla, y comenzará
la copia. Cuando la copia haya sido terminada, se
exhibirá “COPIA TERMINADA”.
COPIAR A : COMPACT FLASH
CUANTAS : 20 IMAGENES
COMIENZO ->
FORMATO COMPACT FLASH ->
CAMBIE CON JOG. AJUSTE CON SHUTTLE
Área de grabación de CompactFlash
COMPACT FLASH
SANYO
02032101
1
2
IMG00001
3
IMG00002
3
00000001.JPG
00000002.JPG
00000003.JPG
IMG00003
3
INDEX.HTM
4
1 Se crea una carpeta SANYO en el directorio raíz.
2 Se crean subcarpetas para guardar las imágenes copiadas en
secuencia en la carpeta SANYO.
3 Se crean subcarpetas dentro de la carpeta de fecha/hora con
Nota:
nombres que comienzan a partir de IMG00001. Cada
subcarpeta puede tener hasta 200 imágenes.
Si copia imágenes al área de grabación de archivo de un
videograbador digital o a una tarjeta CompactFlash sin
especificar el canal de la cámara con el videograbador digital
en el paso 2 anterior, se copiarán todas las imágenes de
cámara del multiplexor.
La función de copia en esta pantalla especial sólo puede ser
realizada mediante multiplexores para los cuales el
videograbador digital pueda decodificar directamente la
información ID del multiplexor. La lista de intercambiabilidad del
multiplexor se indica a continuación.
4 Para ver el listado de archivos usando un ordenador, use un
navegador tal como Internet Explorer 5.0 o posterior para abrir
los archivos INDEX.HTM. Los archivos JPEG se pueden
reproducir como un show diapositivas.
Nota:
• Las imágenes JPG son grabadas como imágenes de campo, de
manera que cuando se ven usando el visor de imágenes normal,
son comprimidas en 1/2 en sentido vertical. Asegúrese que las ve
usando el archivo INDEX.HTM.
• Cuando se copian imágenes de grabación de cuadros en una
tarjeta CompactFlash, las imágenes se copian por separado como
2 imágenes de campo, por lo tanto la reproducción de cuadros no
es posible cuando visualiza estas imágenes usando un ordenador.
• Las imágenes que han sido copiadas en una tarjeta CompactFlash
contienen códigos que sirven para detectar alteraciones en los
archivos, y estos códigos pueden ser reconocidos por aplicaciones
de software del ordenador que puedan detectar alteraciones de
archivos. Póngase en contacto con el comercio donde lo compró
para obtener detalles.
A. Multiplexores que pueden ser decodificados directamente
Sanyo, Robot, DM, Sony
B. Multiplexores que sólo permiten decodificar mediante el
multiplexor
Pelco, Kalatel, ATV, Ultrk
36
Español
SALVANDO (COPIANDO) IMÁGENES GRABADAS
Respaldos
C Copiar imágenes del área de archivo a
una unidad DDS (DAT) o unidad CD-R
Todos los datos del área de archivo se pueden respaldar en una
unidad DDS (DAT).
☞ Conexión a una unidad de disco
1
Inserte una tarjeta SCSI recomendada para conectar la unidad
DDS (DAT) en la ranura de tarjeta PC en la parte de atrás del
videograbador digital.
Las imágenes pueden ser copiadas desde el área de archivo a la
unidad DDS (DAT), y las imágenes grabadas en la unidad DDS (DAT)
pueden ser también copiadas al área de archivo.
• Tarjeta SCSI recomendada
Fabricante: ADAPTEC
No. de modelo: Slim SCSI 1460
• Unidad DDS (DAT) tipo DDS-3 recomendada
Fabricante: Hewlett Packard
No. de modelo: Super Store dat 24e
• Unidad CD-R recomendada
Fabricante: YAMAHA
Modelo: CRW2200SX-VK
COPY
2
Al terminal DIGITAL IN/OUT del multiplexor
DIGITAL IN
DIGITAL OUT
1
3
<AJUSTE ARCHIVO>
RESPALDAR
->
RESTAURAR
->
BORRAR
->
Use el dial de trotar para seleccionar RESPALDAR y luego
gire el dial de correr hacia la derecha.
Aparece “ARCHIVANDO A DDS (DAT) !” y entonces comienza
la copia.
• Si presiona el botón COPY mientras la copia está en
progreso, la copia se cancela.
• Cuando se completa el copiado, aparece “ FIN DE
ARCHIVAR !” . Presione cualquier botón para volver a la
pantalla normal.
01-01-01
00:00:00 ME 0.10SEG
Unidad DDS (DAT)
o unidad CD-R
(en venta por
separado)
2
Presione el botón COPY durante la grabación o cuando está
detenido el videograbador digital.
Aparece la pantalla AJUSTE ARCHIVO.
ARCHIVANDO A DDS(DAT) !
<PRESIONE COPY PARA ABORTAR>
Insertando una tarjeta SCSI (en venta por separado)
(Instalada)
Nota:
• Cuando se convierten datos para almacenamiento en una unidad
DDS (DAT), el proceso de conversión podría resultar en un
aumento del tamaño de los datos. Si se copian imágenes a una
cinta de 12 GB, sólo será posible copiar aproximadamente 10 GB
de datos.
• Demorará aproximadamente 4 horas para copiar 10 GB de datos a
una unidad DDS (DAT).
(Removida)
3
1
3
2
Puede deslizar el dial para
bloquear la tarjeta.
1
2
Vuelva el dial a su lugar
después del desbloqueo.
Nota:
• La ranura de tarjeta PC es sólo para tarjetas de 16 bits y 5 V.
No use tarjetas de tipo bus de 32 bits, porque pueden dañar la ranura
de tarjeta PC del videograbador digital.
• Verifique que la dirección de la inserción sea correcta cuando
inserte la tarjeta SCSI card.
• Si se usa una tarjeta SCSI o unidad DDS (DAT) diferente de las
recomendadas, no se puede garantizar el funcionamiento correcto.
• La unidad CD-R compatible es una unidad YAMAHA SCSI
CD-R/RW, y los medios a utilizar deben ser solamente discos
CD-R. No se pueden usar discos CD-RW.
* DDS (Unidad de almacenamiento de datos digitales)/DAT (Cinta de
audio digital)
Español
37
SALVANDO (COPIANDO) IMÁGENES GRABADAS
Lectura de datos de una unidad DDS (DAT) en
el área de archivo
Borrado de datos de imagen de la unidad DDS
(DAT)
Nota: Todas las imágenes anteriormente grabadas en el área de
archivo se borran cuando las imágenes son transferidas de esta
manera.
1
1
Presione el botón COPY durante la grabación o cuando está
detenido el videograbador digital.
Aparece la pantalla AJUSTE ARCHIVO.
COPY
<AJUSTE ARCHIVO>
RESPALDAR
->
RESTAURAR
->
BORRAR
->
<AJUSTE ARCHIVO>
RESPALDAR
->
RESTAURAR
->
BORRAR
->
COPY
2
Presione el botón COPY durante la grabación o cuando está
detenido el videograbador digital.
Aparece la pantalla AJUSTE ARCHIVO.
2
Use el dial de trotar para seleccionar RESTAURAR y luego
gire el dial de correr hacia la derecha.
Aparece el mensaje “LISTANDO LOS DATOS!”. Cuando se
completa la reproducción, aparece la pantalla RESTAURER DE
DDS(DAT).
Use el dial de trotar para seleccionar BORRAR y luego gire
el dial de correr hacia la derecha.
Aparece la pantalla ADVERTENCIA.
<ADVERTENCIA>
01-01-01
08:00:00 ME 0.10SEG
DATOS ALMACENADOS EN DDS(DAT)SERAN BORRADOS !
ESTA SEGURO ?
LISTANDO LOS DATOS !
NO
<PRESIONE COPY PARA ABORTAR>
CAMBIE CON JOG. AJUSTE CON SHUTTLE
3
3
Use el dial de trotar para seleccionar los datos que desea
leer en el área de archivo, y luego gire el dial de correr hacia
la derecha.
Comienza la lectura de los datos. Aparece la pantalla
RESTAURER DE DDS(DAT).
Los datos de imagen de la unidad DDS (DAT) se graban
entonces en el área de archivo.
Cuando todos los datos han sido leídos en el área de archivo,
aparece "FIN DE RECUPERAR !".
Cuando reproduzca las imágenes en el área de archivo, los
datos de imagen que han sido leídos se pueden reproducir.
NO
0001
0002
0003
Use el dial de trotar para cambiar “ NO” a “ SI” , y luego gire el
dial de correr hacia la derecha.
Aparece “BORRANDO EL MEDIO !” y cuando se ha completado
el borrado de datos de la cinta, aparece “BORRADO
TERMINADO !”.
01-01-01
08:00:00 EN 0.10SEC
BORRANDO EL MEDIO !
<RESTAURER DE DDS(DAT)>
FECHA
HORA TAMAÑO
12-13-2001 11:13 3.0GB
12-15-2001 10:15 2.0GB
12-17-2001 10:15 2.0GB
DATOS EN DISCO SERAN BORRADOS !
01-01-01
08:00:00 ME 0.10SEG
RECUPERANDO DE DDS(DAT) !
<PRESIONE COPY PARA ABORTAR>
38
Español
SALVANDO (COPIANDO) IMÁGENES GRABADAS
Copia de imágenes en una unidad CD-R
1
5
Mientras visualiza la imagen fija que desea copiar del área
de archivo, presione el botón COPY.
Aparece la pantalla COPIA.
Consulte la página 29 para obtener detalles sobre reproducción
de imágenes en el área de archivo.
COPY
COPIAR A : AREA DE ARCHIVO
Use el dial de trotar para seleccionar “ SEGUNDOS” , y luego
gire el dial de correr hacia la derecha.
El cursor se mueve hasta “COMIENZO”.
• IMAGENES: Se copia el número especificado de imágenes
comenzando a partir de la imagen actual.
• SEGUNDOS: Se copia el número especificado de segundos de
imágenes, comenzando a partir de la imagen actual.
• MINUTOS: Se copia el número especificado de minutos de
imágenes, comenzando a partir de la imagen actual.
• EVENTOS: Se copia el número especificado de eventos,
comenzando a partir de la imagen actual.
CUANTAS : 20 IMAGENES
COMIENZO ->
COPIAR A : CD-R
FORMATO COMPACT FLASH ->
CUANTAS : 10 SEGUNDOS
CAMBIE CON JOG. AJUSTE CON SHUTTLE
COMIENZO ->
2
Use el dial de trotar para seleccionar “ COPIAR A” , y luego
gire el dial de correr hacia la derecha.
La exhibición “AREA DE ARCHIVO” destella.
Nota:
• Cada vez que se efectúa una operación de copia, las imágenes se
copian al área de archivo evento por evento como un solo grupo.
La capacidad del área de archivo se puede ajustar tanto como se
desee hasta un límite máximo de 10 GB.
• Solamente se puede copiar a una unidad CD-R las imágenes del
área de archivo. Las imágenes no se pueden copiar directamente
desde el área de grabación normal o desde el área de grabación
de alarma a una unidad CD-R.
• Dependiendo de la duración de cada evento, quizás no sea posible
copiar todos los eventos especificados. (La cantidad máxima de
datos que se pueden copiar es 495 MB.)
• En el caso del ajuste EVENTOS, si selecciona el ajuste “>60”, la
copia continuará hasta que el CD-R se llene.
COPIAR A : AREA DE ARCHIVO
CUANTAS : 20 IMAGENES
COMIENZO ->
FORMATO COMPACT FLASH ->
CAMBIE CON JOG. AJUSTE CON SHUTTLE
3
Use el dial de trotar para seleccionar “ CD-R” , y luego gire el
dial de correr hacia la derecha.
El cursor se mueve hasta “CUANTAS”.
6
Gire el dial de correr hacia la derecha.
El indicador COPY se ilumina, aparece “COPIAR A: CD-R” en la
pantalla y comienza la copia al CD-R.
Cuando la copia haya terminado, aparece “COPIA TERMINADA”.
COPIAR A : CD-R
CUANTAS : 20 IMAGENES
COMIENZO ->
4
COPIAR A : CD-R
CUANTAS : 10 SEGUNDOS
Gire el dial de correr hacia la derecha, use el dial de trotar
para ajustar el número de imágenes a “ 10” , y luego gire el
dial de correr hacia la derecha.
El cursor se mueve hasta “IMAGENES”.
COMIENZO ->
Nota:
• Con la velocidad de escritura normal, tomará aproximadamente 70
minutos o más llenar el CD-R.
• Los archivos no se escriben en un formato de archivo genérico.
Necesitará programas de ordenador especiales. Contacte el lugar
donde realizó la compra para obtener más detalles.
• Las imágenes no se pueden copiar de nuevo desde la unidad de
CD-R al videograbador digital. Además, una vez que las imágenes
han sido copiadas a una unidad CD-R, el disco CD-R se cierra y
no es posible copiar más archivos a ese disco.
• La copia no se puede cancelar mientras la copia está en progreso.
• Si la capacidad de almacenamiento se llena mientras se está
realizando la copia, aparecerá el mensaje de error “CD-R LLENO”
y se exhibirán los detalles de la última imagen copiada.
COPIAR A : CD-R
CUANTAS : 10 IMAGENES
COMIENZO ->
Español
39
DIAGRAMA DE FLUJO Y FUNCIONES DE LOS
MENÚES
Flujo de menúes
Ajustes de grabación
Ajustes del entorno de funcionamiento
El menú principal 1 contiene ajustes relacionados
principalmente con la grabación.
El menú principal 2 contiene ajustes relacionados
principalmente con el entorno de funcionamiento.
Menú principal 1
Menú principal 2
<MENU PRINCIPAL 2>
1.AJUSTE EXHIBICION/PERDIDA VIDEO
2.AJUSTE RS-232C/RS-485
3.AJUSTE ZUMBADOR
4.AJUSTE BLOQUEO DE SEGURIDAD
5.AJUSTE RED
6.AJUSTE HDD
7.FALLO ALIMENTACION/TIEMPO USADO
<MENU PRINCIPAL 1>
1.AJUSTE IDIOMA/RELOJ
->
2.AJUSTE ENTRADA DE VIDEO
->
3.AJUSTE AREA DE GRABACION
->
4.AJUSTE COND.DE GRABACION
->
5.AJUSTE GRABACION NORMAL
->
6.AJUSTE TEMPORIZADOR
->
7.AJUSTE FASTIVOS
->
8.AJUSTE GRABACION DE ALARMA
->
AL MENU PRINCIPAL 2
->
CAMBIE DE LINEAS CON JOG, SELECCIONE CON SHUTTLE
->
->
->
->
->
->
->
AL MENU PRINCIPAL 1
->
CAMBIE DE LINEAS CON JOG, SELECCIONE CON SHUTTLE
Submenúes
b Ajustes de lenguaje, de reloj y de
hora de verano (página 42, 43.)
<AJUSTE IDIOMA>
ESPAÑOL
<AJUSTE RELOJ>
01-01-2001 LUN 00:00:00
<AJUSTE HORA DE VERANO>
MODO :
USO
SEMANA
MES HORA
ON PRI-DOM 04 02:00
OFF ULT-DOM 10 02:00
<AJUSTE RELOJ EXTERNO>
AJUSTAR HORA
01:00
b Ajustes de entrada de vídeo y
multiplexor (página 44.)
<ENTRADA DE VIDEO>
MULTIPLEXOR
: NO USO
ENTRADA DE VIDEO : ANALOGICA
b Ajustes de área de
grabación (página 45.)
<AJUSTE AREA DE GRABACION>
CAPACIDAD TOTAL
: 80GB
AREA DE GRABACION NORMAL
: 80 %
REPOSICION DE AREA ->
AREA DE GRABACION DE ALARMA
: 19 %
REPOSICION DE AREA ->
AREA DE ARCHIVO
: 1%
REPOSICION DE AREA ->
CUIDADO : CUANDO SE CAMBIA EL AJUSTE.
TODA EL AREA SERA INICIALIZADA !
b Ajustes de grabación
(página 47.)
<AJUSTE COND. DE GRABACION>
GRABACION EN SERIE DIGITAL : OFF
NUMERO TOTAL
: ¤¤
NUMERO DE GRABADOR
: ¤¤
AREA DE GRABACION NORMAL
SOBREESCRIBIR
: ON
AREA DE GRABACION DE ALARMA
SOBREESCRIBIR
: ON
AVISO DE DISCO RESTANTE
: ¤¤
b Ajustes de grabación
normal (página 49.)
b Ajustes de exhibición
(página 59.)
<AJUSTE EXHIBICION>
FECHA
: ON
HORA
: ON
CALIDAD
: ON
CICLO DE GRAB. : ON
CONTEO D/ALARMA : ON
TIPO D/ALARMA : ON
<AJUSTE GRABACION NORMAL>
CALIDAD DE IMAGEN
: MEDIA
GRABACION CUADRO/CAMPO : CAMPO
GRABACION DE AUDIO
: OFF
CICLO DE GRAB. : 0.10SEG ( 54H)
<AJUSTE PERDIDA VIDEO>
PERDIDA VIDEO : ON
b Ajustes de temporizador
(página 50.)
SEM
DOM
LUN
MAR
MIE
JUE
VIE
SAB
TODOS
<AJUSTE TEMPORIZADOR>
INICIO PARO CICLO DE GRAB.
--:-- --:-- 0.10SEG ( 54H)
--:-- --:-- 0.10SEG ( 54H)
--:-- --:-- 0.10SEG ( 54H)
--:-- --:-- 0.10SEG ( 54H)
--:-- --:-- 0.10SEG ( 54H)
--:-- --:-- 0.10SEG ( 54H)
--:-- --:-- 0.10SEG ( 54H)
--:-- --:-- 0.10SEG ( 54H)
b Ajustes de comunicación
RS-232C/RS-485 (página 60.)
<AJUSTE RS-232C/RS-485>
CONTROL
RS-232C
VELOCIDAD DATOS 19200
INFO.STATUS
¤¤¤
INFO.ALARMA
¤¤¤
DIRECCION
¤¤¤
USO
OFF
OFF
OFF
OFF
OFF
OFF
OFF
OFF
<AJUSTE RED>
TARJETA DE RED : LAN1
CONTROL DE RED : OFF
DIRECCION IP : 192.168. 0. 1
MASCARA SUBNET : 255.255.255. 0
GATEWAY
: 0. 0. 0. 0
PUERTO
: 00080
ID
CONTRASEÑA (4-8)
ID1
: 1111---ID2
: 2222---ID3
: 3333----
b Ajustes del disco duro
(página 69.)
<AJUSTE HDD>
DISCO 1
: 80GB
DISCO 2
: ---GB
INICIALIZA DISCO ->
CUIDADO : TODAS LAS GRAB.SERAN BORRADAS !
ESPEJO
: OFF
DISCO D/REPRODUCCION : ¤¤¤
CUIDADO : VELOCIDAD DE GRAB. ESTARA
LIMITADA POR EL ESPEJO !
b Ajustes de feriados
(página 53.)
1.
2.
3.
4.
5.
6.
7.
8.
9.
10.
b Ajustes de red (página 66.)
b Ajustes del zumbador
(página 62.)
<AJUSTE ZUMBADOR>
ALARMA
OFF
DISCO LLENO
ON
ERROR DE DISCO ON
ADVER.DE BLOQUEO ON
SENSIB.AL TOQUE OFF
SIN GRABACION OFF
<AJUSTE FESTIVOS>
----11. --------12. --------13. --------14. --------15. --------16. --------17. --------18. --------19. --------20. -----
b Ajustes de falla de
alimentación/tiempo usado
(página 70.)
<FALLO ALIMENTACION/TIEMPO USADO>
FALLO ALIMENTACION
#003 AVERIA ----- --:-SOLUCION ----- --:-TIEMPO USADO
USO DE DISCO1 :
USO DE DISCO2 :
USO GRAL.
:
FIRMWARE :
b Ajustes de grabación de
alarma (página 54.)
00000H
-----H
00000H
MAIN 1.00-00 / SUB 1.00-00
b Ajustes del bloqueo de
seguridad (página 63.)
<AJUSTE BLOQUED DE SEGURIDAD>
NIVEL CONTRASEÑA(4-8) USO
ADMIN
-------- OFF
USUARIO
-------- OFF
CONTROL DE GRAB : ADMIN
<AJUSTE GRABACION DE ALARMA>
CALIDAD DE IMAGEN
:MEDIA
GRABACION CUADRO/ CAMPO :CAMPO
GRABACION DE AUDIO
:OFF
GRABACION DE ALARMA
:OFF
CICLO DE GRAB.: 0.10 SEG. DURACION: 1SEG
GRABACION SIN ALARMA :¤¤¤
CICLO DE GRAB.: ¤¤¤ SEG. DURACION: ¤¤¤
=> (SE PUEDEN GRABAR 46400)
DISPARO DE ALARMA
:ALARMA
SENSOR DE MOVIMIENTO
->
40
Español
DIAGRAMA DE FLUJO Y FUNCIONES DE LOS MENÚES
Funciones básicas de las pantallas de
menú
1
4
Presione el botón MENU.
Aparece la pantalla MENU PRINCIPAL 1. Si presiona el botón
MENU una vez más, aparece la pantalla MENU PRINCIPAL 2.
MENU
EXIT/OSD
<MENU PRINCIPAL 1>
1.AJUSTE IDIOMA/RELOJ
->
2.AJUSTE ENTRADA DE VIDEO
->
3.AJUSTE AREA DE GRABACION
->
4.AJUSTE COND.DE GRABACION
->
5.AJUSTE GRABACION NORMAL
->
6.AJUSTE TEMPORIZADOR
->
7.AJUSTE FASTIVOS
->
8.AJUSTE GRABACION DE ALARMA
->
AL MENU PRINCIPAL 2
->
CAMBIE DE LINEAS CON JOG, SELECCIONE CON SHUTTLE
Funciones mientras se exhibe una
pantalla de submenú
Si presiona el botón MENU mientras se exhibe una pantalla de
submenú, puede verificar los ajustes en las pantallas de submenú.
MENU
<MENU PRINCIPAL 2>
1.AJUSTE EXHIBICION/PERDIDA VIDEO
2.AJUSTE RS-232C/RS-485
3.AJUSTE ZUMBADOR
4.AJUSTE BLOQUEO DE SEGURIDAD
5.AJUSTE RED
6.AJUSTE HDD
7.FALLO ALIMENTACION/TIEMPO USADO
Presione el botón EXIT/OSD.
La exhibición vuelve a la pantalla normal.
<ENTRADA DE VIDEO>
MULTIPLEXOR
: NO USO
ENTRADA DE VIDEO : ANALOGICA
->
->
->
->
->
->
->
MENU
AL MENU PRINCIPAL 1
->
CAMBIE DE LINEAS CON JOG, SELECCIONE CON SHUTTLE
<AJUSTE AREA DE GRABACION>
CAPACIDAD TOTAL
: 80GB
AREA DE GRABACION NORMAL
: 80 %
REPOSICION DE AREA ->
AREA DE GRABACION DE ALARMA
: 19 %
REPOSICION DE AREA ->
AREA DE ARCHIVO
: 1%
REPOSICION DE AREA ->
Nota: Si presiona repetidamente el botón MENU, la pantalla alterna
entre MENU PRINCIPAL 1 y MENU PRINCIPAL 2. Además,
también puede seleccionar “A MENU PRINCIPAL 2” o “AL
MENU PRINCIPAL 1” en las respectivas pantallas de menú
para exhibir la otra pantalla de menú.
2
CUIDADO : CUANDO SE CAMBIA EL AJUSTE.
TODA EL AREA SERA INICIALIZADA !
Gire el dial de trotar hacia la izquierda o la derecha para
mover el cursor hasta los elementos de menú.
El elemento seleccionado queda iluminado.
MENU
<MENU PRINCIPAL 1>
1.AJUSTE IDIOMA/RELOJ
->
2.AJUSTE ENTRADA DE VIDEO
->
3.AJUSTE AREA DE GRABACION
->
4.AJUSTE COND.DE GRABACION
->
5.AJUSTE GRABACION NORMAL
->
6.AJUSTE TEMPORIZADOR
->
7.AJUSTE FASTIVOS
->
8.AJUSTE GRABACION DE ALARMA
->
AL MENU PRINCIPAL 2
->
CAMBIE DE LINEAS CON JOG, SELECCIONE CON SHUTTLE
<AJUSTE COND. DE GRABACION>
GRABACION EN SERIE DIGITAL : OFF
NUMERO TOTAL
: ¤¤
NUMERO DE GRABADOR
: ¤¤
AREA DE GRABACION NORMAL
SOBREESCRIBIR
: ON
AREA DE GRABACION DE ALARMA
SOBREESCRIBIR
: ON
AVISO DE DISCO RESTANTE
3
: ¤¤
Gire el dial de correr hacia la derecha.
Aparece el submenú.
<ENTRADA DE VIDEO>
MULTIPLEXOR
: NO USO
ENTRADA DE VIDEO : ANALOGICA
Español
Nota: Puede exhibir menúes mientras las imágenes se están
grabando en una de las áreas de grabación. En tales casos,
aparece en la pantalla el símbolo de grabación <a>. Los
menúes solamente se pueden exhibir en ese momento; los
ajustes no se pueden cambiar.
41
AJUSTES DE IDIOMA/RELOJ
Este submenú le permite ajustar el idioma de las pantallas de menú, la fecha y hora que aparece en la pantalla todo el tiempo, y la hora de verano.
También incluye una función que le permite sincronizar los ajustes de hora cuando está conectado más de un dispositivo.
Nota: No será posible grabar si no se ha ajustado la hora.
Menú principal 1
Submenúes
<MENU PRINCIPAL 1>
1.AJUSTE IDIOMA/RELOJ
->
2.AJUSTE ENTRADA DE VIDEO
->
3.AJUSTE AREA DE GRABACION
->
4.AJUSTE COND.DE GRABACION
->
5.AJUSTE GRABACION NORMAL
->
6.AJUSTE TEMPORIZADOR
->
7.AJUSTE FASTIVOS
->
8.AJUSTE GRABACION DE ALARMA
->
AL MENU PRINCIPAL 2
->
CAMBIE DE LINEAS CON JOG, SELECCIONE CON SHUTTLE
<AJUSTE IDIOMA>
ESPAÑOL
<AJUSTE RELOJ>
01-01-2002 MAR 00:00:00
<AJUSTE HORA DE VERANO>
MODO :
USO
SEMANA
MES HORA
ON PRI-DOM 04 02:00
OFF ULT-DOM 10 02:00
<AJUSTE RELOJ EXTERNO>
AJUSTAR HORA
01:00
Ajusta el idioma.
Ajusta la fecha y hora.
Ajusta la hora de verano.
Sincroniza la hora para múltiples dispositivos.
Ajuste de idioma
Ajustes AJUSTE RELOJ
(ajuste por defecto: 01-01-2002 MAR 00:00:00)
Siempre debería ajustar correctamente la fecha y hora. Este
videograbador digital incluye la hora de grabación en las imágenes
grabadas, y usa esa hora para la reproducción y búsqueda.
Los menúes se pueden exhibir en uno de varios idiomas (inglés,
francés y español). El ajuste de idioma por defecto es inglés.
1
Presione el botón MENU para seleccionar AJUSTE
IDIOMA/RELOJ, y luego gire el dial de correr hacia la
derecha.
Aparece el submenú LANGUAGE/LANGUE/IDIOMA, y el cursor
se ha movido a “ENGLISH”.
MENU
2
Ejemplo: Para ajustar la fecha y hora a las 8.30 a.m. del 22 de
mayo de 2002
1
<LANGUAGE/LANGUE/IDIOMA>
ENGLISH
<CLOCK SET>
01-01-2002 TUE 00:00:00
<DAYLIGHT SAVING>
MODE :
USE
WEEK MONTH TIME
ON 1ST-SUN 04 02:00
OFF LST-SUN 10 02:00
<EXT.CLOCK SET>
ADJUST.TIME
01:00
Cuando el cursor esté en el ajuste de fecha y hora, gire el
dial de correr hacia la derecha.
“01” destella.
<AJUSTE IDIOMA>
ESPAÑOL
<AJUSTE RELOJ>
01-01-2002 MAR 00:00:00
<AJUSTE HORA DE VERANO>
MODO :
USO
SEMANA
MES HORA
ON PRI-DOM 04 02:00
OFF ULT-DOM 10 02:00
<AJUSTE RELOJ EXTERNO>
AJUSTAR HORA
01:00
Gire el dial de correr hacia la derecha.
“ENGLISH” destella.
2
<LANGUAGE/LANGUE/IDIOMA>
ENGLISH
<CLOCK SET>
01-01-2002 TUE 00:00:00
Gire el dial de trotar para seleccionar “ 05: mes” y luego gire
el dial de correr hacia la derecha.
El cursor se mueve hasta el ajuste de mes “01” y luego destella.
2
05-01-2002 MAR 00:00:00
1
3
Gire el dial de trotar para seleccionar el idioma (por ejemplo:
“ FRANÇAIS” ), y luego gire el dial de correr hacia la derecha.
El idioma cambia a francés y el cursor se mueve hasta la fecha y
hora.
2
1
3
<REGL.LANGUE>
FRANCAIS
<REGL.HORLOGE>
01-01-2002 MAR 00:00:00
<HEURE D’ETE>
MODE :
ARRET
SEMAIN MOIS HEURE
ON 1ER-DIM 04 02:00
OFF DER-DIM 10 02:00
<REGL.HORLOGE EXTERNE>
REGL.DE L’HEURE
01:00
Use el mismo procedimiento para ajustar el día (22), año
(2002), hora (08), minutos (30) y segundos.
Después de ajustar los segundos, el cursor se mueve al ajuste
AJUSTAR HORA para “AJUSTE RELOJ EXTERNO”, y el conteo
comienza desde cero segundos.
Nota: La hora se detiene durante el ajuste del reloj.
42
Español
AJUSTES DE IDIOMA/RELOJ
Ajuste AJUSTE HORA DE VERANO
Ajuste AJUSTE RELOJ EXTERNO
(Ajuste por defecto: USO)
Se puede usar para ajustar la fecha y hora de comienzo y la fecha y
hora de finalización de la hora de verano. Cuando se ajusta la hora de
verano, la hora avanza automáticamente una hora.
(ajuste por defecto: 01:00)
Si se conectan más de dos dispositivos a la misma vez, los ajustes de
la hora (AJUSTAR HORA) para el videograbador digital también serán
aplicados para otros dispositivos.
Ejemplo: Para comenzar la hora de verano a las 2.00 a.m. el
primer domingo de abril, y finalizarla a las 2.00 a.m. el
cuarto domingo de octubre
1
1
Cuando el cursor esté en el ajuste MODE, gire el dial de
correr hacia la derecha.
“USO” destella.
ALARM
C CLOCK
RE ADJUST
RESET
ON UT
ALARM ALARM N O
OUT
C IN
C IN OUT
<AJUSTE HORA DE VERANO>
MODO :
USO
SEMANA
MES HORA
ON PRI-DOM 04 02:00
OFF ULT-DOM 10 02:00
<AJUSTE RELOJ EXTERNO>
AJUSTAR HORA
01:00
2
3
6
PRI-DOM
04
2
04
02:00
3
02:00
2
02:00
4
Presione el botón EXIT/OSD.
La exhibición vuelve a la pantalla normal.
EXIT/OSD
<AJUSTE HORA DE VERANO>
MODO :
USO
SEMANA
MES HORA
ON ULT-DOM 04 02:00
OFF ULT-DOM 10 02:00
<AJUSTE RELOJ EXTERNO>
AJUSTAR HORA
01:00
5
Use el mismo procedimiento para ajustar la finalización de la
hora de verano.
El cursor se mueve hasta AJUSTAR HORA.
Español
<AJUSTE IDIOMA>
ESPAÑOL
<AJUSTE RELOJ>
01-01-2002 MAR 00:00:00
<AJUSTE HORA DE VERANO>
MODO :
USO
SEMANA
MES HORA
ON PRI-DOM 04 02:00
OFF ULT-DOM 10 02:00
<AJUSTE RELOJ EXTERNO>
AJUSTAR HORA
01:00
<AJUSTE RELOJ EXTERNO>
AJUSTAR HORA
05:00
Gire el dial de trotar hacia la derecha para seleccionar “ 04” y
luego gire el dial de correr hacia la derecha.
“02” (HORA) destella.
1
7
Gire el dial de trotar para ajustar las horas (ejemplo: “ 05” ), y
luego gire el dial de correr.
Gire el dial de trotar hacia la derecha para seleccionar
“ DOM” y luego gire el dial de correr hacia la derecha.
“04” (MES) destella.
2
FULL
Gire el dial de trotar para mover el cursor hasta el ajuste
AJUSTAR HORA, y luego gire el dial de correr.
“01” destella.
1
ULT-DOM
NG
NI
RM
AR UT ALA LL
W O
FU
2da unidad
Gire el dial de trotar hacia la derecha para seleccionar “ ULT”
y luego gire el dial de trotar.
“DOM” (SEMANA) destella.
ON
5
04
FULL
ALARM
C CLOCK
RE ADJUST
RESET
ON UT
ALARM ALARM N O
OUT
C IN
C IN OUT
Método de conexión CLOCK SET:
Conecte los terminales C (COMMON) del primer y segundo
videograbador digital, y luego conecte el terminal CLOCK
ADJUST OUT del primero al terminal CLOCK ADJUST IN del
segundo.
Gire el dial de correr hacia la derecha
El ajuste “ULT” (SEMANA) destella.
ON
4
PRI-DOM
NG
NI
RM
AR UT ALA LL
W O
FU
1ra unidad
Gire el dial de correr hacia la derecha.
El cursor se mueve hasta la línea de ingreso de la hora de inicio
(ON).
ON
Conecte los otros dispositivos al terminal de entrada
(CLOCK ADJUST IN) y al terminal de salida (CLOCK ADJUST
OUT) en la parte trasera del videograbador digital.
43
Use el mismo procedimiento para ajustar AJUSTAR HORA
para el segundo dispositivo.
Cuando se terminen los ajustes, la exhibición vuelve a la pantalla
normal.
AJUSTE DE ENTRADA DE VÍDEO
Si selecciona un multiplexor (vendido por separado) que está conectado al videograbador digital, puede ajustar el tipo de entrada de imagen (digital o
analógica).
Menú principal 1
Submenúes
<ENTRADA DE VIDEO>
MULTIPLEXOR
: NO USO
ENTRADA DE VIDEO : ANALOGICA
<MENU PRINCIPAL 1>
1.AJUSTE IDIOMA/RELOJ
->
2.AJUSTE ENTRADA DE VIDEO
->
3.AJUSTE AREA DE GRABACION
->
4.AJUSTE COND.DE GRABACION
->
5.AJUSTE GRABACION NORMAL
->
6.AJUSTE TEMPORIZADOR
->
7.AJUSTE FASTIVOS
->
8.AJUSTE GRABACION DE ALARMA
->
AL MENU PRINCIPAL 2
->
CAMBIE DE LINEAS CON JOG, SELECCIONE CON SHUTTLE
Ajusta el fabricante del multiplexor
conectado.
Ajusta la entrada de vídeo.
Ajuste MULTIPLEXOR
Ajuste ENTRADA DE VIDEO
(ajuste por defecto: NO USO)
1
(ajuste por defecto: ANALOGICA)
Ajusta si las señales de imagen que están ingresando por los
terminales de entrada de vídeo de este videograbador digital son
digitales o analógicas.
Presione el botón MENU para seleccionar VIDEO INPUT SET,
y luego gire el dial de correr hacia la derecha.
Aparece el submenú AJUSTE ENTRADA DE VIDEO, y el cursor
se mueve al ajuste MULTIPLEXOR.
1
<ENTRADA DE VIDEO>
MULTIPLEXOR
: NO USO
ENTRADA DE VIDEO : ANALOGICA
MENU
Cuando el cursor esté en el ajuste ENTRADA DE VIDEO, gire
el dial de correr hacia la derecha.
“ANALOGICA” destella.
<ENTRADA DE VIDEO>
MULTIPLEXOR
: SANYO
ENTRADA DE VIDEO : ANALOGICA
2
Gire el dial de correr hacia la derecha.
“NO USO” destella.
2
<ENTRADA DE VIDEO>
MULTIPLEXOR
: NO USO
ENTRADA DE VIDEO : ANALOGICA
3
Gire el dial de trotar para seleccionar el ajuste
MULTIPLEXOR (por ejemplo: “ SANYO” ), y luego gire el dial
de correr hacia la derecha.
Ejemplos de exhibición:
• NO USO: Cuando no utilice un multiplexor
• SANYO: Cuando utilice un multiplexor Sanyo
• OTROS1: Cuando utilice un multiplexor Sony
• OTROS2: Cuando use un Robot o multiplexor DM
El cursor se mueve hasta ENTRADA DE VIDEO.
2
Gire el dial de trotar para seleccionar “ DIGITAL ejemplo” y
luego gire el dial de correr.
El cursor se mueve hasta MULTIPLEXOR.
Nota:
• Seleccione esto si un multiplexor de transporte digital Sanyo
(MPX-CD163P o CD93P) ha sido conectado digitalmente.
• Al realizar una conexión digital y una de multiplexor, primero
conecte el conector VIDEO OUT de esta unidad al monitor, y
luego ajuste la señal de entrada a “DIGITAL”.
2
<ENTRADA DE VIDEO>
MULTIPLEXOR
: SANYO
ENTRADA DE VIDEO : DIGITAL
1
3
<ENTRADA DE VIDEO>
MULTIPLEXOR
: SANYO
ENTRADA DE VIDEO : ANALOGICA
Presione el botón EXIT/OSD.
La exhibición vuelve a la pantalla normal.
EXIT/OSD
1
Nota:
• Si MULTIPLEXOR se ajusta a algo diferente a “NO USO”, no se
puede seleccionar SENSOR como disparador de alarma (DISPARO
DE ALARMA) en el menú AJUSTE GRABACION DE ALARMA.
Cuando use un multiplexor, use la función de sensor de
movimiento del multiplexor.
• Si usa un multiplexor fabricado por SANYO o algún otro fabricante
en el modo de conexión analógico, conecte el terminal SW OUT en
la parte de atrás de esta unidad al terminal SW IN del multiplexor.
Esto no es necesario si se usa un multiplexor SANYO en el modo
de conexión digital.
Nota: Los multiplexores especificados por SANYO y OTROS1 son
capaces de decodificar información de canal. Por lo tanto,
puede grabar imágenes desde estos multiplexores usando este
videograbador digital, y luego usar el botón CHANNEL del
videograbador digital para seleccionar un número de cámara
(información de canal) que desee reproducir.
44
Español
AJUSTE DE ÁREA DE GRABACIÓN
Menú principal 1
Submenúes
<MENU PRINCIPAL 1>
1.AJUSTE IDIOMA/RELOJ
->
2.AJUSTE ENTRADA DE VIDEO
->
3.AJUSTE AREA DE GRABACION
->
4.AJUSTE COND.DE GRABACION
->
5.AJUSTE GRABACION NORMAL
->
6.AJUSTE TEMPORIZADOR
->
7.AJUSTE FASTIVOS
->
8.AJUSTE GRABACION DE ALARMA
->
AL MENU PRINCIPAL 2
->
CAMBIE DE LINEAS CON JOG, SELECCIONE CON SHUTTLE
Exhibe la capacidad
total del disco duro.
<AJUSTE AREA DE GRABACION>
CAPACIDAD TOTAL
: 80GB
AREA DE GRABACION NORMAL
: 80 %
REPOSICION DE AREA ->
AREA DE GRABACION DE ALARMA
: 19 %
REPOSICION DE AREA ->
AREA DE ARCHIVO
: 1%
REPOSICION DE AREA ->
Ajusta la capacidad del área de
grabación normal.
Área de
grabación
normal
CUIDADO : CUANDO SE CAMBIA EL AJUSTE.
TODA EL AREA SERA INICIALIZADA !
Ajusta la capacidad del área de archivo.
Ajusta la capacidad del área de
grabación de alarma.
Área de
grabación
de alarma
Área de
archivo
Exhibición CAPACIDAD TOTAL
Reposición de cada área de grabación
Exhibe la capacidad total de grabación del disco duro. Esta exhibición
no se puede cambiar excepto cuando se cambia la capacidad misma
del disco duro.
Con el ajuste del disco duro, el área de grabación normal se lleva el
80%, el área de grabación de alarma se lleva el 19% y el área de
archivo se lleva el 1% de la capacidad del disco. El límite superior es
de 10 GB (12,5% de la capacidad total cuando utiliza un disco duro de
80 GB, 6,25% de la capacidad total cuando utiliza un disco duro de
160 GB), por lo tanto no se puede ajustar un valor mayor a ese.
La asignación de espacio a cada área de grabación se exhibe como
un porcentaje del total. El área de grabación normal y el área de
grabación de alarma juntas se pueden ajustar a un máximo de 99%
del espacio total.
El área de archivo no se puede ajustar manualmente. Está asignado a
la fuerza un mínimo del 1%. Por lo tanto, si el área de grabación
normal y el área de grabación de alarma se ajustan a un total de 85%,
el área de archivo automáticamente se ajustará al 15%.
Por ejemplo, si el área de grabación normal se ajusta a 0% y el área
de grabación de alarma se ajusta a 99%, las imágenes de grabación
normal no se grabarán en el disco duro. Solamente se grabarán
imágenes de grabación de alarma. La capacidad de grabación de
cada área de grabación se debería asignar de acuerdo a los requisitos
del lugar de grabación particular.
Si se agrega un disco duro adicional, el aumento de capacidad se
incluirá en la exhibición CAPACIDAD TOTAL.
Ejemplo: Ajuste el área de grabación normal a 50% y el área de
grabación de alarma a 49%
1
MENU
2
3
4
Nota:
• Si cambia la asignación de espacio a cada área de grabación del
disco duro mientras la grabación está en progreso, las imágenes
que han sido grabadas hasta ese punto serán borradas. Esto es
así porque el disco duro mismo es inicializado durante esta
operación, por tanto tenga mucho cuidado cuando realice esta
clase de ajuste. Si debe cambiar los tamaños de las áreas de
grabación por alguna razón, asegúrese de realizar una copia de
respaldo de las imágenes en algún otro medio tal como un
ordenador.
• Cuando ESPEJO del ajuste AJUSTE HDD ha sido ajustado a
“ON”, la exhibición CAPACIDAD TOTAL de AJUSTE AREA DE
GRABACION muestra un valor inferior de capacidad de disco duro.
Español
Presione el botón MENU para seleccionar AJUSTE AREA DE
GRABACION, y luego gire el dial de correr hacia la derecha.
Aparece el submenú AJUSTE AREA DE GRABACION, y el
cursor se mueve hasta AREA DE GRABACION NORMAL.
5
Use el dial de trotar para mover el cursor hasta el ajuste
AREA DE GRABACION NORMAL y luego gire el dial de
correr hacia la derecha.
“80%” destella.
Use el dial de trotar para cambiar el ajuste, por ejemplo de
“ 80%” a “ 50%” , y luego gire el dial de correr hacia la derecha.
El cursor se mueve hasta AREA DE GRABACION DE ALARMA.
Gire el dial de correr hacia la derecha.
“35%” destella.
Gire el dial de trotar para cambiar el ajuste, por ejemplo de
34% a 49%, y luego gire el dial de correr hacia la derecha.
El cursor se mueve hasta REPOSICION DE AREA.
<AJUSTE AREA DE GRABACION>
CAPACIDAD TOTAL
: 80GB
AREA DE GRABACION NORMAL
: 49 %
REPOSICION DE AREA ->
AREA DE GRABACION DE ALARMA
: 40 %
REPOSICION DE AREA ->
AREA DE ARCHIVO
: 2%
REPOSICION DE AREA ->
CUIDADO : CUANDO SE CAMBIA EL AJUSTE.
TODA EL AREA SERA INICIALIZADA !
45
AJUSTE DE ÁREA DE GRABACIÓN
6
2
Gire el dial de correr hacia la izquierda.
La pantalla cambia para mostrar una exhibición de advertencia
“ADVERTENCIA”. Este mensaje es para advertirle que el disco
duro está por ser reinicializado.
Use el dial de trotar para mover el cursor hasta REPOSICION
DE AREA → ajuste para AREA DE GRABACION NORMAL, y
luego gire el dial de correr hacia la derecha.
“NO” destella en la pantalla ADVERTENCIA.
<ADVERTENCIA>
<AJUSTE AREA DE GRABACION>
CAPACIDAD TOTAL
: 80GB
AREA DE GRABACION NORMAL
: 80 %
REPOSICION DE AREA ->
AREA DE GRABACION DE ALARMA
: 19 %
REPOSICION DE AREA ->
AREA DE ARCHIVO
: 1%
REPOSICION DE AREA ->
ESTE CAMBIO INICIALIZARA EL DISCO.
TODAS LAS GRABACIONES SERAN BORRADAS.
ESTA SEGURO ?
NO
CUIDADO : CUANDO SE CAMBIA EL AJUSTE.
TODA EL AREA SERA INICIALIZADA !
CAMBIE CON JOG. AJUSTE CON SHUTTLE
7
Para reinicializar el disco duro, gire el dial de trotar hasta
exhibir “ SI” , y luego gire el dial de correr hacia la derecha.
Aparece la pantalla AJUSTE AREA DE GRABACION y se
cambian las capacidades de grabación de cada área.
<ADVERTENCIA>
REPOSICION DE AREA
AREA DE GRABACION NORMAL
ESTA SEGURO ?
<ADVERTENCIA>
NO
ESTE CAMBIO INICIALIZARA EL DISCO.
TODAS LAS GRABACIONES SERAN BORRADAS.
ESTA SEGURO ?
CAMBIE CON JOG. AJUSTE CON SHUTTLE
SI
3
CAMBIE CON JOG. AJUSTE CON SHUTTLE
Nota: Si gira el dial de correr hacia la derecha cuando está
seleccionado “NO”, aparece la pantalla AJUSTE AREA DE
GRABACION y las capacidades de grabación vuelven a sus
ajustes previos. El disco duro no se reinicializa en este caso.
Use el dial de trotar para cambiar “ NO” a “ SI” , y luego gire el
dial de correr hacia la derecha.
AREA DE GRABACION NORMAL se ajusta a sobreescritura
simple.
Ajuste REPOSICION DE AREA
Cuando las áreas de grabación normal y de grabación de alarma del
disco duro se llenan, las imágenes en las áreas de grabación se
sobreescribirán automáticamente, comenzando desde las más
antiguas que han sido grabadas.
Sin embargo, puede cambiar este ajuste para evitar la sobreescritura
de imágenes cuando se llenan las áreas de grabación, en momentos
tales como cuando desea verificar o editar las imágenes grabadas. En
este caso debe especificar cada vez que desea que las imágenes
sean sobreescritas en cada área de grabación. El siguiente
procedimiento describe el método para realizar esto.
1
4
5
Presione el botón EXIT/OSD.
La exhibición vuelve a la pantalla normal.
EXIT/OSD
Ajuste SOBREESCRIBIR a “ OFF” para AREA DE
GRABACION NORMAL o AREA DE GRABACION DE
ALARMA en el menú AJUSTE COND. DE GRABACION.
Nota:
• Para que la sobreescritura se realice automáticamente, cambie el
ajuste de SOBREESCRIBIR para AREA DE GRABACION
NORMAL o AREA DE GRABACION DE ALARMA a “ON”.
• Si se lleva a cabo el REPOSICION DE AREA, el área de grabación
normal, el área de grabación de alarma y el área de archivo serán
todas inicializadas, y en adelante no será posible reproducir
ninguna imagen que ya haya sido grabada.
<AJUSTE COND. DE GRABACION>
GRABACION EN SERIE DIGITAL : OFF
NUMERO TOTAL
: ¤¤
NUMERO DE GRABADOR
: ¤¤
AREA DE GRABACION NORMAL
SOBREESCRIBIR
: ON
AREA DE GRABACION DE ALARMA
SOBREESCRIBIR
: ON
AVISO DE DISCO RESTANTE
Siga el mismo procedimiento para realizar el ajuste para
AREA DE GRABACION DE ALARMA.
: ¤¤
Este ajuste se puede usar para exhibir en la pantalla el área de
grabación restante del disco duro. Al mismo tiempo, el indicador
frontal del videograbador digital FULL o ALARM FULL destellará.
Cuando se completa la escritura en el disco duro, puede usar
funciones de reproducción para verificar las grabaciones.
46
Español
AJUSTE DE LAS CONDICIONES DE
GRABACIÓN
Le permite realizar ajustes y ajustar permisos de sobreescritura para cada área de grabación cuando están conectados múltiples videograbadores
digitales (hasta un máximo de tres) para grabación en serie.
Menú principal 1
Submenúes
Ajusta la grabación en serie.
<AJUSTE COND. DE GRABACION>
GRABACION EN SERIE DIGITAL : OFF
NUMERO TOTAL
: ¤¤
NUMERO DE GRABADOR
: ¤¤
<MENU PRINCIPAL 1>
1.AJUSTE IDIOMA/RELOJ
->
2.AJUSTE ENTRADA DE VIDEO
->
3.AJUSTE AREA DE GRABACION
->
4.AJUSTE COND.DE GRABACION
->
5.AJUSTE GRABACION NORMAL
->
6.AJUSTE TEMPORIZADOR
->
7.AJUSTE FASTIVOS
->
8.AJUSTE GRABACION DE ALARMA
->
AL MENU PRINCIPAL 2
->
CAMBIE DE LINEAS CON JOG, SELECCIONE CON SHUTTLE
Ajusta el número de videograbadores
digitales conectados.
Ajusta los números para cada
videograbador digital duro.
AREA DE GRABACION NORMAL
SOBREESCRIBIR
: ON
AREA DE GRABACION DE ALARMA
SOBREESCRIBIR
: ON
AVISO DE DISCO RESTANTE
Ajusta la sobreescritura para el área de
grabación normal.
: ¤¤
Ajusta la sobreescritura para el área de
grabación de alarma.
Ajusta la advertencia de espacio restante
para las áreas de grabación.
Grabación de ajustes para la conexión en
serie digital (máximo 3 unidades)
1
4
Conecte los videograbadores digitales usando los
terminales de entrada y salida digitales de cada
videograbador digital. (Consulte la página 8.)
<AJUSTE COND. DE GRABACION>
GRABACION EN SERIE DIGITAL : ON
NUMERO TOTAL
: 2
NUMERO DE GRABADOR
: 1
Nota:
• Use un cable Ethernet de tipo recto para conectar los
videograbadores digitales. Cada cable no debería tener más de
tres metros.
• Si está usando la entrada de alarma, introduzca la misma señal de
alarma a todos los videograbadores digitales.
2
5
Presione el botón MENU para seleccionar AJUSTE COND.
DE GRABACION y luego gire el dial de correr hacia la
derecha.
Aparece el submenú AJUSTE COND. DE GRABACION y el
cursor se mueve hasta GRABACION EN SERIE DIGITAL.
MENU
6
AREA DE GRABACION NORMAL
SOBREESCRIBIR
: ON
AREA DE GRABACION DE ALARMA
SOBREESCRIBIR
: ON
3
: ¤¤
Gire el dial de correr hacia la derecha, use el dial de trotar
para ajustar el número de conexión (por ejemplo: 1), y luego
gire el dial de correr hacia la derecha.
El cursor se mueve hasta SOBREESCRIBIR.
Nota:
• El videograbador digital que se usa como unidad principal siempre
debería tener ajustado como número de corrección el 1.
• No saltee ni superponga números cuando realice los ajustes.
• Si CONTROL DE RED en el menú AJUSTE RED ha sido ajustado
a “ON”, no se puede seleccionar GRABACION EN SERIE
DIGITAL. A la inversa, si GRABACION EN SERIE DIGITAL ha sido
ajustado a “ON”, CONTROL DE RED no se puede ajustar a “ON”.
• El VIDEO INPUT SET para VIDEO INPUT del segundo y
subsiguiente videograbador digital debe estar ajustado a DIGITAL.
Gire el dial de correr hacia la derecha.
“OFF” destella.
<AJUSTE COND. DE GRABACION>
GRABACION EN SERIE DIGITAL : OFF
NUMERO TOTAL
: ¤¤
NUMERO DE GRABADOR
: ¤¤
Español
Gire el dial de correr hacia la derecha, use el dial de trotar
para ajustar el número total de videograbadores digitales
conectados (ejemplo: 3), y luego gire el dial de correr hacia
la derecha.
El cursor se mueve hasta NUMERO DE GRABADOR.
<AJUSTE COND. DE GRABACION>
GRABACION EN SERIE DIGITAL : ON
NUMERO TOTAL
: 3
NUMERO DE GRABADOR
: 1
<AJUSTE COND. DE GRABACION>
GRABACION EN SERIE DIGITAL : OFF
NUMERO TOTAL
: ¤¤
NUMERO DE GRABADOR
: ¤¤
AVISO DE DISCO RESTANTE
Use el dial de trotar para cambiar el ajuste a “ ON” , y luego
gire el dial de correr hacia la derecha.
El cursor se mueve hasta NUMERO TOTAL.
47
AJUSTE DE LAS CONDICIONES DE GRABACIÓN
Ajuste NORMAL RECORDING AREA
OVERWRITE y AVISO DE DISCO
RESTANTE en la sección de exhibición
de funcionamiento
4
Cuando se llenan las áreas de grabación del disco duro, puede ajustar
si se deben sobreescribir las imágenes antiguas, o si se debe detener
la grabación. Si se ajusta la detención de grabación, el porcentaje
actual de espacio libre restante en el disco duro aparecerá en la
sección de exhibición de funcionamiento. Puede usar [AVISO DE
DISCO RESTANTE] para especificar la cantidad de espacio libre
restante.
1
Nota: El ajuste AVISO DE DISCO RESTANTE puede estar entre 1%
(ajuste por defecto) y 10%.
1
AREA DE GRABACION NORMAL
SOBREESCRIBIR
: OFF
AREA DE GRABACION DE ALARMA
SOBREESCRIBIR
: OFF
Cuando el cursor esté en el ajuste SOBREESCRIBIR, gire el
dial de correr hacia la derecha.
“ON” destella.
AVISO DE DISCO RESTANTE
5
AREA DE GRABACION NORMAL
SOBREESCRIBIR
: ON
AREA DE GRABACION DE ALARMA
SOBREESCRIBIR
: ON
AVISO DE DISCO RESTANTE
: ¤¤
POWER
FULL
FULL
ALARM FULL
LOCK
ALARM FULL
5%
01-01-01
00:00:00 ME 0.10SEG
AREA DE GRABACION NORMAL
SOBREESCRIBIR
: OFF
AREA DE GRABACION DE ALARMA
SOBREESCRIBIR
: ON
:
5%
EXIT/OSD
Use el dial de trotar para seleccionar el ajuste (ejemplo:
OFF), y luego gire el dial de correr hacia la derecha.
AVISO DE DISCO RESTANTE cambia de ** a 1%.
Ejemplos de exhibición:
• OFF: Cuando se llena el área de grabación normal, la
grabación se detiene.
• ON: Cuando se llena el área de grabación normal, las
imágenes se sobreescriben automáticamente
comenzando por las imágenes que se grabaron primero.
AVISO DE DISCO RESTANTE
:
Presione el botón EXIT/OSD.
La exhibición vuelve a la pantalla normal.
Cuando el espacio restante en disco en cada área llega al 5%, se
exhibe en la sección de exhibición de funcionamiento. Destella el
indicador FULL (para el área de grabación normal) o ALARM
FULL (para el área de grabación de alarma) en la parte delantera
FULL
ALARM FULL
FULL
ALARM FULL
del videograbador digital.
<AJUSTE COND. DE GRABACION>
GRABACION EN SERIE DIGITAL : OFF
NUMERO TOTAL
: ¤¤
NUMERO DE GRABADOR
: ¤¤
Relación entre AJUSTE AREA DE GRABACION
y SOBREESCRIBIR
FULL
ALARM FULL
1%
<AJUSTE AREA DE GRABACION>
CAPACIDAD TOTAL
: 80GB
AREA DE GRABACION NORMAL
: 80 %
REPOSICION DE AREA ->
AREA DE GRABACION DE ALARMA
: 19 %
REPOSICION DE AREA ->
AREA DE ARCHIVO
: 1%
REPOSICION DE AREA ->
Nota: Si se selecciona “OFF”, el ajuste AVISO DE DISCO
RESTANTE exhibe el porcentaje de espacio del disco duro que
provocará que el indicador FULL o ALARM FULL comience a
destellar.
3
<AJUSTE COND. DE GRABACION>
GRABACION EN SERIE DIGITAL : OFF
NUMERO TOTAL
: ¤¤
NUMERO DE GRABADOR
: ¤¤
2
<AJUSTE COND. DE GRABACION>
GRABACION EN SERIE DIGITAL : OFF
NUMERO TOTAL
: ¤¤
NUMERO DE GRABADOR
: ¤¤
2
Cuando el cursor esté sobre el ajuste AVISO DE DISCO
RESTANTE, gire el dial de correr hacia la derecha y luego
use el dial de trotar para ajustar el valor de exhibición que
corresponde a la cantidad restante de espacio en disco
(ejemplo: “ 5” ).
CUIDADO : CUANDO SE CAMBIA EL AJUSTE.
TODA EL AREA SERA INICIALIZADA !
Siga el mismo procedimiento para realizar el ajuste (OFF)
para AREA DE GRABACION DE ALARMA.
<AJUSTE COND. DE GRABACION>
GRABACION EN SERIE DIGITAL : OFF
NUMERO TOTAL
: ¤¤
NUMERO DE GRABADOR
: ¤¤
AREA DE GRABACION NORMAL
SOBREESCRIBIR
: ON
AREA DE GRABACION DE ALARMA
SOBREESCRIBIR
: ON
AVISO DE DISCO RESTANTE
: ¤¤
Si el área de grabación normal y el área de grabación de alarma se
llenan, seleccione REPOSICION DE AREA para el área de grabación
normal o el área de grabación de alarma en el menú AJUSTE AREA
DE GRABACION. (Consulte la página 46.)
Nota: Realice los ajustes separadamente para cada ítem en el menú,
incluso si se realiza una conexión digital. Los ajustes
SOBREESCRIBIR para la segunda unidad y las subsiguientes
deben estar de acuerdo con el ajuste para la primera unidad.
Nota: No hay entrada de audio desde los terminales de entrada de
vídeo digital. Las señales de audio pueden entrar como señales
analógicas a través de terminales de entrada de audio (como el
terminal MIC). Para detalles sobre CONEXIONES, consulte la
página 8.
48
Español
AJUSTE DE MODO DE GRABACIÓN NORMAL
Menú principal 1
Submenúes
Ajusta la calidad de imagen.
<AJUSTE GRABACION NORMAL>
CALIDAD DE IMAGEN
: MEDIA
GRABACION CUADRO/CAMPO : CAMPO
GRABACION DE AUDIO
: OFF
CICLO DE GRAB. : 0.10SEG ( 54H)
<MENU PRINCIPAL 1>
1.AJUSTE IDIOMA/RELOJ
->
2.AJUSTE ENTRADA DE VIDEO
->
3.AJUSTE AREA DE GRABACION
->
4.AJUSTE COND.DE GRABACION
->
5.AJUSTE GRABACION NORMAL
->
6.AJUSTE TEMPORIZADOR
->
7.AJUSTE FASTIVOS
->
8.AJUSTE GRABACION DE ALARMA
->
AL MENU PRINCIPAL 2
->
CAMBIE DE LINEAS CON JOG, SELECCIONE CON SHUTTLE
Ajusta la grabación de audio.
Ajusta la tasa de grabación
(velocidad de grabación).
Los números entre paréntesis indican los
tiempos de grabación posibles.
Ajuste AJUSTE GRABACION NORMAL
5
Le permite ajustar la calidad de grabación, el método de grabación
(cuadros o campos), la grabación de audio y la velocidad de grabación
del área de grabación normal.
1
<AJUSTE GRABACION NORMAL>
CALIDAD DE IMAGEN
: SUPER ALTA
GRABACION CUADRO/CAMPO : CUADRO
GRABACION DE AUDIO
: ON
CICLO DE GRAB. : A0.20SEG ( 108H)
Nota:
• La grabación de audio puede ser ajustada cuando el ajuste CICLO
DE GRAB. se encuentra entre 0,02 y 0,10 (CAMPO) o 0,03 y 0,20
(CUADRO).
• Cuando se ajusta a “ON”, la letra “A” (indicador de grabación de
audio) aparece en frente de la velocidad de grabación CICLO DE
GRAB. Esto es así porque las grabaciones de audio también se
realizan en el área de grabación normal, por lo tanto se reduce la
capacidad de grabación de imágenes del área de grabación
normal.
<AJUSTE GRABACION NORMAL>
CALIDAD DE IMAGEN
: MEDIA
GRABACION CUADRO/CAMPO : CAMPO
GRABACION DE AUDIO
: OFF
CICLO DE GRAB. : 0.10SEG ( 54H)
Gire el dial de correr hacia la derecha.
“MEDIA” destella.
<AJUSTE GRABACION NORMAL>
CALIDAD DE IMAGEN
: MEDIA
GRABACION CUADRO/CAMPO : CAMPO
GRABACION DE AUDIO
: OFF
CICLO DE GRAB. : 0.10SEG ( 54H)
6
Ejemplos de exhibición: Selección de la calidad de la imagen
• BASICA (BA): (15 KB)
• NORMAL (NO): (22 KB)
• MEDIA (ME): (30 KB)
• ALTA (AL): (42 KB)
• SUPER ALTA (SA): (56 KB)
3
<AJUSTE GRABACION NORMAL>
CALIDAD DE IMAGEN
: SUPER ALTA
GRABACION CUADRO/CAMPO : CUADRO
GRABACION DE AUDIO
: ON
CICLO DE GRAB. : A0.13SEG ( 72H)
Use el dial de trotar para cambiar la calidad de la imagen
(ejemplo: “ SUPER ALTA” ), y luego gire el dial de correr
hacia la derecha.
El cursor se mueve hasta GRABACION CUADRO/CAMPO.
7
Presione el botón EXIT/OSD.
La exhibición vuelve a la pantalla normal.
EXIT/OSD
Gire el dial de correr hacia la derecha, use el dial de trotar
para ajustar la grabación de cuadros o campos (ejemplo:
CUADRO), y luego gire el dial de correr hacia la derecha.
El cursor se mueve hasta GRABACION DE AUDIO.
<AJUSTE GRABACION NORMAL>
CALIDAD DE IMAGEN
: SUPER ALTA
GRABACION CUADRO/CAMPO : CUADRO
GRABACION DE AUDIO
: OFF
CICLO DE GRAB. : 0.20SEG ( 108H)
Español
Gire el dial de correr hacia la derecha, use el dial de trotar
para ajustar la velocidad de grabación (ejemplo: “ 0.13” ), y
luego gire el dial de correr.
El cursor se mueve hasta CALIDAD DE IMAGEN.
Nota: Las velocidades de grabación de campos y cuadros varían
dependiendo del ajuste CALIDAD DE IMAGEN. Consulte el
cuadro de velocidades de grabación para obtener detalles.
(Consulte la página 11.)
<AJUSTE GRABACION NORMAL>
CALIDAD DE IMAGEN
: SUPER ALTA
GRABACION CUADRO/CAMPO : CAMPO
GRABACION DE AUDIO
: OFF
CICLO DE GRAB. : 0.20SEG ( 108H)
4
Gire el dial de correr hacia la derecha, use el dial de trotar
para ajustar la grabación de audio (ejemplo: “ ON” ), y luego
gire el dial de correr.
El cursor se mueve hasta CICLO DE GRAB.
Presione el botón MENU para seleccionar AJUSTE
GRABACION NORMAL, y luego gire el dial de correr hacia la
derecha.
Aparece el submenú AJUSTE GRABACION NORMAL, y el
cursor se mueve al ajuste CALIDAD DE IMAGEN.
MENU
2
Ajusta el método de grabación
(cuadros o campos).
49
AJUSTE DEL TEMPORIZADOR
Use la función de temporizador del videograbador digital para ajustar los tiempos de grabación del temporizador.
Menú principal 1
<MENU PRINCIPAL 1>
1.AJUSTE IDIOMA/RELOJ
->
2.AJUSTE ENTRADA DE VIDEO
->
3.AJUSTE AREA DE GRABACION
->
4.AJUSTE COND.DE GRABACION
->
5.AJUSTE GRABACION NORMAL
->
6.AJUSTE TEMPORIZADOR
->
7.AJUSTE FASTIVOS
->
8.AJUSTE GRABACION DE ALARMA
->
AL MENU PRINCIPAL 2
->
CAMBIE DE LINEAS CON JOG, SELECCIONE CON SHUTTLE
3
2
1
6
Submenúes
SEM
DOM
LUN
MAR
MIE
JUE
VIE
SAB
TODOS
<AJUSTE TEMPORIZADOR>
INICIO PARO CICLO DE GRAB.
--:-- --:-- 0.10SEG ( 54H)
--:-- --:-- 0.10SEG ( 54H)
--:-- --:-- 0.10SEG ( 54H)
--:-- --:-- 0.10SEG ( 54H)
--:-- --:-- 0.10SEG ( 54H)
--:-- --:-- 0.10SEG ( 54H)
--:-- --:-- 0.10SEG ( 54H)
--:-- --:-- 0.10SEG ( 54H)
4
5
USO
OFF
OFF
OFF
OFF
OFF
OFF
OFF
OFF
Ajuste AJUSTE TEMPORIZADOR
Ajusta el temporizador.
El temporizador se debe ajustar cuando se
realiza una grabación de temporizador.
Reservas de temporizador cada día a la
misma hora con la misma calidad de
imagen
Ajusta la hora de comienzo y la hora de detención para cada día, y
también ajusta la velocidad de grabación.
1 SEM
Ejemplo: Grabación con temporizador cada día desde las 8:30
a.m. hasta las 6:30 p.m. con la misma velocidad de
grabación
Selecciona el día para el ajuste del temporizador. Mientras está
destellando un día se puede seleccionar otro día. La séptima línea
(SAB) y la octava línea (TODOS) se usan para ajustar una
grabación de temporizador por un periodo de más de 24 horas.
1
2 INICIO
Se usa para ingresar la hora de comienzo de la grabación de
temporizador.
3 PARO
Se usa para ingresar la hora de detención de la grabación de
temporizador.
Presione el botón MENU para seleccionar AJUSTE
TEMPORIZADOR, y luego gire el dial de correr hacia la
derecha.
Aparece el submenú AJUSTE TEMPORIZADOR, y el cursor se
mueve al ajuste DOM.
MENU
SEM
DOM
LUN
MAR
MIE
JUE
VIE
SAB
TODOS
4 CICLO DE GRAB.
•
•
Ajusta la velocidad de grabación.
El ajuste inicial sirve para la grabación de CAMPO (0.10SEG)
(segundos). Si el ajuste se cambia a grabación de cuadros, la
velocidad de grabación pasa a ser 0.20SEG (segundos).
Los números entre paréntesis rectos son el resultado del
cálculo automático del tiempo disponible basado en los ajustes
de método de grabación, calidad de imagen y grabación de
audio. El valor máximo que se puede exhibir es 9999H. Si el
tiempo disponible es de 10000H o más, la exhibición aparece
como 9999 .
5 USO
2
<AJUSTE TEMPORIZADOR>
INICIO PARO CICLO DE GRAB.
--:-- --:-- 0.10SEG ( 54H)
--:-- --:-- 0.10SEG ( 54H)
--:-- --:-- 0.10SEG ( 54H)
--:-- --:-- 0.10SEG ( 54H)
--:-- --:-- 0.10SEG ( 54H)
--:-- --:-- 0.10SEG ( 54H)
--:-- --:-- 0.10SEG ( 54H)
--:-- --:-- 0.10SEG ( 54H)
USO
OFF
OFF
OFF
OFF
OFF
OFF
OFF
OFF
Gire el dial de correr hacia la derecha.
“DOM” destella en la columna SEM.
*
Ajuste a “ON” cuando utilice la grabación de temporizador.
Ajuste a “OFF” cuando no utilice la grabación de temporizador.
6 Para ajustar una grabación de temporizador de más de 24
horas.
Use esta línea para una grabación de temporizador de más de 24
horas.
DON
3
Nota: Los ajustes de calidad de imagen, grabación de
campos/cuadros y de grabación de audio para la grabación
con temporizador serán los ajustes usados para la
grabación en el área de grabación normal.
--:-- --:--
Use el dial de trotar para cambiar de “ DOM” a “ TODOS” y
luego gire el dial de correr.
“– – ” (horas) destella en la columna INICIO.
TODOS --:-- --:--
50
0.10SEG ( 54H) OFF
0.10SEG ( 54H) OFF
Español
AJUSTE DEL TEMPORIZADOR
4
10 Presione el botón EXIT/OSD.
Use el dial de trotar para cambiar “– –” a “ 08” , y luego gire el
dial de correr hacia la derecha.
“– – ” (minutos) destella en la columna INICIO.
La exhibición vuelve a la pantalla normal.
EXIT/OSD
TODOS 08:-- --:--
5
R
EA
CL
0.10SEG ( 54H) OFF
Use el dial de trotar para ajustar la velocidad de grabación a
“ 0.13” (72H), y luego gire el dial de correr hacia la derecha.
“OFF” destella en la columna USO.
TODOS 08:30 18:30
0.13SEG ( 72H) OFF
Nota: La calidad de la imagen de grabación del temporizador será la
calidad de imagen que fue ajustada en CALIDAD DE IMAGEN
en el submenú AJUSTE GRABACION NORMAL.
Ejemplo: La grabación será SUPER ALTA. Entonces la
velocidad de grabación será la misma previamente ajustada.
9
Use el dial de trotar para cambiar “ OFF” a “ ON” , y luego gire
el dial de correr hacia la derecha.
El cursor se mueve hasta LUN.
SEM
DOM
LUN
MAR
MIE
JUE
VIE
SAB
TODOS
Español
<AJUSTE TEMPORIZADOR>
INICIO PARO CICLO DE GRAB.
08:30 18:30 0.13SEG ( 72H)
--:-- --:-- 0.10SEG ( 54H)
--:-- --:-- 0.10SEG ( 54H)
--:-- --:-- 0.10SEG ( 54H)
--:-- --:-- 0.10SEG ( 54H)
--:-- --:-- 0.10SEG ( 54H)
--:-- --:-- 0.10SEG ( 54H)
--:-- --:-- 0.10SEG ( 54H)
SHUTTLE
JOG
EN
TE
R
MENU
RESET
0.10SEG ( 54H) OFF
Use el dial de trotar para cambiar “– –” a “ 30” , y luego gire el
dial de correr hacia la derecha.
“0.10” (velocidad de grabación) destella en la columna CICLO DE
GRAB..
TODOS 08:30 18:30
8
0.10SEG ( 54H) OFF
Use el dial de trotar para cambiar “– –” a “ 18” , y luego gire el
dial de correr hacia la derecha.
“– – ” (minutos) destella en la columna PARO.
TODOS 08:30 18:--
7
0.10SEG ( 54H) OFF
Use el dial de trotar para cambiar “– –” a “ 30” , y luego gire el
dial de correr hacia la derecha.
“– – ” (horas) destella en la columna PARO (detención).
TODOS 08:30 --:--
6
Nota:
• Si desea usar diferentes días, horas, y velocidades de grabación
para la grabación de temporizador, seleccione la columna SEM
respectiva y realice los ajustes necesarios.
• Si las reservas de temporizador se superponen unas con las otras,
aquella que comience primero tendrá prioridad.
• Para borrar todas las reservas de temporizador (incluyendo los
ajustes de hora) presione el botón MENU RESET en el panel
delantero.
USO
ON
OFF
OFF
OFF
OFF
OFF
OFF
OFF
51
AJUSTE DEL TEMPORIZADOR
Reservas de temporizador que abarquen
más de 24 horas
6
Para realizar reservas de temporizador de 24 horas, use las líneas 7
(SAB) y 8 (TODOS) de la pantalla de menú.
Ejemplo: Para ajustar la grabación de temporizador desde las
10.30 a.m. del lunes hasta las 8.30 p.m. del miércoles.
1
MIE ¤¤:¤¤ --:--
Use el dial de trotar para mover el cursor hasta la séptima
línea (SAB), y luego gire el dial de correr.
“SAB” destella en la columna SEM.
SEM
DOM
LUN
MAR
MIE
JUE
VIE
SAB
TODOS
<AJUSTE TEMPORIZADOR>
INICIO PARO CICLO DE GRAB.
--:-- --:-- 0.10SEG ( 54H)
--:-- --:-- 0.10SEG ( 54H)
--:-- --:-- 0.10SEG ( 54H)
--:-- --:-- 0.10SEG ( 54H)
--:-- --:-- 0.10SEG ( 54H)
--:-- --:-- 0.10SEG ( 54H)
--:-- --:-- 0.10SEG ( 54H)
--:-- --:-- 0.10SEG ( 54H)
Use el dial de trotar para cambiar “ MAR” a “ MIE” , y luego
gire el dial de correr hacia la derecha.
“– – ” (horas) destella en la columna PARO (detención).
7
8
USO
OFF
OFF
OFF
OFF
OFF
OFF
OFF
OFF
Use el dial de trotar para cambiar “– –” a “ 20” , y luego gire el
dial de correr hacia la derecha.
“– – ” (minutos) destella en la columna PARO.
Use el dial de trotar para cambiar “– –” a “ 30” , y luego gire el
dial de correr hacia la derecha.
“0.10” (velocidad de grabación) destella en la columna CICLO DE
GRAB..
MIE ¤¤:¤¤ 20:30
2
Use el dial de trotar para cambiar “ SAB” a “ LUN” , y luego
gire el dial de correr hacia la derecha.
“– – ” (horas) destella en la columna INICIO.
LUN --:-- --:--
9
4
0.10SEG ( 54H) OFF
Use el dial de trotar para cambiar “– –” a “ 10” , y luego gire el
dial de correr hacia la derecha.
“– – ” (minutos) destella en la columna INICIO.
5
0.17SEG ( 90H) OFF
10 Use el dial de trotar para cambiar “ OFF” a “ ON” , y luego gire
el dial de correr hacia la derecha.
El cursor se mueve hasta la primera línea.
Use el dial de trotar para cambiar “– –” a “ 30” , y luego gire el
dial de correr hacia la derecha.
“– – ” (horas) destella en la columna PARO (detención).
LUN 10:30 --:--
0.10SEG ( 54H) OFF
Use el dial de trotar para cambiar “ 0.10” a “ 0.17” (90H), y
luego gire el dial de correr hacia la derecha.
“OFF” destella en la columna USO.
MIE ¤¤:¤¤ 20:30
3
0.10SEG ( 54H) OFF
LUN 10:30 ¤¤:¤¤
MIE ¤¤:¤¤ 20:30
0.10SEG ( 54H) OFF
¤¤¤SEG (¤¤¤¤¤) ¤¤¤
0.17SEG ( 90H) ON
11 Presione el botón EXIT/OSD.
La exhibición vuelve a la pantalla normal.
Use el dial de trotar para cambiar “– –” a “ **” , y luego gire
el dial de correr hacia la derecha.
El ajuste TODOS de la línea octava automáticamente cambia al
siguiente día (MAR) del día de la semana indicado en la línea
séptima. Las partes que no necesitan ajuste aparecen con un
símbolo “*”.
LUN 10:30 ¤¤:¤¤
MAR ¤¤:¤¤ --:--
EXIT/OSD
¤¤¤SEG (¤¤¤¤¤) ¤¤¤
---SEG (----H) OFF
52
Español
AJUSTE DE FERIADOS
Menú principal 1
Submenúes
<MENU PRINCIPAL 1>
1.AJUSTE IDIOMA/RELOJ
->
2.AJUSTE ENTRADA DE VIDEO
->
3.AJUSTE AREA DE GRABACION
->
4.AJUSTE COND.DE GRABACION
->
5.AJUSTE GRABACION NORMAL
->
6.AJUSTE TEMPORIZADOR
->
7.AJUSTE FASTIVOS
->
8.AJUSTE GRABACION DE ALARMA
->
AL MENU PRINCIPAL 2
->
CAMBIE DE LINEAS CON JOG, SELECCIONE CON SHUTTLE
1.
2.
3.
4.
5.
6.
7.
8.
9.
10.
<AJUSTE FESTIVOS>
----11. --------12. --------13. --------14. --------15. --------16. --------17. --------18. --------19. --------20. -----
Ajusta un día ordinario como feriado.
Ajustes AJUSTE FESTIVOS
3
Días tales como los feriados nacionales designados y los feriados
empresariales se tratan de la misma manera como los días de trabajo
normales. Naturalmente la grabación de temporizador se realiza de la
misma manera en esos días, pero si ajusta AJUSTE FESTIVOS a
“USO:ON” en el menú de ajustes de temporizador y luego especifica
las fechas de los feriados en esta pantalla de menú, el mismo tipo de
reservas de temporizador se puede realizar para los feriados.
1. 11---
4
Nota: Para un ajuste de temporizador asegúrese de realizar los
ajustes de hora para el domingo (DOM) antes de cambiar USO
a “ON”.
SEM
DOM
LUN
MAR
MIE
JUE
VIE
SAB
TODOS
<AJUSTE TEMPORIZADOR>
INICIO PARO CICLO DE GRAB.
08:00 18:00 0.10SEG ( 54H)
--:-- --:-- 0.10SEG ( 54H)
--:-- --:-- 0.10SEG ( 54H)
--:-- --:-- 0.10SEG ( 54H)
--:-- --:-- 0.10SEG ( 54H)
--:-- --:-- 0.10SEG ( 54H)
--:-- --:-- 0.10SEG ( 54H)
--:-- --:-- 0.10SEG ( 54H)
USO
ON
OFF
OFF
OFF
OFF
OFF
OFF
OFF
Use el dial de trotar para cambiar “– –” a “ 17” , y luego gire el
dial de correr hacia la derecha.
El cursor se mueve hasta la línea 2.
2
5
Presione el botón MENU para seleccionar AJUSTE
FESTIVOS, y luego gire el dial de correr hacia la derecha.
Aparece AJUSTE FESTIVOS en el submenú, y el cursor se
mueve a la línea 1.
6
Siga el mismo procedimiento para ajustar otras fechas de
feriados.
Presione el botón EXIT/OSD.
La exhibición vuelve a la pantalla normal.
EXIT/OSD
MENU
1.
2.
3.
4.
5.
2
<AJUSTE FESTIVOS>
----11. --------12. --------13. --------14. --------15. -----
Gire el dial de correr hacia la derecha.
“– – ” (mes) destella en la línea 1.
1. -----
Español
1. 11-17
2. -----
1
Ejemplo: Para ajustar el 17 de noviembre como feriado
1
Use el dial de trotar para cambiar “– –” a “ 11” , y luego gire el
dial de correr hacia la derecha.
“– – ” (día) destella en la línea 1.
53
AJUSTE DEL MODO DE GRABACIÓN DE
ALARMA
Menú principal 1
Ajusta la calidad de la imagen.
<MENU PRINCIPAL 1>
1.AJUSTE IDIOMA/RELOJ
->
2.AJUSTE ENTRADA DE VIDEO
->
3.AJUSTE AREA DE GRABACION
->
4.AJUSTE COND.DE GRABACION
->
5.AJUSTE GRABACION NORMAL
->
6.AJUSTE TEMPORIZADOR
->
7.AJUSTE FASTIVOS
->
8.AJUSTE GRABACION DE ALARMA
->
AL MENU PRINCIPAL 2
->
CAMBIE DE LINEAS CON JOG, SELECCIONE CON SHUTTLE
Ajusta el método de grabación (cuadros o campos).
Ajusta la grabación de audio.
Ajusta la grabación de alarma.
Ajusta la tasa de grabación (velocidad de grabación) y la
duración de la alarma.
Submenúes
Ajusta la grabación de prealarma.
<AJUSTE GRABACION DE ALARMA>
CALIDAD DE IMAGEN
:MEDIA
GRABACION CUADRO/ CAMPO :CAMPO
GRABACION DE AUDIO
:OFF
GRABACION DE ALARMA
:OFF
CICLO DE GRAB.: 0.10 SEG. DURACION: 1SEG
GRABACION SIN ALARMA :¤¤¤
CICLO DE GRAB.: ¤¤¤ SEG. DURACION: ¤¤¤
=> (SE PUEDEN GRABAR 46400)
DISPARO DE ALARMA
:ALARMA
SENSOR DE MOVIMIENTO
->
Ajusta la tasa de grabación (velocidad de grabación) y la
duración de la alarma para la grabación de prealarma.
Ajusta el disparador de alarma.
Ajusta los sensores de movimiento (alarma).
Ajuste AJUSTE GRABACION DE ALARMA
3
Le permite a ajustar la calidad de grabación, el método de grabación
(cuadro o campo), la grabación de audio y la velocidad de grabación
del área de grabación de alarma.
1
2
Nota: El número máximo de imágenes que se pueden grabar según
los diferentes ajustes de grabación de alarma se exhibe a
continuación.
=> (SE PUEDEN GRABAR 25600)
Presione el botón MENU para seleccionar AJUSTE
GRABACION DE ALARMA, y luego gire el dial de correr
hacia la derecha.
Aparece el submenú AJUSTE GRABACION DE ALARMA, y el
cursor se mueve al ajuste CALIDAD DE IMAGEN.
MENU
Use el dial de trotar para seleccionar la calidad de la imagen
(ejemplo: “ SUPER ALTA” ), y luego gire el dial de correr
hacia la derecha.
El cursor se mueve hasta GRABACION CUADRO/CAMPO.
(Ajustes de la calidad de la imagen)
• BASICA (BA): (15 KB)
• NORMAL (NO): (22 KB)
• MEDIA (ME): (30 KB)
• ALTA (AL): (42 KB)
• SUPER ALTA (SA): (56 KB)
<AJUSTE GRABACION DE ALARMA>
CALIDAD DE IMAGEN
:MEDIA
GRABACION CUADRO/ CAMPO :CAMPO
GRABACION DE AUDIO
:OFF
GRABACION DE ALARMA
:OFF
CICLO DE GRAB.: 0.10 SEG. DURACION: 1SEG
GRABACION SIN ALARMA :¤¤¤
CICLO DE GRAB.: ¤¤¤ SEG. DURACION: ¤¤¤
=> (SE PUEDEN GRABAR 46400)
DISPARO DE ALARMA
:ALARMA
SENSOR DE MOVIMIENTO
->
<AJUSTE GRABACION DE ALARMA>
CALIDAD DE IMAGEN
:SUPER ALTA
GRABACION CUADRO/ CAMPO :CAMPO
GRABACION DE AUDIO
:OFF
GRABACION DE ALARMA
:OFF
CICLO DE GRAB.: 0.10 SEG. DURACION: 1SEG
GRABACION SIN ALARMA :¤¤¤
CICLO DE GRAB.: ¤¤¤ SEG. DURACION: ¤¤¤
Gire el dial de correr hacia la derecha.
“MEDIA” destella.
<AJUSTE GRABACION DE ALARMA>
CALIDAD DE IMAGEN
:MEDIA
GRABACION CUADRO/ CAMPO :CAMPO
GRABACION DE AUDIO
:OFF
GRABACION DE ALARMA
:OFF
CICLO DE GRAB.: 0.10 SEG. DURACION: 1SEG
54
Español
AJUSTE DEL MODO DE GRABACIÓN DE ALARMA
4
7
Gire el dial de correr hacia la derecha, use el dial de trotar
para ajustar el método de grabación (ejemplo: “ CUADRO” ), y
luego gire el dial de correr hacia la derecha.
El cursor se mueve hasta GRABACION DE AUDIO.
Nota: Cuando se selecciona la velocidad de grabación, el número
máximo de grabaciones aparece a continuación entre
paréntesis.
=> (SE PUEDEN GRABAR 17066)
<AJUSTE GRABACION DE ALARMA>
CALIDAD DE IMAGEN
:SUPER ALTA
GRABACION CUADRO/ CAMPO :CUADRO
GRABACION DE AUDIO
:OFF
GRABACION DE ALARMA
:OFF
CICLO DE GRAB.: 0.20 SEG. DURACION: 1SEG
GRABACION SIN ALARMA :¤¤¤
8
Nota:
• Cuando se selecciona GRABACION CUADRO/CAMPO la
velocidad de grabación aparece en CICLO DE GRAB. y el número
máximo de grabaciones aparece a continuación entre paréntesis.
=> (SE PUEDEN GRABAR 30721)
• Las velocidades de grabación de campos y cuadros varían
dependiendo del ajuste CALIDAD DE IMAGEN. Consulte el cuadro
de velocidades de grabación para obtener detalles. (Consulte la
página 11.)
5
Gire el dial de correr hacia la derecha, use el dial de trotar
para ajustar la grabación de audio (ejemplo: “ ON” ), y luego
gire el dial de correr.
El cursor se mueve hasta GRABACION DE ALARMA.
9
Presione el botón EXIT/OSD.
La exhibición vuelve a la pantalla normal.
Los ajustes de alarma aparecen en la sección de exhibición de
funcionamiento. Cuando se dispara una alarma, se exhibe el
número de alarmas.
EXIT/OSD
01-01-01 ALARMA 0000
05:53:44 SA 0.13SEG
Nota:
• La grabación de audio se puede ajustar cuando el ajuste CICLO
DE GRAB. es 0,10 SEG (CAMPO) o 0,20 SEG (CUADRO) o más.
• Cuando se ajusta a “ON”, aparecerá la letra “A” (indicador de
grabación de audio) enfrente de la velocidad de grabación CICLO
DE GRAB., y aparecerá después entre paréntesis el número
máximo de grabaciones entre paréntesis.
=> (SE PUEDEN GRABAR 25166)
Nota: Si ocurre otra alarma mientras se está realizando una
grabación de alarma, la grabación de alarma continúa grabando
las imágenes para la segunda alarma desde el momento en
que ocurre la segunda alarma.
Si ocurren varias alarmas a la misma vez, son tratadas como si
fueran una sola alarma hasta que se detengan las alarmas.
Gire el dial de correr hacia la derecha, use el dial de trotar
para ajustar el modo de grabación de alarma (ejemplo:
“ MODO1” ), y luego gire el dial de correr.
El cursor se mueve hasta CICLO DE GRAB.
Ejemplos de exhibición: Ajustes de grabación de alarma
• OFF: No se realiza la grabación de alarma.
• MODO1: La grabación de alarma siempre se realiza sin
importar los ajustes de grabación de temporizador.
• MODO2: La grabación de alarma solamente se realiza cuando
está en progreso la grabación de temporizador.
• MODO3: La grabación de alarma solamente se realiza cuando
no está en progreso la grabación de temporizador.
• MODO4: La grabación de alarma solamente se realiza
durante las horas determinadas por el temporizador.
Esto no se puede usar para la grabación normal.
Nota: Si la grabación de alarma se cambia a un ajuste tal como
MODO1, se habilitará el ajuste GRABACION SIN ALARMA
(“***” cambiará a “OFF”).
Español
Use el dial de trotar para ajustar la duración de la grabación
(ejemplo: “ 5” ), y luego gire el dial de correr.
El cursor se mueve hasta GRABACION SIN ALARMA.
<AJUSTE GRABACION DE ALARMA>
CALIDAD DE IMAGEN
:SUPER ALTA
GRABACION CUADRO/ CAMPO :CUADRO
GRABACION DE AUDIO
:ON
GRABACION DE ALARMA
:MODO1
CICLO DE GRAB.:A0.13 SEG. DURACION: 5SEG
GRABACION SIN ALARMA :OFF
CICLO DE GRAB.: ¤¤¤ SEG. DURACION: ¤¤¤
=> (SE PUEDEN GRABAR 03355)
DISPARO DE ALARMA
:ALARMA
SENSOR DE MOVIMIENTO
->
<AJUSTE GRABACION DE ALARMA>
CALIDAD DE IMAGEN
:SUPER ALTA
GRABACION CUADRO/ CAMPO :CUADRO
GRABACION DE AUDIO
:ON
GRABACION DE ALARMA
:OFF
CICLO DE GRAB.:A0.20 SEG. DURACION: 1SEG
GRABACION SIN ALARMA :¤¤¤
CICLO DE GRAB.: ¤¤¤ SEG. DURACION: ¤¤¤
6
Gire el dial de correr hacia la derecha, use el dial de trotar
para ajustar la velocidad de grabación (ejemplo: “ 0.13” ), y
luego gire el dial de correr.
DURACION “1SEG” destella.
55
AJUSTE DEL MODO DE GRABACIÓN DE ALARMA
Ajuste de grabación de prealarma
1
6
Use el dial de trotar para mover el cursor hasta el ajuste
GRABACION DE ALARMA y luego gire el dial de correr hacia
la derecha.
“OFF” destella.
CICLO DE GRAB.:A0.13 SEG. DURACION: 5SEG
GRABACION SIN ALARMA :ON
CICLO DE GRAB.:A0.20 SEG. DURACION: 5SEG
=> (SE PUEDEN GRABAR 02844)
DISPARO DE ALARMA
:ALARMA
SENSOR DE MOVIMIENTO
->
<AJUSTE GRABACION DE ALARMA>
CALIDAD DE IMAGEN
:SUPER ALTA
GRABACION CUADRO/ CAMPO :CUADRO
GRABACION DE AUDIO
:ON
GRABACION DE ALARMA
:OFF
CICLO DE GRAB.:A0.13 SEG. DURACION: 5SEG
GRABACION SIN ALARMA :¤¤¤
CICLO DE GRAB.: ¤¤¤ SEG. DURACION: ¤¤¤
2
7
Use el dial de trotar para cambiar el ajuste “ OFF” a algún
otro modo (ejemplo: MODO1), y luego gire el dial de correr
hacia la derecha.
El ajuste GRABACION SIN ALARMA cambia de “***” a “OFF”.
El cursor se mueve hasta CICLO DE GRAB..
01-01-01 PRE 0000
06:46:15 SA 0.26SEG
Nota:
• La grabación de pre-alarma continúa por el tiempo especificado en
el ajuste DURACION antes de que entre una señal de alarma. Al
reproducir imágenes que han sido grabadas durante la grabación
de pre-alarma, use las operaciones de búsqueda de alarma (botón
SEARCH FRAME/FIELD). Las imágenes serán reproducidas
desde el punto en que se dispara la alarma, de manera que use
las operaciones del dial de correr para realizar la reproducción
hacia atrás.
• Si se realiza una grabación de prealarma en el modo CAMPO
(tasa de grabación), la velocidad del ciclo para los ajustes del ciclo
de grabación serán más lentos, y los ajustes de 0,02 segundo y
0,03 segundo no podrán ser seleccionados.
Use el dial de trotar para mover el cursor hasta el ajuste
GRABACION SIN ALARMA y luego gire el dial de correr
hacia la derecha.
“OFF” destella.
GRABACION DE ALARMA
:MODO1
CICLO DE GRAB.:A0.13 SEG. DURACION: 5SEG
GRABACION SIN ALARMA :OFF
CICLO DE GRAB.: ¤¤¤ SEG. DURACION: ¤¤¤
=> (SE PUEDEN GRABAR 03355)
DISPARO DE ALARMA
:ALARMA
SENSOR DE MOVIMIENTO
->
4
Use el dial de trotar para cambiar “ OFF” a “ ON” , y luego gire
el dial de correr hacia la derecha.
El cursor se mueve hasta CICLO DE GRAB..
GRABACION SIN ALARMA :ON
CICLO DE GRAB.:A0.20 SEG. DURACION: 1SEG
=> (SE PUEDEN GRABAR 02960)
DISPARO DE ALARMA
:ALARMA
SENSOR DE MOVIMIENTO
->
5
Presione el botón EXIT/OSD.
La exhibición vuelve a la pantalla normal.
Aparece “PRE” en la sección de exhibición de funcionamiento.
Cuando se dispara una alarma, la exhibición cambia a
“ALARMA”.
EXIT/OSD
<AJUSTE GRABACION DE ALARMA>
CALIDAD DE IMAGEN
:SUPER ALTA
GRABACION CUADRO/ CAMPO :CUADRO
GRABACION DE AUDIO
:ON
GRABACION DE ALARMA
:MODO1
CICLO DE GRAB.:A0.13 SEG. DURACION: 5SEG
GRABACION SIN ALARMA :OFF
CICLO DE GRAB.: ¤¤¤ SEG. DURACION: ¤¤¤
=> (SE PUEDEN GRABAR 03355)
DISPARO DE ALARMA
:ALARMA
SENSOR DE MOVIMIENTO
->
3
Use el dial de trotar para ajustar la duración de la grabación
(ejemplo: “ 5SEG” ), y luego gire el dial de correr hacia la
derecha.
El cursor se mueve hasta DISPARO DE ALARMA.
Tasa de
grabación
(campo/seg.)
Ciclo de
grabación
(seg.)
BASICA
15 kB
60.00
30.00
20.00
15.00
10.00
7.50
6.00
5 00
0.02
0.03
0.05
0.07
0.10
0.13
0.17
0 20
21H
42H
63H
85H
127H
170H
212H
255H
CALI
NORMAL
22 kB
15H
30H
45H
60H
90H
120H
150H
180H
• Si se realiza una grabación de alarma normal y una grabación de
•
Gire el dial de correr hacia la derecha, use el dial de trotar
para ajustar la velocidad de grabación (ejemplo: “ A0.20” ), y
luego gire el dial de correr hacia la derecha.
El cursor se mueve hasta el ajuste “1SEG” de DURACION y
destella.
GRABACION SIN ALARMA :ON
CICLO DE GRAB.:A0.20 SEG. DURACION: 1SEG
=> (SE PUEDEN GRABAR 02844)
DISPARO DE ALARMA
:ALARMA
SENSOR DE MOVIMIENTO
->
56
prealarma a la misma vez, no se grabará ninguna señal de audio
con las imágenes de grabación de prealarma.
Si usa un videograbador digital junto con un multiplexor, la señal
de cambio desde el multiplexor saldrá de acuerdo con la
sincronización de grabación de videograbador digital para
grabación normal si la grabación de prealarma y la grabación
normal se realizan a la misma vez. Debido a eso, si el ciclo de
grabación para grabación de prealarma es menor que el ajuste del
ciclo de grabación para la grabación normal, las imágenes de
grabación de prealarma de una cámara pueden ser grabadas
continuamente. Por otro lado, si el ciclo de grabación para
grabación de prealarma es mayor que el ajuste del ciclo de
grabación para grabación normal, las imágenes de la cámara
pueden no ser grabadas durante la grabación normal, por lo tanto
este ajuste no debe ser realizado.
Español
AJUSTE DEL MODO DE GRABACIÓN DE ALARMA
Ajuste del disparador de alarma
1
Ajustes del sensor de movimiento
integrado
Use el dial de trotar para mover el cursor hasta el ajuste
DISPARO DE ALARMA.
Se puede exhibir la pantalla de monitoreo (-: 8x10) en la pantalla de
monitoreo de manera que la detección de personas sospechosas
(alarmas) se pueda realizar más fácilmente. El ajuste por defecto es
que todos los sensores de movimiento estén en “OFF”, por tanto no
pueden detectar el movimiento de objetos.
GRABACION SIN ALARMA :ON
CICLO DE GRAB.:A0.13 SEG. DURACION: 5SEG
=> (SE PUEDEN GRABAR 01677)
DISPARO DE ALARMA
:ALARMA
SENSOR DE MOVIMIENTO
->
A OFF (-)
A O N (ú)
C
2
Gire el dial de correr hacia la derecha, use el dial de trotar
para seleccionar el método de detección de personas
sospechosas (ejemplo: “ SENSOR” ), y luego gire el dial de
correr.
El cursor se mueve hasta SENSOR DE MOVIMIENTO.
B
(-)
-
ú
-
- - - - - - - - NIVEL :
OFF
-
- - - - - - - - SALIDA
-
E
-
<AJUSTE GRABACION DE ALARMA>
CALIDAD DE IMAGEN
:MEDIA
GRABACION CUADRO/ CAMPO :CAMPO
GRABACION DE AUDIO
:OFF
GRABACION DE ALARMA
:OFF
CICLO DE GRAB.: 0.10 SEG. DURACION: 5SEG
GRABACION SIN ALARMA :¤¤¤
CICLO DE GRAB.: ¤¤¤ SEG. DURACION: ¤¤¤
=> (SE PUEDEN GRABAR 46400)
DISPARO DE ALARMA
:ALARMA
SENSOR DE MOVIMIENTO
->
D
GRABACION SIN ALARMA :ON
CICLO DE GRAB.:A0.13 SEG. DURACION: 5SEG
=> (SE PUEDEN GRABAR 01677)
DISPARO DE ALARMA
:SENSOR
SENSOR DE MOVIMIENTO
->
Pantalla del sensor de movimiento
Use el dial de trotar para mover el cursor hasta SENSOR DE
MOVIMIENTO, y luego gire el dial de correr hacia la derecha.
La pantalla del sensor de movimiento aparece sobre la pantalla
normal.
Ejemplos de exhibición: Ajustes del disparador de grabación
de alarma
• ALARMA: La grabación de alarma se realiza cuando ocurre
una alarma externa (cuando un interruptor está conectado a
los terminales ALARM IN de la parte trasera de la unidad para
la función de abrir/cerrar).
• SENSOR: La grabación de alarma se realiza solamente
cuando el sensor de movimiento detecta un objeto en
movimiento. Consulte los ajustes del sensor de movimiento.
• ALARMA Y SENSOR: La grabación de alarma se realiza
cuando hay una respuesta simultánea de una alarma externa
y de un sensor de movimiento integrado.
• ALARMA O SENSOR: La grabación de alarma se realiza
cuando hay una respuesta ya sea de una alarma externa o de
un sensor de movimiento integrado.
Nota:
• Los ajustes de SENSOR DE MOVIMIENTO se deben realizar si se
selecciona SENSOR, ALARMA Y SENSOR o ALARM O SENSOR.
• El sensor de movimiento incorporado del videograbador digital no
puede ser usado si se conecta un multiplexor al videograbador
digital.
• Si usa el sensor integrado de un multiplexor, la salida de alarma se
debería dirigir a la entrada de alarma del videograbador digital a fin
de grabar las alarmas.
• Si para de grabar durante una grabación de alarma que ha sido
disparada, mueva el cursor al ajuste AJUSTE GRABACION DE
ALARMA en el menú 1 y luego gire el dial de correr hacia la
derecha. La pantalla del sensor de movimiento aparecerá, use
esta pantalla para cambiar el ajuste NIVEL a “OFF”.
Español
57
A
Cuando los sensores se ajustan a “OFF” (-) y el dial de correr se
gira hacia la derecha, el sensor cambia a “ON” (ú). El ajuste
cambia entre “ON” y “OFF” cada vez que el dial de correr se gira
hacia la derecha.
B
Cuando el dial de trotar se gira hacia la izquierda, el cursor se
mueve pasando “SALIDA” y “NIVEL: OFF”, y luego se mueve
nuevamente desde el final hasta el tope.
C
Cuando el dial de trotar se gira hacia la derecha y el cursor llega
al final, se mueve pasando “NIVEL: OFF” y “SALIDA” y luego se
mueve hasta el tope.
D
Se puede ajustar la sensibilidad cuando el sensor se ajusta a
“ON” (ú). Gire el dial de trotar para seleccionar “NIVEL: OFF”,
gire el dial de correr hacia la derecha, y luego gire el dial de trotar
para ajustar la sensibilidad.
(OFF 1 – 10: La sensibilidad aumenta a medida que el número
es menor.)
E
Si el cursor está en “SALIDA” y el dial de correr se gira hacia la
derecha, la exhibición vuelve a la pantalla AJUSTE GRABACION
DE ALARMA.
AJUSTE DEL MODO DE GRABACIÓN DE ALARMA
1
4
Use el dial de trotar para mover el cursor hasta el ajuste
SENSOR DE MOVIMIENTO y luego gire el dial de correr hacia
la derecha.
Aparece la pantalla sensor de movimiento en la pantalla
normal.
Gire el dial de correr hacia la derecha dos veces.
Esto completa los ajustes del sensor de movimiento, y la
exhibición vuelve a la pantalla AJUSTE GRABACION DE
ALARMA.
-
GRABACION SIN ALARMA :ON
CICLO DE GRAB.:A0.13 SEG. DURACION: 5SEG
=> ( SE PUEDEN GRABAR 01677)
DISPARO DE ALARMA
:SENSOR
SENSOR DE MOVIMIENTO
->
-
2
- - - - - - - - NIVEL :
OFF
-
- - - - - - - - SALIDA
-
-
5
-
- - - ú
- ú
- ú
- - - NIVEL :
ú
ú
ú
OFF
ú
ú
ú
-
- - - - - - - - SALIDA
-
- - - ú
- ú
- ú
- - - NIVEL :
ú
ú
ú
6
ú
ú
ú
-
- - - - - - - - SALIDA
-
-
Presione el botón EXIT/OSD.
La exhibición vuelve a la pantalla normal.
EXIT/OSD
Gire el dial de trotar para ajustar la posición de el sensor, y
luego gire el dial de correr hacia la derecha.
Dado que el sensor cambia de OFF [-] a ON [ú], use el mismo
procedimiento para ajustar el sensor a ON.
-
3
-
-
Nota: Cambie el ajuste ALARMA para el ALARM SET ITEM en el
menú AJUSTE ZUMBADOR en MENU PRINCIPAL 2 a “ON”.
-
Use el dial de trotar para mover el cursor a “ NIVEL: OFF” ,
gire el dial de correr hacia la derecha, y luego use el dial de
trotar para ajustar la sensibilidad (ejemplo: “ 6” ).
Ejemplos de exhibición: Ajustes de sensibilidad
• OFF: El sensor no se activa
• 1 a 10: El sensor se activa (cuanto menor el valor, mayor la
sensibilidad)
-
-
- - - ú
- ú
- ú
- - - NIVEL :
ú
ú
ú
6
ú
ú
ú
-
- - - - - - - - SALIDA
-
-
Nota: Puede revisar la sensibilidad en la pantalla de ajustes. Cuando
se detecta una alarma, suena el zumbador (un ruido de pitidos).
Si la sensibilidad es demasiada, las variaciones de la luz
pueden disparar una alarma. Realice el ajuste que sea
apropiado para el área que está siendo monitoreada.
58
Español
AJUSTES DE EXHIBICIÓN
Menú principal 2
<MENU PRINCIPAL 2>
1.AJUSTE EXHIBICION/PERDIDA VIDEO
2.AJUSTE RS-232C/RS-485
3.AJUSTE ZUMBADOR
4.AJUSTE BLOQUEO DE SEGURIDAD
5.AJUSTE RED
6.AJUSTE HDD
7.FALLO ALIMENTACION/TIEMPO USADO
Submenúes
Exhibe la fecha en la pantalla de monitoreo.
<AJUSTE EXHIBICION>
FECHA
: ON
HORA
: ON
CALIDAD
: ON
CICLO DE GRAB. : ON
CONTEO D/ALARMA : ON
TIPO D/ALARMA : ON
->
->
->
->
->
->
->
Exhibe la hora en la pantalla de monitoreo.
Exhibe la calidad de la imagen en la pantalla
de monitoreo.
<AJUSTE PERDIDA VIDEO>
PERDIDA VIDEO : ON
AL MENU PRINCIPAL 1
->
CAMBIE DE LINEAS CON JOG, SELECCIONE CON SHUTTLE
Para un ejemplo de la exhibición, consulte la sección de
exhibición de funcionamiento. (Consulte la página 13.)
Exhibe el número de alarmas en la pantalla de
monitoreo.
Exhibe los tipos de alarma en la pantalla de
monitoreo.
Ajustes AJUSTE EXHIBICION
6
La fecha y hora que han sido ajustadas usando el ajuste AJUSTE
RELOJ y otros se pueden exhibir en la pantalla de monitoreo durante
la grabación y la reproducción. El ajuste por defecto es todas las
exhibiciones en “ON”, por tanto todos los elementos de ajuste de este
menú aparecen activados en la pantalla. Puede desactivar las
exhibiciones si es necesario.
1
Presione el botón MENU dos veces y exhiba la pantalla
MENU PRINCIPAL 2.
El cursor se mueve hasta AJUSTE EXHIBICION/PERDIDA
VIDEO.
Si es necesario, siga el mismo procedimiento (pasos 3 y 4)
para cambiar los ajustes ON/OFF.
• CALIDAD (OFF): El modo de calidad de imagen no aparece
durante la grabación y la reproducción.
• CICLO DE GRAB. (OFF): El ciclo de grabación no aparece
durante la grabación y la reproducción.
• CONTEO D/ALARMA (OFF): El número actual de alarmas no
aparece.
• TIPO D/ALARMA (OFF): El tipo de grabación de alarma no
aparece.
Nota:
• Si GRABACION DE ALARMA en el menú AJUSTE GRABACION
DE ALARMA ha sido ajustado a “OFF”, CONTEO D/ALARMA y
TIPO D/ALARMA no aparecen. (Consulte la página 54.)
• Cuando se ajusta a “ON”
• ALARMA aparece en la exhibición de funcionamiento durante
la grabación de alarma.
• PRE aparece en la exhibición de funcionamiento durante la
grabación de pre-alarma.
• ARCHIV aparece cuando se están reproduciendo imágenes del
área de archivo.
MENU
2
Exhibe la tasa de grabación (velocidad de
grabación) en la pantalla de monitoreo.
Gire el dial de correr hacia la derecha
Aparece el submenú AJUSTE EXIBICION, y el cursor se mueve
al ajuste FECHA.
7
<AJUSTE EXHIBICION>
FECHA
: ON
HORA
: ON
CALIDAD
: ON
CICLO DE GRAB. : ON
CONTEO D/ALARMA : ON
TIPO D/ALARMA : ON
Presione el botón EXIT/OSD.
La exhibición vuelve a la pantalla normal.
EXIT/OSD
<AJUSTE PERDIDA VIDEO>
PERDIDA VIDEO : ON
3
4
5
Ajuste AJUSTE PERDIDA VIDEO
Gire el dial de correr hacia la derecha.
Destella “ON”. Si usa el dial de trotar para cambiarlo a “OFF”, la
exhibición de fecha desaparece de la pantalla.
Use el dial de trotar para mover el cursor hasta PERDIDA VIDEO,
y luego gire el dial de correr hacia la derecha.
“ON” destella. Si las imágenes de la cámara se pierden cuando este
ajuste está activado, aparecerá “PERDIDA VIDEO !” en la pantalla.
Gire el dial de correr hacia la derecha.
El cursor se mueve hasta HORA.
Gire el dial de correr hacia la derecha.
Destella “ON”. Si usa el dial de trotar para cambiarlo a “OFF”, la
exhibición de hora desaparece de la pantalla .
Español
59
AJUSTE DE RS-232C/RS-485
Menú principal 2
<MENU PRINCIPAL 2>
1.AJUSTE EXHIBICION/PERDIDA VIDEO
2.AJUSTE RS-232C/RS-485
3.AJUSTE ZUMBADOR
4.AJUSTE BLOQUEO DE SEGURIDAD
5.AJUSTE RED
6.AJUSTE HDD
7.FALLO ALIMENTACION/TIEMPO USADO
Submenúes
Selecciona CONTROL.
<AJUSTE RS-232C/RS-485>
CONTROL
RS-232C
VELOCIDAD DATOS 19200
INFO.STATUS
¤¤¤
INFO.ALARMA
¤¤¤
DIRECCION
¤¤¤
->
->
->
->
->
->
->
Ajusta el entorno de comunicaciones.
Ajuste solamente para RS-485
• Habilita la transmisión de estado.
• Habilita la transmisión de alarma.
AL MENU PRINCIPAL 1
->
CAMBIE DE LINEAS CON JOG, SELECCIONE CON SHUTTLE
• Ajusta la dirección.
Ajuste RS-232C/RS-485
Selección de RS-232C
Ajustes relacionados con la comunicación serie RS-232C y RS-485.
1
Para la conexión del terminal RS-232C de la unidad a un ordenador,
use un cable especial RS-232C (en venta por separado). (Consulte la
página 7.)
Presiones el botón MENU dos veces para exhibir la pantalla
MENU PRINCIPAL 2
El cursor se mueve hasta AJUSTE EXHIBICION/PERDIDA
VIDEO.
1
Gire el dial de trotar para seleccionar RS-232C, y luego gire
el dial de correr hacia la derecha.
El cursor se mueve hasta VELOCIDAD DATOS.
MENU
<AJUSTE RS-232C/RS-485>
CONTROL
RS-232C
VELOCIDAD DATOS 19200
INFO.STATUS
¤¤¤
INFO.ALARMA
¤¤¤
DIRECCION
¤¤¤
2
Use el dial de trotar para mover el cursor hasta el ajuste
AJUSTE RS-232C/RS-485, y luego gire el dial de correr hacia
la derecha.
Aparece el submenú AJUSTE RS-232C/RS-485, y el cursor se
mueve al ajuste CONTROL.
1.AJUSTE
2.AJUSTE
3.AJUSTE
4.AJUSTE
5.AJUSTE
6.AJUSTE
<MENU PRINCIPAL 2>
EXHIBICION/PERDIDA VIDEO
RS-232C/RS-485
ZUMBADOR
BLOQUEO DE SEGURIDAD
RED
HDD
2
->
->
->
->
->
->
Gire el dial de correr hacia la derecha, use el dial de trotar
para seleccionar una velocidad de comunicaciones (por
ejemplo: “ 19200” ) y luego gire el dial de correr hacia la
derecha.
Esto completa el ajuste y el cursor se mueve hasta CONTROL.
• Velocidades de comunicación: 2400, 4800, 9600 y 19200
<AJUSTE RS-232C/RS-485>
CONTROL
RS-232C
VELOCIDAD DATOS 19200
INFO.STATUS
¤¤¤
INFO.ALARMA
¤¤¤
DIRECCION
¤¤¤
<AJUSTE RS-232C/RS-485>
CONTROL
RS-232C
VELOCIDAD DATOS 19200
INFO.STATUS
¤¤¤
INFO.ALARMA
¤¤¤
DIRECCION
¤¤¤
3
Presione el botón EXIT/OSD.
La exhibición vuelve a la pantalla normal.
EXIT/OSD
3
Gire el dial de correr hacia la derecha.
Destella “RS-232C”. Use el dial de trotar para seleccionar
RS-232C o RS-485.
<AJUSTE RS-232C/RS-485>
CONTROL
RS-232C
VELOCIDAD DATOS 19200
INFO.STATUS
¤¤¤
INFO.ALARMA
¤¤¤
DIRECCION
¤¤¤
60
Español
AJUSTE DE RS-232C/RS-485
Selección de RS-485
5
Conecte los terminales de control RS-485 (A y B) del videograbador
digital en serie con otros dispositivos tales como un controlador,
multiplexor u otro videograbador digital. (Consulte la página 7.)
1
Gire el dial de correr hacia la derecha, use el dial de trotar
para seleccionar una dirección (ejemplo: “ 37” ) y luego gire
el dial de correr hacia la derecha.
Esto completa el ajuste y el cursor se mueve hasta CONTROL.
Nota: El rango de direcciones válidas para esta unidad va desde 0
hasta 127. Si se conecta más de un videograbador digital,
tenga cuidado de que las mismas direcciones no se repitan.
• Direcciones: 0 a 127
Gire el dial de correr hacia la derecha, use el dial de trotar
para seleccionar RS-485 y luego gire el dial de correr hacia
la derecha.
El cursor se mueve hasta VELOCIDAD DATOS.
Se pueden cambiar los ajustes INFO.STATUS, INFO.ALARMA y
DIRECCION.
<AJUSTE RS-232C/RS-485>
CONTROL
RS-485
VELOCIDAD DATOS 19200
INFO.STATUS
ON
INFO.ALARMA
ON
DIRECCION
000
<AJUSTE RS-232C/RS-485>
CONTROL
RS-485
VELOCIDAD DATOS 19200
INFO.STATUS
ON
INFO.ALARMA
ON
DIRECCION
000
2
<AJUSTE RS-232C/RS-485>
CONTROL
RS-485
VELOCIDAD DATOS 19200
INFO.STATUS
ON
INFO.ALARMA
ON
DIRECCION
37
Gire el dial de correr hacia la derecha, use el dial de trotar
para seleccionar una velocidad de comunicaciones (por
ejemplo: “ 19200” ) y luego gire el dial de correr hacia la
derecha.
• Velocidades de comunicación: 2400, 4800, 9600 y 19200
El cursor se mueve hasta INFO.STATUS.
6
<AJUSTE RS-232C/RS-485>
CONTROL
RS-485
VELOCIDAD DATOS 19200
INFO.STATUS
ON
INFO.ALARMA
ON
DIRECCION
000
3
4
EXIT/OSD
Gire el dial de correr hacia la derecha, use el dial de trotar
para seleccionar la información de estado (ejemplo: ON) y
luego gire el dial de correr hacia la derecha.
• ON: Se transmitirá la información de estado.
El cursor se mueve hasta INFO.ALARMA.
Gire el dial de correr hacia la derecha, use el dial de trotar
para seleccionar información de alarma (ejemplo: “ ON” ) y
luego gire el dial de correr hacia la derecha.
• ON: Se transmitirá la información de alarma.
El cursor se mueve hasta DIRECCION.
Español
Presione el botón EXIT/OSD.
La exhibición vuelve a la pantalla normal.
61
AJUSTE DEL ZUMBADOR
Menú principal 2
<MENU PRINCIPAL 2>
1.AJUSTE EXHIBICION/PERDIDA VIDEO
2.AJUSTE RS-232C/RS-485
3.AJUSTE ZUMBADOR
4.AJUSTE BLOQUEO DE SEGURIDAD
5.AJUSTE RED
6.AJUSTE HDD
7.FALLO ALIMENTACION/TIEMPO USADO
Submenúes
Ajusta el zumbador para que suene durante
las alarmas.
<AJUSTE ZUMBADOR>
ALARMA
OFF
DISCO LLENO
ON
ERROR DE DISCO ON
ADVER.DE BLOQUEO ON
SENSIB.AL TOQUE OFF
SIN GRABACION OFF
->
->
->
->
->
->
->
Ajusta el zumbador para que suene cuando
no queda espacio de grabación.
Ajusta el zumbador para que suene cuando
hay un problema con el disco duro.
AL MENU PRINCIPAL 1
->
CAMBIE DE LINEAS CON JOG, SELECCIONE CON SHUTTLE
Ajusta el zumbador para que suene cuando se
activa el bloqueo de seguridad.
Ajusta el zumbador para que suene cuando
no hay grabación.
Ajusta el zumbador para que suene cuando se
presiona un botón de funcionamiento.
Se puede hacer que el zumbador suene como una advertencia
durante una alarma y cuando se llena el disco duro.
1
3
Presione el botón MENU dos veces y exhiba la pantalla
MENU PRINCIPAL 2.
El cursor se mueve hasta AJUSTE EXHIBICION/PERDIDA
VIDEO.
4
MENU
Gire el dial de correr hacia la derecha.
Destella “OFF”. Use el dial de trotar para cambiar el ajuste a
“ON” o “OFF”.
ON: El zumbador sonará cuando se dispara una alarma.
Si es necesario, siga el mismo procedimiento para cambiar
el ajuste del zumbador (ON/OFF).
• DISCO LLENO (ON):
Ajusta si el zumbador suena cuando la sobreescritura
del disco está desactivada y el disco duro está casi
lleno.
• ERROR DE DISCO (ON):
2
Ajusta si el zumbador suena cuando hay un error de
disco duro.
Use el dial de trotar para mover el cursor hasta el ajuste
AJUSTE ZUMBADOR y luego gire el dial de correr hacia la
derecha.
Aparece el submenú AJUSTE ZUMBADOR, y el cursor se mueve
al ajuste ALARMA.
• ADVER.DE BLOQUEO (ON):
Cuando está activado el bloqueo de seguridad y se
presiona un botón bloqueado, suena el zumbador.
Nota: Cuando un elemento se ajusta a “ON”, el zumbador suena
dos veces en intervalos de aprox. 0,5 segundos.
• SENSIB.AL TOQUE (ON):
<AJUSTE ZUMBADOR>
ALARMA
OFF
DISCO LLENO
ON
ERROR DE DISCO ON
ADVER.DE BLOQUEO ON
SENSIB.AL TOQUE OFF
SIN GRABACION OFF
Ajusta que el zumbador suene cada vez que se
presiona un botón de funcionamiento.
• SIN GRABACION (ON):
Ajusta que el zumbador suene cuando la grabación se
detenga por sí misma y cuando otra persona
deliberadamente detenga la grabación.
5
Presione el botón EXIT/OSD.
La exhibición vuelve a la pantalla normal.
EXIT/OSD
62
Español
AJUSTE DEL BLOQUEO DE SEGURIDAD
El administrador o el usuario o ambos pueden ajustar contraseñas para este videograbador digital. Al ajustar contraseñas se habilita el ajuste de
privilegios para funciones de grabación y reproducción. Después de haber ajustado el bloqueo de seguridad, si alguien que no sea quien ajustó la
contraseña toca un botón de funcionamiento de la unidad, el zumbador sonará y se deberá ingresar una contraseña. Por tanto, asegúrese de tomar
nota de la contraseña.
Menú principal 2
<MENU PRINCIPAL 2>
1.AJUSTE EXHIBICION/PERDIDA VIDEO
2.AJUSTE RS-232C/RS-485
3.AJUSTE ZUMBADOR
4.AJUSTE BLOQUEO DE SEGURIDAD
5.AJUSTE RED
6.AJUSTE HDD
7.FALLO ALIMENTACION/TIEMPO USADO
Submenúes
Ajusta los bloqueos de seguridad a nivel
de administrador y a nivel de usuario.
<AJUSTE BLOQUED DE SEGURIDAD>
NIVEL CONTRASEÑA(4-8) USO
ADMIN
-------- OFF
USUARIO
-------- OFF
CONTROL DE GRAB : ADMIN
->
->
->
->
->
->
->
AL MENU PRINCIPAL 1
->
CAMBIE DE LINEAS CON JOG, SELECCIONE CON SHUTTLE
Privilegios de funcionamiento y bloqueo
de seguridad
3
A Ajuste de la contraseña de administrador
ADMIN
Ejemplo: Para ajustar la contraseña a “123456AB”
1
Gire el dial de correr hacia la derecha.
Destella la barra de ingreso de la primer contraseña.
Presiones el botón MENU dos veces para exhibir la pantalla
MENU PRINCIPAL 2
El cursor se mueve hasta AJUSTE EXHIBICION/PERDIDA
VIDEO.
4
MENU
Use el dial de trotar para mover el cursor hasta el ajuste
AJUSTE BLOQUEO DE SEGURIDAD y luego gire el dial de
correr hacia la derecha.
Aparece el submenú AJUSTE BLOQUEO DE SEGURIDAD, y el
cursor se mueve al ajuste ADMIN.
5
<AJUSTE BLOQUED DE SEGURIDAD>
NIVEL CONTRASEÑA(4-8) USO
ADMIN
-------- OFF
USUARIO
-------- OFF
CONTROL DE GRAB : ADMIN
Nota:
• “NIVEL CONTRASENA (4-8) USO” son títulos y no se pueden
cambiar.
• Si ADMIN se ajusta a “OFF”, no se puede ajustar la contraseña de
usuario.
• La contraseña puede consistir de entre cuatro y ocho caracteres
alfanuméricos.
Español
1-------
12------
OFF
Repita este procedimiento para continuar ingresando
“ 3456AB” , y luego gire el dial de correr hacia la derecha.
El cursor se mueve hasta “OFF” y destella.
<AJUSTE BLOQUED DE SEGURIDAD>
NIVEL CONTRASEÑA(4-8) USO
ADMIN
123456AB OFF
USUARIO
-------- OFF
CONTROL DE GRAB : ADMIN
63
OFF
Use el dial de trotar para exhibir “ 2” y luego gire el dial de
correr hacia la derecha.
Destella la barra de ingreso de la tercer contraseña.
ADMIN
6
OFF
Use el dial de trotar para exhibir “ 1” , y luego gire el dial de
correr.
Destella la barra de ingreso de la segunda contraseña.
• Los caracteres que se pueden usar en la contraseña son: 0, 1,
... 9, A, B, C, ... Z
ADMIN
2
--------
AJUSTE DEL BLOQUEO DE SEGURIDAD
7
B Ajuste de la contraseña de usuario
Use el dial de trotar para cambiar el ajuste a “ ON” , y luego
gire el dial de correr hacia la derecha.
El cursor se mueve hasta USUARIO.
Ejemplo: Para ajustar la contraseña a “AB123456”
1
<AJUSTE BLOQUED DE SEGURIDAD>
NIVEL CONTRASEÑA(4-8) USO
ADMIN
123456AB ON
USUARIO
-------- OFF
CONTROL DE GRAB : ADMIN
Use el dial de trotar para mover el cursor hasta USUARIO, y
luego gire el dial de correr hacia la derecha.
Destella la barra de ingreso de la primer contraseña.
USUARIO
8
Ajustar la contraseña de usuario.
Realizar el B ajuste de la contraseña de usuario. Si no se va
a hacer el ajuste de usuario, esto está completo.
Use el dial de trotar para mover el cursor hasta CONTROL DE
GRAB y realice el ajuste del privilegio de funcionamiento de
grabación y reproducción.
(Consulte la página 65.)
2
Nota: Si está ajustando una contraseña de 4 caracteres, deje el
quinto carácter como "-" y luego gire el dial de correr hacia la
derecha.
A-------
OFF
Use el dial de trotar para exhibir “ B” y luego gire el dial de
correr hacia la derecha.
Destella la barra de ingreso de la tercer contraseña.
USUARIO
4
OFF
Use el dial de trotar para exhibir “ A” , y luego gire el dial de
correr.
Destella la barra de ingreso de la segunda contraseña.
• Los caracteres que se pueden usar en la contraseña son: 0, 1,
... 9, A, B, C, ... Z
USUARIO
3
--------
AB------
OFF
Repita este procedimiento para continuar ingresando
“ 123456” , y luego gire el dial de correr hacia la derecha.
El cursor se mueve hasta “OFF” y destella.
<AJUSTE BLOQUED DE SEGURIDAD>
NIVEL CONTRASEÑA(4-8) USO
ADMIN
123456AB ON
USUARIO
AB123456 OFF
CONTROL DE GRAB : ADMIN
5
Use el dial de trotar para cambiar el ajuste a “ ON” , y luego
gire el dial de correr hacia la derecha.
El cursor se mueve hasta CONTROL DE GRAB.
Realice el ajuste del privilegio de funcionamiento de
grabación y reproducción.
(Consulte la página 65.)
<AJUSTE BLOQUED DE SEGURIDAD>
NIVEL CONTRASEÑA(4-8) USO
ADMIN
-------- OFF
USUARIO
AB123456 ON
CONTROL DE GRAB : ADMIN
64
Español
AJUSTE DEL BLOQUEO DE SEGURIDAD
C Ajuste del privilegio de funcionamiento de
D Ajuste de bloqueo de seguridad
grabación y reproducción
1
Selección del privilegio de funcionamiento
Las funciones disponibles varían dependiendo de los ajustes ON/OFF
y ADMIN/USUARIO.
Condiciones de
la selección
NIVEL CONTRASEÑA(4-8) USO
ADMIN
123456AB ON
USUARIO
AB123456 ON
CONTROL DE GRAB : ADMIN
ADMIN
123456AB ON
USUARIO
AB123456 ON
CONTROL DE GRAB : USUARIO
ADMIN
123456AB ON
USUARIO
-------- OFF
CONTROL DE GRAB : ADMIN
Detalles de funcionamiento
Todas las funciones están bloqueadas. Cuando se
ingresa la contraseña de usuario en la pantalla de
ingreso de contraseña, solamente se pueden realizar
funciones de reproducción. Cuando se ingresa la
contraseña de administrador, se pueden realizar todas
las funciones.
Todas las funciones están bloqueadas. Cuando se
ingresa la contraseña de usuario en la pantalla de
ingreso de contraseña, solamente se pueden realizar
funciones de reproducción y grabación. Cuando se
ingresa la contraseña de administrador, se pueden
realizar todas las funciones.
Las funciones de grabación y menú están
bloqueadas. Las funciones de reproducción no están
bloqueadas. Cuando se ingresa la contraseña de
administrador, se pueden realizar todas las funciones.
En la pantalla de monitoreo normal, mantenga presionado el
botón SHUTTLE HOLD aproximadamente unos tres
segundos.
Se ilumina el indicador LOCK en el panel y suena el zumbador.
Entonces queda ajustado el bloqueo de seguridad.
SHUTTLE HOLD
POWER
2
FULL
ALARM FULL
LOCK
LOCK
Presione cualquier botón de funcionamiento para verificar el
bloqueo de seguridad.
Aparece la pantalla de ingreso de contraseña.
La exhibición de pantalla desaparece luego de 5 segundos.
LOCK
REC/STOP
BLOQUEO DE SEGURIDAD !
ADMIN
123456AB ON
USUARIO
-------- OFF
CONTROL DE GRAB : USUARIO
ADMIN
-------- OFF
USUARIO
-------- OFF
CONTROL DE GRAB : ADMIN
ADMIN
-------- OFF
USUARIO
-------- OFF
CONTROL DE GRAB : USUARIO
1
El funcionamiento del menú está bloqueado.
Las funciones de grabación y reproducción no están
bloqueadas. Cuando se ingresa la contraseña de
administrador en la pantalla de ingreso de contraseña,
se pueden realizar todas las funciones.
El bloqueo de seguridad no está activado (Ajuste por
defecto).
INTRODUZCA SU CONTRASENA
--------
CAMBIE CON JOG. AJUSTE CON SHUTTLE
3
El bloqueo de seguridad no está activado (Ajuste por
defecto).
Use el dial de trotar para mover el cursor hasta CONTROL
DE GRAB.
Use el dial de trotar y el dial de correr para ingresar la
contraseña, y luego gire el dial de correr hacia la derecha
una vez más.
El indicador LOCK se apaga y la exhibición vuelve a la pantalla
normal.
Nota: Ingrese la contraseña (ejemplo: “123456AB”) que fue ingresada
como contraseña de administrador o usuario.
<AJUSTE BLOQUED DE SEGURIDAD>
NIVEL CONTRASEÑA(4-8) USO
ADMIN
123456AB ON
USUARIO
AB123456 ON
CONTROL DE GRAB : ADMIN
1
2
3
BLOQUEO DE SEGURIDAD !
LOCK SU CONTRASENA
INTRODUZCA
LOCK
LOCK
¤¤¤¤¤¤¤¤
2
CAMBIE CON JOG. AJUSTE CON SHUTTLE
Gire el dial de correr hacia la derecha, y luego use el dial de
trotar para seleccionar “ ADMIN” o “ USUARIO” .
Esto completa el ajuste.
<AJUSTE BLOQUED DE SEGURIDAD>
NIVEL CONTRASEÑA(4-8) USO
ADMIN
123456AB ON
USUARIO
AB123456 ON
CONTROL DE GRAB : ADMIN
3
Presione el botón EXIT/OSD.
La exhibición vuelve a la pantalla normal.
EXIT/OSD
Español
65
AJUSTE DE RED
Menú principal 2
<MENU PRINCIPAL 2>
1.AJUSTE EXHIBICION/PERDIDA VIDEO
2.AJUSTE RS-232C/RS-485
3.AJUSTE ZUMBADOR
4.AJUSTE BLOQUEO DE SEGURIDAD
5.AJUSTE RED
6.AJUSTE HDD
7.FALLO ALIMENTACION/TIEMPO USADO
Submenúes
Ajusta tarjeta de red LAN.
<AJUSTE RED>
TARJETA DE RED : LAN1
CONTROL DE RED : OFF
DIRECCION IP : 192.168. 0. 1
MASCARA SUBNET : 255.255.255. 0
GATEWAY
: 0. 0. 0. 0
PUERTO
: 00080
ID
CONTRASEÑA (4-8)
ID1
: 1111---ID2
: 2222---ID3
: 3333----
->
->
->
->
->
->
->
AL MENU PRINCIPAL 1
->
CAMBIE DE LINEAS CON JOG, SELECCIONE CON SHUTTLE
Ajusta control de red.
Ingreso de la DIRECCION IP.
Ingreso de MASCARA SUBNET.
Ingreso de GATEWAY.
Selecciona contraseña de administrador
o usuario.
Ajusta el puerto.
Conexión de red
Inserte una tarjeta Ethernet compatible con PCMCIA recomendada en la ranura de tarjeta PC en la parte de atrás del
videograbador digital.
Esto le permitirá ver imágenes en esta unidad y realizar ajustes en el menú a través de la red (LAN) desde una computadora personal. Se necesitan
los ID1, ID2 o ID3 y las contraseñas.
Nota:
• Se pueden conectar hasta cuatro ordenadores simultáneamente a un DVR principal. Sin embargo, si se conectan cuatro ordenadores y luego se
conecta otro más a un nivel de usuario que es un nivel de usuario mayor que el que se está usando, cualquier usuario que se encuentre
conectado a niveles inferiores será desconectado, y el ordenador que está siendo conectado a un nivel más alto tendrá prioridad. Si todas los
cuatro ordenadores que todavía están conectados se conectan con el nivel de usuario ID1, el último usuario conectado será desconectado.
• La ranura de tarjeta PC es sólo para tarjetas de 16 bits y 5 V. No use tarjetas de tipo bus de 32 bits, porque pueden dañar la ranura de tarjeta PC del
videograbador digital.
• Cuando se conecta directamente al ordenador
(sin usar un hub Ethernet)
• Cuando se conecte mediante una Intranet
(usando un hub Ethernet)
1 – 16
1 – 16
Monitor
principal
1
2
3
Monitor
principal
4
1
2
3
4
5
6
7
8
5
6
7
8
9
13
10
14
11
15
12
16
9
13
10
14
11
15
12
16
Monitor de
televisión
(en venta
por separado)
DIGITAL IN
✱ Cable STP (Par retorcido blindado)
(Tipo recto CAT-5 de 3 m o menos)
DIGITAL IN
DIGITAL OUT
DIGITAL IN
Computadora
2
Use siempre un cable Ethernet
de tipo cruzado
DIGITAL OUT
Hub de interconexión
Ethernet
1
3
DIGITAL OUT
✱ Cable STP (Par retorcido blindado)
(Tipo recto CAT-5 de 3 m o menos)
DIGITAL IN
1
2
Monitor de
televisión
(en venta
por separado)
DIGITAL OUT
Computadora
3
Use siempre un cable
Ethernet de tipo recto
Computadora
Insertando la tarjeta LAN recomendada
(Instalada)
(Removida)
3
1
2
Intranet
3
El bloqueo se puede activar
fácilmente deslizando el dial.
1
Hub de interconexión
Ethernet
2
Vuelva el dial a su lugar
después del desbloqueo.
66
Español
AJUSTE DE RED
• CONTROL DE RED: ON (EXHIBICION: OFF): Cuando
Ajuste AJUSTE RED
1
Presiones el botón MENU dos veces para exhibir la pantalla
MENU PRINCIPAL 2
El cursor se mueve hasta AJUSTE EXHIBICION/PERDIDA
VIDEO.
MENU
•
2
<AJUSTE RED>
TARJETA DE RED : LAN1
CONTROL DE RED : ON (EXHIBICION:ON)
DIRECCION IP : 192.168. 0. 1
MASCARA SUBNET : 255.255.255. 0
GATEWAY
: 0. 0. 0. 0
PUERTO
: 00080
Use el dial de trotar para mover el cursor hasta el ajuste
AJUSTE RED y luego gire el dial de correr hacia la derecha.
Aparece el submenú AJUSTE RED, y el cursor se mueve al
ajuste TARJETA DE RED.
Nota:
• No será posible el control a través de la red a menos que
CONTROL DE RED está en ON.
Cuando se conecta a una red, se debería desactivar si el control
desde la red no es necesario.
• Si GRABACION EN SERIE DIGITAL en el menú RECORDING
CONDITIONS SET se ajusta a “ON”, CONTROL DE RED no se
puede ajustar a “ON”.
• La unidad principal no se puede usar mientras las operaciones de
red estén en progreso. Sin embargo, el videograbador digital se
puede desconectar de la red presionando el botón EXIT/OSD
durante aproximadamente 3 segundos.
<AJUSTE RED>
TARJETA DE RED : LAN1
CONTROL DE RED : OFF
DIRECCION IP : 192.168. 0. 1
MASCARA SUBNET : 255.255.255. 0
GATEWAY
: 0. 0. 0. 0
3
Gire el dial de correr hacia la derecha.
“LAN1” destella.
Seleccione LAN1 o LAN2 según corresponda con el tipo de
tarjeta que se está usando.
• LAN1: COREGA FEther PCC-TXD “CG-FEPCCTXD” tipo
(10/100 BASE-T) o COREGA FEther II PCC-TXD
“CG-FE2PCCTXD” tipo (10/100 BASE-T)
• LAN2: COREGA Ether PCC-TD tipo “CG-EPCCTD”
(10 BASE-T), COREGA Ether II PCC-TD
“CG-E2PCCTD” tipo (10 BASE-T), COREGA Ether II
PCC-T (10 BASE-T) o D-Link DE-660
6
Use el dial de trotar para seleccionar la tarjeta LAN (ejemplo:
“ LAN1” ), y luego gire el dial de correr hacia la derecha.
El cursor se mueve hasta CONTROL DE RED.
7
<AJUSTE RED>
TARJETA DE RED : LAN1
CONTROL DE RED : OFF
DIRECCION IP : 192.168. 0. 1
MASCARA SUBNET : 255.255.255. 0
GATEWAY
: 0. 0. 0. 0
5
Gire el dial de correr hacia la derecha y use el dial de trotar y
el dial de correr para exhibir la MASCARA SUBNET (ejemplo:
“ 255.255.255.0” ) y luego gire el dial de correr hacia la
derecha.
Con el movimiento final de el dial de correr el cursor se mueve
hasta GATEWAY.
<AJUSTE RED>
TARJETA DE RED : LAN1
CONTROL DE RED : ON (EXHIBICION:ON)
DIRECCION IP : 192.168. 0. 1
MASCARA SUBNET : 255.255.255. 0
GATEWAY
: 0. 0. 0. 0
PUERTO
: 00080
Gire el dial de correr hacia la derecha y use el dial de trotar
para seleccionar CONTROL DE RED (ejemplo: "ON"), y luego
girar el dial de correr hacia la derecha para ajustar
(EXHIBICION: ON).
El cursor se mueve hasta DIRECCION IP.
• CONTROL DE RED: ON (EXHIBICION: ON): Cuando
EXHIBICION se ajusta a ON, se exhibirán los caracteres
“CONTROL DE RED” en el monitor del videograbador digital
en todo momento durante una conexión de red. Además,
cuando se reproduzcan imágenes desde la red, el monitor del
videograbador digital también mostrará las imágenes de
reproducción. El videograbador digital no se puede usar
mientras exista una conexión a la red. Sin embargo, puede
desconectarlo de la red presionando el botón EXIT/OSD
durante 3 segundos.
Español
Gire el dial de correr hacia la derecha y use el dial de trotar y
el dial de correr para exhibir la DIRECCION IP (ejemplo:
“ 192.168.0.1” ) y luego gire el dial de correr hacia la derecha.
Con el movimiento final de el dial de correr el cursor se mueve
hasta MASCARA SUBNET.
<AJUSTE RED>
TARJETA DE RED : LAN1
CONTROL DE RED : ON (EXHIBICION:ON)
DIRECCION IP : 192.168. 0. 1
MASCARA SUBNET : 255.255.255. 0
GATEWAY
: 0. 0. 0. 0
PUERTO
: 00080
Nota: No se puede garantizar el funcionamiento correcto si se usa
una tarjeta LAN diferente a la recién recomendada.
4
EXHIBICION se ajusta a OFF, no se exhibirán los caracteres
“CONTROL DE RED” en el monitor del videograbador digital
durante una conexión de red. Además, cuando se
reproduzcan imágenes desde la red, el monitor del
videograbador digital mostrará las imágenes en vivo. El
indicador PLAY/STOP en el videograbador digital no se
encenderá durante la reproducción. (Se podrá grabar.) El
videograbador digital no se puede usar mientras exista una
conexión a la red. Sin embargo, puede desconectarlo de la red
presionando el botón EXIT/OSD durante 3 segundos.
OFF: Se desactivan las operaciones de red.
67
AJUSTE DE RED
8
3
Gire el dial de correr hacia la derecha y use el dial de trotar y
el dial de correr para exhibir la GATEWAY (ejemplo:
“ 192.168.0.1” ) y luego gire el dial de correr hacia la derecha.
Con el movimiento final del dial de correr, el cursor se mueve
hasta el ajuste PUERTO de “80”.
Use el dial de trotar para exhibir “ B” , y luego gire el dial de
correr.
Destella la tercer letra, la 1.
ID1
: AB11----
Nota: Cuando conecte esta unidad a una red, verifique los ajustes
DIRECCION IP, MASCARA SUBNET y GATEWAY con el
administrador de la red LAN.
9
4
Gire el dial de correr hacia la derecha, use el dial de trotar
para ingresar el número de PUERTO (ejemplo: “ 90” ), y luego
gire el dial de correr hacia la derecha.
Puede ajustar cualquier número de puerto que desee dentro del
rango de 1 a 65535.
Repita este procedimiento para continuar ingresando
“ 123456” , y luego gire el dial de correr hacia la derecha.
El cursor se mueve hasta ID2.
Nota: Si el número de puerto se ajusta a algo diferente del ajuste por
defecto de “80”, introduzca el número de puerto después “:” en
la dirección IP.
PUERTO
ID
ID1
ID2
ID3
Ajuste AJUSTE D/CONTRASENA
5
Existen tres niveles de acceso a la red, cada uno de los cuales cuenta
con una contraseña. Cada contraseña puede consistir de una
combinación de cuatro a ocho símbolos alfanuméricos.
Nota: El cursor no se puede mover hasta ID o CONTRASENA (4-8).
6
Ejemplo: Ajustar AB123456 como contraseña ID1
1
Use el dial de trotar para mover el cursor hasta ID1, y luego
gire el dial de correr hacia la derecha.
Destella la letra inicial 1 de la contraseña por defecto
• Los caracteres que pueden ser usados en la contraseña son:
0, 1 ... 9, A, B ... Z
PUERTO
ID
ID1
ID2
ID3
: 00080
CONTRASEÑA (4-8)
: AB123456
: 2222---: 3333----
Según sea necesario, use el mismo procedimiento para
ajustar las contraseñas de ID2 y ID3, y luego gire el dial de
correr hacia la derecha.
El cursor se mueve hasta TARJETA DE RED.
Presione el botón EXIT/OSD.
La exhibición vuelve a la pantalla normal.
EXIT/OSD
7
: 00080
CONTRASEÑA (4-8)
: 1111---: 2222---: 3333----
Uso del ordenador
Consulte el manual separado por el uso del mando a distancia
mediante una conexión de red.
Nota:
• ID1: Este nivel solamente puede observar imágenes en vivo a
través de la red.
• ID2: Este nivel puede observar imágenes en vivo, reproducir y
buscar imágenes grabadas a través de la red.
• ID3: Este nivel permite que se realicen todas las funciones y
ajustes del videograbador digital.
2
Use el dial de trotar para exhibir “ A” , y luego gire el dial de
correr.
Destella la segunda letra, la 1.
ID1
: A111----
68
Español
AJUSTE DEL DISCO DURO
Menú principal 2
<MENU PRINCIPAL 2>
1.AJUSTE EXHIBICION/PERDIDA VIDEO
2.AJUSTE RS-232C/RS-485
3.AJUSTE ZUMBADOR
4.AJUSTE BLOQUEO DE SEGURIDAD
5.AJUSTE RED
6.AJUSTE HDD
7.FALLO ALIMENTACION/TIEMPO USADO
->
->
->
->
->
->
->
AL MENU PRINCIPAL 1
->
CAMBIE DE LINEAS CON JOG, SELECCIONE CON SHUTTLE
Submenúes
Inicializa el disco duro.
<AJUSTE HDD>
DISCO 1
: 80GB
DISCO 2
: ---GB
INICIALIZA DISCO ->
CUIDADO : TODAS LAS GRAB.SERAN BORRADAS !
Graba en espejo.
ESPEJO
: OFF
DISCO D/REPRODUCCION : ¤¤¤
CUIDADO : VELOCIDAD DE GRAB. ESTARA
LIMITADA POR EL ESPEJO !
AJUSTE HDD
Ajusta la lectura del disco duro.
4
Exhibe la capacidad de disco duro del disco 1 (estándar) y del disco 2
(estándar o agregado).
Nota: Antes de agregar un disco duro, es importante respaldar las
imágenes grabadas en un medio tal como una tarjeta
CompactFlash.
1
Use el dial de trotar para seleccionar SI, y luego gire el dial
de correr.
Aparece la pantalla “INICIALIZA DISCO!” y el disco duro es
inicializado. Luego la exhibición vuelve a la pantalla AJUSTE
HDD.
Presiones el botón MENU dos veces para exhibir la pantalla
MENU PRINCIPAL 2.
El cursor se mueve hasta AJUSTE EXHIBICION/PERDIDA
VIDEO.
INICIALIZA DISCO !
MENU
5
2
EXIT/OSD
Use el dial de trotar para mover el cursor hasta el ajuste
AJUSTE HDD, y luego gire el dial de correr hacia la derecha.
Aparece el submenú AJUSTE HDD, y el cursor se mueve al
ajuste INICIALIZA DISCO.
<AJUSTE HDD>
DISCO 1
: 80GB
DISCO 2
: ---GB
INICIALIZA DISCO ->
CUIDADO : TODAS LAS GRAB.SERAN BORRADAS !
Para agregar un disco duro
Consulte a su concesionario acerca de agregar un disco duro. En
caso de agregar, use una unidad de disco duro adicional (en venta por
separado).
Si agrega otro disco duro, asegúrese de inicializar los discos duros.
Cuando haga esto, ambos discos duros serán inicializados, de
manera que cualquier dato existente en el disco duro original será
borrado.
ESPEJO
: OFF
DISCO D/REPRODUCCION : ¤¤¤
CUIDADO : VELOCIDAD DE GRAB. ESTARA
LIMITADA POR EL ESPEJO !
3
Presione el botón EXIT/OSD.
La exhibición vuelve a la pantalla normal.
Referencia: Pantalla AJUSTE HDD
• ESPEJO: Si se agrega un disco duro, o si se instala un disco duro
de 160 GB, es posible grabar las mismas imágenes en dos discos
duros. Esto significa que aunque ocurra un error de escritura de
imagen podrá leer desde un área donde no hay error de escritura.
Tenga en cuenta que si se especifica la función de espejo, el límite
superior de la velocidad de grabación será ilimitado.
• DISCO D/REPRODUCCION: Después de haber ajustado la
función ESPEJO, podrá especificar cuál de los dos discos duros se
va a usar para leer las imágenes grabadas.
Con la función de espejo, si ha ocurrido un error en la imagen
reproducida, cambie el disco duro actualmente en uso (DISCO1) a
(DISCO2).
• Copiando datos del DISCO 1 al DISCO 2: Los datos de
grabación en el DISCO 1 se pueden copiar al DISCO 2.
Seleccione “DESPUES” y luego gire el dial de correr hacia la
derecha. Aparece la pantalla de copia. Puede demorar varias
horas copiar todos los datos.
Gire el dial de correr hacia la derecha.
Aparece una pantalla ADVERTENCIA y luego destella “NO”.
<ADVERTENCIA>
ESTE CAMBIO INICIALIZARA EL DISCO.
TODAS LAS GRABACIONES SERAN BORRADAS.
ESTA SEGURO ?
NO
CAMBIE CON JOG. AJUSTE CON SHUTTLE
Español
69
EXHIBICIÓN DE FALLA DE
ALIMENTACIÓN/TIEMPO USADO
Menú principal 2
<MENU PRINCIPAL 2>
1.AJUSTE EXHIBICION/PERDIDA VIDEO
2.AJUSTE RS-232C/RS-485
3.AJUSTE ZUMBADOR
4.AJUSTE BLOQUEO DE SEGURIDAD
5.AJUSTE RED
6.AJUSTE HDD
7.FALLO ALIMENTACION/TIEMPO USADO
Submenúes
<FALLO ALIMENTACION/TIEMPO USADO>
FALLO ALIMENTACION
#020 AVERIA ----- --:-SOLUCION ----- --:--
->
->
->
->
->
->
->
TIEMPO USADO
USO DE DISCO1 :
USO DE DISCO2 :
USO GRAL.
:
AL MENU PRINCIPAL 1
->
CAMBIE DE LINEAS CON JOG, SELECCIONE CON SHUTTLE
1
FIRMWARE :
00000H
-----H
00000H
MAIN 1.00-00 / SUB 1.00-00
1
2
3
4
5
6
Acerca del submenú
Presiones el botón MENU dos veces para exhibir la pantalla
MENU PRINCIPAL 2
El cursor se mueve hasta AJUSTE EXHIBICION/PERDIDA
VIDEO.
1 AVERIA
Exhibe la fecha / hora cuando ocurrió una falla de alimentación.
El número de fallas de alimentación aparece a la izquierda.
(ejemplo: #020) Cuando el número excede los 999 vuelve a 000.
MENU
2 SOLUCION
Exhibe la fecha / hora cuando fue restaurada la alimentación.
3 USO DE DISCO1
Exhibe el tiempo de uso total del disco duro 1.
2
4 USO DE DISCO2
Use el dial de trotar para mover el cursor hasta el ajuste
FALLO ALIMENTACION/TIEMPO USADO, y luego gire el dial
de correr hacia la derecha.
Aparece el submenú de FALLO ALIMENTACION/TIEMPO
USADO.
Verifique la fecha/hora de una falla de alimentación, el tiempo de
uso de los discos duros, etc.
Exhibe el tiempo de uso total del disco duro 2.
5 USO GRAL.
Exhibe el tiempo de uso total para esta unidad.
6 FIRMWARE
Muestra la versión actual del firmware.
<FALLO ALIMENTACION/TIEMPO USADO>
FALLO ALIMENTACION
#001 AVERIA 06-15 20:30
SOLUCION 06-15 21:30
TIEMPO USADO
USO DE DISCO1 :
USO DE DISCO2 :
USO GRAL.
:
FIRMWARE :
3
00060H
-----H
00060H
MAIN 1.00-00 / SUB 1.00-00
Presione el botón EXIT/OSD.
La exhibición vuelve a la pantalla normal.
EXIT/OSD
70
Español
DETALLES DE LOS AJUSTES DE MENU DE
COPIA
Los detalles de los ajustes de menú se pueden grabar (copiar) en una tarjeta CompactFlash, y los ajustes que han sido grabados en una tarjeta
CompactFlash se pueden recuperar (cargar) en el videograbador digital. Esta función se puede usar para realizar los mismos ajustes fácilmente en
varios videograbadores digitales.
1
Grabación en una tarjeta CompactFlash
Exhiba el menú principal 1, y luego presione el botón
SHUTTLE HOLD durante 3 segundos o más.
Aparece la pantalla AJUSTES DE MENU DE COPIA.
MENU
<AJUSTES DE MENU DE COPIA>
DVR TIPO VER. SA01-00
GUARDAR MENUES EN CF
<AJUSTES DE MENU DE COPIA>
CARGAR MENUES DE CF
->
COPIA AJUSTES AREA DE GRAB.: NO
DVR TIPO VER. SA01-00
1
SHUTTLE HOLD
2
GUARDAR MENUES EN CF
->
->
* SI COPIA AJUSTES AREA DE GRAB.,
EL DISCO DURO SERA INICIALIZADO!
CARGAR MENUES DE CF
->
COPIA AJUSTES AREA DE GRAB.: NO
* SI COPIA AJUSTES AREA DE GRAB.,
EL DISCO DURO SERA INICIALIZADO!
1
1 Grabar los ajustes de menú en una tarjeta
CompactFlash
Esto graba los detalles de los ajustes de menú en una tarjeta
CompactFlash.
2
2 Cargar los ajustes de menú desde una tarjeta
CompactFlash
Esto carga los ajustes de menú desde una tarjeta
CompactFlash en el videograbador digital.
Gire el dial de trotar para seleccionar GUARDAR MENUES
EN CF, y luego gire el dial de correr hacia la derecha.
Aparecerá la pantalla ADVERTENCIA que le permitirá confirmar
la grabación.
Para grabar los ajustes, use el dial de trotar para exhibir
“ SI” , y luego gire el dial de correr hacia la derecha.
Entonces comenzará la grabación. Cuando se termine la
grabación, se exhibirá GUARDADO !
Se creará un archivo llamado MENUCOPY.TXT en el directorio
de la tarjeta CompactFlash.
<ADVERTENCIA>
GUARDAR MENUES EN CF!!
CONTINUAR?
SI
<AJUSTES DE MENU DE COPIA>
GUARDADO !
GUARDAR MENUES EN CF
->
CARGAR MENUES DE CF
->
COPIA AJUSTES AREA DE GRAB.: NO
* SI COPIA AJUSTES AREA DE GRAB.,
EL DISCO DURO SERA INICIALIZADO!
Español
71
DETALLES DE LOS AJUSTES DE MENU DE COPIA
☞ Si está copiando los ajustes de área de grabación
Cargar ajustes de menú grabados
Esto describe como copiar los ajustes del área de grabación.
Normalmente debería ajustar COPIA AJUSTES AREA DE GRAB. a
“NO”.
Este procedimiento carga los detalles de ajuste de menú que han sido
grabados en una tarjeta CompactFlash en el videograbador digital.
Nota: Cuando cargue los ajustes en el videograbador digital, puede
seleccionar si desea cargar también los ajustes del área de
grabación.
Si lee diferentes ajustes de menú en un videograbador digital
que ya tiene imágenes grabadas en su disco duro, las áreas de
grabación serán inicializadas automáticamente, y todas las
imágenes que ya han sido grabadas se perderán. Por lo tanto,
normalmente debería seleccionar “NO” en el elemento COPIA
AJUSTES AREA DE GRAB. Si selecciona “SI” y entonces
carga los ajustes de menú, esto causará que comience la
inicialización del disco duro, y por tanto aparecerá la pantalla de
ingreso de contraseña de administrador.
1
Para copiar los ajustes, use el dial de trotar para ajustar
COPIA AJUSTES AREA DE GRAB. a “ SI” y gire el dial de
trotar para seleccionar “ CARGAR MENUES DE CF” , y luego
gire el dial de correr hacia la derecha.
<AJUSTES DE MENU DE COPIA>
DVR TIPO VER. SA01-00
GUARDAR MENUES EN CF
->
CARGAR MENUES DE CF
->
COPIA AJUSTES AREA DE GRAB.: SI
<AJUSTES DE MENU DE COPIA>
* SI COPIA AJUSTES AREA DE GRAB.,
EL DISCO DURO SERA INICIALIZADO!
DVR TIPO VER. SA01-00
GUARDAR MENUES EN CF
->
2
CARGAR MENUES DE CF
->
COPIA AJUSTES AREA DE GRAB.: NO
* SI COPIA AJUSTES AREA DE GRAB.,
EL DISCO DURO SERA INICIALIZADO!
1
2
Gire el dial de trotar para seleccionar CARGAR MENUES DE
CF, y luego gire el dial de correr hacia la derecha.
Aparecerá la pantalla ADVERTENCIA que le permitirá confirmar
la carga.
Para copiar los ajustes, use el dial de trotar para seleccionar
“ SI” en la pantalla ADVERTENCIA, y luego gire el dial de
correr hacia la derecha.
Entonces comenzará la copia. Cuando se termine de copiar, se
exhibirá CARGADO!!
<ADVERTENCIA>
GUARDAR MENUES EN CF !
EL DISCO DURO SERA INICIALIZADO!
CONTINUAR?
SI
Para cargar los ajustes, use el dial de trotar para exhibir
“ SI” , y luego gire el dial de correr hacia la derecha.
Entonces comenzará la carga. Cuando se termine de cargar, se
exhibirá CARGADO!!
<ADVERTENCIA>
GUARDAR MENUES EN CF !
CARGANDO DE CF !
CONTINUAR?
SI
<AJUSTES DE MENU DE COPIA>
CARGADO!!
CARGANDO DE CF !
<AJUSTES DE MENU DE COPIA>
CARGADO!!
72
Español
ESPECIFICACIONES DEL INTERFAZ
RS-232C
Especificaciones del conector de 9 clavijas
1 2 3 4 5
Número de clavija
Señal
Función
Dirección de la señal
1
–
–
–
2
RXD
Recibir datos
Ordenador → Videograbador digital
3
TXD
Transmitir datos
Videograbador digital → Ordenador
4
–
–
–
5
GND
Tierra
–
6
–
–
–
7
RTS
Solicitud de envío
Videograbador digital → Ordenador
8
–
–
–
9
–
–
–
6 7 8 9
Formato de los datos
Modo
Asíncrono
Longitud de caracteres
8 bits
Velocidad de transmisión de datos
2400, 4800, 9600, 19200 bps
Paridad
Ninguna
Bit de parada
1
Protocolo de comunicaciones
La comunicación se realiza en unidades de 1 byte. Después que el ordenador transmite un byte de datos, espera una
respuesta del videograbador digital, y luego transmite el siguiente byte de datos.
Para comenzar el envío de comandos, se envía un comando ON (F6). El videograbador digital continuará recibiendo
comandos hasta que se envíe un comando OFF (F7) como señal de detención. El videograbador digital envía un ACK
(OA) cada vez que recibe un comando.
Consulte la tabla 4 – Tabla de comandos en la página 75.
RS-485
Formato de los datos
Modo
Asíncrono
Longitud de caracteres
8 bits
Velocidad de transmisión de datos
2400, 4800, 9600, 19200 bps
Paridad
Ninguna
Bit de parada
1
Protocolo de comunicaciones
Se usa un protocolo de Sanyo propietario (SSP: Protocolo Serial de seguridad). Se recomienda que se utilice un
controlador especial. Póngase en contacto con el comercio donde lo compró para obtener detalles sobre cómo conseguir
un controlador especial.
Español
73
ESPECIFICACIONES DEL INTERFAZ
Ajustes del interruptor de terminación RS485 (RS485 TERMINATE)
Ajuste de terminación
Si se están conectando juntos varios videograbadores digitales, también se deben realizar ajustes de terminación.
• Ajuste el interruptor de terminación RS485 del panel trasero a ON, y ajuste el interruptor de terminación del último dispositivo en la serie a ON.
• Asegúrese de ajustar los interruptores de terminación RS485 de todos los dispositivos intermedios (dispositivos que no son ni el primero ni el
último de la serie) a OFF.
Nota: Si los ajustes de terminación no son correctos, los datos se reflejarán por cualquier extremo de la serie y esto afectará la transmisión de otros
datos, por lo que los datos que se transmitirán a cada dispositivo no serán correctos.
(Ejemplo)
ON
Controlador del sistema
RS485
POWER
12V DC IN
ON
A
GND
B
AB
OFF
ADDRESS
1 2 3
Interruptor de terminación
1
0
TERMINATE
OFF
RS485
TERMINATE
ON
Multiplexor
OFF
RS485
TERMINATE
ON
Videograbador digital
OFF
ON
Videograbador de intervalo de tiempo
Interruptor de terminación
OFF
74
Español
ESPECIFICACIONES DEL INTERFAZ
Tabla de comandos (Tabla 4)
La siguiente tabla exhibe todos los comandos que pueden ser procesados por el videograbador digital.
Si un comando enviado no corresponde a una función del videograbador digital, el comando será recibido pero no se realizará ninguna función.
Bit superior
Bit inferior
0
1
2
3
4
5
0
6
7
TIMER ON/OFF
1
2
3
SHIFT←
SHIFT→
4
SHIFT↑
SHIFT↓
5
SHIFT+
/RP UP
6
SHIFT–
/RP DOWN
MENU
7
8
SECURITY
LOCK ON
9
A
ACK
B
NAK
PLAY
SEARCH
C
GROUP SET
D
GROUP
CHECK
E
GROUP
CLEAR
F
Bit superior
Bit inferior
8
9
A
STOP
STILL
B
C
D
E
0
CLOCK
ADJUST
1
MENU RESET
F
2
3
4
5
ZOOM (MPX)
6
7
STATUS
SENSE
8
MENU
UPLOAD
CLOCK
DOWNLOAD
9
A
REC
B
REC/DUB
REQUEST
FF/ALARM F
C
CHANNEL
D
COPY
E
OSD/EXIT
F
REW/ALARM R
*RS-485 SEND
START
*RS-485 RCV
CMF.
STATUS LOG2
STATUS LOG1
: Comando solamente para RS-485
Español
MENU
DOWNLOAD
75
REC STOP
ESPECIFICACIONES
Capacidad del disco duro
Sistema de televisión
Resolución de la imagen
Compresión
Calidad de la imagen
Tipo de grabación
Velocidad de grabación
Área de grabación
Reproducción
Zoom
Modo de búsqueda
• Búsqueda por fecha/hora
• Búsqueda de alarmas
• Búsqueda de miniaturas de alarma
• Búsqueda en área de archivo
• Búsqueda de movimiento
inteligente
Lenguaje de menú
Ajustes de reloj
Entrada de vídeo
Entrada S-video
:
:
:
:
:
:
:
:
:
:
80 GB o 160 GB
Basado en estándar de señal a color NTSC
720 x 240 (campos), 720 x 480 (cuadros)
M-JPEG
5 niveles (básica, normal, mejorada, fina, súper fina)
Grabación de cuadros o campos
27 niveles
Área de grabación normal, Área de grabación de alarma, Área de archivo
Reproducción, Imagen fija, Búsqueda
Función de zoom 2x
:
:
:
:
:
Buscar por fecha y hora
Buscar alarmas en la lista de eventos
Buscar miniaturas de eventos de alarma
Buscar en área de archivo con la lista de eventos
Buscar especificando un sensor de movimiento
:
:
:
:
Entrada Digital
Entrada SUB Digital
Entrada de Audio
Entrada de micrófono
Salida de vídeo
Salida S-video
:
:
:
:
:
:
Salida de lazo
Salida de lazo S-video
:
:
Salida Digital
Salida SUB Digital
Salida de Audio
Ranura de CompactFlash
Ranura de tarjeta de PC
RS-232C
Conectores
• RS-485
• Mando a distancia
• Entrada de alarma
• Salida de alarma
• Reposición de alarma
• Salida SW
• Salida NON Rec
• Entrada de ajuste de reloj
• Salida de ajuste de reloj
• Salida de advertencia
• Salida de disco lleno
• Salida de alarma completa
Alimentación
Consumo de alimentación
Ambiente de funcionamiento
Dimensiones
Peso
:
:
:
:
:
:
Inglés/Francés/Español
Año / mes / día / horas / minutos / segundos
1,0 Vp-p, 75 Ω, no balanceado, BNC x 1
Señales separadas YC, conector DIN (terminal S) x 1
Señal Y: 1,0 Vp-p/75 ohms, no balanceado, sincronizado; señal C: 0,286 Vp-p/75 ohms, no
balanceado
RJ-45 x1
RJ-45 x1
–8 dBs, 27 kΩ no balanceado (toma de clavijas RCA x 1)
–60 dBs 10 kΩ no balanceado (minitoma de 3,5 mm)
1,0 Vp-p, 75 Ω, no balanceado, BNC x 1
Señales separadas YC, conector DIN (terminal S) x 1
Señal Y: 1,0 Vp-p/75 ohms, no balanceado, sincronizado; señal C: 0,286 Vp-p/75 ohms, no
balanceado
1,0 Vp-p, 75 Ω, no balanceado, BNC x 1
Señales separadas YC, conector DIN (terminal S) x 1
Señal Y: 1,0 Vp-p/75 ohms, no balanceado, sincronizado; señal C: 0,286 Vp-p/75 ohms, no
balanceado
RJ-45 x1
RJ-45 x1
–8 dBs, 600 Ω no balanceado (toma de clavijas RCA x 1)
CompactFlash Tipo 2 (Adelante)
PCMCIA Tipo 2 (Atrás) para SCSI o tarjeta Ethernet
D-SUB de 9 clavijas (para PC)
:
:
:
:
:
:
:
:
:
:
:
:
:
:
:
:
:
Bloqueo de empuje, 3 terminales (A, B, C (GND))
1 entrada para el interruptor de pasaje de resistencia
1 entrada (Normal abierta activa de bajo nivel)
1 salida (Normal 5V activa de bajo nivel)
1 entrada (Normal abierta activa de bajo nivel)
1 salida (Normal 5V activa de bajo nivel)
1 salida (Normal 5V activa de bajo nivel)
1 entrada (Normal abierta activa de bajo nivel)
1 salida (Normal 5V activa de bajo nivel)
1 salida (Normal 5V activa de bajo nivel)
1 salida (Normal 5V activa de bajo nivel)
1 salida (Normal 5V activa de bajo nivel)
CA de 120 V, 60 Hz
26 W 400 mA
Temperatura: 5°C a 40 °C, Humedad: 10 a 80%
420 (Ancho) x 86 (Altura) x 364,5 (Profundidad) mm
Aprox. 5,5 kg
Los productos están sujetos a cambios en el diseño y las especificaciones sin previo aviso y sin incurrir en obligación alguna.
76
Español
VIDEO INDUSTRIAL SANYO
VIDEOGRABADOR DIGITAL - GARANTÍA
OBLIGACIONES
Para obtener servicio de garantía, el aparato debe ser entregado y recogido de un Centro Autorizado de Servicio de Sanyo, a costo del usuario, a
menos que sea especificado de otra manera en esta garantía. Los nombres y los domicilios de los Centros Autorizados de Servicio por Sanyo,
pueden obtenerse llamando al número gratuito aquí mostrado:
Para operación del producto, centro de referencia de servicio autorizado, servicio de asistencia o solución de problemas llame:
INFORMACION AL CLIENTE 1-800-421-5013
Días entre semana 8:30 AM - 5:00 PM Hora del Pacífico
Para accesorios y/o partes, llame:
INFORMACION Y ORDENES DE PARTES 1-800-726-9662
Días entre semana 8:30 AM - 5:00 PM Hora del Pacífico
ESTA GARANTIA ES VALIDA UNICAMENTE EN LOS PRODUCTOS SANYO COMPRADOS O RENTADOS EN LOS ESTADOS UNIDOS DE
AMERICA, EXCLUYENDO TODOS LOS TERRITORIOS O PROTECTORADOS. ESTA GARANTIA SE CONCEDE SOLO AL DETALLISTA O
COMPRADOR ORIGINAL. LA FACTURA ORIGINAL FECHADA, EL RECIBO DE VENTA O EL CONTRATO DE ARRENDAMIENTO, DEBEN SER
PRESENTADOS AL MOMENTO EN QUE EL SERVICIO DE GARANTIA SEA REQUERIDO.
Sujetándose a las OBLIGACIONES anteriores y a las EXCLUSIONES abajo descritas, SANYO-FISHER COMPANY (SFC), garantiza este producto
SANYO contra defectos en los materiales y la mano de obra, por los períodos de LABOR y PARTES abajo especificados. SFC reparará o
reemplazará (a su opción) el producto y cualquiera de las partes que pudieran fallar, conforme a esta garantía. El período de garantía comienza en la
fecha en que el producto fue originalmente comprado al menudeo.
MANO DE OBRA
PARTES
3 AÑOS
3 AÑOS
EXCLUSIONES
Esta garantía no cubre (A) el ajuste de los controles operados por el cliente, como se explica en el manual de instrucciones apropiado del modelo, o
(B) la reparación de cualquier producto cuyo número de serie ha sido alterado, borrado o removido. Esta garantía no se aplica para el gabinete o las
partes cosméticas, batería o el mantenimiento de rutina.
Esta garantía no se aplica en el ajuste, instalación, movimiento del producto, para reparación o re-instalación después de ser reparado.
Esta garantía no se aplica en reparaciones o reemplazos necesitados por cualquier causa, más allá del control de SFC, incluyendo, pero no limitando
a, cualquier funcionamiento inadecuado, defecto o falla causada por, o resultante del uso de cualquier producto fuera de los rangos de temperaturas
de funcionamiento especificados en nuestras especificaciones de productos (por ej. entre 41 y 104 grados Fahrenheit o entre 5 y 40 grados Celsius),
de servicio o partes no autorizados, mantenimiento impropio, operación contraria a las instrucciones suministradas, accidentes de envío o transporte,
modificación o reparación por el usuario, abuso, maltrato, negligencia, accidentes, línea de voltaje incorrecta, fuego, caídas y otros Actos de Dios, o el
uso y desgaste normal.
SFC no garantiza que las imágenes grabadas o la información serán mantenidas en ningún producto enviado por reparaciones o cambios.
Lo anterior sustituye todas las demás garantías expresadas y SFC no asume o autoriza ninguna otra parte o asume por ello cualquier otra obligación
o responsabilidad.
LA DURACION DE CUALQUIER GARANTIA QUE PUEDE SER IMPLEMENTADA POR LEY (INCLUYENDO LAS GARANTIAS DE MERCADEO Y
PROPIEDAD) ESTAN LIMITADAS EN LOS TERMINOS DE ESTA GARANTIA. EN NINGUN CASO SFC SERA RESPONSABLE POR DAÑOS
ESPECIFICOS, INCIDENTALES O CONSECUENCIALES DERIVADOS DE LA PROPIEDAD O USO DEL PRODUCTO, O POR CUALQUIER
RETRASO EN EL CUMPLIMIENTO DE LAS OBLIGACIONES BAJO ESTA GARANTIA, DEBIDO A CAUSAS FUERA DE SU CONTROL. ALGUNOS
ESTADOS NO PERMITEN LIMITACIONES EN QUE TANTO UNA GARANTIA IMPLICADA PREVALECE Y/O NO PERMITEN LA EXCLUSION O
LIMITACION DE DAÑOS CONSECUENCIALES, POR LO QUE LAS LIMITACIONES Y EXCLUSIONES AQUI DESCRITAS PUDIERAN NO
APLICARSE A USTED.
ATENCION
Para su protección en caso de robo o pérdida de este producto, por favor complete la información de abajo para su archivo personal.
Modelo No.
____________________________________________
Fecha de Compra
Lugar de Compra
______________________________________
Serie No.
_____________________________________________
(LOCALIZADO ABAJO O ATRAS DE LA UNIDAD)
Precio de Compra
______________________________________
________________________________________________________________________________________________
L8HAA/US (DSR-3000 GB) 2002. 7. 25
Printed on recycled paper
Imprimé sur du papier recyclé
Impreso en papel reciclado
1AC6P1P2610-L8HAA/US3, US4 (0902KP-CZ)
SANYO Electric Co., Ltd.
Printed in Japan