1
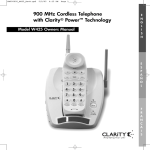
INSTRUCTION MANUAL
CLT -D6220
CLT -D6222
CLT -D6223
Dual Handset Model
Triple Handset Model
Digital Enhanced Cordless
Telephone 6.0
CID
VOL
CID
VOL
FLASH
MENU
MUTE
BACK
OK
CLEAR
1
ABC
2
DEF
3
GHI
4
JKL
5
MNO
6
PQRS
7
TUV
8
WXYZ
9
TONE
0
INT
R
FORMAT
PAUSE
FLASH
BACK
MENU
MUTE
CLEAR
OK
1
ABC
2
DEF
3
GHI
4
JKL
5
MNO
6
PQRS
7
TUV
8
WXYZ
9
TONE
PAGE
0
INT
R
FORMAT
PAUSE
(This picture depicts dual handset model CLT-D6222)
IMPORTANT!
Charge the handset battery for a full 15 hours before using your telephone for
the first time.
SANYO Canada Inc.
66DD121BHBAG
www.sanyo.ca
SANYO Canada Inc.
www.sanyo.ca
TABLE OF CONTENTS
INTRODUCTION
SAFETY INSTRUCTIONS
UNPACKING
TIPS FOR BEST PERFORMANCE
NAMES OF CONTROLS
Handset
LCD display
Base station
External charger
INITIAL SETUP
AC connection
Wall mount
Installing the handset battery and
initial charging
Replace the handset battery
BASIC OPERATION
Register
Dial mode
Set time
Placing a call
Answering a call
Out of range
MENU CHART
FEATURES
Phonebook
Character chart
Chain dialing
Ringer mute
Redial
Temporary touch tone access
Quick access for missed call
Flash
Handsfree speaker
Headset
Mute
Keylock
To adjust the volume
Page/Handset locator
Intercom/Call transfer
3-Way conference
Caller ID features
Voice mail indicator
SETTINGS MENU
New entry
PHONEBOOK
Edit record
3
3
5
6
7
7
7
8
8
9
9
9
Delete record
Delete All
Music Group
Speed dial
Memory Status
SETUP
Unit name
Backlight time
Area code
Dial mode
Auto talk
Flash time
Language
Contrast
Register
New register
De-register
Select base
Time format
Set time
Set default
10
11
12
12
12
13
13
14
14
14
16
16
17
17
17
18
18
18
18
19
19
19
19
19
19
20
21
21
21
22
22
22
22
PROFILE
HS ringer music
HS ringer volume
Page tone
Key tone
FUNCTION
No disturb
Alarm 1, Alarm 2
Call log
Call log options
Store record
Delete record
Delete all
MAXIMIZE BATTERY PERFORMANCE
REPLACE THE BATTERY
RECYCLING NICKEL-METAL
HYDRIDE BATTERIES
POWER FAILURE
HEADSET JACK
DEFAULT SETTING
TROUBLE SHOOTING
MAINTENANCE
TECHNICAL INFORMATION
SANYO COMFORT WARRANTY
SOS HELP LINE
2
23
23
23
24
24
25
25
25
25
25
26
26
26
27
27
27
27
28
28
29
29
29
29
30
30
30
31
31
31
32
32
32
33
33
34
34
35
35
35
36
37
38
39
41
42
IMPORTANT SAFETY INSTRUCTIONS
INTRODUCTION
Thank you for choosing SANYO. Your SANYO DECT 6.0 telephone features include:
Handset speakerphone
Multilingual menu: English, French, Spanish
Caller ID
Voicemail indicator
100-name/number phone book
50-caller log
Polyphonic ringers
Listening and ringer volume control
Lighted keypad
Speed dialing
Page/handset locator
Headset jack on handset
3 parties conference call (CLT-D6222, CLT-D6223 multi handsets)
Clock & 2 wake-up alarms
Intercom and call transfer between handsets (CLT-D6222, CLT-D6223 multi handsets)
13. Never touch uninsulated telephone wires or terminals unless the telephone line has been
disconnected at the network interface.
14. Never install or modify telephone wiring during a lightning storm.
15. Never install telephone jacks in wet locations unless the jack is specifically designed for wet
locations.
16. Use caution when installing or modifying telephone lines to prevent electrical shock and/or fire.
17. Unplug this product from the wall outlet and refer servicing to qualified service personnel under
the following conditions:
A. When the power supply cord or plug is damaged or frayed.
B. If the product has been exposed to water.
C. If the product does not operate normally by following the operating instructions.
D. If the product’s cabinet has been damaged.
E. If the product exhibits a distinct change in performance.
18. Avoid using a telephone (other than a cordless type) during an electrical storm. There may be a
remote risk of electric shock from lightning.
19. Do not use the telephone to report a gas leak in the vicinity of the leak.
20. Do not place this product on an unstable cart, stand or table. The product may fall, causing
serious damage to the product.
IMPORTANT SAFETY INSTRUCTIONS
Some of the following information may not apply to your particular product; however, when
using telephone equipment, basic safety precautions should always be followed to reduce
the risk of fire, electric shock and injury to persons, including the following:
CAUTION
You must use a Class 2 power source that supplies 7.5V DC and delivers at least 250mA. Its plug
must fit the phone’s DC IN jack. The supplied adaptor meets these specifications. Using an
adaptor that does not meet these specifications could damage the phone or the adaptor.
1. Read and understand all instructions.
2. Follow all warnings and instructions marked on the product.
3. Unplug this product from the wall outlet before cleaning. Do not use liquid cleaners or aerosol
cleaners. Use a damp cloth for cleaning.
4. Telephones should not be used while you are in a bathtub, shower or pool. Immersion of the
telephone or handset in water could cause an electrical shock.
5. Slots and openings in the cabinet back or bottom are provided for ventilation, to protect it from
overheating. These openings must not be blocked or covered. The openings should never be
blocked by placing the product on the bed, sofa, rug, or other similar surface. This product should
not be placed in a built-in installation unless proper ventilation is provided.
6. This product should be operated only from the type of power source indicated on the marking
label. If you are not sure of the type of power supplied to your home, consult your dealer or local
power company.
7. Do not allow anything to rest on the power cord. Do not locate this product where the cord will be
abused by people walking on it.
8. Do not overload wall outlets and extension cords as this can result in the risk of fire or electric
shock.
9. Never push objects of any kind into this product through cabinet slots as they may touch
dangerous voltage points or short out parts that could result in a risk of fire or electric shock.
Never spill liquid of any kind on the product.
10. To reduce the risk of electric shock, do not disassemble this product, but take it to a qualified
serviceman when service or repair work is required. Opening or removing covers may expose you
to dangerous voltages or other risks. Incorrect reassembly can cause electric shock when the
telephone equipment is subsequently used.
11. Do not expose the product to extreme temperatures such as areas near a hot radiator or stove
or in a hot car.
12. Do not place light candles, cigarettes, cigars, etc., on the telephone.
1. CAUTION: Risk of explosion if battery is replaced by an incorrect type.
Use only the provided battery pack in the handset of your cordless phone:
2.4V 600mAH NiMH rechargeable battery pack
2. Do not dispose of the battery(ies) in a fire. They may explode. Check with local codes for possible
special disposal instructions.
3. Do not open or mutilate the battery(ies). Released electrolyte is corrosive and may cause damage
to the eyes or skin and it may be toxic if swallowed.
4. Exercise care in handling battery(ies) in order not to short out the battery(ies) with conducting
materials such as rings, bracelets, and keys. The battery(ies) or conductor may overheat and
cause burns.
5. Do not attempt to rejuvenate the battery(ies) provided with or identified for use with this product
by heating them. Sudden release of the battery(ies) electrolyte may occur causing burns or
irritation to eyes or skin.
6. When inserting battery pack into this product,the proper polarity or direction must be observed.
Remove battery(ies) from this product if storing over 30 days because the battery(ies) could leak
and damage the product.
7. If your product uses rechargeable battery(ies), charge the battery(ies) only in accordance with
the instructions and limitation specified in the User Manual.
SAVE THESE INSTRUCTIONS
SAVE THESE INSTRUCTIONS
3
4
Always connect the AC adaptor to the phone before you connect it to AC power. When you finish,
disconnect the adaptor from AC power before you disconnect from the phone.
SAFETY INSTRUCTIONS FOR BATTERIES
UNPACKING
TIPS FOR BEST PERFORMANCE
Check to make sure you have all the items that come with the system.
Base Station
Handset
Telephone Cord
(1 pc for CLT-D6220
2 pcs for CLT-D6222
3 pcs for CLT-D6223)
Rechargeable
Battery Pack
2SN-AAA60H-S-T
(Pre-installed)
(1 pc for CLT-D6220
2 pcs for CLT-D6222
3 pcs for CLT-D6223)
Base station location
For the maximum operating range, the best location for the base station is at the highest point in the
house. Avoid places near electrical appliances and metal structures such as refrigerator and filing
cabinets that can reduce operating range and performance.
Away from electrical appliances such
as TV, radio, or personal computer.
In a HIGH and CENTRAL location
with no obstructions.
PAGE
VOL
CID
AC Adaptor
External Charger
1 pc for base 250mA
1 pc for charger 150mA (CLT-D6222)
2 pcs for charger 150mA (CLT-D6223)
(1 pc for CLT-D6222
2 pcs for CLT-D6223)
INPUT: AC120V, 60Hz
OUTPUT: DC 7.5V, 250mA
Polarity: Center Negative
(for base station)
INPUT: AC120V, 60Hz
OUTPUT: DC 7.5V, 150mA
Polarity: Center Negative
(for external charger)
Do not place the base station on top of or near TV or VCR as this may interfere with the performance of
these appliances.
CAUTIONS:
If you operate this product near water (bathtub, swimming pool, kitchen), take care to avoid
contact between the water and the handset.
Never spill liquid on the handset. This may cause a malfunction.
Do not operate this product with dirty hands or allow the handset to be exposed to direct
sunlight for extended periods. This can cause blurring, discoloration and fading of the lettering
on the handset keypad. Discoloration or fading will have no effect on the telephone performance.
Connect the AC adaptor to a wall outlet that receives power continuously. Do not connect it to a
switched outlet.
5
6
NAMES OF CONTROLS
NAMES OF CONTROLS (Continued)
Base station
Handset
Contact Points
For handset battery charging.
Incoming Ring/
In use LED
Earpiece
TALK Button
Press to answer an incoming
call or to place an outgoing call.
MENU/OK Button
Press to enter the menu
in standby mode. Also use
to confirm the selection in the
menu.
UP/DOWN Button
Use to scroll up ( ) or down ( )
in the menu. Or adjust the
volume level of the earpiece
during a call. Press Up ( ) or
Down ( ) in standby mode to
check for missed calls.
Headset Jack
FLASH/BACK Button
Works like a temporary
hook switch. Use to access
special telephone company
services (call waiting, for example)
Press in menu mode will go
back one step.
TONE/ /
Button
Press for temporary access
to Touch-Tone dialing.
Press and hold will turn ON
and OFF No disturb mode.
CHARGE
/IN USE
END Button
Press to disconnect a call or exit
from menu.
1
ABC
2
DEF
3
MUTE/CLEAR Button
Use to mute the microphone
during a call. Also use for clear
an input.
GHI
4
JKL
5
MNO
6
Dial Buttons
PQRS
7
TUV
8
WXYZ
9
#/KEYLOCK Button
Press and hold will activate
or deactivate keylock
FLASH
MENU
MUTE
BACK
OK
CLEAR
0
INT
R
FORMAT
PAUSE
HANDSFREE SPEAKER Button
Press to activate the
speakerphone.
7.5
REDIAL (PAUSE) Button
Press to display the dialed
number. Also use to insert
a pause between dialing digits.
Microphone
PAGE Button
Press to page
the handset.
PAGE
CID
VOL
TONE
INTERCOM/FORMAT Button
Press to page or intercom
another handset registered
to the same base unit.
Press to format area code/
Long distance numbers when
reviewing Caller ID numbers.
PHONEBOOK Button
Press to access
phonebook.
CHARGE/IN USE
Indicator
Lights when the handset
battery is being recharged
or when the telephone
is in use.
Flashes when there is an
incoming call.
Display
Contact Points
For handset battery charging.
AC Adaptor Jack
(DC 7.5V AC Adaptor)
Modular Telephone Jack
(TEL LINE)
External charger
(For CLT-D6222, CLT-D6223)
LCD display
Speaker, In Use,
Date Ringer Off, Alarm Time
CHARGE Indicator
7.5
Battery
In Range Signal
AC Adaptor Jack
(DC 7.5V AC Adaptor)
7
8
INITIAL SETUP
INITIAL SETUP (Continued)
AC connection
Installing the handset battery and initial charging
1. Insert the small plug on the end of the AC adaptor cord into the DC 7.5V AC ADAPTOR jack on
the back of the base station.
2. Plug the AC adaptor into a standard AC120V wall outlet.
3. Plug one end of the telephone cord into a telephone wall jack and the other into the TEL LINE jack
on the back of the base station.
1. The battery pack is already pre-installed in the handset.
Find the battery contact tab on the back of the handset.
Pull to remove before use
Retirer avant usage
2. Pull the battery contact tab out slowly from the
battery compartment.
Wall Telephone Jack
AC Wall Outlet
3. Place the handset on the base station for 15 hours.
The
indicator in base will light.
CHARGE
/IN USE
Pull to remove before use
Retirer avant usage
The base station must be connected to AC power.
7.5
AC Adaptor
NOTE:
Battery and handset may become warm during charging. This is normal.
To Telephone Line
7.5
IMPORTANT: Charge the handset battery for a full 15 hours before using the telephone for the
first time.
If the handset battery is not installed and the handset is placed on the base station cradle, the
incoming ring will not sound.
(For CLT-D6222, CLT-D6223)
Replacement battery:
Nickel Metal Hydride 2.4V 600mAh battery pack.
Using other types of batteries may cause serious damage or equipment malfunctions.
Only replace with an approved battery pack available through SANYO.
Use enclosed form to order.
NOTE:
Use only AC adaptor provided with the telephone.
Wall mount
To mount the base station on a wall
1.
2.
Connect the cord to a wall phone plate (not supplied).
Mount the base station on the wall phone plate securely.
CAUTION:
Use only the specified battery.
Do not remove the battery from the handset to charge.
Never throw the battery into a fire, disassemble it, or heat it.
Do not remove or damage the battery casing.
Remove the battery if would not use the phone for over 30 days.
Low battery
WARNING:
Be certain there are no electrical cables, pipes or other items behind the mounting location that could
cause a hazard when inserting the screws into the wall.
9
If the handset battery power is low the BATTERY ICON
in the display will be empty
and you will
hear a warning beep every 15 seconds. If you are on a call, finish your conversation as soon as
possible as your call will be cut in approximately 5 minutes. Recharge the handset for 15 hours before
continuing to use the telephone.
10
BASIC OPERATION
INITIAL SETUP (Continued)
Replace the handset battery
Before using the phone
Register
Your handset has been registered to the base at the factory. Please verify the link is still valid before use.
1. Remove the battery compartment lid.
1. Place the handset close to the base station. The antenna icon in the display should appear.
2. Press
. Verify that you get a dial tone and the IN USE indicator lights. The display will
show "IN USE" and a call timer.
Your handset is ready to use.
3. Place a call or press
2. Detach the old battery from the battery compartment
by using the ribbon linked to the battery.
Battery ribbon
to hang up.
If your handset does not register to the base, please see page 36 TROUBLE SHOOTING for help and/
or try the following procedures to register the handset:
Lift the handset from the base charging cradle. Press and hold the
button in the base for 10
seconds until the
LED flashes. Please complete the registration within 1 minute.
PAGE
CHARGE
/IN USE
3. Place the new battery into the compartment.
Follow the direction and make sure the contacts
of the battery touch the contacts of the
compartment.
Press
Battery
contacts
MENU
MENU
MENU
MENU
MENU
key 0-9
To
enter MENU
scroll to SETUP
enter SETUP
scroll to REGISTER
enter REGISTER
enter NEW REGISTER
select BASE 1 for the first base unit
input PIN code, default is 1234
confirm
MENU
Your handset is now searching for the base. If successful you will hear a long beep confirmation tone.
If not successful, you will hear a 3 beep error tone. Please try again.
Dial mode
Depending on the telephone system, you may need to set the dial mode TONE or PULSE to match.
Default is TONE. If you are not sure the dialing system, contact your local telephone company.
Press
MENU
4. Replace the lid.
MENU
MENU
5. Place the handset on the base station for 15 hours.
The
indicator in base will light.
CHARGE
/IN USE
MENU
To
enter MENU
scroll to SETUP
enter SETUP
scroll to DIAL MODE
enter DIAL MODE
select TONE or PULSE
confirm
exit
NOTE: For CLT-D6222 and CLT-D6223 multi-handsets, you must set the dial mode for each handset.
11
12
BASIC OPERATION (Continued)
BASIC OPERATION (Continued)
Answering a call
Before using the phone (continued)
CHARGE
/IN USE
Set time
The handset has a date, time display. You may set the date and time before using the phone.
When a call comes in, the Incoming Ring LED, the
handset will light.
Press
1. Press
or
.
(If the handset is on the base cradle, lift the handset from the base station and then press
or
.
If the AUTO TALK is set to ON, simply lift the handset from the base to answer an incoming call.
To
enter MENU
scroll to SETUP
enter SETUP
scroll to SET TIME
enter SET TIME (the year will flash)
select year (or direct input the number using numeric keys)
confirm year (the month will flash)
select month (or direct input the number using numeric keys)
confirm month (the day will flash)
select day (or direct input the number using numeric keys)
confirm day (the hour will flash)
select hour (or direct input the number using numeric keys)
confirm hour (the minute will flash)
select minute (or direct input the number using numeric keys)
if time format is 12-hour, press
to change AM/PM
confirm
exit
MENU
MENU
MENU
MENU
MENU
MENU
MENU
MENU
2. Press
indicator will flash. Dial buttons on
or place the handset back on the base station to hang up.
NOTE:
If the handset is too far away from the base station, pressing
may not end the call and
an error beep sounds. In this case, move closer to the base station and press
again.
Out of range
If you are too far away from the base and the call is cut, move closer to the base. Press
to search for the base. If successful you will hear a dial tone. Press
to return to standby mode.
MENU CHART
Settings in the menu
You may set the following parameters using the display menu by pressing the
NOTE: You will need to set the date and time again after out of battery power or replacing the batteries.
If you have subscribed to Caller ID service, the date and time will be updated automatically when
received a call. However, it will not update the year.
1. PHONEBOOK
Placing a call
1. Press
or
.
(if the handset is on the base cradle, lift the handset from the base and then press
The dialing buttons will light. Length of time depends on the setting in the menu.
The
CHARGE
/IN USE
).
indicator in the base station will light.
2. After you get the dial tone, dial the number.
The number you dialed will be shown in the display.
3. Press
or
or place the handset back on the base station to hang up.
1
ABC
2
DEF
3
GHI
4
JKL
5
MNO
6
PQRS
7
TUV
8
WXYZ
9
TONE
Or
You may pre-dial the number before you press
0
or
1. Dial the number.
The number you dialed will be shown in the display.
2. Press
3. Press
ADD
EDIT
DELETE
DELETE ALL
MUSIC GROUP
or
SPEED DIAL
MEMORY STATUS
2. SETUP
UNIT NAME
BACKLIGHT TIME
AREA CODE
DIAL MODE
AUTO TALK
or place the handset back on the base station to hang up.
NOTE: If the handset is too far away from the base station, pressing
may not place the call and
an error beep sounds. In this case, move closer to the base station and press
again.
13
14
MENU
button:
INPUT NAME
DEFAULT
VIP
FAMILY
FRIEND
COLLEAGUE
SELECT KEY
SECOND 5 - 20
TONE
PULSE
ON
OFF
FEATURES
MENU CHART (Continued)
2. SETUP
(Continued)
FLASH TIME
LANGUAGE
SHORT (100mS)
MEDIUM (300mS)
LONG (600mS)
ENGLISH
FRENCH
SPANISH
CONTRAST
LEVEL 1 - 8
REGISTER
NEW REGISTER
DEREGISTER
SELECT BASE
TIME FORMAT
12 HOUR
24 HOUR
SET TIME
SET DEFAULT
3. PROFILE
HS RINGER MUSIC
HS RINGER VOLUME
PAGE TONE
KEY TONE
4. FUNCTION
NO DISTURB
ALARM 1
ALARM 2
5. CALL LOG
MISSED CALL
RECEIVED CALL
DIALED CALL
15
DEFAULT
VIP
FAMILY
FRIEND
COLLEAGUE
6 LEVELS
4 MELODY
TONE
MUSIC
OFF
1 - 16 HOURS
OFF
Phonebook
This is a one touch access key to go directly into PHONEBOOK instead of pressing MENU then
PHONEBOOK. The handset can store up to 100 phone numbers in its memory. You can dial a stored
number simply by pressing
, select phone number and then press
.
To store numbers in memory:
1. Press
.
The dial pad lights.
Press MENU
to go into ADD.
Press MENU
again to start inputting a name (up to 16 characters).
2. To input a name for this number, use the method below. See the character chart on page 17 for
input reference.
for example, enter a name "ALICE":Press "2" once, the display will show "A".
Wait a couple of seconds, the cursor will start to blink on the next digit.
Press "5" three times, the display will show "AL".
Press "4" three times, the display will show "ALI".
Press "2" three times, the display will show "ALIC".
Press "3" twice, the display will show "ALICE".
NOTE: To switch between upper case and lower case, press the
key.
3. Press MENU to confirm.
The display will show "INPUT NUMBER".
4. Dial the phone number you would like to store using the handset keypad.
Up to 24 digits can be stored. (a pause counts as one digit).
5. Press MENU to confirm.
If the input name already exists, the display will show "OVERWRITE". If you want to overwrite,
press MENU again. Otherwise press FLASH
to exit.
Back
NOTE:
-
If you want to input a space, press "0" once.
-
If you make an error inputting a name of number, press
may then re-enter the correct name or number.
-
When the memory is full, you will hear an error tone and the display will show "MEMORY FULL".
You cannot store any more numbers unless you delete some of them from memory.
16
MUTE
CLEAR
to go to the previous digit. You
FEATURES (Continued)
FEATURES (Continued)
Character Chart
Redial
Use this chart as a guide for entering characters.
You can redial the dialed number using
1
1
.
,
!
"
ABC
2
A
B
C
2
(
DEF
3
D
E
F
3
)
GHI
4
G
H
I
4
JKL
5
J
K
L
5
MNO
6
M
N
O
6
'
PQRS
7
P
Q
R
S
7
@ :
;
8
T
U
V
8
?
WXYZ
9
W
X
Y
Z
9
0
enter a space
0
R
in the handset (up to 10 numbers).
1. Press R .
The display will show the last dialed number.
Press the
button to scroll the previous dialed numbers.
_
2. Press
or
.
NOTE:
To redial after hearing a busy signal, press
, followed by R , then
.
If there is no number the display will show "EMPTY". The maximum redial number is 24 digits.
/
TUV
R
Temporary touch-tone access
TONE
If you have a pulse dialing line, you can temporarily change to Touch-Tone dialing to access special
services such as electronic banking and remote-control answering machines.
1. Dial the number you want to call.
2. When your call is answered, press
.
3. Follow the voice instructions to complete the service.
TONE
&
%
=
<
>
£
$
¥
The telephone stays in tone mode until the call ends. Then it returns automatically to pulse mode.
R
To insert a pause PAUSE :
You may insert a 3-second pause between two digits (for example, after 9 to get an outside line in a
PBX system).
Press R after the digit.
NOTE: When the telephone is in Pulse mode, press the # key will have no function.
Quick access for Missed call
PAUSE
In standby mode, press the
To dial a number stored in the memory:
1. Press
.
2. Press
to scroll to the location, or input the first letter of the desire name and then press
to go to the location start with the first letter.
3. Press
or
.
Press
to go into the MISSED CALL log. Press
will review the last missed call. Press
will review the first missed call.
MENU
Your telephone will exit the memory mode and return to standby mode if:
You do not press a key within 20 seconds
Press
When you are reviewing a number in MISSED CALL, press
Chain dialing
If you subscribe to call waiting...
NOTE: Press
to go back to the In Use screen when selecting the second number from the
phonebook. Press
again to end the call.
Ringer mute
When the handset is off the cradle and the phone is ringing, you can temporarily mute the
incoming ring by pressing
. The ringer will resume to ring when receiving the next incoming call.
to dial number displayed.
For how to review the Call Log, please refer to page 32.
Flash
This feature allows you to dial phone numbers in the handset phonebook while you are on a call. This
feature can be used, for example, to dial a calling card access number or bank account PIN that you
have stored in the handset phonebook, without having to dial manually.
Press
after you dialed the first number. Scroll and select the second number. Then press
.
or
NOTE: In order to show and store numbers in MISSED CALL, you must subscribe the Caller ID
by your service provider.
If there is an incoming call while programing the memory, your telephone will exit the memory mode
and you will hear the ring. Press
or
to answer the call.
17
to review the calls.
FLASH
You can use the
call waiting.
FLASH
to access special services offered by your service provider or PBX, such as
1. If a call comes in when you are already on the phone, a beep sounds.
2. Press FLASH .
The first caller is placed on hold, and you can talk to the second caller.
3. Press FLASH again.
The second caller is placed on hold, and you can talk to the first caller.
NOTE:
When press the FLASH , the display will show "R".
The FLASH may also be used to get a new dial tone without pressing
or replacing the handset
in the base station cradle. However, if your telephone line has special service features (such as call
waiting), the FLASH may not operate in this way.
18
FEATURES (Continued)
FEATURES (Continued)
Intercom/Call transfer
Handsfree speaker
Your telephone is equipped with a handsfree speaker in the handset. Press the
a call via speaker. Press
to deactivate the speaker and return to earpiece.
to dial or receive
INT
(for CLT-D6222, CLT-D6223 multi-handsets)
For CLT-D6222 and CTL-D6223 with multi-handsets, you can enjoy an intercom call between handsets.
You can also place outside call on hold and transfer the call to another handset.
Intercom
NOTE: Do not lie the handset down on a surface when using handsfree as it will reduce the
performance.
1.
2.
3.
4.
Press INT in standby mode.
Input the handset number (1-3) you want to call.
The receiving handset will play the PAGE music. Press
Press
on either handset to end the INTERCOM.
or
to answer the call.
Headset (not included)
A headset can be connected to the telephone using the jack on the left of the handset.
When a headset is connected, the microphone and earpiece of the handset will be
disconnected. Also the handsfree speakerphone function is disabled.
NOTE: The earpiece volume may be high when using a headset. It may be necessary
to adjust the volume when connecting the headset.
NOTE:
If the handset you are paging is busy or out of range, an error tone will sound.
To stop calling another handset, press INT or
.
During intercom, if there is incoming call, you will hear a long beep from the receiver. Press
or
in either handset to answer the call.
If you page the other handset and the other handset does not answer within one minute, the
operation will stop and go back to standby mode.
Mute
You can temporarily turn off the microphone so the person you are talking with cannot hear you.
1. Press MUTE button during a call. The display will show MUTE.
2. Press MUTE button again to take phone off mute.
Keylock
Press and hold the
button for 2 seconds will lock the keypad to prevent unintentional use.
The LCD display will show "KEY LOCKED" when it is activated.
Press and hold the
for 2 seconds to release the keylock.
NOTE: When the keylock is active and there is an incoming call, intercom from another handset ,
you can press
to answer.
To adjust the volume
The handset receiver volume has 6 levels. Default is level 3. Speaker volume has 6 levels. Default is 4.
Press the
key to adjust the handset receiver or speaker volume during a call.
NOTE: If the handset receiver or speaker volume is already at the maximum or minimum level,
pressing the
or
key will not change the volume level.
Page/handset locator
PAGE
If you misplace the handset or want to page the person carrying the handset, press
on the base
station and the handset(s) will play music for approximately 60 seconds. The display will show
"PAGING".
Press any key on the handset or press
button on the base to stop the music.
PAGE
Call transfer
1. During a call, press INT .
2. Input the handset number (1-3) you want to transfer.
The call will be put on hold and the other handset will play the PAGE music.
To cancel the transfer, press INT on the initial handset. The initial handset will return to the caller.
or
on the handset being paged. Or simply pick up the
3. To answer the page, press
handset from the cradle if the AUTO TALK is set to ON.
on the initial handset to transfer the call.
4. Press
Or
1. During a call, press INT .
2. Input the handset number (1-3) you want to transfer.
The call will be put on hold and the other handset will play the PAGE music.
If you don't want to wait for the other handset to answer, press
.
3. On the receiving handset, to accept the transfer and talk to the outside caller, press
Or simply pick up the handset from the cradle if the AUTO TALK is set to ON.
NOTE:
If the handset being paged does not answer the call within 30 seconds, it will page back the
initial handset. Press
or
on the initial handset to resume the conversation with the
outside call. However, if the initial handset is paged back and does not answer within 30
seconds, the line will be cut and the telephone will be back to standby mode.
If the initial handset cannot reach the other handset, (for example, out of range or low battery)
the initial handset will resume to the line after 30 seconds.
PAGE
19
or
20
.
FEATURES (Continued)
SETTINGS MENU
3-way conference (for CLT-D6222, CLT-D6223 multi-handsets)
Menu
For CLT-D6222 or CLT-D6223 with multi-handsets, you can enjoy 3-way conference calling between 2
handsets and an outside line.
Press the MENU MENU key in standby mode will go into settings menu.
In settings menu, you can press FLASH
key to go back to previous menu, or press
Back
standby mode.
1. During a call, press INT .
2. Input the handset number (1-3) you want to call.
The call will be put on hold and the other handset will play the PAGE music.
3. To answer the page, press
or
on the handset being paged. Or simply pick up the
handset from the cradle if the AUTO TALK is set to ON.
4. To initiate a 3-WAY CONFERENCE, press INT
on the initial handset. The display will show
“CONFERENCE”.
5. To exit from the conversation, press
on the handset. The remaining handset will remain on
the line.
TIPS: If a handset is on the line, you can initiate a conference call from another handset. Simply pick
up the handset and press
.
MENU
Phonebook
New entry
You can store up to 100 phone number in the phone book.
Press
MENU
MENU
Caller ID features
When you subscribe to the Caller ID service from your service provider, your telephone receives and
displays incoming call information. This includes the phone number and/or the name, date and time.
Your telephone can store up to 50 calls for later review.
Call log
The caller information from the phone company is received and transmitted between the first and
second rings and is stored in the Call log. If you answer a call before the second ring the
information may not be stored.
When the Call log is full, a new call will automatically replace the oldest call in the list.
NOTE: Maximum 16 characters and 24 digits Caller ID information can be received. If the number is
too long to display, press
to see the rest of the numbers.
Check with your telephone company regarding name service availability.
Format
When reviewing the caller numbers you may change the format of the telephone number from 7 digits
INT
to 10 digits (with area code) or 11 digits (with the prefix 1 and area code). By pressing the FORMAT
.
Call waiting
If you have Call Waiting service and a call waiting tone sounds, press
call. There will be a short pause, and then you will hear the new caller.
To return to the original caller, press FLASH again.
MENU
MENU
key 2-9
MENU
key 0-9
MENU
to accept the waiting
IMPORTANT: To use this feature, you must subscribe to Caller ID with Call Waiting Service.
Review Call log
Please refer to page 32 for how to review Call Log.
Name matching
If a caller number matches one of the numbers in the phonebook, the display will show the name
information in the stored memory even if the incoming call does not have the name.
enter MENU, the display will show “PHONEBOOK”
enter PHONEBOOK. If there is no number stored, the display will show EMPTY
otherwise the first phonebook number will be displayed
enter phonebook option. The display will show “ADD”
select ADD
input name
confirm name
input telephone number
confirm
exit
Edit record
MENU
MENU
MENU
MENU
key 2-9
MENU
key 0-9
MENU
Voice mail indicator
To
NOTE:
To learn how to input characters please refer to page 16.
When the memory is full, the display will show “MEMORY FULL”. You cannot store numbers
unless you delete some of them from memory.
Press
FLASH
To
enter MENU
enter PHONEBOOK, the first phonebook number will be displayed
scroll to the number you want to edit
enter phonebook option
scroll to EDIT
select EDIT
press
to move the cursor to edit name, use MUTE to delete a character
CLEAR
confirm name
press
to move the cursor to edit telephone number, use MUTE to delete a number
CLEAR
confirm
exit
This function only works if you have subscribed to the voice mail or phone mail service.
When there is a new message in your voice mail system, you will hear a ring. The display will show
and flash "MESSAGE". Follow the instructions from your telephone company to review your messages.
Once complete, another ring will sound. The display will return to standby mode.
21
to exit to
22
SETTINGS MENU (Continued)
SETTINGS MENU (Continued)
Phonebook (continued)
Phonebook (continued)
Delete record
Speed dial
Press
MENU
MENU
MENU
MENU
To
enter MENU
enter PHONEBOOK, the first phonebook number will be displayed
scroll to the telephone number you want to delete
enter phonebook option
scroll to DELETE
confirm, the next phonebook number will be displayed
exit
You can assign a telephone number to one of the 0-9 keys as a 1-touch speed dial hot key. Press and
hold the single-digit speed dial number for 2 seconds you will see the stored number in the display.
Press TALK
will dial out the number.
Press
MENU
MENU
MENU
MENU
key 0-9
Delete all
MENU
Press
MENU
MENU
MENU
MENU
MENU
To
enter MENU
enter PHONEBOOK, the first phonebook number will be displayed
enter phonebook option
scroll to DELETE ALL
select DELETE ALL. The display will show “CONFIRM”
confirm. All phone numbers are deleted. The display will show “EMPTY”
exit
Press
MENU
MENU
You can define a telephone number to one of the 5 number groups. They are DEFAULT, VIP, FAMILY,
FRIEND and COLLEAGUE. Each group can be programmed to have their own ring music.
If you do not define a group for a number, it will belong to the DEFAULT.
Press
MENU
MENU
MENU
MENU
MENU
To
enter MENU
enter PHONEBOOK, the first phonebook number will be displayed
scroll to the phone number you want to assign speed dial
enter phonebook option
scroll to SPEED DIAL
select SPEED DIAL
assign a location for this phone number
confirm. If you are replacing a number, the display will show “OVERWRITE”. Press
again to confirm or press
to exit.
MENU
exit
Memory status
You can check for how many numbers you have stored in this phone.
MENU
Music group
To
MENU
To
enter MENU
enter PHONEBOOK, the first phonebook number will be displayed
enter phonebook option
scroll to MEMORY STATUS
select MEMORY STATUS
the display will show XXX/100 where XXX is the number of memory you have stored
exit
enter MENU
enter PHONEBOOK, the first phonebook number will be displayed
scroll to the phone number you want to assign group
enter phonebook option
scroll to MUSIC GROUP
enter MUSIC GROUP
scroll to the group name you want
confirm
exit
23
24
SETTINGS MENU (Continued)
SETTINGS MENU (Continued)
Setup
Setup (continued)
Unit name
Auto talk
You may assign a name to your handset. Default is "HANDSET" and the number registered to the base.
You may choose if the handset will auto answer a call or not when you lift it from the base. Default is
OFF.
Press
MENU
MENU
MENU
key 2-9
MENU
To
enter MENU
scroll to SETUP
enter SETUP
enter UNIT NAME
input a name (up to 8 characters), use
confirm
exit
Press
MENU
MENU
MUTE
CLEAR
to delete a character if necessary
MENU
MENU
After completion you will see the name in the display. For example ALICE. The display will
show “ALICE 1” where “1” is the handset number registered in the base.
You may select how long the backlight will stay lit (5 - 20 seconds). Default is 10 seconds.
MENU
MENU
MENU
MENU
enter MENU
scroll to SETUP
enter SETUP
scroll to AUTO TALK
enter AUTO TALK
select ON or OFF
confirm
exit
Flash Time
Backlight time
Press
To
To
enter MENU
scroll to SETUP
enter SETUP
scroll to BACKLIGHT TIME
select BACKLIGHT TIME, the display will show “10 SECOND”
select 5 - 20 seconds
confirm
exit
Depending on the telephone system, you may need to change the Flash time to match the system.
There are 3 FLASH TIME built into this telephone: SHORT (100ms), MEDIUM (300ms), LONG
(600ms). Default is LONG (600ms).
Press
MENU
MENU
MENU
MENU
To
enter MENU
scroll to SETUP
enter SETUP
scroll to FLASH TIME
enter FLASH TIME
select SHORT, MEDIUM, or LONG
confirm
exit
Area code
NOTE: If you are too far away from the base or the base is off, the Set Flash Time may not succeed.
You will hear an error tone and the display will show "ERROR". Press
to exit.
You may set the area code to your telephone.
Press
MENU
MENU
MENU
key 0-9
MENU
To
enter MENU
scroll to SETUP
enter SETUP
scroll to AREA CODE
select AREA CODE
input code number, use
confirm
exit
Language
There are 3 display languages built into this telephone. They are English, French, and Spanish.
Default is English.
Press
MUTE
CLEAR
to delete a number if necessary
MENU
MENU
NOTE: when area code is programmed, the area code will not be included in the telephone number
shown in the display if the incoming call is from the same area.
MENU
MENU
Dial mode
To
enter MENU
scroll to SETUP
enter SETUP
scroll to LANGUAGE
enter LANGUAGE
scroll to the language you want to display
confirm
exit
Please refer to page 12.
25
26
SETTINGS MENU (Continued)
SETTINGS MENU (Continued)
Setup (continued)
Setup (continued)
Contrast
Select base
There are 8 levels of LCD contrast for the display. Default is 4.
Press
MENU
MENU
MENU
MENU
Your telephone supports up to 2 base units. After you register to 2 base units, you may select which
one to use.
To
Press
enter MENU
scroll to SETUP
enter SETUP
scroll to CONTRAST
select CONTRAST
select your desired contrast level
confirm
exit
MENU
MENU
MENU
MENU
MENU
Register
To
enter MENU
scroll to SETUP
enter SETUP
scroll to REGISTER
enter REGISTER
scroll to SELECT BASE
enter SELECT BASE
select BASE 1, BASE 2 or AUTO SELECT
confirm
exit
You can register up to 6 handsets to one base.
New register
Please refer to page 12 for how to register a handset to the base.
NOTE: If the base you selected is off or out of range, an error tone will sound from the handset
and the antenna icon in the display will disappear. You have to select another base with power.
Otherwise you cannot make or receive calls.
De-register
Any additional handsets can be de-registered from a base.
Time format
Press
You can select the time format in the display to 12-HOUR (with AM/PM) or 24-HOUR. Default is
12-HOUR.
MENU
MENU
MENU
MENU
MENU
To
enter MENU
scroll to SETUP
enter SETUP
scroll to REGISTER
enter REGISTER
scroll to DEREGISTER
enter DEREGISTER
select handset number you want to deregister (except the one you are using)
confirm. A long beep will sound
exit
27
Press
MENU
MENU
MENU
MENU
To
enter MENU
scroll to SETUP
enter SETUP
scroll to TIME FORMAT
enter TIME FORMAT
select 12 HOUR or 24 HOUR
confirm
exit
28
SETTINGS MENU (Continued)
SETTINGS MENU (Continued)
Setup (continued)
Profile (continued)
Set time
HS ringer volume
Please refer to page 13 for how to set the time.
There are 6 ringer volume levels for the handset. Default is 5.
Press
Set default
This will reset most functions and settings to factory default. Registration is not affected.
Press
MENU
MENU
MENU
To
MENU
MENU
enter MENU
scroll to SETUP
enter SETUP
scroll to SET DEFAULT
confirm. The display will show “CONFIRM”. Press
exit
MENU
MENU
MENU
again to confirm
NOTE: After you set default, the NO DISTURB and ALARM will return to OFF mode.
If you are too far away from the base or the base is off, the Set Default may not succeed. You will
hear an error tone and the display will show "ERROR". Press
to exit.
There are 4 page tones available. Default is melody 4.
MENU
HS ringer music
MENU
MENU
MENU
MENU
MENU
To
MENU
MENU
MENU
enter MENU
scroll to PROFILE
enter PROFILE
enter HS RINGER MUSIC
scroll to the phone number group
enter to the phone number group
scroll to select melody 1 - 20 or ringer off
confirm
exit
NOTE:
It is unavailable to set the Default Group ringer to OFF
29
To
enter MENU
scroll to PROFILE
enter PROFILE
scroll to PAGE TONE
enter PAGE TONE
scroll to select melody 1 - 4
confirm
exit
Key tone
You can select KEY TONE, KEY MUSIC or KEY TONE OFF. Default is key tone.
Press
MENU
MENU
MENU
MENU
If you do not subscribe to a Caller ID service, the telephone number will not show up in the display.
In this case, regardless of the ringer music set in the groups, only the Default Group ringer music
will ring.
in the display will be ON if you set the ringer volume level to OFF.
Page tone
Press
Press
enter MENU
scroll to PROFILE
enter PROFILE
scroll to HS RINGER VOLUME
enter HS RINGER VOLUME
select your desired ringer volume level
confirm
exit
NOTE: The RINGER OFF icon
Profile
There are a total 20 of musical ringers available in this telephone. You can assign different ringer music
to each of the phone number group. When there is incoming call, the phone will play the ringer music
of the group for which the incoming number belongs to. If the phone number has not been defined,
the phone will play the ringer music of the Default Group. Default is melody 1.
To
To
enter MENU
scroll to PROFILE
enter PROFILE
scroll to KEY TONE
enter KEY TONE
scroll to select tone, select music or select off
confirm
exit
30
SETTINGS MENU (Continued)
SETTINGS MENU (Continued)
Function
Call log
No disturb
There is MISSED CALL, RECEIVED CALL and DIALED CALL in the CALL LOG. They share a total of
60 numbers in the memory. You must subscribe to a Caller ID service provided by the telephone
company.
This is a temporary ringer off with timer from 1 - 16 hours. Default is off.
Press
MENU
MENU
MENU
MENU
To
To check the CALL LOG:
enter MENU
scroll to FUNCTION
enter FUNCTION
enter NO DISTURB
scroll to select 1 - 16 hours or off
confirm
exit
The RINGER OFF icon
Press
To
enter MENU
scroll to CALL LOG
enter CALL LOG
scroll to MISSED CALL, RECEIVED CALL or DIALED CALL
enter MISSED CALL, RECEIVED CALL or DIALED CALL
scroll to check call numbers
exit
MENU
MENU
in the display will be ON when you select 1-16 hours.
MENU
TONE
NOTE: You can press and hold the
button in standby mode to turn the NO DISTURB ON and
OFF. However, when you turn the NO DISTURB ON using this quick access key the timer is preset to
be 8 hours.
Alarm 1, Alarm 2
Your telephone has an alarm clock with 2 separate alarms.
Make sure the time is set correctly before setting the alarm.
Press
MENU
MENU
MENU
MENU
MENU
MENU
To
enter MENU
scroll to FUNCTION
enter FUNCTION
scroll to ALARM 1 or ALARM 2
enter ALARM 1 or ALARM 2
scroll to SELECT ON
the display will show “SET TIME” and the hour XX flashes
set hour (or direct input the number using the numeric keys)
confirm hour, then the minute XX flashes
set minute (or direct input the number using numeric keys)
if time format is 12-hour, press
to change AM/PM
confirm the setting
exit
In addition to checking the CALL LOG in the menu you can check MISSED CALL and DIALED CALL
by different quick access keys in standby mode:
1. Press
key in standby mode to enter MISSED CALL log, then you can press
review MISSED CALL.
2. Press R key in standby mode to enter DIALED CALL log, then you can press
review DIALED CALL.
MENU
MENU
MENU
MENU
enter MENU
scroll to FUNCTION
enter FUNCTION
scroll to ALARM 1 or ALARM 2
enter ALARM 1 or ALARM 2
scroll to SELECT OFF
confirm
exit
key to
key to
NOTE: The display will show how many MISSED CALL(s) in standby mode (XX MISSED).
Call log options
When you review telephone numbers there are 3 options if you press the
MENU
:
Store record
This will store the telephone number into your phonebook.
When you are reviewing the Missed Call, Received Call, or Dialed Call:
Press
To
MENU
MENU
key 2-9
The ALARM ICON
in the display will be ON. The alarm rings for 1 minute. Press any key to stop.
If you do not turn off the alarm, it will ring at the same time the next day. To turn off the alarm:
Press
To
or
or
MUTE
CLEAR
MENU
key 0-9/
MENU
MUTE
CLEAR
enter CALL LOG OPTION
enter STORE
edit the name if necessary
confirm name
edit telephone number if necessary
confirm
exit
NOTE:
For how to input characters please refer to page 16.
When the memory is full, the display will show “MEMORY FULL”. You cannot store numbers
unless you delete some of them in memory.
31
32
SETTINGS MENU (Continued)
MAXIMIZE BATTERY PERFORMANCE
The freedom that your telephone can offer is fully dependent on the performance of the rechargeable
battery in the handset. To maximize the battery performance, follow these guidelines:
Call log options (continued)
Delete Record
This will delete the telephone number in the log.
Charge it for full 15 hours
When you are reviewing the Missed Call, Received Call, or Dialed Call:
Press
MENU
MENU
To
enter CALL LOG OPTION
select DELETE
confirm, the display will show next call
exit
This will delete all telephone numbers in the log.
When you are reviewing the Missed Call, Received Call, or Dialed Call:
MENU
MENU
MENU
Keep the contacts clean
You can never fully recharge the battery if the contacts are dirty. Clean all the contacts - two at the
bottom of the handset and two in the base cradle - periodically using a soft cloth.
Do not replace the handset in the base after each call
Delete All
Press
Before initial use of your new battery, charge it for 15 hours continuously. The proper initial charging
is very important to maximize the battery performance.
To
enter CALL LOG OPTION
select DELETE ALL
enter DELETE ALL, the display will show "CONFIRM"
confirm, the display will show "EMPTY"
exit
NOTE:
When you are reviewing a number in either MISSED CALL, RECEIVED CALL or DIALED CALL,
press
will dial out the number.
If you answer a call before the second ring, the Caller ID message may not appear.
When the call is from a private branch exchange, the caller's phone number and name may
not appear.
When the Caller ID memory is full, new call information will replace the oldest call information
automatically.
If you receive a repeated call with the same number, the unit will keep the last call information.
Repeatedly short charging creates a memory effect in the battery. Once a rechargeable battery
acquires this "short memory", it sends a "low battery" signal even when it is almost fully charged.
The battery then needs to be charged frequently. To avoid this, leave the handset out of the
cradle until it really needs recharging.
Refresh the battery
If your battery seems to need recharging more often than usual, it may have lost part of its charging
capacity because of premature recharges. To bring back its full capacity, try "refreshing" the battery:
1. First discharge the battery by leaving the handset in TALK mode until Battery icon
is
empty.
(Disconnect the base from the telephone line, so that your line is not busy all the time).
2. Then charge it for 15 continuous hours.
3. Repeat the above once more.
REPLACE THE BATTERY
Battery replacement and handling
When the operating time becomes short even after the battery is recharged, please replace the
battery.
With normal usage, your battery should last about one year.
For a replacement battery, please contact your place of purchase or fill out and mail the enclosed
form.
33
34
REPLACE THE BATTERY (Continued)
DEFAULT SETTING
To replace the battery
Make sure the telephone is off before replacing the battery.
1.
Slide off the battery compartment cover
Setting default value
Language
English
Unit name
Handset
Backlight time
10 seconds
2.
Remove the battery pack from the compartment
3.
Insert the new battery pack according to the battery contacts location
Area code
_
4.
Slide on the battery compartment cover
Dial mode
Tone
5.
Place handset on the base to charge for 15 hours
Auto talk
Off
NOTE:
Charge the handset battery for at least 15 hours continuously prior to first use. The initial
charge is important for best performance.
After battery replacement, reset the date and time.
Battery and handset may become warm during charging. This is normal.
Warning:
To avoid the risk of personal injury or property damage from fire or electrical shock, only use
2.4V 600mAh rechargeable battery pack.
Replacement part number 2SN-AAA60H-S-T.
RECYCLING NICKEL-METAL HYDRIDE BATTERIES
Flash time
Long (600mS)
Contrast
level 4
Time format
12-hour
HS ringer music
01
HS ringer volume
level 5
Page tone
04
Key tone
Tone
No disturb
Off
Alarm
Off
NICKEL-METAL HYDRIDE BATTERIES MUST BE DISPOSED
OF PROPERLY.
Please take your used battery pack to a store that recycles
Ni-MH batteries. Call 1-800-822-8837 or go to www.rbrc.ca
NOTE: If you are too far away from the base or the base is off, the Set Default may not succeed.
You will hear an error tone and the display will show "ERROR". Press
to exit.
POWER FAILURE
During the period that the power is off, you will not be able to make or receive calls with the telephone.
HEADSET JACK
Headset connection (Headset not included)
For hands free conversation, connect the headset (not included) to the HEADSET jack. The handset
earpiece and microphone are disabled when the headset is connected.
For purchasing, servicing or replacement please contact our service center.
SANYO Canada Inc.
1-300 Applewood Cres.
Concord, Ont. L4K 5C7
(905) 760-9944
1-800-263-2244
www.sanyo.ca
35
36
TROUBLE SHOOTING
MAINTENANCE
Most cordless telephone problems can be corrected quickly and easily -- without service. If you
experience difficulties, try the suggestions below before taking your telephone for service.
Cleaning the contact points
To ensure the handset battery charges properly, clean the contact points on the handset and
base station once a month with a soft cloth.
If the phone doesn’t work at all
The link between handset and base may be lost. See page 12 to register the handset again.
AC adaptor may not be plugged into the wall outlet or base station.
Telephone line may not be connected.
Handset battery may be extremely low. When the battery icon
is empty, recharge the battery.
Handset may be too far from the base station. Move closer.
The operating range seems shorter
Handset battery may need to recharge.
Check the base station location for interfering objects.
Handset battery life or standby time seems shorter
Battery may not be fully charged, due to dirty contact points. Wipe with a soft cloth.
Handset battery may have been repeatedly recharged before being fully exhausted.
Try battery refresh.
Battery may need to be replaced.
Incoming calls do not ring on the handset
Handset may be too far from the base station. Move closer.
Check the handset ringer setting. The ringer may have been set to OFF.
Check and make sure the handset battery is installed properly.
The link between handset and base may be lost. See page 12 to register the handset again.
Nothing is displayed after re-install/replace of batteries
Battery is too weak to operate. Recharge the battery for 15 hours.
Reception is noisy (interference, hum or static)
Base station may be too close to electrical equipment. Try another location.
Handset may be too close to large metal object(s). Move to another location or change the
direction while using handset.
Causes of poor reception
Aluminum siding.
Foil backing on insulation.
Heating ducts and other metal construction can shield radio signals.
You are too close to appliances such as microwaves, stoves, computers, etc.
Atmospheric conditions, such as strong storms.
Base is installed in the basement or lower floor of the house.
Base is plugged into an AC outlet with other electronic devices.
Baby monitor is using the same frequency.
Handset battery is low.
You are out of range of the base.
Contact points
NOTE:
Do not use any liquid or solvent.
To keep your telephone working and looking good, follow these guidelines:
Avoid putting the phone near heating appliances and devices that generate electrical noise
(for example, motors or fluorescent lamps).
Do not expose to direct sunlight or moisture.
Avoid dropping the phone, and other rough treatment to the phone.
Clean the phone with a soft cloth.
Never use a strong cleaning agent or abrasive powder because this will damage the finish.
Periodically clean the charge contacts on the handset and base with a soft cloth.
If the phone still does not work
Reset the base station and the handset as follows:
1.
2.
3.
Retain the original packaging in case you need to ship the phone at a later date.
Disconnect the AC adaptor and then reconnect the AC adaptor to reset the base station.
Disconnect and then reconnect the handset battery.
See page 12 to register the handset again.
37
38
TECHNICAL INFORMATION
TECHNICAL INFORMATION
REN Number:
The Ringer Equivalence Number (REN) assigned to each terminal’s device provides an indication of
the maximum number of terminals allowed to be connected to a telephone interface.
The REN number of this phone is located on the bottom of the base unit. The termination on an
interface may consist of any combination of device subject only to the requirement that the sum of the
Ringer Equivalence Numbers of all the devices does not exceed 5.
CAUTION
This product is intended for use in the USA and CANADA only. Sale or use in other countries may
violate local laws.
Cordless telephones use radio frequencies to allow mobility. This affects the performance of your
phone.
To maintain compliance with the FCC’s RF exposure guidelines it is recommended a typical distance
at least 20cm is maintained between the base unit and nearby persons.
1. NOISE
Electrical pulse noise is present in most homes at one time or another. This is most intense during
electrical storms. Certain kinds of electrical equipment, such as light dimmers, fluorescent bulbs,
motors, fans, etc., also generate pulse noise. Because radio frequencies are susceptible to this, you
may on occasion hear pulse noise through the handset. This is usually only a minor annoyance and
should not be interpreted as a defect of the phone.
2. RANGE
Because radio frequencies are used, the location of the base station can affect the operating range of
the phone. Try several locations and choose the one that gives the clearest signal to the handset.
Generally, a central area on the highest floor in a multi-floor residence yields best results.
3. INTERFERENCE
Electronic circuits activate a relay to connect the unit to your telephone line. These electronic circuits
operate in the radio frequency spectrum. While several protection circuits are used to prevent
unwanted signals, there may be periods when these unwanted signals enter the base station. You
may hear a click or hear the relay activate when you are not using the cordless handset. If this occurs
frequently, or relocating the base station.
4. RADIO EQUIPMENT
The term "IC:" before the radio certification number only signifies that Industry Canada technical
specifications were met. Operation is subject to the following two conditions (as set by Industry
Canada): (1) this device may not cause interference, and (2) this device must accept any
interference, including interference that may cause undesired operation of the device.
NOTICE:
Cordless telephones are radio devices. Communications between the handset and base of your
cordless telephone are accomplished by means of radio waves which are broadcast over the open
airways. Because of the inherent physical properties of radio waves, your communications can be
received by radio receiving devices other than your own cordless telephone unit. Consequently,
any communications using your cordless telephone may not be private.
The Industry Canada Label identifies certified equipment. This certification means that the
equipment meets certain telecommunications network protective, operational and safety
requirements. The ministry does not guarantee that the equipment will operate to the user’s
satisfaction.
Before installing this equipment, users should ensure that it is permissible to be connected to the
facilities of the local telecommunications company. The equipment must also be installed using
an acceptable method of construction. In some cases, the company’s inside wiring associated with
single-line individual service may be extended by means of a certified connector assembly
(telephone extension cord). The customer should be aware that compliance with the above
conditions may not prevent degradation of service in some situations.
Repairs to certified equipment should be made by an authorized Canadian maintenance facility
designated by the supplier. Any repairs or alterations made by the user to this equipment, or
equipment malfunctions, may give the telecommunications company cause to request that the user
disconnect the equipment.
The user should ensure for his own protection that the electrical ground connections of the power
utility, telephone lines and internal metallic water pipe system, if present, are connected together.
This precaution may be particularly important in rural areas.
CAUTION
Users should not attempt to make such connections themselves, but should contact the appropriate
electrical inspection authority, or electrician, as appropriate.
The exclamation point within an equilateral triangle is intended to alert the user to the presence of
important operating and maintenance (servicing) instructions in the literature accompanying the
product.
This symbol on the product is used to identify the following important information. Use only with
specified SANYO power adaptor.
NOTICE: This equipment meets the applicable Industry Canada Terminal Equipment Technical
Specifications. This is confirmed by the registration number. The abbreviation, IC, before
registration number signifies that registration was performed based on a Declaration of Conformity
indicating that Industry Canada technical specifications were met. It does not imply that Industry
Canada approved the equipment. This Class B digital apparatus complies with Canadian ICES-003.
SANYO COMFORT WARRANTY
WARRANTY APPLICATION
SANYO Communications products purchased new, unused in Canada through a SANYO Authorized
Dealer are warranted against manufacturing defects in materials and workmanship for ONE YEAR
covering parts and labour, from the date of purchase by the original retail purchaser. This warranty
only applies in favour of the original retail purchaser of the warranted product.
SANYO CANADA INC.’S RESPONSIBILITY
During the warranty period, SANYO Canada Inc. will repair, or at our option, replace a
Communications product which shows evidence of a manufacturing defect in materials or
workmanship. Replacement PARTS are warranted for the remaining portion of the warranty period.
WHAT IS NOT COVERED
a. Communications products purchased outside Canada.
b. Communications products purchased in a used condition.
c. Communications products purchased from non SANYO authorized dealer.
d. Communications products not intended for Canadian usage or products without appropriate
Canadian regulatory approvals.
e. Problem due to product set-up and installation.
f. Adjustments that are outlined in the Operating Manual.
g. Accessory items including antenna and batteries.
39
40
SANYO COMFORT WARRANTY
SOS HELP LINE
h. Damage in or due to transportation.
i. Damage due to improper maintenance, accident, abuse, misuse or negligence.
j. Damage caused by lightning and power surges.
ORIGINAL RETAIL PURCHASER’S RESPONSIBILITY
You, the original retail purchaser, must present your original, dated bill-of-sale together with this
warranty to SANYO Canada Inc. or to an authorized SANYO Service Depot when you make a
claim under this warranty.
You, the original retail purchaser, are responsible for any costs of TRANSPORTING the product to
and from SANYO Canada Inc. or an authorized SANYO Service Depot. You also are responsible
for the cost of any MAINTENANCE necessary in respect of the product.
WARRANTY BECOMES VOID
This warranty becomes void if the product’s serial numbers are altered or removed or if any repair
to the product is made other than by SANYO Canada Inc. or by an authorized SANYO Service Depot.
LIMITATIONS
a. SANYO Canada Inc. reserves the right to change or improve the design of the model of the product
warranted hereunder without incurring any obligation to make any modifications to or to install any
improvement in or on the product.
b. In no event shall SANYO Canada Inc. or any of its Authorized Dealers be liable for special or
consequential damage arising from the use of this product.
STATUTORY WARRANTIES
The above provisions do not preclude the operation of any applicable provincial statute which in
certain circumstances may not allow some of the limitations and exclusions described in this warranty.
Where any terms of this warranty are prohibited by such a statute, they shall be deemed null and void
but the remainder of this warranty shall remain in effect.
HOW TO OBTAIN WARRANTY SERVICE
Please contact the SANYO Authorized Dealer from whom the product was purchased, or contact us
directly at:
SANYO Canada Inc.
1-300 Applewood Cres.
Concord, Ont. L4K 5C7
(905) 760-9944
1-800-263-2244
At SANYO, fulfilling the needs of our customers is a priority. That’s why we
created our SOS customer service program that guarantees satisfaction.
NATIONWIDE CUSTOMER SUPPORT
SOS is there to help you. Our friendly and knowledgeable product specialists
will quickly answer your questions about setup and use of SANYO telephone
products. Simply call toll free from anywhere in Canada to connect to our
no-charge, SOS support and service network:
1-800-263-2244
Or visit our website at www.sanyoservice.com, and click the Customer
Relations button to get access to our FAQ’s (Frequently Asked Questions)
and other helpful features.
STAY-AT-HOME CONVENIENCE
It’s a nuisance making another trip to the store when you’re stuck. Now with
SOS, all that’s necessary is a quick call from your home for product assistance.
HASSLE-FREE EXCHANGE
Should your SANYO telephone require servicing due to a manufacturing defect
during the warranty period. SANYO Canada will ship prepaid a replacement
unit* within two business days after receiving your defective unit.
Consumers are responsible for the shipping costs of the unit back to
SANYO.
For older, non-current models, replacement units may not be available, in
which case our regular warranty conditions will apply.
GUARANTEED QUALITY
All SOS replacement sets are checked and serviced by factory-authorized
technicians before being sent out.
SOS means you never have to worry.
C.O.D. and/or Collect shipments will not be accepted.
Unit must be returned to SANYO in its original box with all accessories, i.e.:
owner’s manual, battery, adaptor, telephone cord, etc.
41
42