1
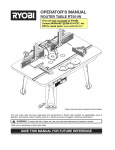
OPERATOR’S MANUAL ROUTER TABLE A25RT02 3 2 1 0 1 Inch 3 2 inch 1 0 1 Inch Your router table has been engineered and manufactured to our high standard for dependability, ease of operation, and operator safety. When properly cared for, it will give you years of rugged, trouble-free performance. WARNING: To reduce the risk of injury, the user must read and understand the operator’s manual before using this product. Thank you for your purchase. SAVE THIS MANUAL FOR FUTURE REFERENCE TABLE OF CONTENTS Introduction ..................................................................................................................................................................... 2 Warranty .......................................................................................................................................................................... 2 General Safety Rules ....................................................................................................................................................3-4 Specific Safety Rules....................................................................................................................................................... 4 Symbols ........................................................................................................................................................................5-6 Electrical .......................................................................................................................................................................... 7 Features ........................................................................................................................................................................8-9 Assembly ..................................................................................................................................................................10-16 Operation ..................................................................................................................................................................17-18 Maintenance .................................................................................................................................................................. 19 Parts Ordering / Service ...................................................................................................................................Back Page INTRODUCTION This product has many features for making its use more pleasant and enjoyable. Safety, performance, and dependability have been given top priority in the design of this product making it easy to maintain and operate. WARRANTY RYOBI® POWER TOOL - LIMITED TWO YEAR WARRANTY AND 30 DAY EXCHANGE POLICY One World Technologies, Inc., warrants its RYOBI® power tools with the following conditions: 30-DAY EXCHANGE POLICY: During the first 30 days after date of purchase, you may either request service under this warranty or you may exchange any RYOBI® power tool which does not work properly due to defective workmanship or materials by returning the power tool to the dealer from which it was purchased. To receive a replacement power tool or requested warranty service, you must present proof of purchase and return all original equipment packaged with the original product. The replacement power tool will be covered by the limited warranty for the balance of the two year period from the date of the original purchase. WHAT THIS WARRANTY COVERS: This warranty covers all defects in workmanship or materials in your RYOBI® power tool for a period of two years from the date of purchase. With the exception of batteries, power tool accessories are warranted for ninety (90) days. Batteries are warranted for two years. HOW TO GET SERVICE: Just return the power tool, properly packaged and postage prepaid, to an Authorized Service Center. You can obtain the location of the Service Center nearest you by contacting a service representative at One World Technologies, Inc., P.O. Box 1207, Anderson, SC 29622-1207, by calling 1-800-525-2579 or by logging on to www. ryobitools.com. When you request warranty service, you must also present proof of purchase documentation, which includes the date of purchase (for example, a bill of sale). We will repair any faulty workmanship, and either repair or replace any defective part, at our option. We will do so without any charge to you. We will complete the work in a reasonable time, but, in any case, within ninety (90) days or less. WHAT’S NOT COVERED: This warranty applies only to the original purchaser at retail and may not be transferred. This warranty only covers defects arising under normal usage and does not cover any malfunction, failure or defects resulting from misuse, abuse, neglect, alteration, modification or repairs by other than Authorized Service Centers. One World Technologies, Inc. makes no warranties, representations or promises as to the quality or performance of its power tools other than those specifically stated in this warranty. ADDITIONAL LIMITATIONS: Any implied warranties granted under state law, including warranties of merchantability or fitness for a particular purpose, are limited to two years from the date of purchase. One World Technologies, Inc. is not responsible for direct, indirect, or incidental damages, so the above limitations and exclusions may not apply to you. This warranty gives you specific legal rights, and you may also have other rights which vary from state to state. 2 GENERAL SAFETY RULES ALWAYS WEAR SAFETY GLASSES WITH SIDE SHIELDS. Everyday eyeglasses have only impactresistant lenses, they are NOT safety glasses. WARNING: Read and understand all instructions. Failure to follow all instructions listed below, may result in electric shock, fire and/or serious personal injury. SECURE WORK. Use clamps or a vise to hold work when practical, it is safer than using your hand and frees both hands to operate the tool. READ ALL INSTRUCTIONS DO NOT OVERREACH. Keep proper footing and balance at all times. KNOW YOUR POWER TOOL. Carefully read the router table operator’s manual and the manual for the particular router you are using. Learn the applications and limitations as well as the specific potential hazards related to this tool. MAINTAIN TOOLS WITH CARE. Keep tools sharp and clean for better and safer performance. Follow instructions for lubricating and changing accessories. DISCONNECT TOOLS. When not in use, before servicing, or when changing attachments, blades, bits, cutters, etc., all tools should be disconnected from power source. GUARD AGAINST ELECTRICAL SHOCK BY PREVENTING BODY CONTACT WITH GROUNDED SURFACES. For example: pipes, radiators, ranges, refrigerator enclosures. AVOID ACCIDENTAL STARTING. Be sure switch is off when plugging in any tool. KEEP GUARDS IN PLACE and in good working order. USE RECOMMENDED ACCESSORIES. Consult the operator’s manual for recommended accessories. The use of improper accessories may result in injury. REMOVE ADJUSTING KEYS AND WRENCHES. Form habit of checking to see that keys and adjusting wrenches are removed from tool before turning it on. NEVER STAND ON TOOL. Serious injury could occur if the tool is tipped. KEEP WORK AREA CLEAN. Cluttered areas and benches invite accidents. DO NOT leave tools or pieces of wood on the tool while it is in operation. CHECK DAMAGED PARTS. Before further use of the tool, a guard or other part that is damaged should be carefully checked to determine that it will operate properly and perform its intended function. Check for alignment of moving parts, binding of moving parts, breakage of parts, mounting and any other conditions that may affect its operation. A guard or other part that is damaged must be properly repaired or replaced by an authorized service center to avoid risk of personal injury. DO NOT USE IN DANGEROUS ENVIRONMENTS. Do not use power tools in damp or wet locations or expose to rain. Keep the work area well lit. KEEP CHILDREN AND VISITORS AWAY. All visitors should wear safety glasses and be kept a safe distance from work area. Do not let visitors contact tool or extension cord while operating. NEVER LEAVE TOOL RUNNING UNATTENDED. TURN THE POWER OFF. DO NOT LEAVE TOOL UNTIL IT COMES TO A COMPLETE STOP. MAKE WORKSHOP CHILDPROOF with padlocks, master switches, or by removing starter keys. DON’T FORCE THE TOOL. It will do the job better and safer at the feed rate for which it was designed. USE THE RIGHT DIRECTION OF FEED. Feed work into a blade or cutter against the direction of rotation of blade or cutter only. USE THE RIGHT TOOL. Do not force the tool or attachment to do a job for which it was not designed. PROTECT YOUR LUNGS. Wear a face or dust mask if the operation is dusty. USE THE PROPER EXTENSION CORD. Make sure your extension cord is in good condition. Use only a cord heavy enough to carry the current your product will draw. An undersized cord will cause a drop in line voltage resulting in loss of power and overheating. A wire gauge size (A.W.G.) of at least 14 is recommended for an extension cord 25 feet or less in length. If in doubt, use the next heavier gauge. The smaller the gauge number, the heavier the cord. PROTECT YOUR HEARING. Wear hearing protection during extended periods of operation. DO NOT ABUSE CORD. Never carry tool by the cord or yank it to disconnect from receptacle. Keep cord from heat, oil, and sharp edges. USE OUTDOOR EXTENSION CORDS. When tool is used outdoors, use only extension cords marked “W-A” or “W”. These cords are rated for outdoor use and reduce the risk of electric shock. DRESS PROPERLY. Do not wear loose clothing, neckties, or jewelry that can get caught and draw you into moving parts. Rubber gloves and nonskid footwear are recommended when working outdoors. Also wear protective hair covering to contain long hair. NEVER USE IN AN EXPLOSIVE ATMOSPHERE. Normal sparking of the motor could ignite fumes. 3 GENERAL SAFETY RULES INSPECT TOOL CORDS PERIODICALLY. If damaged, have repaired by a qualified service technician at an authorized service facility. The conductor with insulation having an outer surface that is green with or without yellow stripes is the equipment-grounding conductor. If repair or replacement of the electric cord or plug is necessary, do not connect the equipment-grounding conductor to a live terminal. Repair or replace a damaged or worn cord immediately. Stay constantly aware of cord location and keep it well away from the rotating blade. STAY ALERT AND EXERCISE CONTROL. Watch what you are doing and use common sense. Do not operate tool when you are tired. Do not rush. DO NOT USE TOOL IF SWITCH DOES NOT TURN IT ON AND OFF. Have defective switches replaced by an authorized service center. DO NOT OPERATE A TOOL WHILE UNDER THE INFLUENCE OF DRUGS, ALCOHOL, OR ANY MEDICATION. WHEN SERVICING use only identical replacement parts. Use of any other parts may create a hazard or cause product damage. USE ONLY RECOMMENDED ACCESSORIES listed in this manual or addendums. Use of accessories that are not listed may cause the risk of personal injury. Instructions for safe use of accessories are included with the accessory. INSPECT EXTENSION CORDS PERIODICALLY and replace if damaged. KEEP TOOL DRY, CLEAN, AND FREE FROM OIL AND GREASE. Always use a clean cloth when cleaning. Never use brake fluids, gasoline, petroleum-based products, or any solvents to clean tool. SPECIFIC SAFETY RULES FOR YOUR OWN SAFETY, read this router table operator’s manual and the router manual before operating the router or using the router table. ALWAYS USE THE ARTICULATING ROUTER CUTTER BIT GUARD. ALWAYS FEED WORKPIECE AGAINST ROTATION OF CUTTER. INSPECT FOR AND REMOVE ALL NAILS FROM LUMBER BEFORE ROUTING. Following this rule will reduce the risk of serious personal injury. KEEP FINGERS AWAY FROM REVOLVING CUTTER, USE FIXTURES WHEN NECESSARY. ALWAYS SUPPORT WORKPIECE FIRMLY AGAINST TABLE AND FENCE. WHEN USING THE ROUTER ON THE ROUTER TABLE, the router must be plugged into the router table switch outlet. KEEP HANDS AWAY FROM CUTTING AREA. Do not reach underneath the table or in the cutting path with your hands or fingers at any time while the tool is connected to a power source. DO NOT USE AWKWARD HAND POSITIONS. FIRMLY CLAMP OR BOLT THE ROUTER TABLE TO A WORK SURFACE so that the router table surface is approximately hip height. IF THE POWER SUPPLY CORD IS DAMAGED, it must be replaced only by the manufacturer or by an authorized service center to avoid risk. SAVE THESE INSTRUCTIONS. Refer to them frequently and use them to instruct others who may use this tool. If you loan someone this tool, loan them these instructions also. 4 SYMBOLS Some of the following symbols may be used on this product. Please study them and learn their meaning. Proper interpretation of these symbols will allow you to operate the product better and safer. SYMBOL NAME DESIGNATION/EXPLANATION V Volts Voltage A Amperes Current Hz Hertz Frequency (cycles per second) W Watt Power Minutes Time Alternating Current Type of current Direct Current Type or a characteristic of current No Load Speed Rotational speed, at no load Class II Construction Double-insulated construction Per Minute Revolutions, strokes, surface speed, orbits etc., per minute Wet Conditions Alert Do not expose to rain or use in damp locations. Read The Operator’s Manual To reduce the risk of injury, user must read and understand operator’s manual before using this product. Eye Protection Always wear safety goggles or safety glasses with side shields and, as necessary, a full face shield when operating this product. Safety Alert Precautions that involve your safety. No Hands Symbol Failure to keep your hands away from the blade will result in serious personal injury. No Hands Symbol Failure to keep your hands away from the blade will result in serious personal injury. No Hands Symbol Failure to keep your hands away from the blade will result in serious personal injury. No Hands Symbol Failure to keep your hands away from the blade will result in serious personal injury. Hot Surface To reduce the risk of injury or damage, avoid contact with any hot surface. min no .../min 5 SYMBOLS The following signal words and meanings are intended to explain the levels of risk associated with this product. SYMBOL SIGNAL MEANING DANGER: Indicates an imminently hazardous situation, which, if not avoided, will result in death or serious injury. WARNING: Indicates a potentially hazardous situation, which, if not avoided, could result in death or serious injury. CAUTION: Indicates a potentially hazardous situation, which, if not avoided, may result in minor or moderate injury. CAUTION: (Without Safety Alert Symbol) Indicates a situation that may result in property damage. SERVICE WARNING: Servicing requires extreme care and knowledge and should be performed only by a qualified service technician. For service we suggest you return the product to the nearest AUTHORIZED SERVICE CENTER for repair. When servicing, use only identical replacement parts. To avoid serious personal injury, do not attempt to use this product until you read thoroughly and understand completely the operator’s manual. If you do not understand the warnings and instructions in the operator’s manual, do not use this product. Call Ryobi customer service for assistance. WARNING: The operation of any power tool can result in foreign objects being thrown into your eyes, which can result in severe eye damage. Before beginning power tool operation, always wear safety goggles or safety glasses with side shields and, when needed, a full face shield. We recommend Wide Vision Safety Mask for use over eyeglasses or standard safety glasses with side shields. Always use eye protection which is marked to comply with ANSI Z87.1. SAVE THESE INSTRUCTIONS 6 ELECTRICAL EXTENSION CORDS SPEED AND WIRING Use only 3-wire extension cords that have 3-prong grounding plugs and 3-pole receptacles that accept the product’s plug. When using a power product at a considerable distance from the power source, use an extension cord heavy enough to carry the current that the product will draw. An undersized extension cord will cause a drop in line voltage, resulting in a loss of power and causing the motor to overheat. Use the chart provided below to determine the minimum wire size required in an extension cord. Only round jacketed cords listed by Underwriter’s Laboratories (UL) should be used. The no-load speed of this product depends on the router you are using. This speed is not constant and decreases under a load or with lower voltage. For voltage, the wiring in a shop is as important as the motor’s horsepower rating. A line intended only for lights cannot properly carry a power product motor. Wire that is heavy enough for a short distance will be too light for a greater distance. A line that can support one power product may not be able to support two or three products. **Ampere rating (on product data plate) In the event of a malfunction or breakdown, grounding provides a path of least resistance for electric current to reduce the risk of electric shock. This product is equipped with an electric cord having an equipment-grounding conductor and a grounding plug. The plug must be plugged into a matching outlet that is properly installed and grounded in accordance with all local codes and ordinances. Do not modify the plug provided. If it will not fit the outlet, have the proper outlet installed by a qualified electrician. Improper connection of the equipment-grounding conductor can result in a risk of electric shock. The conductor with insulation having an outer surface that is green with or without yellow stripes is the equipment-grounding conductor. If repair or replacement of the electric cord or plug is necessary, do not connect the equipment-grounding conductor to a live terminal. Check with a qualified electrician or service personnel if the grounding instructions are not completely understood, or if in doubt as to whether the product is properly grounded. Repair or replace a damaged or worn cord immediately. This product is intended for use on a circuit that has an outlet like the one shown in figure 1. It also has a grounding pin like the one shown. 0-2.0 2.1-3.4 Cord Length 3.5-5.0 5.1-7.0 GROUNDING INSTRUCTIONS 7.1-12.0 12.1-16.0 Wire Size (A.W.G.) 25' 16 16 16 16 14 14 50' 16 16 16 14 14 12 100' 16 16 14 12 10 — **Used on 12 gauge - 20 amp circuit. NOTE: AWG = American Wire Gauge When working with the product outdoors, use an extension cord that is designed for outside use. This is indicated by the letters “WA” on the cord’s jacket. Before using an extension cord, inspect it for loose or exposed wires and cut or worn insulation. WARNING: Keep the extension cord clear of the working area. Position the cord so that it will not get caught on lumber, products or other obstructions while you are working with a power product. Failure to do so can result in serious personal injury. WARNING: Check extension cords before each use. If damaged replace immediately. Never use product with a damaged cord since touching the damaged area could cause electrical shock resulting in serious injury. ELECTRICAL CONNECTION This product should be connected to a power supply that is 120 volts, 60 Hz, AC only (normal household current). Do not operate this product on direct current (DC). A substantial voltage drop will cause a loss of power and the motor will overheat. If the router table does not operate when plugged into an outlet, double check the power supply. GROUNDING PIN 120 V GROUNDED OUTLET Fig. 1 7 FEATURES PRODUCT SPECIFICATIONS Table Dimensions ................................ 16 in. x 32 in. x 1 in. Maximum Cutter Diameter .................................1-15/16 in. Fence Length ............................................................. 28 in. VACUUM PORT Miter Slot ........................................ 1/4 in. x 3/4 in. x 32 in. Rating .............................. 120 V, 60 Hz, AC only, 15 Amps Net Weight .................................................................28 lbs. ARTICULATING ROUTER CUTTER / BIT GUARD FENCE ASSEMBLY FEATHER BOARD STARTING PIN INSERT PLATE 3 2 1 0 1 Inch F D EE IR D E C T IO N 3 2 inch 1 0 c In 1 h Inch SWITCH ASSEMBLY RESET BUTTON PUS H RESE T 1 THROAT PLATES MITER GAUGE Fig. 2 KNOW YOUR ROUTER TABLE FENCE ASSEMBLY See Figure 2. The safe use of this product requires an understanding of the information on the product and in this operator’s manual as well as a knowledge of the project you are attempting. Before use of this product, familiarize yourself with all operating features and safety rules. The sacrifical MDF fence assembly provides an adjustable surface to support and guide the work. Molded into the fence assembly is the vacuum port. INSERT PLATE The insert plate can be used in combination with a variety of routers. It also has pre-drilled countersunk holes that can be used with a variety of routers. ARTICULATING ROUTER CUTTER / BIT GUARD MITER GAUGE The articulating router cutter bit guard on the fence assembly provides a barrier to protect the operator from contact with the cutter and is designed to stay in contact with the workpiece. A miter gauge is used for mitered routing and to help support wider pieces. FEATHERBOARD The featherboard allows for safe movement of the workpiece through the cutter area and is height adjustable. 8 FEATURES RESET BUTTON WARNING: See Figure 2. Always remove the switch key when the tool is not in use and keep it in a safe place. In the event of a power failure, turn the switch OFF ( O ) and remove the key. This action will prevent the tool from accidentally starting when power returns. The router table switch is equipped with a reset button that protects the electronic components of the router table switch box from overload. STARTING PIN When you are unable to use the fence for a guide because the workpiece is odd-shaped or too small, use the starting pin for a guide and/or pivot point. Only use piloted cutters when using the starting pin. WARNING: ALWAYS make sure your workpiece is not in contact with the cutter before operating the switch to start the tool. Failure to heed this warning may cause the workpiece to be kicked back toward the operator and result in serious personal injury. THROAT PLATES Five throat plates are included with the router table. The throat plate provides a stable surface around the cutter and prevents objects from falling through the throat and damaging the spindle. VACUUM PORT WARNING: The vacuum ports molded into the fence will accept either a 1-1/4 in. or 2-1/2 in. vacuum attachment. To reduce the risk of accidental starting, ALWAYS make sure the switch is in the OFF ( O ) position before plugging tool into the power source. SWITCH ASSEMBLY See Figure 3. This product is equipped with a switch assembly that has a built-in locking feature. This feature is intended to prevent unauthorized and possible hazardous use by children and others. SWITCH ON SWITCH OFF TO TURN YOUR ROUTER TABLE ON: Plug the router into either switch box outlet on the router table and plug the router table into a 120 volt grounded outlet. With the switch key inserted into the switch, lift the switch to turn ON ( l ). NOTE: The router table is equipped with a reset button ( See Figure 2 ). If, for any reason, the router table will not turn on, press the reset button and then restart. TO TURN YOUR ROUTER TABLE OFF: Press the switch down to turn OFF ( O ). SWITCH KEY TO LOCK YOUR ROUTER TABLE: Press the switch down. Remove the switch key from the switch and store in a safe, secure location. SWITCH IN LOCKED POSITION 9 Fig. 3 ASSEMBLY UNPACKING WARNING: This product requires assembly. Do not attempt to modify this product or create accessories not recommended for use with this product. Any such alteration or modification is misuse and could result in a hazardous condition leading to possible serious personal injury. Carefully remove the product and any accessories from the box. Make sure that all items listed in the packing list are included. Inspect the product carefully to make sure no breakage or damage occurred during shipping. Do not discard the packing material until you have carefully inspected and satisfactorily operated the product. If any parts are damaged or missing, please call 1-800-525-2579 for assistance. WARNING: Do not connect to power supply until assembly is complete. Failure to comply could result in accidental starting and possible serious personal injury. WARNING: WARNING: If any parts are damaged or missing do not operate this product until the parts are replaced. Failure to heed this warning could result in serious personal injury. The undertable guards must be securely in place before using the router table. Failure to do so could result in serious personal injury. 18 17 23 1 19 2 22 3 21 16 4 3 2 1 3 0 15 1 Inch 20 14 5 3 6 2 FE DIR ED EC TIO N 1 0 8 1 13 Inch 7 9 12 11 10 PACKING LIST Fig. 4 12. Throat Plates (5) 13. Router Insert Plate Screws (5/16-18 x 3/4 in.) (3) 14. Router Insert Plate Screws (10-24 x 5/8 in.) (3) 15. Router Insert Plate Screws (10-32 x 5/8 in.) (3) 16. Under Table Guard Screw (6) 17. Miter Gauge 18. Fence Assembly 19. Fence Lock Knobs (2) 20. Featherboard 21. Featherboard Bolts (2) 22. Fence Lock Knob Washer (2) 23. Featherboard Lock Knobs (2) 24. Operator’s Manual (not shown) 1. Table Leg (4) 2. Starting Pin 3. Table Leg Phillips Head Screw (16) 4. Table Top 5. Switch Box Nut (3) 6. Switch Box Screw (3) 7. Switch Box 8. Carriage Bolt Washer (2) 9. Carriage Bolt (2) 10. Hex Key (1) 11. Under Table Guard (2) 10 ASSEMBLY ASSEMBLING THE ROUTER TABLE Assembling the router table involves attaching the switch box, the under table guards, the legs, the router/insert plate assembly, the fence assembly, featherboard, throat plate, starting pin, and installing the miter gauge to the router table. SWITCH KEY SWITCH BOX SWITCH BOX NUT ATTACHING THE SWITCH BOX See Figure 5. The switch box will come in a bag with the switch box screws and nuts. Use these screws and nuts in the bag to attach the switch box. Place the router table upside down on a flat surface. Hold the switch box so that the words ON and OFF on the toggle switch are upside down. Line up the three holes in the switch box with the three holes on the outside of the front rail, this is the rail that is already installed on the front underside of the router table. Insert the switch box screws through the holes in the switch box and through the holes in the front rail. Install the nuts on the back of the switch box screws. Holding the screws in place with a screwdriver, tighten the nuts onto the screws with a wrench or socket. SWITCH BOX SCREW FRONT RAIL Fig. 5 UNDER TABLE GUARDS UNDER TABLE GUARD SCREW ATTACHING THE UNDER TABLE GUARDS See Figure 6. The under table guards will come in a bag with the under table guard screws. Use these screws in the bag to attach the under table guards. Place the router table upside down on a flat surface. Position the under table guards in front of and behind the insert plate. The front under table guard should have the open ended side facing the back of the router table. Align the three holes of the under table guards with the holes in the table. The front under table guard will be bolted onto the front rail. Insert the under table guard screws through the holes and into the table. Tighten screws with a screwdriver. Fig. 6 TABLE LEG ATTACHING THE TABLE LEGS TABLE LEG SCREW FRONT SIDE See Figure 7. The table legs will come in a bag with the table leg screws. Use the table leg screws in the bag to attach the table legs. Place router table upside down on a flat, level surface with the front edge closest to you. Place each leg in a corner of the table. The legs with the warning labels should go in the front, and the legs without the warning labels should go in the back. NOTE: The table leg with the English language warning should go next to the switch box. Align the four holes in the legs with the four corresponding threaded holes in the table. Insert the table leg screws through the holes and into the table. Tighten screws with a screwdriver. RIGHT LEGFRENCH / SPANISH LABEL 11 LEFT LEGENGLISH LABEL Fig. 7 ASSEMBLY PRE-DRILLING HOLES FOR THROUGH TABLE DEPTH ADJUSTMENT INSERT PLATE REAR SIDE PRE-DRILLED PILOT HOLES See Figure 8. Since each router will have different placements for through table depth adjustments, pilot holes have been pre-drilled in the throat plate to assist in through table adjustments. Only the models listed below in the key are available for use with the through table depth adjustment feature. Remove the throat plate. Determine which router you have and find the pre-drilled pilot hole that matches your router. (Refer to the key below.) Using a drill and drill bit, drill a hole through the pilot hole large enough for the depth adjustment tool (not included with router table, but may be included with your router) to pass though so through table depth adjustments can be made. Figure 8 Key: RD: RIDGID R2930 RY: Ryobi R163K ML: Milwaukee 5615-20, 5616-20 PC1: Porter-Cable 890 Series PC2: Porter-Cable 8529 RD PC2 ML PC1 RY PC1 Fig. 8 INSERT PLATE FRONT SIDE B4 NOTCH A1 A6 A2 B1 B2 A5 A3 B3 A4 ATTACHING THE ROUTER TO THE TABLE Fig. 9 For ease of use, assemble the router to the insert plate with the insert plate removed first, then install the insert plate/ router assembly into the router table. ROUTER INSERT PLATE SCREWS ATTACHING THE ROUTER TO THE INSERT PLATE See Figures 9 - 10. Remove the insert plate. Remove the subbase plate from the router. Using the following chart for reference, and using one of the three included sets of three router insert plate screws, attach the router to the insert plate with the pilot holes facing the router and the notch in the insert plate facing the back of the router table. NOTE: When attaching insert plate to the router, make sure the holes in the router base match up with the insert plate accurately and are not off-center. INSERT PLATE Fig. 10 INSERT PLATE SCREWS NOTCH INSTALLING THE ROUTER/INSERT PLATE ASSEMBLY See Figure 11. With the insert plate installed on the router, insert router and insert plate assembly into the router table with the notch in the insert plate facing the back of the router table toward the fence assembly. 3 2 1 0 1 Inc h Install the insert plate screws and leave loose until all adjustments have been made. 3 2 1 FE DIR ED EC TIO 0 N 1 Inc 12 Fig. 11 h ASSEMBLY BRAND MODEL BASE TYPE FASTENER SIZE INSERT PLATE HOLES USED NUMBER OF HOLES Bosch 1617 Fixed 10-24 x 5/8 in. A1, A3, A5 3 Bosch 1617 EVS Fixed 10-24 x 5/8 in. A1, A3, A5 3 Bosch 1617 EVSPK Fixed 10-24 x 5/8 in. A1, A3, A5 3 Craftsman 17504 Fixed 10-32 x 5/8 in. A2, A4, A6 3 Craftsman 17505 Fixed 10-32 x 5/8 in. A2, A4, A6 3 Craftsman 17506 Fixed 10-32 x 5/8 in. A2, A4, A6 3 Craftsman 17508 Fixed 10-32 x 5/8 in. A2, A4, A6 3 Craftsman 17510 Fixed 10-32 x 5/8 in. A2, A4, A6 3 Craftsman 17511 Fixed 10-32 x 5/8 in. A2, A4, A6 3 Craftsman 17515 Plunge 5/16-18 x 3/4 in. B1, B2, B4 3 Craftsman 17517 Plunge 10-32 x 5/8 in. A2, A4, A6 3 Craftsman 17533 Fixed 10-32 x 5/8 in. A2, A4, A6 3 Craftsman 17533 Plunge 5/16-18 x 3/4 in. B1, B2, B4 3 Craftsman 24833 Fixed 10-32 x 5/8 in. A2, A4, A6 3 Craftsman 24833 Plunge 5/16-18 x 3/4 in. B1, B2, B4 3 Craftsman 27500 Fixed 5/16-18 x 3/4 in. B1, B2, B4 3 Craftsman 26921 Fixed 10-32 x 5/8 in. A2, A4, A6 3 Hitachi M12V Plunge 10-32 x 5/8 in. A1, A3, A5 3 Hitachi KM12VC Fixed 10-32 x 5/8 in. A1, A3, A5 3 Makita RF1101 Fixed 10-24 x 5/8 in. A1, A3, A5 3 Makita RP1101 Plunge 10-24 x 5/8 in. A1, A3, A5 3 Makita RF1101K Fixed/Plunge 10-24 x 5/8 in. A1, A3, A5 3 Milwaukee 5615-20 Fixed 10-24 x 5/8 in. A1, A3, A5 3 Milwaukee 5616-20 Fixed 10-24 x 5/8 in. A1, A3, A5 3 Porter Cable 693LRPK Plunge only 10-24 x 5/8 in. A1, A3, A5 3 Porter Cable 694PK Plunge only 10-24 x 5/8 in. A1, A3, A5 3 Porter Cable 694VK Plunge only 10-24 x 5/8 in. A1, A3, A5 3 Porter Cable 892 Fixed 10-24 x 5/8 in. A1, A3, A5 3 Porter Cable 893PK Fixed 10-24 x 5/8 in. A1, A3, A5 3 Porter Cable 7529 Plunge 10-24 x 5/8 in. A1, A3, A5 3 Porter Cable 8529 Plunge 10-24 x 5/8 in. A1, A3, A5 3 RIDGID R2930 Fixed/Plunge 10-32 x 5/8 in. A1, A3, A5 3 Ryobi R160 Fixed 5/16-18 x 3/4 in. B1, B2, B4 3 Ryobi R161K Fixed 5/16-18 x 3/4 in. B1, B2, B4 3 Ryobi R162K Fixed 5/16-18 x 3/4 in. B1, B2, B4 3 Ryobi R163K Fixed 5/16-18 x 3/4 in. B1, B2, B4 3 Ryobi R165U Fixed 5/16-18 x 3/4 in. B1, B2, B4 3 Ryobi R175 Plunge 5/16-18 x 3/4 in. B1, B3 2 Ryobi RE175 Plunge 5/16-18 x 3/4 in. B1, B3 2 Ryobi RE180PL/PL1 Plunge 5/16-18 x 3/4 in. B1, B3 2 Skil 1810 Fixed 10-32 x 5/8 in. A2, A4, A6 3 Skil 1825 Fixed/Plunge 10-32 x 5/8 in. A2, A4, A6 3 All identified trademarks and trade names are the property of their respective owners. 13 ASSEMBLY MAKING INSERT PLATE LEVEL See Figure 12. Unplug the router table and/or the router. Check to see if the insert plate mounted assembly is level with a straight edge or level. Loosen insert plate screws. Using the supplied hex key, tighten or loosen the adjusting screws depending on how the insert plate needs to be adjusted in order to make the insert plate level. Tighten insert plate screws with a screwdriver. HEX KEY INSERT PLATE STRAIGHT EDGE ADJUSTING SCREWS 3 2 1 0 1 Inc h ATTACHING THE FENCE ASSEMBLY See Figure 13. Unplug the router table and/or the router. Place the router table right side up with the back edge closest to you. Slide the carriage bolt washers onto the carriage bolts. Slide carriage bolts through the slot in the router table and through the slots in the fence assembly. Slide the fence lock knob washer over the carriage bolts. Install the fence lock knobs over the carriage bolts. Tighten the fence lock knobs. 3 2 FE DIR ED EC TIO 1 0 N 1 Inc h Fig. 12 FENCE LOCK KNOB WASHER FENCE ASSEMBLY FENCE LOCK KNOBS Inch 1 0 WARNING: 1 2 3 0 Make sure throat plates snap securely into place. Do not use if snaps are damaged or throat plates do not snap in securely. Failure to do so could result in serious personal injury. SLOT INSERTING AND REMOVING THROAT PLATES See Figure 14. CARRIAGE BOLT WASHER The throat plate provides a stable surface around the cutter and prevents objects from falling through the throat plate and damaging the spindle. The proper size throat plate depends on the size and shape of the cutter. When inserted, the throat plate opening should be within approximately 1/4 in. of the outermost edge of the cutter. CARRIAGE BOLTS Fig. 13 THROAT PLATE TAB 3 2 1 0 1 Inc h 3 2 1 0 1 NOTCH 14 Inc h Fig. 14 EE DIFR D EC TIO N ASSEMBLY Unplug the router table and/or the router. Select the throat plate you wish to use. SLOT FEATHERBOARD BOLT Press throat plate into insert plate slot until it snaps into place. 3 2 To remove, push throat plate out from the bottom of the insert plate. 1 0 1 Inch ATTACHING THE FEATHERBOARD See Figure 15. Unplug the router table and/or the router. Insert the featherboard bolts through the slots in the fence assembly. Slide the featherboard over the featherboard bolts. Install the fence lock knobs and carriage bolt washers over the carriage bolts. 3 2 1 0 1 Inch FEATHERBOARD Tighten the fence lock knobs. CARRIAGE BOLT WASHER FENCE LOCK KNOB INSERTING THE STARTING PIN See Figure 16. Place the starting pin on the router table and use it as a pivot point when cutting small, odd-shaped pieces. NOTE: It is not necessary to use the fence when you are using the starting pin, but the bit guard should be used to 1 cover the cutter. Additionally, only use piloted cutters when Inc h using the starting pin. Unplug the router table and/or the router. Place the starting pin into the hole to the right of the router table throat opening. Fig. 15 STARTING PIN 3 2 1 0 INSTALL 3 REMOVE Push the pin in to secure. 2 1 0 1 INSTALLING THE MITER GAUGE Inc h See Figure 17. Unplug the router table and/or the router. With the router table right side up, and the front edge closest to you, place the miter gauge bar in the slot near the front of the table with the pointer on the right. STARTING PIN HOLES Fig. 16 MITER GAUGE BAR MITER GAUGE POINTER 3 2 1 0 1 Inc h 3 2 1 0 EE DIFR D EC TIO SLOT 15 1 Inc h N Fig. 17 DIF ASSEMBLY ATTACHING THE VACUUM HOSE VACUUM PORT See Figure 18. The vacuum port molded into the fence will accept either a 1-1/4 in. or 2-1/2 in. vacuum attachment. CLAMPING THE ROUTER TABLE TO A WORK BENCH F D EE IR D E C T IO See Figures 19. Unplug the router table and/or the router. Place the router table right side up on a sturdy work surface; e.g., leg stand, workbench, counter top. Using a clamp, insert the top front of clamp through the opening in the router table leg. Tighten clamp securely. N h In c 1 3 2 1 MOUNTING THE ROUTER TABLE TO A WORK BENCH 0 VACUUM HOSE 1 Inc h See Figure 20. Unplug the router table and/or the router. Place the router table right side up on a sturdy work surface; e.g., leg stand, workbench, counter top. Mark the holes with a pencil. Remove the router table. Drill four holes through the work surface. Place the router table back on the work surface, aligning the holes in the table legs with the holes in the work surface. Fig. 18 3 inch 2 1 0 1 Inc h NOTE: Position the router table surface at approximately hip height. Insert four bolts (not included, 1/4-20 recommended) and tighten securely with flat washers, lock washers, and hex nuts (not included). WORK TABLE CLAMP Fig. 19 BOLTS 3 2 1 0 1 Inc h 3 inch 2 1 0 1 Inc h FLAT WASHER HEX NUT 16 LOCK WASHER WORK TABLE Fig. 20 OPERATION WARNING: WARNING: Do not allow familiarity with products to make you careless. Remember that a careless fraction of a second is sufficient to inflict serious injury. The router or router table should never be connected to a power supply when you are assembling parts, making adjustments, installing or removing cutters, cleaning, or when not in use. Disconnecting the router and router table will prevent accidental starting that could cause serious personal injury. WARNING: Always wear safety goggles or safety glasses with side shields when operating power tools. Failure to do so could result in objects being thrown into your eyes resulting in possible serious injury. PERFORMING A ROUTING OPERATION Observe the following rules when using the router. Read the entire operator’s manual for the router and router table. Plug the router table power cord into a power source. Always control the power to the router with the router table switch whenever the router is mounted on the table. Always plug the router into either of the router table switched outlets. Never plug a router table mounted router into another power source. Position the infeed and outfeed fence so they are close to the maximum diameter of the cutter, but not touching the cutter. WARNING: Do not use any attachments or accessories not recommended by the manufacturer of this product. The use of attachments or accessories not recommended can result in serious personal injury. APPLICATIONS You may use this product for the purposes listed below: T � able mounted dado and mortise operations in wood and wood composition materials NOTE: The workpiece must always be tight against the fence, unless you are using a ball-bearing piloted cutter. Adjust the infeed fence to support the uncut workpiece and adjust the outfeed fence to support the workpiece after the cut. The “0” location on the fence scale denotes the center of the throat opening of the table. Reconfirm that all router adjustments are securely locked before connecting the router table to a power source. Feed the workpiece from right to left with the cutter in line with the fence opening. Fence guided edging operations for cabinetry and picture framing on wood and wood composition materials Piloted cutter operations using the starting pin for edging patterned surfaces on wood and wood composition materials WARNING: The direction of feed for the workpiece is always against the sharp edges of the cutter and therefore into the rotation of the cutter. Failure to heed this warning can result in serious personal injury. Make sure the router table switch is off when not in use. Remove the switch key to ensure the router table is off. WARNING: When operating the router with the router table, the router must only be plugged into and controlled by the router table switched outlet. To reduce the risk of serious personal injury, never connect the table mounted router into another power source. 17 OPERATION INSERTING/REMOVING CUTTERS MITER GAUGE KNOB Unplug the router table and/or the router. Remove the router/insert plate assembly. (See Installing Router/Insert Plate Assembly in the Assembly section.) 3 2 1 0 WARNING: 1 Inch If you are changing a cutter immediately after use, be careful not to touch the cutter or collet with your hands or fingers. They will get burned because of the heat buildup from cutting. Always use a wrench. 3 2 1 0 1 Inch Consult the router operator’s manual for proper cutter removal/installation procedure and replace cutter. ADJUSTING DEPTH OF CUT We recommend that cuts be made at a depth not exceeding 1/8 in. and that several passes be made to reach depths of cut greater than 1/8 in. Fig. 21 MITER GAUGE OUTFEED FENCE ADJUSTING THE MITER GAUGE See Figure 21. Unplug the router table and/or the router. Loosen the miter gauge knob. Rotate the miter gauge to the desired angle. Tighten the miter gauge knob. F D EE IR D E C T IO POSITIONING THE FENCE In c h 1 0 1/4 TIGHTEN SCALE FENCE LOCK KNOBS NOTE: The outfeed fence has joining capabilities and can be adjusted out in increments up to 1/4 in. and enable you to support the workpiece as it exits the cutter. WARNING: LOOSEN N See Figure 22. The fence enables you to support and guide the workpiece. Unplug the router table and/or the router. Loosen the fence lock knobs. Position the fence to the desired location. Tighten the fence lock knobs. CUTTER PROPER DISTANCE 3 2 1 When making a side or edge cut, never position the fence such that the workpiece is located between the cutter and the fence. Failure to heed this warning can result in serious personal injury. 0 1 Inc h 3 2 FE DIR ED EC TIO 1 3 2 0 N 1 Inc h SCALE Fig. 22 18 MAINTENANCE WARNING: WARNING: When servicing, use only identical replacement parts. Use of any other parts may create a hazard or cause product damage. Do not at any time let brake fluids, gasoline, petroleumbased products, penetrating oils, etc., come in contact with plastic parts. Chemicals can damage, weaken or destroy plastic which may result in serious personal injury. WARNING: Electric tools used on fiberglass material, wallboard, spackling compounds, or plaster are subject to accelerated wear and possible premature failure because the fiberglass chips and grindings are highly abrasive to bearings, brushes, commutators, etc. Consequently, we do not recommend using this product for extended work on these types of materials. However, if you do work with any of these materials, it is extremely important to clean the product using compressed air. Always wear safety goggles or safety glasses with side shields during power tool operation or when blowing dust. If operation is dusty, also wear a dust mask. GENERAL MAINTENANCE Avoid using solvents when cleaning plastic parts. Most plastics are susceptible to damage from various types of commercial solvents and may be damaged by their use. Use clean cloths to remove dirt, dust, oil, grease, etc. 19 OPERATOR’S MANUAL ROUTER TABLE A25RT02 WARNING: Some dust created by power sanding, sawing, grinding, drilling, and other construction activities contains chemicals known to cause cancer, birth defects or other reproductive harm. Some examples of these chemicals are: • lead from lead-based paints, • crystalline silica from bricks and cement and other masonry products, and • arsenic and chromium from chemically-treated lumber. Your risk from these exposures varies, depending on how often you do this type of work. To reduce your exposure to these chemicals: work in a well ventilated area, and work with approved safety equipment, such as those dust masks that are specially designed to filter out microscopic particles. • PARTS AND SERVICE Prior to requesting service or purchasing replacement parts, please obtain your model and serial number from the product data plate. • MODEL NUMBER • SERIAL NUMBER A25RT02 • HOW TO OBTAIN REPLACEMENT PARTS: Replacement parts can be purchased online at www.ryobitools.com or by calling 1-800-525-2579. Replacement parts can also be obtained at one of our Authorized Service Centers. • HOW TO LOCATE AN AUTHORIZED SERVICE CENTER: Authorized Service Centers can be located online at www.ryobitools.com or by calling 1-800-525-2579. • HOW TO OBTAIN CUSTOMER OR TECHNICAL SUPPORT: To obtain Customer or Technical Support please contact us at 1-800-525-2579. Ryobi® is a registered trademark of Ryobi Limited used under license. ONE WORLD TECHNOLOGIES, INC. 1428 Pearman Dairy Road, Anderson, SC 29625 Phone 1-800-525-2579 www.ryobitools.com 987000-115 03-20-07 (REV:01) 20