1
IMPORTADOR
Comercializadora Thomson de México, S.A. de C.V.
Álvaro Obregón No. 151. Piso 13.
Col. Roma. Delegación Cuauhtémoc
C.P. 06700. México, D.F.
Telefono: 52-55-11-020360
RFC: CTM-980723-KS5
Thomson Inc.
P.O. Box 1976
Indianapolis, IN 46206-1976
© 2004 Thomson Inc.
Trademark(s) ® Registered
Marca(s) ® Registrada(s)
Marque(s) ® Deposée(s)
5588825C (EN/F/E)
www.rca.com
Printed In China / Impreso en China
u s e r
m a n u a l
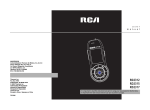
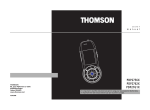
RD2010
RD2011
RD2012
RD2015
It is important to read this instruction book prior to using your new product for the first time.
Es importante leer este manual antes de usar por vez primera su euipo.
FCC Information
EN
FCC Information
This device complies with Part 15 of the FCC
Rules. Operation is subject to the following
two conditions: (1) This device may not cause
harmful interference, and (2) this device
must accept any interference received,
including interference that may cause
undesired operation.
In accordance with FCC requirements,
changes or modifications not expressly
approved by Thomson Inc. could void the
user’s authority to operate this product.
This device generates and uses radio
frequency (RF) energy, and if not installed
and used properly, this equipment may cause
interference to radio and television
reception.
If this equipment does cause interference to
radio or television reception (which you can
determine by unplugging the unit), try to
correct the interference by one or more of
the following measures:
• Re-orient the receiving antenna (that is,
the antenna for the radio or television that is
"receiving" the interference).
• Move the unit away from the equipment
that is receiving interference.
• Plug the unit into a different wall outlet
so that the unit and the equipment receiving
interference are on different branch circuits.
If these measures do not eliminate the
interference, please consult your dealer or an
experienced radio/television technician for
additional suggestions. Also, the Federal
Communications Commission has prepared a
helpful booklet, "How To Identify and
Resolve Radio TV Interference Problems."
This booklet is available from the U.S.
Government Printing Office, Washington, DC
20402. Please specify stock number
004-000-00345-4 when ordering copies.
This product complies with DHHS Rules 21
CFR Subchapter J. Applicable at the date of
manufacture.
This Class B digital apparatus complies with
Canadian ICES-003.
Cet appareil numérique de la class B est
conforme à la norme du NMB-003 du
Canada
CAUTION
RISK OF ELECTRIC SHOCK
DO NOT OPEN
THE LIGHTNING
FLASH AND ARROWHEAD WITHIN THE
TRIANGLE IS A
WA R N I N G S I G N
ALERTING YOU OF
"DANGEROUS
VOLTAGE" INSIDE
THE PRODUCT.
CAUTION: TO REDUCE THE
RISK OF ELECTRIC SHOCK,
D O N OT R E M OV E C OV E R
( O R BAC K ) . N O U S E R S E RV I C E A B L E PA RT S I N S I D E . R E F E R S E RV I C I N G
T O Q UA L I F I E D S E RV I C E
PERSONNEL.
THE EXCLAMATION
POINT WITHIN THE
TRIANGLE IS A
WARNING
SIGN
ALERTING YOU OF
I M P O R TA N T
INSTRUCTIONS
A C C O M PA N Y I N G
T H E P R O D U C T.
SEE MARKING ON BOTTOM / BACK OF PRODUCT
WARNING: TO PREVENT FIRE OR ELECTRICAL
SHOCK HAZARD, DO NOT EXPOSE THIS PRODUCT
TO RAIN OR MOISTURE.
The descriptions and characteristics given in this document are given as a general indication and not as a guarantee. In
order to provide the highest quality product possible, we reserve the right to make any improvement or modification
without prior notice. The English version serves as the final reference on all products and operational details should
any discrepancies arise in other languages.
Safety Information
RCA
RD2010
RCA
RD2012
Equipment tested for
compliance as a
complete unit
Equipment tested for
compliance as a
complete unit
RCA
RD2011
RCA
RD2015
Equipment tested for
compliance as a
complete unit
Equipment tested for
compliance as a
complete unit
Product Registration
Technical Specification
Please fill out the product registration card
and return it immediately. Returning this
card allows us to contact you if needed.
Product: Digital Audio Player
Brand: RCA
Model: RD2010 / RD2011 / RD2012 / RD2015
For Your Records
Keep your sales receipt for proof of purchase
to obtain warranty parts and service.
In the event that service should be required,
you may need both the model number and
the serial number. In the space below, record
the date and place of purchase, and the
serial number:
Date of Purchase
Place of Purchase
Serial No.
Service Information
This product should be serviced only by those
specially trained in appropriate servicing
techniques. For instructions on how to obtain
service, refer to the warranty included in this
Guide.
Electrical Consumption
1 x AA Battery
IMPORTER
Comercializadora Thomson de México, S.A. de C.V.
Álvaro Obregón No. 151. Piso 13.
Col. Roma. Delegación Cuauhtémoc
C.P. 06700. México, D.F.
Telefono: 52-55-11-020360
RFC: CTM-980723-KS5
EN
End User License Agreement
EN
IMPORTANT-READ CAREFULLY: This
End User License Agreement
("Agreement") is a legal agreement
between you and Thomson Inc.
("Thomson") for the RCA Lyra Audio
Device application/driver software
program and associated
documentation, if any ("Program").
ACKNOWLEDGMENT
BY INSTALLING THE SOFTWARE OR
CLICKING ON THE ACCEPTANCE BUTTON
OF THE SOFTWARE, COPYING OR
OTHERWISE USING THE PROGRAM, YOU
ACKNOWLEDGE AND AGREE THAT YOU
HAVE READ THIS AGREEMENT,
UNDERSTAND IT, AND AGREE TO BE
BOUND BY ITS TERMS AND CONDITIONS.
IF YOU DO NOT AGREE TO THE TERMS OF
THIS LICENSE AGREEMENT, CLICK ON THE
REJECTION BUTTON AND/OR DO NOT
INSTALL THE SOFTWARE AND/OR DO NOT
USE THE PROGRAM.
LICENSE
a) You are granted the license (i) to use
the Program on a single workstation
and (ii) to make one (1) copy of the
Program into any machine-readable form
for backup of the Program, provided the
copy contains all of the original Program’s
proprietary notices.
b) You may transfer the Program and
license, only as part of the Lyra Audio
Device, to another party if the other party
agrees to accept the terms and conditions
of this Agreement. If you transfer the
Program, you must at the same time either
transfer all copies to the same party or
destroy any copies not transferred.
End User License Agreement
LICENSE RESTRICTIONS
a) Except for the licenses expressly
granted to you in this Agreement, no
other licenses are implied.
b) You may not (i) modify, translate,
reverse engineer, decompile, disassemble
(except to the extent that this restriction
is expressly prohibited by law) or create
derivative works based upon the Program
or (ii) copy the Program, except as
expressly permitted herein. You agree
that you shall only use the Program in a
manner that complies with all applicable
laws in the jurisdictions in which you use
the Program, including, but not limited
to, applicable restrictions concerning
copyright and other intellectual property
rights.
c) The Program may contain pre-release
code that does not perform at the level of
a final code release. In this case, the
Program may not operate properly.
Updated versions of the Program can be
downloaded from www.rca.com.
d) Thomson is not obligated to provide
support services for the Program.
e) The Program is provided with
"RESTRICTED RIGHTS". Use, duplication,
or disclosure by the U.S. Government is
subject to restrictions as set forth in
subparagraph (c)(1)(ii) of DFARS 252.2277013, or FAR 52.227-19, or in FAR 52.22714 Alt. III, as applicable.
TERM AND TERMINATION
a) The license is effective on the date you
accept this Agreement, and remains in
effect until terminated by either party.
b) You may terminate this license without
any notice or delay, by destroying or
permanently erasing the Program and all
copies thereof.
c) If you use, copy, modify, or transfer the
Program, or any copy, in whole or part,
except as expressly provided for in this
license, your license is automatically
terminated.
d) When the license is terminated, you
must destroy or permanently erase the
Program and all copies thereof.
EN
End User License Agreement
EN
WARRANTY DISCLAIMER
OWNERSHIP RIGHTS
THE PROGRAM IS PROVIDED "AS IS"
WITHOUT WARRANTY OF ANY KIND,
EITHER EXPRESSED OR IMPLIED,
INCLUDING, BUT NOT LIMITED TO THE
IMPLIED WARRANTIES OF
MERCHANTABILITY, FITNESS FOR A
PARTICULAR PURPOSE, TITLE OR NONINFRINGEMENT. THE ENTIRE RISK AS TO
THE QUALITY AND PERFORMANCE OF
THE PROGRAM IS WITH YOU. SHOULD
THE PROGRAM PROVE DEFECTIVE, YOU
(AND NOT THOMSON, ITS SUPPLIERS, ITS
AFFILIATES OR ITS DEALERS) ASSUME THE
ENTIRE COST FOR ALL NECESSARY REPAIR
OR CORRECTION.
All title and intellectual property rights in
and to the Program and any copies
thereof are owned by Thomson or its
suppliers. All title and intellectual
property rights in and to the content
which may be accessed through use of
the Program is the property of the
respective content owner and may be
protected by applicable copyright or
other intellectual property laws and
treaties. This license grants you no rights
to use such content.
This exclusion of warranty may not be
allowed under some applicable laws. As a
result, the above exclusion may not apply
to you, and you may have other rights
depending on the law that applies to you.
End User License Agreement
LIMITATION OF LIABILITY
a) TO THE MAXIMUM EXTENT
PERMITTED BY APPLICABLE LAW, IN NO
EVENT SHALL THOMSON, ITS AFFILIATES,
OR ITS DEALERS BE LIABLE FOR ANY
SPECIAL, INCIDENTAL, INDIRECT OR
CONSEQUENTIAL DAMAGES
WHATSOEVER (INCLUDING, WITHOUT
LIMITATION, DAMAGES FOR LOSS OF
PROFITS, BUSINESS INTERRUPTION,
CORRUPTION OF FILES, LOSS OF BUSINESS
INFORMATION OR ANY OTHER
PECUNIARY LOSS) REGARDLESS OF CAUSE
OR FORM OF ACTION, INCLUDING
CONTRACT, TORT OR NEGLIGENCE,
ARISING OUT OF THE USE OF OR
INABILITY TO USE THE PROGRAM, EVEN
IF THOMSON HAS BEEN ADVISED OF THE
POSSIBILITY OF SUCH DAMAGES.
BECAUSE SOME STATES AND
JURISDICTIONS DO NOT ALLOW THE
EXCLUSION OR LIMITATION OF LIABILITY
OF CONSEQUENTIAL OR INCIDENTAL
DAMAGES, THE ABOVE LIMITATION MAY
NOT APPLY TO YOU.
b) YOU ASSUME RESPONSIBILITY FOR
THE SELECTION OF THE APPROPRIATE
PROGRAM TO ACHIEVE YOUR INTENDED
RESULTS, AND FOR THE INSTALLATION,
USE, AND RESULTS OBTAINED.
WINDOWS MEDIA
This version of the Lyra Audio Device
Player ("Lyra Player") contains software
licensed from Microsoft that enables you
to play Windows Media Audio (WMA)
files ("WMA Software").The WMA
Software is licensed to you for use with
the RCA/THOMSON Portable Audio
Device digital music player under the
following conditions. By installing and
using this version of the Lyra Player, you
are agreeing to these conditions. IF YOU
DO NOT AGREE TO THE CONDITIONS OF
THIS END USER LICENSE AGREEMENT, DO
NOT INSTALL OR USE THIS VERSION OF
THE Lyra Player.
EN
End User License Agreement
EN
The WMA Software is protected by
copyright and other intellectual property
laws. This protection also extends to
documentation for the WMA Software,
whether in written or electronic form.
GRANT OF LICENSE. The WMA Software is
only licensed to you as follows:
You may use this version of the Lyra
Player containing the WMA Software
only with the Portable Audio Device
player.
You may not reverse engineer, decompile,
or disassemble the WMA Software,
except and only to the extent that such
activity is expressly permitted by
applicable law in spite of this limitation.
You may transfer your right to use this
version of the Lyra Player only as part of a
sale or transfer of your Portable Audio
Device player, on the condition that the
recipient agrees to the conditions in this
End User License Agreement. If the
version of the Lyra Player that you are
transferring is an upgrade, you must also
transfer all prior versions of the Lyra
Player that you have which include the
WMA Software.
MICROSOFT IS NOT PROVIDING ANY
WARRANTY OF ANY KIND TO YOU FOR
THE WMA SOFTWARE, AND MICROSOFT
MAKES NO REPRESENTATION
CONCERNING THE OPERABILITY OF THE
WMA SOFTWARE.
The WMA Software is of U.S. origin. Any
export of this version of the Lyra Player
must comply with all applicable
international and national laws, including
the U.S. Export Administration
Regulations, that apply to the WMA
Software incorporated in the Lyra Player.
End User License Agreement
THIRD PARTY SOFTWARE
GENERAL TERMS
ANY THIRD PARTY SOFTWARE THAT MAY
BE PROVIDED WITH THE PROGRAM IS
INCLUDED FOR USE AT YOUR OPTION. IF
YOU CHOOSE TO USE SUCH THIRD PARTY
SOFTWARE, THEN SUCH USE SHALL BE
GOVERNED BY SUCH THIRD PARTY'S
LICENSE AGREEMENT, AN ELECTRONIC
COPY OF WHICH WILL BE INSTALLED IN
THE APPROPRIATE FOLDER ON YOUR
COMPUTER UPON INSTALLATION OF THE
SOFTWARE. THOMSON IS NOT
RESPONSIBLE FOR ANY THIRD PARTY’S
SOFTWARE AND SHALL HAVE NO
LIABILITY FOR YOUR USE OF THIRD
PARTY SOFTWARE.
This Agreement can only be modified by
a written agreement signed by you and
Thomson, and changes from the terms
and conditions of this Agreement made
in any other manner will be of no effect.
If any portion of this Agreement shall be
held invalid, illegal, or unenforceable, the
validity, legality, and enforceability of the
remainder of the Agreement shall not in
any way be affected or impaired thereby.
This Agreement is the complete and
exclusive statement of the agreement
between you and Thomson, which
supersedes all proposals or prior
agreements, oral or written, and all other
communications between you and
Thomson, relating to the subject matter
of this Agreement.
GOVERNING LAW
This Agreement is governed by the laws
of the State of Indiana, U.S.A. without
regard to its conflict of laws.
EN
Table of Contents
EN
FCC Information
General Controls . . . . . . . . . . .9
End User License Agreement
Front View . . . . . . . . . . . . . . . . . . . . .9
Top View . . . . . . . . . . . . . . . . . . . . . .10
Back View . . . . . . . . . . . . . . . . . . . . .10
Display Overview . . . . . . . . . . . . . . .11
Table of Contents . . . . . . . . . . .1
Menu Navigation . . . . . . . . . .12
Safety Information
Before You Begin . . . . . . . . . . .3
Unpacking Your Unit . . . . . . . . . . . . .3
What’s so special about this
mp3 player? . . . . . . . . . . . . . . . . . . . .3
Computer System Requirements 3
Precautions for the unit . . . . . . . . . .4
Caution . . . . . . . . . . . . . . . . . . . . . . . .4
Caution While Driving . . . . . . . . . . .4
Important Battery Information . . . .5
Please Respect the Environment! . .5
Headset Safety . . . . . . . . . . . . . . . . . .5
Inserting battery into the player . . .6
Inserting a SD card/MultiMedia
Card (Optional) . . . . . . . . . . . . . . . . .6
Using Headphones . . . . . . . . . . . . . .7
How to Use Your Clip Phones
(The e.clipz) . . . . . . . . . . . . . . . . . .7
Connecting the Lyra Player to your
Computer . . . . . . . . . . . . . . . . . . . . . .8
1
Top Menu . . . . . . . . . . . . . . . . . .12
Music Sub-menu . . . . . . . . . . . . .13
Radio Sub-menu . . . . . . . . . . . . .13
Menu Navigation . . . . . . . . . . . .13
Digital Music Operation . . . .14
Selecting Music Mode . . . . . . . . . .14
Music Playback Operation . . . . . . .14
Play / Pause . . . . . . . . . . . . . . . . .14
Skipping Tracks . . . . . . . . . . . . . .15
Scan Tracks . . . . . . . . . . . . . . . . .15
Stop Playback . . . . . . . . . . . . . . .15
Adjusting the Volume . . . . . . . .15
Additional Music Features . . . . . . .16
My Selections . . . . . . . . . . . . . . .16
Adding Songs to My Selections16
Removing Songs from My
Selections . . . . . . . . . . . . . . . . . .16
View My Selections . . . . . . . . . .16
Clear My Selections . . . . . . . . .16
View Music Sub-Menu . . . . . . . .17
Repeat . . . . . . . . . . . . . . . . . . . .17
Shuffle . . . . . . . . . . . . . . . . . . . .17
DSP . . . . . . . . . . . . . . . . . . . . . . .18
Table of Contents
Radio . . . . . . . . . . . . . . . . . . .19
System Settings . . . . . . . . . . .23
Selecting Radio Mode . . . . . . . . . . .19
Tuning to a Station . . . . . . . . . . . . .19
Preset Station . . . . . . . . . . . . . . . . . .19
Saving Preset . . . . . . . . . . . . . . .19
Selecting Preset . . . . . . . . . . . . .20
Clearing Preset . . . . . . . . . . . . . .20
Suppressing Stereo Signal . . . . . . .21
Record FM Radio . . . . . . . . . . . . . . .21
Selecting Recording Duration .21
Selecting Recording Quality . . .21
View FM Recording . . . . . . . . . . . . .22
Delete FM Recording . . . . . . . . . . .22
Settings . . . . . . . . . . . . . . . . . . . . . . .23
Memory Usage . . . . . . . . . . . . . . . . .23
Version . . . . . . . . . . . . . . . . . . . . . . .24
EN
More Information . . . . . . . . .24
Check for Updates . . . . . . . . . . . . . .24
Frequently Asked Questions . . . . .24
Troubleshooting Tips . . . . . . . . . . .25
U.S. Warranty . . . . . . . . . . . . .27
Canadian Warranty . . . . . . . .29
2
Before You Begin
EN
Dear RCA Customer,
Thank you for purchasing the
RCA LyraTM Digital Music Player.
This product is compatible with
most secure music downloads
from WMA-compliant services
that support DRM.
Unpacking Your Unit
When you unpack your new player, be
sure you have removed all the accessories
and information papers. The items below
should have been packed in the box with
your player.
• Lyra player
• Music Management CD
• USB cable
• Clip Phones
• Carry case
• Armband
• Car cassette adapter (For RD2011 only)
!
Warning:
The armband is designed for carrying the
player on upper arm only. DO NOT wear the
armband on other parts of the body such as
the neck to avoid choking hazard or
breathing difficulty.
3
What’s so special about
this mp3 player?
This player is meant to play mp3 and
Windows MediaTM audio files encoded on
a memory card or recorded in the built-in
flash memory.
To do so, you need the use of a Windows
computer with USB port , connection
cable (included) and a music
management software (MusicMatch
Jukebox).
Computer System Requirements
•
•
•
•
•
•
•
•
•
Pentium III 500MHz or higher
recommended
Macintosh iMac G3 or higher
Windows ®98SE, Me, 2000, or XP
Mac OS X Version 10.1.5 or higher
Internet Explorer 4.0 or higher
Internet access
100MB free hard disk space for the
software
64MB RAM (128 MB recommended)
CD-ROM drive capable of digital audio
extraction
USB port (2.0 recommended)
Sound card
Before You Begin
•
!
Warning:
Use of this product is for your personal use
only. Unauthorized recording or duplication
of copyrighted material may infringe upon
the rights of third parties and may be
contrary to copyright laws.
•
•
•
Note
Make sure the tracks are encoded in
mp3 or Windows Media formats and
supported bitrates.
Bitrates supported by the player:
mp3 – 32 to 320kbps
wma – 48 to 160kbps
Precautions for the Unit
•
•
Do not use the unit immediately after
transportation from a cold place to a
warm place; condensation problem
may result.
Avoid shock to the unit especially
during recording. Recorded data may
be damaged.
Do not store the unit near fire, places
with high temperature or in direct
sunlight.
Do not operate or store unit in places
with frequent static electricity or
electrical noise (e.g. speaker, TV set).
Clean the unit with a soft cloth or a
damp chamois leather. Never use
solvents.
The unit must only be opened by
qualified personnel.
EN
Caution
•
•
Keep product out of direct sunlight.
Exposure to direct sunlight or extreme
heat (such as inside a parked car) may
cause damage or malfunction.
Do not expose to rain or moisture.
Caution While Driving
Use of headphones while operating an
automobile or moving vehicle is not
recommended and is unlawful in some
states and areas. Be careful and attentive
on the road. Stop operation of the unit if
you find it disruptive or distracting while
driving.
4
Before You Begin
EN
Important Battery
Information
•
•
•
•
•
•
When storing the unit , be sure to
remove the batteries because they
may leak and damage the unit.
Batteries may leak electrolyte if
inserted incorrectly, if disposed of in
fire, or if an attempt is made to charge
a battery not intended to be
recharged.
Never mix new batteries with old ones.
Do not mix battery types.
Discard leaky batteries immediately.
Leaking batteries may cause skin burns
or other personal injury.
Do not charge batteries which are not
intended to be recharged.
Dispose of batteries, according to
federal, state and local regulations.
Please Respect the
Environment!
Before throwing any
batteries away, consult
your distributor who may
be able to take them back
for specific recycling.
5
Headset Safety
Have a Blast- Just Not in Your Eardrums
Make sure you turn down
the volume on the unit
before you put on
headphones. Increase the
volume to the desired level
only after headphone are
in place.
•
•
•
Do not play your headset at a high
volume. Hearing experts warn
against extended high-volume play.
If you experience a ringing in your
ears, reduce volume or discontinue
use.
You should use extreme caution or
temporarily discontinue use in
potentially hazardous situations.
Even if your headset is an open-air
type designed to let you hear outside
sounds, don’t turn up the volume so
high that you are unable to hear what
is around you.
Before You Begin
Insert battery into the
player
Inserting a SD card /
MultiMediaCard (Optional)
1. To insert batteries, press the PUSH
OPEN button next to the battery door
to release the lock and lift the door.
The player has built-in flash memory. To
extend the playtime, you can use the
optional Memory Card slot.
1. Insert a Memory Card into the card slot
on the top of the player when it is off
as illustrated in the diagram below.
EN
PUS
H
OP
EN
MEMORY CARD
Top View
2. Insert a “AA”(UM3) battery with
polarities corresponding to the
indications on the compartment.
(Refer to “Before You Begin” for
important battery information.)
3. Close the door to the battery
compartment.
Note
Refer to the power level indicator on
display for battery level.
Replace with new batteries when the
indicator is empty. Refer to “Display
Overview” on page 11.
2. To remove the card, pull the Memory
Card out when the unit is off.
Note
Do not remove the Memory Card
during playback or when the power is
on. This may stop the unit from
playing immediately or damage the
memory on the memory card or the
player.
6
Before You Begin
EN
Using Headphones
Insert phone plug into the headphones
jack (
) on the back of player for
listening.
Have a Blast- Just Not in Your Eardrums.
Make sure you turn down the volume on
the unit before you put on headphones.
Increase the volume to the desired level
only after headphones are in place.
How to Use Your Clip Phones
(The e.clipz)
2. Slide the ear hook behind the ear with
the ear pad on the front of the ear.
Rotate the clip phone so the ear pad
fits closely with the ear.
3. Lock the clip phone in place by
pushing down on the top of the ear
hook until it locks.
The right ear clip phone is labeled R
while the left ear clip phone is labeled L.
R
L
4. For best sound quality, make sure the
earpad fits closely with your ear.
1. Pull the ear hook away from the ear
pad slightly. You will hear a click
sound.
CLICK
CAUTION
DO NOT INSERT EAR HOOK INTO
YOUR EAR.
7
Before You Begin
Connecting the Lyra Player
to your Computer
1. Lift the rubber cover that is covering
the USB socket on the back of the
player.
2. Insert the smaller end of the
USB cable into the socket on
the unit tightly.
EN
Note
Refer to the “USB Driver
TM
Installation; MusicMatch Jukebox
Software” instruction manual for
procedures in setting up USB drivers
and transferring files to the player.
PUS
H
OP
EN
Note
3. Insert the larger end of the
USB cable to the USB socket on
the back of the computer.
You must profile your contents on
your PC after file transfer in order
for the new files to appear in the
Navigation Menus. Refer to the
“USB Driver Installation;
TM
MusicMatch Jukebox Software”
instruction manual for profiling
details.
8
General Controls
3. OFF/STOP ( ) - Turns the unit off.
Press and hold in any mode to turn off
the unit.
In music mode - Stops music playback.
In radio recording mode - Stops
recording.
Front View
1
4. FM REC ( ) - Starts and pauses FM
radio recording in radio mode.
1. Display - Shows user interface.
Left Side
Right Side
ON
2
5
OFF
3
6
FM
4
CK
EN
7
LO
2. ON/PLAY/PAUSE (
) - Turns the
unit on. Press and hold to toggle
between music and radio modes.
In music mode - Starts and pauses music
playback.
In radio mode - Selects between preset
tuning and manual tuning.
9
5. UP ( ) - Scrolls up when navigating
through the menu and moves the cursor
up.
In radio and music playback mode Increases the volume.
DOWN ( ) - Scrolls down when
navigating through the menu and moves
the cursor down.
In radio and music playback mode Decreases the volume.
SELECT - Enters the selected menu level.
During menu navigation in music mode Tags an unselected item to be included
into the My Selections playlist. Removes a
selected item from the My Selections
playlist.
In radio mode - Selects the current radio
station as a preset station.
Note
Push the SELECT button in to
activate the select feature.
General Controls
PUS
H
Top View
12
EN
EN
7. MENU ( ) / LOCK (
) - Accesses
the menu. Press and hold to lock and
unlock the unit.
Back View
OP
6. LEFT ( ) - In navigation mode Returns to the previous menu level.
In music mode - Skips to the previous
song or the beginning of the current
song. Press and hold to scan backwards.
In radio mode - Scans down radio
frequency.
RIGHT ( ) - Enters the selected menu.
In music mode - Skips to the next song.
Press and hold to scan forward.
In radio mode - Scans up radio frequency.
10
11
9. Headphones Jack (
clip phones plug here.
9
) - Insert the
10. USB port (
) - Attach the
small end of the mini-USB cable here.
11. Battery Compartment - Insert battery
here.
12. PUSH OPEN - Push to release the lock
on the battery door.
8
MEMORY CARD
8. Memory Card (
) - Slot for
inserting the memory card.
The player supports SD and
MultiMediaCard memory cards.
10
General Controls
EN
Display Overview
1
2
3
5
4
9
5. The battery indicator shows the
battery level.
- Battery is full
- Battery is empty
When the battery is almost empty, the
icon blinks.
6. The mp3 PRO is displayed when the
song is in mp3 PRO format.
7. The shuffle icon is displayed when
random playback is selected.
6
7
8
1. The memory card icon is displayed
when memory card is detected.
2. The song elapse time is displayed
during music playback.
3. The lock icon is displayed when the
key lock function is activated.
4. These icons indicate the current
sorting method.
11
8. The repeat icon is displayed when the
repeat feature is activated.
- indicates repeat one song
- indicates repeat all songs in the
current view.
9. In music mode, this section shows song
information.
In radio mode, station information is
displayed.
Menu Navigation
The information in this section presumes
you’ve successfully transferred files to
your Lyra Digital Audio Player, and you’re
ready to play some music (refer to the
Software Instruction Manual).
Albums - Items are sorted into folders
according to the albums.
Top Menu
Genres - Items are sorted into folders
according to their genres.
Top Menu is the main menu. The
navigation scheme is the same no matter
how many menus you access.
The main menu consists of the following
items:
Artists
Albums
Titles
Genres
Folders
My Sel
Radio Recs
Artists - The first level lists the artist
folders, the second level lists the Albums
for each artist and the third level lists the
songs from each artist’s albums.
EN
Titles - Items are sorted according to the
song title.
Folders - Items in mp3 and WMA format
are listed.
My Sel (My Selections playlist) - Items
selected into the My Selections playlist
are listed in the order in which they were
added.
Radio Recs (Radio Recordings) - Radio
recordings are listed in the order they
were recorded.
Note
You must profile your contents on
your PC after file transfer in order
for the new files to appear in the
Navigation Menus. Refer to the
“USB Driver Installation;
TM
MusicMatch Jukebox Software”
instruction manual for profiling
details.
12
Menu Navigation
EN
Music Sub-menu
Go to Radio
Repeat
Off
Shuffle
Off
DSP
Flat
Clear MySel
Delete File
Settings
Mem Usage
Version
Note
“Delete File” is only displayed in FM
recordings and in the Radio Recs
menu where FM recordings are
listed.
Radio Sub-menu
Go to Music
Clr Preset
Mode Stereo
Rec Dur Max
Rec Qua
Hi
Settings
Mem Usage
Version
13
Note
“Clr Preset” is only displayed in
preset mode.
Menu Navigation
1. To Scroll up and down the menu and
move the cursor to items on screen,
press the UP ( ) or DOWN ( )
arrow button.
2. To enter and view the submenu, press
the RIGHT ( ) arrow button or the
SELECT button.
3. To go back to the previous menu level,
press the LEFT ( ) arrow button.
4. To return to the top menu at any given
time, press the MENU ( ) /
LOCK (
) button.
5. Press and hold the ON/PLAY/PAUSE
(
) button to toggle between
music and radio mode.
Digital Music Operation
EN
Note
You must profile your contents on
your PC after file transfer in order
for the new files to appear in the
Navigation Menus. Refer to the
“USB Driver Installation;
TM
MusicMatch Jukebox Software”
instruction manual for profiling
details.
Selecting Music Mode
1. If the unit is in radio mode, press the
MENU ( ) / LOCK (
) button to
view sub-menu.
Tip
You can also press and hold
ON/PLAY/PAUSE (
) to toggle
between music and radio mode.
Music Playback Operation
Use the navigation buttons to select the
item to play.
Play / Pause
•
Go to Music
Clr Preset
Mode Stereo
•
2. Use the UP ( ) or DOWN ( )
arrow to move the cursor to Go to
Music for music mode and press
RIGHT ( )or the scroll button to
select.
•
Once the item that you want to play is
selected, press ON/PLAY/PAUSE
(
) to begin playback. This
item can be an artist, an album, a
playlist, or a song.
Press again to pause playback. The
unit will automatically power off after
remaining in pause mode for more
than the Power Save interval (length
of this Power Save interval can be
modified in the Settings menu).
Press ON/PLAY/PAUSE (
) again to
resume playback.
14
Digital Music Operation
EN
Display (when music is playing)
Stop Playback
Toggles between Artist,
Album and Genre
To stop playback, press the OFF/STOP (
button. The display returns to the
previous menu level.
Song Title
Artist
Flat
DSP mode
Title of the
song
128k
Toggles
between
Bitrate and
Format
Skipping Tracks
•
•
To skip to the next track, press and
release the RIGHT ( ) button.
To go to the previous track, press and
release the LEFT ( ) button.
Scan Tracks
•
•
15
To scan backwards in the track that is
playing, press and hold the LEFT ( )
button.
To scan forwards in the track that is
playing, press and hold the RIGHT ( )
button.
Adjusting the Volume
•
•
To turn up the volume, press the
UP ( ) button. The volume level
shows briefly to indicate the increase
in volume level.
To turn down the volume, press the
DOWN ( ) button. The volume
level shows briefly to show the
decrease in volume level.
)
Digital Music Operation
Additional Music Features
My Selections (My Sel)
- The song is not included in the My
Selections playlist.
- The song is included in My Selections.
Tip
A
icon shows in front of items
that can be added into the My
Selections playlist.
Adding Songs to My Selections
1. In navigation mode, use the UP ( ),
DOWN ( ), LEFT ( ) and RIGHT
( ) navigation buttons to move the
cursor to the song to be added to My
Selections.
2. Press SELECT to tag it (only in
navigation mode).
Song 1
Song 2
Song 3
Removing Songs from My
Selections
EN
1. In navigation mode, use the UP ( ),
DOWN ( ), LEFT ( ) and RIGHT
( ) navigation buttons to move the
cursor to select the song to be
removed from My Selections.
2. Press SELECT to remove it (only in
navigation mode).
View My Selections
1. From the main menu, use the UP (
and DOWN ( ) arrow buttons to
move the cursor to My Sel.
)
Folders
My Sel
Radio Recs
2. Press SELECT to enter and view items
in My Sel.
Clear My Selections
1. In the My Sel folder, press the
MENU ( ) / LOCK (
)button to
view music sub-menu.
3. Use the UP ( ) and DOWN ( )
buttons to move the cursor to Clear
MySel and press SELECT.
Go to Radio
Clear MySel
Repeat
Off
16
Digital Music Operation
EN
View Music Sub-menu
Shuffle
Press MENU (
) / LOCK (
) button
to view the music sub-menu at any time
in music mode.
1. From music sub-menu, use the UP ( )
and DOWN ( ) arrow buttons until
the cursor is at Shuffle.
Repeat
1. In music mode, press MENU (
) /
LOCK (
) to view the music
sub-menu.
2. Use the UP ( ) and DOWN ( )
arrow buttons until the cursor is at
Repeat.
Go to Radio
Repeat
Off
Shuffle
Off
2. Press SELECT to select between
Shuffle Off (default) - Shuffle is off.
Shuffle On
- Plays songs in the
current view randomly.
Go to Radio
Repeat
Off
Shuffle
Off
3. Press SELECT to toggle among repeat
options.
Repeat Off (default) - Repeat is off.
Repeat One
- Repeats the current
song.
Repeat All
- Repeats all the songs
in the current view.
17
Tip
Shuffle On / Repeat One - A song is
selected randomly from the current
view and is played repeatedly.
Shuffle On / Repeat All - Songs in
the current view are played in
random order repeatedly.
Digital Music Operation
DSP
Note
If Shuffle and Repeat settings are
changed when a song is playing, new
settings will start when the current
song is finished playing.
EN
1. From the music sub-menu, use the
UP ( ) and DOWN ( ) arrow
buttons until the cursor is at DSP.
Shuffle
DSP
Profile
Off
Flat
2. Press SELECT to select among
Flat (default), Bass, Pop, Rock and Jazz.
18
Radio
EN
Selecting Radio Mode
Tuning to a Station
1. In music mode, press the MENU ( )
/ LOCK (
) button to view music
sub-menu.
•
Go to Radio
Repeat
Off
Shuffle
Off
2. Select Go to Radio for Radio mode.
FM 98.5MHz
Manual
St
Tip
Press and hold ON/PLAY/PAUSE
(
) to toggle between music and
radio mode.
•
Press the LEFT ( ) arrow button to
tune down radio frequency.
Press the RIGHT ( ) arrow button to
tune up radio frequency.
Tip
Press and hold the LEFT ( ) or
RIGHT ( ) arrow button to
automatically search for the next
station in the respective direction.
Preset Station
Saving Preset
1. Tune to the station to be saved as a
preset station.
2. Press SELECT.
Radio Modes:
Manual Mode - Tuning to stations
manually.
Preset Mode - Selecting stations saved in
preset memory.
Press the ON/PLAY/PAUSE (
) button
to select between Preset mode and
Manual mode.
19
Save to
P 1234567890
Empty
Radio
3. Press the LEFT ( ) or RIGHT ( )
arrow button to select a preset
number.
The current preset location blinks.
4. Press SELECT to confirm your
selection.
2. Use the UP ( ) and DOWN ( )
arrow button to select Clr Preset (Clear
Preset).
Go to Music
Clr Preset
Mode
Stereo
FM 98.5MHz
P 1
Preset
St
Note
Selecting Preset Station
If the unit is in Manual mode, press the
ON/PLAY/PAUSE (
) button to select
Preset mode.
In preset mode, press LEFT ( ) to select
the previous preset station and press
RIGHT ( ) to select the next preset
station.
Clearing Preset
1. In radio mode, press MENU ( )
/ LOCK (
) to view radio sub-menu.
“Preset” must be displayed on the
screen so that “Clr Preset” is
displayed in the Radio sub-menu.
3. Press the RIGHT (
button.
) arrow or SELECT
Clear
P 1234567890
98.5MHz
4. Press the RIGHT ( ) or LEFT ( )
arrow buttons to select the preset
location to clear.
5. Press SELECT to confirm.
20
EN
Radio
EN
Suppressing Stereo Signal
Selecting Recording Quality
If FM stereo reception is weak, select
mono sound to reduce the noise.
1. From the radio submenu, use the
UP ( ) and DOWN ( ) arrow
button to move the cursor to Mode.
2. Press SELECT or the RIGHT ( )
button to select between Stereo and
Mono sound.
1. From the radio sub-menu, press the
UP ( ) or DOWN ( ) arrow
button to move the cursor to Rec Qua
(Recording Quality).
Record FM Radio
Tune to the Station to be recorded.
• Press FM REC ( ) to start recording.
• Press FM REC ( ) to pause recording.
Press again to resume
• Press OFF/STOP ( ) to stop recording.
Selecting Recording Duration
1. From the radio sub-menu, use the
UP ( ) and DOWN ( ) arrow
buttons to move the cursor to Rec Dur
(Recording Duration).
2. Press the RIGHT ( ) arrow button or
the SELECT button to select among
Max, 120m, 90m, 60m and 30m.
Clr Preset
Mode
Stereo
Rec Dur
Max
21
Mode
Rec Dur
Rec Qua
Stereo
Max
Hi
2. Press the RIGHT ( ) arrow button or
the SELECT button to select among
Std (Standard : 32k),
Hi (High : 96k (default)) and
Max (Maximum : 128k).
Radio
EN
View FM Recording
1. In music mode, press the MENU ( ) /
LOCK (
) button to view the Music
sub-menu.
2. Use the UP ( ) or DOWN ( ) arrow
button to move the cursor to Radio
Recs (Radio Recordings).
Artists
Albums
Titles
Genres
Folders
My Sel
Radio Recs
3. Press the RIGHT ( ) arrow button or
SELECT to enter the Radio Recs menu.
The first recording is listed first.
Note
Radio recordings are saved in mp3
file format. They can be treated in
the same way as other mp3 music
files.
Delete FM Recording
1. Press the MENU ( ) / LOCK (
)
button when the cursor is at the radio
recording to be deleted to view the
music menu.
2. Use the UP ( ) or DOWN ( ) arrow
button to move the cursor to Delete
File.
3. Press SELECT to delete.
FM102.5 [001]
FM 90.3 [001]
22
System Settings
EN
Settings
Memory Usage
1. In any mode, press MENU ( ) /
LOCK (
) to view music and radio
sub-menu.
2. Use the UP ( ) or DOWN ( ) arrow
button to move the cursor to Settings.
Memory Usage (Mem Usage) shows the
amount of free space on the internal and
external memory.
1. Press MENU ( ) / LOCK (
) to
view music and radio sub-menu.
2. Use the UP ( ) or DOWN ( ) arrow
button to move the cursor to Mem
Usage (Memory Usage).
Settings
Mem Usage
3. Press the RIGHT ( ) arrow button or
SELECT to enter the Settings menu.
Contrast
Backlit
AutoOff
0
5s
30s
Freq Step
US
4. Use the UP ( ) or DOWN ( ) arrow
button to move the cursor to the
setting you want to change.
5. Press RIGHT ( ) arrow button to
select among options for each setting.
Contrast : -5, -4, -3, -2, -1, 0, 1, 2, 3, 4, 5
Backlit : 5s, 10s, 30s
AutoOff : 15s, 30s, 1m
Freq Step : US, EU
23
Profile
Settings
Mem Usage
3. Press the RIGHT ( ) arrow button or
SELECT to view memory usage
information.
Free / Total
102M / 122M (I)
0M / 0M (E)
I = Internal memory
E = External memory
System Settings
Version
1. Press MENU ( ) / LOCK (
) to
view music and radio sub-menu.
2. Use the UP ( ) or DOWN ( ) arrow
button to move the cursor to Version.
3. Press the RIGHT ( ) arrow button or
SELECT to view firmware version.
EN
Version 1.9
Mem Usage
Version
More Information
Check for Updates
Frequently Asked Questions
Visit
http://www.rca.com/digitalaudiodownloads
for the latest news and firmware
upgrades for our Lyra Digital Audio
Player. You must update your system
after new downloads have been made in
order for the new applications to be
executed.
You can get FAQ information at
www.rca.com/digitalaudiofaq.
24
More Information
EN
Troubleshooting Tips
The player does not turn on when
PLAY button pressed.
• Batteries may be inserted incorrectly.
• Batteries may be empty.
Skipping tracks or bad sound
quality?
• Repeat, random or program function
may be activated.
• There may be strong magnetic fields
(e.g. too close to TV) near the unit.
• Low Battery level. Replace with new
ones.
Cannot perform playback?
• LOCK function may be activated.
• There may be no mp3 tracks in the
card or internal memory.
• Memory Card may be damaged.
25
Cannot play tracks on the player?
• Track encoded bit rate may not be
between 32 to 192 kbps for mp3 or
between 64kbps to 128kbps for
Windows Media Audio.
Note
For better result, we recommend a
constant encoded bit rate from 32
to 320kbps for mp3 and 48kbps to
128kbps for Windows Media Audio.
Nevertheless, your unit may play
tracks encoded in variable bit rate
(VBR).
USB display does not appear when
connected to computer.
• Check connection between your unit
and the computer. ( Refer to the “USB
Driver Installation; MusicMatch
JukeboxTM Software” instruction
manual)
• Check if the USB drivers are properly
installed ( Refer to the “USB Driver
Installation; MusicMatch JukeboxTM
Software” instruction manual)
More Information
The player does not respond to key
operations?
• Turn the player off by removing the
batteries. Reinsert the batteries
properly and turn the player on
again to resume normal operations.
!
EN
Note
Under some rare circumstances,
your unit might report less memory
than is available for storing music
files. If this happens, format the
device to recover all the memory.
Warning:
Formatting the device will erase all
stored contents. Backup all the
valuable files before doing so.
26
U.S. Warranty
EN
What your warranty covers:
• Defects in materials or workmanship.
For how long after your purchase:
• One year from date of purchase.
The warranty period for rental units begins with the first rental or 45 days from date of shipment to
the rental firm, whichever comes first.
What we will do:
• Provide you with a new, or at our option, a refurbished unit. The exchange unit is under warranty
for the remainder of the original product’s warranty period.
• Proof of purchase in the form of a bill of sale or receipted invoice which is evidence that the
product is within the warranty period must be presented to obtain warranty service. For rental firms,
proof of first rental is also required.
How to make a warranty claim:
• Properly pack your unit. Include any cables, etc., which were originally provided with the product.
We recommend using the original carton and packing materials.
• Include evidence of purchase date such as the bill of sale. Also print your name and address and a
description of the defect. Send via standard UPS or its equivalent to:
Thomson Inc.
Product Exchange Center
11721 B Alameda Avenue
Socorro, Texas 79927
• Insure your shipment for of loss or damage. Thomson accepts no liability in case of damage or loss
en route to Thomson.
• Pay any charges billed to you by the Exchange Center for service not covered by the warranty.
• A new or refurbished unit will be shipped to you freight prepaid.
What your warranty does not cover:
• Customer instruction. (Your Owner’s Manual provides information regarding operating Instructions
and user controls. For additional information, ask your dealer.)
• Installation and set-up service adjustments.
• Batteries.
• Damage from misuse or neglect.
• Products which have been modified or incorporated into other products.
• Products purchased or serviced outside the USA.
• Acts of nature, such as but not limited to lightning damage.
27
U.S. Warranty
Product Registration:
• Please complete and mail the Product registration Card packed with your unit. It will make it easier
to contact you should it ever be necessary. The return of the card is not required for warranty
coverage.
Limitation of Warranty:
• THE WARRANTY STATED ABOVE IS THE ONLY WARRANTY APPLICABLE TO THIS PRODUCT.
ALL OTHER WARRANTIES, EXPRESS OR IMPLIED (INCLUDING ALL IMPLIED WARRANTIES OF
MERCHANTABILITY OR FITNESS FOR A PARTICULAR PURPOSE) ARE HEREBY DISCLAIMED. NO
VERBAL OR WRITTEN INFORMATION GIVEN BY THOMSON INC., ITS AGENTS OR EMPLOYEES
SHALL CREATE A GUARANTY OR IN ANY WAY INCREASE THE SCOPE OF THIS WARRANTY.
• REPAIR OR REPLACEMENT AS PROVIDED UNDER THIS WARRANTY IS THE EXCLUSIVE
REMEDY OF THE CONSUMER. THOMSON INC. SHALL NOT BE LIABLE FOR INCIDENTAL OR
CONSEQUENTIAL DAMAGES RESULTING FROM THE USE OF THIS PRODUCT OR ARISING OUT OF
ANY BREACH OF ANY EXPRESS OR IMPLIED WARRANTY ON THIS PRODUCT. THIS DISCLAIMER
OF WARRANTIES AND LIMITED WARRANTY ARE GOVERNED BY THE LAWS OF THE STATE OF
INDIANA. EXCEPT TO THE EXTENT PROHIBITED BY APPLICABLE LAW, ANY IMPLIED
WARRANTY OF MERCHANTABILITY OR FITNESS FOR A PARTICULAR PURPOSE ON THIS
PRODUCT IS LIMITED TO THE APPLICABLE WARRANTY PERIOD SET FORTH ABOVE.
How state law relates to this warranty:
• Some states do not allow the exclusion nor limitation of incidental or consequential damages, or
limitations on how long an implied warranty lasts, so the above limitations or exclusions may not
apply to you.
• This warranty gives you specific legal rights, and you also may have other rights that vary from state
to state.
If you purchased your product outside the USA:
• This warranty does not apply. Contact your dealer for warranty information.
28
EN
Canadian Warranty
EN
Thomson multimedia Ltd. warrants to the purchaser or gift recipient that if any manufacturing
defect becomes apparent in this product within 1 year from the original date of purchase, it will be
replaced free of charge, including return transportation.
This warranty does not include damage to the product resulting from accidents, misuse or leaking
batteries.
Should your product not perform properly during the warranty period, either:
1. Return it to the selling dealer with proof of purchase for replacement,
OR
2. Remove the batteries (where applicable), and pack product complete with accessories in the
original carton (or equivalent).
— Mail prepaid (with proof of purchase) and insured to:
Thomson multimedia Ltd.
6200 Edwards Blvd.,
Mississauga, Ontario L5T 2V7
Canada
The provisions of this written warranty are in addition to and not a modification of or subtraction
from the statutory warranties and other rights and remedies contained in any applicable legislation,
and to the extent that any such provisions purport to disclaim, exclude or limit any such statutory
warranties and other rights and remedies, such provisions shall be deemed to be amended to the
extent necessary to comply therewith.
If you are unable to find a qualified servicer for out of warranty service, you may write to:
Thomson Inc.
P.O. Box 0944
Indianapolis, Indiana, U.S.A., 46206-0944
Attach your sales receipt to this booklet for future reference. This information is required if service is
needed during the warranty period.
PURCHASE DATE
NAME OF STORE
29