1
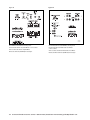
O W N E R ’ S M A N U A L RM7200 RM3300 RM3600 RM7600 RM4300 RM4600 SYSTEM S AT E L L I T E S CENTER CHANNEL SYSTEM S AT E L L I T E S CENTER CHANNEL G E T T I N G S TA RT E D Make certain your system contains all its parts: The complete RM7200 comes in ONE carton, containing the following items: Four (4) magnetically shielded micro-satellite speakers with integrated wall mount brackets One (1) magnetically shielded micro-center channel speaker with integrated wall mount bracket One (1) RM7200 8" Powered Subwoofer The complete RM7600 comes in TWO cartons. Carton 1 contains the following items: Four (4) magnetically shielded satellite speakers with integrated wall mount brackets One (1) magnetically shielded center channel speaker with integrated wall mount brackets Carton 2 contains the following item: One (1) PSW series powered subwoofer with instruction manual Please inspect each loudspeaker carefully. Notify your Polk Audio dealer if you notice any damage or any missing items. Keep the carton and packing material. They will do the best job of protecting your speakers if they need to be transported. SPEAKER PLACEMENT CENTER CHANNEL SPEAKER (Figure 1) Place the center channel speaker as close to your TV as possible (Figure1). The most popular placement for the center channel speaker is right on top of your TV set. The small size and slender design of the RM7000 Series center channel speakers makes them easy to mount on the wall directly above your TV. They look especially nifty if you have a slim line or flat screen TV. RM7000 Satellites are magnetically shielded for safe placement on or near your TV. If you notice video distortion or discoloration, immediately move the speaker away from the TV and call Polk Audio Customer Service 800-377-7655 (US & Can), 410-764-5266, 9am-6pm EST, Monday through Friday, or email: [email protected]. FRONT SATELLITES (Figure 2) The front satellite and center channel speakers of the RM7000 systems are specifically designed to complement flat screen and inset display televisions by mounting unobtrusively on the wall flanking the TV. RM7000 Satellites are magnetically shielded for safe placement on or near your TV. If you notice video distortion or discoloration, immediately move the speaker away from the TV and call Polk Audio Customer Service 800-377-7655 (US & Can), 410-764-5266, 9am-6pm EST, Monday through Friday, or email: [email protected]. The integrated brackets on the RM7000 Series satellites make them easy to mount. They also sound great on stands (available at your Polk Audio dealer, or online at http://polkaudio.tranguard.com/), bookshelves, or in entertainment centers. Place the small front satellites about as far apart as the distance you are sitting from them (Figure 2). Avoid placing them less than 2 feet (60cm) from the side walls of the room. When mounting the speakers on stands or on a shelf, place them at or near ear level. SURROUND SPEAKERS (Figures 3a & 3b) The best placement for surround channel speakers is on the side walls, facing each other, a foot or two (30-60cm) behind your listening position (Figure 3a). If this placement is not possible, the speakers may be placed on a rear wall (Figure 3b). In either case, mount the speakers two to four feet (60-120cm) above your head (when seated). SUBWOOFER (Figures 4 & 5) The RM7200 Systems uses a specially built compact Polk Audio Powered Subwoofer to round out its surround sound capabilities. This subwoofer module may be placed behind furniture or next to a sofa or chair. It can be placed anywhere in the room, but you will get the best performance from it when it is on the same side of the room as the front satellites. Placing it near a wall or in a corner will increase bass loudness. Allow at least 6 inches (15cm) of space between any subwoofer driver and a wall or obstruction (Figure 4). It may lie on its side, but NEVER LAY THE SUBWOOFER ON THE AMPLIFIER END—THIS WILL DAMAGE THE AMPLIFIER (Figure 5). The RM7200 subwoofer is magnetically shielded for safe placement near your television set. If you notice video distortion or discoloration, immediately move the subwoofer away from the TV and call Polk Audio Customer Service 800-377-7655 (US & Can), 410-764-5266, 9am-6pm EST, Monday through Friday, or email: [email protected]. You’ll find an informative article on “Subwoofer Positioning and Adjustment” in the set up section at http://www.polkaudio.com/home/faqad/. 2 Contact Polk Audio Customer Service 1-800-377-7655 (Outside US: 410-764-5266), [email protected] C O N N E C T I N G T H E S P E A K E R S T O Y O U R S Y S T E M (General Directions) We recommend using two-conductor 16 gauge or thicker speaker wire. Strip 1/2 inch (12.7mm) of insulation from each of the two conductors to expose the bare metal and twist each of the individual conductors into single unfrayed strands. Note that one of the terminals on the rear of each speaker is red (+) and the other is black (–). Make certain that you connect the wire from the red (+) terminal of your amplifier or receiver to the red (+) terminal on your speaker and the wire from the black (–) terminal of your amplifier or receiver to the black (–) terminal on your speaker. Most wire has some indicator (such as color-coding, ribbing or writing) on one of the two conductors to help you maintain consistency. If your speakers sound “thin,” with little bass and little or no center image, chances are that one of the speaker wires is connected backwards. Double-check all connections. U S I N G P U S H - TA B A N D 5 - W AY B I N D I N G P O S T S To connect wire to the push-tab connectors, push the plastic tab of one connector to open the hole. Insert the bare wire into the hole and release the plastic tab (Figure 6). Repeat this step with the other connectors. To connect wire using the binding posts (Figure 7), unscrew the hex nut and insert the bare wire into the hole near the base of the binding post. Do not insert the insulated part of the wire into the hole as this will not give you a good connection. Twist the hex nut back down the binding post until it firmly meets the wire. Do not overtighten. To Use Banana Plugs (US only): Carefully pry out the Binding Post Plugs (plastic plugs on the end of the binding posts) to expose Banana Plug holes. Insert Banana Plugs. (This is for US owners only.) HOOK-UP OPTIONS The versatile RM7000 Series loudspeaker systems give you many hook-up options. The option that is best for you depends on your electronics and your personal taste. Here are the hookups we recommend for each system. (You may want to experiment to see what works best for you.) A N I M P O RTA N T N O T E A B O U T S U B W O O F E R H O O K U P For best sound, DO NOT USE THE “SUBWOOFER OUTPUT” OR LFE JACK ON YOUR RECEIVER TO CONNECT THE SUBWOOFER. The RM7200 and RM7600 Systems both feature a powered subwoofer that has a built-in, adjustable low pass filter to separate the low frequency signals (the bass) from the full range signal. The dedicated “subwoofer output” jacks (sometimes labeled “LFE” or “Low Frequency Effects”) on most receivers also contain a fixed low pass filter. If you connect the subwoofer to the receiver’s LFE Out jack, the two filters will interact and reduce the fidelity of your system. Follow the hook up and receiver set-up/bass management instructions below and all of the bass will go to the subwoofer, you will not lose any bass, and you will get the highest possible performance from your system. We promise. You’ll find an informative article on “Bass Management and Subwoofer Connections” in the set up section at http://www.polkaudio.com/home/faqad/. RM7200 HOOKUP OPTIONS OPTION 1—SPEAKER WIRE HOOKUP, OUR FAVORITE HOOKUP METHOD (Figure 8): Using speaker wire, connect the left and right front speaker outputs of your receiver or amplifier to the “speaker level” (wire) inputs of the powered subwoofer. Then, connect the left and right front satellite speakers with speaker wire from the “speaker level” outputs of the powered subwoofer. Connect the Center Channel Speaker directly to the center channel output from your receiver. Connect the Rear Surround Satellites directly to the rear or surround channel outputs from your receiver. OPTION 2—LINE LEVEL HOOKUP, USED WITH ELECTRONICS THAT HAVE PRE-OUT JACKS FOR THE LEFT AND RIGHT FRONT CHANNELS (Figure 9) Connect your front speakers to your receiver or amplifier in the normal way (Figure 8). If your pre-amp, processor, amplifier or receiver has a spare set of front left and right pre-outs, connect them to the Line Level “In” jacks of the subwoofer. Use well-shielded RCA cables. If your pre-amp, processor, amplifier or receiver has a single set of pre-outs and they are being used to deliver signal to an amplifier, use “Y” cables as shown in (Figure 9). For accessories and information visit www.polkaudio.com 3 RM7600 HOOKUP OPTIONS OPTION 1—SPEAKER WIRE HOOKUP, OUR FAVORITE HOOKUP METHOD (Figure 8): Using Speaker Wire, connect the left and right front speaker outputs of your receiver or amplifier to the “speaker level” (wire) inputs of the powered subwoofer. Then, connect the left and right front satellite speakers with speaker wire from the “speaker level” outputs of the powered subwoofer. Connect the Center Channel Speaker directly to the center channel output from your receiver. Connect the Rear Surround Satellites directly to the rear or surround channel outputs from your receiver. OPTION 2—LINE LEVEL HOOKUP, USED WITH ELECTRONICS THAT HAVE PRE-OUT JACKS FOR THE LEFT AND RIGHT FRONT CHANNELS (Figure 9): Connect your front speakers to your receiver or amplifier in the normal way (Figure 8). If your pre-amp, processor, amplifier or receiver has a spare set of front left and right pre-outs, connect them to the Line Level “In” jacks of the subwoofer. Use well-shielded RCA cables. If your pre-amp, processor, amplifier or receiver has a single set of pre-outs and they are being used to deliver signal to an amplifier, use “Y” cables as shown in (Figure 9). R E C E I V E R S E T- U P / B A S S M A N A G E M E N T F O R R M 7 2 0 0 & R M 7 6 0 0 S Y S T E M S All surround receivers allow you to “customize” their performance depending on the size of your speakers. Refer to the owner’s manual of your receiver or surround processor to learn how this is done. To get the best performance from your RM7000 Series Home Theater Systems, use the following settings with the above hook-up methods: Front speakers—set to “large” Center speaker—set to “normal” or “small” Surround speakers—set to “small” Subwoofer—set to “OFF” or “none.” (We know; doesn’t make sense, right? Both your RM7200 and RM7600 have subwoofers. But really truly, this is the correct setting for the recommended Speaker Wire and Line Level hookup methods. In the Speaker Wire Hookup, setting the front left and right speakers to “Large” and routing them through the subwoofer’s low pass filter delivers a full range signal to the subwoofer’s low pass filter. The low pass filter takes the low frequencies and passes the rest on to the front speakers, for perfect sub/sat blending. In the Line Level Hookup, setting the front left and right speakers to “Large” and choosing subwoofer “OFF” directs all the bass and LFE channel information to the subwoofer via the left and right pre-amp outputs.) WALL-MOUNTING YOUR RM7200 & RM7600 SATELLITES & CENTER C H A N N E L S P E A K E R (Figures 10–12) All five satellites of both the RM7200 and RM7600 Systems have integrated wall-mounting brackets built onto the rear of each speaker. On-wall installation of these RM speakers requires basic skills and basic tools (drill and screwdriver). If you are in doubt that you possess the necessary skills or tools, consult your Polk dealer or a professional installer. Otherwise, follow the steps below to safely secure the speakers to the location of your choice. Make sure the material on which you plan to mount the speakers (plaster, drywall, paneling, stone, etc.) can support the weight of the speakers (See product weight specifications on page 14). Make sure the locations you select do not conceal electrical wiring or plumbing. Prior to installation, hold the speaker in the chosen location to make sure it safely clears obstacles such as ceiling, adjacent walls, corners, beams, lighting fixtures and door/window frames. Using the keyhole slots in the bracket template (included), mark the installation location of the keyhole slots with a pencil (Figure 10). Orient the template so that the small ends of the keyhole slots are facing “up” according to the direction of installation. If you are certain that there is a stud behind the wall surface, drive #10 screws (not included) through the wall and into the stud (Figure 11a). If there is no stud behind the wall at the chosen location, install #10 wall anchors (not supplied) into the wall by following the wall-anchor-manufacturer’s instructions (Figure 11b). For masonry walls, use a masonry drill bit and #10 masonry anchor and screw (not included). Tighten screws into stud or wall anchors, leaving screw heads protruding 1/16" (1.6mm). Line up the keyhole slots on the bracket so that the screw heads pass through the large center hole of the slots. Let the speaker slide straight down, allowing the screw head to slip behind the smaller end of the keyhole slot (Figure 12). Tug gently on the speaker to make certain that the screws and bracket are properly aligned and that the wall anchors are secure. If the bracket is not held snug against the wall by the screw heads, remove the speaker from the wall, drive the screws in a little further and then remount the speaker. 4 Contact Polk Audio Customer Service 1-800-377-7655 (Outside US: 410-764-5266), [email protected] RM7200 POWERED SUBWOOFER ADJUSTMENTS (Figure 13) The RM7200 Powered Subwoofer offers a range of setting options. We recommend the following settings as starting points, but the settings that are best for you depend upon your speaker placement, electronics and personal taste. After you’ve become familiar with what the settings do, experiment with alternate options to find the method that works best for your system setup. You’ll find an informative article on “Subwoofer Positioning and Adjustment” in the set up section at http://www.polkaudio.com/home/faqad/. R M 7 2 0 0 A C P O W E R (Figure 13) The RM7200 Powered Subwoofer has a built-in power amplifier and must be plugged into a standard household AC power source in order to operate. The power switch has three positions: “On,” “Off” and “Auto” (Figure 13). When the Powered Subwoofer is plugged in (even with the power switch in the “off” position) the power light will glow RED. In the “Auto” position, the amplifier will automatically turn on as soon as the speaker senses a signal coming from your electronics. The power light will change from RED to GREEN upon sensing a signal. The subwoofer will turn off approximately 15 minutes after input signal ceases, and the power light will return to RED. In the “On” position, the power amplifier will operate and the power light will glow GREEN until the switch is set to the “Off” position or the AC cord is disconnected from a power source. We recommend using the “Auto” position. Turn it to “Off” if the system will not be used for extended periods of time, such as during vacations. R M 7 2 0 0 S U B W O O F E R L E V E L C O N T R O L (Volume) Subwoofer level (volume) is adjusted via the knob on the rear amplifier plate. To set Subwoofer Level, play a piece of music that has an average amount of bass content. Start with the knob set to “5” and the Phase Switch set to 0. Adjust by ear using a wide variety of CDs and video sources. Adjust for deep, powerful bass without “boominess.” R M 7 2 0 0 L O W PA S S F I LT E R This control adjusts the frequency range over which the subwoofer operates. With the RM7200, the upper range of this control will yield the best results. Experiment and let your ears be the final judge. If male vocals sound “thin,” turn this control up until the voice sounds rich but not boomy. If male vocals sound too “thick” or “chesty,” turn this control down until the voice sounds natural. R M 7 2 0 0 R E C O M M E N D E D S E T T I N G S — O N W A L L & O F F W A L L (Figures 13, 15a & 15b) Mounting your right and left front satellites on the wall tends to increase their low-midrange response (the low range of a male voice). Mounting them on stands away from the sides of the room tends to decrease their low-midrange response. If you mount the satellites on the wall, we recommend setting your variable crossover control (see Figure 13) at a lower setting (Figure 15a). If you mount the satellites on stands, we recommend setting your variable crossover control at a higher setting (Figure 15b). Turning the knob up from the recommended setting (Figure 15a or 15b) will add more “warmth” to the bass and lower midrange, possibly at the sacrifice of bass “tightness” and midrange clarity. Turning the knob down from the recommended setting will make the bass and lower midrange sound “thinner.” RM7200 PHASE SWITCH Changing the phase of your subwoofer can strengthen its bass “attack.” If the bass sounds muddy or unclear, try toggling the phase control. Have someone else switch between the two settings while you sit in your favorite listening position. Use music with good bass (preferably “plucked” string bass) and a deep male vocal. When you hear the best balance of deep bass and natural lower octaves of the male voice, you have achieved optimum phase tuning. For accessories and information visit www.polkaudio.com 5 RM7600 POWERED SUBWOOFER ADJUSTMENTS (Figure 14) The RM7600 Powered Subwoofer offers a wide range of setting options. We recommend the following settings as starting points, but the settings that are best for you depend upon your speaker placement, electronics and personal taste. After you’ve become familiar with what the settings do, experiment with alternate options to find the method that works best for your system setup. Outside the US: These adjustments are specific to the Polk Audio PSW650 Model Subwoofer. If you are using a subwoofer other than the PSW650, please refer to that subwoofer’s owner’s manual for correct, model-specific adjustment instructions You’ll find an informative article on “Subwoofer Positioning and Adjustment” in the set up section at http://www.polkaudio.com/home/faqad/. R M 7 6 0 0 A C P O W E R (Figure 14) The RM7600 Powered Subwoofer has a built-in power amplifier and must be plugged into a standard household AC power source in order to operate. The power switch has three positions: “On,” “Off” and “Auto” (Figure 14). The Powered Subwoofer also has a small GREEN light under the Level Control Pod on the subwoofer’s front face. This light is not illuminated when the Subwoofer power switch is in the “Off” position. In the “Auto” position, the amplifier will automatically turn on as soon as the speaker senses a signal coming from your electronics. The power light will glow GREEN upon sensing a signal. The subwoofer will turn off approximately 15 minutes after input signal ceases, and the power light will go off. In the “On” position, the power amplifier will operate and the power light will glow GREEN until the switch is set to the “Off” position or the AC cord is disconnected from a power source. We recommend using the “Auto” position. Turn it to “Off” if the system will not be used for extended periods of time, such as during vacations. R M 7 6 0 0 S U B W O O F E R L E V E L C O N T R O L (Volume) Subwoofer level (volume) is adjusted via the knob on the front of the subwoofer under the logo pod. This lets you adjust the level of bass easily after you have made the more complex adjustments on the rear of the Subwoofer. To set level, play a piece of music that has an average amount of bass content. Start with the knob set to “5” and the Phase Switch set to 0. Adjust by ear using a wide variety of CDs and video sources. Adjust for deep, powerful bass without “boominess.” RM7600 SETTINGS On the back of the subwoofer (Figure 14), you will see the following controls: Variable crossover control Phase toggle switch +3dB bass boost switch High Pass Filter toggle switch (You will never need to change this out of the “0” position. Trust us.) The Subwoofer Level Control is found under the logo pod on the front of the subwoofer. RM7600 VARIABLE CROSSOVER FREQUENCY CONTROL This control adjusts the frequency range over which the subwoofer operates. It only effects signals that are sent through the low level, subwoofer and Speaker Wire inputs. It has no effect on signals fed into the LFE input (and you shouldn’t be using that input anyway). R M 7 6 0 0 R E C O M M E N D E D S E T T I N G S — O N W A L L & O F F W A L L (Figures 14, 15 & 15b) Mounting your right and left front satellites on the wall tends to increase their low-midrange response (the low range of a male voice). Mounting them on stands away from the sides of the room tends to decrease their low-midrange response. If you mount the satellites on the wall, we recommend setting your variable crossover control (see Figure 14) at a lower setting (Figure 15a). If you mount the satellites on stands, we recommend setting your variable crossover control at a higher setting (Figure 15b). Turning the knob up from the recommended setting (Figure 15a or 15b) will add more “warmth” to the bass and lower midrange, possibly at the sacrifice of bass “tightness” and midrange clarity. Turning the knob down from the recommended setting will make the bass and lower midrange sound “thinner.” RM7600 PHASE SWITCH Changing the phase of your subwoofer can strengthen its bass “attack.” If the bass sounds muddy or unclear, try toggling the phase control. Have someone else switch between the two settings while you sit in your favorite listening position. Use music with good bass (preferably “plucked” string bass) and a deep male vocal. When you hear the best balance of deep bass and natural lower octaves of the male voice, you have achieved optimum phase tuning. 6 Contact Polk Audio Customer Service 1-800-377-7655 (Outside US: 410-764-5266), [email protected] RM7600 +3dB BASS BOOST In most cases, this switch should be set to “0.” If you have hooked up the subwoofers from a subwoofer output or pre-out jacks and cannot get enough bass output even with the subwoofer level control turned all the way up, switch to the +3dB position. In typical systems where the 3dB boost is not needed, this switch can be useful for providing a quick boost for bass-shy program material. Most people prefer more bass output for movies than music so you can use this switch as a handy way to adjust bass levels as you switch between movie and music sources. Q. “WHY DOES MY SYSTEM HUM?” BECAUSE IT DOESN'T KNOW THE WORDS. This is what passes for humor in the audio business. Here’s the real answer: If you have any electrical (50/60Hz) hum in your system you’re going to hear it clearly as soon as you hook up your subwoofer. Most hum problems are caused by “ground loops.” That is, the electrical grounds of the components in your system are not at the same electrical potential. A very common ground loop source is cable TV. Disconnect the coaxial cable from your TV and/or VCR. If the hum goes away, the cable is the ground loop villain. In that case you need a 75 ohm ground loop isolator. This device attaches to your coaxial cable where it plugs into your VCR (or television). They’re simple to install and usually solve the hum problem. Find 75 ohm ground loop isolators at your audio dealer, Radio Shack stores, or online at http://polkaudio.tranguard.com/. Ground loops and hum can also be the result of faulty electrical wiring in your home. Consult a licensed electrician to evaluate and, if necessary, repair the AC wiring in your home. Light dimmers also tend to introduce noise into audio systems. Remove them. If none of our suggestions work for you, contact Polk Audio Customer Service 800-377-7655 (US & Canada), 410-764-5266, 9am-6pm EST, Monday through Friday, or email: [email protected]. SAFE LIMITS OF OPERATION FOR RM7000 SERIES LOUDSPEAKERS Your Polk Audio loudspeakers are made with the highest-quality materials to ensure years of great sounding, trouble-free performance. However, damage to loudspeakers can occur when an amplifier, regardless of its wattage, is made to play at higher listening levels that its power can clearly produce. (This is usually beyond the “1 to 2 o’clock” position on the volume control.) This results in very high levels of audible distortion originating in the amplifier, which adds a harsh, gritty sound to the music you’re listening to. Contrary to popular belief, a speaker is more likely to be damaged by trying to get too much volume from a low-powered amp or receiver (than from a high-powered one). T A K I N G C A R E O F Y O U R R M 7 0 0 0 L O U D S P E A K E R S (Figure 16) Your new RM7000 Series Loudspeakers are finished in rugged vinyl. Avoid harsh detergents and cleaning fluids, as they can permanently damage your speakers’ finish (Figure 16). Instead, clean the speaker cabinets with non-abrasive products like Windex or Brillianize Brand products and a clean soft cloth. Gently vacuum the grilles to remove dust. T E C H N I C A L A S S I S TA N C E O R S E R V I C E If, after following these hook up directions, you experience difficulty, please double-check all wire connections. Should you isolate the problem to the speaker, contact the authorized Polk Audio dealer where you made your purchase, or call Polk Audio’s friendly Customer Service Department at 1-800-377-7655 (calls from US or CAN only), 410-764-5266 9am to 6pm EST, Monday through Friday. You may also contact us via email: [email protected]. For more detailed hook up information and manual updates, visit http://www.polkaudio.com/home/products/systems/RM7200 or http://www.polkaudio.com/home/products/systems/RM7600 or http://www.polkaudio.com/home/faqad/ For recommended accessories (including speaker stands, brackets, accessories and exclusive Polk Audio logowear), visit our Webstore: http://polkaudio.tranguard.com/ For accessories and information visit www.polkaudio.com 7 Figure 1 OR Most popular placement, above the TV screen. RM7000 Series Center Channel Speakers can also be wall mounted. RM7000 Series Loudspeakers are magnetically shielded for safe placement near TV or video monitors. If you notice video distortion or discoloration, immediately move the speakers away from the video source and call Polk Audio Customer Service 800.377.7655 (US & Can) or [email protected]. Esta es la ubicación más popular, sobre el televisor. Los altavoces de canal central de la serie RM7000 también se pueden montar en la pared. Los altavoces de la serie RM7000 tienen blindaje magnético para poder ubicarlos con seguridad cerca de televisores o monitores de video. Si nota que hay distorsión o descoloración del video, aleje inmediatamente los altavoces de la fuente de video y llame al Servicio al Cliente de Polk Audio al 800.377.7655 (EE.UU. y Canadá) o escriba a [email protected]. Disposition la plus courante, au-dessus de l’écran. Les enceintes centrales de la Série RM7000 peuvent également être installées au mur. Elles sont blindées magnétiquement et peuvent être disposées à proximité d’une télé ou d’un moniteur vidéo. Si vous percevez de la distorsion ou de la décoloration vidéo, éloignez immédiatement les enceintes de l’écran et communiquez avec le service à la clientèle de Polk. 800-377-7655 (É-U et Can) ou [email protected]. Häufigste Platzierung—über dem Fernsehbildschirm. Lautsprecher der Serie RM7000 können auch an der Wand montiert werden. Diese Lautsprecher (RM7000) sind für eine Platzierung in der Nähe von Fernsehgeräten oder Videomonitoren magnetisch abgeschirmt. Wenn Sie eine Verzerrung oder Verfärbung des Videobildes bemerken, sind die Lautsprecher umgehend von der Videoquelle zu entfernen. Setzen Sie sich in diesem Fall mit dem Kundendienst von Polk Audio in Verbindung (telefonisch unter: 1 (800) 377.7655—gebührenfrei, nur in den USA/Kanada—oder per E-Mail an: [email protected]). Figure 2 Front speaker array. Create an equilateral triangle between the speakers and the listening position. RM7000 Series Loudspeakers are magnetically shielded for safe placement near TV or video monitors. If you notice video distortion or discoloration, immediately move the speakers away from the video source and call Polk Audio Customer Service 800.377.7655 (US & Can) or [email protected]. Disposición de los altavoces frontales. Forme un triángulo equilátero entre los altavoces y la posición de audición. Los altavoces de la serie RM7000 tienen blindaje magnético para poder ubicarlos con seguridad cerca de televisores o monitores de video. Si nota que hay distorsión o descoloración del video, aleje inmediatamente los altavoces de la fuente de video y llame al Servicio al Cliente de Polk Audio al 800.377.7655 (EE.UU. y Canadá) o escriba a [email protected]. Disposition des enceintes avant. Créez un triangle équilatéral entre les enceintes et la position d’écoute. Les enceintes de la série RM7000 sont blindées magnétiquement et peuvent être disposées à proximité d’une télé ou d’un moniteur vidéo. Si vous percevez de la distorsion ou de la décoloration vidéo, éloignez immédiatement les enceintes de l’écran et communiquez avec le service à la clientèle de Polk. 800-377-7655 (É-U et Can) ou [email protected]. Anordnung der vorderen Lautsprecher. Bilden Sie ein Dreieck zwischen den Lautsprechern und Ihrer Hörposition. Diese Lautsprecher (RM7000) sind für eine Platzierung in der Nähe von Fernsehgeräten oder Videomonitoren magnetisch abgeschirmt. Wenn Sie eine Verzerrung oder Verfärbung des Videobildes bemerken, sind die Lautsprecher umgehend von der Videoquelle zu entfernen. Setzen Sie sich in diesem Fall mit dem Kundendienst von Polk Audio in Verbindung (telefonisch unter: 1 (800) 377.7655 - gebührenfrei, nur in den USA/Kanada - oder per E-Mail an: [email protected]). 8 Contact Polk Audio Customer Service 1-800-377-7655 (Outside US: 410-764-5266), [email protected] Figure 3a Figure 3b Placement options for rear/surround speakers. Opciones de ubicación de los altavoces surround o de atrás. Options de disposition des enceintes arrière- ambiophoniques. Platzierungsoptionen für hintere Lautsprecher bzw. Surround-Lautsprecher. Figure 4 Figure 5 SUB TV NOT OK 6" (15cm) AMPLIFIER AMPLIFICADOR AMPLIFICATEUR VERSTÄRKER Allow at least 6" (15cm) between sub driver and wall or obstruction. Deje por lo menos 15 cm (6 plg.) entre el excitador del subwoofer y la pared o la obstrucción. NEVER LAY THE SUBWOOFER ON ITS AMPLIFER END. THIS WILL DAMAGE THE SUBWOOFER. Assurez un dégagement d’au moins 15cm (6po) entre le transducteur du subwoofer et le mur (ou toute autre obstruction). NUNCA COLOQUE EL SUBWOOFER SOBRE EL EXTREMO DE SU AMPLIFICADOR. ESTO DAÑARÍA EL AMPLIFICADOR. Lassen Sie mindestens 15 cm Abstand zwischen dem Subwoofer (Treiber) und der Wand oder anderen Gegenständen. NE COUCHEZ JAMAIS LE SUBWOOFER SUR SON AMPLIFICATEUR. L’AMPLIFICATEUR SERA ENDOMMAGÉ. LEGEN SIE DEN SUBWOOFER NIE AUF DAS VERSTÄRKERENDE. DADURCH WIRD DER SUBWOOFER BESCHÄDIGT. For accessories and information visit www.polkaudio.com 9 Figure 6 Using push tab connectors. Uso de conectores de plástico. Utilisation des bornes à languettes de plastique. Verwendung der Kunststoffanschlüsse. Figure 7 Using binding post connectors. Loosen hex nut. Desentornille la tuerca hexa-gonal. Desserrer l’écrou. Sechskantmutter lösen. Insert speaker wire through hole. Insterte el cable conector del altoparlante a traves del orificio. Insérer le fil du hautparleur dans le trou. Lautsprecher-draht durch das loch schieben. Tighten hex nut. Asegure la tuerca hexagonal. Serrer l’écrou. Sechskantmutterfestschrau-ben. Do not insert insulated section of speaker wire. No inserte la sección aislada del cable conector del altoparlante. Ne pas insérer la partie isolée du fil du haut-parleur. Isolation des lautsprecher-drahtes nicht in das loch schieben. To use Banana Plugs (US only): Carefully pry out the Binding Post Plugs (plastic plugs on the end of the binding posts) to expose Banana Plug holes. Insert Banana Plugs. (This is for US owners only.) Figure 8 Basic Speaker Wire Hookup method. We recommend this method for best blending. CENTER CHANNEL Método básico de conexión de los cables del altavoz. Recomendamos este método para obtener la mejor mezcla. Branchement élémentaire des fils de haut-parleurs. Méthode recommandée pour la meilleure sonorité. Grundlegende Methode zum Anschluss der Lautsprecherkabel. Zur Gewährleistung des optimalen Hörerlebnis empfehlen wir diese Methode. SUBWOOFER 10 Contact Polk Audio Customer Service 1-800-377-7655 (Outside US: 410-764-5266), [email protected] Figure 9 Figure 10 CENTER CHANNEL FRONT AMP-IN PRE-AMP OR PROCESSOR FRONT PRE-OUT Use template to mark mounting location. Use la plantilla para marcar la ubicación de montaje. Y-CABLES Utilisez le gabarit pour marquer l’endroit de l’installation. Verwenden Sie die Schablone zur Markierung der Befestigungsstelle. Figure 12 SUBWOOFER Line Level Hookup method using pre-amp outs. Método de conexión usando cables con conectores RCA para salidas de preamplificador. Branchement aux sorties niveau de ligne du préamplificateur. Line-Level-Anschlussmethode mit Vorverstärker-Ausgängen. Figure 11 Slide the speaker down on the screw heads to catch the keyhole slots. Deslice el altavoz sobre las cabezas de los tornillos para que encajen en las ranuras en forma de cerradura. Glissez l’enceinte sur les têtes de vis jusqu’à ce que les encoches en trou de serrure s’enclenchent. a Schieben Sie den Lautsprecher auf die Schraubköpfe herunter, so dass er in den Ritzen einrastet. b Use #10 screw for wall stud, use #10 wall anchors + screw for no wall stud. Use tornillos n° 10 cuando haya parales internos en la pared, use to rnillos y anclas n° 10 cuando no haya parales internos. Utilisez des vis #10 pour fixation sur un montant ou des chevilles #10 avec vis s’il n’y a pas de montant. Verwenden Sie eine Schraube Nr. 10 für Wände mit Holzstielverstärkung bzw. Dübel und Schrauben (Nr. 10) für Wände ohne Holzstielverstärkung. For accessories and information visit www.polkaudio.com 11 Figure 13 Figure 14 the speaker specialists Rear of RM7200 Powered Subwoofer showing controls. Rear of PSW650 Subwoofer used with RM7600, showing controls. Parte de atrás del subwoofer de potencia RM7200. Se ven los controles. Parte de atrás del subwoofer PSW650 usado con el RM7600. Se ven los controles. Arrière et contrôles du subwoofer amplifié RM7200. Rückseite des Subwoofers (mit RM7200) mit Steuerungen. ® Arrière et contrôles du subwoofer PSW650 utilisé avec le RM7600. Rückseite des PSW650-Subwoofers (mit RM7600) mit Steuerungen. 12 Contact Polk Audio Customer Service 1-800-377-7655 (Outside US: 410-764-5266), [email protected] Figure 15a Figure 15b Recommended Variable Crossover Setting for wall mounted satellites. Recommended Variable Crossover Setting for satellites on stands. Ajuste recomendado del crossover variable para satélites montados en la pared. Réglage recommandé du séparateur de fréquences lorsque les satellites sont installés au mur. Empfohlene variierbare CrossoverEinstellung für wandmontierte Satellitenlautsprecher. Figure 16 Ajuste recomendado del crossover variable para satélites montados sobre pedestales. Réglage recommandé du séparateur de fréquences lorsque les satellites sont posés sur des socles. Empfohlene variierbare Crossover-Einstellung für Satellitenlautsprecher auf Ständern. Do not use furniture polish on the Gloss veneer. Dust with a damp cloth only. No use lustramuebles sobre el enchapado lustroso. Quite el polvo solamente con un paño húmedo. N’utilisez jamais de poli à meubles sur le placage lustré. Époussetez seulement avec un chiffon humide. Furnierte Hochglanzelemente sollten nicht mit Möbelpolitur gereinigt werden. Die Reinigung mit einem feuchten Tuch wird empfohlen. For accessories and information visit www.polkaudio.com 13 14 Contact Polk Audio Customer Service 1-800-377-7655 (Outside US: 410-764-5266), [email protected] 80W 89dB SPL 4 ohms NA 3.25" 3/4" (19mm) Metalized Dome NA 2.6kHz vented 8" H x 6 3/4" W 5 3/8" H x 14" W x 4" D x 4 11/16" D (20.5cm H x (3.7cm H x 35.7cm W 17.2cm W x 10cm D) x 11.9cm D) 10.5 lbs. (4.8kg) pair 4.6 lbs. (2.1kg) ea. Recommended Amplification Sensitivity @1m, 2.83Vrms drive level Nominal Impedance Power Output Mid-bass Driver Diameter (nominal) Tweeter Diameter (nominal) Subwoofer Driver Diameter (nominal) Crossover Frequency Enclosure Type Dimensions Shipping Weight Product Net Weight 7.7 lbs. (3.5kg) ea. 9 lbs. (4.1kg) ea. vented 3.1kHz NA 3/4" (19mm) Metalized Dome 2 x 3.25" NA 8 ohms 89dB SPL 80W 115Hz-20kHz 125Hz-20kHz 80Hz-23kHz 90Hz-23kHz -3dB Limits RM3600 Center Overall Freq Response RM3300 Satellite S P E C I F I C AT I O N S 26Hz-23kHz NA NA NA NA NA NA NA NA 20-125W 32Hz-20kHz 39 lbs. (17.7kg) ea. NA NA 70 lbs. (31.8kg) sys. 16 1/2" H x 13 1/2" W NA x 16 1/4" D (41.9cm H x 34.3cm W x 41.3cm D) vented with floorcoupled Power Port variable 60-160Hz, 90Hz optimal (Low-pass filter) 8", Shielded NA NA 100W Contiuous Average Power into 4 Ohms with < 1% THD, 30-200Hz NA NA NA 32Hz-180Hz 26Hz-200Hz RM7200 Subwoofer RM7200 System 9.3 lbs. (4.2kg) ea. 20 lbs. (9.1kg) pair 11 1/4" H x 9 13/16" W x 5 1/2" D (28.6cmH x 24.9cm W x 28.6cm D) vented 2.5kHz NA 1" (25mm) Tri-laminate Dome 5.25" (13.34 cm), shielded NA Compatible with 8 Ohm outputs 89dB SPL 20-125W 90Hz-25kHz 65Hz-26kHz RM4300 Satellite 13.5 lbs. (6.1kg) ea. 15 lbs. (6.8kg) ea. 6 5/16" H x 21 11/16" W x 5 3/4" D (16.1cm H x 55cm W x 14.6cm D) vented 2.0kHz NA 1" (25mm) Tri-laminate Dome 2 x 5.25" (13.34 cm), shielded NA Compatible with 8 Ohm outputs 89dB SPL 20-125W 80Hz-25kHz 55Hz-26kHz RM4600 Center (see specification in subwoofer manual) NA NA (see specification in subwoofer manual for power rating) Compatible with 8 Ohm outputs 89dB SPL 20 -150 Watts/channel 28Hz-25kHz 25Hz-26kHz (see individual component’s specs) 61 lbs. (27.7kg) ea. 75 lbs. (34kg) ea. (see individual component’s specs) (see individual component’s specs) 18 3/4" H x 17-1/2" W (see individual x 19" D component’s specs) (47.62cm H x 44.45cm W x 48.26cm D) Power Port, vented 60Hz - 160Hz, (see specification in adjustable Low Pass subwoofer manual) Filter. Selectable 80Hz High Pass Filter on the line level outputs 2 - 10" (25 cm) Polymer composite drivers NA NA 165 W Continuous Average Power into 4 Ohms with < 1% THD, 30-200Hz NA NA NA 28 - 125 Hz 25 - 180Hz PSW650 Subwoofer RM7600 System (with PSW650 subwoofer. Specifications will vary depending on subwoofer model supplied.) POLK AUDIO LIMITED WARRANTY Warranty for Satellites and Center Channel Loudspeakers Polk Audio, Inc. warrants to the original purchaser only that this Polk Audio Loudspeaker Product (the “Product”) will be free from defects in materials and workmanship for a period of five (5) years from the date of original retail purchase from a Polk Audio Authorized Dealer. However, this Warranty will automatically terminate prior to the expiration of the five (5) years if the original retail purchaser sells or otherwise transfers the Product to any other party. The original retail purchaser shall hereinafter be referred to as “you.” Warranty for Subwoofer Polk Audio, Inc., warrants to the original purchaser only that the amplifier in this Polk Audio Loud-speaker Product (the “Product”) will be free from defects in material and workmanship for a period of three (3) years from the date of original retail purchase from a Polk Audio Authorized Dealer. Polk Audio, Inc., further warrants to the original purchaser only that the Loudspeaker(s) in this Polk Audio Product (the “Product”) will be free from defects in material and workmanship for a period of five (5) years from the date of original retail purchase from a Polk Audio Authorized Dealer. The original retail purchaser shall hereinafter be referred to as “you.” However, this Warranty will automatically terminate prior to the expiration if you sell or otherwise transfer the Product to any other party. To allow Polk Audio to offer the best possible warranty service, please fill out the Product Registration Card(s) and send it to the Factory, at the address provided on the Product Cards(s) within ten (10) days of the date of purchase. Defective Products must be shipped, together with proof of purchase, prepaid insured to the Polk Audio Authorized Dealer from whom you purchased the Product, or to the Factory at 2550 Britannia Boulevard, Suite D, San Diego, California 92154. Products must be shipped in the original shipping container or its equivalent; in any case the risk of loss or damage in transit is to be borne by you. If upon examination at the Factory or Polk Audio Authorized Dealer it is determined that the unit was defective in materials or workmanship at any time during this Warranty period, Polk Audio or the Polk Audio Authorized Dealer will, at its option, repair or replace this Product at no additional charge, except as set forth below. All replaced parts and Products become the property of Polk Audio. Products replaced or repaired under this warranty will be returned to you, within a reasonable time, freight prepaid. This warranty does not include service or parts to repair damage caused by accident, disaster, misuse, abuse, negligence, inadequate packing or shipping procedures, commercial use, voltage inputs in excess of the rated maximum of the unit, cosmetic appearance of cabinetry not directly attributable to defect in materials or workmanship, or service, repair, or modification of the Product which has not been authorized or approved by Polk Audio. This warranty shall terminate if the Serial number on the Product has been removed, tampered with or defaced. This warranty is in lieu of all other expressed Warranties. If this Product is defective in materials or workmanship as warranted above, your sole remedy shall be repair or replacement as provided above. In no event will Polk Audio, Inc. be liable to you for any incidental or consequential damages arising out of the use or inability to use the Product, even if Polk Audio, Inc. or a Polk Audio Authorized Dealer has been advised of the possibility of such damages, or for any claim by any other party. Some states do not allow the exclusion or limitation of consequential damages, so the above limitation and exclusion may not apply to you. All implied warranties on this Product are limited to the duration of this expressed Warranty. Some states do not allow limitation on how long an implied Warranty lasts, so the above limitations may not apply to you. This Warranty gives you specific legal rights, and you also may have other rights which vary from state to state. This Warranty applies only to Products purchased in the United States of America, its possessions, and U.S. and NATO armed forces exchanges and audio clubs. The Warranty terms and conditions applicable to Products purchased in other countries are available from the Polk Audio Authorized Distributors in such countries. For accessories and information visit www.polkaudio.com 15 Polk Audio 5601 Metro Drive Baltimore, Maryland 21215 800-377-7655 RM7208-1