1
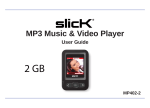
4GB
Music & Video Player with 2.8” Touch Display
PMP280-4
User Guide
In the box
In the Box
• MP3 Player
• Headphones
Headphones
• USB 2.0 Cable
USB Cable
• Quick Start Guide
Quick Start Guide
MP3 Player
Quick Start Guide
Gu
er
Us
er
ter
• Applications CD
n
Co
id e •
Vi d e o
v
Applications CD
Features & Location of controls
1.
•4GBinternalmemory
•MiniSDcardslotallowsyoutoaddupto8GB
additionalmemory.(MiniSDcardnotincluded)
•Highresolution2.8”TOUCHscreen
•Stores&playsmusic,video,andpictures
•Built-incamera(Stillpictures&videoclips)
•Digitalvoicerecording
•Built-inspeaker
•RechargeableLi-ionbattery
2.
3.
11.
4.
5.
1.
2.
3.
4.
5.
6.
7.
8.
9.
10.
11.
Mini-USBport
[POWER]-Poweron/off/lockswitch
Headphone jack
Speaker
Touch Screen display
[M]-Menu/Select/Returnkey
[–]-volumedown
[+]-volumeup
Mini SD card slot
Resethole
Camera
7. 6. 8.
10.
9.
Basic Operation
Turning on/off:
MakesureyourMP3playerisfullychargedbeforeturningiton.
• ToturnthePlayeron,slideandholdthe[POWER]switchtothe
rightuntilthedisplayturnson.
• Toturntheplayeroff,slideandholdthe[POWER]switchtothe
rightuntilthedisplayturnsoff.
Lock/unlock function:
TheLockfunctionpreventsyoufromaccidentallypressingthebuttons
whileusingyourplayer.
• Slidethepowerswitchtothelefttolocktheplayerorrightto
unlock.
[POWER]switch
lock
on/off
Adjusting the volume:
• Toincreasethevolume,pressthe[+]key.
• Todecreasethevolume,pressthe[–]key.
Resetting the Player:
IftheMP3Playermalfunctions,youcanusetheResetfunctiontorestartit.
• ToresetthePlayer,takeametalpin(suchastheendofapaperclip),
andpushitintotheRESETholetorestartthePlayer.
Basic controls In a Menu/List:
[+]movestheselectiondown
[–]movestheselectionup
[M]makesaselection
Viewing Music/Video/Picture:
[M]plays/pausesthemusic/video/slideshow
[+]incresesvolumewhensongisplaying;goestonextsongwhen
musicisstopped
[–]decresesvolumewhensongisplaying;goestoprevioussong
whenmusicisstopped.
RESEThole
volumedown
volumeup
Connecting to a computer
•
•
•
•
Systemrequirements:
Pentium200MHzorabove
MicrosoftWindows2000/ME/XP/Vista
USB port
PCconnection:
InordertoenjoythemultimediacapabilitiesofyourMP3Player,you
havetofirstcopyfilesfromyourPCtoitsinternalmemory.
ConnectyourMP3PlayertothecomputerusingtheincludedUSB2.0
cable.Thedevicewillbedetectedautomaticallywithoutinstallingany
driver.Oncedetected,youcanread/writetothedevice’smemoryjust
asifyouwereusingaregulardiskdrive.
Makesureyourcomputerispoweredon,andfollowthestepsbelow
toconnecttheplayertoyourcomputer.
1.PlugthelargerUSBconnectoroftheUSBcableintotheUSBport
onthecomputer.
2.Plugtheotherend(small)oftheUSBcabletotheplayer.
3.Thecomputersystemdetects“Newhardware”andstartstoinstall
thedriverautomatically.Waitforthesystemtofinishtheinstallation.
Whenithasfinished,“MP3”willbecreatedin“MyComputer”.
Disconnecting the USB cable:
1. Open the “Safe Device Removal” icon in the task bar, on the
lower right corner of the screen.
2. Select “USB Device” and click “Stop.”
3. When the notification that “It is now safe to disconnect your
device,” disconnect the USB cable from your computer.
Important: to avoid any data loss, always perform a safe USB device
extraction before disconnecting the USB cable.
Charging the battery
Mini SD card
YourMP3PlayerhasanintegratedrechargeableLi-ionbattery.Itis
recommendedtofullychargetheplayerbeforeusingitforthefirst
time.Rechargethebatterybyconnectingtheplayertoacomputer
usingtheincludedUSB2.0cable.Chargingtimeisbetween3-5
hours,dependingiftheplayerispoweredofforworking.Tokeepthe
batteryingoodcondition,werecommendnotchargingitformore
than 8 hours.
Important:
• Fullychargetheplayerbeforeusingitforthefirsttime
• Chargetheplayerimmediatelywhenthe“LowBattery”message
is displayed
• Donotoverchargeorcompletelydrainthebattery.Overcharingor
completelydrainingthebatterywillshortenbatterylife.
• Thebatterycanbedrainediftheplayerisnotusedforalong
time.Toavoiddrainingthebattery,fullychargetheplayereverythree
months,andalwayskeepthebatterychargeabove50%.
TheplayersupportsMiniSDcards(notincluded),whichallowyouto
addupto8GBofadditionalmemorytoyourMP3Player.
ToinserttheMiniSDcard:
1. InserttheMiniSDcardintothecardslotatthebottomofyour
player,withthewiththemetalcontactsfacingtowardstheback
oftheplayer,andgentlypushitinuntilitclicks.Donotapply
excessiveforce,asthismaydamageyourMP3PlayerandMini
SD card.
2. ToviewfilesonyourMiniSDcard,touch“Music”,fromthemain
menuandthen“Browser”>“CardDir”
3. ToremovetheMiniSDcard,gentlypushitinuntilitpopsout.
Important:
• DonotuseforcewhileinsertingorremovingtheMiniSDcard.
• Donotremovethecardduringfiletransfers.
• Makesuretheplayeristurnedoffbeforeinsertingortaking
outthecard.
Transferring media to the player
YourMP3Playeriscapableofstoringandplayingyourfavoritemusic,
photosandvideo.
Whenyouaredone,disconnectyourMP3Playerfromthecomputer
usingthe“SafeDeviceRemoval”utilityinthetaskbar.
Totransfermediafromyourcomputer:
1. ConnectyourMP3Playertoyourcomputerusingtheincluded
USB cable.
2. Open“WindowsExplorer”or“MyComputer,”andlocate“MP3.”
3. Draganddrop,orcopyandpasteyourmediafilesinto“MP3.”
Important:
donotdisconnecttheUSBcablewhentransferringfiles,asdoing
somaydamageyourMP3Playerandyourfiles.
MP3
Drag or copy files to
the correct folder
MP3 (G:)
Locate“MP3”
MusicP
icturesV
ideo
Main menu
After you turn on the Player, the Main Menu appears.
•
•
Touch an icon on the Main Menu to select it.
To return to the Main Menu, press and HOLD the [M] key.
Main Menu icons:
•
Music:playsongs
•
Video:playmovies
•
Photos:viewpictures
•
Camera:Takepicturesorrecordvideoclips
•
Record:recordvoice
•
Settings:customizeyourPlayer’sfunctions
Music
Toplaybackmusic,select“Music”fromtheMainMenu.
Play/Pause/Stop:letsyoustart,pause,
andstoptheplaybackofmusic.
Forward/reverse:presstoskiptothe
previous/nexttrack.
Volume:dragthesliderleft/rightto
lower/increasevolume.
Songprogress:displaysprogress
throughthecurrenttrack.Dragthe
sliderleft/righttochangeposition
within the track.
Equalizer
Playingorder
Viewthefilelistoraccessthecarddrivetoselect
differentsongs.
Playingmode
Changesoundsettings.
Currentsong/totalsongs
Viewfileinformation.
ReturntoMainMenu
Using Windows Media Player
Windows Media Player allows you to organize your media collection,
as well as create digital music files from your CDs. If Windows Media
Player is not installed on your computer, you can get the latest version
by going to
www.microsoft.com/windows/windowsmedia/player/download/
GettingmusicfromyourCDsontoyourcomputer:
YoucanuseWindowsMediaPlayertocopy,or“Rip”,musicfrom
your audio CDs.
1.
2.
3.
4.
5.
OpenWindowsMediaPlayer.
Clickonthe“Rip”tab.
InsertamusicCDintoyourcomputer’sCDdrive.
ClickthecheckboxestoselectwhichtrackstoRip.
Click“StartRip.”
Clickthe“Rip”tab.
Click“StartRip”
WindowsMediaPlayergivesyouaneasywaytoadd,or“Sync,”
musictoyourMP3Player.
1.
2.
3.
4.
5.
Clickthe“Sync”tab.
OpenWindowsMediaPlayer.
ConnectyourMP3PlayertothecomputerusingtheUSBcable.
Clickonthe“Sync”tabinWindowsMediaPlayer.
DragmediafilestoyourMP3PlayerwithinWindowsMediaPlayer.
Clickthe“StartSync”button.
MP3
Drag
your
songs
here
SyncpicturestoyourMP3Player:
Click
on the
Category
button
and
select
Pictures
Click“StartSync”
Drag
your
pictures
here
Syncinprogress
Click“StartSync”
Youmayalsotransfermusicorothermediafilesbyragging/copying
themdirectlyintoyourplayer.
Video
Towatchvideo,select“Video”fromtheMainMenu.
OpenstheFileBrowser
Bookmarksthecurrentpositioninthevideo
Playsandpausesthevideo
Opensthevolumeadjustmentbar
ReturntotheMainMenu
Gotoprevious/nextvideo
Using the Video Converter
BeforetransferringvideofilestotheMP3Player,youmustconvert
themtothecorrectformat.UsetheVideoConverterprovidedonthe
includedCDtoconvertmostvideofilestothecorrectformatsuitable
forthePlayer.
ToinstalltheVideoConverter:
1. InserttheCDintotheCDdriveofyour
computer.
2. Clickon“VideoConverter”onthescreen
that opens.
3. Click“Install”andthen“Next.”
4. Follow the installation instructions.
5. Click“Close”whentheinstallationiscomplete.
Converting videos:
1. Connect the MP3 Player to the USB port of your
computer (optional).
2. Click on the
icon on your Desktop.
4. Click on “Output File” to select the destination for the converted
video. You can send it directly to the MP3 Player by selecting
MP3 > Video and clicking “OK,” or if you would like to save the
video to your computer, we recommend sending it to your Desktop
where you can easily find and transfer the video to the Player.
3. Click on “Input File” and select a video to convert.
click “Input File”
MP3
click “Output File”
Desktop
MP3
OR
Findandselectavideo
fromyourcomputer.
Choose“MP3”>”Video”folderandsave
theconvertedvideodirectlytoyour
MP3 Player.
Note: your MP3 Player must be connected
to the USB port of your computer during
the conversion for this option.
Choose“Desktop”andsavetheconverted
videototheDesktopofyourcomputer.After
savingtheconvertedvideotoyourdesktop,
youcantransferitdirectlytoyouPlayer.
5. Clickonthevideofileandtheonthe“Settings”button.Confirm
thatthescreenwidthandheightaresetto320x240,andclick
“OK.”
6. Clickonthe“Convert”buttontobegintheconversion.When
complete,theconvertedvideowilleitherbeonyourMP3Player,
ortheselectedOutputFilelocationonyourcomputerwhereyou
caneasilytransferittotheplayer.
ConfirmScreenwidthand
heightselection
Click“OK”toclosethe
Settingsscreen
Click on the
videofileand
then on the
Settingsbutton
Convertbutton
Settingsbutton
Camera
Thecameraallowsyoutotakephotosandshootvideo.Toenterthe
Cameramode,selectthe“Camera”iconfromtheMainMenu.
Takepictures:allowsyoutotakephotographs.
Recordvideos:allowsyoutoshootvideoclips.
Photomodeinterface:
SwitchtoVideomode
Numberofshotsremaining
Timersetting.Choosebetween5,15,20s,off
ReturntotheMainMenu
Viewthefiledirectory
Changepicturemodesettings
Selectrecordingresolution
Take a picture
Pressthe[M]buttontotakeapictureorrecordvideoclips.
Videomodeinterface:
SwitchtoPhotomode
Setsexpsuremode:Auto,Indoor,Outdoor
Setsspecialeffect:blackandwhite,negative,sepia,off
ReturntoMainMenu
View the File Directory
ChangeVideomodesettings
ChangeVideoresolution
Startrecordingvideo
Whenrecordingvideo:
Recordingandplayingbackvideos
Pausesvideorecording
1. Pressthe[M]buttontostartorpauserecording
2. Presstheicontosavethevideofile
Savestherecordedvideo
3. Presstheicontoaccessthevideofilelistandplaybackyour
videos
Photos
Toviewphotos,selectthe“Photos”iconintheMainMenu
Selectaphototoviewit.
Switchbetweenautomatic/manualslideshow
ReturntoPictureList
Setslideshowinterval(1-5seconds)
Previous/nextphoto
ReturntoMainMenu
Voice recorder
Torecordvoicememos,selectthe“Record”iconfromtheMainMenu.
Presstobeginorpauserecording.
Savetherecordedfile
Gotothelistofrecordedfilesandplaybackyour
voicememos
Changerecordingsettings
File directory
TheFileDirectoryletsyouviewalistofmediafilesonyourMP3
Player.TheFileDirectorycanbeaccessedfromtheMusic,Video,
PhotoandRecordmodesbypressingthebutton.
UsingtheFileDirectory:
Selectafoldertoopenitscontents.
Pressthebuttontogotothepreviousscreen.
Todeleteafile,selectitbypressingit,andthenpressing“Delete.”
System settings
ToaccesstheSystemSettings,pressthe“Settings”iconfromthem
Main Menu.
System Settings icons:
• Player Information:displaysvariousinformationaboutyourMP3Player.
• Set Time:changethetimeanddateofyourMP3Player.
• Language:changethedisplaylanguageofyourMP3Player.
• Display:Changehowlongthebacklightstayson.
• Calibrate:Calibratethescreenifthetouchdisplayisnotaccuratelyresponding
to your selections.
• Power Of f Time:setthePowerOfftimer.Thistimerturnstheplayeroff
afteraperiodofinactivitytoconservebatterypower.
• Default Setting:restoresalloftheMP3Player’ssettingstotheirdefaultvalues.
• Upgrade:AllowsyoutoupgradetheMP3Player’sfirmwarebyuploading
itfromyourcomputerusingtheUSBcable.
• Other Settings:AllowsyoutoformattheMP3Player’smemoryorthe
Mini SD card.
Warning:formattingyourPlayer’smemoryortheMiniSDcardwill
permanentlydeleteallthedataonthedevice.
Troubleshooting
Ifyouhaveproblemswhileoperatingyourplayer,pleasecheckthepoints
belowbeforesendingittotheservicecenter
Can not power on
• Thebatterymaybeexhausted,pleaserechargethebattery
Files can not be transferred to the player
• Checkifthedriverisinstalledcorrectlyinthecomputerby
disconnectingandthenreconnectingtheplayertothecomputer
• ChecktheconnectionbetweentheplayerandPC,andconfirm
the USB cable is properly connected
TROUBLESHOOTING
My computer is not detecting the MP3 Player with Windows Vista
• ThereisaUSBmassstoragedevicesrecognitionissuewithWindowsVistaacknowledgedbyMicrosoft.Asolutionisavailablein
theServicePack1whichmaybedownloadedfromMicrosoft’s
website
I cannot display my .jpg files
• Manydigitalcamerasandimageeditingsoftwaresaddhiddendatatothe.jpgfiles.ThisdatacanpreventyourMP3from
No sound from the headphones
• Pleaseensurethevolumeisturnedup,andtheheadphonesare
properly connected
• Checkiftheformatofmusicfileissupportedbytheplayer
Can not record
• Checkifthereisenoughmemoryandbatterycapacity
Display is in the wrong language
• Pleaseensureyouselectedthecorrectlanguagefromthe“Settings”
menu
The buttons do not work
• Theplayermaybelocked.Unlockitbyslidingthe[POWER]switch
totheright.
• Presstheresetholewithametalpintore-initializethesystemof
the player
loadingtheimages.Trytoeliminatethembysavingthefilewith
anothername.
The player freezes or not functioning properly
• IftheMP3Playermalfunctions,youcanusetheResetfunctionto
restartit.ToresetthePlayer,takeametalpin(suchastheendofa
paperclip),andpushitintotheRESETholetorestartthePlayer.
Important safety precautions
Alwaysfollowthesebasicsafetyprecautionswhenusingyourplayer.
Thiswillreducetheriskofproductdamageandpersonalinjury.
• Donotdisassemble,repairormodifytheplayerbyyourself.Refer
servicingtoqualifiedpersonnel.
• Thisdevicecontainsabuilt-inbattery,donotdisposeofinfire.
• Intheeventthatthebatteryisleaking,donothandlethedevice
with your bare hands.
• Contacttheservicecenterforhelpsincetheliquidmayremain
intheplayer.Ifyourbodyorclotheshadcontactwiththebattery
liquid,washitoffthoroughlywithwaterandconsultadoctor.
• Keeptheplayerawayfromdirectsunlightandanydirectheat
source.
• Donotexposetheunittorainormoisture.
• Donotusetheplayerindryenvironmentstoavoidstatic.
• Neverapplyheavyimpactontheplayer,orplaceitonamagnet.
• RoutetheUSBcablesothatpeopleandpetsarenotlikelytotrip
overit.
• DisconnecttheUSBcablefromthecomputerwhenyoudonot
usetheplayerforalongtime.
• Cleanonlywithadrycloth.Makesuretheplayeristurnedoff
beforecleaning.Donotusealiquidcleanser.
• Besuretobackupyourfilestoavoiddataloss.
Precautions in using the headphones
• Donotusetheheadphoneswhiledrivinganautomobileorridinga
bicycleitisdangerousandagainstthelaw.Toavoidanaccident,do
notturnupthevolumeoftheheadphonestoohighwhilewalking.
• Itisnotrecommendedthatyouusetheheadphonesatahigh
volumeforanextendedtime,asthismaycausehearingdamage.
Legal information
FCC Part 15:
Copyright Information:
This equipment has been tested and found to comply with the requirements
for a Class B digital device under Part 15 of the Federal Communications
Commission (FCC) rules. These requirements are intended to provide
reasonable protection against harmful interference in a residential
installation.
This equipment generates, uses and can radiate radio frequency energy
and, if not installed and used in accordance with the instructions, may
cause harmful interference to radio communications. However, there
is no guarantee that interference will not occur in a particular installation.
If this equipment does cause harmful interference to radio or television
reception, which can be determined by turning the equipment off and
on, the user is encouraged to try to correct the interference by one
or more of the following measures:
• Re-orient or relocate the receiving antenna.
• Increase the separation between the equipment and receiver.
• Connect the equipment into an outlet on a circuit different from
that to which the receiver is connected.
• Consult the dealer or an experienced radio/TV technician for help.
Trademarks and trade names used in this instruction manual are
owned by their respective companies or organizations.
Changes or modifications to this equipment not expressly approved
by the party responsible for compliance could void the user’s authority
to operate the equipment.
Unathorized duplication of any recordings whether downloaded from
the Internet or made from audio CDs is a violation of copyright laws
and international treaties.
The making of unauthorized copies of copy-protected material, may
be an infringement of copyrights and constitute a criminal offense.
This equipment should not be used for such purposes.
Limited warranty
Intheunlikelyeventthatthisproductisdefective,ordoesnotperform Toobtainserviceafterthewarrantyperiod,[email protected]
properly,youmaywithinninety(90)daysfromyouroriginaldateofpurchase withproductinformation,dateofpurchaseandnatureoftheproblem.Customer
returnittotheauthorizedservicecenterforrepairorexchange.
servicewillreplytothee-mailwithserviceinstructions.
TO OBTAIN WARRANTY SERVICE:
-Provideproofofthedateofpurchasewithinthepackage(Datedbillofsale)
-Prepayallshippingcoststotheauthorizedservicecenter,and
remembertoinsureyourreturn.
-Includeareturnshippingaddress(noP.O.Boxes),atelephonecontact
number,andthedefectiveunitwithinthepackage.
-Describethedefectorreasonyouarereturningtheproduct.Your
productwillberepairedorreplaced,atouroption,forthesameor
similarmodelofequalvalueifexaminationbytheservicecenter
determinesthisproductisdefective.Productsreceiveddamagedasa
resultofshipping,willrequireyoutofileaclaimwiththecarrier.
Theshippingaddressoftheauthorizedservicecenteris:
Southern Telecom Inc. ATTN:ReturnsDepartment
14-C53rdStreetBrooklyn,NY11232
Shouldyouhaveanyquestionsorproblemsconcerningthisproduct,please
contactourcustomerservicedepartmentat:
CustomerSupport:1-877-768-8483(TollFree)
[email protected]
Monday-Thursday:9AM-5PM(EST)
Friday:9AM-3PM(EST)
Warrantyservicenotprovided:
Thiswarrantydoesnotcoverdamageresultingfromaccident,misuse,abuse,improperinstallationoroperation,lackofreasonablecare,andunauthorizedmodification.Thiswarrantyisvoidedintheeventanyunauthorizedpersonopens,altersor
repairsthisproduct.Allproductsbeingreturnedtotheauthorizedservicecenterfor
repairmustbesuitablypackaged.
LimitationofWarranty:
•THEWARRANTYSTATEDABOVEISTHEONLYWARRANTYAPPLICABLETOTHIS
PRODUCT.ALLOTHERWARRANTIES,EXPRESSORIMPLIED(INCLUDINGALL
IMPLIEDWARRANTIESOFMERCHANTABILITYORFITNESSFORAPARTICULAR
PURPOSE)AREHEREBYDISCLAIMED.NOVERBALORWRITTENINFORMATION
GIVENBYSOUTHERNTELECOMINC.IT’SAGENTS,OREMPLOYEESSHALLCREATEAGUARANTYORINANYWAYINCREASETHESCOPEOFTHISWARRANTY.
•REPAIRORREPLACEMENTASPROVIDEDUNDERTHISWARRANTYISTHE
EXCLUSIVEREMEDYOFTHECONSUMER,SOUTHERNTELECOMINC.SHALL
NOTBELIABLEFORINCIDETALORCONSEQUENTIALDAMAGESRESULTING
FROMTHEUSEOFTHISPRODUCTORARISINGOUTOFANYBREACHOFANY
EXPRESSORIMPLIEDWARRANTYONTHISPRODUCT.THISDISCLAIMER
OFWARRANTIESANDLIMITEDWARRANTYAREGOVERNEDBYTHELAWS
OFTHESTATEOFNEWYORK.EXCEPTTOTHEEXTENTPROHIBITEDBYAPPLICABLELAW,ANYIMPLIEDWARRANTYOFMERCHANTABILITYORFITNESSFOR
APARTICULARPURPOSEONTHISPRODUCTISLIMITEDTOTHEAPPLICABLE
WARRANTYPERIODSETFORTHABOVE.
Howstatelawrelatestothiswarranty:
•Somestatesdonotallowtheexclusionnorlimitationofincidental,consequential
damages,orlimitationsonhowlonganimpliedwarrantylastssotheabovelimitations
orexclusionmaynotapplytoyou..
•Thiswarrantygivesyouspecificlegalrights,andyoualsomayhaveotherrightsthat
varyfromstatetostate.
“Polaroid” and “Polaroid and Pixel” are registered trademarks of Polaroid Corporation, used under license.
Microsoft, the Windows logo, and Windows Media are either registered trademarks of Microsoft Corporation
in the United States and / or other countries.