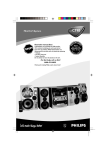
1
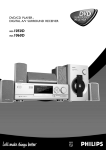
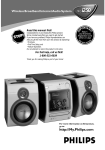
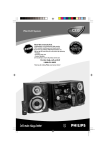
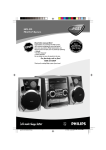
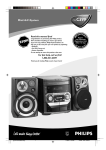
DVD/CD PLAYER DIGITAL A/V SURROUND RECEIVER
DVD
SURROUND
SURROUND
RECEIVER
RECEIVER
1015D
MX-1055D
MX-
Toll Free Help Line
Ligne d'assistance en service libre
Linea de ayuda telefónica sin cargo
800-531-0039
1
Return your Warranty Registration card today to
ensure you receive all the benefits you’re entitled to.
• Once your Philips purchase is registered, you’re eligible to
receive all the privileges of owning a Philips product.
• So complete and return the Warranty Registration Card
enclosed with your purchase at once, and take advantage
of these important benefits.
Owner
Confirmation
Model
Registration
Registering your product within 10 days
confirms your right to maximum
protection under the terms and
conditions of your Philips warranty.
Your completed Warranty Registration
Card serves as verification of ownership
in the event of product theft or loss.
Returning your Warranty Registration
Card right away guarantees you’ll
receive all the information and special
offers which you qualify for as the
owner of your model.
TR
ATION
N
IS
Warranty
Verification
IT
AY
DED W
S REG
EE
!
rry
u
H
HIN 10 D
Congratulations on your purchase,
and welcome to the “family!”
Dear Philips product owner:
Thank you for your confidence in Philips.You’ve selected one of the best-built,
best-backed products available today. And we’ll do everything in our power to
keep you happy with your purchase for many years to come.
As a member of the Philips “family,” you’re entitled to protection by one of the
most comprehensive warranties and outstanding service networks in the industry.
What’s more, your purchase guarantees you’ll receive all the information and
special offers for which you qualify, plus easy access to accessories from our
convenient home shopping network.
And most importantly you can count on our uncompromising commitment to
your total satisfaction.
All of this is our way of saying welcome – and thanks for investing in a Philips product.
Sincerely,
Lawrence J. Blanford
President and Chief Executive Officer
Know these
safety symbols
CAUTION
RISK OF ELECTRIC SHOCK
DO NOT OPEN
CAUTION: TO REDUCE THE RISK OF ELECTRIC SHOCK, DO NOT
REMOVE COVER (OR BACK). NO USER-SERVICEABLE PARTS
INSIDE. REFER SERVICING TO QUALIFIED SERVICE PERSONNEL.
t
This “bolt of lightning” indicates
uninsulated material within your unit
may cause an electrical shock. For
the safety of everyone in your household,
please do not remove product covering.
s
The “exclamation point” calls attention
to features for which you should read
the enclosed literature closely to
prevent operating and maintenance problems.
WARNING: TO PREVENT FIRE OR
SHOCK HAZARD, DO NOT EXPOSE THIS
EQUIPMENT TO RAIN OR MOISTURE.
CAUTION: To prevent electric shock,
match wide blade of plug to wide slot, and
fully insert.
For Customer Use
Enter below the Serial No. which is located
on the rear of the cabinet. Retain this
information for future reference.
P.S. Remember, to get the most from your Philips product, you must
return your Warranty Registration Card within 10 days. So please
mail it to us right now!
Model No. ___________________________
Serial No. ____________________________
MAC5097
2
Visit our World Wide Web Site at http://www.philips.com
English
Index and General Information
Canada
This warning label is located on the rearside
and inside this laser product.
: INVISIBLE
LASER RADIATION
WHEN OPEN. DO NOT STARE INTO BEAM.
CAUTION
LASER RADIATION WHEN OPEN.
DANGER:INVISIBLE
AVOID DIRECT EXPOSURE TO BEAM.
AVATTAESSA JA SUOJALUKITUS OHITETTAESSA OLET
VARO! ALTTIINANAKYMATTOMAALLE LASERSATEILYLLE. ALA
KATSO SATEESEEN.
VARNING!
OSYNLIG LASERSTRÅLNING NÄR DENNA DEL ÄR ÖPPNAD.
OCH SPARREN AR URKOPPLAD.BETRAKTA EJ STRÅLEN.
Français
Français:
Cet appareil numérique n'emet pas de bruits
radioélectriques dépassant les limites applicables
aux appareils numériques de Class B prescrites
dans le Règlement sur le Brouillage
Radioélectrique édicté par le Ministère des
Communications du Canada.
English -------------------------------------------------------- 5
Français ------------------------------------------------------ 32
Español
English:
This digital apparatus does not exceed the Class
B limits for radio noise emissions from digital
apparatus as set out in the Radio Interference
Regulations of the Canadian Department of
Communications.
Español ------------------------------------------------------ 60
The set complies with the FCC-Rules, Part 15
and with 21 CFR 1040.1. Operation is subject
to the following two conditions:
1. This device may not cause harmful
interference, and
2. This device must accept any interference
received, including interference that may
cause undesired operation.
or
DANGER - Invisible laser radiation when open.
AVOID DIRECT EXPOSURE TO BEAM.
Manufactured under license from Dolby
Laboratories. “Dolby” and the double-D symbol are
trademarks of Dolby Laboratories. Confidential
Unpublished Works. ©1992-1997 Dolby
Laboratories, Inc. All rights reserved.
This product incorporates copyright protection
technology that is protected by method claims of
certain U.S. patents and other intellectual property
rights owned by Macrovision Corporation and other
rights owners. Use of this copyright protection
technology must be authorized by Macrovision
Corporation, and is intended for home and other
limited viewing uses only unless otherwise
authorized by Macrovision Corporation. Reverse
engineering or disassembly is prohibited.
Laser
Type
Wave length
Output Power
Beam divergence
CAUTION
Use of controls or adjustments or performance
of procedures other than herein may result in
hazardous radiation exposure or other unsafe
operation.
ATTENTION
L'utilisation des commandes ou réglages ou le
non-respect des procédures ci-incluses peuvent
se traduire par une exposition dangereuse à
l'irradiation.
ATENCIÓN
El uso de mando o ajustes o la ejecucción de
métodos que no sean los aquí descritos puede
ocasionar peligro de exposición a radiación.
NOTE:
PICTURES SHOWN MAY BE DIFFERENT BETWEEN
COUNTRIES.
Semiconductor laser GaAIAs
650nm
7mW
60 degree
NEVER MAKE OR CHANGE CONNECTIONS WITH THE
POWER SWITCHED ON.
I NDEX
AND
G ENERAL I NFORMATION
3
IMPORTANT SAFETY INSTRUCTIONS
1. Read these instructions.
2. Keep these instructions.
3. Heed all warnings.
11. Only use attachments/accessories specified by the
manufacturer.
12.
4. Follow all instructions.
5. Do not use this apparatus near water.
6. Clean only with a dry cloth.
7. Do not block any of the ventilation openings.
Install in accordance with the manufacturers
instructions.
13. Unplug this apparatus during lightning storms or when
unused for long periods of time.
14. Refer all servicing to qualified service personnel.
Servicing is required when the apparatus has been
damaged in any way, such as if the power-supply cord or
plug is damaged, liquid has been spilled or objects have
fallen into the apparatus, or when the apparatus has been
exposed to rain or moisture, does not operate normally, or
has been dropped.
8. Do not install near any heat sources such as
radiators, heat registers, stoves, or other apparatus
(including amplifiers) that produce heat.
9. Do not defeat the safety
purpose of the polarized or
grounding-type plug. A polarized plug
AC Polarized
Plug
has two blades with one wider than
the other. A grounding type plug has two blades and a third
grounding prong.The wide blade or the third prong are
provided for your safety.When the provided plug does not
fit into your outlet, consult an electrician for replacement of
the obsolete outlet.
Use only with a cart, stand, tripod, bracket,
or table specified by the manufacturer or sold
with the apparatus.When a cart is used, use
caution when moving the cart/apparatus
combination to avoid injury from tip-over.
15. Battery usage CAUTION – To prevent battery leakage
which may result in bodily injury or damage to the unit:
●
Install all batteries correctly, + and - as marked on the unit.
●
Do not mix batteries (old and new or carbon and
alkaline, etc.).
●
Remove batteries when the unit is not used for a long time.
10. Protect the power cord from being walked on or
pinched, particularly at plugs, convenience receptacles, and
the point where they exit from the apparatus.
4
EL 6475-E002: 01/3
Introduction
DVD/CD Operation
Package contents ....................................................... 6
DVD discs ................................................................... 6
Player Zones ............................................................... 6
General Information ................................................. 6
Environmental Information ...................................... 6
Installation ................................................................... 6
Cleaning Discs ............................................................ 6
Loading Discs .......................................................... 18
When the DVD is playing ..................................... 18
Active Navigation Menu (DVD) ................... 18–19
Playing a music CD ................................................. 19
When the music CD is playing ............................ 19
Active Navigation Menu (music CD) ................. 20
On screen messages .............................................. 21
Disc Setup Menu
Language ............................................................... 22
Subtitle .................................................................. 22
TV Aspect .............................................................. 23
Audio Set ....................................................... 23–24
Digital Out ........................................................... 25
Parental Control ................................................. 25
Panel Keys Lock .................................................. 26
On Screen ............................................................ 26
Program music CD ................................................ 27
Index (DVD) ............................................................ 27
Functional Overview
Front Panel .................................................................. 7
Remote Control ........................................................ 8
Connections
Rear Panel ............................................................ 9–10
Analog Audio Connections .................................. 10
Video Connections ................................................ 11
Digital/Optical Audio Connections .................... 11
System Setup
Setting up the Digital Cinema system ................ 12
Speakers Placement ............................................... 12
Speakers Setup ................................................. 12–13
Subwoofer Setup .................................................... 13
English
Contents
Specifications ............................................ 28
Basic Functions
Selecting the source ............................................... 14
Adjusting the master volume ............................... 14
Adjusting the tone .................................................. 14
Muting the sound .................................................... 14
Dimming the display screen ................................. 14
Selecting output modes - surround
sound & sound effects .................................... 14–15
Tuner
Manual tuning .......................................................... 16
Automatic tuning .................................................... 16
Tuning to a weak FM station ................................ 16
Preset Radio Stations............................................. 16
Clock/Timer
Setting the Clock .................................................... 17
Setting the On/Off Timer...................................... 17
Activating/Deactivating On/Off Timer ............... 17
Setting the Sleep Timer ......................................... 17
C ONTENTS
5
Introduction
English
Package contents
Player Zones
This DVD/CD player-AV Surround Receiver is
supplied with the following items :
– a remote control with two AAA batteries
– an AM loop antenna and an FM wire antenna
– an audio and video cable for connection with
your TV
– five speakers and including five speaker cables
– an active subwoofer, including a connection cable
and a power cable
– this instruction booklet
There are six world zones for the distribution of DVD
Discs. The zone your player is intended for is indicated on
the “Zone Label”. This should be the same as the label on
discs available in your region. If you have any difficulty
playing a disc, make sure the disc is the same zone as your
player.
If any item is damaged or missing, contact your retailer or
Philips.
DVD discs
Your Philips DVD Receiver player will play digital video discs
conforming to the universal DVD Video standard. In
addition to DVD Video discs, you will be able to play audio
CDs.
1
2
3
4
5
6
Region 1
Region 2
Region 3
Region 4
Region 5
Region 6
General Information
Anti-copy disc protection
Some DVD discs have anti-copying devices. When playing
these discs through a television will give the highest quality
picture. However, you will not be able to record the disc
through a VCR.
Closed Captions
This Receiver is compatible with USA closed caption TVs.
Environmental Information
DVD Video discs have “Titles” and “Chapters”. There can
be several Titles on one disc and each Title can contain
several Chapters. Titles and Chapters are numbered (e.g.
Title 1, Title 2, etc., and Chapter 1, 2, 3, etc.).
All unnecessary packaging has been omitted. We have tried
to make the packaging easy to separate into three materials:
cardboard (box), polystyrene foam (buffer) and
polyethylene (bags, protective foam sheet).
Usually one Title will show the disc publisher and studio
logos. Under another Title is the featue film itself. Other
Titles can contain trailers for other films also available, or
introduction notes from the film, or alternative endings for
the film. There are many possibilities with Digital Versatile
Discs.
Your system consists of materials which can be recycled
and reused if disassembled by a specialized company. Please
observe the local regulations regarding the disposal of
packaging materials, exhausted batteries and old equipment.
Chapters within the main Title allow you to search quickly
for a specific point on the disc. Many discs have a “Chapter
Menu”, sometimes called “Scene Index” or “Scene Menu”,
that displays the first shot from each Chapter and allows
you to select a shot and play the disc from that point
forward. DVD discs can be PAL or NTSC. This player can
play both types (as long as the zone is correct formatted).
DVD discs allow up to 8 languages and 32 subtitles on a
single disc. You can select and change the language and
subtitle to suit yourself. You can play the whole disc or just
part of it and view it from different angles. However,
availability of these features varies among discs. Check the
disc menu or outer case to see if such features (for
example, subtitles, angles) are available on the disc.
6
I NTRODUCTION
Installation
● Place the player on a flat, hard and stable surface.
● There must be sufficient room in front of the player for the
drawer to open.
● In a cabinet, allow about 10cm (4 inch) of free space all
around the player for adequate ventilation.
● Do not expose your player to extreme temperatures or
humidity.
Cleaning Discs
● When a disc becomes dirty, clean it with a cleaning cloth.
Wipe the disc from the center out, in a straight line.
● Do not use solvents such as benzene, thinner, commercially
available cleaners, or anti-static spray intended for analog
discs.
Functional Overview
1
2 34
5
7 8 9 0!
6
English
Front Panel
@
DVD /CD PLAYER- DIGITAL AV SURROUND RECEIVER
PRESETS
FREQUENCY▲
SURR. MODE FREQUENCY
VOLUME
SOURCE SELECT
DIGITAL CINEMA CENTER
CDR
▲
POWER /STANDBY
TV
DVD
VCR
OPEN / CLOSE
*
TUNER
PREV
&
NEXT
^
PLAY
1 POWER / STANDBY y
# STOP Ç (DVD/CD mode only)
–
$ PAUSE Å (DVD/CD mode only)
–
–
to freeze the picture and sound.
3 SURR. MODE
% PLAY £ (DVD/CD mode only)
–
–
to select various surround modes or soundfield
modes.
4 PRESETS (Tuner mode only)
–
to select preset function.
5 FREQUENCY 4 3 (Tuner mode only)
–
to tune the radio frequency down or up.
6 Display screen
–
#
to stop playing the disc.
2 Standby LED indicator
to indicate Standby mode.
STOP
%$
–
to switch between Power On and Standby modes.
PAUSE
to play the disc.
^ PREV S / NEXT T (DVD/CD mode only)
–
to skip to the previous or next chapter/track.
& OPEN/CLOSE 0 (DVD/CD mode only)
–
to open or close the disc tray.
* Disc Tray
to display details for user’s information.
7 VCR
–
to select the VCR as the input source.
8 DVD
–
to select the DVD/CD mode.
9 CDR
–
to select the CDR as the input source.
0 TV
–
to select the TV as the input source.
! TUNER
–
to select the Tuner mode. It can also switch between
AM and FM band.
@ VOLUME
–
to adjust the master volume. Turn clockwise to
increase and counter-clockwise to decrease.
F UNCTIONAL O VERVIEW
7
7 SYSTEM MENU
English
Remote Control
–
–
§
∞
1
2
3
4
5
6
7
8
9
0
!
9
@
#
DISPLAY
OPEN/CLOSE
≤
VCR
1
2
3
TV
4
5
6
7
8
CDR
TITLE
9
SLEEP
0
TUNER
SYSTEM
DISC
MENU
MENU
EXIT
DVD
TONE
MODE
VOL
FM MODE
8
MUTE
RDS
RDS
SEARCH
DISPLAY
£
™
¡
)
(
*
&
^
0
%
$
–
9
–
–
–
–
–
0
–
–
–
!
–
–
–
@
–
–
#
–
$
–
–
%
Notes for remote control:
– First, select the source you wish to control by
pressing one of the source select keys on the remote
control (DVD or TUNER, for example).
– Then select the desired function (É, Q , R
for example).
1 y
–
2
–
3
–
4
–
5
–
6
–
to switch between Power On and Standby modes.
VCR
to select VCR as the input source.
TV
to select TV as the input source.
CDR
to select CDR as the input source.
TUNER
to select Tuner mode. It can also switch between AM
and FM band.
DVD
to select the DVD/CD mode.
–
–
–
^
–
&
–
*
–
(
–
)
–
¡
–
™
–
£
–
≤
–
∞
–
§
–
8
F UNCTIONAL O VERVIEW
in DVD/CD mode, to enter the Disc Setup Menu or
Disc Contents Menu.
in all other modes, to enter System Setup : SPEAKER,
CLOCK or TIMER.
S / T (DVD/CD mode only)
to skip to the previous or next chapter/track.
à/á
in DVD/CD mode, to fast reverse or fast forward the
disc.
in Tuner mode, to tune down or up.
in Tone mode, to adjust the treble/bass tone level.
use during menu and setup navigation.
to select movement direction in Disc Setup /Disc
Contents /Active Navigation menus.
(/)
in DVD/CD mode, to slow reverse or slow forward
the disc.
in Tuner mode, to select a preset channel number.
to select movement direction in Disc Setup /Disc
Contents /Active Navigation menus.
£
in DVD/CD mode, to star t disc playback.
in Tuner mode, to enter preset programming mode or
to confirm a preset.
to enter or confirm menu and setup navigation.
Ç FM Mode
in DVD/CD mode, to stop disc playback.
in Tuner mode, to select Mono/Stereo.
Å
to freeze the picture and sound.
RDS SEARCH (RDS not available for all versions)
in DVD mode, to display the Index Menu.
in Tuner mode, to search RDS station.
RDS DISPLAY (RDS not available for all versions)
in DVD/CD mode, to set the limits for section repeat.
in CD mode, to display the CD Program Menu.
in Tuner mode, to display RDS information.
VOL +/to increase or decrease the volume.
TONE
to select Bass/Treble adjustment mode.
MODE
to select various surround modes or soundfield
modes.
DISC MENU (DVD/CD mode only)
to enter or exit Active Navigation Menu.
EXIT
to leave the Disc Setup Menu or System Setup.
TITLE (DVD mode only)
to display the Title Menu if present on the disc.
SLEEP
to set the sleep (auto-off) timer function.
Numeric Keys (0-9)
for direct access of preset channels or for use in Disc
Player menus.
MUTE
to mute or unmute the sound.
OPEN/CLOSE (DVD/CD mode only)
to open or close the disc tray.
DISPLAY
to dim the display screen.
Connections
1
0
9
8
2
7
3
4
5
6
IMPORTANT!
– Before connecting the AC power cord to the wall
outlet, ensure that all other connections have been
made.
– Never make or change any connections with the
power switched on.
– The type plate is located at the rear of the system.
2 AUDIO IN
1 ANTENNA
3 VIDEO IN
FM Antenna
For FM reception, connect the FM antenna to the FM
jack. Move the antenna in various directions until the
clearest signal is received.
For connecting to the corresponding VIDEO OUT
jack on a VCR, TV or CDR.
AM Loop Antenna
For AM reception, connect the AM loop antenna to
the AM jack. Position the loop antenna to receive the
clearest sound.
Digital Coaxial Output RCA Jack
For connecting to external equipment that has a
digital coaxial in jack.
1
English
Rear Panel
For connecting analog (Left/Right) audio signals from
external sources to the unit.
VCR – connect to Video Cassette Recorder AUDIO OUT
jack
TV – connect to Television AUDIO OUT jack
CDR – connect to CD Recorder AUDIO OUT jack
4 DIGITAL OUT (in DVD/CD mode only)
Digital Optical Output Socket
For connecting to external equipment that has a
digital optical in jack.
5 S-VIDEO OUT
2
● Fully insert the stripped portion of the antenna into the
jacks as shown.
Note:
– Position the antenna as far as possible from a TV,VCR or
other radiation source.
For connecting to the S-VIDEO IN jack on the TV
using an optional S-Video cable.
6 VIDEO OUT
For connecting to external equipment with video in
jacks for viewing or recording.
REC – connect to VCR or other recording device
MON– connect to TV or Monitor
C ONNECTIONS
9
English
7 AUDIO OUT
0 SUBWOOFER OUT
For connecting analog (Left/Right) signals to external
recording devices such as VCR or Tape Recorder for
recording.
Connect this jack to the AUDIO INPUT jack of the
powered subwoofer.
8 FRONT SPEAKERS
Connect the left front speaker to the “L” jacks, the
right front speaker to the “R” jacks and center speaker
to the “C” jacks. Connect the colored (marked) wire
to "+" and the black (unmarked) wire to "-".
12 mm
a
b
c
9 SURROUND SPEAKERS
Connect the left surround speaker to “SL” jacks and
the right surround speaker to “SR” jacks. Connect the
colored (marked) wire to "+" and the black
(unmarked) wire to "-".
Analog Audio Connections
10
C ONNECTIONS
After completing all the connections, connect the AC
power cord of the player and subwoofer to the wall
outlet. To switch on the subwoofer, rotate the
VOLUME knob at the front panel of subwoofer
clockwise until you hear a click.
Notes:
– To prevent damage to circuits, never short-circuit the
positive and negative speaker output jacks.
– Do not connect more than one speaker to any one pair of
+/- speaker jacks.
– Do not connect speakers with an impedance lower than
the speakers supplied. Please refer to the SPECIFICATIONS
section of this manual.
English
Video Connections
Digital/Optical Audio
Connections
Recording from the digital output
The digital output can be used to record digitally a
multichannel surround sound audio signal (Dolby Digital
or DTS) to a CD-R. To convert the digital multichannel
signal into a stereo signal, following settings have to be
activated in the Disc Setup Menu :
– In “Audio Set”, set to 2 audio channel (see page 24)
– In “Digital Out”, set to PCM (see page 25)
Note:
– Digital recording is not possible when the digital source
material is copy-protected.
C ONNECTIONS
11
System Setup
Positioning the center speaker
English
Setting up the Digital
Cinema system
The center speaker should be placed in the center between
both front speakers and should always be placed in line
with the television (e.g. underneath or on top of the TV).
The best height for the center speaker is the height of the
listener’s ears (while seated).
You must connect all the speakers and set up the system
properly in order to enjoy the Digital Cinema experience
at home. You will have the feeling of being in the middle of
the action, because sound is coming from everywhere
around you. The subwoofer can enhance the bass
performance of your system dramatically. Look for discs
with the
marks which indicates the material is
encoded for surround sound.
Positioning the surround speakers
The surround speakers should face each other and be
placed at normal listening ear level or mounted on the wall
at the back of the room.
The availability of the various surround sound modes
depends on the number of speakers used and the incoming
sound information available on the disc.
Positioning the Subwoofer
Place the subwoofer on a solid floor where resonance is
unlikely to occur. The subwoofer can be positioned
anywhere in the room because it is not possible to locate
the source of deep tones. Nevertheless, you should not
place it in the center of a room, the bass could be
extremely weakened. Do not place an object on the
subwoofer.
Speakers Placement
General hints for positioning
● Avoid positioning the speakers in a corner or on the floor
as this will boost the bass tones too much. Placing the
speakers behind curtains, furniture, etc., will reduce the
treble response.
● The speakers should be visible from the listening area.
● For the best surround effects, install all speakers. If a center
speaker or subwoofer is not connected, the sound from the
unused channel will be distributed to the connected
speakers in order to reproduce the best possible surround
sound.
● Each room has different acoustic characteristics and the
positioning possibilities often are limited. You can find the
best position for your speakers by experimenting or
referring to the picture below.
Note:
– To avoid magnetic interference with the picture on your TV,
do not position the front speakers too close to the TV.
Speakers Setup
Before operating your system in TV, VCR or CDR mode,
you will need to set up the speaker configuration and the
distance from the listening position to each speaker. For
speaker setup in DVD mode, refer to “DVD/CD operation
- Audio Set”.
Note:
– It is only necessary to set the parameters once unless you
change the speaker configuration.
Setting the speaker size
1 Press SYSTEM MENU to enter System Setup mode.
2 Press £ to select Speaker Setup.
Positioning the front speakers
The front speakers should be placed to the right and left at
an angle of approximately 45 degrees from the listening
position.
3 Press £ to select Speaker Size Setup mode.
4 Use ( / ) to select a different speaker :
5
6
12
S YSTEM S ETUP
“LR“ – front left/right, “LRG“– large, “SML“– small,
“CEN“ – center, “SUR“ – surround or “SUB“ – subwoofer.
Use à / á to adjust the setting.
Press £ to save these settings or press EXIT to leave
setup mode.
1 Press SYSTEM MENU to enter System Setup mode.
2 Press £ to select Speaker Setup.
3 Press ( / ) until Speaker Distance Setup is selected.
Subwoofer Setup
English
Setting the speaker distance
Before you operate the subwoofer, complete the
subwoofer connections. Switch on your player and select
the sound source.
Switch on/off the subwoofer
4 Press £ to enter Speaker Distance Setup mode.
5 Use ( / ) to select a different speaker.
6 Use à / á to adjust the distance to match as close as
7
possible to the actual distance.
Press £ to save these settings or press EXIT to leave
setup mode.
● Rotate the VOLUME knob at the front panel of
subwoofer until you hear a click, clockwise to switch
on and counterclockwise to switch off.
➜ The LED indicator will light up in green when the
subwoofer is switched on.
Volume Adjustment
You can adjust the subwoofer to suit the sound level of
your front speakers. Reinforcing the bass sound gives you a
greater sense of atmosphere.
1 Adjust the VOLUME on the player until the sound from
Setting each speaker’s relative volume
balance
IMPORTANT!
Please sit at your usual listening position to correctly
set up the speaker balance to match each other.
1 Press SYSTEM MENU to enter System Setup mode.
2 Press £ to select Speaker Setup.
3 Use ( / ) until Speaker Level Setup is selected.
4 Press £ to enter Speaker Level Setup mode.
5 Use ( / ) to select a different speaker channel :
6
7
“Lch, Cch, Rch, LSUR, RSUR, SUB”.
Use à / á to adjust the level of a particular speaker until
it matches the other speakers.
Press £ to save these settings or press EXIT to leave
setup mode.
the front speakers is not distorted. If it is distorted, the
sound from the subwoofer also will be distorted.
2 Play your favorite songs.
● Male vocal tunes containing bass sounds are the most
suitable samples for adjusting the subwoofer volume.
3 Adjust the VOLUME on the subwoofer to determine the
loudness of the bass sound from the subwoofer.
Phase Selector
Use PHASE SELECTOR located at the rear of the
subwoofer to select the phase polarity. Selecting the
polarity at either 0˚ or 180˚ may determine better bass
reproduction effect in certain listening environments
(depending on the type of front speakers and the position
of the subwoofer). It also may change the expanse and
tightness of the sound, and affect the feeling of the sound
field. Select the setting that provides the sound you prefer
when you are in your normal listening position.
Repeat the adjustment for Volume and Phase Polarity to
suit your preference. After you have adjusted the
subwoofer to the settings you desire, use the VOLUME
control on the player to adjust the volume of the
subwoofer and the other speakers. You will not need to
adjust the subwoofer settings again, even when you change
the volume level of the player.
S YSTEM S ETUP
13
Basic Functions
English
Selecting the source
● Press one of the SOURCE SELECT buttons (VCR, TV,
CDR, TUNER or DVD) to select the input source.
➜ The selected source will be displayed.
Adjusting the master volume
The master volume adjusts all speaker channels at the same
time.
● Rotate the VOLUME knob on the front panel (or press
VOL +/- on the remote control).
Selecting output modes surround sound & sound effects
The number of output modes varies according to the
system setup and the input source. A list of all output
modes is shown below.
IMPORTANT!
For proper surround sound, make sure you have
followed the Connections and System Setup
procedure fully.
● Press SURR. MODE (or MODE on the remote control)
to select the available output modes.
Dolby Digital Surround
Adjusting the tone
The tone controls only affect the front left and right
speakers.
1 Press TONE once to select Bass adjustment.
2 Press TONE again to select Treble adjustment.
The Dolby Digital Surround system requires connection of
all five speakers (front left, center, front right, surround right,
surround left) for correct surround sound reproduction.
This 5.1 channel digital surround format allows for five
individual full-range (20Hz - 20kHz) channels plus an LFE
(Low Frequency Effects) channel for the low-range
(20Hz - 120kHz) effects. It creates a realistic sound similar
to theater and cinema. A large number of DVD discs have
recorded in Dolby Digital Surround.
Dolby Pro Logic Surround
● While in Bass or Treble adjustment mode, press à / á to
adjust the selected Bass or Treble level.
3 Press TONE for the third time to exit.
Note:
– If no button is pressed within a few seconds, the player will
exit the tone mode automatically.
The Dolby Pro Logic Surround system is a specially
encoded two channels analog format that will produce
sound through four speaker channels (front left, center,
front right, monaural surround) when a Dolby Pro Logic
Decoder is used. It is also compatible with stereo systems
but the user will only have two channels (Front Left &
Right) of sound.
Muting the Sound
1 Press MUTE to mute the speaker output, the “MUTE”
icon will appear on the display.
Dolby 3 Stereo
Dolby 3 Stereo produces sound through three speaker
channels (front left, center, front right) from a two channels
analog signal. It is not a surround format, so it does not
require surround speakers.
2 To restore the volume, press MUTE again.
Dimming the display screen
1 Press DISPLAY will dim the display by a third.
2 Press DISPLAY again will dim the display by another third.
3 Press DISPLAY the third time will return the display to
the original brightness.
14
B ASIC F UNCTIONS
Stereo
All sound is reproduced and played through the front left
and right speakers. This enables standard stereo
reproduction.
English
Soundfield Effects
The digital Soundfield Effects can recreate the effects of
sounds reflected from walls or ceilings to obtain the sound
presence of real environments.
STADIUM
This mode recreates a large stadium effect using very long
reverberation times.
STAGE
This effect recreates a stage environment, emphasizing
sound from the front speakers.
HALL
The surround effect recreates a hall using lots of reflections.
Suitable for orchestral music such as classical and opera.
DISCO
This surround effect generates a feeling of being in a disco
or club. It is suitable for all types of music that are played in
discos.
LIVE
This soundfield effect is suitable for all types of music.
B ASIC F UNCTIONS
15
Tuner
English
Manual tuning
Preset Radio Stations
When a preset station is selected, the preset number will
appear shortly and the display will show the waveband and
frequency.
1 Press TUNER to select tuner mode.
Storing Preset Radio Stations
➜ After two seconds, the display will show the current
waveband and frequency.
You can store up to 20 stations in the FM waveband and 20
stations in the AM waveband in the memory.
1 In tuner mode, press TUNER to switch between FM and
AM waveband.
2 To switch between FM and AM waveband, press TUNER
2 Press FREQUENCY 4 or 3 to tune in the desired
again.
3 Press FREQUENCY 4 or 3 (or à / á on the remote
3
station.
Press and hold PRESETS until the “PRESET” icon flashes.
control) repeatedly to change the frequency. The frequency
changes in 100kHz steps in FM and 10kHz steps in AM
waveband.
Automatic tuning
1 Press TUNER to select tuner mode.
2 To switch between FM and AM waveband, press TUNER
4 Press ( / ) (or numeric keys 0-9 on the remote control)
5
to select the desired preset channel number to store.
Press PRESETS again to store the radio station.
again.
3 Press and hold FREQUENCY 4 or 3 for more than one
second to activate auto tuning mode.
➜ When a station is reached, auto tuning stops.
● Repeat steps 2–3 to search for other radio stations.
● Repeat steps 2–5 to store other preset radio stations.
Selecting Preset Radio Stations
1 In tuner mode, press TUNER to switch between FM and
Tuning to a weak FM station
1 Press FREQUENCY 4 or 3 repeatedly to tune in the
weak FM station manually.
2 Press FM MODE (Ç) to switch to monaural mode. This
should reduce the noise and make the station easier to
hear.
16
T UNER
AM waveband.
2 Press PRESETS, then FREQUENCY 4 or 3 (or ( / )
on the remote control) to select the desired preset station.
● You can also use the remote control’s numeric keys.
Clock/Timer
English
IMPORTANT!
When in DVD/CD mode, it is not possible to operate
clock or timer function.
Setting the Clock
1 Press SYSTEM MENU to enter System Setup mode.
2 Press ( / ) to select the Clock Setup mode and press
£ to confirm.
7 Press £ to confirm and return to the last selected source.
● Repeat steps 1-5 again to set the Off Time.
Note:
– When the “on time” is reached, the player will switch on to
the last selected source.
3 Press à / á to change between 12 and 24 hour mode.
Activating/Deactivating
On/Off Timer
4 Press £ to enter clock adjustment mode.
➜ The clock digits for the hours flash.
1 Press SYSTEM MENU to enter System Setup mode.
2 Press ( / ) to select the Timer Setup mode and press
£ to confirm.
3 Press £ twice and press à / á to select
5 Press à / á to set the hour.
6 Press ( / ) to change the minute field.
➜ The clock digits for the minutes flash.
7 Press à / á to set the minute.
8 Press £ to confirm the setting and return to normal
mode.
4
“SET ON” or “SET OFF” mode.
Press £ to confirm the setting and return to the last
selected source.
Setting the Sleep Timer
This feature allows you to select a preset amount of time
after which the player will switch to standby mode
automatically.
● Press SLEEP repeatedly to select a preset amount of time.
➜ The selections are as follows (time in minutes):
90 ™ 60 ™ 30 ™ 15 ™ OFF ™ 90 …
Setting the On/Off Timer
1 Press SYSTEM MENU to enter System Setup mode.
2 Press ( / ) to select the Timer Setup mode and press
£ to confirm.
➜ When the Sleep Timer is activated, the “SLEEP” icon will
appear on the display.
Checking the remaining Sleep Time
3 Press ( / ) to select set on timer or set off timer :
“ON TIME” or “OFF TIME”.
When the Sleep Timer is switched on, you can check the
remaining time before the player switches to standby
mode.
● Press SLEEP once.
➜ The remaining time will be displayed.
Cancelling the Sleep Timer
To switch off the Sleep Timer after it has been activated.
4 Press £ to enter set time mode.
5 Set time (refer to point 5-7 of “Setting the Clock”) and
● Press SLEEP repeatedly until “OFF” is displayed.
press £ to confirm the setting.
6 Press à / á to select activating or deactivating the timer :
“SET ON” or “SET OFF”.
C LOCK /T IMER
17
DVD/CD Operation
English
Stop/Resume Stop
Loading Discs
1 Press OPEN/CLOSE 0 to open the disc tray.
2 Load your chosen disc in the tray, label side up.
3 Press OPEN/CLOSE 0 again to close the tray.
➜ There will be a short delay while the player identifies the
disc and reads the menu from the disc.
● Some discs will start playing automatically, others will display
the Disc Contents Menu. If the menu is presented,
use à / á or ( / ) to select a play option, then press
£ to confirm the selection.
1 While playing a disc, press Ç once will go into “Resume
2
Stop” mode. The disc can resume playback from the point
at which it stopped when you press £ .
➜ In resume stop mode, you can display the Setup Menu.
While resume stop mode, pressÇ again to enter stop
mode. The disc will start playback from the beginning when
you press £ .
Active Navigation Menu (DVD)
A number of operations can be done with the Active
Navigation Menu without interrupting disc playback.
When the DVD is playing
Skip
● Press S or T to skip backward or forward by a
Chapter. Each press will take the disc to the beginning of
the previous or next chapter.
Fast Search
1 Press à or á to reverse or fast forward. There are four
2
speeds; each press will increase the speed.
➜ The sound will be muted.
61 = 62 = 63 = 64 = 61 ...
OR 51 = 52 = 53 = 54 = 51 ...
To resume normal play, press £ .
1 Press DISC MENU.
➜ The Active Navigation Menu will be displayed across the
top of the TV screen.
2 Press ( or ) to move through the Active Navigation Menu.
● Press T to go directly to the second part of the Active
Navigation Menu.
3 Press DISC MENU or EXIT to exit.
Title
Slow Motion
1 Press ( or ) to play slow motion picture backward or
2
forward. There are four speeds; each press will reduce the
speed.
➜ The sound will be muted.
⁄1 = ⁄2 = ⁄3 = ⁄4 = ⁄1 ...
OR !1 = !2 = !3 = !4 = !1 ...
To resume normal play, press £ .
Disc Contents Menu
● Press à or á to select a title from a multititle DVD disc and press £ to confirm the
selection.
➜ The selected title will be displayed.
Chapter
● Press à or á to select a chapter from a
multi-chapter DVD disc and press £ to
confirm the selection.
➜ The selected chapter will be displayed.
1 While playing a disc, press SYSTEM MENU.
2
Time Search
➜ The “Disc Contents Menu” will be displayed.
Press à / á or ( / ) to select a desired feature and
press £ to confirm the selection.
This function enables you to select and play the
disc from any point.
1 Select TIME SEARCH in the Active Navigation Menu.
Pause
1 Press Å to temporarily stop playing the disc.
➜ The picture freezes and the sound will be muted.
● Press Åagain will show the next frame of picture.
2 To resume normal play, press £ .
18
DVD/CD O PERATION
2
➜ The figure appears on the screen is the elapsed time for
the current playing title.
Use the numeric keys to enter the time, then press
£ to confirm.
➜ The disc will play from the time you selected.
➜ The associated chapter and elapsed playing time will be
displayed.
Language/Sound
● Press à or á to cycle through the sound tracks available
on the disc, then press £ to confirm.
Playing a music CD
English
There could be alternative language
tracks or 2 channel and 5.1 channel
audio available on a disc. All discs are different in this
respect.
1 Load a music CD in the disc tray.
2 Press £ to start playback.
● You can use the numeric keys on the remote control to
directly select a desired track, then press £ to confirm.
When the music CD is playing
Subtitle
● Press à or á to select the available subtitle
languages or to turn off the subtitle, then press
£ to confirm.
Angle
If the disc contains sequences recorded from
different camera angles, this allows you to view
the picture from different angles.
● Press à or á to select an angle.
➜ After a while, playback changes to the selected angle.
OSD (on screen display)
If the OSD is switched on, it will serve as an
additional display for messages on the top
corner of the screen, e.g. STOP, PLAY, which will appear
momentarily when you press a remote control button.
● Press £ repeatedly to set On Screen Display to “ON” or
“OFF”.
Skip
● Press S or T to skip backward or forward. Each
press will take the disc to the beginning of the previous or
next track.
● If the RANDOM mode is switched on, skip will jump a
RANDOM number of tracks.
Fast Search
1 Press à or á to reverse or fast forward the disc. There
2
are three speeds; each press will increase the speed until
the maximum speed is reached.
Press £ to revert to normal speed playback.
Pause
1 Press Å to temporarily stop playing the disc.
➜ The sound will be muted.
2 To resume normal play, pressÅ again or £ .
Repeat A-B
Repeat A-B allows a passage to play repeatedly.
1 Press £ at the start of the desired passage.
2 Press £ again at the end of the passage.
3
➜ The passage will now repeat continuously.
To resume normal play, press £ again.
● You can also press RDS DISPLAY on the remote
control to direct access to Repeat A-B mode.
Zoom
The zoom function allows you to enlarge or
reduce the video image.
● Press £ repeatedly to select the zoom factor : 1.0x, 2.0x
and 0.5x.
➜ The picture will change accordingly.
DVD/CD O PERATION
19
English
Active Navigation Menu
(music CD)
A number of operations can be done with the Active
Navigation Menu without interrupting disc playback.
Random
All the tracks will play in random order.
● Press £ repeatedly to select random “ON” or
“OFF”.
OSD (on screen display)
1 Press DISC MENU.
2
3
➜ The Active Navigation Menu will be displayed across the
top of the TV screen.
Press ( or ) to move through the Active Navigation Menu.
Press DISC MENU or EXIT to exit.
Track
● Press à or á to select a track and press
£ to confirm the selection.
➜ The track number and elapsed playing time of the
current track will appear on the display.
Time Search
This function enables you to select and play the
disc from any point.
● Use the numeric keys on the remote control to enter
the time, then press £ to confirm.
➜ The disc will play from the time you entered.
Repeat A-B
Repeat A-B allows a passage to play repeatedly.
1 Press £ at the start of the required passage.
2 Press £ again at the end of the passage.
➜ The passage will now repeat continuously.
3 To resume normal play, press £ again.
Repeat
This function is to repeat playback a track or
the whole disc.
● Press £ repeatedly to select “1” or “ALL”.
➜ If “1” is selected, the current track will play repeatedly.
➜ If “ALL” is selected, the whole disc will play repeatedly.
20
DVD/CD O PERATION
If the OSD is switched on, it will serve as an
additional display for messages on the top
corner of the screen, e.g. STOP, PLAY, which will appear
momentarily when you press a remote control button.
● Press £ repeatedly to select On Screen Display “ON” or
“OFF”.
During play, various messages will be shown on the screen
for a few seconds to confirm that a function has been
selected. You can switch on or off these messages in the
“On Screen” setup mode of the System Setup menu.
The possible messages may appear are listed below :
PLEASE WAIT .................... The system is initializing.
READING ............................ Reading the disc.
OPEN ( é ) ...................... The tray is about to open.
CLOSE ( ) ...................... The tray is about to close.
DVD ................................. DVD disc is loaded.
MUSIC CD ..................... Music CD is loaded.
NO VALID DISC .............. Wrong disc format or damaged
disc cannot play; disc is loaded
upside down or no disc is in the
disc tray.
INVALID REGION DISC…The disc cannot play because
the regional code is different than
the player.
PARENTAL LEVEL TOO LOW TO PLAY
.................................................... The parental control has been set
and the disc cannot play.
PLAY (É ) ............................ Start playback.
PAUSE (Å ) ........................ Pause the disc.
STEP FWD (
) ........... One frame forward in pause
mode.
STEP BWD (
) .......... One frame backward in pause
mode.
CONTINUE (É ) ........... Continue playing after pause.
RESUME STOP (
)…Stop the disc but allow the disc
to be resumed from the same
place later.
RESUME (
) ........... Playback is resumed.
STOP (Ç) ........................... The disc is completely stopped.
( ) ........................................ This function is not available.
NEXT CHAPTER (
)…Playback from beginning of next
chapter.
PREV CHAPTER (
) …Playback from beginning of
previous chapter.
FAST FWD (
) .......... Fast forward speed 1 (for DVD up
to speed 4, for CD up to speed 3).
FAST BWD (
) ......... Fast backward speed 1 (for DVD
up to speed 4, for CD up to speed
3).
) ...... Slow forward speed 1 (for DVD
up to speed 4).
SLOW BWD (
) .... Slow backward speed 1 (for DVD
up to speed 4).
MUTE ( ) ........................ The sound is muted.
UNMUTE ( ) ................. Sound mute is cancelled.
SKIPPING BAD DISC AREA …There is a damaged
section of the disc that the player
can skip over.
TRACK: 1 ............................. Track selection with a number key
(Music CD).
SKIP NEXT (
) ......... Skip to the start of the next track
(Music CD).
SKIP PREV (
) ........... Skip to the start of the previous
track (Music CD).
STAND BY .......................... Entering standby mode.
POWER ON ...................... Switched on from stand by.
BUTTON: 2 ......................... Indicates a menu selection using
the number keys.
SLOW FWD (
DVD/CD O PERATION
21
English
On-screen messages
English
Disc Setup Menu
The selections from the Disc Setup Menu are the preferred
options that will be chosen if they are available on a disc. If
the disc inserted does not have the preferred option, then
the disc’s own preference will be used.
IMPORTANT!
To access the Disc Setup Menu, playback must be
stopped.
Language
2
3
➜ The Disc Setup Menu will be displayed across the top of
the TV screen.
Press à / á or ( / ) to move through the Disc Setup
Menu.
Press £ to confirm the selection.
Example showing how to change the audio language from ENGLISH to FRENCH
[ Language ]
[ Audio ]
[ Return ]
Subtitle
1 Press SYSTEM MENU.
X2
X4
[ Francais ]
X1
[ OFF ]
Example showing how to turn off the subtitle
[ Subtitle ]
X 1 [Return]
22
DVD/CD O PERATION
English
TV Aspect
[L-Box] means "Letter Box". The picture will be displayed as
with black bars at the top and
bottom of the screen. (For disc which support letter box feature)
[P-Scan] means "Pan and Scan". The picture fills the whole screen however some parts to left and right
may not be visible. The picture will automatically Pan and Scan to left and right to center the most
important part of the picture. Not all discs support Pan and Scan, so the Letter Box display may remain
even though [P-Scan] is selected.
Example shows setting of Letter Box display on a normal TV.
[ TV Aspect ]
X1
[ Return ]
X1
[ TV Aspect ]
[ L-Box ]
Audio Set Example shows setting of Dynamic Range Compression (DRC) to night time listening.
[ Audio Set ]
[ Exit ]
X3
X1
[ DRC ]
X4
DVD/CD O PERATION
23
English
Audio Set Example shows setting of 2 audio channel to 5.1 audio channel (only available on 5.1 Channel models).
➤
[ Audio Set ] ➤
or
or
24
or
➤
➤
or
➤ [ Exit ] ➤
or
➤
or
➤
Exit
➤
➤
DVD/CD O PERATION
or
Rear
➤ Speakers
➤
or
Center
➤
➤ Speaker
➤
➤
➤ Subwoofer ➤
➤
➤
English
Digital Out
Set up the Digital Audio output for a 5.1 Receiver/Decoder. This menu enables you to set the type
of 5.1 output according to your Decoder/Amplifier. The form of each type of Data (Dolby Digital, MPEG
or DTS) can be set as a Bitstream or PCM format to suit your Dolby & DTS decoders.
[ Digital out ]
The player is delivered without a password. When you set
the parental level for the first time, you are invited to enter
your own password (e.g. 1, 2, 3, 4). This becomes the
password for the player. You must know this password
in order to change it. Some films do not have
parental control, the disc will play regardless of
the player setting.
Parental Control
Some DVD discs have a parental level assigned to the disc.
The range of parental controls is from 1 to 8. The meaning
of the levels 1 to 8 varies depending upon the country and
the type of content on the disc.
The player can be set in a similar way. If the player’s
parental level is set to 8, it will play all discs. If the player’s
parental level is set below 8, only discs with a lower or
equal level will play. For example, if the player is set to 5,
only discs with parental control ratings of 5, 4, 3, 2 & 1 will
play. To play a higher rated disc, you must change the
player’s rating to a higher number.
Alternative scenes with a lower rating might be included.
The player plays the highest rated scene that the parental
setting allows. For example, consider a disc that generally is
suitable for most audiences, and it is rated as level 2 for the
most part. However, in the middle, there are also scenes
rated at 5 (not suitable for children).
Parental Control
[ Parental ]
[ Return ]
Parental Lock password erase
1 Press and hold FREQUENCY 3 on the front panel
2
while unplug and plug-in the power cord.
➜ “PAS ERASE” will be displayed.
Wait until “PASSWORD ERASE OK” appear on the TV
display, the player will then switch to standby mode 20
seconds later.
Example showing how to set parental level to 3.
or
[ Level ]
X4
<3>
[4 digits password ]
DVD/CD O PERATION
25
English
Panel Keys Lock
A second method of parental control is also available in the PANEL KEYS option.
Set panel keys to OFF and the player can only be operated by the remote control.
X 3 [ Panel keys ]
[ Parental ]
[ Off ]
[ Exit ]
On Screen
If the On Screen Display is on, various icons and messages will show on the screen for a few seconds
to confirm that a function has been selected.
Example showing how to turn off the On Screen Display.
[ On Screen ]
[ Off ]
X 1 [ Return ]
26
DVD/CD O PERATION
2 Press RDS DISPLAY.
To display the CD program menu, the player must be in
CD mode and playback must be stopped.
➜ CD Program Menu will appear.
3 Press à / á to select a desired track.
4 Press ) to store the track in the program.
1 Insert a music CD and close the disc tray.
➜ The player will go into CD mode when it identifies the
disc.
Program Music CD
RDS
● Repeat steps 3–4 to store other tracks.
5 Press £ to save the program.
Example showing how to program favorite tracks from a music CD.
or
➤
English
Program music CD
or
➤
➤
➤
DISPLAY
SAVE
Index (DVD)
3 Press à / á to display the information of the selected
To display the DVD Index Menu, DVD must be playing.
index marker.
1 While playing a disc, press RDS SEARCH.
2
4 Press £ to confirm the selection.
➜ The film will pause and the Index Menu will appear.
Press ( / ) to select the desired index marker.
Index DVD
Example showing how to set an Index marker.
RDS
X2
(INDEX)
SEARCH
➤
Example showing how to play from an indexed point.
RDS
(INDEX)
X2
➤
SEARCH
DVD/CD O PERATION
27
Specifications
English
AMPLIFIER SECTION
Power Output
- Output power, stereo mode FTC (40 Hz – 20 kHz) .............. 2 x 60 W
- Output power, surround mode (1 kHz) ................ 70 W RMS / channel
Total Harmonic Distortion .............................. 0.7% at rated power (1 kHz)
Frequency Response ..................................................... 20 Hz – 20 kHz / ±1 dB
Signal-to-Noise Ratio ....................................................................... > 65dB (CCIR)
Input Sensitivity ..................................................................................................... 460 mV
Tone Control .......................................................................................................... ±12 dB
TUNER SECTION
Tuning Range ....................................... FM 87.5 – 108 MHz (100 kHz steps)
......................................................................... AM 530 – 1720 kHz (10 kHz steps)
26 dB Quieting Sensitivity .......................................................................... FM 20 dB
26 dB Quieting Sensitivity ............................................................... AM 3162uV/m
Image Rejection Ratio ................................................................................... FM 25 dB
.................................................................................................................................. AM 28 dB
IF Rejection Ratio ............................................................................................ FM 60 dB
.................................................................................................................................. AM 38 dB
Signal-to-Noise Ratio .................................................................................... FM 60 dB
.................................................................................................................................. AM 40 dB
Selectivity ............................................................................................................. FM 20 dB
AM Suppression Ratio ................................................................................. FM 30 dB
Harmonic Distortion ............................................................................ FM Mono 3%
.................................................................................................................................. Stereo 3%
........................................................................................................................................ AM 5%
Frequency Response ................................................... FM 63Hz-10kHz / ±6 dB
Stereo Separation ......................................................................... FM 26 dB (1 kHz)
Stereo threshold .............................................................................................. FM 28 dB
DVD SECTION
Laser Type ................................................................................................ Semiconductor
Disc Diameter .............................................................................................. 12cm / 8cm
Playing Time (12cm)
Single Layer ........................................................ 2.12h
Dual Layer .......................................................... 4.01h
Two Sides, Single Layer ............................... 4.26h
Two Sides, Dual Layer .................................. 8.02h
Video Decoding .................................................................................................. MPEG-2
Video DAC ................................................................................................................ 10 Bits
Signal System ............................................................................................... PAL / NTSC
Video Format ..................................................................................................... 4:3 / 16:9
Video S/N ........................................................................................... 56 dB (minimum)
Composite Video Output ........................................................ 1.0 Vp-p, 75 ohms
S-Video Output ..................................................................... Y - 1.0 Vp-p, 75 ohms
................................................................................................... C - 0.286 Vp-p, 75 ohms
Audio DAC ........................................................................................... 24 Bits / 96 kHz
Frequency Response ................................................. 4 Hz – 20 kHz (44.1 kHz)
................................................................................................... 4 Hz – 22 kHz (48 kHz)
................................................................................................... 4 Hz – 44 kHz (96 kHz)
Digital Output .................................................................. SPDIF Coaxial & Optical
MISCELLANEOUS
Power Supply Rating ............................................................................. 120 V / 60 Hz
Power Consumption (DFR1500, DFR1600) ......................................... 216 W
Dimensions (w x h x d) ................................ 435 mm x 140 mm x 430 mm
Weight ............................................................................................................................. 13 kg
IR REMOTE CONTROL
Effective Range ................................................................................................. > 8 Meter
Number of Keys .............................................................................................................. 39
Battery (1.5V) ..................................................................................................... AAA x 2
Specifications subject to change without prior notice
28
S PECIFICATIONS
SPEAKERS
Front Speakers
System ........................................................................................................ 2-way shielded
Impedance ........................................................................................................................ 8 Ω
Speaker drivers ........................................................................ 3” full range, 1” piezo
Dimensions (w x h x d) ..................................... 94 mm x 155 mm x 88 mm
Weight ......................................................................................................................... 0.45 kg
Center Speaker
System ........................................................................................................ 2-way shielded
Impedance ........................................................................................................................ 8 Ω
Speaker drivers ............................................................... 2 x 3” full range, 1” piezo
Dimensions (w x h x d) ..................................... 250 mm x 94 mm x 88 mm
Weight ......................................................................................................................... 0.92 kg
Surround Speakers
System .......................................................................................................... 2-way satelite
Impedance ........................................................................................................................ 8 Ω
Speaker drivers ........................................................................ 3” full range, 1” piezo
Dimensions (w x h x d) ..................................... 94 mm x 155 mm x 88 mm
Weight ......................................................................................................................... 0.45 kg
SUBWOOFER (MX-1015D)
Subwoofer (not magnetically shielded design) ............................................ 6.5”
Output power .................................................................................. 50 W (4 Ω, DIN)
THD .............................................................................................................. 10% at 55 Hz
Reproduction frequency response .......................................... 45 Hz – 150 Hz
Phase switch ............................................................................................................ 0 , 180
Input sensitivity (Subwoofer In) .......................................................... 460 mVrms
AC power ................................................................................................... 120 V / 60 Hz
Power Consumption ........................................... 38.5 W (at 1/8 Rated Power)
Dimensions (w x h x d) ................................ 200 mm x 310 mm x 370 mm
Weight ............................................................................................................................... 7 kg
O
O
SUBWOOFER (MX-1055D)
Subwoofer (not magnetically shielded design) .....................................................
.......................................................................................... 6.5” with wOOx technology
Output power ............................................................................... 100 W (4 Ω, DIN)
THD .............................................................................................................. 10% at 55 Hz
Reproduction frequency response .......................................... 30 Hz – 110 Hz
Phase switch ............................................................................................................ 0 , 180
Input sensitivity (Subwoofer In) .......................................................... 200 mVrms
AC power ................................................................................................... 120 V / 60 Hz
Power Consumption ............................................... 70 W (at 1/8 Rated Power)
Dimensions (w x h x d) ................................ 200 mm x 310 mm x 370 mm
Weight ......................................................................................................................... 8.24 kg
O
O
LIMITED WARRANTY
AUDIO SYSTEM
One Year Free Labor
One Year Free Service on Parts
This product must be carried in for repair.
WHO IS COVERED?
BEFORE REQUESTING SERVICE...
You must have proof of purchase to receive warranty service. A sales
receipt or other document showing that you purchased the product
is considered proof of purchase.
Please check your owner’s manual before requesting service.
Adjustments of the controls discussed there may save you a service
call.
WHAT IS COVERED?
TO GET WARRANTY SERVICE IN U.S.A.,
PUERTO RICO OR U.S. VIRGIN ISLANDS...
Warranty coverage begins the day you buy your product. For one year
thereafter, all parts will be repaired or replaced, and labor is free.
After one year from the day of purchase, you pay for the replacement
or repair of all parts, and for all labor charges.
All parts, including repaired and replaced parts, are covered only for
the original warranty period.When the warranty on the product
expires, the warranty on all replaced and repaired parts also expires.
WHAT IS EXCLUDED?
Your warranty does not cover:
• labor charges for installation or setup of the product, adjustment
of customer controls on the product, and installation or repair of
antenna systems outside of the product.
• product repair and/or part replacement because of misuse,
accident, unauthorized repair or other cause not within the
control of Philips Consumer Electronics Company.
• reception problems caused by signal conditions or cable or
antenna systems outside the unit.
• a product that requires modification or adaptation to enable it to
operate in any country other than the country for which it was
designed, manufactured, approved and/or authorized, or repair of
products damaged by these modifications.
• incidental or consequential damages resulting from the product.
(Some states do not allow the exclusion of incidental or
consequential damages, so the above exclusion may not apply to
you.This includes, but is not limited to, prerecorded material,
whether copyrighted or not copyrighted.)
• a product that is used for commercial or institutional purposes.
Take the product to a Philips factory service center (see enclosed
list) or authorized service center for repair.When the product has
been repaired, you must pick up the unit at the center. Centers may
keep defective parts.
(In U.S.A., Puerto Rico and U.S.Virgin Islands, all implied warranties,
including implied warranties of merchantability and fitness for a
particular purpose, are limited in duration to the duration of this
express warranty. But, because some states do not allow limitations
on how long an implied warranty may last, this limitation may not
apply to you.)
TO GET WARRANTY SERVICE IN CANADA...
Please contact Philips at:
1-800-661-6162 (French Speaking)
1-800-363 7278 (English Speaking)
(In Canada, this warranty is given in lieu of all other warranties. No
other warranties are expressed or implied, including any implied
warranties of merchantability or fitness for a particular purpose.
Philips is not liable under any circumstances for any direct, indirect,
special, incidental or consequential damages, howsoever incurred,
even if notified of the possibility of such damages.)
REMEMBER...
Please record the model and serial numbers found on the product
below. Also, please fill out and mail your warranty registration card
promptly. It will be easier for us to notify you if necessary.
WHERE IS SERVICE AVAILABLE?
Warranty service is available in all countries where the product is
officially distributed by Philips Consumer Electronics Company. In
countries where Philips Consumer Electronics Company does not
distribute the product, the local Philips service organization will
attempt to provide service (although there may be a delay if the
appropriate spare parts and technical manual(s) are not readily
available).
MODEL #
________________________________________
SERIAL #
________________________________________
MAKE SURE YOU KEEP...
Please keep your sales receipt or other document showing proof of
purchase. Attach it to this owner’s manual and keep both nearby. Also
keep the original box and packing material in case you need to return
your product.
This warranty gives you specific legal rights. You may have other rights which vary from state/province to state/province.
Philips Service Solutions Group, P.O. Box 2976, Longview,Texas 75606, USA, (903) 242-4800
EL4965E006 / MAC 4110 / 12-98
29