1
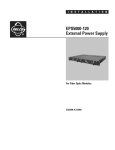
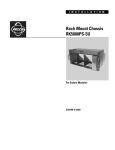
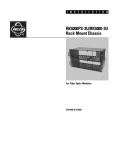
I N S T A L L A T I O N
EPS5000-300
External Redundant
Power Supply
For Endura Modules
C1631M-B (9/06)
Contents
Regulatory Notices . . . . . . . . . . . . . . . . . . . . . . . . . . . . . . . . . . . . . . . . . . . . . . . . . . . . . . . . . . . . . . . . . . . . . . . . . . . . . . . . . . . . . . . . . . . . . . . . . . . . 5
Before You Begin . . . . . . . . . . . . . . . . . . . . . . . . . . . . . . . . . . . . . . . . . . . . . . . . . . . . . . . . . . . . . . . . . . . . . . . . . . . . . . . . . . . . . . . . . . . . . . . . . . . . . 6
Parts List . . . . . . . . . . . . . . . . . . . . . . . . . . . . . . . . . . . . . . . . . . . . . . . . . . . . . . . . . . . . . . . . . . . . . . . . . . . . . . . . . . . . . . . . . . . . . . . . . . . . . . . 6
Package Contents . . . . . . . . . . . . . . . . . . . . . . . . . . . . . . . . . . . . . . . . . . . . . . . . . . . . . . . . . . . . . . . . . . . . . . . . . . . . . . . . . . . . . . . . . . . . . . . . 6
Description . . . . . . . . . . . . . . . . . . . . . . . . . . . . . . . . . . . . . . . . . . . . . . . . . . . . . . . . . . . . . . . . . . . . . . . . . . . . . . . . . . . . . . . . . . . . . . . . . . . . . . . . . . 8
Front View . . . . . . . . . . . . . . . . . . . . . . . . . . . . . . . . . . . . . . . . . . . . . . . . . . . . . . . . . . . . . . . . . . . . . . . . . . . . . . . . . . . . . . . . . . . . . . . . . . . . . . 8
Back View . . . . . . . . . . . . . . . . . . . . . . . . . . . . . . . . . . . . . . . . . . . . . . . . . . . . . . . . . . . . . . . . . . . . . . . . . . . . . . . . . . . . . . . . . . . . . . . . . . . . . . 8
Installation . . . . . . . . . . . . . . . . . . . . . . . . . . . . . . . . . . . . . . . . . . . . . . . . . . . . . . . . . . . . . . . . . . . . . . . . . . . . . . . . . . . . . . . . . . . . . . . . . . . . . . . . . . 9
Mounting an EPS5000-300 . . . . . . . . . . . . . . . . . . . . . . . . . . . . . . . . . . . . . . . . . . . . . . . . . . . . . . . . . . . . . . . . . . . . . . . . . . . . . . . . . . . . . . . . . 9
Attaching Rails to an EPS5000-300 . . . . . . . . . . . . . . . . . . . . . . . . . . . . . . . . . . . . . . . . . . . . . . . . . . . . . . . . . . . . . . . . . . . . . . . . . . . . . . . . . . 10
Service . . . . . . . . . . . . . . . . . . . . . . . . . . . . . . . . . . . . . . . . . . . . . . . . . . . . . . . . . . . . . . . . . . . . . . . . . . . . . . . . . . . . . . . . . . . . . . . . . . . . . . . . . . . . 12
Replacing a Power Supply . . . . . . . . . . . . . . . . . . . . . . . . . . . . . . . . . . . . . . . . . . . . . . . . . . . . . . . . . . . . . . . . . . . . . . . . . . . . . . . . . . . . . . . . . 12
Specifications . . . . . . . . . . . . . . . . . . . . . . . . . . . . . . . . . . . . . . . . . . . . . . . . . . . . . . . . . . . . . . . . . . . . . . . . . . . . . . . . . . . . . . . . . . . . . . . . . . . . . . . 13
List of Illustrations
1
2
3
4
5
6
7
8
9
C1631M-B (9/06)
Package Components . . . . . . . . . . . . . . . . . . . . . . . . . . . . . . . . . . . . . . . . . . . . . . . . . . . . . . . . . . . . . . . . . . . . . . . . . . . . . . . . . . . . . . . . . . 7
Support Rail Kit . . . . . . . . . . . . . . . . . . . . . . . . . . . . . . . . . . . . . . . . . . . . . . . . . . . . . . . . . . . . . . . . . . . . . . . . . . . . . . . . . . . . . . . . . . . . . . 7
EPS5000-300 Front View . . . . . . . . . . . . . . . . . . . . . . . . . . . . . . . . . . . . . . . . . . . . . . . . . . . . . . . . . . . . . . . . . . . . . . . . . . . . . . . . . . . . . . . 8
EPS5000-300 Back View . . . . . . . . . . . . . . . . . . . . . . . . . . . . . . . . . . . . . . . . . . . . . . . . . . . . . . . . . . . . . . . . . . . . . . . . . . . . . . . . . . . . . . . 8
Mounting an EPS5000-300 into a Rack . . . . . . . . . . . . . . . . . . . . . . . . . . . . . . . . . . . . . . . . . . . . . . . . . . . . . . . . . . . . . . . . . . . . . . . . . . . . 9
Inserting Cage Nuts . . . . . . . . . . . . . . . . . . . . . . . . . . . . . . . . . . . . . . . . . . . . . . . . . . . . . . . . . . . . . . . . . . . . . . . . . . . . . . . . . . . . . . . . . . . 9
Attaching Rails . . . . . . . . . . . . . . . . . . . . . . . . . . . . . . . . . . . . . . . . . . . . . . . . . . . . . . . . . . . . . . . . . . . . . . . . . . . . . . . . . . . . . . . . . . . . . . 10
Connecting to an RK5000PS-5U . . . . . . . . . . . . . . . . . . . . . . . . . . . . . . . . . . . . . . . . . . . . . . . . . . . . . . . . . . . . . . . . . . . . . . . . . . . . . . . . 11
Power Supply Replacement
. . . . . . . . . . . . . . . . . . . . . . . . . . . . . . . . . . . . . . . . . . . . . . . . . . . . . . . . . . . . . . . . . . . . . . . . . . . . . . . . . . . 12
3
4
C1631M-B (9/06)
Regulatory Notices
This device complies with Part 15 of the FCC Rules. Operation is subject to the following two conditions: (1) this device may not cause harmful
interference, and (2) this device must accept any interference received, including interference that may cause undesired operation.
RADIO AND TELEVISION INTERFERENCE
This equipment has been tested and found to comply with the limits of a Class A digital device, pursuant to Part 15 of the FCC Rules. These limits
are designed to provide reasonable protection against harmful interference when the equipment is operated in a commercial environment. This
equipment generates, uses, and can radiate radio frequency energy and, if not installed and used in accordance with the instruction manual, may
cause harmful interference to radio communications. Operation of this equipment in a residential area is likely to cause harmful interference in
which case the user will be required to correct the interference at his own expense.
Changes and Modifications not expressly approved by the manufacturer or registrant of this equipment can void your authority to operate this
equipment under Federal Communications Commission’s rules.
This Class A digital apparatus complies with Canadian ICES-003.
Cet appareil numérique de la classe A est conforme à la norme NMB-003 du Canada.
C1631M-B (9/06)
5
Before You Begin
Please familiarize yourself with the parts list before installing the unit.
PARTS LIST
Qty Description
1
EPS5000-300
2
USA standard power cord
2
European standard power cord
2
UK standard power cord
2
Over-molded G-power cables
4
Screws with washers, 10-32 x 0.750-inch, Phillips, pan head
1
Rail Kit
2
1
Rails
2
Brackets
2
Plates
4
Screws, 6-32 x 0.375-inch, Phillips, pan head
4
Screws, 10-32 x 0.750-inch, Phillips, pan head with washers
8
Screws, 8-32 x 0.625-inch, Phillips, pan head with washers
8
Cage nuts, 10-32
EPS5000-300 Installation manual
PACKAGE CONTENTS
The following diagrams show the contents of the box. When installing the EPS5000-300, refer to these diagrams.
6
C1631M-B (9/06)
USA STANDARD
POWER CORD
(110 VAC)
2 EA.
SHIPPING BOX
EPS5000-300
EUROPEAN
STANDARD POWER
CORD (230 VAC)
2 EA.
SUPPORT RAIL KIT
RACK MOUNT SCREW
WITH WASHER
10-32 X 0.750
4 EA.
INSTALLATION MANUAL
OVER-MOLDED
G-POWER CABLES
2 EA.
UK
STANDARD POWER
CORD (250 VAC)
2 EA.
Figure 1. Package Components
RAIL
2 EA.
BRACKET
2 EA.
PLATE
2 EA.
SUPPORT RAIL KIT
SHOWN ACTUAL SIZE
PHILLIPS PAN
HEAD SCREW
6-32 x 0.375
4 EA.
PHILLIPS PAN HEAD SCREW
WITH WASHER
8-32 x 0.625
8 EA.
PHILLIPS PAN HEAD SCREW
WITH WASHER
10-32 x 0.750
4 EA.
CAGE NUT,
10-32
8 EA.
Figure 2. Support Rail Kit
C1631M-B (9/06)
7
Description
The EPS5000-300 external redundant power supply, which is 1 rack unit (RU) high, has dual 300 W power supplies that slide into a tray. The
external power supply can be mounted into a 19-inch, EIA-standard rack. The EPS5000-300 can be used in the following ways:
•
Provide redundant power to two fully populated RK5000PS-5U
•
Provide redundant power to one fully populated RK5000PS-5U
The EPS5000-300 has a relay output connector that is directly wired to the power and is a normally closed (N.C.) dry contact. If the power supply
fails, the relay opens. The 10-pin power connector allows you to connect an over-molded cable (supplied) from the EPS5000-300 to the
RK5000PS-5U.
FRONT VIEW
�
�
�
�
Rack Ear (2)
Power Supply with Handle (2)
Thumbscrew for Fastening Power Supply (4)
Pelco Badge Power Indicator (2)
�
�
�
�
Figure 3. EPS5000-300 Front View
BACK VIEW
�
�
�
�
�
AC Power Cord Connector (2)
Power Switch (2)
10-Pin Power Connector (2)
Relay Output Connector (2)
Spare Fuse (2)
� �
� �
�
Figure 4. EPS5000-300 Back View
8
C1631M-B (9/06)
Installation
MOUNTING AN EPS5000-300
The power supply, which is 1 RU high, can provide redundant power to one or two fully populated RK5000PS-5U. To mount the power supply,
follow these steps and refer to Figure 5.
1. Insert the EPS5000-300 into the rack.
2. Secure the EPS5000-300 to the rack with four of the supplied 10-32 x 0.750-inch screws and washers.
3. Connect each power supply to the RK5000PS-5U using the supplied over-molded cables. Figure 8 shows the EPS5000-300 providing
redundant power to two RK5000PS-5U.
4. Plug in the AC power cords.
5. Turn on the power supply switches.
Figure 5. Mounting an EPS5000-300 into a Rack
If installing the EPS5000-300 into a square-hole rack, insert two cage nuts in each side of the square-hole rack as shown in Figure 6.
CAGE NUT
Figure 6. Inserting Cage Nuts
C1631M-B (9/06)
9
ATTACHING RAILS TO AN EPS5000-300
The rails give the EPS5000-300 more support for rack mounting, especially in deeper racks. To attach the rails, follow these steps and refer to
Figure 7.
1. Secure the two brackets to the back of the EPS5000-300 with the four supplied 6-32 x 0.375-inch screws.
2. Place the rails on the sides of the EPS5000-300 to a desired length.
3. Secure the rails and plates to the brackets using the eight supplied 8-32 x 0.625-inch screws and washers.
4. Secure the rails to the rack with four of the supplied 10-32 x 0.750-inch screws and washers.
NOTE: The illustration below shows the attachment of one rail only. The steps for attaching the second rail are the same.
10-32 x 0.750
8-32 x 0.625
BRACKET
6-32 x 0.375
PLATE
RAIL
Figure 7. Attaching Rails
10
C1631M-B (9/06)
EPS5000-300
POWER CORD
POWER CORD
OVER-MOLDED CABLE
RK5000PS-5U
OVER-MOLDED CABLE
RK5000PS-5U
Figure 8. Connecting to an RK5000PS-5U
C1631M-B (9/06)
11
Service
REPLACING A POWER SUPPLY
You can easily replace either of the two power supplies in the EPS5000-300 with a replacemnet (EPSPWR-300). You will know if there is a problem with a power supply because the blue Pelco badge on the front panel will turn off. Before replacing a power supply, check the fuse. It can be
replaced easily with the supplied spare. If the fuse is not the problem, then follow these steps and refer to Figure 9 to replace the power supply.
1. Disconnect the over-molded cable and the power cord from the failed power supply.
2. Unscrew both thumbscrews of the failed power supply.
3. Remove the power supply.
4. Insert the new power supply.
5. Secure the power supply by tightening both thumbscrews.
6. Connect the over-molded cable from the power supply to the RK5000PS-5U.
7. Plug in the AC power cord.
8. Turn on the power switch.
Figure 9. Power Supply Replacement
12
C1631M-B (9/06)
Specifications
ELECTRICAL
Input Voltage
100-240 VAC
Output Voltage
Power Consumption
100 VAC
115 VAC
220 VAC
12 VDC
Operating Maximum (non-inclusive of components within the rack)
103 W, 352 BTU/H
104 W, 355 BTU/H
109 W, 372 BTU/H
Fuse
4 amps
MECHANICAL
Rack Units
1
Construction
Aluminum
Finish
Black
ENVIRONMENTAL
Ambient Temperature
70° to 74°F (21° to 23°C)
Operating Temperature
32° to 122°F (0° to 50°C) at air intake of unit
Storage Temperature
-40° to 149°F (-40° to 65°C)
Operating Humidity
20% to 80% noncondensing
Maximum Humidity
Gradient 10% per hour
Operating Altitude
-50 ft to 10,000 ft (-16 m to 3,048 m)
Operating Vibration
0.25 G at 3 Hz to 200 Hz at a sweep rate of 0.5 octaves/minute
GENERAL
Dimensions
1.73” H x 17.40” W x 12.00” D
(4.39 x 44.20 x 30.48 cm)
Mounting
Fits 19-inch, EIA-standard rack
Unit Weight
16.5 lb (7.48 kg)
C1631M-B (9/06)
13
14
C1631M-B (9/06)
PRODUCT WARRANTY AND RETURN INFORMATION
WARRANTY
Pelco will repair or replace, without charge, any merchandise proved defective in material or
workmanship for a period of one year after the date of shipment.
Exceptions to this warranty are as noted below:
• Five years on FR/FT/FS Series fiber optic products and TW3000 Series unshielded twisted
pair transmission products.
• Three years on Genex® Series products (multiplexers, server, and keyboard).
• Three years on Camclosure® and fixed camera models, except the CC3701H-2,
CC3701H-2X, CC3751H-2, CC3651H-2X, MC3651H-2, and MC3651H-2X camera models,
which have a five-year warranty.
• Three years on PMCL200/300/400 Series LCD monitors.
• Two years on standard motorized or fixed focal length lenses.
• Two years on Legacy®, CM6700/CM6800/CM9700 Series matrix, and DF5/DF8 Series
fixed dome products.
®
®
™
• Two years on Spectra , Esprit , ExSite , and PS20 scanners, including when used in
continuous motion applications.
• Two years on Esprit and WW5700 Series window wiper (excluding wiper blades).
• Two years (except lamp and color wheel) on Digital Light Processing (DLP®) displays.
The lamp and color wheel will be covered for a period of 90 days. The air filter is not
covered under warranty.
• Eighteen months on DX Series digital video recorders, NVR300 Series network video
recorders, and Endura™ Series distributed network-based video products.
• One year (except video heads) on video cassette recorders (VCRs). Video heads will be
covered for a period of six months.
• Six months on all pan and tilts, scanners or preset lenses used in continuous motion
applications (that is, preset scan, tour and auto scan modes).
Pelco will warrant all replacement parts and repairs for 90 days from the date of Pelco
shipment. All goods requiring warranty repair shall be sent freight prepaid to Pelco, Clovis,
California. Repairs made necessary by reason of misuse, alteration, normal wear, or accident
are not covered under this warranty.
Pelco assumes no risk and shall be subject to no liability for damages or loss resulting from
the specific use or application made of the Products. Pelco’s liability for any claim, whether
based on breach of contract, negligence, infringement of any rights of any party or product liability, relating to the Products shall not exceed the price paid by the Dealer to Pelco for such
Products. In no event will Pelco be liable for any special, incidental or consequential damages
(including loss of use, loss of profit and claims of third parties) however caused, whether by
the negligence of Pelco or otherwise.
The above warranty provides the Dealer with specific legal rights. The Dealer may also have
additional rights, which are subject to variation from state to state.
If a warranty repair is required, the Dealer must contact Pelco at (800)þ289-9100 or
(559) 292-1981 to obtain a Repair Authorization number (RA), and provide the following
information:
1. Model and serial number
2. Date of shipment, P.O. number, Sales Order number, or Pelco invoice number
3. Details of the defect or problem
If there is a dispute regarding the warranty of a product which does not fall under the
warranty conditions stated above, please include a written explanation with the product when
returned.
Method of return shipment shall be the same or equal to the method by which the item was
received by Pelco.
RETURNS
In order to expedite parts returned to the factory for repair or credit, please call the factory at
(800) 289-9100 or (559) 292-1981 to obtain an authorization number (CA number if returned for
credit, and RA number if returned for repair).
All merchandise returned for credit may be subject to a 20% restocking and refurbishing
charge.
Goods returned for repair or credit should be clearly identified with the assigned CA or RA
number and freight should be prepaid. Ship to the appropriate address below.
If you are located within the continental U.S., Alaska, Hawaii or Puerto Rico, send goods to:
Service Department
Pelco
3500 Pelco Way
Clovis, CA 93612-5699
If you are located outside the continental U.S., Alaska, Hawaii or Puerto Rico and are
instructed to return goods to the USA, you may do one of the following:
If the goods are to be sent by a COURIER SERVICE, send the goods to:
Pelco
3500 Pelco Way
Clovis, CA 93612-5699 USA
If the goods are to be sent by a FREIGHT FORWARDER, send the goods to:
Pelco c/o Expeditors
473 Eccles Avenue
South San Francisco, CA 94080 USA
Phone: 650-737-1700
Fax: 650-737-0933
The materials used in the manufacture of this document and its components are compliant to the requirements of Directive 2002/95/EC.
This equipment contains electrical or electronic components that must be recycled properly to comply with Directive 2002/96/EC of the European Union
regarding the disposal of waste electrical and electronic equipment (WEEE). Contact your local dealer for procedures for recycling this equipment.
REVISION HISTORY
Manual #
C1631M
C1631M-A
C1631M-B
Date
4/05
9/05
9/06
Comments
Original version.
Added Parts List and Package Contents sections. Added Figure 6. Revised Figures 4 and 5. Revised Power Consumption in Specifications.
Revised Specifications.
Pelco, the Pelco logo, Spectra, Genex, Esprit, Camclosure, and Legacy are registered trademarks of Pelco.
Endura and ExSite are trademarks of Pelco.
©Copyright 2006, Pelco. All rights reserved.
Worldwide Headquarters
3500 Pelco Way
Clovis, California 93612 USA
USA & Canada
Tel: 800/289-9100
Fax: 800/289-9150
International
Tel: 1-559/292-1981
Fax: 1-559/348-1120
www.pelco.com
ISO9001
Australia
| Canada | Finland | France | Italy | Russia | Singapore | Spain | Sweden | The Netherlands | United Arab Emirates | United Kingdom | United States