1
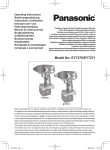
Cordless Hammer Drill Driver
Operating Instructions
Model No: EY6932
IMPORTANT
This manual contains safety information. Read manual completely before first using
this product and save this manual for future use.
. GENERAL SAFETY
RULES
FOR ALL BATTERY
OPERATED TOOLS
WARNING!
Read and understand all instructions.
Failure to follow all instructions listed
below, may result in electric shock,
fire and/or serious personal injury.
SAVE THESE INSTRUCTIONS
Work Area
1) Keep your work area clean and
well lit.
Cluttered benches and dark areas
invite accidents.
2) Do not operate power tools in
explosive atmospheres, such
as in the presence of flammable
liquids, gases, or dust.
Power tools create sparks which
may ignite the dust or fumes.
3) Keep bystanders, children, and
visitors away while operating a
power tool.
Distractions can cause you to lose
control. Make sure that no one is
beneath, or on the other side of the
area when you are working.
Electrical Safety
4) A battery operated tool with integral
batteries or a separate battery
pack must be recharged only
with the specified charger for
the battery.
A charger that may be suitable for one
type of battery may create a risk of
fire when used with another battery.
5) Use battery operated tool only
with specifically designated
battery pack.
Use of any other batteries may
create a risk of fire.
-2-
Personal Safety
6) Stay alert, watch what you are
doing, and use common sense
when operating a power tool. Do
not use tool while tired or under
the influence of drugs, alcohol,
or medication.
A moment of inattention while
operating power tools may result in
serious personal injury.
7) Dress properly. Do not wear
loose clothing or jewelry. Contain
long hair.
Keep your hair, clothing, and
gloves away from moving parts.
Loose clothes, jewelry, or long hair
can be caught in moving parts.
8) Avoid accidental starting. Be
sure switch is in the locked or off
position before inserting battery
pack.
Carrying tools with your finger on
the switch or inserting the battery
pack into a tool with the switch on
invites accidents.
9) Remove adjusting keys or wrenches
before turning the tool on.
A wrench or a key that is left
attached to a rotating part of the
tool may result in personal injury.
10) Do not overreach. Keep proper
footing and balance at all times.
Proper footing and balance enable
better control of the tool in unexpected situations.
11) Use safety equipment. Always
wear eye protection.
Dust mask, non-skid safety shoes,
hard hat, or hearing protection must
be used for appropriate conditions.
Tool use and care
12) Use clamps or other practical
way to secure and support the
workpiece to a stable platform.
Holding the work by hand or
against your body is unstable and
may lead to loss of control.
13) Do not force tool. Use the correct
tool for your application.
The correct tool will do the job better and safer at the rate for which it
is designed.
14) Do not use tool if switch does
not turn it on or off.
A tool that cannot be controlled
with the switch is dangerous and
must be repaired.
15) Disconnect battery pack from tool
or place the switch in the locked
or off position before making any
adjustments, changing accessories,
or storing the tool.
Such preventive safety measures
reduce the risk of starting the tool
accidentally.
16) Store idle tools out of reach of children and other untrained persons.
Tools are dangerous in the hands
of untrained users.
17) When battery pack is not in use,
keep it away from other metal
objects like: paper clips, coins,
keys, nails, screws, or other
small metal objects that can
make a connection from one
terminal to another.
Shorting the battery terminals
together may cause sparks, burns
or a fire.
18) Maintain tools with care. Keep
cutting tools sharp and clean.
Properly maintained tools with
sharp cutting edge are less likely to
bind and are easier to control.
19) Check for misalignment or binding
of moving parts, breakage of parts,
and any other condition that may
affect the tool’s operations. If
damaged, have the tool serviced
before using.
Many accidents are caused by
poorly maintained tools.
20) Use only accessories that are
recommended by the manufacturer for your model.
Accessories that may be suitable for
one tool may create a risk of injury
when used on another tool.
-3-
Service
21) Tool service must be performed
only by qualified repair personnel.
Service or maintenance performed
by unqualified personnel may
result in a risk of injury.
22) When servicing a tool, use only
identical replacement parts. Follow
instructions in the Maintenance
section of this manual.
Use of unauthorized parts or failure
to follow Maintenance Instructions
may create a risk of shock or injury.
. SPECIFIC
SAFETY RULES
1) Hold tool by insulated gripping
surfaces when performing an
operation where the cutting tool
may contact hidden wiring.
Contact with a "live" wire will make
exposed metal parts of the tool
“live” and shock the operator.
2) Wear ear protectors when using
the tool for extended periods.
Prolonged exposure to high intensity noise can cause hearing loss.
3) Be aware that this tool is always
in an operating condition, it does
not have to be plugged into an electrical outlet.
4) Do not operate the Forward/
Reverse lever when the Variable
speed control trigger is on.
The battery will discharge rapidly
and damage to the unit may occur.
5) If the bit becomes jammed, immediately turn the Variable speed control trigger off to prevent an overload which can damage the battery pack or motor. Use reverse
motion to loosen jammed bits.
6) When storing or carrying the tool,
set the Forward/Reverse lever to
the center (switch lock) position.
7) Do not strain the tool by holding
the speed control trigger halfway
(speed control mode) so that the
motor stops.
8) During charging, the charger
may become slightly warm. This
is normal. Do not charge the battery for a long period.
Symbol
meaning
V
Volts
.FOR BATTERY
CHARGER &
BATTERY PACK
1)
Direct Current
n0
no load speed
…/min
revolutions or
reciprocation per minutes
SAVE THESE
INSTRUCTIONS
This manual contains important
safety and operating instructions
for battery charger EY0230.
2) Before using battery charger, read all
instructions and cautionary markings
on (1) battery charger, (2) battery
pack.
Forward Rotation
Reverse Rotation
3)
Rotation with Hammering
CAUTION
To reduce the risk of injury, charge
only Battery Pack as shown below.
EY9065, EY9066, EY9080, EY9086,
EY9180, EY9182, EY9001, EY9006,
EY9101, EY9106, EY9107, EY9200,
EY9201, EY9136, EY9230, EY9231
Other types of batteries may burst
causing personal injury and damage.
Rotation only
WARNING;
Some dust created by power sanding, sawing, grinding, drilling, and
other construction activities contains chemicals known to the State
of California to cause cancer, birth
defects or other reproductive harm.
Some examples of these chemicals
are:
* Lead from lead-based paints
* Crystalline silica from bricks and
cement and other masonry products
* Arsenic and chromium from chemically-treated lumber.
To reduce your exposure to these
chemicals: work in a well ventilated
area, and work with approved safety
equipment, such as dust masks that
are specially designed to filter our
microscopic particles.
4) Do not expose charger to rain or
snow.
5) To reduce risk of damaging the
electric plug and cord, pull by plug
rather than cord when disconnecting charger.
6) Make sure cord is located so that it
will not be stepped on, tripped over,
or otherwise subjected to damage
or stress.
-4-
7) An extension cord should not be
used unless absolutely necessary.
Use of improper extension cord
could result in a risk of fire and
electric shock. If extension cord
must be used, make sure:
a. that pins on plug of extension
cord are the same number, size
and shape as those of plug on
charger.
b. that extension cord is properly wired and in good electrical
condition.
c. that wire size is large enough
for ampere rating of charger as
specified below.
RECOMMENDED MINIMUM AWG SIZE OF
EXTENSION CORDS FOR
BATTERY CHARGERS
AC Input Rating.
Amperes
AWG Size of Cord
Equal to or
But less
Length of Cord, Feet
greater than
than
25 50 100 150
0
2
18 18 18 16
8) Do not operate charger with damaged cord or plug replace them
immediately.
9) Do not operate charger if it has received a sharp blow, been dropped,
or otherwise damaged in any way;
take it to a qualified serviceman.
10) Do not disassemble charger; take it
to a qualified serviceman when service or repair is required. Incorrect
reassembly may result in a risk of
electric shock or fire.
11) To reduce the risk of electric shock,
unplug charger from outlet before
attempting any maintenance or
cleaning.
12) The charger and battery pack are
specifically designed to work together. Do not attempt to charge
any other cordless tool or battery
pack with this charger.
13) Do not attempt to charge the battery
pack with any other charger.
14) Do not attempt to disassemble the
battery pack housing.
-5-
15) Do not store the tool and battery pack
in locations where the temperature
may reach or exceed 50°C (122°F)
(such a metal tool shed, or a car
in the summer), which can lead to
deterioration of the storage battery.
16) Do not charge battery pack when the
temperature is BELOW 0°C (32°F)
or ABOVE 40°C (104°F). This is very
important.
17) Do not incinerate the battery pack.
It can explode in a fire.
18) Avoid dangerous environment. Do not
use charger in damp or wet locations.
19) The charger is designed to operate
on standard household electrical
power only. Do not attempt to use it
on any other voltage!
20) Do not abuse cord. Never carry charger
by cord or yank it to disconnect from
outlet. Keep cord away from heat, oil
and sharp edges.
21) Charge the battery pack in a well
ventilated place, do not cover the
charger and battery pack with a
cloth, etc., while charging.
22) Use of an attachment not recommended may result in a risk of fire,
electric shock, or injury to persons.
23) Do not short the battery pack. A battery short can cause a large current
flow, over heating and burns.
24) NOTE: If the supply cord of this appliance is damaged, it must only be
replaced by a repair shop appointed
by the manufacturer, because special
purpose tools are required.
25) TO REDUCE THE RISK OF ELECTRIC SHOCK, THIS APPLIANCE
HAS A POLARIZED PLUG (ONE
BLADE IS WIDER THAN THE
OTHER).
This plug will fit in a polarized outlet
only one way. If the plug does not fit
fully in the outlet, reverse the plug. If
it still does not fit, contact a qualified
electrician to install the proper outlet.
Do not change the plug in any way.
. FUNCTIONAL DESCRIPTION
Clutch handle
Speed selector switch
Keyless drill chuck
Vent holes
Forward/Reverse lever
Battery pack release button
Variable speed control trigger
15.6V Battery pack (EY9231)
Battery charger (EY0230)
. ASSEMBLY
Attaching or removing bit
Lock collar
Note: When attaching or removing
a bit, disconnect battery pack
from tool or place the switch in
the center position (switch lock).
This tool is equipped with a keyless
drill chuck.
1. Attachment
Insert the bit and turn the Lock collar clockwise (looking from the front)
to tighten firmly.
Slide the Lock collar to LOCK side
until it snaps.
Lock collar
LOCK
2. Removal
Slide the Lock collar to FREE side.
Turn the Lock collar counterclockwise (looking from the front), then
remove the bit.
-6-
FREE
Note: If excessive play occurs in the
chuck,
secure the drill in place
and tighten the chuck by turning
clockwise, open the chuck jaws
by unscrewing the Lock collar and
tighten the screw (left-handed
screw) with a screwdriver by turning it counterclockwise (viewed
from the front).
drilling. The brake operates and the
chuck stops immediately when the
trigger is released.
4. After use, set the lever to its center
position (switch lock).
Attaching or removing battery
pack
1. To connect the battery pack:
Insert the battery pack. It snaps into
place to indicate proper connection.
Reverse Rotation Switch Operation
2. To remove the battery pack:
Press the two buttons on the sides
of the battery pack. Slide the battery pack out of the tool body.
1. For reverse rotation, set the lever to
reverse. Check the direction of rotation before use.
2. Depress the trigger switch slightly to
start the tool slowly.
3. After use, set the lever to its center
position (switch lock).
. OPERATION
Switch Operation
1. The speed increases with the
amount of depression of the trigger.
When beginning work, depress the
trigger slightly to start the rotation
slowly.
Clutch Torque Setting
2. A feedback electronic controller is
used to give a strong torque even in
low speed.
Adjust the torque to one of the 5 possible settings or “ “, “ “ position to
the job.
CAUTION: Test the setting before
actual operation.
Set the scale at this line.
3. The brake operates when the trigger is released and the motor stops
immediately.
Note: When the brake operates, a
braking sound may be heard.
This is normal.
Forward/Reverse lever Operation
Reference for Adjusting Torque
Scale
(Forward ( ), Switch lock, Reverse ( ))
CAUTION: Do not operate Forward/
Reverse lever until the
chuck comes to a complete stop. Shifting during
rotation of the chuck may
damage the tool.
Forward Rotation Switch Operation
1. For forward rotation, set the lever to
forward.
2. Depress the trigger switch slightly to
start the tool slowly.
3. The speed increases with the
amount of depression of the trigger
for efficient tightening of screws and
-7-
1
2
3
4
5
Torque
Approx. 1.0 Nm
(10 k f-cm or 8.7 in-lbs.)
Approx. 1.5 Nm
(15 k f-cm or 13.0 in-lbs.)
Approx. 2.5 Nm
(25 k f-cm or 21.7 in-lbs.)
Approx. 3.4 Nm
(35 k f-cm or 30.5 in-lbs.)
Approx. 4.4 Nm
(45 k f-cm or 39.0 in-lbs.)
Use
For driving terminal
screws
For driving machine
screws
For driving screws
into soft materials
For driving screws
into hardwood
For powerful driving and drilling
Percussion
For drilling to mortar, brick, etc.
Bit-locking function
1. With the trigger switch not engaged
and a screwdriver bit locked in
place, the tool can be used as a
manual screwdriver (up to 22.6 Nm,
230 k f-cm, 199 in-lbs).
There will be a little play in the
chuck, but this is not a malfunction.
2. This feature is handy for tightening
screws that require more torque
than the maximum torque of the
driver (position on the clutch), for
confirming the tightness of a screw
or to loosen an extremely tight
screw.
For Appropriate use of Battery
pack
Ni-MH Battery pack EY9231
Charge the Ni-MH battery fully before storage in order to ensure a
longer service life.
The ambient temperature range is
between 0°C (32°F) and 40°C
(104°F).
If the battery pack is used when the
battery temperature is below 0°C
(32°F) the tool may fail to function
properly. In that case, charge the
battery until charging is completed
for appropriate functioning of the
battery.
When operating with a Ni-MH battery pack, make sure the place is
well-ventilated.
Battery Pack Life
The rechargeable batteries have a
limited life. If operation time becomes
extremely short after recharging,
replace the battery pack with a new
one.
Note: Use under extremely hot or
cold conditions will reduce
operating capacity per charge.
Speed Selection
Choose a low or high speed to suit
the use.
The more the speed control trigger is
pulled, the higher the speed becomes.
LOW
No load speed
Torque
80 - 550/min (rpm)
Strong
HIGH 300 - 2000/min (rpm)
Charging
Weak
CAUTION: Check the speed selector
switch before use.
Us e at low speed when
strong force is needed during operation. (Using at
high speed while a strong
force is applied may cause
a motor breakdown.)
Do not operate the
speed selector switch
(LOW-HIGH) while pulling on the speed control
trigger. This can cause
the rechargeable battery
to wear quickly or damage the internal mechanism of the motor.
* See appendix for “RECOMMENDED SPEED SELECTION”.
-8-
Note: When you charge the battery
pack for the first time, or after
prolonged storage, charge it
for about 24 hours to bring the
batteries up to full capacity.
EY0230
1. Plug the charger into the AC outlet.
Note: Sparks may be produced
when the plug is inserted into
the AC power supply, but this
is not a problem in terms of
safety.
2. Insert the battery pack firmly into
the charger.
time. (Max. charging time is approx. 90 minutes).
If a fully charged battery pack is
inserted into the charger again,
the charging lamp may light up
and then flash slowly. After several minutes, the charging lamp
may flash quickly to indicate the
charging is completed.
Battery pack
To AC
outlet
Battery
charger
3. During charging, the charging lamp
will be lit.
When charging is completed, an
internal electronic switch will automatically be triggered to prevent
overcharging.
Charging will not start if the battery
pack is warm (for example, immediately after heavy-duty operation).
The orange standby lamp will be
lit until the battery cools down.
Charging will then begin automatically.
6. If the charging lamp does not light
immediately after the charger is
plugged in, or if after the standard
charging time the lamp does not go
off, consult an authorized dealer.
Note:
4. When charging is completed, the
charging lamp will start flashing rapidly.
5. When in any of the conditions that
battery pack is too cool, or the battery pack has not been used for a
long time, the charging lamp starts
flashing slowly to indicate protective
charging. Protective charging takes
longer to fully charge the battery
pack, than the standard charging
When charging a cool battery
pack (below 15°C (41°F) in a
warm place, leave the battery
pack at the place and wait for
more than one hour to warm
up the battery to the level of
the ambient temperature.
(Battery pack may not be fully
charged.)
Cool down the charger when
charging more than two battery packs consecutively.
Do not insert your fingers into
contact hole, when holding
charger or any other occasions.
CAUTION:
Do not use power source
from an engine generator.
Do not cover vent holes
on the charger and the
battery pack.
. LAMP INDICATIONS
Charger is plugged into a wall outlet.
Ready to charge.
Flashing
Now charging
Lit
Charging is completed.
Flashing quickly
Protective charging
Battery pack is warm. Charging will begin
when temperature of battery pack drops.
Charging is not possible. Clogged with
dust or malfunction of the battery pack.
Flashing slowly
Lit
Flashing
-9-
. MAINTENANCE
. ACCESSORIES
Use only a dry, soft cloth for wiping
the unit. Do not use a damp cloth,
thinner, benzine, or other volatile solvents for cleaning.
Use only bits suitable for size of drill’s
chuck.
BATTERY RECYCLING
ATTENTION:
A nickel metal hydride battery that is
recyclable powers the product you
have purchased.
Please call 1-800-8-BATTERY for
information on how to recycle this
battery.
RECOMMENDED SPEED SELECTION
CAUTION: USE AT LOW SPEED WHEN STRONG FORCE IS NEEDED
DURING OPERATION.
(Using at high speed while a strong force is applied may cause a
motor breakdown.)
Use the following as a guide to select low or high speed for the job.
EY6932
SCREW
TIGHTENING
DRILLING
WOOD /
YELLOW PINE
MATERIAL/
CONDITION
MORTAR /
BRICK
HIGH
ø 10 mm (3/8")
or less
Not used
LOW
ø 13 mm (1/2")
or less
(Slow operation)
ø 36 mm (1-27/64")
or less
Thickness: 40 mm
(1-37/64") or less
METAL
METAL HOLE SAW
Cold-rolled steel plate (SPC)
Thickness: 1.6 mm (1/16”) or less
ø 6.5 mm (1/4")
or less
Not used
Wood screws
ø 4 mm (5/32")
or less
ø 13 mm (1/2") ø 34 mm (1-11/ 32") ø 6.8 mm (17/64")
or less
or less
or less
- 10 -
. SPECIFICATIONS
MAIN UNIT
EY6932
M3 ~ M6
ø 2.1 ~ ø 6.8 mm (5/64" ~ 17/64")
ø 4 ~ ø 6 mm (5/32" ~ 15/64")
ø 3 ~ ø 13 mm (1/8" ~ 1/2")
ø 3 ~ ø 36 mm (1/8" ~ 1-27/64")
ø 1.5 ~ ø 13 mm (1/16" ~ 1/2")
Max. ø 34 mm (1-11/32")
DC Motor 15.6 V
80 ~ 550/min (rpm)
300 ~ 2000/min (rpm)
1200 ~ 8250/min (bpm)
4500 ~ 30000/min (bpm
ø 1.5 ~ ø 13 mm (1/16" ~ 1/2")
1.7 kN, (173 k f, 370 lbs.f)
236 mm (9-5/16")
2.4 k , (5.3 lbs)
Model
Machine screw
Screw
Wood screw
driving
Masonry screw
Capability
Mortar/Brick
Wood
Drilling
Metal
Metal hole saw
Motor
LOW
No load speed
HIGH
LOW
Blows rate per
minute
HIGH
Chuck capacity
Blow strength
Overall length
Weight (with battery pack)
BATTERY PACK
EY9231
Ni-MH Battery
15.6 V DC (1.2 V × 13 cells)
Model
Storage battery
Battery voltage
BATTERY CHARGER
Model
Electrical Rating
Weight
Charging time
EY0230
See the name plate on the bottom of the charger.
0.78 k , (1.72 lbs)
15.6 V 12 V
9.6 V 7.2 V Standard charging time
-
EY9001
EY9006
EY9080
EY9086
EY9065
EY9066
Approx. 20 min.
-
EY9101
EY9180
EY9182
-
Approx. 25 min.
EY9136
EY9106
EY9107
-
-
Approx. 30 min.
EY9230
EY9200
-
-
Approx. 45 min.
EY9231
EY9201
-
-
Approx. 55 min.
NOTE: This chart may include models that are not available in your area.
Please refer to the catalogue.
- 11 -
30-DAY QUALITY
SATISFACTION GUARANTEE:
If you are dissatisfied with any Panasonic
Cordless Power Tool for any reason, simply
return it to the place of purchase with a
dated proof of purchase, in the original
packaging, with all accessories, parts
and instructions, within 30 days of the
date of purchase, for a full refund, or call
Panasonic at 201-392-6655. Abuse or
misapplication of any power tool voids
the guarantee.
PANASONIC CONSUMER ELECTRONICS COMPANY
One Panasonic Way, Secaucus, New Jersey 07094
EY981069321
H1501
Printed in Japan