1
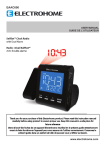
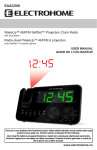
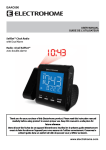
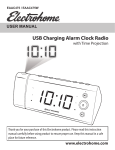
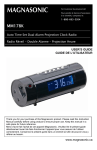
For Customer Assistance Call:
Pour joindre le service à la
clientèle, Composez le:
1-800-663-5954
MAAC500
WakeUp™ AM/FM SelfSet™ Projection Clock Radio
with Dual Alarm
Radio-réveil WakeUp™ AM/FM à projection
avec SelfSet™ et double alarme
USER MANUAL
GUIDE DE L’UTILISATEUR
Thank you for your purchase of this Magnasonic product. Please read this instruction manual
carefully before using product to ensure proper use. Keep this manual in a safe place for future
reference.
Merci d’avoir fait l’achat de cet appareil Magnasonic. Veuillez lire le présent guide attentivement
avant de faire fonctionner l’appareil pour vous assurer de l’utiliser correctement. Conservez le
présent guide dans un endroit sûr afin de pouvoir vous y référer au besoin.
www.magnasonic.com
WARNINGS
WARNING
To reduce the risk of fire or electic shock, do not expose this appliance to rain or
moisture.
CAUTION
Use of controls or adjustments or performance of procedures other than those
specified may result in hazardous radiation exposure.
RISK OF ELECTRIC SHOCK
DO NOT OPEN
CAUTION - TO REDUCE THE RISK OF ELECTRIC SHOCK, DO NOT REMOVE
COVER (OR BACK). NO USER-SERVICABLE PARTS INSIDE, REFER TO
QUALIFIED USER PERSONNEL.
The lightning flash with arrowhead symbol, within an equilateral traingle, is
intended to alert the user to the presence of uninsulated “dangerous voltage”
within the product’s enclosure that may be of sufficient magnitude to constitute
a risk of electric shock to persons.
The exclamation point within an equilateral triangle is intended to alert the user
to the presence of important operating and maintenance (servicing) instructions
in the literature accompanying the appliance.
-2-
TABLE OF CONTENTS
Warnings..................................................................................................... 2
Table of Contents........................................................................................ 3
Buttons and Connections............................................................................ 4
Operation..................................................................................................... 5
Power Connection................................................................................. 5
DST - Daylight Savings Time................................................................ 5
Manually Set the Clock Time and Date................................................. 5
Setting Alarm Output and Alarm On/Off................................................ 6
Alarm Duration and Snooze Function................................................... 6
Change Display Content....................................................................... 6
Sleep Function...................................................................................... 7
Nap Timer Function............................................................................... 7
Radio Operation.................................................................................... 7
Reset..................................................................................................... 7
Projection Unit....................................................................................... 8
Alarm Battery BackUp System.............................................................. 8
Specifications.............................................................................................. 8
Warnings..................................................................................................... 9
MAGNASONIC WARRANTY....................................................................... 10
-3-
BUTTONS AND CONNECTIONS
1.
2.
3.
4.
5.
6.
7.
8.
9.
10.
11.
12.
13.
14.
ALARM 1 ON / OFF BUTTON
ALARM SET BUTTON
<< / YEAR – MONTH – DAY
BUTTON
>> / DST BUTTON
MODE BUTTON
ALARM 2 ON / OFF BUTTON
VOLUME KNOB
TUNING KNOB
LED DISPLAY
SPEAKER
AM/FM BAND BUTTON
ON / OFF BUTTON
SNOOZE / SLEEP / NAP
BUTTON
PROJECTION TIME 180° FLIP
BUTTON
15. PROJECTION ON/OFF
BUTTON
16. ALARM RADIO / BUZZER
SWITCH
17. PROJECTION UNIT
18. FOCUS ADJUSTMENT FOR
PROJECTION UNIT
19. AUX IN JACK
20. RESET BUTTON
21. DISPLAY LIGHT AUTO OFF /
HIGH / LOW DIMMER
22. AC POWER CORD
23. FM ANTENNA
24. BATTERY DOOR
25. RATING LABEL (ON BOTTOM
OF UNIT)
-4-
OPERATION
POWER CONNECTION
Plug the AC power cord to a household outlet AC source. Clock display will
flash “3“ indefinitely. Unit will go to zone 3, which is the default setting, and
correct time will be displayed, if you are in a different time zone.
To Set time Zone:
This product is factory preset.
There are 6 time zones programmed into your preset clock:
Zone 1 – Newfoundland
Zone 2 – Atlantic Time
Zone 3 – Eastern Time
Zone 4 – Central Time
Zone 5 – Mountain Time
Zone 6 – Pacific Time
Press the >> / DST button or >> / Y-M-D button to select 1-6 time zone. Until
your own time zone number appears on the LCD display, press the MODE
button to save.
DST - Daylight Savings Time
Press >> / DST button and hold for 3 seconds to toggle on and off DST
function.
Manually Set the Clock Time and Date
1. Press and hold the MODE button in normal mode to enter the set mode.
2. Press the MODE button repeatedly to cycle through the available settings
in this order:
Year >> Month >> Day >> 12/24 Hr >> RTC Hour >> RTC Minute
Action (during data adjustment) :
• Press << / Year – Month – Day button (3) to adjust data backward.
• Press >> / DST button (4) to adjust data forward.
• Keep depress << or >> button for 2 seconds to enable auto forward.
Setting Alarm 1 and Alarm 2
1. Press alarm set button (2) during normal mode and keep depress over 2
seconds to enter alarm set mode.
2. Press alarm set button (2) to change the mode cycle as follows:
Normal >> AL 1 Hour >> AL 1 Min >> AL 1 Weekday Alarm >> AL 2 Hour
>> AL 2 Min >> AL 2 Weekday alarm >> Normal
-5-
OPERATION
Select alarm weekday mode as follows:
1-5 - Monday to Friday
1-7 - Whole week
6-7 - Saturday & Sunday
1-1 - One day of week
Action (during data adjustment) :
• Press << / Year – Month – Day button (3) to adjust data backward.
• Press >> / DST button (4) to adjust data forward.
• Keep depress << or >> button for 2 seconds to enable auto forward.
SETTING ALARM OUTPUT AND ALARM ON/OFF
Change the alarm output
1. Using the Alarm radio / buzzer switch (16) select radio position to select
wake up by radio, select to buzzer position to select wake up by buzzer.
2. Select the Display light auto off / high / low dimmer (21) to the auto off
mode, alarm wake up the display is auto turn on.
3. Press alarm 1 on / off button (1) to toggle on and off alarm output function.
4. Press alarm 2 on / off button (6) to toggle on and off alarm output function.
ALARM DURATION AND SNOOZE FUNCTION
Alarm Duration
Buzzer alarm or Radio alarm will continue output for 30 minutes if no key
press, then it will stop automatically and wait for same alarm time on next day.
Action for Snooze :
• During alarming, press Snooze button (13) will enable snooze function,
buzzer alarm or radio alarm will stop.
• Snooze interval is 9 minutes (not include second offset)
• Snooze will continue unless press on/off button (12) to alarm off of buzzer
alarm or radio alarm stop automatically after 30 minutes.
• Select the display light auto off / high / low dimmer button (21) to the auto
off mode, during alarming display auto turn on, press snooze / sleep /nap
button (13) will enable snooze function, buzzer alarm or radio / display
will stop & off.
CHANGE DISPLAY CONTENT
Press << / Year-Month-Day button (3) during normal can switch to display
Year/Month/Day, after 5 seconds timeout and return back to display time.
-6-
OPERATION
SLEEP FUNCTION
During radio on mode, press Snooze / Sleep / Nap button (13) to turn on sleep
mode, the sleep time will keep flashing by 10 seconds, within 10 seconds and
press sleep button can change the duration from 90 min – 15 min. Press on/
off button (12) to cancel sleep function.
NAP timer function (countdown timer)
During radio off mode, press snooze / sleep / NAP button (13) to turn on NAP
mode, the NAP time will keep flashing by 10 seconds, within 10 seconds
and press snooze / sleep / NAP (13) button can change the duration from
90 min – 10 min. The alarm buzzer will sound for 30 min and then shut off
automatically. To stop the alarm buzzer, press the on/off button (12).
Press the snooze / sleep / NAP (13) button has no effect during alarm
operation. Press on/off button (12) to cancel NAP function.
The radio OFF mode, select the display light Auto off / low / high dimmer (21)
to the on/off mode, the LED display will automatically off in 15 seconds. Press
any key button to turn the display on.
RADIO OPERATION
• Press the on/off button (12) to turn radio on.
• Select AM/FM band press the AM/FM band button (11).
• Select the station using the Tuning knob (8).
• Turn the volume knob (7) to adjust volume as required.
• Press the on/off button (12) to turn radio off.
Note : The AM band use an internal directional aerial, rotate the radio
for best reception. Ensure that the FM antenna (23) is completely
unrolled and extended for best FM reception.
RESET
The reset button (20) is located on the back of unit. Use a ballpoint pen to
press it whenever you change the batteries, or unit is not performing as
expected. This will return all settings to default value, you will lose any stored
data (alarm and clock settings).
-7-
OPERATION
PROJECTION UNIT
Focus setting : adjust the projection clock brightness / focus by turning the
brightness / focus adjustment wheel (18) until the projected time is clearly
shown on the ceiling or wall.
-To flip projected image by 180°, press 180° flip button (14).
NOTE: THIS PRODUCT PROJECTS THE TIME IMAGE ON THE CEILING
OR WALL OF A DARKENED ROOM. MAXIMUM PROJECTION
DISTANCE IS 3-9 FEET.
Alarm battery back-up system
This clock radio includes an alarm battery back-up circuit that can wake you
up even if the power is ‘off’ at the selected wake up time the clock display will
be off and the radio will not operate, but a separate mini-buzzer will turn ‘on’
automatically to wake you up, even if you had selected the ‘wake to radio’
option.The alarm will sound for 30 seconds and then shut off automatically. To
stop the alarm buzzer immediately, press the power on/off button. Pressing
the snooze button has no effect during battery back-up alarm operation.
SPECIFICATIONS
Frequency Range.................................... AM 530 – 1710 kHz
FM 88 – 108 MHz
Battery Backup........................................ 1 x CR2032 Flat Lithium Battery
Power Source.......................................... AC 120V ~ 60Hz, 5W
-8-
WARNINGS
WARNING
1.
No naked flame sources, such as lighted candles, should be placed on
the apparatus.
2. Do not place the product in closed bookcases or racks without proper
ventilation.
3. The mains plug is used as the disconnect device, the disconnect device
shall remain readily operable.
4. The ventilation should not be impeded by covering the ventilation
openings with items, such as newspapers, table-cloths, curtains, etc.
5. It shall not be exposed to dripping or splashing and that no objects filled
with liquids, such as vases, shall be placed on the apparatus.
6. Do not connect FM antenna to outside antenna.
7. The unit should not be exposed to direct sunlight, very high or low
temperature, moisture, vibrations or placed in dusty environment.
8. Do not use abrasive, benzene, thinner or other solvents to clean the
surface of the unit. To clean, wipe it will mild non-abrasive detergent
solution and clean soft cloth.
9. Never attempt to insert wires, pins or other such objects into the vents
or opening of the unit.
10. Batteries shall not be exposed to excessive heat such as sunshine, fire
or the like.
11. Class 1 LED product.
12. Attention should be drawn to the environmental aspects of battery
disposal.
Do not dispose this product into usual household garbage at the
end of its lifecycle; hand it over to a collection center for recycling
the electrical and electronic appliances. By recycling, some of the
materials can be reused. You are making an important contribution
to protect our environment. Please inquire your community
administration for the authorized disposal center.
CAUTION
Danger of explosion if battery is incorrectly replaced. Replace only with the
same or equivalent type
-9-
MAGNASONIC® WARRANTY
Consumer Electronics Products and Home Appliances
Thank you for choosing MAGNASONIC®!
MAGNASONIC gives the following express warranty to the original consumer purchaser or gift recipient for this MAGNASONIC
product, when shipped in its original container and sold or distributed in Canada by MAGNASONIC or by an Authorized
MAGNASONIC Dealer:
MAGNASONIC warrants that this product is free, under normal use and maintenance, from any defects in material and
workmanship. If any such defects should be found in this product within the applicable warranty period, MAGNASONIC shall, at
its option, repair or replace the product as specified herein. Replacement parts furnished in connection with this warranty shall be
warranted for a period equal to the unexpired portion of the original equipment warranty.
This warranty shall not apply to:
A. Any defects caused or repairs required as a result of abusive operation, negligence, accident, improper installation or
inappropriate use as outlined in the owner’s manual.
B. Any MAGNASONIC product tampered with, modified, adjusted or repaired by any party other than MAGNASONIC or
MAGNASONIC’s Authorized Service Centres.
C. Damage caused or repairs required as a result of the use with items not specified or approved by MAGNASONIC, including
but not limited to head cleaning tapes and chemical cleaning agents.
D. Any replacement of accessories, glassware, consumable or peripheral items required through normal use of the product
including but not limited to earphones, remote controls, AC adapters, batteries, temperature probe, stylus, trays, filters,
cables, paper, cabinet, cabinet parts, knobs, buttons, baskets, stands, shelves, cookware and cooking utensils.
E. Any cosmetic damage to the surface or exterior that has been defaced or caused by normal wear and tear.
F. Any damage caused by external or environmental conditions, including but not limited to transmission line/power line
voltage or liquid spillage.
G. Any product received without appropriate model, serial number and CSA /cUL /cULus /cETL /cETLus markings.
H. Any products used for rental or commercial purposes.
I.
Any installation, setup and/or programming charges.
Should this MAGNASONIC product fail to operate during the warranty period, warranty service may be obtained upon delivery of
the MAGNASONIC product together with proof of purchase and a copy of this LIMITED WARRANTY statement to an Authorized
MAGNASONIC Service Centre. In-home warranty service may be provided at MAGNASONIC’s discretion on any MAGNASONIC
television with the screen size of 27” or larger. This warranty constitutes the entire express warranty granted by MAGNASONIC
and no other dealer, service centre or their agent or employee is authorized to extend, enlarge or transfer this warranty on behalf
of MAGNASONIC. To the extent the law permits, MAGNASONIC disclaims any and all liability for direct or indirect damages or
losses or for any incidental, special or consequential damages or loss of profits resulting from a defect in material or workmanship
relating to the product, including damages for the loss of time or use of this MAGNASONIC product or the loss of information.
The purchaser will be responsible for any removal, reinstallation, transportation and insurance costs incurred. Correction of
defects, in the manner and period of time described herein, constitute complete fulfillment of all obligations and responsibilities of
MAGNASONIC Electronics to the purchaser with respect to the product and shall constitute full satisfaction of all claims, whether
based on contract, negligence, strict liability or otherwise.
CARRY-IN PARTS & LABOUR WARRANTY PERIODS:
•
Audio / Communications Products: 1 Year (Remote Control, if applicable – 90 Days)
•
DVD Products: 1 Year (Remote Control – 90 Days)
•
LCD & Plasma Display TV: 1 Year (Remote Control – 90 Days)
•
Television Products: 1 Year (Remote Control – 90 Days)
•
VCR Products: 1 Year (Remote Control – 90 Days, Video Heads – 6 Months)
•
Home Appliances: 1 Year
•
Microwave Magnetron parts only additional 3 Years
•
Refrigerator / Freezer Compressor parts only, additional 4 years
•
Heating / Cooling & Humidification Products: 1 Year (Remote Control – 90 Days)
•
Compressor parts only (if applicable), additional 4 years
•
Home Office: 1 Year
To obtain the name and address of the nearest Authorized MAGNASONIC Service Centre or for
more information on this warranty
•
Contact Magnasonic Support by Email: [email protected]
•
Visit www.MAGNASONIC.com
•
Mail your inquiry to:
MAGNASONIC
MAGNASONIC Customer Service. Niagara Falls, ON L2H 1J9; or
•
Call toll free 1-800-663-5954, Monday to Friday 8:00AM – 8:00PM EST
- 10 -
MAGNASONIC is a registered trade-mark
of Circus World Displays Limited. 09.2011
AVERTISSEMENT
AVERTISSEMENT
AFIN D’EVITER UN INCENDIE OU UN RISQUE DE CHOC, NE PAS EXPOSER
CET APPAREIL A LA PLUIE OU L’HUMIDITE.
CAUTION
AFIN DE REDUIRE LE RISQUE D’ELECTROCUTION, VEUILLEZ NE PAS RETIRER L’AVANT OU L’ARRIERE. IL N’EXISTE AUCUNE PIECE DANS CET APPAREIL QUI SOIT COMMODE POUR L’UTILISATEUR. CONSULTEZ UN PERSONNEL QUALIFIE POUR TOUTE REPARATION.
ATTENTION - RISQUE
D’ELECTROCUTION - NE PAS OUVRIR
POUR RÉDUIRE LE RISQUE DE CHOC ÉLECTRIQUE, NE PAS RETIRER LE
COUVERCLE (ENDOS). AUCUNE PIÈCE RÉPARABLE PAR L’UTILISATEUR.
VEUILLEZ CONSULTER LE PERSONNEL DE SERVICE QUALIFIÉ.
Le symbole de l’éclair en pointe de flèche dans un triangle équilatéral est un
avertissement alertant l’utilisateur de « voltage dangereux » à l’intérieur de
l’appareil qui puisse être suffisamment ample pour constituer un risque de choc
électrique auprès d’une personne.
Le point d’exclamation dans un triangle est un avertissement alertant l’utilisateur
de consignes importantes accompagnant le produit qui figurent dans ce guide.
- 11 -
TABLE DES MATIÈRES
Avertissement............................................................................................ 11
Table des Matières.................................................................................... 12
Touches et connexions.............................................................................. 13
Opération................................................................................................... 14
Connexion d’Alimentation.................................................................... 14
Réglage du fuseau horaire.................................................................. 14
DST - L’Heure d’été............................................................................. 14
Régler manuellement l’heure de l’horloge et la date........................... 14
Régler alarme1 et alarme2.................................................................. 14
Réglage de la Sortie Alarme et Alarme Marche/Arrêt.......................... 15
Durée d’alarme et Fonction Minuterie-Sommeil.................................. 15
Changer le Contenu de l’Affichage...................................................... 16
Fonction Somnolence.......................................................................... 16
Minuteur pour Fonction Sieste............................................................. 16
Opération de la Radio.......................................................................... 17
Réinitalisation...................................................................................... 17
Projecteur............................................................................................ 17
Système de batterie de sauvegarde pour l’alarme.............................. 17
Spécifications............................................................................................ 18
Avertissement............................................................................................ 18
GARANTIE MAGNASONIC....................................................................... 19
- 12 -
TOUCHES ET CONNEXIONS
1. TOUCHE ALARME 1 MARCHE/
ARRÊT
2. TOUCHE ALARME
3. TOUCHE <</ANNÉE-MOISJOUR
4. TOUCHE >>/DST
5. TOUCHE MODE
6. TOUCHE ALARME 2 MARCHE/
ARRÊT
7. BOUTON DE VOLUME
8. BOUTON DE RÉGLAGE
9. AFFICHEUR LED
10. HAUT-PARLEUR
11. TOUCHE DE BANDE AM/FM
12. TOUCHE MARCHE/ARRÊT
13. TOUCHE MINUTERIE-SOMMEIL
(SNOOZE)/SOMNOLENCE
(SLEEP)/SIESTE(NAP)
14. BOUTON POUR BASCULER LE
PROJECTEUR 180 °
15. TOUCHE MARCHE/ARRÊT
POUR PROJECTEUR
16. TOUCHE ALARME RADIO/
SONNERIE (BUZZER)
17. PROJECTEUR
18. MOLETTE DE RÉGLAGE
POUR LA MISE AU POINT DU
PROJECTEUR
19. ENTRÉE AUXILIAIRE
20. BOUTON DE RÉINITIALISATION
21. LUMINOSITÉ DE L’AFFICHEUR
AUTO ARRÊT / HAUT/ BAS
(AUTO OFF / HIGH / LOW)
22. CORDE D’ALIMENTATION
23. ANTENNE FM
24. PORTE POUR PILE
25. PLAQUE SIGNALÉTIQUE (SOUS
L’APPAREIL)
Indicateur de l’HEURE
Indicateur PM
Indicateur EN VEILLE
Indicateur ALARME 1
Indicateur ALARME 2
- 13 -
OPÉRATION
CONNEXION D’ALIMENTATION
Branchez le cordon d’alimentation à une source AC courante.
Affichage de l’heure clignote “3” indéfiniment
L’unité ira à la zone 3, qui est le paramètre par défaut, et l’heure correcte
s’affiche, si vous êtes dans un fuseau horaire différent.
Pour régler le fuseau horaire :
Ce produit est réglé à l’usine. Il y a 6 fuseaux horaires programmés dans
votre horloge préréglée.
Zone 1 – Heure Normale de Terre-Neuve
Zone 2 – Heure Normale de l’Atlantique
Zone 3 – Heure Normale de l’Est
Zone 4 – Heure Normale du Centre
Zone 5 – Heure Normale des Rocheuses
Zone 6 – Heure Normale du Pacifique
Appuyez sur la touche >> / DST ou sur la touche >> / A-M-J pour sélectionner
le fuseau horaire 1-6. Une fois que votre numéro de fuseau horaire apparaît
sur l’écran LCD, appuyez sur la touche MODE pour sauvegarder.
DST- L’heure d’été
Appuyer et enfoncer sur la touche >>/DST (4) pour 3 secondes pour activer
ou désactiver la fonction DST.
Régler manuellement l’heure de l’horloge et la date
1. Appuyez et retenez la touche MODE en mode normal pour entrer dans
le mode de réglage.
2. Appuyez sur la touche MODE à plusieurs reprises pour faire défiler les
réglages disponibles dans cet ordre:
Année >> Mois >> Jour >> 12/24 Hr >> Heure HTR >> Minute HTR
Action (durant l’ajustement de données) :
• Appuyer sur la touche << / ANNÉE-MOIS-JOUR (3) pour ajuster les
données en arrière
• Appuyer sur la touche >> / DST (4) pour ajuster les données en avant
• Garder la touche << ou >> enfoncé pour 2 secondes pour activer l’avance
automatique
Régler alarme1 et alarme2
Appuyer sur la touche alarme (2) pendant le mode normale et le garder
enfoncé pour plus de 2 secondes pour entrer dans le réglage mode. Appuyer
sur la touche alarme (2) pour changer le cycle du mode comme suit.
- 14 -
OPÉRATION
Normale >> Heure AL 1 >> Minute AL 1 >> Alarme sur semaine AL 1 >>
Heure AL 2 >> Minute AL 2 >> Alarme sur semaine AL 2 >> Normale
Sélectionnez le mode d’alarme jour de semaine comme suit Action (during
data adjustment) :
1-5 : Du lundi au vendredi
1-7 : Semaine entière
6-7 : Samedi et dimanche
1-1 : Un our de la semaine
Action (durant l’ajustement de données) :
• Appuyer sur la touche <</ANNÉE-MOIS-JOUR (3) pour ajuster les
données en arrière
• Appuyer sur la touche >>/DST (4) pour ajuster les données en avant
• Garder la touche << ou >> enfoncé pour 2 secondes pour activer l’avance
automatique
RÉGLAGE DE LA SORTIE ALARME ET ALARME MARCHE/ ARRÊT
Changer la sortie alarme
1. Appuyer sur la touche ALARME RADIO/SONNERIE (BUZZER) (16) à
la position radio pour choisir le réveil à la radio ou à la position sonnerie
(BUZZ) pour se réveiller par la sonnerie.
2. Sélectionnez la touche LUMINOSITÉ DE L’AFFICHEUR AUTO ARRÊT /
HAUT/ BAS (21) à la position MODE AUTO ARRÊT (AUTO OFF) Régler
à la position alarme arrêt pour désactiver tout les alarmes.
DURÉE D’ALARME ET FONCTION MINUTERIE-SOMMEIL (SNOOZE)
Durée d’alarme
L’alarme sonnerie ou radio continuera pour 30 minutes si aucune touche est
appuyé. Il arrêtera automatiquement et attendra le même temps d’alarme le
lendemain.
Action pour minuterie-sommeil (SNOOZE)
• Pendant l’alarme, appuyer sur la touche minuterie-sommeil (SNOOZE)
(13) pour activer la fonction minuterie-sommeil (SNOOZE). L’alarme
radio ou sonnerie (BUZZ) arrêtera.
• L’intervalle de minuterie-sommeil (SNOOZE) est de 9 minutes (sans
compter les secondes de décalage)
• La minuterie-sommeil (SNOOZE) continuera à moins que la touche
marche/arrêt (12) soit mise à la position arrêt pendant l’alarme radio ou
la sonnerie (BUZZ). Il arrêtera automatiquement après 30 minutes.
- 15 -
OPÉRATION
•
Sélectionnez la touche de LUMINOSITÉ DE L’AFFICHEUR AUTO
ARRÊT / HAUT/ BAS (AUTO OFF / HIGH / LOW) (21) à la position auto
off, pendant l’alarme l’afficheur démontre qu’il est activé, appuyer sur la
touche MINUTERIE-SOMMEIL (SNOOZE)/SOMNOLENCE (SLEEP)/
SIESTE(NAP) (13) qui activera la fonction minuterie-sommeil (SNOOZE),
la sonnerie (BUZZER) ou la radio. L’affichage cessera et l’appareil sera
éteint.
CHANGER LE CONTENU DE L’AFFICHAGE
Appuyer sur la touche <</ANNÉE-MOIS-JOUR (3) en fonction normale,
vous pouvez afficher ANNÉE/MOIS/JOUR et après 5 secondes il retourne à
l’affichage de l’heure.
Indicateur de l’ANNÉE
Indicateur du MOIS
Indicateur du JOUR
FONCTION SOMNOLENCE (SLEEP)
Pendant que la radio est en marche, appuyer sur la touche minuteriesommeil (SNOOZE)/Somnolence (SLEEP)/Sieste(NAP) (13) pour activer
cette fonction. Le temps de sommeil se mettra à clignoter par intervalles
de 10 secondes, dans les dernières 10 secondes appuyez sur le bouton
Somnolence (SLEEP) pour changer les minutes de 90 à 15. Appuyer sur la
touche marche/arrêt (12) pour annuler la fonction Somnolence (SLEEP).
Minuteur pour fonction SIESTE (NAP)
Pendant que la radio est éteinte, appuyer sur la touche minuterie-sommeil
(SNOOZE)/Somnolence (SLEEP)/Sieste(NAP) (13) pour activer cette
fonction. Le temps de Sieste(NAP) se mettra à clignoter par intervalles de 10
secondes, dans les dernières 10 secondes appuyez sur le bouton minuteriesommeil (SNOOZE)/Somnolence (SLEEP)/Sieste(NAP) (13) pour changer
les minutes de 90 min à 10 min.
L’alarme retentit pendant 30 min puis s’éteint automatiquement. Pour arrêter
la sonnerie d’alarme, appuyez sur le bouton marche / arrêt (12). Appuyer sur
la touche minuterie-sommeil (SNOOZE)/Somnolence (SLEEP)/Sieste(NAP)
(13) n’a pas d’effet pendant le fonctionnement d’alarme. Appuyez sur le
bouton marche / arrêt (12) pour annuler la fonction Sieste(NAP). Pendant
que la radio est éteinte, place la touche de LUMINOSITÉ DE L’AFFICHEUR
AUTO ARRÊT / HAUT/ BAS (AUTO OFF / HIGH / LOW) . (21) à la position
marche / arrêt, l’affichage LED s’éteint automatiquement en 15 secondes.
- 16 -
OPÉRATION
Appuyez sur n’importe quelle touche pour activer l’affichage
OPÉRATION DE LA RADIO
Appuyer la touche MARCHE/ ARRÊT (12) pour allumer la radio. Pour choisir
la bande AM/FM, appuyer la touche de bande AM/FM (11). Choisir le poste
en utilisant le bouton de réglage (8). Ajuste le volume en tournant le bouton
de volume (7) au besoin. Appuyer la touche MARCHE/ ARRÊT (12) pour
éteindre la radio.
Note :La bande AM utilise une antenne directionnelle interne, tourner la
radio pour une meilleure réception.Assurez-vous que l’antenne FM (23) est
complètement déroulée et étendue pour une meilleure réception FM.
RÉINITIALISATION
Le bouton de réinitialisation (20) est situé à l’arrière de l’appareil. Utiliser
un stylo bille pour l’appuyer quand vous changez les piles ou si l’appareil
ne fonctionne pas comme prévu. Ceci retournera tous les paramètres aux
valeurs par défaut et vous perdrez toutes les données stockées (réglages de
l’alarme et l’horloge).
PROJECTEUR
Réglage de la mise au point : Tournez la molette de réglage du projecteur
(18) pour régler l’intensité lumineuse et la mise au point du projecteur jusqu’à
ce que l’heure projetée sur le mur ou le plafond s’affiche clairement. Pour
faire basculer l’image de 180°, appuyez sur le bouton pour faire basculer le
projecteur de 180° (14)
REMARQUE : L’APPAREIL PROJETTE L’HEURE SUR LE PLAFOND OU
UN MUR DANS UNE PIÈCE SOMBRE. LA DISTANCE MAXIMALE DE
PROJECTION EST DE 3 À 9 PIEDS.
Système de batterie de sauvegarde pour l’alarme
Ce radio-réveil comporte un circuit de batterie de sauvegarde pour l’alarme
qui peut vous réveiller, même si vous êtes sans pouvoir à l’heure du réveil
définie. L’affichage de l’horloge sera désactivé et la radio ne fonctionnera
pas, mais un signal sonore distinct signalera automatiquement pour vous
réveiller, même si vous aviez choisi l’option du réveille à la radio. L’alarme
retentit pendant 30 secondes, puis s’éteint automatiquement. Pour arrêter la
sonnerie d’alarme immédiatement, appuyez sur la touche marche / arrêt. En
appuyant sur la touche minuterie-sommeil (SNOOZE) n’a pas d’effet pendant
le fonctionnement de l’alarme de batterie de sauvegarde.
- 17 -
SPECIFICATIONS
Fréquence : ............................................. AM 530 – 1710 kHz
FM 88 – 108 MHz
Batterie de secours : ............................... 1x CR2032 batterie au lithium plate
Alimentation : . ........................................ AC 120V ~650 Hz, 5W
AVERTISSEMENT
AVERTISSEMENT
1. Aucune flamme nue telle que des chandelles peuvent être placée sur
l’appareil.
2. Ne placez pas le produit dans une étagère fermée ou des supports sans
ventilation adéquate.
3. Lorsque la fiche principale est utilisée pour débrancher l’appareil, le
dispositif restera opérationnel.
4. La ventilation ne doit pas être empêchée en recouvrant les orifices
d’aération avec des objets tels que des journaux, nappes, rideaux, etc.
5. Le dispositif ne doit pas être exposé à des gouttes ou des éclaboussures
et aucun objet rempli de liquides, tels que des vases, doit être placé sur
l’appareil.
6. Ne pas connecter l’antenne FM à une antenne extérieure.
7. Cette unité ne doit pas être exposée directement au soleil, des
températures très élevées ou basses, humidité, vibrations ou placés
dans un environnement poussiéreux.
8. Ne pas utiliser de produits abrasifs, du benzène, des diluants ou solvants
pour nettoyer la surface de l’unité. Pour nettoyer, essuyez-le avec une
solution non-abrasive et un chiffon doux et propre.
9. Ne tentez jamais d’insérer les fils, des épingles ou autres tels objets dans
les fentes ou ouvertures de l’appareil.
10. Les piles ne doivent pas être exposées à une chaleur excessive comme
le soleil, feu, etc.
11. Produit LED Classe I
12. L’attention devrait être attirée sur les aspects environnementaux de
l’élimination des piles.
Ne jetez pas ce produit avec les ordures ménagères à la fin de son
cycle de vie; le remettre à un centre de collecte pour le recyclage
des appareils électriques et électroniques. En recyclant, certains
matériaux peuvent être réutilisés. Vous apportez une contribution
importante pour protéger notre environnement. S’il vous plaît
renseignez-vous auprès de votre municipalité pour l’endroit de votre
centre agréé d’élimination.
ATTENTION: Danger d’explosion si la pile n’est pas correctement remplacée.
Remplacer seulement avec le même type ou équivalent.
- 18 -
GARANTIE MAGNASONIC®
Appareils électroniques grand public et électroménagers
Merci d’avoir choisi MAGNASONIC®!
MAGNASONIC accorde la garantie expresse suivante à l’acheteur original de cet appareil MAGNASONIC ou à la personne qui l’a
reçu en cadeau, pourvu qu’il ait été expédié et vendu ou distribué au Canada par MAGNASONIC ou un détaillant MAGNASONIC
autorisé dans son emballage original. MAGNASONIC garantit que cet appareil est exempt de tout défaut de matériau et de fabrication
dans des conditions normales d’utilisation et d’entretien. Advenant le cas où cet appareil s’avèrerait défectueux au cours de la période
pendant laquelle il est couvert par la présente garantie, MAGNASONIC s’engage à le réparer ou, le cas échéant et à son entière
discrétion, le remplacer. Les pièces de rechange utilisées dans l’exécution de la présente sont aussi couvertes par la garantie pendant
une période égale à la portion non échue de la garantie originale sur l’appareil.
La présente garantie ne couvre pas :
A. Les défectuosités ni les réparations résultant d’un usage abusif, d’une négligence, d’un accident ou d’une installation
inadéquate ou un usage inapproprié selon les directives fournies dans le guide d’utilisation accompagnant l’appareil.
B. Les appareils de marque MAGNASONIC trafiqués, modifiés, réglés, ajustés ou réparés par une entité autre que MAGNASONIC
ou un centre de réparation autorisé par MAGNASONIC.
C. Les dommages causés ni les réparations requises à l’appareil résultant de son usage avec des composantes ou accessoires
non recommandés ni approuvés par MAGNASONIC, incluant, sans en exclure d’autres, les cassettes et/ou produits chimiques
de nettoyage.
D. Le remplacement d’accessoires ou de pièces de verre, consomptibles ou périphériques requis dans le cadre de l’usage normal
de l’appareil incluant, sans en exclure d’autres, les écouteurs, télécommandes, adaptateurs CA, piles, sondes de température,
pointes de lecture, stylets, plateaux, filtres, câbles, papier, boîtier et composantes de boîtiers, boutons, paniers, supports,
tablettes et accessoires et ustensiles de cuisson.
E. Tout dommage apparent à la surface ou au boîtier extérieur de l’appareil et attribuable à la détérioration ou à l’usure résultant
d’un usage normal.
F. Tout dommage causé par des conditions externes ou environnementales, incluant, sans en exclure d’autres, les lignes de
transmission ou de transport d’énergie ou le renversement de liquide.
G. Tout appareil ne portant pas les identifications appropriées quant aux numéros de modèle et de série ni les étiquettes et
attestations de l’ACNOR, de l’ULC, de l’ULI, de l’ETL au Canada et aux États-Unis.
H. Tout appareil utilisé à des fins commerciales ou de location.
I. Tous les frais d’installation, d’ajustement et/ou de programmation.
Si cet appareil de marque MAGNASONIC devient défectueux au cours de la période de garantie, une réparation peut être obtenue,
conformément aux termes de la présente garantie, en présentant cet appareil MAGNASONIC avec la preuve d’achat originale et une
copie de la présente GARANTIE LIMITÉE à un centre de service autorisé par MAGNASONIC. Le service à domicile est effectué, à
la discrétion de MAGNASONIC, sur les téléviseurs de marque MAGNASONIC dotés d’un écran de 27 pouces et plus. La présente
garantie constitue l’intégrale de la garantie expresse accordée par MAGNASONIC et aucun autre détaillant, centre de service ni leur
agent ou employé n’est autorisé à prolonger, étendre ou transférer la présente garantie au nom de MAGNASONIC. Dans la mesure
où la loi le permet, MAGNASONIC décline toute responsabilité pour des dommages ou pertes directs et indirects, tous dommages
accessoires, particuliers ou consécutifs ou perte de profits résultant d’un défaut de matériau ou de fabrication de cet appareil, incluant
les dommages attribuables à la perte de temps ou perte de jouissance de cet appareil MAGNASONIC ou de la perte de données. Il
incombe à l’acheteur de défrayer les coûts encourus pour l’enlèvement, la réinstallation, le transport et l’assurance de cet appareil.
La correction de toute défectuosité, de la manière et dans les délais indiqués dans la présente, constitue l’exécution intégrale de tous
les engagements et obligations contractés par MAGNASONIC envers l’acheteur à l’égard de cet appareil et représentera la pleine
et entière satisfaction vis-à-vis de toutes les réclamations contractuelles ou attribuables à la négligence, et la responsabilité absolue
ou autre.
PÉRIODES DE GARANTIE SUR LES PIÈCES ET LA MAIN-D’ŒUVRE POUR LES APPAREILS RAPPORTÉS AUX CENTRES DE
SERVICE :
• Appareils audio et de communication : 1 an (télécommande, s’il y a lieu – 90 jours)
• Lecteurs DVD : 1 an (télécommande – 90 jours)
• Téléviseurs à écran ACL ou plasma : 1 an (télécommande – 90 jours)
• Téléviseurs : 1 an (télécommande – 90 jours)
• Magnétoscopes : 1 an (télécommande – 90 jours, têtes vidéo – 6 mois)
• Électroménagers : 1 an
- Four à micro-ondes, pièces de magnétron seulement, 3 ans additionnels
- Réfrigérateurs/congélateur, pièces de compresseur seulement, 4 ans additionnels
Pour obtenir le nom et l’adresse du centre de service MAGNASONIC autorisé le plus près de chez vous ou pour plus de
renseignements sur cette garantie :
•
Contacter le support MAGNASONIC par courriel: [email protected]
•
Visitez www. MAGNASONIC.com
•
Postez votre demande à
MAGNASONIC
MAGNASONIC Customer Service. Niagara Falls, ON L2H 1J9; ou
•
Composez le numéro sans frais : 1-800-663-5954, du lundi au vendredi, de 08:00 à 20:00 heure de l’Est.
MAGNASONIC est une marque déposée
- 19 de Circus World Displays. 09.2011
MAAC500
Please visit our website for more information:
S’il vous plaît visiter notre site web
pour plus d’informations :
• Products
• Produits
• Warranty Information
• Informations de la garantie
• Customer Support
• Service à la clientèle
• Extended Warranties
• Garanties prolongées
• Product Updates
• Mises à jour de produits
• Company Information
• Information de l’entreprise
www.MAGNASONIC.com