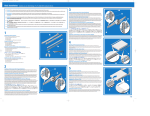
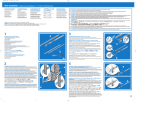
1
Connectez le câble IDE et l’alimentation à votre disque
dur, CD-ROM, CDRW ou lecteur DVD. Connectez
également le câble audio à votre lecteur CD ou DVD.
Fixez ensuite le périphérique à l’aide des 4 vis fournies.
1.
USB 2.0 External Drive Box
Firewire External Drive Box
Installation Guide
Installationsanleitung
Manuel Utilisateur
Manuale d’uso
English
Deutsch
Français
Italiano
For Driver Installation please refer
to the Software Installation Manual
Carefully prise the two fixing rails from the backside of the
housing using a screwdriver. Strip the rails off carefully
from back to front. Separate the top cover from the base.
Connettete il cavo IDE e l’alimentazione al vostro HDD, CDROM, CD-R(W) o DVD drive e il cavo audio (solo per drive CD,
CD-RW e DVD). Nel caso stiate installando un drive CD-ROM,
CD-R(W) o DVD collegate anche il cavo audio e rimuovete il
pannello frontale. Fissate poi il drive con le 4 viti incluse.
Heben Sie die seitlichen Gehäuseschienen an der
Rückseite des Gehäuses mit einem Schraubenzieher
vorsichtig an. Heben Sie die Verschlussschienen
vorsichtig von hinten nach vorne ab. Öffnen Sie dann
die beiden Gehäusehälften.
Retirez les sécurités des rails à l’aide d’un tournevis plat.
Pousser les rails de logement latéraux en tirant vers
l'arrière.
Sfilare le rotaie facendo delicatamente pressione sulla parte
posteriore del Box con un cacciavite. Sganciate il guscio
superiore dalla base.
3.
Add the top cover to the base taking care for not to clamp
the cables. Attach the fixing rails starting at the front and
working towards the back by pressing the clips into the
holes. Finally stick on the bottom labels.
2.
LINDY Model No. 42926 USB 2.0/1.1 & SATA
LINDY Model No. 42924 USB 2.0/1.1 & FireWIre800
LINDY Model No. 42913 USB 2.0/1.1 & FireWIre
LINDY Model No. 20698 Version USB 2.0/1.1 ALI Chip
www.LINDY.com
© LINDY ELECTRONICS LIMITED & LINDY-ELEKTRONIK GMBH - 4th EDITION (MAY 2004)
Connect the IDE and Power Cable to your HDD, CD-ROM,
CDR(W) or DVD drive and the Audio Cable to your CDROM, CD-R(W) or DVD drive.
If you use a CD-ROM, CD-RW or DVD drive, remove the
front panel from the Housing.
Mount the drive carefully on to the base and secure using
the 4 screws supplied.
Schliessen Sie die IDE-, Stromversorgungs- und AudioSound-Kabel Ihres Laufwerkes an. Entfernen Sie die
Frontblende wenn Sie ein CD, CD-R(W) oder DVD
Laufwerk einsetzen wollen. Legen Sie das Laufwerk
vorsichtig in die untere Gehäusehälfte und schrauben
Sie es mit 4 Schrauben fest.
Setzen Sie die Gehäusehälften wieder zusammen und
haken Sie die Gehäuseschienen an der Frontblende
ein. Drücken Sie die Gehäuseschienen von vorne nach
hinten vorsichtig in die vorgesehenen Aussparungen
bis Sie an der Rückseite einrasten.
Befestigen Sie abschliessend die Produktaufkleber an
der Unterseite des Gehäuses.
Lorsque vous aurez installé correctement la totalité des
composants, refermez les couvercles, puis les rails
latéraux.
Riposizionate il guscio superiore facendo attenzione ai cavi e
reinserite le due rotaie di fissaggio e bloccatele facendo scattare
le clips nelle loro sedi. Per concludere attaccate l’adesivo sul
fondo del box.
OPERATION
(ENGLISH)
Caution: During an active data transfer the connection to the
computer must not be unplugged!
Failure to comply may cause the loss of data!
Only one Interface can be used at one time!
Driver Installation USB and FireWire
Modern operating systems like Windows XP already
include the necessary drivers provided your USB 2.0 Card
is installed correctly and drivers are up to date. If the
external Drive is recognized correctly as a USB 2.0 device
please do not install drivers again.
For other operating systems please plug in the External
Drive Box and follow the instructions.
Please also refer to the enclosed Software Installation
Manual and Installation CD of the chipset supplier.
Installation du pilote
(FRANCAIS)
Il est vivement recommandé de ne pas déconnecter le
périphérique USB lorsqu’il effectue un transfert !
Cela peut causer une perte de données!
FCC Warning
Les systèmes d’exploitation actuels comme Windows XP
incluent directement le pilote USB 2.0 et il sera mis à jour
automatiquement. Si le disque dur externe est reconnu
correctement en tant que périphérique USB 2.0 n’essayez
pas de réinstaller le pilote.
Pour les autres systèmes d’exploitation, connectez le
boîtier externe et suivez les instructions.
Veuillez également vous référer au manuel fourni pour
l’installation des pilotes sous différents systèmes.
INSTALLAZIONE
Beachten Sie bitte, dass während eines aktiven
Datentransfers die Verbindung zum Rechner nicht getrennt
werden darf!
ATTENZIONE: durante il trasferimento dei dati non scollegate
l’ Astuccio Esterno dal PC.
Es darf immer nur eine der externen
Schnittstellen gleichzeitig betrieben werden!
Moderne Betriebssysteme wie Windows XP (mit installierter
USB 2.0 Karte und aktuellen Treibern) haben bereits alle
notwendigen Treiber an Board. Sollte das externe Laufwerk
hier bereits als USB 2.0 Device erkannt werden und
funktionieren, so sollte keine erneute Treiberinstallation
vorgenommen werden.
Für andere Betriebssysteme: Schließen Sie das Laufwerksgehäuse an und folgen Sie den Bildschirmanweisungen.
Orientieren Si sich gegebenenfalls am beiliegenden
Software Installation Manual des Chipsatzherstellers sowie
der Installations-CD.
European EMC Directive CE statement
This equipment complies with the requirement for CE mentioned in
the European Directive and Standards EN55022 and EN55024.
Seulement une seule interface peut être utilisée à
la fois!
Hinweis & Treiberinstallation (DEUTSCH)
Bei Nichtbeachtung droht Datenverlust!
Radio Frequency Energy, Certifications
(Italiano)
Ciò potrebbe causare perdite di dati e
malfunzionamenti!
N.B. : Non è possibile utilizzare entrambe le
interfacce (USB 2.0 e Firewire)
contemporaneamente!
Installazione dei driver USB e FireWire
I moderni sistemi operativi come Windows XP includono
già tutti i driver necessari al funzionamento dell’astuccio
esterno: se, dopo averlo collegato, il Box Esterno viene
riconosciuto e funziona correttamente non installate alcun
altro driver.
Per gli altri sistemi operativi collegate l’Astuccio Esterno e
seguite le istruzioni che compaiono a video. Fate anche
riferimento al manuale di installazione del software e al CD
di installazione fornito dal produttore del chipset.
This equipment has been tested and found to comply with the
limits for a Class B Digital device, pursuant to part 15 of the
FCC Rules. These limits are designed to provide reasonable
protection against harmful interference in a residential
installation. This equipment generates, uses, and can radiate
radio frequency energy and, if not installed and used in
accordance with the instructions, may cause harmful
interference to radio communications. However, there is no
guarantee that interference will not occur in a particular
installation. If this equipment does cause harmful
interference to radio or television reception, which can be
determined by turning the equipment off and on, the user is
encouraged to try to correct the interference by one or more
of the following measures:
Reorient or relocate the receiving antenna
Increase the separation between the equipment and receiver
Connect the equipment into an outlet on a circuit different
from that to which the receiver is connected
Consult the dealer or an experienced technician for help
You are cautioned that changes or modifications not expressly
approved by the party responsible for compliance could void your
authority to operate the equipment.
Canadian Department of Communications RFI statement
This equipment does not exceed the class B limits for radio noise
emissions from digital apparatus set out in the radio interference
regulations of the Canadian Department of Communications.
Le présent appareil numérique n’émet pas de bruits
radioélectriques dépassant les limites applicables aux appareils
numériques de la classe A prescrites dans le règlement sur le
brouillage radioélectriques publié par le ministère des
Communications du Canada
LINDY No.
42926,
42924, 20698, 42913
For Home and Office Use
Tested to Comply with FCC Standards
© LINDY ELECTRONICS LIMITED & LINDY-ELEKTRONIK GMBH - 4th EDITION (MAY 2004)