1
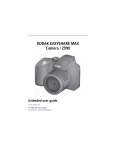
KODAK EASYSHARE
Camera / C443
Extended user guide
www.kodak.com
For videos of your camera:
www.kodak.com/go/c443demos
For help with your camera:
www.kodak.com/go/c443support
Eastman Kodak Company
Rochester, New York 14650
© Eastman Kodak Company, 2011
All screen images are simulated.
Kodak, EasyShare, Max, and Pulse are trademarks of Eastman Kodak Company.
4H8600_en
Product features
Front view
Shutter button
Flash button
Mode button
Power button
Zoom (Wide
Angle/Telephoto)
lever
Flash
Self-timer/
Video light
Microphone
Lens
NOTE: Your camera offers a built-in Help system. See page 40.
www.kodak.com/go/support
i
Product features
Back view
Delete, Menu, Info,
Review buttons
LCD
Strap post
USB port
OK
Share button
Tripod
socket
Battery compartment,
SD/SDHC Card slot
NOTE: Your camera offers a built-in Help system. See page 40.
ii
www.kodak.com/go/support
Table of contents
1
1 Setting up your camera .........................................................................1
Attaching the strap ....................................................................................... 1
Loading the AA batteries............................................................................... 1
Turning on the camera .................................................................................. 2
Setting the language and date/time............................................................... 2
Storing pictures on an optional SD or SDHC Card........................................... 3
2 Taking pictures/videos ...........................................................................4
Taking pictures.............................................................................................. 4
Taking a video .............................................................................................. 5
Understanding the picture-taking icons.......................................................... 6
Know when your batteries need attention...................................................... 6
Using the optical zoom.................................................................................. 7
Using the flash.............................................................................................. 8
Using different modes ................................................................................... 9
Using shortcuts ........................................................................................... 11
Using the self-timer..................................................................................... 12
Using burst ................................................................................................. 12
Taking panoramic pictures........................................................................... 13
3 Sharing and tagging pictures ..............................................................14
Sharing through social networks.................................................................. 14
Tagging pictures ......................................................................................... 16
Marking pictures/videos for emailing ........................................................... 18
4 Reviewing and editing .........................................................................19
Reviewing pictures/videos ........................................................................... 19
Deleting pictures/videos .............................................................................. 20
Viewing pictures/videos in different ways..................................................... 21
A smarter way to find and enjoy your pictures.............................................. 22
Understanding the review icons................................................................... 23
www.kodak.com/go/support
iii
Table of contents
Creating a slide show.................................................................................. 24
Displaying pictures/videos on a television..................................................... 25
Using the menu button in review................................................................. 26
Cropping pictures........................................................................................ 26
Rotating pictures......................................................................................... 27
Editing videos ............................................................................................. 28
Selecting multiple pictures/videos ................................................................ 29
Copying pictures/videos............................................................................... 29
5 Doing more with your camera .............................................................30
Using the menu button to change settings................................................... 30
Using the Setup menu ................................................................................. 33
6 Transferring, printing pictures .............................................................36
Download software, transferring pictures..................................................... 36
Printing pictures.......................................................................................... 37
Marking your pictures for printing................................................................ 39
7 Troubleshooting ..................................................................................40
Getting help from your camera .................................................................... 40
Troubleshooting .......................................................................................... 41
Getting help on the Web ............................................................................. 44
8 Appendix .............................................................................................45
Specifications.............................................................................................. 45
Care and maintenance ................................................................................ 47
Upgrading your software and firmware........................................................ 47
Storage capacities ....................................................................................... 48
Important safety instructions ....................................................................... 48
Battery replacement, battery life .................................................................. 49
Limited warranty ......................................................................................... 50
Regulatory compliance ................................................................................ 51
iv
www.kodak.com/go/support
1
Setting up your camera
Attaching the strap
Loading the AA batteries
Purchase extra batteries
www.kodak.com/go/support
www.kodak.com/go/accessories
1
Setting up your camera
Turning on the camera
Setting the language and date/time
Language:
to change.
OK to accept.
Date/Time:
At the prompt, press OK.
to change current field.
for previous/next field.
OK to accept.
NOTE: To change language in the future, use the Setup Menu (see page 33).
2
www.kodak.com/go/support
Setting up your camera
Storing pictures on an optional SD or SDHC Card
Your camera has internal memory. We recommend purchasing an SD or SDHC Card to
conveniently store more pictures/videos.
CAUTION:
A card can only be inserted one way; forcing it may cause
damage. Inserting or removing a card while the camera is on may
damage the pictures, the card, or the camera.
1 Turn off the camera.
2 Insert the card.
Push it until it clicks.
3 Turn on the camera.
Purchase accessories
www.kodak.com/go/support
www.kodak.com/go/accessories
3
2
Taking pictures/videos
Taking pictures
To get clear, focused pictures:
1 The camera turns on in Smart Capture mode.
(If it’s in a different mode, press the Mode
button, then
until the LCD displays
Smart Capture mode
, then press OK.)
2 Compose the picture.
3 Press the Shutter button halfway to focus and
set exposure. When the framing marks turn green,
press the Shutter button completely down.
Using the framing marks
Framing marks
Framing marks indicate the camera focus area.
1 Press the Shutter button halfway.
If the camera is not focusing on the desired subject,
release the Shutter button and recompose the scene.
2 Press the Shutter button completely down to
take the picture.
NOTE: Multiple framing marks may appear when faces are detected.
NOTE: Your camera offers a built-in Help system. See page 40.
4
www.kodak.com/go/support
Taking pictures/videos
Taking a video
1 Press the Mode
button, then
until
, then press OK.
the LCD displays Video
2 Press the Shutter button completely down,
then release it. To stop recording, press and release
the Shutter button again.
To review and work with videos, see page 19.
Reviewing the picture/video just taken
After you take a picture/video, the LCD briefly displays the picture or the first frame of
a video. (To take new pictures/videos sooner, press the Shutter button halfway.)
NOTE: Audio is captured during video recording. Audio can be heard when the video is played on a
computer or when the camera is connected to a TV (page 25).
While a picture/video is displayed,
you may:
Delete the current picture/video
OK Play/pause a video
NOTE: To review pictures/videos anytime, see page 19.
www.kodak.com/go/support
5
Taking pictures/videos
Understanding the picture-taking icons
Shortcuts*
Focus mode
Self timer/Burst
Exposure compensation
Flash mode
Pictures/time remaining
Capture mode
Zoom indicator
Keyword tag
Battery level
* For more about shortcuts, see page 11.
Know when your batteries need attention
The battery level icon works like the gas gauge in your car, but appears only when the
battery requires your attention. (If you’re viewing shortcuts, the battery level is always
displayed. See page 11.)
Purchase extra batteries
6
www.kodak.com/go/accessories
www.kodak.com/go/support
Taking pictures/videos
Using the optical zoom
1 Use the LCD to frame your subject.
2 To zoom in, turn the Zoom lever toward Telephoto
(T). To zoom out, turn it toward Wide Angle (W).
3 Take the picture.
NOTE: For focus distances, see Specifications starting on page 45.
Using digital zoom
Use digital zoom to get up to 5X magnification beyond optical zoom. (Digital zoom is
not available in Smart Capture mode.) Turn the Zoom lever toward Telephoto (T) until
the slider on the LCD is at the end of the optical zoom range. Release Telephoto (T),
then turn it again.
NOTE: You may notice decreased image quality when using digital zoom.
www.kodak.com/go/support
7
Taking pictures/videos
Using the flash
Press the Flash button repeatedly until the LCD displays the desired flash mode.
Flash modes
Flash fires
Auto
When the lighting conditions require it.
Fill (Flash On)
Every time you take a picture, regardless of the lighting
conditions. Use when the subject is in shadow or is “backlit”
(when the light is behind the subject).
NOTE: Not available in Smart Capture mode.
Red-eye
Preflash
Reduction
Choose a setting
in the Setup
menu, page 34. Digital
Correction
The flash fires before the picture is taken to reduce the chance
of red-eye.
Off
Never
8
The camera digitally corrects red-eye after a picture is taken.
NOTE: When using digital correction, image processing takes longer
than when using preflash.
www.kodak.com/go/support
Taking pictures/videos
Using different modes
Press the Mode
button, then
until the LCD displays the mode that best
suits your subjects and surroundings, then press OK.
Use this mode
For
General picture taking—it offers excellent image quality and ease
of use.
■ Faces get focus and exposure priority.
Smart
Capture
■ The scene is analyzed for other content and for lighting.
You can choose the best picture size and aspect ratio for your
needs—just press the Menu
button and choose Picture Size.
■ 3:2 (the best choice when making 4 x 6 prints)
■ 16:9 (wide screen)
■ 4:3 (the default setting)
Program
Advanced picture taking—allows more access to manual settings
than Smart Capture.
Scene
Point-and-shoot simplicity when taking pictures in practically any
situation. (See page 10.)
Video
Capturing video with sound.
www.kodak.com/go/support
view single picture.
9
Taking pictures/videos
Using Scene (SCN) modes
Choose a Scene mode—for great pictures in practically any situation.
1 Press the Mode
press OK.
button, then
until the LCD displays SCN, then
2 Press
to view scene mode descriptions.
If the mode description turns off before you finish reading it, press OK.
3 Press OK to choose a Scene mode.
SCN mode
For
Portrait
Full-frame portraits of people.
Sport
Action pictures.
Landscape
Distant scenes.
High ISO
People indoors, in low-light scenes.
Close-up
Close range. Use available light instead of flash, if possible.
Flower
Close-ups of flowers or other small subjects in bright light.
Sunset
Subjects at dusk.
Backlight
Subjects that are in shadow or “backlit.”
Candle Light
Subjects illuminated by candle light.
Children
Action pictures of children in bright light.
Manner/
Museum
Quiet occasions, like a wedding or lecture. Flash is off. For best results, place
the camera on a steady surface or tripod.
Text
Documents. For best results, place the camera on a steady surface or tripod.
Beach
Bright beach scenes.
Snow
Bright snow scenes.
Fireworks
Fireworks. For best results, place the camera on a steady surface or tripod.
Self-Portrait
Close-ups of yourself. Assures proper focus and minimizes red eye.
10
www.kodak.com/go/support
Taking pictures/videos
SCN mode
For
Night Portrait Reduces red eye of people in night scenes or low-light conditions.
Night
Landscape
Distant scenery at night. Flash does not fire.
Blur Reduction Reducing blur caused by camera shake or subject motion.
Panorama R-L, “Stitching” 2 or 3 pictures into 1 panoramic scene. See page 13.
L-R
Panning Shot
Emphasizing horizontal motion, with a sharp subject and blurred
background.
Using shortcuts
Your camera has a clean, uncluttered interface. For quick access to the most popular
capture and review functions:
1 Press the Info
button.
The shortcuts appear. To hide the shortcuts again, press
.
2 Press
to access functions like Exposure Compensation, Self-timer, and Auto
focus. (You’ll see different functions in different modes.)
3 Press
to choose a setting.
Shortcuts
Press to
show/hide
shortcuts.
www.kodak.com/go/support
11
Taking pictures/videos
Using the self-timer
Use the self-timer when you want to be included in a picture, or to ensure a steady
Shutter button press. For best results, place the camera on a tripod or steady surface.
You can turn on the self-timer using a shortcut (see page 11) or these steps:
1 Press the Menu
2 Press
button. Press
to choose Self-timer, then press OK.
to choose a Self-timer setting:
10 Seconds— 10 A picture is taken after a 10-second delay (so you have time
to get into the scene).
2 Seconds— 2
A picture is taken after a 2-second delay.
2 Picture Timer— 2x The first picture is taken after a 10-second delay. A
second picture is taken 8 seconds later.
3 Compose the scene. Press the Shutter button halfway, then completely down.
The camera takes the picture/pictures after the delay.
To take a video after a 2- or 10-second delay, use the same procedure but press the
Shutter button completely down.
Using burst
Use the burst feature to take up to 3 pictures in rapid succession. You can turn on
burst using a shortcut (see page 11) or these steps:
1 Press the Menu
2 Press
button.
to choose Self-timer/Burst, then press
3 Press the Menu
to choose Burst On.
button.
4 Compose the scene. Press the Shutter button halfway, then completely down
and hold it.
The camera stops taking pictures when you release the Shutter button, when pictures
are taken, or when there is no more storage space. Burst is unavailable in some modes.
12
www.kodak.com/go/support
Taking pictures/videos
Taking panoramic pictures
Use panorama to “stitch” up to 3 pictures into a panoramic scene.
NOTE: For best results, use a tripod. Only the panoramic picture is saved; individual pictures are not.
(Exposure and white balance are set with the first picture. The flash is set to Off.)
1 Press the Mode
press OK.
button, then
until the LCD displays SCN, then
2 Press
to choose Panorama Left-Right or Panorama Right-Left
(depending on the direction you want to pan), then press OK.
3 Take the first picture.
After a quickview, the LCD displays the liveview and an “overlay” from the first picture.
4 Compose the second picture. Make the overlay from the first picture cover the
same portion in the new picture.
5 If you are taking/stitching only 2 pictures, press OK to stitch them together.
After you take 3 pictures, the pictures are automatically stitched together.
Take
2 or 3
pictures.
Get 1
panoramic
picture.
NOTE: To use the self-timer 10-second or 2-second setting, see page 12.
www.kodak.com/go/support
13
3
Sharing and tagging pictures
Sharing through social networks
It’s never been easier to share pictures on your favorite social networking sites.
IMPORTANT: To use the camera’s social networking features, you must install the KODAK
Share Button App. (See page 36.)
1 Press the Share button, then
to find a picture.
If it’s your first time, a Help screen appears.
2 Press
to choose a social networking site, then press OK.
A check mark appears. Repeat this step to choose more sites. (Press OK again to clear a
check mark.)
3 Press
to choose Done, then press OK.
The picture is displayed with the Share icon. When you transfer the picture to your
computer, it will be sent to the networking site(s) that you chose.
Tip: Do you send pictures to the same sites each time?
Find a picture, then press and hold the Share button for about 1 second.
The camera applies the settings that you used previously and adds the Share icon to the
picture.
14
www.kodak.com/go/support
Sharing and tagging pictures
Choose which social networking sites to display on your camera
You can show/hide networking sites on your camera so that only your favorite sites
appear.
1 In Review, press the Menu
button.
2 Press
to choose the Setup tab, then
then press OK.
to choose Share Button Settings,
3 Press
to choose a social networking site, then press
to choose Show or
Hide. Repeat this step until you have chosen Show/Hide for each social network.
4 When finished, press
to choose Done, then press OK.
To return to picture-taking mode, press the Shutter button halfway down. When you
are in Review and press the Share button, only chosen sites are shown.
Manage email addresses and KODAK PULSE Digital Frames
You can add, edit, or delete email addresses and KODAK PULSE Digital Frames on
your camera.
1 Press the Share button, then
Manage Frames), then press OK.
to choose Manage Email Addresses (or
2 To add an email address or frame, press
to choose Add Email or Add Frame,
then press OK. Use the on-screen keyboard to make the addition.
(Example: [email protected])
To edit an email address or a KODAK PULSE Digital Frame, press
to choose
the address’s nickname or the frame, then press OK. Use the on-screen keyboard
to make edits.
To delete an email address or frame, choose Delete Email or Delete Frame, then
press OK. Press
to choose the address or frame, then press OK so that a
check mark appears. Press
to choose Delete, then press OK.
3 When finished, press
to choose Done, then press OK.
To return to picture-taking mode, press the Shutter button halfway down.
www.kodak.com/go/support
15
Sharing and tagging pictures
Tagging pictures
Tag pictures to make them easy to find, later. You can tag pictures in 2 ways:
■
People, and then find all pictures of “Mary.”
■
Keywords, and then find all pictures from “Dad’s 60th Birthday.”
Tagging people
When you tag faces, you’re helping your camera to recognize people by name. Then it
matches names and faces in pictures you’ve taken—and those you take in the future!
1 Press the Review
2 Press the Menu
3 Press
button, then
button. Press
to find a picture that contains faces.
to choose Tag People, then press OK.
to choose Apply Tags, then press OK.
4 Press
to choose an existing name, or New Name to add a new one (see
Using the keyboard, page 18), then press OK.
If more than one face is detected, a name or question mark is assigned to each detected
face. To resolve an incorrect name or a question mark, press
to select a face,
then press OK.
5 If prompted to Update People Tags, press
to choose Yes, then press OK.
Other pictures are scanned and updated with the name(s) you applied here.
Press
to add names to other pictures. When finished, press
to choose
Done, then press OK. To return to picture-taking mode, press the Shutter button
halfway down.
Tip: Are faces not always detected?
If a face is turned sideways, is too distant, or if the contrast between face and
background is insufficient, then the camera might not detect the face.
16
www.kodak.com/go/support
Sharing and tagging pictures
Need to update a name?
If you meet a new friend—James—but you already have pictures tagged with your
old friend, James, you can:
■
Tag the new James with “James Smith” and/or
■
Update the old James to “James Monroe”
Here’s how:
1 Press the Review
2 Press the Menu
button.
button. Press
to choose Tag People, then press OK.
3 Press
to choose Modify Names List, then press OK.
4 Press
to choose the name you want to modify, then press OK.
5 Edit the name, press
to choose OK, then press OK. (If prompted to Update
People Tags, press
to choose Yes, then press OK.)
To return to picture-taking mode, press the Shutter button halfway down.
NOTE: You can have up to 20 active names.
Tagging with keywords
1 Press the Review
2 Press the Menu
button, then
button. Press
to find a picture to tag.
to choose Keyword Tag, then press OK.
3 Press
to choose an existing keyword, or New Keyword (See Using the
keyboard, page 18) to add a new one.
4 Press
to add keywords to other pictures. When finished, press
to
choose Done, then press OK.
To return to picture-taking mode, press the Shutter button halfway down.
Tip: You can pre-choose a tag so that new pictures are assigned that tag (see
page 33).
www.kodak.com/go/support
17
Sharing and tagging pictures
Using the keyboard
The keyboard appears when you need to enter text.
1 Press
to choose a letter, then press OK.
2 When finished, press
to choose OK, then press OK.
Marking pictures/videos for emailing
It’s simple to mark pictures so that they’re ready to email when you transfer them to
your computer. First, create a new email address. (See Using the keyboard.)
1 Press the Share button. Press
to find a picture.
2 Press
to choose Email, then press OK.
3 Press
to find an email address, then press OK.
To mark other pictures/videos with the same address, press
, then press OK.
To send the pictures/videos to more than one address, repeat step 3.
To return to picture-taking mode, press the Shutter button halfway down.
When you transfer the marked pictures/videos to your computer, the software prompts
you to send the pictures/videos.
NOTE: Your camera offers a built-in Help system. See page 40.
18
www.kodak.com/go/support
4
Reviewing and editing
Reviewing pictures/videos
1 Press the Review
2 Press
button.
for previous/next picture/video.
■
To exit, press the Review button or press the
Shutter button halfway down.
■
To view pictures/videos as thumbnails, press the
Wide Angle (W) button. (For more information,
see page 21.)
Find your pictures like a pro...
See “A smarter way to find and enjoy your pictures” on page 22.
Playing a video
Press OK to play a video. Press OK to pause/resume.
During playback:
Playback speed
4X 2X
1X
2X
■
Press
to play at 2X speed; press again for 4X.
■
Press
to reverse at 2X speed; press again for 4X.
4X
www.kodak.com/go/support
19
Reviewing and editing
Deleting pictures/videos
1 Press the Review
2 Press
button.
for previous/next picture/video.
3 Press the Delete button.
4 Follow the screen prompts.
NOTE: To delete protected pictures/videos, remove protection before deleting. (See Protecting
pictures/videos from deletion.)
Using the undo delete picture feature
If you accidentally delete a picture, you may be able to use Undo Delete to retrieve it.
This feature is only available immediately after you delete a picture.
Protecting pictures/videos from deletion
1 Press the Review
2 Press
for previous/next picture/video.
3 Press the Menu
4 Press
button.
button.
to choose Protect, then press OK.
5 Press
to choose Protect, then press OK.
A check mark indicates that the picture/video is protected. Clicking OK again removes
the check mark. Press
to protect other pictures/videos, or press
to choose
Done, then press OK.
■
Press the Menu
button to exit the menu.
CAUTION:
Formatting internal memory or an SD or SDHC Card deletes all (including
protected) pictures/videos. (Formatting internal memory also deletes
email addresses and keyword tags.)
20
www.kodak.com/go/support
Reviewing and editing
Viewing pictures/videos in different ways
Magnifying a picture
1 Turn the Zoom lever toward Telephoto (T) to
magnify 1X–8X.
2 Press
■
to view other parts of a picture.
Press OK to return to 1X.
Viewing as thumbnails (multi-up)
1 Press the Review
button.
The camera shows the last picture that was taken.
2 Turn the Zoom lever toward Wide Angle (W) to view pictures/videos as thumbnails.
(Turn it again to see more, smaller thumbnails.)
To view all pictures/videos, choose the All tab.
To sort by favorites, date, or tagged pictures/videos, press
and choose the
appropriate tab.
3 To see a single picture/video, press
lever toward Telephoto (T).
to choose it. Then turn the Zoom
■
To select multiple pictures/videos, see page 29.
■
Press the Review button to exit Review.
www.kodak.com/go/support
21
Reviewing and editing
A smarter way to find and enjoy your pictures
Tag pictures—by people or keywords—to make them easy to find, later. For example,
the camera can find all pictures that contain “Mary” or “Dad’s 60th Birthday.” (See
Tagging people, page 16 or Tagging with keywords, page 17.)
1 Press the Review
button.
2 Turn the Zoom lever toward Wide Angle (W) to view pictures by thumbnail (or
choose View Thumbnails shortcut).
3 Press
to choose a tab and sort pictures by All, Date, People, Favorite, or
Keyword.
4 Press
to choose a face or keyword, then press OK.
Pictures tagged with that name or keyword are displayed. Press
to view all
pictures.
To return to picture-taking mode, press the Shutter button halfway down.
All
People
Date
Favorites
Keywords
Tip: For best results, make sure the camera’s date/time is current (see page 33).
22
www.kodak.com/go/support
Reviewing and editing
Understanding the review icons
Print/number of prints
Protected
Email
Video duration
Picture/Video number
Select
picture/video
Shortcuts*
Add text tag
View thumbnails
Play video
Battery level
Favorite
Text tag
* For more about shortcuts, see page 11.
Know when your batteries need attention
The battery level icon works like the gas gauge in your car, but appears only when the
battery requires your attention. (If you’re viewing shortcuts, the battery level is always
displayed. See page 11.)
Purchase extra batteries
www.kodak.com/go/support
www.kodak.com/go/accessories
23
Reviewing and editing
Creating a slide show
Use Slide Show to display your pictures/videos on the LCD. You can play all
pictures/videos, or choose pictures to include in the slide show.
Make a slide show
1 Press the Review
button. Select pictures (see page 29). If you don’t select any,
then all pictures will be shown.
2 Press the Menu
button.
3 Press
to choose Slide Show, then press OK.
Each picture/video is displayed once. To interrupt the slide show, press OK.
NOTE: Your camera offers a built-in Help system. See page 40.
Play a slide show loop
When you turn on Loop, the slide show is continuously repeated.
1 On the Slide Show menu, press
2 Press
to choose Loop, then press OK.
to choose On, then press OK.
3 Press
to choose Preview Slide Show, then press OK.
The slide show repeats until you press OK or until the batteries are exhausted.
24
www.kodak.com/go/support
Reviewing and editing
Displaying pictures/videos on a television
You can display pictures/videos on a television, computer monitor, or any device
equipped with a video input. To connect the camera directly to a television, use an
A/V cable (may be sold separately).
Purchase accessories
www.kodak.com/go/accessories
NOTE: To control the audio portion of a video, use the TV (or TV remote control) volume controls. Ensure
that the Video Out setting (NTSC or PAL) is correct (see page 34). The slide show stops if you
connect or disconnect the cable while the slide show is running. (Image quality on a television
screen may not be as good as on a computer monitor or when printed.)
www.kodak.com/go/support
25
Reviewing and editing
Using the menu button in review
1 Press the Review
2 Press
button.
to choose a tab:
■
Review
■
Edit
■
Setup
3 Press
button, then the Menu
to choose a setting, then press OK.
4 Choose an option, then press OK.
NOTE: Your camera offers a built-in Help system. See page 40.
Cropping pictures
You can crop a picture so that only the desired portion of the picture remains.
1 Press the Review
picture to crop.
Picture
Cropped picture
button, then
to find a
2 Press the Menu
button, then
to choose the
Edit tab. Choose Crop, then press OK.
3 Turn the Zoom lever toward Telephoto (T) to shrink the crop area or Wide (W) to
stretch it. Press
to move the crop box. When satisfied with the crop
box, press OK.
4 Follow the screen prompts.
The picture is cropped. (The original is saved.) Cropped pictures cannot be cropped
again on the camera.
Press the Shutter button halfway down to return to Capture mode.
NOTE: Your camera offers a built-in Help system. See page 40.
26
www.kodak.com/go/support
Reviewing and editing
Rotating pictures
You can rotate a picture to portrait or landscape orientation.
1 Press the Review
2 Press the Menu
3 Press
button, then
button. then
to find the previous/next picture.
to choose the Edit tab.
to highlight Rotate Picture, then press OK.
4 Press to highlight an option:
■
Rotate Right—rotates the picture 90 degrees clockwise.
■
Rotate Left—rotates the picture 90 degrees counterclockwise.
5 Press OK. Follow the screen prompts to replace the original picture or to save the
rotated picture as a new one.
Press the Shutter button halfway down to return to Capture mode.
NOTE: Your camera offers a built-in Help system. See page 40.
www.kodak.com/go/support
27
Reviewing and editing
Editing videos
You can do incredible things with your videos.
Making a picture from a video
You can choose a single frame from a video, then make a picture suitable for a
4 x 6-inch (10 x 15 cm) print.
1 Press the Review
video.
Video
Picture
button, then
to find a
2 Press the Menu
button, then
to choose the
Edit tab. Choose Make Picture, then press OK.
3 Follow the screen prompts.
A picture is created. (The original video is saved.) Press
the Shutter button halfway down to return to Capture
mode.
NOTE: Your camera offers a built-in Help system. See page 40.
Trimming a video
You can remove an unwanted start or end from a video, saving only the desired
portion.
1 Press the Review
video.
Video
28
Trimmed video
button, then
to find a
2 Press the Menu
button, then
to choose the
Edit tab. Choose Trim, then press OK.
3 Follow the screen prompts.
The video is trimmed. (You can save it as a new video
or replace the original.) Press the Shutter button
halfway down to return to Capture mode.
www.kodak.com/go/support
Reviewing and editing
Selecting multiple pictures/videos
Use the multi-select feature when you have two or more pictures/videos to print,
transfer, delete, etc. Multi-select is used most effectively in Multi-Up mode. See
Viewing as thumbnails (multi-up), page 21.
1 Press the Review
button, then
(and
if you’re in multi-up mode) to find a picture/video.
2 Press OK to select pictures/videos.
A check mark appears on the picture. (Press OK again
to remove a check mark.) You can now print, transfer,
delete, etc. the selected pictures.
Selected
pictures
Copying pictures/videos
You can copy pictures/videos from a card to internal memory or from internal memory
to a card.
Copy pictures/videos:
1 Press the Review
button, then
to find a picture. (You can also use
multi-select. See Selecting multiple pictures/videos.)
2 Press the Menu
button, then
to choose the Edit tab.
3 Press
to choose Copy, then press OK. Make a choice, then press OK.
NOTE: Pictures/videos are copied, not moved. To remove pictures/videos from the original location after
copying, delete them (see page 20).
NOTE: Your camera offers a built-in Help system. See page 40.
www.kodak.com/go/support
29
5
Doing more with your camera
NOTE: Your camera offers a built-in Help system. See page 40.
Using the menu button to change settings
You can change settings to get the best results from your camera.
NOTE: Some modes offer limited settings. Some settings remain until you change them; others, until you
change modes or turn off the camera.
1 Press the Menu
2 Press
button.
to choose a tab:
■
Capture/Video for the most common picture- and video-taking settings
■
Setup for other camera settings
3 Press
to choose a setting, then press OK.
4 Choose an option, then press OK.
Using the capture tab
Settings
More information
Picture Size
Choose a picture resolution.
See Specifications, starting on page 45.
Self-timer/Burst
Choose Self-timer or Burst
feature.
Off
10 Seconds
2 Seconds
2 Picture Timer
Burst On—Press the Shutter button halfway to focus and
set exposure. Press the Shutter button completely down
and hold it to take up to 3 pictures.
30
www.kodak.com/go/support
Doing more with your camera
Settings
More information
Exposure Compensation See Specifications, starting on page 45.
Make a picture lighter or
darker. (Available in Program
mode.) To access this feature
with a shortcut, see page 11.
ISO Speed
Control the sensitivity of the
camera to light.
Auto—For general picture taking.
For manual settings, see Specifications, starting on page 45.
Long Time Exposure
None
Choose how long the shutter 0.5, 1.0, 2.0, 4.0, 8.0 seconds
stays open (normally in
low-light conditions). For best
results, place the camera on a
tripod or steady surface.
Color Mode
Choose color tones.
Unavailable in Video and
Smart Capture modes.
Vivid Color—For increased saturation and exaggerated
color.
Full Color—For rich, balanced color.
Basic Color—For accurate color.
Black & White—For black and white.
Sepia—For a reddish-brown, antique look.
White Balance
Choose your lighting
condition. (Available only in
Program mode.)
Auto—Automatically corrects white balance. Ideal for general
picture taking.
Daylight—For pictures in natural lighting.
Tungsten—Corrects the orange cast of incandescent light
bulbs. Ideal for indoor pictures under tungsten or halogen
lighting without flash.
Fluorescent—Corrects the green cast of fluorescent lighting.
Ideal for indoor pictures under fluorescent lighting without
flash.
Open Shade—For pictures in shade in natural lighting.
www.kodak.com/go/support
31
Doing more with your camera
Settings
More information
Focus Mode
Choose a focus distance.
Auto—For general picture-taking.
Macro—For sharpness and detail in pictures at close range.
Use available light instead of flash, if possible. The camera
automatically sets the focus distance depending on the zoom
position.
Infinity—For distant subjects; auto-focus framing marks are
unavailable.
Focus/Exposure Zone
Choose how the camera
assesses the scene for
exposure and focus.
Face Priority—If faces are detected, they receive
focus/exposure priority. (If faces are not detected, the camera
switches to Multi-Zone.)
Multi-Zone—Evaluates 5 zones to give an even picture
focus. Ideal for general picture taking.
Center-Zone—Evaluates the small area centered in the lens.
Ideal for focusing on a precise area.
AF Control (Still)
Continuous AF—Because the camera is always focusing,
Choose an auto-focus setting. there is no need to press the Shutter button halfway down to
focus.
Single AF—Focuses when the Shutter button is pressed
halfway down. (This setting uses less battery power.)
Sharpness
Control picture sharpness or
softness.
See Specifications, starting on page 45.
Video settings
NOTE: Your camera offers a built-in Help system. See page 40.
Settings
Self-timer
Choose Self-timer feature.
32
More information
See Specifications, starting on page 45.
www.kodak.com/go/support
Doing more with your camera
Using the Setup menu
Use Setup to customize other camera settings.
NOTE: Your camera offers a built-in Help system. See page 40.
Settings
More information
Date & Time
Set date and time.
Auto Time Setting
Date and time are set when camera is connected
to a computer.
Preset Keyword Tag
Create keywords and assign them to
pictures/videos. See page 17.
New Keyword
Delete Keyword
Camera Sounds
Choose sound effects for individual
functions.
Exit
Focus Lock: On/Off
Shutter: On/Off
Self-timer: On/Off
Error: On/Off
Power On: On/Off
LCD Brightness
Choose LCD brightness during
picture/video capture. (During Review, the
LCD is set to High Power.)
Auto—LCD brightness is automatically adjusted
according to environment.
High Power—Brighter LCD; uses more battery
power.
Power Save—Dimmer LCD; uses less power.
Share Button Settings
Show or hide:
Choose what is displayed when the Share ■ Individual social networking sites
button is pressed in Review.
■ E-mail addresses (all or none)
■ KODAK Digital Frames (all or none)
www.kodak.com/go/support
33
Doing more with your camera
Settings
Red-eye Reduction
The Red-eye flash fires automatically
before a picture is taken.
More information
Preflash—The flash fires before the picture is
taken to reduce the chance of red-eye.
Digital correction—The camera digitally
corrects red-eye after a picture is taken.
(Processing time after taking a picture may
increase.)
Video Out
NTSC—Used in North America and Japan; most
Choose the regional setting that lets you common format.
connect the camera to a television or other PAL—Used in Europe and China.
external device.
Image Storage
Choose a storage location for
pictures/videos.
Auto—The camera uses the card if one is in the
camera. If not, the camera uses internal memory.
Internal Memory—The camera always uses
internal memory, even if a card is installed.
Language
Choose your language.
Reset All Camera Settings
Reset settings to their default.
Computer Connection
KODAK Software
Choose which application is downloaded Other Application (APPLE IPHOTO, etc.)
or launched when you connect the camera
to the computer.
IMPORTANT: To use the camera’s social
networking features, you must install the
KODAK Share Button App (page 36).
34
www.kodak.com/go/support
Doing more with your camera
Settings
Format
CAUTION:
Formatting deletes all
pictures/videos, including those
that are protected. Removing a
card during formatting may
damage the card.
More information
Memory Card—Deletes everything on the card;
formats the card.
Cancel—Exits without making a change.
Internal Memory—Deletes everything in
internal memory including email addresses and
keyword tags; formats the internal memory.
KODAK Camera Software
View the URL to download KODAK Software.
About
View camera information.
www.kodak.com/go/support
35
6
Transferring, printing pictures
Download software, transferring pictures
Download KODAK Software—so it’s easy to transfer and share pictures and videos.
IMPORTANT: To use the camera’s social networking features, you must install the KODAK
Share Button App.
Make sure the computer is connected to the Internet. When you connect the camera
to the computer, the installer automatically runs.
1 Turn off the camera.
2 Use the KODAK Camera USB Cable, Micro B / 5-Pin
to connect the camera to the computer. (Use only
the cable included with this camera!)
3 Turn on the camera.
IMPORTANT: If the installer does not run, download and
install the right version for your computer’s operating
system: www.kodak.com/go/camerasw
4 After the software is installed, follow the prompts
to transfer pictures and videos to your computer.
NOTE: You can also use a card reader to transfer your pictures/videos.
36
Download KODAK Software later
www.kodak.com/go/camerasw
Get Software help
www.kodak.com/go/support
www.kodak.com/go/support
Transferring, printing pictures
Printing pictures
Direct printing with a KODAK All-in-One Printer
IMPORTANT: To print using PICTBRIDGE Technology, you must change the Computer
Connection setting (in the Setup menu) to Other Application (see page 34).
You need a camera, a PICTBRIDGE enabled Printer, and a USB cable.
Connecting the camera to a KODAK All-in-One Printer
1 Turn off the camera and printer.
2 Connect the USB cable from the camera to the printer.
Printing from a KODAK All-in-One Printer
1 Turn on the printer. Turn on the camera.
The PictBridge logo is displayed, followed by the current picture and menu. (If no
pictures are found, a message is displayed.) If the menu turns off, press any button to
redisplay it.
2 Choose a printing option, then press OK.
Current Picture—Press
to choose a picture.
Tagged Pictures—If your printer is capable, print pictures that you marked for
printing.
Index Print—Print thumbnails of all pictures. (This option requires one or more
sheets of paper.)
All Pictures—Print all pictures in internal memory or on a card.
Image Storage—Access Auto or Internal Memory.
NOTE: During direct printing, pictures are not permanently transferred or saved to the printer. To transfer
pictures to your computer, see page 36.
www.kodak.com/go/support
37
Transferring, printing pictures
Disconnecting the camera from a KODAK All-in-One Printer
1 Turn off the camera and printer.
2 Disconnect the USB cable from the camera and the printer.
Ordering prints online
KODAK Gallery (www.kodakgallery.com) makes it easy to:
■
Upload your pictures.
■
Edit, enhance, and add borders to your pictures.
■
Store pictures, and share them with family and friends.
■
Have prints, photo greeting cards, frames, and albums delivered to your door.
Printing from an optional SD or SDHC Card
■
Automatically print tagged pictures when you insert your card into a printer with
an SD/SDHC Card slot. See your printer user’s guide for details.
■
Make prints at an SD/SDHC Card-capable KODAK Picture Kiosk. Go to
www.kodak.com/go/picturemaker.
■
Take the card to your local photo retailer for professional printing.
38
www.kodak.com/go/support
Transferring, printing pictures
Marking your pictures for printing
1 Press the Review
2 Press the Menu
button. Press
to find a picture.
button.
3 Press
to choose Print, then press OK.
4 Press
to choose the number of copies.
Optional: You can apply a print quantity to other pictures. Press
for
previous/next. Repeat this step until the desired print quantity is applied to each
picture.
5 Press OK.
Press the Shutter button halfway down to return to Capture mode.
NOTE: Your camera offers a built-in Help system. See page 40.
www.kodak.com/go/support
39
7
Troubleshooting
Getting help from your camera
Your camera offers a built-in Help system. It describes every setting for every menu
choice. If you learn nothing else about your camera, learn how to use on-camera Help.
Turning on camera Help
button, then
1 Press the Menu
highlight a menu choice.
2 Press the Info
button.
Scroll through a Help topic.
40
www.kodak.com/go/support
Troubleshooting
Troubleshooting
Camera problems
Status
Solution
Camera does not
turn on
■ Make sure the batteries are installed correctly (see page 1).
Camera does not turn
off
■ Make sure batteries are new. If batteries are rechargeable, make
sure they are fully charged (see charger documentation).
Camera buttons and
controls do not
function
In Review, a blue or
black screen is
displayed instead of
a picture
■ Transfer all pictures to the computer (see page 36).
■ Take another picture.
Pictures remaining
■ Continue taking pictures. The camera is operating normally.
number does not
(The camera estimates the number of pictures remaining after each
decrease after taking a picture is taken, based on picture size and content.)
picture
Flash does not fire
■ Check the flash setting, and change as needed (see page 8).
NOTE: The flash does not fire in all modes.
Memory card is almost ■ Transfer the pictures to the computer (see page 36).
or entirely full
■ Delete pictures from the card (see page 20) or insert a new card.
Battery life is short
■ Make sure the correct battery type is installed (see page 49).
■ Wipe the contacts with a pencil eraser before inserting batteries
in the camera.
■ Insert new/charged batteries (see page 1).
Cannot find the
desired picture/video
■ To view pictures on a card or in internal memory, see page 19.
www.kodak.com/go/support
41
Troubleshooting
Status
Solution
You cannot take a
picture
■ Turn the camera off, then on again.
■ Depress the Shutter button all the way (see page 4).
■ Insert new/charged batteries in the correct orientation (see
page 1).
■ When inserting a memory card, push it in until it clicks (see
page 3).
■ Memory is full. Transfer pictures to the computer (see page 36),
delete pictures (see page 20), or insert another card.
Memory card not
■ Use a card reader to check the card on a computer. If it’s
corrupted, format the card in the camera (see page 35).
recognized or camera
freezes with card
■ Try another SD or SDHC Card.
Computer/connectivity problems
Status
Solution
Slide Show does not
run on an external
video device
■ Adjust the camera Video Out setting to NTSC or PAL (see
Computer does not
communicate with
the camera
■ Turn off the camera, then turn it back on.
page 34).
■ Make sure the external device settings are correct. (See the
device’s user guide).
■ Make sure fresh batteries are installed correctly (see page 1).
■ Make sure the KODAK Camera USB Cable, Micro B / 5-Pin is
connected to the camera and the computer (see page 36). Then
turn on the camera.
■ See KODAK Software Help at www.kodak.com/go/camerasw.
Direct printing (PICTBRIDGE enabled Printer) problems
Status
Solution
Cannot print to a
PICTBRIDGE Printer
■ In the Setup menu, change the Computer Connection setting to
42
Other Application (see page 34).
www.kodak.com/go/support
Troubleshooting
Picture quality problems
Status
Solution
Picture is not clear
■ To automatically set exposure and focus, press the Shutter button
■
■
■
■
■
Picture is too dark
halfway. When the framing marks turn green, press the Shutter
button completely down to take the picture.
Clean the lens (see page 47).
Make sure the camera is not in Macro mode (see page 32).
Place the camera on a flat, steady surface or use a tripod (especially
in high-zoom settings or in low light).
Use a larger picture size (see page 30).
If you’re manually adjusting the ISO speed, realize that a high ISO
setting may cause grainy pictures (see page 31).
■ Reposition the camera for more available light.
■ Use Fill flash (see page 8) or change your position so light is not
behind the subject.
■ Move so that the distance between you and the subject is within the
effective flash range. (See Specifications starting on page 45.)
■ To automatically set exposure and focus, press the Shutter button
halfway. When the framing marks turn green, press the Shutter
button completely down to take the picture.
■ In Program mode, adjust the Exposure Compensation (see page 31).
Picture is too light
■ Reposition the camera to reduce the amount of available light.
■ Turn the flash off (see page 8).
■ Move so that the distance between you and the subject is within the
effective flash range. (See Specifications starting on page 45.)
■ To automatically set exposure and focus, press the Shutter button
halfway. When the framing marks turn green, press the Shutter
button completely down to take the picture.
■ In Program mode, adjust the Exposure Compensation (see page 31).
www.kodak.com/go/support
43
Troubleshooting
Getting help on the Web
Camera
Get support for your product (FAQs, troubleshooting www.kodak.com/go/c443support
information, arrange for repairs, etc.)
Purchase camera accessories
www.kodak.com/go/accessories
Download the latest camera firmware and software www.kodak.com/go/c443downloads
See online demonstrations of your camera
www.kodak.com/go/c443demos
Register your camera
www.kodak.com/go/register
Chat, email, write, or phone Kodak
(Chat not available in all languages)
www.kodak.com/go/contact
Software
Download and get Help with KODAK Software
www.kodak.com/go/camerasw
Other
Get support for cameras, software, accessories, more www.kodak.com/go/support
Get information on KODAK All-in-One Printers
44
www.kodak.com/go/inkjet
www.kodak.com/go/support
8
Appendix
Specifications
CCD—1/2.3-type
Effective pixels—12.2 MP (4026 x 3026)
LCD—2.7 in. (6.9 cm) LCD; 230K pixels; 4:3 aspect ratio
Image storage—Optional SD/SDHC Card
(The SD logo is a trademark of the
SD Card Association.) Maximum supported card size: 32 GB
Internal storage capacity—32 MB internal memory (19 MB available for image
storage. 1 MB equals one million bytes.)
Taking lens—3X optical zoom; f/2.9–f/5.2; 35 mm equivalent: 32–96 mm
Lens protection—Built-in
Digital zoom—5X continuous
Focus system—TTL-AF (through-the-lens auto focus); Multi-Zone, Center-Zone,
Face Priority. Working range:
0.1 m (0.3 ft)–infinity @ wide, normal
0.35 m (1.1 ft)–infinity @ telephoto, normal
10–80 cm (3.9–31.5 in.) @ wide, Macro mode
35–100 cm (13.8–39.4 in.) @ telephoto, Macro mode
Auto focus control—Continuous and Single AF
Face detection—Yes
Face recognition—Yes
Shutter speed—8–1/1400 seconds
Long time exposure—0.5–8 seconds
ISO speed—Smart Capture mode: Auto 80–400
www.kodak.com/go/support
45
Appendix
Program mode: Auto 80-400; manual 80, 100, 200, 400, 800, 1600
Exposure metering—TTL-AE; Face Priority, Multi-Zone, Center-Zone
Exposure compensation—+/-2.0 EV with 1/3 EV step
White Balance—Auto, Daylight, Tungsten, Fluorescent, Open Shade
Electronic Flash—Auto flash; Auto, Fill, Red Eye, Off; Guide No. 6.4 (m) @ ISO
100; working range @ ISO 400: 0.3–4.0 m (1–13.1 ft) @ wide; 0.5–2.0 m (1.6–6.6
ft) @ telephoto
Self-timer mode—10 Second, 2 Second, 2 Picture Timer
Burst mode—Maximum 3 pictures @ 1.5 fps
Capture modes—Smart Capture, Program, Scene modes, Video
Image file format—
Still: EXIF 2.21 (JPEG compression); file organization DCF
Video: .AVI (CODEC Motion JPEG; audio: -Law)
Picture size—12 MP (4:3): 4000 x 3000 pixels
10 MP (3:2): 4000 x 2664 pixels
9 MP (16:9): 4000 x 2248 pixels
6 MP (4:3): 2880 x 2160 pixels
3 MP (4:3): 2048 x 1536 pixels
2 MP (16:9): 1920 x 1080 pixels
1 MP (4:3): 1280 x 960 pixels
Color modes—Vivid Color, Full Color, Basic Color, Black & White, Sepia
Sharpness modes—High, Normal, Low
Video capture—4 GB maximum; VGA (640 x 480 @ 30 fps)
Communication with computer—USB 2.0 full speed (PIMA 15740 protocol); via
KODAK Camera USB Cable, Micro B / 5-Pin
Video output—NTSC or PAL
Microphone—Yes
46
www.kodak.com/go/support
Appendix
PICTBRIDGE support—Yes
Power—KODAK MAX Alkaline Batteries AA; KODAK Ni-MH Rechargeable Digital
Camera Batteries AA (Pre-Charged); KODAK Ni-MH Rechargeable Digital Camera
Batteries AA; AA lithium batteries
Tripod mount—1/4 inch
Size—93.8 x 62 x 30.1 mm (3.7 x 2.4 x 1.2 in.) @ power off
Weight—172 g (6.1 oz) with card and batteries
Operating temperature—0–40° C (32–104° F)
Care and maintenance
■
If you suspect water has gotten inside the camera, remove the batteries and card.
Allow all components to air-dry for at least 24 hours before using the camera.
■
Blow gently on the lens or LCD to remove dust and dirt. Wipe gently with a soft,
lint-free cloth or an untreated lens-cleaning tissue. Do not use cleaning solutions
unless designed specifically for camera lenses. Do not allow chemicals, such as
suntan lotion, to contact painted surfaces.
■
Service agreements may be available in your country. Contact a dealer of KODAK
Products for more information.
■
For digital camera disposal or recycling information, contact your local authorities.
In the US, go to the Electronics Industry Alliance site at www.eiae.org or Kodak at
www.kodak.com/go/support.
Upgrading your software and firmware
Occasionally check for the latest versions of the KODAK Software and camera
firmware (the software that runs on the camera). Go to
www.kodak.com/go/c443downloads.
www.kodak.com/go/support
47
Appendix
Storage capacities
The LCD displays the approximate number of pictures (or minutes/seconds of video)
remaining. Actual storage capacity varies depending on subject composition, card
size, and other factors. You may be able to store more or fewer pictures and videos.
Important safety instructions
CAUTION:
Do not disassemble this product; there are no user-serviceable
parts inside. Refer servicing to qualified service personnel.
KODAK AC Adapters and Battery Chargers are intended for indoor
use only. The use of controls, adjustments, or procedures other
than those specified herein may result in exposure to shock
and/or electrical or mechanical hazards. If the LCD breaks, do not
touch the glass or liquid. Contact Kodak customer support.
■
The use of an accessory that is not recommended by Kodak may cause fire, electric
shock, or injury. For approved accessories, go to www.kodak/go/accessories.
■
Use only a USB-certified computer equipped with a current-limiting motherboard.
Contact your computer manufacturer if you have questions.
■
If using this product in an airplane, observe all instructions of the airline.
■
When removing the batteries, allow them to cool; they may be hot.
■
Follow all warnings and instructions supplied by the battery manufacturer.
■
Use only batteries approved for this product to avoid risk of explosion.
■
Keep batteries out of the reach of children.
■
Do not allow batteries to touch metal objects, including coins. Otherwise, a battery
may short circuit, discharge energy, become hot, or leak.
■
Do not disassemble, install backward, or expose batteries to liquid, moisture, fire,
or extreme temperature.
48
www.kodak.com/go/support
Appendix
■
Remove the batteries when the product is stored for an extended period of time. In
the unlikely event that battery fluid leaks inside the product, contact Kodak
customer support.
■
In the unlikely event that battery fluid leaks onto your skin, wash immediately with
water and contact your local health provider. For additional health-related
information, contact your local Kodak customer support.
■
Go to www.kodak.com/go/reach for information about the presence of substances
included on the candidate list according to article 59(1) of Regulation (EC) No.
1907/2006 (REACH).
■
Dispose of batteries according to local and national regulations. Go to
www.kodak.com/go/kes.
■
Do not charge non-rechargeable batteries.
For more information on batteries, go to www.kodak.com/go/batterychart.
Battery replacement, battery life
KODAK MAX Alkaline Batteries AA: 180 pictures per charge. Battery life per CIPA
testing method. (Approx. number of pictures in Smart Capture mode, using an SD
Card.) Actual life may vary based on usage. For other compatible batteries, see the
Power section in Specifications, page 45.
Extending battery life
■
Use power-saving features (see LCD Brightness, page 33).
■
Charge Ni-MH batteries when they are nearly depleted.
■
Dirt on the battery contacts can affect battery life. Wipe the contacts with a pencil
eraser before loading batteries in the camera.
■
Battery performance is reduced at temperatures below 41° F (5° C). When using
your camera in cold weather, carry spare batteries and keep them warm. Do not
discard cold batteries that do not work; when they return to room temperature,
they may be usable.
www.kodak.com/go/support
49
Appendix
Limited warranty
Kodak warrants its digital cameras and accessories (excluding batteries) to be free
from malfunctions and defects in both materials and workmanship for the warranty
period specified on your KODAK Product packaging. Retain the original dated sales
receipt. Proof of purchase date is required with any request for warranty repair.
Limited warranty coverage
Warranty service is only available from within the country where the Products were
originally purchased. You may be required to ship Products, at your expense, to the
authorized service facility for the country where the Products were purchased. Kodak
will repair or replace Products if they fail to function properly during the warranty
period, subject to any conditions and/or limitations stated herein. Warranty service
will include all labor as well as any necessary adjustments and/or replacement parts. If
Kodak is unable to repair or replace a Product, Kodak will, at its option, refund the
purchase price paid for the Product provided the Product has been returned to Kodak
along with proof of the purchase price paid. Repair, replacement, or refund of the
purchase price are the sole remedies under the warranty. If replacement parts are
used in making repairs, those parts may be remanufactured, or may contain
remanufactured materials. If it is necessary to replace the entire Product, it may be
replaced with a remanufactured Product. Remanufactured Products, parts and
materials are warranted for the remaining warranty term of the original Product, or 90
days after the date of repair or replacement, whichever is longer.
Limitations
This warranty does not cover circumstances beyond Kodak's control. This warranty
does not apply when failure is due to shipping damage, accident, alteration,
modification, unauthorized service, misuse, abuse, use with incompatible accessories
or attachments (such as third party ink or ink tanks), failure to follow Kodak's
operation, maintenance or repacking instructions, failure to use items supplied by
Kodak (such as adapters and cables), or claims made after the duration of this
warranty. Kodak makes no other express or implied warranty for this product. In the
event that the exclusion of any implied warranty is ineffective under the law, the
duration of the implied warranty will be the length of the express warranty period
50
www.kodak.com/go/support
Appendix
specified on your Kodak product packaging. The option of repair, replacement, or
refund is Kodak's only obligation. Kodak will not be responsible for any special,
consequential or incidental damages resulting from the sale, purchase, or use of this
product regardless of the cause. Liability for any special, consequential or incidental
damages (including but not limited to loss of revenue or profit, downtime costs, loss
of the use of the equipment, cost of substitute equipment, facilities or services, or
claims of your customers for such damages resulting from the purchase, use, or failure
of the Product), regardless of cause or for breach of any written or implied warranty is
expressly disclaimed. The limitations and exclusions of liability set forth herein apply
to both Kodak and its suppliers.
Your rights
Some states or jurisdictions do not allow exclusion or limitation of incidental or
consequential damages, so the above limitation or exclusion may not apply to you.
Some states or jurisdictions do not allow limitations on how long an implied warranty
lasts, so the above limitation may not apply to you. This warranty gives you specific
rights, and you may have other rights which vary from state to state or by jurisdiction.
Outside the United States and Canada
In countries other than the United States and Canada, the terms and conditions of
this warranty may be different. Unless a specific Kodak warranty is communicated to
the purchaser in writing by a Kodak company, no warranty or liability exists beyond
any minimum requirements imposed by law, even though defect, damage, or loss may
be by negligence or other act.
Regulatory compliance
FCC compliance and advisory
This equipment has been tested and found to comply with the limits for a Class B
digital device, pursuant to Part 15 of the FCC Rules. These limits are designed to
provide reasonable protection against harmful interference in a residential
installation. This equipment generates, uses, and can radiate radio frequency energy
and, if not installed or used in accordance with the instructions, may cause harmful
interference to radio communications. However, there is no guarantee that
www.kodak.com/go/support
51
Appendix
interference will not occur in a particular installation. If this equipment does cause
harmful interference to radio or television reception, which can be determined by
turning the equipment off and on, the user is encouraged to try to correct the
interference by one or more of the following measures: 1) reorient or relocate the
receiving antenna; 2) increase the separation between the equipment and the
receiver; 3) connect the equipment to an outlet on a circuit different from that to
which the receiver is connected; 4) consult the dealer or an experienced radio/TV
technician for additional suggestions. Any changes or modifications not expressly
approved by the party responsible for compliance could void the user’s authority to
operate the equipment. Where shielded interface cables have been provided with the
product or specified additional components or accessories elsewhere defined to be
used with the installation of the product, they must be used in order to ensure
compliance with FCC regulation. The KODAK High Performance USB AC Adapter
K20-AM complies with part 15 of the FCC Rules. Operation is subject to the following
two conditions: (1) This device may not cause harmful interference, and (2) this device
must accept any interference received, including interference that may cause
undesired operation.
Waste Electrical and Electronic Equipment/Battery disposal
In Europe: For human/environmental protection, it is your responsibility to
dispose of this equipment and batteries at a collection facility established for
this purpose (separate from municipal waste.) For more information, contact
your retailer, collection facility, or appropriate local authorities; or go to
www.kodak.com/go/recycle. Product weight: 172 g (6.1 oz) with card and
batteries.
Canadian DOC statement
DOC Class B Compliance—This Class B digital apparatus complies with Canadian
ICES-003.
Observation des normes-Classe B—Cet appareil numérique de la classe B est
conforme à la norme NMB-003 du Canada.
52
www.kodak.com/go/support
Appendix
CE
Hereby, Eastman Kodak Company declares that this KODAK Product is in compliance
with the essential requirements and other relevant provisions of Directive 1999/5/EC.
Australian C-Tick
N137
VCCI Class B ITE
Russian GOST-R
Eastman Kodak Company
Rochester, NY 14650
www.kodak.com/go/support
53
Appendix
China RoHS
Korean Class B ITE
54
www.kodak.com/go/support
1
Index
A
A/V out, 25
about this camera, 35
accessories
battery, 49
buying, 44
SD/SDHC Card, 3
add keywords, 16, 18
AF control (Still), 32
AF zone, 32
auto, 9
focus control, 32
focus framing marks, 4
auto focus (AF)
zone, 32
B
backlight, 10
battery
expected life, 49
loading, 1
purchase, 6, 23
status, 6, 23
types, 49
beach, 10
burst, 12
button
delete, 5
telephoto/zoom, 7
C
cable
www.kodak.com/go/support
audio/video, 25
camera sounds, 33
Canadian compliance, 52
care and maintenance, 47
children, 10
clock, setting, 2
color mode, 31
computer
connect camera, 36
transfer to, 36
connector, USB / A/V, 25
copy pictures
card to memory, 29
memory to card, 29
to computer, 36
cropping pictures, 26
customize camera, 33
D
date setting, 2
deleting
during quickview, 5
from internal memory, 20
from SD/SDHC Card, 20
protecting pictures, videos, 20
digital zoom, 7
displaying slide show, 24
disposal, recycling, 47
download
KODAK Software, 36
download pictures, 36
55
Index
E
edit videos, 28
emailing pictures, videos, 18
expected battery life, 49
exposure
long time, 31, 33
exposure compensation, 31
external video device
viewing pictures, videos, 25
F
faces, tagging, recognition, 16
FCC compliance, 51
find pictures, 22
fireworks, 10
firmware, upgrading, 47
flash, using, 8
flower, 10
focus framing marks, 4
focus mode, 32
format, 35
framing marks, 4
G
guidelines, battery, 49
H
help
camera help, 40
Web links, 40
high ISO, 10
I
icons, modes, 9
image storage, 34
56
installing
battery, 1
SD/SDHC Card, 3
ISO speed, 31
K
keyboard, 16, 18
KODAK Software
upgrading, 47
KODAK Software, download, 36
Kodak Web sites, 40
L
language, 34
LCD
brightness, 33
reviewing pictures, 19
reviewing videos, 19
LCD brightness, 33
lens
cleaning lens, 47
loading
battery, 1
SD/SDHC Card, 3
locate pictures, 22
long time exposure, 31, 33
M
magnify a picture, 21
maintenance, camera, 47
make picture from video, 28
manner/museum, 10
marking
for email, 18
memory
www.kodak.com/go/support
Index
inserting card, 3
menu settings, 30
modes, 9
auto, 9
backlight, 10
beach, 10
children, 10
fireworks, 10
flower, 10
high ISO, 10
manner/museum, 10
night landscape, 11
night portrait, 11
scene (SCN), 10
self-portrait, 10
snow, 10
text, 10
modes, capture
smart capture, 9
multiple selections, 29
multi-up, 21
N
night landscape, 11
night portrait, 11
O
online prints, ordering, 38
optical zoom, 7
P
panoramic pictures, 13
people, tagging, 16
PICTBRIDGE enabled printer, 37
picture size, 30, 31
www.kodak.com/go/support
pictures
copying, 29
cropping, 26
emailing marked, 18
marking, 39
protecting, 20
review icons, 23
reviewing, 19
taking, modes, 9
transfer to computer, 36
pictures/video
deleting, 20
playing a video, 19
power
camera, 2
printing
from a card, 38
optimizing printer, 40
order online, 38
PICTBRIDGE, 37
tagged pictures, 38
protecting pictures, videos, 20
Q
quickview, using, 5
R
recycling, disposal, 47
regulatory information, 51
repair, 44
reset camera, 34
reviewing pictures/video
as you take them, 5
deleting, 20
57
Index
LCD, 19
protecting, 20
slide show, 24
running slide show, 24
S
safety, 48
scene modes (SCN), 10
SD/SDHC Card
inserting, 3
printing from, 38
search pictures, 22
select multiple pictures/videos, 29
self-portrait, 10
self-timer, 12
set tag, 33
setting
AF zone, 32
auto-focus, 32
camera sounds, 33
color mode, 31
date and time, 2
image storage, 34
ISO, 31
language, 34
LCD brightness, 33
long time exposure, 31, 33
picture size, 30, 31
picture-taking mode, 9
self-timer, 12
sharpness, 32
video out, 34
white balance, 31
setting up the camera, 1
58
setup menu, 33
Share button, 33
sharpness, 32
shutter
problems, 42
self-timer delay, 12
slide show
continuous loop, 24
running, 24
smart capture, 9
smart display, 33
smart find, 22
snow, 10
software
upgrading, 47
software downloader, 36
sounds, 33
specifications, camera, 45
strap, 1
T
tagging
people, faces, 16
taking pictures, videos, 4
television, slide show, 25
text, 10
text, entering, 16
time, setting, 2
timer, shutter delay, 12
tips
battery guidelines, 49
care & maintenance, 47
transfer pictures, 36
trash can, deleting, 5
www.kodak.com/go/support
Index
trimming a video, 28
troubleshooting, 40
turning camera on and off, 2
typing, 16, 18
digital, 7
optical, 7
U
undelete, undo, 20
upgrading software, firmware, 47
URLs, Kodak Web sites, 40
USB
transfer pictures, 36
V
VCCI compliance, 53
video
copying, 29
edit, 28
emailing marked, 18
out, 34
playback, 19
protecting, 20
review icons, 23
transfer to computer, 36
viewing, 19
video out, 34
viewing
by multi-up, 21
picture, after taking, 5, 19
W
warranty, 50
white balance, 31
Z
zoom
www.kodak.com/go/support
59