1
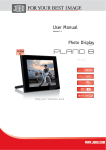
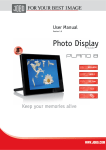
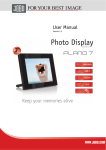
Photo Display
PDJ077
User’s Manual
TABLE OF CONTENT
Introduction .....................................................................................................................................................................................................................................1
Important Safety Precautions......................................................................................................................................................................................................2
Location of Control Buttons ........................................................................................................................................................................................................4
Remote Control................................................................................................................................................................................................................................5
Getting Started ...............................................................................................................................................................................................................................6
Remote control preparation .......................................................................................................................................................................................................6
Connecting the power cable ......................................................................................................................................................................................................6
Inserting media............................................................................................................................................................................................................................7
Copy files from computer ...........................................................................................................................................................................................................8
Viewing Photos................................................................................................................................................................................................................................9
Main screen ..................................................................................................................................................................................................................................9
Running a slideshow .................................................................................................................................................................................................................10
Viewing thumbnails ...................................................................................................................................................................................................................10
Browsing a single picture ......................................................................................................................................................................................................... 11
Using OSD menu.........................................................................................................................................................................................................................12
Managing Files...............................................................................................................................................................................................................................13
Coping files.................................................................................................................................................................................................................................14
Deleting files..............................................................................................................................................................................................................................15
Changing Frame Settings ............................................................................................................................................................................................................15
Settings menus ..........................................................................................................................................................................................................................16
i
Frequently Asked Questions .......................................................................................................................................................................................................17
Technical Specification ...............................................................................................................................................................................................................19
Contact/Service .............................................................................................................................................................................................................................20
ii
Introduction
Congratulations on your purchase of this JOBO Photo Display PDJ077.
Before operating this unit, please read this manual thoroughly and keep it for future reference.
This manual will help you use all of the exciting features to make your Digital Photo Frame view more enjoyable.
The PDJ077 is compatible with SD, MMC, MS and CF memory card formats, which enables you to view digital photo directly from your
camera’s memory card.
This manual contains important safety information and operation instructions, so please read all the instructions carefully before you use
the product in order to avoid any confusion.
User Manual PDJ077 page 1
Important Safety Precautions
Always follow these basic safety precautions when using your Digital Photo Frame. This will reduce the risk of fire, electric shock, product
damage and personal injury.
y
Warning: To reduce the risk of electric shock, do not remove the cover or back. There are no user-serviceable parts inside. Refer
servicing to qualified personnel.
y
y
Warning: To prevent fire or electric shock hazard, do not expose the unit to rain or moisture.
Do not expose the Digital Photo Frame to water (dripping or splashing) and no objects filled with liquids, such as vases, should
be placed on the unit.
y
Keep the Digital Photo Frame away from direct sunlight and heat source such as radiators or stoves.
y
Do not block the ventilation openings. Slots and openings on the unit are provided for ventilation. The openings should never be
blocked by placing your Digital Photo Frame on a cushion, sofa or other similar surface.
y
Do not place the Digital Photo Frame on unstable cart, stand, tripod, bracket or table. The unit may fall, resulting in possible
damage or injury.
y
Never place heavy or sharp objects on the LCD panel or frame.
y
Only use the AC adapter included with Digital Photo Frame. Using any other adapter will void your warranty.
y
Protect the power cord from being walked on or pinched particularly at plugs, receptacles and the point where the cord attached
to the Digital Photo Frame.
y
Unplug the power from the outlet when the unit is not in use.
User Manual PDJ077 page 2
Cleaning
y
Before cleaning the product make sure it is turned off.
y
Never spray or pour liquid directly onto the screen or plastic casing.
y
To clean fingerprints and dust from the screen, a clean, soft, non-abrasive cloth such as lens-cleaning cloth is recommended. If
it still is not clean, apply a small amount of non-ammonia, non-alcohol based glass cleaner on the lens-cleaning cloth to wipe the
screen.
y
To clean the plastic casing, use a soft, dry cloth. If it still is not clean, apply a small amount of non-ammonia, non-alcohol based,
mildly non-abrasive detergent on a clean, soft, lint-free cloth to clean the surface.
y
To clean the frame, use a soft, dry cloth.
Disclaimer: We do not recommend the use of any ammonia or alcohol-based cleaners on the LCD screen or plastic casing. Some chemical
cleaners have been reported to damage the screen and/or display case. JOBO will not be liable for damage resulting from the use of any
ammonia or alcohol-based cleaners.
User Manual PDJ077 page 3
Location of Control Buttons
1.
SD/MMC/MS -card slot
2.
CF-card slot
3.
[j] Press to move the cursor down or select the next
8.
display the OSD menu while playing photos.
9.
picture.
4.
[M] Press to return to the main menu. Press and hold to
[X] Press to start or pause slideshow or confirm the
selection.
[i] Press to move the cursor up or select the previous
10.
Power On/Off switch
picture.
11.
USB HOST for connecting the USB device directly.
5.
[h] Press to move the cursor right or rotate the picture.
12.
Mini USB port for connecting the computer
6.
[g] Press to move the cursor left or rotate the picture.
13.
DC 9V 1.5A Port
7.
[2] Press to return to the previous menu.
14.
Frame stand
User Manual PDJ077 page 4
Remote Control
1
Press to turn the player on or to standby mode.
2
a
Press to move the cursor upward or select previous picture.
3
_
Press to move the cursor leftward or rotate the picture.
4
MENU
Press to return to the main menu.
5
b
Press to move the cursor downward or select next picture.
6
Press to select the previous picture during viewing pictures or
switch to previous page in thumbnail mode.
Press to zoom in the picture.
8
4:3/16:9
9
SETUP
Press to select 4:3 or 16:9 aspect ratio for a 4:3 picture with
resolution > 800*480.
Press to go to the setup menu.
10
OK
Press to confirm the selection or start or pause playback.
11
`
Press to move the cursor rightwards or rotate the picture.
12
13
OSD
2
Press to open or exit the OSD bar display.
Press to return to the previous menu.
14
Press to select the next picture during viewing pictures or switch
to next page in thumbnail mode.
Press to start slide show.
7
15
User Manual PDJ077 page 5
Getting Started
Remote control preparation
The supplied lithium battery has already been inserted into the remote control. Pull out the protective sheet from the battery
compartment to activate the battery. The remote control is now ready for use.
If the remote control stops working, follow the procedures below to replace the battery with a new one.
1.
Place the Remote Control with the buttons facing downward.
2.
While pressing the movable left part of the battery cover to the right, pull the tray out.
3.
Place a CR2025 lithium battery on the tray with the positive + symbol face up.
4.
Close the tray.
Note: Please ensure that the batteries are disposed of in accordance with local environmental legislation.
Connecting the power cable
1.
2.
3.
Insert and screw the stand into the threaded insert at the rear of the unit to prop up
the photo frame.
Use the supplied power adapter to connect the digital photo frame to an electrical
outlet.
Slide the power switch on the back of the photo frame from OFF to ON.
Note:
y
y
You can leave the power switch on, and use the [ ] button on the remote control to turn the frame on or to standby mode.
To turn off the power of the Digital Photo Frame completely, slide the power switch from ON to OFF.
User Manual PDJ077 page 6
Inserting media
Insert the SD/MMC/MS card into the 3-in-1 card slot with the metallic contacts facing towards
the display.
Insert the CF card into the CF card slot with the pinholes pointing towards the CF card slot
opening.
Insert the USB drive into the USB HOST slot as shown.
Important:
y
Do not force the memory card in the memory slot.
y
The 3-in-1 card slot only reads one memory card at a time. Do not insert more than one card into the memory card slot.
y
To remove the cards, pull out the card slowly.
Note:
y
If a USB drive, a CF card and a SD card are all connected before the frame is switched on:
when the frame is switched on, the photos on the USB drive will start a slide show
automatically.
y
If a CF card and a SD card are connected: when the frame is switched on, the photos on
the SD card will start a slide show automatically.
y
If the frame has been switched on and main menu is displayed on the screen, inserting a device will activate a slide show of
selected device.
User Manual PDJ077 page 7
Copy files from computer
You can connect the digital photo frame to a computer to copy the files to the card inserted on the photo frame.
Before connecting to computer, remove any connected USB drive from the frame.
1.
2.
Connect the mini plug of the USB cable to the mini USB port on digital photo frame, and other end to the computer.
The computer system detects “New hardware” and starts to install the driver automatically. Wait for the system to finish the
installation. When it has finished, several “Removable Disk”, which indicate all drivers of the digital photo frame, will be created
in “My computer”.
3.
Move the files on your computer to the card inserted on the photo frame in the usual way (drag and drop).
4.
Follow the Safely Remove Instructions to disconnect the USB cable.
Note:
y
You must plug in and turn on the photo frame before connecting to the computer.
y
When connecting with a computer, the USB HOST driver is not available.
y
Do not disconnect the USB cable or remove the card when coping or transferring the files to the card on the photo frame.
y
Make sure your computer is running Windows 2000 or above, e.g. Windows XP or Vista, with USB port supported.
Please note that this feature is optional for frames with internal memory only!
User Manual PDJ077 page 8
Viewing Photos
Main screen
In the main screen, you can select connected source to view pictures or change the frame settings.
1.
2.
Press the [MENU] button on the remote control to access the main screen. All connected sources and setup icons are displayed.
USB driver
Appears when you inserted a USB flash driver.
SD/MMC
Appears when you insert a SD or MMC card.
MS
Appears when you insert a MS card.
CF
Appears when you insert a CF card.
SETUP
To customize the settings of Digital Photo Frame.
Press the [W] or [X] button on the remote control to highlight a picture source.
To start a slideshow, press the [ ] button.
To view pictures in thumbnails or manage your photos, press the [OK] button.
User Manual PDJ077 page 9
Running a slideshow
In any mode, press the [ ] button to start slideshow.
y
To pause the slideshow and view a single picture, press the [OK] button. To resume the slideshow, press the [OK] button again.
y
Press the [2] button to exit the slideshow and view the pictures in thumbnail.
y
Press the [MENU] button to exit the slideshow and return to the main screen.
Viewing thumbnails
The pictures on the selected memory source can be displayed on the screen as thumbnails.
Up to 15 pictures are displayed at a time.
1.
Select a memory source (e.g. USB, SD/MMC) in the main screen and press the [OK]
button. The mode menu appears.
2.
Press the [W] or [X] button on the remote control to select Photo, and press the
3.
To navigate through the thumbnails, press the [S], [T], [W] or [X] on the
[OK] button. The pictures are displayed on the screen as thumbnails.
remote control.
4.
To switch to next or previous page to display another set of photos, press the []
or [] button.
Note: You can also press the [2] button from a slideshow or a single view to return to the thumbnails view.
User Manual PDJ077 page 10
Browsing a single picture
You can select a single picture to display on the screen, without a slideshow.
1.
Select a picture in the thumbnail view, and press the [OK] button. The selected picture is displayed on the full screen.
y
To view the previous or next photo, press the [S] or [T] or [] or [] button.
y
To rotate a picture, press the [W] or [X] button.
y
To magnify a picture up to 16X, press the [
] button repeatedly. When a picture is magnified, press the [S], [T], [W]
or [X] to view the other part of the picture.
2.
To start slide show from the current picture, press the [OK] button.
3.
To return to the thumbnail view, press the [2] button.
User Manual PDJ077 page 11
Using OSD menu
You also can use the OSD menu to manually view the photos one by one.
1.
2.
Press the [OSD] button during viewing the picture or slideshow. The OSD menu appears on the screen and slideshow pauses.
Press the [W] or [X] button to navigate between the icons on the OSD menu.
y
To start slide show from the current picture, highlight X and press the [OK] button.
y
To skip to previous picture, highlight
y
To skip to next picture, highlight
and press the [OK] button.
y
To rotate the picture, highlight
and press the [OK] button.
y
To stop the slideshow and return to thumbnail display, highlight
y
To zoom in the picture, highlight
and press the [OK] button.
or [X] to view the other part of the picture.
User Manual PDJ077 page 12
and press the [OK] button.
and press the [OK] button. When a picture is magnified, press the [S], [T], [W]
Managing Files
In the File mode, you can view all playable files and folders on the memory source. You also can copy files from a memory device to
another memory device or delete the files.
1.
Select a memory source (e.g. USB, SD/MMC) in the main screen and press the [OK]
button. The mode menu appears.
2.
Press the [W] or [X] button on the remote control to select File, and press the
[OK] button. The file list appears.
3.
Use the [S] or [T] button on the remote control to navigate between files and
folders.
When a file is highlighted, the detailed information of file is displayed on the
right of the screen.
y
To open a folder, highlight it and press the [OK] or [X] button. To return
to superior directory, press the [W] button.
y
To play a file, highlight it and press the [OK] button. To return to file list,
press the [2] button.
User Manual PDJ077 page 13
Coping files
1.
Highlight a file using the [S] or [T] button and press the [X] button. A check
mark
; is displayed next to the file.
To check more files, repeat above step.
2.
Press the [OSD] button. A menu with COPY and DELETE options is displayed on
the right screen.
3.
Use the [S] or [T] button to select COPY and press the [OK] button. The other
4.
Use the [S] or [T] button to select a memory device and press the [X] button to
5.
Press the [OK] button to start coping files.
available memory source is displayed.
select the destined directory.
Note: If your destination device doesn’t appear in the list, the memory device should be write-protected. Please unlock and try again the
operation.
User Manual PDJ077 page 14
Deleting files
1.
Highlight a file using the [S] or [T] button and press the [X] button. A check mark
; is displayed next to the file.
To check more files, repeat above step.
2.
Press the [OSD] button. A menu with COPY and DELETE options is displayed on the right screen.
3.
Use the [S] or [T] button to select DELETE and press the [OK] button.
4.
Use the [W] or [X] button to select “
;” or “:” to delete the file or exit without deleting.
Changing Frame Settings
The system settings let you customize and configure your Digital Photo Frame.
1.
Select the SETUP icon in the main screen and press the [OK] button. Or press the
[SETUP] button any time.
The Setup Menu and software version appear on the screen.
2.
3.
To select a setting option, press the [S] or [T] button.
To change the value, press the [W] or [X] button and press the [OK] button to
confirm.
4.
Press the [2] button to exit.
User Manual PDJ077 page 15
Settings menus
Setting options
Description
LANGUAGE
Choose the on-screen language.
SLIDESHOW TIME
Specify how long each picture is displayed in a slide show.
The available options include: 3s, 5s, 15s, 1 min, 15mins, 1 hour.
Specify the transition effect between pictures in a slide show.
TRANSITION EFFECT
The available options include: Random, Fading, Vexpand Top, Vexpand Bottom, Vexpand Middle,
Hexpand Left, Hexpand Right, Hexpand Middle, Off, Bottom to Top, Top to Bottom, Left to Right,
Right to Left, Door Close, Door Open, Hori Cross, Verti Cross.
Adjust the brightness of the TFT screen.
TFT BRIGHTNESS
TFT CONTRAST
TFT SATURATION
DEFAULT SETTINGS
User Manual PDJ077 page 16
The available options include: -3, -2, -1, 0, 1, 2, 3.
Adjust the contrast of the TFT screen.
The available options include: -3, -2, -1, 0, 1, 2, 3.
Adjust the saturation of the TFT screen.
The available options include: -3, -2, -1, 0, 1, 2, 3.
Reset all settings to the default factory settings.
Frequently Asked Questions
1.
Why cannot the Digital Photo Frame display some files from my Flash card or USB device?
•
Some unpopular memory cards are not compatible with the device. Use a card which matches with the Digital Photo Frame.
•
The file formats on your card or USB device might not be supported (only JPEG pictures are accessible). Provide files with the
supported JPEG.
2.
There is a memory card inserted in the Digital Photo Frame, but the device is not able to read the card. What can I do?
•
First, make sure that you are using a memory card type that is supported by the Digital Photo Frame.
•
Secondly, make sure that the memory card is inserted correct.
•
Thirdly, check if the USB device is inserted into the unit. This Digital Photo Frame always reads the files in the USB device if USB
•
The file formats on your card might not be supported (only JPEG pictures are accessible). Provide files with the supported JPEG.
device and a card are inserted simultaneously.
Note: Some digital cameras save images into non-standard formats. Please refer to the operating manual of your camera for specifics.
3.
Why do some pictures load faster than others?
•
Higher resolution pictures load slower. Use pictures with lower resolution to speed up the loading time.
Note: The Digital Photo Frame supports up to 8000*8000 pixels picture display.
User Manual PDJ077 page 17
4.
Why does the screen not show anything?
•
The device might not have been turned ON or the adapter is not well connected.
5.
Can I rotate a picture on the screen?
•
YES. Use the [W] or [X] button to rotate a picture.
Note: The rotated picture will return to its original orientation after you power off the Digital Photo Frame.
6.
What is the best picture resolution displayed on the screen?
•
The best resolution is 640*480 and the maximum picture resolution supported by this Digital Photo Frame is 8000*8000 pixels.
User Manual PDJ077 page 18
Technical Specification
Digital TFT LCD
Display
Panel size: 7 inches
Screen aspect ratio: 4:3
Resolution: 640*480 pixels
I/O
Remote control, DC in
Power adaptor
Input: 100~240V AC, 50/60Hz
Output: 9V 1.5A DC
USB port
USB Host 2.0 & USB device 2.0
Supports USB flash media
Supported peripheral
devices
SD™ (Secure Digital Card), MMC™ (MultiMedia Card), MS™ (Memory Stick), CF™ (Compact
Flash)
Supported photo format
JPEG, Maximum resolution:8000*8000 pixels
Operating temperature
5° ~ 35°
Dimension
214*168*33.5mm
Weight
451 g
User Manual PDJ077 page 19
Contact/Service
If you have any questions on or need help with our products please do not hesitate to get in touch with our Technical Service. You can reach our
service people by phone under the telephone number indicated below from Monday through Thursday from 9:00 am to 4:00 pm and on Friday from
9:00 am to 1:00 pm. Independently of these service times you can also get in touch by e-mail, fax or mail:
JOBO AG
Koelner Strasse 58
D-51645 Gummersbach
Tel. 0049 2261 545-72
Fax: 0049 2261 545-42
E-mail: [email protected]
www.jobo.com
User Manual PDJ077 page 20