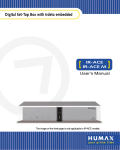
1
Digital Cable Receiver Digital-tvmottagare The default password is 0000. Standardlösenordet är 0000. User’s Manual Användarmanual CXHD-5000C • • • • • • Viaccess is a trademark of France Telecom. CryptoWorks is a trademark of Irdeto Access B.V. Irdeto is a trademark of Irdeto Access B.V. Nagravision is a registered trademark of KUDELSKI S.A. Conax is a trademark of Telenor Conax AS. Manufactured under license from Dolby Laboratories. Dolby and the double-D symbol are trademarks of Dolby Laboratories. Trademarks GB1 User’s Manual The warranty does not cover parts which may become defective due to misuse of the information contained in this manual. Warranty Not to be copied, used or translated in part or whole without HUMAX’s prior consent in writing except approval of ownership of copyright and copyright law. Copyright (Copyright © 2008 HUMAX Corporation) Thank you for purchasing a HUMAX product. Please read this user’s manual carefully to be able to safely install, use and maintain the product at maximum performance. Keep this user’s manual next to your product for future reference. The information in this user’s manual is subject to change without notice. Notice Caution Indicates a situation which could damage the equipment or other apparatus. Note Indicates additional information to make the user aware of possible problems and information of any importance to help understand, use and maintain the installation. • • Business users: Contact your supplier and check the terms and conditions of the purchase contract. This product should not be mixed with other commercial wastes for disposal. • User’s Manual GB2 Domestic users: Please contact either the retailer where you purchased this product or their local government office for details of where and how they can take this item for environmentally safe recycling. • This product should not be disposed with other household wastes at the end of its working life. Please separate this from other types of wastes and recycle it responsibly to promote the sustainable reuse of material resources. This will prevent possible harm to the environment or human health from uncontrolled waste disposal. Instruction about the ‘WEEE’ Symbol This symbol indicates important instructions accompanying the product. This symbol indicates dangerous voltage inside the product that presents a risk of electric shock or personal injury. To reduce the risk of electric shock, do not remove cover (or back). No user serviceable parts inside. Refer servicing to qualified service personnel. Meaning of Symbols Warning Indicates a hazardous situation which could result in serious injury. • Throughout the whole manual, pay special attention to the following marks that indicate hazardous situations. Warnings, Cautions and Notes Notice Operate this product only from the type of power supply indicated on the marking label. If you are not sure of the type of power supplied to your home, consult your local power company. Disconnect the product from the mains before you start any maintenance or installation procedures. Do not overload a wall outlet, extension cord or adapter as this may result in electric fire or shock. The product should not be exposed to liquid of any kind. In addition, no objects filled with liquid should be placed on the apparatus. Disconnect the product from the wall outlet before cleaning. Use a light damp cloth (no solvents) to dust the product. The slots on top of the product must be left uncovered to allow proper airflow into the unit. Do not stand the product on soft furnishings or carpets. Do not stack electronic equipments on top of the product. Do not use any unsupported attachments as these may be hazardous or cause damage to the product. Connect all components before plugging any power cords into the wall outlet. Always turn off the product, TV and other components before you connect or disconnect any cables. Disconnect the product from the mains before connecting or disconnecting the cable from the TV. Failure to do so can damage the TV. • • • • • • User’s Manual GB3 Place the product indoors to avoid exposing it to lightning, rain or sun. Do not place it near a radiator or heat register. We recommend that the product has 10 cm clearance from any other appliances susceptible to electromagnetic influences, such as a TV or a VCR. Do not block the openings with any object, and do not place the product on a bed, sofa, rug, or other similar surface. If you place the product on a rack or a bookcase, ensure that there is adequate ventilation and that you have followed the manufacturer’s instructions for mounting. Do not place the product on an unstable cart, stand, tripod, bracket, or table where it can fall. A falling product can cause serious injury to a child or adult, and serious damage to the appliance. 9. LOCATION • 8. CONNECTION TO THE TV • 7. CONNECTION TO THE CABLE TV SIGNAL • 6. ATTACHMENTS • • • 5. VENTILATION • • 4. CLEANING • 3. LIQUID • 2. OVERLOADING • • 1. MAINS SUPPLY 90-250V a.c., 50/60Hz Safety Instructions and Precautions This product has been manufactured to comply with international safety standards. Please read the following safety precautions carefully. Safety Warning Unplug the product from the wall outlet and disconnect the antenna during a thunderstorm or when left unattended and unused for long periods of time. This will prevent damage to the unit due to lightning and power-surges. Do not insert anything through the openings in the unit, where they can touch dangerous voltage points or damage parts. When replacement of parts is required, be sure the service technician uses replacement parts specified by the manufacturer or those that have the same characteristics as the original part. Unauthorized substitution may result in additional damage to the unit. Do not modify or process the power cord or plug arbitrarily. Do not bend or twist the power cord. Make sure to disconnect the power cord holding the plug. Keep heating appliances as far as possible from the power cord in order to prevent the cover vinyl from melting. The mains plug, as a disconnection device, shall remain readily accessible by the user. Do not open the main body. Do not insert metal or inflammable objects inside the product. Do not touch the power plug with wet hands. Disconnect the power cord in case of lightning. Do not use the product when it is out of order. If you continue to use the product when defective, serious damage can be caused to it. Make sure to contact your local product distributor if the product is out of order. Do not insert metal or alien substance into the slots for the modules or Smartcards. It may cause damage to the product and reduce its life span. User’s Manual GB4 • • 3. To avoid damage of product; • • • • 2. To avoid electrical shock; • • • • • 1. To avoid damage of the power cord or plug; Warning • 12. REPLACEMENT of PARTS • 11. EXTRANEOUS OBJECTS • 10. LIGHTNING, STORM or NOT IN USE Safety Warning . . . . . . . . . . . . . . . . . . . . . . . . . . . . . . . . . . . . . . . . . . . . . . . . . . . . . . . . . . . . . . . . . . . . . . . . . . . . . . . . . . . . . . . . . . . . . . . . . . . . . . . . . . . . . . . . . . . . . . . . . . . . . . . . . . . . . . . . . . . . . . . . . . . . . . . . . . . . . . . . . . . . . . . . . . . . . . . . . . . . . . . . . . . . . . . . . . . . . . . . . . . . . . . . . . . . . . . . . . . . . . . . . . . . . . . . . . . . . . . . . . . . . . . . . . . . . . . . . . . . . . . . . . . . . . . . . . . . . . . . . . . . . . . . . . . . . . . . . . . . . . . . . . . . . . . . . . GB7 . . GB8 . . GB9 . GB10 . GB11 . GB13 . . . . . . . . . . . . . . . . . . . . . . . . . . . . . . . . . . . . . . . . . . . . . . . . . . . . . . . . . . . . . . . . . . . . . . . . . . . . . . . . . . . . . . . . . . . . . . . . . . . . . . . . . . . . . . . . . . . . . . . . . . . . . . . . . . . . . . . . . . . . . . . . . . . . . . . . . . . . . . . . . . . . . . . . . . . . . . . . . . . . . . . . . . . . . . . . . . . . . . . . . . . . . . . . . . . . . . . . . . . . . . . . . . . . . . . . . . . . . . . . . . . . . . . . . . . . . . . . . . . . . . . . . . GB14 . GB15 . GB17 . GB18 . GB19 . . . . . . . . . . . . . . . . . . . . . . . . . . . . . . . . . . . . . . . . . . . . . . . . . . . . . . . . . . . . . . . . . . . . . . . . . . . . . . . . . . . . . . . . . . . . . . . . . . . . . . . . . . . . . . . . . . . . . . . . . . . . . . . . . . . . . . . . . . . . . . . . . . . . . . . . . . . . . . . . . . . . . . . . . . . . . . . . . . . . . . . . . . . . . . . . . . . . . . . . . . . . . . . . . . . . . . . . . . . . . . . . . . . . . . . . . . . . . . . . . . . . . . . . . . . . . . . . . . . . . . . . . . . . . . . . . . . . GB20 . GB20 . GB21 . GB21 . GB22 . . . . . . . . . . . . . . . . . . . . . . . . . . . . . . . . . . . . . . . . . . . . . . . . . . . . . . . . . . . . . . . . . . . . . . . . . . . . . . . . . . . . . . . . . . . . . . . . . . . . . . . . . . . . . . . . . . . . . . . . . . . . . . . . . . . . . . . . . . . . . . . . . . . . . . . . . . . . . . . . . . . . . . . . . . . . . . . . . . . . . . . . . . . . . . . . . . . . . . . . . . . . . . . . . . . . . . . . . . . . . . . . . . . . . . . . . . . . . . . . . . . . . . . . . . . . . . . . . . . . . . . . . . . . . . . . . . . . . . . . . . . . . . . . . . . . . . . . . . . . . . . . . . . . . . . . . . . . . . . . . . . . . . . . . . . . . . . . . . . . . . . . . . . . . . . . . . . . . . . . . . . . . . . . . . . . . . . . . . . . . . . . . . . . . . . . . . . . . . . . . . . . . . . . . . . . . . . . . . . . . . . . GB23 . GB23 . GB23 . GB24 . GB24 . GB24 . GB25 . GB25 . GB26 . . . . . . . . . . . . . . . . . . . . . . . . . . . . . . . . . . . . . . . . . . . . . . . . . . . . . . . . . . . . . . . . . . . . . . . . . . . . . . . . . . . . . . . . . . . . . . . . . . . . . . . . . . . . . . . . . . . . . . . . . . . . . . . . . . . . . . . . . . . . . . . . . . . . . . . . . . . . . . . . . . . . . . . . . . . . . . . . . . . . . . . . . . . . . . . . . . . . . . . . . . . . . . . . . . . . . . . . . . . . . . . . . . . . . . . . . . . . . . . . . GB28 . GB30 . GB30 . GB31 6.1 Table Guide. 6.2 List Guide . . 6.3 Schedule . . 6.4 Find . . . . . . . . . . . . . . . . . . . . . . . . . . . . . . . . . . . . . . . . . . . . . . . . . . . . . . . . . . . . . . . . . . . . . . . . . . . . . . . . . . . . . . . . . . . . . . . . . . . . . . . . . . . . . . . . . . . . . . . . . . . . . . . . . . . . . . . . . . . . . . . . . . . . . . . . . . . . . . . . . . . . . . . . . . . . . . . . . . . . . . . . . . . . . . . . . . . . . . . . . . . . . . . . . . . . . . . . . . . . . . . . . . . . . . . . . . . . . . . . . . . . . GB5 . GB32 . GB33 . GB33 . GB35 User’s Manual . . . . 6. TV Guide . . . . . . . . . . . . . . . . . . . . . . . . . . . . . . . . . . . . . . . . . . . . . . . . . . . . . . . . GB32 5.1 My TV List. . . 5.2 Favourite List. 5.3 HD List. . . . . 5.4 History List . . 5. Channel List . . . . . . . . . . . . . . . . . . . . . . . . . . . . . . . . . . . . . . . . . . . . . . . . . . . . . . GB28 4.1 Switching Channel . . . . . . . . . . 4.2 Volume Control . . . . . . . . . . . . 4.3 Resolution . . . . . . . . . . . . . . . 4.4 Sleep. . . . . . . . . . . . . . . . . . . 4.5 Wide . . . . . . . . . . . . . . . . . . . 4.6 Audio . . . . . . . . . . . . . . . . . . 4.7 Subtitle . . . . . . . . . . . . . . . . . 4.8 TEXT . . . . . . . . . . . . . . . . . . . 4.9 Programme Information (i-plate) . 4. Basic Operation . . . . . . . . . . . . . . . . . . . . . . . . . . . . . . . . . . . . . . . . . . . . . . . . . . . . GB23 3.1 Language . . . . . . . . 3.2 Search Channels . . . 3.3 Display . . . . . . . . . 3.4 Result . . . . . . . . . . 3.5 Installation Checklist. 3. Installation Wizard . . . . . . . . . . . . . . . . . . . . . . . . . . . . . . . . . . . . . . . . . . . . . . . . . . GB20 2.1 Using HDMI Cable . . . . 2.2 Using DVI Converter . . . 2.3 Using Component Cable 2.4 Using SCART Cable . . . . 2.5 Powering On . . . . . . . . 2. Setup . . . . . . . . . . . . . . . . . . . . . . . . . . . . . . . . . . . . . . . . . . . . . . . . . . . . . . . . . . GB14 1.1 Package Contents. . . . . . 1.2 Front Panel . . . . . . . . . . 1.3 Conditional Access . . . . . 1.4 Rear Panel . . . . . . . . . . 1.5 Remote Control . . . . . . . 1.6 Remote Control Batteries . 1. Before Using the Product . . . . . . . . . . . . . . . . . . . . . . . . . . . . . . . . . . . . . . . . . . . . . . . GB7 Contents . . . . . . . . . . . . . . . . . . . . . . . . . . . . . . . . . . . . . . . . . . . . . . . . . . . . . . . . . . . . . . . . . . . . . . . . . . . . . . . . . . . . . . . . . . . . . . . . . . . . . . . . . . . . . . . . . . . . . . . . . . . . . . . . . . . . . . . . . . . . . . . . . . . . . . . . . . . . . . . . . . . . . . . . . . . . . . . . . . . . . . . . . . . . . . . . . . . . . . . . . . . . . . . . . . . . . . . . . . . . . . . . . . . . . . . . . . . . . . . . . . . . . . . . . . . . . . . . . . . . . . . . . . . . . . . . . . . . . . . . . . . . . . GB36 . GB37 . GB39 . GB40 . GB42 User’s Manual GB6 12.1 Menu Map . . . . . . 12.2 Trouble Shooting . . 12.3 Error Message . . . . 12.4 Specification . . . . . 12.5 Glossary . . . . . . . . 12.6 Service and Support . . . . . . . . . . . . . . . . . . . . . . . . . . . . . . . . . . . . . . . . . . . . . . . . . . . . . . . . . . . . . . . . . . . . . . . . . . . . . . . . . . . . . . . . . . . . . . . . . . . . . . . . . . . . . . . . . . . . . . . . . . . . . . . . . . . . . . . . . . . . . . . . . . . . . . . . . . . . . . . . . . . . . . . . . . . . . . . . . . . . . . . . . . . . . . . . . . . . . . . . . . . . . . . . . . . . . . . . . . . . . . . . . . . . . . . . . . . . . . . . . . . . . . . . . . . . . . . . . . . . . . . . . . . . . . . . . . . . . . . . . . . . . . . . . . . . . . . . . . . . . . . . . . . . . . . . . . . . . . . . . . . . . . . . . . . GB52 . GB53 . GB54 . GB55 . GB57 . GB58 12. Appendix . . . . . . . . . . . . . . . . . . . . . . . . . . . . . . . . . . . . . . . . . . . . . . . . . . . . . . . GB52 11.1 OTA (Over the Air) . . . . . . . . . . . . . . . . . . . . . . . . . . . . . . . . . . . . . . . . . . . . . . . . . . . . . . . . . . GB51 11. Software Update . . . . . . . . . . . . . . . . . . . . . . . . . . . . . . . . . . . . . . . . . . . . . . . . . . GB51 10.1 Status . . . . . . . . . . . . . . . . . . . . . . . . . . . . . . . . . . . . . . . . . . . . . . . . . . . . . . . . . . . . . . . . . GB48 10.2 Signal Detection. . . . . . . . . . . . . . . . . . . . . . . . . . . . . . . . . . . . . . . . . . . . . . . . . . . . . . . . . . . GB48 10.3 Conditional Access . . . . . . . . . . . . . . . . . . . . . . . . . . . . . . . . . . . . . . . . . . . . . . . . . . . . . . . . . GB49 10. System . . . . . . . . . . . . . . . . . . . . . . . . . . . . . . . . . . . . . . . . . . . . . . . . . . . . . . . . . GB48 9.1 Channel Search . . . . . . . . . . . . . . . . . . . . . . . . . . . . . . . . . . . . . . . . . . . . . . . . . . . . . . . . . . . . GB46 9.2 Software Update . . . . . . . . . . . . . . . . . . . . . . . . . . . . . . . . . . . . . . . . . . . . . . . . . . . . . . . . . . . GB47 9.3 Default Setting . . . . . . . . . . . . . . . . . . . . . . . . . . . . . . . . . . . . . . . . . . . . . . . . . . . . . . . . . . . . GB47 9. Installation . . . . . . . . . . . . . . . . . . . . . . . . . . . . . . . . . . . . . . . . . . . . . . . . . . . . . . . GB46 8.1 Edit Channel List . . . . . . . . . . . . . . . . . . . . . . . . . . . . . . . . . . . . . . . . . . . . . . . . . . . . . . . . . . . GB43 8.2 Edit Favourite List. . . . . . . . . . . . . . . . . . . . . . . . . . . . . . . . . . . . . . . . . . . . . . . . . . . . . . . . . . . GB44 8.3 Display History List . . . . . . . . . . . . . . . . . . . . . . . . . . . . . . . . . . . . . . . . . . . . . . . . . . . . . . . . . . GB45 8. Edit Channels . . . . . . . . . . . . . . . . . . . . . . . . . . . . . . . . . . . . . . . . . . . . . . . . . . . . . GB43 7.1 Parental Control. . 7.2 Language Setting. 7.3 Time Setting . . . . 7.4 A/V Setting . . . . . 7.5 Other Settings . . . 7. Preferences. . . . . . . . . . . . . . . . . . . . . . . . . . . . . . . . . . . . . . . . . . . . . . . . . . . . . . . GB36 Contents SCART Cable HDMI Cable User’s Manual User’s Manual User’s Manual GB7 Note: • Faults may occur if the remote control is left without battery for a long time. Always keep the battery inserted in the remote control. • Package contents may vary according to area. Remote Control Batteries Please check all package contents before using your product. 1.1 Package Contents This chapter provides detail instructions on the product and its accessories. 1. Before Using the Product 2 3 4 5 6 7 8 9 10 User’s Manual GB8 Note: The front of the product is subject to change without notice. 10. SMARTCARD SLOT A slot for a Smartcard 9. RADIO LED Amber light is emitted when the product is in radio mode. 8. TV LED Green light is emitted when the product is in TV mode. 7. STANDBY LED Red light is emitted when the product is in standby mode. 6. GUIDE Displays the programme guide. 5. MENU Displays the main menu. 4. OK Selects a menu or confirms the selected operation. Displays the channel list while watching a programme. 3. ARROW BUTTONS Changes the channel or moves the cursor up, down, left or right. 2. TV/RADIO BUTTON Switches between TV and radio modes. 1. STANDBY BUTTON Switches between operation and standby modes. 1 1.2 Front Panel 1. Before Using the Product e GB9 User’s Manual Smartcard 1. Open the right-hand flap on the front panel of the product to expose the card slot. 2. Hold the Smartcard horizontally with the electronic chip (small square-shaped, gold in colour) facing downwards. 3. Insert the Smartcard into the slot. The Smartcard looks similar to a credit card and is inserted into the slot behind the right-hand front flap of the product. A valid Smartcard entitles you to view and listen to all the channels you choose to subscribe to. The Smartcard slot on the product can be used for Conax Smartcard only. 1. Inserting the Smartcard Although some TV and radio services are free to air, others are available on a subscription basis and can only be enjoyed via a Conditional Access component. The Conditional Access component is a removable Smartcard. 1.3 Conditional Access 1. Before Using the Product No tic 2 3 4 5 7 8 User’s Manual GB10 9 10 11 12 12. SPDIF Connects to the audio system using an S/PDIF cable. (digital audio) 11. COMPONENT SELECT Switch for changing video. (default: YPbPr) 10. AUDIO Connects to the TV or VCR using an RCA cable. 9. VIDEO Connects to the TV or VCR using an RCA cable. 8. COMPONENT(YPbPr) Connects to the TV or VCR using a component cable. 6 Note: The rear panel of the product is subject to change without notice. 7. USB Connects to the USB memory or external HDD. 6. ETHERNET Ethernet port (for future use). 5. HDMI Connects to the TV using an HDMI cable. 4. VCR SCART Connects to the VCR or DVD using a VCR SCART cable. 3. TV SCART Connects to the TV using a TV SCART cable. 2. CABLE OUT Connects to the RF IN of the TV or VCR using an RF cable. 1. CABLE IN Connects a network cable. 1 1.4 Rear Panel 1. Before Using the Product 12. WIDE Sets the display format. GB11 User’s Manual 11. TEXT Switches between the teletext and TV modes. 10. i (INFORMATION) Displays the channel and programme information. 9. MENU Displays the main menu. 8. P-/P+ or PAGE/PAGE Changes the channel or page. 7. COLOUR BUTTONS(R/G/Y/B) Select the colour keys for interactive applications. 6. ARROW BUTTONS Navigates through the menu options. 5. EXIT Exits all On-Screen Display (OSD) screens. 4. OPT+ Displays the channels attributes while watching a programme. 3. NUMERIC(0-9) BUTTONS Enters a TV/radio channel number or menu option number. 2. TV/RADIO Switches between TV and radio modes. 1. SOURCE Controls the output of TV SCART. Note: The remote control of the product is subject to change without notice. 12 11 10 9 8 7 6 5 4 3 2 1 1.5 Remote Control 1. Before Using the Product User’s Manual GB12 22 21 20 19 18 17 16 15 14 13 22. V-FORMAT Changes the resolution of video. 21. SLEEP Sets the sleep time. 20. AUDIO Displays the audio list. 19. SUBTITLE Displays the subtitle language list. 18. MUTE Mutes or unmutes the audio temporarily. 17. V-/V+ Adjusts the audio volume. 16. OK Selects a menu or confirms the selected operation. 15. BACK Closes and returns to the previous menu and screen. 14. GUIDE Displays the programme guide. 13. STANDBY Switches between operation and standby modes. 1. Before Using the Product User’s Manual GB13 1. Press down the top of the battery cover and slide the cover off. 2. Insert the new batteries. Make sure the plus (+) ends meet the plus markings on the battery case. 3. Slide the cover back into place. 1.6 Remote Control Batteries 1. Before Using the Product i User’s Manual GB14 Cable Outlet RF Cable 1. Connect your CATV line to the CABLE IN. 2. Connect the product and TV using an HDMI cable. HDMI HDMI Cable The HDMI connection is recommended for Digital TV. In case the TV has an HDMI input connector, a special all-digital interface that provides the highest picture quality, connect the product and the TV using an HDMI cable as follows. 2.1 Using HDMI Cable Note: • If you encounter any problems setting up your product, please contact your local product distributor. • The rear image of the TV and VCR may differ depending on the manufacturer and model. This chapter describes how to connect your product to the TV with the particular equipments for gaining optimum signal quality. The product provides various interfaces to connect to the TV, VCR or other devices. Select the most appropriate procedure depending on the equipment you have. 2. Setup Cable Outlet RF Cable HDMI Cable User’s Manual GB15 1. Connect your CATV line to the CABLE IN. 2. Connect one end of the HDMI cable to the HDMI input on the product and the other end to the HDMI to DVI converter. 3. Connect the DVI converter to the TV. 4. Connect the product and the Dolby Digital decoder using an S/PDIF cable. 1. When equipped with an A/V receiver The DVI connection using an HDMI to DVI converter is recommended for Digital TV. In case the TV has a DVI input connector, connect the product to the TV with an HDMI cable using an HDMI to DVI converter as follows. 2.2 Using DVI Converter 2. Setup User’s Manual GB16 Cable Outlet RF Cable HDMI Cable Caution: DO NOT CONNECT TO HEAD PHONE CONNECTOR ON TV! Note: You can also connect the product to the TV using the 3.5 Stereo Jack Cable to 2 RCA Y Cable. 1. Connect your CATV line to the CABLE IN. 2. Connect the product and the TV using an RCA cable. 3. Connect one end of the HDMI cable to the HDMI input on the product and the other end to the HDMI to DVI converter. 4. Connect the DVI converter to the TV. In case you are not equipped with an A/V receiver, connect the product and the TV using an audio cable as follows. 2. When there is no A/V receiver available 2. Setup Cable Outlet RF Cable COMPONENT IN COMPONENT Cable L AUDIO R RCA Cable S/PDIF S/PDIF Cable Note: The Component Select switch should be on YPbPr when using the component cable. You can either: 3. 1) Connect the product and the TV using an RCA cable (Audio L/R). 2) Connect the product and the Dolby Digital decoder using an S/PDIF cable. 1. Connect your CATV line to the CABLE IN. 2. Connect the product and the TV using a component cable. GB17 User’s Manual The component connection is recommended for Digital TV. Connect the product and the TV using a component cable as follows. 2.3 Using Component Cable 2. Setup User’s Manual GB18 Cable Outlet RF Cable TV SCART SCART Cable VCR SCART SCART Cable Note: The Component Select switch should be on RGB when using the SCART cable. 1. Connect your CATV line to the CABLE IN. 2. Connect the product and the TV using a SCART cable. 3. Connect the product and the VCR using a SCART cable. A SCART cable connection is recommended for analogue TV or VCR. Connect the product and the TV using a SCART cable as follows. 2.4 Using SCART Cable 2. Setup User’s Manual GB19 1. Connect the power cord of the product to a wall outlet. 2. Power on by pressing the STANDBY button of the remote control or the STANDBY button at the front of the product. 2.5 Powering On 2. Setup User’s Manual GB20 1. Enter Frequency/ Symbol Rate/ Network ID using the NUMERIC (0-9) buttons. 2. Select Search and press the OK button. 3. Please wait for finishing the channel search. If you want to stop the channel search, press the OK button. 4. Select Save and press the OK button to go to the next step. Search Channels will activate and the result will appear. 3.2 Search Channels Select the appropriate language from the list. Press the OK button to save. Language allows you to select the main language. 3.1 Language Tip: • The default password is 0000. • If you have forgotten your password, please contact your local product distributor. When powering on your product for the first time after purchase, the installation wizard will operate automatically. 3. Installation Wizard Select Finish and press the OK button to complete the installation wizard. After all setting is complete, you can view the result screen. 3.4 Result Select Next and press the OK button. Select the value for Screen Ratio, Display Format and Resolution. Display enables you to set the screen ratio, display format and resolution of the screen. 3.3 Display 3. Installation Wizard GB21 User’s Manual GB19 GB20 Is the product in operation mode (not Standby mode)? Have you performed channel search in the installation wizard? Done? User’s Manual GB22 Note: If you exit the installation wizard without fully completing the channel searching procedure, you may not have all of the channels available. In this case, you can use the installation menu to search for more channels. GB19 GB14~18 Is the product connected to your TV? Is the power cord plugged in the wall outlet? GB14~18 Page Is the CATV line connected correctly? Step Before using the product, please make sure that you have completed the following steps. 3.5 Installation Checklist 3. Installation Wizard You can set the resolution of the screen. Press the V-FORMAT button while watching a programme. The current resolution will be displayed. Each time you press the V-FORMAT button, the resolution changes in the following sequence: 576i576p720p1080iOriginal 4.3 Resolution Note: The mute function remains set while you switch channels. You can adjust the audio volume. Press the V-/V+ button to adjust the audio volume. Press the MUTE button to stop the audio temporarily. 4.2 Volume Control User’s Manual GB23 Note: You can switch channels using the channel list or TV guide. To return to the previous channel, press the BACK button. You can switch the current channel by pressing the P-/P+ button or entering the channel number directly using the NUMERIC(0-9) buttons. Press the TV/RADIO button to switch between TV channels and radio channels. 4.1 Switching Channel This chapter describes the basic functions the product provides such as switching channel, volume control and other common features. 4. Basic Operation User’s Manual GB24 Note: If the programme is broadcast in Dolby Digital, you cannot set the audio direction. 1. Press the AUDIO button. 2. Select the audio language you prefer. 3. Select audio direction (left, right, stereo) using the / button. 4. Press the EXIT button to close. You can select the language you prefer in Audio if the current programme is available in multiple audio languages. 4.6 Audio Note: For more information about display format, refer to 7.4.7 Display Format. Press the WIDE button while watching a programme to change the display format. Each time you press the WIDE button, the display format changes. You can set the display format. 4.5 Wide Press the SLEEP button while watching a programme to set the sleep time. Each time you press the SLEEP button, the sleep time changes in the following sequence: 10, 20, 30, 60, 90, 120 minutes. You can set the automatic turn off time. 4.4 Sleep 4. Basic Operation Note: You can also select teletext using SUBTITLE button. 1. Press the TEXT button. 2. To display the teletext menu, press the MENU button in teletext mode. 3. Select the teletext function you want and press the OK button. To view the teletext page, use the NUMERIC(0-9) buttons. All teletext supporting channels have the teletext icon on the i-plate. 4.8 TEXT Note: When there is no subtitle available, Off does not appear. 1. Press the SUBTITLE button. 2. Select the required subtitle language and press the OK button. The subtitle will be displayed in the selected language at the bottom of the screen. 3. Select Off from the subtitle language list to hide the subtitle from the screen. You can select the language for the subtitle if the programme provides subtitle information. 4.7 Subtitle 4. Basic Operation GB25 User’s Manual 2 4 6 Displays the resolution of the current programme. 1080i User’s Manual Displayed only when the programme is broadcast in Dolby Digital. Displayed the screen ratio of the current programme. 4:3 Displayed only when subtitle information is available. Displayed only when there is any teletext information. Displayed only when the channel is a scrambled channel. Displayed only when the channel provides HD programmes. Digital 7 5 Represents parental level. Indicates the minimum level of age for viewing the programme. Displayed only if the programme is reserved for watching. HD CX 3 Displayed only when the channel is a locked channel. Next/previous channel Channel number and name Programme name Icons GB26 1. 2. 3. 4. 1 The general information is displayed on the screen as the following. 1. General Information After switching to a channel, press the / button to display navigation mode. Press the / button to view the previous/next programme information. Press the / button to view the programme information of other channels. 8 The i-plate is always displayed for a certain period of time whenever you switch channels. You can view the programme information by pressing the i button while watching a programme. Press the EXIT button to hide the i-plate. 4.9 Programme Information (i-plate) 4. Basic Operation Current time & date Programme broadcasting time and progress bar: Displays programme playing time and progress bar. Group name: Displays the group the channel belongs to. Previous/Next programme information: Displayed if previous/next programme information is provided. Press the / button to display previous/next programme information. GB27 User’s Manual Note: If the detailed programme information is over one page, use the / button to move to the previous or next page. Press the i button when the i-plate is displayed to view detailed information. Press the i button once more to hide the i-plate. You can see the detailed information about the current programme. 2. Detailed Programme Information Note: If there is no programme information available, programme information is not displayed. 5. 6. 7. 8. 4. Basic Operation The list of the favourite channels in five groups. The list of all HD channels. Most Viewed: The list of the most viewed channels. Recently Viewed: The list of the recently viewed channels. Favourite (GREEN) HD (YELLOW) History (BLUE) User’s Manual GB28 Note: You can switch between TV and radio by simply pressing the TV/RADIO button. 1. Press the OK button while watching a programme to display the channel list. 2. Press the RED button while the channel list is displayed. 3. Select the channel you wish to view and press the OK button. You can also enter the channel number using the NUMERIC(0-9) buttons. 4. Press the RED button again and select a sub group using the / button. My TV List is the list of all channels available including both TV and radio channels. 5.1 My TV List Note: • Press the EXIT button to exit the channel list. • The sub-groups of favourite channel list exist only after configuration. The list of all TV and radio channels. My TV (RED) Four types of channel lists are provided for quick and easy channel search. This chapter will help you manipulate the channel list. You can display the channel list by pressing the OK button while watching a programme. 5. Channel List 1. Press the MENU button. 2. To display the icon, enable Show Icon using the OK button. 3. To display the channel number, enable Show Channel Number using the OK button. 4. To close the channel list automatically by pressing the OK button, enable Close Automatically using the OK button. 5. To change the list type, select List Type and select among Simple, One Column and Two Column using the / button. 2. Configuration 1. Select a channel and press the OPT+ button. 2. To add the channel to the favourite group, select Favourite. Select the group using the / button and press the OK button. 3. To lock the channel, select Lock and press the OK button. 1. Option 5. Channel List GB29 User’s Manual User’s Manual GB30 1. Press the OK button while watching a programme. 2. Press the YELLOW button to display the HD list. HD List is the list of HD channels. 5.3 HD List 1. Press the OK button while watching a programme. 2. Press the GREEN button to display the list of favourite groups. 3. Press the GREEN button again and select a sub group using the / button. Favourite List is the list of the favourite channels you can select yourself from the entire channel list. There are five favourite groups in total. 5.2 Favourite List 5. Channel List 1. Press the OK button while watching a programme. 2. Press the BLUE button to display the history list. 3. Press the BLUE button again and select Most Viewed or Recently Viewed using the / button. History List is the list of the most or recently viewed channels. 5.4 History List 5. Channel List GB31 User’s Manual User’s Manual GB32 Note: • Press the i button to view the programme information. • Press the TV/RADIO button to switch to TV or radio. 1. Press the GUIDE button. 2. Press the RED button. 3. Move to the previous/next programme within the same channel using the / button. 4. Move to another channel using the / button. If the contents are more than one page, use the P-/P+ button to skip to the next page. Enter the number of the channel you wish to move using the NUMERIC(0-9) buttons. 5. Select the programme you wish to view and press the OK button. 6. Press the RED button to enter to the quick navigation mode. Jump back/ahead two hours using the / button. Move to the previous/next day using the / button. 7. Press the OPT+ button to change the channel group. Select the channel group using the / button and select the sub channel group using the / button. 8. You can reserve it if it is a future programme. Select a future programme and press the OK button. Select Yes and press the OK button. Select a reserved programme and press the OK button to cancel the reservation. 9. Press the BACK button to return to the current time. You can view the programme information of all channels in time and date order. 6.1 Table Guide Note: Press the GUIDE or EXIT button to exit the TV guide screen. The TV Guide displays the programme information of each channel, in time and date order. You can customize your own programme guide to list the channels or programmes of interest to you and schedule your viewing using the programme information. 6. TV Guide Note: Press the BACK button to sort the list in time or alphabetical order. 1. Press the GUIDE button. 2. Press the YELLOW button to display the schedule of reservations. 3. Select a reservation and press the OPT+ button to delete the reservation. User’s Manual GB33 Schedule displays the list of the programmes reserved. You can modify, delete or make new reservations. 6.3 Schedule 1. Press the GUIDE button. 2. Press the GREEN button. 3. You can view the programme information for approximately a week. The features are similar as in grid guide. 6.2 List Guide 6. TV Guide User’s Manual GB34 Note: • Reservations for deleted channels or past programmes are automatically deleted. • In case the channel number has changed, reservation has to be done again. 1. Select a blank space and press the OK button. 2. The reservation popup will appear. Enter the channel number, date, start/end time and repeat frequency and then press the OK button. 2. New Reservation 1. Select a reservation you want to edit and press the OK button. The reservation popup will appear. 2. Select Channel and press the OK button to display the channel list. Select the channel. 3. Select Date and press the OK button to view the calendar. Select the date. 4. Select Start Time or End Time and enter the time using the NUMERIC(0-9) buttons. 5. Select Repeat and change the repeat frequency using the / button. 6. Select OK and press the OK button. 1. Editing Reservations 6. TV Guide Press the OK button while the cursor is on Keyword. A keyboard will appear. Enter the keyword. Select Language and choose the language of the keyword. Select SMS to switch to SMS keyboard. Press the YELLOW button to complete. 1. Press the OK button while the cursor is on Time & Day. 2. The time & day popup will appear. Select the time and day using the OK or / button. 3. Select OK and press the OK button. 3. Search by Time and Day 1. Press the OK button while the cursor is on Genre. 2. The list of genres will appear. Select a genre and press the OK button. 2. Search by Genre 1. 2. 3. 4. 5. 1. Search by Keyword Note: Press the OPT+ button to display seven of the most recent values that have been entered. 1. Press the GUIDE button. 2. Press the BLUE button to find programme. 3. Enter the keyword, genre, time & day of the programme and select Search and then press the OK button. 4. The search result of the entered values will appear. 5. To reserve a programme, select a future programme and press the OK button. User’s Manual GB35 Find enables you to find the programme you want by entering the keyword, genre, time and day of the programme. 6.4 Find 6. TV Guide The default password is 0000. User’s Manual GB36 Note: You must enter your password to watch programmes blocked by the age restriction. 1. Select Age Limit and press the OK button. 2. Select the age limit you wish to set. Age Limit enables you to place certain restrictions on the viewers by setting age limits. 1. Age Limit 1. Press the MENU button. 2. Select Preferences using the / button and press the OK button. 3. Select Parental Control using the / button and press the OK button. 4. You will be prompted to enter your password. Enter the password using the NUMERIC(0-9) buttons. Tip: Parental Control allows you to set rating limits for each programme according to the age of the viewer or change your previous password. You can also lock the changes you have made using installation lock. 7.1 Parental Control Note: Press the EXIT button to save the changes and return to the previous menu. Press the MENU button to exit the menu screen. In this chapter you can set parental control, language setting, time setting, A/V setting and other configuration items to keep limitations where you want them for the viewers. 7. Preferences 1. Select Menu/Audio/Subtitle Language and press the OK button.. 2. Select the language you want and press the OK button. GB37 User’s Manual Menu/Audio/Subtitle Language allows you to choose from the given language options and set the language. 1. Menu/Audio/Subtitle Language 1. Press the MENU button. 2. Select Preferences using the / button and press the OK button. 3. Select Language Setting using the / button and press the OK button. Language Setting enables you to set the basic language and subtitle options. 7.2 Language Setting 1. Select Installation Lock. 2. Select Enable or Disable using the OK or / button. Installation Lock allows you to block access to the installation menu settings you have previously made. 3. Installation Lock 1. Select Change Password and press the OK button. 2. Enter the password in New Password using the NUMERIC(0-9) buttons. 3. Enter the password again in Verify Password to confirm. Change Password allows you to change the current password. 2. Change Password 7. Preferences Subtitles are displayed only when you press the SUBTITLE button and set subtitle. Manual Uses the fixed subtitle font as in TEXT. Fixed User’s Manual GB38 Uses the horizontally variable subtitle font of the on-screen display. Variable 1. Select Subtitle Font. 2. Select Variable or Fixed using the OK or / button. Subtitle Font enables you to select the font of the subtitle. 3. Subtitle Font Subtitles are displayed automatically in the predefined subtitle language. Auto 1. Select Subtitle Display. 2. Select Auto or Manual using the OK or / button. Subtitle Display allows you to display the subtitle automatically. This service is provided when subtitles are available. 2. Subtitle Display 7. Preferences GB39 User’s Manual 1. Select System Update Time and press the button. 2. Enter the system update time using the NUMERIC(0~9) buttons or select Disable using the / button. You can set the time you want to update system. 4. System Update Time 1. Select Power OFF and press the button. 2. Enter the powering off time using the NUMERIC(0-9) buttons or select Disable using the / button. You can select the time the product turns off automatically. 3. Power OFF 1. Select Power On Channel and press the OK button to display the channel list. 2. Select the channel and press the OK button. You can select the channel to watch when the product turns on at the preset wakeup time. 2. Power On Channel 1. Select Power ON and press the button. 2. Enter the powering on time using the NUMERIC(0-9) buttons or select Disable using the / button. You can set the time the product turns on automatically. 1. Power ON 1. Press the MENU button. 2. Select Preferences using the / button and press the OK button. 3. Select Time Setting using the / button and press the OK button. Time Setting allows you to set the time you want to turn the product on or off. 7.3 Time Setting 7. Preferences User’s Manual GB40 1. Select Audio Output. 2. Select Stereo or Mono using the OK or / button. You can select the audio output option. 3. Audio Output 1. Select VCR SCART. 2. Select CVBS or S-Video using the OK or / button. You can select the VCR SCART output option. 2. VCR SCART Note: You can select RGB only when the Component Select switch at the rear is on RGB. 1. Select TV SCART and press the OK button. 2. Select among CVBS, S-Video and RGB and press the OK button. You can select the TV SCART output option. 1. TV SCART 1. Press the MENU button. 2. Select Preferences using the / button and press the OK button. 3. Select A/V Setting using the / button and press the OK button. You can configure the audio and video output settings. 7.4 A/V Setting 7. Preferences 1. Select Letter and Pillar Box Colour and press the OK button. 2. Select Black or Gray using the OK or / button. You can set the colour for margin space according to the display format. 8. Letter and Pillar Box Colour User’s Manual GB41 1. Select Display Format and press the OK button. 2. When choosing 4:3 as screen ratio, select among Auto, Letterbox and Pan & Scan and press the OK button. 3. When choosing 16:9 as screen ratio, select among Auto, Pillar Box and Zoom and press the OK button. You can select the display format according to the screen ratio. 7. Display Format 1. Select Screen Ratio. 2. Select 4:3 or 16:9 using the OK or / button. You can select the screen ratio option. 6. Screen Ratio Note: Lip-Sync is applied to all channels when once adjusted. 1. Select Lip-Sync and press the OK or button. 2. Adjust the sync using the / button. 3. Press the BACK button to complete. You can adjust the sound difference of audio and video. 5. Lip-Sync 1. Select Dolby Digital Auto Selection. 2. Select On or Off using the OK or / button. You can set Dolby Digital automatically. If you select On, Dolby Digital audio will be output via S/PDIF. 4. Dolby Digital Auto Selection 7. Preferences The bigger the number, the more transparent the screen. 25%, 50%, 75% User’s Manual GB42 1. Select Power Saving in Standby and press the OK button. 2. Select On or Off using the OK or / button. You can switch the product to power saving mode in standby. 3. Power Saving in Standby Fully opaque screen Disable 1. Select OSD Transparency and press the OK button. 2. Select among Disable, 25%, 50% and 75% and press the OK button. You can set the transparency of the On-Screen Display. 2. OSD Transparency Note: When set to Disable, the i-plate will not be displayed when you switch the channel. 1. Select Info Display Time and press the OK button. 2. Select a value between Disable, 1~ 20 seconds and press the OK button. You can set the automatic display time of the information box when the channel is switched. 1. Info Display Time 1. Press the MENU button. 2. Select Preferences using the / button and press the OK button. 3. Select Other Settings using the / button and press the OK button. You can configure other settings such as info display time and OSD transparency. 7.5 Other Settings 7. Preferences The default password is 0000. Note: • When all selected channels are locked, Lock is switched into Unlock. When you press Unlock, the locked channel is switched into an unlocked channel. • To watch locked channels, you must enter the password using the NUMERIC(0-9) buttons. 1. Select the channel you want to lock and press the OK button. 2. Press the RED button. 1. Locking/Unlocking Channels 1. Press the MENU button. 2. Select Edit Channels using the / button and press the OK button. 3. Select Edit Channel List using the/ button and press the OK button. 4. You will be prompted to enter your password. Enter the password using the NUMERIC(0-9) buttons. Tip: GB43 User’s Manual Edit Channel List enables you to select or lock/unlock the channels in the channel list conveniently. 8.1 Edit Channel List Note: • Press the EXIT button to save the changes and return to the previous menu. Press the MENU button to exit the menu screen. • Press the TV/RADIO button to move to TV or radio channel list directly. In this chapter you can edit all channels in the channel list or make changes to the favourite lists of the channels you have chosen. 8. Edit Channels User’s Manual GB44 1. Press the GREEN button to display the list of groups. 2. Select the favourite group you want and press the OK button. 2. Selecting Favourite Groups Note: When the cursor is on the left column, the red button is marked Add; when the cursor moves to the right column, it becomes Remove. 1. Select the channels you want to add to the favourite channel list and press the OK button. 2. Press the RED button to add the channels to the favourite list you have chosen. 3. To remove channels from the favourite list, select the channels from the list and press the RED button. 1. Adding/Removing Channels 1. Press the MENU button. 2. Select Edit Channels using the / button and press the OK button. 3. Select Edit Favourite List using the / button and press the OK button. You can add or remove channels from the favourite groups, move favourite channels and rename favourite groups. 8.2 Edit Favourite List 1. Press the YELLOW button to select all channels. 2. Press the BLUE button to release all channels. 3. Select All/Release All 1. Press the GREEN button to display the list of groups. 2. Select the group you want and press the OK button. 2. Selecting a Channel Group 8. Edit Channels Select the favourite group you want to rename and press the OK button. Press the BLUE button. Select Rename Group and press the OK button. A keyboard will appear. Enter the name of the favourite group using the keyboard. Press the YELLOW button to complete. 1. Press the MENU button. 2. Select Edit Channels using the / button and press the OK button. 3. Select Display History List using the / button and press the OK button. Display History List allows you to set the history list in the channel list to Enable or Disable. GB45 User’s Manual Select the favourite channels to move within the favourite channel list and press the OK button. Press the BLUE button. Select Move and press the OK button. Move the cursor to the destination using the / button, and press the OK button. The selected channel is moved to the new location. 8.3 Display History List 1. 2. 3. 4. 5. 5. Moving Favourite Channels Note: The YELLOW and BLUE buttons become activated only when the cursor is placed on the right column. 1. 2. 3. 4. 5. 4. Renaming Favourite Groups 1. Press the YELLOW button to select all channels in the favourite list. 2. To release all channels, press the YELLOW button again. 3. Select All/Release All 8. Edit Channels The default password is 0000. User’s Manual GB46 1. Press the MENU button. 2. Select Installation using the / button and press the OK button. 3. Select Channel Search using the / button and press the OK button. 4. Select Frequency and enter the frequency using the NUMERIC(0~9) buttons. 5. Select Symbol Rate and press the OK and / button. If the required value is not available, select User Define and enter the symbol rate directly. 6. Select Network ID and enter the value using the NUMERIC (0~9) buttons. 7. Select Search and press the OK button. 8. Please wait for finishing the channel search. If you want to stop the channel search, press the OK button. 9. Press the OK button to save the result. 9.1 Channel Search Tip: Note: • When you select Installation and press the OK button, you will be prompted to enter your password. Enter the password to proceed. • Press the EXIT button to save the changes and return to the previous menu. Press the MENU button to exit the menu screen. In this chapter you can configure the installation setting and perform channel search. Menus such as channel search, software update and default setting are included in this section. 9. Installation Press the MENU button. Select Installation using the / button and press the OK button. Select Software Update using the / button and press the OK button. When new software is detected, you can choose to download the software immediately or save for later. User’s Manual GB47 Note: For detailed information about the installation wizard, refer to Chapter 3. Installation Wizard. 1. Press the MENU button. 2. Select Installation using the / button and press the OK button. 3. Select Default Setting using the / button and press the OK button. 4. Select Yes and press the OK button to restore all setting to factory default. To return to the previous menu, select No and press the OK button. 5. You will be prompted to enter your password again before starting to load default setting. Enter the password to proceed. 6. When default setting is completed, installation wizard pops up automatically and assists channel search. Warning: Please note that once you perform Default Setting, all data such as channel list and all user configured data will be deleted. Default Setting enables you to restore the product to the factory default. 9.3 Default Setting Note: • For more information about the software update, refer to 11. Software Update. • Software Update is activated when a new software is found. 1. 2. 3. 4. Software Update allows you to update the system software. 9.2 Software Update 9. Installation User’s Manual GB48 1. Press the MENU button. 2. Select System using the / button and press the OK button. 3. Select Signal Detection and press the OK button. 4. The information of the tuner will be displayed. You can view the antenna, transponder information, signal strength and quality of the tuner. 10.2 Signal Detection 1. Press the MENU button. 2. Select System using the / button and press the OK button. 3. Select Status and press the OK button. 4. The system status information will be displayed. You can view the model name, software version, loader version, system ID, STB ID, Chip ID, update date, Micom version and MAC address of the product. 10.1 Status 10. System 1. Select Change CA PIN and press the OK button. 2. A popup will appear. Enter the CA PIN in the popup using the NUMERIC(0-9) buttons. 3. Enter the new CA PIN and confirm the new CA PIN to complete. You can change the current CA PIN. 4. Change CA PIN You can view the tokens status. Press the / button to scroll up/down the list. 3. Tokens Status GB49 User’s Manual You can view the status of the reserved events. Press the / button to scroll up/down the list. 2. Event Status You can view the subscription status of the channels subscribed. Press the / button to scroll up/down the list. 1. Subscription Status 1. Press the MENU button. 2. Select System using the / button and press the OK button. 3. Select Conditional Access and press the OK button. 10.3 Conditional Access User’s Manual GB50 You can view the Smartcard information. 7. About Conax CA You can view the conditional access messages. Press the / button to scroll up/down the list. 6. Messages 1. Select Maturity Rating and press the OK button. 2. Select Change Maturity Rating and select the rating value using the OK or button. You can change the maturity rating setting. 5. Maturity Rating User’s Manual GB51 When new software is detected, you can choose to download the software immediately or save for later. In case there is no software currently available, select Next and press the OK button to proceed to the next step. 1. Software update while watching a programme Note: • It may take 5 ~10 minutes to update software. • Other functions will not activate while software update takes place. • You cannot schedule programmes during software update. Caution: • Please be careful to keep the power on and the power cord plugged in during software update. If the power is off during software update, fatal damage may be caused to the product. • Please be careful not to pull out the signal line (coaxial cable) during software update. Update may be interrupted and the product may not operate. 2. The manufacturer transmits the software via cable. The new version of the software is generally detected automatically. Caution: Please note that if the normal loader software is not equipped, the product may not be updated or operate properly after software update. 1. The equipment should have the appropriate loader software. OTA, an abbreviation of Over–the-Air, is a standard for the transmission of software through a broadcast system. The manufacturers reserve the right to decide when and where an update is made available. The new software version is then downloaded via cable. The software update via cable will only occur under the following circumstances. 11.1 OTA (Over the Air) In order to maintain proper performance of the product, it is essential to have the most up-to-date software. Visit the Humax website to check the latest news and newly released software versions. http://www.humaxdigital.com. It is recommended that you periodically check for the availability of software update. 11. Software Update User’s Manual GB52 System Installation Edit Channels Preferences 12.1 Menu Map 12. Appendix Parental Control Language Setting Time Setting A/V Setting Other Settings 1. Status 2. Signal Detection 3. Conditional Access 1. Channel Search 2. Software Update 3. Default Setting 1. Edit Channel List 2. Edit Favourite List 3. Display History List 1. 2. 3. 4. 5. Check the main power cable and make sure it is plugged into a suitable power outlet. Check that the mains supply is switched on. Connect the power cable to a different power outlet. Make sure that the product is powered on and in operation mode. (Press the STANDBY button) Make sure that the AV cable is firmly connected to the TV. Make sure that the cable is properly connected to the product. Be sure to activate channel search. Check the brightness level of the TV. Check if the channel is currently on air. Contact the broadcaster to ensure that the channel is running. Press the SOURCE button if the product is in external input mode. Check that your AV cable is connected correctly. Check the volume levels of your TV set and the product. Check if the product or TV is on mute. Check audio type or soundtrack option in the AV menu. To control the product, the top end of the remote control should point directly towards the receiving part of the product. Remove and reinsert the batteries in the remote control. Replace the batteries in the remote control for a new set. Check that no previous reservations are conflicting with the new reservation. Check that your cable is connected correctly. You can get an update. If the product does not show a message requesting update, that means no software is available. • • • • User’s Manual GB53 Check that you have the appropriate Smartcard. Reinsert the Smartcard and make sure it initializes correctly. Check in the menu that the product is detecting the Smartcard. Check in the menu that you have a valid and working subscription to the channels you wish to view. Ensure that the Smartcard is not damaged. 9. Cannot watch scrambled channels. • 8. Cannot update new software. • 7. Channel search does not work. 6. No password information is given. • The default password is always 0000. • 5. Cannot make reservations. • • • 4. Remote control does not operate. • • • • 3. No or poor sound • • • • • • • 2. No picture on TV set • • • 1. No message displayed on the front panel. (The product will not switch on.) Before contacting your local service centre, please read the tips below carefully. If the problem persists after completing the following procedure, please contact your local product distributor or service centre for further instructions. 12.2 Trouble Shooting 12. Appendix User’s Manual GB54 Incorrect card No card inserted. No access The audio is not available. The channel is scrambled or not available. No or bad signal Error message Pull out the Smartcard and reinsert it. Replace the Smartcard. Smartcard is broken. Insert appropriate Smartcard. Wrong Smartcard is inserted. Smartcard is not inserted correctly. Insert Smartcard. Smartcard is not inserted. No authorization. Make sure you are subscribed to the channel. No subscription to this channel. If the product has been turned off for a long time (standby or power off ), please wait for authorization. It may take up to 60 minutes. Press the audio button to confirm if the channel has audio. The channel has signal, but no audio. The channel is for data broadcasting. The channel is deleted by the broadcasting company. The channel has signal, but no video. Confirm if the channel is currently on air. Exchange the cable. The cable may be damaged or defective. The channel is not broadcasting. Make sure the cable is connected correctly. What to do The cable is not connected. Possible causes Check in the menu that you have a valid and working subscription to the channels you wish to view. Contact your network operator for more information. 12.3 Error Message • • 10. Cannot watch pay channels. 12. Appendix 51 MHz~858MHz -15dBmV~15dBmV DVB-C(16QAM, 32QAM, 64QAM, 128QAM, 256QAM) 1.5~7MS/s Frequency Range Signal Level Demodulation Input Symbol Rate MPEG-2MP@ML, MPEG-2MP@HL, MPEG-4 AVC/H 264 HP@L4 15MB/s Max 4:3, 16:9 1080i, 720p, 576p, 576i MPEG/MusiCam Layer I & II Single channel/Dual channel/Joint stereo/Stereo Profile Level Input Rate Video Format Video Resolution Audio Decoding Audio Mode 128MB 8KB RAM EEPROM USB USB 2.0 Host (5 V 100mA Max.) User’s Manual GB55 TV-SCART, VCR-SCART, Audio L/R, S/PDIF(Digital Audio Output) Audio Data Port TV-SCART(CVBS,S-Video,RGB) VCR-SCART(CVBS, S-Video) RCA-Typ(CVBS), YPbPr(RCA), HDMI/HDCP Video Audio/Video 8MB Flash Memory Memory MPEG-2 ISO/IEC 13818 Transport Stream Specification Transport Stream MPEG Transport Stream A/V Decoding IEC 169-2 Female Input Connector Tuner & Channel 12.4 Specification 12. Appendix SMPS Max. 14W Separate internal fuse. The input should be protected against lightning. Type Power Consumption Protection 1.5 Kg 0 ºC to +45 ºC -10 ºC to +70 ºC Weight (Net) Operating Temperature Storage Temperature User’s Manual GB56 280mm×200mm×45mm Size Physical Specification 90-250V a.c., 50/60Hz Input Voltage Power Supply 12. Appendix • • • • • • • • User’s Manual GB57 A credit card sized card that contains updateable chip memory. It is used for accessing Pay TV (encrypted) channel or services when inserted into an appropriate receiver. Smartcard An on-screen graphic menu that displays how strong the digital signal you are receiving is. Signal Strength A standard format for the transfer of digital audio signals. It allows the transfer of digital audio between two devices without any conversion to and from analogue, which could degrade the signal quality. S/PDIF (Sony/Philips Digital Interface format) A 21-pin connector standard to connect two pieces of Audio-Visual equipment such as a TV and a VCR. Each device will have a 21-pin female connection; a cable with male connection at both ends is used for connecting the devices. SCART A technology for transmitting video signals via a cable. RGB is a system to represent red, green, and blue colours on a TV or monitor display. Red, green, and blue can be combined in various proportions to obtain any colour. RGB (Red – Green – Blue) The property of a signal measured in cycles per second (=Hz). Frequency An encoding system that digitally compresses up to 5.1 discrete channels of audio (left front, centre, right front, left surround, right surround) into a single Bitstream. A low frequency effect (LFE) channel is included providing the sound needed for special effects. Dolby Digital A cable designed to conduct RF signals. To connect a two devices cable will usually have one female and one male connector. Coaxial Cable 12.5 Glossary 12. Appendix User’s Manual GB58 Tfn: Öppettider: Språk: Sverige Tel: Orario: Lingua: Italia Tel: Opening Hours: E-mail: Website: Language: Australia Tel: Opening Hours: E-mail: Website: Language: UK Tel: Öffnungszeiten: E-mail: Website: Sprache: Deutschland +46 (0)550 85527 Mån-fre 08:00-16:30 Svenska/Engelska 899 100 080 (€1+ VAT/min) Lun.-Ven. 8:00-18:00 Italiano 1800 613 011 Mon- Fri 9:00-17:30 [email protected] www.humaxdigital.com/australia English 0870 247 8800 Mon-Fri 8:30-21:00 [email protected] www.humax-digital.co.uk English 01805-778870 (€ 0,14/Min) Mo-Fr 8:00-23:00 Uhr, Sa-So 8:00-20:00 Uhr [email protected] www.humax-digital.de Deutsch/Englisch/Türkisch Information concerning troubleshooting, software upgrade and product support is provided in the following websites and call centers. Should your product require warranty service, please contact HUMAX to obtain the appropriate authorization. 12.6 Service and Support 12. Appendix 0820 400675 (€0,14/min) Mon-Sun 8:00-23:00 [email protected] www.humax-digital.de Deutsch/English/Turkish +358 9 56186 130 ma-pe 8:00-16:00 Suomi/Englanti Note: For hardware repair, please visit our website. Tel: Opening Hours: E-mail: Website: Language: Austria Puh: Aukioloajat: Kieli: Suomi 12. Appendix GB59 User’s Manual *20000-00064PT* 20000-00097PT ROHS/MANUAL/CXHD5000C/200GBSV(COMHEM)