1
262640 HEM-711 EN_SP_r2.qxp
1/15/07
11:33 AM
Page 1
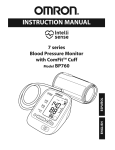
INSTRUCTION MANUAL
ENGLISH
ESPAÑOL
Automatic Blood Pressure Monitor
with ComFitTM Cuff
Model HEM-711DLX
262640 HEM-711 EN_SP_r2.qxp
1/15/07
11:33 AM
Page 2
TABLE OF CONTENTS
Before Using the Unit
Introduction . . . . . . . . . . . . . . . . . . . . . . . . . . . . . . . . . . . . . . . . . . . . . .3
Safety Information . . . . . . . . . . . . . . . . . . . . . . . . . . . . . . . . . . . . . . . .4
Operating the Device . . . . . . . . . . . . . . . . . . . . . . . . . . . . . . . . .4
Risk of Electrical Shock . . . . . . . . . . . . . . . . . . . . . . . . . . . . . .5
Care and Maintenance . . . . . . . . . . . . . . . . . . . . . . . . . . . . . . . .6
Before Taking a Measurement . . . . . . . . . . . . . . . . . . . . . . . . . . . . . . .7
Operating Instructions
Know Your Unit . . . . . . . . . . . . . . . . . . . . . . . . . . . . . . . . . . . . . . . . . .8
Unit Display . . . . . . . . . . . . . . . . . . . . . . . . . . . . . . . . . . . . . . . . . . . . .9
Display Symbols . . . . . . . . . . . . . . . . . . . . . . . . . . . . . . . . . . . . . . . . .10
Irregular Heartbeat Symbol . . . . . . . . . . . . . . . . . . . . . . . . . . .10
Average Value Symbol . . . . . . . . . . . . . . . . . . . . . . . . . . . . . . .10
Movement Error Symbol . . . . . . . . . . . . . . . . . . . . . . . . . . . . .10
Heartbeat Symbol . . . . . . . . . . . . . . . . . . . . . . . . . . . . . . . . . . .11
Battery Installation . . . . . . . . . . . . . . . . . . . . . . . . . . . . . . . . . . . . . . .13
Using the AC Adapter . . . . . . . . . . . . . . . . . . . . . . . . . . . . . . . . . . . . .15
Setting the Date and Time . . . . . . . . . . . . . . . . . . . . . . . . . . . . . . . . .16
Applying the Arm Cuff . . . . . . . . . . . . . . . . . . . . . . . . . . . . . . . . . . . .19
Taking a Measurement . . . . . . . . . . . . . . . . . . . . . . . . . . . . . . . . . . . .23
Special Conditions . . . . . . . . . . . . . . . . . . . . . . . . . . . . . . . . . .25
Using the Memory Function . . . . . . . . . . . . . . . . . . . . . . . . . . . . . . . .26
Care and Maintenance
Care and Maintenance . . . . . . . . . . . . . . . . . . . . . . . . . . . . . . . . . . . .29
Error Indicators and Troubleshooting Tips . . . . . . . . . . . . . . . . . . . . .31
FCC Statement . . . . . . . . . . . . . . . . . . . . . . . . . . . . . . . . . . . . . . . . . .33
Warranty . . . . . . . . . . . . . . . . . . . . . . . . . . . . . . . . . . . . . . . . . . . . . . .34
Specifications . . . . . . . . . . . . . . . . . . . . . . . . . . . . . . . . . . . . . . . . . . .35
2
262640 HEM-711 EN_SP_r2.qxp
1/15/07
11:33 AM
Page 3
Before Using the Unit
INTRODUCTION
Thank you for purchasing the Omron® HEM-711DLX IntelliSense®
Automatic Blood Pressure Monitor with ComFitTM Cuff.
Fill in for future reference.
DATE PURCHASED: __________________
SERIAL NUMBER: ____________________
Staple your purchase receipt here
Your new digital blood pressure monitor uses the oscillometric method
of blood pressure measurement. This means the monitor detects your
blood’s movement through your brachial artery and converts the
movements into a digital reading. The monitor stores measurement
results.
The HEM-711DLX comes with the following components:
• Monitor
• ComFitTM Cuff • AC Adapter
• Storage Case
• Warranty Card
• Instruction Manual printed in English and Spanish
The HEM-711DLX IntelliSense® Automatic Blood Pressure Monitor is
intended for home use.
SAVE THESE INSTRUCTIONS
3
262640 HEM-711 EN_SP_r2.qxp
1/15/07
11:33 AM
Page 4
SAFETY INFORMATION
To assure the correct use of the product basic safety measures should
always be followed including the warnings and cautions listed in this
instruction manual.
SAFETY SYMBOLS USED IN THIS INSTRUCTION MANUAL
WARNING
Indicates a potentially hazardous situation
which, if not avoided, could result in death or
serious injury.
CAUTION
Indicates a potentially hazardous situation
which, if not avoided, may result in minor or
moderate injury to the user or patient or
damage to the equipment or other property.
OPERATING THE DEVICE
Contact your physician for specific information about your blood
pressure. Self-diagnosis and treatment using measured results may be
dangerous. Follow the instructions of your physician or licensed
healthcare provider.
If battery fluid should get in your eyes, immediately rinse with
plenty of clean water. Contact a physician immediately.
Read all of the information in the instruction manual and any other
literature in the box before operating the unit.
This device is intended for use in measuring blood pressure and
pulse rate in the adult population. Do not use this device on infants
or persons who cannot express their intentions.
Read the Special Conditions section (page 25) of the instruction
manual if your systolic pressure is known to be more than 220
mmHg. Inflating to a higher pressure than necessary may result in
bruising where the cuff is applied.
4
262640 HEM-711 EN_SP_r2.qxp
1/15/07
11:33 AM
Page 5
SAFETY INFORMATION
OPERATING THE DEVICE (continued)
Operate the device only as intended. Do not use the device for any
other purpose.
Dispose of the device, components and optional accessories
according to applicable local regulations. Unlawful disposal may
cause environmental pollution.
Do not use a cellular phone near the device. It may result in an
operational failure.
Use only Omron authorized parts and accessories. Parts and
accessories not approved for use with the device may damage the
unit.
Use only 1.5 V manganese or alkaline batteries with this device. Do
not use other types of batteries. This may damage the unit.
RISK OF ELECTRICAL SHOCK
Do not plug or unplug the power cord into the electrical outlet with
wet hands.
Do not overload power outlets. Plug the device into the appropriate
voltage outlet.
5
262640 HEM-711 EN_SP_r2.qxp
1/15/07
11:33 AM
Page 6
SAFETY INFORMATION
CARE AND MAINTENANCE
Do not subject the monitor to strong shocks, such as dropping the
unit on the floor.
Do not submerge the device or any of the components in water.
Store the device and the components in a clean, safe location.
Changes or modification not approved by Omron Healthcare will
void the user warranty. Do not disassemble or attempt to repair the
unit or components.
6
262640 HEM-711 EN_SP_r2.qxp
1/15/07
11:33 AM
Page 7
BEFORE TAKING A MEASUREMENT
To ensure a reliable reading follow these recommendations:
1. Avoid eating, drinking alcohol, smoking, exercising, and bathing for
30 minutes before taking a measurement. Rest for at least 15 minutes
before taking the measurement.
2. Stress raises blood pressure. Avoid taking measurements during
stressful times.
3. Measurements should be taken in a quiet place.
4. Remove tight-fitting clothing from your arm.
5. Sit in a chair with your feet flat on the floor. Rest your arm on
a table so that the cuff is at the same level as your heart.
6. Remain still and do not talk during the measurement.
7. Keep a record of your blood pressure and pulse readings for your
physician. A single measurement does not provide an accurate
indication of your true blood pressure. You need to take and record
several readings over a period of time. Try to measure your blood
pressure at about the same time each day for consistency.
8. Wait 2-3 minutes between measurements. The wait time allows the
arteries to return to the condition prior to taking the blood pressure
measurement. You may need to increase the wait time depending on
your individual physiological characteristics.
7
262640 HEM-711 EN_SP_r2.qxp
1/15/07
11:33 AM
Page 8
Operating Instructions
KNOW YOUR UNIT
Main Unit:
Display
Battery Compartment
START/STOP Button
MEMORY Button
Air Jack
Date/Time Setting Button
AC Adapter Jack
Components:
Air Tube
Housing
Storage Case
INSTRUCTION MANUAL
Arm Cuff
Cord
AC Adapter
8
ESPAÑOL
Automatic Blood Pressure Monitor
with ComFitTM Cuff
Model HEM-711DLX
ENGLISH
Air Plug
(Connects to Air Jack)
Instruction Manual
262640 HEM-711 EN_SP_r2.qxp
1/15/07
11:33 AM
Page 9
UNIT DISPLAY
Systolic Blood Pressure
Diastolic Blood Pressure
Memory Symbol
Average Value Symbol
Heartbeat Symbol
Pulse Display
Deflation Symbol
Movement Error Symbol
Date/Time Display
Low Battery Indicator
Irregular Heartbeat Symbol
9
262640 HEM-711 EN_SP_r2.qxp
1/15/07
11:33 AM
Page 10
DISPLAY SYMBOLS
IRREGULAR HEARTBEAT SYMBOL (
)
When the monitor detects an irregular rhythm two or more times during
the measurement, the Irregular Heartbeat Symbol ( ) will appear on
the display with the measurement values.
An irregular heartbeat rhythm is defined as
a rhythm that is more than 25 % slower
or 25 % faster from the average rhythm
detected while the monitor is measuring
the systolic blood pressure and the
diastolic blood pressure.
Blood
pressure
Irregular Heartbeat
Short Long
Pulse
If the Irregular Heartbeat Symbol ( )
displays with your measurement results,
we recommend you consult your
physician. Follow the directions of your
doctor.
AVERAGE VALUE SYMBOL (
Normal Heartbeat
Pulse
Blood
pressure
)
The Average Value Symbol is displayed if the measurement values
displayed are an average of up to three measurements taken within 10
minutes of the last reading.
MOVEMENT ERROR SYMBOL (
)
The Movement Error Symbol is displayed if you move your body during
the measurement. Please remove the arm cuff, and wait 2-3 minutes.
Take another measurement.
10
262640 HEM-711 EN_SP_r2.qxp
1/15/07
11:33 AM
Page 11
DISPLAY SYMBOLS
The American Heart Association1 recommends the following guideline
for upper limit of normal for home blood pressure readings:
AHA Home Guideline for Upper Limit of Normal BP
Systolic Blood Pressure
135 mmHg
Diastolic Blood Pressure
85 mmHg
This is a general guideline because blood pressure depends on age
and morbidity. The AHA recommends a lower home blood pressure
goal for certain patients, including diabetic patients, pregnant women,
and patients with renal failure1.
The monitor is not intended to be a diagnostic device.
WARNING
Contact your physician for specific information about your blood
pressure. Self-diagnosis and treatment using measured results may
be dangerous. Follow the instructions of your physician or licensed
healthcare provider.
Omron Healthcare recommends you contact your physician if the
HEARTBEAT SYMBOL appears on the display with your measurement
values.
HEARTBEAT SYMBOL (
)
TAKING A MEASUREMENT
The Heartbeat Symbol flashes on the display during
the measurement.The Heartbeat Symbol flashes at every heartbeat.
When the measurement is complete, the Heartbeat Symbol
flashes on the display with your blood pressure and pulse rate if
the reading is above 135 for the Systolic Blood Pressure value
and/or 85 for the Diastolic Blood Pressure value.
11
262640 HEM-711 EN_SP_r2.qxp
1/15/07
11:33 AM
Page 12
DISPLAY SYMBOLS
USING THE MEMORY FUNCTION
The Heartbeat Symbol flashes when the blood pressure reading
stored in the memory is above 135 for the Systolic Blood
Pressure value and/or 85 for the Diastolic Blood Pressure value.
12
262640 HEM-711 EN_SP_r2.qxp
1/15/07
11:33 AM
Page 13
BATTERY INSTALLATION
1. Press the ▼ indicator on the battery cover
and slide the cover off in the direction of
the arrow.
2. Install 4 “AA” size batteries so the +
(positive) and - (negative) polarities match
the polarities of the battery compartment
as indicated.
Battery Cover
−
+
3. Replace the battery cover.
−
+
13
+
−
+
−
262640 HEM-711 EN_SP_r2.qxp
1/15/07
11:33 AM
Page 14
BATTERY INSTALLATION
BATTERY REPLACEMENT
Low Battery Indicator
When the Low Battery Indicator appears on the display screen turn the
monitor off and remove all the batteries. Replace with four new batteries
at the same time. Longlife alkaline batteries are recommended.
CAUTION
If battery fluid should get in your eyes, immediately rinse with
plenty of clean water. Contact a physician immediately.
NOTES: • Turn the unit off before replacing the batteries. If the
batteries are removed while the unit is still on, the date and
time will be reset to that of the previous use. However, the
measurement results are not deleted.
• When the batteries are replaced, you may need to reset the
date and time. If the year is flashing on the display screen,
refer to page 16, SETTING THE DATE AND TIME.
CAUTION
Dispose of the device, components and optional accessories
according to applicable local regulations. Unlawful disposal may
cause environmental pollution.
14
262640 HEM-711 EN_SP_r2.qxp
1/15/07
11:33 AM
Page 15
USING THE AC ADAPTER
NOTES: • Use only the authorized Omron AC Adapter, Model Number
HEM-ADPT1,with this monitor.
• We recommend you install the batteries even if the AC
Adapter is used. If no batteries are installed, you may need
to reset the date and time if the AC Adapter is disconnected.
The measurement results will not be deleted.
CAUTION
Use only Omron authorized parts and accessories. Parts and
accessories not approved for use with the device may damage the
unit.
TO CONNECT THE AC ADAPTER
① Insert the AC Adapter Plug into
the AC Adapter Jack on the back
side of the monitor as illustrated.
② Plug the AC Adapter into a 120V
AC outlet (60 cycles).
TO DISCONNECT THE AC ADAPTER
Housing
2
1
Cord
① Hold and pull the Housing to remove the AC Adapter from the
electrical outlet. Do not remove by pulling on the cord.
② Remove the AC Adapter plug from the monitor.
WARNING
Do not plug or unplug the power cord into the electrical outlet with
wet hands.
CAUTION
Do not overload power outlets. Plug the device into the appropriate
voltage outlet.
15
262640 HEM-711 EN_SP_r2.qxp
1/15/07
11:33 AM
Page 16
SETTING THE DATE AND TIME
Set the monitor to the current date and time before taking a
measurement for the first time. If the date and time are not set correctly,
the measurement values stored in the memory and the average values
may not be correct.
The Blood Pressure Monitor automatically stores up to 60 individual
measurements values with the dates and times.
The monitor can also calculate an average reading based on the three
most recent measurements taken within 10 minutes of the last reading.
NOTES: • If only two readings are stored in the memory for the 10minute period, the average is based on the two readings.
• If one reading is stored in the memory for the 10-minute
period, this reading is displayed as the average.
1. TO START THE SETTING
Press the Date/Time Setting button to
adjust the date and time.
The year flashes on the display.
16
STOP
262640 HEM-711 EN_SP_r2.qxp
1/15/07
11:33 AM
Page 17
SETTING THE DATE AND TIME
2. SETTING THE YEAR
The year can be set between 2006 and
2030. When the display reaches 2030,
it will return to 2006.
START
STOP
Press the MEMORY button to advance
by increments of one year.
Press the Date/Time Setting button to
set the current year.
STOP
The month flashes on the display.
NOTE: Press and hold the MEMORY
button to advance the date and time values faster.
3. SETTING THE MONTH
Press the MEMORY button to advance by increments of one month.
Press the Date/Time Setting button to set the current month.
STOP
The day flashes on the display.
17
262640 HEM-711 EN_SP_r2.qxp
1/15/07
11:33 AM
Page 18
SETTING THE DATE AND TIME
4. SETTING THE DAY
Press the MEMORY button to advance by increments of one day.
Press the Date/Time Setting button to set the current day.
STOP
The hour flashes on the display.
5. SETTING THE HOUR
The time is set using AM or PM.
Press the MEMORY button to advance by increments of one hour.
Press the Date/Time Setting button to set the current hour.
The minute flashes on the display.
6. SETTING THE MINUTE
Press the MEMORY button to advance
by increments of one minute.
Press the Date/Time Setting button to set the minute setting.
7. TO TURN THE MONITOR OFF
Press the START/STOP button.
18
STOP
262640 HEM-711 EN_SP_r2.qxp
1/15/07
11:33 AM
Page 19
APPLYING THE ARM CUFF
CAUTION
Read all of the information in the instruction manual and any other
literature in the box before operating the unit.
CAUTION
This device is intended for use in measuring blood pressure and
pulse rate in the adult population. Do not use this device on infants
or persons who cannot express their intentions.
APPLYING THE CUFF ON THE LEFT ARM
1. Make sure the air plug is securely inserted in the main unit.
2. Remove tight-fitting clothing from your upper left arm.
19
262640 HEM-711 EN_SP_r2.qxp
1/15/07
11:33 AM
Page 20
APPLYING THE ARM CUFF
3. Sit in a chair with your feet flat on the floor. Place your left arm on a
table so the cuff is level with your heart.
Thumb Grip
4. Hold the grip on the cuff securely with
your right hand, placing your thumb on
the thumb grip.
5. Turn the palm of your left hand
upward.
20
Cloth Strip
262640 HEM-711 EN_SP_r2.qxp
1/15/07
11:33 AM
Page 21
APPLYING THE ARM CUFF
6. Apply the cuff to your left upper arm so the blue strip is on the inside
of your arm and aligned with your middle finger. The air tube runs
down the inside of your arm. The bottom of the cuff should be
approximately 1/2" above your elbow.
Blue Strip
1/2 inch (1 - 2 cm)
Air Tube
7. Wrap the cuff firmly in place around your arm using the cloth strip.
21
262640 HEM-711 EN_SP_r2.qxp
1/15/07
11:33 AM
Page 22
APPLYING THE ARM CUFF
APPLYING THE CUFF ON THE RIGHT ARM
Apply the cuff to your right upper arm so the thumb grip is centered on
the inside of your inner arm. The bottom of the cuff should be
approximately 1/2'' above your elbow.
Thumb Grip
NOTE: Be careful not to rest your arm on the air tube. This will restrict
the flow of air to the cuff.
22
262640 HEM-711 EN_SP_r2.qxp
1/15/07
11:33 AM
Page 23
TAKING A MEASUREMENT
The monitor automatically determines your ideal inflation level. In rare
circumstances when a higher inflation may be necessary, the monitor
automatically re-inflates the cuff up to 30 mmHg higher than the initial
inflation and restarts the measurement.
CAUTION
Operate the device only as intended. Do not use the device for any
other purpose.
1. Press the START/STOP button.
All symbols appear on the display. The cuff starts to inflate
automatically.
As the cuff inflates, the monitor automatically determines your ideal
inflation level. This monitor detects the pulse during inflation. Do not
move your arm and remain still until the entire measurement process
is completed.
START
STOP
NOTE: To stop the inflation or measurement, press the
START/STOP button. The monitor will stop inflating,
start deflating and will turn off.
23
262640 HEM-711 EN_SP_r2.qxp
1/15/07
11:33 AM
Page 24
TAKING A MEASUREMENT
2. Inflation stops automatically and the measurement is started.
As the cuff deflates,
decreasing numbers appear on
the display.
The Heartbeat Symbol ( )
flashes at every heartbeat.
3. When the measurement is complete, the arm cuff
completely deflates. Your blood pressure and pulse
rate are displayed.
4. Press the START/STOP button to turn the
monitor off.
START
STOP
NOTE: The monitor will automatically turn
off after five minutes.
When the measurement is complete, the Heartbeat Symbol flashes on
the display with your blood pressure and pulse rate if the reading is
above 135 for the Systolic Blood Pressure value and/or 85 for the
Diastolic Blood Pressure value.
24
262640 HEM-711 EN_SP_r2.qxp
1/15/07
11:33 AM
Page 25
TAKING A MEASUREMENT
SPECIAL CONDITIONS
CAUTION
Inflating to a higher pressure than necessary may result in bruising
where the cuff is applied.
If your systolic pressure is known to be more than 220 mmHg, press
and hold the START/STOP button until the monitor inflates 30 to 40
mmHg higher than your expected systolic pressure.
START
STOP
NOTES: • Do not apply more pressure than necessary.
• The monitor will not inflate above 299 mmHg.
When the measurement is complete, the arm cuff completely deflates.
Your blood pressure and pulse rate are displayed.
25
262640 HEM-711 EN_SP_r2.qxp
1/15/07
11:33 AM
Page 26
USING THE MEMORY FUNCTION
The monitor is designed to store the blood pressure and the pulse rate in
the memory every time a measurement is completed.
The monitor automatically stores up to 60 sets of measurement values
(blood pressure and pulse rate). When 60 sets of measurement values
are stored, the oldest record is deleted to save the most recent values.
AVERAGING FUNCTION
The monitor calculates the average reading based on the three most
recent sets of measurement values taken within 10 minutes of the most
recent reading.
NOTE: If two sets of measurement values are stored in the memory for
the 10 minutes period, the average is based on the two sets of
measurement values. If one set of measurement values is stored,
this is displayed as the average.
26
262640 HEM-711 EN_SP_r2.qxp
1/15/07
11:33 AM
Page 27
USING THE MEMORY FUNCTION
TO DISPLAY THE MEASUREMENT VALUES
1. Press the MEMORY button.
STOP
The Average Symbol ( ) appears on the display when the average
reading is shown.
2. Press the MEMORY button to display the measurement values from
the most recent to the oldest.
3. Press the START/STOP button to turn the power off.
NOTES: • Press the MEMORY button to
display the next values.
• Press and hold the MEMORY
button to display the values
faster.
• The date and time are
alternately displayed with the
measurement values.
27
Alternating display
262640 HEM-711 EN_SP_r2.qxp
1/15/07
11:33 AM
Page 28
USING THE MEMORY FUNCTION
TO DELETE ALL VALUES STORED IN THE MEMORY
You cannot partially delete values stored in the memory. All values will
be deleted.
1. While holding the MEMORY button and the START/STOP button
simultaneously for more than 2 seconds all values will be deleted.
START
STOP
28
262640 HEM-711 EN_SP_r2.qxp
1/15/07
11:33 AM
Page 29
CARE AND MAINTENANCE
To keep your digital blood pressure monitor in the best condition and
protect the unit from damage, follow the directions listed below:
Keep the monitor in the storage case
when not in use. Make sure the AC
adapter is placed in the storage case as
illustrated to avoid damage to the
display. Avoid kinking or sharply
bending the AC Adapter cord.
Do not forcefully bend the arm cuff or
air tube. Do not fold tightly.
Clean the monitor with a soft dry cloth. Do not use any abrasive or
volatile cleaners. Do not attempt to clean the cuff.
CAUTION
Do not submerge the device or any of the components in water. Do
not subject the monitor to extreme hot or cold temperatures,
humidity or direct sunlight.
CAUTION
Store the device and the components in a clean, safe location.
CAUTION
Do not subject the monitor to strong shocks, such as dropping the
unit on the floor.
29
262640 HEM-711 EN_SP_r2.qxp
1/15/07
11:33 AM
Page 30
CARE AND MAINTENANCE
Remove the batteries if the unit will not be used for three months or
longer. Always replace all the batteries with new ones at the same time.
Use the unit consistent with the instruction provided in this manual.
Use only authorized parts and accessories.
CAUTION
Changes or modification not approved by Omron Healthcare will
void the user warranty. Do not disassemble or attempt to repair the
unit or components.
30
262640 HEM-711 EN_SP_r2.qxp
1/15/07
11:33 AM
Page 31
ERROR INDICATORS AND TROUBLESHOOTING TIPS
ERROR INDICATORS
SYMBOL
CAUSE
CORRECTION
Monitor could not
detect pulse wave.
Take another measurement and
remain still until the
measurement is complete.
Air plug is not
connected.
Cuff under-inflated.
Cuff not applied
correctly.
Remove the arm cuff.
Read “Taking a
Measurement”.
Take another measurement.
Cuff over-inflated
Replace the four batteries. Refer
to “Battery Installation.”
Batteries are worn
31
262640 HEM-711 EN_SP_r2.qxp
1/15/07
11:33 AM
Page 32
ERROR INDICATORS AND TROUBLESHOOTING TIPS
TROUBLESHOOTING TIPS
PROBLEM
CAUSES AND SOLUTIONS
No power.
Replace all four batteries with new
ones.
No display appears on the unit. Check the battery installation
for proper placement of the
battery polarities.
Measurement values appear
too high or too low.
Blood pressure varies constantly.
Many factors including stress, time
of day, and how you wrap the cuff,
may affect your blood pressure.
Review the sections “Before Taking
a Measurement” and “Taking a
Measurement.”
32
262640 HEM-711 EN_SP_r2.qxp
1/15/07
11:33 AM
Page 33
FCC STATEMENT
NOTE:
POTENTIAL FOR RADIO/TELEVISION INTERFERENCE (for U.S.A. only)
This product has been tested and found to comply with the limits for a Class B
digital device, pursuant to part 15 of the FCC rules.
These limits are designed to provide reasonable protection against harmful
interference in a residential installation. The product generates, uses, and can
radiate radio frequency energy and, if not installed and used in accordance
with the instructions, may cause harmful interference to radio communications.
However, there is no guarantee that interference will not occur in a particular
installation. If the product does cause harmful interference to radio or television
reception, which can be determined by turning the product on and off, the
user is encouraged to try to correct the interference by one or more of the
following measures:
• Reorient or relocate the receiving antenna.
• Increase the separation between the product and the receiver.
• Connect the product into an outlet on a circuit different from that to which
the receiver is connected.
• Consult the dealer or an experienced radio/TV technician for help.
POTENTIAL FOR RADIO/TELEVISION INTERFERENCE (for Canada only)
This digital apparatus does not exceed the Class B limits for radio noise
emissions from digital apparatus as set out in the interference-causing equipment
standard entitled “Digital Apparatus”, ICES-003 of the Canadian Department of
Communications.
Cet appareil numérique respecte les limites de bruits radioeléctriques
applicables aux appareils numériques de Clase B prescrites dans la norme sur le
materiel brouilleur: “Appareils Numériques”, ICES-003 édictée par le minister
des communications.
Changes or modifications not expressly approved by the party responsible for
compliance could void the user’s authority to operate the equipment.
33
262640 HEM-711 EN_SP_r2.qxp
1/15/07
11:33 AM
Page 34
WARRANTY
Your HEM-711DLX, IntelliSense® Automatic Blood Pressure Monitor, excluding
the arm cuff, is warranted to be free from defects in materials and workmanship
appearing within 5 years from the date of purchase, when used in accordance
with the instructions provided with the monitor. The arm cuff is warranted to be
free from defects in materials and workmanship appearing within one year from
the date of purchase when the monitor is used in accordance with the instructions
provided with the monitor. The above warranties extend only to the original retail
purchaser.
We will, at our option, repair or replace without charge any monitor or arm cuff
covered by the above warranties. Repair or replacement is our only responsibility
and your only remedy under the above warranties.
To obtain warranty service contact Omron Healthcare for the address of the repair
location. Shipping instructions and repair information is available by calling 1-800634-4350 or visit our website at www.omronhealthcare.com.
Enclose the Proof of Purchase. Include $5.00 for the return shipping and handling.
Include a letter, with your name, address, phone number, and description of the
specific problem. Pack the product carefully to prevent damage in transit.
Because of possible loss in transit, we recommend insuring the product with
return receipt requested.
ALL IMPLIED WARRANTIES, INCLUDING BUT NOT LIMITED TO
THE IMPLIED WARRANTIES OF MERCHANTABILITY AND FITNESS
FOR PARTICULAR PURPOSE, ARE LIMITED TO THE DURATION OF
THE APPLICABLE WRITTEN WARRANTY ABOVE. Some states do not
allow limitations on how long an implied warranty lasts, so the above limitation
may not apply to you.
OMRON SHALL NOT BE LIABLE FOR LOSS OF USE OR ANY OTHER
INCIDENTAL, CONSEQUENTIAL OR INDIRECT COSTS, EXPENSES
OR DAMAGES. Some states do not allow the exclusion or limitation of incidental
or consequential damages, so the above exclusions may not apply to you.
This warranty gives you specific legal rights, and you may also have other rights
which may vary from state to state.
FOR CUSTOMER SERVICE
Visit our web site at:
www.omronhealthcare.com
Call toll free:
1-800-634-4350
34
262640 HEM-711 EN_SP_r2.qxp
1/15/07
11:33 AM
Page 35
SPECIFICATIONS
HEM-711DLX
LCD Digital Display
Pressure: 0 to 299 mmHg, Pulse: 40-180/min.
Pressure: ±3mmHg or 2% of reading
Pulse: ±5% of reading
Inflation:
Automatic by electric pump
Deflation:
Automatic pressure release valve
Rapid Air Release:
Automatic exhaust valve
Pressure Detection:
Capacitive pressure sensor
Measurement Method: Oscillometric method
Pulse Wave Detection: Capacitance type pressure sensor
Power Source:
120V 60Hz AC adapter or 4 “AA” batteries
Battery Life:
Approx. 1500 uses when used once a day for 2 minutes
with 4 new alkaline batteries
Operating Temperature 50ºF to 104ºF (10ºC to 40ºC) /30 to 85% RH
/Humidity:
Storage Temperature
-4ºF to 140ºF (-20ºC to 60ºC) /10 to 95% RH
/Humidity/Air Pressure: /700 - 1060 hPa
Main Unit Weight:
Approximately 12 1/2 oz. (355 g)
not including batteries
Main Unit Dimensions: Approx. 6 3/32" (l) ×5 5/32" (w) × 3 5/16" (h)
(155 mm × 131 mm × 84 mm)
Cuff Size:
Approximately 6" (w) (152 mm)
Cuff tube 23 5/8" (l) (600 mm)
Cuff Circumference:
Fits arm circumferences 9" to 17"
(220 mm to 420 mm)
Memory:
Up to 60 readings
Contents:
Main Unit, ComFitTM Cuff, AC Adapter, Warranty Card,
Instruction Manual and Storage Case
UPC Code:
0 73796 71142 9
Model:
Display:
Measurement Range:
Accuracy/Calibration:
NOTE: These specifications are subject to change without notice.
35
262640 HEM-711 EN_SP_r2.qxp
1/15/07
Manufactured by OMRON HEALTHCARE
Made in China
Distributed by:
OMRON HEALTHCARE, INC.
1200 Lakeside Drive
Bannockburn, Illinois 60015
www.omronhealthcare.com
Copyright © 2007 Omron Healthcare, Inc.
HEM-711DLXINST Rev
11:33 AM
Page 36
262640 HEM-711 EN_SP_r2.qxp
1/15/07
11:33 AM
Page 1
MANUAL DE INSTRUCCIONES
ESPAÑOL
Monitor de presión arterial
automático con banda
para el brazo ComFit TM
Modelo HEM-711DLX
262640 HEM-711 EN_SP_r2.qxp
1/15/07
11:33 AM
Page 2
ÍNDICE
Antes de usar la unidad
Introducción . . . . . . . . . . . . . . . . . . . . . . . . . . . . . . . . . . . . . . . . . . . E3
Información de seguridad . . . . . . . . . . . . . . . . . . . . . . . . . . . . . . . . . E4
Operación del dispositivo . . . . . . . . . . . . . . . . . . . . . . . . . . . E4
Riesgo de choques eléctricos . . . . . . . . . . . . . . . . . . . . . . . . . E5
Cuidado y mantenimiento . . . . . . . . . . . . . . . . . . . . . . . . . . . E6
Antes de tomar una medición . . . . . . . . . . . . . . . . . . . . . . . . . . . . . . E7
Instrucciones de funcionamiento
Conozca la unidad . . . . . . . . . . . . . . . . . . . . . . . . . . . . . . . . . . . . . . . E8
Pantalla de la unidad . . . . . . . . . . . . . . . . . . . . . . . . . . . . . . . . . . . . . E9
Símbolos de la pantalla . . . . . . . . . . . . . . . . . . . . . . . . . . . . . . . . . . E10
Símbolo de latido irregular . . . . . . . . . . . . . . . . . . . . . . . . . . E10
Símbolo de valor promedio . . . . . . . . . . . . . . . . . . . . . . . . . E10
Símbolo de error de movimiento . . . . . . . . . . . . . . . . . . . . . E10
Símbolo de latido . . . . . . . . . . . . . . . . . . . . . . . . . . . . . . . . . E11
Colocación de las pilas . . . . . . . . . . . . . . . . . . . . . . . . . . . . . . . . . . E13
Uso del adaptador de CA . . . . . . . . . . . . . . . . . . . . . . . . . . . . . . . . E15
Configuración de la fecha y hora . . . . . . . . . . . . . . . . . . . . . . . . . . E16
Colocación de la banda para el brazo . . . . . . . . . . . . . . . . . . . . . . . E19
Cómo tomar una medición . . . . . . . . . . . . . . . . . . . . . . . . . . . . . . . E23
Condiciones especiales . . . . . . . . . . . . . . . . . . . . . . . . . . . . E25
Uso de la función Memoria . . . . . . . . . . . . . . . . . . . . . . . . . . . . . . E26
Cuidado y mantenimiento
Cuidado y mantenimiento . . . . . . . . . . . . . . . . . . . . . . . . . . . . . . . . E29
Indicadores de error y resolución de problemas . . . . . . . . . . . . . . . E31
Declaración de la FCC . . . . . . . . . . . . . . . . . . . . . . . . . . . . . . . . . . E33
Garantía . . . . . . . . . . . . . . . . . . . . . . . . . . . . . . . . . . . . . . . . . . . . . . E34
Especificaciones . . . . . . . . . . . . . . . . . . . . . . . . . . . . . . . . . . . . . . . E35
E2
262640 HEM-711 EN_SP_r2.qxp
1/15/07
11:33 AM
Page 3
Antes de usar la unidad
INTRODUCCIÓN
Gracias por adquirir el monitor de presión arterial automático HEM-711DLX
IntelliSense® de Omron® con banda ComFitTM.
Complete los siguientes datos para futuras consultas.
FECHA DE COMPRA: _________________
NÚMERO DE SERIE: __________________
Abroche aquí el recibo de compra.
Su nuevo monitor de presión arterial digital usa el método oscilométrico
para la medición de la presión arterial. Esto significa que el monitor
detecta el movimiento de la sangre a través de la arteria braquial y
convierte dicho movimiento en una lectura digital. El monitor almacena
los resultados de las mediciones.
El HEM-711DLX cuenta con los siguientes componentes:
• Monitor
• Banda ComFitTM • Adaptador de CA
• Estuche
• Tarjeta de garantía
• Manual de instrucciones impreso en inglés y español
El monitor de presión arterial automático HEM-711DLX IntelliSense®
está diseñado para uso en el hogar.
GUARDE ESTAS INSTRUCCIONES
E3
262640 HEM-711 EN_SP_r2.qxp
1/15/07
11:33 AM
Page 4
INFORMACIÓN DE SEGURIDAD
Para garantizar el uso correcto del producto, siempre se deben aplicar
las medidas de seguridad básicas, incluyendo las advertencias y
precauciones que se describen en este manual de instrucciones.
SÍMBOLOS DE SEGURIDAD UTILIZADOS EN ESTE MANUAL DE
ADVERTENCIA
PRECAUCIÓN
INSTRUCCIONES
Indica una situación potencialmente peligrosa
que, si no se evita, puede provocar la muerte o
lesiones graves.
Indica una situación potencialmente peligrosa
que, si no se evita, puede provocar lesiones
leves o moderadas al usuario o al paciente o
daños al equipo u otros bienes.
OPERACIÓN DEL DISPOSITIVO
Consulte a su médico para obtener información específica acerca de
su presión arterial. El autodiagnóstico y la automedicación realizados
sobre la base de los resultados de la medición pueden ser peligrosos.
Siga las instrucciones de su médico o profesional médico autorizado.
En caso de que el fluido de las pilas entre en contacto con los ojos,
enjuague de inmediato con abundante agua limpia. Consulte
inmediatamente a un médico.
Lea toda la información del manual de instrucciones y cualquier otro
material impreso incluido en la caja antes de usar la unidad.
La unidad está diseñada para medir la presión arterial y el pulso en
pacientes adultos. Este dispositivo no debe utilizarse con bebés o con
otras personas que no puedan expresar sus deseos.
Lea la sección sobre condiciones especiales (página E25) del manual
de instrucciones si le consta que su presión sistólica es de más de 220
mmHg. Inflar el dispositivo a una presión más alta que la necesaria,
puede provocar magulladuras en el lugar donde se aplique la banda.
E4
262640 HEM-711 EN_SP_r2.qxp
1/15/07
11:33 AM
Page 5
INFORMACIÓN DE SEGURIDAD
OPERACIÓN DEL DISPOSITIVO (continuación)
Sólo opere el dispositivo para el fin para el que está diseñado. No
use el dispositivo para ningún otro fin.
Respete las normas locales aplicables al desechar el dispositivo, los
componentes y los accesorios opcionales. Violar las normas
establecidas para su eliminación, puede provocar contaminación
ambiental.
No use teléfonos celulares cerca del dispositivo. Puede provocar
fallas de funcionamiento.
Use sólo las piezas y accesorios autorizados por Omron. Las piezas y
accesorios que no hayan sido aprobados para usar con el dispositivo
pueden dañar la unidad.
Utilice únicamente pilas de manganeso o alcalinas de 1.5 V en este
dispositivo. No utilice otro tipo de pilas. Podría dañar la unidad.
RIESGO DE CHOQUES ELÉCTRICOS
No enchufe ni desenchufe el cable de alimentación en el
tomacorrientes eléctrico con las manos mojadas.
No sobrecargue los tomacorrientes. Enchufe el dispositivo en un
tomacorrientes con el voltaje adecuado.
E5
262640 HEM-711 EN_SP_r2.qxp
1/15/07
11:33 AM
Page 6
INFORMACIÓN DE SEGURIDAD
CUIDADO Y MANTENIMIENTO
No someta el monitor a golpes fuertes, como por ejemplo, dejar caer
la unidad al suelo.
No sumerja el dispositivo ni ninguno de sus componentes en agua.
Guarde el dispositivo y los componentes en un lugar limpio y seguro.
Los cambios o modificaciones que no hayan sido aprobados por
Omron Healthcare dejarán sin efecto la garantía del usuario. No
desarme ni trate de reparar la unidad ni los componentes.
E6
262640 HEM-711 EN_SP_r2.qxp
1/15/07
11:33 AM
Page 7
ANTES DE TOMAR UNA MEDICIÓN
A fin de garantizar una lectura confiable, siga estas recomendaciones:
1. Evite comer, tomar bebidas alcohólicas, fumar, hacer ejercicio y
bañarse durante 30 minutos antes de tomar una medición. Descanse
durante al menos 15 minutos antes de tomar la medición.
2. El estrés eleva la presión arterial. Evite tomar mediciones en
momentos de estrés.
3. Las mediciones se deben llevar a cabo en un lugar tranquilo.
4. Retire la ropa ajustada del brazo.
5. Siéntese en una silla con los pies apoyados en el piso. Coloque el
brazo sobre una mesa, de modo que la banda quede al mismo nivel
que el corazón.
6. Quédese quieto y no hable durante la medición.
7. Lleve un registro de las lecturas de presión arterial y pulso para que
las vea su médico. Una sola medición no brinda una indicación
precisa de su verdadera presión arterial. Es necesario tomar varias
mediciones y registrarlas durante un período de tiempo. Trate de
medir su presión arterial todos los días a la misma hora para obtener
mediciones consistentes.
8. Espere 2-3 minutos entre cada medición. El tiempo de espera permite
que las arterias vuelvan a la condición en la que estaban antes de
tomar la medición de la presión. Es posible que sea necesario
aumentar el tiempo de espera según sus características fisiológicas
particulares.
E7
262640 HEM-711 EN_SP_r2.qxp
1/15/07
11:33 AM
Page 8
Instrucciones de funcionamiento
CONOZCA LA UNIDAD
Unidad principal: Pantalla
Compartimiento
de las pilas
Botón START/STOP
(Inicio/Detener)
Botón MEMORY (Memoria)
Enchufe
hembra
Botón de Configuración
del aire
de la fecha/hora
Enchufe del
adaptador de CA
Componentes:
Tubo de aire
Bastidor
Estuche
INSTRUCTION MANUAL
Banda para el
brazo
ESPAÑOL
Model
ENGLISH
Enchufe macho del aire
(Se conecta al enchufe
hembra del aire)
Automatic Blood Pressure Monitor
with ComFitTM Cuff
HEM-711DLX
Cable
Adaptador de CA
E8
Manual de
instrucciones
262640 HEM-711 EN_SP_r2.qxp
1/15/07
11:33 AM
Page 9
PANTALLA DE LA UNIDAD
Presión arterial sistólica
Presión arterial diastólica
Símbolo de memoria
Símbolo de valor promedio
Símbolo de latido
Pantalla de visualización del pulso
Símbolo de desinflado
Símbolo de error de
movimiento
Pantalla de fecha/hora
Indicador de batería baja
Símbolo de latido irregular
E9
262640 HEM-711 EN_SP_r2.qxp
1/15/07
11:33 AM
Page 10
SÍMBOLOS DE LA PANTALLA
SÍMBOLO DE LATIDO IRREGULAR (
)
Cuando el monitor detecta un ritmo irregular dos o más veces durante la
medición, aparecerá en la pantalla el Símbolo de latido irregular (
)
con los valores de medición.
El latido irregular se define como un ritmo que es
más del 25 % más lento o más del 25 %
Pulso
más rápido que el ritmo promedio que se
Presión
arterial
detecta mientras el monitor mide la
presión arterial sistólica y diastólica.
Si se visualiza el Símbolo de latido
irregular (
) con los resultados de su
medición, le recomendamos que consulte
a su médico. Siga las instrucciones del
médico.
Latido normal
Latido irregular
Corto Largo
Pulso
Presión
arterial
SÍMBOLO DE VALOR PROMEDIO (
)
Se exhibe el Símbolo de valor promedio si los valores de medición
mostrados representan un promedio de hasta tres mediciones tomadas
dentro de un período de 10 minutos después de la última medición.
SÍMBOLO DE ERROR DE MOVIMIENTO (
)
El Símbolo de error de movimiento aparece si usted se mueve mientras
se realiza la medición. Retire la banda para el brazo y espere 2 ó 3
minutos. Realice otra medición.
E10
262640 HEM-711 EN_SP_r2.qxp
1/15/07
11:33 AM
Page 11
SÍMBOLOS DE LA PANTALLA
La Asociación Estadounidense del Corazón (AHA, The American Heart
Association) 1 recomienda los siguientes valores como límite máximo de
una lectura normal de presión arterial tomada en el hogar:
Pautas de la AHA para la medición doméstica de la
presión arterial normal máxima
Presión arterial sistólica
135 mmHg
Presión arterial diastólica
85 mmHg
Ésta es una pauta general dado que la presión arterial depende de la
edad y el estado de salud de la persona. La AHA recomienda que el
resultado de la medición hogareña de la presión arterial sea más bajo
para ciertos pacientes, como los pacientes diabéticos, mujeres
embarazadas y pacientes con insuficiencia renal1.
El monitor no está destinado para ser utilizado como dispositivo de diagnóstico.
ADVERTENCIA
Consulte a su médico para obtener información específica acerca de
su presión arterial. El autodiagnóstico y la automedicación realizados
sobre la base de los resultados de la medición pueden ser peligrosos.
Siga las instrucciones de su médico o profesional médico autorizado.
Si el SÍMBOLO DE LATIDO aparece en la pantalla junto con los valores
de medición, Omron Healthcare recomienda que consulte a su médico.
SÍMBOLO DE LATIDO (
)
CÓMO TOMAR UNA MEDICIÓN
El Símbolo de latido parpadea en la pantalla durante la medición. El
símbolo de latido parpadea ante cada latido del corazón.
Una vez que se completa la medición, el Símbolo de latido
parpadea en la pantalla junto con la presión arterial y el pulso si
a lectura es superior a 135 para el valor de la presión arterial sistólica
y/o 85 para el valor de la presión arterial diastólica.
E11
262640 HEM-711 EN_SP_r2.qxp
1/15/07
11:33 AM
Page 12
SÍMBOLOS DE LA PANTALLA
USO DE LA FUNCIÓN MEMORIA
El Símbolo de latido parpadea cuando la lectura de la presión arterial
almacenada en la memoria es superior a 135 para el valor de la
presión arterial sistólica y/o 85 para el valor de la presión arterial
diastólica.
E12
262640 HEM-711 EN_SP_r2.qxp
1/15/07
11:33 AM
Page 13
COLOCACIÓN DE LAS PILAS
1. Presione el indicador ▼ que aparece en la
cubierta del compartimiento de las pilas y
deslice la cubierta en la dirección que
indica la flecha.
2. Coloque 4 pilas “AA” de modo que las
polaridades + (positiva) y - (negativa)
concuerden con las polaridades que se
indican en el compartimiento de las pilas.
Tapa del compartimiento de las pilas
−
+
−
+
3. Vuelva a colocar la tapa del
compartimiento.
E13
+
−
+
−
262640 HEM-711 EN_SP_r2.qxp
1/15/07
11:33 AM
Page 14
COLOCACIÓN DE LAS PILAS
CAMBIO DE LAS PILAS
Indicador de batería baja
Cuando el indicador de batería baja aparezca en la pantalla, apague el
monitor y retire todas las pilas. Coloque cuatro pilas nuevas al mismo
tiempo. Se recomienda usar pilas alcalinas de larga duración.
PRECAUCIÓN
En caso de que el fluido de las pilas entre en contacto con los ojos,
enjuague de inmediato con abundante agua limpia. Consulte
inmediatamente a un médico.
NOTAS: • Apague la unidad antes de cambiar las pilas. Si las pilas se
retiran mientras la unidad está encendida, la fecha y hora se
reconfigurarán en base a los datos anteriores. Sin embargo,
los resultados de la medición no se borran.
• Al cambiar las pilas, es posible que necesite volver a configurar
la fecha y hora. Si el año parpadea en la pantalla, consulte la
página E16, CONFIGURACIÓN DE LA FECHA Y HORA.
PRECAUCIÓN
Respete las normas locales aplicables al desechar el dispositivo, los
componentes y accesorios opcionales. Violar las normas establecidas
para su eliminación, puede provocar contaminación ambiental.
E14
262640 HEM-711 EN_SP_r2.qxp
1/15/07
11:33 AM
Page 15
USO DEL ADAPTADOR DE CA
NOTAS: • Use sólo el adaptador de CA autorizado por Omron, Número
de modelo HEM-ADPT1, con este monitor.
• Le recomendamos colocar las pilas incluso si se utiliza el
adaptador de CA. Si no hay ninguna pila colocada, es posible que
necesite volver a configurar la fecha y hora si el adaptador de CA
se desconecta. Los resultados de la medición no se borran.
PRECAUCIÓN
Use sólo las piezas y accesorios autorizados por Omron. Las
piezas y accesorios que no hayan sido aprobados para usar con el
dispositivo pueden dañar la unidad.
PARA CONECTAR EL ADAPTADOR DE CA
① Inserte el enchufe macho del
adaptador de CA en el enchufe
hembra del adaptador de CA
ubicado en la parte trasera del
monitor como se indica en la
ilustración.
② Enchufe el adaptador de CA a un
tomacorrientes de 120 VCA (60 ciclos).
Bastidor
2
1
Cable
PARA DESCONECTAR EL ADAPTADOR DE CA
① Sostenga y retire el bastidor para retirar el adaptador de CA del
tomacorrientes. No lo retire jalando del cable.
② Retire el enchufe del adaptador de CA del monitor.
ADVERTENCIA
No enchufe ni desenchufe el cable de alimentación en el
tomacorrientes eléctrico con las manos mojadas.
PRECAUCIÓN
No sobrecargue los tomacorrientes. Enchufe el dispositivo en un
tomacorrientes con el voltaje adecuado.
E15
262640 HEM-711 EN_SP_r2.qxp
1/15/07
11:33 AM
Page 16
CONFIGURACIÓN DE LA FECHA Y HORA
Configure el monitor con la fecha y hora actuales antes de tomar una
medición por primera vez. Si no se configuran la fecha y la hora
correctamente, es posible que los valores de medición y los valores
promedio no se guarden correctamente en la memoria.
El monitor de presión arterial almacena automáticamente hasta 60
valores de medición individuales con la fecha y hora correspondiente.
El monitor también puede calcular una lectura promedio basada en las
tres mediciones más recientes que se tomaron dentro de un período de
10 minutos a partir de la última lectura.
NOTAS: • Si sólo se almacenan dos lecturas en la memoria durante el
período de 10 minutos, el promedio se basa en las dos
lecturas.
• Si se almacena una lectura en la memoria durante el período
de 10 minutos, esta lectura se muestra como el promedio.
1. PARA INICIAR LA CONFIGURACIÓN
Presione el botón de Configuración de la
fecha/hora para ajustar la fecha y hora.
El año parpadea en la pantalla.
E16
STOP
262640 HEM-711 EN_SP_r2.qxp
1/15/07
11:33 AM
Page 17
CONFIGURACIÓN DE LA FECHA Y HORA
2. CONFIGURACIÓN DEL AÑO
El año se puede configurar entre 2006
y 2030. Cuando la pantalla llega a
2030, vuelve a 2006.
START
STOP
Presione el botón MEMORY
(Memoria) para avanzar con
incrementos de un año.
Presione el botón de Configuración de la
fecha/hora para establecer el año actual.
STOP
El mes parpadeará en la pantalla.
NOTA: Presione y mantenga presionado el botón MEMORY
(Memoria) para hacer avanzar los valores de fecha y hora más
rápidamente.
3. CONFIGURACIÓN DEL MES
Presione el botón MEMORY (Memoria) para avanzar con
incrementos de un mes.
Presione el botón de Configuración de la fecha/hora para establecer el
mes actual.
STOP
El día parpadeará en la pantalla.
E17
262640 HEM-711 EN_SP_r2.qxp
1/15/07
11:33 AM
Page 18
CONFIGURACIÓN DE LA FECHA Y HORA
4. CONFIGURACIÓN DEL DÍA
Presione el botón MEMORY (Memoria) para avanzar con
incrementos de un día.
Presione el botón de Configuración de la fecha/hora para establecer el
día actual.
STOP
La hora parpadeará en la pantalla.
5. CONFIGURACIÓN DE LA HORA
La hora se configura con AM o PM.
Presione el botón MEMORY (Memoria) para avanzar con
incrementos de una hora.
Presione el botón de Configuración de la
fecha/hora para establecer la hora actual.
STOP
Los minutos parpadearán en la
pantalla.
6. CONFIGURACIÓN DE LOS MINUTOS
Presione el botón MEMORY (Memoria) para avanzar con
incrementos de un minuto.
Presione el botón de Configuración de la fecha/hora para establecer la
configuración de minutos.
7. PARA APAGAR EL MONITOR
Presione el botón START/STOP (Inicio/Detener).
E18
262640 HEM-711 EN_SP_r2.qxp
1/15/07
11:33 AM
Page 19
COLOCACIÓN DE LA BANDA PARA EL BRAZO
PRECAUCIÓN
Lea toda la información del manual de instrucciones y cualquier otro
material impreso incluido en la caja antes de comenzar a usar la unidad.
PRECAUCIÓN
Este dispositivo está diseñado para medir la presión arterial y el
pulso en pacientes adultos. Este dispositivo no debe utilizarse con
bebés o con otras personas que no puedan expresar sus deseos.
COLOCACIÓN DE LA BANDA EN EL BRAZO IZQUIERDO
1. Asegúrese de que el enchufe macho del aire esté correctamente
insertado en la unidad principal.
2. Retire la ropa ajustada de la parte superior del brazo izquierdo.
E19
262640 HEM-711 EN_SP_r2.qxp
1/15/07
11:33 AM
Page 20
COLOCACIÓN DE LA BANDA PARA EL BRAZO
3. Siéntese en una silla con los pies apoyados en el piso. Coloque el brazo
en una mesa de modo que la banda quede al mismo nivel del corazón.
Soporte para el pulgar
4. Sostenga firmemente el soporte de la
banda con la mano derecha, colocando
el pulgar en el soporte para el pulgar.
5. Coloque la palma de la mano
izquierda hacia arriba.
E20
Correa de tela
262640 HEM-711 EN_SP_r2.qxp
1/15/07
11:33 AM
Page 21
COLOCACIÓN DE LA BANDA PARA EL BRAZO
6. Coloque la banda en la parte superior del brazo izquierdo de modo
que la correa azul quede en la parte interna del brazo y alineada con
el dedo medio. El tubo de aire corre hacia abajo por la parte interna
del brazo. La parte inferior de la banda debe quedar aproximadamente
a 1/2” (1.27 cm) por encima del codo.
Correa azul
1/2 pulgada (1 - 2 cm)
Tubo de aire
7. Coloque la banda de modo que quede bien envuelta alrededor del
brazo usando la correa de tela.
E21
262640 HEM-711 EN_SP_r2.qxp
1/15/07
11:33 AM
Page 22
COLOCACIÓN DE LA BANDA PARA EL BRAZO
COLOCACIÓN DE LA BANDA PARA EL BRAZO EN EL
BRAZO DERECHO
Coloque la banda en la parte superior del brazo derecho de modo que el
soporte para el pulgar quede centrado en la parte interna del brazo. La
parte inferior de la banda debe quedar aproximadamente a 1/2” (1.27 cm)
por encima del codo.
Soporte para el pulgar
NOTA: Tenga cuidado de no apoyar el brazo sobre el tubo de aire. Esto
impedirá el flujo de aire hacia la banda.
E22
262640 HEM-711 EN_SP_r2.qxp
1/15/07
11:33 AM
Page 23
CÓMO TOMAR UNA MEDICIÓN
El monitor determina automáticamente el nivel de inflado ideal. Rara
vez, cuando pueda ser necesario un mayor inflado, el monitor vuelve a
inflar automáticamente la banda hasta 30 mmHg más que el inflado
inicial y vuelve a realizar la medición.
PRECAUCIÓN
Sólo opere el dispositivo para el uso para el que fue diseñado. No
use el dispositivo para ningún otro fin.
1. Presione el botón START/STOP (Inicio/Detener).
Todos los símbolos aparecen en la pantalla. La banda comienza a
inflarse automáticamente.
A medida que la banda empiece a inflarse, el monitor determinará
automáticamente el nivel de inflado óptimo. Este monitor detecta el
pulso durante el inflado. No mueva el brazo y quédese quieto hasta
que se complete el proceso de medición.
START
STOP
NOTA: Para detener el inflado o la medición, presione el botón
START/STOP (Inicio/Detener). El monitor dejará de inflarse,
comenzará a desinflarse y se apagará.
E23
262640 HEM-711 EN_SP_r2.qxp
1/15/07
11:33 AM
Page 24
CÓMO TOMAR UNA MEDICIÓN
2. El inflado se detiene automáticamente y se inicia la medición.
A medida que la banda se
desinfla, aparecen números en
pantalla en orden decreciente.
El Símbolo de latido ( )
parpadea ante cada latido del
corazón.
3. Una vez que se haya completado la medición, la
banda se desinfla por completo. Aparecen la presión
arterial y el pulso.
4. Presione el botón START/STOP (Inicio/Detener) para apagar el
monitor.
NOTA: El monitor se apagará
automáticamente después de cinco
minutos.
START
STOP
Una vez que se complete la medición, el Símbolo de latido parpadea
en la pantalla junto con la presión arterial y el pulso si la lectura es
superior a 135 para el valor de la presión arterial sistólica y/o 85 para
el valor de la presión arterial diastólica.
E24
262640 HEM-711 EN_SP_r2.qxp
1/15/07
11:33 AM
Page 25
CÓMO TOMAR UNA MEDICIÓN
CONDICIONES ESPECIALES
PRECAUCIÓN
Inflar el dispositivo a una presión más alta que la necesaria puede
provocar magulladuras en el lugar donde se aplica la banda.
Si le consta que su presión sistólica es mayor a 220 mmHg, presione
y mantenga presionado el botón START/STOP (Inicio/Detener) hasta
que el monitor se infle de 30 a 40 mmHg más que su presión sistólica
esperada.
START
STOP
NOTAS: • No aplique más presión de la necesaria.
• El monitor no se infla a más de 299 mmHg.
Una vez que se haya completado la medición, la banda se desinfla por
completo. Aparecen la presión arterial y el pulso.
E25
262640 HEM-711 EN_SP_r2.qxp
1/15/07
11:33 AM
Page 26
USO DE LA FUNCIÓN MEMORIA
El monitor ha sido diseñado para almacenar la presión arterial y el pulso
en la memoria cada vez que se complete una medición.
El monitor almacena automáticamente hasta 60 conjuntos de valores de
medición (presión arterial y pulso). Una vez que se guarden 60
conjuntos de valores de medición en la memoria, el registro más antiguo
se borrará para guardar los valores de medición más recientes.
FUNCIÓN DE PROMEDIO
El monitor calcula una lectura promedio basada en los valores de los
tres conjuntos de mediciones más recientes que se tomaron dentro de los
10 minutos posteriores a la lectura más reciente.
NOTA: Si se guardan dos conjuntos de valores de medición en la
memoria para el período de 10 minutos, el promedio se basa en
los dos conjuntos de valores de medición. Si se guarda un
conjunto de valores de medición, éste se visualiza como el
promedio.
E26
262640 HEM-711 EN_SP_r2.qxp
1/15/07
11:33 AM
Page 27
USO DE LA FUNCIÓN MEMORIA
PARA MOSTRAR LOS VALORES DE MEDICIÓN
1. Presione el botón MEMORY (Memoria).
STOP
El Símbolo de promedio ( ) aparece en la pantalla cuando se
muestra la lectura promedio.
2. Presione el botón MEMORY (Memoria) para mostrar los valores de
medición desde el más reciente hasta el más antiguo.
3. Presione el botón START/STOP (Inicio/Detener) para apagar el
aparato.
NOTAS:
• Presione el botón MEMORY
(Memoria) para mostrar los
valores siguientes.
• Presione y mantenga
presionado el botón
MEMORY (Memoria) para
visualizar los valores más
rápidamente.
Cambio de
visualizaciones
• La fecha y hora se visualizan
de manera alternada con los valores de medición.
E27
262640 HEM-711 EN_SP_r2.qxp
1/15/07
11:33 AM
Page 28
USO DE LA FUNCIÓN MEMORIA
PARA BORRAR TODOS LOS VALORES ALMACENADOS
EN LA MEMORIA
No se pueden borrar parcialmente los valores almacenados en la
memoria. Se borrarán todos los valores.
1. Al mantener presionados el botón Memory (Memoria) y el botón
START/STOP (Inicio/Apagado) simultáneamente durante más de
2 segundos, se borrarán todos los valores.
START
STOP
E28
262640 HEM-711 EN_SP_r2.qxp
1/15/07
11:33 AM
Page 29
CUIDADO Y MANTENIMIENTO
Para mantener el monitor de presión arterial digital en buenas
condiciones y proteger la unidad para que no se dañe, siga estas
instrucciones:
Guarde el monitor en el estuche
cuando no lo esté utilizando. Asegúrese
de que el adaptador de CA esté colocado
en el estuche de almacenamiento según lo
ilustrado para evitar daños a la pantalla.
Evite enroscar o doblar en exceso el cable
del adaptador de CA.
No doble la banda ni el tubo de aire por la fuerza.
No doble los elementos de modo que queden demasiado apretados.
Limpie el monitor con un paño seco y suave. No use limpiadores
abrasivos o volátiles. No trate de limpiar la banda.
PRECAUCIÓN
No sumerja el dispositivo ni ninguno de sus componentes en el agua.
No someta al monitor a temperaturas extremas altas o bajas,
humedad o luz directa del sol.
PRECAUCIÓN
Guarde el dispositivo y los componentes en un lugar limpio y
seguro.
PRECAUCIÓN
No someta al monitor a golpes fuertes, como por ejemplo, dejar caer
la unidad al suelo.
E29
262640 HEM-711 EN_SP_r2.qxp
1/15/07
11:33 AM
Page 30
CUIDADO Y MANTENIMIENTO
Saque las pilas si no piensa utilizar la unidad durante tres meses o un
período de tiempo más prolongado. Cambie siempre todas las pilas por
pilas nuevas al mismo tiempo.
Use la unidad de acuerdo con las instrucciones que se suministran
en este manual. Use sólo las piezas y los accesorios autorizados.
PRECAUCIÓN
Los cambios o modificaciones que no hayan sido aprobados por
Omron Healthcare dejarán sin efecto la garantía del usuario. No
desarme ni trate de reparar la unidad ni los componentes.
E30
262640 HEM-711 EN_SP_r2.qxp
1/15/07
11:33 AM
Page 31
INDICADORES DE ERRORY RESOLUCIÓN DE PROBLEMAS
INDICADORES DE ERROR
SÍMBOLO
CAUSA
CORRECCIÓN
El monitor no pudo
detectar el pulso.
El enchufe macho del
aire no está conectado.
Tome otra medición y quédese
quieto hasta que se complete la
medición.
La banda no está lo
suficientemente inflada.
La banda no está
Retire la banda para el brazo.
colocada correctamente.
Consulte “Cómo tomar una
medición”.
Realice otra medición.
La banda está inflada
en exceso
Cambie las cuatro pilas.
Consulte “Colocación de las
pilas”.
Las pilas están
agotadas
E31
262640 HEM-711 EN_SP_r2.qxp
1/15/07
11:33 AM
Page 32
INDICADORES DE ERRORY RESOLUCIÓN DE PROBLEMAS
RECOMENDACIONES PARALARESOLUCIÓN DE PROBLEMAS
PROBLEMA
CAUSAS Y SOLUCIONES
No hay alimentación eléctrica.
Cambie las cuatro pilas por pilas
nuevas.
Verifique la colocación de las pilas
para ver si las polaridades de las
mismas están correctamente colocadas.
No aparece ningún símbolo en
la pantalla de la unidad.
Los valores de medición
parecen ser demasiado altos o
demasiado bajos.
La presión arterial varía constantemente.
Muchos factores, como el estrés, la hora
del día y la forma en que se coloca la
banda, pueden afectar su presión
arterial. Repase las secciones “Antes de
tomar una medición” y “Cómo tomar
una medición”.
E32
262640 HEM-711 EN_SP_r2.qxp
1/15/07
11:33 AM
Page 33
DECLARACIÓN DE LA FCC
NOTA:
POTENCIAL DE INTERFERENCIA DE RADIO/TELEVISIÓN (para EE.UU.
solamente)
Este producto ha sido probado y cumple con los límites de un dispositivo digital
de Clase B, de acuerdo con la sección 15 de las normas de la FCC.
Estos límites fueron diseñados para proporcionar una protección razonable contra
interferencias perjudiciales cuando se utilice el equipo en una instalación
residencial. El producto genera, utiliza y puede irradiar energía de radiofrecuencia
y, si no se instala y se utiliza de acuerdo con las instrucciones, puede provocar
interferencias perjudiciales en las comunicaciones por radio. Sin embargo, no se
puede garantizar que no se producirán interferencias en una instalación en
particular. Si el producto provoca interferencias perjudiciales a la recepción de
radio o televisión, lo que puede determinarse encendiendo y apagando el equipo,
se sugiere que el usuario intente corregir la interferencia aplicando una o más de
las siguientes medidas:
• Reoriente o reubique la antena receptora.
• Aumente la distancia entre el equipo y el receptor.
• Conecte el equipo a un tomacorrientes que esté en un circuito distinto de aquél
al que se encuentra conectado el receptor.
• Consulte al distribuidor o a un técnico experimentado en radio/TV para
obtener más información.
POTENCIAL DE INTERFERENCIA DE RADIO/TELEVISIÓN (para Canadá
solamente)
Este aparato digital no excede los límites de Clase B para las emisiones de
ruido de radio de los dispositivos digitales como se establece en la norma con
respecto a equipos que causan interferencia denominada “Dispositivos
digitales”, ICES-003 del Departamento Canadiense de Comunicaciones.
Cet appareil numérique respecte les limites de bruits radioeléctriques
applicables aux appareils numériques de Clase B prescrites dans la norme sur le
materiel brouilleur: “Appareils Numériques”, ICES-003 édictée par le minister
des communications.
Los cambios o modificaciones que no estén expresamente aprobados por la
parte responsable de su cumplimiento podrán dejar sin efecto la autoridad del
usuario para operar el equipo.
E33
262640 HEM-711 EN_SP_r2.qxp
1/15/07
11:33 AM
Page 34
GARANTÍA
El monitor de presión arterial IntelliSense HEM-711DLX®, salvo la banda para el
brazo, está garantizado como libre de defectos en materiales y mano de obra que se
presenten dentro de los 5 años a partir de la fecha de compra, si se usa de
acuerdo con las instrucciones que se suministran con el monitor. La banda para el
brazo está garantizada como libre de defectos en materiales y mano de obra que
se presenten dentro de un año a partir de la fecha de compra si el monitor se usa
de acuerdo con las instrucciones que se suministran con el monitor. Las garantías
anteriormente mencionadas se extienden sólo al comprador minorista original.
A criterio de la empresa, se reparará o cambiará sin cargo alguno el monitor o la
banda para el brazo que estén cubiertos por las garantías anteriormente
mencionadas. Nuestra empresa será únicamente responsable de la reparación o el
reemplazo y dichas acciones constituyen su único recurso conforme a las
garantías anteriormente mencionadas.
Para obtener servicio de garantía, contáctese con Omron Healthcare para obtener la
dirección del lugar donde se efectúan las reparaciones. Puede obtener instrucciones
de envío e información sobre reparaciones llamando al 1-800-634-4350 o visitando
nuestro sitio Web en www.omronhealthcare.com.
Adjunte el comprobante de compra. Incluya US$ 5.00 para la devolución por correo.
Incluya una carta con su nombre, dirección, número de teléfono y la descripción del
problema específico. Empaque el producto cuidadosamente para evitar que se dañe
durante el traslado. Dado que existe la posibilidad de pérdida durante el traslado, le
recomendamos que asegure el producto con solicitud de acuse de recibo.
TODAS LAS GARANTÍAS IMPLÍCITAS, INCLUYENDO ENTRE OTRAS
LAS GARANTÍAS IMPLÍCITAS DE COMERCIALIZACIÓN Y APTITUD
PARA UN PROPÓSITO EN PARTICULAR, SE LIMITAN A LA
DURACIÓN DE LA GARANTÍA POR ESCRITO PERTINENTE QUE
APARECE ANTERIORMENTE. Algunos estados no aceptan limitaciones en
cuanto a la duración de una garantía implícita, de modo que es posible que la
limitación anterior no sea aplicable en su caso.
OMRON NO SE RESPONSABILIZA POR LA PÉRDIDA DE USO O
CUALQUIER OTRO COSTO, GASTO O DAÑO INCIDENTAL O
INDIRECTO. Algunos estados no aceptan la exclusión o limitación de los daños
incidentales o indirectos, de modo que es posible que las exclusiones anteriores
no sean aplicables en su caso.
Esta garantía le otorga derechos legales específicos y es posible que también le
correspondan otros derechos que pueden variar de un estado a otro.
PARA CONTACTARSE CON SERVICIO AL CLIENTE
Visite nuestro sitio Web en:
www.omronhealthcare.com
Llame sin cargo al:
1-800-634-4350
E34
262640 HEM-711 EN_SP_r2.qxp
1/15/07
11:33 AM
Page 35
ESPECIFICACIONES
HEM-711DLX
Pantalla digital LCD
Presión: 0 a 299 mmHg, Pulso: 40-180/min.
Presión: ±3mmHg o 2% de lectura
Pulso: ±5% de lectura
Inflado:
Automático por bomba eléctrica
Desinflado:
Válvula de liberación automática de presión
Liberación rápida de presión: Válvula de liberación automática
Detección de presión:
Sensor de presión capacitivo
Método de medición:
Método oscilométrico
Detección del pulso:
Sensor de presión de tipo de capacitancia
Fuente de alimentación:
Adaptador de CA de 120V 60Hz o 4 pilas “AA”
Vida útil de las pilas:
Approx. 1500 usos cuando se emplea una vez
por día por 2 minutos on 4 pilas alcalinas nuevas
Temperatura de funcionamiento 50ºF a 104ºF (10ºC a 40ºC) /30 a 85% RH
/Humedad:
Temperatura de almacenamiento -4ºF a 140ºF (-20ºC a 60ºC) /10 a 95% de RH
/Humedad/Presión de aire:
/700 - 1060 hPa
Peso de la unidad principal:
Aproximadamente 12 1/2 onzas (355 g)
sin incluir las pilas
Dimensiones de la unidad principal: Aprox. 6 3/32” (largo) × 5 5/32” (ancho) × 3
5/16” (alto)
(155 mm × 131 mm × 84 mm)
Tamaño de la banda:
Aproximadamente 6” (ancho) (152 mm)
Tubo de la banda 23 5/8” (largo) (600 mm)
Circunferencia de la banda:
Se adapta a una circunferencia de brazo de 9” a
17” (220 mm a 420 mm)
Memoria:
Hasta 60 lecturas
Contenido:
Unidad principal, banda ComFitTM , adaptador de CA,
tarjeta de garantía, manual de instrucciones y estuche
Código UPC:
0 73796 71142 9
Modelo:
Pantalla:
Rango de medición:
Precisión/Calibración:
NOTA: Estas especificaciones están sujetas a cambio sin previo aviso.
E35
262640 HEM-711 EN_SP_r2.qxp
1/15/07
11:33 AM
Page 36
Fabricado por OMRON HEALTHCARE
Hecho en China
Distribuido por:
OMRON HEALTHCARE, INC.
1200 Lakeside Drive
Bannockburn, Illinois 60015
www.omronhealthcare.com
Copyright © 2007 Omron Healthcare, Inc.
HEM-711DLXINST Rev
1663644-9B