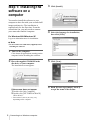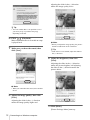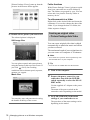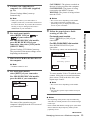
1
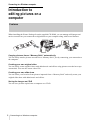
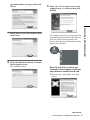
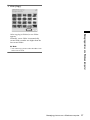
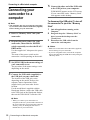
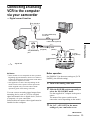
3-087-936-13(1) Computer Applications Guide Digital Video Camera Recorder © 2004 Sony Corporation Read this first • For camera operations, read the separate Camera Operations Guide supplied with your camcorder. The supplied CD-ROM includes the following software. For Windows computer : Picture Package For Macintosh computer : ImageMixer VCD2 System requirement For Windows users When viewing pictures recorded on a tape on a computer • OS: Microsoft Windows 98SE, Windows 2000 Professional, Windows Millennium Edition, Windows XP Home Edition or Windows XP Professional Standard installation is required. Operation is not assured if the above OS has been upgraded. You cannot hear sound if your computer is running Windows 98. You can only transfer and view still images. • CPU: Intel Pentium III 500 MHz or faster (800 MHz or faster recommended) • Application: DirectX 9.0b or later (This product is based on DirectX technology. It is necessary to have DirectX installed.) Windows Media Player 7.0 or later Macromedia Flash Player 6.0 or later • Sound system: 16 bit stereo sound card and stereo speakers • Memory: 64 MB or more • Hard disk: Available memory required for installation: 200 MB or more Available free hard disk space recommended: 6 GB or more (depending on the size of the image files edited) • Display: 4 MB VRAM video card, Minimum 800 × 600 dots, High color (16 bit color, 65 000 colors), DirectDraw display driver capability (this product will not operate correctly at 800 × 600 dots or less, and 256 colors or less.) 2 • Others: USB port (this must be provided as standard), DV Interface (IEEE1394, i.LINK) (to connect via an i.LINK cable), disc drive (You need a CD-R drive to create a Video CD. For the compatible drive, visit the following URL:http://www.ppackage.com/) When playing pictures recorded on a “Memory Stick” on a computer (only the models with a Memory Stick slot) • OS: Microsoft Windows 98, Windows 98SE, Windows 2000 Professional, Windows Millennium Edition, Windows XP Home Edition or Windows XP Professional Standard installation is required. Operation is not assured if the above OS has been upgraded. • CPU: MMX Pentium 200 MHz or faster • Application: Windows Media Player (this must be installed to play back movies.) • Others: USB port (this must be provided as standard), disc drive For Macintosh users b Note • When you connect your camcorder to a Macintosh computer using a USB cable, you cannot copy pictures recorded on a tape to the computer. To copy pictures, connect your camcorder to the computer with an i.LINK cable and use the standard software in the OS. When using ImageMixer VCD2 • OS: Mac OS X (v10.1.5 or later) Standard installation is required. • Application: QuickTime 4.0 or later (this must be installed to play back movies.) • Others: USB port (this must be provided as standard), DV Interface (IEEE1394, i.LINK) (to connect via an i.LINK cable), disc drive When only copying pictures recorded on a “Memory Stick” on a computer (only the models with a Memory Stick slot) • OS: Mac OS 9.1/9.2 or Mac OS X (v 10.0/v 10.1/v 10.2/v 10.3) • Applications: QuickTime 3.0 or later (this must be installed to play back movies.) • Others: USB port (this must be provided as standard), disc drive About this manual • The name of the power switch on the camcorder varies depending on the model. To record on a tape : CAMERA-TAPE or CAMERA To play : PLAY/EDIT, PLAYER or VCR CAMERA-TAPE and PLAY/EDIT are used in this manual. Refer to the separate Camera Operations Guide supplied with your camcorder for details. • The screens shown in this manual are from a Windows XP computer. The screens may vary depending on the OS. • Roxio is a registered trademark of Roxio, Inc. • Toast is a trademark of Roxio, Inc. • Macromedia and Macromedia Flash Player are trademarks or registered trademarks of Macromedia, Inc. in the United States and / or other countries. • Pentium is a trademark or registered trademark of Intel Corporation. All other product names mentioned herein may be the trademarks or registered trademarks of their respective companies. Furthermore, “” and “” are not mentioned in each case in this manual. On copyrights Music works, sound recording or other third party musical contents you may acquire from CDs, the Internet or other sources (the “Music Contents”) are the copyrighted work of the respective owners thereof and are protected by copyright laws and other applicable laws of each country/region. Except to the extent expressly permitted by applicable laws, you are not permitted to use (including, without limitation, copying, modifying, reproducing, uploading, transmitting or placing to the external network accessible to the public, transferring, distributing, lending, licensing, selling and publishing) any of the Music Contents without obtaining authorization or approval of the respective owners thereof. License of Picture Package by Sony Corporation would not be construed as conferring to you by implication, estoppel or otherwise any license or right to use the Music Contents. On trademarks • Picture Package is a trademark of Sony Corporation. • “Memory Stick” and are registered trademarks of Sony Corporation. • Microsoft, Windows, and Windows Media are either registered trademarks or trademarks of Microsoft Corporation in the United States and/or other countries. • Macintosh, iMac, Mac OS, iBook and Power Mac are trademarks of Apple Computer Inc. • QuickTime and the QuickTime logo are trademarks of Apple Computer, Inc. 3 Table of Contents Read this first ............................................................................................. 2 Connecting to a Windows computer Introduction to editing pictures on a computer ........................................... 6 Features ...................................................................................................................... 6 Overview of the preparation ........................................................................................ 7 Step 1: Installing the software on a computer ............................................ 8 Step 2: Connecting your camcorder to a computer.................................. 10 Using the USB cable (supplied) when viewing pictures on a tape ............................ 11 Using the USB cable (supplied) when copying pictures on a “Memory Stick” ........... 13 Using the i.LINK cable (optional) ............................................................................... 15 Managing pictures on a Windows computer Copying, viewing and creating pictures.................................................... 17 Viewing video and pictures on your computer – Picture Package Viewer ................................................................................... 17 Creating an original video – Picture Package Auto Video ............................................................................ 18 Creating an original slide show – Picture Package Auto Slide .............................................................................. 21 Saving the images on CD-R – Picture Package CD Backup ............................................................................ 23 Creating a Video CD (Direct Access to Video CD Burn) – Picture Package VCD Maker ........................................................................... 24 Copying images for MEMORY MIX to a “Memory Stick” (only the models with a Memory Stick slot) .................................................................................... 26 Connecting to a Macintosh computer Connecting your camcorder to a computer .............................................. 28 Copying pictures recorded on a “Memory Stick” (only the models with a Memory Stick slot)......................................... 29 Installing software on a computer ............................................................ 29 Other functions Creating a DVD (Direct Access to “Click to DVD”)................................... 30 Connecting an analog VCR to the computer via your camcorder — Digital convert function ................................................................... 33 4 Additional information Troubleshooting ....................................................................................... 35 Index ........................................................................................................ 41 5 Connecting to a Windows computer Introduction to editing pictures on a computer Features When installing the Picture Package from the supplied CD-ROM, you can manage still images and movies recorded on your camcorder as digital data on your computer along with several features. Copying pictures from a “Memory Stick” automatically You can easily transfer pictures recorded on a “Memory Stick” just by connecting your camcorder to the computer. Creating your own original video You can easily create original videos with added music and effects using pictures recorded on a tape as materials. You can also create video CDs. Creating your own slide show You can select your favorites from pictures imported from a “Memory Stick” and easily create your original slide show with added music and effects. Saving the images on CD-R You can save pictures copied onto a computer on a CD-R. 6 Connecting to a Windows computer Overview of the preparation Follow the steps below to complete the preparation. On your computer (for the first time only) Step 1: Installing the software on a computer Connecting to a Windows computer CD-ROM (supplied) On your camcorder Step 2: Connecting your camcorder to a computer There are two ways to connect your camcorder to a computer. • Connecting with a USB cable (supplied) • Connecting with an i.LINK cable (optional) See “Step 2: Connecting your camcorder to a computer” (p. 10) for details. Now, start from Step1 ! * These illustrations are of models with a Handycam Station. For models with a Handycam Station, place your camcorder on the Handycam Station, then connect the Handycam Station to a computer. You cannot directly connect your camcorder to the computer. Connecting to a Windows computer 7 Step 1: Installing the software on a computer You need to install the software to your computer to have fun with your recorded still images and movies. The installation is required only for the first time. From the second time on, you only need to connect your camcorder and the computer. 3 Click [Install]. 4 Select the language for installation, then click [Next]. 5 Click [Next]. 6 Read [License Agreement], check [I accept the terms of the license For Windows 2000/Windows XP Log on as Administrators for installation. b Note • Do not connect the USB cable (supplied) before installing the software. 1 Turn on the computer. Close down all applications running on the computer before installing the software. 2 Place the supplied CD-ROM in the disc drive of your computer. The installation screen appears. If the screen does not appear 1 Double-click [My Computer]. 2 Double-click [PICTUREPACKAGE] (Disc drive)*. * Drive names (such as (E:)) may vary depending on the computer. 8 Connecting to a Windows computer agreement] when you agree, then click [Next]. 8 Select where to save the software, then click [Next]. Make sure [Yes, I want to restart my computer now.] is checked, then click [Finish]. Connecting to a Windows computer 7 9 The computer turns off once, then starts up again automatically (Restart). The short-cut icons for [Picture Package Menu] and [Picture Package Menu destination Folder] appear on the desktop. Click [Install] on the [Ready to Install the Program] screen. The installation starts. When DirectX 9.0b or later is not installed on the computer, follow the steps below to install DirectX 9.0b. 1 Read [License Agreement], then click [Next]. ,continued Connecting to a Windows computer 9 2 Click [Next]. Step 2: Connecting your camcorder to a computer About connection 3 Click [Finish]. There are two ways to connect your camcorder to a computer: – USB cable (supplied) – i.LINK cable (optional) Connecting with the USB cable (supplied) The computer restarts automatically, then a short-cut icon for [Picture Package Menu] appears on the desktop. 10Remove the CD-ROM from the disc drive of your computer. If you have any questions about Picture Package For details, refer to the operating instructions supplied on the CD-ROM supplied with your camcorder, or on-line help. This method is good for copying pictures and sound recorded on a tape to the computer, copying files from a “Memory Stick” to a computer, and copying files to a “Memory Stick.” • When connecting the camcorder to a computer with a USB cable (supplied), the computer and camcorder must be recognized beforehand. Follow the steps below. – Using the USB cable (supplied) when viewing pictures on a tape (p. 11) – Using the USB cable (supplied) when copying pictures on a “Memory Stick” (p. 13) Connecting with an i.LINK cable (optional) • This method is good for copying pictures and sound recorded on a tape. Image data is transferred with more precision than with a USB cable. b Notes • When you are using a USB cable or an i.LINK cable to connect your camcorder to a computer, make sure you insert the connector in the correct direction. If you insert the connector forcibly, it may be damaged, and causes a malfunction of your camcorder. • You cannot copy pictures from a “Memory Stick” to a computer with an i.LINK cable. • You cannot connect with an i.LINK cable when you use Windows 98/Windows 98SE. 10 Connecting to a Windows computer pictures that your camcorder is seeing on the computer - USB Streaming. Using the USB cable (supplied) when viewing pictures on a tape 3 Before following the procedures below, make sure you have installed Picture Package on your computer (p. 8). Set [USB STREAM] in the menu settings of your camcorder to on. The procedure of the menu settings varies depending on the model. 4 Connect the USB cable (supplied) to the USB jack on the camcorder. Connecting to a Windows computer to USB jack USB cable (supplied) Fully insert. The location of the USB jack varies depending on the model. Refer to the separate Camera Operations Guide supplied with your camcorder for the location. For the model that is supplied with the Handycam Station, connect the USB cable to the USB jack on the Handycam Station, then set the USB ON/OFF switch to ON. to USB jack b Notes • Do not connect your camcorder to the computer at this point. • The computer may not recognize the camcorder if you connect them with the USB cable (supplied) before turning on your camcorder. 1 Turn on the computer. Close down all applications running on the computer. For Windows 2000/Windows XP Log on as Administrators. 2 Prepare the power source for your camcorder, then slide the POWER switch to select the PLAY/EDIT mode. Use the supplied AC Adaptor as the power source. The name of the power switch on the camcorder varies depending on the model. 5 Connect the other end of the USB cable to the USB jack on your computer. It may take some time for the computer to recognize the camcorder when you connect the USB cable for the first time. Then [USB Streaming Tool] starts up. If [Found New Hardware Wizard] appears, click [Continue Anyway] and complete the installation. For Windows 2000/Windows XP When the dialogue box prompting you to confirm the digital signature appears, select [Yes] if you use Windows 2000 or select [Continue Anyway] if you use Windows XP. z Tip • Slide the POWER switch to select the CAMERA-TAPE mode, and you can view ,continued Connecting to a Windows computer 11 adjusting the slider in the (-) direction makes the image quality lower. z Tip • You can confirm there is no problem even if you select [Yes] or [Continue Anyway] depending on the OS. 6 Click (Playback). Make sure that the movie recorded on a tape is played back. 7 b Note • When you adjust the image quality, the picture and the sound break off for a moment. Make sure you hear the sound, then click [Next]. z Tip • If the movie is not smooth, adjust the slider in the (-) direction. 9 Adjust the brightness, then click [Next]. Adjusting the slider in the (+) direction makes the picture brighter, and adjusting the slider in the (-) direction makes the picture darker. b Note • When you cannot hear the sound, select another device. 8 Adjust the image quality, then click [Next]. Adjusting the slider in the (+) direction makes the image quality higher and 10Click [Done]. [Picture Package Menu] starts up. 12 Connecting to a Windows computer The settings from steps 7 to 9 are saved. From the second time on, [USB Streaming Tool] does not start up. z Tip • To adjust the image quality and brightness when connecting your camcorder to the computer after the second time, select [Start], [Programs] ([All Programs] for Windows XP), [Picture Package], [Handycam Tools], and [USB Streaming Tool], then start up [USB Streaming Tool]. When you connect your camcorder and the computer, [Picture Package Menu] starts up, then pictures recorded on a “Memory Stick” are automatically copied to the computer. Before following the procedures below, make sure you have installed Picture Package on your computer (p. 8). If your computer has a Memory Stick slot Insert a “Memory Stick” on which pictures are recorded into the Memory Stick slot on your computer. [Picture Package Viewer] starts up after pictures are automatically copied. You can skip the following steps. To check where the images are stored on a “Memory Stick,” see page 14. 1 Turn on the computer. Close down all applications running on the computer. For Windows 2000/Windows XP Log on as Administrators. 2 Insert a “Memory Stick” into your camcorder. 3 Prepare the power source for your camcorder, then slide the POWER switch to select the PLAY/EDIT mode. Use the supplied AC Adaptor as the power source. The name of the power switch on the camcorder varies depending on the model. 4 Set [STD-USB] in the menu settings of your camcorder to on. The procedure of the menu settings varies depending on the model. 5 Connect the USB cable (supplied) to the USB jack on the camcorder. The location of the USB jack varies depending on the model. Refer to the separate Camera Operations Guide supplied with your camcorder for the location. For the model that is supplied with the Handycam Station, connect the USB cable to the USB jack on the Handycam Station, then set the USB ON/OFF switch to ON. to USB jack USB cable (supplied) 6 Connect the other end of the USB cable to the USB jack on your computer. [USB MODE] appears on the LCD screen of your camcorder. to USB jack ,continued Connecting to a Windows computer 13 Connecting to a Windows computer Using the USB cable (supplied) when copying pictures on a “Memory Stick” b Notes • Do not connect your camcorder to the computer at this point. • The computer may not recognize the camcorder if you connect them with the USB cable (supplied) before turning on your camcorder. It may take some time for the computer to recognize the camcorder when you connect the USB cable for the first time. [Picture Package Menu] starts up, and pictures in a “Memory Stick” are automatically copied to the computer. . Documents] or [My Pictures] folder. Where pictures are saved varies depending on the OS. Pictures on a “Memory Stick” The pictures are stored in the [Removable Disk] or [Sony MemoryStick] folder displayed in [My Computer]. After all the pictures are copied to the computer, [Picture Package Viewer] starts up. A For Windows XP B The automatic playback wizard starts up at the default setting. Follow the steps below to deactivate this setting. (From the second time on, you can skip this procedure.) 1 Click [Settings] of [Picture Package Menu]. 2 Check [Do not automatically launch Windows AutoPlay.] (Only when using memory device under Windows XP). 3 Click [OK]. To change the Picture Package Menu settings Click [Copy automatically] t [Settings] to change [Basic], [Copy], and [Delete]. Click [Restore defaults] to return to the default setting. To copy pictures to the computer without using Picture Package Menu Double-click the [Removable Disk] or [Sony MemoryStick] icon displayed in [My Computer]. Then, drag and drop a picture in the folder onto the hard disk drive of your computer. On destination folders and file names Pictures transferred to the computer using Picture Package Menu The pictures are copied to the [Date] folders in the [Picture Package] created inside the [My 14 Connecting to a Windows computer C A Folder containing image files recorded using other camcorders without the folder creation function (for playback only) B Folder containing image files recorded with your camcorder When no new folders have been created, only [101MSDCF] is displayed. C Folder containing movie data recorded using other camcorders without the folder creation function (for playback only) Folder File Meaning 101 MSDCF (up to 999 MSDCF) DSC0sss s.JPG Still image file MOV0sss Movie file s.MPG ssss stands for any number between 0001 to 9999. To disconnect the USB cable For Windows 2000/Windows Me/ Windows XP If [USB MODE] appears on the LCD screen, follow the procedure below to disconnect the USB cable. • If your computer has a USB keyboard and a USB mouse as standard equipment, leave them connected and connect the camcorder to an available USB jack with the USB cable (supplied). 1 Click the [Unplug or eject hardware] icon on the task tray. Click this icon. Connecting to a Windows computer task tray 2 Click [Safely remove Sony Camcorder] ([Unplug or eject hardware] in Windows 2000/Windows Me). Click here. 3 Click [OK] in Windows 2000/Windows Me. b Notes • Operation is not guaranteed if you connect two or more USB devices to the computer. • Operation is not guaranteed if you connect the USB cable to the USB jack on a keyboard or USB hub. • Make sure to connect the cable to the USB jack on the computer. • Operation is not guaranteed on all the recommended environments. 4 Disconnect the USB cable from the camcorder and computer. Using the i.LINK cable (optional) If [USB MODE] does not appear on the LCD screen, do only step 4 above. For Windows 98/Windows 98SE Do only step 4 above. b Notes • Do not disconnect the USB cable while the access lamp is lit. • Make sure to disconnect the USB cable (supplied) before turning off your camcorder. to i.LINK (IEEE1394) connector Recommended connection Connect as shown in the following illustrations to operate the camcorder correctly. • Connect the camcorder to a computer via the USB cable (supplied). Make sure no other USB devices are connected to the computer. i.LINK cable (optional) to DV Interface ,continued Connecting to a Windows computer 15 The location of the DV Interface varies depending on the model. Refer to the separate Camera Operations Guide supplied with your camcorder for the location. For the model that is supplied with the Handycam Station, connect the i.LINK cable to the DV Interface on the Handycam Station. z Tip • You can use other image editing software that can read video signals to edit the recorded pictures. For details on the operation of other software, refer to the help files or the operating instructions of that software. To disconnect the i.LINK cable Turn off the power of the camcorder and disconnect the i.LINK cable from the camcorder and computer. 16 Connecting to a Windows computer Managing pictures on a Windows computer Copying, viewing and creating pictures This chapter describes how to use the applications that are included in Picture Package. There are applications that appear on [Picture Package Menu] and an application that starts up from the [Start] menu of the computer. If you double-click [Picture Package Menu] icon on the desktop, [Picture Package Menu] appears. The following applications appear on [Picture Package Menu]. Application that starts up from the [Start] menu of the computer MEMORY MIX Image Tool (p. 26) You can copy images for MEMORY MIX to a “Memory Stick.” For details of MEMORY MIX functions, refer to the separate Camera Operations Guide supplied with your camcorder. b Notes • Before following the procedures below, make sure you have installed Picture Package on your computer (p. 8). • For Windows 2000/Windows XP, log on as Administrators. Managing pictures on a Windows computer Applications that appear on Picture Package Menu Picture Package VCD Maker (p. 24) You can create a Video CD from pictures recorded on a tape. z Tip • You can change the applications that appear on the menu with the [Settings] screen. Viewing video and pictures on your computer – Picture Package Viewer Picture Package Viewer (p. 17) You can view the pictures copied from your camcorder by selecting from thumbnails. Still images and movies are saved in folders by date. Picture Package Auto Video (p. 18) You can easily create original videos with added music and effects using pictures recorded on a tape. Picture Package Auto Slide (p. 21) You can select your favorites from pictures imported from a “Memory Stick” and easily create your original slide show with added music and effects. Pictures copied from your camcorder are saved in folders by date. You can view the pictures by selecting from thumbnails. 1 Turn on the computer. 2 Double-click [Picture Package Menu] icon on the desktop. [Picture Package Menu] starts up. 3 Click [Viewing video and pictures on PC]. Picture Package CD Backup (p. 23) You can save pictures copied onto a computer to a CD-R. ,continued Managing pictures on a Windows computer 17 [Picture Package Viewer] starts up, then the pictures in the newest folder appears. Folder functions With [Picture Package Viewer], pictures copied from your camcorder are saved in folders by date. The folders are grouped by year. You can select and view pictures from any folder or memory device. To add comments to a folder Right-click on the desired folder and insert the comments. You can also change the date of the folder. If you change the date of a folder, the folder sequence changes. 4 Double-click a picture you want to see. The selected picture is displayed. Creating an original video – Picture Package Auto Video Still image files You can create original video that is edited automatically to match the music and effects you have selected. The maximum length of your original movies you can create on a computer is 10 minutes. b Note • You cannot save pictures from a tape directly onto the hard disk drive of your computer. You can print, expand, and rotate pictures using the buttons at the top of the screen. If you click (Exif), the recording conditions such as shutter speed, exposure, aperture, etc. appear. z Tip • You can use an i.LINK cable for this function. 1 Turn on the computer. Movie files 2 Prepare the power source for your camcorder, then slide the POWER switch repeatedly to select the PLAY/ EDIT mode. Use the supplied AC Adaptor as the power source. The name of the power switch on the camcorder varies depending on the model. 3 You can play, stop, and pause movies using the buttons at the top of the screen. 18 Managing pictures on a Windows computer Set [USB STREAM] in the menu settings of your camcorder to on. The procedure of the menu settings varies depending on the model. z Tip • This operation is not necessary when connecting the camcorder to the computer via an i.LINK cable (p. 15). 4 Search for the point on the tape where you want to start copying. 5 Connect your camcorder to the computer using a USB cable (supplied) or i.LINK cable (optional) (p. 11, 15). [Picture Package Menu] starts up automatically. 8 Click [Automatic Video Producer]. Click [Effect settings], then select the effect. Managing pictures on a Windows computer 6 music on the application. Select music, then click [OK]. . [Picture Package Auto Video] starts up. . You can select one of the 5 effects. Select an effect, then click [OK]. 7 . Click [Music settings], then select the music You can select music from music files in the computer or music CDs other than sample ,continued Managing pictures on a Windows computer 19 9 Click [Output settings], then select where to store the images. music and effects. The remaining time appears on the computer screen. . 11Click [No] when you want to finish. . When you select [Video CD] for where to store the images, place a new CD-R in the disc drive. Select where to save images, then click [OK]. . To create another copy with the same content, click [Yes], then place a new CDR in the disc drive. b Note • CD-RWs cannot be used. 10Click [Start]. The movie is automatically copied from your camcorder and is edited with selected 20 Managing pictures on a Windows computer b Notes • Any and all third party musical contents you may acquire from CDs, the Internet or other sources are the copyrighted work of the respective owners thereof, and except to the extent protected by applicable laws, you are not permitted to use any of the third party musical contents. Please refer to “On Copyrights” of “Read this first” above-mentioned (p. 3) for further note on your use of such third party musical contents. • When you select a music file longer than 10 minutes, the playback fades out automatically. z Tips • When the recorded time of the movie on the tape is longer than the selected music file, the movie is edited automatically according to the length of the music file. • If you want to rewind to the beginning of a tape and copy, click [Options] and check [Rewind the tape to the beginning, then capture]. • If you saved a created movie on the hard disk, you can view it with [Picture Package Viewer]. • If you select CD-R for where to save, you can view the created video as a video CD. For details on playback of video CDs, see page 26. 5 Creating an original slide show – Picture Package Auto Slide Click the [View selected pictures] tab, and make sure the desired pictures are selected. . You can add music and effects to selected pictures saved on your computer and automatically create a slide show. You can combine still images and movies in the slide show. The maximum length of your original slide show you can create on a computer is 10 minutes. Turn on the computer. 2 Double-click [Picture Package Menu] icon on the desktop. 6 Click [Create slide show]. 7 Click [Music settings], then select the music. Managing pictures on a Windows computer 1 [Picture Package Menu] starts up. 3 Click [Automatic Slide show Producer]. [Picture Package Auto Slide] starts up. 4 Open the desired folder on the left side of the screen, select pictures as materials for slide show. The selected picture is marked with . . You can select music from music files in the computer or music CDs other than the ,continued Managing pictures on a Windows computer 21 sample music on the application. Select music, then click [OK]. 9 . 8 Click [Effect settings], then select the effect. Click [Output settings], then select where to store the images. When you select [Video CD] for where to store the images, place a new CD-R in the disc drive. Select where to store the images, then click [OK]. . You can select one of the 5 effects. Select an effect, then click [OK]. b Note • CD-RWs cannot be used. . 10Click [Start]. 22 Managing pictures on a Windows computer Slide show creation starts. The remaining time appears on the computer screen. Saving the images on CD-R – Picture Package CD Backup . You can save pictures copied on the computer, as a backup, to a CD-R. 11Click [No] when you want to finish. 1 Turn on the computer. 2 Double-click [Picture Package Menu] icon on the desktop. . 3 Managing pictures on a Windows computer [Picture Package Menu] starts up. Click [Save the images on CD-R]. [Picture Package CD Backup] starts up. 4 To create another copy with the same content, click [Yes], then place a new CDR in the disc drive. Open the desired folder on the left side of the screen, select pictures you want to save. The selected picture is marked with . . b Notes • Any and all third party musical contents you may acquire from CDs, the Internet or other sources are the copyrighted work of the respective owners thereof, and except to the extent protected by applicable laws, you are not permitted to use any of the third party musical contents. Please refer to “On Copyrights” of “Read this first” above-mentioned (p. 3) for further note on your use of such third party musical contents. • When you select a music file longer than 10 minutes, the playback fades out automatically. z Tips • If you saved a created slide show on the hard disk, you can view it as a movie file with [Picture Package Viewer]. • If you select CD-R for where to save, you can view the created slide show as a video CD. For details 5 Click the [View selected pictures] tab, and make sure the desired pictures are selected. . on playback of video CDs, see page 26. ,continued Managing pictures on a Windows computer 23 6 To create another copy with the same content, click [Yes], then place a new CDR in the disc drive. Click [Write to CD-R]. . Creating a Video CD (Direct Access to Video CD Burn) – Picture Package VCD Maker Place a new CD-R in the disc drive. b Note • CD-RWs cannot be used. 7 Click [Start]. Saving to a CD-R starts. The remaining time appears on the computer screen. . You can copy recorded movies on a tape to a Video CD using a computer equipped with a disc drive compatible with CD-Rs. The following procedure describes how to create a Video CD from a picture recorded on a tape (maximum length of about one hour). b Notes • Some models are not compatible for this operation. Regarding supported models, check to see if there is a listing for the Burn VCD feature in the index of the separate Camera Operations Guide. • You can only use a USB cable for this operation. You cannot use an i.LINK cable. • You cannot save pictures from a tape directly onto the hard disk drive of your computer. 1 Turn on the computer. 2 Prepare the power source for your camcorder, then slide the POWER switch repeatedly to select the PLAY/ EDIT mode. Use the supplied AC Adaptor as the power source since it takes a few hours to create a Video CD. The name of the power switch on the camcorder varies depending on the model. 8 Click [No] when you want to finish. The disc tray comes out automatically. 3 . Set [USB STREAM] in the menu settings of your camcorder to on. The procedure of the menu settings varies depending on the model. 4 24 Managing pictures on a Windows computer Insert a recorded cassette into your camcorder. 5 CAPTURING: The picture recorded on the tape is being copied to the computer. CONVERTING: The picture is being converted to the MPEG1 format. WRITING: The picture is being written onto the CD-R. Connect your camcorder to a computer via a USB cable (supplied) (p. 11). [Picture Package Menu] starts up automatically. b Notes • The screen varies depending on the model. • You cannot cancel the operation after [Finalizing VCD.] is displayed on the LCD screen of your camcorder. b Note • When you connect your camcorder to a computer, make sure you insert the connector in the correct direction. If you insert the connector forcibly, it may be damaged, and causes a malfunction of your camcorder. 9 For touch panel models, select [BURN VCD] on or of your camcorder. For SEL/PUSH EXEC dial models, press BURN DVD/VCD of your camcorder, then select [VCD] on the [SELECT DISC]. [Picture Package VCD Maker] starts up. The procedure of the menu settings varies depending on the model. 7 Place a new CD-R in the disc drive of the computer. b Note • CD-RWs cannot be used. 8 Follow the steps below to finish creating a Video CD. For touch panel models Select [ END] or [NO] of your camcorder. For SEL/PUSH EXEC dial models Press BURN DVD/VCD of your camcorder. The disc tray comes out automatically. . 0:00:00:00 BURN VCD COMPLETED Create another copy? Disctray opens. YES For touch panel models, select [EXEC] of your camcorder. For SEL/PUSH EXEC dial models, press the dial of your camcorder. . 0:00:00:00 BURN VCD START CREATE VCD? Managing pictures on a Windows computer 6 NO To create another Video CD with the same content, follow the on-screen instructions, place a new CD-R in the disc drive, then repeat steps 8 and 9. b Note • The screen varies depending on the model. z Tip • You can also operate steps 8 and 9 from your computer. EXEC CANCEL The status of the operation on your computer is displayed on the LCD screen of your camcorder. b Notes • The importing of the picture stops automatically, when there is a blank portion of 10 seconds or longer on the tape. • Select a hard disk that has enough space (more than about 6 GB) for the [Temporary folder] on the [Options] screen. ,continued Managing pictures on a Windows computer 25 • Once you have created a Video CD, you cannot add images to the same CD-R. • There may be a few second-break about every 10 minutes on the created Video CD. This is due to the AVI format used to create the Video CD, which divides a picture every 10 minutes (about 4 GB) to write it on a CD-R. • The picture being written onto the CD-R does not appear on the computer screen. z Tip • The importing of the picture stops automatically when the tape is played to the end. To play the Video CD You can play back the Video CD in one of the following devices. Refer to the operating instructions supplied with each player for details. – a DVD player compatible with Video CDs – a computer equipped with a DVD drive and software compatible with Video CDs – a computer equipped with Windows Media Player (You may not be able to play back the Video CD depending on the computer environment, including such factors as the operating system or the hardware. The menu functions of Windows Media Player do not work.) Copying images for MEMORY MIX to a “Memory Stick” (only the models with a Memory Stick slot) You can copy images for the MEMORY MIX function to a “Memory Stick.” Refer to the separate Camera Operations Guide supplied with your camcorder for details on the MEMORY MIX function. 1 Turn on the computer. 2 Insert a “Memory Stick” into your camcorder. 3 Prepare the power source for your camcorder, then slide the POWER switch repeatedly to select the PLAY/ EDIT mode. The name of the power switch on the camcorder varies depending on the model. 4 The following procedure describes how to play back a Video CD using Windows Media Player. The procedure of the menu settings varies depending on the model. For details, refer to the separate Camera Operations Guide supplied with your camcorder. 1 Place a Video CD in the disc drive of your computer and start up Windows Media Player. For Windows XP Click [Start], [All Programs], [Accessories], [Entertainment], then [Windows Media Player]. For other operating systems Click [Start], [Programs], [Accessories], [Entertainment], then [Windows Media Player]. 2 Open [My Computer], [CD-R], then [MPEGAV]. Then, drag and drop the movie file [sss*.DAT] onto the Windows Media Player screen. * sss indicates the actual file name. Set [STD-USB] in the menu settings of your camcorder to on. 5 Connect your camcorder to the computer via the USB cable (supplied) (p. 12). Click if [Picture Package Menu] starts up automatically. 6 Start up [MEMORY MIX Image Tool]. For Windows XP Click [Start], [All Programs], [Picture Package], [Handycam Tools], then [MEMORY MIX Image Tool]. For other operating systems Click [Start], [Programs], [Picture Package], [Handycam Tools], then [MEMORY MIX Image Tool]. 26 Managing pictures on a Windows computer 7 Click [Copy]. . Managing pictures on a Windows computer After copying is finished, a new folder appears. Normally, a new folder is automatically created with a number one higher than the last created folder. b Note • You cannot copy pictures when all folders from 100 to 999 are used. Managing pictures on a Windows computer 27 Connecting to a Macintosh computer Connecting your camcorder to a computer b Note • The computer may not recognize the camcorder if you connect them with the USB cable (supplied) before turning on your camcorder. 5 Connect the other end of the USB cable to the USB jack on your computer. [USB MODE] appears on the LCD screen of your camcorder, and a “Memory Stick” icon appears on the desktop. To disconnect the USB cable/ To turn off the camcorder/To eject the “Memory Stick” 1 Quit all applications running on the computer. 1 2 Insert a “Memory Stick” into your camcorder. Prepare the power source for your camcorder, then slide the POWER switch repeatedly to select the PLAY/ EDIT mode. Use the supplied AC Adaptor as the power source. The name of the power switch on the camcorder varies depending on the model. 3 Set [STD-USB] in the menu settings of your camcorder to on. The procedure of the menu settings varies depending on the model. 4 Connect the USB cable (supplied) to the USB jack on your camcorder. The location of the USB jack varies depending on the model. Refer to the separate Camera Operations Guide supplied with your camcorder for the location. For the model that is supplied with the Handycam Station, connect the USB cable to the USB jack on the Handycam Station, then set the USB ON/OFF switch to ON. b Note • When you connect your camcorder to a computer, make sure you insert the connector in the correct direction. If you insert the connector forcibly, it may be damaged, and causes a malfunction of your camcorder. 28 Connecting to a Macintosh computer 2 Drag and drop the “Memory Stick” or drive icon on the desktop onto the [Trash] icon. 3 Disconnect the USB cable from the camcorder and computer. b Notes • Make sure to disconnect the USB cable (supplied) before turning off your camcorder. • If you are using Mac OS X, turn off the computer before disconnecting the USB cable and ejecting the “Memory Stick”. Copying pictures recorded on a “Memory Stick” (only the models with a Memory Stick slot) Double-click the “Memory Stick” icon. Then, drag and drop the desired picture file onto the hard disk icon. You need QuickTime 3.0 or a later version installed on your computer. The picture or sound may break up when you directly play back a picture saved on a “Memory Stick.” Make sure to copy the picture file to the hard disk before playing. b Notes • For details on the “Memory Stick” that you can use with the camcorder, refer to the separate Camera Operations Guide supplied with your camcorder. • If you would like to copy pictures recorded on a tape, copy the pictures to a “Memory Stick” on your camcorder first. When installing the ImageMixer VCD2 from the supplied CD-ROM, you can create video CDs using still images and movies recorded on your computer as materials. An image file compatible with Video CD creation in Roxio’s Toast will be created. A Video CD can be created by writing the image file to disk in the Toast. b Note • You cannot copy pictures recorded on a tape into your computer using ImageMixer VCD2. To copy images, connect your camcorder to the computer with an i.LINK cable and use the standard software in the OS. 1 Connecting to a Macintosh computer To play back movies Installing software on a computer Start up the computer Close down all applications running on the computer before installing the software 2 Place the supplied CD-ROM in the disc drive of your computer 3 Double-click CD-ROM icon. 4 Copy [IMXINST.SIT] in the [MAC] folder to a folder of your choice. 5 Double-click [IMXINST.SIT] in the folder it was copied to. 6 Double-click the unzipped [ImageMixerVCD2_Install]. 7 When the user acceptance screen is displayed, enter your name and password. The installation of the software starts. For details on ImageMixer VCD2, refer to the software’s on-line help. Connecting to a Macintosh computer 29 Other functions Creating a DVD (Direct Access to “Click to DVD”) to i.LINK (IEEE1394) connector i.LINK cable (optional) to DV Interface b Notes • Some models are not compatible for this operation. Regarding supported models, check to see if there is a listing for the Burn DVD feature in the index of the Camera Operations Guide. • You can only use an i.LINK cable for this operation. You cannot use a USB cable. You can create DVDs when you connect your camcorder to a Sony VAIO series computer* that supports “Click to DVD” via an i.LINK cable (optional). The picture is automatically copied and written to a DVD. The following procedures describe how to create a DVD from a picture recorded on a tape. For system and operation requirements, visit the following URL: * Note that you need a Sony VAIO computer equipped with a DVD drive that can be used to write DVDs. You also need the computer with “Click to DVD Ver.1.2” (Sony original software) or later installed. – Europe http://www.vaio-link.com/ – USA http://www.ita.sel.sony.com/support/ dvimag/ 30 Other functions – Asia Pacific Regional http://www.css.ap.sony.com/ – Korea http://scs.sony.co.kr/ – Taiwan http://vaio-online.sony.com/tw/vaio/ – China http://www.sonystyle.com.cn/vaio/ – Thailand http://www.sony.co.th/vaio/index.html – Latin America http://vaio-online.sony.com/ Using the Direct Access to “Click to DVD” function for the first time The Direct Access to “Click to DVD” function enables you to copy pictures recorded on a tape to a DVD easily if your camcorder is connected to a computer. Before operating the Direct Access to “Click to DVD” function, follow the steps below to start “Click to DVD Automatic Mode Launcher.” 1 Turn on the computer. 2 Click the start menu, then select [All Programs]. 3 Select [Click to DVD] from the programs displayed, then click [Click to DVD Automatic Mode Launcher]. [Click to DVD Automatic Mode Launcher] starts up. z Tips • After you start up [Click to DVD Automatic Mode Launcher] once, from then on it starts up automatically when you turn on your computer. • [Click to DVD Automatic Mode Launcher] is set up for each Windows XP user. 1 Turn on the computer. Quit all applications running with an i.LINK. 2 Prepare the power source for your camcorder, then slide the POWER switch repeatedly to select the PLAY/ EDIT mode. Use the supplied AC Adaptor as the power source since it takes a few hours to create a DVD. The name of the power switch on the camcorder varies depending on the model. 3 Insert a recorded cassette into your camcorder. 4 Connect your camcorder to a computer via an i.LINK cable (optional). (p. 15) The status of the operation on your computer is displayed on the LCD screen of your camcorder. CAPTURING: The picture recorded on the tape is being copied to the computer. CONVERTING: The picture is being converted to the MPEG2 format. WRITING: The picture is being written onto the DVD. b Note • The screen varies depending on the model. b Note • When you connect your camcorder to a computer, make sure you insert the connector in the correct direction. If you insert the connector forcibly, it may be damaged, and causes a malfunction of your camcorder. 5 “Click to DVD” starts up and the on-screen instructions appear on your computer. The procedure of the menu setting varies depending on the model. 6 Place a writable DVD in the disc drive of the computer. 7 For touch panel models, select [EXEC] on your camcorder. For SEL/PUSH EXEC dial models, press the dial on your camcorder. 0:00:00:00 BURN DVD START CREATE DVD? EXEC CANCEL 8 Other functions For touch panel models, select [BURN DVD] on or of your camcorder. For SEL/PUSH EXEC dial models, press BURN DVD/VCD of your camcorder, then select [DVD] on the [SELECT DISC]. z Tip • If you use a DVD-RW/+RW which has other data stored on it, the message [This is a recorded disc. Delete and overwrite?] appears on the LCD screen of your camcorder. When you select [EXEC], the existing data is erased and new data is written. Follow the steps below to finish creating a DVD. For touch panel models Select [ END] or [NO] of your camcorder. For SEL/PUSH EXEC dial models Press BURN DVD/VCD of your camcorder. The disc tray comes out automatically. 0:00:00:00 BURN DVD COMPLETED Create another copy? Disctray opens. YES NO To create another DVD with the same content, follow the on-screen instructions, then repeat steps 7 and 8. The disc tray comes out and place a new writable DVD in the disc drive. b Note • The screen varies depending on the model. ,continued Other functions 31 To cancel the operation For touch panel models Select [CANCEL] on the LCD screen of your camcorder. For SEL/PUSH EXEC dial models Press BURN DVD/VCD of your camcorder. b Notes • You cannot cancel the operation after [Finalizing DVD.] is displayed on the LCD screen of your camcorder. • Do not disconnect the i.LINK cable or set the POWER switch to another mode on your camcorder until the picture is completely copied to the computer. • The DVD is created even if you disconnect the i.LINK cable (optional) or turn off the power of your camcorder while [WRITING] or [CONVERTING] is displayed. • When any of the following occurs, copying of the picture is canceled. A DVD containing the data up to the point the operation was canceled is created. Refer to the help files of “Click to DVD Automatic Mode Launcher” for details. – When there is a blank portion of 10 seconds or longer on the tape. – When the data of the tape contains a date before the recording date of the later images. – When normal and wide size pictures are recorded on the same tape. • You cannot operate your camcorder in the following situations: – While playing back a tape – While recording images onto a “Memory Stick” – When “Click to DVD” is started up from the computer – When [A/V t DV OUT] in the menu settings of your camcorder is set to on • You may not be able to create a DVD from an 8mm tape if it contains pictures recorded in a format other than Digital 8 format. 32 Other functions Connecting an analog VCR to the computer via your camcorder — Digital convert function DV Interface to i.LINK (IEEE1394) connector i.LINK cable (optional) A/V connecting cable (supplied) (White) Other functions A/V (audio/video) jack (Yellow) S video plug (Black) (Red) AUDIO/VIDEO jacks : Signal flow VCR (analog) b Notes • Some models are not compatible for this operation. Regarding supported models, check to see if there is a listing for the Digital convert function in the index of the Camera Operations Guide. • The supplied A/V cable varies depending on the model. Refer to the separate Camera Operations Guide supplied with your camcorder with the operations guide of the analog video unit Before operation Set [DISPLAY] in the menu settings to [LCD PANEL] (the default setting). 1 Turn on the analog video unit. 2 Slide the POWER switch repeatedly to select the PLAY/EDIT mode. You can convert an analog signal output from an analog device such as a VCR to a digital signal and transfer it to a digital device, such as a computer, via your camcorder. Software that can capture video signals must be installed on the computer. Use the supplied AC Adaptor as the power source. The name of the power switch on the camcorder varies depending on the model. 3 Set [A/VtDV OUT] in the menu settings of your camcorder to on. ,continued Other functions 33 The procedure of the menu settings varies depending on the model. 4 Start playback on the analog video unit. 5 Start capturing procedures on your computer. Regarding operation, refer to the operating instructions supplied with the software or on-line help. After capturing images and sound Stop capturing procedures on your computer, and stop playback on the analog video unit. b Notes • The bundled software Picture Package or ImageMixer VCD2 do not support the digital convert function. • You may not be able to output the pictures correctly depending on the condition of the analog video signal input to your camcorder. • You cannot transfer pictures with copyright protection signals to a computer. • You can use a USB cable instead of an i.LINK cable (optional) to transfer pictures to a computer. Note, however, that the picture displayed may lack the smoothness. • The location of the USB jack and the shape of the cable vary depending on the model. For details, refer to the separate Camera Operations Guide supplied with your camcorder. • When you are using a USB cable or an i.LINK cable to connect your camcorder to a computer, make sure you insert the connector in the correct direction. If you insert the connector forcibly, it may be damaged, and causes a malfunction of your camcorder. 34 Other functions Additional information Troubleshooting Symptom Cause and/or Corrective Actions The computer does not recognize cDisconnect the cable from the computer and camcorder, then your camcorder. connect it again firmly. cFor the model that is supplied with the Handycam Station, set the USB ON/OFF switch to ON. cFor the model that is supplied with the Handycam Station, connect the Handycam Station to the camcorder firmly. cDisconnect the USB device other than the keyboard, the mouse, and the camcorder from the computer. cDisconnect the cable from the computer and camcorder, restart the computer, then connect them again correctly (p. 11, 13, 28). You cannot view the pictures the cDisconnect the cable from the computer, turn on the camcorder, camcorder is seeing on the then connect it again. computer. cSlide the POWER switch repeatedly to select the CAMERATAPE mode, set [USB STREAM] in the menu settings of your camcorder to on. cDisconnect the cable from the computer, turn on the camcorder, then connect it again. cSlide the POWER switch repeatedly to select the PLAY/EDIT mode, set [USB STREAM] in the menu settings of your camcorder to on. You cannot view the pictures recorded on a tape on the Macintosh computer. (only the models with a Memory Stick slot) cTo copy pictures recorded on a tape to your Macintosh computer, copy the pictures to a “Memory Stick” in your camcorder first, then copy the pictures recorded on the “Memory Stick” to your computer. You cannot view the pictures recorded on a “Memory Stick” on the computer. (only the models with a Memory Stick slot) cInsert the “Memory Stick” firmly. cYou cannot use an i.LINK cable. Connect the camcorder and the computer using the USB cable. cSlide the POWER switch repeatedly to select the PLAY/EDIT mode, set [STD-USB] in the menu settings of your camcorder to on. • The computer does not recognize the “Memory Stick” during camcorder operation such as tape playback or editing. cFinish camcorder operation before connecting the camcorder to the computer. Additional information You cannot view the pictures recorded on a tape on the computer. ,continued Additional information 35 Symptom Cause and/or Corrective Actions The image does not appear on [USB Streaming Tool] when using the USB cable. cThe USB driver has been registered incorrectly as the computer was connected to your camcorder before the installation of the USB driver was completed. Follow the procedure below to install the [Picture Package] correctly. For Windows 98*/Windows 98SE/Windows Me * When copying or playing the pictures on a tape using a computer, the operation is not guaranteed on Windows 98. 1 Check that your camcorder is connected to a computer. 2 Right-click [My Computer], then click [Properties]. The [System Properties] screen appears. 3 Click the [Device Manager] tab. 4 If devices below are already installed, right-click them, then click [Remove] to delete them. For copying and viewing pictures recorded on a tape • [USB Audio Device] in the [Sound, video and game controllers] folder • [USB Device] in the [Other devices] folder • [USB Composite Device] in the [Universal Serial Bus Controller] folder For copying and viewing pictures recorded on a “Memory Stick” (only the models with a Memory Stick slot) • [? Sony Handycam] or [? Sony DSC] with a “?” mark in the [Other devices] folder 5 When the [Confirm Device Removal] screen appears, click [OK]. 6 Turn off the power of your camcorder, disconnect the USB cable, then restart the computer. 7 Place the supplied CD-ROM in the disc drive of your computer. 8 Follow the steps below and try to install the USB driver again. 1 Double-click [My Computer]. 2 Right-click [PICTUREPACKAGE] (Disc drive)*. * Drive names (such as (E:)) may vary depending on the computer. 3 Click [Open]. 4 Double-click [Driver]. 5 Double-click [Setup.exe]. b Note • Deleting anything other than [USB Audio Device], [USB Device], [USB Composite Device], [? Sony Handycam] and [? Sony DSC] may cause malfunction of your computer. 36 Additional information Symptom Cause and/or Corrective Actions The image does not appear on For Windows 2000 [USB Streaming Tool] when Log on as Administrators. using the USB cable. (Continued 1 Check that your camcorder is connected to a computer. from the previous page) 2 Right-click [My Computer], then click [Properties]. The [System Properties] screen appears. 3 4 5 6 Click the [Hardware] tab. Click [Device Manager]. Click [View], then click [Devices by type]. If devices below are already installed, right-click them, then click [Uninstall] to delete them. For copying and viewing pictures recorded on a tape • [USB Composite Device] in the [Universal Serial Bus Controller] folder • [USB Audio Device] in the [Sound, video and game controller] folder • [Composite USB Device] in the [Other devices] folder Additional information For copying and viewing pictures recorded on a “Memory Stick” (only the models with a Memory Stick slot) • [? Sony Handycam] or [? Sony DSC] with a “?” mark in the [Other devices] folder 7 When the [Confirm Device Removal] screen appears, click [OK]. 8 Turn off the power of your camcorder, disconnect the USB cable, then restart the computer. 9 Place the supplied CD-ROM in the disc drive of your computer. 10 Follow the steps below and try to install the USB driver again. 1 Double-click [My Computer]. 2 Right-click [PICTUREPACKAGE] (Disc drive)*. * Drive names (such as (E:)) may vary depending on the computer. 3 Click [Open]. 4 Double-click [Driver]. 5 Double-click [Setup.exe]. b Note • Deleting anything other than [USB Composite Device], [USB Audio Device], [Composite USB Device], [? Sony Handycam] and [? Sony DSC] may cause malfunction of your computer. ,continued Additional information 37 Symptom Cause and/or Corrective Actions The image does not appear on For Windows XP [USB Streaming Tool] when Log on as Administrators. using the USB cable. (Continued 1 Check that your camcorder is connected to a computer. from the previous page) 2 Click [Start]. 3 Right-click [My Computer], then click [Properties]. The [System Properties] screen appears. 4 5 6 7 Click the [Hardware] tab. Click [Device Manager]. Click [View], then click [Devices by type]. If devices below are already installed, right-click them, then click [Uninstall] to delete them. For copying and viewing pictures recorded on a tape • [USB Composite Device] in the [Universal Serial Bus Controller] folder • [USB Audio Device] in the [Sound, video and game controllers] folder • [USB Device] in the [Other devices] folder For copying and viewing pictures recorded on a “Memory Stick” (only the models with a Memory Stick slot) • [? Sony Handycam] or [? Sony DSC] with a “?” mark in the [Other devices] folder 8 When the [Confirm Device Removal] screen appears, click [OK]. 9 Turn off the power of your camcorder, disconnect the USB cable, then restart the computer. 10 Place the supplied CD-ROM in the disc drive of your computer. 11 Follow the steps below and try to install the USB driver again. 1 Double-click [My Computer]. 2 Right-click [PICTUREPACKAGE] (Disc drive)*. * Drive names (such as (E:)) may vary depending on the computer. 3 Click [Open]. 4 Double-click [Driver]. 5 Double-click [Setup.exe]. b Note • Deleting anything other than [USB Composite Device], [USB Audio Device], [USB Device], [? Sony Handycam] and [? Sony DSC] may cause malfunction of your computer. 38 Additional information Symptom Cause and/or Corrective Actions The “Memory Stick” icon ([Removable Disk] or [Sony MemoryStick]) does not appear on the computer screen. (only the models with a Memory Stick slot) cSlide the POWER switch repeatedly to select the PLAY/EDIT mode on your camcorder. cInsert a “Memory Stick” into your camcorder. cDisconnect the USB device other than the keyboard, the mouse, and the camcorder from the computer (p. 15). cSet [STD-USB] in the menu settings of your camcorder to on. • The computer does not recognize the “Memory Stick” during camcorder operation such as tape playback or editing. cFinish camcorder operation before connecting the camcorder to the computer. Picture Package does not function correctly. cClose Picture Package, then restart the computer. An error message appears while operating Picture Package. cClose Picture Package first, then set the POWER switch on your camcorder to another mode. The CD-R drive is not cFor the compatible drive, visit the following URL: recognized or data cannot be http://www.ppackage.com/ written on the CD-R in Picture Package Auto Video, Auto Slide, CD Backup or VCD Maker. Additional information You cannot copy pictures. (only cDisplay pictures recorded on a “Memory Stick” with the the models with a Memory Stick following procedures. slot) 1 Double-click [My Computer]. 2 Double-click the icon for the newly recognized drive [Removable Disk (F:)] (For Windows XP, [Sony Memory Stick]). It may take some time until the drive is recognized. If the computer does not recognize it, the USB driver may be installed incorrectly. 3 Double-click the desired image file. z Tip • Windows XP does not start up [Picture Package Menu] automatically at the default setting even though [Sony MemoryStick] appears in [My Computer]. To deactivate the setting, see “For Windows XP” in “Using the USB cable (supplied) when copying pictures on a “Memory Stick”” (p. 13). An error message appears when cSet the computer display as follows: you place the supplied CD-ROM Windows: 800 × 600 dots or more, High Color (16 bits, 65 000 in your computer. colors) or more Macintosh: 800 × 600 dots or more, 32 000 colors or more [USB Streaming... This function cStart the operations for MEMORY MIX, recording or playing is not available.] appears on the back pictures recorded on a “Memory Stick” after USB screen of your camcorder. Streaming is finished. ,continued Additional information 39 Symptom Cause and/or Corrective Actions [Cannot start Easy Handycam cYou cannot start or cancel the Easy Handycam settings while the with USB connected] or [Cannot USB cable is connected. Disconnect the USB cable from your cancel Easy Handycam with camcorder first. USB connected] appears on the screen of your camcorder. There is no sound when the camcorder is connected to the computer via a USB cable. cChange the settings for your computer environment as described in the following procedures: 1 Select [Start], [Programs]( [All Programs] for Windows XP), [Picture Package], [Handycam Tools], and [USB Streaming Tool] then, start up [USB Streaming Tool]. 2 Select another device on the [Select audio device] screen. 3 Follow the on-screen instructions, click [Next] , then click [Done]. b Note • Sound is not supported on Windows 98. The movie is not smooth. cChange the settings as described in the following procedures: 1 Select [Start], [Programs]( [All Programs] for Windows XP), [Picture Package], [Handycam Tools], and [USB Streaming Tool], then start up [USB Streaming Tool]. 2 Adjust the slider in the (-) direction on [Select video quality]. 3 Follow the on-screen instructions, click [Next] , then click [Done]. 40 Additional information Index A Picture Package Auto Slide .......................................21 Picture Package Auto Video .......................................18 Picture Package CD Backup AVI format...........................26 B BURN DVD ........................31 BURN VCD .........................25 .......................................23 Picture Package VCD Maker .......................................24 Picture Package Viewer ......17 S C CD-R ........... 20, 22, 23, 24, 25 CD-ROM ...............................8 CD-RW ............. 20, 22, 24, 25 Click to DVD .......................30 Copying pictures on a “Memory Stick” .... 13, 29 D T Touch panel models ..... 25, 31 U USB cable ......... 10, 11, 13, 15 USB STREAM ....... 11, 18, 24 USB Streaming ............. 11, 24 Additional information Digital convert function ......33 Direct Access to “Click to DVD” ............................30 Direct Access to Video CD Burn ...............................24 DirectX 9.0b ..........................9 DV Interface ........... 15, 30, 33 DVD .....................................30 SEL/PUSH EXEC dial models ................................ 25, 31 STD-USB ...................... 13, 26 W Windows ..............................17 Windows Media Player ......26 Writable DVD .....................31 H Handycam Station ................ 7, 11, 13, 16, 28 I i.LINK cable .............. 10, 15, 18, 30, 33 ImageMixer VCD2 .............29 Install ......................................8 M Macintosh.............................28 MEMORY MIX ..................26 “Memory Stick” ..... 13, 26, 29 O On-line help .................. 10, 29 P Picture Package .............. 6, 17 Additional information 41 Printed on 100% recycled paper using VOC (Volatile Organic Compound)-free vegetable oil based ink. Printed in Japan