1
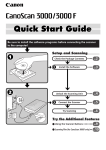
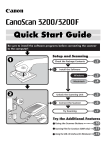
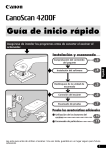
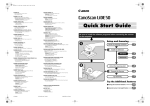
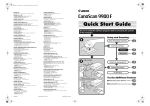
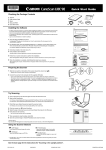
Quick Start Guide
1. Checking the Package Contents
1
2
3
4
5
1
Scanner
2
Quick Start Guide
CanoScan Setup Utility CD-ROM
USB Interface Cable
Stand (CanoScan LiDE 60 only)
5
4
3
2. Installing the Software
1
Place the CanoScan Setup Utility CD-ROM in the drive.
Windows
The CanoScan Setup Utility main memu will display.
When auto start setting fails to work:
1 For Windows XP, click [Start] menu and then [My computer]. For other Windows systems, double-click
[My Computer] icon on the desktop.
2 Double-click [CanoScan] CD-ROM icon and [Setup] icon to display the main menu.
Macintosh
1 Double-click [CanoScan LiDE 25] or [CanoScan LiDE 60] CD-ROM icon on the desktop.
2 Double-click [SetUp] icon to display the main memu.
2
Click [Install] on the main menu.
3
4
5
Click [Install] on the “Install” window.
“Install” window will display.
Follow the on-screen message prompts to continue the installation.
When “Installation completed successfully” displays, click [Restart].
3. Unlocking the Scanning Unit
Push the lock switch to the unlock mark (
).
• Do not tilt the scanner more than 90 degrees from horizontal when releasing the lock.
4. Connecting the Scanner
Connect the scanner to the computer with the supplied USB interface cable.
• Only use the USB interface cable provided with the scanner. Use of other cables may lead to a malfunction.
• The scanner does not have a power switch. The power is activated as soon as the computer is turned on.
• When CanoScan LiDE 60 is connected to the USB 1.1 port on Windows XP and “HI-SPEED USB Device Plugged into
non-HI-SPEED USB Hub” message appears, ignore the message. The scanner operates in this condition without problems.
5. Try Scanning
1
2
Place an item to be scanned onto the document glass.
ScanGear CS window
Start ArcSoft PhotoStudio.
Windows
Select [start], [(All)Programs], [ArcSoft PhotoStudio 5.5] and [PhotoStudio 5.5].
Macintosh
3
4
5
6
7
Bottom
Double-click [Applications] folder, [PhotoStudio] folder, and then [PhotoStudio] icon.
Click [File] menu, [Select Source] and select the scanner model.
Click the acquire icon
Top
or click [File] menu and select [Acquire]. ScanGear CS will start.
Select a Select Source option and click [Preview].
Click [Scan]. The final scan will start.
Click the close box
(Windows) or
(Macintosh) in the ScanGear CS window, and save
the scanned image in the PhotoStudio window.
For more information about ScanGear CS, click
button and refer to the Scanning Guide (HTML format manual).
6. Using the Scanner Buttons
COPY Button
Prints (copies) the scanned image with a printer.
PDF Button (CanoScan LiDE 60 only)
Saves the scanned image as a PDF file.
SCAN Button
Forwards the scanned image to the image editing
program, ArcSoft PhotoStudio.
E-MAIL Button
Attaches the scanned image to a new e-mail
message.
7. Setting the Stand (CanoScan LiDE 60 only)
1
2
Position the scanner directly above the stand on a slight angle.
1
Adjust the scanner into an upright position until the latch clicks into place.
2
For more information using the scanner on the stand,refer to the Scanning Guide (HTML format manual).
Sta
nd
8. Try the Additional Features
Refer to the Scanning Guide (HTML format manual) for further information about the scanner. Double-click the Scanning
Guide icon to view the manual.
To read the User’s Guide for the bundled application programs (PDF format manual), select [Reference Manual] on the
main menu of CanoScan Setup Utility CD-ROM.
QT5-0874-V03
©CANON INC. 2007
PRINTED IN VIETNAM
■Specifications
CanoScan LiDE 25
CanoScan LiDE 60
Scanner Type
Flatbed
Scanning Element
CIS (Color Contact Image Sensor)
Light Source
3-color (RGB) LED
Optical Resolution (*1)
1200 x 2400 dpi
Selectable Resolution
25 - 19200 dpi (ScanGear CS)
Scanning Bit Depth
Color
16 bit input/8 bit output for each
color (RGB)
Grayscale
Color
Scanning Speed
Grayscale, B&W
Preview Speed
16 bit input / 8 bit output
16 msec./line (600dpi),
32 msec./line (1200dpi) (*2)
6.4 msec./line (600dpi),
12.7 msec./line (1200dpi) (*3)
5.3 msec./line (600dpi),
10.6 msec./line (1200dpi) (*2)
3.1 msec./line (600dpi),
4.2 msec./line (1200dpi) (*3)
Approximately 16 sec. (*2,*4)
Approximately 9 sec. (*3,*4)
USB 1.1
USB 2.0 Hi-Speed/USB
(USB1.1 equivalent)
Interface
Maximum Document Size
A4/Letter: 216 x 297 mm (8.5 x 11.7 in.)
3 buttons: COPY, SCAN,
E-MAIL
Scanner Buttons
Operating Range
16 bit input/16 bit or 8 bit output
for each color (RGB)
Temperature
5°C to 35°C (41°F to 95°F)
Humidity
10% to 90% RH (without condensation formation)
Power Requirements
Power Consumptions
Maximum Exterior Dimensions
Weight
4 buttons: COPY, SCAN,
PDF, E-MAIL
Supplied via USB port (No external adapter required)
In operation: 2.5watts maximum,
Stand by: 1.4watts
In operation: 2.5watts maximum,
Stand by: 1.5watts
256 x 383 x 34 mm
(10.1 x 15.1 x 1.3 in.)
258 x 374 x 40 mm
(10.2 x 14.8 x 1.6 in.)
Approximately 1.5 kg (3.3 lbs)
Approximately 1.74 kg (3.9 lbs)
Optical resolution is a measure of maximum hardware sampling resolution, based on ISO 14473 standard.
The fastest speed in USB 1.1 on Windows PC. Transfer time to computer is not included.
*3 The fastest speed in USB 2.0 Hi-Speed mode on Windows PC. Transfer time to computer is not included.
*4 Calibration processing time is not included.
*1
*2
• Note that only the initially equipped interface is supported.
• Specifications are subject to change without notice.
Model Number: F910111/F910114 (CanoScan LiDE25/LiDE60)
FCC Notice (U.S.A. Only)
Model Number : F910111/F910114
This device complies with Part 15 of the FCC Rules. Operation is subject to the following two conditions: (1) This device may not cause harmful interference, and (2) this device must accept any
interference received, including interference that may cause undesired operation.
Note: This equipment has been tested and found to comply with the limits for a Class B digital device, pursuant to Part 15 of the FCC Rules. These limits are designed to provide reasonable protection
against harmful interference in a residential installation. This equipment generates, uses and can radiate radio frequency energy and, if not installed and used in accordance with the instructions, may
cause harmful interference to radio communications. However, there is no guarantee that interference will not occur in a particular installation. If this equipment does cause harmful interference to
radio or television reception, which can be determined by turning the equipment off and on, the user is encouraged to try to correct the interference by one or more of the following measures:
•
•
•
•
Reorient or relocate the receiving antenna.
Increase the separation between the equipment and receiver.
Connect the equipment into an outlet on a circuit different from that to which the receiver is connected.
Consult the dealer or an experienced radio/TV technician for help.
Use of a shielded cable is required to comply with Class B limits in Subpart B of Part 15 of the FCC Rules.
Do not make any changes or modifications to the equipment unless otherwise specified in the manual. If such changes or modifications should be made, you could be required to stop operation of the
equipment.
Canon U.S.A., Inc.
One Canon Plaza
Lake Success, NY 11042
1-516-328-5600
For Customers in Europe, Middle-East, Africa and Russia only
For Canon Customer Support contacts, please see the back cover of the European Warranty System (EWS) Booklet or visit www.canon-europe.com.
Warning
When you use this product, you should pay attention to the following legal issues:
• Scanning of certain documents, such as bank notes (bank bills), government bonds and public certificates, may be prohibited by law and may result in criminal and/or civil liability.
• You may be required under law to obtain authorization from a person possessing copyrights or other legal rights to the item being scanned.
If you are uncertain of the legality of scanning any particular item, you should consult your legal adviser in advance.
• Adobe® and Acrobat® are either registered trademarks or trademarks of Adobe Systems Incorporated in the U.S. and/or other countries.
• Microsoft® and Windows® are either registered trademarks or trademarks of Microsoft Corporation in the U.S. and/or other countries.
• Macintosh® and Mac® are trademarks of Apple Computer, Inc., registered in the U.S. and other countries.
• ©ArcSoft, Inc. All rights reserved for PhotoStudio.
• Other names and products not mentioned above may be registered trademarks or trademarks of their respective companies.
In this guide, Windows XP screen shots are used to illustrate explanations common to all operating systems.