1
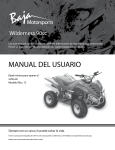
INSTRUCTION MANUAL Model Number/Número de Modelo: WDTZ000 HOT AND COLD WATER DISPENSER DISPENSADOR DE AGUA FRIA Y CALIENTE BEFORE USE, PLEASE READ AND FOLLOW ALL SAFETY RULES AND OPERATING INSTRUCTIONS. La sección en español empieza en la página 13. Avanti has a policy of continuous improvement on its products and reserves the right to change materials and specifications without notice. Avanti Products P.O. Box 520604 - Miami, Florida 33152 www.avantiproducts.com Table of Contents Help Us Help You 3 Parts and Features 4 Important Safety Instructions 5 Installation Instructions 5 Electrical Connection 6 Before Using Your Dispenser 7 Operating Your Water Dispenser 8 Control and Display Panel 8 Child Safety Guard on Hot Water Faucet 8 Care and Maintenance 9 Taking Dispenser Out of Service 9 Problems with Your Dispenser 10 Troubleshooting Guide 10 Service for Your Water Dispenser 11 Wiring Diagram 11 Your Avanti Products Warranty 12 13 – 14 Instrucciones en Español Last Page Registration Information and Registration Card 2 HELP US HELP YOU Read this guide carefully. Write down the model and serial numbers. It is intended to help you operate and maintain your new water dispenser properly. You'll find them on a label located on the back side of the unit. Keep it handy to answer your questions. If you don't understand something or you need more assistance please call: Please write these numbers here: ____________________________________ Date of Purchase Avanti Customer Service 800-220-5570 Keep proof of original purchase date (such as your sales slip) with this guide to establish the warranty period. ____________________________________ Model Number ____________________________________ Serial Number Use these numbers in any correspondence or service calls concerning your water dispenser. If you received a damaged water dispenser, immediately contact the dealer (or builder) that sold you the water dispenser. Save time and money. Before you call for service, check the Trouble Shooting Guide. It lists causes of minor operating problems that you can correct yourself. IF YOU NEED SERVICE We're proud of our service and want you to be pleased. If for some reason you are not happy with the service you receive, here are some steps to follow for further assistance. FIRST, contact the people who serviced your appliance. Explain why you are not pleased. In most cases, this will solve the problem. NEXT, if you are still not pleased, write all the details, including your telephone number, and send it to: Customer Service Avanti Products 10880 NW 30 Street Miami, FL 33172 3 PARTS AND FEATURES 1 2 3 Water Intake Display Panel Hot Water Faucet 5 6 7 Hot Water Outlet Cold Water Outlet Removable Drip Tray Back Panel Hot and Cold Water System Power Switches Drain Plug (With Child Safety Guard) 4 Cold Water Faucet 4 Important Safety Instructions WARNING To reduce the risk of fire, electrical shock, or injury when using your appliance, follow these basic precautions: Read all instructions before using the water dispenser. Never clean parts with flammable fluids. The fumes can create a fire hazard or explosion. Do not store or use gasoline or any other flammable vapors and liquids in the vicinity of this or any other water dispenser. The fumes can create a fire hazard or explosion. -Save these instructions- INSTALLATION GUIDELINES: Remove the exterior and interior packing. Place your appliance on a countertop or surface that is strong enough to support the dispenser when it is fully loaded. The unit is provided with four plastic feet, if it does not sit level on the floor, adjust the front feet to level the unit well to the floor. Locate the appliance away from direct sunlight and sources of heat (stove, heater, radiator, etc.). Direct sunlight may affect the acrylic coating and heat sources may increase electrical consumption. Extreme cold ambient temperatures may also cause the appliance not to perform properly. Allow 5 inches of space between the water dispenser and the wall, which allows for proper air circulation to cool the compressor. Plug the appliance into an exclusive properly installed-grounded wall outlet. Do not cut or remove the third (ground) prong from the power cord under any circumstances. Any questions concerning power and/or grounding should be directed toward a certified electrician or an authorized Avanti Products service center. This water dispenser is not recommended for outdoor use. Do not locate the dispenser in area where the temperature may fall below freezing (32º F). Keep area around dispenser free of dust and dirt. Keep the reserve supply of water bottles away from excessive heat and light. Never unplug the water cooler, except for maintenance. 5 ELECTRICAL CONNECTION Warning Improper use of the grounded plug can result in the risk of electrical shock. If the power cord is damaged, have it replaced by an authorized Avanti Products service center. This appliance should be properly grounded for your safety. The power cord of this appliance is equipped with a three-prong plug which mates with standard three prong wall outlets to minimize the possibility of electrical shock. Do not under any circumstances cut or remove the third ground prong from the power cord supplied. For personal safety, this appliance must be properly grounded. This appliance requires a standard 115/120 Volt AC ~/60Hz electrical ground outlet with three-prong. Have the wall outlet and circuit checked by a qualified electrician to make sure the outlet is properly grounded. When a standard 2-prong wall outlet is encountered, it is your responsibility and obligation to have it replaced with a properly grounded 3-prong wall outlet. The cord should be secured behind the appliance and not left exposed or dangling to prevent accidental injury. The appliance should always be plugged into its own individual electrical outlet which has a voltage rating that matches the rating label on the appliance. This provides the best performance and also prevent overloading house wiring circuits that could cause a fire hazard from overheated. Never unplug the appliance by pulling the power cord. Always grip the plug firmly and pull straight out from the receptacle. Repair or replace immediately all power cords that have become frayed or otherwise damaged. Do not use a cord that shows cracks or abrasion damage along its length or at either end. When moving the appliance, be careful not to damage the power cord. EXTENSION CORD Because of potential safety hazards under certain conditions, it is strongly recommended that you do not use an extension cord with this appliance. However, if you must use an extension cord it is absolutely necessary that it be a UL/CUL-Listed, 3-wire grounding type appliance extension cord having a grounding type plug and outlet and that the electrical rating of the cord be 115 volts and at least 10 amperes. SURGE PROTECTOR Most electrical appliances use a series of electric control boards to operate. These boards are very susceptible to power surges and could be damaged or destroyed. If the appliance is going to be used in an area or if your city / country is prone to power surges / outages; it is suggested that you use a power surge protector for all electrical devices / appliances you use. The surge protector that you select must have a surge block high enough to protect the appliance it is connected to. If you have any questions regarding the type and size of surge protector needed contact a licensed electrician in your area. Damages due to power surges are not considered a manufacturer covered defect and will void your product warranty. 6 OPERATION INSTRUCTIONS: Before Using Your Water Dispenser Check to be sure the following parts are included: Instruction manual 2 extra cup dispenser cabinet plugs (Located in the bag with this manual) 2 extra drain seals (Located in the bag with this manual) Accessories order form. BEFORE TURNING YOUR WATER DISPENSER POWER ON Fill the Zerowater Bottle with tap water and wait approximately 15 minutes for the water to filter into the water dispenser before turning your water dispenser ON. Before connecting the appliance to the power source, let it stand upright for approximately 2 hours. This will reduce the possibility of a malfunction in the cooling system from handling during transportation. Remove the bottle stabilizer ring (IF SUPPLIED) from the top of the water dispenser as this part is not needed when using the ZeroWater bottle kit. This part is only used for delivery type water bottles. The water dispenser is pre-cleaned at the factory but the reservoir and water lines must be flushed with fresh water before use as follows: Keep the unit unplugged. Fill water tank with tap water full to capacity. Wait for 15 minutes as indicated above. Slide child safety button then push the hot water faucet (See the Hot Water Faucet diagram on the next page) until water comes out, then stop. Plug the dispenser into the electrical outlet. Locate and flip the COLD (Green) and HOT (Red) power switches at the rear of the unit to the ON position. We are ready to complete the first cycle. In order to do that, wait for the hot water to reach temperature in approximately 10 minutes, and then wait for the cold to reach temperature (another 40 minutes, approximately). Warning: The water coming out of the back may be scolding hot Flip the COLD (Green) and HOT (Red) power switches to the OFF position. Unplug the dispenser from the electrical outlet. Proceed to drain the water from the faucets one at a time until no more water remains. (Note: To facilitate this operation, use a large container). Then, drain any water left in the tanks by opening the drain plug located on the back, until it drains completely. Proceed to close the drain cap tightly and ensure there are no leaks. Push water faucet buttons to insure water flows from both faucets. Plug dispenser back into the electrical outlet. Flip the COLD (Green) and HOT (Red) power switches to the ON position. Now you are ready to use your water dispenser. NOTE: Your water dispenser has been cleaned and sanitized before leaving the factory, but in case a taste problem develops, remove the ZeroWater bottle kit and place two tablespoons of baking soda directly into the water intake and add tap water and repeat basic operations previously outlined, except turn hot water switch “OFF” to avoid leaving residues in hot water tank. Once you have flushed the water cooler, replace the ZeroWater bottle kit and fill as indicated above. 7 ATTENTION: If you do not plan to use the water heating function for more than three days, we recommend that you turn off the hot water function. OPERATING YOUR WATER DISPENSER The following steps apply only if you are switching from the Zerowater Bottle Kit to Standard Delivery type water bottles. Steps To Replace Water Bottles Remove cap from the 5-gallon bottle and use a clean cloth to wipe off the neck of the bottle. Carefully lift bottle (approx. 40 lbs.) using your legs and not your back. Do not place hands on opening of bottle while placing in reservoir. Place the 5-gallon bottle of water on the water intake, allow the water to stand for approximately 5 minutes. Wipe off any water which may have splashed on dispenser top. When a new bottle is installed you must open the hot water faucet and remove no less than 4 full cups of water to insure the water flows properly and the water reservoir is at the proper level. Control and Display Panel For operation of unit, please fill water and make sure water settles inside the water tank, and then switch on both hot and cold switches at back of unit. NOTE: THE HOT WATER FAUCET HAS A CHILD-SAFETY GUARD ATTACHMENT. To get hot water: Slide red safety button to the right and hold while pressing downward on hot water faucet to dispense hot water. Safety button will return to its original position when faucet is released. NOTE: THE DISPENSING CAPACITY OF HOT WATER IS APPROXIMATELY 2 ½ CUPS AT A SINGLE TIME. ONCE THE MAXIMUM NUMBER OF CUPS HAS BEEN DISPENSED THE RESERVOIR WILL REFILL AND BE READY TO DISPENSE ANOTHER 2 ½ CUPS IN APPROXIMATELY 5 – 6 MINUTES 8 CARE AND MAINTENANCE Wash the inside of the reservoir with a warm water and baking soda solution. The solution should be about 2 tablespoons of baking soda to a quart of water. (Turn off the hot water function). The drip tray and water faucets should be cleaned with mild detergent and warm water. At regular intervals or once a month inspect the coils located across the back of the dispenser. Vacuum accumulation of dust or clean it with a hard brush. TAKING DISPENSER OUT OF SERVICE If the water dispenser will not be used for a long period of time, unplug the power cord from the wall outlet. Turn off the hot water. Drain the water through the faucets. Drain the water from the tanks by removing the plug from the back of the dispenser. WARNING—THE WATER COMING OUT OF THE BACK MAY BE SCOLDING HOT. Unit should NOT be transported on the units side. Place it upright if possible and cover it with a blanket. Cup Dispenser (OPTIONAL) The cup dispenser may be installed by using the mounting holes (covered with plastic caps) located near the top of the right side panel of the cooler. The cup dispenser comes equipped with a mounting bracket and screws and may be ordered by completing the enclosed order form provided with your instruction manual. 9 PROBLEMS WITH YOUR WATER DISPENSER? You can solve many common water dispenser problems easily, saving you the cost of a possible service call. Try the suggestions outlined below to see if you can solve the problem before calling the servicer. TROUBLESHOOTING GUIDE PROBLEM Water dispenser does not operate. Water cooler is not cold enough. Water dispenser hot water is not hot enough. Compressor turns on and off frequently. Vibrations. The water dispenser seems to make too much noise. Bottle feels warm. Water bottle is hot. Water Leaks O-Ring Seals (Filters) Water not Reading “000” POSSIBLE CAUSE Not plugged in. The circuit breaker tripped or a blown fuse. Check to be sure the cold switch on the back is ON. The water dispenser does not have the correct clearances. Cooling coils at the back of the unit need to be cleaned. Check to be sure the hot switch on the back is ON. Thermostat may be tripped. Contact Customer Service for additional instructions. The room temperature is hotter than normal. The water dispenser does not have the correct clearances. Check to assure that the water dispenser is level. The rattling noise may come from the flow of the refrigerant, which is normal. As each cycle ends, you may hear gurgling sounds caused by the flow of refrigerant in your water dispenser. Contraction and expansion of the inside walls may cause popping and crackling noises. The water dispenser is not level. The water system is overfilled. Dispense Cold water until air is released into the bottle. Water is boiling in the hot tank and bubbling up into the bottle. Press the hot dispenser button until water flows to remove air from the hot tank. • Over filling the ZeroWater Bottle Kit: - Only add enough water to fill the bottom chamber up to the “MAX” fill line. • Float Valve is sticking or improperly installed: - To reset the valve simply lift the bottles until the valve clears the water level and replace the bottles back into the water intake area. - If the valve is still leaking, check to ensure it is securely attached as instructed. O-Rings are not installed properly or missing. Check each of the 3 locations Adapter connection to top tank (1) Filter connection to adapter (2) •O-Rings are not installed properly or missing or leaking. Check each of the 3 locations Adapter connection to top tank (1) Filter connection to adapter (2) • Filters need replacing. • Dispenser needs cleaning. 10 SERVICE FOR YOUR WATER DISPENSER We are proud of our customer service organization and the network of professional service technicians that provide service on your Avanti appliances. With the purchase of your Avanti appliance, you can be confident that if you ever need additional information or assistance, the Avanti Products Customer Service Team will be here for you. Just call us toll-free. AVANTI PRODUCTS CUSTOMER SERVICES Product Information 800-323-5029 Part Orders 800-220-5570 In-Home Repair Service 800-220-5570 Whatever your questions are about our products, help is available. You may order parts and accessories that will be delivered directly to your home, by personal check, money order, Master Card, or Visa. An Avanti Products authorized service center will provide expert repair service, scheduled at a time that is convenient for you. Our trained servicers know your appliance inside and out. WIRING DIAGRAM 11 YOUR AVANTI PRODUCTS WARRANTY Staple your sales receipt here. Proof of original purchase date is needed to obtain service under warranty. WHAT IS COVERED – LIMITED ONE-YEAR WARRANTY Avanti Products warrants that the product is free from defects in materials and/or workmanship for a period of twelve (12) months from the date of purchase by the original owner. The foregoing timeline begins to run upon the date of purchase, and shall not be stalled, tolled, extended, or suspended for any reason whatsoever unless described in detail in the warranty document. For one year from the date of purchase by the original owner, Avanti products will, at its option, repair or replace any part of the product which proves to be defective in material or workmanship under normal use. Avanti Products will provide you with a reasonably similar product that is either new or factory refurbished. During this period Avanti Products will provide all parts and labor necessary to correct such defects free of charge, so long as the product has been installed and operated in accordance with the written instructions in this manual. In rental or commercial use, the warranty period is 90 days. All Avanti appliances of 4.2 cubic feet capacity or less must be brought/sent to the appliance service center for repair. LIMITED SECOND THROUGH FIFTH YEAR WARRANTY For the second through the fifth year from the date of original purchase, Avanti Products will provide a replacement compressor free of charge due to a failure. You are responsible for the service labor and freight charges. In rental or commercial use, the limited compressor warranty is one year and nine months. Costs involved to move the product to the service center and back to the user’s home, as maybe required, are the user’s responsibility. WARRANTY EXCLUSIONS / WHAT IS NOT COVERED: The warranty coverage described herein excludes all defects or damage that are not the direct fault of Avanti Products, including without limitation, one or more of the following: A failure to comply with any applicable state, local, city, or county electrical, plumbing and/or building codes, regulations, or laws, including failure to install the product in strict conformity with local fire and building codes and regulations. Any external, elemental and/or environmental forces and factors, including without limitation, rain, wind, sand, floods, fires, mud slides, freezing temperatures, excessive moisture or extended exposure to humidity, lightning, power surges, structural failures surrounding the appliance, and acts of God. Shipping and handling costs associated with the Content losses of food or other content due to replacement of the unit. spoilage. Repairs performed by unauthorized servicers. Incidental or consequential damages Service calls that are related to external problems, Parts and labor costs for the following will not be such as abuse, misuse, inadequate electrical considered as warranty: power, accidents, fire, floods, or any other acts of Light bulbs and/or plastic housing. God. Plastic cabinet liners. Failure of the product if it is used for other than it Punctured evaporator that voids the warranty on intended purpose. the complete sealed system. The warranty does not apply outside the Continental USA. Surcharges including but not limited to, any after hour, weekend, or holiday service calls, tolls, ferry trip charges, or mileage expense for service calls to remote areas. In no event shall Avanti Products have any liability or responsibility whatsoever for damage to surrounding property, including cabinetry, floors, ceilings, and other structures and/or objects around the product. Also excluded from this warranty are scratches, nicks, minor dents, and other cosmetic damages on external surfaces and exposed parts; Products on which the serial numbers have been altered, defaced or removed; service visits for customer education, or visits where there is nothing wrong with the product; correction of installation problems (you are solely responsible for any structure and setting for the product, including all electrical, plumbing and/or other connecting facilities, for proper foundation/flooring, and for any alterations including without limitation cabinetry, walls, floors, shelving etc., as well as the resetting of breakers or fuses. OUT OF WARRANTY PRODUCT Avanti Products is under no obligation, at law or otherwise, to provide you with any concessions, including repairs, pro-rates, or product replacement, once this warranty has expired. WARRANTY – REFRIGERATION - COMPRESSOR 12 INSTRUCCIONES EN ESPAÑOL ADVERTENCIA EL USO INCORRECTO DEL CABLE A TIERRA PUEDE OCASIONAR UN CHOQUE ELECTRICO. SI EL CORDON ESTA DAÑADO, REEMPLACELO EN UN CENTRO DE SERVICIOS AUTORIZADO POR AVANTI PRODUCTS. PASOS RECOMENDADOS PARA CAMBIAR EL BOTELLON ANTES DE ENCENDER SU DISPENSADOR DE AGUA Antes de encender su dispensador de agua por primera vez, llene el botellón de agua ZeroWater. Espere 15 minutos aproximadamente hasta que el agua vaya filtrando hacia el depósito inferior y lo llene hasta el nivel de agua indicado. DIRECCIONES BASICAS DE OPERACION: COLOQUE EL ENFRIADOR DE PIE POR UN PERIODO DE 2 HORAS ANTES DE ENCHUFAR LA UNIDAD A LA PARED. COLOQUE EL ENFRIADOR EN UN AREA BIEN VENTILADA Y DEJE UN ESPACIO DE UN POCO MAS DE 5 PULGADAS ENTRE LA UNIDAD Y LA PARED. ESCOJA UN LUGAR CON PISO NIVELADO. NO COLOQUE EL ENFRIADOR DONDE LA TEMPERATURA AMBIENTAL PUEDA BAJAR DE 32°F (0°C). REMUEVA LA ARANDELA QUE ESTABILICE EL BOTELLON ESTANDAR, ESTE ARTICULO NO ES NECESARIO CUANDO ESTE UTILIZANDO EL BOTELLON DE ZEROWATER. ANTES DE ENCHUFARLO AUNQUE EL ENFRIADOR SALE LIMPIO DE LA FABRICA, DEBE LIMPIAR Y ESTERILIZAR LOS CONDUCTOS DEL TANQUE Y LOS GRIFOS DE ACUERDO A LOS SIGUIENTES PASOS: LLENE EL TANQUE DE AGUA (HASTA EL TOPE) CON AGUA DE LA PILA. DEJE NIVELAR EL AGUA POR 15 MINUTOS. ENCHUFE LA UNIDAD A LA PARED. ENCIENDA LOS INTERRUPTORES DE AGUA CALIENTE Y FRIA LOCALIZADOS EN LA PARTE TRASERA DE LA UNIDAD. VACIE EL TANQUE COMPLETAMENTE ABRIENDO LA TAPA DE DRENAJE SITUADA ATRAS DEL GABINETE. CIERRELAS. AHORA SU DISPENSADOR DE AGUA ESTA LISTO PARA USAR. AVISO: ESTE GRIFO DE AGUA CALIENTE TIENE UN ADAPTADOR DE SEGURIDAD PARA NIÑOS. 13 PARA OBTENER AGUA CALIENTE: MUEVA EL BOTON DE SEGURIDAD HACIA LA DERECHA SIN SOLTARLO. MANTENGA AGARRADO ESE BOTON DE SEGURIDAD MIENTRAS QUE EMPUJE EL GRIFO HACIA ABAJO PARA DISPENSAR EL AGUA CALIENTE. CUANDO SUELTE EL GRIFO ASEGURESE DE RETORNARLO A LA POSICION ORIGINAL. NOTA: SU ENFRIADOR FUE LIMPIADO Y ESTIRILIZADO ANTES DE SALIR DE LA FABRICA. EN CASO QUE SIENTA ALGUN SABOR EN EL AGUA, ECHE UNA CUCHARADA DE BICARBONATO DE SODIO Y AÑADA AGUA DE LA PILA. LLENE EL TANQUE Y REPITA LA OPERACION INICIAL. MANTENIMIENTO ANTES DE EFECTUAR LA LIMPIEZA, DESENCHUFE EL ENFRIADOR. PARA LIMPIAR LAS PARTES DE PLASTICO SE REQUIERE JABON LIQUIDO Y AGUA TIBIA. NO USE LIMPIADORES ABRASIVOS EN LA SUPERFICIE SUPERIOR NI EN LA BANDEJA DE ESCURRIMIENTO. SI NO VA A USAR EL ENFRIADOR POR UN TIEMPO PROLONGADO DESENCHUFE LA UNIDAD. QUITE EL BOTELLON DE AGUA. COLOQUE LOS INTERRUPTORES (EN LA PARTE TRASERA) EN LA POSICION “OFF”. (APAGADO) DRENE EL AGUA ABRIENDO LAS LLAVES. DRENE LA APERTURA EN LA PARTE TRASERA QUITANDO EL TAPON (EN LA PARTE TRASERA). 14 Registration Information Thank you for purchasing this fine Avanti product. Please fill out this form and return it to the following address within 100 days from the date of purchase and receive these important benefits: Avanti Products, A Division of The Mackle Co., Inc. P.O.Box 520604 – Miami, Florida 33152 Protect your product: We will keep the model number and date of purchase of your new Avanti product on file to help you refer to this information in the event of an insurance claim such as fire or theft. Promote better products: We value your input. Your responses will help us develop products designed to best meet your future needs. -------------------------------------------------------(detach here)------------------------------------------------------------- Avanti Registration Card Name Model # Serial # Address Date Purchased Store / Dealer Name City State Area Code Phone Number Zip Did You Purchase An Additional Warranty Extended None Reason for Choosing This Avanti Product: Please indicate the most important factors That influenced your decision to purchase this product: Price Product Features Avanti Reputation Product Quality Salesperson Recommendation Other: ___________________ Friend / Relative Recommendation Warranty Other: ___________________ Comments: E-mail Address Occupation As your Primary Residence, Do You: Own Rent Your Age: under 18 18-25 26-30 31-35 36-50 over 50 Marital Status: Married Single Is This Product Used In The: Home Business How Did You Learn About This Product: Advertising In-Store Demo Personal Demo 15 WDTZ000 – 05092013 PRINTED IN CHINA 16 1 000 USE AND CARE MEASURE AND TASTE THE DIFFERENCE! OWNER’S MANUAL FILTER BOTTLE FOR STANDARD COOLERS 000 USE AND CARE “000” = FDA Standard for TDS in Purified Water* 000 MEASURE AND TASTE THE DIFFERENCE! ZeroWater 21 0 Tap 07 6 124 21 0 2 124 Conventional Filtered Sample readings may vary. Test for yourself. Bottled USE AND CARE Congratulations on your purchase of a new ZeroWater® Filter Bottle! Be prepared to taste the BEST tasting water like never before – we guarantee it! Your 5-Stage ZeroWater® filters are guaranteed to remove virtually all dissolved solids from your tap water. To find out more about Zero Technologies, please visit www.zerowater.com. Included in this brochure are simple instructions to help you assemble and maintain your ZeroWater® Filter Bottle. Now you’ll be able to start converting your own tap water into ZeroWater®! IMPORTANT! Should you experience any difficulties with water filters, before returning the product to the store, please call Customer Service toll free 24 hours a day, 7 days a week at 1-800-503-2939. Most issues can be resolved with a short phone call to our trained professionals. SAFETY PRECAUTIONS Do not use with water that is microbiologically unsafe or of unknown quality without proper disinfection before or after the system. Individuals requiring water of specific microbiological purity should consult their physician. Unless notified otherwise, municipal water is potable. The contaminants or other substances removed or reduced by this water treatment device are not necessarily in your water. PROPER INSTALLATION Please read all instructions, specifications, and precautions before installing and using your water filtration system. Don’t forget to register your ZeroWater® Filter Bottle. Details are included on the enclosed Registration Card. *Filtered potable tap water tested by an independent lab (not the FDA) to meet specifically the water quality requirements for using the label “purified”. Compared to water produced by leading gravity fed filters. www.avantiproducts.com 1 2 USE AND CARE IMPORTANT! Please read before first use. If you are using a water cooler with this product, please read this! Our ZeroWater® Filter Bottle fits most standard water coolers AFTER the splash guard is removed! If the splash guard is not removed, the float valve on the ZeroWater® Filter Bottle will not work and will cause your water to spill! DIRECTIONS FOR REMOVING THE SPLASH GUARD If you look into the reservoir you’ll see the splash guard with a spike, used to pierce a hole in the cap of bulk water containers. Grip the splash guard, turn it counter clockwise and pull up on it. This should remove the splash guard from the water cooler. If you have further questions about this process with your particular model, you may need to refer to your user’s manual. If you still need assistance, please call our Customer Service number. If you are using the Avanti Water Dispenser Model WDTZ000 Simply remove the ring as shown. (Only if provided on your model). If you are using any other standard water dispenser remove the entire splash guard assembly as shown. USE AND CARE RECYCLING Filtering your water through ZeroWater® filters not only improves the taste of your tap water, it also prevents you from throwing plastic water bottles into the trash and clogging up landfills. Zero Technologies, LLC is proud to be the only major company that recycles gravity filter cartridges from U.S. customers. If you wish to participate in this program, you will need to do a few simple steps to be sure the filters returned are processed accurately for recycling. Visit www.zerowater.com/recycling to download a form. Place your used filter into a sealable plastic bag and be sure it is sealed tightly. Place your used filters and your completed form in a well packed box and mail to the following address: Zero Technologies, LLC 4510 Adams Circle Unit F Bensalem, PA 19020 Make sure to clearly mark your package “ATTN: RECYCLING PROGRAM”. When the filter reaches us, the plastic as well as the materials inside it will be separated and sent to various facilities for reuse. We are asking customers to pay for shipping their exhausted filters to us. Additional information on this program, including discounts on future purchases, can be found at www.zerowater.com/recycling. If you have any questions about this program, please call the ZeroWater® customer service hotline 24 hours a day: 1-800-503-2939 Patents: 5,635,063; 6,572,769; 7,276,161; 7,413,663; Additional patents pending. 3 4 USE AND CARE LID UPPER CHAMBER LOWER CHAMBER DIVIDER RIM FILTER ADAPTER (NOT SHOWN) MAXIMUM WATER LEVEL FILTER CARTRIDGE LOWER CHAMBER FLOAT VALVE WITH SOFT WASHER USE AND CARE ZeroWater® Filter Bottle Use and Care Instructions Please read before first use. INSTRUCTIONS BEFORE INSTALLING CARTRIDGE AND FIRST USE 1. Clean all plastic components and filter cartridges by washing and rinsing thoroughly with warm water only. Rinse the Filter Bottle thoroughly when washing with soap. 2. Note: the Filter Bottle components, filter cartridges and TDS meter are not dishwasher safe. 3. Discard all plastic bags. This may be a suffocation hazard to young children. ASSEMBLY 1. Take the lower chamber and place the lower chamber divider rim firmly on the top. The rippled part of the white rim should be overlapping the lower chamber. If assembled upside down, there will be leakage. Be sure it fits tightly on the lower chamber (see ZeroWater® Filter Bottle components on page 4). A 2. Align the nut (included) into the recessed area at the inner bottom of the lower chamber and screw the float valve tightly through the hole on bottom of lower chamber (inset A). Do not prop the Filter Bottle on the float valve once assembled, as it is fragile and will break. 3. Place the lower chamber on top of your cooler with the float valve fitting inside the cooler’s reservoir (see Using Your ZeroWater® Filter Bottle with a Standard Water Cooler on page 6). 4. Install filter cartridges now, using steps 1 through 3 from instructions on next page. 5. Place the upper chamber on top of the lower chamber. Be sure that the lower chamber divider ring is tightly affixed around the lower chamber (see ZeroWater® Filter Bottle components on page 4). 6. Place the lid on top of the upper chamber. 5 6 USE AND CARE INSTALLATION OF FILTER CARTRIDGES 1. Install the filter adapter to the upper chamber by turning clockwise until you feel a tight and secure fit. Ensure the “O-Ring” is in place and not bulging outward. 2. Remove filter cartridges from packaging. 3. Tightly screw cartridges into the holes on the bottom side of the adapter to obtain a complete seal with the O-ring. Do not over-tighten as the O-ring will become warped and not seal completely allowing unfiltered water to leak to the lower chamber and your water will not read “000”(see ZeroWater® Filter Bottle components on page 4). 4. Place upper chamber with attached filter cartridges back onto the lower chamber divider rim of the lower chamber (see ZeroWater® Filter Bottle components on page 4). If new filters are exposed to cold temperatures for prolonged periods, keep filters at room temperature for several hours before passing water through the first time. USING YOUR FILTER BOTTLE WITH A STANDARD WATER COOLER (sold separately) 1. Unplug your cooler. 2. Drain all water from the cooler using the spigots and the drain plug in the back of the cooler. Using a cooler without water in it, when plugged in, can cause it to smoke and break. Make sure you secure the drain plug when you are finished draining the cooler. 3. Be sure you have removed the splashguard from the cooler reservoir. Refer to page (2) for directions. 4. Clean the reservoir and spigots by mixing 1 tablespoon of baking soda into 1 gallon of hot water and pouring the solution directly into the cooler reservoir. 5. Let solution sit for about 30 minutes and then drain through spigots and drain plug. 6. Flush the cooler with three gallons of plain hot water using same method. Secure the drain plug. The total capacity of the bottom chamber is three gallons. 7. Do not replace the splashguard or spike fixture. 8. Now your cooler is ready for your assembled ZeroWater® Filter Bottle. Add water before plugging cooler back into electrical outlet (See step 6 under section “Filling the ZeroWater® Filter Bottle with Tap Water on page 7).” USE AND CARE FILLING THE FILTER BOTTLE WITH TAP WATER 1. Remove lid. 2. Slowly fill the upper reservoir with cold tap water. Be careful not to dump water too quickly into the upper chamber when the lower chamber is empty because it may tip and spill. 3. Allow water to pass from the upper chamber through the filters to the lower chamber. Water will be ready to drink in several minutes. 4. Test the water using the TDS meter to confirm a “000” reading. 5. If it doesn’t read “000”, flush the water out, check all connections and seals. 6. Pour water through. 7. Do not over fill. The first time you fill your Filter Bottle it will take extra water to fill the cooler reservoir. When water in the lower chamber reaches the line marked “MAXIMUM WATER LEVEL”, do not put any more water in the upper chamber, as it may leak. The upper chamber is not designed to be a long term reservoir. Safety Precautions: Do not use with water that is microbiologically unsafe or of unknown quality without proper disinfection before or after the system. Individuals requiring water of specific microbiological purity should consult their physician. Unless notified otherwise, municipal water is potable. 7 Patented Ion Exchange Filter Most conventional carbon filters only filter certain substances from your water. ZeroWater® 5-Stage Filters remove 99.6% of total dissolved solids based on an EPA certified lab test, while conventional 2-Stage Filter remove less than 50%. 1 2 3 STAGE 1 Activated carbon infused micron cloth STAGE 2 Multi-layer system using activated carbon and oxidation reduction alloy STAGE 3 Distributor that maximizes contact time 4 5 * Filtered potable tap water tested by an independent lab (not the FDA) to meet specifically the water quality requirements for using the label “purified”. Compared to water produced by leading gravity fed filters. STAGE 4 Comprehensive ION EXCHANGE array STAGE 5 Non-woven membrane to remove fine particles It is essential to change the filters with a reading of “006” on the included TDS meter in order for the product to continue to perform as represented. The longevity of the filter may vary based on local water conditions. Under laboratory protocols, a single filter was rated for 22.5 gallons in the certification process. The contaminants or other substances removed or reduced by this water treatment device are not necessarily in all users’ water. USE AND CARE Filter Cartridges FILTER CARTRIDGE LIFE How often the cartridge needs to be replaced is determined by how much water you put through the system and how hard the cartridge has to work to clean the water you put through it. The more dissolved solids in your water (or the higher your TDS reading), the shorter the cartridge life. It is essential to change the filters with a reading of “006” on the included TDS meter in order for the product to continue to perform as represented. The longevity of the filter may vary based on local water conditions. Under laboratory protocols, a single filter was rated for 22.5 gallons in the certification process. Store filters at or near room temperature. REPLACEMENT FILTER CARTRIDGES Replacement filter cartridges can be purchased in packs of 2, 4 or 8 from your local retailer. For replacement parts and pricing, call Customer Service toll free 24 hours a day, 7 days a week at 1-800-503-2939. TROUBLE SHOOTING My ZeroWater Filter Bottle is brand new but the water doesn’t read “000”? First, check the reading directly in the lower chamber. If the water in the lower chamber does NOT read “000”, either the lower chamber is not clean, or the filters are not functioning properly. Try cleaning the lower chamber and check to see that filters are installed properly. If the water in the lower chamber DOES read “000”, your Filter Bottle is functioning properly and the problem is an unclean cooler reservoir or spigot. Try cleaning the cooler reservoir and spigot again. ® The TDS Meter does not turn on. Remember that you should not dip the meter too far into the water as it will short circuit. If you have used the meter according to instructions, try replacing the batteries. My filter emits a strong odor. Test the water that has run through the filter. Most likely it will read higher than “006”, which indicates it’s time to replace your filter. The lower chamber fills slowly. It takes time to give you high quality water. We regulate the flow to ensure the water has enough time to pass through each filtering stage and be cleaned thoroughly. My cooler is leaking from the lower chamber divider rim. Be sure the lower chamber divider rim is placed with the correct side up and is seated tightly to ensure the best seal possible. Do not over fill upper chamber beyond the capacity of the lower chamber. The upper chamber is not designed to be a long-term reservoir. Questions or Problems? Please call our Customer Service Hotline 1-800-220-5570 9 10 USE AND CARE Operating the TDS Meter BATTERY COMPARTMENT ALWAYS CHANGE FILTER CARTRIDGE WHEN TDS METER READS “006” 1. Remove the cap from the end of the TDS Meter. 2. Push the “ON/OFF” button. The meter should read “000”. ON /OF F ON/OFF MAXIMUM IMMERSION LEVEL 3. Place the end of the meter in one inch of water. Do not fully submerge the TDS Meter; this may short circuit the battery. 4. Wait a few seconds for the reading to stabilize. You can read the number when you remove the meter from the water. 5. Do not use in hot water. CHANGING THE TDS METER BATTERIES (two 1.5v button cell) 1. Use a fingernail to remove the cap at the end that says “TDS”. 2. Replace the old batteries with two new batteries (Battery Type LR44). 3. Replace the cap. UNDERSTANDING THE TDS METER The TDS meter helps you put a number on what your taste buds are already telling you about what’s in your water. It measures for the things in water that can give it a taste. The higher the reading on the water, the more substances dissolved in your water. For a more scientific explanation, it is showing you the total number of detectable dissolved solids in water. With the push of a button, the electrodes in the bottom of the tester measure the amount of ions in the water and convert that amount to a number that displays on the screen. The number represents the amounts of detectable dissolved solids in parts per million that exist in your water sample. The meter is primarily used to indicate ZeroWater® filter replacement at 006. It may also be used as a simple method to compare water quality by displaying the Total of the Dissolved Solids (TDS) in parts per million only. The meter does not specify what substances comprise the Total. The meter should not be used to assess the safety or purity of water, which should only be undertaken by a qualified laboratory. WARRANTY/REGISTRATION REPLACEMENT FILTER CARTRIDGE WARRANTY Though replacement filter cartridges do have a 30 day warranty for manufacturing defects, there is no money back guarantee otherwise. To place a claim for a defective cartridge, you must first speak to a customer service representative who will help you trouble shoot any problems. If a problem is found that may be due to a manufacturing defect, they will then give you instructions on how to send back the cartridges to be tested by our laboratory. Depending on whether or not the lab determines the cartridges to be defective, they will either be replaced or returned to you. Please remember that we do not and cannot warrant the life of the filter cartridges since there are many variables that affect the life of each cartridge, including weather, your local treatment facility, consumption rate, etc. We can only provide estimates based on the experiences of other customers. A shortened cartridge life alone does not necessarily mean that you have a defective cartridge. 11 000 USE AND CARE “000” = Estándar del FDA (Food and Drug Administration) para TDS (Total de Sólidos Disueltos) en Agua Purificada* 000 MIDA Y PRUEBE LA DIFERENCIA! ZeroWater 21 0 07 6 124 21 0 12 124 Tap Conventional Filtered Bottled * Los resultados pueden variar. Pruebe ud. mismo USO Y CUIDADO 13 USE AND CARE ¡Felicitaciones por su compra de un nuevo Botellón con Filtro Zerowater®! Prepárese para probar el agua con el mejor sabor, como nunca antes lo ha hecho se lo garantizamos! - Su sistema de filtro ZeroWater® en 5 etapas está garantizado para remover virtualmente todos los sólidos disueltos en su agua de grifo. Para averiguar más sobre Zero Technologies, por favor visite www.zerowater.com Incluídas con este folleto encontrará unas simples instrucciones para ayudarle a ensamblar y mantener su Botellón con Filtro ZeroWater®. ¡Ahora ud. podrá convertir su propia agua de grifo en agua ZeroWater®! ¡IMPORTANTE! Si encontrara cualquier problema o dificultad con sus filtros de agua, antes de devolver el producto a la tienda, por favor llame a nuestra línea gratuíta de Servicio al Cliente, 24 horas al día y 7 días de la semana, al número 1-800-503-2939. La mayoría de los problemas se pueden corregir a través de una corta llamada telefónica a nuestros profesionales capacitados. PRECAUCIONES DE SEGURIDAD Use sólo con agua potable. No use con agua contaminada, microbiológicamente peligrosa o de procedencia incierta; en ese caso debe desinfectar la unidad antes y después de usar. Individuos que requieran agua purificada con niveles específicos de pureza deberán consultar con su doctor. A no ser que su Municipalidad indique lo contrario, el agua de grifo es potable*. Los contaminantes u otras substancias removidas del agua o reducidas a través de este aparato de tratamiento de agua, no necesariamente se encuentran en el agua de su localidad. INSTALACION CORRECTA Antes de instalar y usar su Sistema de Filtración de Agua, por favor lea todas las instrucciones, especificaciones y precauciones en este manual. No se olvide de registrar su Botellón con Filtro ZeroWater®. Puede encontrar los detalles en la Tarjeta de Registro que viene incluída. *Resultados basados en agua de grifo filtrada y comprobados por un laboratorio independiente (no el FDA - Food and Drug Administration) para verificar que se cumplen específicamente los requisitos de calidad del agua necesarios para ser clasificada “Purificada”. Resultados comparados contra filtros que funcionan con gravedad. www.avantiproducts.com 13 14 USE AND CARE USO Y CUIDADO ¡IMPORTANTE! Por favor lea antes del primer uso. ¡ Si ud. está usando un Dispensador de Agua con este producto, por favor lea esta parte! Nuestro Botellón con Filtro ZeroWater® se puede usar con la mayoría de Dispensadores de Agua estándar. Solamente asegúrese de PRIMERO retirar el protector contra salpicaduras (Splash Guard) del dispensador de agua y DESPUES instale el Botellón rellenable. De no retirar el protector contra salpicaduras, entonces la válvula de flote del Botellón con Filtro ZeroWater® no trabajará correctamente y además causará que el agua de la botella se derrame fuera del dispensador. DIRECCIONES PARA REMOVER EL PROTECTOR CONTRA SALPICADURAS Si observa el depósito de agua del Dispensador, notará que el protector contra salpicaduras tiene una púa, la cual se usa para perforar un pequeño agujero en los botellones grandes de agua. Agarre el protector contra salpicaduras, gírelo en sentido anti-horario y hale firmemente. Esto permitirá que retire el protector contra salpicaduras del dispensador de agua. Si tuviera preguntas adicionales sobre este proceso, por favor lea el manual de instrucciones de su dispensador de agua. Si después de leerlo necesitara más información o ayuda, por favor llame a nuestro Centro de Servicio al Cliente. Si Ud. está utilizando el dispensador de agua de Avanti Model WDTZ000, simplemente remueva la arandela plástica mostrada en la foto ala izquierda Si Ud. está utilizando cualquier dispensador de agaua estandar remueva el protector contra salpicaduras mostrada en la foto a la derecha. 14 USO Y CUIDADO 15 USE AND CARE RECICLANDO Al filtrar el agua con los filtros de ZeroWater® no solamente mejora el sabor del agua del grifo, sino que también evita el desperdicio que representa tirar las botellas de plástico a la basura y que luego llenan el vertedero de basura municipal. Zero Technologies, LLC tiene el orgullo de ser la compañía más grande que recicla los cartuchos de los filtros de gravedad de los usuarios en EEUU. Si ud. desea participar en este programa, solamente deberá seguir unos simples pasos para asegurar que los filtros devueltos sean procesados correctamente para reciclaje. Visite www.zerowater.com/recycling para obtener un formulario. Coloque el filtro usado dentro de una bolsa plástica con cierre y asegúrese de cerrarla completa y herméticamente. Coloque los filtros usados y el formulario en una caja bien empacada y luego envíelos a la siguiente dirección: Zero Technologies, LLC 4510 Adams Circle Unit F Bensalem, PA 19020 Asegúrese de marcar su paquete de esta manera: “ATTN: RECYCLING PROGRAM”. Cuando recibamos el filtro, tanto el plástico como los materiales incluídos serán separados y enviados a diferentes instalaciones. Pedimos a nuestros clientes que por favor paguen el envío de sus filtros usados. Para obtener información adicional sobre este programa, incluyendo descuentos para compras futuras, por favor visite www.zerowater.com/recycling . Si tuviera preguntas adicionales sobre este programa, por favor llame a la Línea Directa de Servicio al Cliente de ZeroWater® las 24 horas del día: 1-800-503-2939 Patentes: 5,635,063; 6,572,769; 7,276,161; 7,413,663; Patentes adicionales pendientes. 15 16 USE AND CARE TAPA CAMARA SUPERIOR BORDE DIVISOR DE LA CAMARA INFERIOR ADAPTADOR DE LOS FILTROS NIVEL MAXIMO DE AGUA CARTUCHO DEL FILTRO CAMARA INFERIOR VALVULA DE FLOTE CON ARANDELA SUAVE USO Y CUIDADO USE AND CARE 17 Botellón con Filtro ZeroWater® Instrucciones de Uso y Cuidado Por favor lea antes del primer uso. INSTRUCCIONES DE USO ANTES DE INSTALAR EL FILTRO Y PRIMER USO 1. Limpie todos los componentes plásticos y cartuchos del filtro, lavándolos y enjuagándolos completamente con agua tibia solamente. Enjuague el botellón completamente si lo lava con jabón. 2. Nota: los componentes del botellón, filtros, cartuchos del filtro y medidor TDS no se deben lavar en máquina lava-platos. 3. Deshágase de todas las bolsas plásticas. Estas representan un peligro de asfixia para niños pequeños. ENSAMBLAJE A 1. Tome la Cámara inferior; encima de ella coloque firmemente el Borde Divisor. La parte ondulada del borde blanco debe encajar y quedar sobre la Cámara inferior. Si lo ensambla de cabeza, entonces causará que el agua de la botella se derrame hacia afuera. Por tanto, asegúrese que el borde encaje fuerte y correctamente con la Cámara inferior (vea los componentes del Botellón con Filtro ZeroWater® en la página 16). 2. Alinea la tuerca con la area adentro de la Cámara interior y enrosque firmemente la Válvula de Flote en el agujero al fondo de la Cámara Inferior (recuadro A). No fuerce el Botellón y la Válvula de Flote, ya que es frágil y se puede dañar. 3. Coloque la Cámara Inferior sobre el Dispensador de Agua, asegurándose que la Válvula de Flote quede dentro del depósito de agua (vea Usando su Botellón con Filtro ZeroWater® con Dispensador de Agua Estándar, en la página 18). 4. Ahora instale los cartuchos del filtro, siguiendo los pasos 1 a 3 de las instrucciones en la página siguiente. 5. Coloque la Cámara Superior encima de la Cámara Inferior. Asegúrese que el Borde Divisor esté firmemente asegurado en la Cámara Inferior (vea los componentes del Botellón con Filtro ZeroWater® en la página 16 ). 6. Coloque la tapa encima del botellón. 17 18 USE AND CARE USO Y CUIDADO INSTALACION DE LOS CARTUCHOS DEL FILTRO 1. Enrosque firmemente el adaptador de los cartuchos en el agujero en el fondo de la Cámara Superior. 2. Retire del paquete los cartuchos del filtro. 3. Enrosque firmemente los cartuchos en el agujero en el fondo del adaptador para que se selle completamente con el “sello u O-RING”, de otra manera el agua no podrá leer “000”. 4. Coloque la Cámara Superior con los cartuchos del filtro ya incorporados y encájela con la Cámera Inferior y el Borde Divisor (Vea Botellón con Filtro ZeroWater® en la página 16). Si los filtros nuevos están expuestos a temperaturas frías por un período de tiempo prolongado, antes de instalarlos deja que los filtros lleguen a temperatura ambiente unas cuantas horas antes de pasar el agua por primera vez. USANDO SU BOTELLON DE AGUA CON UN DISPENSADOR DE AGUA (VENDIDO POR SEPARADO). 1. Desenchufe el Dispensador de Agua 2. Drene toda el agua que queda en el Dispensador usando sus grifos y sacando el remanente destapando el desagüe. No use el dispensador cuando no tiene agua; si está enchufado y lo usa, puede causar humo y que se malogre. Asegúrese de volver a taponear el desagüe cuando termine de drenar el dispensador. 3. Asegúrese de retirar el protector contra salpicaduras del depósito de agua del dispensador. Favor revise la página 14 para las instrucciones. 4. Limpie el depósito de agua y los grifos con una solución de 1 Cucharada de polvo de hornear mezclado en 1 galón de agua caliente. Vierta la mezcla directamente en el depósito de agua del dispensador. 5. Espere unos 30 minutos para que la solución actúe y luego drene el dispensador usando sus grifos y sacando el remanente de agua destapando el desagüe. 6. Vierta 3 galones de agua caliente usando el mismo método, para enjuagar el depósito y dispensador. Vuelva a taponear el desagüe. La capacidad de la Cámara Inferior es de 3 galones. 7. No vuelva colocar el protector contra salpicaduras ni la púa. 8. Ahora su Dispensador está listo para su Botellón con Filtro ZeroWater®. Añada el agua antes de volver a enchufar el dispensador a la toma eléctrica (vea el paso # 6 Llenando su Botellón con Filtro ZeroWater® con agua de grifo en la página 19). 18 USO Y CUIDADO 19 USE AND CARE LLENANDO SU BOTELLON CON FILTRO ZEROWATER® CON AGUA DE GRIFO. 1. Retire la tapa. 2. Lentamente llene la Cámara Superior con agua de grifo fría. Cuando la Cámara Inferior esté vacía, tenga cuidado de no verter muy rápido el agua en la Cámara Superior porque esta podría perder el equilibrio y caerse, derramando toda el agua. 3. Espere hasta que el agua pase de la Cámara Superior a través de los filtros y llegue hasta a la Cámara Inferior. Esto puede tomar varios minutos. 4. Use el Medidor TDS y verifique que la medida del agua es “000”. 5. Si el medidor no indica “000”, entonces drene toda el agua de ambas Cámaras y vuelve a llenarlas con más agua. 6. No llene demasiado. La primera vez que llene su botellón va a necesitar más agua, ya que también va a llenar el depósito de agua del dispensador. Cuando el agua en la Cámara Inferior llegue a la linea marcada “MAXIMUM WATER LEVEL”, ya no vierta más agua en la Cámara Superior, porque podría rebalsarse y derramar toda el agua. La Cámara Superior no está diseñada para usarse como depósito ni tener agua por mucho tiempo. PRECAUCIONES DE SEGURIDAD: No use con agua contaminada, microbiológicamente peligrosa o de procedencia incierta; en ese caso debe desinfectar la unidad antes y después de usar. Individuos que requieran agua purificada con niveles específicos de pureza deberán consultar con su doctor. A no ser que su Municipalidad indique lo contrario, el agua de grifo es potable. 19 Filtro de Intercambio de Iones Patentado La mayoría de filtros de carbón convencionales sólo filtran algunas substancias del agua. El sistema ZeroWater® de 5 etapas remue 99.6% de los sólidos disueltos en el agua; mientras que los filtros convencionales de 2 Etapas sólo remueven menos de 50%, según resultados basados en exámenes elaborados por un laboratorio certificado por el EPA. 1 ETAPA 1 Filtro micrón infundido con carbón activado 2 ETAPA 2 Sistema de múltiples capas que usa el carbón activado y la aleación de reducción de óxido 3 ETAPA 3 Distribuidor que maximiza el tiempo de contacto ETAPA 4 Serie de intercambio de iones (ION Exchange) 4 5 *Resultados basados en agua de grifo filtrada y comprobados por un laboratorio independiente (no el FDA - Food and Drug Administration) para verificar que se cumplen específicamente los requisitos de calidad del agua necesarios para ser clasificada “Purificada”. Resultados comparados contra filtros que funcionan con gravedad. ETAPA 5 Membrana No-tejida que filtra las partículas pequeñas Cuando la lectura del medidor TDS que viene incluído indique “006”, es esencial que ud. cambie los filtros para asegurar que el producto funcione de manera óptima. La longevidad del filtro puede variar dependiendo de las condiciones del agua en su localidad. Durante el Proceso de Certificación los resultados del estudio de protocolo en laboratorios, indican que un solo filtro logra filtrar 22.5 galones. Los contaminantes u otras substancias removidas del agua o reducidas a través de este aparato de tratamiento de agua, no necesariamente se encuentran en el agua de su localidad. USO Y CUIDADO 21 USE AND CARE Cartuchos del Filtro TIEMPO DE VIDA DE LOS CARTUCHOS DEL FILTRO La frequencia con que necesitará cambiar los cartuchos del filtro depende de cuanta agua filtre en este sistema y que tantas impurezas contenga el agua (que tanto deber funcionar el filtro). Mientras mas sólidos disueltos existan en el agua que use (o mientras más alta sea la medida del TDS), más tendrá que trabajar el filtro y por lo tanto menos durará. Cuando la lectura del Medidor TDS que viene incluído indique “006”, es esencial que ud. cambie los filtros para asegurar que el producto funcione de manera óptima. La longevidad del filtro puede variar dependiendo de las condiciones del agua en su localidad. Durante el Proceso de Certificación, los resultados del estudio de protocolo en laboratorios, indican que un solo filtro logra filtrar 22.5 galones. Almacene los filtros nuevos a temperatura ambiente. REEMPLAZANDO LOS CARTUCHOS DE FILTRO Para reemplazar los cartuchos del filtro usados, ud. puede comprar unos nuevos en paquetes de 2, 4 u 8 en las tiendas. Para comprar y verificar precios de piezas y partes por favor llame a la Línea Directa de Servicio al Cliente las 24 horas del día, 7 días de la semana al 1-800-503-2939. 21 22 USO Y CUIDADO USE AND CARE GUIA DE RESOLUCION DE PROBLEMAS Mi Botellón con Filtro ZeroWater® es nuevo pero el medidor no lee “000”. Primero verifique la medida directamente en la Cámara Inferior. Si el medidor no indica “000” es porque la Cámara Inferior no está completamente limpia o los filtros no están funcionando correctamente. Trate de limpiar la Cámara Inferior y verifique que los filtros esten instalados correctamente. Si cuando verifique la medida directamente en la Cámara Inferior, el medidor indica “000”, entonces los filtros están funcionando bien y el problema se debe a que el depósito del dispensador o los grifos no están bien limpios. Liempie el dispensador y los grifos otra vez. El Medidor TDS no enciende. Recuerde no debe sumergir el medidor en el agua, de lo contrario creará un corto circuito. Si usó el medidor de acuerdo a las instrucciones, trate de remplazar las baterías. Mi filtro tiene un olor muy fuerte. Mida el agua que ya paso a través del filtro. Lo mas probable es que el medidor indique mas de “006”, lo cual quiere decir que es momento de remplazar su filtro. La Cámara Inferior se llena muy lentamente. Filtrar el agua hast llegar a la pureza óptima toma cierto tiempo. El flujo del agua está regulado de manera que espere el tiempo necesario en cada etapa del sistema de filtraje y pueda ser limpiada completamente. Mi dispensador está goteando por el Borde Divisor de la Cámara Inferior. Asegúrese que el Borde Divisor esté colocado con el lado correcto hacia arriba y que esté firmemente encajado en la Cámara Inferior, para verficar que está sellado. No sobrellene la Cámara Superior con más agua de la que cabe en la Cámara Inferior. La Cámara Superior no está diseñada para usarse como depósito ni tener agua por mucho tiempo. Preguntas o Problemas? No devuelva la unidad a la tienda. Nuestro cordial Departamento de Servicio al Cliente está a su disposición para ayudarle con cualquier pregunta o inquietud que pudiera tener. Por favor llame a la Línea Directa de Servicio al Cliente al 1- 800 - 220 - 5570 22 USO Y CUIDADO USE AND CARE 23 USANDO EL MEDIDOR TDS Compartimiento para batería SIEMPRE CAMBIE EL CARTUCHO DEL FILTRO CUANDO EL MEDIDOR TDS LEA “006”. 1. Retire la tapa de la punta del Medidor TDS. 2. Presione el botón ON/OFF. El medidor debe leer “000”. ON /OF F ON/OFF Encendido / Apagado 3. Sumerja la punta del medidor en una pulgada de agua (aprox. 2.5 cm). No sumerja el Medidor TDS completamente; de lo contrario creará un corto circuito con la batería. Nivel Máximo de Inmersión 4. Espere unos cuantos segundos hasta que la lectura se estabilice. Ud. podrá leer la medida después de sacar el medidor del agua. 5. No use el medidor en agua caliente. CAMBIANDO LAS BATERIAS DEL MEDIDOR TDS (Dos baterías de botón de 1.5V) 1. Con la uña u objeto pequeño levante y retire la tapa de la punta que indica “TDS”. 2. Retire las baterías viejas y coloque las nuevas (Batería tipo botón # LR44). 3. Coloque la tapa. ENTIENDO EL MEDIDOR El Medidor TDS le ayuda a cuantificar lo que sus papilas gustativas y le está diciendo sobre lo que se encuentra en el agua que está consumiendo. El mide substancias que se encuentran en el agua y que le cambian el sabor. Mientras más alta sea la medida indicada, mayor será la cantidad de substancias disueltas en el agua. Para una explicación más científica, el medidor le indica el número total de sólidos disueltos detectables en el agua. Con sólo presionar un botón, los electrodos en la punta del medidor cuantifican la cantidad de iones en el agua y convierten esa cantidad en el número que aparece en la pantalla. Ese número representa la cantidad total en “partes por millón” de sólidos disueltos detectables que están presentes en el agua que probó. El medidor se usa principalmente para indicar que es momento de cambiar el filtro al llegar a la medida “006”. También se puede usar como un método simple para comparar la calidad del agua al indicar el Total de Sólidos Disueltos (TDS) en “partes por millón” solamente. El medidor no especifica cuales son las substancias presentes.en el agua. 23 24 USE AND CARE GARANTIA GARANTIA DEL CARTUCHO DEL FILTRO DE REEMPLAZO Aunque los cartuchos del filtro de reemplazo tienen 30 días de garantía por defectos de fabricación, no hay garantía de devolución de dinero. Para poner un reclamo por un cartucho defectuoso, usted deberá hablar primero con un representante de Servicio al Cliente, quien le ayudará a identificar y resolver cualquier posible problema. En caso de encontrar un problema causado por un defecto de fabricación, ellos le darán instrucciones sobre como devolver el cartucho para que sea evaluado en nuestro laboratorio. Dependiendo de si el laboratorio determina que el cartucho está defectuoso o no, ellos lo reemplazarán o se lo enviarán de vuelta. Por favor recuerde que no podemos garantizar la vida del cartucho del filtro ya que existen muchas variantes que afectan la vida de cada cartucho, incluído el clima, la planta de tratamiento de agua en su localidad, su nivel de consumo de agua, etc. Solamente podemos darle estimados basados en experiencia previa de otros clientes. Si la vida de un cartucho no es muy larga, eso no necesariamente quiere decir que tenga un cartucho defectuoso. 24 USE AND CARE 25 www.avantiproducts.com • 1-855-634-1282