Download American DJ XDM-221 Music Mixer User Manual
Transcript
User Instructions
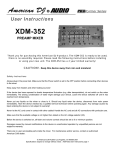
XDM-221
PREAMP MIXER
Thank you for purchasing this American DJ® product. The XDM-221 is ready to be used,
there is no assembly required. Please read the following instructions before installing
or using your new unit. The XDM-221 has a 2 year limited warranty!
C A U T I O N ! - Keep this device away from rain and moisture!
Safety Instructions
Always plug in the power last. Make sure that the Power switch is set to the OFF position before connecting other devices
to the mixer.
Keep away from heaters and other heating sources!
If the device has been exposed to drastic temperature fluctuation (e.g. after transportation), do not switch on the mixer
immediately. The arising condensation of water might damage your device. Leave the device switched off until it has
reached room temperature.
Never put any liquids on the mixer or close to it. Should any liquid enter the device, disconnect from main power
immediately. Have the device be checked by a qualified service technician before operating again. Any damage caused by
liquid entering the device is not subject to warranty!
Never let the AC cord come in contact with other cables! Handle the AC cord and all AC connections with particular care.
Make sure that the available voltage is not higher than stated on the AC voltage selector (22).
Before the device is switched on, all fader and volume controls should be set to 0 or minimum position.
Damages caused by manual modifications to the device or unauthorized operation by unqualified persons are not
subject to warranty.
There are no user serviceable parts inside the mixer. For maintenance and/or service, contact an authorized
American DJ® dealer.
© American DJ® AUDIO Los Angeles, CA 90058 USA
Specifications subject to change without notice. XDM-221 User Instructions page 1
Operating Determinations
When installing this mixer, please make sure that the device is not exposed to extreme heat, moisture or dust! There should
not be any cables lying around. Doing so endangers you as well as others.
Do not operate the mixer in extremely hot (more than 30˚C / 100˚F) or extremely cold (less than 5˚C / 40˚F) surroundings.
Keep away from direct sunlight and heaters.
Operate the mixer only after becoming familiar with its functions. Do not permit operation by persons not qualified for
operating the mixer. Most damages are the result of unprofessional operation!
Never use spray cleaners to clean the faders!
Never use solvents or abrasive detergents to clean the mixer! It is recommended that you use a soft damp cloth.
Please consider that unauthorized modifications on the device are forbidden due to safety reasons!
Connections (Refer to diagrams on pages 3 & 4)
• Make sure that the power switch (1) is set to OFF. Before connecting other devices to the mixer, all units have to be
switched off and the Master Control (6) set to min.
• Make sure that the available voltage is not higher than stated on the voltage selector (22) before connecting to power.
• In order to obtain the highest sound quality, only use high quality American DJ®, Ameri-Cable™ cables for connecting
devices. Make sure that the cables are properly fixed.
• Connect your amplifier to the OUT AMP jacks (19). Make sure that the channels are set properly.
• For recording, connect your tape recorder or cassette deck to the OUTPUT REC jacks (18). The REC OUT level will not
be influenced by the Master Control (6).
• Connect your microphone to the Microphone Input (23) on the rear panel. (See diagram on page 4).
• Connect your record player(s) to the PHONO 1 jacks (16) and the PHONO 2 jacks (17) on the rear panel. You can only
control the record player signal after switching the PHONO/LINE switches (2) to phono. The signal is then controlled via
the CH-1 and CH-2 faders (4).
• Connect your tape recorder, tuner, sound effects, CD player, cassette deck or any other line signals to the AMP OUT jacks
(16 & 17) on the rear panel. You can only control the line signals after switching the PHONO/LINE switches (2) to LINE.
The signal is then controlled via the CH-1 and CH-2 faders (4).
© American DJ® AUDIO Los Angeles, CA 90058 USA
Specifications subject to change without notice. XDM-221 User Instructions page 2
Functions
12
2
3
2
1
15
6
13
14
7
4
8
10
9
11
5
(1) POWER SWITCH
(2) LINE/PHONO SWITCH - Used to select the input (LINE or PHONO) to be sent to channel 1 or 2. Can also be used for
TRANSFORMER SCRATCHING.
(3) BASS/TREBLE CONTROL - Used to increase or decrease the LOW’s and HIs of the input signal.
(4) CHANNEL FADER CHANNEL 1 / CHANNEL 2 - Used to adjust the input level of each channel.
(5) CROSSFADER - Mixes the signals of channel 1 and channel 2. When the crossfader is set in the center position, both
channels can be heard at once.
(6) BASS/TREBLE CONTROL - Used to increase or decrease the LOWs and HIs of the input signal.
(7) CUE LEVEL CONTROL - Adjusts the headphone output level.
(8) CUE MIXING CONTROL - Selects the channel for monitoring. The monitor signal comes from the Prefader. This means
it will not be affected by the channel faders, so that you can monitor an input signal without the sound coming from the
AMP output. Connect your headphones to the PHONES JACK (10). Turn the CUE MIXING CONTROL (8) to CUE and
select CH1 or CH2 with the CUE SWITCHES (9). When you turn the CUE MIXING CONTROL to PGM (CUE SWITCHES
without function), you can cue the output signal of the mixer. If the CUE MIXING CONTROL is set to the center position,
you can cue both the channel signal you have selected and the output signal. With the CUE LEVEL CONTROL (7), you
can adjust the phones volume without changing the output signal.
(9) CUE SWITCH CHANNEL 1 / CHANNEL 2 - Use the cue switch in order to select the channel to be monitored.
© American DJ® AUDIO Los Angeles, CA 90058 USA
Specifications subject to change without notice. XDM-221 User Instructions page 3
Functions (Cont.)
(10) PHONES JACK - Connect headphones to this jack. Headphones from 8 Ohms to 600 Ohms can be used. 16 Ohms
is recommended.
(11) BEAT INDICATOR CHANNEL 1 / CHANNEL 2 - Use the cue switch in order to select the channel to be monitored.
(12) TALKOVER BUTTON - Press the talkover button when you want to use the microphone. When the button is pressed,
all signals except the microphone level are decreased by 15dB. In the OFF position, all signals return to their original level.
When talkover is ON, the red L.E.D. is lit.
(13) DJ MIC CONTROL - Adjusts the microphone volume.
(14) BASS/TREBLE CONTROL FOR DJ MIC - Use bass and treble adjustment knobs to fine tune the DJ MIC signal.
Increase LOWs by turning the BASS CONTROL to the right. Increase HIs by turning the TREBLE CONTROL to the right.
Inputs and Outputs
23
GND
ACVOLTAGE
SELECTOR
20
AC IN
115 / 230V
115
FUSE
L-
RAMP
REC
OUTPUT
22
21
19
LINE 2
PHONO 2
LINE 1
CH 2
18 17
PHONO 1
CH 1
16
(16), (17) LINE / PHONO INPUT JACK - Input jacks for CH1, CH2, and CH3. Connect turntables equipped with MM
pickup cartridges to the PHONO input. CD Players or Tape Decks should be connected to the LINE input. Line level
musical instruments with stereo outputs such as Rhythm Machines or Samplers should also be connected to the LINE
inputs.
(18) REC OUT - To record your record unit. The REC OUT level is not influenced by the master control.
(19) AMP OUTPUT - Parallel output for P.A. output. Connect with the input of power amplifier.
(20) GND (Ground Terminal) - Connect this terminal to ground lead of the turntable. This helps to reduce humming and
popping noises.
(21) FUSE - Fuseholder. Only replace the fuse when the device is disconnected from power supply. Only replace fuses
with the same power and rating.
(22) AC VOLTAGE SELECTOR - Make sure that the selector is properly set desired voltage (115V or 230V).
(23) MIC INPUT - 1/4 inch (6.3 mm) jack plug for microphone input to mixer.
© American DJ® AUDIO Los Angeles, CA 90058 USA
Specifications subject to change without notice. XDM-221 User Instructions page 4
Replacing the Crossfader
Instructions for replacing the crossfader:
• Disconnect from main power supply
• Remove the fader knob.
• Remove the two outer screws.
• Take the fader out and unplug the connection cable.
• Connect the new fader and replace back into mixer.
Technical Specifications - model XDM-221
Inputs:
Microphone
Phono
Line
Output
Frequency range
Distortion
S/N-ratio
Talkover
Tone control
Headphone impedance
Power supply
Dimensions
Weight
1.5mV, 600 Ohm
1.2mV, 47kOhm
100mV, 27kOhm
28V, peak to peak
20Hz-20KHz, ± 1dB
<0,03%
>75dB
-15dB
Treble: 10Khz ± 12dB
Bass: 100 Hz ± 12dB
16 Ohms
AC115/230V, 50/60Hz
10” W x 7.5” D x 3.75” H
256 x 192 x 100 mm
5 lbs. / 2.3 kg
© American DJ® AUDIO Los Angeles, CA 90058 USA
Specifications subject to change without notice. XDM-221 User Instructions page 5


