1
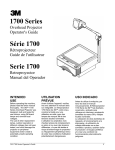
1700 Series
Overhead Projector
Operator’s Guide
Série 1700
Rétroprojecteur
Guide de l’utilisateur
Serie 1700
Retroproyector
Manual del Operador
Go to
Main Menu
Go to Operator Guide
Table of Contents
INTENDED USE
Before operating the machine, please read the entire
manual thoroughly. The 3Mt Overhead Projector
1700 was designed, built and tested for use indoors,
using 3M brand lamps and nominal local voltages.
The use of other replacement lamps, outdoor
operation or different voltages has not been tested,
and could damage the projector or peripheral
equipment and/or create a potentially unsafe
operating condition.
IMPORTANT SAFEGUARDS
When using your photographic equipment, basic
safety precautions should always be followed,
including the following:
1. Read and understand all instructions before
using. Pay particular attention to areas where
this symbol ! is shown.
2. Close supervision is necessary when any
appliance is used by or near children. Do not
leave appliance unattended while in use.
! 3.
Care must be taken as burns can occur from
touching hot parts.
! 4.
Do not operate appliance with a damaged cord
or if the appliance has been dropped or
damaged — until it has been examined by a
qualified serviceman.
! 5.
Position the cord so that it will not be tripped
over, pulled or contact hot surfaces.
6. If an extension cord is necessary, a cord with a
current rating at least equal to that of the
appliance should be used. Cords rated for less
amperage than the appliance may overheat.
7. Always unplug appliance from electrical outlet
before cleaning and servicing and when not in
use. Never yank cord to pull plug from outlet.
Grasp plug and pull to disconnect.
! 8.
Let appliance cool completely before putting
away or when replacing lamp. Loop cord loosely
around appliance when storing.
9. To reduce the risk of electric shock, do not
immerse this appliance in water or other liquids.
10. To reduce the risk of electric shock, do not
disassemble this appliance, but take it to a
qualified technician when service or repair work
is required. Incorrect reassembly can cause
electric shock when the appliance is used
subsequently.
11. The use of an accessory attachment not
recommended by the manufacturer may cause a
risk of fire, electric shock, or injury to persons.
12. Connect this appliance to a grounded outlet.
13. Disconnect this unit from its source of supply
before replacing the projection lamp.
! 14. This unit is equipped with optical lenses and
should not be exposed to direct sunlight.
15. Keep ventilation openings free of any
obstructions.
16. This unit is assembled with a special power
cable that, if damaged, must be replaced by the
same type of cable. This power cable can be
ordered from your local 3M Visual Systems
Division Dealer and must be installed by a
serviceman.
SAVE THESE
INSTRUCTIONS
The information contained in this manual will help you
operate and maintain your overhead projector.
Setup Instructions
1. Remove bolts (1) from projector body.
2. Align post holes (2) with mounting holes on
projector.
3. Insert bolts (3) through post holes and turn
finger tight.
4. Use wrench (4) to tighten bolts and secure post to
projector body.
4
2
3
1
n Note
n Important
Post bolt wrench (4) is taped to the projection post.
Tighten bolts (1) with equal pressure.g
3M 1700 Operator’s Guide
Page 1
Go to
Main Menu
Go to Operator Guide
Table of Contents
Product Description and Machine Characteristics
The 3MtOverhead Projector 1700 Series is designed
to be safe, efficient and easy to use.
It features a safety interlock that shuts off power to
the lamp when the cover is open, a thermostat to
prevent overheating, a quiet and efficient cooling
system, a closed head with singlet lens, an ENX
lamp system, a lamp changer (if equipped), a cord
wrap, a fixed post and easily accessible focus knob
and on/off switch.
Refer to the illustration below to identify the external
machine characteristics for this projector.
Part Identification List
1
1.
2.
3.
4.
5.
6.
7.
8.
Closed Projection Head
Singlet Lens
Focus Knob
Fixed Post Assembly
Top Cover Release
On/Off Switch
Cord Wrap
Control Panel
a. Lamp Changer
b. Lamp Interrupt Switch
9. Top Cover
10. Stage Glass
Electrical:
120 VAC
3
2
9
10
4
8
60 Hz
5
6
7
Cleaning
Daily Cleaning
For best performance, use 3MtOverhead Cleaner
676 to keep your projector free of excess dust and
surface dirt.
Use a soft cloth to remove dust from the stage and
projector base areas.
Stage Glass and Lenses
Use 3MtOverhead Cleaner 676 to remove surface
dirt from the stage glass and projector lens.
70-0705-6877-2
!
Caution
Cleaning the underside of the stage glass or
Fresnel lens is not recommended. Improper
cleaning or disassembly can damage the
optics. Contact your 3M Dealer or Service
Center for assistance.
3M 1700 Operator’s Guide
Page 2
Go to
Main Menu
Go to Operator Guide
Table of Contents
Operating Instructions
Read the Important Safeguards before operating this
projector.
5. Adjust angle of projection head (2) to raise or
lower the image on the screen.
1. Position projector in front of the projection
screen.
2. Plug power cord into electric outlet.
3. Push power switch (4) “On” to illuminate lamp.
4. Rotate projector (1) until projected light beam is
perpendicular (90_) to the screen surface. The
height at the left and right sides of the projected
image should be equal.
!
Caution
Do not look directly into the path of the projection
lamp when it is illuminated. The light is very bright
and prolonged exposure could cause damage to
your eyesight.
6. For best results, tilt projection screen (3) toward
projector until the width of the projected image is
equal at both the top and bottom.
7. Rotate focus knob (5) to obtain clearest image.
8. Push power switch (4) to “off” and unplug unit
when not in use.
n Note
An LCD projection panel is not recommended for
use with this projector.
Lamp Changer
If the primary lamp burns out, rotate lamp changer
dial to select the second lamp.
1. Open control panel door (1).
2. Lamp interrupt switch (2) cuts power to lamp.
3. Rotate lamp changer dial (3) to select alternate
lamp. Turn dial fully until it stops.
4. Close control panel door to illuminate lamp.
n Important
Lamp will not illuminate unless control panel
door is completely closed.
3M 1700 Operator’s Guide
Page 3
Go to
Main Menu
Go to Operator Guide
Table of Contents
Color Tuning Dial
Rotate the color tuning dial (if equipped) to eliminate
the yellow/orange to brown or blue corners on the
screen.
1. Rotate dial to the left to remove blue corners.
2. Rotate dial to the right to remove yellow/orange
to brown corners.
Lamp Replacement
Use the proper lamp type for your projector.
ENX – 82V, 360W
78-6969-8027-1
2
To replace the lamp:
1. Turn projector off and unplug (1) the power cord.
2. Allow projector lamp and metal parts to cool.
3. Release cover latch (2) and lift up top cover to
access lamp (3).
4. Depress lever (4) to release lamp. Discard old
lamp.
5. Push new lamp (5) fully and squarely into socket.
6. Close the top cover.
!
Caution
To avoid burns to the fingers, allow projector
parts to cool before replacing lamp.
!
Caution
If a lamp cracks or breaks and deposits glass
fragments inside the projector body, use a vacuum
cleaner to remove. Touching sharp glass could
result in cuts to your fingers.
3M 1700 Operator’s Guide
3
1
5
4
!
Caution
Use care when placing hands inside projector body.
Sharp or rough edges could cause abrasions or
cuts to fingers.
!
Caution
When the top cover is in the open position, use
care not to tip it over. If the cover slams shut, it
could result in pinching or bruises to your
fingers.
Page 4
Go to
Main Menu
Go to Operator Guide
Table of Contents
Troubleshooting
Problem
Probable Causes
A new lamp has been installed and a. Projector not plugged in
neither lamp nor fan energize
b. No power at wall outlet
c. Top cover not completely closed
Lamp does not illuminate but fan
motor runs
After replacing a burned out lamp,
the new lamp fails
a. Lamp is not seated properly in
socket
b. Lamp is burned out
a. Defective lamp was installed
b. Possible electrical problem
Short lamp life. Lamps seem to
fail before expected life span of
130 hours (typical)
a. Defective lamp
b. High line voltage
Fan motor does not run but lamp
illuminates
Projected image is wider at the top
or on one side of the screen
a. Fan blade/motor is obstructed
b. Fan motor is burned out
Screen surface is not
perpendicular to projected
image
Projected image is dim
Projected image does not have
uniform brightness
Color, focus, image problems
Dirty stage glass, lenses or
optical surfaces
Lamp is not seated properly in
socket
Optics out of alignment
Solution
Make sure unit is plugged into
outlet supplied with power, top
cover is completely closed and
latched.
Seat lamp fully and squarely into
the lamp socket. If lamp still does
not illuminate, replace it.
Replace lamp again. If second
lamp fails immediately, you may
have an electrical problem. Call
service to have projector checked.
Monitor actual lamp life with daily
log. If early lamp failure continues,
call service to have projector
checked.
Call service to have projector
checked.
Tilt projection screen until it is
perpendicular (90_) to the
projected image.
Follow cleaning instructions to
remove surface dirt.
Seat lamp squarely into the lamp
socket.
Call for service.
Service Information
In the U.S. and Canada, please call us for:
D
D
D
D
Product information
Product assistance
Technical assistance
Service locations
3M 1700 Operator’s Guide
If you need product assistance or service, contact
your dealer or:
1-800-328-1371
Page 5
Go to
Main Menu
Go to Operator Guide
Table of Contents
Accessories – Accessoires – Accessorios – Acessórios
Roller Attachment – 10 1/4″ (260 mm)
Attachment à roulettes
Accessorio para el rodillo
Acessórios para o rolo (260 mm)
78-6969-7214-6
HA5760
Write-on Film Roll
Rouleau de pellicule à écrire
Rollo de Pelicula para Escribir
Rolo e Película para Escrever
78-9020-1282-8 – 10 1/4 ″ (260mm)
AF4310
Overhead Presenter’s Cart
Chariot pour rétroprojecteur
Carro para Presentación del Proyector
Carro para o Retroprojetor
78-6969-7217-9
Lamp
Lampe
Bombilla
Lâmpada
Overhead Cleaner
Nettoyant pour rétroprojecteur
Limpiador de retroproyectores
Limpador de Retroprojetores
ENX – 78-6969-8027–1 HA6000
70-0705-6877-2
3M 1700 Operator’s Guide
HA5651
Page 6