1
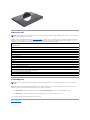
Adamo by Dell™ Service Manual Inserting a SIM Card
Flashing the BIOS
System Setup
Troubleshooting
Getting Help
Reinstalling Software
Notes, Cautions, and Warnings
NOTE: A NOTE indicates important information that helps you make better use of your computer.
CAUTION: A CAUTION indicates potential damage to hardware or loss of data if instructions are not followed.
WARNING: A WARNING indicates a potential for property damage, personal injury, or death.
Information in this document is subject to change without notice.
© 2009 Dell Inc. All rights reserved.
Reproduction of these materials in any manner whatsoever without the written permission of Dell Inc. is strictly forbidden.
Trademarks used in this text: Dell, the DELL logo, and Dell Adamo are trademarks of Dell Inc.; Bluetooth is a registered trademark owned by Bluetooth SIG, Inc. and is used by Dell
under license; Microsoft, Windows, Windows Vista, a n d Windows Vista start button logo are either trademarks or registered trademarks of Microsoft Corporation in the United States
and/or other countries.
Other trademarks and trade names may be used in this document to refer to either the entities claiming the marks and names or their products. Dell Inc. disclaims any
proprietary interest in trademarks and trade names other than its own.
Model P01S
March 2009 Rev. A00
Back to Contents Page
Flashing the BIOS
Adamo by Dell™ Service Manual Flashing the BIOS From the Hard Drive
Flashing the BIOS From a CD
The BIOS is a utility that serves as an interface between the computer hardware and the operating system. You may require to flash the BIOS when an
update is available.
Flashing the BIOS From the Hard Drive
NOTE: It is recommended that you review specifics about the BIOS update to determine if it applies to your system. Some updates contain changes that
impact only certain configurations, or provide new features that may/may not apply to your computer.
1.
Ensure that the AC adapter is plugged in and a network cable is attached.
2.
Turn on the computer.
3.
Locate the latest BIOS update file for your computer at support.dell.com.
4.
Click Download Now to download the file.
5.
If the Export Compliance Disclaimer window appears, click Yes, I Accept this Agreement.
The File Download window appears.
6.
Click Save this program to disk and then click OK.
The Save In window appears.
7.
Click the down arrow to view the Save In menu, select Desktop, and then click Save.
The file downloads to your desktop.
8.
Click Close when the Download Complete window appears.
The file icon appears on your desktop and is titled the same as the downloaded BIOS update file.
9.
Double-click the file icon on the desktop and follow the instructions on the screen.
NOTE: An error message is displayed if you do not have enough privileges to install the BIOS update. You need to be logged in as Administrator or rightclick the file and click Run as Administrator to update the BIOS.
Flashing the BIOS From a CD
NOTE: Your computer does not have an optical drive. You need to connect an external optical drive to flash the BIOS from a CD.
1.
Ensure that the AC adapter is plugged in.
NOTE: If you use a BIOS upgrade CD to flash the BIOS, set up the computer to boot from a CD before inserting the CD.
2.
Insert the BIOS upgrade CD in the external optical drive, and restart the computer.
Follow the instructions that appear on the screen. The computer continues to boot and updates the new BIOS. When the flash update is complete, the
computer will automatically reboot.
3.
Press <F2> during POST to enter the system setup program.
4.
Select the Exit menu.
5.
Select Load Setup Defaults to reset the computer defaults.
6.
Remove the BIOS upgrade CD from the drive.
7.
Select Exit Saving Changes to save configuration changes.
8.
The BIOS upgrade finishes and the computer restarts automatically.
NOTE: An error message is displayed if you do not have enough privileges to install the BIOS update. You need to be logged in as Administrator or rightclick the file and click Run as Administrator to update the BIOS.
Back to Contents Page
Back to Contents Page
Getting Help
Adamo by Dell™ Service Manual Obtaining Assistance
Product Information
Returning Items for Warranty Repair or Credit
Locating the Service Tag and Express Service Code
Before You Call
Contacting Dell
Obtaining Assistance
If you experience a problem with your computer, you can complete the following steps to diagnose and troubleshoot the problem:
1.
See Troubleshooting Tips for information and procedures that pertain to the problem your computer is experiencing.
2.
See Dell Diagnostics for procedures on how to run Dell Diagnostics.
3.
Fill out the Diagnostics Checklist.
4.
5.
Use Dell's extensive suite of online services available at Dell Support (support.dell.com) for help with installation and troubleshooting procedures. See
Online Services for a more extensive list of Dell Support online.
If the preceding steps have not resolved the problem, see Contacting Dell.
NOTE: Call Dell Support from a telephone at or near the affected computer so that the support staff can assist you with any necessary procedures.
NOTE: Dell's Express Service Code system may not be available in all countries.
When prompted by Dell's automated telephone system, enter your Express Service Code to route the call directly to the proper support personnel.
For instructions on using the Dell Support, see Technical Support and Customer Service.
NOTE: Some of the following services are not always available in all locations outside the continental U.S. Call your local Dell representative for
information on availability.
Technical Support and Customer Service
Dell's support service is available to answer your questions about Dell™ hardware. Our support staff uses computer-based diagnostics to provide fast,
accurate answers.
To contact Dell's support service, see Before You Call, and then see the contact information for your region or go to support.dell.com.
Online Services
You can learn about Dell products and services at the following websites:
www.dell.com
www.dell.com/ap (Asian/Pacific countries only)
www.dell.com/jp (Japan only)
www.euro.dell.com (Europe only)
www.dell.com/la (Latin American and Caribbean countries)
www.dell.ca (Canada only)
You can access Dell Support through the following websites and e-mail addresses:
l
Dell Support websites:
support.dell.com
support.jp.dell.com (Japan only)
support.euro.dell.com (Europe only)
l
Dell Support e-mail addresses:
[email protected]
[email protected]
[email protected] (Latin America and Caribbean countries only)
[email protected] (Asian/Pacific countries only)
l
Dell Marketing and Sales e-mail addresses:
[email protected] (Asian/Pacific countries only)
[email protected] (Canada only)
l
Anonymous file transfer protocol (FTP):
ftp.dell.com – log in as user anonymous, and use your e-mail address as your password
Automated Order-Status Service
To check on the status of any Dell products that you have ordered, you can go to support.dell.com, or you can call the automated order-status service. A
recording prompts you for the information needed to locate and report on your order. For the telephone number to call for your region, see Contacting Dell.
Problems With Your Order
If you have a problem with your order, such as missing parts, wrong parts, or incorrect billing, contact Dell for customer assistance. Have your invoice or
packing slip available when you call. For the telephone number to call for your region, see Contacting Dell.
Product Information
If you need information about additional products available from Dell, or if you would like to place an order, visit the Dell website at www.dell.com. For the
telephone number to call for your region or to speak to a sales specialist, see Contacting Dell.
Returning Items for Warranty Repair or Credit
Prepare all items being returned, whether for repair or credit, as follows:
1.
Call Dell to obtain a Return Material Authorization Number, and write it clearly and prominently on the outside of the box.
NOTE: For the telephone number to call for your region, see Contacting Dell. Include a copy of the invoice and a letter describing the reason for the
return.
2.
Include a copy of the Diagnostics Checklist (see Diagnostics Checklist), indicating the tests that you have run and any error messages reported by the
Dell Diagnostics (see Contacting Dell).
3.
Include any accessories that belong with the item(s) being returned (power cables, software floppy disks, guides, and so on) if the return is for credit.
4.
Pack the equipment to be returned in the original (or equivalent) packing materials.
NOTE: You are responsible for paying shipping expenses. You are also responsible for insuring any product returned, and you assume the risk of loss
during shipment to Dell. Collect On Delivery (C.O.D.) packages are not accepted.
NOTE: Returns that are missing any of the preceding requirements will be refused at Dell's receiving dock and returned to you.
Locating the Service Tag and Express Service Code
The Service Tag and Express Service Code are required when you contact Dell for assistance. These details help Dell's automated support telephone system
direct your calls more efficiently.
You can identify the Service Tag and Express Service Code in the following ways:
l
The service tag and express service code are etched on the back of the computer below the USB ports.
l
The service tag is listed in the security menu of the system setup program. For information on accessing the system setup program, see Entering the
System Setup Program.
Before You Call
NOTE: Have your Express Service Code ready when you call. The code helps Dell's automated-support telephone system direct your call more efficiently.
You may also be asked for your Service Tag.
Remember to fill out the Diagnostics Checklist (see Diagnostics Checklist). If possible, turn on your computer before you call Dell for assistance and call from a
telephone at or near the computer. You may be asked to type some commands at the keyboard, relay detailed information during operations, or try other
troubleshooting steps possible only at the computer itself. Ensure that the computer documentation is available.
Diagnostics Checklist
Name:
Date:
Address:
Phone number:
Service Tag:
Express Service Code:
Return Material Authorization Number (if provided by Dell support technician):
Operating system and version:
Devices:
Expansion cards:
Are you connected to a network? Yes No
Network, version, and network adapter:
Programs and versions:
See your operating system documentation to determine the contents of the system's start-up files. If the computer is connected to a printer, print each file.
Otherwise, record the contents of each file before calling Dell.
Error message, beep code, or diagnostic code:
Description of problem and troubleshooting procedures you performed:
Contacting Dell
NOTE: If you do not have an active Internet connection, you can find contact information on your purchase invoice, packing slip, bill, or Dell product
catalog.
Dell provides several online and telephone-based support and service options. Availability varies by country and product, and some services may not be
available in your area. To contact Dell for sales, technical support, or customer service issues:
1.
Visit support.dell.com, and verify your country or region in the Choose A Country/Region drop-down menu at the bottom of the page.
2.
Click Contact Us on the left side of the page, and select the appropriate service or support link based on your need.
3.
Choose the method of contacting Dell that is convenient for you.
Back to Contents Page
Back to Contents Page
Inserting a SIM Card
Adamo by Dell™ Service Manual CAUTION: Only a certified service technician should perform repairs on your computer. Damage due to servicing that is not authorized by Dell is
not covered by your warranty.
NOTE: Subscriber Identity Module (SIM) cards identify users uniquely through an International Mobile Subscriber Identity.
NOTE: Ensure that you do not scratch the computer while inserting an object to release the SIM tray.
1.
Insert a needle, paper clip, or a long thumb tack into the hole on the SIM tray.
Press firmly and push it straight in until the tray pops out.
CAUTION: The SIM tray is fragile. Handle it with care to avoid damaging it.
2.
3.
4.
Turn over the SIM tray.
Align the angled corner of the SIM card with the angled corner in the tray and place the card. If the card does not fit in the tray easily, check to ensure
that you have aligned the corner on the card with the corner on the tray.
Turn over the SIM tray and replace it into the slot.
Back to Contents Page
Back to Contents Page
Reinstalling Software
Adamo by Dell™ Service Manual Drivers
Restoring Your Operating System
Drivers
If you experience a problem with any device, identify whether the driver is the source of your problem and, if necessary, update the driver.
1.
Click the Windows Vista Start button™ 2.
Click Properties® Device Manager.
, and right-click Computer.
NOTE: The User Account Control window may appear. If you are an administrator on the computer, click Continue; otherwise, contact your
administrator to continue.
Scroll down the list to see if any device has an exclamation point (a yellow circle with a [!]) on the device icon.
If an exclamation point is next to the device name, you may need to reinstall the driver or install a new driver (see Reinstalling Drivers and Utilities).
Reinstalling Drivers and Utilities
CAUTION: The Dell Support website at support.dell.com and your Drivers and Utilities disc provide approved drivers for Dell™ computers. If you install drivers obtained from other sources, your computer might not work as expected.
Returning to a Previous Device Driver Version
1.
Click the Windows Vista Start button
2.
Click Properties® Device Manager.
, and right-click Computer.
NOTE: The User Account Control window may appear. If you are an administrator on the computer, click Continue; otherwise, contact your
administrator to enter the Device Manager.
3.
Right-click the device for which the new driver was installed and click Properties.
4.
Click the Drivers tab® Roll Back Driver.
If Device Driver Rollback does not resolve the problem, then use System Restore (see Restoring Your Operating System) to return your computer to the
operating state that existed before you installed the new driver.
Using the Drivers and Utilities Disc
NOTE: Your computer does not have an optical drive. You need to connect an external optical drive to use the Drivers and Utilities disc.
If using Device Driver Rollback or System Restore (see Restoring Your Operating System) does not resolve the problem, reinstall the driver from your Drivers
and Utilities disc.
1.
With the Windows desktop displayed, insert your Drivers and Utilities disc.
If this is your first time to use the Drivers and Utilities disc, go to step 2. If not, go to step 5.
2.
When the Drivers and Utilities disc installation program starts, follow the prompts on the screen.
NOTE: In most cases, the Drivers and Utilities program starts running automatically. If it does not, start Windows Explorer, click your disc drive directory
to display the disc contents, and then double-click the autorcd.exe file.
3.
When the InstallShield Wizard Complete window appears, remove the Drivers and Utilities disc and click Finish to restart the computer.
4.
When you see the Windows desktop, reinsert the Drivers and Utilities disc.
5.
At the Welcome Dell System Owner screen, click Next.
A message appears, stating that the Drivers and Utilities disc is detecting hardware in your computer.
The drivers that are used by your computer are automatically displayed in the My Drivers—The ResourceCD has identified these components in your
system window.
6.
Click the driver that you want to reinstall and follow the instructions on the screen.
If a particular driver is not listed, then that driver is not required by your operating system.
Manually Reinstalling Drivers
After extracting the driver files to your hard drive as described in the previous section:
1.
Click the Windows Vista Start button
2.
Click Properties® Device Manager.
, and right-click Computer.
NOTE: The User Account Control window may appear. If you are an administrator on the computer, click Continue; otherwise, contact your
administrator to enter the Device Manager.
3.
Double-click the type of device for which you are installing the driver (for example, Audio or Video).
4.
Double-click the name of the device for which you are installing the driver.
5.
Click the Driver tab® Update Driver® Browse my computer for driver software.
6.
Click Browse and browse to the location to which you previously copied the driver files.
7.
When the name of the appropriate driver appears, click the name of the driver® OK® Next.
8.
Click Finish and restart your computer.
Restoring Your Operating System
You can restore your operating system in the following ways:
l
Microsoft Windows System Restore returns your computer to an earlier operating state without affecting data files. Use System Restore as the first
solution for restoring your operating system and preserving data files.
l
Dell Factory Image Restore (available in Windows Vista) returns your hard drive to the operating state it was in when you purchased the computer. The
program permanently deletes all data on the hard drive and removes any programs installed after you received the computer. Use Dell Factory Image
Restore only if System Restore did not resolve your operating system problem.
l
If you received the Operating System disc with your computer, you can use it to restore your operating system. However, using the Operating System
disc also deletes all data on the hard drive. Use the disc only if System Restore did not resolve your operating system problem.
Using Microsoft® Windows® System Restore
The Windows operating systems provide a System Restore option that allows you to return your computer to an earlier operating state (without affecting data
files) if changes to the hardware, software, or other system settings have left the computer in an undesirable operating state. Any changes that System
Restore makes to your computer are completely reversible.
CAUTION: Make regular backups of your data files. System Restore does not monitor your data files or recover them.
NOTE: The procedures in this document were written for the Windows default view, so they may not apply if you set your Dell™ computer to the Windows Classic view.
Starting System Restore
1.
Click Start
2.
In the Start Search box, type System Restore and press <Enter>.
.
NOTE: The User Account Control window may appear. If you are an administrator on the computer, click Continue; otherwise, contact your
administrator to continue the desired action.
3.
Click Next and follow the remaining prompts on the screen.
In the event that System Restore did not resolve the issue, you may undo the last system restore (see Undoing the Last System Restore).
Undoing the Last System Restore
CAUTION: Before you undo the last system restore, save and close all open files and exit any open programs. Do not alter, open, or delete any
files or programs until the system restoration is complete.
1.
Click Start
2.
In the Start Search box, type System Restore and press <Enter>.
.
3.
Click Undo my last restoration and click Next.
Using Dell™ Factory Image Restore
CAUTION: Dell Factory Image Restore permanently deletes all data on the hard drive and removes any programs or drivers installed after you
received your computer. If possible, back up the data before using these options. Use Dell Factory Image Restore only if System Restore did not
resolve your operating system problem.
NOTE: Dell Factory Image Restore may not be available in certain countries or on certain computers.
Use Dell Factory Image Restore (Windows Vista) only as the last method to restore your operating system. These options restore your hard drive to the
operating state it was in when you purchased the computer. Any programs or files added since you received your computer—including data files—are
permanently deleted from the hard drive. Data files include documents, spreadsheets, e-mail messages, digital photos, music files, and so on. If possible, back
up all data before using Factory Image Restore.
Dell Factory Image Restore
1.
Turn on the computer. When the Dell logo appears, press <F8> several times to access the Vista Advanced Boot Options Window.
2.
Select Repair Your Computer.
The System Recovery Options window appears.
3.
Select a keyboard layout and click Next.
4.
To access the recovery options, log on as a local user. To access the command prompt, type administrator in the User name field, then click OK.
5.
Click Dell Factory Image Restore.
NOTE: Depending upon your configuration, you may need to select Dell Factory Tools, then Dell Factory Image Restore.
6.
On the Dell Factory Image Restore welcome screen, click Next.
The Confirm Data Deletion screen appears.
CAUTION: If you do not want to proceed with Factory Image Restore, click Cancel.
7.
Click the checkbox to confirm that you want to continue reformatting the hard drive and restoring the system software to the factory condition, then click
Next.
The restore process begins and may take 5 or more minutes to complete. A message appears when the operating system and factory-installed
applications have been restored to factory condition.
8.
Click Finish to restart the computer.
Using the Operating System Disc
Before you Begin
If you are considering reinstalling the Windows operating system to correct a problem with a newly installed driver, first try using Windows Device Driver
Rollback. See Returning to a Previous Device Driver Version. If Device Driver Rollback does not resolve the problem, use Microsoft Windows System Restore to
return your operating system to the operating state it was in before you installed the new device driver. See Using Microsoft® Windows® System Restore.
CAUTION: Before performing the installation, back up all data files on your primary hard drive. For conventional hard drive configurations, the
primary hard drive is the first drive detected by the computer.
To reinstall Windows, you need the Dell™ Operating System disc and the Dell Drivers and Utilities disc.
NOTE: The Dell Drivers and Utilities disc contains drivers that were installed during the assembly of the computer. Use the Dell Drivers and Utilities disc
to load any required drivers. Depending on the region from which you ordered your computer, or whether you requested the disc, the Dell Drivers and
Utilities disc and Dell Operating System disc may not ship with your computer.
Reinstalling Windows
The reinstallation process can take 1 to 2 hours to complete. After you reinstall the operating system, you must also reinstall the device drivers, virus
protection program, and other software.
1.
Save and close any open files and exit any open programs.
2.
Insert the Operating System disc.
3.
If the Install Windows message appears, click Exit.
4.
Restart the computer.
When the DELL logo appears, press <F12> immediately.
NOTE: If you wait too long and the operating system logo appears, continue to wait until you see the Microsoft® Windows® desktop; then, shut
down your computer and try again.
NOTE: The next steps change the boot sequence for one time only. On the next start-up, the computer boots according to the devices specified in
the system setup program.
5.
When the boot device list appears, highlight CD/DVD/CD-RW Drive and press <Enter>.
6.
Press any key to Boot from CD-ROM, and follow the instructions on the screen to complete the installation.
Back to Contents Page
Back to Contents Page
System Setup
Adamo by Dell™ Service Manual Viewing System Settings With the System Setup Program
Changing the BIOS Settings
Viewing System Settings With the System Setup Program
Your operating system may override some of the options that you set through the system setup program.
Use the system setup program to:
l
Set or change user-selectable options such as your password
l
Verify information about your computer's current configuration, such as the amount of system memory
Run the system setup program to become familiar with your system configuration information and optional settings. Write down the information for future
reference.
NOTE: Unless you are an expert computer user or are directed to do so by Dell technical support, do not change the system setup program settings.
Certain changes might make your computer work incorrectly.
Entering the System Setup Program
1.
Turn on (or restart) your computer.
2.
When the DELL™ logo appears, press <F2> immediately. NOTE: If you wait too long and the operating system logo appears, continue to wait until you see the Microsoft® Windows® desktop. Then, shut down
your computer and try again.
Working With Options on the System Setup Program Screen
NOTE: To learn more about a specific item on a system setup program screen, highlight the item and see the Help area on the screen.
On each screen, the system setup options are listed at the left. To the right of each option is the setting or value for that option.
You cannot change options or values that are grayed because they are determined by the computer.
The right pane of the screen displays help information for the currently highlighted option. System setup key functions are listed across the bottom of the
screen.
The system setup screens display the current setup information and settings for your computer, such as:
l
System configuration
l
Boot order
l
Boot (start-up) configuration
l
Basic device configuration settings
l
System security and hard drive password settings
Changing the Boot Sequence
The boot sequence, or boot order, tells the computer where to look to find the software needed to start the operating system. You can control the boot
sequence and enable/disable devices using the Boot page of the system setup program.
The Boot page displays a general list of the bootable devices that may be installed in your computer, including but not limited to the following:
l
Hard Drive
l
USB Storage
l
CD/DVD/CD-RW Drive
l
Removable Devices
l
Network
During the boot routine, the computer starts at the top of the list and scans each enabled device for the operating system start-up files. When the computer
finds the files, it stops searching and starts the operating system.
To control the boot devices, select (highlight) a device by pressing the down-arrow or up-arrow key, and then enable or disable the device or change its order
in the list.
1.
Enter the system setup program.
2.
Press the left- and right-arrow keys to highlight the Boot tab.
3.
Press the up- and down-arrow keys to highlight the Boot Device Property, and then press <Enter>.
4.
5.
Press the up- and down-arrow keys to select the boot device you want to change, and then press <Shift + 1> to enable or disable a device, or <+> to
move the device up in the list, or <-> to move the device down in the list.
Press <F10> and then press <Enter> to exit the system setup program and resume the boot process.
Boot sequence changes take effect as soon as you save the changes and exit the system setup program.
Changing the Boot Sequence for the Current Boot
You can use this setting to boot your system from your preferred device only for the current boot. The system reverts to the original boot sequence the next
time you restart your computer.
1.
Shut down the computer through the Start menu.
2.
Turn on the computer. When the DELL logo appears, press <F12> immediately.
NOTE: If you wait too long and the Windows logo appears, continue to wait until you see the Windows desktop, then shut down your computer and try
again.
3.
When the boot device list appears, highlight the device from which you want to boot and press <Enter>.
The computer boots to the selected device.
Changing the Boot Sequence to a USB Device
1.
Connect the USB device to a USB port.
2.
Turn on (or restart) your computer.
3.
When F2 = Setup, F12 = Boot Menu appears in the bottom corner of the screen, press <F12>. NOTE: If you wait too long and the operating system logo appears, continue to wait until you see the Windows desktop, then shut down your computer
and try again.
4.
The Boot Menu appears, listing all available boot devices.
5.
Use the arrow keys to select the appropriate device (for the current boot only).
NOTE: To boot to a USB device, the device must be bootable. To ensure that a device is bootable, check the device documentation.
Changing the BIOS Settings
The system setup program allows you to configure user-selectable options in the BIOS, such as date and time or system password. See Viewing System
Settings With the System Setup Program for more information.
Viewing the BIOS Settings
1.
Click the Start button and select All Programs.
2.
Click Accessories® System Tools ® System Information.
3.
Locate the BIOS Version/Date item in System Summary.
The BIOS Version/Date item displays the BIOS version and date.
Back to Contents Page
Back to Contents Page
Troubleshooting
Adamo by Dell™ Service Manual Troubleshooting Tips
Error Messages
If the message is not listed, see the documentation for the operating system or the program that was running when the message appeared.
Auxiliary device failure —
The touch pad or external mouse may be faulty. For an external mouse, check the cable connection. If the problem persists, contact Dell (see Contacting Dell).
Cache disabled due to failure —
The primary cache internal to the microprocessor has failed. Contact Dell (see Contacting Dell).
Data error —
The hard drive cannot read the data. Contact Dell (see Contacting Dell).
Decreasing available memory —
One or more memory modules may be faulty or improperly seated. Run Dell Diagnostics (see Dell Diagnostics). If the problem persists, Contact Dell (see
Contacting Dell).
Disk C: failed initialization —
The hard drive failed initialization. Run the hard drive tests in the Dell Diagnostics (see Dell Diagnostics).
Extended memory size has changed —
The amount of memory recorded in nonvolatile memory (NVRAM) does not match the memory installed in the computer. Restart the computer. If the error
appears again, contact Dell (see Contacting Dell).
The file being copied is too large for the destination drive —
The file that you are trying to copy is too large to fit on the disk, or the disk is full. Try copying the file to a different disk or use a larger capacity disk.
A filename cannot contain any of the following characters: \ / : * ? " < > | —
Do not use these characters in filenames.
Gate A20 failure —
A memory module may be loose. Run Dell Diagnostics (see Dell Diagnostics). If the problem persists, Contact Dell (see Contacting Dell).
General failure —
The operating system is unable to carry out the command. The message is usually followed by specific information—for example, Printer out of paper. Take the
appropriate action.
Hard-disk drive configuration error —
The computer cannot identify the drive type. Run the Hard Disk Drive tests in the Dell Diagnostics (see Dell Diagnostics).
Hard-disk drive controller failure 0 —
The hard drive does not respond to commands from the computer. Run the Hard Disk Drive tests in the Dell Diagnostics (see Dell Diagnostics).
Hard-disk drive failure —
The hard drive does not respond to commands from the computer. Run the Hard Disk Drive tests in the Dell Diagnostics (see Dell Diagnostics).
Hard-disk drive read failure —
The hard drive may be defective. Run the Hard Disk Drive tests in the Dell Diagnostics (see Dell Diagnostics).
Insert bootable media —
The operating system is trying to boot to nonbootable media. Insert bootable media.
Invalid configuration information-please run System Setup Program —
The system configuration information does not match the hardware configuration. The message is most likely to occur after a memory module is installed.
Correct the appropriate options in the system setup program.
Keyboard clock line failure —
For external keyboards, check the cable connection. Run the Keyboard Controller test in the Dell Diagnostics (see Dell Diagnostics).
Keyboard controller failure —
For external keyboards, check the cable connection. Restart the computer, and avoid touching the keyboard or the mouse during the boot routine. Run the
Keyboard Controller test in the Dell Diagnostics (see Dell Diagnostics).
Keyboard data line failure —
For external keyboards, check the cable connection. Run the Keyboard Controller test in the Dell Diagnostics (see Dell Diagnostics).
Keyboard stuck key failure —
For external keyboards or keypads, check the cable connection. Restart the computer, and avoid touching the keyboard or keys during the boot routine. Run
the Stuck Key test in the Dell Diagnostics (see Dell Diagnostics).
Memory allocation error —
The software you are attempting to run is conflicting with the operating system, another program, or a utility. Shut down the computer, wait 30 seconds, and
then restart it. Try to run the program again. If the error message still appears, see the software documentation.
No boot device available —
The computer cannot find the hard drive. If the hard drive is your boot device, ensure that it is partitioned as a boot device.
No boot sector on hard drive —
The operating system may be corrupted. Contact Dell (see Contacting Dell).
No timer tick interrupt —
A chip on the system board may be malfunctioning. Run the System Set tests in the Dell Diagnostics (see Dell Diagnostics).
Not enough memory or resources. Exit some programs and try again —
You have too many programs open. Close all windows and open the program that you want to use.
Operating system not found —
If the problem persists, contact Dell (see Contacting Dell).
Optional ROM bad checksum —
The optional ROM has failed. Contact Dell (see Contacting Dell).
A required .DLL file was not found —
The program that you are trying to open is missing an essential file. Try to repair the program. If this does not solve your problem, remove and then reinstall
the program.
1.
Click the Windows Vista start button
2.
Select the program you want to remove.
® Control Panel® Programs® Programs and Features.
3.
Click Uninstall.
4.
See the program documentation for installation instructions.
Sector not found —
The operating system cannot locate a sector on the hard drive. You may have a defective sector or corrupted FAT on the hard drive. Run the Windows errorchecking utility to check the file structure on the hard drive. See Windows Help and Support for instructions (click Start® Help and Support). If a large number
of sectors are defective, back up the data (if possible), and then reformat the hard drive.
Seek error —
The operating system cannot find a specific track on the hard drive.
Shutdown failure —
A chip on the system board may be malfunctioning. Run the System Set tests in the Dell Diagnostics (see Dell Diagnostics).
Time-of-day clock lost power —
System configuration settings are corrupted. Connect your computer to an electrical outlet to charge the battery. If the problem persists, try to restore the
data by entering the system setup program, then immediately exit the program. If the message reappears, contact Dell (see Contacting Dell).
Time-of-day clock stopped —
The reserve battery that supports the system configuration settings may require recharging. Connect your computer to an electrical outlet to charge the
battery. If the problem persists, contact Dell (see Contacting Dell).
Time-of-day not set-please run the System Setup program —
The time or date stored in the system setup program does not match the system clock. Correct the settings for the Date and Time options.
Timer chip counter 2 failed —
A chip on the system board may be malfunctioning. Run the System Set tests in the Dell Diagnostics (see Dell Diagnostics).
Unexpected interrupt in protected mode —
The keyboard controller may be malfunctioning, or a memory module may be loose. Run the System Memory tests and the Keyboard Controller test in the Dell
Diagnostics (see Dell Diagnostics).
x:\ is not accessible. The device is not ready —
Insert a disk into the drive and try again.
Warning: Battery is critically low —
The battery is running out of charge. Connect the computer to an electrical outlet; otherwise, activate hibernate mode or shut down the computer.
System Messages
NOTE: If the message you received is not listed in the table, see the documentation for either the operating system or the program that was running
when the message appeared.
Alert! Previous attempts at booting this system have failed at checkpoint [nnnn]. For help in resolving this problem, please note this checkpoint and
contact Dell Technical Support —
The computer failed to complete the start routine three consecutive times for the same error (see Contacting Dell for assistance).
CMOS checksum error —
Possible system board failure or RTC battery low. Contact Dell (see Contacting Dell).
CPU fan failure —
Processor fan failure. Contact Dell (see Contacting Dell).
Hard-disk drive failure —
Possible hard drive failure during hard drive POST. Check cables, swap hard disks, or see Contacting Dell for assistance.
Hard-disk drive read failure —
Possible hard drive failure during hard-drive start test (see Contacting Dell for assistance).
Keyboard failure —
Keyboard failure or keyboard cable loose. Contact Dell (see Contacting Dell).
No boot device available —
No bootable partition on hard drive, or the hard drive cable is loose, or no bootable device exists.
l
If the hard drive is your boot device, ensure that the drive is partitioned as a boot device.
l
Enter system setup and ensure that the boot sequence information is correct.
No timer tick interrupt —
A chip on the system board might be malfunctioning or system board failure (see Contacting Dell for assistance).
USB over current error —
Disconnect the USB device. Use external power source for the USB device.
NOTICE - Hard Drive SELF MONITORING SYSTEM has reported that a parameter has exceeded its normal operating range. Dell recommends that you
back up your data regularly. A parameter out of range may or may not indicate a potential hard drive problem —
S.M.A.R.T error, possible hard drive failure. This feature can be enabled or disabled in BIOS setup.
Troubleshooting Software and Hardware Problems
If a device is either not detected during the operating system setup or is detected but incorrectly configured, you can use the Hardware Troubleshooter to
resolve the incompatibility.
To start the Hardware Troubleshooter:
1.
Click the Windows Vista Start button
2.
Type hardware troubleshooter in the search field and press <Enter> to start the search.
, and click Help and Support.
3.
In the search results, select the option that best describes the problem and follow the remaining troubleshooting steps.
Dell Diagnostics
Before you begin any of the procedures in this section, follow the safety instructions that shipped with your computer.
When to Use the Dell Diagnostics
If you experience a problem with your computer, perform the checks in Lockups and Software Problems (see Lockups and Software Problems) and run the Dell
Diagnostics before you contact Dell for technical assistance.
It is recommended that you print these procedures before you begin.
NOTE: The Dell Diagnostics works only on Dell computers.
NOTE: The Dell Drivers and Utilities disc is optional and may not ship with your computer.
Start the Dell Diagnostics from your hard drive or from the Dell Drivers and Utilities disc.
Starting the Dell Diagnostics From Your Hard Drive
NOTE: If your computer cannot display a screen image, see Contacting Dell.
1.
Ensure that the computer is connected to an electrical outlet that is known to be working properly.
2.
Turn on (or restart) your computer.
3.
When the DELL™ logo appears, press <F12> immediately. Select Diagnostics from the start menu and press <Enter>.
NOTE: If you wait too long and the operating system logo appears, continue to wait until you see the Microsoft® Windows® desktop, and then shut
down your computer and try again.
4.
If you see a message stating that no diagnostics utility partition has been found, run the Dell Diagnostics from the Drivers and Utilities media.
5.
Press any key to start the Dell Diagnostics from the diagnostics utility partition on your hard drive, and follow the instructions on the screen. Starting the Dell Diagnostics From the Dell Drivers and Utilities Disc
NOTE: Your computer does not have an optical drive. You need to connect an external optical drive to use the Drivers and Utilities disc.
1.
Insert the Drivers and Utilities disc.
2.
Shut down and restart the computer.
When the DELL logo appears, press <F12> immediately.
NOTE: If you wait too long and the operating system logo appears, continue to wait until you see the Microsoft® Windows® desktop; then, shut
down your computer and try again.
NOTE: The next steps change the boot sequence for one time only. On the next start-up, the computer starts according to the devices specified in
the system setup program.
3.
When the boot device list appears, highlight CD/DVD/CD-RW and press <Enter>.
4.
Select the Boot from CD-ROM option from the menu that appears and press <Enter>.
5.
Type 1 to start the CD menu and press <Enter> to proceed.
6.
Select Run the 32 Bit Dell Diagnostics from the numbered list. If multiple versions are listed, select the version that is appropriate for your computer.
7.
When the Dell Diagnostics Main Menu appears, select the test that you want to run, and follow the instructions on the screen.
Troubleshooting Tips
Follow these tips when troubleshooting your computer:
l
If a device does not work, ensure that the device is properly connected.
l
If an error message appears on the screen, write down the exact message. This message may help support personnel to diagnose and fix the problem
(s).
l
If an error message occurs in a program, see the program documentation.
NOTE: The procedures in this document were written for the Windows default view, so they may not apply if you set your Dell computer to the Windows
Classic view.
Power Problems
Before you begin any of the procedures in this section, follow the safety information that shipped with your computer.
If the power light is off —
The computer is either turned off or is not receiving power.
l
Reseat the power cable in the power connector on the back of the computer and the electrical outlet.
l
Bypass power strips, power extension cables, and other power protection devices to verify that the computer turns on properly.
l
Ensure that any power strips being used are plugged into an electrical outlet and are turned on.
l
Ensure that the electrical outlet is working by testing it with another device, such as a lamp.
If the power light is blinking white —
The computer is in standby mode. Press a key on the keyboard, move the mouse, or press the power button to resume normal operation.
If the power light is blinking amber —
The computer is receiving electrical power, a device might be malfunctioning or incorrectly installed. Contact Dell (see Contacting Dell).
If the power light is steady amber —
There is a power problem, a device may be malfunctioning or incorrectly installed. Contact Dell (see Contacting Dell).
Eliminate interference —
Some possible causes of interference are:
l
Power, keyboard, and mouse extension cables
l
Too many devices connected to the same power strip
l
Multiple power strips connected to the same electrical outlet
Memory Problems
Before you begin any of the procedures in this section, follow the safety information that shipped with your computer.
If you receive an insufficient memory message — l
Save and close any open files and exit any open programs you are not using to see if that resolves the problem.
l
See the software documentation for minimum memory requirements.
l
Run the Dell Diagnostics (see Dell Diagnostics).
If you experience other memory problems — l
Ensure that the memory you are using is supported by your computer. For more information about the type of memory supported by your computer,
see the documentation that shipped with your computer.
l
Run the Dell Diagnostics (see Dell Diagnostics).
Lockups and Software Problems
CAUTION: Before you begin any of the procedures in this section, follow the safety information that shipped with your computer.
The computer does not start up
Ensure that the power cable is firmly connected to the computer and to the electrical outlet.
The computer stops responding or a solid blue screen appears
CAUTION: You may lose data if you are unable to perform an operating system shutdown.
Turn the computer off —
If you are unable to get a response by pressing a key on your keyboard or moving your mouse, press and hold the power button for at least 8 to 10 seconds
(until the computer turns off), and then restart your computer.
A program stops responding
End the program —
1.
Press <Ctrl><Shift><Esc> simultaneously to access the Task Manager, and click the Applications tab.
2.
Click to select the program that is no longer responding, and click End Task.
A program crashes repeatedly
NOTE: Most software includes installation instructions in its documentation or on a CD or DVD.
Check the software documentation —
Try to repair the program. If necessary, uninstall and then reinstall the program.
A program is designed for an earlier Microsoft® Windows® operating system
Run the Program Compatibility Wizard —
The Program Compatibility Wizard configures a program so that it runs in an environment similar to non-Windows Vista operating system environments.
1.
Click Start
® Control Panel® Programs® Use an older program with this version of Windows.
2.
In the welcome screen, click Next.
3.
Follow the instructions on the screen.
Other software problems
Check the software documentation or contact the software manufacturer for troubleshooting information —
l
Ensure that the program is compatible with the operating system installed on your computer.
l
Ensure that your computer meets the minimum hardware requirements needed to run the software. See the software documentation for information.
l
Ensure that the program is installed and configured properly.
l
Verify that the device drivers do not conflict with the program.
l
If necessary, uninstall and then reinstall the program.
Back up your files immediately
l
Use a virus-scanning program to check the hard drive
l
Save and close any open files or programs and shut down your computer through the Start menu
Dell Technical Update Service
The Dell Technical Update service provides proactive e-mail notification of software and hardware updates for your computer. This service is free and can be
customized for content, format, and how frequently you receive notifications.
To register for the Dell Technical Update service, go to support.dell.com/technicalupdate.
Back to Contents Page