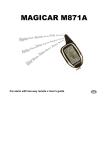
Download Magicar m110as bruger User`s guide
Transcript
Two-Way Remote User’s Guide
Thank you.
Thank you for your purchase of an MAGICAR alarm and/or remote-start system. MAGICAR alarms and remote-start systems are the most advanced systems on the market with amazing features, incomparable ease of use, and
breakthrough technologies never before used in the automotive environment.
Please take time to read and understand this owner's manual so that you can
fully use and enjoy you new MAGICAR system.
2
Two-Way Remote User’s Guide
3
Two-Way Remote User’s Guide
4
Two-Way Remote User’s Guide
Two-Way Remote User’s Guide
Before using your Magicar system, please take some time to familiarize
yourself with it.
LCD Screen
Remote Description
Front
Buttons
LCD ICONS
Antenna
Timer Function On
Color LCD Screen
Back
Turbo Function On
Passive Function On
Auto Function On
Battery
1.5V (AAA)
On - Siren will chirp when arming or disarming.
Off- Siren will not chirp when arming or disarming. The
siren will still be activated if the alarm is triggered or
PANIC mode is activated.
Battery Door Lock
On - Remote will vibrate (when applicable), and give
audible confirmation.
Techinical Specification
Application
Frequency
433.92Mhz
Weight
33.5g
(without Battery)
Frequency
Stability
2ppm/year
Transmitting
Output
10 mW
Operating
Temperature
-15°C ~ +50°C
Exterior
86
39
20 (mm)
Off - Remote will only vibrate (when applicable), no audi
ble confirmations will be given.
Two-Way Remote User’s Guide
Two-Way Remote User’s Guide
On - Impacts to the vehicle will be ignored by the alarm.
Off - Impacts to the vehicle, depending on the severity,
will trigger the alarm.
Valet mode is on, only the door lock function will be
available.
Alarm Clock On
Indicates that the vehicle is currently remote-started.
Ignition Control Door Lock.
Used while displaying temperatures and other features.
Parking lights are flashing.
Doors locked/unlocked.
Voltage display.
AUX mode on
Door open.
Cold Start Function On
Remote Start Availability Indication
Hood Open
Trunk open.
Displays current time, remote start runtime, remaining,
turbo mode time inside temperature of the vehicle, battery
voltage of the vehicle, start reservation time, failure of
signal transfer.
This icon displays the signal strength while transmitting or
receiving.
Display of remaining remote control battery life.
Impact to the vehicle is detected.
Indicates that someone is using the RPS to page you from
your vehicle.
Car Call function using the RPS is on.
Note
Each icon will be displayed while the function it corresponds to is operating.
The screen may be hard to see in direct sunlight.
Two-Way Remote User’s Guide
Two-Way Remote User’s Guide
Button Functions Description
F u n c t i o ns
Arming(Locking)/Disarming(Unlocking)
If the vehicle is remote started or turbo
operated, the runtime will be extended.
2
II
0.5Sec
AUX #1
Activates AUX #1 output
2Sec
START/STOP
If the remote start availability icon is on,
this will start the remote start process
If the remote start was running, this will
stop the remote atart process.
3
III
0.5Sec
AUX #2
Activates AUX #2 output
2Sec
Trunk
Trunk release.
Tap Twice Back Light On
The backlight of remote is turned on for 10Sec
4
IV
0.5Sec
Query
Car Check function
-1st tap:Vehicle temperature
-2nd tap:Voltage of vehicle battery
-3rd tap:Voltage of remote battery
In valet mode, it shows valet.
2Sec
Button HOLD
Button hold on/off
4Sec
Panic
Panic mode (for 90sec)
Tap Twice Parking Timer
Paking timer on/off
5 (I+II) 0.5Sec
MUTE
Siren chirp on/off
2Sec
PROGRAM #1
Main controller option #1
VALET
Valet mode on/off
6 (I+III) 0.5Sec
2Sec
SHOCK ON/OFF Shock Sensor on/off
7 (I+IV) 0.5Sec
DRIVE LOCK
Drive lock(lgniion door lock) on/off
2Sec
PROGRAM #2
Main controller option #2
8 (II+III) 0.5Sec
PASSIVE ON/OFF Passive arming on/off
2Sec
MENU
Entering into Remote menu
9 (II+IV) 0.5Sec
TIME ON/OFF
TIME starting reservation on/off
2Sec
AUTO ON/OFF Auto door on/off
10 (III+IV) 0.5Sec
TURBO ON/OFF Turbo function on/off
2Sec
AUX ON/OFF
AUX mode on/off
1
B u t t on s
0.5Sec
I
2Sec
Note
ARM/DISARM
Extension
0.5 sec: press shortly (between 0.5 and 1.0 sec.)
: press until a car responds (longer than 2 sec.)
+: Press two buttons at the same time.
Performing the same button functions again will
toggle the various modes between on and off.
Two-Way Remote User’s Guide
Two-Way Remote User’s Guide
Locking/Arming
If the system is unlocked/disarmed, pressing button I for a half second will lock the
doors and arm the alarm. This function will still operate even while the vehicle is
remote started. The remote and vehicle will beep once.
Unlocking/Disarming
If the system is locked/armed, pressing button I for a half second will unlock the
doors and disarm the alarm. This function will still operate even while the vehicle
is remote started. The remote and vehicle will chirp twice.
~Beeps two, four times
~Beeps once
1) Arming
Red LED of Car Call sensor flashes, and the doors, shock sensor and Car
Call are monitored.
2) Door Trigger
If the alarm is armed and a door is opened, the alarm will be triggered, playing
the siren and flashing the parking lights for 30 seconds. (Even if the Siren Chirp
is turned off.)
3) Shock Sensor
If the shock sensor detects a heavy impact to the vehicle after 30 seconds of the
alarm being armed, the alarm will be triggered, playing the siren and flashing
the parking lights for 9 seconds. The remote will be notified of the impact and
will beep rapidly while displaying the impact icon; a person hitting the wind
shield. The siren will not play at this time if the Siren Chirp has been turned off.
In the case of a light impact, the siren will chirp four times, and the remote will
display the impact icon.
4) RPS (Remote Paging Sensor)
If the RPS sensor is triggered while the alarm is armed, the remote will be
paged and will display the RPS icon.
Siren may go off if you arm the vehicle while the hazard
lights are on.
11
1) Disarming
The door(s) will be unlocked the RPS LED will stop flashing, and the following
details will be indicated according to the number of chirps and parking light
flashes:
Twice: No trouble while the system was armed.
Four times: Alarm was triggered by strong impact or a opened door.
2) Auto Rearm
If a door has not been opened within 30 sec. of disarming the alarm, the doors
will be relocked and the alarm will arm. This feature is meant to protect against
an accidental disarm of the system. To prevent the rearm process, simply open
a door within 30 sec. of disarming the alarm. The system will not arm again
until given the command through the remote.
Note
In the alarm has been triggered, press button I. The siren will stop, but the
alarm will still be armed. The system will not respond for the first few
seconds after the alarm was triggered, this is because it is still trying to
send a signal out to the remote during that time.
Press button I again to disarm the alarm.
12
Two-Way Remote User’s Guide
Two-Way Remote User’s Guide
3) RPS Display
When disarming, if the RPS was triggered while the system was armed, the
numbers of times it was triggered will be displayed.
AUTO Mode (ON/OFF)
and
Pressing button
for 2 sec. will turn on Auto mode. With Auto mode, the
vehicle will unlock/disarm when the remote is getting closer, and lock/arm when the
remote is far away.
1) Automatic door lock/unlock function starts.
Operating distance may differ from vehicle and different environments.
This function works on the following order:
Press button I again for 2 sec. to switch to the next mode.
4) Function of Shock Alarm
When disarming, if the Shock Sensor was triggered while the system was armed,
the numbers of times it was triggered will be displayed.
Auto Mode 1
Short distance Icon on.
Auto Mode 2
Long distance
Icon flashes in 1.5 second intervals.
Auto Mode 3
Long distance
Icon flashes in 0.5 second intervals.
OFF
No operation
Icon off.
Auto mode 3 suspends AUTO mode when it senses consecutively arming/disarming signals.
The suspension above is cancelled by pressing button I once.
~Beeps once
2) When the door is locked
dodoreremimifafamimireredodo
3) When the door is unlocked
beep beep beep beep
Note
Due to varying vehicles and environments, there may be a small area of distance in which
the system thinks the remote is far enough away to lock, and, close enough to unlock. If your
remote is within this area, the system will repeatedly arm and disarm. To avoid this situation,
try placing your remote farther away from the vehicle.
Auto mode will drain your remote battery faster than normal.
Weather and temperature differences will affect the operation distance of Auto mode.
13
14
Two-Way Remote User’s Guide
AUX Mode Entry (ON/OFF)
As you enter AUX mode, the
icon will be displayed. If an auxiliary channel is not
triggered within 60 sec., Aux mode will be cancelled. An auxiliary channel can be programmed for a pulsed, latched, or timed latch output. You can use them to open or close
windows, turn on lights, activate heated seats, and other features. Please follow instruction.
Two-Way Remote User’s Guide
Remote Start (ON/OFF)
The vehicle will start and run for a preset time if button II is pressed for 2 sec. If
the vehicle is a diesel, the system will pause for a moment after turning on the ignition to allow time to glow plug warm-up. (If needed.)
~Beeps three times
1) AUX 1 (optional)
After entering AUX mode, AUX 1 output will be triggered, if button II is pressed
for 0.5 sec.
While operating AUX 1, the remote control will indicate that AUX 1 is operating.
~Beeps once
2) AUX 2 (optional)
After entering AUX mode, AUX 2 output will be triggered, if button III is pressed
for 0.5 sec.
While operating AUX 2, the remote control will indicate that AUX 2 is operating.
The remaining
time is 9min.
and 50 sec.
Vehicle will be armed (if unarmed before start) by getting the signal from remote.
If the vehicle fails to start, a second and third attempt will be made.
Remote Start will run for the preset time (10, 25, 3, 5min.). If button II is
pressed again for 2 sec. Remote Start will shut off.
The remote start running will continue for 20sec after a door opens. The car key
needs to be in On position within the 20 seconds.
After the vehicle has been remote started, the remaining run-time will be displayed
on the screen.
If the timer goes 1 minute, the remote will warn your with (beep) that the vehicle is
about to shut off.
~Beeps once
Remote starting should be avoided while people are inside
the vehicle.
You will need to turn the key to the ON position in order to
drive the vehicle. Turning the key past the ON position
could cause damage to the vehicle starter.
Note
Options that utilize auxiliary outputs generally cost extra for installation.
15
16
Two-Way Remote User’s Guide
Two-Way Remote User’s Guide
Trunk Release
1) Extension of Remote Start Timer
During the running time, if you press button I for 2 sec.“ Start-Again”
will scroll across the screen once and the timer will be reset to the preset time.
The trunk will be opened/unlocked, if a button III is pressed for more than 2 sec. If
the alarm is on, it will disarm and unlock the doors as well.
~Beeps twice.
~Beeps three times after resetting the runtime.
The remaining
runtime will be
reset.
2) Remote Start Display
If the remote start confirmation is not received by the remote for different reasons,
pressing any button within range of the vehicle will update the remote and show the
remaining run time.
~Beeps three times after resetting the runtime.
If the vehicle has not a trunk actuator, it may be conve nient
to put the system in Valet mode if you are going to be in the trunk doing work
for an extended period of time.
If the vehicle trunk release is a cable type and not electric, extra installation
steps will be required to make the remote trunk release functional.
On vehicles with a trunk actuator, if the trunk is opened more than 20 sec.
while the vehicle is remote started, the remote start will be cancelled and the
vehicle will shut off.
Note
If trunk sensor is installed in a manual transmission vehicle, opening
trunk will cancel the remote start reservation.
Installation of a trunk open sensor or connection of the sensor wire will
generally cost extra as it is an optional feature.
17
18
Two-Way Remote User’s Guide
Two-Way Remote User’s Guide
Query Function
Panic Mode
If button IV is pressed for 0.5 sec., the remote and vehicle will respond with
beeps/chirps and parking light flashes to report the status of the vehicle.
Division
Car Inspection
Remote Control Operation
Armed, Remote Start OFF
Peep
Beep Beep Beep
Disarmed, Remote Start OFF
Peep Peep
Beep Beep
Armed, Remote Start ON
Peep Peep Peep
Beep Beep Beep Beep Beep Beep
Disarmed, Remote Start ON
Peep Peep Peep Peep
Beep Beep Beep Beep
1) When armed:
The icons of door lock, shock and Car Call flash.
2) When disarmed:
The icon of unlock flashes. Door will be opened.
3) Car s Indoor Temperature Indication
Internal temperature of vehicle will be indicated with ℃.
(However, the temperature indicated is the temperature of where a sensor is located,
and if temperature sensor doesn’ t exist, FAIL will be indicated)
The temperature sensor can be located in a specific location per a customer’ s
request by using the extended cable if needed. (Option)
4) Car s Battery Voltage Check
In checking the conditions of a car, the battery voltage of a car can be checked with
the numbers, if a IV button is pressed for 0.5 second, once.
5) Remote Control s Battery Check
After checking the voltage of a car, the battery voltage of a remote control can be
checked with the numbers, if a IV button is pressed for 0.5 second, once.
Changes of Menu
The menu will change from
pressed.
in order, if a IV button is
Note
These functions should be operated within transmitting and receiving range
of the vehicle.
19
four seconds
If button IV is held for more than 4 sec., Panic mode will be initiated. The doors will
lock, the parking lights will flash and the siren will play for 1 min. and 30 sec.
“ PANIC” will scroll across the remote screen for 30 sec.
Flashes for 30
seconds.
In operating self-emergency, remote control will be turned off, in the case of
remote wakeup.
In operating self-emergency, a siren will operate for 1 min 30sec, in the case of car
silence.
Canceling Panic Mode
To cancel Panic mode, press button I for 0.5 sec.
Note
You can use this feature to draw attention to you and your vehicle if you are
attacked or otherwise threatened.
10. Siren Chirp (ON/OFF)
By pressing buttons I + II for 0.5 sec, at the same time, the siren chirps from the vehicle will be muted. To un-mute the siren chirps, press buttons I + II for 0.5 sec. again.
Exception
The siren will still play in these situations:
If the alarm is triggered by opening the trunk or a door.
The siren will still be silent if the alarm is trigger via the shock sensor.
If Panic mode is activated.
20
Two-Way Remote User’s Guide
Valet Mode (ON/OFF)
Activate Valet mode by pressing buttons I + III for 0.5 sec. at the same time. (Valet
mode can also be activated with the ignition key as well, see page 36.) Valet mode
will put the system to sleep and almost all functions will be disabled. Remote
lock/unlock, code unlock, remote option programming, and the query function will
still operate.
When the system is in Valet mode, the alarm is not
active, even when the doors are locked. Any starter or
ignition kill systems that have been installed will be
disabled as well.
1) Valet Mode OFF
Pressing buttons I + III for 0.5 sec. at the same time again will turn Valet mode
OFF, which restores all functions to the remote.
2) Valet Mode Display
The only functions available will be:
1. Button I for 0.5 sec. (lock/unlock)
2. Buttons I + III for 0.5 sec. (Valet OFF)
3. Button IV for 0.5 sec. (Query Function)
4. Button III double press. (EL Lamp ON)
5. Buttons II + III for 2 sec. (Remote Set-Up)
If any other functions are attempted, the remote will beep three times and“ SLEEP”
will scroll across the screen to indicate that the system is in Valet mode.
~Beeps three times.
Two-Way Remote User’s Guide
Shock Sensor (ON/OFF) [
]
To turn off the shock sensor, press buttons I + III for 2 sec.
The shock sensor is turned off if the [
] icon is displayed on the LCD of the
remote.
This mode is useful if you will be parked in a loud or high traffic area such as an
airport. Turning the shock sensor off will help prevent false alarms.
Drive Lock(Ignition control door lock) (ON/OFF)
Drive lock icon“ [
]” will be displayed on remote control, by pressing I+ IV
buttons for 0.5 sec at the same time, and the doors will be locked right after brake
padal is pushed
Drive Lock OFF
Drive lock will be OFF, and drive lock icon will be turned off, again by pressing
I+ IV buttons for 0.5 sec at the same time.
Drive Lock function is not activated:
during remote start,
a door opens within 30 seconds after ignition is turned on,
a door is open when the vehicle is started with key.
Doors will be unlocked when ignition is turned off.
~Beeps once
If you loan your vehicle to someone who is not familiar
with this CompuStar system, you may want to use
Valet mode to avoid any problems they might have by
accidentally activating various features.
21
22
Two-Way Remote User’s Guide
Two-Way Remote User’s Guide
Passive Arming (ON/OFF)
Timer Start Reservation (ON/OFF)
Passive Arming, which will lock/arm the vehicle if it is disarmed, after 30sec, can be
turned ON by pressing buttons II + III at the same time, it operates under the following
conditions.
~Beeps once
Timer start reservation is activated by pressing buttons II+ IV at the same time for 0.5
sec if timer has been set up. Once activated, the vehicle will start by itself at preset
time in every 24 hours .
(See page 42-Timer Start Set-Up)
~Beeps once
While ignition is off after
the door is open and closed.
When the alarm is disarmed.
1) Instant Locking
After remote start reservation is complete in a manual transmission vehicle.
In the case of turbo function ON, after the door is open and closed following the
removal of Key
2) Passive Arming OFF
To turn off Passive Arming, press buttons II+ III buttons at the same time for 0.5
sec. The siren will beep twice and the parking lights will flash.
If Passive Arming is ON, the doors will be locked
automatically, the remote should be taken with you
when you leave the vehicle so that it does not get locked
inside.
If you will be staying in the vehicle for an extended
period of time without the engine running, you should
turn Passive Arming off so that it does not become a
nuisance.
23
※ However, for a manual transmission vehicle, the remote start reservation is required
for this function to work.
Timer Start Reservation
To turn off Timer Start, press buttons II+ IV buttons at the same time for 0.5 sec.
The siren will beep twice and the parking lights will flash.
Note
The, timer start reservation and turbo mode functions are not turned from the
factory, these options must be turned on before use.
24
Two-Way Remote User’s Guide
Two-Way Remote User’s Guide
Parking Timer (ON/OFF)
tap twice
1) Parking Timer
The Parking Timer can be used to monitor the time passed while driving or being
parked.
2) Parking Timer Set-up
By pressing buttons IV twice, the parking timer will be set up and the remote will
beep
3) Parking Timer Display
After starting the parking timer, the display will alternate between the present time
(for 1 sec.) and the parking timer (for 2 sec.)
The parking time will also shows on tenth of a minute
.
The maximum display time of the parking timer is 99 hours 59 min.
~Beep twice, 4 times
(Continue for 2 sec alternating with the present time)
2min and 30 sec
has passed.
4) Parking Timer Release
Parking timer will be turned off with a chirp from the remote, if buttons II+ IV are
pressed for more than 2 sec, while the parking timer is on.
25
Turbo Function (ON/OFF)
Turbo function can be turned on by pressing buttons III+ IV for 0.5 sec. With Turbo
mode active, the vehicle will stay running after the key has been removed from the
ignition
In the case that Key is removed and the door is locked, wakeup will maintain for
turbo function set-up time, however, a car whose auto alarming function is ON will
be immediately locked.
In the case that turbo operating time is set-up for 1 min, wakeup will maintain for a
while, if Key is removed, but the door unlocked/locked doesn’ t work.
To stop the vehicle from running via the Turbo Timer, press button II for more
than 2 sec. (In the case of a manual transmission vehicle, remote start reservation
will be maintained.)
In the case the door is unlocked in the middle of turbo operating, engine will shut
off in 20 seconds assuming that owner will be ready to drive the vehicle.
1) Turbo Function OFF
Turbo Timer will be turned off with a chirp from the remote, if buttons III+ IV are
pressed for 0.5 sec.
If you pressing button III+ IV while engine is running by Turbo Timer, both engine
and Turbo Mode will be turned off
2) Check Function of Turbo Time
The remaining time is displayed, and turbo icon will flash
~Beep twice, 4 times
(The remaining time of turbo will be displayed
for 1 minute and 1/2 sec)
26
Two-Way Remote User’s Guide
Two-Way Remote User’s Guide
3) Turbo Time Extension
Pressing button I for more than 2 sec. while the turbo timer is operating will
is scrolled across the display.
extend the run time, as
~Beep twice, 4 times
(1:57 will be displayed when 2 minute Turbo
Timer is activated)
Button Hold Functions
2 sec
This function prevents accidental button presses while carrying your remote.
1) Button Hold Set-up
To activate the Button Hold function, press button IV for 2 sec. The remote will
beep and display“ Hold” on the screen.
~Beep once
Note
A turbo timer is designed for vehicles with turbo chargers. After hard use,
the turbo housing will be very hot and allowing the vehicle to idle for a few
minutes will cycle more oil through the turbo while it cools.
Turbo Function works differently with LPG option vehicles.
Warning! Since engine is running without key with this Turbo Mode, the dri
ver should make sure that the vehicle’ s gear is in neutral.
EL Lamp
Double Tap
Flashes 5 times
2) Button Hold Cancellation
To cancel the Button Hold function, press button IV for 2 sec. again while the
Button Hold function is active. The remote will beep twice, and the normal func
tions will return to the remote.
3) Button hold Display
Normally, Button Hold operation is indicated on the right side of the screen as
an“ H”
If it is hard to see the screen because of low light conditions, tap button III twice, the
EL Lamp will be turned on.
~Beep
EL Lamp is
turned on
Note
The Button Hold function will be cancelled if you activate Panic mode by
pressing button IV for 4 sec.
27
28
Two-Way Remote User’s Guide
Two-Way Remote User’s Guide
Warning of vehicle battery drain
If the vehicle is locked (armed) with a taillight on, the parking lights will flash once
and siren will chirp 7 times
One flashing light
Trunk Open Sensor
With this sensor installed and the alarm armed, the alarm will be triggered if the trunk
is opened. The siren will be activated and the parking lights will flash.
Wakeup Interception Function
With this option installed: If the door is forced open, while the vehicle is armed/locked,
the vehicle will not start with either the remote or key.
Preheating Sensor
For remote starting diesel vehicles, the system monitors Wait to start lights to preheat
the engine.
Note
Options will generally cost extra for installation and parts.
29
30
Two-Way Remote User’s Guide
Two-Way Remote User’s Guide
Shock Sensor Trigger
If the alarm is armed and the shock sensor is triggered by an impact to the vehicle, the
following sequence will occur:
~Beeps for 9 sec
CAR : The siren will activate and the parking
lights will flash for 9 sec.
Remote control : Vibration/theft indication
sound.
Remote will beep at 4 second intervals until a
button is pressed.
Theft Function (Door, trunk or hood trigger)
If the alarm is armed and the door, trunk, or hood is opened, the following sequence
will occur:
~Beeps for 30 sec
CAR : The siren will activate and the parking
lights will flash for 9 sec.
Remote control : Vibration/theft indication
sound.
Remote will beep at 4 second intervals until a
button is pressed.
Car Owner Calling Function
If the alarm is armed and the RPS function is turned on, when a person knocks on the
RPS sensor, the remote will be paged and will ring like a telephone and vibrate.
~Beeps
31
CAR : The vehicle LED changes from red to
green.
Remote control : Vibration/telephone ring.
(4 times)
Remote will beep at 6 second intervals until a button
is pressed.
32
Two-Way Remote User’s Guide
Two-Way Remote User’s Guide
Code Unlock Function
Cold Start Functions
This is the function that when the timer start reservation is on, engine will be started automatically based on fixed 3 steps of temperature setting if the temperature is below 0 , the engine
will be started automatically Temperature setting can be adjusted by changing main controller
option.
~Beeps
CAR : The siren will activate and the parking
lights will flash for 9 sec.
Remote control : Vibration/theft indication
sound.
Remote will beep at 4 second intervals until a
button is pressed.
Enter the four numbers (1111~9999) as a password, by using a RPS sensor, entering
the correct pass code will unlock the doors, without either remote control or Key.
(“0” should be avoided for a password.)
Each knock in a set needs to be done within 1.5 sec. of each other. Waiting longer
than 1.5 sec will switch to the next set of knocks.
Green LED should be checked at the first knock.
Conditions for Entering the Password the First Time
Conditions for Entering the Password the First Time
Doors
Unlocked
Ultra Sonic Sensor (Optional)
It perceives someone is inside the car, and makes car alarm activated and transfer the siginal
to the remote controller when it detects someone is inside the car This is an optional product.
~Beeps for 30 sec
CAR : The siren will activate and the parking
lights will flash for 9 sec.
Remote control : Vibration/theft indication
sound.
Remote will beep at 4 second intervals until a
button is pressed.
33
Door
Open
Key On, but
Engine Off
Note
If you enter the wrong password more than 5 times within 30 min, this
function will not be available for 24 hours.
(The remote will still operate during this 24 hour period.)
If you give up in the middle of entering the password, it will not count
toward the wrong entry count of 5.
34
Two-Way Remote User’s Guide
Knocking (For door open or entering the password.)
The password should be entered under the,
(see page 28).
Push the Button or Knock on the
RPS sensor 10 times
Two-Way Remote User’s Guide
Set-up and Other Functions
In Range Display Method
If the remote and vehicle are within operating range of each other, the signal
strength will be displayed beside the antenna icon on the display.
Red LED flashes fast
Flashes 5 times
The Green LED will flash at the first knock.
The next knock shall be done within 1.5 sec.
Push the Button orKnock as many times as the first password number, and then
check to see if the red LED flashes.
(Knock as many times as the first password number)
After 1.5 sec
Green LED will flash at the first knock.
Battery Save Function
When the battery is almost dead and ready to be replaced, the battery icon will flash
and Battery Save Mode will operate.
Red LED flashes as many times as the
number of the first set of knocks.
After the first set
The second, third, and fourth password numbers should be entered the same as
above.
(As the password has four numbers.)
After entering the final set
The parking lights will flash, signaling that the password has been entered.
Flashes 5 times
Battery Save Mode Operation
The remote will only receive confirmation signals for button I operations.
The other buttons will still function, but they will not receive confirmation signals
back from the vehicle.
The transmitting power will be reduced for a close range operation only.
Unlocking the doors using the RPS
To unlock the doors using the RPS, the code must be entered correctly, matching
the code you specified initially. The remote will be paged and will show that the
doors have been unlocked.
35
36
Two-Way Remote User’s Guide
Time Information Backup
1) It saves time information (current time, start-up reservation time and alarm time)
in the status where power has not been supplied to remote (at a time of replacing
batteries). If the power is supplied again, users do not have to re-adjust the time
information.
2) Remote default is set in the status when the time information backup is released.
In order to set up the time information backup for the remote, users need to execute
the menu of the remote once or more.
After users execute the menu ((2+3)-), the time information backup is automatically
executed.
3) Cautions at a time of replacement of batteries
In order to use the time information backup function more effectively, press button
No.4 of the remote before and at a time of the replacement of the batteries (communication with the main not needed at that time) to back up more accurate time information.
Two-Way Remote User’s Guide
GAS(LPG) Option Set-up
※ Burning off gas residue in the system:
Auto Transmission Car
- While engine is running, shut off the gas valve and wait. Then turn off the key after
the gas residue was burnt off.
- Activating Turbo Mode will be a convenient way of burning off the gas residue
since engine will continue running like a manual transmission vehicle until the gas
residue is burnt off. See below.
Manual Transmission Vehicle
Turn off the key first then shut off the gas valve. Engine will continue running until
the gas residue is burnt off. If you open and close the door while engine is still run
ning, the remote start reservation is also completed.
Remote Start
After remote start is completed, the ignition wire will continue to be powered for 4
more minutes (or 4 minute and 20 seconds if a door opens while engine is running)
by the system to make sure the gas residue is burnt out.
Door Open Indicating Function
The parking lights will flash to indicate that the door is open.
(See INSTALLATION MANUAL for the setup procedure “the main option”)
Note
In Turbo Mode, if Key is turned OFF but the GAS valve is not shut off, then
the engine will be turned off in 4 minutes without burning off the gas
residue.
In Turbo Mode, the remote will show the engine running to burn off the gas
residue.
37
38
Two-Way Remote User’s Guide
Remote Start Reservation Mode for Manual Transmisson Vehicles
Reservation Mode prevents a manual transmission vehicle from starting in gear if the
system has been installed properly.
Automatic(Passive) Reservation
When key is turned off, the doors will unlock and the engine will remain running up to
2 minutes. Within the 2 minutes, if a door opens then closes, the engine will shut off
]” icon shall be displayed to confirm
completing the remote start reservation.“ [
the reservation.
Two-Way Remote User’s Guide
Reservation Mode Cancellation in Manual Transmission Vehicles
After Reservation Mode has been set up, it will be cancelled if either the trunk or a
door is opened.
After driving and removing Key, the engine will stay running for 2 minutes. If but
ton II is pressed for more than 2 sec. during this time, Reservation Mode will be
cancelled.
If Valet Mode is ON, Reservation Mode will be cancelled.
Remote Wakeup Reservation
Active Reservation
If button II is pressed for more than 2 sec., before the key turned off and removed from
the ignition, the parking lights will flash and the siren will chirp one time. The engine
will stay running for 2 min. even if the key is taken out of the ignition. Before the 2
min. timer expires, you must get out of the vehicle and shut the door. Once the door
closes the engine will shut off and Reservation mode has now been set. The remote
start availability icon,“ [
]” will be displayed on the remote screen.
This procedure is for the vehicles that have a problem with the Automatic Reservation
procedure.
Note
In the process of Reservation mode set up, the display lights in the instrument
cluster may be ON for 3 sec after the engine has been turned off.
(This is a normal process.)
In the process of Reservation mode set up, when the key is removed, the ABS
light may be ON/OFF, this is a normal operation.
When this product is installed in a manual transmission vehicle,
it must be set to Manual Transmission Mode. Our company is
not responsible for any accident resulting from selecting wrong
mode (Automatic Transmission Mode) for a Manual
Transmission vehicle. Customer must confirm this with his/her
installer and check and inspect by himself/herself.
Automatic transmission vehicles must be checked in the same
manner, ensuring that the vehicle will not start with the key
39
On the slopes, a car may move. You should not set up
the reservation mode.
Examination of Remote Wakeup Failure
If there is a problem remote starting your vehicle, you will hear three chirps from
the remote to indicate that there is a problem. If you go to the vehicle and try again,
an error code will be displayed through the parking lights. The lights will flash
three times, pause, and then flash a number of times equivalent to the error code
number. Example for error code 4, the parking lights will flash three times, pause,
and then flash four times.
Number of Flashes
Error Explanation
Once
Engine is already running.
Twice
Ignition (Key) is on.
3 times
Door open.
4 times
Trunk open.
5 times
Reservation Mode not set.
(Manual transmission vehicles only.)
40
Two-Way Remote User’s Guide
Two-Way Remote User’s Guide
Setting the Shock Sensor Sensitivity
Controlling Shock Sensor Sensitivity
To adjust the shock sensor sensitivity, locate the shock
sensor and adjust the dial on the sensor. The higher the
number on the dial, the higher the sensitivity of the
sensor.
]
Entering the Main Menu
The higher the numbers,
the more sensitive
Entering Valet Mode Using a Key
If the remote has been lost or damaged, you can enter Valet Mode
using the ignition key of the vehicle. The following steps must be
completed within a limited amount of time, so please read
through the instructions before beginning.
1) Turn the key to the Ignition On position. When the ignition
is on, the lights in the instrument cluster will turn on. In most
vehicles this position is two clicks forward from the Off
position.
2) Move the key back one click to the Accessory On position.
The lights in the instrument cluster should turn off.
3) Steps 1 and 2 must be repeated for a total of three times within
three seconds. Once this has been done, the alarm will turn off
and valet mode will be active
Valet Mode can only be turned off through the remote
(Press buttons I + III for 0.5 sec. at the same time, the siren will chirp and the
parking lights will flash twice.)
41
Button Control Method
Function(Menu)
Button
I
II
Set-up of present time
hour control
minute control
Set-up of timer start
reservation time
hour control
minute control
Set-up of alarm clock time
hour control
minute control
Set-up /cancellation of
alarm clock function
change(basic :
cancellation)
Set-up/cancellation RPS
change(basic :
Activation)
change(basic :
cancellation)
change
(basic : “ ”)
Set-up/cancellation of
vibration mode
Change of the temperature unit
The change of
or
III
IV
back to the next menu
Control of Siren Sound
In order to increase the volume of the siren, locate
the siren, (usually under the hood in the engine bay)
and cut the loop of black wire at the base of the siren.
Be careful not to cut the thicker black ground wire of
the siren.
The remote can be programmed
after pressing buttons II III for
more than 2 sec. at the same time.
back to the previous menu
Shock Sensor sensitivity can vary from vehicle to
vehicle for many reasons including where and how it
is mounted, and the size of the vehicle. Some after
install adjustment may be necessary to fine tune the
sensor.
Setup of Remote Options [
Note
The icon corresponding to the option you are changing will flash on the screen.
Menu End Method
To exit the remote programming menu, press buttons II + III for more than 2 sec.
The remote will automatically exit the programming menu if 15 sec. pass without a
button being pressed.
42
Entering Valet Mode Using a Key
Two-Way Remote User’s Guide
Function
Set-up of
Present time
Set-up of
Timer Start
Reservation
Time
Set-up of
Alarm
Clock Time
Set-up/cancellation of
Alarm
Clock
Function
Button
Hour
Minute
Hour
Minute
Hour
Application Method
The
icon flashes.
At this time, button
will control the hour, and
button
will control the minute.
The
icon,
and [
] flash
At this time, button
will control the hour, and
button
will control the minute.
The [
and
icon flash.
Minute
ON/OFF
[
] icon flashes
for alarm clock active,
Clock display
for alarm clock disabled.
Toggle this option on and off with button
.
When the alarm clock activates at the specified time, tap
any button for 0.5 sec. to silence the remote.
ON/OFF
] icon flashes
Clock display
for alarm clock active,
for alarm clock disabled.
Toggle this option on and off with button
.
RPS Function ON/OFF
In order for someone to use the RPS to page your
remote, the system must be armed/locked and the
RPS must be knocked on twice within 2 sec.
Set-up/cancellation of
Vibration
Mode
ON/OFF
Fahrenheit
Centigrade
Change
43
],
At this time, button
will control the hour, and
button
will control the minute.
[
Set-up/cancellation of
Remote
Paging Sensor
Two-Way Remote User’s Guide
[
] icon flashes
Clock display
for alarm clock active,
for alarm clock disabled.
Toggle this option on and off with button
.
Vibration Function ON/OFF
With the vibration function on, the remote will not
make any sound unless the alarm is triggered. With
vibration mode off, vibration will be felt during an
RPS page, or if alarm is triggered.
The
icon flashes.
The change of the temperature unit with either
44
Two-Way Remote User’s Guide
45


