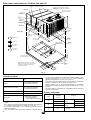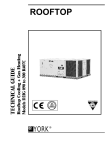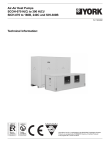
1
Sunline 2000TM
packaged air conditioners
with gas heating
models D3IG 180, 240 and 300 (Euro 50 Hz)
Ref: Y-R24976 1001M
ER-028/1/91
ISO 14001
ISO 9001
Operating Instructions
CGM-97/013
GB
1
2
GB
GB Index
General description
-
Nomenclature
General information
Environmental protection
Warning signs
Inspection
Standards
Installation
-
-
-
Limits
Table 1 - Unit application data
Location
Installation and use
Clearance
Ducts
Fixed outdoor air intake damper (optional accessory)
Condensed water drain
Compressors
Air filters
Combustion discharge
Table 2 - Application data with gas heating
Gas pipes
Gas connection
Ventilation and combustion air hoods
GLP/propane gas units, tanks and pipes
Power and control wiring
Typical site wiring
Thermostat
Unit control wiring
Servicing access
Unit wiring diagrams
Optional economiser rain-hood/motor-driven damper
Adjustment of enthalpy set point
Table 3 - Physical data
Dimensions and clearances - D*IG180, 240 and 300
Clearances (mm)
Supply entry data
Dimensions and clearances D*IG180, 240 and 300 (Cont.)
Table 4 - Wiring specifications
Table 5 - Impulse air fan performances
(Mod. D*IG180) - With application downward
discharge
Table 6 - Impulse air fan performance
(Mod. D*IG240) - With application downward
discharge
Table 7 - Impulse air fan performances
Page
Page
5
5
5
5
5-6
6
6
6
6
6
6-7
7
7
7-8
8
8
8
8
8
8
9
9
9
10
10
10
11
11
11
12 - 19
20
20
21
22
22
22
(Mod. D*IG300) - With application of downward
discharge
- Table 8 - Static resistance
- Table 9 - Fan motor and drive specifications
25
25
25
Operation
26
-
Cooling system
Preliminary cooling operation
Thermostat operation
Cooling operation sequence
Heating operation sequence
Table 10 - Gas valve/heat switch adjustment
Safety features and controls
Check list prior to start up
Start up
-
Operating instructions
Check list after start up (gas)
Gas pressure adjustment in the manifold
Burner instructions
Checking air flow
Temperature increase adjustment
Table 11 - Impulse air fan motor pulley
adjustment
- Pressure drop in dry indoor coil vs. impulse
air flow
26
26
26
26 - 27
27 - 28
27
28
28 - 29
29
29
29
29
29 - 30
30
30
30 - 31
31
Maintenance
32
- Normal maintenance
- Cleaning smoke stacks and heating
elements
32
Trouble shooting
33
- General information
- Probable causes of failures and suggested
corrective measures
- Trouble shooting diagram
33
32
23
23
24
24
GB
33
33 - 35
3
4
GB
General description
Nomenclature
Product category:
D = Packaged air conditioner (air-cooled)
Product generation:
3 = 3rd generation
Product identification:
IG = International cooling with gas heating
Nominal cooling capacity:
180 = 52.7 kW (180 MBH)
240 = 70.3 kW (240 MBH)
300 = 87.8 kW (300 MBH)
Heating installed and type of refrigerant:
N = Natural gas equipment and R-22 refrigerant
G = Natural gas equipment and R-407C refrigerant
Nominal heating capacity with gas:
320 = 93.7 kW (320 MBH)
Voltage:
50 = 400/415 - 3 + N - 50
D
3
IG 180 N 320 50
General information
The D*IG models are packaged type air conditioners with gas
heating, designed for installation outdoors on a rooftop or
bedframe, and comply with the ISO 9002 Quality Standards.
These units are supplied completely assembled on rigid beams
that are fitted to the base in a permanent manner. All piping,
refrigerant loads and electric wiring are factory-assembled and
tested. These units require electric power supply, gas connection, duct connections, installation of a hood at the combustion air intake, a hood at the combustion gas outlet and a
fixed outdoor air intake damper (for equipment without an
economiser or motorised-damper) at the installation site.
The gas units have aluminium-plated steel tubular heat exchangers with spark ignition.
FOR YOUR OWN SAFETY
Should you smell gas:
1. Do not touch any electric switch.
2. Put out all exposed flames.
3. Call your gas company immediately.
FOR YOUR OWN SAFETY
Do not store or use gasoline or other inflammable products near this
or any other equipment.
Environmental protection
Packing is made of recyclable material. Its eliminate should
be carried out in accordance with the existing regulations on
selective collection of residual material.
Elimination of the unit
Upon disassembly after a long service life, the components
of the unit should be recuperated ecologically. The cooling
circuit contains R-22 or R-407C refrigerant, which should be
recuperated and then returned to the gas manufacturer for
recycling.
Oil will remain in the sealed compressor and, therefore, must
be returned with its circuit sealed.
The air conditioning unit will be deposited in an area determined by the local authorities, for its selective recuperation.
Warning signs
The following signs indicate the existence of potentially dangerous conditions for users or servicing personnel.
Whenever found on the unit itself, take into account their
meaning.
GB
5
3. To be installed on combustible materials without any danger.
4. To be used with natural or propane gas.
These units are not to be used with conventional ventilating
systems.
This symbol indicates an electrical danger or risk.
CAUTION
This product should be installed by strictly following the enclosed
instructions and all local, state and national regulations including, but
not limited to, standards on buildings, electricity and mechanics.
Attention: The unit is equipped with remote
control and can run automatically. Two minutes prior to having access to the interior,
disconnect the power supply so as to avoid
any contact with the fan in motion.
WARNING
Incorrect installation could enable the operation of the unit to cause
personal or property damage.
The installer should pay special attention to the words: NOTE, CAUTION and WARNING. The purpose of the Notes is to clarify or facilitate installation. The Cautions attempt to avoid damage to the equipment. The Warnings are to alert the installer that personal damage
and/or damage to the equipment could be caused if the assembly
operation is not carried out correctly.
Attention: It is obligatory to read the instructions prior to any handling.
Installation
Limits
These units should be installed in compliance with the National, Local or Municipal Safety Standards in force.
See Table 1 on Unit Application Data, and Table 2 on Gas
Heating Application Data.
Should components need be added to the equipment so as to
comply with local standards, these should be installed at the
expense of the distributor and/or the client.
Attention: Fan in operation.
Table 1 - Unit application data
Attention: Do not touch hot surfaces.
Voltage variation (Min. / Max.)
WB air temperature in the
evaporating coil (Min. / Max.)
DB air temperature in the
condensing coil (Min. / Max.)
Attention: Lifting point.
V
360 / 456
°C
15 / 23
°F
59 / 73
°C
-4 / 52
°F
25 / 125
Location
Inspection
As soon as the unit is received, it should be inspected for
damage during transportation. If any damage is observed, it
should be noted on the delivery slip. A separate inspection by
a transport company agent should be requested in writing.
For further details, contact your Distributor.
Standards
These units have been designed and manufactured in compliance with the TÜV, VDE and DVGW requirements:
1. To be used as forced air boilers with cooling equipment.
2. Only for installation outdoors.
6
Use the following guidelines to select an adequate location
for these units.
1. This equipment is designed for outdoor installation only.
2. The condenser requires an unlimited air supply. Whenever
possible, locate the equipment on the north or east side of
the building.
3. For ground level installations, use a level concrete slab of
at least 100 mm. thick. The length and width should be at
least 150 mm. more than the base beams of the units. Do
not fasten the bedframe to the foundation of the building.
4. For roof-top assembly, the roof structure should be able to
support the weight of the equipment, its options and/or
accessories. The equipment should be installed on a mounting base or on an adequate frame of iron angles (an optional “Mounting Base” or Roof-Curb accessory is available).
GB
Typical sling
CAUTION
If this equipment is to be installed on a mounting base or a special
angle frame that is not the standard mounting base, gaskets should
be placed on all surfaces in contact with the lower part of the unit.
If it is preferable to set the unit on shock-absorbers, this should be
done in accordance with the following figure:
SPACER BAR
Total amount: 10 ports
There are Ø13,5 holes at
the bottom of the base beams
45
Outdoor coil
side
2337
45
In plant view
CAUTION:
BEFORE SUSPENDING THE UNIT,
MAKE SURE ITS WEIGHT IS
DISTRIBUTED EQUALLY ON THE
1168
1168
70
Electrical box
45
LIFTING HOLES
875
800
875
260
Model 180 : 3180
- Fig. 1 -
Models 240/300 : 3460
Centre of gravity
Approx. load at each supporting point (kg)
D3IG
unit
size
180
Basic
unit
without
acces.
CONDENSER
COIL END
APPROX. CENTRE
OF GRAVITY
Increment per accessory
REAR
Motor-driven
damper or econ.
Extraction
fan
Barometric
damper
1524
233
7
96
3180 (180)
3460 (240, 300)
FRONT
1143
240
107
300
136
7
6
2
- Fig. 2 -
5. Keep the level tolerance at a maximum of 13 mm. along
the entire length or width of the unit.
Installation and use
Be careful when moving the unit. Do not remove any part of
the packing until the equipment is near its final location. Suspend the unit using chain or cable slings, inserting them through
the lifting holes located on the base beams of the unit. Separators should be used all along the top of the unit, the length
of which should surpass the longest measurement. See
Fig. 1.
CAUTION
The opening for combustion air intake has an adhesive label on the
outside so as to avoid any humidity within the unit, which would
cause damage to the electric components. Leave this seal in place
until the combustion air hood is installed (see Fig. 5).
Clearances
All units require certain clearances for optimum operation and
servicing. See unit dimensions, Fig. 11, for clearances required for fuel, construction, maintenance and correct operation of the unit.
Ducts
A network of closed return ducts should be used. This does
not exclude the use of economisers or outdoor air intakes.
The impulse and return air connections should be made with
flexible gaskets so as to minimise noise levels.
The impulse and return air duct networks should be designed
in accordance with the air flow requirements on site. They
should not be sized to equal the dimensions of the connections of the ducts of the unit.
See Table 3 on the weights of the equipment, and Fig. 2 on
the approximate centre of gravity.
GB
CAUTION
When fastening the ducts to the side flanges of the equipment, insert
the screws only through the duct flanges. Do not insert the screws
through the casing.
The external ducts should be insulated and waterproofed.
7
See Fig. 11 for details concerning the side and bottom openings for the impulse and return air ducts.
NOTE
The condensed water drain pipe must have a siphon so as to facilitate correct drainage. See Fig. 4.
Fixed outdoor air intake damper (optional accessory)
75 mm
Piping recommended for drain
UNIT CONDENSED WATER
DRAIN CONNECTION
BASE
TRAY
BASE BEAMS
51 mm
See the instructions included in the accessory. The hood contains an adjustable damper deflector so as to give variable
amounts of outdoor air to the units not equipped with neither
an economiser nor a motor-driven damper. See Fig. 3
A bag fastened to the hood assembly contains mounting gaskets and screws. Place gaskets on the three hood flanges
prior to installation. Have the gaskets extend approximately
6 mm. beyond the top and bottom of the latch so as to insure
adequate sealing.
Adjustment of the desired air flow damper can be carried out
before or after installing the hood. Position 1 of the damper
deflector allows an air flow of approximately 10%, position 2
of about 15% and, to achieve about 25%, remove the damper
deflector.
On units with bottom return air, install the damper assembly
over the opening on the side access panel to the return air
(supplied with the accessory). Fasten with the screws supplied.
On units with side return air, install the damper assembly in
the return air duct network, as close to the unit as possible.
Drill a hole, 400 mm. high by 455 mm. wide, in the duct so as
to insert the damper. Using the holes in the hood flanges as a
pattern, drill 3.5 mm. holes and fasten with the screws supplied.
DRAIN PLUG
- Fig. 4 -
Compressors
These units are supplied with the supplied with the
antivibratory supports factory adjusted and ready for use.
Fixed outdoor air damper (optional accessory)
CAUTION
Do not loosen the screws of the antivibratory supports.
Air filters
All units are supplied with 50 mm. filters. The filters should
always be mounted before the indoor coil, and must be kept
clean or be replaced by others of the same size and type.
Dirty filters limit the capacity of the unit, and can cause freezing
of the coils or a security lock-out. Table 3 shows the minimum
filter surface and size required.
SICE ACCESS
PANEL IMPULSE
AIR
DAMPER
DEFLECTOR
Combustion discharge
*
The combustion products are discharged horizontally through
two openings (with a hood), protected by a grill and located at
the upper access panel of the gas heating.
HOOD
* LATCH
WITH GASKET
2
1
SIDE ACCESS
PANEL RETURN
AIR
Table 2 - Application data with gas heating
OPENING COVER
OUTDOOR AIR
Absorbed
Given
power
power kW
(Nett) kW
(Mbh)
(Mbh)
85 / 290
FRONT VIEW
- Fig. 3 -
Condensed water drain
The piping installation should comply with local regulations.
Use sealing putty on male threads. Install a condensed water
drain pipe from the female connection (1" BSP) on the unit, to
an open drain.
8
GB
76 / 260
Models
180, 240
300
Temperature
increase - Min./Max.
Gas
at full absorbed
consump.*
power**
m3/h (cfm)
Min.
Max.
8.5 / 302
17 / 30
33 / 60
NOTE: Gas heaters are supplied for natural gas, but can also be
transformed to propane gas (LPG) by means of a conversion kit.
* Based on nett absorbed power, gas type 2nd-H, G20 (9.97 kW/
m³).
** Air flow should be adjusted so as to achieve a temperature increase within the indicated limits.
Gas pipes
Ventilation and combustion air hoods
The correct sizing of the gas pipes depends upon the flow
required, density of the gas and the length of the pipes. The
regulations of the local gas company must be complied with
when determining the diameter of the pipes.
The heating value of the gas may vary from city to city. This
value should be check with the local gas (supplier) company.
Two gas outlet and combustion air intake hoods are supplied
fastened to the fan casing inside this compartment. These
hoods should be installed so as to guarantee correct operation of the unit. All hoods should be fastened to the outside of
the gas heating access panel, by means of the screws supplied in the bag that is also included in the fan casing.
When installing, the upper latch of this hood slips in beneath
the top of the access panel opening, and is fastened with the
screws supplied. (See Fig. 5)
NOTE:
There could be a regulation of the local gas company with regard to
the minimum diameter of gas pipes.
Ventilation and combustion air hoods
Gas connection
The gas supply pipes can be channelled through the hole
located at the front of the unit. See Fig. 11 for the location.
Fig. 6 shows the usual position of the supply pipes.
The fan compartment contains a wall through-ring for all units
with gas heating, and should be placed in the access panel
when the gas pipes are inserted through the front of the unit.
Recommendations on gas pipes:
1. A condensed water supplement and grounding should be
installed on the gas pipes.
2. If so specified by local regulations, it may be necessary
to install a manual shut-off valve on the outside of the
unit.
3. Use wrought iron or steel pipes for all gas lines. The sealing putty should be applied, scarcely, only on the male
threads.
OPENING IN
ACCESS PANEL
COMBUSTION
GAS OUTLET
HOODS
COMBUSTION
AIR INTAKE
HOOD
ACCESS
PANELS TO
GAS HEATING
- Fig. 5 -
External supply connection
WARNING:
Natural gas may contain a small amount of propane. Due to the fact
that propane is an excellent solvent, it would quickly dissolve the lead
carbon or the majority of normal commercial type components. Therefore, a special sealing putty should be applied when wrought iron or
steel pipes are used. Putties that comply with Standard BS6956 Part 5,
or equivalent, may be used.
4. All dirt and burrs should be removed from the pipes by
lightly tapping the pipe with a hammer and blowing them
out. Prior to the initial start up, make sure all air has been
drained from all external gas lines of the unit.
5. Gas supply should be carried out by means of a separate
line, installed in compliance with all state, local and city
safety regulations. Once the gas connections are finished,
open the main valve to normal gas pressure. Make sure
there are no leaks at joints by means of a soap solution or
any other adequate method. Never use a flame.
6. The boiler and its individual manual shut-off valves should
be disconnected from the gas supply pipe system during
the pressure test of said system with test pressures over
3.5 kPa (0.5 psi).
7. Immediately after the gas supply connection (upwards) to
the boiler, a threaded 1/8" NPT hole should be drilled for
the connection of a test pressure gauge.
GB
MAIN
VALVE
MANUAL
CLOSING
SUPPLEMENT FOR CONDENSED WATER
- Fig. 6 -
CONNECTING TUBING
MODEL
DIG 180 - 240 - 300
FEMALE GAS CONNECTION
1"
9
GLP/propane gas units, tanks and pipes
All units with gas heating are supplied factory equipped for
operation with natural gas only. The unit can be transformed
for operation with GLP/propane gas by means of a conversion kit installed on job site.
All units operating with GLP/propane gas must comply with
local or city safety regulations.
For satisfactory operation, the pressure of the GLP/propane
gas should be 37 mbar with the unit at full load. Maintaining
an adequate gas pressure will depend upon three main factors:
1. The evaporation rate that depends upon (a) the temperature of the liquid and (b) the magnitude of the “wet surface”
of the container o containers.
2. A correct pressure adjustment. (A two-stage adjustment
is recommended, both from a cost as well as a performance point of view.)
3. The pressure drop in the lines between the regulators and
between the second phase regulator and the unit. The diameter of the pipes will depend upon the length of same
and the total load of all units.
Complete information on the sizing of the evaporating tank,
adjustments recommended for the regulator and pipe sizing
can be obtained from the corresponding manufacturers and
the GLP/propane gas suppliers.
See Fig. 8 for typical wiring on site, and Fig. 9 for unit wiring
diagram and information on the control circuit and power wiring.
Typical site wiring
Control wiring
COOLING/HEATING
(24V ELECTRONIC THERMOSTAT)
THERMOSTAT
2
TERMINALS
R
Y1
Y2
W1
W2
G
24V(C)
LED 2
LED 1 4
CLK 1
5
CLK 2
RS 2
RS 1
RS+V
3
UNUSED
1
1
R
Y1
Y2
W1
W2
G
B
X
A1
A2
24 V-VOLT
TRANSFORMER
TO REMOTE SENSOR
SL-IDS-R (IF USED)
1
WARNING:
Natural gas may contain a small amount of propane. Due to the fact
that propane is an excellent solvent, it would quickly dissolve the lead
carbon or the majority of normal commercial type components. Therefore, a special sealing putty should be applied when wrought iron or
steel pipes are used. Putties that comply with Standard BS6956 Part
5, or equivalent, may be used.
CONNECTING
STRIP
2
3
4
5
TERMINALS A1 AND A2 PROVIDE AN OUTLET RELAY TO CLOSE THE
OUTDOOR ECONOMISER DAMPERS WHEN THE THERMOSTAT
1
CHANGES TO THE ENERGY SAVING POSITION
DSL-700
ELECTRONIC THERMOSTAT
2
PRESSURE SWITCH FAILURE INDICATION (HP, LP).
DIRTY FILTER INDICATION (IF DIRTY FILTER PRESSURE SWITCH
IS USED).
REMOTE CONTACT TO ALTERNATE DAY/NIGHT SET POINT
After final installation of pipes, check for leaks at the joints
with a soap solution. Never use a flame.
Power and control wiring
Site wiring and grounding of the unit should be carried out in
compliance with national, local and city regulations. The voltage tolerances to be maintained at the compressor terminals
during start up and operation appear on the Identification Plate
and in Table 1.
The inner wiring hose supplied with the unit is an integral part
of same. No variation should be necessary for compliance
with electrical regulations.
An automatic switch and a differential should be installed on
site for the unit. This switch should be independent of all other
circuits. Should any of the cables supplied with the unit need
replacement, the replacement cable should be of the type
shown on the wiring diagram. See Table 4 for wiring specifications.
The power supply line should be adequately sized for the load.
Use only copper wires. Each one of the units should be
connected to an independent circuit with an automatic switch
and a differential, supplied directly from the main panel.
POWER WIRING
L1
SEE WIRING
SPECIFICATIONS
TABLE FOR POWER
SUPPLY CABLE AND
SWITCH SIZING
L2
CONNECTIONS
FOR POWER
SUPPLY
L3
N
PE
GROUNDING
TERMINAL
CONFIGURATION OF SWITCHES (DSL-700)
OFF
ON
4 MINUTES (MIN ON/OFF)
1
UNBLOCKED KEYBOARD
2
IMMEDIATE FAN WITH
1 STAGE HEATING 1 STAGE
3
1 STAGE
LED 1+OFF ICON
4
LED 2+ICON OFF
6
2 MINUTES (MIN ON/OFF)
BLOCKED KEYBOARD
2 STAGES
5 LED 1+FILTER ICON
LED 2+ ALARM ICON
CAUTION:
When connecting the power supply and control wiring to the unit,
waterproof type wires should be used so as to avoid water or humidity getting into the unit during normal operation. These waterproof conditions also apply when a switch is installed on site.
- Fig. 8 10
GB
Thermostat
The ambient thermostat should be located on an inner wall, at
about 1420 mm. above floor level, where it will not be exposed to air flows, direct sunlight or heat from other electric
devices. For general installation, follow the instructions supplied by the manufacturers. To connect the thermostat to the
unit, eight colour-coded 1 mm² wires should be used.
Unit control wiring
The following notes and indications pertain to the unit wiring
diagram shown in Fig. 9.
NOTES:
1. All site wiring should be carried out in compliance with all
city and local standards and/or regulations in force at the
time of installing the unit.
2. Should it be necessary to remove any cables supplied
with the unit, these should be replaced by cables of the
H5V-K, HO7V-K or equivalent type, and be numbered
clearly for identification purposes.
3. Remove jumper “608” if an occupation switch has been
installed.
4. Motors are intrinsically protected, except for the indoor
fan motor, that has external protection.
5. This unit is wired for operation with a 415 V power supply.
6. See the Identification Plate for the maximum size of the
automatic switch and the minimum power supply cable
section.
7. The timer for the “KM 1” contactor is factory adjusted to 4
seconds. The timer for the “KM 2” contactor is factory adjusted to 10 seconds.
8. To invert the rotation of the indoor fan, interchange wires
133 and 134 of the indoor fan “KM 3” connector.
Servicing access
Upon removal of the following panels, the different components subject to revision, repairs or maintenance are accessible:
- Compressor compartment.
- Gas heating compartment (two panels).
- Side impulse and return air compartment (two panels).
- Fan compartment (three panels).
- Main electric panel.
- Filter compartment.
- Outdoor air compartment (two panels).
See Fig. 11 for the location of these access panels.
GB
CAUTION:
Be sure to replace all screws, with their corresponding O-rings
(located between the panel internal supporting surface and the base
of the unit).
11
12
(01)
104
103
GB
108
107
106
- Fig. 9 133
122
121
113
112
111
110
109
330
N
X3/...
165
BLACK
114
M6
M7
OUTDOOR FAN 1 OUTDOOR FAN 2
P4 S4
7
166
X1/...
N
M
1~
E16
2
3
GV1
1
Y2
7
IC1
Y1
5
334
M5
INDOOR FAN
MOTOR
E8
M8
2 X3/...
PS
1
3
1
3
3
PS
2
5
X3
S4
371
M1
M2
M3
COMPRESSOR 1 COMPRESSOR 2 COMPRESSOR 3
134
E7
145
E6
146
E4
148
M
3~
4
149
E3
(35)
6
150
2
FLAME
SENSOR 1
M
3~
4
BF
3
WHITE
E2
(34)
6
147
2
IE
10
349
M
3~
4
IN
2
S5
P5
332
M
3~
(33)
6
135
2
IN
1
3
2 1
P3
S3
331
M
3~
4
5
E18
AS
P
3
1
LS2
12
4
3
ST
5
14
3
c
d
b
X3/...
a
I-2079-1a (1 of 4)
D3IG180N32050
S4
ST
3
306
177
N X1/...
P4
12
S4
P4
MR
13
352
M
3~
6
123
2
3
2
3
305
(29)
118
1
2
310
6
119
5
GS
P
S5
2
P5
4
S5
315
4
130
3
4
2
P3
P5
RS
175
4
S5 S4 P4
RW1 3
P3
S3
314
(25)
4
163 5
11
317
2
131
1
139
5
140
3
142
1
KM5
143
5
KM4
4
144
3
4
22
6 14
132
2
21
13
6
141
2
160
1
KM3
Reg.8.2A
3
161
5
4
F5
6A
1
3
1
1
9 10
KM3 13
(33)
14
8
309
3
6
120
2
F4
10 A
5
S3
LS1
P3
1
S3
336
357
(31)
105
313
1
115
312
KM2
116
3
P5
164
7
362
KM1
117
6
127
4
F3
128
2
F2
16 A
129
1
136
5
137
3
138
1
6
304
5
3
311
3
157
X1/...
L
2
156
1
316
1
(07)
303
307
5
(06)
308
3
(05)
360
1
E1
(04)
SEE WIRING DATA TABLE FOR SIZING OF AUTOMATIC
SWITCH AND POWER SUPPLY LINE SECTION
(03)
E20
E22
F1
25 A
L1 L2 L3 N PE
L1 L2 L3 N
(02)
174
Q1
X/... L1 L2 L3 N
400V, 3 ~, 50 Hz, N,
Unit wiring diagram - 180
IGNITION 1
GAS VALVE 1
E12
SMOKE
EXTRACTOR
MOTOR
(01)
104
103
108
107
106
GB
134
133
125
124
123
122
121
113
112
111
110
109
E8
P4 S4
7
166
X1/...
N
330
165
WHITE
126
114
X3/...
N
M
1~
1
2
3
E16
GV1
Y2
7
IC1
Y1
5
334
M6
M7
OUTDOOR FAN 1 OUTDOOR FAN 2
E7
M8
2 X3/...
PS
1
3
3
PS
2
S5
P5
P3
S3
3
1
5
X3
S4
13
4
3
S4
ST
3
3
d
b
c
X3/...
a
14
I-2079-2a (2 of 4)
D3IG240N32050
ST
5
306
177
N X1/...
P4
12
S4
P4
MR
12
371
M1
M2
M3
M4
M5
COMPRESSOR 1 COMPRESSOR 2 COMPRESSOR 3 COMPRESSOR 4 INDOOR FAN
MOTOR
E6
145
E5
146
E4
2
148
M
3~
6
4
149
E3
(35)
150
E2
4
FLAME
SENSOR 1
M
3~
6
147
2
BLACK
M
3~
(34)
BF
3
349
M
3~
4
IE
10
332
M
3~
6
135
2
IN
2
IN
1
3
2 1
331
M
3~
(33)
5
AS
P
1
3
LS2
P3 S3
4
11
352
M
3~
6
3
143
4
142
1
144
2
5
E18
2
3
305
(29)
3
2
310
6
1
2
RS
P5
4
S5
314
315
4
118
5
KM5
GS
P
S5
P3
P5
175
4
S5 S4 P4
RW1 3
(25)
163 5
10
317
2
119
3
130
1
131
5
139
3
4
140
1
KM4
6
141
2
160
5
KM3
4
22
6 14
132
2
21
13
4
161
2
3
336
3
4
F5
6A
1
9
KM3 13
(33)
14
8
309
1
6
120
2
F4
10 A
5
312
357
(31)
105
313
KM2
115
3
3
1
1
164
7
362
KM1
116
6
117
4
127
Reg.12 A
F3
128
2
F2
25 A
129
1
136
5
137
3
138
1
P5
P3
1
S3
S3
LS1
6
304
5
3
311
3
157
X1/...
L
2
156
1
316
1
(07)
303
307
5
(06)
308
3
(05)
360
1
(04)
SEE WIRING DATA TABLE FOR SIZING OF AUTOMATIC
SWITCH AND POWER SUPPLY LINE SECTION
(03)
E20
E22
F1
25 A
L1 L2 L3 N PE
L1 L2 L3 N
E1
(02)
174
Q1
X/... L1 L2 L3 N
400V, 3 ~, 50 Hz, N,
Unit wiring diagram - 240
IGNITION 1
GAS VALVE 1
E12
SMOKE
EXTRACTION
MOTOR
- Fig. 9 -
13
14
c
BF
3
318
326
327
352
- Fig. 9 -
GB
X2/...
171
CCH 2
CCH 3
337
B
292
(9)
247
290
283
1
3
5
13
229
230
504
508
183
2
4 (01)
6
14
1
3
5
13
187
372
329
325
FLAME
SENSOR 2
354
1
3
5
13
2
4 (05)
6
14
2
4
6
14
206
M2 (28)
M4
276
2
4 (03)
6
14
(06)
1
3
5
13
3
1
4
2
3
1
4
2
6
5 (34)
2
4 (07)
6
14
275
6
1
3
5
13
6
5
7
RY2
8
A2
7
KM5 RY1
A1
8
502
6
(15)
16
A1
503
M1
M3
505
5
263
3
1
4
2
234
5
A2
KM4
A1
233
A2
KM3
A1
205
3
1
4
2
228
A2
KM1
A1
TLA
274
N
287
H
280
TDR
272
A2
KM2
A1
204
S9
3
P9
232
7
RW2
8
273
TD1
4 SEC
P11
S9
6
P9
279
H
277
3
RY1 3
(36)
5
15
Y1
36 37
213
E15
CCH 1
14
13
13 14
212
7
RW1
8
278
S11
238
TD2
10 SEC
239
S11
4
P11
235
F3
12
Y2
608
35
38
(30)
408
411
409
407
8
7
6
5
39
WHEN THE
ECONOMISER IS
FACTORY INSTALLED
THIS CONNECTOR IS
NOT USED
I-2079-3a (3 of 4)
D3IG180N32050
D3IG240N32050
8
7
6
5
P12
P7 S7 401
3
3
403
2
2
S12
405
1
1
406
4
4
215
6
319
FS1
8
K5-2
203
(17)
323
FS2
LP1
P
HP1
P
P11
1
S11
7
K3
A2 R
34
237
2
3
GV2
1
X3
P11
2
S11
9
5
S9
3
1
RY2
(37) 5 P9
4
K3-1
K5-1
G
33
214
5
177
LP2
P
HP2
P
(26) M2
S9
2
M1 P9
270
Y2
7
6
K4
K3-2
32
RELAY BOARD
A1
30 31
226
Y1
5
168
PS
2
S9
5
P9
10
K4-1
X
216
29
K4-2
K5
TDR
11
B
28
269
PS
1
S9
4
P9
2
W2
27
606
607
3
1
4
2
IE
10
0V
26
211
3
178
24V
169
100VA
1
2
S6
3 P6
W1
25
210
7
RPS
8
S4
IN
2
184
1T
CB
R
X2/...
24
170
0V
230V
23
282
225
IN
1
22
207
ST
5
21
200
ST
3
IC2
20
286
306
19
281
265
S4
3
RPS
5 (14a)
18
240
d
b
17
180
264
222
P4
6
16
255
5
3
15
220
RW2
(27)
a
14a
Unit wiring diagram - 180 and 240
E10
167
SUMP ELECTRIC
HEATERS 3 AND 4
SUMP ELECTRIC
HEATERS 1 AND 2
IGNITION 2
W1 24VAC
RS2 RS+V
GB
Y1
G
SR
+R
S
+
K2-2
R
K2-2
N
1
3
2
4
DEFROST
SENSOR
24V LLEVAR A POSICION MINIMA
0V LLEVAR TOTALMENTE CERRADO
K1-1
+0
+
K1-2
S0
S
ECONOMISER SECTION (OPTIONAL)
LD2 Y2
TR1
RELE K1, K2
REFRIGERACION MECANICA: CONTACTOS POSICION NORMAL
"FREE COOLING": CONTACTOS POSICION ACTIVO
TR
24V DAMPER MODULATOR
0V MINIMUM POSITION
RETURN AIR ENTHALPY
SENSOR (OPTIONAL)
OUTDOOR AIR
ENTHALPY SENSOR
RS1
REMOTE SENSOR
W2
AMBIENT THERMOSTAT DSL-700
BROWN
BROWN
OR
OR
T
T1
3
2
1
4
5
6
7
8
GV2
P12
IC2
IC1
RPS
S12
X3
RS
M8
AS
P7
P11
P4
X2
F1
F3
F4
F5
IT
3
TLA
Q1
X1
N L1
L2L3
M2
TDR
M1
P9
H
H
A1
RELAY
BOARD
P6
I-2079-4a (4 de 4)
D3IG180N32050
D3IG240N32050
P9/S9- PARTITION 24-VAC CONNECTOR
P11/S11.- COMPRESSOR SAFETY CONNECTOR
PE.- GROUNDING TERMINAL
Q1.- MAIN SWITCH
RPS- AIR PRESSURE RELAY
RS- BURNER TEMPERATURE SENSOR
RW1 and RW2- 1st AND 2nd STAGE HEAT RELAY
RY1 and RY2- HEAT RELAYS
TD1.- 4 SEC. TIMER
TD2.- 10 SEC. TIMER
TDR- DELAY RELAY
TLA- OUTDOOR THERMOSTAT
X1.- POWER CONNECTING STRIP
X2.- 24 VAC CONNECTING STRIP
X3- GAS CONNECTING STRIP
1
PE
CB
TD2
TD1
CONTROL PANEL
KM1 KM2 KM3 KM4 KM5
F2
RY1 RY2 RW1 RW2
1T.- 24 VAC TRANSFORMER
A1.- 24 VAC THERMOSTAT RELAY PLATE
CB.- 24 VAC AUTOMATIC CIRCUIT BREAKER
CCH1 ÷ 3.- SUMP HEATER
F1 and F2.- COMPRESSOR AUTOMATIC SWITCH
F3.- AUTOMATIC SWITCH INDOOR FAN
F4.- OAUTOMATIC SWITCH OUTDOOR FANS 1 AND 2
F5.- AUTOMATIC SWITCH 220 VAC
FS1 and FS2.- LOW TEMP. SWITCH EVAPORATING UNIT
GS- GAS PRESSURE SWITCH
GV1 and GV2- GAS VALVES
HP1 and HP2.- HIGH PRESSURE CONTROL
ICI and IC2- GAS CONTROL
KM1 and KM2.- COMPRESSOR CONTACTS
KM3.- INDOOR FAN CONTACTOR
KM4.- OUTDOOR FAN 1 CONTACTOR
KM5.- OUTDOOR FAN 2 CONTACTOR
LP1 and LP2.- LOW PRESSURE CONTROL
LS1.- MANUAL RESET TEMPERATURE LIMIT
LS2.- AUTO RESET TEMPERATURE LIMIT
M8- SMOKE EXTRACTION MOTOR
OR.- OCCUPIED RELAY
P3/S3, P5/S5- TEMPERATURE SENSOR CONNECTOR
P4/S4.- GAS CONTROL CONNECTOR
P6/S6.- RELAY BOARD 24 VAC CONNECTOR
P7/S7, P12/S12.- ECONOMISER CONNECTOR
GV1
GAS SECTION
Unit wiring diagram - 180 and 240
A
OR
B
- Fig. 9 -
15
16
(01)
104
103
108
107
106
GB
4
4
134
133
100
99
97
96
125
124
122
121
113
112
111
110
109
101
126
114
E2
E3
E4
E5
E23
E24
E6
M1
M2
M3
M4
M9
M10
M5
COMPRESSOR 1 COMPRESSOR 2 COMPRESSOR 3 COMPRESSOR 4 COMPRESSOR 5 COMPRESSOR 6 CENTRIFUGAL
FAN
M
3~
6
135
2
(34)
M6
OUTDOOR
FAN 1
M
3~
6
5
4
3
2
1
145
M
3~
(33)
KM4
146
M
3~
6
98
2
5
147
M
3~
(37)
3
E7
(35)
KM5
M7
OUTDOOR
FAN 2
M
3~
6
5
4
3
2
1
148
M
3~
4
1
F5
6A
149
M
3~
6
123
2
KM3
6
5
4
3
2
1
150
M
3~
118
(29)
119
6
93
5
94
3
130
1
131
4
KM6
22
6 14
21
F4
10 A
13
4
5
132
2
3
139
5
4
1
140
3
6
95
2
F3
Reg.18 A
141
1
4
5
(09)
142
2
KM2
6
120
2
3
(08)
143
(31)
105
144
5
115
E8
1
4
3
b
a
I-2080-1a (1 of 4)
D3IG300N32050
X1/...
N
3
X1/...
L
2
1
2
160
3
116
161
1
117
6
90
1
91
4
F6
25 A
92
5
127
3
128
1
129
2
F2
25 A
(07)
136
5
(06)
137
3
(05)
SEE WIRING DATA TABLE FOR SIZING OF AUTOMATIC
SWITHC AND POWER SUPPLY LINE SECTION
(04)
138
1
(03)
157
KM1
L1 L2 L3 N PE
L1 L2 L3 N
E1
(02)
156
F1
25 A
Q1
X/... L1 L2 L3 N
400V, 3 ~, 50 Hz, N,
Unit wiring diagram - 300
166
305
GB
349
BLACK
FLAME
SENSOR 1
350
E16
S4
ST
3
3
BF
3
3
1
4
2
7
RPS
8
354
(17)
15
ST
5
IN
1
IN
2
IE
10
IC2
PS
2
PS
1
Y1
5
Y2
7
E15
2
3
GV2
1
329
334
WHITE
330
6
5
S4
ST
3
3
RPS
5 (14a)
18
X3
19
372
X3/...
332
165
331
N
ST
5
352
2
3
GV1
1
X3
377
S4
310
532
M
1~
317
PS
2
357
2 X3/...
309
Y2
7
315
IC1
Y1
5
S4
P4
318
PS
1
306
6
319
327
M8
BF
3
177
17
323
326
A2
IE
10
3
P4
12
S4
P4
5
3
16
20
CCH 2
A1
E18
S5
P5
5
RW2
(27)
15
CCH 1
IN
2
3
1
S4
X3/...
14a
21
CCH 4
7
IN
1
336
3
2
3
313
2
AS
P
P3
4
3
362
S5
312
2
3
MR
14
N X1/...
13
E20
E22
GS
P
304
P3
P5
316
178
TAR1
2 MIN
303
307
2
S3
3
1
12
360
1
LS2
4
S3
11
308
AS
P5
4
S5
P3
10
180
3
1
175
4
S5 S4 P4
RW1 3
(25)
163 5
9
314
22
CCH 5
P4
311
P3
1
S3
1
174
KM3 13
(33)
14
8
184
S3
LS1
P5
164
7
188
b
a
6
CCH 3
189
COMP. SUMP
HEATER 5 AND 6
187
COMP. SUMP
HEATER 3 AND 4
183
COMP. SUMP
HEATER 1 AND 2
I-2080-2a (2 of 4)
D3IG300N32050
N
d
c
Unit wiring diagram - 300
CCH 6
IGNITION 2
GAS
VALVE 2
FLAME
SENSOR 2
325
371
IGNITION 2
GAS
VALVE 1
E12
SMOKE
EXTRACTION
MOTOR
364
17
18
168
GB
3
1
4
2
700
171
280
(15)
263
287
247
701
754
755
753
5
1
3
5
13
757
2
4 (03)
6
14
234
3
1
4
2
1
3
5
13
229
756
2
4 (01)
6
14
S11
6
P11
8
K6
7
207
167
E10
6
(37)
5 (36)
3
(05) 1
4
2
3
1
4
2
7
RY3
8
6
5 (30)
(34)
7
RY2
8
3
1
4
2
6
5
759
2
4
6
14
3
1
4
2
760
2
1
4 (09) 3
6
5
14
13
761
1
2
4 (08) 3
5
6
13
14
758
2
1
4 (07) 3
6
5
14
13
7
RY1
8
716
A2
KM6
A1
14
5
721
A2
KM5
A1
Y3
751
750
1
3
5
13
1
Y3 Y2
41 42
Y2
720
40
722
Y1
207
608
39
752
A2
KM4
A1
205
M2 (28)
M4
5
38
723
A2
KM3
A1
705
M1
M3
TD3
10 SEC
274
(9)
228
A2
KM1
A1
TLA
S9
6
P9
FS3
LP3
P
HP3
P
S11
P11
717
5
272
A2
KM2
A1
S9
3
P9
204
H
P11
RY1 3
(39) 5
2
K6
(38) 6
715
TDR
277
279
7
RW2
8
278
238
3
3
707
37
719
H
273
TD1
4 SEC
239
14
3
K6
RY3
(41) 5 (38) 5
709
706
4
P11
203
13
13
36
(35)
44
16
A1
214
213
15
Y1
43
X2/...
212
7
RW1
8
270
714
S11
704
F3
12
35
211
S11
8
34
A2 R
K5-2
718
713
TD2
4 SEC
269
FS1
226
FS2
225
LP1
P
P11
1
S11
7
702
LP2
P
9
K3
K5-1
G
33
712
P7
8
7
6
5
4
1
2
3
9
S12
P12
WHEN THE ECONOMISER
IS FACTORY INSTALLED,
THIS CONTACT IS NOT
USED
408
411
409
407
406
405
403
401
400
46
I-2080-3a (3 of 4)
D3IG300N32050
8
7
6
5
4
1
2
S7
3
45
606
607
B
282
P9
HP1
P
703
0V
P11
2
S11
5
K3-1
S9
3
1
RY2
(40) 5 P9
4
K4
K3-2
32
RELAY BOARD
A1
30 31
708
X2/...
169
HP2
P
S9
2
P9
265
711
100VA
S9
286
5
(26) M2
6
K4-1
X
29
K4-2
M1
281
S9
4
P9
10
K5
TDR
11
B
724
28
264
222
24V
2
W2
27
255
1
26
220
1T
170
2
S6
3 P6
W1
25
725
710
0V
230V
CB
R
X2/...
24
210
d
c
23
Unit wiring diagram - 300
215
W1 24VAC
RS2 RS+V
GB
RETURN AIR
S
ENTHALPY SENSOR
+
(OPTIONAL)
S
OUTDOOR AIR
ENTHALPY SENSOR +
DEFROST
SENSOR
RS1
LD2 Y2
Y1
G
S1
+R
SR
+0
SO
S2
K2-2
K1-2
R1-2
R1-1
R1
A
A
S12
5
6
4
2
3
TR
TR1
7
9
1
ERC
OR
OR
OR
ECR
2
B
B
8
R
P12
GV2
IC2
IC1
RPS
3
1
B3
B2
B1
A
T1
T2
ECONOMISER SECTION (OPTIONAL)
REMOTE SENSOR
W2
AMBIENT THERMOSTAT DSL-700
UNIT WIRED FOR 66% OF CAPACITY IN 1st STAGE AND 33% EIN 2 nd STAGE
OF COOLING FOR33% EIN THE1ª Est STAGE AND 66% EIN THE2ªnd PHASE
PLACE A720 DJUMPER FROMY1 ATOY2.
PFOR A3ªrdESTAGE OF COOLING REMOVE JUMPER720.
X3
RS
M8
AS
P4
P7
P11
X2
F1
F3
K6
F4
F5
RW1 RW2
IT
PE
3
TLA
1
H
L2 L3
P9
X1
H
A1
P6
RELAY
BOARD
I-2080-4a (4 de 4)
D3IG300N32050
P3/S3, P5/S5.- TEMPERATURE SENSOR CONNECTOR
P4/S4.- GAS CONTROL CONNECTOR
P6/S6.- RELAY BOARD 24 VCA CONNECTOR
P7/S7, P12/S12.- ECONOMISER CONNECTOR
P9/S9.- PARTITION 24 VAC CONNECTOR
P11/S11.- COMPRESSOR SAFETY CONNECTOR
PE.- GROUNDING TERMINAL
Q1.- MAIN SWITCH
RPS.- AIR PRESSURE RELAY
RS.- BURNER TEMPERATURE SENSOR
RW1 and RW2.- RELE, 1ª and 2ª STAGE HEAT RELAY
RY1, RY2 and RY3.- HEAT RELAYS
TD1.- 4 SEC TIMER
TD2.- 10 SEC TIMER
TDR.- DELAY RELAY
TLA.- OUTDOOR THERMOSTAT
X1.- POWER CONNECTIONG STRIP
X2.- 24 VAC CONNECTING STRIP
X3.- GAS CONNECTING STRIP
Q1
N L1
CB
M2
TDR
TD2 TD3 M1
TD1
CONTROL PANEL
KM1 KM2 KM6 KM3 KM4 KM5
F2
RY1 RY2 RY3
1T.- 24 VAC TRANSFORMER
A1.- 24 VAC THERMOSTAT RELAY PLATE
AS.- AIR PRESSURE SWITCH
CB.- 24 VAC CIRCUIT BREAKER
CCH1 ÷ 6.- SUMP HEATER
CLI.- COMPRESSOR LOCK-OUT INDICATOR
F1, F2 and F6.- COMPRESSOR AUTOMATIC SWITCH
F3.- AUTOMATIC SWITCH INDOOR FAN
F4.- AUTOMATIC SWITCH OUTDOOR FANS 1 AND 2
F5.- AUTOMATIC SWITCH, 220 VAC
FS1, FS2 and FS3.- LOW TEMP, SWITCH, EVAPORATING UNIT
GS.- GAS PRESSURE SWITCH
GV1 and GV2.- GAS VALVES
HP1, HP2 and HP3.- HIGH PRESSURE CONTROL
IC1 and IC2.- GAS CONTROL
KM1, KM2, KM6.- COMPRESSOR CONTACTORS
KM3.- INDOOR FAN CONTACTOR
KM4.- OUTDOOR FAN 1 CONTACTOR
KM5.- OUTDOOR FAN 2 CONTACTOR
LP1, LP2 and LP3.- LOW PRESSURE CONTROL
LS1.- MANUEL RESET TEMPERATURE LIMIT
LS2.- AUTO RESET TEMPERATURE LIMIT
M8.- SMOKE EXTRACTION MOTOR
OR.- OCCUPIED RELAY
GV1
GAS SECTION
Unit wiring diagram - 300
19
Optional economiser rain-hood/motor-driven 1. At this point, the damper enthalpy set point can be adjusted by selecting the desired position, as shown in Fig.
damper
10. Proceed as follows:
For operation in single enthalpy, carefully turn the set point
adjustment screw to settings “A”, “B”, “C” or “D” that correspond to the curve with letters.
- For operation in dual enthalpy, carefully turn the set point
adjustment screw all the way to the right, past position
“D”.
2. To make sure that the blades of the damper move
smoothly, carefully turn the minimum position adjusting
screw completely to the right (clockwise), and then connect and disconnect terminals “R” to “G”. With terminals
“R” to “G” connected, turn the minimum position adjusting
screw to the left until the desired minimum setting is
reached.
3. Replace the economiser access panel. Set the two latches
horizontally and tighten the screws.
The instructions for the optional economiser rain-hood/motordriven damper are on the accessory itself. When an economiser rain-hood is installed, proceed as described in said instructions. The outdoor and return air dampers, the damper
actuator, the damper drive mechanism, and outdoor and return air dividing deflectors and all control sensors are supplied factory mounted, as a part of the “factory-assembled”
economiser option.
Enthalpy set point adjustment
Remove the economiser access panel from the unit to check
the following adjustments. Loosen, but do not remove the two
panel latches.
-
CAUTION:
Special care should be taken when turning the adjusting screws of
both the set point and minimum position, so as to avoid their removal.
Adjustment of enthalpy set point
29.5
(85)
35
(95)
40.5 43.5
38
(100) (105) (110)
10
(4 2.3
4)
10
(4 7.0
6)
32
(90)
D
17
63
RELATIVE
HUMIDITY
90%
HA
LP
51
Y
(2 .2
-K
2)
j/K
56
g
.
(2 3
(B
4)
TU
51
/lb
(2 .2
)D
6)
RY
56
AI
(2 .8
R
8)
66
(3 .8
0)
74
(3 .4
2)
24
(75)
21
(70)
50
%
60
%
67
80%
70
19
70%
21
C
9
(4 3.0
0)
B
26.5
(80)
88
(3 .4
8)
73
8
(3 3.7
6)
23
7
(3 9.1
4)
A
97
(4 .7
2)
POINT OF CONTROL
(APPROX. ADJUST.)
AT 50%R.H.
°C
°F
CONTROL
CURVE
40
EN
%
T
18.5
(65)
A
4
(1 1.9
8)
30
%
4
(2 6.5
0)
15,5
(60)
B
37
(1 .2
6)
13
(55)
C
2
(1 7.9
2)
7
(45)
%
20
3
(1 2.6
4)
10
(50)
D
4.5
(40)
1.5
(35)
10%
D C
1.5
(35)
4.5
(40)
7
(45)
10
(50)
13
(55)
15.5
(60)
18.5
(65)
21
(70)
B
24 26.5
(75) (80)
A
29.5
(85)
32
(90)
DRY BULB TEMPERATURE (APPROX.) - °C (°F)
- Fig. 10 20
GB
40.5
35
38
(95) (100) (105)
Table 3 - Physical data
Unit model
Description of components
Impulser
air fan
Indoor
coil
Outdoor
fans
(two per unit)
180
240
300
Dia. x Width (mm)
381 x 381
457 x 381
457 x 381
kW
4
5.5
7.5
Tubing depth
3
3
4
Fins per inch
13.5
13.5
13
Centrifugal fan
Fan motor
Front surface
m2
1.45
1.92
2.14
Dia. propeller
mm (per unit)
762
762
762
Fan motor
kW (per unit)
1.5
1.5
1.5
m3 / s (per unit)
2.83
3.78
3.78
CFM (per unit)
6 000
8 000
8 000
Tubing depth
2
2
3
Fins per inch
13
20
15
3.35
4.02
4.02
Tandem
1*
2
3
Single
1
-
-
404 x 498 (mm)
-
4
4
404 x 632 (mm)
-
4
2
442 x 594 (mm)
5
-
-
350 x 498 (mm)
-
-
3
m2
1.40
1.87
1.9
SYS. Nº 1 (kg.)
7.94
8.16
7.7
8.16
7.3
-
8.2
Nominal air flow
Outdoor
coil
Front surface
Compressor
(Amount per unit)
Air
filters
Amount per unit
Total front surface
Load
m2
Refrigerant 22 or 407C
3.86(R-22)
3.5(R-407C)
SYS. Nº 2 (kg.)
-
SYS. Nº 3 (kg.)
* This compressor will be activated first.
Weight accessories (kg)
Basic unit
180
960
240
1 066
300
1 353
Options / Accessories
Economiser
73
Motor-driven damper
68
180
81/157
240 / 300
85/165
Mounting base (fixed/adjustable)
Barometric damper
20
Fua outdoor air intake
9
Extraction fan
55
GB
21
Dimensions and clearances - D*IG180, 240 and 300
LOCATION OF SWITCH
ACCESS TO
FAN
ECONOMISER RAIN-HOOD/MOTOR-DRIVEN
DAMPER AND FIXED OUTDOOR AIR INTAKE
(See detail "Y")
ACCESS TO
FAN MOTOR
SIDE DUCT ACCESSORY
OPENING (See detail "X")
ACCESS TO FAN
COMPARTMENT
(Auxiliary)
1235 (180)
1337 (240, 300)
CAP
(For pressure drop
readings)
COMBUSTION AIR
INTAKE HOOD
180
COMBUSTION
AIR OUTLET
HOOD
533
ACCESS TO
GAS HEATING
FRONT VIEW
127
COIL
PROTECTION
OUTDOOR
COILS
248
34 318
60 0 (
(24 18
0, 0)
30
0)
(C)
GAS SUPPLY
INTAKE
37
23
13
00
29
2
RESET
GAS
RETURN AIR
(A)
CONTROL
WIRING
INTAKE
ACCESS TO
ELECTRIC PANEL
0
15
IMPULSE AIR
(B) POWER
WIRING
INTAKE
BOTTOM IMPULSE
AND RETURN AIR
OPENINGS (See note)
7
88
OUTDOOR AIR
(Discharge)
89 615
5 ( (1
24 80
0, )
30
0)
OUTDOOR AIR
(Economiser)
RETURN
AIR
84
0
DETAIL BASE SPACER
FOR GREATER CLARITY
70
94
IMPULSE
AIR
54
4
(B)
POWER
WIRING
INTAKE
(A)
CONTROL
WIRING
INTAKE
NOTE: For units mounted on a mounting
base (Roof-Curb accessory), see technical
information on impulse and return ducts
connection dimensions.
24
32
5
0
20
0
5
23
- Fig. 11 -
Clearances (mm.)
Front
1
2
915
3
Back
610 (without economiser)
1 245 (with economiser)
Left side (access to filter)
610 (without economiser)
1 370 (with economiser)
Right side (outdoor coil)
915
Beneath unit2
0
Over unit3
1 830 with 915 maximum
horizontal overhand
(For outdoor air discharge)
Supply entry data
Hole
1
Locate the unit in such a way that the hood of the ventilation air outlet is
at least:
- 0.9 m. above any forced air intake located horizontally at a distance of
3 m. (excluding those that form an integral part of the unit).
- 1.2 m. below or horizontally, or 0.31 m. above any door or normal air
intake of the building.
- 1.2 m. from electric metres, gas metres, regulators and safety devices.
22
The units can be installed on combustible materials capable of withstanding temperatures of up to 92º C (197º F), with an intermittent
exposure to temperatures of up to 124º C (255º F).
These units are to be installed outdoors. Do not allow any overhanging
structure or element to obstruct the air discharge outlet.
NOTE: A space of 25 mm. should be left between any combustible
material and the network of impulse air ducts at a distance of 0.9 m. from
the unit.
The accumulation or recirculation of combustible products should not
be allow in closed areas.
GB
A
B
Opening
diameter
(mm)
29
PG-21
38 + 29
PG-48
C
58
Used for
Front
Control
wiring
Bottom
Power
wiring
Bottom
Gas pipes
Front
Dimensions and clearances - D*IG180, 240 and 300 (Cont.)
1027
OUTDOOR
SECTION
INDOOR
SECTION
IMPULSE
AIR
140
CAP
(For pressure
drop readings)
RETURN
AIE
OUTDOOR
AIR
ACCESS TO
COMPRESSOR
47
5
ACCESS TO
OUTDOOR
AIR COMPART
RETURN AIR
ACCESS
30
10
70
7
127
10 727
06 (
(24 180
0, )
30
0)
REAR VIEW
DUCT COVERS - The units are supplied with
all air duct openings covered. An accessory
kit with flanges is available for connecting
the side ducts.
In applications with bottom discharge:
1. Remove the side covers of the impulse
and return air compartments so as to
have access to the bottom impulse and
return air covers, making sure they are
airtight.
2. Remove and discard the bottom duct
covers.
3. Replace the side panels of the impulse
and return air compartments.
In applications with side discharge:
1. Replace the side panels of the impulse
and return air compartments with the set
of accessory panels, making sure they
are airtight.
2. Connect the duct network to the flanges
of these panels.
(1") FEMALE BSP
CONDENSED WATER
DRAIN CONNECTION
ACCESS TO
FILTERS
ACCESS TO
OUTDOOR AIR
COMPART.
DETAIL “X”
SIDE ACCESSORY OPENINGS, IMPULSE AND RETURN AIR DUCT
FIXED OUTDOOR
AIR INTAKE HOOD
ECONOMISER RAIN-HOOD
ACCESSORIES
923
FIXED OUTDOOR
AIR INTAKE HOOD
CONDENSED WATER
DRAIN 25
(Must form a siphon)
REAR VIEW
610 (180)
880 (240)
RETURN AIR
COMPARTMENT
51
98
394
2337
902
RETURN AIR
LEFT SIDE VIEW
DETAIL “Y”
UNIT WITH ECONOMISER AND FIXED OUTDOOR AIR HOODS
- Fig. 11 -
Table 4 - Wiring specifications
Compressor
(Nº1, Nº2 & Nº3 Mod.300)
Model
180
240
300
Power
supply
400/3/50
400/3/50
400/3/50
Outdoor fan
motor x 2
Impulse air
fan motor
Operating intensity
of each one
(A)
Start intensity
of each one
(A)
kW
Intensidad de
cada uno (A)
kW
Nom.
(A)
16.6 / 9.6
2 x 16.6
3 x 15.4
146 / 66
146
146
1.5
1.5
1.5
2.9
2.9
2.9
4
5.5
7.5
8.9
12
15.3
Max.
Total
auto.
unit
switch
consum.
(Curve
(A)
K)1
40.9
51
67.3
50
63
80
Min.
section
cables
(mm 2)
10
16
25
NOTES: 1. Curve K (DIN, VDE 0660 - 104).
2. The section of the site wiring is based on copper wires, 105º C insulation, 3-phase, sleeved.
GB
23
Table 5 - Impulse air fan performances (Mod. D*GI180) - with application of downward discharge
ducts
Standard operation (m³/s)
Flow
Fan
speed
RPM
3
3
2.80 m3/s
2.45 m /s
2.10 m /s
E.S.P.
E.S.P.
3.40 m3/s
3.10 m3/s
E.S.P.
E.S.P.
E.S.P.
(Pa)
(kW)
(Pa)
(kW)
(Pa)
(kW)
(Pa)
(kW)
(Pa)
(kW)
845
173
2.2
138
2.6
83
3.1
18
3.5
-
-
885
208
2.3
172
2.8
115
3.3
49
3.7
-
-
925
245
2.4
208
2.9
149
3.4
82
3.9
-
-
960
281
2.6
242
3.1
182
3.6
114
4.1
30
4.6
1 000
323
2.7
283
3.2
222
3.8
152
4.3
67
4.8
1 040
369
2.9
327
3.4
264
4
193
4.5
107
5.1
High speed operation (m³/s)
Flow
Fan
speed
RPM
2.10 m3/s
2.45 m3/s
E.S.P.
2.80 m3/s
E.S.P.
3.40 m3/s
3.10 m3/s
E.S.P.
E.S.P.
E.S.P.
(Pa)
(kW)
(Pa)
(kW)
(Pa)
(kW)
(Pa)
(kW)
(Pa)
(kW)
1 030
357
2.8
316
3.4
253
1 070
405
3
362
3.6
298
3.9
183
4.5
97
5.0
4.2
226
4.7
-
-
1 115
461
3.2
416
3.8
1 155
514
3.4
468
4.0
351
4.4
278
5.0
-
-
401
4.7
-
-
-
1 200
577
3.7
529
-
4.3
461
5.0
-
-
-
1 240
636
3.9
587
-
4.5
-
-
-
-
-
-
Table 6 - Impulse air fan performances (Mod. D*IG240) - with application of downward discharge
ducts
Standard operation (m³/s)
Flow
Fan
speed
RPM
3
3
2.80 m /s
3.80 m3/s
3.30 m /s
E.S.P.
E.S.P.
4.40 m3/s
4.10 m3/s
E.S.P.
E.S.P.
E.S.P.
(Pa)
(kW)
(Pa)
(kW)
(Pa)
(kW)
(Pa)
(kW)
(Pa)
(kW)
765
137
3.3
93
3.3
23
3.7
-
-
-
-
795
176
3.4
132
3.5
62
3.9
-
-
-
-
820
209
3.6
165
3.7
95
4.1
40
4.5
-
-
850
250
3.8
206
3.9
136
4.4
81
4.8
16
5.3
875
284
3.9
240
4.1
170
4.6
115
5
51
5.6
905
327
4.1
283
4.3
212
4.9
157
5.3
93
5.9
High speed operation (m³/s)
Flow
Fan
speed
RPM
3
3
2.80 m /s
E.S.P.
(Pa)
3.80 m3/s
3.30 m /s
E.S.P.
4.40 m3/s
4.10 m3/s
E.S.P.
E.S.P.
E.S.P.
(kW)
(Pa)
(kW)
(Pa)
(kW)
(Pa)
(kW)
(Pa)
(kW)
895
312
4
268
4.3
198
4.8
143
5.2
79
5.8
930
362
4.3
318
4.5
248
5.1
193
5.6
129
6.2
970
421
4.5
377
4.9
306
5.5
252
6.0
187
6.6
1 005
473
4.8
429
5.1
359
5.8
304
6.4
240
7.0
1 045
535
5
491
5.5
420
6.2
365
6.8
-
-
1 080
590
5.3
596
5.8
475
6.5
420
7.1
-
-
NOTES:
1. The fan performances comprise fixed outdoor air, a dry indoor coil, standard filters and heat exchangers.
2. See Table 8 for the resistance of all other unit options or accessories.
E.S.P. = External Static Pressure available for the impulse and return air duct system. All interior resistances of the unit have been subtracted from the
total static pressure of the fan.
24
GB
Table 7 - Impulse air fan performances (Mod. D*IG300) - with application of downward discharge
Standard operation (m³/s)
Flow
3.78 m3/s
Fan
speed
RPM
4.72 m3/s
4.25 m3/s
E.S.P.
E.S.P.
5.19 m3/s
5.66 m3/s
E.S.P.
E.S.P.
E.S.P.
(Pa)
(Pa)
(kW)
(Pa)
(kW)
(Pa)
(kW)
1 010
375
6.4
225
7.5
102
8.7
1 064
448
6.9
325
8
203
9.3
1 118
548
7.4
423
8.6
305
10
224
1 172
648
7.9
523
9.2
410
10.6
249
(kW)
(Pa)
(kW)
-
-
-
-
50
10.6
-
-
11.4
25
12.9
12.2
105
13.7
High speed operation (m³/s)
Flow
3
3
3.78 m /s
Fan
speed
RPM
4.72 m3/s
4.25 m /s
E.S.P.
E.S.P.
5.66 m3/s
5.19 m3/s
E.S.P.
E.S.P.
E.S.P.
(Pa)
(kW)
(Pa)
(kW)
(Pa)
(kW)
(Pa)
(kW)
(Pa)
(kW)
1 080
483
6.9
356
9
229
9.3
76
10.6
-
-
1 130
610
7.9
505
9.2
400
10.6
230
12.2
100
13.7
1 180
737
8.1
610
9.6
483
11.1
330
12.6
178
14.2
1 235
787
8.4
660
9.9
533
11.4
381
13
-
-
1 270
-
-
762
10.8
635
12.2
508
13.9
-
-
NOTES:
1. The fan performances comprise fixed outdoor air, a dry indoor coil, standard filters and heat exchangers.
2. See Table 8 for the resistance of all other unit options or accessories.
E.S.P. = External Static Pressure available for the impulse and return air duct system. All interior resistances of the unit have been subtracted from the
total static pressure of the fan.
Table 8 - Static resistances
External static pressure drop - Resistance, Pa /inch
m3/s / CFM
Description
Model 180
Model 240 - 300
2.10/4 450 2.45/5 190 2.80/5 930 3.10/6 565 3.40/7 200 2.80/5 930 3.30/6 990 3.80/8 050 4.10/8 685 4.40/9 320
Wet indoor coil1
Economiser1
25 / 0.10
25 / 0.10
25 / 0.10
25 / 0.10
25 / 0.10
25 / 0.10
25 / 0.10
25 / 0.10
25 / 0.10
25 / 0.10
6 / 0.02
8 / 0.03
10 / 0.04
12 / 0.05
15 / 0.06
10 / 0.04
14 / 0.06
18 / 0.07
21 / 0.09
24 / 0.10
81 / 0.32 106 / 0.42 84 / 0.34
70 / 0.28
66 / 0.26
64 / 0.26
12 / 0.05
12 / 0.05
12 / 0.05
12 / 0.05
2
Side discharge Impul. air duct 150 / 0.60 126 / 0.50 106 / 0.42 92 / 0.37
applications
Return air duct2 12 / 0.05 12 / 0.05 12 / 0.05 12 / 0.05
12 / 0.05
12 / 0.05
1
Subtract these resistance values from the external static pressure available indicated shown in the Fan Performance Table.
Since the air flow resistance will be lower for connections with side discharge ducts than for downward discharge, add these pressures to the External
Static Pressure values that appear in the corresponding fan performance table.
2
Table 9 - Fan motor and drive specifications
Fan
range
(RPM)
Model
Standard
operation
High
speed
operation
1
2
Motor1
Adjustable motor pulley2
kW
Ø Prim.
(mm)
Ø
(mm)
Fixed fan pulley
Ø Prim.
(mm)
Ø
(mm)
Belt (geared)
Prim.
length
Denomination
Amount
180
845-1 040
4
109-135
28
188
25
1 790
BX69
1
240
300
180
240
300
765-905
980/1 170
1 030-1 240
895-1 080
1 080-1 270
5.5
7.5
4
5.5
11
124-150
152-190
147-178
28
38
28
28
38
236
235
188
236
212
25
35
25
25
35
2 040
2 123
1 840
2 123
2 123
BX79
BX82
BX71
BX82
BX82
1
2
1
1
2
147-178
152-190
All motors are of the totally enclosed type, fan-cooled at 1450 rpm, with a solid base and a service factor of 1.15.
Do not close this pulley below the minimum number of turns.
GB
25
Operation
Cooling system
The cooling system is a complete factory-mounted assembly
that uses an air-cooled condenser. The system is delivered
loaded with R-22 refrigerant.
The compressors are sealed airtight, have internal shock absorbency and are mounted onto their base by means of isolated fixing screws.
The compressors also have intrinsic (internal) protection.
Should there be an unusual temperature increase in the compressor, the safety device will turn the compressor off.
Preliminary cooling operation
Once installation is finished, connect the sump heaters during at least four hours prior to starting the unit up. After this
initial operation, the compressors should undergo three false
connections (sufficient for about four rotations), with a 5-7minute delay between starts, prior to full operation.
NOTE:
Before each cooling season, the sump heaters should be connected
at least 10 hours prior to starting the system.
Thermostat operation
FAN SWITCH AUTO MODE: If the fan switch is set to “FAN”,
the indoor fan is in continuous operation. If the fan switch is
set to “AUTO”, the fan is activated by means of the thermostat only while in cool or heat operation.
AUTO MODE: If the thermostat is set to “AUTO”, the unit operates both in the cooling as well as heating modes, as required by the thermostat. Generally, there is a differential of
1º C between the cool and heat set points (this value can be
increased on the DSL-700 thermostat).
COOL/HEAT:: If the thermostat is set to “COOL”, the unit operates in the cooling mode when the thermostat requires cool,
but does not operate in the heating mode. If set to “HEAT”, the
unit operates in the heating mode when required, but not in
the cooling mode.
Cooling operation sequence
Without economiser: If the unit is not equipped with an
Economiser, the P7 plug of the economiser wiring hose will
be jumped in such a way that terminals P7-1 and P7-5, and
P7-4 and P7-6 will be connected. In this way, upon the request for cooling, Signal Y1 goes to the cooling relay RY-1/RY3, and Signal Y2 to cooling relay RY-2.
NOTE: These units are factory- wired for 66% of capacity in 1st stage,
and 33% in 2nd stage of cooling.
For 33% in the 1st stage and 66% in the 2nd phase, place a 720 jumper
from Y1 to Y2. For the 3rd phase of cooling, remove jumper 720.
26
REQUEST FOR COOLING, Y1: Signal Y1 of the thermostat
activates cooling relays RY-1/RY-3. Contact RY-1 activates
contacts KM4 and KM5 of the outdoor fan, and activates the
timer to connection TD1 through P6-8 on the Relay Board.
After a 4-second delay, TD1 activates contact KM1, which in
turn starts compressor No. 1 of the system in tandem.
Contact RY3-1 activates the Timer to contact TD3. After 10
seconds, TD3 activates compressor contact KM6, which
starts the compressor (hermetic in tandem) No. 3 of the system. Signal G of the thermostat activates contact KM3 of the
indoor fan and starts the indoor fan motor. Contact RY1-1
also supplies voltage to cooling relay RY2-1, thus allowing
operation of the second stage.
REQUEST FOR COOLING, Y2: If the thermostat is not satisfied by signal Y1 and the temperature continues to rise, Signal Y2 from the thermostat activates Cooling Relay RY2.
Contact RY2-1 activates the Timer to connection TD2 through
terminal P6-5 of the Relay Board and, after a 10-second delay, activates Contact KM2 of the Compressor (mod. 300,
TD2 delays 4 sec.), which starts Compressor No. 2 of the
system (only hermetic in mod. 180, and hermetic in tandem
in mod. 240 and 300).
With economiser: If the unit is equipped with an Economiser,
the request for Cooling will depend upon whether the enthalpy
of the outdoor air (a combination of temperature and humidity) is below the Logic Module set point of the Economiser
(model with single enthalpy), or the enthalpy of the return air
(model with dual enthalpy). If the enthalpy of the outdoor air is
above (for example, hotter and/or more humid) the set point
enthalpy (or return air), operation is as described above.
REQUEST FOR COOLING, Y1: If the outdoor air enthalpy is
below (for example, cooler and/or drier) the set point enthalpy
(or return air), Signal Y1 from the thermostat will go through
contact K1-2 of the relay to activate the Economiser Damper
Motor assembly. Contact K1-1 of the relay remains open,
avoiding compressor operation. The Damper Motor modulates
through the Discharge Air Sensor (DAS), mixing the cold outdoor air with the warm return air so as to reach the selected
temperature of the impulse air, 10-13º C (50-55º F).
REQUEST FOR COOLING, Y2: If the thermostat is not satisfied by the operation of the economiser from Signal Y1 and
the temperature continues to rise, Signal Y2 from the thermostat goes through contact K2-2 to Cooling Relay RY1, activating cooling circuit No. 1 of the system (mod. 300, circuits
Nos. 1 and 3), as described above.
Occupation relay, OR: Occupation Relay OR is activated by
the thermostat through terminal G, or by Fan Lock-out Relay
K5 of the Relay Board. This occurs every time that Contact
3M of the indoor fan is activated, as long as the Occupied
Switch (if installed) is closed, or through jumper A1-A2 if this
switch is not installed. When OR is activated, contacts OR-1
and OR-2 close, allowing Signals Y1 and Y2 of the thermostat to activate Cooling Relays RY1 and RY2.
If the Occupied Switch is installed in the thermostat, and is
set to Occupied, mechanical cooling will be produced (compressor), as described above, depending upon the operating
mode of the thermostat and the economiser.
If the Occupation Switch is open (unoccupied), the economiser operates as described above, but mechanical cooling
cannot be produced since contacts OR-1 and OR-2 are open.
This device allows free cooling by the economiser of the unoccupied and air conditioned space, but avoids the expense
of the mechanical cooling of that unoccupied space.
GB
Low temperature operation: If the outdoor temperature is
above 21º C (70º F), Low Temperature Thermostat TLA is
closed, and Contact KM5 of the outdoor fan operates as described above. TLA opens below 16º C (60º F), avoiding operation of KM5 and the fan of condenser No. 2. The limited air
flow on the front of the condensing coil allows cooling operation up to -4º C (25º F).
Heating operation sequence
REQUEST FOR HEATING, W1: Signal W1 from the thermostat activates Heat Relay RW1 and Timer Relay TDR. The
Heat Relay RW1 contact closes, activating the system of
Ignition Control circuits. After about 15 seconds, the Timer
Relay TDR contacts close, activating the Fan Lock-out Relay
KM5 (on the relay board). Contact K5-2 of relay K5 closes,
activating contact KM3 of the Indoor Fan, which in turn starts
the indoor fan. Contact K5-1 opens, isolating contact KM3 of
the Indoor Fan from the cooling circuit of the thermostat.
If the gas supply pressure is above the set point of the Gas
Pressure Switch (GS) (located in gas valve No. 1), the Ignition Control (IC1)is activated and the ignition sequence of the
first stage begins. See Fig. 12.
Typical gas valve diagram
BY-PASS VALVE
(ADJUSTABLE)
GAS VALVE
GAS SUPPLY
Y1
TO BURNER
MANIFOLD
Y2
MAIN ELECTRO VALVE
MAIL REGULATOR
1-STAGE REGULATING
ELECTROVALVE
TO IGNITION
PILOT PEPE
- Fig. 12 -
IGNITION SEQUENCE: Once contacts RW1 and GS have
closed, Ignition Control (IC1) makes sure the Air Pressure
Switch (AS) contact is open. In this case, the burner fan motor
is activated through terminal BF-3 of the IC1, and a 30-second prepurge sequence is begun.
If the AS contact has closed and the prepurge is finished,
terminal X3 of the IC1 activates Ignition Transformer No. 1,
which gives a high frequency arc at ignition electrode No. 1 of
the system (located in the burner on the right of the upper
manifold).
The main gas valve No. 1 (GV1) is activated at a low flow rate
through terminal Y1-5 of the IC1. The burner on the right ignites and assures that all burners ignite correctly. If the flame
detector No. 1 of the system (of the ionisation electrode type,
located within the burner on the left of the upper manifold)
does not supply an adequate current to terminal IE-10 of the
IC1 within a 5-second interval, Ignition Control No. 1 is locked
out.
If ignition sequence is correct and the flame goes out afterwards, the Ignition Control IC1 tries to start again. If no flame
presence is detected at the end of the cycle, the IC1 control
is locked out. Likewise, if heat switches LS1 or LS2 open due
to excessive temperature, or if the heat switch of the Burner
Assembly (RS) opens due to high temperature in the gas
control compartment, or if the Air Pressure Switch (AS) opens
due to a lack of combustion air (for example, lock-out or failure of the fan), Ignition Control No. 1 is locked out.
Request for heat, W2: If the thermostat is not satisfied by
signal W1 and the conditioned area temperature continues to
drop, contact RW2 of the Heat Relay closes, activating the
second ignition phase. Ignition Control No. 2 (IC2) operates
the same as IC1, previously described, except for: SEQUENCE OF IGNITION No. 2 OF THE SYSTEM: Ignition
Control IC2 is supplied from terminal Y2-7 of IC1. Ignition
Control No. 2 makes sure contacts 3 and 5 of relay RPS are
connected to terminals PS1 and PS2 of IC2. In this case, a
30-second delay period is begun; if not, IC2 is locked out.
Ignition Transformer No. 2 gives a high frequency arc to ignition electrode No. 2 of the system (located in the burner to the
left of the bottom manifold). The burner on the left ignites and
the ignition tube assembly assures that all burners ignite correctly. If flame detector No. 2 (of the ionisation electrode type,
located within the burner on the right of the bottom manifold)
does not supply an adequate current to terminal IE10 of IC2
within a 5-second interval, Ignition Control No. 2 is locked
out.
If ignition is correct, Ignition Control No. 2 is locked out.
If the ignition sequence is correct and, afterwards, the flame
goes out, ignition control IC2 tries to start up again. If the
presence of a flame is not detected at the end of the cycle,
Table 10 - Gas valve/heat switch adjustment
Gas valve adjustments
mbar (inch each)
Capacity
kW (Mbh)
Boiler
model Nº
N320
Heat switch limits
°C (°F)
Type
of gas
Absorbed
(Gross)*
Absorbida
(Nett)*
Given
94.5 (322)
85.2 (291)
75.6 (258)
2ND-H (G-20)
2ND-L (G-25)
Main
regulator
Second
flame
Automatic
reset
Manual
reset
10.5 (4.2)
15.2 (6.1)
9.9 (4.0)
14.6 (5.9)
82 (180)
82 (180)
93 (200)
93 (200)
* Heating value.
GB
27
control IC2 is locked out.
guard F3 opens, interrupting the electric power supply to Indoor Fan Contact KM3.
Controls and gas valves
NOTE:
Since IC2 is controlled by IC1, any limiting device or failure that may
lock out IC1, also disactivates out IC2.
Safety features and controls
IGNITION CONTROL -IC Nº 1
Cooling lock-out: If the High Pressure Control (HP1), the
Low Pressure Control (LP1) or the Low Temperature Control
of the Evaporating Unit (FS1) open while the compressor is in
operation, Lock-out Relay K3 of Compressor No. 1 is activated. Contact K3-1 opens and keeps K3 active after contacts HP1, LP1 or FS1 have closed again. At the same time,
contact K3-2 closes, activating terminal X of the Relay Board
so as to create an external lock-out signal. Despite the fact
that contact KM1 is connected in series to relay K3, the great
voltage drop in high impedance relay K3 avoids the activation
of 1M. The lock-out is deleted from the thermostat, eliminating and re-establishing Signal Y1; that is to say, setting the
thermostat to OFF and then to ON again.
The circuit system of Lock-out Relay K4 of cooling circuit No.
2 operates as per the description given for the previously
mentioned circuit No. 1.
Heating lock-out: Should the Ignition Control (IC1) be locked
out due to the activation of any of the LS2 (Automatic Reset
Heat Switch), RS (Burner Heat Switch) or AS (Air Pressure
Switch) features, the control will not unlock until it is reset. In
the case of a lock-out due to a lack of flame detection, control IC1 generates an alarm signal at terminals ST-3 and ST-4
(230 VAC current appears). To unlock IC1 press manual reset
button MR located on the outside of the unit. The IC No. 1 will
not reset in the case of a power shortage or restriction, and it
cannot be reset from the ambient thermostat. Should the
Manual Reset Heat Switch (LS1) open (LS2 has a lower set
point and, normally, should open first), the Ignition Control will
not operate until LS1 is reset manually. LS1 can be accessed
through the impulse air access panel (for installations of the
downward flow type), or through the cover located on the dividing wall of the condenser compartment (for installations
with side ducts).
Ignition Control IC2 locks out in the case of a flame failure.
IC2 lock-out does not lock out IC1. See Fig. 13 for the location of controls and gas valves.
Low gas pressure: If the gas supply pressure drops below
the set point of the gas pressure switch (GS), the electric
power supply to the IC1 and IC2 is interrupted, and this unit
becomes inoperative. The gas equipment will reset automatically once the gas supply pressure surpasses the pressure
switch set point, and the ignition sequence will begin once
again.
Motor overload protection: All motors of the sealed compressors and outdoor fan motors are protected against overloads by means of an internal heat cut-off switch. This protection will reset automatically once the motor has cooled down
sufficiently. Externally, they are protected against short circuits and overloads by means of automatic switches (F1, F2,
F4 and F6), curve K (DIN, VDE 0660-104).
The indoor fan motor is protected by a motor-guard, adjusted
to the maximum amperage of the fan motor. In the case of an
excessive power consumption in the three phases, motor28
IGNITION CONTROL - IC Nº 2
IC1
IC1
IGNITION
ELECTRODE Nº 1
BURNER
FAN MOTOR
RS
SENSOR Nº 1
GAS
VALVE
GV1
GAS
VALVE
GV2
SENSOR Nº2
IGNITION ELECTRODE Nº 2
BURNER COMPARTMENT
- Fig. 13 -
Check list prior to start up
Check the following before starting the unit.
1. Make sure all valves are installed at unit intakes and their
location is clear. Make sure the gas outlet and combustion air hoods have been installed correctly.
2. Make sure the gas to be used is of the required type and
appears on the Identification Plate of the unit. Also make
sure that the calibre of the jets are in accordance with the
information appearing on the Identification Plate.
3. Purge all air from the unit gas supply to (and including)
the gas valve. Purge this air through pressure intakes “Pa”
of the valve. Once all air is purged, close connection “Pa”
once again.
4. While gas is supplied to the unit and the valve is under
pressure, check for gas leaks using a soap solution.
5. Use the pressure intakes designated for measuring devices; for example, pressure gauge or low pressure gauge
so as to follow up operating pressures.
6. Check gas supply pressure. It should be within the limits
shown on the Identification Plate. Gas supply pressure
should be checked with all gas-powered equipment in the
building operating at full force. The auxiliary gas line operating pressure should never surpass 25 mbar (10" each),
nor the operating pressure be below 12.5 mbar (5" each)
when operating with natural gas. If the gas pressure is not
within these limits, contact your local gas company for
adequate corrective measures.
7. Make sure the gas intake pressure switch operates at the
pressure selected on the variable dial, which is normally
12.5 mbar (5" each). To adjust this switch, remove the
transparent cover and set the switching point at the adjustment flywheel. The nominal value on the scale corresponds to the real value, with a ±15% tolerance.
8. Make sure the setting of the extraction air pressure switch
GB
of the heat exchanger is 1 mbar (2.5" each).
9. Make sure all wiring connections of the gas chamber are
correct.
Start up
Operating instructions
CAUTION:
This burner is equipped with automatic ignition systems. Do not
attempt to ignite it manually.
2. Turn the Quick Partial Opening Regulation flywheel (B) one
complete turn backwards.
3. With the gas valve in operation, loosen the Flow Regulating Flywheel of the second flame V2 (C) slightly, and set
said flywheel to its maximum opening. Adjust the main
regulator (D) in accordance with the tabulated value. Reduce the Flow Regulation of the second flame (C) until
that specific pressure is reached.
4. Tighten the Regulating Flywheel to fix the settings permanently. Close the small cover located on the main regulator.
Typical gas valve
To ignite the main burners:
1. Disconnect the power supply to the unit.
2. Set the ambient thermostat to its lowest setting.
3. Connect the power supply to the unit.
4. Set the ambient thermostat to the desired temperature.
(If the temperature “set” on the thermostat is higher than
the ambient temperature, the burner will ignite.)
5. If there is any trouble with the start up, see “Trouble Shooting”.
To turn them off:
1. Disconnect the power supply to the unit.
(D) MAIN REGULATOR ADJUSTMENT
(Beneath the cover)
(B) QUICK PARTIAL OPENING
ADJUSTMENT
(Beneath the cap)
GROOVED REGULATING
FLYWHEEL (Loosen)
(C) FLAME FLOW
REGULATING
FLYWHEEL
GAS PRESSURE
GAUGE
Check list after start up (gas)
After having activated the control circuit and the heating section is operating normally, check the following:
1. Make sure there are no leaks at the gas manifold, using a
soapy solution.
2. Make sure the gas pressures in the manifold are correct
and correspond to those appearing on the Identification
Plate.
3. At the discharges of the smoke ducts, check CO, CO2
and NOX content, if possible, with regard to combustible
products. CO content should be less than 0.1%; that is to
say, 1.000 ppm. Make sure the CO/CO2 ratio is less than
0.02.
Gas pressure adjustment in the manifold
This equipment is dispatched from the factory prepared for
natural gas of the 2ND-H group (G-20).
When adjustment is needed, depending upon the type of gas
used, this can be done by means of the adjusting screws of
the gas valve (Fig. 14), in accordance with the following sequence. Set to the values given in Table 10.
(A) INTERNAL PILOT
(Beneath the cap)
CONNECTING
FLANGE
- Fig. 14 -
5. To check operation of the extraction air pressure gauge,
partially cover the gas outlet duct until the switch turns
the gas system off. Reset the ignition control and proceed. Make sure the CO content in combustion gas is
below 0.2%.
6. Disconnect the flame sensor connection and make sure
the system turns off immediately. Reconnect the sensor
connection; reset the ignition control lock-out and proceed.
Burner instructions
NOTE
For equipment converted to propane gas (LPG), the gas
valve should be adjusted in accordance with the technical information included in the conversion kit.
1. Set the interior pilot (A) to five turns open, to the right,
from maximum value.
To check the burners, pilots or jets, close the main manual
valve and shut off all power supply to the unit.
1. Remove the screws that hold the burner to its supports on
both sides.
2. Disconnect the gas supply line to the gas valve intake.
3. Disconnect the gas valve and ignition electrode cables.
Remove the connector-gas valve assembly from the burner
by pulling up and towards the rear.
The burners can now be accessed. See Fig. 15 for a view of a
typical burner and flame.
To reassemble this assembly, invert the previous procedure.
Make sure the burners are level and rest on the guides at the
rear of the heat exchanger.
GB
29
there is sufficient penetration in the air flow on both sides
of the indoor coil.
View of typical flame
NOTE:
The pipes should be inserted and kept in perpendicular to the air
flow in such a way that the speed pressure does not affect the
static pressure reading.
3. Using an inclined pressure gauge, determine the pressure
drop in a dry indoor coil. Since humidity can vary considerably in an indoor coil, to measure a pressure drop in a
wet coil under site conditions would not be precise. To make
sure the coil is dry, the compressors should be disconnected during this test.
4. Having the value of the pressure drop in a dry coil, the real
air flow through the 50 mm. filters of the unit can be determined by means of the curve appearing in Fig. 17.
HEAT EXCHANGER
TUBE
BURNER
BURNER FLAME
(Blue only)
SUPPLY MANIFOLD
IGNITION PILOT
WARNING
Not being able to adjust the total amount of air in the system could
cause serious damage to the fan.
Once these readings are made, remove the pipes and replace the caps removed in Step 1.
- Fig. 15 -
Temperature increase adjustment
Checking air flow
The RPMs of the impulse air fan depend upon the air flow
required, the accessories or options of the unit and the static
resistances of the impulse and return air systems. With this
information, the RPMs of the impulse air fan and motor pulley
adjustment (open turns) can be determined by means of the
performance data of the fan shown in Tables 5, 6 and 7.
High speed operation accessories are available (containing a
smaller fan pulley and a larger motor pulley) for applications
which require the impulse air fan to supply greater flows and
lower static pressures. See Table 9 on fan motor and drive
data.
With the value of the RPMs required and the fan motor HP,
the adjustment (turns open) of the impulse air motor pulley
can be determined by means of Table 11.
Check the following:
1. Impulse air flow should be within the limits appearing in
Table 1.
2. Pulleys can be adjusted in increments of half a turn.
3. Belt tensing should be carried out as shown in Fig. 16.
Turn the impulse air fan motor on. Adjust resistances both in
the impulse as well as return air systems so as to balance
distribution throughout the air conditioned space. Due to the
specifications of the site, it may be necessary to have this
balancing carried out by someone other than the unit installer.
To check the impulse air flow after initial balancing:
1. There are two 9.5 mm. ports for reading pressure before
and after the evaporating coil. They are located in the filter
side and fan side access panels, and are fitted with caps.
Remove both caps.
2. Insert at least 200 mm. of piping (with a diameter of about
6 mm.) through each one of the ports in such a way that
30
Temperature increase (or temperature difference between the
return air and the hot air from the boiler) should be within the
limits shown in Table 2.
Table 11 - Impulse air fan motor pulley adjustment
Fan operating range (RPM)
Turns
open
180 unit
240 unit
300 unit
Standard
operation
High
speed
operation
Standard
operation
High
speed
operation
1 030
765
895
1 010
1 080
1 070
795
925
1 064
1 130
925
1 115
820
955
1 118
1 180
960
1 155
850
990
1 172
1 236
2
1 000
1 200
875
1 020
-
1 270
1
1 040
1 240
905
1 050
-
-
0
-
-
-
1 080
-
-
Standard
operation
High
speed
operation
6
845
5
885
4
3
Once the temperature increase is determined, the flow can
be calculated as follows:
GB
m3/s =
0.8 x kW Gas intake*
1.2072 x °C Temp.
increase
o CFM =
0.8 x Btu Gas intake
1.08 x °F Temp.
increase
* Based on an 80% nominal performance and the gross heating value,
or over, of the fuel. Alternatively, use gas intake 0.9 x based on 90%
nominal performance and the nett heating value, or less, of the fuel.
After about 20 minutes of operation, determine the temperature increase in the boiler. Take a reading of both the return
and hot air in the ducts (at about 1.8 m. from the boiler), where
this reading is not affected by radiant heat. Increase the fan
air flow so as to decrease the temperature; decrease the fan
air flow so as to increase the temperature. See Table 8 for fan
motor and data on operation of same.
Pressure drop in dry indoor coil vs. impulse air
flow
Tensing belts
180-240
IMPULSE AIR m3/S
CAUTION
Procedure for tensing belts:
1. Loosen the four nuts (upper and lower) (A).
2. Turn to adjust (B).
3. Never loosen nuts (C).
4. With a belt tensing tester, apply perpendicular pressure on the
intermediate point of the belt, as shown below. This deflecting
pressure should be applied until a correct 4 mm. deflection
distance is achieved.
To determine the deflection distance from normal position, use a
straight edge, from pulley to pulley, as a line of reference. The recommended deflection pressure is as shown below:
1.9
2.4
2.8
3.3
3.8
4.2
4.7
200
187.5
175
PRESSURE DROP (Pa.)
162.5
180
240
150
137.5
125
112.5
100
87.5
75
62.5
4
6
5
SPAN
7
8
9
10
IMPULSE AIR IN NOMINAL CFM (x 1000)
N
ECTIO
DEFL SSURE
PRE
* NEVER LOOSEN NUTS
(X)
(A)
(C)*
300
IMPULSE AIR m3/S
3.3
3.8
4.2
4.7
5.2
5.7
6.1
7
8
9
10
11
12
13
200
187.5
175
162.5
PRESSURE DROP (Pa.)
Tense all new belts to the maximum deflection recommended. Check
belt tension at least twice during the first 24 hours of operation.
Whenever the belts are retensed, the deflection pressure values
should be within maximum and minimum.
5. After this tensing operation, retighten nuts (A).
150
137.5
125
112.5
100
87.5
75
- Fig. 16 -
62.5
Tensing belts
All units are equipped with single speed motors and belt drive
for fans. The variable fan motor pulley can be adjusted so as
to obtain the desired impulse air flow.
MPULSE AIR IN NOMINAL CFM (x 1000)
NOTE:
Disconnect compressors before test readings so as to insure a dry
indoor coil.
- Fig. 17 -
GB
31
Maintenance
Normal maintenance
CAUTION:
Before carrying out any of the following operations, disconnect all
electric power supply to the unit. Not doing this could cause personal injuries.
Normally, periodical maintenance comprises changing or
cleaning filters and (in certain cases) cleaning the main burners.
FILTERS: Check them once a month. Replace the non-reusable or clean the permanent filters, as required. DO NOT replace the permanent type with non-reusable types. The dimensions of the replaced filter should be the same as the
original.
MOTORS
The indoor and outdoor fan motors have permanent lubrication and do not require maintenance.
OUTDOOR COILS: Dirt should not accumulate on the surface of the outdoor coils, or on other parts of the air circuit.
They should be cleaned as frequently as required to keep the
coils clean, making sure all electrical power supplies to the
unit are disconnected before carrying out this cleaning operation.
NOTE
When cleaning the coils, be sure not to damage the fins of same.
Do not allow any structure or overhanging element to obstruct outdoor air discharge.
BURNER: Regularly (at least once a year, at the beginning of
each heating season), visually check the flame of the main
burner.
TO CLEAN THE BURNERS: Remove them from the boiler as
described in “Burner Instructions”. Clean the burners with hot
water along the top of same. When reassembling a burner,
make sure the electrode is at 2 or 3 mm. See Fig. 18.
of a boiler hardly ever needs cleaning. If the element has
deposits of soot on it, it can be cleaned as follows:
1. Remove the burner assembly as described in “Burner
Instructions”.
2. Remove the cover over the gas heating section.
3. On the top plate, remove the screws from the casing and
from the top turbine of the combustion gas extraction
fan.
4. Remove the screws that fasten the top to the smoke
stack, without tearing the insulation next to it. Then remove the central dividing plate that separates the upper
and lower smoke stacks.
5. Inside the smoke stack, remove the smoke deflectors
inside the tubes. Make sure the last curve of the deflector fits tightly with the pipe, holding the end of the deflector tightly in the pipe hoop. This hoop is formed when the
pipe is expanded at an end plate. To remove, move the
end of the deflector towards the centre of the pipe, thus
releasing the deflector end from the pipe hoop, and then
pull straight out. See Fig. 18.
6. With a metal brush on a flexible rod, sweep the inside of
the heat exchangers from the entrance of the burner, and
the ends of the smoke discharges.
7. Sweep the inside of the smoke stacks and the smoke
deflectors.
8. Pass the metal brush through the ventilation hoods downwards, from the end of the smoke stack.
9. If the accumulation of soot is considerable, remove the
fan motor and clean the turbine and casing. Pass the
metal brush along the prolonged smoke ducts downwards,
at the ventilation outlet.
10. Once brushing is concluded, clean out with air or nitrogen. If necessary, use a vacuum cleaner.
11. Reassemble all parts in the same order as disassembly,
following steps 1 to 4.
12. When replacing the centre and top of the smoke stack,
be sure not to tear the insulation next to them.
13. Make sure all gaskets on the ventilation side of the combustion system are airtight. Apply high-temperature sealing putty (260ºC/+500ºF) wherever necessary.
Typical installation of smoke deflector
UPPER VIEW
GAS FLOW
NOTE: One end of each smoke deflector has a tighter
curve than the other end. This curve should be located at the pipe outlet so that its spring action will
keep it in place.
BURNERS
CONNECTING
PLUG
2 TO 3 mm
SMOLE
DEFLECTOR
TEFLON
SUPPORT
HEAT EXCHANGER
OUTLET MANIFOLD
EVACUATION
PIPE
EVACUATION PIPES
ELECTRODE
- Fig. 18 "A"
"A"
SEE
NOTE
PIPE
HOOP
SECTION "A - A"
COMBUSTION AIR DISCHARGE: Regularly, visually check
the discharge outlet to make sure there is no excess of soot
and dirt. If necessary, clean to keep the combustion air discharge in adequate condition.
Cleaning of smoke stacks and heating elements
With adequate combustion adjustment, the heating element
32
GB
SMOKE DEFLECTOR
- Fig. 19 -
Trouble shooting
ii. With economiser:
a. Economiser logic module or wiring defective.
b. Thermostat set to unoccupied mode.
c. Defective occupied relay coil or contacts.
General information
Before trouble shooting in depth, first make sure the thermostat is calling for Cool or Heat, and that the power supply to
the unit has not been interrupted by any automatic switch,
etc. Make sure both the thermostat as well as the site wiring
operate correctly.
Normally, a lack of impulse air supply causes other failures.
In cooling, a loss of impulse air will lock out the compressor
due to low temperature at the evaporating unit. In heating, a
lack of impulse air supply will activate the heat switch and
lock out the ignition control. Check and correct this lack of
impulse air before checking other possible trouble.
CAUTION:
For trouble shooting, it is normally necessary to have the power
supply system in operation while components and operation are
being evaluated. Avoid live wires. Check voltage by means of a
voltmeter with insulated testers that are adequate for the voltage
being tested. Never take for granted that the circuits are inoperative!
SEC. 3: No cooling/heating; no presence of impulse air;
contacts of contactor KM3 closed.
A. One or more phases open. Check the automatic switch
and power supply.
B. Failure of contacts of Contactor KM3. Check voltage at
charge side and replace contactor, if necessary.
C. Loose or damaged wiring on line or charge side of contacts. Check wiring.
D. Impulse air motor failure.
E. Broken drive belt or loose drive pulley. Check the drive
and fan assemblies.
Trouble shooting diagram
NO
COOLING
IMPULSE
AIR?
YES
YES
CONTACTS
KM 1. KM 2. KM6
CLOSED?
NO
Probable causes and suggested corrective
measures:
SEC. 1
NO
SEC. 2
See Fig. 20 for the Trouble Shooting Diagram.
CONTACTS
KM 3.
CLOSED?
SEC. 1: No cooling; presence of impulse air; contacts KM1/
KM2/KM6 (300) closed.
A. Compressor motor protection open. Wait for protection to
reset.
B. One or more phases open. Check power supply.
C. Contacts of Contact KM1/KM2/KM6 damaged. Check voltage on the charge side and replace the contact(s), if necessary.
D. Loose or damaged wiring on the line or charge side of the
contacts. Check cables.
E. Compressor motor failure.
F. Pressure drop.
SEC. 2: No cooling; presence of impulse air; contacts KM1/
KM2/KM6 (300) open.
A. Cooling relay RY1/RY2/RY3 defective.
B. Lock out due to high discharge pressure, or low suction
temperature. The external lock-out alarm, if installed, is
activated. Reset thermostat lock-out and check consequences. If the unit locks out again, call a technician.
CAUTION:
From a lock-out position, do no reset repeatedly since this could
damage the unit.
C. Inadequate connection at Contact KM1/KM2/K6 coil, or
failure of this coil. Repair or replace.
D. Relay timed to connection TD1/TD2/TD3 in default.
E. Contacts K3-1 or K4-1 of the relay board are open when
the relay K3/K4 is inoperative. Replace relay board.
F. No signal at relay board:
i. Without economiser: Defective economiser jumper or
wiring.
YES
SEC. 3
NO
SEC. 4
NO
NO HEATING
IMPULSE
AIR?
YES
PROCEED
TO LOCKOUT?
YES
SEC. 5
NO.
SEC. 6
- Fig. 20 -
SEC. 4: No cooling/heating; no presence of impulse air;
contacts KM3 open.
A. One or more phases open. Check the automatic switch
and power supply.
B. No 24 VAC control power. Reset the 24 VAC automatic
switch CB, if it has gone off. Check control transformer
1T.
C. No 220-240 V power supply reaching transformer 1T because automatic switch F5 is open.
D. Overload relay is open due to excessive intensity.
E. Overload relay is open and cannot be reset. Replace relay.
F. Defective connection at KM3 contactor coil, or failure of
this coil. Repair or replace.
G. COOLING MODE: Contacts K5-1 of relay board are open.
Replace the relay board.
H. HEATING MODE: Timed relay contacts (TDR) open. Check
wiring. If voltage is present at the TDR coil, but the contacts do not close after the delay time, replace TDR.
I. HEATING MODE: Timed relay contacts closed, relay K5-
GB
33
2 activated, but contacts K5-2 of relay board are open.
Replace the relay board.
SEC. 5: No heating, presence of impulse air; ignition control locked out.
Make sure there is 230 VAC tension between terminals ST-3
and ST-4, so as to determine lock-out of IC1 and IC2.
A. No flame detected. Check the ignition electrode, the ignition transformer and the flame detector. Check grounding
of unit, ignition control and ignition transformer. Make sure
the fuel is being liberated by the gas valve.
B. This can also mean that the ignition and the flame were
correct, but then failed, perhaps due to a change in the
shape or characteristics of the flame after the valve went
into the second stage (max. open), causing a failure in
flame detection by the ignition control. Check for problems
in the gas supply.
The ignition control should be reset manually by pressing
the manual reset button MR.
SEC. 6: No heating; presence of impulse air, ignition control not locked out.
A. Does not start because there is no tension at terminal IN1. Make sure the indoor fan has started and contacts of
KM3 and KW1 are closed. Also make sure contacts LS1
and GS are closed.
B. Contacts RW1 of heating relay are open. Check wiring and
the coil. Replace if necessary. Failure of the RW2 heating
relay contacts will allow the boiler to operate, but only in
first phase (low power). Check RW2 and operation of the
second phase of the gas valve, should the boiler not operate at full force.
C. The Gas Pressure Switch (GS) contacts are open. Check
wiring and operation of the switch. Make sure GS is adjusted correctly in accordance with the type of gas being
supplied to the unit. If the gas line supply pressure is below the GS set point, contact the gas company so adequate corrective measures may be taken.
D. The burner fan is off or permanently on. Make sure the Air
Pressure Switch (AS), the heat switch (LS2) or the heat
contacts (RS) of the burner assembly close after the purge
starts. Make sure the contacts of LS2 and RS have continuity.
Check adequate operation of the burner fan motor and
check actuation of AS. Inspect the AS pipe and the smoke
discharge, in case they are obstructed. Make sure the pressure generated by the combustion air fan is greater than
the pressure at the AS.
E. Heat switch LS1 is open. LS1 should be reset manually so
as to resume operation.
CAUTION:
Disconnect all electric power supply to the unit.
Installations with downward discharge: Remove the
impulse air access panel. The heat switch assembly is
mounted on the dividing wall of the condenser, over the
outer most heat exchanger pipe. Reset LS1 manually by
34
pressing the reset button at the top of the switch.
Installations with side discharge: Remove the screws
from the rear condenser fan grill, and place the fan assembly to one side very carefully. Remove the four screws
from the condenser dividing wall cover and, very carefully, withdraw the Stroke End switch, resetting the switch
as previously described. Be sure not to damage or loosen
cables. Reassemble the Stroke End assembly and the
condenser fan motor.
SEC. 7:
Low performance; the unit cools or heats, but
does not maintain the set point.
A. Dirty air filters. Replace filters at least every 3 months, or
more regularly if conditions so require.
B. The drive belt slips. Tense the belt or replace same if it is
cracked, glossy, etc.
C. Second stage Cooling/Heating inoperative. See “Trouble
Shooting” for general causes of not producing heat or cool.
D. COOL ONLY: Low refrigerant load.
E. COOL ONLY: Dirty indoor coil surfaces due to dirty or
non-existing filters. Outdoor coil dirty due to dust, leaves,
etc.
F. COOL ONLY: A motor/compressor of one of the compressors in tandem (only in units with a certain capacity) may
be failing, and thus operates at low power.
Check resistance of the windings and power consumption
of each motor separately.
G. Defective economiser assembly:
i. Damper assembly and/or activating mechanism loose
or stuck, avoiding complete movement.
ii. Damper motor inoperative. To check motor operation,
remove the screw, withdraw the logic module of the
damper motor and carry out the following steps:
a. Make sure the interior spring takes the motor to a
completely closed position (that is to say, the outdoor air dampers should be completely closed, and
the return air dampers open).
b. Apply 24 VAC to terminals TR and TR1. Connect
terminals T and T1 by means of a jumper. The
damper motor should advance to the totally open
position. Remove the jumper between terminals T
and T1. The damper motor should advance to the
totally closed position. Now place a jumper between
terminals P and P1. The damper motor should advance to the totally open position. Replace the
damper motor if it does not surpass any of these
tests.
iii. Defective logic module. To check it, remove power supply and jumpers, and reinstall the logic module in the
damper motor.
Models with Single Enthalpy: Disconnect the enthalpy
sensor cables from terminals So and +o, and install a
1.2 K ohms resistance (1 watt, ±5%) between the terminals. Terminals SR and +R will be equipped with a
620 ohms resistance (1 watt, ±5%).
Models with Dual Enthalpy: Disconnect the enthalpy
sensor cables from terminals SR and +R, and install a
620 ohms resistance (1 watt, ±5%). Disconnect the
discharge air sensor and install a jumper between terminals T and T1. Install a jumper between terminals
TR and 1.
Apply a 24 VAC current again between terminals TR
(and terminal 1) and TR1 (this can be achieved by
setting the fan thermostat switch to “ON”) and carry
GB
out the following steps:
a. Set the potentiometer of the enthalpy set point to
position “A”. The LED should go on, indicating low
enthalpy, and the damper motor should advance to
its open position.
b. Set the potentiometer of the enthalpy set point to
position “D”. The LED should go off, indicating high
enthalpy, and the damper motor should advance to
its closed position.
c. If the logic module does not surpass test a. or b.,
replace it. If not, make sure the signals from the
specified thermostat cause the appropriate action.
Contacts KM1, KM2 and KM3 operate only after a
short pause. See notes on UNIT CONTROL WIRING on page 10 for required times. The occupation
switch of the thermostat should be set to “Occupied”. If a positive response is not achieved, replace
the logic module.
Set point
Enthalpy
Signal
Action
"A"
Low
Y1
The dampers modulate
"A"
Low
Y2
Contact KM1 is operative
"D"
High
Y1
Contact KM1 is operative
"D"
High
Y2
Contact KM2 is operative
d. Apply 24 VAC between terminals TR and TR1, and
between terminals N and TR1. Remove cables from
terminals T and T1. Set the enthalpy set point to
“A”. The damper motor should advance to its minimum position. Slightly readjust the minimum position of the potentiometer and make sure the dampers move correctly. Then connect terminals T and
T1 by means of a jumper. The damper motor should
advance to its maximum position. If the damper
motor does not respond as described above, replace
the logic module.
iv. Defective Enthalpy Sensor(s): To evaluate either one
of the two sensors, install a DC ammeter between terminal So (or SR) of the logic module and terminal S of
the enthalpy sensor, with the positive cable of the
ammeter at the sensor terminal. The output reading
should be between 3 and 25 milliamps, depending upon
the ambient temperature and humidity.
For reference values of the output reading with respect
to ambient conditions, see curves “A” to “D” in Fig. 10.
If the output current value is not within these limits,
replace the sensor(s).
Point on
the curve
Sensor output
(mA, ±2mA)
"A"
12
"B"
14
"C"
16
"D"
18
v. If the damper motor, logic module and enthalpy sensor
operate correctly, but the economiser assembly does
not modulate the dampers sufficiently to generate an
impulse air within the range of 10 to 13ºC (50 and 56ºF),
check the discharge air sensor resistance. After a 15minute pause at the specified temperatures, this resistance should be within the range shown in the following Fig. Should this not be the case, replace the
discharge air sensor.
Sensor temp. °C / °F
Min. / Max. ohms
0 / 32
9.300 / 10.300
25 / 77
2.860 / 3.140
100 / 212
188 / 219
vi. After evaluating the components, replace those that
are defective and change the cables removed from the
terminals during the tests. Remove all test jumpers or
resistances used during the tests. Restore maximum
position and set the enthalpy set point potentiometers
to their original settings.
Data and measurements are subject to change without prior notice.
GB
35
DECLARATION OF COMPLIANCE ON MACHINERY
MANUFACTURER: CLIMA ROCA YORK, S.L.
ADDRESSE:
Paseo Espronceda, 278, 08.204 SABADELL
This machine complies with the basic demands of the EC Standards on machinery (Standard "EC" 89/392/CEE), including any modification of same.
APPLICATION OF THE MACHINE:
AIR CONDITIONER/COOLING
180, 240 & 300
TYPE: D3IG
..............................
EC STANDARDS APPLIED:
89/392/EEC,89/336/EEC
MATCHING STANDARDS APPLIED:
EN60204-1, EN292-1, EN292-2, EN563, EN294, EN953, EN55014,
EN60555-2, EN50082-1
INTERNATIONAL STANDARDS AND TECHNICAL SPECIFICATIONS
APPLIED :
PLACE:
Sabadell, (España)
EN ISO 9001, (Pr EN378)
SIGNATURES:
ROMÁN LARRODA
QUALITY CONTROL MANAGER
36
GB