1
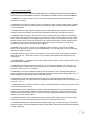
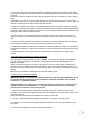
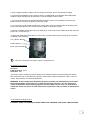
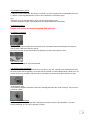
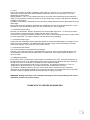
OWNER’S MANUAL Spa PROVENCE 1 1.0 SAFETY INSTRUCTIONS READ AND FOLLOW ALL INSTRUCTIONS CAREFULLY DURING INSTALLATION AND USE OF THIS ELECTRICAL EQUIPMENT, ALWAYS TAKE PRECAUTIONS ON THE FOLLOWING BASIS: 1. WARNING: To reduce the risk of injury, do not allow children using this product without the supervision of an adult 2. WARNING: This product includes a connector grounding used to connect a solid copper conductor between the product and any metal equipment, electrical box, pipe or plumbing metal located within 1.5 m of the product. 3. DANGER: Risk of drowning. Be careful to prevent unauthorized access to children. To avoid accidents, ensure that children can not use the spa without supervision of an adult at any time. 4. WARNING: Risk of damage. The lining of the suction fitting in this spa is a dimension adapted to specific water flow created by the pump. If it is necessary to replace the lining of the fitting or suction pump, make sure that flows are compatible. Due to the risk of injury, never operate or use the spa if the filter, the filter cover or skimmer are broken or any part of the skimmer is absent. Please contact your dealer for service. Never replace a suction fitting with one that is assessed at a rate lower compared to that marked on the suction fitting original. 5. DANGER: Risk of electric shock .Do not Install the product less than 1 5m from any metallic surface. As an alternative, the spa may be installed within 1.5 m of metal surface if it is permanently connected to a ground copper. 6. DANGER: Risk of electric shock. Do not allow the use of electric parts, such as lights, telephone, radio, television, etc.. closer than at least 1 5m spa unless such appliances are integrated by the manufacturer. 7. POWER SUPPLY: The power of this product should include a switch or RCD of 30mA and a circuit breaker adequately powered. 8. WARNING: The water should never exceed 40 ° C. A temperature between 38 ° C and 40 ° C is considered safe for a healthy adult. Lower temperatures are recommended for young children and when spa is used more than 10 minutes. 9. WARNING: An excessive water temperature has the potential to risk to the fetus during the first month of pregnancy, pregnant women or potentially pregnant should limit water temperature to 37 ° C. Women pregnant should consult a doctor before using a spa. 10. WARNING: To know the exact temperature, the user must measure the temperature with an accurate thermometer, since the devices for regulating the water temperature has a tolerance that can vary up to + / -2 ° C. 11. WARNING: The consumption of alcohol, drugs or medication before or during spa use may lead to unconsciousness and drowning. 12. WARNING: Persons suffering from obesity or medical heart disease, low or high blood pressure, problems circulatory disease, diabetes, infectious disease or deficiency immune syndrome should consult a doctor before using a spa. If a person has breathing difficulties related to the use of a spa, discontinue use and consult a doctor. 13. WARNING: Persons taking medications should consult a doctor before using a spa since some medications can cause drowsiness and affect heart rate, pressure and blood flow. 14. WARNING: Always take a shower before and after using a spa. To reduce the risk of contracting water-borne illness, maintain systematically the chemical balance of water within the parameters given in Water Treatment. 2 15. WARNING: Hyperthermia. A prolonged bath in hot water may cause hyperthermia. Observe a reasonable time limit when using a spa. A description of the causes, symptoms and effects of hyperthermia is presented below: Hyperthermia occurs when the body temperature rises a few degrees above the normal temperature of 37 ° C. The symptoms of hyperthermia include drowsiness, lethargy and an elevated temperature of body. The effects of hyperthermia include: - Unawareness of impending hazard - Inability to perceive heat - Inability to admit the need to exit the spa - Physical inability to exit the spa - Damage to the fetus in a pregnant woman - Unconsciousness and danger of drowning 16. WARNING: Exit slowly, spa surfaces may be wet and slippery. 17. WARNING: Use the straps and fasteners for attaching the cover to the spa between uses. This will help discourage children from entering the spa, monitoring, while maintaining the cover on windy days. No statements made claiming that the cover, fasteners or latches to prevent access spa. 2.0 Provision of spa IMPORTANT: Due to the combined weight of the spa, water and its occupants, it is extremely important that the spa rests on a solid surface, smooth, level and capable of uniformly supporting this weight, without risk of landslide or subsidence, as long as it is in place. If the spa is placed on a surface that does not meet these requirements, the skirt and / or the hull may be damaged. Such damage to a support are not covered by warranty. It is the spa owner's responsibility to ensure integrity support at all times. We recommend using a concrete slab reinforced, poured in place and a thickness of 10cm. A wooden deck is also acceptable as long as its construction meets the requirements outlined above. The spa must be installed to allow drainage of water. The installation of a spa in a pit/hole without proper drainage, allows the risk of letting the rain, flooding and other source of casual water to flood the spa equipment which could cause damage to the spas equipment. For spas embedded in a floor or deck, the facility must allow access to equipment, either the top or bottom for maintenance. Make sure there is no obstruction which hinders the removal of side panels and access to parts of the jets, particularly side doors for access to equipment. 2.1 Location outdoor When selecting the ideal outdoor location for your spa, we suggest to take the following into account: 1. The proximity of a shelter and a place to change. 2. The path leading to the spa (it must be clean and clear to prevent dirt being drawn into the spa) 3. The proximity of trees and shrubbery (leaves and dead birds may make it difficult to keep the spa clean) 4. A sheltered place (reduced exposure to wind and weather can reduce operating costs and maintenance) 5. The general beautification of your environment. It is preferable not to place the spa under the overhang of a roof without gutters because the water flow will shorten the life of the spa cover. 2.2 Location indoor For installations indoor, there are many factors to consider before you begin: 1. Adequate foundation: consult a structural engineer to provide a foundation which can properly bear the spa all the time where they will remain in place. A adequate support is especially vital if the spa must be installed in the second floor or higher. For spas to relax on a balcony, a roof, a platform not specifically linked to the main structure or not been specifically designed to accommodate spa, you should consult an structural engineer or architect with experience in this type of application. 3 2. Proper drainage: it is essential that the facility is capable of accepting major spills of water. Make sure the floor on which the spa is to be sited has suitable drainage and can accept the entire contents of the tub. Be sure to arrange for ceilings and other structures located in the spa. The sealing of decks, ceilings are of responsibility of the owner. In case of water damage, the manufacturer of the spa can not be held responsible. The area surrounding the spa may become damp or wet and the floor, furniture, walls and adjacent structures must be able to resist water and moisture. 3. Adequate ventilation: the question of ventilation should be discussed with an engineer or authority competent to understand the steps necessary to ventilate moist air or heated or filled with the smell of chemicals. Using a spa can produce a significant amount of moisture which can cause mold over time, damaging certain areas and certain objects. 4. Sufficient access: In the unlikely event that you need to access every element of the spa for a repair, it is strongly recommended that the indoor facility will allow full access to any location of the spa. 5. Warranty: Warranty does not cover damage caused by the non observation of these guidelines or by the improper installation not in accordance with regulations or local codes. 6. WARNING: in addition to maintenance of filters and chemical equilibrium of water, it is advisable to have adequate ventilation to reduce risks exposure to viruses and bacteria that may be present in air or water. Consult an architect or a licensed contractor to determine the needs specific to installing a spa indoors. 3.0 General safety instructions for electrical installation Your spa must be properly installed to ensure reliability. For questions regarding the installation of your spa, consult your dealer or a specialist. It is extremely important that the earthing is done properly. All material electric or metallic component your spa is connected to a connector for grounding, intended to be connected to the grounding of the general switchboard, via a copper cable appropriate section. It is also the case for any metallic object or surface being at least 1.5 m device. This assurance of greater security. Make sure your installation complies with the rules and building codes. 4.0 Instructions for electrical installation IMPORTANT NOTE: The electrical wiring must conform to electrical standards Building. If you do not have the skills required to ensure compliance with these standards, call a licensed electrician or a competent authority. CAUTION: Before you connect your spa to the grid, make sure the cable is not powered. For security, switch the circuit breaker to "0". If you do not have the skills or you're unsure of yourself, use an electrician. Do not risk your life. 1. This spa must be permanently connected to the power supply. No connection with an outlet extension cord can be used to operate the spa. Use of an extension cord can cause fire. If the power of this spa does not comply with these instructions, the manufacturer's warranty will be void. 2. This spa must be supplied by a separate circuit which is not used for any other device. 3. To determine the current size and supply required, see Section 5.0 Power requirements for your spa model. 4. The size of the supply must conform to electrical standards. 4 5. Every supply should be copper to ensure proper connection. Do not use aluminum supply. 6. The electrical installation must contain a switch or a differential circuit breaker 30mA differential capable of protecting property and persons in case of leakage current to earth. 7. The circuit for the spa must include adequate protection vis-à-vis consumption for Electric spa. Refer to Section 5.0 Power required for your spa model. 8. To access the connector block of the spa, remove the screws from being under the keyboard and remove the panel. Remove the screws from the cabinet to open gain access. 9. Choose a suitable access place for your cable (eg a corner) and run the cable into the tub along the skins to the connection box. 10. Bring the cable through the gland, in front of the connector and insert the cables in the connector according to the following: Live. (Red or Brown) Neutral. (Blue) Earth. (Green & Yellow) 11. Once the connections are made, close the connection box. 5.0 Power requirements Provence Cable thickness 4mm² Protection 25A The values section of cable is purely indicative for a distance between the General Electric and the spa of less than 20m. If this distance is greater, it will require a higher specification cable. If you are unsure, ask the advice of a licensed electrician. WARNING: In the configuration defined by the plant, the heater will automatically cut off when the massage pumps are functionning, to limit the amperage. However, you can change this setting and allow the heater working together with the pumps. In this case, it is imperative to review the values of sections of cable and electrical protection. Ask your dealer to define these values. 6.0 Procedure for filling the spa FOR BEST RESULTS, READ EACH STEP COMPLETELY BEFORE YOU START THE PROCESS. 5 1. Preparation of the spa for filling: Remove the cover and remove the skimmer filter. 2. To fill the spa, place the tip of a hose in the compartment vacuum skimmer filter and fill the tub until the upper jets are submerged. Be careful not to overfill. CAUTION: Never completely fill your spa with water from a water softener. Use anti-scale treatment to prevent limestone deposit. Eventually you can fill the spa halfway with water "hard" and the other half with softened water. IMPORTANT: Always fill the spa through the filter compartment after having emptied. This facilitates priming pumps 3. Powering: Using the circuit breaker of the house, put the spa under tension. After a brief test ( can take upto 5mins ) of its devices, the spa will display the spa water temperature. 4. Activation of pumps: Activate each of the pumps, one after the other, ensuring that each is primed and water is flowing. 5. If a pump does not boot automatically turn on and turn off several times in succession until it begins. If this is unsuccessful, unscrew the panel cladding, which is under the keyboard and slightly loosen the relevant pump bleed screw ( see photo below ) to bleed to vent air trapped in the pump. Once the air is exhausted, tighten the screw, the pump is primed. screw 6. Adding chemicals : add chemicals recommended by your dealer. See section 11.0 Water treatment for general guidance. 7. Setting the temperature of the spa to heat the water at a comfortable temperature, follow these steps: -The display indicates the actual temperature of the spa water. Press once the button "cool" or "warm" to the desired temperature (or setpoint) is displayed for a few seconds. If you want change the water temperature, simply press "less" or "more" until the desired temperature is displayed. -The heater will stop once the temperature setpoint is reached. Important Information on the heater: The maximum temperature of the spa is 40 ° C and minimum temperature is 26 ° C. For the heater to work, you need only pump 1 working on speed 1. Turn off the pump 2 if it is turned on. . Setting the thermostat at maximum will not accelerate the warming of the spa. Only the final temperature will be higher. The heater operates until the set temperature is reached, then turns off. It will restart when the water temperature is 0.5 ° C below the set temperature. DANGER: Risk of burns! Check the water temperature before entering in the spa! Do not leave under any pretext the spa unattended while the cover is open and it is accessible to young children or pets. 6 7.0 Installation of the Cover 1. Place the cover on the spa. Be careful to consider the more logical sense to manipulate the cover. 2. Use the screws supplied with the cover to fix the fasteners on the sides of spa. Tips: -Place the cover on the spa when is not in use to reduce heating costs. -The time required to heat the spa depends on the initial temperature of the water. 8.0 Control functions Please look at the document supplied with your spa 9.0 Adjusting massage Venturi Valves Use the venturi valve to inject air into the hydro-jets. This allows make the massage more vigorous and provides a little more power in the jet. By turning the knob of the venturi valve it’s opening or closing on the injection of air. The waterfall valve Turn the valve to open or close the waterfall. The different types of massage Here are some examples of projects that you can find in your spa. This list is not exhaustive because the array of jets evolves regularly. Some jets may be opened or closed independently. Simply turn the contour of the jet and rotate in the direction of clockwise to close and in the other direction to open. Jet Directional neck It is possible to adjust the direction of the jet in handling the ball in the center of the jet. The jet can be opened or closed Mini-jet rotational relaxation Mini-jet rotary massages a larger area. Although its primary function is the relaxation, it can also provide massage. The jet can be opened or closed. 7 Jet Rotary relaxation This jet is ideal for increasing blood flow to a specific area. The massage is soft and relaxing. The jet can be opened or closed. Jet Directional large diameter It's a perfect to massage the muscles of the backbone. Flow is important so you can adjust the direction of the jet. The jet can be opened or closed. Cluster jet This jet often used for legs and is not adjustable. The massage is very invigorating. The jet cannot be opened or closed. Air jets This jet is only used by the air network under pressure from the spa. (blower). The jet cannot be opened or closed. Vulcano jet It is a very large jet diameter, through a diverter valve, it takes the whole pressure of a pump to provide you a particularly powerful massage in the bottom of the spa, for feet for example. 10.0 Spa Maintenance CAUTION: Always cut power of the spa before cleaning filter cartridges. Never operate the spa without a filter cover and mounting the skimmer pre-filter installed. 8 10.1 Cleaning the filter First : disassemble the floating part of skim performing a quarter turn in the counterclockwise. Remove the filter and clean if necessary. Remove the filter from its compartment to rinse with a hose. Rinse debris from filter pleats starting up then down. Continue doing a section at a time, until all debris is removed of the filter. Occasionally you can use a filter cleaner that disinfects the filter and destroy the limescale. For more information, ask your dealer. 10.2 Draining the Spa You may want to change the spa water every 3 to 6 months. The frequency depends a number of factors such as frequency of use, number of users, the careful maintenance of water quality, etc.. You know it is time to change the water when you cannot prevent the formation of foam or when you cannot maintain the normal clarity, although the main measures of balance are all within the required parameters. CAUTION: To avoid damaging the components of the spa, turn off the electric power before emptying. Do not restore power until the tub is filled. If it is very cold outside parts can freeze when the spa is empty. Be Sure to not find yourself in this scenario To empty the spa you can: -Use the gravity drain by connecting a hose to the part dedicated in the spa cabinet. You open the tap and flush the spa begins. It takes between 3 and 6 hours to empty spa. -Or use a vacuum pump-cellar. Put it into the footbath and the drain. this takes a few minutes. 10.3 Fill the spa To fill the spa, after removing the filter, place the hose in the filter compartment and start filling. You must ensure that the water level is between the higher jet and the lower part of the pillows. Depending on the number of users or their size, the water level will change. You can adjust the water level for comfortable bathing. Once the tub is filled, you can restore power and turn on the pumps one after one to check they are all properly primed. IN THE EVENT OF A PUMP IS NOT RUNNING: See chapter 6 section 5 10.4 Maintenance of the cover CAUTION: All chemicals recommended in this manual must be used with extreme caution! Take time to read labels and apply them exactly as recommended with safety The cover is an essential element of the spa that can protect and conserve temperature. To prolong the life of the cover, handle it with care and clean it with water and mild soap. Never allow anyone to sit or stand on the cover and avoid the dragging over rough surfaces. The skin is not particularly fragile, however, be sure to use water and a mild soap to clean. 9 10.5 Maintenance of the acrylic shell The acrylic shell is designed to withstand UV or climate assault, but to slow aging, use cover to protect it between use. There are cleaners for acrylic shells (For more information about these products contact your dealer), that remove the limescale and scrub impurities from the hull. 10.6 Disinfection of spa Occasionally you can disinfect the spa. This spot treatment eliminates bacteria that can sit in the pipes or destroy the limescale that was deposited in the ducts. For this, use a product a specialist Spa Shell cleaner recommended by your dealer which, when mixed with water, will act in twenty minutes. ATTENTION ONCE THE PRODUCT IS IN THEWATER, IT IS FORBIDDEN TO SWIM, RISK OF SERIOUS INJURY ON THE SKIN! After this treatment, drain the tub making sure to drain the water into the drain and not over the lawn etc. Rinse the tub and with a sponge remove the remaining residue. Finally, fill your spa. 10.7 Wintering spa Your spa is designed to protect itself automatically from freezing when they are properly used. If you want to winterize your spa and turn off power, some precautions are taken: -Drain the spa. -Remove the panel allowing access to the pumps. Unscrew the nut-water inlet on the pump to remove residual water. Unscrew the nut-output pump. "With silicone grease, grease the joints before you tighten the nuts Arrival and departure pump. -Do this for each water pump. 11.0 Water Treatment 11.1 First boot You just received your spa and you're about to fill with water. Your spa has been tested with water for several hours, so water could spill when handling. However, after having been stored , pumps are completely empty. CAUTION: Do not turn your spa until it is completely filled. Using the pumsp without water may damage them irreversibly! CAUTION: All chemicals recommended in this manual must be used with extreme caution! Take time to read labels and apply them to the letter with safety. After connecting your spa (see Section 4.0 Instruction for wiring) .Remove the filter cover and filter and insert the filler pipe in compartment of the filter. This method allows the pumps to start easier. Once the water level is between the jets and the highest pillows, put spa on. If pump 1 does not start automatically See section 10.3 Filling the tub to keep prime the pumps. 10 11.2 pH The pH is a measure of acidity or alkalinity of the water on a scale of 0 to 14. The midpoint of 7 is called neutral, above which the water is alkaline, and below, acid. For the spa water, IT IS VERY IMPORTANT TO MAINTAIN A Slightly alkaline 7.4 to 7.6. The problems worsen as a function of the remoteness of the measuring range. A low pH will be corrosive to metals on the spa equipment. A high pH will cause the deposit of minerals on the surface In addition to the ability of sanitizers to clean the spa is greatly affected when the pH deviates from the ideal range. Every week the water should be measured with a dipstick to test the pH and if necessary the correct. Normally in a spa pH naturally tends to rise, this so that the pH- can be adjusted. 11.3 Treatment with bromine Bromine is a disinfectant. Bromine is effective and requires little supervision. 1 or 2 doses per week are a sufficient. However bromine is slightly fragrant, which may cause inconvenience to people particularly sensitive. In this case, a softer treatment like active oxygen would be more appropriate. For usage of bromine, see the label on the packaging. 11.4 Treatment with oxygen Oxygen has the advantage of being especially gentle on the skin and little fragrant. A dosage of 3 to 4 times per week is sufficient. The disadvantage is that active oxygen needs to be added to the spa water more regularly than of bromine (only 1 time / week). 11.5 Treatment with chlorine The chlorine treatment is probably the most popular. Chlorine is the most often used for residential spas, mainly for the low cost and effectiveness. The dis-advantage is the smell and possible irritant to certain skins. It will require regular dosages 1 or twice per week. 11.6 Maintaining weekly Each week there is a need to take a few minutes to maintain the spa. First, check the cleanliness of the filter and rinse with a jet of water with power to remove debris from between the folds. Start from the top to the down. A clean filter is essential to ensure optimum filtration. -Check the pH using test strips and correct it if necessary. The ideal pH is between 7.2 and 7.4. -Depending on the treatment you use, make sure the level of disinfectant is correct. -If you notice a buildup of tartar on the hull, remove them before the phenomenon worsening. -Generally try to avoid stagnant water close to the controls venturi or keypad. With a towel, dry these surfaces, thereby simplifying maintenance and slowing the aging of your spa. . WARNING: Scaling of the spa is not included in warranty! It is the responsibility of the user to implement solutions to prevent scaling. THANK YOU TO CHOOSE AN AQUA SPA 11