Download Bacharach Portable Wireless Infrared Printer Specifications
Transcript
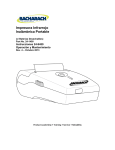
Portable Wireless
IrDA Printer
Instruction 24-9422
Operation & Maintenance
Rev. 0 – September 2001
Product Leadership • Training • Service • Reliability
WARRANTY
Bacharach, Inc. warrants to Buyer that at the time of delivery this Product will be free from
defects in material and manufacture and will conform substantially to Bacharach Inc.’s
applicable specifications. Bacharach’s liability and Buyer’s remedy under this warranty are
limited to the repair or replacement, at Bacharach’s option, of this Product or parts thereof
returned to Seller at the factory of manufacture and shown to Bacharach Inc.’s reasonable
satisfaction to have been defective; provided that written notice of the defect shall have been
given by Buyer to Bacharach Inc. within six (6) months after the date of delivery of this
Product by Bacharach, Inc.
Bacharach, Inc. warrants to Buyer that it will convey good title to this Product. Bacharach’s
liability and Buyer’s remedy under this warranty of title are limited to the removal of any title
defects or, at the election of Bacharach, to the replacement of this Product or parts thereof
that are defective in title.
THE FOREGOING WARRANTIES ARE EXCLUSIVE AND ARE GIVEN AND ACCEPTED IN
LIEU OF (I) ANY AND ALL OTHER WARRANTIES, EXPRESS OR IMPLIED, INCLUDING
WITHOUT LIMITATION THE IMPLIED WARRANTIES OF MERCHANTABILITY AND
FITNESS FOR A PARTICULAR PURPOSE: AND (II) ANY OBLIGATION, LIABILITY, RIGHT,
CLAIM OR REMEDY IN CONTRACT OR TORT, WHETHER OR NOT ARISING FROM
BACHARACH’S NEGLIGENCE, ACTUAL OR IMPLIED. The remedies of the Buyer shall be
limited to those provided herein to the exclusion of any and all other remedies including,
without limitation incidental or consequential damages. No agreement varying or extending
the foregoing warranties, remedies or this limitation will be binding upon Bacharach, Inc.
unless in writing, signed by a duly authorized officer of Bacharach.
Note:
The battery pack is considered a consumable item, and is excluded from the
terms of this warranty.
Register Your Warranty On-Line by Visiting
www.bacharach-inc.com
Notice:
Product improvements and enhancements are continuous, therefore the specifications and
information contained in this document may change without notice.
Bacharach, Inc. shall not be liable for errors contained herein or for incidental or consequential
damages in connection with the furnishing, performance, or use of this material.
No part of this document may be photocopied, reproduced, or translated to another language
without the prior written consent of Bacharach, Inc.
Copyright © 2001, Bacharach, Inc., all rights reserved.
BACHARACH® is a registered trademark of Bacharach, Inc.
All other trademarks, trade names, service marks and logos referenced
herein belong to their respective companies.
A
Instruction 24-9422
IrDA Printer
Contents
Contents
Description ....................................................................................... 1
General .................................................................................................... 1
Features ................................................................................................... 1
Battery Charger / Power Supply ............................................................ 1
Belt Clip ................................................................................................... 1
Power Switch ........................................................................................... 2
Indicator LEDs ........................................................................................ 2
Pushbuttons ............................................................................................. 2
Connectors ............................................................................................... 2
Sensors ..................................................................................................... 3
Technical Characteristics............................................................. 4
Operation .......................................................................................... 5
Precautions .............................................................................................. 5
Self Test ................................................................................................... 5
Set-Up Mode ............................................................................................ 6
Using the Printer .................................................................................... 7
Maintenance ..................................................................................... 8
Cleaning the Printer ............................................................................... 8
Opening / Closing the Paper Cover ........................................................ 8
Cleaning the Print Head ......................................................................... 8
Installing the Paper ................................................................................ 9
Parts & Service .............................................................................. 10
Replacement Parts ................................................................................ 10
Sales / Service Centers .......................................................................... 10
Instruction 24-9422
i
IrDA Printer
Notes:
ii
Instruction 24-9422
IrDA Printer
Description
Description
General
Bacharach’s portable wireless printer uses infrared technology to communicate with other Bacharach instruments that are capable of transmitting
data using the Infrared Data Association (IrDA) standard.
The printer is designed around a patented easy-loading paper mechanism, which consists of a main cavity into which a paper roll is dropped
for loading. The thermal print head is at the front of the cavity and a
rubber roller is attached to the lid of the mechanism. When the lid is
closed, the paper is pinched between the rubber roller and the print-head
to give a close alignment and a consistent pressure.
Features
• Small size
• Quiet and fast printing
• Direct line thermal printing
• Typically 1,000 printouts from a fully charged battery pack
• Easy loading paper
• Easy maintenance and head cleaning
• User setable printer parameters using external pushbuttons
• Self-test function
AC Adapter / In-Car Charger
The supplied AC adapter (either 120 or 230 VAC) or 12 V in-car charger
can be used to either charge the battery pack, or both charge the battery
and run the printer when the battery is partially discharged.
Important! The AC adapter and in-car charger cannot
operate the printer with the battery pack removed, or when
the battery pack is completely discharged.
Belt Clip
If desired, the supplied belt clip and screws can be installed to allow the
printer to be attached to a vertical surface or carried on a belt.
Instruction 24-9422
1
Description
IrDA Printer
Power Switch
Use the Power switch located on the left side of the printer to turn the
unit ON and OFF (see Figure 1).
Indicator LEDs
There are two LEDs on the front panel that provide the following information about the printer’s status:
• Power (Green): The Power LED glows green when the printer is
turned ON.
• Battery (Red): The Battery LED glows red when the battery is being
charged. This LED flashes when the battery is fully charged, and turns
OFF when the battery charger is disconnected.
• Error (Green): The Power LED flashes once-a-second when: 1) the
printer is out of paper, 2) when the paper cover is opened, or 3) when
the printing head temperature exceeds 140 °F (60 °C).
Pushbuttons
There are two pushbuttons located on the front panel that perform the
following functions:
• FEED: Momentarily press this button to advance the paper. Pressing and
holding down the button causes the paper to feed continuously. This button
is also used to start the printer’s self test (refer to Section Self Test).
• SEL: Press this button to enter the printer’s set-up mode (refer to
Section Set-Up Mode).
Connectors
Two connectors located on the right side of the printer provide the following functions:
• Power: Connect the AC adapter or in-car charger to this connector to
charge the battery pack, or directly power the printer.
• RS-232C: Not used in conjunction with Bacharach instruments.
2
Instruction 24-9422
Description
IrDA Printer
Sensors
There are three sensors that perform the following functions:
• Paper Cover: When the paper cover is open the printer is disabled to
prevent damage to the print head. This condition is indicated by the
Power LED flashing.
• Paper Out: When the paper roll runs out, the printer is disabled to
prevent damage to the print head. This condition is indicated by the
Power LED flashing.
• IrDA: Located at the front of the printer, this sensor accepts the infrared signal from the instrument.
O F F
P o w e r
P o w e r / E rro r
1 ) G lo w s s te a d
tu rn e d O N .
2 ) F la s h e s w h e
w h e n p a p e r
p r in t h e a d te
(G re e n ) L E D :
y w h e n p r in te r is
B a tte
1 ) G lo
b e
2 ) F la
L E D :
y w h e n b a tte r y p a c k is
e d .
n b a tte r y is fu lly c h a r g e d .
ry (
w s
in g
s h e
R e d )
s te a d
c h a rg
s w h e
n p r in te r is o u t o f p a p e r ;
c o v e r is o p e n ; o r w h e n
m p . is a b o v e 1 4 0 ° F .
Ir D A S e n s o r
O N
S E L P u s h
1 ) H o ld d o
to e n te r
2 ) O n c e in
c h a n g e
b u tto
w n a n
S e t-U
S e t-U
p r in te
n :
d
p
p
r p
tu
M
M
a
rn
o d
o d
ra m
p r in te r O N
e .
e , p re s s to
e te r.
F E E D P
1 ) W ith
a d v a
2 ) W ith
to c h
a s c h
3 ) H o ld
to e n
u s h b u tto n :
p r in te r a lr e a d y
n c e p a p e r.
p r in te r in its S e
a n g e v a lu e o f p
o s e n b y th e S E
d o w n a n d tu rn
te r S e ft-T e s t M
O N , p re s s to
t-U p M
r in te r p
L b u tto
p r in te r
o d e .
o d e , p re s s
a ra m e te r
n .
O N
P a p e r C o v e r
B a tte ry C o v e r
P o w e r C o n n e c to r
R S -2 3 2 C C o n n e c to r
Figure 1. Component Locations and Functions
Instruction 24-9422
3
Technical Characteristics
IrDA Printer
Technical Characteristics
Printing Method ....................... Direct thermal
Number of Columns ................. 32 columns, 384 dots/line
Character Size ......................... 0.06 x 0.12 in. (1.5 x 3.0 mm)
Line Pitch ................................. 0.1 in (4.0 mm)
Paper Width ............................. 2.25 in. (57.5 mm)
Interface ................................... IrDA and Serial (RS-232C)
International Characters ........ U.S.A., France, U.K., Denmark I,
Sweden, Italy, Spain, Japan, Norway,
Denmark II, Korea
Buffer ........................................ 7 kB
Baud Rate ................................. 2400 – 11,5200 bps
Power Requirement ................. 12 V, 1.2A (with battery)
12 V, 3 A (without battery)
Battery Pack ............................ Lit-ion, 7.2 V, 1650 mAh
Weight ...................................... 13 oz (0.4 kg)
Dimensions ............................... 3.6 x 5.5 x 2.0 in. (92 x 140 x 51 mm)
4
Instruction 24-9422
Operation
IrDA Printer
Operation
Precautions
To ensure the proper operation of the printer and prevent the possibility
of voiding the warranty, be sure to observe the following precautions:
• Avoid dirty or dusty locations, or those with excessive heat or humidity
• Choose a stable level or solid wall on which to mount the printer
• Use only the supplied power adapter to charge the battery pack
• Ensure that the AC adapter will be plugged into the correct source of
AC power
• Use only the supplied thermal paper or its replacement part
Self Test
The self-test mode checks the printer’s control circuit functions, setting
parameters, software version, and printer quality.
1. Before running the self test, make sure there is sufficient paper to
run the test (18" [46 cm]); the paper cover is closed; and that the
printer is switched OFF.
2. Press and hold down the FEED pushbutton; then switch ON the
printer to begin the test.
Note: The test can be aborted by switching OFF the printer.
3. The following typical information is printed, followed by the printer’s
complete character set:
Version
Data bit
Parity
Baud rate
Handshaking
Country
Print mode
Paper
Density
IrDA
Buffer size
Head volt
Head temp.
Instruction 24-9422
: 1.1.6
: 8 bit
: None
: 9600 bps
: DTR
: U.S.A.
: Text (upright)
: Normal paper
: 100%
: IrDA-SIR
: 7000Byte
: 7.1V
: 31°C
5
Operation
IrDA Printer
Set-Up Mode
The printer has been set up at the factory with the following default
parameters:
Baud rate
Handshaking
Country
Print mode
Paper
IrDA
: 9600 bps
: DTR
: U.S.A.
: Text (upright)
: Normal paper
: IrDA-SIR
If necessary, the default parameters can be changed as follows:
1. With the printer initially switched OFF, press and hold down the SEL
pushbutton; then switch the printer ON.
2. The printer now goes into its set-up mode and prints its current
parameter status. Observe that the green Power LED flashes to
indicate that the printer is in its set-up mode.
Note: If no pushbuttons are pressed within 15 seconds, the
set-up mode is automatically terminated without changing
the original parameters.
3. Baud rate is first parameter printed. Pressing the FEED button
causes the value of that parameter to change in the sequence shown
in the following table.
SEL Button
FEED Button
Baud rate
Handshaking
Country
2400, 4800, 9600, 19200, 38400, 57600, 115200
DTR, X-on/X-off
U.S.A., Korea, Cyrillic, Denmark2, Norway,
Japanese, Spain, Italy, Sweden, Denmark1,
U.K., Germany, France
Text(upright), Data(inverted)
Normal paper, Reprint paper
50 – 150% in 5% steps
Chamjin-Ir, IrDA-Sir, BHT-Ir(DENSO), EL-ME-Ir
Print mode
Paper
Density
IrDA
6
Instruction 24-9422
IrDA Printer
Operation
4. Press the SEL button to print the next parameter; then, if necessary,
use the FEED button to change that parameter to the desired value.
5. Once all parameters have been set, press and hold down the SEL
button then press the FEED button.
Using the Printer
Turn ON the printer and, if necessary, set it up as previously described
under the heading Set-Up Mode. Also ensure that the instrument that is
sending data to the printer is set up to operate in its IrDA print mode
(refer to the instrument’s instruction manual for set up information).
Align the printer’s infrared sensor to that of the instrument and begin
printing as described in the instrument’s instruction manual.
Instruction 24-9422
7
Maintenance
IrDA Printer
Maintenance
WARNING! Remove all electrical connections before performing any maintenance work.
Cleaning the Printer
External surfaces of the printer may be kept clean by simply wiping with
a damp cloth. Do not use any solvents that may attack the plastic case. Be
sure that the inside surfaces are kept dry at all times, and that the
external surfaces are thoroughly dry before re-making any electrical
connections.
Opening / Closing the Paper Cover
From underneath the printer, use your thumb and forefinger to push up
on the paper cover until it releases from its latches (see Figure 2.)
Close the cover by pushing down until it snaps into place.
Cleaning the Print Head
To maintain a good print quality, it is recommended that the print head
be cleaned at least once a year or up to once a month if the printer is used
heavily. The print head should be cleaned immediately, however, if the
print becomes visibly fainter due to contamination of the print head.
Clean the print head as follows:
Material Required:
• Isopropyl Alcohol
• Cotton swabs
Procedure:
1. Switch OFF printer.
CAUTION: Allow the print head to cool before cleaning,
otherwise damage to the print head may occur.
2. Open paper cover and remove paper roll.
8
Instruction 24-9422
Maintenance
IrDA Printer
3. Using a cotton swab dampened with alcohol, wipe the heating dots of
the print head. Be careful not to touch the heating dots with your
fingers.
4. Allow the alcohol to dry.
5. Reload the paper and close the paper cover.
Installing the Paper
Replace the paper when it runs out as indicated by the front panel green
Power LED flashing.
1. Open the paper cover as previously described.
2. Remove the spent paper core.
3. Drop in a new paper roll so that it will rotate in the direction shown
in Figure 2.
4. Insert edge of paper roll into slot in cover next to cutter; then close
cover. Remove any slack by pulling out about ½ inch of paper from
the printer.
Note: If there was unprinted data in memory when the
paper ran out, and the printer was not shut OFF, then the
printer will automatically go on-line and print the remaining
data 5 seconds after closing the paper cover.
Figure 2. Installing the Paper
Instruction 24-9422
9
Parts & Service
IrDA Printer
Parts & Service
Replacement Parts
Part No.
Complete Printer Kits:
120VAC: includes printer, 120V AC adapter, 12V in-car
charger, belt clip, and instruction manual ................................... 24-1229
230VAC: includes printer, 230V AC adapter, 12V in-car
charger, belt clip, and instruction manual ................................... 24-1230
Paper roll, thermal ............................................................................ 06-8733
Battery pack, rechargable 7.2V, Lit-ion ........................................... 24-1244
AC adapter:
120 VAC .......................................................................................... 24-1243
230 VAC .......................................................................................... 24-1245
12V in-car charger ............................................................................. 24-1250
10
Instruction 24-9422
Parts & Service
IrDA Printer
Sales / Service Centers
United States
Canada
California
Bacharach of Canada, Inc.
250 Shields Court Unit #3
Markham, Ontario L3R 9W7
Canada
Phone: 905-470-8985
Fax: 905-470-8963
E-mail: [email protected]
7281 Garden Grove Blvd.,
Suite H
Garden Grove, CA 92841
Phone: 714-895-0050
Fax: 714-895-7950
E-mail: [email protected]
Indiana
8618 Louisiana Place
Merrillville, IN 46410
Phone: 219-736-6178
Fax: 219-736-6269
E-mail: [email protected]
New Jersey
7300 Industrial Park
Rte. 130, Bldg. 22
Pennsauken, NJ 08110
Phone: 856-665-6176
Fax: 856-665-6661
E-mail: [email protected]
Pennsylvania
621 Hunt Valley Circle
New Kensington, PA 15068
Phone: 724-334-5051
Fax: 724-334-5723
E-mail: [email protected]
Texas
5151 Mitchelldale, B-4
Houston, TX 77092
Phone: 713-683-8141
Fax: 713-683-9437
E-mail: [email protected]
Instruction 24-9422
México
Bacharach de México
Playa Regatas No. 473 Tercer Piso
Col. Militar Marte
Delegación Iztacalco, 08830
México D.F.
México
Phones:
011-5255-5634-7740
011-5255-5634-7741
FAX:
011-5255-5634-7738
E-mail: [email protected]
Europe
European Headquarters
Bacharach Instruments
Sovereign House, Queensway
Leamington Spa
Warwickshire CV31 3JR
England
Phone: +44 1926 338111
Fax: +44 1926 338110
Sales / Service Center - Denmark
Bacharach Instruments Int'l
P.O. Box 44
39 Lindegade
DK 6070 Christiansfeld
Denmark
Phone: +45 74 563171
Fax: +45 74 563178
E-mail: [email protected]
11
World Headquarters
621 Hunt Valley Circle, New Kensington, PA 15068
Ph: 724-334-5000 • Fax: 724-334-5001 • Toll Free: 800-736-4666
Website: www.bacharach-inc.com • E-mail: [email protected]
Printed in U.S.A.


