1
406
WELLS BLOOMFIELD, LLC
10 Sunnen Drive P.O.Box 430195
St. Louis, MO
63143 USA
telephone: 314-781-2777
fax: 314-781-2714
www.wellsbloomfield.com
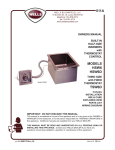
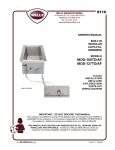
OWNERS MANUAL
DROP-IN
HOT AND
COLD PANS
MODELS
HRCP7200
HRCP7300
HRCP7400
HRCP7500
HRCP7600
Includes
INSTALLATION
USE & CARE
PARTS LIST
WIRING DIAGRAM
Model HRCP7200
IMPORTANT: DO NOT DISCARD THIS MANUAL
This manual is considered to be part of the appliance and is to be given to the OWNER or
MANAGER of the restaurant, or to the person responsible for TRAINING OPERATORS of
this appliance. Additional manuals are available from your WELLS DEALER.
THIS MANUAL MUST BE READ AND UNDERSTOOD BY ALL PERSONS USING OR
INSTALLING THIS APPLIANCE. Contact your WELLS DEALER if you have any
questions concerning installation, operation or maintenance of this equipment.
PRINTED IN UNITED STATES OF AMERICA
p/n 2M-304942 Rev. E
M406
090915
LIMITED WARRANTY STATEMENT
Unless otherwise specified, all commercial cooking
equipment manufactured by WELLS BLOOMFIELD, LLC is
warranted against defects in materials and workmanship for
a period of one year from the date of original installation or
18 months from the date of shipment from our factory,
whichever comes first, and is for the benefit of the original
purchaser only.
THIS WARRANTY IS THE COMPLETE AND ONLY
WARRANTY, EXPRESSED OR IMPLIED IN LAW OR IN
FACT, INCLUDING BUT NOT LIMITED TO, WARRANTIES
OF MERCHANTABILITY OR FITNESS FOR ANY
PARTICULAR PURPOSE, AND/OR FOR DIRECT,
INDIRECT OR CONSEQUENTIAL DAMAGES IN
CONNECTION WITH WELLS BLOOMFIELD PRODUCTS.
This warranty is void if it is determined that, upon inspection
by an authorized service agency, the equipment has been
modified, misused, misapplied, improperly installed, or
damaged in transit or by fire, flood or act of God. It also
does not apply if the serial nameplate has been removed, or
if service is performed by unauthorized personnel. The
prices charged by Wells Bloomfield for its products are
based upon the limitations in this warranty. Seller’s
obligation under this warranty is limited to the repair of
defects without charge by a Wells Bloomfield factory
authorized service agency or one of its sub-service
agencies. This service will be provided on customer’s
premises for non-portable models. Portable models (a
device with a cord and plug) must be taken or shipped to
the closest authorized service agency, transportation
charges prepaid, for service. In addition to restrictions
contained in this warranty, specific limitations are shown in
the Service Policy and Procedure Guide. Wells Bloomfield
authorized service agencies are located in principal cities.
This warranty is valid in the United States and Canada and
void elsewhere. Please consult your classified telephone
directory, your foodservice equipment dealer or contact:
Wells Bloomfield, LLC
10 Sunnen Dr., P.O.Box 430129 St. Louis MO 63143 USA
phone (314) 781-2777 or fax (314) 781-2714
for information and other details concerning warranty.
SERVICE POLICY AND PROCEDURE GUIDE and ADDITIONAL WARRANTY EXCLUSIONS
1.
2.
3.
4.
6.
cleaning schedules, are customer responsibility. Those
miscellaneous adjustments noted are customer
responsibility. Proper attention to preventative
maintenance and scheduled maintenance procedures
will prolong the life of the appliance.
7. Travel mileage is limited to sixty (60) miles from an
Authorized Service Agency or one of its sub-service
agencies.
8. All labor shall be performed during regular working
hours. Overtime premium will be charged to the buyer.
9. All genuine Wells replacement parts are warranted for
ninety (90) days from date of purchase on nonwarranty equipment. This parts warranty is limited only
to replacement of the defective part(s). Any use of
non-genuine Wells parts completely voids any
warranty.
10. Installation, labor, and job check-outs are not
considered warranty and are thus not covered by this
warranty.
11. Charges incurred by delays, waiting time or operating
restrictions that hinder the service technician’s ability to
perform service are not covered by warranty. This
includes institutional and correctional facilities.
SHIPPING DAMAGE CLAIM PROCEDURE
NOTE: For your protection, please note that equipment in
this shipment was carefully inspected and packaged by
skilled personnel before leaving the factory. Upon
acceptance of this shipment, the transportation company
assumes full responsibility for its safe delivery.
IF SHIPMENT ARRIVES DAMAGED:
1. VISIBLE LOSS OR DAMAGE: Be certain that any
visible loss or damage is noted on the freight bill or
express receipt, and that the note of loss or damage is
signed by the delivery person.
2. FILE CLAIM FOR DAMAGE IMMEDIATELY:
Regardless of the extent of the damage.
3.
CONCEALED LOSS OR DAMAGE: if damage is
unnoticed until the merchandise is unpacked, notify the
transportation company or carrier immediately, and file
“CONCEALED DAMAGE” claim with them. This
should be done within fifteen (15) days from the date
the delivery was made to you. Be sure to retain the
container for inspection.
Wells Bloomfield cannot assume liability for damage or loss
incurred in transit. We will, however, at your request, supply
you with the necessary documents to support your claim.
xi
M406 p/n 2M-304942 Owners Manual HRCP-Series Heated Cold Pans
5.
Resetting of safety thermostats, circuit breakers, over
load protectors, and/or fuse replacements are not
covered by this warranty unless warranted conditions
are the cause.
All problems due to operation at voltages or phase
other than specified on equipment nameplates are
not covered by this warranty.
Conversion to correct voltage and/or phase must be
the customer’s responsibility.
All problems due to electrical connections not made
in accordance with electrical code requirements
and wiring diagrams supplied with the equipment are
not covered by this warranty.
Replacement of items subject to normal wear, to
include such items as knobs, light bulbs; and, normal
maintenance functions including adjustments of
thermostats, adjustment of micro switches and
replacement of fuses and indicating lights are not
covered by warranty.
Damage to electrical cords and/or plug due to exposure
to excessive heat are not covered by this warranty.
Full use, care, and maintenance instructions supplied
with each machine. Noted maintenance and
preventative maintenance items, such as servicing and
TABLE OF CONTENTS
WARRANTY ......................................................................... xi
SPECIFICATIONS ............................................................... 1
FEATURES & OPERATING CONTROLS ............................ 2
PRECAUTIONS & GENERAL INFORMATION .................... 3
AGENCY LISTING INFORMATION ..................................... 4
INSTALLATION .................................................................... 5
OPERATION ........................................................................ 8
CLEANING INSTRUCTIONS ............................................... 10
TROUBLESHOOTING SUGGESTIONS .............................. 11
MAINTENANCE INSTRUCTIONS ....................................... 12
WIRING DIAGRAM ...............................................................
SERVICE PARTS LIST SP233 ............................................
ACCESSORY PARTS & SERVICE ...................................... 15
CUSTOMER SERVICE DATA ............................................. 15
INTRODUCTION
Thank You for purchasing this Wells Bloomfield appliance.
M406 p/n 2M-304942 Owners Manual HRCP-Series Heated Cold Pans
Proper installation, professional operation and consistent maintenance of this appliance will ensure that
it gives you the very best performance and a long, economical service life.
This manual contains the information needed to properly install this appliance, and to use and care for
the appliance in a manner which will ensure its optimum performance.
ELECTRICAL SPECIFICATIONS
WARMER
MODEL
REFRIGERATION
1ø AMPS
REFRIGERANT
POWER SUPPLY
REQUIREMENT
5.5
R-134a
3-wire: L1, L2, N
#10 AWG min. 60ºC
120 60Hz
7.0
R-404a
3-wire: L1, L2, N
#10 AWG min. 60ºC
1/2
120 60Hz
7.5
R-404a
3-wire: L1, L2, N
#10 AWG min. 60ºC
33.3/28.9
3/4
120 60Hz
15.3
R-404a
3-wire: L1, L2, N
#8 AWG min. 60ºC
33.3/28.9
3/4
120 60Hz
15.3
R-404a
3-wire: L1, L2, N
#8 AWG min. 60ºC
VOLTS
KW
1ø AMPS
HP
HRCP7200
240/208
60Hz
2.5/1.9
10.4/9.0
1/4
HRCP7300
240/208
60Hz
4.0/3.0
16.7/14.4
1/3
HRCP7400
240/208
60Hz
5.0/3.8
20.8/18.1
HRCP7500
240/208
60Hz
8.0/6.0
HRCP7600
240/208
60Hz
8.0/6.0
VOLTS
120 60Hz
NOTE: For equipment and cut-out dimensions, refer to the Installation Instructions provided with each unit.
1
FEATURES & OPERATING CONTROLS
2
M406 p/n 2M-304942 Owners Manual HRCP-Series Heated Cold Pans
NOTE: Model HRCP7300 shown. Others are similar
PRECAUTIONS AND GENERAL INFORMATION
This appliance is intended for use in commercial establishments
only, and is intended to hold previously prepared food for human
consumption. Food may be held either hot or cold. No other use is
recommended or authorized by the manufacturer or its agents.
Operators of this appliance must be familiar with the appliance use,
limitations and associated restrictions. Operating instructions must be
read and understood by all persons using or installing this appliance.
For hot operation, the appropriate water level must be maintained at
all times. Food must be kept in appropriate inserts. Never place food
directly into the tank.
Cleanliness of this appliance is essential to good sanitation. Read
and follow all included cleaning instructions and schedules to ensure
the safety of the food product.
Disconnect this appliance from electrical power before performing any
maintenance or servicing.
DO NOT submerge this appliance in water. This appliance is not jet
stream approved. Do not direct water jet or steam jet at this appliance,
or at any control panel or wiring. Do not splash or pour water on, in
or over any controls, control panel or wiring. Do not wash floor
around this appliance with water or steam jet.
Do not operate this appliance if the control panel is damaged. Call
your Authorized Wells Service Agent for service.
The technical content of this manual, including any wiring diagrams,
schematics, parts breakdown illustrations and/or adjustment
procedures, is intended for use by qualified technical personnel.
M406 p/n 2M-304942 Owners Manual HRCP-Series Heated Cold Pans
Any procedure which requires the use of tools must be performed by
a qualified technician.
This manual is considered to be a permanent part of the appliance.
This manual and all supplied instructions, diagrams, schematics,
parts breakdown illustrations, notices and labels must remain with the
appliance if it is sold or moved to another location.
This appliance is made in the USA. Unless otherwise noted, this
appliance has American sizes on all hardware.
3
WARNING:
ELECTRIC
SHOCK HAZARD
All servicing requiring access
to non-insulated electrical
components must be
performed by a factory
authorized technician.
DO NOT open any access
panel which requires the use
of tools. Failure to
follow this warning can
result in severe electrical
shock.
CAUTION:
RISK OF
DAMAGE
DO NOT connect or
energize this appliance
until all installation
instructions are read and
followed. Damage to the
appliance will result if these
instructions are not
followed.
CAUTION:
HOT SURFACE
Exposed surfaces can be hot
to the touch and may cause
burns.
AGENCY LISTING INFORMATION
STD 4
STD 7
This appliance is performance tested to NSF Standard 4 for holding hot
foods. This appliance conforms to NSF Standard 4 for sanitation only if
installed in accordance with the supplied Installation Instructions and
maintained according to the instructions in this manual.
This appliance performance tested to NSF Standard 7 for storage of
potentially hazardous foods. This appliance meets NSF Standard 7
only when pan rails are installed in the lowest position.
UL197
HRCP units are ETL listed for US and Canada
UL471
HRCP units are evaluated to UL standards 197 and 471.
Components used in the manufacture of this unit are Underwriters
Laboratory recognized.
M406 p/n 2M-304942 Owners Manual HRCP-Series Heated Cold Pans
4
INSTALLATION
UNPACKING & INSPECTION
Carefully remove the appliance from the carton. Remove all
protective plastic film, packing materials and accessories from the
Appliance before connecting electrical power or otherwise performing
any installation procedure.
Carefully read all instructions in this manual and the Installation
Instruction Sheet packed with the appliance before starting any
installation.
Read and understand all labels and diagrams attached to the
appliance.
Carefully account for all components and accessories before
discarding packing materials. Store all accessories in a convenient
place for later use.
COMPONENTS
2 ea.
2 ea.
1 - 5 ea.
1 ea.
1 ea.
1 ea.
PAN RAIL, SIDE
PAN RAILS, END
PAN RAILS, INTERMEDIATE ( qty differs with unit)
BACKFLOW PREVENTER ASSEMBLY
DRAIN VALVE
DRAIN SCREEN
PREPARATION
Cutout dimensions for tank units and control panels are listed on the
Installation Instructions provided with the unit.
M406 p/n 2M-304942 Owners Manual HRCP-Series Heated Cold Pans
Countertop must be flat and level before the unit is installed. After
cutout is made, add stiffeners or bottom braces to counter as required
to support unit weight.
Provide louvered grills and service access below control panel.
Verify that provided sealants are applied to the underside of the top
flange prior to setting the unit into the cutout.
After installation, apply a thin bead of food-grade silicone sealant
around the flange to seal it to the counter.
IMPORTANT:
Unit flange must be sealed to the counter top. Damage caused by
leaks due to improper installation is NOT covered by warranty.
For installation in plastic (e.g. Corian®) counter tops, the counter
material must be protected from the heat of the warmer in order to
prevent discoloration and/or deterioration. The installer should contact
the manufacturer or distributor of the countertop material for specific
installation instructions.
Avoid storing flammable or combustible materials in, on or near the
appliance.
5
NOTE: DO NOT discard
the carton or other packing
materials until you have
inspected the appliance for
hidden damage and tested it
for proper operation.
Refer to SHIPPING DAMAGE
CLAIM PROCEDURE on the
inside front cover of this
manual.
WARNING:
RISK OF
INJURY
Installation procedures must
be performed by a qualified
technician with full knowledge
of all applicable electrical and
plumbing codes. Failure can
result in personal injury and
property damage.
IMPORTANT:
Unit must remain in an upright
position during installation to
prevent damage to the
refrigeration system.
IMPORTANT:
Refrigeration system is air
cooled. Recommend louvered
grills or equivalent openings
on left and right side of
condensing unit, with a
minimum size of twice the
condenser area (each
opening) in order to provide
adequate air circulation.
IMPORTANT:
DO NOT block air openings.
Damage to the compressor
will result. Damage caused by
improper air circulation is NOT
covered by warranty.
IMPORTANT:
Access is required for the
operation of the drain valve
and for maintenance of the
refrigeration unit. Provide
adequate access to the drain
valve and refrigeration unit.
INSTALLATION
WARNING:
ELECTRICAL INSTALLATION
ELECTRIC
SHOCK HAZARD
1. Refer to the nameplate. Verify the electrical service power.
Voltage and phase must match the nameplate specifications.
Wiring the unit to the wrong voltage can severely damage the unit
or cause noticeably decreased performance.
All servicing requiring
access to non-insulated
electrical components
must be performed by a
factory authorized
technician.
DO NOT open any access
panel which requires the
use of tools. Failure to
follow this warning can
result in severe electrical
shock.
2. Available electrical service amperage must meet or exceed the
specifications listed on the specification sheet provided with the
unit. Connect to the terminal block in the control unit. Wiring must
be secured to the control unit with an appropriate strain relief
(provided by installer).
IMPORTANT:
* L1 to L2 must be 208 to 240 volts AC.
* L2 to Neutral must be 120 volts AC
CAUTION:
L1
RISK OF
DAMAGE
208V
or
240V
DO NOT connect or energize
this appliance until all
installation instructions are
read and followed. Damage
to the appliance will result if
these instructions are not
followed.
L2
120V
N
ELECTRICAL
SHOCK HAZARD
The ground lug of this
appliance must be connected
to a suitable building ground.
IMPORTANT:
Contact a licensed electrician
to install and connect
electrical power to the
appliance.
3. Tank and control unit must be connected to an appropriate building
ground. Ground connection will be marked “GND” or “
”.
NOTE: Wire gauge, insulation type and temperature rating , as
well as type, size and construction of conduit, must meet or exceed
applicable specifications of local codes and of the National
Electrical Code.
IMPORTANT:
Damage due to being
connected to the wrong
voltage or phase is NOT
covered by warranty.
6
M406 p/n 2M-304942 Owners Manual HRCP-Series Heated Cold Pans
CAUTION:
INSTALLATION
PLUMBING INSTALLATION
1. Install provided 1" drain valve on unit drain. Plumb to an
appropriate waste as required by local plumbing and sanitation
ordinances.
IMPORTANT:
DO NOT allow the sink drain spud to turn during installation.
Hold the spud with an appropriate cross-guard-style spud wrench,
or carefully grip the center threaded portion with a strap wrench or
slip-joint pliers to immobilize the drain spud during drain fitting
installation.
DO NOT grip the drain spud nut or gasket.
2. Install provided backflow preventer assembly to the tank water
inlet. Attach water outlet tubing from water connection (located on
bottom left of control unit) to the inlet of the backflow preventer.
NOTE: While a backflow preventer is incorporated into the unit,
local codes may require an additional backflow preventer or
vacuum breaker in the water inlet line.
3. The unit must be connected to a potable cold water supply line with
average pressure between 20 PSI and 90 PSI. If your water
pressure exceeds 90 PSI at anytime, a pressure regulator must be
installed in the water supply line to limit the pressure to not more
than 90 PSI in order to avoid damage to lines and solenoid. Install
water supply to inlet fitting (located on left side of control unit) with
a 1/4" female flare.
A water shut-off valve should be installed on the incoming water
line in a convenient location (Use a low restriction type valve, such
as a 1/4-turn ball valve, to avoid loss of water flow thru the valve.
5.
Test the operation of the autofill in the HOT operation mode.
M406 p/n 2M-304942 Owners Manual HRCP-Series Heated Cold Pans
4.
IMPORTANT:
Plumbing connections must
be made in compliance with
all Federal, State and Local
Codes and Ordinances.
IMPORTANT:
All drain plumbing installations must be performed by a
qualified plumber.
NOTE:
All water line connections are
made OUTSIDE of the
control unit.
USE A
SPUD
WRENCH
0.25"
0.85" dia.
SINK
DRAIN
SPUD
WITH
CROSS
GUARD
GASKET
NUT
OR ...
GRIP
HERE
WHEN
ATTACHING
DRAIN
FITTING
7
OPERATION
CAUTION:
HOT OPERATION
HOT SURFACE
Exposed surfaces can be hot
to the touch and may cause
burns.
CAUTION:
ELECTRICAL
SHOCK HAZARD
DO NOT splash or pour water
onto control panel or wiring.
CAUTION:
EQUIPMENT
DAMAGE
DO NOT operate the unit
without the element cover in
place. Operation without the
element cover will allow
damage to the temperature
sensing element.
HRCP units are performance
tested to NSF Standard 4 for
holding hot foods.
2. Turn SELECTOR SWITCH to HOT. The red HOT indicator will
glow and the tank will begin filling with water.
3. Set the TEMPERATURE CONTROL to the desired temperature.
When the water in the tank reaches the minimum water level the
heating elements are energized and the water will begin heating.
The HEAT indicator will glow while the unit is heating.
a. Temperature range is (OFF) - 85ºF to 205ºF.
b. When the HEAT indicator goes out, the water in the tank is up
to the set temperature.
4. Install the pan rails.
a. Side rails are installed first. For normal hot operation, install
the side rails on the upper pan rail supports.
b. Install the end rails, then any intermediate rails.
5. Install pans or insets on the pan rails.
IMPORTANT:
Always use a pan or inset. Never place food directly into the tank.
6. Cover pans and insets to maintain consistent temperature. Stir
thick foods frequently.
SHUT DOWN PROCEDURE
1. Turn SELECTOR SWITCH to OFF. The red HOT indicator will
turn off.
2. Remove all pans and insets.
3. Open drain valve.
8
M406 p/n 2M-304942 Owners Manual HRCP-Series Heated Cold Pans
Always drain unit and allow to
cool before switching to
COLD operation.
1. Verify that drain valve is CLOSED, the DRAIN SCREEN is in
place, and the ELEMENT COVER is properly positioned over the
heating element.
OPERATION
COLD OPERATION
CAUTION:
ELECTRICAL
SHOCK HAZARD
DO NOT splash or pour water
onto control panel or wiring.
HRCP units are performance
tested to NSF Standard 4 for
holding non-critical foods.
1. Verify that drain valve is OPEN, and the ELEMENT COVER is
properly positioned over the heating element. The tank must be
dry.
2. Turn SELECTOR SWITCH to COLD. The white COLD indicator will
glow. When the tank cools to 100ºF or less, the refrigeration
system will start.
M406 p/n 2M-304942 Owners Manual HRCP-Series Heated Cold Pans
3. The temperature is factory set to NSF 7 required of 33ºF - 41ºF.
4. Install the pan rails.
a. Side rails are installed first.
For normal cold operation, install the side rails on the upper pan
rail supports.
For holding potentially hazardous foods, install the side rails on
the lower pan rail supports.
b. Install the end rails, then any intermediate rails.
5. Install pans or insets on the pan rails.
IMPORTANT:
Always use a pan or inset. Never place food directly into the tank.
IMPORTANT:
For NSF 7 operation, use 12" x 20" x 4" deep pans, and use the
lower pan rail supports which are recessed 3" from tank top.
SHUT DOWN PROCEDURE
1. Turn SELECTOR SWITCH to OFF. The white COLD indicator will
turn off.
2. Remove all pans and insets.
9
HRCP units are performance
tested to NSF Standard 7 for
holding potentially hazardous
foods only when the pan rails
are installed on the lower pan
rail supports,
Ambient room temperature
must be 86ºF (30ºC) or less.
Unit maintains pre-chilled
foods at 33ºF - 41ºF.
Tank must be dry for COLD
operation. Water in the tank
will form ice, compromising
the cooling to the food
product. Ice in the tank will
delay the proper use of the
unit when switching to HOT
operation.
CLEANING INSTRUCTIONS
CAUTION:
ELECTRIC
SHOCK HAZARD
DO NOT splash or pour water
onto control panel or wiring.
CAUTION:
EQUIPMENT
DAMAGE
DO NOT operate the unit
without the element cover in
place. Operation without the
element cover will allow
damage to the temperature
sensing element .
PREPARATIONS: Turn temperature control knob and selector switch
to OFF. Allow tank to cool before proceeding.
Remove any insets, pans and/or adapter tops ( if
used). Drain water from tank.
FREQUENCY:
Daily
TOOLS:
Warm Water and Mild Detergent
Solution: 10 Parts Warm Water to 4 Parts Vinegar
Plastic Scouring Pad
Clean Cloth or Sponge
Food-Grade Silicone Sealant
1. Remove pan rails, element cover and drain screen. Wipe interior of
tank using a clean cloth or sponge and mild detergent.
2. Use a plastic scouring pad to remove any mineral deposits from
water level probes.
3. Rinse tank thoroughly with a vinegar and water solution to neutralize
all detergent / cleanser residue.
IMPORTANT: DO NOT use
steel wool for cleaning.
4. Pan rails and element cover may be washed in a sink or
dishwasher. Allow to dry thoroughly, then reinstall.
5. Check drain screen, clean if necessary and reinstall.
6. Periodically inspect warmer flange-to-counter seal. Reseal with
food-grade silicone sealant if necessary.
7. Inspect tank and control panel for damage. Contact your Authorized
Wells Service Agency for repairs if water or grease contamination is
suspected.
8. Inspect cooling louvers in counter. Remove any lint or debris.
10
M406 p/n 2M-304942 Owners Manual HRCP-Series Heated Cold Pans
Procedure is complete
TROUBLESHOOTING SUGGESTIONS
SYMPTOM
No power to unit
Unit won't heat
(HOT Mode)
Food not kept hot enough
(HOT Mode)
M406 p/n 2M-304942 Owners Manual HRCP-Series Heated Cold Pans
Unit won't cool
(COLD Mode)
Food not kept cold enough
(COLD Mode)
Tank won't fill
Tank overflows
POSSIBLE CAUSE
REMEDY
Circuit breaker tripped
Reset circuit breaker
Selector switch OFF
Set to HOT or COLD
Selector switch not set to HOT
Set to HOT
Insufficient water in tank
Be sure drain valve is closed
Allow to fill above min water level
Temp control not set high enough Set temp control
Min water level sensor dirty
Clean water level sensors
Hi-limit safety tripped
Allow to cool, reset hi-limit
Internal damage
Contact Authorized Wells Service
Agency for repairs
Food not warm to start
Add only pre-heated food
Food too thick
Stir thick food frequently
Temp control not set high enough Set temp control to desired temp
One hi-limit tripped (HRCP7400,
7500 or 7600)
Allow to cool, reset hi-limit
Internal damage
Contact Authorized Wells Service
Agency for repairs
Selector switch not set to COLD
Set to COLD
Tank too hot
Allow to cool to 100ºF or less
Condenser cooling louvers or coil Clean condenser louvers and/or
plugged
coil
Internal damage
Contact Authorized Wells Service
Agency for repairs
Food not chilled to start
Add only pre-chilled food
Pan rails set too high
For NSF 7 operation use lower
pan rail supports
Condenser cooling louvers or coil Clean condenser louvers and/or
plugged
coil
Refrigerant adjustment needed
Contact Authorized Wells Service
Agency for repairs
Selector switch not set to HOT
Set to HOT
Max water level sensor dirty
Clean water level sensors
Drain valve open
Be sure drain valve is closed
Internal damage
Contact Authorized Wells Service
Agency for repairs
Max water level sensor dirty
Clean water level sensors
Internal damage
Contact Authorized Wells Service
Agency for repairs
11
MAINTENANCE INSTRUCTIONS
CAUTION:
INJURY HAZARD
Disconnect appliance from
electrical power before
cleaning.
Wells hot and cold pans are
constructed of high quality
stainless steel. As long as
the stainless steel surface is
intact, the equipment will not
rust or corrode.
Recommendation:
A water softening device or a
cartridge-type filtration device
may be used to minimize lime
and calcium build-up.
CARE OF STAINLESS STEEL
1. The surface can be damaged by mechanical abrasion, hard water
deposits and chlorine:
a. NEVER use steel wool, wire brushes or metal scrapers to clean
the appliance. These will damage the surface.
b. Hard water deposits left behind when water is evaporated will
attack the surface and allow the stainless steel to rust.
c. Chlorides from chlorinated cleansers, calcium / lime / rust
removers (e.g. muriatic acid), even heavily chlorinated city water
will attack the surface and allow the stainless steel to rust.
d. DO NOT use any highly caustic cleaners. Use of highly caustic
cleaners will damage the surface.
a. LIMIT USE of strong caustic cleaners on warmers. Rinse
thoroughly with a vinegar and water solution to neutralize any
residue. Failure to do so may cause damage to the surface
and allow the stainless steel to rust.
e. Cleansers containing ammonia will attack the surface and allow
the stainless steel to rust.
2. Use the proper tools in the proper way to clean your Wells warmer:
a. Soft cloth and plastic scouring pads are safe to use on stainless
steel surfaces.
b. Stainless steel pads may be used ONLY IF the scrubbing
motion is in the direction of the visible grain. DO NOT use a
circular motion.
c. In the absence of visible grain, use only soft cloth or plastic
pads. Scrub only in a linear motion along the longest axis of
the equipment.
5. Keep your Wells hot and cold pan clean. Clean frequently to avoid
build-up of hard, stubborn stains and hard-to-remove deposits:
a. Rinse thoroughly with a vinegar and water solution to neutralize
any residue.
b. For discoloration caused by using the warmer in dry operation,
use a cleaner made specifically for stainless steel.
c. Wipe dry with a soft, clean, dry cloth.
d. Restore the surface by using a polishing product specifically
made for stainless steel after each cleaning.
6. In areas where tap water has a high mineral content, warmers may
develop lime deposits.
Use a non-chloride de-liming agent to remove lime deposits. It is
important to use Lime and Scale Cleaner for Warmer Pans often to
prevent a difficult-to-remove build-up of lime deposits.
12
M406 p/n 2M-304942 Owners Manual HRCP-Series Heated Cold Pans
4. Use only non-chloride and non-ammonia cleansers:
a. DO NOT use any cleanser listed as “chlorinated”.
b. DO NOT use any cleanser listing “ammonia” or “ammonium” in
its contents.
c. Contact your cleaning materials supplier for suitable alkaline
cleansers.
MAINTENANCE INSTRUCTIONS (continued)
LIME AND SCALE CLEANER INSTRUCTIONS
FIRST AID
Wells Lime and Scale Cleaner for Warmer Pans (instructions modified
for used in Hot and Cold Pan)
NOTE: Perform weekly, or whenever lime or scale is seen accumulating
on the sides of the tank.
1. Add water to tank until water is at normal operating level
or until water covers accumulated scale.
2. Turn SELECTOR SWITCH to HOT. Heat water to maximum
temperature (190ºF or higher).
3. For HRCP7200, use two packages,
7300 use 3 packages,
7400 use 4 packages,
7500 use 5 packages,
7600 use 6 packages:
Pour contents packages into tank. Stir to dissolve cleaner.
Cover tank.
4. Allow solution to soak at least one hour, or overnight for heavy
scale buildup.
5. After soak period, turn control to OFF position.
M406 p/n 2M-304942 Owners Manual HRCP-Series Heated Cold Pans
6. Drain hot water from pans.
Scrub with a plastic scouring pad.
Rinse thoroughly with hot water then dry.
7. Refill tank and resume operation.
8. Heavy scale buildup may require additional treatments.
13
EYES: In case of contact,
immediately flush with warm
water for 15 minutes and
consult a physician
SKIN: Wash with soap and
water
INHALATION: Relocate to
fresh air.
INGESTION: If swallowed,
drink plenty of water or milk
and consult a physician
EMERGENCY PHONE :
(800) 255-3924
IMPORTANT:
Turn selector switch OFF if
soaking overnight.
MAINTENANCE INSTRUCTIONS
CAUTION:
HOT SURFACE
Exposed surfaces can be hot
to the touch and may cause
burns.
CAUTION:
INJURY HAZARD
Disconnect appliance from
electrical power before
cleaning condenser coil.
CAUTION:
INJURY HAZARD
Condenser coil fins are sharp.
Use care to avoid cuts while
cleaning the condenser.
CONDENSER COIL CLEANING INSTRUCTIONS
The condenser coil must be kept clean to allow adequate air flow for
proper heat dissipation. Recommend this procedure be performed
monthly.
1. Turn selector switch to OFF. Disconnect appliance from electrical
power.
2. Remove louvers or access panel to allow coil to be reached.
3. Using a stiff bristle brush, brush lint and debris from the condenser
fins. Brush vertically, top to bottom. Collect and discard all lint and
debris gathered from this operation
IMPORTANT: The fins of the condenser coil are delicate and
easily damaged. Use care to brush only in a vertical motion to
avoid damaging the coil fins.
4. Wipe the fan blades to remove accumulated lint.
5. Reconnect to electrical power. Refer to COLD Operation (page 7)
and test for proper operation.
M406 p/n 2M-304942 Owners Manual HRCP-Series Heated Cold Pans
14
M406 p/n 2M-304942 Owners Manual HRCP-Series Heated Cold Pans
WIRING DIAGRAM
15
SERVICE PARTS LIST: HRCP7200, 7300, 7400, 7500, 7600
PART NO.
TERM BLOCK KIT
RING WIRE SAFETY THERMO
LIGHT SIGNAL RED 240V
FTG FLEX COND 90Dº x 1/2"
SCREWS 8-32 x 1/16"
NUTS 8-32 KEPS GREEN
CLIP THERMOSTAT BULB
LIGHT SIGNAL WHITE 120V
KNOB THERMOSTAT-MDMW
HOSE DRAIN 36" LG PC-1M
CLAMP HOSE 5/8"
VALVE ANTISYPHON 3/8"
FTG STR BRS 3/8"NPT x 3/8"
NIPPLE 3/8"NPT X 2" SS
DRAIN FITTING 1" NPT SS304
ELEM HRCP-SERIES 2.5KW 240V
ELEM HRCP-SERIES 4KW 240V
PANEL CONTROL W/ LABELS
SWITCH TOGGLE (2P ON-OFF-ON)
THERMO CONTROL CAP/BULB 204ºF
CONTROL WATER LEVEL HRCP 220V
VALV SOL TP SGL 240V
THERMO 130ºF SEALED HRCP
FTG CAPILLARY S/S 3/8" FNPT
FUSEHOLDER TYPE T 30A
FUSE CLASS T TYPE JJS 15A
FUSE CLASS T TYPE JJS 30A
ELBOW STREET 3/8"M X 3/8"F
RELAY 30A
WS-50131
2B-30792
2J-31157
2K-34136X
2C-35487
2C-35736
2A-38665
2J-40563
2R-Y7690
P2-46587
2C-46591
2V-47650
2K-47662
2K-48197
P2-301756
2N-304144
2N-304145
WS-504345
2E-304936
2T-304937
2E-304938
WS-504939
2T-304944
2K-304945
2E-305478
2E-305479
SS-505480
2K-70698
2E-70889
16
M406 p/n 2M-304942 Owners Manual HRCP-Series Heated Cold Pans
DESCRIPTION
ACCESSORY PARTS & SERVICE
DESCRIPTION
PART NO.
DRAIN SCREEN
SOUP LADEL, 6 oz.
P2-31869
DD-47088
IMPORTANT: Use only
factory authorized service
parts and replacement
filters.
For factory authorized
service, or to order factory
authorized replacement parts,
contact your Wells authorized
service agency, or call:
Wells Bloomfield, LLC
10 Sunnen Dr.
St. Louis MO 63143 USA
Service Dept.
phone: (800) 807-9054
fax:
(314) 781-2714
M406 p/n 2M-304942 Owners Manual HRCP-Series Heated Cold Pans
Service Parts Department can
supply you with the name and
telephone number of the
WELLS AUTHORIZED
SERVICE AGENCY
nearest you.
CUSTOMER SERVICE DATA
please have this information available if calling for service
RESTAURANT _____________________________ LOCATION _____________
INSTALLATION DATE ________________________ TECHNICIAN ___________
SERVICE COMPANY ________________________________________________
ADDRESS ___________________________ STATE ______ ZIP__________
TELEPHONE NUMBER (_____)_____-_________
EQUIPMENT MODEL NO. _______________
EQUIPMENT SERIAL NO. _______________
VOLTAGE: (check one)
208
240
17
WELLS BLOOMFIELD, LLC
10 Sunnen Dr., St. Louis, MO 63143
telephone: 800-807-8054
fax: 314-781-2714
www.wells-mfg.com