1
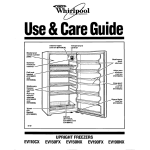
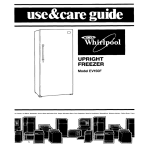
A Note To You
2
Important Safety
Instructions
3
Parts And Features
4
Installing Your
Freezer
5
Using Your Freezer
7
gazirFor
Your
10
If You Need Assistance
12
Or Sewice
16
Warranty
1-800-253-1301
Call us with
questions
or comments.
a43
UPRIGHT FREEZERS
MODELS
EVlZOFX
EV170NX
EVl50FX
EV200FX
A Note To You
Thank
you for buying
a Whirlpool
appliance.
You have purchased a quality, worldclass home appliance. Years of engineering experience have gone
into its manufacturing. To ensure that you will enjoy many years of trouble-free operation, we have
developed this Use and Care Guide. ft is full of valuable information on how to operate and maintain
your appliance properly and safely. Please read it carefully. Also, please complete and mail the Cwnership Registration Card provided with your appliance. This will help us notify you about any new information on your appliance.
Your
safety
is important
to us.
This guide contains safety symbols and statements. Please pay special attention to these symbols and
follow any instructions given. Here is a brief explanation of the use of each symbol.
This symbol will help alert you to such dangers as
personal injury, burns, fire and electrical shock.
This symbol will help you avoid actions which
could cause product damage (scratches, dents,
etc.) and damage to your personal property.
Our Consumer
Assistance
Center
is toll-free,
24 hours a day.
number,
1-800-253-1301,
If you ever have a question concerning your appliance’s operation, or if you need service. first see ‘If
You Need Assistance Or Service” on page 21. If you need further help, feel free to call our Consumer
Assistance Center. When calling, you will need to know your appliance’s complete model number and
serial number. You can find this information on the model and serial number plate (see diagram on
page 6). For your convenience, we have included a handy place below for you to record these numbers,
the purchase date from the sales slip and your dealer’s name and telephone number. Keep this book
and the sales slip together in a safe place for future reference.
Model Number
Dealer Name
Serial Number
Dealer Phone
Purchase
Date
The Whirlpool
Freezer
Guide
is also available.
The Whirlpool Freezer Guide is a companion
book to this Freezer Use and Care Guide and is
available free of charge. It contains information
on freezing different kinds of foods, packaging
and food storage times. The Freezer Guide also
has helpful hints for saving energy and solving
common freezer problems.
To order the Freezer Guide, write to:
Whirlpool Corporation
Attention: Customer Service Dept.
1900 Whirlpool Drive
LaPorte, IN 46305
and request the Whirlpool Freezer Guide, Part
No. 1114865.
c
2
9
FreezerGuide
Important
Safety
Instructions
To reduce the risk of fire, electrical shock, or injury when using
your freezer, follow these basic precautions:
l
l
Read all operating Instructions
before
using your freezer.
Child entrapment
and suffocations
are
not problems of the past. Junked or
abandoned freezers are still dangerous,
even if they will “just slt in the garage for
a few days.”
ff you are getting rid of your old freezer,
do it safely. Please read the enclosed
safety bookfet from the Association
of
Home Appliance Manufacturers.
Help
prevent accidents.
-SAVE
I
Help us help
Never allow children to operate, play with,
or crawl inside the freezer.
l Never
clean freezer parts with flammable
fluids. The fumes can create a fire hazard
or explosion.
l FOR YOUR SAFE-W l
DO NOT STORE OR USE GASOLINE OR
OTHER FLAMMABLE VAPORS AND LIQUIDS
IN THE VICINITY OF THIS OR ANY OTHER
APPLIANCE. THE FUMES CAN CREATE A
FIRE HAZARD OR EXPLOSION.
l
THESE INSTRUCTIONS-
you
Please:
l Install and level the freezer
on a floor that will
hold the weight, and in an area suitable for its
size and use.
9 Connect the freezer only to the proper kind of
outlet, with the correct electrical supply and
grounding. (See “Locating the proper electrical
supply” on page 5.)
l Use the freezer only to do what home freezers
are designed to do.
l Do not install the freezer
near an oven, radiator
or other heat source.
l Property maintain the freezer.
l Keep the freezer
out of the weather.
l Use the freezer only in an area where the
temperature will not exceed 110°F (43.3%) or
drop below 55°F (13°C).
l Make sure the freezer
is not used by anyone
unable to operate it properly.
l Do not load the freezer
with food before it has
time to get properly cold.
Also, please remove the Consumer Buy Guide
Label, materials, tape and inside labels (except
the model and serial number label) before using
the freezer.
To remove any remaining glue:
l Rub briskly with thumb to make a ball, then
remove.
OR
l Soak area with liquid hand dishwashing
detergent before removing glue as described
above.
Do not use sharp instruments, rubbing alcohol,
flammable fluids or abrasive cleaners. These
can damage the material. See “Important Safety
Instructions” above.
NOTE: Do not remove the Tech Sheet located
on the back of the freezer.
3
Parts And Features
This section contains captioned illustrations of your appliance.
all parts and features are located and what they look like.
Model and serial
number label (on side wall)
Use them to become familiar with where
-
tight
(on some models)
Temperature
control -
Stationary
Stationary
door shelves
(number varies
with model)
\
Storage
gate
Key eject lock
(on mome models)
Base grille
\
Leveling
leg6
(not shown)
4
\
\
Dtain
and
dram cover
(on 8ome modeir)
Installing
In This
Your Freezer
Section
Page
Page
Installing
the handle . . . . . . . . . . ..-. “_..” . . . . . . . . . ..-...“.I 5
Cleaning
your freezer ... ... ... . ....“...I.............“.....
Locating
the proper electrical
5
Choosing
the proper
Completing
. . . .. . . . . . . .. . . . -....6
location
the installation
...... .........“..“..” .... 6
8upply . . . . . . . .. . . . .. . 5
Proper installation of any appliance is very important. This section will tell you everything YOU need to
know to install your freezer property.
Installing
the handle
I. Remove screws from front of freezer door and
discard.
2. Locate handle assembly kii among packing
materials.
3. Attach top of handle to top hole in door with
shorter of 2 screws provided.
4. Attach bottom of handle to lower hole in door
with longer of 2 screws.
5. Snap trim piece into place.
Cleaning
Trim piece
Use
longest
screw here
your freezer
Clean your freezer thoroughly before using it.
1, Use a sponge, cloth or paper towel and mild
detergent in warm water to clean outside and
inside of freezer, door liner and gasket.
2. Rinse and dry thoroughfy.
Locating
Recommended
the proper
Grounding
electrical
Method
A 115 Volt, 60 Hz., AC only 15 or 20 ampere
fused and properly grounded electrical supply is
required. It is recommended that a separate
circuit serving only this appliance be provided.
Use a receptacle which cannot be turned off with
a switch or pull chain. Do not use an extension
cord.
Attach retaining clip, from literature package
inside the freezer, over power cord plug. See
Electrical Requirements and Grounding Instructions Sheet in literature package for complete
details.
supply
&prong grounding
type wall receptacle
Retaining
clip
5
Choosing
the proper
location
Read the following items before choosing the
location for the freezer. See “Completing the
installation” below before sliding freezer into
place.
1. Pick a safe place, indoors, away from flammables such as gasoline.
2. Check the strength of the floor. It should hold
the weight of a fully loaded freezer.
3. Allow at least 3 inches (7.5 cm) of air space at
top of freezer.
4. Allow at least 3 inches (7.5 cm) on each side
of the freezer for ease of installation.
5. lf the freezer is to be against a wall, you might
want to leave extra space on the hinge side so
the door can be opened wider.
Completing
the installation
Level freezer so the door will stay open at any
position.
1. Locate, remove and discard the 4 bofts that
held the freezer in the shipping crate.
2. Locate the 2 front leveling legs taped among
the packing materials.
3. Screw these legs into the front holes on the
bottom of the freezer. The back of the freezer
rests on 2 fixed supports.
4. Adjust the 2 front legs so freezer does not
rock.
5. Connect freezer to proper electrical supply
and attach retaining clip. (Refer to “Locating
the proper electrical supply” on page 5.)
6. Slide freezer into place.
7. Place a level on top of the freezer-first side to
side then front to back. Turn leg clockwise to
raise a corner. Turn leg counterclockwise to
lower a comer.
6. Repeat step 7 until the freezer is level.
9. After freezer is fully loaded, recheck with level.
6
3 inches
minimum
L
Using Your Freezer
I
In This Section
Setting
Adjusting
control
the temperature
Using the refrigerated
....................... .7
control
rhehrsr
Using the lower storage
Page
Page
the temperature
................... .7
..........................
9
gate ...... ..- .................. 9
Removing
the base grille
Using UKAdrain 8ystam
Changing
.............................
I. 8
.. . .-. ...................... I. 9
the light bulb ....................... . .......... 9
Using the key eject lock ................. . .. . . ..,.- ..Q
In order to obtain the best possible results from your freezer, you must operate it properly. This section
will tell you how to do just that.
Setting
the temperature
control
Turn the control to 4. This setting is designed to
maintain the temperature at or near 0°F (-17.6%)
under normal operating conditions.
Allow the freezer to cool 6 to 6 hours before
filling with frozen food. Let the freezer cool
overnight before adding large amounts of unfrozen
food. Never add more than 2-3 pounds of unfrozen food per cubic foot of freezer space.
NOTE: When the freezer is first started, the
compressor will run constantly until the cabinet is
cooled. It may take up to 6 to 8 hours or longer,
depending on room temperature and the number
of times the freezer door is opened.
After the cabinet is cooled, the compressor will
turn on and off as needed to keep the freezer at
the proper temperature.
The outside of your freezer may feel warm. This
is normal. The freezer’s design and main function
is to remove heat from packages and air space
inside the freezer. This heat is transferred to the
room air, so the outside of the freezer may feel
warm.
Adjusting
l
l
the temperature
control
Turn control to a higher number for colder
temperatures.
Turn control to a lower number for less cold
temperatures.
7
Using
the refrigerated
Your freezer is equipped with refrigerated interior
shelves. Packages in direct contact with the
shelves will have the best refrigeration. Fresh,
unfrozen food packages should be stored directly
on the shelves and not on top of already frozen
food packages.
When placing the food packages in your
freezer, please remember:
l The cabinet shelves
have the best freezing
capability. The door shelves and the bottom of
the cabinet have a slightly higher temperature.
Therefore, packages sensitive to temperature
(meat, pouttry, etc.) should not be placed on the
door shelves or the freezer bottom.
l Give the cold air a chance to completely
surround the packages.
Using
the lower
storage
To lower gate:
1. Lii top of gate up slightly to clear supports.
2. Pull gate forward.
To
1.
2.
3.
gate
Pull top up,
then forward.
raise gate:
Return gate to upright position.
Lift top of gate slightfy to clear supports.
Lower gate into supports.
\
Removing
the base grille
For Manual-defrost
models: The base grille will
need to be removed when defrosting the freezer.
To remove the grille:
1. Open the door.
2. Pull on both sides of the grille.
To replace the grille:
1. Line up grille support tabs with openings in
freezer cabinet.
2. Push firmly to snap grille into place.
3. Close the door.
Using
the drain
system
(On some
models)
The freezer’s drain system consists of:
l drain cap and sleeve (at the liner and cabinet
bottom); and
l drain hose.
The drain hose carries defrost water out of the
freezer, and through the area behind the base
grille, into a customer provided pan for disposal.
NOTE: The drain cap must be removed before
defrosting the freezer, and replaced securely
afterward.
Changing
the light
bulb
(On some
models)
Electrical Shock Hazard
Before removing the light bulb, either turn
Temperature Control to OFF and unplug the
freezer, or disconnect the electricity leading
to the freezer at the main power supply.
Shock and injury can occur if electricity
remains connected.
To replace interior liQht:
1. Turn Temperature Control to OFF and
disconnect freezer from power supply.
NOTE: Turning Temperature Control to OFF
does not disconnect power to the freezer.
2. Remove the light shield by squeezing sides
slightly and pulling out.
3. Replace bulb with 15-waft appliance bulb.
4. Replace light shield. Insert back tabs into slots
and squeeze shield slightly to insert front tabs
into slots.
5. Reconnect freezer to power supply and refer
to Setting the temperature control” on page 7.
Using
the key eject
lock
c
(I
Light shield
(On some
models)
If your freezer is equipped with a lock, it can help
reduce the hazard of child entrapment.
To lock or unlock the freezer, you must hold
the key in the lock while turning. The lock is
spring loaded, so the key cannot be left in the
lock.
If the key is lost, contact your Whirlpool dealer
for a replacement. Always give the complete
model and serial number of your freezer when
requesting a replacement key.
9
Caring
In This
Section
Manuaklefro8t
Frost-free
For Your Freezer
mod&
models
Page
Page
. . . . . . . . . . . . . . . ..-....-...._..__.. 10
. . . . . . . .. . .. . . . . . .. . . . . . ...” .. . . . . . . . . . . . . . . 11
What to do during
Moving
power
outagea
“-. ..__.. S 11
care . . . . .._............I....“.......“...........”.
11
Your freezer is designed to give you years of dependable service. However, there are a few things you
can do to ensure a long product life. This section will tell you how to care for your freezer properly.
Manual-defrost
(EVlZOFX,
EV150FX
models
and EVZOOFX)
Defrost and clean your freezer when frost has
buift up to about % inch (6 mm) thickness.
Complete defrosting and cleaning should be
done at least once a year. In high humidity areas,
a freezer may need more frequent defrosting and
cleaning.
Electrical Shock and
Product Damage Hazard
l Turning the Temperature
Control to OFF
does not remove power to the unit.
Failure to unplug the power cord before
cleaning or servicing freezer could result
in electrical shock.
l Do not place electrical
devices in freezer
when defrosting. Shock or injury can
occur.
l Do not use an ice pick, knife or other
sharp-pointed tool to defrost freezer.
Damage can occur.
9 Do not use abrasive cleaners on your
freezer. Do not use cleaning waxes,
concentrated detergents, bleaches or
cleaners containing petroleum on plastic
parts. Damage can occur.
1. Turn Temperature
Control to OFF and
unplug power cord.
2. Remove all frozen food. Wrap frozen food in
several layers of newspaper and cover with
a blanket. Food will stay frozen for several
hours.
OR
Store frozen food in a cooler, additional
refrigerator-freezer,
or in a cool area.
10
3. Remove base grille. (See page 8.)
4. Reach under unit and pull drain hose out
through opening. Place a shallow pan under
drain hose. Remove drain cap inside freezer.
NOTE: Check drain pan frequently to avoid
water overflow. Have a second pan handy
for easier emptying of drain pan.
5. Place pans of hot water in freezer with door
open to speed mefting. Directing air from an
electric fan into freezer will also help. Do not
place fan in freezer.
6. Use a plastic scraper to remove frost.
7. wipe water from walls with a towel or
sponge.
8. Wash the inside walls with a solution of 2
tablespoons (26 mg) baking soda to 1 quart
(0.95 L) warm water.
9. Rinse and dry thoroughfy.
10. Use a sponge, cloth or paper towel and mild
detergent in warm water to clean outside of
freezer, door liner and gasket.
11. Rinse and dry thoroughly.
12. Wax painted metal surfaces outside of
freezer to provide rust protection.
NOTE: Do not use wax on plastic parts. Wax
may damage them.
13. Replace drain hose, drain cap and base
grille.
14. Replace all frozen food.
15. Plug in power cord and refer to “Setting the
temperature control” on page 7.
Frost-free
models
(EVI~ONX)
Frost-free means that you will never have to
defrost your Freezer. Frost is removed by air
moving and collecting any moisture and depositing it on the cooling coil. The cooling coil periodically warms up just enough to melt the frost and it
then flows down to the drain pan (located behind
the base grille) where if is evaporated.
Complete cleaning should be done at least
once a year.
1. Turn Temperature Control to OFF and unplug
power cord.
2. Remove all frozen food. Wrap frozen food in
several layers of newspaper and cover with a
blanket. Food will stay frozen for several
hours.
OR
Store frozen food in a cooler, additional
refrigerator-freezer,
or in a cool area.
What to do during
3. Wash the inside walls with a solution of
2 tablespoons (26 mg) baking soda to 1 quart
(0.95 L) warm water.
4. Rinse and dry thoroughly.
5. Use a sponge, cloth or paper towel and mild
detergent in warm water to clean outside of
freezer, door liner and gasket.
6. Rinse and dry thoroughly.
7. Wax painted metal surfaces outside of freezer
to provide rust protection.
NOTE: Do not use wax on plastic parts. Wax
may damage them.
6. Replace all frozen food.
9. Plug in power cord and refer to “Setting the
temperature control” on page 7.
power
1. Call the Power company.
Ask how long power will be off.
2. Keep freezer closed if service is to be
interrupted
24 hours or less.
This will help food stay frozen.
3. tf service is to be interrupted longer than
24 hours, do this:
Remove all frozen food and store in a frozen
food locker.
OR
Place 2 Ibs. (0.9 kg) of dry ice in freezer for
every cubic foot of freezer space. This will
keep foods frozen for 2 to 4 days.
outages
OR
If dry ice or a food locker is not available,
or can perishable food at once.
use
NOTE: A full freezer stays cold longer than a
partly filled one. A freezer full of meat stays cold
longer than a freezer full of baked goods.
Food containing ice crystals may be safely
refrozen, but the quality and flavor of the food
may be affected.
Use refrozen food quickly. If the condition of
the food is poor, or you feel it is unsafe to eat,
dispose of it immediately.
Personal Injury Hazard
Wear gloves to protect your hands from dry
ice burns.
Failure to do so could resutt in dry ice
burns.
Moving
care
Remove all frozen food and pack it in dry ice.
Unplug the freezer and clean it thoroughly. Tape
the door shut and tape electrical cord to the
cabinet.
When you get to your new home, refer to
pages 4 and 5 for information on installation and
setting controls.
11
If You Need Assistance
Service
Or
This section is designed to help you save the cost of a service call. Part 1 of this section outlines
possible problems, their causes, and actions you can take to solve each problem. Parts 2 and 3 tell you
what to do if you still need assistance or service. When calling our Consumer Assistance Center for help
or calling for service, please provide a detailed description of the problem, your appliance’s complete
model and serial numbers and the purchase date. (See page 2.) This information will help us respond
properly to your request.
1. Before
calling
for assistance
...
Performance problems often result from little things you can find and fix without tools of any kind. Please
check the chart below for problems you can fix. lt could save you the cost of a service call.
PROBLEM
The freezer
running
stops
The motor seems
to run too long
The freezer
clicks but does
not run
12
POSSIBLE
CAUSE
SOLUTION
The power cord in not plugged
into a live circuit with the proper
voftage.
Firmly plug the power cord into a live
circuit with the proper voltage.
A household fuse has blown or
circuit breaker has tripped.
Replace fuse or reset circuit breaker.
The local power has failed.
Wait for power to be restored.
The Temperature
to OFF.
Set the Temperature
bered setting.
Control is set
Control to a num-
There is excessive frost or a
package holding the door open.
Defrost and clean freezer or move
package so door closes property.
Large amount of unfrozen food
have been added to freezer.
The motor will naturally run longer. Add
no more unfrozen food at one time than
will freeze in 24 hour-approximately
2 to
3 Ibs. per cubic foot of freezer space.
The day is hot and muggy or the
room is too warm.
The motor will run longer to provide the
correct amount of cooling.
There is not enough air circulation space around the freezer.
See “Choosing the proper location” on
page 6.
The local power has failed.
Unplug the freezer for 30 minutes to allow
the refrigeration system to equalize.
During this time, keep the door closed
whenever possible.
2. If you need
assistance
...
Call Whirlpool Consumer Assistance
Center
telephone number. Dial free from anywhere in
the U.S.:
1-800-253-l 301
and talk with one of our trained consultants. The
consultant can instruct you in how to obtain
satisfactory operation from your appliance or, ti
service is necessary, recommend a qualified
service company in your area.
If you prefer, write to:
Mr. William Clark
Consumer Assistance Center
Whirlpool Corporation
2000 M-63
Benton Harbor, Ml 49022
Please include a daytime phone number in your
correspondence.
3. If you need
service
- Saa- WHrlpool Appliences or
Auhrlzed
Whkml
Se4c.e
(Erempb:
XYZ service Co.)
* WASHING
DRYERS
replace-
FSP is a registered trademark of Whirlpool
Corporation for quality parts. Look for this symbol
of quality whenever you need a replacement part
for your Whirlpool appliance. FSP replacement
parts will fit right and work right, because they
are made to the same exacting specifications
used to build every new Whirlpool appliance.
To locate FSP replacement parts in your area,
refer to Step 3 above or call the Whirlpool
Consumer Assistance Center number in Step 2.
5. If you are not satisfied
how the problem
was
solved . . .
l
. ..
Whirlpool has a nationwide
network of authorized
WhirlpoolSM service compaE nies. Whirlpool service
technicians are trained to
fulfill the product warranty and provide afterwarranty service, anywhere in the United States.
To locate the authorized Whirlpool service
company in your area, call our Consumer
Assistance Center telephone number (see
Step 2) or look in your telephone directory Yellow
Pages under:
-APPLIANCE-HOUSEHOLDUAlOR,
SERWCE L REPAIR
4. If you need FSP
ment parts . . .
l
l
with
Contact the Major Appliance Consumer Action
Panel (MACAP). MACAP is a group of independent consumer experts that voices consumer views at the highest levels of the major
appliance industry.
Contact MACAP only when the dealer,
authorized servicer and Whirlpool have failed
to resolve your problem.
Major Appliance Consumer Action Panel
20 North Wacker Drive
Chicago, IL 60606
MACAP will in turn inform us of your action.
MACHINES
L
SERVICE & REPAlR
- See: Wl-idpool Applia~es
or
Authorlred
Whklpcd
Servla
(Erempb:
Xyz Service Co.)
13
14
WHIRLPOO”
Domestic Freezer Warranty
FZOOI
LENGTH OF WARRANTY
WHIRLPOOL
FULL ONE YEAR WARRANTY
From Date of Purchase
FSPQ replacement parts and repair labor to correct defects in
materials or workmanship.
FULL TEN YEAR WARRANTY
From Date of Purchase
FSP replacement parts and repair labor to correct defects in
materials or workmanship in the sealed refrigeration system.
These parts are:
4. Drier
1. Compressor
5. Connecting Tubing
2. Evaporator
3. Condenser
WHIRLPOOL
WILL PAY FOR
WlLL NOT PAY FOR
k Service calls to:
1. Correct the installation of the freezer.
2. Instruct you how to use the freezer.
3. Replace house fuses or correct house wiring or plumbing.
4. Replace light bulbs or batteries.
B. Pickup and delivery. This product is designed to be repaired in the home.
C. Damage to freezer caused by accident, misuse, fire, flood, acts of God or use of products not
approved by Whirlpool.
D. Food loss coverage for freezers used in commercial applications.
E. Repairs to parts or systems caused by unauthorized modifications made to the appliance.
domestic
food loss coverage.
See below for details on limited domestic food loss protection plan.
Service under the full warranties must be provided by an authorized WhirtpoolsU service company.
Limited
WHIRLPOOL CORPORATION SHALL NOT BE UABLE FOR INCIDENTAL OR CONSEQUENTIAL DAMAGES. Some states do not allow the exclusion or limitation of incidental or consequential damages so this
limitation or exclusion may not apply to you. This warranty gives you specific legal tights, and you may also
have other rights which vary from state to state.
Outside the United States, a different warranty may also apply. For details contact your authorized Whirfpool
distributor or military exchange.
LIMITED
DOMESTIC
FOOD LOSS COVERAGE
REIMBURSEMENT
FOR FOOD LOSSES.
During the first year of ownership, the Whirlpool Freezer warranty provides reimbursement as stated below for
food actually spoiled while stored in the freezer as a result of defects in materials or workmanship.
During the second through tenth years of ownership, reimbursement will be made as stated below for food
actually spoiled while stored in the freezer as a result of a FAILURE OF THE SEALED REFRIGERATION
SYSTEM.
Food spoilage losses must be verified by Whirlpool or an authorized WhirlpoolSM service company. Reimbursement of losses will be based on domestic use and freezer size up to the total cumulative amount shown for the
ten year warranty period.
10.0 to 16.0 cubic feet ._.............. .... ...... .._.................. up to $300.00 maximum payment
16.1 cubic feet or larger ._..........._...... .. .... ............... .... up to $400.00 maximum payment
The reimbursement amounts shown may or may not cover the actual replacement cost of the contents of your
freezer. They are, however, the maximum payments that will be paid and they are cumulative for the ten year
warranty period.
Sorry, but Whirip~l is not responsible for food losses caused by natural spoilage, misuse or negligent care of
the freezer, or by accidental or intentional disconnecting of the electrical power cord, power interruption,
inadequate power, fire damage, water damage, theft, or riots, strikes, war or acts of God.
If you need service, first see the “Assistance or Service”
Service,”
additional
l-800-253-1301,
PART
section of this book. After checking “Assistance
help can be found by calling our Consumer Assistance Center telephone number,
from anywhere in the U.S.
or
NO. 2156273
0 1992 Whirlpool
Corporalion
Q Fkgisfered
Trademark!
SM Service
Mark of whirlpa
Corporation
Ptinled
in U.SA.