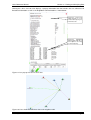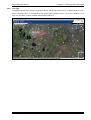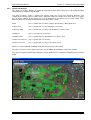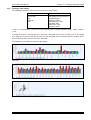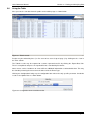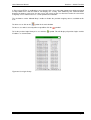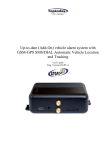
1
Aries Reference Manual
Section 1 – Overview
Aries
Autonomous TETRA Network
Performance Measurement Tool
User Guide and Reference Manual
RSI
Kingswear House
High Street
Cranbrook
Kent TN17 3EW
Tel: 0208 123 0028
Email: [email protected]
www.rsi-uk.com
Issue 2.10
Nov 2014
© Copyright 2009-2014 Radio Systems Information Ltd. All Rights Reserved
Neither the whole, nor any part of the information contained in this manual may be adapted or reproduced
in any material form except with the prior written approval of RSI.
Aries is a trademark of Radio Systems Information Ltd.
Radio Systems Information Ltd.
Page 1
Aries Reference Manual
Section 1 – Overview
Table of Contents
ARIES ...............................................................................................................................1
AUTONOMOUS TETRA NETWORK................................................................................1
PERFORMANCE MEASUREMENT TOOL ......................................................................1
USER GUIDE AND REFERENCE MANUAL....................................................................1
TABLE OF CONTENTS....................................................................................................2
DISCLAIMER....................................................................................................................3
1
1.1
1.2
1.3
2
OVERVIEW ................................................................................................................4
What is Aries?............................................................................................................................. 4
System Overview........................................................................................................................ 5
Data Security............................................................................................................................... 6
VIEWING AND ANALYSING DATA ..........................................................................7
2.1
User Access Levels.................................................................................................................... 7
2.2
Logging In ................................................................................................................................... 7
2.3
Selecting Data for Analysis ....................................................................................................... 9
2.3.1
Analysis profiles....................................................................................................................9
2.3.2
Filter by Date ........................................................................................................................9
2.3.3
Filter by Probe ....................................................................................................................10
2.3.4
Filter by Base Site ..............................................................................................................10
2.3.5
Filter by Area ......................................................................................................................11
2.3.6
Filter Events........................................................................................................................12
2.3.7
Filter Custom ......................................................................................................................13
2.4
Using Maps ............................................................................................................................... 14
2.4.1
Icon Colour .........................................................................................................................21
2.4.2
Icon Type ............................................................................................................................23
2.4.3
Square Km Analysis ...........................................................................................................24
2.4.4
Failure Simulation Mode.....................................................................................................25
2.5
Using Graphs ............................................................................................................................ 26
2.5.1
Values Type Graphs...........................................................................................................26
2.5.2
Summary Type Graphs ......................................................................................................27
2.6
Using the Table......................................................................................................................... 28
2.7
Using Warnings ........................................................................................................................ 29
2.8
Using Summary ........................................................................................................................ 32
2.9
Using KPI................................................................................................................................... 35
2.10 Using Neighbour Analysis....................................................................................................... 37
3
3.1
3.2
3.3
3.4
3.5
3.6
4
4.1
4.2
VOICE QUALITY TESTING .....................................................................................41
How PESQ works...................................................................................................................... 42
Performance.............................................................................................................................. 43
Which PESQ?............................................................................................................................ 44
Voice Quality Testing using Aries .......................................................................................... 45
Voice Quality Analysis ............................................................................................................. 46
Marked Samples ....................................................................................................................... 48
ADMIN FUNCTIONS ................................................................................................49
Configuring Networks .............................................................................................................. 49
Configuring Users .................................................................................................................... 51
Radio Systems Information Ltd.
Page 2
Aries Reference Manual
Section 1 – Overview
4.3
Configuring Probes .................................................................................................................. 53
4.2.1
Adding a new probe............................................................................................................53
4.2.2
Editing a probe ...................................................................................................................54
4.3.3
Probe configuration ............................................................................................................55
4.2.4
VQ Slave Probes ................................................................................................................57
4.2.5
Probe firmware update .......................................................................................................58
4.2.6
Manage Audio Files............................................................................................................59
4.4
Configuring Base Sites ............................................................................................................ 60
4.5
Configuring Layers................................................................................................................... 62
4.6
Configuring Areas .................................................................................................................... 63
4.7
Configuring Settings ................................................................................................................ 65
4.8
Profile Activity .......................................................................................................................... 66
4.9
Database.................................................................................................................................... 67
5
PROBES ..................................................................................................................68
5.1
Probe Configuration................................................................................................................. 68
5.2
Version 1 Probe ........................................................................................................................ 69
5.2.1
Specifications .....................................................................................................................69
5.2.2
SIM Card.............................................................................................................................69
5.2.3
Setting Up New probe ........................................................................................................70
5.2.4
Logging ...............................................................................................................................70
5.3
Version 2 Probe ........................................................................................................................ 72
5.3.1
Specifications .....................................................................................................................72
5.2.2
SIM Card.............................................................................................................................72
5.2.3
Setting Up New Probe ........................................................................................................72
5.2.4
Logging ...............................................................................................................................72
5.4
Operation................................................................................................................................... 73
5.5
Packet Data Testing ................................................................................................................. 77
Disclaimer
Whilst every care has been taken in the preparation and publication of this document, errors in content,
typographical or otherwise, may occur. If you have queries regarding its accuracy please contact RSI at
the address shown on the title page.
With a policy of continual improvement RSI reserves the right to alter specification without notice.
Radio Systems Information Ltd.
Page 3
Aries Reference Manual
1
Overview
1.1
What is Aries?
Section 1 – Overview
Aries is an autonomous TETRA network monitoring tool that provides real-time performance statistics. It
consists of many small probes that connect to the back of existing TETRA radios as well as software that
runs on a web server. As the vehicles with the TETRA radios and probes travel across the network, data is
sent from the probes back to a central web server so that a picture of network performance builds up.
Results may be viewed in real-time as maps, graphs, tables and warnings using a secure passwordprotected web site available on any Internet connected PC using a standard browser.
Aries provides first-line TETRA network monitoring of faults and problems with the facility to send warning
SMS to service engineers when key metrics are exceeded. Problems can then be investigated further with
the detailed technical data and powerful analysis functionality.
Aries provides a picture of the network performance that is not available from the standard TETRA network
call logging as it takes into account all of the failed calls and poor coverage areas and it provides a true
and independent measure of grade-of-service as perceived by the user.
Aries monitoring probes are ideal for fitting in any vehicle that regularly travels across the TETRA service
area such as public transport - once installed they can be forgotten about.
Aries key features:
•
Autonomous monitoring of TETRA network performance
•
Sends SMS to service engineers when network faults detected
•
All results presented in real-time on secure web pages accessible from any browser
•
Built-in powerful analysis functions for investigation of network faults
•
Low-cost, small, robust probes can be fitted in a any vehicle
Radio Systems Information Ltd.
Page 4
Aries Reference Manual
1.2
Section 1 – Overview
System Overview
Aries is shown diagrammatically in figure 1 below:
TETRA
NETWORK
GPRS
INTERNET
Aries
Server
Internet
Figure 1: Aries overall configuration
Aries probes are deployed in vehicles across the TETRA network service area ensuring that each base
site is monitored at least once a day and preferably much more frequently for critical base sites. Each
probe records the basic site parameters, such as RSSI and LAC, typically every 60 seconds and initiates a
test call typically every 5 minutes to avoid generating excessive traffic.
Results are sent back immediately from the probe to the central server using GPRS packet data. If the
GPRS service is not available then data is stored in the probe until it can be sent back.
All of the probe parameters are configured by the system administrator and updated over-the-air from the
central server. All over-the-air data both to and from the probes is encrypted for the highest level of
security and a separate TETRA Group is assigned for Aries so that the test calls do not disturb or interfere
with users.
The Aries central server software runs on almost any Web server with support for PHP and MySQL
database. Users may run the application on their existing server or on dedicated server hardware supplied
by RSI or indeed on RSI’s own server if desired.
A single server can be used to provide the Aries service to several completely separate TETRA networks
with users for each network only able to access data for their own network.
The server application handles the incoming GPRS data packets, putting the data into the central
database.
Users log onto the server web page and view the results using a standard web browser with access being
strictly password controlled. The server application generates fully interactive web pages with an intuitive
interface producing maps, graphs, tables and automatic warnings of historical data or real-time data as it is
received.
Radio Systems Information Ltd.
Page 5
Aries Reference Manual
1.3
Section 1 – Overview
Data Security
The Aries data paths and the security measures used to protect the data are shown in figure 2 below.
TETRA
Aries Probe
Probe data sent by GPRS to
server as coded CSV. Option
for end-to-end encryption
with DES64 algorithm.
Probe configuration &
update messages sent by
SMS end-to-end encrypted
with DES64 algorithm
GPRS path is automatically
encrypted with standard
algorithms
Aries Server
All user access is
password protected
Internet
User IP address is logged
Option for http or
https access
End User
Figure 2: Aries data security
Radio Systems Information Ltd.
Page 6
Aries Reference Manual
2
Section 2 – Viewing and Analysing Data
Viewing and Analysing Data
Aries produces maps, graphs, tables and automatic warnings with all parameters being configurable. An
intuitive user-interface makes the system easy-to-use without losing the power of advanced analysis
features. Analysis is carried out on live data as it is received from the probes, e.g. showing the last 12
hours, or on historical data, e.g. showing last month performance compared to this month. Thresholds may
be set for any parameter that trigger an alarm if exceeded and send an SMS to the service engineer.
2.1
User Access Levels
There are various types of user with different levels of access to the system; These are:
User:
view and analyse data, view data for Probes, Base Sites and Areas
Admin:
as User but also able to configure and create Probes, Base Sites and Areas
Super Admin:
As Admin but also able to configure and create users and admins
System Administrator:
Full access, able to configure and create TETRA networks
Users, Admins and Super Admins only have access to a single TETRA network. The system administrator
has access to all TETRA networks.
2.2
Logging In
Use any browser to access the Aries server – for example the main RSI server is at www.rsi-aries.com.
Enter your username and password in the box in the top-right of the window as shown below:
Figure 3: Log In
Once logged in your username will appear on the black bar.
Click on the Edit link to
change the password
Figure 4: Logged In
When you have finished using Aries then click the ‘Log Out’ link. Click on the (Edit) link to change the
password:
Radio Systems Information Ltd.
Page 7
Aries Reference Manual
Section 2 – Viewing and Analysing Data
Figure 5: Changing the password
If the Password Complexity Rules option has been selected for this network then the password must meet
the following rules:
• Minimum 8 characters
• At least 1 uppercase (A - Z)
• At least 1 lowercase (a - z)
• At least 1 numeral (0 - 9)
• Must be different to previous 3 passwords
In addition passwords will expire after 90 days with a warning email being sent to the user at 14, 7 and 1
days notice before the automatic expiry. When a password expiry warning has been sent the (Edit) link will
change colour to yellow when there at less than 14 days left before expiry, and then to flashing red when
there are less than 7 days.
Radio Systems Information Ltd.
Page 8
Aries Reference Manual
2.3
Section 2 – Viewing and Analysing Data
Selecting Data for Analysis
Aries data is displayed using maps, graphs, tables and warnings. For all of these methods it is possible to
filter the data first so that only a part of the data is displayed. The data may be filtered by date & time,
Probe, Base Site, Areas and a general value filter. The filters are selected from the relevant tab on the
configuration form.
2.3.1
Analysis profiles
It is possible to create a number of named analysis profiles which contain all of the settings for a particular
type of analysis. This makes it very easy to set up combinations of settings to analyse data in a particular
way and re-use these in the future.
Either select the name of the analysis profile from the drop-down list on the configuration form to use an
existing profile or enter a new name in the ‘save as new profile’ box.
Selecting the ‘Share this profile’ box allows other users to see and use this profile but not change it. The
profile name will appear in their list of profiles with the user name of the owner prefixed to the profile name.
Users can save the shared profile under a different name at which point they will be able to change the
configuration settings. After setting a profile to shared, other users that are logged in will need to refresh
their browser before the shared profile is visible.
Selecting the ‘Do not change Map position’ box will prevent the user’s map from changing each
2.3.2
Filter by Date
Three options are possible as shown below:
Figure 6: Filter on Date Range
In general the first two options should be used for real-time monitoring so that new data arriving at the
server is always used in the analysis and display.
The third option is used for historical analysis.
The date setting should be specified carefully so that you don’t select an excessive amount of data that will
slow down the analysis. Selecting very large amounts of data together with a fast regular update places a
heavy load on the server and can result in poor performance for all users. The Aries system will warn you
if you have selected a large amount of data with a fast update rate, or historical data with any update rate
as shown in the following warnings:
Figure 7: Analysis warnings
Radio Systems Information Ltd.
Page 9
Aries Reference Manual
2.3.3
Section 2 – Viewing and Analysing Data
Filter by Probe
Data from all or a single probe may be selected as shown below:
Figure 8: Filter on Probe
Note that at least one probe must be selected.
2.3.4
Filter by Base Site
Data from all or a selection of base sites may be selected as shown below:
Figure 9: Filter on Base Site
Note that having all base sites unselected means that there is no filtering on base site so that all data is
displayed. If all base sites are selected then only data collected from those base sites will be displayed, so
that if data is collected unexpectedly from a base site not in the list the data will not be displayed. The
analysis time will be faster if no Base Sites are selected.
Radio Systems Information Ltd.
Page 10
Aries Reference Manual
2.3.5
Section 2 – Viewing and Analysing Data
Filter by Area
Data from a specific area may be selected as shown below.
Figure 10: Filter on Area
Note that having all areas unselected means that here is no filtering on area so that all data is displayed.
See section 2.4 for more information about areas. The analysis time will be faster if no Areas are selected.
Radio Systems Information Ltd.
Page 11
Aries Reference Manual
2.3.6
Section 2 – Viewing and Analysing Data
Filter Events
General filters may be created that are applied to either events or as a Custom filter to any of the probe
parameters. Multiple Custom filters may be created.
Figure 11: Events Filter
See section 2.4 for an explanation of the events.
Radio Systems Information Ltd.
Page 12
Aries Reference Manual
2.3.7
Section 2 – Viewing and Analysing Data
Filter Custom
The following parameters may be selected for the Custom filter:
RSSI
LAC
Vehicle Speed
C1
BN RSSI
BN C2
Call Setup Time
Frequency
Packet Data Download Time
Figure 12: Filter Custom
Radio Systems Information Ltd.
Page 13
Aries Reference Manual
2.4
Section 2 – Viewing and Analysing Data
Using Maps
Aries includes a user friendly map engine to display the probe data in a map format as shown below.
Figure 13: Example map showing Aries events superimposed on top
It is possible to select the preferred mapping source by clicking on the blue icon in the upper-right of the
window. This displays the available map sources as shown below:
Figure 14: Mapping source selector
It is up to the end-user to ensure that they hold the appropriate license if Google is chosen as a map
source.
In addition this pop-up allows the user to enable or disable the map display of Areas, Squares, Data, Probe
Current Positions, Base Sites and Labels. This functionality is repeated to some extent on the map
configuration form.
Radio Systems Information Ltd.
Page 14
Aries Reference Manual
Section 2 – Viewing and Analysing Data
Events from the probe are shown on the map as icons:
Monitor event, rate configurable for each probe, see section 4.2.3
Call Setup Success
Call Setup Fail
Uplink Speech Sample. Samples with suspect scores are shown as ‘Marked’ and may be
excluded from the analysis. See section 2.5
Downlink Speech Sample. Samples with suspect scores are shown as ‘Marked’ and may be
excluded from the analysis. See section 2.5
Call Completed Successfully
Call Dropped
Handover
Network Registration Event. The Version 2 Aries probe produces the Network Registration
event when connected to a Motorola TETRA radio. This event occurs when the radio is powered
up and represents the time taken for the radio to discover a suitable control channel on the
TETRA network and then to register on the TETRA network ready. The event time is taken from
messages sent through the radio PEI port. The Aries probe measures the time from +CTOM
message to the +CREG message reporting the value in milliseconds.
Failed Handover, produced if a ‘No Service’ or ‘additional ‘Handover’ event occurs within X secs
of the original events. X is set to a default of 20 secs but is configurable for each probe.
No Service
Error, may be any of the following:
Serial Comms Error
Running on battery
Battery is too low
External power applied
TETRA Radio Initialisation or Limited Service Mode
DMO
Limited Service Mode
PIN Lock Mode
Custom TETRA Request
Tracking, produced at the same rate as the Monitor event when no response is received form
the TETRA terminal i.e. it is powered off or not connected.
Packet Data Test Success
Packet Data Test Fail
The colour of the icon may be set to indicate the value of a parameter such as RSSI or LAC.
In addition the map also shows the base site and probe locations:
Base Site location, colour indicates LAC, see section 2.3 for
configuring the colour. If multiple base sites are specified with the same latitude and longitude then the
icon is split into the different colours indicating each base site LAC, antenna beamwidth and direction. The
different antenna radius sizes are purely to help identification.
Probe current location, colour indicates probe ID, see section 2.2 for configuring the colour
Radio Systems Information Ltd.
Page 15
Aries Reference Manual
Section 2 – Viewing and Analysing Data
Clicking on any icon on the map will show a pop-up box with full details about the event as shown below.
Clicking on handover events displays additional Cell Broadcast information about the base site (only
available if the probe is connected to a Motorola terminal).
Click on the frequency
to show other Base
Sites
using
this
frequency. See fig 18
Click on the Base Site
Name to jump to that
Base Site on the map
Frequencies coloured red
indicate that this is not in
the Planned Frequency list
for this Base Site
Figure 15: icon pop-up info box for data events
Radio Systems Information Ltd.
Page 16
Aries Reference Manual
Section 2 – Viewing and Analysing Data
Best Neighbour Cell has
dotted thick line
Serving Cell has solid
thick line
Other Neighbour Cells
have thin dotted line
Figure 16: Lines drawn from the data event to the serving and neighbour cells
Radio Systems Information Ltd.
Page 17
Aries Reference Manual
Section 2 – Viewing and Analysing Data
Clicking on a base site icon also displays a pop-up information box that includes the last collected Cell
Broadcast information as well as the Neighbour Cell information as shown below:
Frequencies coloured red
indicate that this is not in
the Planned Frequency list
for this Base Site
Frequencies
highlighted
orange indicate that two or
more neighbours are using
the same frequency
Figure 17: icon pop-up info box for base sites
Figure 18: Lines drawn from the base site to the neighbour cells
Radio Systems Information Ltd.
Page 18
Aries Reference Manual
Section 2 – Viewing and Analysing Data
Frequencies may be displayed in MHz or channel numbers. The choice is set by the Sysadmin user for
each network (see section 2.5).
The Planned Frequencies for a base site are defined by the user however the Used Frequencies and
Neighbour Cell frequencies are collected by the probe and are updated for each site as new data is
gathered.
Used Frequencies that do not appear in the Planned Frequency list are coloured red indicating that the
network may not be configured correctly.
Frequencies that appear in the Used Frequency and Neighbour Cell lists are updated as soon as a new
frequency is logged however if a frequency is not logged for more than a certain period then it is removed
from the list. This period is set by the SYSADMIN with a default of 3 days (see section 2.5). The only
exception to this is if no neighbour cell lists have been logged for the base site in which case the
frequencies do not expire.
The Handover Count lists the percentage of handovers occurring from this base site to the listed base site
and gives a good indication of which neighbour cells are critical. In addition the number in brackets gives
the number of failed handovers to the listed base site.
When a frequency is clicked the map displays bumpy lines from the event or base site to the other base
sites using that frequency within a radius specified by the SYSADMIN (see section 2.5).
Figure 19: Lines drawn from the data event or base site to other base sites also using that frequency
Radio Systems Information Ltd.
Page 19
Aries Reference Manual
Section 2 – Viewing and Analysing Data
Clicking the ‘Configuration’ button brings up the following form:
Figure 20: Map Configuration
The ‘Map Update Rate’ selection allows the map to be updated automatically as new data is received in
real-time from the probes every 10 seconds, 60 seconds or 5 minutes or not at all.
The ‘Follow the probe’ selection allows the map to pan automatically so that a specified probe is kept in the
centre of the screen.
The configuration has three main areas as described in the following sections:
Radio Systems Information Ltd.
Page 20
Aries Reference Manual
2.4.1
Section 2 – Viewing and Analysing Data
Icon Colour
Icons may be coloured by one of the following parameters:
Parameter
RSSI
C1
BN RSSI
BN C2
Call Setup Time
LAC
BN LAC
Vehicle Speed
Handover Time
IP Data Test Time
Units
dBm
dB
dBm
dB
msec
Km/h
msec
msec
Up to 3 thresholds (4 colours) may be defined for all of the parameters except LAC which takes the colour
from the Admin Site Table – see section 4.2.
RSSI is measured in units of dBm.
‘No Service’ and ‘Error’ events are not coloured by the parameter as they would normally only be received
when the data is not available from the TETRA radio.
Figures 14 and 15 below show examples of icons coloured by LAC and RSSI:
Figure 21: Example of icons coloured by LAC
Radio Systems Information Ltd.
Page 21
Aries Reference Manual
Section 2 – Viewing and Analysing Data
Figure 22: Example of icons coloured by RSSI
Radio Systems Information Ltd.
Page 22
Aries Reference Manual
2.4.2
Section 2 – Viewing and Analysing Data
Icon Type
The tickbox next to each icon type on the Filter Events tab specifies which icons are displayed on the map.
Figure 16 below shows an example of a map showing only handover events (excessive handovers in an
area can sometimes indicate network configuration problems).
Figure 23: Example of displaying only handover events coloured by LAC
Radio Systems Information Ltd.
Page 23
Aries Reference Manual
2.4.3
Section 2 – Viewing and Analysing Data
Square Km Analysis
The square km analysis provides a method of analysing the data that prevents the results being biased by
taking too many samples in one location.
The analysis process creates a grid of 1km squares across the survey area and then allocates each
sample to the relevant square. If more than a minimum number of samples have been taken in a square
then all of the samples in that square are used to determine if the square has passed or failed. Three
different criteria are available for determining the status of the square:
RSSI
pass = greater than x% of the samples greater than y dBm signal level
Call Success
pass = greater than x% of call attempts successful
Call Setup Time
pass = greater than x% of the call attempts less than y msec
Handovers:
pass = less than x% of all events
Handover Time:
pass = greater than x% of handovers less than y msec
IP Data Test Success: pass = greater than x% no error
IP Data Test Time:
pass = greater than x% of tests less than y msec
Squares are then coloured according to whether they have passed or failed.
To make it easier to see the squares the icons may be hidden by clicking the ‘Hide Icons’ tickbox.
The square Km grid is locked to the Ordnance Survey grid in the U.K. and to the UTM grid in the rest of the
world.
Figure 24: Example of Square Km Analysis, red squares have failed the criteria
Radio Systems Information Ltd.
Page 24
Aries Reference Manual
2.4.4
Section 2 – Viewing and Analysing Data
Failure Simulation Mode
Base Sites may be put into Failure Simulation mode – this is where the serving base site for an event is
replaced by the next best serving base site to simulate the resulting coverage if the main base site were to
fail. This type of analysis only affects the results displayed on the map – it does not affect the results for
the Graph, Summary, KPI or Neighbour Analysis.
Radio Systems Information Ltd.
Page 25
Aries Reference Manual
2.5
Section 2 – Viewing and Analysing Data
Using Graphs
Aries provides powerful graphing functionality that allows multiple graphs to be created and updated in
real-time as new data arrives at the server. Either click on ‘New Graph’ or click anywhere on an existing
graph to display the configuration form as shown below:
Figure 25: Graph Configuration
The ‘Graph Update Rate’ selection allows the graph to be updated automatically as new data is received in
real-time from the probes every 10 seconds, 60 seconds or 5 minutes or not at all.
Two types of graphs may be created, ‘Values Type’ and ‘Summary Type’ as explained in the following
sections.
2.5.1
Values Type Graphs
The following parameters may be chosen for the X Axis and Y Axis:
X Axis
Time
Y Axis
RSSI
C1
BN RSSI
BN C2
Call Setup Time
A separate graph line is created for each probe. The following are examples of values type graphs:
Figure 26: Example values type graph of RSSI against time
Figure 27: Example values type graph of Call Setup Time against time
Radio Systems Information Ltd.
Page 26
Aries Reference Manual
2.5.2
Section 2 – Viewing and Analysing Data
Summary Type Graphs
The following parameters may be chosen for the X Axis and Y Axis:
X Axis
Time
Time of Day
LAC
Probe ID
Area
Y Axis
RSSI min/avg/max
Call Setup Time min/avg/max
Grade of Service
All Events Total
Call Setup Fail Total
Call Drop Total
No Service Total
Handover Total
If ‘Time’ is selected for the X Axis then it is possible to select a sample period of 15mins, 30mins, 60mins,
1 day.
If ‘Grade of Service’ is selected for the Y Axis then a threshold must also be entered in msec. The graph
then shows the % of call setups that are less than this threshold so that a Grade of Service of 100% means
that all call setup times were less than this threshold.
The following are examples of summary type graphs:
Figure 28: Example summary type graph of Call Setup Time minimum, average and maximum for each
base site
Figure 29: Example summary type graph of RSSI minimum, average and maximum for each base site
Figure 30: Example summary type graph of Call Fail reason for each probe
Radio Systems Information Ltd.
Page 27
Aries Reference Manual
2.6
Section 2 – Viewing and Analysing Data
Using the Table
Aries presents the raw data from the probes on the tabular page as shown below.
Figure 31: Tabular results
Results may be ordered by time (i.e. first event or last event is top of page 1) by clicking on the ^ icon in
the Time column.
The Tabular results may be exported to a comma separated text file by clicking the ‘Export Data’ link.
There is an option to compress the exported file into a standard zip file format.
Some events such as handovers or errors will have additional information associated with them. This may
be viewed by hovering the mouse over the blue text for the Event Type.
Clicking on ‘Configuration’ brings up the configuration form where the only specific parameter for tabular
results is the Update Rate as shown below.
Figure 32: Configuration form for tabular results
Radio Systems Information Ltd.
Page 28
Aries Reference Manual
2.7
Section 2 – Viewing and Analysing Data
Using Warnings
Aries is capable of monitoring many parameters and then sending a warning SMS and/or email when any
parameter goes above or drops below a threshold. The Aries web page for configuring the warnings is
shown below.
Figure 33: Warnings
Warnings are configured by either clicking on ‘Add Warning’ to create a new warning or on ‘Configure’ to
edit the parameters. This displays the form shown below.
Radio Systems Information Ltd.
Page 29
Aries Reference Manual
Section 2 – Viewing and Analysing Data
Figure 34: Warnings configuration
The following parameters should be set for each warning:
Parameter
Warning Text
Comment
Enter the text that will be sent in the SMS message when
the warning is triggered
Select the time period for checking the parameter
Check Period
Time
Delay
sending warning
after
GSM Number
Email
Warning Type
Select the time period that must elapse after a warning
before another warning for the same parameter is sent
again. This prevents repeated SMS and/or email being sent
if the parameter continues to trigger the warning
Enter the GSM number that the warning SMS should be
sent to. If left blank then no SMS is sent. Enter multiple
numbers by separating them with commas.
Enter the email address that the warning message should
be sent to. If left blank then no email is sent. Enter multiple
email addresses by separating them with commas.
There are 8 types of warning:
- Check site frequency against site list
this checks that the base site frequency being reported for
each event is in the list of frequencies expected for that
base site. This guards against a common problem where a
base-site is re-configured to work on a different frequency
without re-configuring the rest of the network which can
lead to unexpected co0channel interference
Radio Systems Information Ltd.
Page 30
Aries Reference Manual
Section 2 – Viewing and Analysing Data
- Square km
this takes the output from the square km analysis and
creates a warning if there are too many failed squares
- Graph
this takes the output from the graph settings and
determines if any value exceeds or falls below the
threshold. If a summary graph with min/avg/max values is
used then it is the average value that is compared against
the threshold. For a summary graph with all events then
every event is compared against the threshold.
- Summary: Base Site, Areas, Probes Mobile, Probes Static
If any if the items in the summary analysis fails then a
warning is produced
- Neighbours
If there are any entries in the specified neighbour analysis
list then a warning is produced.
Note that all warnings should be used with a date range
setting that includes the most recent data, e.g. last hour
with a check period of 10 minutes.
To perform a manual check to test the warning then click ‘Check Now’ in the main window.
To delete a warning click on the
symbol in the main window.
Once a warning has been issued and the SMS and/or email sent then a copy of the warning will appear in
the ‘Issued’ page.
To check the email and SMS numbers, click the ‘Test’ button and a test message will be sent immediately.
A typical warning sent by SMS or email would look similar to the following example:
----------------------------------------------------------------------------------------------ID: 257
Date: 13/02/2010 18:40:01
Profile: probe_warning
Username: jsmith
Message: Probes Mobile - No Service
The following Probes Mobile has failed the summary analysis:
test_probe7
--No Service Events count: more then 1
-----------------------------------------------------------------------------------------------
Radio Systems Information Ltd.
Page 31
Aries Reference Manual
2.8
Section 2 – Viewing and Analysing Data
Using Summary
Aries provides a summary screen showing the status of individual base sites, areas or probes – this
display is ideal for an at-a-glance screen showing the overall status of the network. If the base site (or area
or probe) passes a number of Key Performance Indicators (KPI) then the item is coloured green indicating
a pass. If any of the KPIs is a fail then the item is coloured red indicating a possible problem. If there are
insufficient measurements then the item is coloured grey. Clicking on one of the items displays a pop-up
box showing more information about the individual KPIs and whether they have passed or failed. A typical
summary screen is shown below.
Figure 35: Summary screen showing the pop-up info box
The summary KPIs are configured from the configuration form shown below.
Radio Systems Information Ltd.
Page 32
Aries Reference Manual
Section 2 – Viewing and Analysing Data
Figure 36: Summary configuration form for base sites and areas
The configuration form for the probes summary includes an additional parameter ‘No Service Events count
less than’ as shown in the form below:
Figure 37: Summary configuration form for probes
Radio Systems Information Ltd.
Page 33
Aries Reference Manual
Section 2 – Viewing and Analysing Data
In addition it is possible to specify the tab caption for the probes summary analysis. The 2 tabs are
normally called ‘Probes Mobile’ and ‘Probes Static’ however there is no difference between the two tabs
and they can be used in other ways if preferred. The filter to specify static probes and mobile probes for
each tab must be set by the user.
The ‘RSSI against threshold’ is used to compare the probe RSSI against the threshold specified for each
probe in the probe configuration form. This is intended for use with static probes monitoring a single base
site where the RSSI level will be fairly constant.
For all summary configuration forms it is possible to select either ‘Event Count, more than’ or ‘Event Count,
less than’ but not both at the same time. The ‘Event Count, less than’ is intended to be used in conjunction
with warnings when checking for unwanted events so that normally there would be no events however if
any of the specified events appears then this check fails, triggering the warning.
For probes, it is possible to specify whether the ‘Event Count, more than’ test produces a red fail or a grey
insufficient data result by clicking the ‘set result to grey if test fails’ clickbox. If this test is being used for a
warning then the box should be unticked so that a red fail is produced that triggers the warning. A grey
result does not trigger a warning.
The summary analysis results for all base sites, probes and areas may also be viewed on a map on the
‘Map View’ tab as shown below:
Figure 38: Summary results displayed on map
Radio Systems Information Ltd.
Page 34
Aries Reference Manual
2.9
Section 2 – Viewing and Analysing Data
Using KPI
The results for the full set of KPIs is available on the KPI screen as shown below.
Figure 39: KPI results screen
The KPI results may be exported to a comma separated text file by clicking the ‘Export Data’ link.
The KPI are configured from the configuration form shown below.
Radio Systems Information Ltd.
Page 35
Aries Reference Manual
Section 2 – Viewing and Analysing Data
Figure 40: KPI configuration form
Radio Systems Information Ltd.
Page 36
Aries Reference Manual
Section 2 – Viewing and Analysing Data
2.10 Using Neighbour Analysis
There are a number of different built-in analysis methods for detecting neighbour cell problems.
Missing Neighbour Cells: this lists base sites that are within a specified distance of a base site but are not
in the neighbour cell list. There may be a good reason for this, for example the base site may be sectored.
Figure 41: Missing Neighbour Cells
Unplanned Frequencies: this lists base sites where a frequency has been used that is not in the Planned
Frequency list.
Figure 42: Unplanned Frequencies
Radio Systems Information Ltd.
Page 37
Aries Reference Manual
Section 2 – Viewing and Analysing Data
Unused Frequencies: this lists base sites where a frequency is in the Planned Frequency list but is not in
the Used Frequency list.
Figure 43: Unused Frequencies
Possible Duplicate LAC. This lists base sites where an event has been logged more than a specified
distance from the serving base site. This may indicate handover problems with cell boundaries being
dragged, or it may indicate a possible duplicate LAC being assigned in the network.
Figure 44: Possible Duplicate LAC
Radio Systems Information Ltd.
Page 38
Aries Reference Manual
Section 2 – Viewing and Analysing Data
Incorrect Neighbour Frequency: this lists base sites where the neighbour frequency being broadcast does
not match any frequency in the Planned or Used frequency lists of the specified base site.
Figure 45: Incorrect Neighbour Frequency
Asymmetric Neighbour Cells: this lists base sites which do not include a neighbour cell which does itself list
the specified base site.
Figure 46: Aysymmetric Neighbour Cells
Radio Systems Information Ltd.
Page 39
Aries Reference Manual
Section 2 – Viewing and Analysing Data
Adjacent Channel Analysis: this lists base sites within a specified distance using an adjacent channel (i.e.
is +/- 1 channel). This is useful to help detect possible interference problems where adjacent channels are
being used too close to each other.
Figure 47: Adjacent Channel Analysis
Radio Systems Information Ltd.
Page 40
Aries Reference Manual
3
Section 2 – Viewing and Analysing Data
Voice Quality Testing
Digital radio networks use speech vocoders and require sophisticated measurement techniques using
human speech samples to provide a true and repeatable Mean Opinion Score (MOS). Aries achieves this
by using a digital signal processing algorithm with an auditory model that takes into account the
psychophysical properties of human hearing and the subjectivity of the distortion in the received signal.
This means that the measured MOS will truly reflect the speech quality perceived by the user and will
typically be within a half point of a MOS score determined by a controlled subjective test in a laboratory.
The algorithm used in Aries is the industry standard known as 'PESQ' (Perceptual Evaluation of Speech
Quality) meeting ITU recommendation P.862.
Conventionally Bit Error Rate (BER) and signal strength have been used as the prime indicators of radio
system quality however, now that objective methods for measuring speech quality are available, it makes
more sense to use speech quality as the prime indicator. BER and signal strength have the following
limitations:
•
Voice quality is the only parameter to compare networks of different technologies.
•
Voice quality is measured in both the uplink and downlink whereas BER and signal strength are
normally only measured on the downlink.
•
Signal strength used on its own is not always a good indicator of performance for digital networks.
Multi-path effects that cause inter-symbol interference may mean that a strong signal could have a
poor BER.
•
BER does not remain at a constant level during a call hence laboratory measurements of vocoder
speech quality at a constant BER are not always representative of the speech quality produced by
a signal with a fast changing BER.
•
BER does not detect failures within voice processing circuits.
•
BER does not detect echo or other audio effects caused by the PSTN.
Voice Quality testing using the PESQ algorithm has therefore become the de facto standard methodology
for testing TETRA network performance.
Radio Systems Information Ltd.
Page 41
Aries Reference Manual
3.1
Section 2 – Viewing and Analysing Data
How PESQ works
PESQ measures one-way, end-to-end voice quality and is designed for use with intrusive tests: a signal is
passed through the system under test, and the degraded output is compared with the input (reference)
signal.
The test signals must be speech-like, because many systems are optimised for speech, and respond in an
unrepresentative way to non-speech signals (e.g. tones, noise, ITU-T P.50). The processing carried out by
PESQ is illustrated in fig 5.1 below.
Reference signal
Level
align
Input
filter
Auditory
transform
Time align
and equalise
System under
test
Degraded signal
Level
align
Input
filter
Figure 48: Structure of PESQ
Disturbance
processing
Cognitive
modelling
Auditory
transform
Identify bad
intervals
Prediction of
perceived
speech quality
Re-align bad intervals
The model includes the following stages:
Level alignment. In order to compare signals, the reference speech signal and the degraded signal are
aligned to the same, constant power level. This corresponds to the normal listening level used in subjective
tests.
Input filtering. PESQ models and compensates for filtering that takes place in the telephone handset and in
the network.
Time alignment. The system may include a delay, which may be variable. In order to compare the
reference and degraded signals, they need to be lined up with each other. Time alignment is then done in
a number of stages. First it estimates the delay applied to each speech utterance, then searches for delay
changes that occurred within utterances. Finally, bad intervals (sections which may have been mis-aligned)
are realigned. Delay variations during speech may be audible, so PESQ samples across each delay
change to determine its subjectivity.
Auditory transform. The reference and degraded signals are passed through an auditory transform that
mimics key properties of human hearing.
Disturbance processing. The disturbance parameters are calculated using non-linear averages over
specific areas of the error surface:
the absolute (symmetric) disturbance: a measure of absolute audible error
the additive (asymmetric) disturbance: a measure of audible errors that are significantly louder than the
reference
These disturbance parameters are converted to a PESQ score, which ranges from –1 to 4.5. This may also
be convert to PESQ LQ which is on a P.800 MOS-like scale from 1 to 5 as shown below:
5
4
3
2
1
Radio Systems Information Ltd.
Speech Quality
Excellent
Good
Fair
Poor
Bad
Page 42
Aries Reference Manual
3.2
Section 2 – Viewing and Analysing Data
Performance
Early models for quality assessment (for example, P.861 PSQM, P.861 MNB, PSQM+) were mainly
designed for assessing speech codecs and are unsuitable for use with today’s networks because they are:
•
inaccurate in predicting quality with some important codecs
•
unable to take proper account of noise or errors such as packet loss
•
unable to account for the filtering effect of analogue elements (for example, handsets and 2-wire
access)
•
unable to deal with variable delay
PESQ compared with PSQM, PSQM+ and MNB
The ITU-T use correlation coefficient as a measure of the accuracy of models like PESQ at predicting
subjective MOS, using P.800/P.830 subjective tests as a benchmark.
The table below presents correlation figures for 38 subjective tests that were available to the PESQ
developers.
No. tests
19
Type
Mobile
Network
Corr. Coeff.
Average
Worst-case
PESQ
0.962
0.905
PAMS
0.954
0.895
PSQM
0.924
0.843
PSQM+
0.935
0.859
MNB
0.884
0.731
9
Fixed
Network
Average
Worst-case
0.942
0.902
0.936
0.805
0.881
0.657
0.897
0.652
0.801
0.596
10
VoIP
Multi-type
Average
Worst-case
0.918
0.810
0.916
0.758
0.674
0.260
0.726
0.469
0.690
0.363
The table below presents figures from an independent evaluation of PESQ by four of the world’s leading
test labs. These tests cover a very broad range of fixed, mobile and VoIP networks as well as
combinations of different types of network.
Test
Type
1
2
3
4
5
6
7
8
Mobile: real network measurements
Mobile: simulations
Mobile: real network, per file only
Fixed: simulations 4-32kbit/s codecs
Fixed: simulations, 4-32kbit/s codecs
VoIP: simulations
Multiple network types: simulations
VoIP frame erasure concealment
simulations
Average
Worst-case
Corr.
Coeff.
0.979
0.943
0.927
0.992
0.974
0.971
0.881
0.785
0.932
0.785
The average correlation is a measure of how well models perform on average in a wide range of
conditions. The worst-case correlation is very important – this shows what happens when the models are
used in the most challenging conditions.
With every type of network, on both average and worst –case performance, PESQ is much better than
PSQM, PSQM+ and MNB. PESQ is also slightly better than PAMS, particularly in worst case performance.
In fact the performance of PESQ was so good that the old recommendation P.861, which specified PSQM
and MNB, was withdrawn by the ITU as soon as they standardised PESQ as P.862.
Radio Systems Information Ltd.
Page 43
Aries Reference Manual
3.3
Section 2 – Viewing and Analysing Data
Which PESQ?
Aries provides a choice of PESQ results: either P.862 (known as PESQ) or P.862.1 (known as PESQ
MOS-LQO).
P.862 (PESQ) provides results on a MOS-like scale ranging from -0.5 to 4.5.
P.862.1 (PESQ MOS-LQO) provides a better match to the true Mean Opinion Score scale of 0 to 5.
The basic analysis is the same for both results, with the results simply mapped to the MOS scale in a
different way.
Radio Systems Information Ltd.
Page 44
Aries Reference Manual
3.4
Section 2 – Viewing and Analysing Data
Voice Quality Testing using Aries
Aries measures voice quality using a normal probe together with a slave probe that is installed at a fixed
location. The slave probe uses the same hardware as the normal probe but has different internal software.
The slave probe should be installed at a location with excellent TETRA signal strength so that the radio
path from the network to the slave probe can be assumed to be perfect.
If more than one slave probe is installed at a single location, it is reccomended that the TETRA antennas
are sufficiently well isolated to ensure the TETRA terminals do not cause mutual interference. In addition,
multiple TETRA terminals could overload the local TETRA base station so the number of slave probes at a
single location should be limited.
The following diagram shows the probe configuration for voice quality testing:
Normal
Probe
in
Slave
Probe
TETRA
Strong TETRA signal
Aries
Figure 49: PESQ testing configuration
The normal probe initiates all voice quality test calls and must be exclusively paired with a slave probe –
see section 4.2.4. All testing is done using a TETRA group call with each pair of normal and slave probes
being assigned to a different TETRA group.
The structure of a typical voice quality test call (4 sec speech sample, 2 samples each direction repeated
twice) is given below:
Master (mobile)
Call Setup Initiated
Call Started
Icon
Event Time
0 sec
3 sec
Slave (fixed)
Incoming Call
Play 1st Audio
5 sec
Record incoming audio
nd
Play 2 Audio
10 sec
Record incoming audio
Release PTT
Record incoming audio
14 sec
15 sec
16 sec
Press PTT
Play 1st Audio
Record incoming audio
21 sec
Play 2nd Audio
25 sec
26 sec
27 sec
Release PTT
Press PTT
Play 1st Audio
Record incoming audio
nd
Play 2 Audio
32 sec
Record incoming audio
Release PTT
Record incoming audio
36 sec
37 sec
38 sec
Press PTT
Play 1st Audio
Record incoming audio
43 sec
Play 2nd Audio
48 sec
52 sec
Release PTT
Wait for normal call end after PTT release
Radio Systems Information Ltd.
Page 45
Aries Reference Manual
3.5
Section 2 – Viewing and Analysing Data
Voice Quality Analysis
Voice quality samples are displayed on the table and map event pop-up form as shown below:
Click to listen to
audio sample
PESQ results
Click to listen to
audio sample
PESQ results
Figure 50: Voice Quality events
The PESQ values for P.862.1, P.862 and Audio Level (dB) are displayed for each sample. The sample
audio may be replayed by clicking on the loudspeaker icon. This is often helpful to understand the nature
of any degradation in the audio.
PESQ results are analysed to produce a summary for each base station site as shown below on the map
base site pop-up form:
Figure 51: Voice Quality analysis for a base site
Overall average scores are produced for uplink and downlink separately as well as a combined value plus
values for each frequency used at the base station. The data for the analysis is taken from the same time
period as currently selected for the map analysis.
The same analysis is also displayed on the ‘VQ Analysis’ main tab for all base sites as shown below:
Figure 52: Voice Quality analysis for all base sites
Radio Systems Information Ltd.
Page 46
Aries Reference Manual
Section 2 – Viewing and Analysing Data
The configuration settings for the VQ analysis are shown below:
Figure 53: Voice Quality analysis configuration
The following parameters may be configured from this form:
Parameter
Minimum Number of
Samples
Score Type to use
Report Value
Threshold value
Radio Systems Information Ltd.
Comment
For statistical validity it is better
to base the analysis on a large
number of samples – typically
10 should be regarded as the
absolute minimum
The PESQ value may be either
P.862 or P.862.1. see section
3.3
The mathematical method of
producing the result may be
selected from the following
options depending on the
purpose of the analysis and the
confidence level required:
Average
50% (=median)
90%
95%
Any results below this value
shall be displayed in red to
highlight poor scores. This is
also used to trigger a warning if
configured from the ‘Warning’
tab.
Page 47
Aries Reference Manual
3.6
Section 2 – Viewing and Analysing Data
Marked Samples
There are several circumstances when voice quality measurement can be affected by factors not directly
related to network performance. Aries provides a mechanism for detecting these bad samples and
excluding them from the analysis. The situations that are detected include:
Call synchronisation lost
Handover in speech sample
Invalid file size
These situations are displayed to the user by an orange ‘Marked’ icon next to the speech sample event as
shown below:
Figure 54: Marked voice quality samples
Clicking on the icon displays the following form allowing the user to either over-ride the ‘Marked’ status or
to add ‘Marked’ status to other samples that have not bee automatically detected as suspect:
Figure 55: Marked sample setting
Marked samples may then be excluded or included from voice quality analysis and maps and tables using
the norrmal filter event function.
Radio Systems Information Ltd.
Page 48
Aries Reference Manual
4
Admin Functions
4.1
Configuring Networks
Section 3 – Admin Functions
This functionality is only available to the system administrator. The Aries server may be configured for use
with one or more TETRA networks with users and probes being assigned for use on just one network. This
provides a way of completely segregating groups of probes or users perhaps for testing purposes. New
Networks are setup and edited form the Aries web page shown below:
Figure 56: Configuring Networks
Click on either ‘Add Network’ to add a new network or on the
the parameters. This displays the form shown below:
Radio Systems Information Ltd.
symbol for each existing network to edit
Page 49
Aries Reference Manual
Section 3 – Admin Functions
Figure 57: Configuring Network parameters
The ‘Grid Ref’ parameter is used to specify the mapping system that is used to produce the square km
analysis. For the UK this should be set to OSGB.
The ‘Frequency representation’ parameter is used to set the method of displaying radio channel
frequencies: either in MHz or channel number. If channel number is selected then the Offset and Spacing
in MHz must also be specified separately for frequencies in the 300MHz and 400MHz bands.
The System Administrator will always view frequencies in MHz because of the potential of confusion from
seeing several different networks with different settings.
The expiry period for frequencies in the Used Frequency list and the Site Neighbour list may be specified.
Note that the ‘Used Frequency’ list and ‘Site Neighbour’ list may be cleared by a Super Admin user from
the Base Sites page. See section 2.2.
The distance limit for the lines linking to base sites using the same frequency may be specified. See
section 2.4.
Radio Systems Information Ltd.
Page 50
Aries Reference Manual
4.2
Section 3 – Admin Functions
Configuring Users
This functionality is only available to super admin users and above. The super admin user is able to specify
which users are able to access Aries using the Aries web page shown below:
Figure 58: Configuring Users
Click on either ‘Add User’ to add a new user or on the
parameters. This displays the form shown in below:
symbol for each existing probe to edit the
Figure 59: Configuring User parameters
Users may either be ‘Super Admin’, ‘Admin’ or ‘User’ which have different levels of access to Aries as
defined in section 2.1.
Radio Systems Information Ltd.
Page 51
Aries Reference Manual
Section 3 – Admin Functions
If ‘Force using HTTPS’ is enabled then accessing the Aries server using http://www.xxxxx will be translated
to https://www.xxxxx and the browser will display the security icon confirming that communications
between the browser and server are now secure. All aspects of the user interface remain the same when
using https access however there is a small performance reduction.
The checkboxes under ‘Allowed Maps’ enable or disable the possible mapping sources available to this
user.
To delete a user click on the
symbol in the main window.
To force a user who is currently online to go offline click the
To list the previous login history of a user click the
IP address as shown below:
symnbol.
symbol. This will display all previous logins and the
Figure 60: User login history
Radio Systems Information Ltd.
Page 52
Aries Reference Manual
4.3
Section 3 – Admin Functions
Configuring Probes
This functionality is only available to admin users and above.
Probes may be configured, enabled/disabled and have new firmware downloaded all controlled from the
Aries web page as shown below:
Figure 61: Configuring Probes
Probes continually check the server to see if there is a new configuration or software version to download.
Usually a probe will detect that there is an update within 60secs however if the probe is out of GSM
coverage then this may take longer. If the probe has not responded within 10 mins then the server will
send an encrypted SMS to the probe (if this functionality has been enabled for the server). The probe will
validate the SMS by checking the IMEI number embedded in the SMS and then react accordingly.
Symbols:
- click to edit the probe parameters.
- click to delete a probe
- probe is currently in call generator mode
- probe is offline / online (hover over icon to show when probe was last online)
- probe has audio files to send back to server (hover over icon for how many)
- TETRA radio is in AT mode (green), Airtracer mode (blue) or Not Connected (grey)
- send custom AT command to TETRA radio
4.2.1
Adding a new probe
This displays a form that is a combination of the forms shown in sections 2.2.2 and 2.2.3 below – refer to
these sections for information on the parameters on the new probe form.
Radio Systems Information Ltd.
Page 53
Aries Reference Manual
4.2.2
Section 3 – Admin Functions
Editing a probe
This displays the form shown below:
Figure 62: Configuring Probes parameters
The key parameters for each probe are the IMEI number and GSM number complete with country code.
The colour is used to identify the current location of each probe on the map with a coloured circle.
Probes may be classed as ‘static’, ‘mobile’ or ‘Not in Use’ – there is no difference in function except for
allowing the user to group and filter results based on these classes. In addition, static probes may be
assigned coordinates in this form that will be used by the server for the probe location if the probe is
unable to use GPS (static probes are intended to be used inside buildings where GPS coverage may not
be possible).
The ‘RSSI Threshold’ parameter allows the user to define a minimum signal level that applies to just this
probe. The parameter is used in the Summary analysis and is intended for use with static probes
monitoring a single base site where the RSSI level will be fairly constant. The value will need to be set
once the probe has been installed and the actual RSSI level is known.
The ‘Custom Monitor Icon’ allows a shape to be superimposed onto the Monitor event on the map to help
distinguish which events belong to which probes.
Radio Systems Information Ltd.
Page 54
Aries Reference Manual
4.3.3
Section 3 – Admin Functions
Probe configuration
To configure the probe click on the word ‘Configure’ in the ‘Actions’ column. This will show the form below:
Figure 63: Configuring Probe parameters- showing each tab of the form
Radio Systems Information Ltd.
Page 55
Aries Reference Manual
Section 3 – Admin Functions
The last known state of the probe is displayed in brackets for each parameter. The parameters should be
set as explained below:
General Tab
Parameter
TETRA Type
Packets Accumulate
Period
Use Encryption
Handover Timeout
Collect Neighbour Info
Action when external
power removed
Network Tab
Net APN
Net Username
Net Password
Monitor Tab
TETRA Params Rate
Enable Tracking
Comment
Set to ‘Motorola’ or ‘Sepura’ depending on the terminal type
Enter the time in minutes that the probe should wait
between sending data back to the server. Setting this
parameter to 0 means that data is sent back instantly so
that the server shows data in real-time. Increasing this
parameter to maybe 10 or 20 minutes will cause the probe
to accumulate logged data and then send it all in one go to
the server. The advantage of this is that the overall amount
of data sent using GPRS is reduced as there is a significant
overhead per data transmission hence GPRS costs are
reduced – at the cost of the server being slightly behind
real-time.
Data from the probe to the probe to the server may be sent
in clear text or encrypted using the DES64 algorithm. There
is no significant time or data amount penalty using
encryption therefore this is the default.
This is the timeout period in secs after a handover event. If
another handover or ‘No Service’ event occurs in this period
then the initial handover will be marked as a Failed
Handover.
Specify how often the full neighbour list should be logged.
As this produces a large amount of data the default is ‘On
Handover and every 10 events’
Options are ‘Continue running on battery’ or ‘shut down
after 15 mins’. If the TETRA radio is also powered down
then the probe shall send Tracking messages (if allowed in
the Monitor Tab). If there is still data in the probe internal
memory to send to the server then the probe shall continue
to remain operational until the data has been sent or the
battery runs out.
As specified by the GSM provider
e.g. for Orange UK set to ‘orangeinternet’
As specified by the GSM provider
e.g. for Orange UK set to ‘user’
As specified by the GSM provider
e.g. for Orange UK set to ‘pass’
Enter the time in seconds between each monitor message
– default is 60, minimum is 5. When using very short
monitor periods, i.e. less than 60secs, it is generally a good
idea to set a Packets Accumulate Period of 1 min to prevent
too many simultaneous attempts to send individual
messages to the server.
Send Tracking messages when the probe is running but
there is no TETRA radio attached or powered up.
Call Tab
Enable Active TETRA
operations
Test Call Type
Radio Systems Information Ltd.
Ticking this enables the probes to make test calls
Options are:
‘PTT Only – No Speech’
‘One Sample in each direction’ – VQ test call
‘Two samples in each direction’ – VQ test call
Page 56
Aries Reference Manual
Slave Probe
Speech Sample for VQ
test call
TETRA Call Rate
TETRA Group Call
Number
TETRA Call Duration
TETRA Call Slot
Number
Packet Tab
TETRA Packet Data
Test Rate
TETRA Packet Data ftp
access parameters
TETRA Packet Data file
path
Section 3 – Admin Functions
‘Two samples in each direction repeated twice’ – VQ test
call
The slave probe must be defined for VQ test calls
Select the required speech sample. The speech sample is
downloaded to the active and slave probe before each
survey. New speech samples may be uploaded to the
server using the ‘Manage Audio Samples’ link.
Enter the time in seconds between TETRA test calls. The
fields below will then display the actual ‘Call length’, ‘Gap
between calls’ and ‘Actual call rate’ based on the selected
audio file and call type. Call Rates shorter than the length of
the call + 10sec call gap are ignored.
Enter the TETRA group call number (GSSI) for the group
that should be used for the test calls
Enter the duration in seconds for the TETRA test call –
default is 10 – only applicable to non VQ test calls
Enter the slot number from 0 to (Rate / Duration) = 29, this
should be different for each probe allocated for this group
and provides a timeslot within which to make the test call
therefore ensuring that test calls do not overlap – only
applicable to non VQ calls
Enter the time in seconds between TETRA Packet Data
tests – default is 60, minimum is 60
Enter the ftp parameters
<server>[,<port>]:<username>,<password>
e.g. 10.20.30.40:user,pass
Enter the folder / file name of the test file – default is
/Aries/testfile.bin
Clicking ‘Submit’ will set the New Configuration flag for the probe so that it updates itself next time it
checks for updates. The success of this can be seen from the ‘Update State’ column which will change
from ‘Updating Configuration to ‘Finished’ once the probe has been successfully updated and informed the
server of the outcome.
4.2.4
VQ Slave Probes
VQ Slave probes are listed separately from the normal probes – click on the ‘Slave’ link to list the slave
probes.
To carry out VQ testing, a normal probe must be paired with a slave probe. The slave probe is selected on
the ‘Call’ tab for the normal probe. Once selected, the slave probe will appear linked to the normal probe
as shown below:
Figure 64: Paired slave probe
Any configuration updates applied to the normal probe will also be applied to the slave probe – this
ensures that that they are both using the same GSSI, call type and speech sample.
Note that when VQ testing is started, the normal probe will often receive a configuration update, such as
start VQ survey, more quickly than the slave probe. This is because the normal probe will usually be
sending events back to the server more frequently than the slave so has more opportunities to check for a
new update. When starting a VQ survey, the normal probe will wait for the paired slave probe to confirm it
has received the configuration updates – this may take 1 or 2 minutes.
Slave probes do not produce normal monitor events. They do however produce all other events although
slave probe events are only visible to the sysadmin user.
Radio Systems Information Ltd.
Page 57
Aries Reference Manual
4.2.5
Section 3 – Admin Functions
Probe firmware update
To update the probe’s firmware click on the word ‘Upgrade’ in the ‘Actions’ column. The upgrade progress
can be seen in the ‘Upgrade State’ column displaying:
Version 1 Probe
Request is pending
Downloading JAR file
Downloading JAD file
Finished: 900 Success
Version 2 Probe
Request is pending
DWL file sent
Finished: Successfully upgraded to V1.5.1
The whole process may take several minutes. As part of the upgrade process the probe will restart itself.
Probes continually check the server to see if there is a new software version to download. Usually a probe
will detect that there is an update within 60secs however if the probe is out of GSM coverage then this may
take longer. If the probe has not responded within 10 mins then the server will send an encrypted SMS to
the probe (if this functionality has been enabled for the server). The probe will validate the SMS by
checking the IMEI number embedded in the SMS and then react accordingly.
Once the probe has re-started it will confirm the current version of software it is running back to the server
which will then update the value displayed in the ‘Current Version’ column for that probe. This may take
several minutes to update following the completion of the upgrade process.
A new software version may be updated on multiple probes simultaneously by clicking on the ‘Mass
Upgrade’ link. This displays the form below:
Figure 65: Probe Mass upgrade
Select the probes you wish to upgrade and click submit. All selected probes will then attempt to upgrade. If
any probe fails to upgrade then it will need to be reselected and the upgrade attempted again.
Radio Systems Information Ltd.
Page 58
Aries Reference Manual
4.2.6
Section 3 – Admin Functions
Manage Audio Files
VQ testing can use different speech samples that can be different lengths or languages. It is possible to
upload new speech sample files to the server and these will then be downloaded to the probes when
starting a new VQ survey. Click on the ‘Manage Audio Files’ link to display the form below:
Figure 66: Manage audio files
The server can hold many different speech sample files that may then be selected for each probe. Click
on ‘Add File’ to upload a new speech sample file.
The native speech sample file format is 8000Hz PCM 16 bit wav however it is possible to upload speech
sample files in many different formats and the server will automatically convert them to the native format.
The result file size is limited to 1MB which is equivalent to 65secs length. In practice, a speech sample file
should be around 4 to 8 secs long.
Radio Systems Information Ltd.
Page 59
Aries Reference Manual
4.4
Section 3 – Admin Functions
Configuring Base Sites
This functionality is only available to admin users and above. Base Site locations are displayed on the map
symbol and may be coloured differently for each site. Base Site locations may be set up and
using the
configured from the Aries web page as shown below:
Frequencies
highlighted
orange indicate that two or
more neighbours are using
the same frequency
Figure 67: Configuring Base Sites
Click on either ‘Add Base Site’ to add a new base site or on the
edit the parameters. This displays the form shown below:
symbol for each existing base site to
Figure 68: Configuring Base Sites parameters
Radio Systems Information Ltd.
Page 60
Aries Reference Manual
Section 3 – Admin Functions
The key identifying parameter for each base site is the ‘LAC’. This is compared to the LAC data reported
by the TETRA radio to determine which base site is currently being used. To delete a base site click on the
symbol in the main window.
If more than one base site has an identical latitude and longitude to other base sites then they are
assumed to be sectors of a single base site and are displayed on the map as a single symbol. The antenna
symbol displayed on the map is defined by the Beamwidth, Direction and Icon Size parameters. The Icon
Size is intended purely to make overlapping antenna patterns clearer.
Frequencies may be displayed in MHz or channel numbers. The choice is set by the Sysadmin user for
each network (see section 2.5).
The Planned Frequencies for a base site are defined by the user however the Used Frequencies and
Neighbour Cell frequencies are collected by the probe and are updated for each site as new data is
gathered.
Used Frequencies that do not appear in the Planned Frequency list are coloured red indicating that the
network may not be configured correctly.
Neighbour Cell frequencies that appear for more than one LAC are coloured red, again indicating that the
network may not be configured correctly.
Frequencies that appear in the Used Frequency and Neighbour Cell lists are updated as soon as a new
frequency is logged however if a frequency is not logged for more than a certain period then it is removed
from the list. This period is set by the SYSADMIN with a default of 3 days (see section 2.5). The only
exception to this is if no neighbour cell lists have been logged for the base site in which case the
frequencies do not expire.
The base site data may be exported to a comma separated text file by clicking the ‘Export’ link. There is an
option to compress the exported file into a standard zip file format.
Super Admin users also have access to the following functions:
Large lists of new base site planned frequencies may be imported by clicking on the ‘Import Planned
Frequency Lists’ link. The import file should be a text file with the following format:
LAC frequency1,frequency2..frequencyN
With each base site LAC being on a new line. There is an option to clear the existing planned frequency
list.
The ‘Used Frequency’ and ‘Neighbour cell’ lists may be cleared by clicking on the relevant links. These will
delete all of the data in these lists for all base sites so should be used with caution.
Radio Systems Information Ltd.
Page 61
Aries Reference Manual
4.5
Section 3 – Admin Functions
Configuring Layers
The Aries map provides the ability to group Areas into Layers which can then be independently displayed
or hidden on the map. This is particularly useful for displaying large numbers of individual Areas, e.g.
representing predicted base site coverage areas, where it is useful to be able to display or hide all of them
at the same time.
Layers are created and managed from the Aries web page as shown below:
Figure 69: Configuring Layers
Layers are controlled on the map using the pop-out form shown below:
Figure 70: Displaying Layers on the map
Each layer may be displayed or hidden using the tick-box next to the Layer name.
Radio Systems Information Ltd.
Page 62
Aries Reference Manual
4.6
Section 3 – Admin Functions
Configuring Areas
Areas are arbitrary polygons that may be used to filter data. They might be used to group data for a police
district or maybe to define an area of poor coverage, or to show the area of predicted coverage for a base
site. They are displayed on the map as a semi-transparent filled or unfilled coloured polygon as shown
below:
Figure 71: Example of areas
Areas are configured from the Aries web page shown below:
Figure 72: Configuring Areas
Click on either ‘Add Area’ to add a new area or on the
parameters. This displays the form shown below:
Radio Systems Information Ltd.
symbol for each existing area to edit the
Page 63
Aries Reference Manual
Section 3 – Admin Functions
Figure 73: Configuring Areas parameters
Polygons are defined in a vector KML file that has been created in Google Earth or a similar application.
Areas are limited to a maximum of 1000 points and must be a simple area shape with the points defining
the perimeter and with no internal boundaries.
The area can be set to invisible but will still be available for use in the analysis.
The area must be assigned to a map Layer that has been previously been created, see section 2.4 for
information on map Layers.
The area may be rendered on the map as a solid coloured polygon or as just a line on the polygon
perimeter. The colour of the area is set by the user.
To delete an area click on the
symbol in the main window
Large numbers of Areas may be uploaded in a single operation using the ‘Mass Upload’ link. This displays
the form shown below:
Figure 74: Area Mass Upload
If the filename of the uploaded Areas matches the name of a Base Site then the colour of the Area shall be
set to the assigned colour for that Base Site. This is particularly useful if Areas are being uploaded to show
the predicted coverage areas for each Base Site.
Radio Systems Information Ltd.
Page 64
Aries Reference Manual
4.7
Section 3 – Admin Functions
Configuring Settings
This functionality is only available to the system administrator. System settings are configured from the
Aries web page shown below:
Figure 75: Configuring System Settings
Hide all text on frontpage and add nofollow, noindex metatag: this option is intended to present an
anonymous front page so that casual or accidental visitors to the site are given no information. In addition it
prevents search engines from indexing the site further increasing the anonymity.
When the second user logs onto account from different IP address: the options are:
Do nothing, Allow multiple logins
Allow multiple logins, but all users will see the warning messages
Force original user offline
Do not allow login until original user logs off
The Following options are intended to increase the password security:
Passwords expire after 90 days
Send expiry warning by email at 14, 7 and 1 day
Password complexity rules apply
Once a password expires the user will not be allowed to log in and a new password must be assigned by
the System Administrator. See section 2.2 for details on how users may change their own passwords.
Radio Systems Information Ltd.
Page 65
Aries Reference Manual
4.8
Section 3 – Admin Functions
Profile Activity
This functionality is only available to the system administrator. The profile analysis activity is shown in realtime on the Aries web page shown below:
Figure 76: Profile Activity
This screen shows each separate analysis carried out by users as a separate line and includes the
processor execution time. The graph shows the total processor analysis time for all profiles in seconds per
minutes. The page is updated every 15 seconds.
The information is normally used to identify poorly configured analysis profiles that are taking an excessive
amount of processing time, for example, showing the last 3 months of data on a 10 second update.
Radio Systems Information Ltd.
Page 66
Aries Reference Manual
4.9
Section 3 – Admin Functions
Database
This functionality is only available to the system administrator. The Clear Database functionality is shown
in the form below:
Figure 77: Database cleansing
Old data may be deleted from the database to free up space. Select which network to delete from – or all
networks – and select the date and time. The selected data will be deleted from before this date.
Data to be cleared may either be just the stored wav files or both wav files and events.
Once data has been cleared, the effective table size will be displayed which will be smaller than the actual
size. To release the unused space the table must be rebuilt by clicking the icon next to the table size.
Radio Systems Information Ltd.
Page 67
Aries Reference Manual
5
Probes
5.1
Probe Configuration
Section 4 – Probes
The Aries probe is intended to connect directly to the interface ports on a Sepura or Motorola TETRA radio
terminal as shown below.
Figure 78: Probe connection to Sepura TETRA radio terminal
Figure 79: Probe connection to Motorola TETRA radio terminal
The probe gets power directly for the TETRA radio but it also contains a battery that will keep the probe
alive for 30 minutes after power is removed. This time allows the probe to send any data that may be
stored in its memory before automatically switching itself off. When the probe is connected to the terminal
the probe internal battery is charged.
The probe is supplied with a combined GSM/GPS antenna suitable for mounting on a rear window or
dashboard.
Radio Systems Information Ltd.
Page 68
Aries Reference Manual
5.2
Version 1 Probe
5.2.1
Specifications
Physical Dimensions:
GSM Antenna Connector:
GPS Antenna Connector:
GPRS Modem:
Processor:
GPS:
Battery:
Connection to Sepura radio:
Connection to Motorola radio:
Section 4 – Probes
86mm x 56mm x 26mm not including RF connectors
FME (male) silver colour
SMA (female) gold colour
Quad-Band GSM 850/900/1800/1900 GPRS class 12
Java with 400kB RAM & 1.2MB Flash
16 channel tracking sensitivity –157dBm
2.8V Lithium
15pin hi-density D plug on 30cm flying lead
9pin D and 25pin D to radio expansion head on 50cm flying lead
Cable to TETRA radio
GPS Antenna
External power applied
GSM Antenna
Flashing in normal operation
Figure 80: Front Panel
5.2.2
SIM Card
The probe must be installed with a SIM card for the GSM network. This is installed by removing the rear
panel as shown below:
Press and hold
button for 4 seconds
to reset probe
Press button
momentarily to switch
off probe
Press yellow
button to release
SIM card
Figure 81: Changing the SIM card
If the probe needs to be reset for any reason then press and hold the button indicated for 4 seconds.
In normal operation the probe does not need to be switched off, however, in special circumstances, it is
possible to momentarily press the button indicated to force the probe to switch off.
Radio Systems Information Ltd.
Page 69
Aries Reference Manual
5.2.3
Section 4 – Probes
Setting Up New probe
Follow these instructions when setting up a new probe:
1) Connect the probe to power and by USB to a PC running hyperterminal or other Comms software
2) Get the IMEI number of the probe by typing the command: AT+CGSN into hyperterminal
3) Enter the probe details onto the server, including the IMEI number and the GSM number
4) Enter these commands into hyperterminal:
If using an Orange SIM card:
AT^SJOTAP=,"http://www.rsi-aries.com/upgrades/index/aries.jad","a:",,,"gprs","orangeinter
net","user","pass",,"http://www.rsi-aries.com/upgrades/info"
Or if using an O2 SIM card:
AT^SJOTAP=,"http://www.rsi-aries.com/upgrades/index/aries.jad","a:",,,"gprs","mobile.o2.c
o.uk","mobileweb","password",,"http://www.rsi-aries.com/upgrades/info"
5) Enter the command:
AT^SJOTAP
And then close down hyperterminal. Monitor the upgrade progress on the Aries web page.
This instructs the probe to obtain the current software from the Aries server. When it is finished the
USB device on the PC will disappear for 2 seconds and then reappear.
6) Re-start hyperterminal and enter the command:
AT^SJRA=a:/aries.jar
This starts the software running on the probe. The correct operation of the probe can now be
monitored using hyperterminal.
5.2.4
Logging
Connect the probe to power and by USB to a PC running hyperterminal or other Comms software.
The probe will produce a continuous log of the activity which can be used for debug purposes. As part of
this log, a debug string is produced every 2secs with the following format:
e.g.:
p0|c1|b4.173|g1|r1|c0|s0|rl50|tl14|sl0|bl18|hl23|fl197|cl55|gl6|sl119
where:
p -- packets count in memory
c -- charger connected
b -- battery voltage
g -- GSM state
r -- GPRS state
c -- clear to send
s -- suppress_GPRS
pl -- gps_thread_lock_time
rl -- gprs_state_thread_lock_time
tl -- tetra_thread_lock_time
sl -- status_led_thread_lock_time
bl -- battery_state_thread_lock_time
hl -- packet_send_thread_lock_time
fl -- packet_save_thread_lock_time
cl -- confirm_settings_thread_lock_time
gl -- get_new_settings_thread_lock_time
sl -- get_new_SMS_thread_lock_time
GSM State may be:
0 – not registered
1 – registered with home network
Radio Systems Information Ltd.
Page 70
Aries Reference Manual
Section 4 – Probes
2 – searching
3 – registration denied
4 - unknown
5 – registered with foreign network
Radio Systems Information Ltd.
Page 71
Aries Reference Manual
5.3
Version 2 Probe
5.3.1
Specifications
5.2.2
SIM Card
5.2.3
Setting Up New Probe
5.2.4
Logging
Radio Systems Information Ltd.
Section 4 – Probes
Page 72
Aries Reference Manual
Section 4 – Probes
5.4.1 Operation
The probe will start automatically when power is applied to the TETRA radio.
The probe will send back data to the server after every monitor event or test call. If there is no GPRS
coverage in an area, or the server is unavailable for any reason, then the probe will store the data to
internal memory instead until it has GPRS coverage again when it will send all of the stored data to the
server. The probe will store up to about 9000 data messages, which is equivalent to about 6 days
operation (assuming 60 second updates). For periods without GPRS longer than this the probe will store
the most recent data and drop the oldest data.
The probe sends back an error message if communication is lost with the TETRA radio or external power
is lost. Error messages are only sent once.
The probe logs the basic parameters in a monitor event typically every 60 seconds. This is a non-intrusive
action which does not cause the TETRA radio to transmit.
If enabled at the server then the probe will perform a test call typically every 5 minutes. The probe will
request a group call on the specified TETRA group. If the group call is granted then the probe maintains
the PTT for the period specified (typically 5 seconds) and then releases the PTT and lets the group call
time out. The test call can result in a call setup failure event if the call was never granted or a call dropped
event if the call failed during the call.
It is usual to assign a single TETRA group for all Aries probes and then configure the parameters at the
server so that each probe performs the test call in a different time slot so that there is no overlap of test
calls.
If at any time the TETRA radio hands over from one base site to another a handover event is produced.
Similarly if the TETRA radio has no service due to bad coverage then a no service event is produced.
The probe logs the following parameters:
Time
Latitude & Longitude
Vehicle Speed (km/h)
Current Base LAC
Current RSSI (dBm)
Current Base Site Frequency (MHz)
Current C1 (dB)
Best Neighbour Base LAC
Best Neighbour RSSI (DBM)
Best Neighbour C2 (dB)
Call Setup Time
Packet Data Download Time
GSM Signal Quality dBm
Event Type – one of the following:
Monitor
Call Setup Success
Call Setup Failure
Call Dropped
Handover
Failed Handover
No Service
TETRA Radio Communications Error
Running on Battery
Battery is too low (probe shuts down automatically)
External Power Applied
TETRA Radio Initialisation Failure (specified group is not available on the radio)
DMO (TETRA radio is in Direct Mode)
Radio Systems Information Ltd.
Page 73
Aries Reference Manual
5.5
Hand-held Probe
5.5.1
Overview
Section 4 – Probes
Figure 82: Hand-held probe in carry-case
The Aries hand-held probe contains a standard V2 probe together with a large battery providing 15 hours
of service, an internal GSM/GPS antenna, a Bluetooth function for connecting to external GPS sources
and a connection cable for use with Motorola hand-held TETRA radio terminals. The unit is supplied in a
convenient carry-case designed for attaching to a belt or being held by the wrist-strap.
The ability to use external GPS sources via the Bluetooth link provides the possibility of using deadreckoning location systems for indoor surveying.
5.5.2
Specification
Dimensions:
Weight::
Charge Time:
Operating time:
Antenna:
GPS source:
Connector:
105 x 63 x 40mm excluding buttons and carry-case
350g
approximately 6 hours
approximately 15 hours
built-in sensitive patch for GSM and GPS
Internal GPS receiver or external source via Bluetooth
terminated in Motorola hand-held TETRA radio connector
Radio Systems Information Ltd.
Page 74
Aries Reference Manual
5.5.3
Section 4 – Probes
Operation
Activity LED:
Flashing every 2 secs = Normal operation
Permanently ON = Locked Up/Fault
Permanently OFF = Powered down
Ext GPS LED:
ON = External GPS source via Bluetooth
OFF = GPS from internal antenna
To start the probe: press and hold the ON/OFF
button for 5 secs until the probe beeps
To stop the probe: press and hold the ON/OFF
button for 5 secs until the probe beeps
GPS Lock LED:
ON = GPS providing 2D/3D coordinates
OFF = no GPS coordinates
Charge LED:
ON = Battery being charged
OFF = Battery fully charged (when charger
connected)
Figure 83: Hand-held probe top panel
Charger connector (12V)
To use the hand-held probe for a survey –
- connect the hand-held probe to a Motorola radio and power-on the radio
- enable or disable the radio Airtracer mode as appropriate
- press and hold the ON/OFF button for 5secs until the probe beeps twice
- confirm the activity LED starts flashing every 2 secs
- wait for the GPS Lock LED to light, confirming that the unit has good coordinates
- start walking, data will be sent to the server in real-time
- finish the survey by pressing and holding the ON/OFF button for 5 secs
If the hand-held probe is about to shut down due to a low battery then the probe will start beeping.
To charge the probe, connect the charger to the ‘Charge’ connector. The probe will charge faster if the
probe is powered off.
Radio Systems Information Ltd.
Page 75
Aries Reference Manual
5.5.4
Section 4 – Probes
Indoor Surveying
The hand-held probe provides the option for using GPS data from an external source using a Bluetooth
link. This can be useful for indoor surveys. One possible external source is an Android smart phone
running an app such as ‘Bluetooth GPS Output’, ‘GPS Share BT’ or ‘GPS NMEA Bluetooth Transmitter’.
It is then possible to use a dead-reckoning location app such as ‘SmartNavi’ for indoor positioning although
our experience is that currently this app is not sufficiently stable to be used for reliable surveying.
To pair the hand-held probe with an external GPS source:
- enable Bluetooth on the Android phone
- open the hand-held probe, move the Bluetooth Mode slide switch to ‘SLAVE’ as shown below
- force the phone to scan for new Bluetooth devices
- select the device with the correct name, e.g. ‘Aries_HH_6001’
- pair with the probe using code ‘1234’
- enable GPS on the phone
- change the slide switch in the hand-held probe back to ‘MASTER’ as shown below
- start the appropriate GPS sharing app
- enable the ‘Make Discoverable’ option in the app
- within a few seconds the phone should auto-connect to the probe
- once the phone has good GPS coordinates, confirm the probe ‘Ext GPS’ LED is lit
Bluetooth Mode
Slide Switch
Figure 84: Hand-held probe internal view
Radio Systems Information Ltd.
Page 76
Aries Reference Manual
5.6
Section 4 – Probes
Packet Data Testing
The probe may be configured to test Packet Data performance on the TETRA network.
The probe attempts to create a Packet Data connection typically every 1 minute or as specified by the user
in the probe configuration. The probe will attempt to download a test file using ftp protocol from the server
specified in the probe configuration. If the probe is unable to establish an Packet Data connection then an
error is reported. If the file is downloaded then the probe will check that the file has been received with no
errors and reports the time taken for the test file to be received.
nd
The test file is typically 1kbyte and consist of pseudo-random data with the 2 half of the file being a copy
of the first half – this allows any errors to be detected without the probe knowing in advance what the test
file data is. The test file should be in a non-password protected folder on the server so that the probe can
simply download the file using ftp protocol.
Note that the Aries probe will only attempt to download the test file – it does not attempt to upload data to
the server by changing the file or creating a new file.
Radio Systems Information Ltd.
Page 77