1
Caution
Use an AC outlet that accepts a three-pronged plug.
Otherwise, static electricity may be generated and there
will be danger of electric shock.
Printed in China
JM74915-00
CLP-521
CLP-621
Serial Interface Cable
USB Interface Cable
CBM Bldg., 5-68-10, Nakano
Nakano-ku, Tokyo 164-0001
Tel: (+81-3) 5345-7540
Fax: (+81-3) 5345-7541
Japan CBM Corporation
CLP-621
For Asia, including China and Japan:
Power Cord Inlet
Parallel Interface Cable
Park House, 643-651 Staines Road
Feltham, Middlesex, TW14 8PA
United Kingdom
Tel: +44 (0) 20 8893 1900
http://www.citizen-europe.com
Mettinger Strasse 11
D-73728 Esslingen
Germany
Tel: +49 (0) 711 3906 400
Citizen Systems Europe GmbH
For Europe, Middle East and Africa
AC Outlet
Power Switch
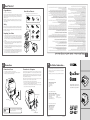
Connection to a Computer
a. Check that the power switch to the printer is turned OFF.
b. Connect the connector of the power cord to the power cord inlet on the printer.
c. Insert the plug of the power cord in the AC outlet.
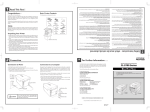
This product has three interfaces that can be used to receive printing data: a serial port
(RS232C), parallel port (IEEE1284, Non-L. P. S.), and a USB port (USB1.1). An optional
internal Ethernet (LAN) or Wireless LAN port can be added by your dealer. If the optional
Ethernet or wireless LAN port is used, the standard parallel port is removed from the printer,
so the parallel interface cannot be used.
This Quick-Start Guide covers basic operation.
For detailed operating instructions, please see
the User's Manual on the supplied CD-ROM.
2102 Alton Parkway, Unit A
Irvine, CA 92606
Tel: (949) 428-3700
U.S.A.
Citizen America Corporation
CLP-521
GUIDE
For North and South America:
Alternatively, you may find it easier to contact your local Citizen office as follows:
For further information and more detailed instructions on the use of your new
printer, please refer to the complete user manual included on the CD-ROM
accompanying your printer.
*
Connection
QUICK-START
For Further Information ...
!
a. Turn OFF the power switches of both the printer and the computer.
b. Connect one end of the interface cable to the interface connector on the back of the
printer and secure it with locks or locking screws, where available.
c. Connect the other end of the interface cable to the interface connector on the computer
and secure it with locks or locking screws, where available.
With the exception of a wireless LAN connection, an interface cable is necessary to connect
the printer to a computer. To connect the cable, proceed as follows:
Connection to Power
Safety Instructions - which must be strictly observed
Printer
Quick-start Guide
This equipment has been tested and found to comply with the limits for a Class A digital device, pursuant to Part 15 of the FCC Rules.
These limits are designed to provide reasonable protection against harmful interference when the equipment is operated in a commercial
environment. This equipment generates, uses, and can radiate radio frequency energy and, if not installed and used in accordance with the
instruction manual, may cause harmful interference to radio communications. Operation of this equipment in a residential area is likely to
cause harmful interference in which case the user will be required to correct the interference at his own expense.
Media holder guide
Media holder bar
Test label media
Power cord
EMI Compliance Statement for Canadian Users
This Class A digital apparatus complies with Canadian ICES-003.
This equipment generates and uses radio frequency energy and if not installed and used properly, that is, in strict accordance with the
manufacturer's instructions, may cause interference to radio and television reception. This digital apparatus does not exceed the Class A
limits for radio noise emissions from digital apparatus set out in the Radio Interference Regulations of the Canadian Department of
Communications. This equipment is designed to provide reasonable protection against such interference in a residential installation.
However, there is no guarantee that interference will not occur in a particular installation. If this equipment does cause interference to
radio or television reception, which can be determined by turning the equipment off and on, the user is encouraged to try to correct the
interference by one or more of the following measures:
Reorient or relocate the receiving antenna.
Increase the separation between the equipment and receiver.
Connect the equipment into an outlet on a circuit different from that to which the receiver is connected.
Consult the dealer or an experienced radio/TV technician for help.
Paper Core
•
•
•
•
Sample Ribbon
For the safe operation of your printer, please read the following important operation and safety instructions carefully. Failure to observe
these precautions can result in personal injury or property damage or, in extreme situation, serious injury or death.
27. Data residing in the printer is temporary. Therefore, all data will be lost if power is lost. We are not liable for any damage or loss of
profits caused by data loss due to failures, repairs, inspections, etc.
28. Please contact us if there are any mistakes or ambiguities within this manual.
29. If there are missing or incorrectly collated pages in this manual, contact us to obtain a new manual.
30. Trademarks or registered trademarks of other companies and products are included in this manual. Citizen acknowledges all trademarks.
Compliance Statement for European Users
CE marking shows conformity to the following criteria and provisions:
Low Voltage Directive (73/23/EEC)/EN60950-1
EMC Directive (89/336/EEC)/EN55022, EN55024, EN61000-3-2 & EN61000-3-3
This product has been tested under EN ISO 7779 and has a acoustic level output no higher than 55db(A)
FCC Compliance Statement for American Users
CD-ROM
Head cleaner
Ribbon Holder
CAUTION: Use shielded cables to connect this device to computers. Any changes or modifications not expressly approved by the
grantee of this device could void the user's authority to operate the equipment.
Etat de Conformite EMI à líusage des Utilisateurs Canadiens
Cet appareil numérique de la classe A est conforme à la norme NMB-003 du Canada.
Cet équipment produit et utilise l’énergie à radiofréquences et s’iln’est pas installé et utilisé correctment, c’esst à dire en accord strict avec
les instructions du fabricant, il risque de provoquer des intérferences avec la réception de la radio et de latélévision.
Le présent appareil numérique n’émet pas de bruite radio électriques dépassant les limites applicables aux appareils numériques de la
classe A prescrites dans le Réglement sur le brouillage radioélectrique édicté par le ministère des Communications du Canada.
Cet équipment est conçu pour fournir une protection satisfaisante contre de telles interférences dans une installation résidentielle.
Cependant, il n’y a pas de garantie contre les interférences avec les réceptions radio ou télévision, provoquées par la mise en et hors circuit
de l’équipment; aussi, il est demandé a l’utilisateur d’essayer de corriger l’interférence par l’une ou plus des mesures suivantes:
• Réorienter l’antenne de réception.
• Installer l’ordinateur autre part, par égard pour le récepteur.
• Brancher l’ordinateur dans une prise de courant différente de façon à ce que l’ordinateur et le récepteur soient branchés sur des circuits
différents.
The following items are only present in the CLP-621 carton :
Read This First !
1. Read all of these instructions and save them for later reference.
2. Follow all warnings and instructions marked on the product.
3. Unplug this product from the wall outlet before cleaning. Do not use liquid or aerosol cleaners, thinner, trichloroethylene, benzine,
ketone or similar chemicals. Instead use a damp cloth for cleaning, when the printer is disconnected from the mains supply.
4. Do not use this product near water or where a chemical reaction can occur such as in a laboratory or where there is a lot of oil, dust,
salt or iron particles.
5. Do not place this product on an unstable cart, stand or table. The product may fall, causing serious damage to the product and
people around it.
6. Slots and openings on the cabinet and the back or bottom are provided for ventilation.
7. To ensure reliable operation of the product and to protect it from overheating, do not block or cover these openings. The openings
should never be blocked by placing the product on a bed, sofa, rug or other similar surface. This product should never be placed near
or over a radiator or heat source. This product should not be placed in a built-in installation unless proper ventilation is provided.
8. This product should be operated from the type of power source indicated on the marking label. If you are not sure of the type of
power available, consult your dealer or local power company.
9. This product is equipped with a three-pronged plug, a plug having a third grounding pin. This plug will only fit into a grounding-type
power outlet. This is a safety feature. If you are unable to insert the plug into the outlet, contact your electrician to replace your
obsolete outlet. Do not defeat the safety purpose of the grounding-type plug.
10. Do not allow anything to rest on the power cord. Do not locate this product where the cord will be walked on. Do not pull on the
power cord or data cables or keep them under tension.
11. If an extension cord is used with this product, make sure that the total of the ampere ratings on the products plugged into the
extension cord do not exceed the extension cord ampere rating. Also, make sure that the total of all products plugged into the wall
outlet does not exceed 7.5 amperes for 220/240V outlet and 15 amperes for a 120V outlet.
12. Never push objects of any kind into this product through cabinet slots as they may touch dangerous voltage points or short out parts
that could result in a risk of fire or electric shock. Never spill liquid of any kind on the product.
13. Except as explained elsewhere in this manual, donít attempt to service or disassemble this product yourself. Opening and removing
those covers that are marked ìDo Not Removeî may expose you to dangerous voltage points or other risks. Refer all servicing on
those compartments to service personnel.
14. The mains plug on this equipment must be used to disconnect mains power. Please ensure that the socket outlet is installed near the
equipment and shall be easily accessible.
15. Unplug this product from the wall outlet and refer servicing to qualified service personnel under the following conditions:
a. When the power cord or plug is damaged or frayed.
b. If liquid, aerosol chemicals or other chemicals have been spilled into the product.
c. If the product has been exposed to rain or water or excessive humidity.
d. If the product does not operate normally when the operating instructions are followed. Adjust only those controls that are covered
by the operating instructions since improper adjustment of other controls may result in damage and will often require extensive work
by a qualified technician to restore the product to normal operation.
e. If the product has been dropped or knocked or the cabinet has been damaged.
f. If the product exhibits a distinct change in performance, indicating a need for service.
16. Discard or safely store the plastic packing bag. This bag should be kept away from children. If the bag is pulled over childís head, it
may cause suffocation.
17. Make sure if you open the top cover, it is opened all the way. If only partially open, the cover could slam shut, possibly causing injury.
18. When the cover is open, be careful of the corners of cover. They could cause injury.
19. Do not open the printer during printing.
20. Operate the control panel properly. A careless, rough handling may cause problems or malfunction. Do not use such sharp-edged
tool as a ballpoint for operation.
21. If a problem occurs during printing, stop the printer immediately and unplug the power cord from the outlet.
22. The contents of this manual may be changed without prior notice.
23. Reproduction, transfer, or transmission of the contents of this manual without prior consent is strictly prohibited.
24. We are not liable for any damage resulting from the use of the information contained herein, regardless of errors, omissions, or
misprints.
25. We are not liable for any problems resulting from the use of optional products and consumable supplies other than the designated
products contained herein.
26. We are not liable for any damage caused by userís erroneous use of the printer and inadequate environment.
2
d. There is another strip of adhesive tape that must be removed which holds the mechanism
closed for shipping. Remove the tape and attached paper by carefully peeling from the
plastic case. A further piece of packing paper is inside the mechanism and you can
remove this when the head is opened as explained later in this manual.
c. The printer is shipped with adhesive tape in place to hold the top cover closed. Simply
remove the two pieces of tape on either side of the top cover. Then simply open the cover
by lifting up and tipping it backwards.
b. If you have any questions, or if you find any of the items are missing, please initially refer
back to your supplier. Otherwise, contact details for Citizenís regional offices are shown
on the back page of this Quick Start Guide.
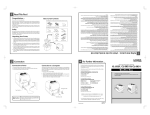
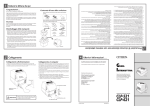
a. Carefully unpack your new printer and ensure all the items shown on the adjacent picture
are present in your printerís carton. In some cases, your supplier or Citizen may have
added extra items required for your particular installation such as additional CD-ROM,
cable or manuals. Instructions for each of these items will be included within the individual
packages.
Unpacking Your Printer
But if you have not done so already, please carefully read the safety instructions included at
the beginning of this Quick Start Guide and in more detail on the user manual included on
the CD-ROM. Failure to observe the safety precautions could cause serious injury or damage
to both you and your property.
Safety
The following items are present in both the CLP-521 and CLP-621 cartons :
We will guide you through unpacking of the printer from its carton, connection to your
computer system and installation of the media including a quick self-test of the printer to
ensure it is working.
Please take a moment to read this Quick Start Guide which will familiarise yourself with the
printer and its operation. The printer is a sophisticated but easy-to-use label printer featuring
simple media loading and quick connection together with a powerful VuePrint menu
configuration system.
On your choice of a Citizen label printer.
Basic Carton Contents
Congratulations....
1
3
5
Media Installation
Installing the Media
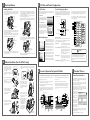
a. Push the large blue head open lever to release the head unit and then
raise it to the position shown below. On the CLP-621, you will also need
to raise the sensor arm by simply lifting it in the same way; the CLP-521
does this automatically.
Self Test Print
Printer Configuration Menu
e. Move the media roll so it is touching the leftside of the housing. Then
slide the black media guide so it is touching the media on the right side.
Do not try to hold the media too tightly with these guides as it will cause
the printer to jam during printing.
Performing a self test print is an easy way to check on the state of printer
setting and printing quality. Install the media as explained in section 4 and
then operate the printer as follows.
f. You may need to adjust the media sensors as described in section 6. This
will depend on the media types you are using.
For label media
If the printer power is turn on while the MODE/REPEAT key is pressed, the
printer enters menu setup mode. In this mode, the printer’s configuration
can be changed using the VuePrint Menu System. During menu setting mode,
the CONDITION LED is on. Media must be installed in the printer to use
the VuePrint menu system.
g. Align the media with the left fixed media guide (2 locations), align the
right movable media guide with the media width, and lower the sensor
arm.
Head unit
Self Tests and Printer Configuration
Turn on printer power while pushing
the FEED key. When the PRINT LED has
begun to flash slowly, release the FEED
key.
Shown below is a sample menu output from the VuePrint menu system.
This particular example is changing the print speed and print darkness
then continues through the remainder of the “Print Setup” menu.
The actual output from the printer is “vertically reversed” due to the way
the printer outputs the menu options. Please look at the example below to
see how the output changes.
Sensor arm
For continuous media
Large blue-head open lever
Fixed media guide
Movable media
guide
b. Firstly, slide the two black plastic parts of the media holder assembly
together. Ensure correct alignment of the guide with the bar as it can
only be installed in one direction.
YES/Select/Save
The printer will produce the self test
shown, then it will stop. To repeat,
press the FEED key again. To exit,
switch of the printer.
c. Slide the roll of media over the media bar. The media guide must be on
the right side of the roll of media (as viewed from the front of the printer)
with the flat surface of the media guide touching the roll.
Exit to previous menu
Functions of the keys
Using the Self Test Print shown above, you
can make adjustments to the printer settings
such as media width and media thickness
(printhead pressure). The location of these
two adjustments is explained in section 4.h
Media holder bar
The first sample, left, shows an incorrectly
set “media thickness adjustment”. For
standard label media, it is recommended you
set the blue dial to the “0” position.
Head close knob
Media thickness adjustment
4
Next digit
Media Adjustments
Head unit
d. Set the media roll and media holder in to the printer as shown above. It is
advisable to pull a length of media forwards and through the mechanism
ready for later positioning.
Media width adjustment
The second sample, left, shows an incorrectly
set “media width adjustment”. For 4-inch or
100mm wide media, the adjuster should be
set to the “9” position on the blue dial.
i. With the power switched on, push the FEED key to feed the media. It will
halt at the next print start position.
The settings shown above are for general label
media and may not apply to specialist media.
Ribbon Installation (For the CLP-621 only)
a. Set the ribbon winding switch
(located on the side of the ribbon
motor housing) according to whether
you are using inside or outsidewound ribbons.
Ribbon winding selection
switch
After each menu item is printed, the printer will also print the function of
each of the buttons at that time. They vary slightly depending on the menu
selected but generally fit the following guidelines:
PAUSE key (YES):
It is pushed to either select the current menu
option or to save the new setting after which
it advances to the next menu.
STOP key (CHANGE/NO): Whilst changing a menu value (such as head
temperature), pressing this key displays the
next menu value available but does not save
the setting.
In the “main menu”, pressing this key moves
to the next menu available.
FEED key (CURSOR):
With some menu options such as head
temperature, there is more than one “digit”
than can be changed. This key moves the
cursor to the next digit.
Caution
When you are changing a menu value, pressing the "PAUSE" key (YES)
causes the printer to save the currently selected parameter.
The CONDITION LED flashes briefly. Do not turn off the power to
the printer at this time as this may cause a malfunction.
If the power is accidentally turned off, first reset the printer to factory
defaults.
MODE/REPEAT key (EXIT): Exits the current menu or the VuePrint menu
system
e. Using tape etc., fix the ribbon that you have pulled out on the ribbon
holder on which the paper tube has been set and wind it on the ribbon
holder.
Winding side
ribbon holder
6
Winding side
ribbon holder
For outside wound ribbons, push the
switch down. This is the default
location.
NO/Next Item/
Change Value
Sensor arm
h. Lower and lock the head unit. Align it with the width of the media that has
been set, then set the media width and media thickness adjustment dials.
See section 5 for more info.
Media holder guide
Light up
Turn on printer power while pushing
the FEED key. When the PRINT LED has
stopped flashing slowly and has begun
to flash rapidly, release the FEED key.
7
Sensor Adjustment for Specialist Media
For non-standard media sizes and shapes, you may need to adjust the media sensors from their usual positions
Windows® Drivers
Printer Driver Installation
Ribbon holders
b. Place the new, unused ribbon and the
paper core (tube) on to a ribbon
holder each.
Ribbon
Insert the ribon holders all the way
in to the ribbon and paper core.
f. Put the ribbon holder on which the
paper tube has been set in the
ribbon drive unit, then rotate it in
the direction shown by the arrow
to remove slack and wrinkles from
the ribbon.
Paper core
1
2
To detect media with black ‘registration’ marks on the back of the media,
use the reflective sensor:
a. First, move the lower sensor to the center of the media installed or
in line with the hole or notch in the media.
a. In reflective sensor mode, only the lower sensor is used.
b. Then align the upper sensor marker with the lower sensor marker as
shown in the diagram below.
c. For easy and quick alignment (and to reset to factory positions)
slide both the upper and lower sensors to the right-most position of
travel. They will now be perfectly aligned over the centre of the
mechanism.
c. Install the unused ribbon and holder
in to the rear ribbon drive unit.
The splines on the ribbon drive gear
mechanism engauge with the end of
the ribbon holder.
To detect gaps between labels and for media with notches or holes, use
the transparent or see-through sensor:
b. Adjust the position of the lower reflective sensor so that the marker
is at the center of the black mark on the media as shown below.
c. The upper sensor arm is still closed over the media to help guide it
through the printer, even though the upper sensor arm is no longer
used.
Upper sensor marker
f. Push the head close knob to lower
and lock the head unit. Be sure to
always push the head close knob
to lock the head unit
Upper sensor
Black mark
Media
d. Push the head open lever to release
the head unit. Pull out the ribbon
from the bottom of the head unit to
the ribbon winding side.
g. If the ribbon is wrinkled, push the
FEED key until the wrinkles
disappear. If the wrinkles
do not disappear or if it slips,
perform ribbon balance
adjustment and ribbon
tension adjustment as
described in Chapter 3 of
the full user’s manual
on the CD supplied.
Bottom sensor
Black mark
Aligned with the marker
Reflective sensor marker
Bottom sensor
Transparent
sensor marker
Movable
media guide
Platen
Head close knob
Front
Platen
Front
If you are using Windows® 98, NT4, 2000, XP or 2003 or any newer
versions of Windows®, the latest printer drivers will usually be supplied
on CD in the box by your dealer.
If the drivers are not included with the printer, you can download
the latest version free-of-charge from our web site, details of which
are on the back of this Quick Start Guide.
Under the latest versions of Windows ®, the computer will often
automatically detect the presence of the printer. Therefore it is
advisable to download the drivers from our web site before installing
the printer so the files are ready for installation.
During installation of
the printer driver, the
computer may ask you
to select the printer
required.
You will need to click on
“Have Disk...” box and
then tell the computer
the location of the
driver files on your hard
disk or on the CD ROM.
You will usually need to
look for the “Citizen.Inf” file.
Your supplier will assist you with the correct drivers and software
which are compatible with your particular computer system if you
are not using Windows®.
Windows® is a trademark of Microsoft® Corporation.