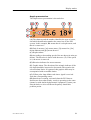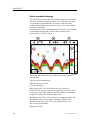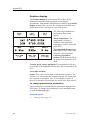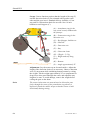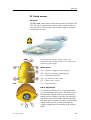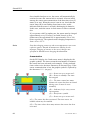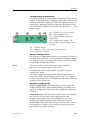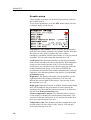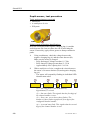
1
Operator manual
Simrad PI32
Catch monitoring system
www.simrad.com
MAX IMIZI NG
YOUR
PER FOR MAN CE
AT
SE A
857-164636 / Rev.A
Simrad PI32
Catch monitoring system
Operator manual
Important notice
Operation of the PI32 Catch monitoring system
assumes that the communication between the
Operator Unit and the sensors is fully functional.
Ensure that the communication channels and update
rates defined on the Operator Unit matches those of
the sensors.
About this document
Rev
Date
Written by
Checked by
Approved by
Rev.A
04.12.05
RBr
KRa
KRa
Original issue
© 2005 Simrad AS
ISBN 82-8066-059-3
All rights reserved. No part of this work covered by the copyright hereon may be
reproduced or otherwise copied without prior permission from Simrad AS.
The information contained in this document is subject to change without prior notice.
Simrad AS shall not be liable for errors contained herein, or for incidental or consequential
damages in connection with the furnishing, performance, or use of this document.
The equipment to which this manual applies must only be used for the purpose for which
it was designed. Improper use or maintenance may cause damage to the equipment or injury
to personnel. The user must be familiar with the contents of the appropriate manuals before
attempting to operate or work on the equipment. Simrad AS disclaims any responsibility
for damage or injury caused by improper installation, use or maintenance of the equipment.
If you require maintenance on your Simrad equipment, contact your local dealer. You can
also contact Simrad using the following e-mail address: [email protected]
Operator manual
Sections
1
Introduction
This section introduces the PI32 Catch monitoring system operator manual.
Refer to page 1.
2
System description
This section provides a general introduction to the PI32 Catch monitoring
system and the units in use. Refer to page 2.
3
Getting started
This section provides general guidelines to help you get started with the PI32
Catch monitoring system. Refer to page 8.
4
Applications
This section gives an overview of the various applications that the PI32 can
offer. Refer to page 20.
5
Display modes
This section gives an in--depth description of all the display presentations.
Refer to page 27.
6
Operational procedures
This section provides detailed procedures to guide you through the most
common functions. Refer to page 45.
7
Practical use of the sensors
This section describes how to install and use each sensor type. Both PI and PS
sensors are described and explained. Refer to page 83.
8
Sensor chargers
This section describes how to install and use the sensor chargers. Refer to page
144.
9
Menu system
This section allows you to access the reference information from the menu
structure. Refer to page 149.
10
References
This section details the various setup pages, those selected from the menu
system and those accessed from the display presentation. Refer to page 152.
11
PI Configurator
This section explains how to use the PI Configurator utility to change the
sensor’s communication channel and update rate. Refer to page 184.
857-164636 / Rev.A
I
Simrad PI32
12
Sensor test procedures
This section provides simple test procedure you can use to verify the the sensors
are working properly. Refer to page 223.
13
Technical specifications
This section provides the basic technical specifications. Refer to page 243.
II
857-164636 / Rev.A
Operator manual
INTRODUCTION . . . . . . . . . . . . . . . . . . . . . . . . . . . . . . . . . . . . . . . . . . . . . .
1
SYSTEM DESCRIPTION . . . . . . . . . . . . . . . . . . . . . . . . . . . . . . . . . . . . . .
2
System diagram . . . . . . . . . . . . . . . . . . . . . . . . . . . . . . . . . . . . . . . . . .
Operator Unit . . . . . . . . . . . . . . . . . . . . . . . . . . . . . . . . . . . . . . . . . . .
3
4
Hull mounted and portable hydrophones . . . . . . . . . . . . . . . . . . . . . .
Sensor overview . . . . . . . . . . . . . . . . . . . . . . . . . . . . . . . . . . . . . . . . .
5
6
Battery chargers . . . . . . . . . . . . . . . . . . . . . . . . . . . . . . . . . . . . . . . . . .
7
GETTING STARTED . . . . . . . . . . . . . . . . . . . . . . . . . . . . . . . . . . . . . . . . . . .
8
How to switch power on and off . . . . . . . . . . . . . . . . . . . . . . . . . . . . .
Defining initial presentation pages . . . . . . . . . . . . . . . . . . . . . . . . . . .
9
10
Introduction to the main menu . . . . . . . . . . . . . . . . . . . . . . . . . . . . . .
Introduction to the keypad . . . . . . . . . . . . . . . . . . . . . . . . . . . . . . . . .
12
13
Introducing the sensors . . . . . . . . . . . . . . . . . . . . . . . . . . . . . . . . . . . .
15
APPLICATION EXAMPLES . . . . . . . . . . . . . . . . . . . . . . . . . . . . . . . . . . . .
20
Purse seine . . . . . . . . . . . . . . . . . . . . . . . . . . . . . . . . . . . . . . . . . . . . . .
Danish seine . . . . . . . . . . . . . . . . . . . . . . . . . . . . . . . . . . . . . . . . . . . .
Bottom trawl . . . . . . . . . . . . . . . . . . . . . . . . . . . . . . . . . . . . . . . . . . . .
Pelagic trawl . . . . . . . . . . . . . . . . . . . . . . . . . . . . . . . . . . . . . . . . . . . .
Echo sounder . . . . . . . . . . . . . . . . . . . . . . . . . . . . . . . . . . . . . . . . . . . .
Graphic display . . . . . . . . . . . . . . . . . . . . . . . . . . . . . . . . . . . . . . . . . .
21
22
23
24
25
26
DISPLAY PRESENTATIONS . . . . . . . . . . . . . . . . . . . . . . . . . . . . . . . . . .
27
Numeric display . . . . . . . . . . . . . . . . . . . . . . . . . . . . . . . . . . . . . . . . .
Graphic display . . . . . . . . . . . . . . . . . . . . . . . . . . . . . . . . . . . . . . . . . .
Surface temperature . . . . . . . . . . . . . . . . . . . . . . . . . . . . . . . . . . . . . . .
28
35
37
Status display . . . . . . . . . . . . . . . . . . . . . . . . . . . . . . . . . . . . . . . . . . .
Echo sounder display . . . . . . . . . . . . . . . . . . . . . . . . . . . . . . . . . . . . .
Navigation display . . . . . . . . . . . . . . . . . . . . . . . . . . . . . . . . . . . . . . .
38
40
43
Position display . . . . . . . . . . . . . . . . . . . . . . . . . . . . . . . . . . . . . . . . . .
44
OPERATIONAL PROCEDURES . . . . . . . . . . . . . . . . . . . . . . . . . . . . . . . .
45
Overview . . . . . . . . . . . . . . . . . . . . . . . . . . . . . . . . . . . . . . . . . . . . . . .
How to define sensor presentation . . . . . . . . . . . . . . . . . . . . . . . . . . .
45
46
How to set up the sensors . . . . . . . . . . . . . . . . . . . . . . . . . . . . . . . . . .
48
How to mount the sensors on the net . . . . . . . . . . . . . . . . . . . . . . . . .
How to use the sensors . . . . . . . . . . . . . . . . . . . . . . . . . . . . . . . . . . . .
How to replace the sacrificial water switch . . . . . . . . . . . . . . . . . . . .
51
52
53
How to test the sensors . . . . . . . . . . . . . . . . . . . . . . . . . . . . . . . . . . . .
How to calibrate the Depth sensor . . . . . . . . . . . . . . . . . . . . . . . . . . .
54
55
How to define sensor offsets . . . . . . . . . . . . . . . . . . . . . . . . . . . . . . . .
56
857-164636 / Rev.A
III
Simrad PI32
How to set up a Twin Spread sensor for twin trawl applications . . . .
How to access graphic display parameters . . . . . . . . . . . . . . . . . . . . .
How to view echo sounder data . . . . . . . . . . . . . . . . . . . . . . . . . . . . .
How to set up marker lines . . . . . . . . . . . . . . . . . . . . . . . . . . . . . . . . .
Special features for trawl marker lines . . . . . . . . . . . . . . . . . . . . . . . .
How to access echo sounder parameters . . . . . . . . . . . . . . . . . . . . . . .
How to use visual aids and filters . . . . . . . . . . . . . . . . . . . . . . . . . . . .
How to define echo sounder range . . . . . . . . . . . . . . . . . . . . . . . . . . .
How to zoom in on bottom echoes . . . . . . . . . . . . . . . . . . . . . . . . . . .
How to zoom in on pelagic echoes . . . . . . . . . . . . . . . . . . . . . . . . . . .
How to enable A-Scope presentation . . . . . . . . . . . . . . . . . . . . . . . . .
How to define alarm limits . . . . . . . . . . . . . . . . . . . . . . . . . . . . . . . . .
How to select menu language . . . . . . . . . . . . . . . . . . . . . . . . . . . . . . .
How to control automatic page rotation . . . . . . . . . . . . . . . . . . . . . . .
How to restore default settings . . . . . . . . . . . . . . . . . . . . . . . . . . . . . .
57
62
63
64
67
69
70
72
74
75
76
77
80
81
82
PRACTICAL USE OF THE SENSORS . . . . . . . . . . . . . . . . . . . . . . . . . .
83
Sensor configuration . . . . . . . . . . . . . . . . . . . . . . . . . . . . . . . . . . . . . .
PI Bottom Contact sensor . . . . . . . . . . . . . . . . . . . . . . . . . . . . . . . . . .
PS Bottom Contact sensor . . . . . . . . . . . . . . . . . . . . . . . . . . . . . . . . .
PI Catch sensor . . . . . . . . . . . . . . . . . . . . . . . . . . . . . . . . . . . . . . . . . .
PS Catch sensor . . . . . . . . . . . . . . . . . . . . . . . . . . . . . . . . . . . . . . . . . .
PI Depth sensor . . . . . . . . . . . . . . . . . . . . . . . . . . . . . . . . . . . . . . . . . .
PS Depth sensor . . . . . . . . . . . . . . . . . . . . . . . . . . . . . . . . . . . . . . . . .
PI Height sensor . . . . . . . . . . . . . . . . . . . . . . . . . . . . . . . . . . . . . . . . .
PI Rip sensor . . . . . . . . . . . . . . . . . . . . . . . . . . . . . . . . . . . . . . . . . . . .
PI Spread and Remote sensors . . . . . . . . . . . . . . . . . . . . . . . . . . . . . .
PI Twin Spread . . . . . . . . . . . . . . . . . . . . . . . . . . . . . . . . . . . . . . . . . .
PI Temperature sensor . . . . . . . . . . . . . . . . . . . . . . . . . . . . . . . . . . . . .
PS Temperature sensor . . . . . . . . . . . . . . . . . . . . . . . . . . . . . . . . . . . .
84
87
91
95
100
104
109
114
118
123
128
133
139
SENSOR CHARGERS . . . . . . . . . . . . . . . . . . . . . . . . . . . . . . . . . . . . . . . . . . 144
Overview . . . . . . . . . . . . . . . . . . . . . . . . . . . . . . . . . . . . . . . . . . . . . . .
PI Charger . . . . . . . . . . . . . . . . . . . . . . . . . . . . . . . . . . . . . . . . . . . . . .
PS30 Charger . . . . . . . . . . . . . . . . . . . . . . . . . . . . . . . . . . . . . . . . . . .
144
145
147
MENU SYSTEM . . . . . . . . . . . . . . . . . . . . . . . . . . . . . . . . . . . . . . . . . . . . . . . . 149
The main menu . . . . . . . . . . . . . . . . . . . . . . . . . . . . . . . . . . . . . . . . . .
150
REFERENCES . . . . . . . . . . . . . . . . . . . . . . . . . . . . . . . . . . . . . . . . . . . . . . . . . . 152
Depth calibration . . . . . . . . . . . . . . . . . . . . . . . . . . . . . . . . . . . . . . . . .
Echo presentation setup . . . . . . . . . . . . . . . . . . . . . . . . . . . . . . . . . . . .
Echo sounder setup . . . . . . . . . . . . . . . . . . . . . . . . . . . . . . . . . . . . . . .
IV
153
154
157
857-164636 / Rev.A
Operator manual
Factory presets . . . . . . . . . . . . . . . . . . . . . . . . . . . . . . . . . . . . . . . . . .
Graphic setup . . . . . . . . . . . . . . . . . . . . . . . . . . . . . . . . . . . . . . . . . . .
159
160
Interface setup NMEA . . . . . . . . . . . . . . . . . . . . . . . . . . . . . . . . . . . .
162
Interface setup remote/alarm . . . . . . . . . . . . . . . . . . . . . . . . . . . . . . . .
Navigation setup . . . . . . . . . . . . . . . . . . . . . . . . . . . . . . . . . . . . . . . . .
167
168
Numeric setup . . . . . . . . . . . . . . . . . . . . . . . . . . . . . . . . . . . . . . . . . . .
Offset adjust . . . . . . . . . . . . . . . . . . . . . . . . . . . . . . . . . . . . . . . . . . . .
169
170
Page setup . . . . . . . . . . . . . . . . . . . . . . . . . . . . . . . . . . . . . . . . . . . . . .
Palette setup . . . . . . . . . . . . . . . . . . . . . . . . . . . . . . . . . . . . . . . . . . . .
171
172
Position display setup . . . . . . . . . . . . . . . . . . . . . . . . . . . . . . . . . . . . .
173
Receiver setup . . . . . . . . . . . . . . . . . . . . . . . . . . . . . . . . . . . . . . . . . . .
174
Sensor alarms . . . . . . . . . . . . . . . . . . . . . . . . . . . . . . . . . . . . . . . . . . .
Sensor setup . . . . . . . . . . . . . . . . . . . . . . . . . . . . . . . . . . . . . . . . . . . .
177
179
Speed setup . . . . . . . . . . . . . . . . . . . . . . . . . . . . . . . . . . . . . . . . . . . . .
180
Surface temperature setup . . . . . . . . . . . . . . . . . . . . . . . . . . . . . . . . . .
Trawl info setup . . . . . . . . . . . . . . . . . . . . . . . . . . . . . . . . . . . . . . . . .
Units setup . . . . . . . . . . . . . . . . . . . . . . . . . . . . . . . . . . . . . . . . . . . . . .
181
182
183
PI CONFIGURATOR . . . . . . . . . . . . . . . . . . . . . . . . . . . . . . . . . . . . . . . . . . 184
Purpose . . . . . . . . . . . . . . . . . . . . . . . . . . . . . . . . . . . . . . . . . . . . . . . .
Basic information . . . . . . . . . . . . . . . . . . . . . . . . . . . . . . . . . . . . . . . .
About sensor configuration . . . . . . . . . . . . . . . . . . . . . . . . . . . . . . . . .
184
185
187
Main dialogue description . . . . . . . . . . . . . . . . . . . . . . . . . . . . . . . . . .
Operational procedures . . . . . . . . . . . . . . . . . . . . . . . . . . . . . . . . . . . .
References . . . . . . . . . . . . . . . . . . . . . . . . . . . . . . . . . . . . . . . . . . . . . .
189
191
198
Maintenance . . . . . . . . . . . . . . . . . . . . . . . . . . . . . . . . . . . . . . . . . . . .
219
SENSOR TEST PROCEDURES . . . . . . . . . . . . . . . . . . . . . . . . . . . . . . . . . 223
Overview . . . . . . . . . . . . . . . . . . . . . . . . . . . . . . . . . . . . . . . . . . . . . . .
223
Bottom Contact test procedure . . . . . . . . . . . . . . . . . . . . . . . . . . . . . .
224
Catch sensor, test procedure . . . . . . . . . . . . . . . . . . . . . . . . . . . . . . . .
Depth sensor, test procedure . . . . . . . . . . . . . . . . . . . . . . . . . . . . . . . .
227
230
Height sensor, test procedure . . . . . . . . . . . . . . . . . . . . . . . . . . . . . . .
Spread & Remote sensors test procedure . . . . . . . . . . . . . . . . . . . . . .
233
236
Temperature sensor, test procedure . . . . . . . . . . . . . . . . . . . . . . . . . . .
240
TECHNICAL SPECIFICATIONS . . . . . . . . . . . . . . . . . . . . . . . . . . . . . . . 243
Sensors . . . . . . . . . . . . . . . . . . . . . . . . . . . . . . . . . . . . . . . . . . . . . . . .
244
INDEX . . . . . . . . . . . . . . . . . . . . . . . . . . . . . . . . . . . . . . . . . . . . . . . . . . . . . . . . . 249
857-164636 / Rev.A
V
Simrad PI32
Sensors
Use this table to write down the sensors you use on your PI32 Catch monitoring system.
Sensor
type
VI
Serial
number
Communication
channel
Update
rate
857-164636 / Rev.A
Operator manual
Sensors
Use this table to write down the sensors you use on your PI32 Catch monitoring system.
Sensor
type
857-164636 / Rev.A
Serial
number
Communication
channel
Update
rate
VII
Simrad PI32
VIII
857-164636 / Rev.A
Introduction
INTRODUCTION
The Simrad PI32 is an integration of proven commercial fishing
technologies which can dramatically increase the yield and
effectiveness of purse/danish seining and bottom/pelagic
trawling applications.
By means of three underwater sensors mounted on the gear, this
robust, maintenance-free catch monitoring system allows
unparalleled control over fishing operations by providing
continuous, centralised information on the vessel’s position, its
gear and the environment at and below the surface.
This manual is not intended to be read from cover to cover, but
is designed as a book of references that you can consult
whenever necessary.
(CD6521)
This manual describes PI32 software version SW 3.09.
Topics
857-164636 / Rev.A
→
System description, page 2
→
Getting started, page 8
→
Applications, page 20
→
Display modes, page 27
→
Operational procedures, page 45
→
Sensors, page 83
→
Menu system, page 149
→
References, page 152
→
PI Configurator, page 184
→
Sensor test procedures, page 223
1
Simrad PI32
SYSTEM DESCRIPTION
The Simrad PI32 Catch monitoring system consists of an
operator station, a hydrophone and an optional echo sounder
transducer. The hydrophone and the transducer are both
mounted under the vessel’s hull. The system further comprises a
number of small and robust sensors measuring the conditions on
your fishing gear.
The PI32 Catch monitoring system can work with three sensors
simultanously.
The sensors are powered by built-in rechargeable batteries. They
are housed in titanium casings, and designed using advanced
shock absorbing materials. The information collected by the
sensors are sent through the water to the hydrophone by means
of coded sound waves. From the hydrophone, the signals are
sent to the operator unit, which decodes the information,
interprets it, and finally present it to you.
Topics
2
→
System diagram, page 3
→
Operator unit, page 4
→
Hydrophones, page 5
→
Sensors overview, page 6
→
Battery chargers, page 7
857-164636 / Rev.A
System description
System diagram
(A) = Operator Unit
(B) = PI charger
(C) = Hydrophone
(provides communication
with the sensors)
(D) = Optional echo
sounder transducer.
Several types are
available.
(E) = Sensors mounted on
the net. Maximum three
sensors may be used
simultanously, and several
types are available.
(F) = Interfaces to
external sensors (serial
lines, NMEA format)
(G) = +24 Vdc power
857-164636 / Rev.A
3
Simrad PI32
Operator Unit
The PI32 Operator Unit is a marine grade electronic
instrument incorporating an impact resistant polycarbonate front
panel, die-cast aluminium housing and watertight electrical
connections.
The PI32 electronics are sealed in the operator unit allowing the
it to be flush or bracket mounted in the wheelhouse or at an
exposed control station.
Computed information is displayed in both numerical and
graphical form on the display. The unit is operated using
drop-down menus and an integrated keypad.
4
857-164636 / Rev.A
System description
Hull mounted and portable hydrophones
Two hull mounted hydrophones are available, one for purse
seining operations, and one for trawl operations. You can install
both, and then select active hydrophone by means of a selector
box on the bulkhead.
Purse seining: The hull mounted
hydrophone for purse seining operations
has a 90 degrees horizontal beam and a
30 degrees vertical beam to provide the
PI32 with optimal reception from the
sensors. This specific beam pattern is
especially suited for purse seining and the
wide coverage area reduces the need for
careful alignment.
Trawling: The hull mounted hydrophone for trawling
operations has a 50 degrees horizontal beam and a 30degrees
vertical beam to provide the PI32 with optimal reception from
the sensors. This specific beam pattern is especially suited for
trawling and the wide coverage area reduces the need for careful
alignment.
Portable: A portable hydrophone is also
available. It is designed as a temporary
measure until a fixed hydrophone can be
installed at the vessel’s next planned dry
docking. It has an omni-directional beam
and a 50 meter integrated cable which is
sheathed in polyurethane providing robust
external protection to compliment its 150
kg tensile strength. The cable is supplied on
a reel for convenient retrieval and stowage,
and is equipped with a plug for easy
attachment to the Operator Unit.
(CD5582)
857-164636 / Rev.A
5
Simrad PI32
Sensor overview
This chapter provides a very short description of each sensor.
• Depth sensor - The Depth sensor provide information about
the current depth as well as the descending or ascending rate
related to the surface.
• Catch sensor - The Catch sensor provides information about
the amount of catch in the trawl. The sensor monitors the
opening of the meshes in the cod-end, and will activate once
the caught volume pulls the detector wire. To monitor the
filling rate, you are adviced to use minimum two sensors.
• Bottom Contact sensor - The Bottom Contact sensors
detects if a trawl is accidentally lifted off the seabed, or a
purse seine is touching the bottom.
• Rip sensor - The Rip sensor provides an immediate warning
when the net is ripped.
• Temperature sensor - Temperature sensors read and transmit
the ambient water temperature at the gear depth.
• Height sensor - The Height sensor contains s small echo
sounder to measure the current depth related to the seabed.
• Spread & Remote sensor - These sensor always work in
pairs, and they measure the distance betwen the trawl doors.
You can also use two Remote sensors if you run a twin trawl.
The use of separate communication channels for the individual
sensors allows you to use your sensors in the vincinity of other
vessels using PI or PS sensors. The communication channels can
be defined and/or changed onboard your vessel using a standard
computer and the PI Configurator utility.
Related topics
6
→
More information about the sensors, page 15
→
How to use the sensors, page 83
857-164636 / Rev.A
System description
Battery chargers
All sensors are power by internal batteries, and these need
charging at regular intervals. The Simrad chargers have been
designed to allow the sensors to be stored in charging positions
whenever they are not used, and “overcharging” will not take
place. Either of the two charger types can be used on any of the
sensors, but the PI Charger will only provide fast charging on
the PI Sensors.
PS30 Charger
Three different Simrad PS30 Chargers are
available depending on the vessel’s main power
supply; 230 Vac, 110 Vac and +24 Vdc.
PI Charger
The PI Charger will provide fast charging of the
new PI sensor series. The Simrad PI Charger
requires a +12 to +32 Vdc power supply.
Related topics
857-164636 / Rev.A
→
PI Charger, page 145
→
PS30 Charger, page 147
7
Simrad PI32
GETTING STARTED
This section contains an brief overview of the basic system
operation. If you are a first time user, we recommend that you
read through this chapter while operating the PI32 so that you
can familiarize yourself with the buttons, menus and display
presentations.
In order to navigate the menu structures and display
presentations, you need to know the most important buttons.
MENU: Press to access the main menu. Press again to close it.
ENT: Press to apply the changes you have requested.
Selector pad (circular): Press along the edges to move the
cursor.
WIN: Press to leaf through the predefined display pages
(windows). You can have four different presentations active
simultanously, and use this button to access them.
Topics
8
→
How to switch power on and off, page 9
→
Defining initial presentation pages, page 10
→
Introducing the main menu, page 12
→
Introducing the keypad, page 13
→
Introducing the sensors, page 15
857-164636 / Rev.A
Getting started
How to switch power on and off
Observe the following procedure to switch the PI32 on and off.
Power on
1
Press and hold the PWR button until the display is
switched on.
2
Observe that the start-up page appears.
When you power up the PI32, it will automatically assume
operation using the most recent page mode.
Power off
857-164636 / Rev.A
1
Press the PWR button to call up the Light and power
dialogue.
2
Press and hold the PWR button to switch off the PI32.
9
Simrad PI32
Defining initial presentation pages
Observe the following procedure to set up the four display pages
on the PI32. The presentations chosen are those commonly used,
but using the guidelines in this procedure you can change the
content of individual pages to suit your requirements.
Page 1: Echo sounder
1
Press the MENU button to bring up the main menu.
2
Press the Selector pad to move the cursor (inverse video)
to the ECHO choice on the main menu.
3
On the Echo menu, select Echo display.
4
Press the ENT button to enter the choice.
An echo sounder appears. If you already know the basic settings
of an echo sounder you can access the setup page by pressing
the ENT button one more time.
Page 2: Numeric display
1
Press the WIN button once to select the next display page.
2
Press the MENU button to bring up the main menu.
3
Press the Selector pad to move the cursor (inverse video)
to the Fishery choice on the main menu.
4
On the Fishery menu, select Numeric display.
5
Press the ENT button to enter the choice.
The numeric display appears. If you already know how to
perform the basic setup, you can access the setup page by
pressing the ENT button one more time.
Page 3: Graphic display
1
Press the WIN button once to select the next display page.
2
Press the MENU button to bring up the main menu.
3
Press the Selector pad to move the cursor (inverse video)
to the FISHERY choice on the main menu.
4
On the Fishery menu, select Graphic display.
5
Press the ENT button to enter the choice.
The graphic display appears with the sensor data shown on the
top and the echo sounder shown below. If you already know
how to set up the basic parameters you can access the setup page
by pressing the ENT button one more time.
Page 4: Navigation display
1
10
Press the WIN button once to select the next display page.
857-164636 / Rev.A
Getting started
2
Press the MENU button to bring up the main menu.
3
Press the Selector pad to move the cursor (inverse video)
to the NAV choice on the main menu.
4
On the Navigation menu, select Navigation display.
5
Press the ENT button to enter the choice.
The navigation display appears. If you already know how to set
up the basic parameters you can access the setup page by
pressing the ENT button one more time.
Leafing through the pages
To leaf through the display presentations you have defined,
press the WIN button.
Other display presentations
Several other display presentations are available, but you only
have four different display pages to use. After some experience
with the PI32 system, you will however soon find out which
display presentations that are the most useful to you, and you
can alter the setup accordingly.
Related topics
→
857-164636 / Rev.A
Display presentations, page 27
11
Simrad PI32
Introduction to the main menu
The main menu is located across the top of the display. To open
the menu, press the MENU button. Note that if it is left
unactivated, the menu will disappear automatically after a few
seconds.
Each of the four options of the main menu provide a drop-down
menu. On these, you can select which information to view on
the display pages, or which parameters to define. Main and
drop-down menus are highlighted when selected, and the
complete main menu title is displayed in the top left-hand corner
of the screen.
• To open a sub-menu, press the ENT button, or press “down”
on the selector tab.
• To make your selection, highlight the choice, and press the
ENT button.
Related topics
→
12
The choices on the main menu, page 150
857-164636 / Rev.A
Getting started
Introduction to the keypad
The keypad is used for direct user interface with the PI32
system, and allows you to control the functionality. Note that the
majority of the buttons are mainly used only during echo
sounder operations, and that some of them will only work when
they are enabled by a specific function.
MENU: This button turns the menu bar on and off. It will also
allow you to exit dialogues without applying any changes.
ENT (Enter): Turns the cursor on and off. Opens for insertion,
and confirms the editing of data.
Selector pad: Use this button to navigate through menus and
dialogues. It moves the cursor horizontally by pressing it on the
left or right side, and vertically by pressing it on its top or
bottom.
-/+: These two buttons are used to select between available
values, scales and ranges. (-) reduces and (+) increases the
graduation.
VRM (Variable Range Marker): This button provides a
horizontal marker line on the echo sounder display. Use the
Selector pad to alter the depth of the marker. Press the button
one more time to switch the marker line off.
WIN (Windows): Changes the display presentation between
four predefined page modes.
STND (Standard): This button actuates a full-screen standard
echo sounder display. This is done by replacing the current
presentation with the echo sounder presentation. If you did not
have an echo sounder presentation amoung your four predefined
pages, you will have one now. If you already had such a
presentation on a different page, you will now have two.
ZOOM: This button actuates a full-screen standard echo
sounder display, and then expands the area around a variable
range marker. Adjust the depth of the range marker with the
selector pad, and choose the zoom range in the setup menu. The
page is provided by replacing the current presentation with the
echo sounder presentation. If you did not have an echo sounder
presentation amoung your four predefined pages, you will have
one now. If you already had such a presentation on a different
page, you will now have two.
857-164636 / Rev.A
13
Simrad PI32
B-LCK (Bottom lock): This button actuates a full-screen
standard echo sounder display, and then expands the area just
above the bottom. In the expanded presentation, the bottom will
appear flat. Choose the vertical expansion range in the setup
menu. The page is provided by replacing the current
presentation with the echo sounder presentation. If you did not
have an echo sounder presentation amoung your four predefined
pages, you will have one now. If you already had such a
presentation on a different page, you will now have two.
A-SCP (A-Scope): This button will only work if you have an
echo sounder presentation on your current page. It will open a
vertical presentation of the echoes from the latest ping. The
horizontal deflections indicate the strength of the echo, while
the vertical information shows at which depth the echoes
appeared.
GAIN: The two gain buttons are used to adjust the receiver gain
on the echo sounder.
PWR* (Power): This button is used to switch the PI32 system
on and off. During operation, it is also used to adjust the display
intensity and the background illumination of the buttons.
EVENT: This button places a vertical marker on the echo
sounder depth display to identify an event.
14
857-164636 / Rev.A
Getting started
Introducing the sensors
The PI32 Catch monitoring can be used with a variety of
sensors. All these sensors can be placed on your trawl or purse
seine to monitor key parameters.
On the PI32, you can use a maximum of three sensors
simultanously.
There are two sensor families; PI and PS. The sensors in the
two families are almost identical, and they can be used together
on the same PI32 system. The PI sensors will however offer
increased range, some added functionality, and they can also be
charged much faster using the PI Charger.
Bottom Contact: Best at the bottom!
With patented technology and awardwinning design, Simrad
provides you full control of the actions that take place at the
bottom. Mounted on a bottom trawl, pelagic trawl or purse
seine, this sensor will provide the important information when
you need it!
(A) = The Bottom Contact sensor mounted on a bottom trawl
will let you know once the trawl lifts a few centimeters above the
bottom. You can then immediatley perform the necessary
adjustments, and you will not loose any catch.
(B) = On a purse seine you will be notified once the seine
reaches the bottom, and you can thus fish even on a rough
bottom.
(C) = On a pelagic trawl, the sensor will notify you once you get
near the bottom.
The Bottom Contact sensor will let you know immediately if
your gear touches the bottom.
• Bottow trawl: If your trawl lifts off the bottom, this may
cause fish to escape, and hence reduce the catch. This sensor
will detect this, and allow you to trim your equipment for
perfect balance.
857-164636 / Rev.A
15
Simrad PI32
• Pelagic trawl: On a pelagic trawl, this sensor proves very
useful when the trawl moves downwards. It will let you
know immediately if the footrope touches bottom.
• Purse seine: When you work with a purse seine, you need to
know when the seine reaches the bottom. This sensor will let
you know. once it happens.
• Danish seine: Used on a Danish seine, the sensor will let you
know when the net has a stable bottom contact, and when it
is time to haul.
• Scientific research: During scientific surveys, an exact
definition of towed distance with proper ground gear contact
is an essential parameter in bottom trawl swept area estimates
of fish abundance. Using a Bottom Contact sensor will
reduce errors in this key parameter.
Catch sensor: When is the trawl full?
This is your “eye” at the cod-end. With PI Catch sensors in use,
you can easily monitor the fi lling rate and the amount of catch
in the trawl. Save time and fuel, haul in the trawl at the right
moment! The design is rugged and awardwinning, and the
sensor’s sensitivity is easily adjustable for trawls of all sizes.
Some professionals claim that the Catch sensor is the most
important sensor on the trawl. Why? Because it will tell you the
amount of catch in the trawl.
The sensor simply monitors the expansion of the meshes in the
cod-end. Once the volume caught is enough to expand the
meshes, they will pull the detector wires and engage the sensor.
The sensitivity of the sensor can easily be adjusted, just extend
the detection rubber bands to span additional meshes.
To monitor the filling rate, we recommend that you use
minimum two sensors. Place the first sensor at the far end of the
cod-end, it will tell you that the trawl is actually fishing. Place
the second sensor closer to the trawl opening. Once the trawl is
filled to the chosen location, the sensor is engaged, and you
know that it is time to haul.
Use the PI Catch sensor to adjust the catch volume according to
the production capacity, check that the trawl is fishing, adjust
the caught volume to secure quality, and minimize the towing
time to save fuel. These are only a few of the reasons why this
sensor is considered to be so important.
16
857-164636 / Rev.A
Getting started
Depth: How deep can you go?
When the sonar and echo sounder tell you how deep the school
goes, it is good to know that you can place your fishing gear at
the same depth. And even better, you can monitor and hold the
desired depth. The design is rugged and awardwinning, and the
sensor is available for three different depth ranges.
The PI Depth sensor provides information about the current
depth and the depth changes of your gear.
• Bottom trawl: On a bottom trawl, you will use the sensor to
achieve full control when shooting, and to position the trawl
on the slope.
• Pelagic trawl: During pelagic trawling, you know how
important it is to position the trawl relative to the largest
concentration of fish. By using a Depth sensor, you can
monitor the exact depth relative to the surface, and adjust the
trawl depth accordingly. Additional depth sensors on the
doors will monitor if the doors stay at the same depth.
• Purse seine: During seining, use the Depth sensor to monitor
the depth of the net, and the descending speed of the net.
Then you will know when to start pursing, and which speed
to use.
• Danish seine: Mounted on a Danish Seine the Depth sensor
monitors the sinking speed of the net, and it will tell you
when to start hauling once the net has stopped sinking.
Height sensor: Accurate distance to the bottom!
With a built-in echo sounder, this new PI sensor is full of
advanced technology. Wherever you place it, it will always tell
you the exact distance to the bottom.
The height sensor measures the height over the bottom, that is
the distance from the bottom and up to wherever the sensor is
located. This provides you with a valuable range of applications
for bottom and pelagic trawling.
• Bottom trawl: Place the sensor behind the headrope, and it
will tell you the height of the trawl opening. This allows you
to adjust you equipment immediately if the opening is
reduced, and you will avoid loosing catch.
• Pelagic trawl: With a height sensor behind the footrope you
will know at once if the trawl approaches the bottom. If you
use a second sensor behind the headrope, the difference
between the two measurements will give you the height of
the trawl opening.
857-164636 / Rev.A
17
Simrad PI32
Rip: Check for damages!
The Rip sensor is identical to the Catch sensor, and can thus be
regarded as a application for the Catch sensor. Place the sensor
on the trawl belly behind the footrope, and use it to detect if the
trawl is torn or in any other ways damaged by rocks or other
roughness on the bottom. If this is detected immediately you can
adjust the gear to minimise the damage.
Spread and Remote: Check the trawl doors!
This dynamic duo tells you the exact distance between the trawl
doors. Used on bottom and pelagic trawls the Spread and
Remote sensors provide crucial information about your trawl
behaviour. On a twin trawl, simply add a Remote sensor and
you have both openings covered!
These two sensors always work in pairs. They are used to
monitor the physical distance between the trawl doors during
bottom and pelagic trawling.
Use a Spread sensor on the port door and a Remote sensor on
the starboard door. Both sensors are normally mounted in
special adapters, but you may also attached them to the
wing-end or warp using snap hooks or rope.
The Spread sensor communicates with the Remote sensor using
a special transverse communication link. By means of this link it
measures the excact distance (maximum 350 meters) between
the two sensors. The information is is transmitted to the vessel
by the Spread sensor.
As you already know, correct door spread is important in order
to obtain the correct sweep-angle, as this ensures optimal trawl
performance. Door behavior and stability during shooting and
towing is also monitored by these sensors. Many regard this pair
of sensors one of the most important sensors to obtain efficient
trawling.
A special version of the PI Spread sensor, The PI Twin Spread,
allows you to use a single Spread sensor with two Remote
sensors to monitor a twin trawl.
Temperature: Too warm or too cold water?
Fishing in too warm or too cold water may be just a waste of
time and money. The same applies to a pelagic trawl placed on
the wrong side of a thermal layer. Using advanced technology,
rugged construction and awardwinning design, the PI
Temperature sensor allows you to increase your fishing
efficiency.
The PI Temperature sensor tells you the exact sea water
temperature while you are fishing.
18
857-164636 / Rev.A
Getting started
The water temperature is an important parameter. Fish and bait
are temperature sensitive, and they are normally found within
specific temperature zones for feeding and spawning.
However, the temperature layers in the water are changing
constantly, and for this reason the temperature must be
monitored constantly. Fishing in an area with unfavourable
water temperature might be just a waste of time!
For any kind of trawling, use this sensor to monitoring and log
the temperature. Then, increase your knowledge about the
correlation between temperature, fish concentration and catch
efficiency. On a purse seine net, monitor the temperature to see
when you are passing the thermo-cline.
Related topics
857-164636 / Rev.A
→
Purse seine, application, page 21
→
Danish seine, application, page 22
→
Bottom trawl, application, page 23
→
Pelagic trawl, application, page 24
→
Sensor configuration, page 84
→
PI Bottom Contact, page 87
→
PS Bottom Contact, page 91
→
PI Catch, page 95
→
PS Catch, page 100
→
PI Depth, page 104
→
PS Depth, page 109
→
PI Height, page 114
→
PI Rip, page 118
→
PI Spread & Remote, page 123
→
PI Temperature, page 133
→
PS Temperature, page 139
19
Simrad PI32
APPLICATION EXAMPLES
The Simrad PI32 system is designed to fulfill all your
requirements within a range of specific applications. This
chapter provides a few examples on how the various sensors can
be placed on your fishing gear. It also provides a brief
description of the echo sounder and graphic display
functionality.
Topics
20
→
Purse seine, application, page 21
→
Danish seine, application, page 22
→
Bottom trawl, application, page 23
→
Pelagic trawl, application, page 24
→
Echo sounder, application, page 25
→
Graphic display, application, page 26
857-164636 / Rev.A
Applications
Purse seine
When used for purse seining, the PI32 system must have one or
more of the following sensors attached to the net: Depth sensor,
Bottom Contact sensor and Temperature sensor.
The system is designed to be used with up to three sensors,
optimally two Depth sensors and one Temperature or Bottom
Contact sensor. The sensor configuration can be tailored to suite
individual needs.
(A) = (B) = Depth / Bottom Contact sensor
(C) = Temperature / Bottom Contact sensor
(D) = Depth sensor (placed on the headrope to warn if it sinks)
Using the recommended sensors, the PI32 system will provide
the following information:
• When to begin pursing, and which speed to use for the most
efficient pursing
• Location of the net related to the school
• Bottom approximation without net contact
• Net sink rate, when the net has stopped sinking, and when it
starts to rise
• Water temperature at different depths
• When the gear passes the thermocline
857-164636 / Rev.A
21
Simrad PI32
Danish seine
When used for Danish seining the PI32 system needs up to three
of the following sensors attached to the net: Depth and Bottom
Contact.
The system is designed to be used with up to three sensors.
Optimally two Depth sensors (located at the top and bottom of
the net) and one Bottom Contact sensor are used. Sensor
configuration can be tailored to suite individual needs.
(A) = Bottom contact sensor
(B) = (C) = Depth sensors
Using the recommended sensors, the PI32 system will provide
the following information:
• When to start hauling
• Monitor net sinkage rate
• Bottom approximation without net contact
• Net opening (using two depth sensors)
22
857-164636 / Rev.A
Applications
Bottom trawl
When used for bottom trawling, the PI32 system will give you
all necessary information about the trawl status. You should
have minimum three of the following sensors attached to the
net: Depth sensors(s), Bottom Contact sensor, Rip sensor and
Catch sensors(s).
The system is designed to be used with up to three sensors. We
recommend that you use a Catch sensor, a Height sensor behind
the headrope and a Spread sensor. Sensor configuration can be
tailored to suite individual needs.
(A) = Depth sensor (headrope)
(B) = Depth sensor (footrope)
(C) = Bottom contact sensor
(D) = Rip sensor
(E) = (F) = Catch sensor(s)
Using the recommended sensors, the PI32 system will provide
the following information:
• Optimal vessel speed with regard to net sink rate and bottom
approximation.
• When the codend is full.
• Footwire/bottom lift-off.
• Net opening (using two depth sensors) and damage
857-164636 / Rev.A
23
Simrad PI32
Pelagic trawl
When used for pelagic trawling the PI32 system must have one
or more of the following sensors attached to the net: Depth
sensor(s), Bottom Contact sensor, Temperature sensor, Rip
sensor and Catch sensor(s).
The system is designed to be used with up to three sensors. We
recommend that you use a Catch sensor, a Depth sensor behind
the headrope, and a Spread sensor. Sensor configuration can be
tailored to suite individual needs.
(A) = Depth sensor (headrope)
(B) = Depth sensor (footrope)
(C) = Bottom contact sensor
(D) = Rip sensor
(E) = Temperature sensor
(F) = (G) = Catch sensors
Using the recommended sensors, the PI32 system will provide
the following information:
• Optimal vessel speed with regard to net sink rate and school
location.
• When the codend is full.
• Bottom approximation to avoid net contact.
• Net opening (using two depth sensors) and damage
• Ambient water temperature at gear depth.
24
857-164636 / Rev.A
Applications
Echo sounder
The built-in echo sounder will provide information about depth,
bottom contours and the presence of fish below the vessel. The
echo sounder can use three frequencies; 38 kHz, 50 kHz and
200 kHz. Two frequencies can be operated simultanously.
The following operational modes are available
• Standard mode: Range start is fixed, and the depth range
can be altered
• Bottom lock: The echo sounder provides an expansion
window to study the echoes closest to the bottom.
• Zoom: The echo sounder provides an expansion window to
study echoes in the water column.
• A-scope: Single ping echo presentation
857-164636 / Rev.A
25
Simrad PI32
Graphic display
By means of the built-in echo sounder and the information
provided by the analogue sensors, you can set up a graphic
display to give you a total overview of the underwater situation.
The graphic display presents the echogram at the bottom of the
screen while the numerical sensor presentations are listed at the
top of the screen. The information from those sensors providing
analogue data (Depth, Height, Temperature and Spread) are
superimposed on the echogram.
Related topics
26
→
How to superimpose echo sounder data, page 63
→
How to superimpose marker lines, page 64
857-164636 / Rev.A
Display modes
DISPLAY PRESENTATIONS
The PI32 supports a range of display presentations. These are
the information elements that you can choose to see on each
page.
Topics
857-164636 / Rev.A
→
Numeric display, page 28
→
Graphic display, page 35
→
Surface temperature, page 37
→
Status display, page 38
→
Echo sounder display, page 40
→
Navigation display, page 43
→
Position display, page 44
27
Simrad PI32
Numeric display
The numeric display provides vital sensor data in large, easy to
read digits and symbols. In the following, all sensor
presentations are explained in detail.
This illustration shows a typical twin display setup with the numeric presentation from
six sensors on the left side and an echo sounder presentation on the right hand side.
The background colour for the numerical display presentations
can be selected individually from the palette. If the data from
the sensors are unstable, the presentations will use the following
character presentations:
??? - The sensor provides uncertain readings.
±±± - No communication between Spread and Remote sensors
***.* - No communication with the sensor.
Topics
→
Bottom Contact sensor presentation, page 29
→
Catch sensor presentation, page 30
→
Depth sensor presentation, page 31
→
Height sensor presentation, page 32
→
Spread sensor presentation, page 33
→
Temperature sensor presentation, page 34
To change presentation parameters
The numeric presentations are controlled by the parameters
defined in the setup. To change these parameters, press the ENT
button to access the Numeric setup page.
Related topics
→
28
Numeric setup, page 169
857-164636 / Rev.A
Display modes
Bottom Contact presentation
The Bottom Contact sensor presentation is shown below.
(A) The character and the number identifies the type of sensor,
and which identification number the sensor has on the PI32
system. In this example, B4 means that it is a bottom contact
sensor, and that it is sensor no.4.
(B) Status field. The three arrows display “bottom contact”,
graphically represented by the black or red downward pointing
arrows in contact with the horizontal black line. Upon loss of
bottom contact, the arrows will rise from the black line (seabed)
and change colour from black to red. At the same time an
audible warning is sounded, and the timer starts. Bottom sensor
measurement range may be adjusted as necessary.
(C) Timer, records how many minutes that have elapsed since
the sensor lost bottom contact. If the bottom contact is regained,
the timer stops. It is then restarted once the status changes again.
The timer must be manually restarted in the Numeric setup.
(D) Yellow pulse lamp blinks each time a signal is received
from the corresponding sensor.
(E) Interference warning, activated when the PI32 detects
interference from other nearby vessel(s) operating on the same
channel or with similar hydroacoustic equipment. Contact your
Simrad dealer to select a different frequency should this
problem persist.
857-164636 / Rev.A
29
Simrad PI32
Catch presentation
The Catch sensor presentation is shown below.
Note:
If you use more than one catch sensor in the trawl, make sure
that you configure them with different channel numbers, and
that you mount and read them in the correct order!
(A) The character and the number identifies the type of sensor,
and which identification number the sensor has on the PI32
system. In this example, C3 means that it is a catch sensor, and
that it is sensor no.3.
(B) Status field. A yellow rectangle means that the sensor has
not been activated yet. A red rectangle means that the trawl has
been filled with fish, and this has triggered the sensor. When the
indicator switches from yellow to red an audible alarm is
sounded, and the timer starts.
(C) Timer, records how many minutes that have elapsed since
the sensor was triggered. If the status switches from red back to
yellow, the timer stops. It is then restarted once the status
changes again. The timer must be manually restarted in the
Numeric setup.
(D) Yellow pulse lamp blinks each time a signal is received
from the corresponding sensor.
(E) Interference warning, activated when the PI32 detects
interference from other nearby vessel(s) operating on the same
channel or with similar hydroacoustic equipment. Contact your
Simrad dealer to select a different frequency should this
problem persist.
30
857-164636 / Rev.A
Display modes
Depth presentation
The Depth sensor presentation is shown below.
(A) The character and the number identifies the type of sensor,
and which identification number the sensor has on the PI32
system. In this example, D1 means that it is a depth sensor, and
that it is sensor no.1.
(B) Unit of measure. [m] means meter, [ft] means feet, [fm]
means fathoms and [pb] means braccia.
(C) Depth readout.
(D) Ascending or descending speed of the net shown in units per
minute. The direction is shown with the arrow (E). If the speed
is 0, the arrow is removed.
(E) Direction indicator for net movements.
(F) Graphic alarm. The direction of the triangle indicates if the
net depth should be increased or decreased with regard to the
selected alarm limits. If requested, this graphic alarm may be
accompanied with an audible alarms.
(G) Yellow pulse lamp blinks each time a signal is received
from the corresponding sensor.
(H) Interference warning, activated when the PI32 detects
interference from other nearby vessel(s) operating on the same
channel or with similar hydroacoustic equipment. Contact your
Simrad dealer to select a different frequency should this
problem persist.
857-164636 / Rev.A
31
Simrad PI32
Height presentation
The Height sensor presentation is shown below.
(A) The character and the number identifies the type of sensor,
and which identification number the sensor has on the PI32
system. In this example, H1 means that it is a height sensor, and
that it is sensor no.1.
(B) Unit of measure. [m] means meter, [ft] means feet, [fm]
means fathoms and [pb] means braccia.
(C) Readout of the actual height between the sensor and the sea
bottom.
(D) Speed of increasing or decreasing depth. The two arrows
(E) are used to indicate if the distance is increasing or
decreasing. If the depth is constant and the speed is 0, the
arrows are removed.
(E) Depth increase/decrease indicators. If the two arrows point
towards each other (as shown in the example), the depth is
decreasing.
(F) Graphic alarm. The direction of the triangle indicates if the
depth should be increased or decreased with regard to the
selected alarm limits. If requested, this graphic alarm may be
accompanied with an audible alarms.
(G) Yellow pulse lamp blinks each time a signal is received
from the corresponding sensor.
(H) Interference warning, activated when the PI32 detects
interference from other nearby vessel(s) operating on the same
channel or with similar hydroacoustic equipment. Contact your
Simrad dealer to select a different frequency should this
problem persist.
32
857-164636 / Rev.A
Display modes
Spread presentation
The Spread sensor presentation is shown below.
(A) The character and the number identifies the type of sensor,
and which identification number the sensor has on the PI32
system. In this example, S3 means that it is a spread sensor, and
that it is sensor no.3.
(B) Unit of measure. [m] means meter, [ft] means feet, [fm]
means fathoms and [pb] means braccia.
(C) Readout of the actual distance between the two trawl doors.
(D) Increasing or decreasing distance speed of the trawl door
distance shown in units per minute. The two arrows (E) are used
to indicate if the distance is increasing or decreasing. If the
distance is constant and the speed is 0, the arrows are removed.
(E) Distance increasing/decreasing indicators. If the two arrows
point away from each other (as shown in the example), the
distance is increasing.
(F) Graphic alarm. The direction of the triangle indicates if the
trawl door distance should be increased or decreased with regard
to the selected alarm limits. If requested, this graphic alarm may
be accompanied with an audible alarms.
(G) Yellow pulse lamp blinks each time a signal is received
from the corresponding sensor.
(H) Interference warning, activated when the PI32 detects
interference from other nearby vessel(s) operating on the same
channel or with similar hydroacoustic equipment. Contact your
Simrad dealer to select a different frequency should this
problem persist.
857-164636 / Rev.A
33
Simrad PI32
Temperature presentation
The temperature sensor presentation is shown below.
(A) The character and the number identifies the type of sensor,
and which identification number the sensor has on the PI32
system. In this example, T2 means that it is a temperature
sensor, and that it is sensor no.2.
(B) Temperature readout.
(C) Unit of measure in Celcius or Fahrenheit.
(D) Temperature trend, indicates if the temperature is falling or
rising. An arrow pointing up this indicates that the temperature
is increasing, while an arrow pointing down indicates decreasing
temperature.
(E) Graphic alarm. The direction of the triangle indicates if the
temperature is higher or lower than a predefined limit.
(F) Yellow pulse lamp blinks each time a signal is received from
the corresponding sensor.
(G) Interference warning, activated when the PI32 detects
interference from other nearby vessel(s) operating on the same
channel or with similar hydroacoustic equipment. Contact your
Simrad dealer to select a different frequency should this
problem persist.
34
857-164636 / Rev.A
Display modes
Graphic display
The graphic display provided by the PI32 offers an accurate
echo sounder combined with numeric readouts from the net
sensors.
Note that some of the information provided by the graphic
presentation assumes that you have the relevant sensors
connected to your PI32 system.
The following information is provided in the graphic
presentation.
(A) Numeric display. In this example, the information from a
depth sensor is shown. The current depth is 25.9 meters.
(B) Numeric display. In this example, the information from a
bottom contact sensor is shown. The trawl has currently lifted
off the seabed.
(C) Numeric display. In this example, the information from a
catch sensor is shown. The sensor has not yet been triggered.
(D) Depth scale.
(E) Data from a depth sensor located on a pelagic trawl. The
information has been superimposed onto the graphic display.
The colour of the line will automatically be the same as the
current background colour of the relevant numeric display.
There are two lines because the height of the trawl opening has
been added manually.
(F) Fish echo
857-164636 / Rev.A
35
Simrad PI32
(G) Bottom echo
(H) Height of trawl opening (manual input)
(I) Time scale.
Information not shown in this example
Temperature scale: When requested, a temperature scale can be
provided on the left side of the display. To switch the
temperature scale on or off, use the Graphic setup.
Depth bars: Depth information from relevant sensors can be
shown as vertical bars on the right side of the display. Each
vertical bar will use the same colour as the current background
colour of the relevant numeric display. To switch the depth bars
on or off, use the Graphic setup.
To change presentation parameters
The presentation is controlled by the parameters defined in the
PI32 setup. To change these parameters, press the ENT button
to open the Graphic setup page.
To change echo sounder parameters, press the MENU button to
open the main menu, and select Echo sounder setup on the
Echo menu.
Related topics
36
→
Graphic setup, page 160
→
Echo presentation setup, page 154
857-164636 / Rev.A
Display modes
Surface temperature
The Surface temperature display shows the current
temperature. By means of the graph it will also show you the
temperature history for the past minute. The presentation is
activated from the Fishery menu. To have this information
available, you must have the relevant temperature feeler
connected to your PI32 system. A suitable feeler is integrated
with several Simrad echo sounder transducers, or it may be
connected as a separate peripheral.
To change presentation parameters
The presentation is controlled by the parameters defined in the
PI32 setup. To change these parameters, press the ENT button
to open the Surface temperature setup page.
Related topics
→
857-164636 / Rev.A
Surface temperature setup, page 181
37
Simrad PI32
Status display
The Status display shows sensor data, signal thresholds and
background noise levels providing an overview of present
hydro-acoustical conditions and the margin for reliable signal
detection. Other information displayed includes cable status,
program version, and echo sounder / position information.
Note that some of the information provided by the Status
display assumes that you have the relevant sensors connected to
and operational on your PI32 system.
The following information is provided by the Status display.
(A) Numeric display. In this example, the information from a
depth sensor is shown. The current depth is 47.9 meters.
(B) Numeric display. In this example, the information from a
bottom contact sensor is shown. The trawl has currently lifted
off the seabed.
(C) Numeric display. In this example, the information from a
catch sensor is shown. The sensor has not yet been triggered.
(D) Information lines 1 and 2: The top line provides the
following information:
• The status of the MP (MultiPath) filter
• The current software version of the PI32.
38
857-164636 / Rev.A
Display modes
The second lines shows:
• The current AGC status (Automatic Gain Control)
• The status off the hydrophone cable. A yellow circle means
that the cable is serviceable. A black circle means that it has
broken, while a red circle indicates a short circuit.
• CH/R: The channel number of the sensor from which data
was last received.
• E: Error code for systems manlfunctions. The error code “0”
signifies that no system error is present.
(E) Frequency spectrum for frequencies on the 00 to 15 band.
Select the desired band by pressing the respective - or + buttons.
Wait for the unit to update the display. The graph represents the
associated background noise and the signal strength of the band
selected.
(F) Gain indicator
(G) Gain indicators for the three current sensors. The green field
indicates that the detection level is within normal specifications.
The red field indicates that the signal level is currently over the
detection threshold (DT).
(H) Information lines 3 and 4. The top line provides the
following information:
• Geographical position (longutide)
• Current course
• Current depth
• Current time.
The bottom line shows:
• Geographical position (latitude)
• Current speed
• Current surface temperature
To change status display parameters
The parameters are fixed, and they can not be changed.
Related topics
→
857-164636 / Rev.A
Receiver setup, page 174
39
Simrad PI32
Echo sounder display
The PI32 offers an accurate echo sounder with a colour display.
The echo sounder can operate on 38, 50 or 200 kHz, and with
two frequencies simultanously. In order to enjoy the echo
sounder functionality, you must have one or two echo sounder
transducers installed.
Note that some of the information provided by the echo sounder
presentation assumes that you have the relevant sensors
connected to your PI32 system.
The following information is provided in the echo sounder
presentation.
(A) Current sea temperature.
(B) Current vessel speed
(C) Current depth
(D) Colour scale. This scale shows how the echoes are
presented, The strongest echoes are displayed using the colour
on the top of the scale, while the weakest echoes are displayed
using the colours at the bottom of the scale.
(E) Depth scale: This scale can be set up change automatically
depending on the current depth. Automatic depth scale is
identified with the text AUTO at the bottom of the scale.
(F) A-scope presentation.
(G) Bottom echo
40
857-164636 / Rev.A
Display modes
(H) Single fish echo
(I) Current primary technical parameters. The top line specifies
the current operational frequency. The second line specifies the
current output power (”A” means that it is set automatically),
and the third line specifies the current pulse length.
The presentation is controlled by the parameters defined in the
presentation setup. To change these parameters, press the ENT
button to open the Presentation setup. To change presentation
units, press the MENU button to open the main menu, and then
select Speed alarm, units and language on the Setup menu.
In the Echo sounder setup (on the Echo menu) you can change
the readout for current depth (C). The A-scope presentation can
be switched on and off from the Echo menu.
Bottom expansion
The PI32 provides a Bottom expansion function. When enabled
the vertical area close to the seabed is expanded. The resulting
presentation will not show the depth variations, as the bottom
will appear flat. However, echoes close to the bottom will be
enhanced. Note that the depth range in this presentation will be
“upside down”, as the seabed is defined as level “0”.
To enable this function, press the MENU button, and select
Bottom expansion on the Echo menu. To disable it, select
Echo display on the same menu. The vertical size of the
expansion window is controlled by the Expansion window
parameter in the Presentation setup. Press the ENT button to
access this setup page.
A-Scope
The PI32 provides an A-Scope function. This presentation
provides the echo from the latest ping only. The strength of the
returned signal from various depths in the water column are
indicated by the horizontal deflections from the Y-axis. This
presentation is very useful if you wish to search for single fish,
as those echoes are hard to see on the regular echogram. Also,
the presentation will give an indication on how strong the
various echoes are.
To enable this function, press the MENU button, and select
Turn A-Scope on on the Echo menu. To disable it, select Turn
A-Scope off on the same menu.
857-164636 / Rev.A
41
Simrad PI32
VRM expansion
The PI32 provides an VRM expansion function. When enabled
the vertical area on both sides on a vertical range marker (VRM)
is expanded. The resulting echo sounder presentation is thus
split in two with the lower half of the screen providing the
expanded view.
When activated, you can move the depth of the vertical marker
by pressing the circular Selector pad.
To enable the this function, press the MENU button, and select
VRM expansion on the Echo menu. To disable it, select Echo
display on the same menu. The vertical size of the expansion
window is controlled by the Expansion window parameter in
the Presentation setup. Press the ENT button to access this
setup page.
To change presentation parameters
The echo sounder presentation is controlled by the parameters
defined in the setup. To change these parameters, press the ENT
button to access the Presentation setup page.
The technical parameters for the echo sounder are located on the
Echo sounder setup page. To access, press the MENU button,
and select Echo sounder setup on the Echo menu.
Related topics
42
→
Echo presentation setup, page 154
→
Echo sounder setup, page 157
857-164636 / Rev.A
Display modes
Navigation display
The navigation display provided by the PI32 offers all key
information related to waypoint navigation. Note that the
information provided by this presentation assumes that you have
the relevant sensor (GPS) connected to your PI32 system.
The following information is
provided by the Navigation
display:
(A) “C” is the current course
over ground, while “B” is the
course to the next waypoint.
(B) “DS” is the current depth
from the surface, while the
temperature is the current
surface temperature.
(C) ”S” is the current speed
over ground, while “V” is the
speed towards the next
waypoint.
(D) Crosstrack error
(E) Crosstrack error
(F) Satellite reception status. The character “A” means that the
reception is good, “B” means that the reception is acceptable,
and “C” means that it is poor. If there is no reception, the
message No valid POS will be shown.
(G) The ideal course line between the two waypoints.
(H) These are the crosstrack error alarm lines.
(I) The distance to the next waypoint.
To change presentation parameters
The presentation is controlled by the parameters defined in the
PI32 setup. To change these parameters, press the ENT button
to open the Navigation setup page.
Related topics
→
857-164636 / Rev.A
Navigation setup, page 168
43
Simrad PI32
Position display
The Position display provided by the PI32 offers all key
information related to safe navigation on one display
presentation. Note that the information provided by the Position
display assumes that you have the relevant sensors (GSP and
temperature feeler) connected to your PI32 system.
The following information is
provided by the position
display:
Water temperature: The
temperature will only be
available if the applicable
temperature feeler is connected
to the PI32.
Two individual distance logs:
Both distance logs can be reset
using the setup parameters.
Current geographical
position: If the position fails to
be updated, the characters will
flash.
Current speed, course and depth: This information will only
be available if the applicable sensors have been connected to the
PI32.
Local time and date
Status: This is the current status of the satellite reception. The
character “A” means that the reception is good, “B” means that
the reception is acceptable, and “C” means that it is poor. If
there is no reception, the message No valid POS will be shown.
To change presentation parameters
The presentation is controlled by the parameters defined in the
PI32 setup. To change these parameters, press the ENT button
to open the Reset log page.
Related topics
→
44
Reset log setup, page 173
857-164636 / Rev.A
Operational procedures
OPERATIONAL PROCEDURES
Overview
This chapter will provide you with basic procedures in order to
help you set up the most common functions and parameters in
the PI32.
Sensor procedures
→
How to show or hide the graphic
alarm, page 46
→
How to show or hide the sensor timers,
page 46
→
How to reset the sensor timers,
page 46
→
How to change background colour,
page 46
→
How to set up the sensors, page 48
→
How to mount the sensors on the net,
page 51
→
How to use the sensors, page 52
→
How to replace the sacrificial water
switch, page 53
→
How to test the sensors, page 54
→
How to calibrate the Depth sensor,
page 55
→
→
How to define sensor offsets, page 56
How to set up a Spread sensor for a
twin trawl, page 57
Echo sounder procedures
→
How to access echo sounder
parameters, page 69
→
How to use visual aids and filters,
page 70
→
How to define range, page 72
→
How to zoom in on bottom echoes,
page 74
→
How to zoom in on pelagic echoes,
page 75
→
How to activate the A-Scope
presentation, page 76
Common procedures
→
How to define alarm limits, page 77
→
How to select menu language, page 80
→
How to control automatic page
rotation, page 81
→
How to restore default settings, page 82
Graphic display procedures
→
→
→
→
How to access graphic display
parameters, page 62
How to view echo sounder data,
page 63
How to set up marker lines, page 64
How to use the special features for
trawl markers, page 67
857-164636 / Rev.A
45
Simrad PI32
How to define sensor presentation
The information from the various sensors are provided by the
Numerical display, where each sensor is presented in its own
rectangular data winsow.
How to show or hide the graphic alarm
1
Ensure that you have a Numeric display presentation in
your active window.
2
Press the ENT button to open the Numeric setup
dialogue.
3
Switch Show graphic alarm on or off.
4
Press the ENT button to save the parameters and exit.
How to show or hide the sensor timers
Sensor timers are only used on Catch and Bottom Contact
sensors.
1
Ensure that you have a Numeric display presentation in
your active window.
2
Press the ENT button to open the Numeric setup
dialogue.
3
Switch Sensor timer on or off.
4
Press the ENT button to save the parameters and exit.
How to reset the sensor timers
Sensor timers are only used on Catch and Bottom Contact
sensors.
1
Ensure that you have a Numeric display presentation in
your active window.
2
Press the ENT button to open the Numeric setup
dialogue.
3
Set Reset sensor timers to YES.
4
Press the ENT button to save the parameter and exit.
5
Press the ENT button one more time to accept the process.
The next time you access the Numeric setup dialogue, the value
for Reset sensor timers is NO.
How to change the background colour
You can change the background colours on the rectangular data
windows in order to easily distingush them from each other.
1
46
Press the ENT button to open the manin menu.
857-164636 / Rev.A
Operational procedures
2
On the Setup menu, select Display colour.
3
Observe the first palette page appear. It contains fixed
colours, which can not be altered. Press the + button
repeatedly until you reach a custom page.
4
By means of the circular Selector pad and the + and buttons, select the requested colour(s).
5
Press the ENT button to accept the choice.
Related topics
857-164636 / Rev.A
→
Numeric setup, page 169
→
Numeric display, page 28
47
Simrad PI32
How to set up the sensors
The very first time you switch on the PI32, you will need to set
up the sensor configuration. This will also be required if you
perform a “master reset” on the PI32, and then reload the
manufacturer’s default settings.
Observe the following procedure to establish the most common
values. For more detailed information about the settings, refer to
the References chapter.
Note:
In order to establish the sensor configuration, you need to know
what kind of sensors you have, which channels they
communicate on, and how often they communicate. This
information is required before you start the configuration on the
PI32.
Note:
Do not attempt to set up the sensors unless this is absolutely
necessary.
We strongly suggest that you use the forms in the front of this
manual to write down the sensor you have with information
about their update rates and communication channels.
1
Press the MENU button to open the main menu.
2
Open the Setup menu, and select Sensor setup.
3
Press the ENT button to enable modification. Observe the
warning, and press the ENT button to proceed.
- In the following, you must use the Selector pad to
navigate through the parameters, and the + and buttons to select values.
- Each of the three sensors are initially set to None and
Normal, and the communication channels are not
defined.
For Sensor 1:
4
a Set type (currently None) to Single.
b Set Update to the current update rate of the chosen
sensor (Slow, Normal or Fast)
c Set Measure to the type of sensor.
d Select transmission Channel (currently NO), and use
the + and - buttons to select desired channel.
48
5
Repeat for Sensor 2 and Sensor 3.
6
Press the ENT button to save the configuration and exit.
857-164636 / Rev.A
Operational procedures
Predefined settings
Each sensor is delivered with a predefined setup. This setup
includes:
• transmission channel for the acoustic communication link
between the sensor and the vessel’s hydrophone
• update rate; how often the sensor sends its readings back to
the PI32 system.
To change the sensor setup, you can call your local Simrad
dealer, or you can do it yourself if you have the proper
equipment, training and the PI Configurator software.
Changing a transmission channel
It may be required to change one or more transmission channels,
and there may be many reasons for this.
• You have more than one of each sensor. For example, if you
have three temperature sensors, they MUST communicate on
three different channels.
• Other vessels near your use the same PI32 system (or a
similar), and they have one or more of their sensors set up to
the same communication channels as you have. This will
create interference, as you will “read” each others sensors.
• If your sensors are set up to use communication channels too
close to each other (for example, you have chosen channels
4, 5 and 6), this will limit the vessel’s speed. The reason for
this is the doppler effect. If the speed is too high, the doppler
will cause the transmission frequencies to change so much
that they overlap, and this will create interference. The PI32
will provide a warning if this is about to happen! You must
then either change to other communication channels further
apart, or reduce the maximum shooting speed.
• If you operate at the maximum range of the sensors, you may
be able to increase this range slightly if you use lower
communication channels. This is because the lower
communication channels user lower transmission
frequencies.
Changing the update rate
It may be required to change the update rate on a sensor, that is
how often it sends information back to the PI32 system. A high
update rate will give frequent information updates, but the
sensor will use more battery power. If you need your batteries to
last as long as possible, you must consider lowering the update
rate.
857-164636 / Rev.A
49
Simrad PI32
• A low update rate will provide you with fewer information
updates, but the battery will last very long.
• A high update rate will give you frequent information
updates, but the battery will run out faster.
All sensors are provided from Simrad with a default update rate
setting. In some cases you may find that this update rate does
not suit your operational needs. This is a decision you have to
make depending on the local fishing conditions.
How to change the sensor setup
To change the sensor setup, you can call your local Simrad
dealer, or you can do it yourself if you have the proper
equipment, training and the PI Configurator software.
Related topics
50
→
Sensor configuration, page 179
→
Max shooting speed, page 174
→
PI Configurator, page 184
857-164636 / Rev.A
Operational procedures
How to mount the sensors on the net
Once the sensor has been coded correctly, you must mount it on
the net. The mounting instructions for each sensor is provided in
the Sensors chapter, and the same information can also be found
on the Quick Reference Guide for each sensor.
Related topics
→
857-164636 / Rev.A
Sensors overview, page 83
51
Simrad PI32
How to use the sensors
Once the sensors have been coded and installed on the net, they
will automatically be switched on once they are submerged into
water. The PI32 will then automatically retreive information
from them, and provided that you have chosen the correct
display presentation, the information will be provided to you.
Applications
The various applications available to you with the different
sensors are explained in the Getting started and Applications
chapters.
Display presentation
How to set up the display to see the information provided by the
sensors are described in the Getting started chapters. The
various modes are explained in detail in the Display modes
chapter.
Practical information
The practical information about the various sensors is provided
in the Sensors chapter, and the same information can also be
found on the Quick Reference Guide for each sensor.
Related topics
52
→
Getting started: Presentation pages, page 10
→
Getting started: Sensors, page 15
→
Applications, page 20
→
Sensors overview, page 83
857-164636 / Rev.A
Operational procedures
How to replace the sacrificial water switch
All PI and PS sensors are equipped with a water switch, and two
different types are used. If your sensors are equipped with a
brass screw, observe the following procedure for replacement.
1
Turn the sensor upside down, and locate the brass screw.
2
Inspect the screw for wear and tear. If required, replace
the screw.
A standard commercial brass screw is used. Local supply will
normally be available, but the following specifications must be
met:
Brass, Size M5x10, DIN85A, rounded head
Before a new screw is inserted, Aqua Shield (or a similar
underwater lubricant) must be applied. Due to the size of the
tube, we recommend that the grease is applied from a syringe.
1
Apply Aqua Shield to the screw threads.
2
Insert the screw, mount firmly, but not too hard.
3
Use maximum torque 1.5 NM
A pack with ten screws and a tube of Aqua Shield can be
ordered from Simrad as a spare parts kit.
Aqua Shield is manufactured by D.A.Stuart, Warrenville,
Illinois, USA (www.d-a-stuart.com).
857-164636 / Rev.A
53
Simrad PI32
How to test the sensors
By using the PI Configurator, you can test the operational status
of each sensor. Test procedures for all the sensors have been
provided in a separate chapter in this manual.
Note that PI and PS sensors are tested using the same
procedures.
Related topics
54
→
PI Configurator, page 184
→
Test procedures, page 223
857-164636 / Rev.A
Operational procedures
How to calibrate the Depth sensor
Only the Depth sensor can be calibrated. The purpose is to
ensure that the depth reported by the sensor is as accurate as
possible.
This procedure is carried out onboard the vessel.
Note:
1
Mount a rope to the top fastening lugs on the sensor.
2
Tighten the rope, and measure one meter from the bottom
of the sensor to a spot on the rope. Place a visual marker
on the rope at that location.
3
Lower the sensor over the side of the vessel and into the
water. Lower it until the visual marker on the rope is even
with the surface.
4
On the PI32, observe the numerical presentation of the
sensor, and allow the reading to stabilize itself.
5
On the PI32, press the MENU button to open the Main
menu.
6
Open the Setup menu, and select Sensor
alarm/calibration.
7
At the bottom of the page, set Depth sensor calibration
to YES.
8
Leave the sensor hanging from the rope for minimum two
minutes. Meanwhile, observe that the numerical
presentation shows grey characters only.
9
On the PI32, observe that the numerical presentation of
the Depth sensor is stable, and shows 1 meter.
10
Retrieve the sensor from the water.
In order to calibrate the sensor, it must be submerged in salt
water.
You may wish to use a different depth reference than the sea
surface. If this is the case, change the marking on the rope to fit
you preference, for example the depth of the keel or the depth of
an echo sounder transducer.
Related topics
857-164636 / Rev.A
→
How to define sensor offsets, page 56
→
Depth calibration, setup, page 153
55
Simrad PI32
How to define sensor offsets
Only the Depth and Spread sensors can have their offset values
adjusted. The purpose is to allow you to compensate for known
deviations.
You may wish to insert a Depth sensor offset to line up the
depth readings from the sensor with those from your echo
sounder. If the echo sounder transducer is located X meters
below the surface, the Depth sensor should have the same offset
value.
Note:
If you have performed a Depth sensor calibration, you will see
than an offset value may already be present. This value has been
provided by the calibration routine.
1
On the PI32, press the MENU button to open the main
menu.
2
Open the Setup menu, and select Sensor
alarm/calibration.
3
At the bottom of the dialogue, enter the required values.
4
Press the ENT button to save the parameters and exit.
Related topics
→
56
Offset adjust, setup, page 170
857-164636 / Rev.A
Operational procedures
How to set up a Twin Spread sensor for
twin trawl applications
By means of the Twin Spread sensor, you can set up your PI32
to monitor the openings on a twin trawl. Apart from the Twin
Spread sensor, you will also need two Remote sensors.
Sensor configuration
The Twin Spread and Remote sensors are supplied in sets, and
they MUST operate in these sets. The sets are:
• Twin Spread 1 uses two Remote sensors; Remote 1 and
Remote 3.
• Twin Spread 2 uses two Remote sensors; Remote 2 and
Remote 4.
When supplied from the manufacturer, all Twin Spread sensors
are set up as Twin Spread 1. If you wish to use a Twin Spread 2,
your dealer (or yourself) must reconfigure the sensor using the
PI Configurator application.
Communication channels and update rate
Each Twin Spread sensor will communicate on two channels,
one for each of the two distances the sensor measures. By
default, these communication channels are set to 02 and 07.
• Channel 02 is used to measure the distance to Remote 1.
• Channel 07 is used to measure the distance to Remote 3.
By default, both communication channels are set up with Fast
update rate. In order to increase the lifetime between each
sensor charging, you may consider changing to Normal update
rate.
If you wish to reconfigure the settings, your dealer (or yourself)
must use the PI Configurator application.
Placing the sensors on the trawl
The Twin Spread sensor must be mounted on the port trawl
door, and the three communication transducers on the sensor
must not be obstructed. Ensure that you have a clear line of
sight between the tip of the Twin Spread sensor and the vessel,
and between the Twin Spread sensor and the two Remote
sensors.
Remote 1 is placed on the centre clump.
Remote 3 is placed on the starboard door.
857-164636 / Rev.A
57
Simrad PI32
This configuration will allow the Twin Spread sensor to measure
the distance from the port door to the centre clump directly. It
will also measure the distance between the two trawl doors. In
order to calculate the distance between the centre clump and the
starboard door, you must perform the required settings on the
PI32.
(P) = Port trawl
(S) = Starboard trawl
(C) = Port trawl door with the Twin Spread 1 sensor mounted.
(D) = Centre clump with Remote 1 mounted.
(E) = Starboard trawl door with Remote 3 mounted.
(F) = Forward
(1) = Distance between port trawl door and centre clump,
measured direcly by the Twin Spread sensor.
(2) = Distance between the centre clump and the starboard
trawl door, must be calculated by the PI32 system.
58
857-164636 / Rev.A
Operational procedures
Sensor setup
Observe the procedure below to set up a Twin Spread
configuration with its default settings.
In this procedure, sensors 1 and 2 are used, and no other sensors
are shown. Due to the fact that the Twin Spread sensor occupy
two communication channels, the setup program requires that it
is configured as if it was two separate sensors, but not
necessarily sensors 1 and 2. The remaining four channels can be
used for other sensors.
We strongly suggest that you use the forms in the front of this
manual to write down the sensor you have with information
about their update rates and communication channels.
1
Press the MENU button to open the main menu.
2
Open the Setup menu (4), and select Sensor setup (5).
3
Press the ENT key to bypass the warning page.
4
To configure the Twin Spread sensor, enter the following
parameters:
a
b
c
d
e
f
g
h
857-164636 / Rev.A
Set Sensor 1 type to SINGLE to activate the sensor.
Set Update 1 rate to FAST.
Set Measure 1 to SPREAD.
Set Channel to 02.
Set Sensor 2 type to SINGLE to activate the sensor.
Set Update 2 rate to FAST.
Set Measure 2 to SPREAD.
Set Channel to 07.
5
For operational use, make sure that Demo mode is set to
OFF.
6
When you have defined the sensors, press the ENT
buttom to save the changes and exit.
59
Simrad PI32
According to the sensor locations previously described, Spread
1 will now measure the distance from the port trawl door to the
centre clump, while Spread 2 will measure the distance from the
port trawl door to the starboard trawl door.
Readout adjustments
It is necessary to set certain parameters in order to have the PI32
to calculate the distance from the centre clump to the starboard
trawl door.
GAIN-
Trawl info
Headrope sensor:
Footrope sensor:
Trawl opening mode:
Manual trawl marker:
Clump sensor:
Door sensor:
Trawl data in additional info:
Type of trawl data:
MENU
GAIN+
SPREAD 1
SPREAD 2
ON
SPREAD
Exit
(CD11105C)
1
2
3
4
5
6
7
8
9
10
Press the MENU button to open the main menu.
Press the WIN button to select a full screen presentation.
Open the Fishery menu, and select a Graphic display.
Press the ADJ button to open the Graphic setup.
Press the PAGE+ button three -3- times to access the
Trawl info dialoge.
Locate the Clump sensor setting, select SPREAD 1.
- As previously defined and described, sensor Spread 1
measures the distance between the port trawl door and
the centre clump.
Locate the Door sensor setting, select SPREAD 2.
- As previously defined and described, sensor Spread 2
measures the distance between the port and the
starboard trawl doors. This setting allows the PI32 to
calculate the distance between the clump and the
starboard trawl door.
Locate Trawl data in additional info, select ON.
Locate Type of trawl data, select SPREAD.
Press the ENT button to save the settings and exit.
Readouts
Following the configuration and readout adjustments explained,
the following readouts are now available in the Graphic
display.
60
857-164636 / Rev.A
Operational procedures
• Numeric display: Rectangle S1 shows the distance between
the port trawl door and the centre clump. Rectangle S2 shows
the distance between the port trawl door and the starboard
trawl door.
• Additional information: The information bar directly below
the numeric rectangles displays the abbreviation TS and a
value. This value represents the distance between the centre
clump and the starboard trawl door.
Related topics
857-164636 / Rev.A
→
Twin Spread, page 128
→
Sensor setup, page 179
→
Trawl info, page 182
61
Simrad PI32
How to access graphic display parameters
The various parameters defining the Graphic display
presentation are controlled from the following dialogues:
• Graphic setup
• Numeric setup
• Trawl info
How to use the most common parameters are explained in
separate procedures.
Access to Graphic setup
1
Make sure that you have a Graphic display presentation in
your active window.
2
Press the ENT button to open the Graphic setup
dialogue.
Access to Trawl info
1
Make sure that you have a Graphic display presentation in
your active window.
2
Press the ENT button to open the Graphic setup
dialogue. The Trawl info parameters are located at the
bottom of this setup page.
Access to Numeric setup
1
Make sure that you have a Numeric display presentation in
your active window.
2
Press the ENT button to open the Numeric setup
dialogue.
Related topics
62
→
Graphic setup, page 160
→
Numeric setup, page 169
→
Trawl info setup, page 182
857-164636 / Rev.A
Operational procedures
How to view echo sounder data
When you have chosen the Graphic display presentation, you
can choose to superimpose the information from the echo
sounder. This feature allows you to see where your sensors are
located in relation to the bottom and fish echoes. Note that this
feature will only work if you have mounted an echo sounder
transducer to the PI32.
1
Make sure that a Graphic display presentation is active.
2
Press the ENT button to open the Graphic setup
dialogue.
3
Locate the setting Superimpose echo sounder, and set the
option to ON.
4
Press the ENT button to save the setting and close the
dialogue.
Related topics
→
857-164636 / Rev.A
Graphic setup, page 160
63
Simrad PI32
How to set up marker lines
When you have chosen the Graphic display presentation, you
can choose to superimpose the information from the echo
sounder, and then add marker lines to see where your sensors
are located in relation to the bottom and fish echoes. Note that
the echo sounder data will only appear if you have mounted an
echo sounder transducer to the PI32.
The following parameters will affect the way the marker lines
are displayed:
• Width - you can select how thick (in pixels) each marker line
shall be.
• Delay - The echo sounder information is provided by the
transducer, and this transducer is located under the vessel.
The sensors are located on the gear, which may be positioned
several hundred meters behind the vessel. To adjust for this
delay, you can enter a value for Marker line delay. You must
calculate this value (in minutes) based on the vessel’s speed,
the wire length and the depth of the gear.
Alternatively, you can use the built-in Trawl caluclator to
find the correct delay.
• Colour - The colour of the marker line is automatically set to
the current Numeric display background colour for the same
sensor. To change that colour, you must access the Display
colour setup page from the Setup menu.
(A) = Numeric depth display
(B) = Marker line from Depth sensor
64
857-164636 / Rev.A
Operational procedures
Access to the marker line parameters
1
2
3
Make sure that a Graphic display presentation is active.
Press the ENT button to open the Graphic setup
dialogue.
The Marker line parameter allows you to switch the
marker line on or off for sensors S1, S2 and S3.
Depth and Height marker lines
The purpose of these marker lines is to provide an easy way to
monitor the depth of the gear. The Height sensor measures the
distance from the seabed and up to the sensor, while the Depth
sensor measures the distance from the sea surface and down to
the sensor.
1
Identify which of the sensors that are the Depth and/or
Height sensors.
2
Set the applicable marker line(s) to ON.
3
Enter the preferred settings for Marker line thickness
and Marker line delay.
4
Press ENT to save the settings and exit to the graphic
display presentation.
The Depth and Height marker lines are presented on the
Graphic display with continuous lines in the same background
colour as in the Numeric display. To read the depth, consult the
depth range on the right side of the display, or the readout in the
Numeric display.
Spread marker line
The purpose of this marker line is to provide an easy way to
monitor the distance between the trawl doors.
1
Identify which of the sensors that is the Spread sensor.
2
Set the marker line to ON.
3
Enter the preferred settings for Marker line thickness
and Marker line delay.
4
Press ENT to save the settings and return the the graphic
presentation.
The Spread marker line is presented on the Graphic display
with a continuous line. The colour of the line is the same as the
background colour in the numeric presentation. To read the
distance between the trawl doors, consult the depth range on the
right side of the display, or the readout in the Numeric display.
If the trawl door distance is reduced or increased, this will be
easily detected as the marker line moves up or down. Note that
you do not monitor the depth of the trawl doors even though
you use the depth scale, the scale is used as a range scale.
857-164636 / Rev.A
65
Simrad PI32
Surface temperature marker line
The purpose of this marker line is to provide an easy way to
monitor the surface temperature. Note that this is NOT a reading
from a temperature sensor, but from a feeler. Such feelers are
often built into the echo sounder transducers.
1
Ensure that a proper feeler is connected to the PI32.
2
Set the marker line to On.
3
Enter the preferred settings for Marker line thickness
and Marker line delay.
4
Locate the Temperature scale parameter, and switch it
ON.
5
Press ENT to save the settings and exit to the graphic
display presentation.
The Temperature marker line is presented on the Graphic
display as a continuous line.
Related topics
→
66
Graphic setup, page 160
857-164636 / Rev.A
Operational procedures
Special features for trawl marker lines
When you have chosen a graphic presentation, you can choose
to superimpose the information from the echo sounder, and then
add marker lines to see where your sensors are located in
relation to the bottom and fish echoes. When you use a pelagic
or bottom trawl, the PI32 offers certain special features to
provide additional information.
(A) = Numeric depth display
(B) = Headrope marker line
(C) = Footrope marker line
(D) = The value entered (calculated) for the Manual trawl
marker
The recommended sensor configuration to monitor the trawl
opening is to use one Height or Depth sensor on the headrope,
and one Depth sensor on the footrope. However, if you only use
one of these sensors, place it on the headrope. The PI32 will
then manually draw the trawl opening markers for you provided
that you enter the typical height of the trawl opening.
The following parameters will provide the extra information
related to trawl markers:
• Headrope and footrope sensors: You need to tell the PI32
which Depth and/or Height sensor(s) you have placed on the
footrope and/or headrope of the trawl.
857-164636 / Rev.A
67
Simrad PI32
• Trawl opening mode: This parameter decides how the trawl
opening shall be recreated on the graphic presentation. If you
have sufficient sensors on the trawl you must select Auto,
and the the PI32 will automatically calculate the trawl
opening and draw it accordingly. If you only have one sensor
on the trawl opening (Depth or Height sensor on the
headrope), the Manual setting will add an artificial line on
the presentation. The distance from the headrope to the
footrope must then be defined manually using the Manual
trawl marker parameter.
Access to the parameters
1
Make sure that a graphic presentation is active.
2
Press the ENT button to open the Graphic setup
dialogue.
Set up the parameters
1
Locate the setting Headrope sensor, and choose the
sensor that you have placed on the headrope.
- If you have no Depth or Height sensors on the
headrope, leave the setting to None.
2
Locate the setting Footrope sensor, and chose the sensor
that you have placed on the footrope.
- If you have no Depth or Height sensors on the
footrope, leave the setting to None.
3
Observe that the setting for Trawl opening mode is
automatically set to Auto or Manual.
- If you have sensors placed on both the footrope and the
headrope, the PI32 will be able to calculate the trawl
opening automatically, and the mode is set to Auto.
- If you have only one sensor, you will need to enter a
manual trawl marker.
4
If you have only one sensor, enter a value for Manual
trawl marker.
- This value must represent the actual height of your
trawl opening, based on your knowledge about your
gear. The information will be used by the PI32 to draw
a second trawl marker line.
Related topics
→
68
Graphic setup, page 160
857-164636 / Rev.A
Operational procedures
How to access echo sounder parameters
The built-in echo sounder is easily controlled from separate
dialogues.
• The Echo presentation setup dialogue controls the visual
parameters, such as Range, Gain, White line and Expansion
window.
• The Echosounder setup dialogue controls the operational
parameters, such as alarms, sound velocity and transducer
selection.
How to find the most common parameters are explained in
separate procedures. The parameters are described in detail in
the References chapter.
Echo presentation setup
1
Make sure thast you have an echo sounder presentation in
view.
2
Press the ENT button to open the Presentation setup.
Echosounder setup
1
Press the MENU button to open the main menu.
2
Select Echo
3
On the Echo menu, select Echo sounder setup.
Related topics
857-164636 / Rev.A
→
Echo presentation setup, page 154
→
Echosounder setup, page 157
69
Simrad PI32
How to use visual aids and filters
When you use the echo sounder, several visual aids and filters
are available to make the echoes easier to read and interpret.
Ping to ping filter
This function employs a filter which compares the echo
information from one ping with the information from the
previous ping. This will “clean up” the echogram by removing
random noise spikes and interference with no correlation with
the previous echo. The function will thus make the echoes
appear more stable. You can switch this filter on or off.
1
Make sure that your echo sounder presentation is active.
2
Press the ENT button to open setup dialogue.
3
Locate the Ping to ping filter parameter. Set it to ON.
Colour threshold
This function allows you to choose the number of colours to use
for echogram presentation. By switching this filter on and
selecting a colour in the box, all echo colours “below” the
chosen colour will not be shown in the echogram. You can thus
regard this as an “echo threshold” which will remove the
weakest echoes.
1
Make sure that your echo sounder presentation is active.
2
Press the ENT button to open setup page
3
Locate the Colour threshold parameter. Set it to ON.
4
Select preferred colour in the box.
Signal threshold
This is an on/off function. When activated, it will remove the
weakest echoes from the screen. The threshold level is
automatic. Activate with caution, as it may remove small fish or
other weak unidentified echoes from the presentation.
1
Make sure that your echo sounder presentation is active.
2
Press the ENT button to open setup page
3
Locate the Signal threshold parameter. Set it to ON.
Depth grid
When this function is enabled, thin horisontal depth lines will be
added to the echogram to easier identify the depth intervals.
70
1
Make sure that your echo sounder presentation is active.
2
Press the ENT button to open setup page
3
Locate the Depth grid parameter. Set it to ON.
857-164636 / Rev.A
Operational procedures
Scroll speed
This function controls how fast the presentation shall scroll
from right to left across the display. By defining this speed you
also control the time scale. If you slow down the scroll speed,
you will also increase the time between each echo sounder
transmission (ping). If you choose FREEZE the presentation
(and also the echo sounder transmissions) will stop altogether.
1
Make sure that your echo sounder presentation is active.
2
Press the ENT button to open setup page
3
Locate the Scroll speed parameter. Set it to your preferred
value.
White line
When enabled, a band in the current echogram background
colour is inserted immediately below the detected bottom depth.
1
Make sure that your echo sounder presentation is active.
2
Press the ENT button to open setup page
3
Locate the White line parameter. Set it to ON.
Background colour
You can choose which background colour to use on the
echogram presentation.
1
Press the MENU button to open the main menu.
2
Select the Setup menu.
3
Select Display colour.
4
Observe the first palette page appear. It contains fixed
colours, which can not be altered. Press the + button
repeatedly until you reach a custom page.
5
Locate the Echogram background, and make the
required changes.
6
Press the ENT button to save the changes and exit the
setup page.
Related topics
857-164636 / Rev.A
→
Presentation setup, page 154
→
Display colour, page 172
71
Simrad PI32
How to define echo sounder range
There are two parameters for range:
• Range start: This is the upper depth from which the echo
sounder will provide its presentation.
• Range: This is the vertical depth range for the echo sounder.
The PI32 also offers a Phased range function, where the Range
is fixed, but the Range start is modified.
The two parameters in question are located at the top of the
parameter list.
The Range and Range start parameters can be manually
controlled from the Presentation setup dialogue. The Range
start is a fixed value. It is normally set to 0 meters, and if you
wish to use another value, you must define this manually in the
Presentation setup dialogue.
Standard mode
1
Make sure thast you have an echo sounder presentation in
view.
2
Press the ENT button to open the Presentation setup.
3
Locate the Range start and Range parameters.
4
Set Range start to 0 meters, and Range to a suitable
value depending on the current depth (or select Auto).
5
Press the ENT button to close the dialogue, save the new
settings, and return to the echo sounder view.
When you reach the upper and lower range limits, the echo
sounder will automatically shift to Auto range.
Phased range mode
In this mode, the Range start is variable, and the Range is
fixed.
72
1
Make sure thast you have an echo sounder presentation in
view.
2
Press the ENT button to open the Presentation setup.
3
Locate the Range start and Range parameters.
4
Set Range start to a suitable depth, and Range to a
suitable value depending on the current depth (or select
Auto).
5
Press the ENT button to close the dialogue, save the new
settings, and return to the echo sounder view.
857-164636 / Rev.A
Operational procedures
You will see that different ranges are used, but the value for the
Range start is always added. For example, if you set the Range
start to 30 meters, and then select the 250 meters range, the
total range achieved is from 30 to 280 meters. The upper 30
meters are however not shown in the echogram.
Related topics
→
857-164636 / Rev.A
Echo presentation setup, page 154
73
Simrad PI32
How to zoom in on bottom echoes
The Bottom Expansion functions allows you to zoom in on the
echoes closest to the bottom.
When this function is active, the echo sounder presentation is
split in two. The upper part is the ordinary presentation, while
the lower part shows the echoes just above the bottom. The
bottom appears to be flat, but this may not be the case, as the
zoomed area is related to the bottom.
Activate Bottom Expansion
1
Make sure that your echo sounder presentation is active.
2
Press the MENU button to open the main menu.
3
Open the Echo menu.
4
Select Bottom expansion.
If your current window was not an echo sounder, you have now
closed it, and replaced it with an echo sounder with bottom
expansion. If you also have a second page with an echo sounder
enabled, you need to enable the expansion mode for the second
page separately.
Change the range in the expansion window
1
Press the ENT button to open the Presentation setup.
2
Locate the Expansion window setting, and change to a
new value.
3
Press the ENT button save the setting and return to the
echo sounder view.
De-activate BottomExpansion
1
Press the MENU button to open the main menu.
2
Open the Echo menu.
3
Select Echo display.
Related topics
→
74
Echo presentation setup, page 154
857-164636 / Rev.A
Operational procedures
How to zoom in on pelagic echoes
The VRM Expansion functions allows you to zoom in on
echoes in the water column.
When this function is active, the echo sounder presentation is
split in two. The upper part is the ordinary presentation, while
the lower part shows the expansion window with the echoes
over and under a reference depth.
Activate VRM Expansion
1
Make sure that your echo sounder presentation is in view.
2
Press the MENU button to open the main menu.
3
Open the Echo menu.
4
Select VRM expansion.
If your current window was not an echo sounder, you have now
closed it, and replaced it with an echo sounder with VRM
expansion. If you have an additional echo sounder page you will
need to enable the expansion mode for that page separately.
Change the reference depth
1
Press “up” and “down” on the Selector pad to change the
reference depth.
The depth you select will be stored by the echo sounder. The
next time you activate the VRM expansion mode, it will
autmatically use this reference value.
Change the range in the expansion window
1
Press the ENT button to open the Presentation setup.
2
Locate the Expansion window setting, and change to a
new value.
3
Press the ENT button save the setting and return to the
echo sounder view.
De-activate VRM Expansion
1
Press the MENU button to open the main menu.
2
Open the Echo menu.
3
Select Echo display.
Related topics
→
857-164636 / Rev.A
Echo presentation setup, page 154
75
Simrad PI32
How to enable A-Scope presentation
The A-Scope presentation provides the echo from the latest ping
only. The strength of the returned signal from various depths in
the water column are indicated by the horizontal deflections
from the Y-axis. This presentation is very useful if you wish to
search for single fish, as those echoes are hard to see on the
regular echogram. Also, the presentation will give an indication
on how strong the various echoes are.
Activate A-Scope
1
Make sure that your echo sounder presentation is in view.
2
Press the MENU button to open the main menu.
3
Open the Echo menu.
4
Select Turn A-Scope on.
De-activate A-Scope
76
1
Press the MENU button to open the main menu.
2
Open the Echo menu.
3
Select Turn A-Scope off.
857-164636 / Rev.A
Operational procedures
How to define alarm limits
The PI32 will provide a variety of audible and visible alarms to
keep you posted when something occur.
Observe the following procedures to set up an enable the most
common alarms. For more detailed information about the setup
pages, refer to the References chapter.
Speed alarm
The speed alarm provides you with an audible warning if the
vessel’s speed exceeds a predefined speed limit, or if the speed
is lower than a predefined minimum.
1
Press the MENU button to access the main menu.
2
On the Setup menu, select Speed alarm, units &
language.
3
Move the cursor down the the Speed alarm parameters.
4
Make the necessary changes, and set each alarm to ON.
5
Press the ENT key to store the parameters and exit.
Fish alarm
The fish alarm provides you with an audible warning if fish
echoes are detected by the echo sounder. You can select the
alarm sensitivity (how strong the echoes need to be to trigger
the alarm), and you can also define a vertical depth area to limit
the monitored area.
1
Press the MENU button to access the main menu.
2
On the Echo menu, select Echo sounder setup.
3
When the page is presented, press the ENT button again to
allow editing.
4
Move the cursor down the the Alarm for fish parameter.
5
Select required strength, and set the alarm to ON.
6
Move the cursor to the next line, and select a vertical area
for the alarm by entering minimum and maximum depths.
7
Press the ENT key to store the parameters and exit.
Depth alarm
The depth alarm provides you with an audible warning if the
water depth is shallower or deeper than predefined limits.
1
857-164636 / Rev.A
Press the MENU button to access the main menu.
77
Simrad PI32
2
On the Echo menu, select Echo sounder setup.
3
When the page is presented, press the ENT button again to
allow editing.
4
Move the cursor down the the Depth DK alarm alarm
parameters. (DK means “depth under keel”.)
5
Select required minimum and/or maximum depths, and set
the alarms to ON.
6
Press the ENT key to store the parameters and exit.
Sensor alarms
The sensor alarms provide you with an audible and visual
warning if the data from a sensor exceeds predefined limits.
1
Press the MENU button to access the main menu.
2
On the Setup menu, select Sensor alarm/calibration.
3
Select minimum and/or maximum limits for the individual
sensors, and activate each alarm separately.
4
Press the ENT key to store the parameters and exit.
Note that the Catch, Rip and Bottom Contact sensors can only
provide alarms when they are activated, that is when their
detector wires have been pulled tight.
Surface temperature alarm
The surface temperature alarm provide you with an audible and
visual warning if the temperature exceeds predefined limits, or
if it changes too fast.
1
Press the MENU button to access the main menu.
2
On the Setup menu, select Sensor alarm/calibration.
3
Select minimum and/or maximum temperature limits for
the alarms, and activate each alarm separately.
4
Enter the appropriate value for the Shear alarm, and
activate the alarm.
5
Press the ENT key to store the parameters and exit.
The Shear alarm will be triggered if the temperature changes
faster per minute than the value you have entered.
Note:
In order to enable these alarms, your PI32 must have the
relevant temperature feeler fitted!
Clearance alarms
The clearance alarm provide you with an audible and visual
warning if a trawl or another towed object either moves too
close to the bottom, or lifts too far off the bottom.
78
857-164636 / Rev.A
Operational procedures
1
Verify that the echo sounder is operational.
2
Press the MENU button to access the main menu.
3
On the Setup menu, select Sensor alarm/calibration.
4
Select minimum and/or maximum distance for the alarms,
and activate each alarm separately.
5
Press the ENT key to store the parameters and exit.
The clearance alarm will take the current depth reading from the
echo sounder and subtract the current depth reading from the
Depth sensor. The calculated depth of the trawl or towed body is
then compared to the alarm limits. Due to the distance between
the vessel and the trawl, you will have ample time to make the
necessary adjustments to avoid damage.
If your Depth sensor is mounted to the headrope, you must
create a manual depth marker. This is made in the Trawl info
dialogue.
Related topics
857-164636 / Rev.A
→
Speed setup, page 180
→
Echo sounder setup, page 157
→
Trawl info dialogue, page 182
→
Sensor alarm setup, page 177
79
Simrad PI32
How to select menu language
The menus on the PI32 can be provided in several different
languages.
Observe the following procedure to select menu language. For
more detailed information about the setup pages, refer to the
References chapter.
1
Press the MENU button to access the main menu.
2
On the Setup menu, select Speed alarm, units &
language.
3
Move the cursor down the Display text in parameter.
4
Press the + or - buttons to select language.
5
Press the ENT button to store the parameter and exit.
Related topics
→
80
Page setup, page 171
857-164636 / Rev.A
Operational procedures
How to control automatic page rotation
You can set up the PI32 to automatically leaf through the four
display pages. Each page will then be shown a set time before
the next page is brought up.
Observe the following procedure to set up automatic page
rotation. For more detailed information about the setup pages,
refer to the References chapter.
1
Press the MENU button to access the main menu.
2
On the Setup menu, select Speed alarm, units &
language.
3
Move the cursor down the WIN change interval
parameters.
4
Press the + or - buttons to select time interval.
5
Select AUTO if you wish to activate the automatic page
rotation.
6
Press the ENT button to store the parameter and exit.
Related topics
→
857-164636 / Rev.A
Page setup, page 171
81
Simrad PI32
How to restore default settings
Whenever necessary you can restore the default factory settings
on the PI32.
Observe the following procedure.
Caution:
1
Press the MENU button to access the main menu.
2
On the Setup menu, select Master reset.
3
Press the selector pad “up”, then press it “down”.
4
Press the ENT button.
If you choose to do a master reset, you will need to
redefine every single parameter you have made on the
PI32. This includes all echo sounder settings, sensor
selections and setup, system interfaces and alarms.
Related topics
→
82
Factory presets setup, page 159
857-164636 / Rev.A
Sensors
PRACTICAL USE OF THE SENSORS
The PI32 Catch monitoring can operate with several different
sensors. In the following, the most important information
regarding installation and use of each sensor is described.
Both PI and PS sensors are described. The PI sensors have
longer ranges, they can be “fast-charged” using the PI Charger,
and they will provide some additional functionality. For all
other practical purposes the two types may be regarded as
identical. The PI32 system will automatically adapt to and work
with both types, and you can also use PS and PI sensors
together.
Topics
→
Sensor configuration, page 84
→
PI Bottom Contact, page 87
→
PS Bottom Contact, page 91
→
PI Catch, page 95
→
PS Catch, page 100
→
PI Depth, page 104
→
PS Depth, page 109
→
PI Height, page 114
→
PI Rip, page 118
→
PI Spread & Remote, page 123
→
PI Temperature, page 133
→
PS Temperature, page 139
Related topics
857-164636 / Rev.A
→
How to set up the sensors, page 48
→
How to test the sensors, page 223
83
Simrad PI32
Sensor configuration
Communication channels and update rates
All sensors are provided from the factory with pre-defined
communication channels and update rates.
Sensor
Com.channel
Update rate
PI Bottom Contact
6
Normal
PI Catch
4
Normal
PI Depth (300 m)
16
Fast
PI Depth (600 m)
12
Fast
PI Depth (1000 m)
10
Fast
PI Height
14
Fast
PI Spread
2
Fast
PI Twin Spread
2 and 7
Fast
PI Temperature
8
Fast
Factory default communication channels and update rates
Changing a transmission channel
It may be required to change one or more transmission channels,
and there may be many reasons for this.
• You have more than one of each sensor. For example, if you
have three temperature sensors, they MUST communicate on
three different channels.
• Other vessels near your use the same PI32 system (or a
similar), and they have one or more of their sensors set up to
the same communication channels as you have. This will
create interference, as you will “read” each others sensors.
• If your sensors are set up to use communication channels too
close to each other (for example, you have chosen channels
4, 5 and 6), this will limit the vessel’s speed. The reason for
this is the doppler effect. If the speed is too high, the doppler
will cause the transmission frequencies to change so much
that they overlap, and this will create interference. The PI32
will provide a warning if this is about to happen! You must
then either change to other communication channels further
apart, or reduce the maximum shooting speed.
• If you operate at the maximum range of the sensors, you may
be able to increase this range slightly if you use lower
communication channels. This is because the lower
communication channels user lower transmission
frequencies.
84
857-164636 / Rev.A
Sensors
Changing the update rate
It may be required to change the update rate on a sensor, that is
how often it sends information back to the PI32 system. A high
update rate will give frequent information updates, but the
sensor will use more battery power. If you need your batteries to
last as long as possible, you must consider lowering the update
rate.
• A low update rate will provide you with fewer information
updates, but the battery will last very long.
• A high update rate will give you frequent information
updates, but the battery will run out faster.
All sensors are provided from Simrad with a default update rate
setting. In some cases you may find that this update rate does
not suit your operational needs. This is a decision you have to
make depending on the local fishing conditions.
How to change the sensor setup
To change the sensor setup, you can call your local Simrad
dealer, or you can do it yourself if you have the proper
equipment, training and the PI Configurator software.
The PI Configurator application is provided to enable local
sensor configuration. In order to perform this configuration, you
will need a personal computer (desktop or laptop) running
Microsoft® Windows® 2000 or Windows XP®, and a special
cable.
Special configuration of PI Spread
The PI Spread sensor is always used with a PI Remote sensor,
and these must be configured in a pair in order to make the
transverse communication link work properly. In order to allow
for a dual Spread application, you can use two predefined
configurations: PI Spread 1 and/or PI Spread 2.
The Remote sensors are available pre-programmed for these
two pairs, and the sensors are identified as Remote 1 and
Remote 2.
The two pairs must be configured as follows:
Configuration
Spread sensor
Remote sensor
PI Spread 1
PI Spread (*)
Remote 1
PI Spread 2
PI Spread (*)
Remote 2
(*) = The same PI Spread sensor is used for both configurations. By default, it is programmed for PI Spread 1. If you
wish to use it for PI Spread 2, you must re--configure it using
the PI Configurator application.
857-164636 / Rev.A
85
Simrad PI32
You can select the communication channels between the PI
Spread sensors and the vessel to suit your preferences.
86
857-164636 / Rev.A
Sensors
PI Bottom Contact sensor
Purpose
The PI Bottom Contact sensor detects if a trawl is accidentally
lifted off the seabed, or a purse seine is touching the bottom.
(A) = The trawl follows the bottom. The detection wire on the sensor is not released.
(B) = The trawl has lifted off the bottom, and the detection wire is released.
Main parts
(A) = Negative charging / fastening lug
(B) = Positive charging / fastening lug
(C) = Communication link (Channel 1 - 30)
(D) = Location of sensor lamp
(E) = Water switch sensor
(F) = Detection wire (in/out)
(G) = Ground weight
Daily operation
Once installed and put to use, the sensor will
automatically be switched on once the
waterswitch is activated. After an initial startup,
the sensor starts transmission of the detector wire
(F) status (in or out). When the sensor is not in
use, check that the sensor lamp (D) is not flashing
from time to time, as this indicaties that the
sensor is on and is discharging its batteries. In
this case, wash the sensor in fresh water to
remove salt and dirt.
If you operate with Fast update rate, the sensor
must be charged approximately every 35 hours.
Used with Normal or Slow update rates, the
operational life is approximately 60 or 250 hours
respectively. The optimal sensor charging
temperature is from +10 to +25° C.
857-164636 / Rev.A
87
Simrad PI32
Note:
Charging sensors at sub-zero temperatures can create explosive
gasses. Simrad AS assumes no liability for the improper
charging of sensors or the use of chargers not specified in
Simrad sensor charging documentation.
Bottom Contact presentation
On the PI32 display, the Bottom Contact sensor status is
displayed with graphic symbols. Note that the timers count the
total number of minutes the sensor has lost contact with bottom.
If only predicted timer values exist, the characters are shown in
grey. If the sensor communication is lost, the graphic symbol is
replaced by the characters ***.* (in grey).
(A) = Sensor set up as sensor no.2.
(B) = Sensor in contact with bottom.
The timer has stopped.
(C) = The timer counts how many
minutes the sensor has been “lifted
off” the bottom. It must be reset
manually.
(D) = Indicator, lit for every sensor
interrogation.
(E) = Interference symbol.
(F) = Sensor set up as sensor no.3.
(G) = Sensor has lost contact with
bottom. The timer starts. An audible
alarm may be enabled.
(H) = The timer shows how many
minutes the net has “lifted off”
during a tow.
Sensor configuration
On delivery, all Bottom Contact sensors are configured in
Channel 6 and with Normal update rate.
Note:
The sensor and the PI32 system setup must correspond,
otherwise the communication will not work.
To change the sensor setup (channel selection, update rate etc),
use the PI Configurator utility.
The sensor update rate controls how often the sensor monitors
whether the gear is on of off the bottom. Three settings are
available. Note that a faster update rate will decrease the battery
life.
• Fast (~3,2 sec): Recommended for new trawl or gear, or
changes in rigging to monitor instabilities in ground gear
bottom contact.
88
857-164636 / Rev.A
Sensors
• Normal (~5,3 sec): Recommended for normal fishing.
• Slow (~33 sec): Recommended if maximum operational
battery life before charging is required. The system will be
more sensitive to bad communication conditions due to the
slow data update.
System configuration
Sensor configuration: The sensor must be configured with a
unique sensor number. Select update rate and channel number
according to the sensor’s configuration. Write down this
configuration for future reference.
Status & Receiver: The Interference filter must be switched on.
Set it to level 9 if you have noise problems from other
hydroacoustic sources. Note that with the filter on, it will
influence the signal spectrum shown in the Status display.
Catch/Bottom sensor filter: Switch this filter off. Set it to
Light or Heavy only if you experience excessive noise.
Mounting
Location: Place the sensor where you
wish to monitor bottom contact. This
is normally in the center of the net.
Seize the attachment ring (A) for the
stay underneath the net, then put two
carabine hooks inside the footrope
forming a bridle of 15 to 20 cm
securely holding the sensor in a stable
position.
Penetration ring: Place the
penetration ring (B) for the detection
wire approximately 30 cm rear of the
footrope. Before final seizing, mount
the sensor to the carabine hooks and
check that the detection wire (E)
passes trough the center of the
penetration ring (B). Remove any net
on the inside of the penetration ring.
857-164636 / Rev.A
89
Simrad PI32
Set up: Correct function requires that the length of the stay (F)
and the detection chain (G) are trimmed with regard to each
other and the gear in use. Standard delivery includes a 63 cm
stay and 39 cm detection chain for use with 14 to 16 inch
bobbins or rock hoppers (C).
(A) = Attachment ring for the
stay seized securely underneath
the footrope
(B) = Penetration ring for the
detection wire
(C) = Rock hopper, bobbins etc.
(D) = End link
(E) = Detection wire
(F) = Stay
(G) = Detection chain
(H) = Weight ~ 5.5 kg
(J) = Weight and stay hang
freely.
(K) = Bottom
(L) = Angle approximately 25°
Adjustment: Lay the sensor on an elevated surface. Adjust the
length of the detection chain (G) as necessary. Observe detection
wire (E) movement while simulating bottom contact by raising
the weight. Tilt the weight approximately 25° to compensate for
drag forces when towed through the water, and adjust the stay
length to be taut. To avoid damage, remove the weight before
coiling the gear on the drum.
Note:
The sensor’s detection wire must always be allowed to pass
freely through the center of the penetration ring when it is
deployed. Attach the rubber straps so that the sensor is held
horizontally during towing.
Sacrificial water switch sensor
If the water switch on your sensor is a sacrificial brass screw,
this screw must be checked every month. Whenever required
due to wear and tear, the screw must be replaced. Refer to the
Operational procedures in the operator manual.
90
857-164636 / Rev.A
Sensors
PS Bottom Contact sensor
Purpose
The PS Bottom Contact sensor detects if a trawl is accidentally
lifted off the seabed, or a purse seine is touching the bottom.
(A) = The trawl follows the bottom. The detection wire on the sensor is not released.
(B) = The trawl has lifted off the bottom, and the detection wire is released.
Main parts
(A) = Negative charging / fastening lug
(B) = Positive charging / fastening lug
(C) = Communication link (Channel 1 - 30)
(D) = Location of sensor lamp
(E) = Water switch sensor
(F) = Detection wire (in/out)
(G) = Ground weight
Daily operation
Once installed and put to use, the sensor will
automatically be switched on once the
waterswitch is activated. After an initial startup,
the sensor starts transmission of the detector wire
(F) status (in or out). When the sensor is not in
use, check that the sensor lamp (D) is not flashing
from time to time, as this indicaties that the
sensor is on and is discharging its batteries. In
this case, was the sensor in fresh water to remove
salt and dirt.
If you operate with Fast update rate, the sensor
must be charged approximately every 35 hours.
Used with Normal or Slow update rates, the
operational life is approximately 60 or 250 hours
respectively. The optimal sensor charging
temperature is from +10 to +25° C.
857-164636 / Rev.A
91
Simrad PI32
Note:
Note that charging sensors at sub-zero temperatures can create
explosive gasses. Simrad AS assumes no liability for the
improper charging of sensors or the use of chargers not
specified in Simrad sensor charging documentation.
Bottom Contact presentation
On the PI32 display, the Bottom Contact sensor status is
displayed with graphic symbols. Note that the timers count the
total number of minutes the sensor has lost contact with bottom.
If only predicted timer values exist, the characters are shown in
grey. If the sensor communication is lost, the graphic symbol is
replaced by the characters ***.* (in grey).
(A) = Sensor set up as sensor no.2.
(B) = Sensor in contact with bottom.
The timer has stopped.
(C) = The timer counts how many
minutes the sensor has been “lifted
off” the bottom. It must be reset
manually.
(D) = Indicator, lit for every sensor
interrogation.
(E) = Interference symbol.
(F) = Sensor set up as sensor no.3.
(G) = Sensor has lost contact with
bottom. The timer starts. An audible
alarm may be enabled.
(H) = The timer shows how many
minutes the net has “lifted off”
during a tow.
Sensor configuration
On delivery, all Bottom Contact sensors are configured in
Channel 6 and with Normal update rate.
Note:
The sensor and the PI32 system setup must correspond,
otherwise the communication will not work.
To change the sensor setup (channel selection, update rate etc),
use the PI Configurator utility.
The sensor update rate controls how often the sensor monitors
whether the gear is on of off the bottom. Three settings are
available. Note that a faster update rate will decrease the battery
life.
Fast (~3,2 sec): Recommended for new trawl or gear, or
changes in rigging to monitor instabilities in ground gear bottom
contact.
92
857-164636 / Rev.A
Sensors
Normal (~5,3 sec): Recommended for normal fishing.
Slow (~33 sec): Recommended if maximum operational battery
life before charging is required. The system will be more
sensitive to bad communication conditions due to the slow data
update.
System configuration
Sensor configuration: The sensor must be configured with a
unique sensor number. Select update rate and channel number
according to the sensor’s configuration. Write down this
configuration for future reference.
Status & Receiver: The Interference filter must be switched on.
Set it to level 9 if you have noise problems from other
hydroacoustic sources. Note that with the filter on, it will
influence the signal spectrum shown in the Status display.
Catch/Bottom sensor filter: Switch this filter off. Set it to
Light or Heavy only if you experience excessive noise.
Mounting
Location: Place the sensor where you
wish to monitor bottom contact. This
is normally in the center of the net.
Seize the attachment ring (A) for the
stay underneath the net, then put two
carabine hooks inside the footrope
forming a bridle of 15 to 20 cm
securely holding the sensor in a stable
position.
Penetration ring: Place the
penetration ring (B) for the detection
wire approximately 30 cm rear of the
footrope. Before final seizing, mount
the sensor to the carabine hooks and
check that the detection wire (E)
passes trough the center of the
penetration ring (B). Remove any net
on the inside of the penetration ring.
857-164636 / Rev.A
93
Simrad PI32
Set up: Correct function requires that the length of the stay (F)
and the detection chain (G) are trimmed with regard to each
other and the gear in use. Standard delivery includes a 63 cm
stay and 39 cm detection chain for use with 14 to 16 inch
bobbins or rock hoppers (C).
(A) = Attachment ring for the
stay seized securely underneath
the footrope
(B) = Penetration ring for the
detection wire
(C) = Rock hopper, bobbins etc.
(D) = End link
(E) = Detection wire
(F) = Stay
(G) = Detection chain
(H) = Weight ~ 5.5 kg
(J) = Weight and stay hang
freely.
(K) = Bottom
(L) = Angle approximately 25°
Adjustment: Lay the sensor on an elevated surface. Adjust the
length of the detection chain (G) as necessary. Observe detection
wire (E) movement while simulating bottom contact by raising
the weight. Tilt the weight approximately 25° to compensate for
drag forces when towed through the water, and adjust the stay
length to be taut. To avoid damage, remove the weight before
coiling the gear on the drum.
Note:
94
The sensor’s detection wire must always be allowed to pass
freely through the center of the penetration ring when it is
deployed. Attach the rubber straps so that the sensor is held
horizontally during towing.
857-164636 / Rev.A
Sensors
PI Catch sensor
Purpose
The PI Catch sensor detects when the trawl has been filled with
fish. The sensor monitors the opening of the meshes in the cod
end, and will be activated once the volume caught is enough to
pull the detector wires.
Catch sensor principle: Three sensors are
mounted at the cod end of the trawl to detect the
amount of fish caught.
Main parts
(A) = Negative charging / fastening lug
(B) = Positive charging / fastening lug
(C) = Communication link
(D) = Location of sensor lamp
(E) = Water switch sensor
(F) = Detection wires
Daily operation
To monitor the filling rate, we recommend that
you use minimum two sensors. The first sensor is
located at the far end of the cod-end indicating
that the trawl is fishing, while the second sensor
tells when to haul. Due to the fish moving back
and forth in the cod-end, the sensor will normally
change status (on/off) several times until the
volume caught keeps the opening of the meshes
stable.
857-164636 / Rev.A
95
Simrad PI32
Once installed and put to use, the sensor will automatically be
switched on once the waterswitch is activated. After an initial
startup, the sensor starts transmission of the detection wires (F)
status (in or out). When the sensor is not in use, check that the
sensor lamp (D) is not flashing from time to time, as this
indicaties that the sensor is on and is discharging its batteries.
In this case, wash the sensor in fresh water to remove salt and
dirt.
If you operate with Fast update rate, the sensor must be charged
approximately every 35 hours. Used with Normal or Slow
update rates, the operational life is approximately 150 or 300
hours respectively. The optimal sensor charging temperature is
from +10 to +25° C.
Note:
Note that charging sensors at sub-zero temperatures can create
explosive gasses. Simrad AS assumes no liability for the
improper charging of sensors or the use of chargers not
specified in Simrad sensor charging documentation.
Presentation
On the PI32 display, the Catch sensor status is displayed with
graphic symbols. The timers count the total number of minutes
the sensor has been activated (red rectangle). If only predicted
timer values exist, the timer characters are shown in grey. If the
sensor communication is lost, the graphic symbol is replaced by
the characters ***.* (in grey).
(A) = Sensor set up as sensor no.2.
(B) = Sensor in standby. The timer
has stopped.
(C) = The timer counts how many
minutes the sensor has been activated
during a tow. It must be reset
manually.
(D) = Indicator, lit for every sensor
interrogation.
(E) = Interference symbol.
(F) = Sensor set up as sensor no.3.
(G) = The sensor has been activated. The timer starts. An
audible alarm may be enabled.
(H) = The timer shows how many minutes the sensor has been
activated.
96
857-164636 / Rev.A
Sensors
Sensor configuration
On delivery, all Catch sensors are configured in Channel 4 and
with Normal update rate. If you use more than one Catch sensor,
make sure that you set them up to operate on different channels
and with different sensor numbers!
Note:
The sensor and the PI32 system setup must correspond,
otherwise the communication will not work.
To change the sensor setup (channel selection, update rate etc),
use the PI Configurator utility.
The Catch sensor can be configured (using the PI Configurator
software) to act as a FA701 catch sensor. This will allow the
sensor to be used with the Simrad FS trawl sonar. The
communication channel on the FS sonar must be set up to
correspond to the equivalent sensor number (1, 2 3 or 4).
The sensor update rate controls how often the amount of fish
caught is measured and transmitted to the vessel. Three settings
are available. Note that a faster update rate will decrease the
battery life.
• Fast (~5,3 sec): Recommended for trawling in areas where
the rate of filling is very high. Use this setting to avoid
damage to the trawl or excessive catches.
• Normal (~33 sec): Recommended for normal fishing.
• Slow (~125 sec): Recommended if maximum operational
battery life before charging is required. The system will be
more sensitive to bad communication conditions due to the
slow data update.
When the Catch sensor is configured as an FA701, it will have a
constant update rate of approximately 80 seconds. This rate
must not be changed.
System configuration
Sensor configuration: The sensor must be configured with a
unique sensor number. Select update rate and channel number
according to the sensor’s configuration. Write down this
configuration for future reference.
Status & Receiver: The Interference filter must be switched on.
Set it to level 9 if you have noise problems from other
hydroacoustic sources. Note that with the filter on, it will
influence the signal spectrum shown in the Status display.
Catch/Bottom sensor filter: Switch this filter off. Set it to
Light or Heavy only if you experience excessive noise.
857-164636 / Rev.A
97
Simrad PI32
Mounting
Location: Attach the sensor on top of the cod-end where the
catch is to be monitored. As the cod-end fills, the net’s meshes
will open pulling the detector wires and thus activating the
sensor.
Sensor attachment to a net with an approximate mesh size of 140 mm. The distance
between the anchor points for the attachment rings and rubber straps will vary
according to mesh size and sensitivity required.
(A) = Snap hook and screw link
(B) = Steel attachment rings bent to the net
(C) = Nylon attachment rings bent to the net
(D) = Detection wires
(E) = Rubber strap
(F) = Attachment point
Attachment: The Catch sensor’s orientation towards the vessel
is maintained by the steel and nylon attachment rings. The
number of meshes the attachment rings are supported between
must be restricted to avoid unnecessary stress on the sensors
fastening lugs when the cod-end is filled to maximum. The use
of both nylon and steel attachment rings is required to secure the
sensor lugs if excessive forces are applied on them. The nylon
rings will stretch or break down, but the steel ring will prevent
the sensor from being lost. Note that two steel rings must be
mounted on the same side.
98
857-164636 / Rev.A
Sensors
Sensitivity: The sensitivity of the Catch sensor is determined by
the number of meshes separating the rubber straps. You can
simulate this by stretching the net’s meshes to approximate the
mesh opening estimated to trigger the sensor. Mark the location
(with colored thread) for future references.
Rubber straps: Inspect the rubber straps regularly and always
before a new haul. Replace them if you detect visible signs of
cracks or damage.
Sacrificial water switch sensor
If the water switch on your sensor is a sacrificial brass screw,
this screw must be checked every month. Whenever required
due to wear and tear, the screw must be replaced. Refer to the
Operational procedures in the operator manual.
857-164636 / Rev.A
99
Simrad PI32
PS Catch sensor
Purpose
The PS Catch sensor detects when the trawl has been filled
with fish. The sensor monitors the opening of the meshes in the
cod end, and will be activated once the volume caught is enough
to pull the detector wires.
Catch sensor principle: Three sensors are
mounted at the cod end of the trawl to detect the
amount of fish caught.
Main parts
(A) = Negative charging / fastening lug
(B) = Positive charging / fastening lug
(C) = Communication link
(D) = Location of sensor lamp
(E) = Water switch sensor
(F) = Detection wires
Daily operation
To monitor the filling rate, we recommend that
you use minimum two sensors. The first sensor is
located at the far end of the cod-end indicating
that the trawl is fishing, while the second sensor
tells when to haul. Due to the fish moving back
and forth in the cod-end, the sensor will normally
change status (on/off) several times until the
volume caught keeps the opening of the meshes
stable.
100
857-164636 / Rev.A
Sensors
Once installed and put to use, the sensor will automatically be
switched on once the waterswitch is activated. After an initial
startup, the sensor starts transmission of the detector wire (F)
status (in or out). When the sensor is not in use, check that the
sensor lamp (D) is not flashing from time to time, as this
indicaties that the sensor is on and is discharging its batteries. In
this case, wash the sensor in fresh water to remove salt and dirt.
If you operate with Fast update rate, the sensor must be charged
approximately every 60 hours. Used with Normal or Slow
update rates, the operational life is approximately 250 or 450
hours respectively. When the sensor is configured as an FA701,
the operational time is approximately 250 hours. The optimal
sensor charging temperature is from +10 to +25° C.
Note:
Note that charging sensors at sub-zero temperatures can create
explosive gasses. Simrad AS assumes no liability for the
improper charging of sensors or the use of chargers not
specified in Simrad sensor charging documentation.
Catch presentation
On the PI32 display, the Catch sensor status is displayed with
graphic symbols. The timers count the total number of minutes
the sensor has been activated (red rectangle). If only predicted
timer values exist, the timer characters are shown in grey. If the
sensor communication is lost, the graphic symbol is replaced by
the characters ***.* (in grey).
(A) = Sensor set up as sensor no.2.
(B) = Sensor in standby. The timer
has stopped.
(C) = The timer counts how many
minutes the sensor has been activated
during a tow. It must be reset
manually.
(D) = Indicator, lit for every sensor
interrogation.
(E) = Interference symbol.
(F) = Sensor set up as sensor no.3.
(G) = The sensor has been activated.
The timer starts. An audible alarm
may be enabled.
(H) = The timer shows how many
minutes the sensor has been
activated.
857-164636 / Rev.A
101
Simrad PI32
Sensor configuration
On delivery, all Catch sensors are configured in Channel 4 and
with Normal update rate. If you use more than one Catch sensor,
make sure that you set them up to operate on different channels
and with different sensor numbers!
Note:
The sensor and the PI32 system setup must correspond,
otherwise the communication will not work.
To change the sensor setup (channel selection, update rate etc),
use the PI Configurator utility.
The Catch sensor can be configured (using the PI Configurator
software) to act as a FA701 catch sensor. This will allow the
sensor to be used with the Simrad FS trawl sonar. The
communication channel on the FS sonar must be set up to
correspond to the equivalent sensor number (1, 2, 3 or 4).
The sensor update rate controls how often the amount of fish
caught is measured and transmitted to the vessel. Three settings
are available. Note that a faster update rate will decrease the
battery life.
• Fast (~5,3 sec): Recommended for trawling in areas where
the rate of filling is very high. Use this setting to avoid
damage to the trawl or excessive catches.
• Normal (~33 sec): Recommended for normal fishing.
• Slow (~125 sec): Recommended if maximum operational
battery life before charging is required. The system will be
more sensitive to bad communication conditions due to the
slow data update.
• When the Catch sensor is configured as an FA701, it will
have a constant update rate of approximately 80 seconds.
This rate must not be changed.
System configuration
Sensor configuration: The sensor must be configured with a
unique sensor number. Select update rate and channel number
according to the sensor’s configuration. Write down this
configuration for future reference.
Status & Receiver: The Interference filter must be switched on.
Set it to level 9 if you have noise problems from other
hydroacoustic sources. Note that with the filter on, it will
influence the signal spectrum shown in the Status display.
Catch/Bottom sensor filter: Switch this filter off. Set it to
Light or Heavy only if you experience excessive noise.
102
857-164636 / Rev.A
Sensors
Mounting
Location: Attach the sensor on top of the cod-end where the
catch is to be monitored. As the cod-end fills, the net’s meshes
will open pulling the detector wires activating the sensor.
Sensor attachment to a net with an approximate mesh size of 140 mm. The distance
between the anchor points for the attachment rings and rubber straps will vary
according to mesh size and sensitivity required.
(A) = Carabine hook and screw link
(B) = Steel attachment rings bent to the net
(C) = Nylon attachment rings bent to the net
(D) = Detection wires
(E) = Rubber strap
(F) = Attachment point
Attachment: The Catch sensor’s orientation towards the vessel
is maintained by the steel and nylon attachment rings. The
number of meshes the attachment rings are supported between
must be restricted to avoid unnecessary stress on the sensors
fastening lugs when the cod-end is filled to maximum. The use
of both nylon and steel attachment rings is required to secure the
sensor lugs if excessive forces are applied on them. The nylon
rings will stretch or break down, but the steel ring will prevent
the sensor from being lost. Note that two steel rings must be
mounted on the same side.
Sensitivity: The sensitivity of the Catch sensor is determined by
the number of meshes separating the rubber straps. You can
simulate this by stretching the net’s meshes to approximate the
mesh opening estimated to trigger the sensor. Mark the location
(with colored thread) for future references.
Rubber straps: Inspect the rubber straps regularly and always
before a new haul. Replace them if you detect visible signs of
cracks or damage.
857-164636 / Rev.A
103
Simrad PI32
PI Depth sensor
Purpose
The PI Depth sensor monitors the current depth of the net, as
well as the rate of any depth changes. All measurements are
related to the surface.
(A) = Two Depth sensors are mounted to the ground rope to
monitor the depth.
(B) = One Bottom Contact sensor is mounted to the ground rope
to detect if the net hits the bottom.
Main parts
(A) = Negative charging / fastening lug
(B) = Positive charging / fastening lug
(C) = Communication link
(D) = Location of sensor lamp
(E) = Water switch sensor
(F) = Pressure sensor (label is removed)
Daily operation
Once installed and put to use, the sensor will
automatically be switched on once the
waterswitch is activated. After an initial startup,
the sensor starts transmission of the current depth
when this exceeds a predefined depth you have
selected. When the sensor is not in use, check that
the sensor lamp (D) is not flashing from time to
time, as this indicates that the sensor is on and is
discharging its batteries. In this case, wash the
sensor in fresh water to remove salt and dirt.
104
857-164636 / Rev.A
Sensors
If you operate with Fast update rate, the sensor must be charged
approximately every 24 hours. Used with Normal or Slow
update rates, the operational life is approximately 75 or 150
hours respectively. The optimal sensor charging temperature is
from +10 to +25°C.
Note:
Note that charging sensors at sub-zero temperatures can create
explosive gasses. Simrad AS assumes no liability for the
improper charging of sensors or the use of chargers not
specified in Simrad’s sensor charging documentation.
Numerical presentation
On the PI32 display, the depth is displayed in the numeric
display. The descending or ascending rate is shown in units per
minute supported by an arrow indicating the direction. In order
to monitor changes of depth as a function of time, the depth will
also be displayed in the graphic display showing both the
numeric value and a corresponding marker line for each sensor.
When the readings are stable, the digits are shown in black
colour. When the values are predicted, the digits are grey, and if
the contact is lost, the characters *.* * are shown in grey.
(A) = Sensor set up as sensor no.1.
(B) = Current depth.
(C) = Current rate of depth change.
The arrow indicates that the depth is
ascending.
(D) = Indicator, lit for every sensor
interrogation.
(E) = Graphic alarm
(F) = Sensor set up as sensor no.2.
(G) = Interference symbol.
(H) = Current rate of depth change.
The arrow indicates that the depth is
descending.
857-164636 / Rev.A
105
Simrad PI32
Sensor configuration
On delivery, all depth sensors are configured in Channel 16
(300 m), Channel 12 (600 m) or Channel 10 (1000 m) and with
Fast update rate. If you use more than one sensor, you must set
them up to operate in different channels.
Note:
The sensor and the PI32 system setup must correspond,
otherwise the communication will not work.
To change the sensor setup (channel selection), use the PI
Configurator utility.
The sensor update rate controls how often the sensor reads and
reports the current depth. Three settings are available. Note that
a faster update rate will decrease the battery life.
• Fast (~4,5 sec): Recommended for purse seine or trawl,
allows immediate update of critical depth information, and
helps to avoid damage to the purse seine or trawl.
• Normal (~14 sec): Recommended for trawl and normal
fishing.
• Slow (~34 sec): Recommended if maximum operational
battery life before charging is required. The system will be
more sensitive to bad communication conditions due to the
slow data update.
System configuration
Sensor configuration: The sensor must be configured with a
unique sensor number. Select channel number according to the
sensor’s configuration. Write down the configuration for future
reference.
Status & Receiver: The Interference filter must be switched on.
Set it to level 9 if you have noise problems from other
hydroacoustic sources. Note that with the filter on, it will
influence the signal spectrum shown in the Status display.
Sensor filter: Switch this filter to Light. Set it to Heavy only if
you experience excessive noise. Position Off will provide raw
data and fastest possible response.
106
857-164636 / Rev.A
Sensors
Mounting
Purse seine: In order to secure stable communication with the
vessel’s hydrophone, it is very important that the sensor is
allowed to hang freely with the top end pointing towards the
surface during shooting and pursing.
Attach the sensor to a standard purse
ring with two separate wires (A).
Mount one end of each wire to a
common snap hook (B), and place
another snap hook at the other end of
each wire to snap onto the sensor.
Mount a safety line (C) between the
sensor and the adjacent bridle/purse
ring. Make sure that security line does
not prevent the sensor from hanging
freely!
Remove the sensor from the purse
seine before it passes through the
power block.
Any attachment material
“permanently” attached to the
sensor’s charging lugs must not form
an electrical connection between the
two charging lugs shorting the
charging current.
(A) = Two wires with a snap hook in
one end and the other end attached
permanently to (B).
(B) = Large snap hook.
(C) = Safety wire with snap hooks on
each end. Note that the upper end is
NOT attached to the purse seine wire.
857-164636 / Rev.A
107
Simrad PI32
Tuna purse: The sensor must not be
attached to the footrope wire, but to
the foot-rope chain. Use a safety wire
in addition in case the sensor is ripped
off the net.
Trawl or Danish seine: The depth
sensor is normally attached to the
headrope (A). For secure fastening
and stable positioning of the sensor
pointing towards the vessel, make a
fine mesh bag (B) located at the
centre of the headrope. Size two snap
hooks (C) approximately 10 - 15 cm
from the headrope forming a bridle,
and keep the sensor stretched by
means of two rubber straps (D)
attached to the aft fastening lugs.
Sacrificial water switch sensor
If the water switch on your sensor is a sacrificial brass screw,
this screw must be checked every month. Whenever required
due to wear and tear, the screw must be replaced. Refer to the
Operational procedures in the operator manual.
108
857-164636 / Rev.A
Sensors
PS Depth sensor
Purpose
The PS Depth sensor monitors the current depth of the net, as
well as the rate of any depth changes. All measurements are
related to the surface.
(A) = Two Depth sensors are mounted to the ground rope to
monitor the depth.
(B) = One Bottom Contact sensor is mounted to the ground rope
to detect if the net hits the bottom.
Main parts
(A) = Negative charging / fastening lug
(B) = Positive charging / fastening lug
(C) = Communication link
(D) = Location of sensor lamp
(E) = Water switch sensor
(F) = Pressure sensor (label is removed)
Daily operation
Once installed and put to use, the sensor will
automatically be switched on once the
waterswitch is activated. After an initial startup,
the sensor starts transmission of the current depth
when this exceeds a predefined depth you have
selected. When the sensor is not in use, check that
the sensor lamp (D) is not flashing from time to
time, as this indicates that the sensor is on and is
discharging its batteries. In this case, wash the
sensor in fresh water to remove salt and dirt.
857-164636 / Rev.A
109
Simrad PI32
You can only operate this sensor with Fast update rate, the
sensor must then be charged approximately every 35 hours. The
optimal sensor charging temperature is from +10 to +25°C.
Note:
Note that charging sensors at sub-zero temperatures can create
explosive gasses. Simrad AS assumes no liability for the
improper charging of sensors or the use of chargers not
specified in Simrad’s sensor charging documentation.
Numerical presentation
On the PI32 display, the depth is displayed in the numeric
display. The descending or ascending rate is shown in units per
minute supported by an arrow indicating the direction. In order
to monitor changes of depth as a function of time, the depth will
also be displayed in the graphic display showing both the
numeric value and a corresponding marker line for each sensor.
When the readings are stable, the digits are shown in black
colour. When the values are predicted, the digits are grey, and if
the contact is lost, the characters *.* * are shown in grey.
(A) = Sensor set up as sensor no.1.
(B) = Current depth.
(C) = Current rate of depth change.
The arrow indicates that the depth is
ascending.
(D) = Indicator, lit for every sensor
interrogation.
(E) = Graphic alarm
(F) = Sensor set up as sensor no.2.
(G) = Interference symbol.
(H) = Current rate of depth change.
The arrow indicates that the depth is
descending.
110
857-164636 / Rev.A
Sensors
Sensor configuration
On delivery, all depth sensors are configured in Channel 16
(300 m), Channel 12 (600 m) or Channel 10 (1000 m) and with
Fast update rate. It is not possible to change the update rate
setting. If you use more than one sensor, you must set them up
to operate in different channels.
Note:
The sensor and the PI32 system setup must correspond,
otherwise the communication will not work.
To change the sensor setup (channel selection), use the PI
Configurator utility.
The sensor update rate controls how often the depth is
measured, and the data transmitted to the vessel. To be able to
monitor critical depth information and avoid damage to the
purse seine or the trawl, the depth sensor will only operate on
Fast update rate.
System configuration
Sensor configuration: The sensor must be configured with a
unique sensor number. Select channel number according to the
sensor’s configuration. Write down the configuration for future
reference.
Status & Receiver: The Interference filter must be switched on.
Set it to level 9 if you have noise problems from other
hydroacoustic sources. Note that with the filter on, it will
influence the signal spectrum shown in the Status display.
Sensor filter: Switch this filter to Light. Set it to Heavy only if
you experience excessive noise. Position Off will provide raw
data and fastest possible response.
857-164636 / Rev.A
111
Simrad PI32
Mounting
Purse seine: In order to secure stable communication with the
vessel’s hydrophone, it is very important that the sensor is
allowed to hang freely with the top end pointing towards the
surface during shooting and pursing.
Attach the sensor to a standard purse
ring with two separate wires (A).
Mount one end of each wire to a
common snap hook (B), and place
another snap hook at the other end of
each wire to snap onto the sensor.
Mount a safety line (C) between the
sensor and the adjacent bridle/purse
ring. Make sure that security line does
not prevent the sensor from hanging
freely!
Remove the sensor from the purse
seine before it passes through the
power block.
Any attachment material
“permanently” attached to the
sensor’s charging lugs must not form
an electrical connection between the
two charging lugs shorting the
charging current.
(A) = Two wires with a snap hook in
one end and the other end attached
permanently to (B).
(B) = Large snap hook.
(C) = Safety wire with snap hooks on
each end. Note that the upper end is
NOT attached to the purse seine wire.
112
857-164636 / Rev.A
Sensors
Tuna purse: The sensor must not be
attached to the footrope wire, but to
the foot-rope chain. Use a safety wire
in addition in case the sensor is ripped
off the net.
Trawl or Danish seine: The depth
sensor is normally attached to the
headrope (A). For secure fastening
and stable positioning of the sensor
pointing towards the vessel, make a
fine mesh bag (B) located at the
centre of the headrope. Size two snap
hooks (C) approximately 10 - 15 cm
from the headrope forming a bridle,
and keep the sensor stretched by
means of two rubber straps (D)
attached to the aft fastening lugs.
857-164636 / Rev.A
113
Simrad PI32
PI Height sensor
Purpose
The PI Height sensor monitors the current height of the trawl,
as well as the rate of any height changes. All measurements are
related to the bottom.
(A) = The PI Height sensor is normally
mounted on the headrope, and by means of
the built-in echo sounder it will measure the
distance to the bottom.
(B) = Echo sounder transmission field
Main parts
(A) = Negative charging and fastening lug
(B) = Positive charging and fastening lug
(C) = Communication link
(D) = Location of sensor lamp
(E) = Water switch sensor
(F) = Echo sounder transducer - must be
directed towards the seabed!
114
857-164636 / Rev.A
Sensors
Daily operation
Once installed and put to use, the Height sensor will
automatically be switched on once the waterswitch is activated.
After an initial startup, the sensor starts the echo sounder, and
the depth results are transmitted to the vessel. When the sensors
are not in use, check that the sensor lamp (D) do not flash from
time to time, as this indicates that the sensor is on and is
discharging its batteries. In this case, wash the sensor in fresh
water to remove salt and dirt.
If you operate with Fast update rate, the sensors must be
charged approximately every 35 hours. Used with Normal or
Slow update rates, the operational life is approximately 60 or
250 hours respectively. The optimal sensor charging temperature
is from +10 to +25°C. The sensor can only be charged with the
PI Charger.
Note:
Charging sensors at sub-zero temperatures can create explosive
gasses. Simrad AS assumes no liability for the improper
charging of sensors or the use of chargers not specified in
Simrad’s sensor charging documentation.
Numerical presentation
On the PI32 display, the distance to the bottom is displayed in
the numeric display. If the height is increasing or decreasing,
this is shown with two arrows and the variation in meters per
second. When the readings are stable, the digits are shown in
black colour. When the values are predicted, the digits are grey,
and if the contact is lost, the characters *.* * are shown in grey.
(A) = Sensor set up as sensor no.1.
(B) = Height measured in meters.
(C) = Current distance from the
sensor to the bottom.
(D) = The distance is decreasing by 1
meters per second.
(E) = Arrows pointing “out” means that the height is
increasing. Arrows pointing “in” means that the height is
decreasing.
(F) = Graphic alarm
(G) = Indicator, lit for every sensor interrogation.
(H) = Interference symbol.
857-164636 / Rev.A
115
Simrad PI32
Sensor configuration
On delivery, all Height sensors are configured in Channel 14
and with Fast update rate.
Note:
The sensor and the PI32 system setup must correspond,
otherwise the communication will not work.
To change the sensor setup (channel selection), use the PI
Configurator utility.
The sensor update rate controls how often the sensor reads and
reports the height. Three settings are available. Note that a faster
update rate will decrease the battery life.
• Fast (~5,5 sec): Recommended for new trawl or changes in
rigging to monitor any instabilities or unexpected changes.
This mode provides the shortest battery life before charging.
• Normal (~14 sec): Recommended for well known trawl
behavior with stable situations. Use this setting during
normal conditions.
• Slow (~34 sec): Recommended to monitoring a stable
situation over time. The system will be more sensitive to bad
communication conditions due to the slow data update. This
mode provides longest operational battery life before
charging.
System configuration
Sensor configuration: The sensor must be configured with a
unique sensor number. Select channel number and update rate
according to the sensor’s configuration. Write down the
configuration for future reference.
Status & Receiver: The Interference filter must be switched on.
Set it to level 9 if you have noise problems from other
hydroacoustic sources. Note that with the filter on, it will
influence the signal spectrum shown in the Status display.
Sensor filter: Switch this filter to Light. Set it to Heavy only if
you experience excessive noise. Position Off will provide raw
data and fastest possible response.
116
857-164636 / Rev.A
Sensors
Mounting
Location: Place the sensor where you wish to monitor the
height. This is normally aft of the headrope at the center of the
net.
Ensure that you mount the sensor with the reverse side (D) and
the echo sounder transducer (E) pointing towards the bottom!
The SIMRAD print on the sensor (C) must point up towards the
water surface!
Mounting: Secure the two forward
fastening lugs (A) using two snap
hooks and rope. Then, secure the two
aft fastening lugs (B) using snap
hooks and strong rubber bands. This
mounting places the sensor in a cradle
supported on all four sides.
In order to secure the sensor in place,
we recommend that you assemble a
bag of fine-meshed net, and ties this
to the trawl close to the middle of the
headrope. Then, mount the sensor
inside this bag. The sensor must be
properly secured to prevent it from
moving sideways or rotate during use.
(A) = Rope and snap hooks
(B) = Rubber bands and snap hooks
(C) = SIMRAD imprint on the sensor
must point up!
(D) = Reverse side of sensor
(E) = Echo sounder transducer must
point towards the bottom!
Sacrificial water switch sensor
If the water switch on your sensor is a sacrificial brass screw,
this screw must be checked every month. Whenever required
due to wear and tear, the screw must be replaced. Refer to the
Operational procedures in the operator manual.
857-164636 / Rev.A
117
Simrad PI32
PI Rip sensor
Purpose
The PI Rip sensor is identical to the PI Catch, and it must be
regarded as a second application for the Catch sensor. The PI
Rip sensor will monitor if your net is damaged and ripped apart
due to obstructions or foreign objects on the seabed.
(A) = The PI Rip is mounted on the footrope with
the two sensor wires stretched out and the wires
engaged.
(B) = Two strong rubber bands ensure that the
sensor is activated. If the net is torn, the slack in
the net will disengage the Rip sensor.
Main parts
(A) = Negative charging and fastening lug
(B) = Positive charging and fastening lug
(C) = Communication link to the vessel
(D) = Location of sensor lamp
(E) = Water switch sensor
(F) = Detection wires
Daily operation
In most cases, one or two Rip sensors mounted
on the footrope will be sufficient to monitor the
condition of the net.
118
857-164636 / Rev.A
Sensors
Once installed and put to use, the sensor will automatically be
switched on once the waterswitch is activated. After an initial
startup, the sensor will detect the status of the detection wires,
and transmit this information to the vessel. When the sensor is
not in use, check that the sensor lamps (D) do not flash from
time to time, as this indicates that the sensor is on and is
discharging its batteries. In this case, wash the sensor in fresh
water to remove salt and dirt.
If you operate with Fast update rate, the sensors must be
charged approximately every 35 hours. Used with Normal or
Slow update rates, the operational life is approximately 150 or
300 hours respectively. The optimal sensor charging temperature
is from +10 to +25° C.
Note:
Note that charging sensors at sub-zero temperatures can create
explosive gasses. Simrad AS assumes no liability for the
improper charging of sensors or the use of chargers not
specified in Simrad’s sensor charging documentation.
Numeric presentation
On the PI32 display, the Rip sensor status is displayed with
graphic symbols. The timers count the total number of minutes
the sensor has been activated (red rectangle). If only predicted
timer values exist, the timer characters are shown in grey. If the
sensor communication is lost, the graphic symbol is replaced by
the characters ***.* (in grey).
(A) = Sensor set up as sensor no.3.
(B) = A yellow rectangle indicates
that the sensor has deactivated, and
that net has been damaged. The timer
has stopped.
(C) = The timer counts how many
minutes the sensor has been activated
with a serviceable net during a tow. It
must be reset manually.
(D) = Indicator, lit for every sensor
interrogation.
(E) = Interference symbol.
(F) = A red rectangle indicates that the sensor is activated. This
is the normal position, and it means that the net is serviceable.
The timer is running.
(G) = Timer
857-164636 / Rev.A
119
Simrad PI32
Sensor configuration
On delivery, all Rip sensors are configured in Channel 4 and
with Normal update rate. If you wish to use Rip and Catch
sensors simultanously, one of them must be set to a different
communication channel.
Note:
The sensor and the PI32 system setup must correspond,
otherwise the communication will not work.
To change the sensor setup (channel selection), use the PI
Configurator utility.
The sensor update rate controls how often the sensor reads and
reports the condition of the net. Three settings are available.
Note that a faster update rate will decrease the battery life.
• Fast (~5,3 sec): Recommended if you suspect that the bottom
conditions are rough and unpredicatble, and that damage may
be easily inflicted. This mode provides the shortest battery
life before charging.
• Normal (~33 sec): Recommended for normal bottom
conditions.
• Slow (~125 sec): Recommended if the bottom conditions are
well known, and you know that no obstructions exist. This
mode provides longest operational battery life before
charging.
System configuration
Sensor configuration: The sensor must be configured with a
unique sensor number. Select channel number and update rate
according to the sensor’s configuration. Write down the
configuration for future reference.
Status & Receiver: The Interference filter must be switched on.
Set it to level 9 if you have noise problems from other
hydroacoustic sources. Note that with the filter on, it will
influence the signal spectrum shown in the Status display.
Sensor filter: Switch this filter to Light. Set it to Heavy only if
you experience excessive noise. Position Off will provide raw
data and fastest possible response.
120
857-164636 / Rev.A
Sensors
Mounting
Location: Place the sensor where you wish to check the net
condition. This is normally close to the footrope at the center of
the net. If the net is torn, the slack will release one or both of the
sensor’s detection wires.
Rip sensor attachment to the net, location just aft of the footrope. The distance between
the anchor points for the attachment rings and rubber straps must be defined depending
on the size of the net and how large area you wish to monitor.
(A) = Snap hook and screw link
(B) = Steel attachment rings bent to the net
(C) = Nylon attachment rings bent to the net
(D) = Detection wires
(E) = Rubber strap
(F) = Attachment point
857-164636 / Rev.A
121
Simrad PI32
Attachment: The sensor’s orientation towards the vessel is
maintained by the steel and nylon attachment rings. The number
of meshes the attachment rings are supported between must be
restricted to avoid unnecessary stress on the sensors fastening
lugs. The use of both nylon and steel attachment rings is
required to secure the sensor lugs if excessive forces are applied
on them. The nylon rings will stretch or break down, but the
steel ring will prevent the sensor from being lost. Note that two
steel rings must be mounted on the same side of the sensor.
Rubber straps: The two rubber bands (E) must be stretched
towards aft, and mounted to the meshes in such a way that the
detection wires are engaged during normal operations. The
angle between the two rubber bands should be approximately 70
degrees. Inspect the rubber straps regularly and always before a
new haul. Replace them if you detect visible signs of cracks or
damage.
Sacrificial water switch sensor
If the water switch on your sensor is a sacrificial brass screw,
this screw must be checked every month. Whenever required
due to wear and tear, the screw must be replaced. Refer to the
Operational procedures in the operator manual.
122
857-164636 / Rev.A
Sensors
PI Spread and Remote sensors
Purpose
The PI Spread and Remote sensors measure the physical
distance between the trawl doors.
Note:
Each Spread sensor can be configured to communicate with one
of two remote sensors; Remote 1 or Remote 2. Label the Spread
sensor accordingly, and ensure that you only use the sensors in
the correct pairs.
(S) = The PI Spread sensor is mounted in a
special adapteron the port trawl door.
(R) = The PI Remote sensor is mounted in a
special adapter on the starboard trawl door.
(C) = The PI Spread sensor communicates with
the PI system on the vessel.
(F) = Using the transverse communication link,
the two sensors measure the physical distance
between the trawl doors.
Main parts
(A) = Negative charging and fastening lug
(B) = Positive charging and fastening lug
(C) = Communication link to the vessel
(D) = Location of sensor lamp (rear side of PI
Spread)
(E) = Water switch sensor
(F) = Transverse communication link
857-164636 / Rev.A
123
Simrad PI32
Daily operation
Once installed and put to use, the Spread sensor will
automatically be switched on once the waterswitch is activated.
After an initial startup, the sensor starts interrogating the
Remote sensor to measure the distance. The results are
transmitted to the vessel. When the sensors are not in use, check
that the sensor lamps (D) do not flash from time to time, as this
indicates that the sensor is on and is discharging its batteries.
If you operate with Fast update rate, the sensors must be
charged approximately every 45 hours. Used with Normal or
Slow update rates, the operational life is approximately 100 or
150 hours respectively. The optimal sensor charging temperature
is from +10 to +25° C.
Note:
The two rubber inserts provided at the bottom of each sensor
adapter must not be replaced with any other types or designs. It
is essential that these inserts provide a secure cradle for the
sensors, but they must also allow for free water circulation to
allow the sensor’s water switch to engage. Also, the design of
the inserts allows sand and mud to flow out when the trawl
doors are pulled up from the water.
Note:
Note that charging sensors at sub-zero temperatures can create
explosive gasses. Simrad AS assumes no liability for the
improper charging of sensors or the use of chargers not
specified in Simrad’s sensor charging documentation.
124
857-164636 / Rev.A
Sensors
Numerical presentation
On the PI32 display, the distance between the trawl doors is
displayed in the numeric display. If the distance is increasing or
decreasing, this is shown with two arrows and the variation in
meters per second. When the readings are stable, the digits are
shown in black colour. When the values are predicted, the digits
are grey, and if the contact is lost, the characters *.* * are
shown in grey. If the transvere communication link fails, this is
indicated with the characters ±±± .
(A) = Sensor set up as sensor no.3.
The distance is measured in meters.
(B) = Current distance between the
trawl doors.
(C) = The distance is increasing by
18 meters per second.
(D) = Arrows pointing “out” means that the distance is
increasing. Arrows pointing “in” means that it is decreasing.
(E) = Graphic alarm
(F) = Indicator, lit for every sensor interrogation.
(G) = Interference symbol.
Sensor configuration
On delivery, all Spread sensors are configured in Channel 2,
with Fast update rate, and for use with Remote 1.
Note:
The sensor and the PI32 system setup must correspond,
otherwise the communication will not work.
To change the sensor setup (channel selection), use the PI
Configurator utility.
The sensor update rate controls how often the sensor reads and
reports the door spread. Three settings are available. Note that a
faster update rate will decrease the battery life.
• Fast (~5,5 sec): Recommended for new trawl or gear or
changes in rigging to monitor any instabilities or unexpected
changes. This mode provides the shortest battery life before
charging.
• Normal (~14 sec): Recommended for well known trawl, gear
and door behavior with stable situations. Use this setting
during normal conditions.
857-164636 / Rev.A
125
Simrad PI32
• Slow (~34 sec): Recommended to monitoring a stable
situation over time, focus on door not falling over, broken
sweep lines etc. during the tow. The system will be more
sensitive to bad communication conditions due to slow data
update. This mode provides longest operational battery life
before charging.
System configuration
Sensor configuration: The sensor must be configured with a
unique sensor number. Select channel number and update rate
according to the sensor’s configuration. Write down the
configuration for future reference.
Status & Receiver: The Interference filter must be switched on.
Set it to level 9 if you have noise problems from other
hydroacoustic sources. Note that with the filter on, it will
influence the signal spectrum shown in the Status display.
Sensor filter: Switch this filter to Light. Set it to Heavy only if
you experience excessive noise. Position Off will provide raw
data and fastest possible response.
Mounting
The Spread and Remote sensors must be mounted in special
adapters on each trawl door. These adapters must be installed
aforehand. Detailed information on how to install the adapters
are provided with the installation kit.
Installation principle
The PI Spread sensor is mounted on the port door, while the PI
Remote sensor is mounted on the starboard door. It is essential
that there is a clear line of sight between the two transverse
communication “eyes” (one on each sensor), and between the
top of the PI Spread sensor and the hydrophone on the vessel.
126
857-164636 / Rev.A
Sensors
Top view:
(A) = Starboard door
(B) = Port door
(C) = Communication link to vessel’s
hydrophone
(D) = Angle of attack
(E) = Direction of tow
(F) = Transverse communication link
(R) = PI Remote sensor in its adapter
(S) = PI Spread sensor in its adapter
Sacrificial water switch
sensor
If the water switch on your sensor is a
sacrificial brass screw, this screw
must be checked every month.
Whenever required due to wear and
tear, the screw must be replaced.
Refer to the Operational procedures
in the operator manual.
857-164636 / Rev.A
127
Simrad PI32
PI Twin Spread
Purpose
The PI Twin Spread is used with two Remote sensors to
measure the physical distance between the trawl doors during
twin trawl operations.
(A) = The PI Twin Spread sensor communicates with the PI system on the vessel.
(B) = The PI Twin Spread sensor is mounted on the port trawl door.
(C) = One PI Remote sensor is mounted on the center clump.
(D) = One PI Remote sensor is mounted on the starboard trawl door.
128
857-164636 / Rev.A
Sensors
Main parts
(A) = Negative charging and fastening lug
(B) = Positive charging and fastening lug
(C) = Communication link to the vessel
(D) = Location of sensor lamp (rear side of PI
Twin Spread)
(E) = Water switch sensor
(F) = Transverse communication links to the two
Remote sensors
Daily operation
Once installed and put to use, the Twin Spread sensor will
automatically be switched on once the waterswitch is activated.
After an initial startup, the sensor starts interrogating the
Remote sensors to measure the two distances. The results are
transmitted to the vessel. When the sensors are not in use, check
that the sensor lamps (D) do not flash from time to time, as this
indicates that the sensor is on and is discharging its batteries. In
this case, wash the sensor in fresh water to remove salt and dirt.
If you operate with Fast update rate, the sensors must be
charged approximately every 24 hours. Used with Normal or
Slow update rates, the operational life is approximately 48 or 70
hours respectively. For the Remote sensors, the batteries will
last approximately 50, 100 and 150 hours respectively. The
optimal sensor charging temperature is from +10 to +25° C.
Note:
The two rubber inserts provided at the bottom of each sensor
adapter must not be replaced with any other types or designs. It
is essential that these inserts provide a secure cradle for the
sensors, but they must also allow for free water circulation to
allow the sensor’s water switch to engage. Also, the design of
the inserts allows sand and mud to flow out when the trawl
doors are pulled up from the water.
Note:
Note that charging sensors at sub-zero temperatures can create
explosive gasses. Simrad AS assumes no liability for the
improper charging of sensors or the use of chargers not
specified in Simrad’s sensor charging documentation.
857-164636 / Rev.A
129
Simrad PI32
Numerical presentation
On the PI32 display, the distances between the trawl doors are
displayed in the numeric display. Two rectangles are used, one
for each distance. If the distance is increasing or decreasing, this
is shown with two arrows and the variation in meters per
second.
When the readings are stable, the digits are shown in black
colour. When the values are predicted, the digits are grey, and if
the contact is lost, the characters **.* are shown in grey. The
characters ±±.± indicate that the Twin Spread sensor has lost
contact with the Remote sensor(s), while characters ??.? means
that the Remote sensors are out of range.
(A) = Twin Spread sensor set up as
sensor no.1.
(B) = The distancea are measured in
meters.
(C) = Current distance between the
port door and the center clump.
(D) = The distance is increasing by 1
meters per second.
(E) = Arrows pointing “out” means
that the distance is increasing.
Arrows pointing “in” means that it is
decreasing.
(F) = Graphic alarm
(G) = Indicator, lit for every sensor interrogation.
(H) = Interference symbol.
The bottom numeric display shows the distance from the port
door to the starboard door, and indicates that the distance is
decreasing with 0.5 meters per second.
130
857-164636 / Rev.A
Sensors
Sensor configuration
You can operate two sets of Twin Spread sensors, these sets are
identified as Twin Spread 1 and Twin Spread 2.
Twin Spread 1 uses two Remote sensors: Remote 1 and 2.
Twin Spread 2 uses two Remote sensors: Remote 2 and 4.
On delivery, all Twin Spread sensors are configured as Twin
Spread 1 in Channels 2 and 5, with Fast update rate, and for use
with Remote sensors 1 and 3. The four Remote sensors can be
ordered pre-programmed from Simrad, but if you wish to use a
Twin Spread 2 set-up you must re-configure a Twin Spread 1
sensor using the PI Configurator utility.
Note:
The Twin Spread sensor and the PI32 system setup must also
correspond, otherwise the communication will not work.
The sensor update rate controls how often the sensor reads and
reports the door spread. Three settings are available. Note that a
faster update rate will decrease the battery life.
• Fast (~5,5 sec): Recommended for new trawl or gear or
changes in rigging to monitor any instabilities or unexpected
changes. This mode provides the shortest battery life before
charging.
• Normal (~14 sec): Recommended for well known trawl, gear
and door behavior with stable situations. Use this setting
during normal conditions.
• Slow (~34 sec): Recommended to monitoring a stable
situation over time, focus on door not falling over, broken
sweep lines etc. during the tow. The PI32 system will be
more sensitive to bad communication conditions due to slow
data update. This mode provides longest operational battery
life before charging.
System configuration
Sensor configuration: The sensor must be configured with a
unique sensor number. Select channel number and update rate
according to the sensor’s configuration. Write down the
configuration for future reference.
Status & Receiver: The Interference filter must be switched on.
Set it to level 9 if you have noise problems from other
hydroacoustic sources. Note that with the filter on, it will
influence the signal spectrum shown in the Status display.
Sensor filter: Switch this filter to Light. Set it to Heavy only if
you experience excessive noise. Position Off will provide raw
data and fastest possible response.
857-164636 / Rev.A
131
Simrad PI32
Mounting
The Spread and Remote sensors must be mounted in special
adapters on each trawl door and on the centre clump. These
adapters must be installed aforehand. Detailed information on
how to install the adapters are provided with the installation kit.
Installation principle
The PI Twin Spread sensor is mounted on the port door. One PI
Remote sensor is mounted on the center clump, while the other
Remote sensor is mounted on the starboard door. It is essential
that there is a clear line of sight between the transverse
communication “eyes” (one on each sensor), and between the
top of the PI Twin Spread sensor and the hydrophone on the
vessel.
Top view:
(A) = Port trawl
(B) = Starboard trawl
(C) = Port door with the
PI Twin Spread sensor
mounted in an adapter.
One acoustic
communication link is
directed forward towards
the vessel, while two are
directed towards the two
Remote sensors.
(D) = Center clump with
one Remote sensor
(E) = Starboard door with
the other Remote sensor
(F) = Forward
In a Twin Spread 1 set-up,
the two remote sensors
would need to be Remote
1 and Remote 3.
Sacrificial water switch sensor
If the water switch on your sensor is a sacrificial brass screw,
this screw must be checked every month. Whenever required
due to wear and tear, the screw must be replaced. Refer to the
Operational procedures in the operator manual.
132
857-164636 / Rev.A
Sensors
PI Temperature sensor
Purpose
The PI Temperature sensor monitors the current water
temperature at the chosen location on the purse seine or trawl.
(A) = The sinking rate of the net is monitored by two Depth
sensors
(B) = One Temperature sensor is mounted on the footrope to
monitor the location of the thermo-cline.
(C) = One Temperature sensor is mounted on the headrope to
monitor if the sea water temperature is favourable for the target
species.
857-164636 / Rev.A
133
Simrad PI32
Main parts
(A) = Negative charging and fastening lug
(B) = Positive charging and fastening lug
(C) = Communication link
(D) = Location of sensor lamp
(E) = Water switch sensor
(F) = Temperature sensor (label is removed)
Daily operation
Once installed and put to use, the sensor will
automatically be switched on once the
waterswitch is activated. After an initial startup,
the sensor starts transmission of the current
temperature. When the sensor is not in use, check
that the sensor lamp (D) is not flashing from time
to time, as this indicates that the sensor is on and
is discharging its batteries.
If you operate with Fast update rate, the sensor
must be charged approximately every 24 hours.
Used with Normal or Slow update rates, the
operational life is approximately 75 or 150 hours
respectively. The optimal sensor charging
temperature is from +10 to +25° C.
Note that charging sensors at sub-zero temperatures can create
explosive gasses. Simrad AS assumes no liability for the
improper charging of sensors or the use of chargers not specified
in Simrad’s sensor charging documentation.
134
857-164636 / Rev.A
Sensors
Temperature presentation
On the PI32 display, the temperature is displayed in the numeric
display. If the temperature is falling or rising, this is shown with
an arrow. When the readings are stable, the digits are shown in
black colour. When the values are predicted, the digits are grey,
and if the contact with the sensor is lost, the characters *.* * are
shown in grey.
(A) = Sensor set up as sensor no.2.
(B) = Current temperature.
(C) = Denomination (Celcius or
Fahrenheit)
(D) = Temperature change. This
arrow indicates that the temperature
is rising.
(E) = Graphic alarm
(F) = Indicator, lit for every sensor interrogation.
(G) = Interference symbol.
Sensor configuration
On delivery, all temperature sensors are configured in Channel 8
and with Fast update rate. If you use more than one sensor, you
must set them up to operate in different channels.
Note:
The sensor and the PI32 system setup must correspond,
otherwise the communication will not work.
To change the sensor setup (channel selection), use the PI
Configurator utility.
The sensor update rate controls how often the sensor reads and
reports the temperature. Three settings are available. Note that a
faster update rate will decrease the battery life.
• Fast (~4,5 sec): Recommended for purse seine or trawl,
allows immediate update of changes in the sea temperature.
• Normal (~14 sec): Recommended for trawl and normal
fishing with fairly constant sea temperatures.
• Slow (~34 sec): Recommended if you experience constant
sea temperatures, or if maximum operational battery life
before charging is required. The system will be more
sensitive to bad communication conditions due to the slow
data update.
857-164636 / Rev.A
135
Simrad PI32
System configuration
Sensor configuration: The sensor must be configured with a
unique sensor number. Select channel number according to the
sensor’s configuration. Write down the configuration for future
reference.
Status & Receiver: The Interference filter must be switched on.
Set it to level 9 if you have noise problems from other
hydroacoustic sources. Note that with the filter on, it will
influence the signal spectrum shown in the Status display.
Sensor filter: Switch this filter to Light. Set it to Heavy only if
you experience excessive noise. Position Off will provide raw
data and fastest possible response.
136
857-164636 / Rev.A
Sensors
Mounting
Purse seine: In order to secure stable communication with the
vessel’s hydrophone, it is very important that the sensor is
allowed to hang freely with the top end pointing towards the
surface during shooting and pursing.
Attach the sensor to a standard purse
ring with two separate wires (A).
Mount one end of each wire to a
common snap hook (B), and place
another snap hook at the other end of
each wire to snap onto the sensor.
Mount a safety line (C) between the
sensor and the adjacent bridle/purse
ring. Make sure that security line does
not prevent the sensor from hanging
freely!
Remove the sensor from the purse
seine before it passes through the
power block.
Any attachment material
“permanently” attached to the
sensor’s charging lugs must not form
an electrical connection between the
two charging lugs shorting the
charging current.
(A) = Two wires with a snap hook in
one end and the other end attached
permanently to (B).
(B) = Large snap hook.
(C) = Safety wire with snap hooks on
each end. Note that the upper end is
NOT attached to the purse seine wire.
857-164636 / Rev.A
137
Simrad PI32
Tuna purse: The sensor must not be
attached to the footrope wire, but to
the foot-rope chain. Use a safety wire
in addition in case the sensor is ripped
off the net.
Trawl or Danish seine: The sensor is
normally attached to the headrope.
For secure fastening and stable
positioning of the sensor pointing
towards the vessel, make a fine mesh
bag sized to the middle of the
head-rope. Size two snap hooks
approximately 10 - 15 cm from the
headrope forming a bridle, and keep
the sensor stretched by means of two
rubber straps attached to the aft
fastening lugs.
Sacrificial water switch sensor
If the water switch on your sensor is a sacrificial brass screw,
this screw must be checked every month. Whenever required
due to wear and tear, the screw must be replaced. Refer to the
Operational procedures in the operator manual.
138
857-164636 / Rev.A
Sensors
PS Temperature sensor
Purpose
The PS Temperature sensor monitors the current water
temperature at the chosen location on the purse seine or trawl.
(A) = The sinking rate of the net is monitored by two Depth
sensors
(B) = One Temperature sensor is mounted on the footrope to
monitor the location of the thermo-cline.
(C) = One Temperature sensor is mounted on the headrope to
monitor if the sea water temperature is favourable for the target
species.
857-164636 / Rev.A
139
Simrad PI32
Main parts
(A) = Negative charging and fastening lug
(B) = Positive charging and fastening lug
(C) = Communication link
(D) = Location of sensor lamp
(E) = Water switch sensor
(F) = Temperature sensor (label is removed)
Daily operation
Once installed and put to use, the sensor will
automatically be switched on once the
waterswitch is activated. After an initial startup,
the sensor starts transmission of the current
temperature. When the sensor is not in use, check
that the sensor lamp (D) is not flashing from time
to time, as this indicates that the sensor is on and
is discharging its batteries.
You can only operate this sensor with Fast update
rate. The sensor must then be charged
approximately every 30 hours. The optimal
sensor charging temperature is from +10 to
+25°C.
Note that charging sensors at sub-zero temperatures can create
explosive gasses. Simrad AS assumes no liability for the
improper charging of sensors or the use of chargers not specified
in Simrad’s sensor charging documentation.
140
857-164636 / Rev.A
Sensors
Temperature presentation
On the PI32 display, the temperature is displayed in the numeric
display. If the temperature is falling or rising, this is shown with
an arrow. When the readings are stable, the digits are shown in
black colour. When the values are predicted, the digits are grey,
and if the contact with the sensor is lost, the characters *.* * are
shown in grey.
(A) = Sensor set up as sensor no.2.
(B) = Current temperature.
(C) = Denomination (Celcius or
Fahrenheit)
(D) = Temperature change. This
arrow indicates that the temperature
is rising.
(E) = Graphic alarm
(F) = Indicator, lit for every sensor interrogation.
(G) = Interference symbol.
Sensor configuration
On delivery, all temperature sensors are configured in Channel 8
and with Fast update rate. It is not possible to change the update
rate setting. If you use more than one sensor, you must set them
up to operate in different channels.
Note:
The sensor and the PI32 system setup must correspond,
otherwise the communication will not work.
To change the sensor setup (channel selection), use the PI
Configurator utility.
The sensor update rate controls how often the temperature is
measured, and the data transmitted to the vessel. To be able to
monitor fast changes in the sea temperature, the sensor will only
operate on Fast update rate.
System configuration
Sensor configuration: The sensor must be configured with a
unique sensor number. Select channel number according to the
sensor’s configuration. Write down the configuration for future
reference.
Status & Receiver: The Interference filter must be switched on.
Set it to level 9 if you have noise problems from other
hydroacoustic sources. Note that with the filter on, it will
influence the signal spectrum shown in the Status display.
Sensor filter: Switch this filter to Light. Set it to Heavy only if
you experience excessive noise. Position Off will provide raw
data and fastest possible response.
857-164636 / Rev.A
141
Simrad PI32
Mounting
Purse seine: In order to secure stable communication with the
vessel’s hydrophone, it is very important that the sensor is
allowed to hang freely with the top end pointing towards the
surface during shooting and pursing.
Attach the sensor to a standard purse
ring with two separate wires (A).
Mount one end of each wire to a
common snap hook (B), and place
another snap hook at the other end of
each wire to snap onto the sensor.
Mount a safety line (C) between the
sensor and the adjacent bridle/purse
ring. Make sure that security line does
not prevent the sensor from hanging
freely!
Remove the sensor from the purse
seine before it passes through the
power block.
Any attachment material
“permanently” attached to the
sensor’s charging lugs must not form
an electrical connection between the
two charging lugs shorting the
charging current.
(A) = Two wires with a snap hook in
one end and the other end attached
permanently to (B).
(B) = Large snap hook.
(C) = Safety wire with snap hooks on
each end. Note that the upper end is
NOT attached to the purse seine wire.
142
857-164636 / Rev.A
Sensors
Tuna purse: The sensor must not be
attached to the footrope wire, but to
the foot-rope chain. Use a safety wire
in addition in case the sensor is ripped
off the net.
Trawl or Danish seine: The sensor is
normally attached to the headrope.
For secure fastening and stable
positioning of the sensor pointing
towards the vessel, make a fine mesh
bag sized to the middle of the
head-rope. Size two snap hooks
approximately 10 - 15 cm from the
headrope forming a bridle, and keep
the sensor stretched by means of two
rubber straps attached to the aft
fastening lugs.
857-164636 / Rev.A
143
Simrad PI32
SENSOR CHARGERS
Overview
Two different battery chargers can be used to charge the PI and
PS sensors:
• PI Charger
• PS30 Charger
Even though both chargers can be used to charge any of the
sensors (except the PI Height sensor), only the PI Charger will
provide fast and intelligent charging of the PI sensors.
Note:
The PI Height sensor can only be charged with the PI Charger.
Topics
144
→
PI Charger, page 145
→
PS30 Charger, page 147
857-164636 / Rev.A
Sensor chargers
PI Charger
Purpose
The PI Charger is an intelligent battery charger for fast and
secure charging of the PI sensors. The charger will
automatically set up the correct charging current depending on
the sensor type and the battery temperature. Even though the PI
Charger is designed for fast charge of the PI sensors, it can also
charge the PS sensors, but only at normal charge rate. A fuel
meter shows the status of the battery during the charge.
Daily operation
1) Attach the charging clamps to the sensor as
follows:
Red clamp: Positive fastening lug (+)
Black clamp: Negative fastening lug (-)
2) Ensure that attachment materials, rope etc. do not
short circuit the charging lugs, preventing charging
and causing damage to the sensor lugs.
Once connected, the charger will identify whether
the sensor connected can be fast charged or not.
The battery temperature will always be monitored
for a fast charging sensor. A sensor which can not
be fast charged, will not display the battery
temperature, and the temperature LED will be
dark.
3) Observe the charge times and temperature limitations:
Fast charge: First approximately 1 hour for 70% battery
capacity, then approximately 3 hours to reach 100% capacity.
Once fully charged, a constant trickle charge will compensate
for self discharging. Note that fast charging applies to PI
sensors only!
Normal charge: 16 hours for full battery capacity. This
mode applies for charging outside specified temeparture
range, and for all PS sensors.
Charging temperature: For best results, keep the ambient
temperature between +10 and +25°C. Do not charge in
temperatures above +50°C or below 0°C!
857-164636 / Rev.A
145
Simrad PI32
Indicators
(A) = Mains: 12 to 32 Vdc
(B) = Fuel meter. The number of LEDs illuminated shows the
current charging status. A complete charging cycle is indicated
with all “full” battery. Charging:
Fast: Fast flash
Normal: Slow flash
Trickle: On, off every 4 second
(C) = Battery temperature indicators during fast charging:
Green: Battery temperature between +5 and +40°C. Fast
charge is enabled.
Green and Blue: Battery temperature between 0 and +5°C.
Fast charge is disabled, normal charge is used.
Green and Red: Battery temperature between +40 and
+50°C. Fast charg disabled, normal charge is used.
Blue: Battery temperature is below 0°C. No charging takes
place.
Red: Battery temperature is above +50°C. No charging takes
place.
Warning:
Charging a sensor at sub-zero temperature might
develop explosive gases representing a potential
danger. Simrad assumes no liability for improper
charging, or the use of other chargers than those
approved by Simrad.
Automatic configuration
The charger communicates with the sensor at regular intervals.
The fast charge cycle is controlled by data exchanged between
the PI sensor and the charger, and a series of safety mechanisms
controls the termination of the fast charging current.
The PS sensors do not communicate with the charger. A
constant charge current of 58 mA is then set up by the charger
regardless of the battery temperature.
Typical sensor (PI Depth)
(A) = Negative charging / fastening lug
(B) = Positive charging / fastening lug
(C) = Communication link
(D) = Location of sensor lamp
(E) = Water switch sensor
(F) = Water pressure sensor
146
857-164636 / Rev.A
Sensor chargers
PS30 Charger
Purpose
The PS Charger is a battery charger for secure charging of the
PS and PI sensors.
Daily operation
1) Attach the charging clamps to the sensor as follows:
Red clamp: Positive fastening lug (+)
Black clamp: Negative fastening lug (-)
2) Ensure that attachment materials, rope etc. does not short
circuit the charging lugs, preventing charging and causing
damage to the sensor lugs.
3) Observe the sensor’s indiactor lamp. It will flash once every
four seconds during charging.
4) Observe the charge times and temperature limitations:
Normal charge: ~16 hours for full battery capacity.
Charging temperature: To obtain best results, try to keep
the ambient temperature between +10°C and +25°C. The
sensor must not be charged in temperatures above +50°C or
below 0°C!
Warning:
857-164636 / Rev.A
Charging a sensor at sub-zero temperature might
develop explosive gases representing a potential
danger. Simrad assumes no liability for improper
charging, or the use of other chargers than those
approved by Simrad.
147
Simrad PI32
General guidelines
Operational time and service life of the sensor’s NiCd battery
depends on proper use and regular charging. Observe the
following precautions, as these will have an influence on the
battery performance:
• Observe the charging temperatures.
• Charge sensors regularly. Avoid draining the sensor battery
completely before charging.
• Charge the sensor battery before storage, and at three-month
intervals under long-term storage.
• Operational life may be initially reduced after long-term
storage or charging for a long time.
• Sensors are not damaged by being left attached to a charger
for several days. However, do not store the sensor for
extended periods under charge.
• We recommend that a wooden box is made to keep the sensor
in a secure place during charging and storage. Make openings
in the bottom to drain for sea water.
Battery depleted frequently
If the charger lamp is illuminated, but the sensor lamp does not
flash every four seconds, the battery is not being charged
properly. Most likely, this is because the sensor was not
switched off when the charger was connected.
To correct, charge the sensor for ten minutes, then disconnect
the alligator clips. Use a small wire, and make contact between
the water switch sensor and one of the fastening lugs. This will
cause the sensor to flash its start-up code. If not, wash the sensor
in fresh water to disengage the water switch.
Typical sensor (PI Depth)
(A) = Negative charging / fastening lug
(B) = Positive charging / fastening lug
(C) = Communication link
(D) = Location of sensor lamp
(E) = Water switch sensor
(F) = Water pressure sensor
148
857-164636 / Rev.A
Menu system
MENU SYSTEM
The PI32 is controlled using a small meny system. Although
several shortcuts exist, the main functions and setup parameters
can be accessed from the main menu. To access the main menu,
press the MENU button.
Topics
→
857-164636 / Rev.A
Main menu, page 150
149
Simrad PI32
The main menu
To access the main menu, press the MENU button.
Fishery
On the Fishery menu, you can select display modes related to
catch monitoring.
→
Numeric display, page 28
→
Graphic display, page 35
→
Surface temperature, page 37
→
Status display, page 38
Navigation
On the Navigation menu, you can select display modes related
to vessel navigation.
→
Position display, page 44
→
Navigation display, page 43
Echo
On the Echo menu, you can select display modes related to the
built-in echo sounder, and you can switch echo sounder
functions on or off.
→
Echo display, page 40
→
Bottom expansion, page 41
→
VRM expansion, page 42
→
Echo sounder setup, page 157
Setup
On the Setup menu, you can access setup parameters to control
the operation of the PI32.
Note that additional parameters are accessed directly from the
presentations by pressing the ENT button.
→
→
150
Speed alarm, units and language:
→
Speed alarm, page 180
→
Units, page 183
→
Language, page 171
Interface setup NMEA, page 162
857-164636 / Rev.A
Menu system
857-164636 / Rev.A
→
Interface setup remote/alarm, page 167
→
Sensor alarm/calibration, page 177
→
Sensor setup, page 179
→
Receiver setup, page 174
→
Display colour, page 172
→
Master reset, page 159
151
Simrad PI32
REFERENCES
This chapter contains reference information. It thus provides
detailed information about the various parameters used to
control the operation and performance of the PI32 system. You
do not need to read and understand thic chapter to operate the
PI32, but the information may guide you to a more efficient use.
The setup pages are provided in alphabetical order. Some are
accessed from the Setup menu, others directly from the display
presentations by means of the ADJ button.
Topics
152
→
Depth calibration, page 153
→
Echo presentation setup, page 154
→
Echo sounder setup, page 157
→
Factory presets, page 159
→
Graphic setup, page 160
→
Interface setup NMEA, page 162
→
Interface setup remote/alarm, page 167
→
Navigation setup, page 168
→
Numeric setup, page 169
→
Offset adjust, page 170
→
Page setup, page 171
→
Palette setup, page 172
→
Position display setup, page 173
→
Receiver setup, page 174
→
Alarm setup, page 177
→
Sensor configuration, page 179
→
Speed setup, page 180
→
Surface temperature setup, page 181
→
Trawl info setup, page 182
→
Units setup, page 183
857-164636 / Rev.A
References
Depth calibration
This function is used to enable calibration of the PI32 Depth
sensor.
To access this function, press the MENU button to open the
main menu. Then, open the Setup menu, and select Sensor
alarm/calibration.
The Depth calibration feature will calibrate the current depth
of the Depth sensor to one -1- meter.
1
Lower the sensor over the side to a depth of one meter, to
a certain draft depth plus one meter, or to any reference
level that you wish to be defined as one meter.
2
Once the reading from the sensor is stable, set Depth
sensor calibration to YES.
The calibration takes one minute. While the process is running,
the numerical presentation is shown with grey text. Note that the
sensor must be submerged into salt water to perform the
calibration.
Related topics
857-164636 / Rev.A
→
How to calibrate the sensor, page 55
→
PI Depth sensor, page 104
→
PS Depth sensor, page 109
153
Simrad PI32
Echo presentation setup
These settings are used to set up the echo sounder presentation
parameters on the PI32. The operational parameters are set up
using the Echo sounder setup dialogue.
To access the parameters, press the ENT button when you have
an echo sounder presentation on the screen.
Range start: This is the upper depth from which you wish the
echo sounder shall start. This value will typically be 0 meters,
but you may for example set up the echo sounder to only present
echoes from 5 meters below the sea surface and downwards.
Range: This is the vertical depth range for the echo sounder.
You can set it to change depth range automaticially (AUTO), or
you can define your own fixed range. The maximum range will
depend on the chosen echo sounder frequency, as the 38 or 50
kHz modes will detect echoes deeper than the 200 kHz mode.
Gain: This is the gain in the echo sounder’s preamplifier. The
gain must be defined manually, and you can choose any value
between 1 and 95 dB. In most cases, use a value around 30 dB.
If you use too much gain, the echogram will contain a lot of
noise and false echoes.
White line: This parameter allows you to switch the White line
function on or off. When enabled, a band in the current
echogram background colour is inserted immediately below the
detected bottom depth.
Expansion window: The PI32 provides a Bottom expansion
function. When this is enabled, you can control the depth range
in the expanded window using this parameter. To enable the
Bottom expansion function, select it on the Echo menu. To
disable it, select Echo display on the Echo menu.
154
857-164636 / Rev.A
References
TVG (Time Varying Gain): The PI32 provides a TVG function
to enhance the echoes from deeper waters. You can select either
Bottom (20 log R) or Fish (40 log R) setting, depending on
which echoes you wish to enhance.
Sound speed: This parameter allows you to fine tune the
performance of the PI32 echo sounder to the speed of sound in
the water. However, in most cases, the speed is not known, and
this parameter is not important at all when operating in shallow
waters. For all practical purposes, leave this setting to the
default value of 1470 m/s.
Ping to ping filter: This function employs a filter which
compares the echo information from one ping with the
information from the previous ping. This will “clean up” the
echogram by removing random noise spikes and interference
with no correlation with the previous echo. The function will
thus make the echoes appear more stable. You can switch this
filter on or off.
Signal threshold: This is an on/off function. When activated, it
will remove the weakest echoes from the screen. The threshold
level is automatic. Activate with caution, as it may remove
small fish or other weak unidentified echoes from the
presentation.
Colour threshold: This function allows you to choose the
number of colours to use for echogram presentation. By
switching this filter on and selecting a colour in the box, all
echo colours “below” the chosen colour will not be shown in the
echogram. You can thus regard this as an “echo threshold”
which will remove the weakest echoes.
Depth grid: When this function is enabled, thin horisontal depth
lines will be added to the echogram to easier identify the depth
intervals. When you operate with a graphic display, this function
can also be switched on and off in the Graphic setup.
Scroll speed: This function controls how fast the presentation
shall scroll from right to left across the display. By defining this
speed you also control the time scale. If you slow down the
scroll speed, you will also increase the time between each echo
sounder transmission (ping). If you choose FREEZE the
presentation (and also the echo sounder transmissions) will stop
altogether. Note that this parameter can also be set in the
Graphic setup.
Echo sounder frequency: This function allows you to choose
echo sounder operating frequency. Use the high frequency for
shallow waters, and the low frequency for deeper waters.
857-164636 / Rev.A
155
Simrad PI32
Note:
The echo sounder frequency you choose must be supported by
the transducer you have installed!
Related topics
156
→
How to define the echo sounder range, page 72
→
Echosounder setup, page 157
→
Graphic setup, page 160
→
Bottom expansion, page 41
857-164636 / Rev.A
References
Echo sounder setup
These settings are used to set up the operational parameters for
the PI32 echo sounder.
To access dialogue, press the MENU button to access the main
menu. Then, select Echo sounder setup on the Echo menu.
Note that the presentation parameters are defined in a separate
dialogue; the Presentation setup.
Echo sounder setup:
Transducer depth below surface:
Keel depth below surface:
Display:
Alarm
Depth
Depth
Depth
for fish, strength:
for fish:
alarm maximum:
alarm minimum:
Transmitter:
Transmit pulse length:
Echo sounder mode:
(CD11100D)
Transducer depth below surface: Enter the vertical distance
between the transducer face and the water surface. Normally,
this value can be fixed, but if it changes considerably when the
vessel is loaded, you may need to change it. The value is used to
provide you with a correct depth under keel (DK) value in the
echo sounder presentation.
Keel depth below surface: Enter the vertical distance between
the keel and the water surface. Normally, this value can be
fixed, but if it changes considerably when the vessel is loaded,
you may need to change it. This parameter is used to provide
you with the correct depth below keel value in the echo sounder
presentation.
Display: This parameter defines which depth value to be
provided in the echo sounder presentation. You can choose to
see the water depth under the keel, the depth below the
transducer, or the depth from the sea surface. In order to ensure
correct depth readouts, you must make sure that the distances
between the surface and the transducer face and the surface and
the lower part of the keel are defined. See the parameter
descriptions above.
Alarm for fish, strength: This parameter enables the fish
detection alarm, and adjusts the sensitivity (strength). With high
sensitivity, smaller fish (with weaker echoes) will trigger the
alarm.
857-164636 / Rev.A
157
Simrad PI32
Depth for fish: This parameter allows you to define a vertical
depth area (between a maximum and a minimum depth) in
which the fish alarm can be triggered. Echoes outside the chosen
area will not trigger the alarm.
Depth alarm (minimum and maximum values): This parameter
enables an alarm to sound off if the water depth is shallower or
deeper than two predefined limits.
Transmitter: This parameter allows you to change the power
output from the echo sounder. You can choose OFF (and no
echogram will appear!), LOW, HIGH or AUTO. In most cases,
select AUTO. The echo sounder will then automatically adjust
the power output depending on the current operational
frequency and the current depth.
Transmit pulse length: This parameter allows you to choose
the length of the echo sounder pulse transmissions. You can
choose OFF (to observe the ambient sea noise), SHORT,
MEDIUM, LONG or AUTO. In most cases, select AUTO. The
PI32 will then automatically choose the pulse length depending
on your current depth range. If you choose to try a manual
mode, try long pulse lengths when you operate in deeper waters,
and shorter pulses with higher frequency in shallower waters.
As a general rule, short pulses serve to make the echoes from
various objects more distinct. It is therefore used to obtain
optimal vertical resolution, as it will separate individual fishes
from each other and from the bottom. Longer pulses will
penetrate deeper, but with less resolution.
Echo sounder mode: This parameter allows you to run the echo
sounder in a “demonstration” mode, or to switch it off. When
you select any other mode than NORMAL, the echo sounder
will automatically use a “demo transducer” to avoid damage to
the output circuitry.
Display: This parameter defines which depth value to be
provided in the echo sounder presentation. You can choose to
see the water depth under the keel, the depth below the
transducer, or the depth from the sea surface. In order to ensure
correct depth readouts, you must make sure that the distances
between the surface and the transducer face and the surface and
the lower part of the keel are defined. See the parameter
descriptions above.
Related topics
158
→
Echo sounder display, page 40
→
Echo presentation setup, page 154
857-164636 / Rev.A
References
Factory presets
This function allows you to restore the PI32 parameters to the
default settings chosen by Simrad.
To access this function, press the MENU button top open the
main menu. Open the Setup menu, and select Master reset.
Once accessed, you must first press the selector pad up, then
down, and finally the ENT key. The PI32 restarts automatically,
and once it has passed the welcome screen it will automatically
ask to have the sensors set up.
Caution:
If you choose to do a master reset, you will need to
redefine every single parameter you have made on the
PI32. This includes all echo sounder settings, sensor
selections and setup, system interfaces and alarms.
Related topics
→
857-164636 / Rev.A
How to restore default settings, page 82
159
Simrad PI32
Graphic setup
These settings are used to set up the PI32 parameters related to
the Graphic display.
To access the parameters, press the ENT button when you have
a Graphic display on the screen.
Superimpose echo sounder: When activated, the presentation
from the echo sounder is added to the graphic display. Note that
this option is only valid if you have the echo sounder
transducer(s) installed, and the echo sounder is set up for normal
operation. You can only switch this function on or off.
Scroll speed: This function controls how fast the presentation
shall scroll from right to left across the display. By defining this
speed you also control the time scale. If you slow down the
scroll speed, you will also increase the time between each echo
sounder transmission (ping). If you choose FREEZE the
presentation (and also the echo sounder transmissions) will stop
altogether. Note that this parameter can also be set in the Echo
presentation setup.
Depth bars: The feature will enable vertical depth bars on the
right hand side of the display presentation. The bars will
indicate the current depth of the sensors. You can only switch
this function on or off.
Depth grid: When this function is enabled, thin horisontal depth
lines will be added to the presentation to easier identify the
depth intervals. Note that this function can also be switched on
and off in the Echo presentation setup.
Surface temperature marker: This function places a marker
on the display to identify the current surface temperature. You
can only switch this function on or off, and you can define how
thick you want the marker line to be.
Temperature scale: This function provides a temperature scale
located on the left side of the Graphic display. You can only
switch this function on or off.
160
857-164636 / Rev.A
References
Marker line: Certain sensors will provide information that can
be superimposed on the graphic display. This parameter allows
you to switch up to three marker lines on and off. The
identifications S1 to S3 relate to sensors 1, 2 and 3, and if the
sensor in question does not provide information that can be
superimposed, the related switch can not be switched on. The
marker lines will appear using the same colour as the currently
defined background colour for the applicable sensor’s numeric
display.
Marker line thickness: Use this parameter to control the
thickness of the marker line(s).
Marker line delay: Use this parameter to control the delay of
the marker line(s). Using this function you can adjust for the
time delay between the echo sounder depth detection and the
information from the sensor(s).
Related topics
857-164636 / Rev.A
→
Echo presentation setup, page 154
→
Sensor setup, page 179
→
Numeric setup, page 169
161
Simrad PI32
Interface setup NMEA
These settings are used to set up the PI32 parameters related to
the communication to and from peripheral units. To access the
parameters, press the MENU button to access the main menu.
Then, select Interface setup NMEA on the Setup menu.
Background
By means of the connectors on the rear side of the PI32 cabinet,
it can communicate with several peripheral devices. This is
useful, as it allows you to export and import information to and
from these devices. In order to establish this communication, the
devices on each end of the cable must speak the same
“language”. The National Marine Electronics Association
(NMEA) has defined communication standards for maritime
electronic equipment, and the PI32 system conforms to these
standards. The most common standard is NMEA 0183, and the
National Marine Electronics Association describes it as follows:
“The NMEA 0183 Interface Standard defines electrical signal
requirements, data transmission protocol and time, and specific
sentence formats for a 4800-baud serial data bus. Each bus may
have only one talker but many listeners.” For more information
about the National Marine Electronics Association and the
NMEA 0183 standard, refer to the organization’s web pages at
www.nmea.org.
Telegrams
To move information between two electronic units, the data are
collected in telegrams. The content (protocol) of each telegram
is defined by the NMEA standard, and several telegram types
exist to allow different type of data to be distributed. Unless you
wish to write your own software, you do not need to know how
these telegrams are designed. However, whenever you set up
equipment interfaces, you need to ensure that each system on
your communication line is set up to send and receive the same
telegram. The standard allows one system to send data (a
“talker”) and several others to receive data simultanously
(”listeners”) on the same line. Therefore, you must ensure that
all products receiving data on a communication line is set up to
receive the same telegram(s) that the transmitting product
provides.
Topics
162
→
Parameters, page 163
→
Applicable telegram formats, page 165
857-164636 / Rev.A
References
Input
By default, the PI32 is only equipped with one NMEA interface
connector. For this reason, you can only receive data from one
peripheral device. However, this device may provide you with
more than one type of information. For example, GPS systems
will provide you with position, course, speed and navigational
information, and these telegrams are transmitted sequentially on
the same serial line using different telegram types.
If you do not use you Remote connector to interface a
secondary display, you can define this output as an NMEA
interface. For more information, refer to the Interface setup
Remote/Alarm setup page.
Position: Select which telegram you wish to use to receive
position data; either GLL, RMA, RMC or GGA. Then, switch
the interface on or off.
Course: Select which telegram you wish to use to receive
course data; either RMA, RMC or VTG. Then, switch the
interface on or off.
Speed: Select which telegram you wish to use to receive speed
data; either RMA, RMC or VTG. Then, switch the interface on
or off.
Navigation: The telegrams used to receive navigational data are
fixed, and the PI32 will receive APB, RMB and XTE telegrams.
Switch the interface on or off.
Water temperature: The telegram used to receive water
temperature data is fixed, and the PI32 will receive this
information using the MTW telegram. Switch the interface on
or off.
857-164636 / Rev.A
163
Simrad PI32
Output
The PI32 is only equipped with one NMEA connector, but you
can still export several information types, as these will be
transmitted sequentially using different telegram types. Whether
this information can be accepted and interpreted on your
peripheral device(s) at the other end of the cable depends on the
functionality of this device.
DBK On/Off: The PI32 will export the current depth below
keel if you switch this parameter on.
DPT On/Off: The PI32 will export the current depth and offset
values if you switch this parameter on.
DBS On/Off: The PI32 will export the current depth below
surface if you switch this parameter on.
MTW On/Off: The PI32 will export the current water
temperature if you switch this parameter on.
DBT On/Off: The PI32 will export the current depth if you
switch this parameter on.
VHW On/Off: The PI32 will export the current speed and
heading if you switch this parameter on.
Navigation data: The PI32 will only export navigational data
on the RMC telegram format. Switch the interface on or off.
Configuration: The PI32 will export the $PSIMP
Configuration sentence (C) on the chosen NMEA port.
Data output: The PI32 will export the $PSIMP Data sentence
(D) on the chosen NMEA port.
Sensor definition: The PI32 will export the $PSIMP Sensor
definition sentence (F) on the chosen NMEA port.
Frequency spectrum: The PI32 will export the $PSIMP
Frequency spectrum sentence (S) on the chosen NMEA port.
Transit: The PI32 will export the $PSIMP Transmit sentence
(T) on the chosen NMEA port.
Related topics
→
164
Interface setup remote/alarm, page 167
857-164636 / Rev.A
References
Applicable telegram formats
The following NMEA telegram formats are used by the PI32.
APB = Autopilot Sentence ”B”. The information provided
includes Status, Cross track error magnitude, Direction to steer,
Cross track units, Bearing origin to destination, Destination
waypoint identification, Bearing, and Heading to steer.
DBK = Depth below keel. The information provided includes
the depth in meters, fathoms and feet.
DBS = Depth below surface. The information provided includes
the depth in meters, fathoms and feet.
DPT = Heading - Deviation & Variation. The information
provided includes the depth and the offset from the transducer.
GGA = Global positioning system fix data. The information
provided includes Universal time coordinated, Latitude,
Longitude, GPS quality indicator, Number of satellites in view,
Horizontal dilution of precision, Antenna altitude, Geoidal
separation, Age of the differential GPS data, and Differential
reference station.
GLL = Geographic Position - Latitude/Longitude. The
information provided includes Latitude, Longitude and
Universal time coordinated.
MTW = Water temperature. The information provided includes
water temperature in Celcius.
RMA = Recommended minimum navigation information. The
information provided includes Blink warning, Latitude,
Longitude, Time difference, Speed over ground, Track made
good, and Magnetic variation.
RMB = Recommended minimum navigation information. The
information provided includes Status, Cross track error,
Direction to steer to waypoint, Destination waypoint latitude
and longitude, Range to destination (in nautical miles), Bearing
to destination (in degrees True), and Destination closing
velocity (in knots).
RMC = Recommended minimum navigation information. The
information provided includes Universal time coordinated,
Latitude, Longitude, Speed over ground (in knots), Track made
good, degrees true, Date, and Magnetic Variation.
VHW = Water speed and heading. The information provided
inludes Vessel speed relative to the water (in knots and
kilometers per hour) and Heading (true and magnetic).
857-164636 / Rev.A
165
Simrad PI32
VTG = Track made good and Ground speed. The information
provided inludes Track degrees (true and magnetic) and Speed
(in knots and kilometers per hour).
XTE = Cross-Track Error, Measured. The information provided
inludes Status, Cross track error and Direction to steer.
166
857-164636 / Rev.A
References
Interface setup remote/alarm
The PI32is equipped with only one NMEA interface port, but
the Remote interface can also be used for NMEA interface
provided that the remote display is not used. This setup page is
used to define the inputs and outputs if the Remote interface is
used as an NMEA port.
Position: Select which telegram you wish to use to receive
position data; either GLL, RMA, RMC or GGA. Then, switch
the interface on or off.
Course: Select which telegram you wish to use to receive
course data; either RMA, RMC or VTG. Then, switch the
interface on or off.
Speed: Select which telegram you wish to use to receive speed
data; either RMA, RMC or VTG. Then, switch the interface on
or off.
Navigation: The telegrams used to receive navigational data are
fixed, and the PI32 will receive APB, RMB and XTE telegrams.
Switch the interface on or off.
Water temperature: The telegram used to receive water
temperature data is fixed, and the PI32 will receive this
information using the MTW telegram. Switch the interface on
or off.
Output
The output pins on the Remote connector can be used as an
alarm output.
Output pin: The PI32 will allow provide an alarm output when
this setting is enabled.
Alarm stand-by level: ???
857-164636 / Rev.A
167
Simrad PI32
Navigation setup
These settings are used to set up the PI32 parameters related to
the navigation display presentation.
To access the parameters, press the ENT button when you have
the navigation display in view.
Course & bearing as: Select True or Magnetic reading.
XTE alarm distance: Define how large crosstrack error the
PI32 can accept before the alarm is triggered.
Related topics
→
168
Navigation display, page 43
857-164636 / Rev.A
References
Numeric setup
These settings are used to set up the PI32 parameters related to
the Numeric display.
To access the parameters, press the ENT button when you have
the Numeric display presentations in view.
Data window 1/2/3: Select which sensor data to appear in the
three numeric presentations.
Show graphic alarm: The graphic alarm is the small red
triangle in each sensor presentation. If the triangle is lit, it
indicates an alarm situation. If the triangle points upwards a
“minimum” alarm has been triggerd, if it points downwards, a
“maximum” alarms has been triggerd. The default setting for
this parameter is ALWAYS.
Sensor timer: The Catch and Bottom Contact sensors have a
timer feature indicating how many times each sensor has been
activated during a tow. The timer runs when the sensor is
activated, and stops once the sensor is released. This parameter
allows you to enable or disable these timers. The default setting
is ON. You can also access this parameter in the Graphic setup.
Reset sensor timers: The Catch and Bottom Contact sensors
have a timer feature indicating how many times each sensor has
been activated during a tow. To reset the timers to 0 prior to a
new tow, select YES. Default setting is NO. You can also access
this parameter in the Graphic setup.
Related topics
857-164636 / Rev.A
→
How to define sensor presentations, page 46
→
Numeric display, page 28
169
Simrad PI32
Offset adjust
These settings are used to set up offset values for the Depth and
Spread sensors.
To access the parameters, press the MENU button to open the
main menu. Then, open the Setup menu and select Sensor
alarm/calibration.
When accessed, this dialogue will only display the Depth and
Spread sensors currently configured. Offset adjustments can be
only be made on the listed sensors. Enter a negative or positive
value to decrease or increase all readings from the chosen
sensor.
Related topics
170
→
How to define sensor offsets, page 56
→
PI Depth sensor, page 104
→
PS Depth sensor, page 109
→
PI Spread sensor, page 123
857-164636 / Rev.A
References
Page setup
These settings are used to set up the PI32 parameters related to
the page; automatic page rotation and menu language.
To access the parameters, press the MENU button to access the
main menu. Then, open the Setup menu and select Speed
alarm, units & language.
WIN change interval: The feature will make the PI32 leaf
through its four pages automatically. This parameter can turn the
function on or off. The change interval is the time it keeps each
page displayed before it brings up the next page.
Display text in: This parameter allows you to change the menu
language. Note that the presence of other languages than english
will depend on the software version.
Related topics
→
857-164636 / Rev.A
How to control automatic page rotation, page 81
171
Simrad PI32
Palette setup
These settings are used to set up the PI32 parameters related to
presentation colours.
The information provided by the PI32 can be presented using
one out of nine palettes. In each palette, the text and background
colours are defined. Seven of the palettes are user defined, and
you can make your own preferences.
To access the Palette setup, press the Menu key, and select
Setup. On the submenu, select Display colour.
To leaf through the palette pages, use the + and - buttons. To
change colour settings, use the Selector pad to find the graphic
element, and the + and - buttons to leaf through the available
colours.
172
857-164636 / Rev.A
References
Position display setup
These settings are used to set up the PI32 parameters related to
the position display presentation.
To access the parameters, press the ENT button when you have
the Position display in view.
Log 1/2: Use this parameter to reset the two distance logs.
Related topics
→
857-164636 / Rev.A
Position display, page 44
173
Simrad PI32
Receiver setup
These settings are used to establish the communication
parameters between the PI32 and the sensors.
To access the parameters, select Sensor config & receiver
setup on the Setup menu.
The Receiver setup parameters have a major influence on the
PI32 performance. The default settings are those we have found
to be the best for general use, but for individual installations
optimized settings may enhance the performance.
Interference filter: When this filter is active it will remove
interference (noise and false echoes) from other echo sounders
and sonars in the the vincinity of your own vessel. It may not
remove all interference, but in most cases you will find this
filter to be very efficient. If you suffer from poor range
performance, and the spectrum on the Status Display is nearly
flat, this filter may also prove useful. A normal sensor will then
show up with a narrow peak at its dedicated frequency. This
filter is by default switched on and set to level 9, and will tend
to prioritize stronger signals.
Interference filter level: Use this setting to control the strength
of the Interference filter. 9 is the default value and the heaviest
filtering. Selecting 0 will hardly have any effect, and is really
equivalent with the filter switched off.
174
857-164636 / Rev.A
References
Sensor filter: The PI32 is designed to quickly update data.
After the sensors have been submerged, the receiver requires
only three consecutive pings from individual sensors to calculate
and display their respective information. However, if you
experience problems with the reception, you may also try this
filter: it will average the data received from the sensors. Light
filtering will average the data received by the last four pings,
while heavy filtering averages the data received by the last eight
pings. We recommend that you only use heavy filtering if there
are large fluctuations in the displayed data, or if the rate of
change is small. Reduced filtering shortens the delay between
updating the changes in sensor location and the corresponding
displayed information. Default setting is LIGHT.
Catch/Bottom Sensor filter: This filter is used to smooth out
the information from the Catch and Bottom Contact sensors.
When the filter is switched off any change in sensor status will
immediately be shown on the display. Set to LIGHT the change
in status must last and remain stable for at least two pings before
the display is changed. When HEAVY filtering is applied the
change in status must last and remain stable for at least four
pings before the change is shown on the PI32 display.
AGC (Automatic Gain Control): This function allows the PI32
to automatically control the receiver gain. The units reads and
interprets the received signal strength, and adjusts the gain
accordingly. During normal operation, ON is the recommended
(and default) setting.
Manual gain: If you decide to switch the AGC off you must set
the gain manually. This can be useful when you work at
maximum detection ranges with favourable noise levels. The
default setting is 0 dB, and you can adjust the gain in steps of
20 dB.
Multipath filter (MP filter): When you operate in an areas with
substantial reverberation due to bottom topography, or in
shallow waters, you may experience problems when consecutive
operating channels have been configured, but the corresponding
sensors are not in use. False signals and sporadic error values
can also be caused by other types of hydroacoustical equipment
operating on the PI32 frequency range. This filter has been
implemented to remedy for such interference problem. Default
setting is OFF.
Multipath filter level (MP filter level): When the Multipath
filter has been enabled, you can adjust the filter level in small
steps to correct the interference problem. Lower filter values
represent stronger filtering. It is best to experiment with this
parameter by reducing the value in steps of 3 dB until the
857-164636 / Rev.A
175
Simrad PI32
detection error disappears. Check that the signals from the
sensor in use are still being received, if they are not, the filter
will not be of help in this particular situation. The filter’s
effectiveness is both location and net specific. Therefore, the
same parameters will not necessary work in different areas or
using various types of nets. Default setting is 42 dB.
Detection Threshold (DT): This function will inhibit reception
of the weakest signals. If you experience problems with
interference signals generating false data and all of the
configured sensors are operative (analogous with the Multipath
problem); increase the Detection Threhold value carefully in
steps of 1 dB. High values allow only strong sensor signals to be
detected. A lower threshold value will provide greater range if
conditions are optimal, but if too low, interference will be
detected. It is best to experiment with different values to
determine which to employ.
Note:
If the Detection Threshold (DT) value is set higher than 28 dB,
all signals will be prevented from being detected.
Max shooting speed: The PI32 has a built in doppler
compensation function which is configured using this parameter.
The parameter and related function is however only relevant if
sensor data is desired while the purse seine is being deployed. It
has no effect once the vessel is stopped waiting for the net to
sink. Note that if you set this parameter too high, you can create
a conflict with the channel selection. Should this situation arise,
the following message will appear: Max shooting speed differs
from wanted, channels are set too close to each other.
Time: Present time. You can adjust the time by altering the
individual digits.
Date: Present date. You can adjust the date by altering the
individual digits.
176
857-164636 / Rev.A
References
Sensor alarms
These settings are used to set up the PI32 parameters related to
sensor alarms.
To access the parameters, press the MENU button to open the
main menu. Then, open the Setup menu, and select Sensor
alarm/calibration.
Each sensor has an individual alarm setting, and you can also
trigger alarms to warn you about sudden temperature changes
and shallow water. Whenever an alarm is triggered an audible
signal is provided, and a message on the display presents the
cause of the alarm. Unless the reason for the alarm is corrected,
or the alarm disabled, it will sound again after 20 seconds.
Sensor alarms: These parameters allow you to define alarms
related to the information provided by the sensors you have in
current use on your PI32 system. The appearance of the
dialogue will thus automatically change to suit your individual
configuration. Each sensor has an individual alarm setting. To
enable an alarm, you must define minimum and maximum
limits for the sensor, and set it to ON.
Catch sensor alarm: This sensor can only provide an alarm
when it is triggered.
Bottom sensor alarm: This sensor can only provide an alarm
when it is triggered.
S.Temp (Surface temperature): Thisparameter allows you to
define an alarm related to the surface temperature. In order to
enable this alarm, your PI32 must have relevant sensor fitted. To
enable an alarm, you must define the appropriate limits, and set
it to ON.
Shear alarm: This alarm triggers if the temperature changes
faster per minute than the limit value provided.
857-164636 / Rev.A
177
Simrad PI32
Clearance pre-warning: These alarms are used to warn you if a
trawl or another towed object either moves too close to the
bottom, or lifts too far off the bottom. You must have the echo
sounder switched on to use this alarm. To enable it, set the
minimum limit to the minimum allowed distance between the
footrope and the bottom, and/or the maximum limit to the
maximum allowed distance between the footrope and the
bottom. Then, switch one or both alarms to ON. The alarm is
triggered if the reading from a Depth sensor mounted on the
footrope (or a manual depth marker) exceeds one of the defined
limits. To use this alarm for a single towed object, select the
Depth sensor as a Foot rope sensor in the Trawl info dialogue.
Related topics
178
→
How to define alarm limits, page 78
→
Trawl info dialogue, page 182
857-164636 / Rev.A
References
Sensor setup
These parameters are used to establish communication between
the PI32 and the sensors.
To access the parameters, press the MENU button to open the
main menu, Then select Sensor setup on the Setup menu.
Note:
In order to set up these parameters correctly, you need to know
what kind of sensors you have, how often the provide
information updates, and on which channels they communicate.
A form has been provided in the front of this book to write down
this information.
For each of the sensors, enable it, and select sensor type,
communication rate and communication channel.
Note:
The settings you choose for update rate and communication
channel must be identical to the settings in the relevant sensor. If
these settings are not matched, your PI32 will not be able to
read the information from the sensor!
Related topics
→
857-164636 / Rev.A
How to set up the sensors, page 48
179
Simrad PI32
Speed setup
These settings are used to set up the PI32 parameters related to
speed.
To access the parameters, press the MENU button to access the
main menu. Then, select Speed alarm, units & language on
the Echo menu.
LOG speed sensor: The PI32 may be interfaced to an external
speed log. Use this parameter to enable or disable the input from
this device.
LOG speed calibration: If an external speed log is used, this
parameter allows you to match the output data from the speed
log with the PI32 input. Refer to the applicable speed log
documentation, and find the rated output in number of pulses
per nautical miles. Then, set this PI32 accordingly.
Speed alarm maximum: This parameter provides you with an
audible warning if the vessel’s speed exceeds a predefined speed
limit.
Speed alarm minimum: This parameter provides you with an
audible warning if the vessel’s speed is lower than a predefined
minumum.
Related topics
→
180
Alarm procedures, page 77
857-164636 / Rev.A
References
Surface temperature setup
These settings are used to set up the PI32 presentation
parameters related to the surface temperature presentation.
To access the parameters, press the ENT button when you have
a Surface temperature display in view.
Temperature scale max/min: Use these settings to define the
maximum and minimum values in your temperature scale.
Temperature grid: When enabled, this function places
horizontal grid lines in the temperature graph to make it easier
to read the data.
Temperature offset: Using this function, you can add or
subtract a fixed termperature value for compensate for known
deviations in the sensor.
Average of temperature readings: If you wish to read the
averga temperature, you must define how many readings to take
before the result is computed.
Related topics
→
857-164636 / Rev.A
Surface temperature display, page 37
181
Simrad PI32
Trawl info setup
These settings are used to set up the PI32 parameters related to
the trawl presentations on the Graphic display. When enabled,
marker lines providing trawl depth information will be
superimposed on the display.
To access the parameters, press the ENT button when you have
a graphic display in view.
Headrope sensor: This setting defines which sensor that is
placed on the headrope.
Footrope sensor: This setting defines which sensor that is
placed on the footrope.
Trawl opening mode: This parameter decides how the trawl
opening shall be recreated on the Graphic Display. If you have
sufficient sensors on the trawl you must select Auto, and the the
PI32 will automatically calculate the trawl opening and draw it
accordingly. If you only have one sensor on the trawl opening
(Depth or Height sensor on the headrope), the Manual setting
will add an artificial line on the Graphic Display. The distance
from the headrope to the footrope must then be defined
manually using the Manual trawl marker parameter (below).
Manual trawl marker: Set the manual trawl opening height for
use with the Trawl opening mode parameter (above).
Clump sensor: This setting defines which sensor that is placed
on the clump.
Door sensor: This setting defines which sensor that is placed on
the door.
Related topics
182
→
Graphic display, page 35
→
Graphic setup, page 160
857-164636 / Rev.A
References
Units setup
These settings are used to set up the PI32 parameters related to
units.
To access the parameters, press the MENU button to access the
main menu. Then, select Speed alarm, units & language on
the Setup menu.
Select the units you wish to use on the various data. These
parameters are self explanatory.
857-164636 / Rev.A
183
Simrad PI32
PI CONFIGURATOR
Purpose
The purpose of the PI Configurator utility is to be able to
configure sensors so that they can operate on different
communication channels. Several PI equipped vessels may then
operate simultaneously in the same area without interference.
The utility also allows you to change the update rate on each
sensor. This is the time elapsed between each data transmission
from the sensor to the host PI system.
This document describes software version 3.40.
Introduction
→
Basic information, page 185
→
About sensor configuration, page 187
→
Main dialogue description, page 189
Procedures
→
How to perform software installation, page 192
→
How to interface the sensor, page 193
→
How to perform basic sensor configuration, page 194
→
How to set up a Twin Spread system, page 195
→
How to upload factory settings, page 197
Reference information
→
References, page 198
Maintenance
→
Programming modes, page 220
→
Making a programming cable, page 221
→
Troubleshooting, page 222
Sensor test procedures
→
184
Sensor test procedures, page 223
857-164636 / Rev.A
PI Configurator
Basic information
Default sensor settings
PI and PS sensors are delivered from Simrad configured with
common default settings. When required, the individual sensors
may be re-configured with regard to:
•
•
•
•
•
•
Communication channel
LED control
Ping control
Data Update rate
Remote
Show channel with LED flash at start up
Who can configure PI sensors?
Sensor configuration is normally performed by authorized
Simrad technicians. However, individuals with basic computer
skills and access to the necessary equipment should not find it
difficult.
Programming modes
The PI Configurator configuration software has two
programming modes, Standard and Professional.
Note:
It is highly recommended that the configuration of PI and PS
sensors in the Professional mode is only performed by skilled
and experienced personnel.
Necessary equipment
The following hard- and software is required to use the PI
Configurator utility:
• PI Configuration software
• A PC with Microsoft WindowsE 2000 or XP operating
system and a COM port (serial line).
• A sensor programming cable for either a stationary or
portable PC.
The sensor programming cables for stationary and portable
PCs are constructed differently and are not interchangeable.
857-164636 / Rev.A
185
Simrad PI32
Available equipment
The following is available from Simrad:
• User Guide (857-164924)
• Software (889-204037)
• Programming cable for stationary PCs (380-204624)
• Programming cable for portable PCs (380-208429)
• Service hydrophone (314-204480)
The configuration equipment is also is available in kits:
• KIT 1, User guide and software (KIT-208780)
• KIT 2, User guide, software and programming cable for
stationary PC (KIT-208781)
• KIT 3, User guide, software and programming cable for
portable PC (KIT-208782)
186
857-164636 / Rev.A
PI Configurator
About sensor configuration
All sensors are provided from the factory with pre-defined
communication channels and update rates.
Sensor
Com.channel
Update rate
PI Bottom Contact
6
Normal
PI Catch
4
Normal
PI Depth (300 m)
16
Fast
PI Depth (600 m)
12
Fast
PI Depth (1000 m)
10
Fast
PI Height
14
Fast
PI Spread
2
Fast
PI Twin Spread
2 and 7
Fast
PI Temperature
8
Fast
Factory default communication channels and update rates
Changing a transmission channel
It may be required to change one or more transmission channels,
and there may be many reasons for this.
• You have more than one of each sensor. For example, if you
have three temperature sensors, they MUST communicate on
three different channels.
• Other vessels near your use the same PI Configurator system
(or a similar), and they have one or more of their sensors set
up to the same communication channels as you have. This
will create interference, as you will “read” each others
sensors.
• If your sensors are set up to use communication channels too
close to each other (for example, you have chosen channels
4, 5 and 6), this will limit the vessel’s speed. The reason for
this is the doppler effect. If the speed is too high, the doppler
will cause the transmission frequencies to change so much
that they overlap, and this will create interference. The PI
Configurator will provide a warning if this is about to
happen! You must then either change to other communication
channels further apart, or reduce the maximum shooting
speed.
• If you operate at the maximum range of the sensors, you may
be able to increase this range slightly if you use lower
communication channels. This is because the lower
communication channels user lower transmission
frequencies.
857-164636 / Rev.A
187
Simrad PI32
Changing the update rate
It may be required to change the update rate on a sensor, that is
how often it sends information back to the PI Configurator
system. A high update rate will give frequent information
updates, but the sensor will use more battery power. If you need
your batteries to last as long as possible, you must consider
lowering the update rate.
• A low update rate will provide you with fewer information
updates, but the battery will last very long.
• A high update rate will give you frequent information
updates, but the battery will run out faster.
All sensors are provided from Simrad with a default update rate
setting. In some cases you may find that this update rate does
not suit your operational needs. This is a decision you have to
make depending on the local fishing conditions.
188
857-164636 / Rev.A
PI Configurator
Main dialogue description
Observe the illustration and descriptions below. Note that the
apperance of function buttons will differ depending on the
sensor type connected to the application. When functions are
unavailable, the fields are identified accordingly with a shaded
appearance.
15
13
1
16
2
17
3
18
4
19
6
7
8
9
10
5
11
12
20
22
14
(CD11025)
ID
Button/Function
Use
1
Establish communication with
sensor
Once the sensor is connected to the PC, click to initiate
sensor interface.
2
Read sensor data
Click to download current parameter settings from the
sensor. The information is shown in the message field
(5).
3
Configure sensor
Click to upload the new configuration parameters to the
sensor.
857-164636 / Rev.A
189
Simrad PI32
ID
Button/Function
Use
4
Terminate communication
Click to disconnect the sensor from the PC.
5
Message field
Displays program and sensor data.
6
Communication channel
Select channel number to be uploaded to the sensor. If
a Twin Spread sensor is connected, two
communication channels must be defined.
7
LED control
Click and drag the slider bar to control the behaviour of
the sensor’s internal LED.
8
Ping control
Click and drag the slider bar to control how often ther
sensor will transmit (”ping”).
9
Sensor type
Displays the sensor type.
10
Data update rate
Select the time interval between data transmissions
from the sensor.
11
Remote
Only available for Twin Spread sensors, used to
defined the set of Remote sensors to be used in the
Twin Spread system.
Number
Only available for Remote sensors, used to define its
identification number (1 -- 4)
12
Show channel at startup
Click to activate or deactivate the sensor’s internal LED
identification flash.
13
PI Configurator title
Displays current software version.
14
Serial number
Displays the sensor’s serial number. This parameter is
not available for PS sensors.
15
Dialogue box function buttons
Standard operating system functionality.
16
Communication port setup
Click to select which COM port you use to
communicate with the sensor.
17
Language
Click to change language.
18
Help
Click to open on--line help.
19
Factory default
Click to configure the sensor with the corresponding
factory default settings.
20
Indicator lamp
Indicates sensor interrogation.
21
Quit
Close the PI Configurator utility.
190
857-164636 / Rev.A
PI Configurator
Operational procedures
Observe the following procedures.
857-164636 / Rev.A
→
How to perform software installation, page 192
→
How to interface the sensor, page 193
→
How to perform basic sensor configuration, page 194
→
How to set up a Twin Spread system, page 195
→
How to upload factory settings, page 197
191
Simrad PI32
Software installation
Observe the following procedure to install the PI Configurator
software on a stationary or portable computer. Note that the
computer must have either Microsoft WindowsE 2000 or
Microsoft WindowsE XP operating system. You must also have
the Winzip utility installed on your computer. if this is not the
case, it can be dowloaded from www.winzip.com.
Note:
Note:
Certain anti virus applications may cause the installation
process to fail. If you suspect this, close down the anti virus
protection, and reinstall the PI Configurator.
1
Locate the zip file containing the PI Configurator utility.
- The file can be found on a CD, it can be downloaded,
or distributed by e-mail.
2
Copy the zip file to your harddrive, and open it.
- The Winzip utility is required to open the file.
3
Unpack the installation files to a temporary folder on your
harddrive.
4
Locate and run the setup.exe file.
5
Allow the installation wizard to start. Follow the online
instructions carefully.
If you have a previous version of the PI Configurator utility, the
installation program will remove it. You will then need to restart
the setup.exe file to complete the installation of the new version.
The user guide is available in electronic form on the PI
Configurator CD. It may be viewed by opening the CD’s
contents and double-clicking the file.
192
857-164636 / Rev.A
PI Configurator
How to interface the sensor
Before you can configure the sensor, you need to connect it to
the computer. Observe the procedure below.
1
Start the PI Configurator utility.
2
Plug the programming cable into one of computer’s COM
ports (COM1 is recommended).
3
Ensure that the sensor to be connected is switched off.
Check that the internal LED does not flash, and that the
sea water switch is not activated in any way.
4
Attach the programming cable’s positive (red) alligator
clip to one of the sensor’s positive fastening lugs
(designated with a plus symbol).
5
Attach the programming cable’s negative (black) alligator
clip to one of the sensor’s negative fastening lugs
(designated with a minus symbol).
6
In the PI Configurator utility, click the Communication
Port Setup button to open the Com Port Setup dialogue
box.
7
Select the COM port the programming cable is plugged
into by clicking it, then click OK.
8
Observe that the Establish Communication with Sensor
button has been activated.
9
Click the Establish Communication with Sensor button.
Small dialogues will tell you that the computer first opens the
COM port, and then wakes up the sensor. If there is a
malfunction, you will be notified accordingly. Once the
communication between the PC and interfaced sensor is
established, the yellow text field will display the key parameters
retrieved from the sensor. Also, the indicator lamp in the lower
right-hand corner of the PI Configurator dialogue will turn on
and off every two seconds. The indicator lamp inside the sensor
will illuminate at the same rate.
857-164636 / Rev.A
193
Simrad PI32
How to perform basic configuration
Once the sensor is connected to the computer, and you have
established communication, you can use the PI Configurator
utility to change the basic sensor parameters.
194
1
Click the Read Senor Data button.
- Observe that the current sensor configuration
parameters are displayed in the message field. The
information includes sensor type, channel number, and
the sensor’s software version.
2
If required, select a new communication channel in the
spin box next to the Communication channel label.
3
If required, select a different update rate in the spin box
next to the Data update rate label.
4
Press the Configure sensor button to upload the new
parameters.
5
Press Terminate communication, and disconnect the
sensor.
857-164636 / Rev.A
PI Configurator
How to configure a Twin Spread system
This procedure describes hot to set up a Twin Spread system
using one Twin Spread sensor and two Remote sensors.
Setting up the Twin Spread sensor
1
Connect the Twin Spread sensor to the PI Configurator.
2
Press Establish communication with Sensor.
- Observe that the current sensor configuration
parameters are displayed in the message field. The
information includes sensor type, channel number, and
the sensor’s software version.
If required, select new communication channels in the
spin boxes next to the Communication channel labels.
- Two communication channels are required because the
Twin Spread system measures two different distances.
The channels you select here MUST match the
channels you select on the PI44.
If required, select a different update rate in the spin box
next to the Data update rate label.
3
4
5
6
7
Use the spin box next to the Remote label to choose the
set of Remote sensor you wish to use.
- You can either use Remote set 1 and 3 or 2 and 4.
- The selection you make here MUST match the two
Remote sensors you wish to use.
Press the Configure sensor button to upload the new
parameters.
Press Terminate communication, and disconnect the
sensor.
Setting up the first Remote sensor
1
Connect the first Remote sensor to the PI Configurator.
2
Press Establish communication with Sensor.
- Observe that the current sensor configuration
parameters are displayed in the message field.
Use the spin box next to the Number label to define the
sensor’s number in the Twin Spread system.
- The number you choose MUST match one of the
numbers chosen in step 5 in the Twin Spread sensor
setup.
Press the Configure sensor button to upload the new
parameters.
3
4
5
857-164636 / Rev.A
Press Terminate communication, and disconnect the
sensor.
195
Simrad PI32
Setting up the second Remote sensor
196
1
Connect the second Remote sensor to the PI Configurator.
2
Press Establish communication with Sensor.
- Observe that the current sensor configuration
parameters are displayed in the message field.
3
Use the spin box next to the Number label to define the
sensor’s number in the Twin Spread system.
- The number you choose MUST match the other
number chosen in step 5 in the Twin Spread sensor
setup.
4
Press the Configure sensor button to upload the new
parameters.
5
Press Terminate communication, and disconnect the
sensor.
857-164636 / Rev.A
PI Configurator
How to upload factory settings
Once the sensor is connected to the computer, and you have
established communication, you can use the PI Configurator
utility to upload the applicable sensor’s factory settings.
857-164636 / Rev.A
1
Click the Read Senor Data button.
- Observe that the current sensor configuration
parameters are displayed in the message field. The
information includes sensor type, channel number, and
the sensor’s software version.
2
Click the Factory default button to retrieve the default
parameters for the current sensor.
3
Press Configure sensor button to upload the parameters
to the sensor.
4
Press Terminate communication, and disconnect the
sensor.
197
Simrad PI32
References
The features available when using PI Configurator software
depend which mode it is in (Standard or Professional) and the
type of sensor that is interface. All commands are described
here, and they are listed in alphabetical order.
198
→
Communication Channel, page 199
→
Communication Port Setup, page 200
→
Configure Sensor, page 201
→
Data Update Rate, page 202
→
Establish Communication with sensor, page 203
→
Factory Default, page 204
→
Help, page 205
→
Language, page 206
→
LED control, page 207
→
Message field, page 208
→
Number, page 209
→
Ping control, page 210
→
Quit, page 211
→
Read Sensor Data, page 212
→
Remote, page 213
→
Sensor Type, page 214
→
Serial number, page 215
→
Show channel at startup, page 216
→
Terminate Communication, page 218
857-164636 / Rev.A
PI Configurator
Communication Channel
This parameter allows you to redefine the sensor’s transmission
channel (1 to 30).
Sensors send information using specific frequencies, each
designated as an individual channel. PI and PS sensors have 30
channels to choose from, and the FA701 sensors have four. The
frequency range of these channels are of from 43.5 to 49.5 kHz
for PI and PS systems, and 70 to 80 kHz for FA710 systems.
Note:
This is a key parameter. Unless the communication channel
defined in the sensor matches the channel defined on the host PI
system, the communication will not work!
Operation
To operate, click the up or down arrow on the Communication
Channel spin box until the desired channel is shown in the text
box. It is also possible to enter a channel directly by clicking the
text box and inputting the value with the PC’s keyboard.
Click the Configure Sensor button to program the interfaced
sensor with the new channel number parameter. Finally, check
that the message field is updated with the new parameter, and
that the message Success!! is displayed at the bottom as
confirmation that the command was executed.
Spread sensors
Note that Spread sensors can be configured to communicate
with Remote sensors No.1 or 2; but should be labelled
accordingly because they must be used in pairs and can not be
interchanged. It is important to remember to re-configure the
Spread 2 communication channel.
Note:
Spread sensors configured as Sensor Type / Twin Spread have
two Communication Channel dialogue boxes.
Related topics
→
857-164636 / Rev.A
Remote, page 213
199
Simrad PI32
Communication Port Setup
This button opens the Com Port Setup dialogue. The integrated
slider bar is used to designate which COM port (COM1 to
COM8) the programming cable is plugged into. COM1 is the
factory default setting and recommended parameter.
Operation
To operate, click the Communication Port Setup button to
open the Com Port Setup dialogue box. Click on the desired
port, or use the slider bar to select. Click OK to save and exit.
If the chosen COM port is unavailable on the computer, a
corresponding message will inform you about this.
200
857-164636 / Rev.A
PI Configurator
Configure Sensor
This button is used to re-program the currently interfaced sensor
with the new parameters selected (those presently displayed).
This operation can not be “undone” however, the sensor’s
previous status information and parameter configuration is still
available in the main dialogue box and may be re-entered if
necessary.
Operation
To operate, click the Configure Sensor button to program the
sensor with the new parameters shown on the screen. Check that
the message field is updated with the new parameters and the
message Success!! is displayed at the bottom as a confirmation
that the command was executed.
857-164636 / Rev.A
201
Simrad PI32
Data Update Rate
This parameter is used to select an interfaced sensor’s data
update rate.
Note:
This is a key parameter. Unless the data update rate defined in
the sensor matches the rate defined on the host PI system, the
communication will not work!
The data update rate is the time interval between individual
transmissions from the sensor containing measurement data. The
rate selected must match the corresponding setting in the PI
Cabinet’s Setup window.
Operation
To operate, click the spin box next to the Data Update Rate
label. Select the desired rate. Then, click the Configure Sensor
button to program the interfaced sensor with the new data
update rate parameter. Finally, check that the message field is
updated with the new parameter, and that the message Success!!
is displayed at the bottom as confirmation that the command
was executed.
Related topics
→
202
About sensor configuration, page 187
857-164636 / Rev.A
PI Configurator
Establish Communication With Sensor
This button initiates contact between the computer and a well
charged sensor by sending it a ”wake-up” command.
Once two-way communication is established the following
occurs:
• The indicator lamp (in the lower right-hand corner of the
dialogue) will be turned on and off every two seconds.
• The LED inside the interfaced sensor will illuminate every
two seconds.
• The sensor will download its current configuration data to the
PC. The information is shown in the message field.
Operation
To operate: click the Establish Communication with Sensor
button. Check that the message field shows the interfaced
sensor’s current configuration parameters, and thate the message
Success!! is displayed as confirmation at the bottom of the text.
To terminate the communication with the sensor, click the
Terminate Communication button.
857-164636 / Rev.A
203
Simrad PI32
Factory Default
This button is used to restore a sensor’s factory default values,
according to the type of sensor currently interfaced.
Factory default settings include:
•
•
•
•
•
•
Sensor Communication Channel
LED control
Ping control
Data Update rate
Remote
Show channel with LED flash at start up
Operation
To operate, click the Factory Default button to select the
original factory default settings. Then, click the Configure
Sensor button to program the interfaced sensor with the original
factory default settings. Finally, check that the message field is
updated with the factory default settings, and that the message
Success!! is displayed at the bottom as confirmation that the
command was executed.
204
857-164636 / Rev.A
PI Configurator
Help
This button opens the on-line Help.
The on-line help include general information concerning the use
of PI Configurator software and sensor interface.
To operate, click the Help button to open the on-line help.
To access context sensitive help, click the right mouse button
over a given button or parameter. This will open a help window
with specific information concerning the parameter or button the
cursor is located over.
857-164636 / Rev.A
205
Simrad PI32
Language
This button opens the Language dialogue.
The dialogue allows you to select operational language by
clicking on one of the flag icons. Clicking an icon will convert
the PI Configurator’s buttons, information, help functions and
interfaced sensor data to the respective language.
Operation
To operate, click the Language button to open the dialogue.
Click on the desired icon to select language, or click Cancel to
close the dialogue without replacing the present language in use.
When you have changed the language, click the Configure
sensor button to have the information in the message field
translated.
206
857-164636 / Rev.A
PI Configurator
LED Control
This parameter can only be accessed in the Professional mode.
The dialogue box is used to control the behaviour of the
interfaced sensor’s internal LED during normal operation. LED
behaviour in both the charge and communication modes can not
be altered. Sensor LED parameters are:
• Startup Only - The LED will only illuminate (flashing its
identification code) when it is energized. It will not be turned
on during normal operation.
• Only when Pinging - The LED will only illuminate when it
“pings” (transmits data).
• When <2m - The LED will flash every time the sensor
“pings”, but only when it is at a depth of less than two
meters. This parameter is only available for depth sensors.
• Always - If the sensor is disabled from pinging at depths less
than two meters by the Ping Control parameter being set to
Depth > 2m, the Always parameter causes the sensor’s LED
to illuminate at depths of less than two meters even when the
sensor does not “ping”.
Operation
To operate, use the LED Control spin button to select the
desired LED behaviour. Then, click the Configure Sensor
button to program the interfaced sensor with the new parameter.
Finally, check that the message field is updated with the new
parameter, and that the message Success!! is displayed at the
bottom as confirmation that the command was executed.
857-164636 / Rev.A
207
Simrad PI32
Message field
This message field displays present and past configuration data,
communication status, error messages and other information.
Configured parameters can not be “undone” however, the
previous parameter configuration is still available in the main
dialogue box and may be re-entered if necessary.
Each time the Configure Sensor button is clicked, the message
field will be automatically updated. The latest status information
and parameters will displace (vertically) the older values until
they are no longer displayed in the window.
(1) = Previous status information and
parameters
(2) = New status information and
parameters
To operate, click the Configure Sensor
button to update the message field
information. Check that the message
field was updated and the message
Success!! displayed at the bottom as
confirmation that the command was
executed.
208
857-164636 / Rev.A
PI Configurator
Number
This box allows you to define the identification number for the
currently connected Remote sensor. This is a key parameter
when you set up a Twin Spread system.
Related topics
→
857-164636 / Rev.A
How to set up a Twin Spread system, page 195
209
Simrad PI32
Ping control
This parameter is only available for depth sensors, and can only
be accessed in the Professional mode.
The dialogue box is used to control when a sensor will “ping”
(transmit an acoustic signal). For example, it is possible to
disable the sensor from being inadvertently activated when lying
in a wet net on deck (a depth of less than two meters) to prolong
its battery life. The available parameters are:
• Always - The sensor will “ping” at all depths during normal
operation.
• Depth > 2m - The sensor will “ping” only when it is at a
measured depth of more than two meters (deployed).
Operation
To operate, click the Ping Control dialogue box and drag the
slider bar to select the desired “ping” behaviour. Then, click the
Configure Sensor button to program the interfaced sensor with
the new Ping Control parameter. Finally, check that the
messagie filed is updated with the new parameter, and that the
message Success!! is displayed at the bottom as confirmation
that the command was executed.
210
857-164636 / Rev.A
PI Configurator
Quit
Click this button to close the PI Configurator utility.
857-164636 / Rev.A
211
Simrad PI32
Read Sensor Data
This button requests that configuration data be sent from the
interfaced sensor to the PC.
When the Read Sensor Data button is clicked, the sensor will
download information to the PC. This data is then used to
populate the message field just as when the Establish
Communication with Sensor button is clicked.
Operation
To operate, click the Read Sensor Data button. Check that the
message field is populated with the interfaced sensor’s data and
the message Success!! is displayed as confirmation that the
command was executed.
212
857-164636 / Rev.A
PI Configurator
Remote
This parameter is only available for Spread, Twin Spread and
Remote sensors. The dialogue box allows selection of the
channels used to communicate between Spread and the Remote
sensors.
Note:
These are key parameters when you work with Spread and
Remote sensors. Make sure the correct channels are selected for
all the sensors. Should incorrect parameters be chosen, the
sensors will not be able to communicate with each other, and the
PI Operator Unit will display “± ± ±”.
The Spread and Remote sensors must always be set up in sets as
follows:
Single trawl:
• Spread 1 must communicate with Remote 1
• Spread 2 must communicate with Remote 2
Twin trawl:
• Twin Spread 1 must communicate with Remote 1 and 3
• Twin Spread 2 must communicate with Remote 2 and 4
A Twin Spread sensor uses two channels to communicate
with the Remote sensors; one channel for each Remote.
Dual twin trawl:
• Twin Spread 1 must communicate with Remote 1 and 3
• Twin Spread 2 must communicate with Remote 2 and 4
To set up a dual twin trawl configuration, the two sets of
Twin Spread sensors must work with different
communication channels.
Operation
Use the Remote spin box, and select the desired channel or
channel combination. Click the Configure Sensor button to
program the interfaced sensor with the new channel parameter.
Check that the message field is updated with the new parameter
and the message Success!! displayed at the bottom as
confirmation that the command was executed.
857-164636 / Rev.A
213
Simrad PI32
Sensor Type
This parameter is to be configured in accordance with the
sensor’s label and can only be accessed in the Professional
mode.
The dialogue box is used to select which of the sensor’s internal
programs to run when activated. When using the PI
Configurator in the Standard mode, it will only display the type
of sensor interfaced.
It is not possible to change a sensor’s type.
Operation
To operate, click the Sensor Type dialogue box and drag the
slider bar to the type of sensor written on its label. Then, click
the Configure Sensor button to program the interfaced sensor
with the new parameter. Finally, check that the message field is
updated with the new parameter, and that the message Success!!
is displayed at the bottom as confirmation that the command
was executed.
214
857-164636 / Rev.A
PI Configurator
Serial number
This text box displays the interfaced sensor’s serial number. It
can not be re-configured. This feature is not available for PS
sensors.
857-164636 / Rev.A
215
Simrad PI32
Show Channel At Startup
This dialogue box controls weather or not the interfaced sensor
will flash a channel identification code using its internal LED
when first energized.
When Enabled is selected, the sensor will flash its presently
configured communication channel number at startup when in
the normal mode (not in the charge or communication modes).
This feature may also be activated by touching a sensor’s lid and
charging lug simultaneously.
When activated, the sensor will respond by flashing its
individual LED identification codes, as follows:
(1) = One long flash: It has a duration of approximately 1
second.
(2) = One start flash: This signals that the first digit of the
channel number is next.
(3) = None, one, two or three short flashes: The number of short
flashes signifies the first digit of the configured channel number.
(4) = A second start flash: This signals that the second digit of
the channel number is next.
(5) = None to nine short flashes: The number of short flashes
signifies the second digit of the configured channel number.
Operation
To operate, use the spin box and choose Enable or Disable.
Then. click the Configure Sensor button to program the
interfaced sensor with the new parameter. Finally, check that the
message field is updated with the new parameter, and that the
message Success!! is displayed at the bottom as confirmation
that the command was executed.
216
857-164636 / Rev.A
PI Configurator
Examples
Example of channel number 16 at startup (below):
(1) = A one second “long flash”
(2) = A start ”flash”
(3) = One “quick flash” (first digit of 16 is 1)
(4) = A start ”flash”
(5 - 10) = Six ”quick flashes” (second digit of 16 is 6)
Normal operation starts
Example of channel 2 at startup (below):
(1) = A one second flash
(2) = A ”start-flash”
(3) = No short flashes (first digit of 02 is 0)
(4) = A ”start-flash”
(5 - 6) = Two short flashes (second digit of 02 is 2)
Normal operation starts
857-164636 / Rev.A
217
Simrad PI32
Terminate Communication
Press this button to terminate the serial data flow between the
sensor and the computer.
Operation
Press the button to terminate the communication, then
disconnect the cable.
If you disconnect the cable before you terminate the data flow,
the PI Configurator will issue a error message.
218
857-164636 / Rev.A
PI Configurator
Maintenance
This chapter contains information related to maintenance, setup
and troubleshooting.
Topics
857-164636 / Rev.A
→
Programming modes, page 220
→
Making a programming cable, page 221
→
Troubleshooting, page 222
219
Simrad PI32
Programming modes
Available modes
The PI Configurator utility has two programming modes:
• Standard - default mode, described in this manual.
• Professional - for use by Simrad personnel only.
Caution:
The use of PI Configurator software in the Professional
mode is for qualified Simrad personnel only. Improper
use of PI Configurator software in the Professional
mode can cause permanent, irreparable damage to
sensors. It must therefore never be activated by
unqualified personnel.
To change mode
To activate PI Configurator software in the Professional mode:
1
Close the PI Configurator utility.
2
Open the folder C:\Program Files\PI Configurator.
3
Find the file named ps30_cfg.ini and open it with a text
editor.
4
Locate the line of code that contains the word
STANDARD and overwrite it to PROFESSIONAL.
Make sure that have a <return> character after the last
word!
5
Save the ps30_cfg.ini file.
6
Restart the PI Configurator software.
If you install a new software version, you must repeat this
provedure.
After changing modes
After activating PI Configurator software in the Professional
mode, the start up screen will display:
UKB (unchanged)
COM1 (unchanged)
PROFESSIONAL (previously STANDARD)
220
857-164636 / Rev.A
PI Configurator
Making a programming cable
Should a Simrad programming cable not be available, it is
possible to make an adequate substitution as described below.
It is only possible to make programming cables for stationary
computers. If you wish to use a portable computer the cable
must be ordered from Simrad. Some new stationary computers
have been found to provide the same output specifications as
portable computers using lower voltage on the serial line. On
these computers, a “portable” cable is also required.
You will need the following parts:
• A 9-pin, Sub-D female connector
• Approximately one to two meters of 2-wire cable
• A 3 kohm resistor
• Two alligator clamps
The cable assembly procedure is as follows:
857-164636 / Rev.A
1
Connect pin number two of the 9-pin, Sub-D female
connector to one end of the positive (+) lead of the 2-wire
cable. At the other end of the positive (+) lead, connect
the positive (red) alligator clamp.
2
Connect pin number five of the 9-pin, Sub-D female
connector to one end of the negative (-) lead of the 2-wire
cable. At the other end of the negative (-), connect the
negative (black) alligator clamp.
3
Connect the 3 kohm resistor between pins number two and
three of the 9-pin, Sub-D female connector.
4
Check both alligator clamps and respective pins for
continuity.
221
Simrad PI32
Troubleshooting
Most problems are easily solved. Troubleshoot interface,
configuration or other complications by checking the following:
• The interfaced sensor is sufficiently charged.
• The correct PI sensor programming cable is used and in good
condition
• The PI sensor programming cable is connected to the PC’s
COM port correctly.
• The PI sensor programming cable is connected to the sensor
correctly.
• The PI sensor programming cable is connected to the COM
port selected in the Com Port Setup dialogue box.
• The mode of operation for the PI Configurator software has
been correctly selected.
• The type of sensor interfaced has the features / parameters
attempting to be accessed.
• The latest version of PI Configurator software has been
correctly installed.
222
857-164636 / Rev.A
Sensor test procedures
SENSOR TEST PROCEDURES
Overview
Using the PI Configurator application, you can test the
operational status of each sensor. In the following, you will find
the test procedures. Note that PI and PS sensors are tested using
the same procedures.
Topics
→
Bottom Contact sensor, test procedure, page 224
→
Catch & Rip sensors, test procedure, page 227
→
Depth sensor, test procedure, page 230
→
Height sensor, test procedure, page 233
→
Spread & Remote sensors, test procedure, page 236
→
Temperature Sensor, test procedure, page 240
Sea water switch design change
The sea water switch design on all the PI sensors was changed
in 2005. On sensors produced after the design change, the sea
water switch is comprised of a sacrificial brass bolt. This bolt
must be replaced when and if it is worn. A dedicated procedure
is provided in the PI System operator manual.
857-164636 / Rev.A
223
Simrad PI32
Bottom Contact test procedure
Tools and equipment required
•
•
•
•
Multimeter
A small piece of wire
PI Service Hydrophone (Order no. 314-204480)
PI System
Initial check and setup identification
Keep the area between the negative charging lug (A) and the
water detector (B) clean to reduce the risk of activating the
sensor. If necessary, apply silicon grease to disrupt conductive
paths.
1
2
Using a multimeter, check the voltage between the
negative charging lug (A) and the water detector (B).
Make sure the sensor is charged:
- Fully discharged: Voltage less than 11.5 Vdc
- Fully charged: Voltage greater than 13.5 Vdc
- Approximately 50% capacity left: 12.8 Vdc
With a small piece of wire, complete the circuit between
the sensor’s sea water detector (B) and negative charging
lug (A).
- The sensor will respond by flashing its individual LED
identification codes.
(1) = One long flash: It has a duration of
approximately 1 second.
(2) = One start flash: This signals that the first digit of
the channel number is next.
(3) = None, one, two or three short flashes: The
number of short flashes signifies the first digit of the
configured channel number.
224
857-164636 / Rev.A
Sensor test procedures
(4) = A second start flash: This signals that the second
digit of the channel number is next.
(5) = None to nine short flashes: The number of short
flashes signifies the second digit of the configured
channel number.
3
Using a multimeter, check the DC current between the
negative charging lug (A) and the water detector (B).
- With the initial sea water switch and a a fully charged
battery, the current should not exceed 150 µA.
- With a redesigned sea water switch (sacrificial bolt)
and a a fully charged battery, the current should not
exceed 67 µA.
- If you measure 0 µA, check the fuse on your
multimeter.
Testing on land
1
Connect the PI Service Hydrophone to the PI Operator
Unit.
2
Place the sensor on a level surface with its “domed top”
pointing towards the test hydrophone approximately five
meters away.
3
Use the Status display on the PI to monitor the sensor’s
signal strength.
- If the interference filter is on, the spectrum displayed
should be relatively flat (approximately 25 dB,
interference filter set at level 9) with a peak detected in
the configured channel.
Check that the bottom contact symbol on the PI is
“touching the bottom” when the detector wire is not pulled
out.
4
5
Pull out the detector wire, and check that the sensor
presentation changes.
Testing in water
857-164636 / Rev.A
1
Disconnect the PI Service hydrophone, and reconnect the
vessel’s normal hull mounted hydrophone.
2
Switch off the vessel’s echo sounders, sonars and other
hydroacoustical equipment to avoid interference.
3
Lower the sensor over the side of the vessel.
- Note that the weight of the sensor in water
(approximately 1.4 kg) may not provide sufficient
resistance to trigger the sensor’s bottom contact
function when the detector wire is pulled. Apply extra
weight if required.
225
Simrad PI32
4
Note:
Note:
226
Switch off the PI system’s interference filter, and observe
the numeric display.
- If the interference symbol is not displayed, leave the
interference filter switched off to increase the system’s
range and performance.
Should any problems arise during this procedure, check that the
communication channel and update rate has been configured
correctly.
5
Check that the information from the sensor is displayed on
the PI.
6
Engage the sensor, and check that this is registered by the
PI.
7
Check the PI Status Display, and record the signal
strength.
8
Switch on the vessel’s echo sounders and other
hydroacoustical equipment used during normal fishing
operations.
9
Switch the PI32 interference filter on and off, and observe
the numeric display. If the interference symbol is not
shown when the filter is off, leave the interference filter
switched off to increase the system’s range and
performance.
10
Use a water-proof pen, write the sensor’s number,
configured channel number and any other pertinent
information on its label.
- A dedicated form has also been provided in the front of
the PI Operator Manual to record this information.
Do not write on the sensor! Such information may be
misunderstood when future service or replacement is performed.
857-164636 / Rev.A
Sensor test procedures
Catch sensor, test procedure
Tools and equipment required
•
•
•
•
Multimeter
A small piece of wire
PI Service Hydrophone (Order no. 314-204480)
PI System
Initial check and setup identification
Keep the area bteween the negative charging lug (A) and the
water detector (B) clean to reduce the risk of activating the
sensor. If necessary, apply silicon grease to disrupt conductive
paths.
1
2
Using a multimeter, check the voltage between the
negative charging lug (A) and the water detector (B).
Make sure the sensor is charged:
- Fully discharged: Voltage less than 11.5 Vdc
- Fully charged: Voltage greater than 13.5 Vdc
- Approximately 50% capacity left: 12.8 Vdc
With a small piece of wire, complete the circuit between
the sensor’s sea water detector (B) and negative charging
lug (A).
- The sensor will respond by flashing its individual LED
identification codes.
(1) = One long flash: It has a duration of
approximately 1 second.
(2) = One start flash: This signals that the first digit of
the channel number is next.
857-164636 / Rev.A
227
Simrad PI32
(3) = None, one, two or three short flashes: The
number of short flashes signifies the first digit of the
configured channel number.
(4) = A second start flash: This signals that the second
digit of the channel number is next.
(5) = None to nine short flashes: The number of short
flashes signifies the second digit of the configured
channel number.
3
Using a multimeter, check the DC current between the
negative charging lug (A) and the water detector (B).
- With the initial sea water switch and a a fully charged
battery, the current should not exceed 150 µA.
- With a redesigned sea water switch (sacrificial bolt)
and a a fully charged battery, the current should not
exceed 67 µA.
- If you measure 0 µA, check the fuse on your
multimeter.
Testing on land
1
Connect the PI Service Hydrophone to the PI Operator
Unit.
2
Place the sensor on a level surface with its “domed top”
pointing towards the test hydrophone approximately five
meters away.
3
Use the Status display on the PI to monitor the sensor’s
signal strength.
- If the interference filter is on, the spectrum displayed
should be relatively flat (approximately 25 dB,
interference filter set at level 9) with a peak detected in
the configured channel.
4
Check that the Catch symbol on the PI is activated (red
symbol and audible alarm) when one of the detector wire
is pulled out.
5
Release the detector wire, and check that the sensor
presentation changes to yellow.
Testing in water
228
1
Disconnect the PI Service hydrophone, and reconnect the
vessel’s normal hull mounted hydrophone.
2
Switch off the vessel’s echo sounders, sonars and other
hydroacoustical equipment to avoid interference.
3
Lower the sensor over the side of the vessel.
857-164636 / Rev.A
Sensor test procedures
- Note that the weight of the sensor in water
(approximately 1.4 kg) may not provide sufficient
resistance to trigger the sensor function when the
detector wirer are pulled. Apply extra weight if
required.
4
Note:
Note:
857-164636 / Rev.A
Turn off the PI system’s interference filter, and observe
the numeric display.
- If the interference symbol is not displayed, leave the
interference filter switched off to increase the system’s
range and performance.
Should any problems arise during this procedure, check that the
communication channel and update rate has been configured
correctly.
5
Check that the information from the sensor is displayed on
the PI.
6
Engage the sensor, and check that this is registered by the
PI.
7
Check the PI Status Display, and record the signal
strength.
8
Switch on the vessel’s echo sounders and other
hydroacoustical equipment used during normal fishing
operations.
9
Switch the PI32 interference filter on and off, and observe
the numeric display. If the interference symbol is not
when the filter is off, leave the interference filter switched
off to increase the system’s range and performance.
10
Use a water-proof pen, write the sensor’s number,
configured channel number and any other pertinent
information on its label.
- A dedicated form has also been provided in the front of
the PI Operator Manual to record this information.
Do not write on the sensor! Such information may be
misunderstood when future service or replacement is performed.
229
Simrad PI32
Depth sensor, test procedure
Tools and equipment required
• Multimeter
• A small piece of wire
• PI System
Initial check and setup identification
Keep the area between the negative charging lug (A) and the
water detector (B) clean to reduce the risk of activating the
sensor. If necessary, apply silicon grease to disrupt conductive
paths.
1
Using a multimeter, check the voltage between the
negative charging lug (A) and the water detector (B).
Make sure the sensor is charged:
- Fully discharged: Voltage less than 11.5 Vdc
- Fully charged: Voltage greater than 13.5 Vdc
- Approximately 50% capacity left: 12.8 Vdc
2
With a small piece of wire, complete the circuit between
the sensor’s sea water detector (B) and negative charging
lug (A).
- The sensor will respond by flashing its individual LED
identification codes.
(1) = One long flash: It has a duration of
approximately 1 second.
(2) = One start flash: This signals that the first digit of
the channel number is next.
(3) = None, one, two or three short flashes: The
number of short flashes signifies the first digit of the
configured channel number.
(4) = A second start flash: This signals that the second
digit of the channel number is next.
230
857-164636 / Rev.A
Sensor test procedures
(5) = None to nine short flashes: The number of short
flashes signifies the second digit of the configured
channel number.
3
Using a multimeter, check the DC current between the
negative charging lug (A) and the water detector (B).
- With the initial sea water switch and a a fully charged
battery, the current should not exceed 150 µA.
- With a redesigned sea water switch (sacrificial bolt)
and a a fully charged battery, the current should not
exceed 67 µA.
- If you measure 0 µA, check the fuse on your
multimeter.
Testing on land
The sensor can only be tested in water.
Testing in water
857-164636 / Rev.A
1
Lower the Depth sensor over the side of the vessel to a
measured depth greater than two meters.
- The sensor will not activate if the depth is less than two
meters.
2
Switch off the vessel’s echo sounders, sonars and other
hydroacoustical equipment to avoid interference.
3
Switch off the PI32’s interference filter, and observe the
numeric display.
- If the interference symbol is not displayed, leave the
interference filter switched off to increase the system’s
range and performance.
4
Use the PI32 Status display to monitor the sensor’s signal
strength.
- If the interference filter is activated, the spectrum
displayed should be relatively flat (approximately 25
dB with interference filter set at level 9) with a peak
detected in the configured channel.
5
Check that the depth read-out on the PI32 corresponds to
the actual measured depth at which the sensor is
suspended.
- If these values vary, calibrate the PI32 depth offset. The
procedure is described below.
6
Hoist and lower the sensor in the water, and observe that
the depth readout changes accordingly.
7
Turn on the vessel’s echo sounders as well as other
hydroacoustical equipment used during normal fishing
operations.
231
Simrad PI32
Note:
8
Switch the PI32 interference filter on and off, and observe
the numeric display. If the interference symbol is not
shown when the filter is off, leave the interference filter
switched off to increase the system’s range and
performance.
9
Use a water-proof pen, write the sensor’s number,
configured channel number and any other pertinent
information on its label.
- A dedicated form has also been provided in the front of
the PI Operator Manual to record this information.
Do not write on the sensor! Such information may be
misunderstood when future service or replacement is performed.
PI32 Calibration procedure
Observe this procedure to calibrate the depth sensor using the
functionality on the PI system.
1
Press the Menu button, and select Setup.
2
On the Setup menu, select Sensor alarm/calibration.
3
Press the Enter button to allow the parameters to be
changed.
4
Move the cursor down the Depth/Spread sensor
calibration, and switch Depth sensor calibration to ON.
- If these values vary, calibrate by adjusting the PI32
depth offset function until the measured depth under
the vessel corresponds to the PI32’s displayed depth.
- Another method of calibration is to suspend the sensor
to a measured depth of three meters under the vessel,
and then using the PI32’s depth sensor calibration
functionality. When this calibration procedure is
performed, the offset value will be reduced by two
meters.
PI44 Calibration procedure
Observe this procedure to calibrate the depth sensor using the
functionality on the PI system.
232
857-164636 / Rev.A
Sensor test procedures
Height sensor, test procedure
Tools and equipment required
•
•
•
•
Multimeter
A small piece of wire
A reference echo sounder
PI System
Initial check and setup identification
Keep the area between the negative charging lug (A) and the
water detector (B) clean to reduce the risk of activating the
sensor. If necessary, apply silicon grease to disrupt conductive
paths.
1
2
Using a multimeter, check the voltage between the
negative charging lug (A) and the water detector (B).
Make sure the sensor is charged:
- Fully discharged: Voltage less than 10.4 Vdc
- Fully charged: Voltage greater than 12.2 Vdc
- Approximately 50% capacity left: 11,5 Vdc
With a small piece of wire, complete the circuit between
the sensor’s sea water detector (B) and negative charging
lug (A).
- The sensor will respond by flashing its individual LED
identification codes.
(1) = One long flash: It has a duration of
approximately 1 second.
(2) = One start flash: This signals that the first digit of
the channel number is next.
(3) = None, one, two or three short flashes: The
number of short flashes signifies the first digit of the
configured channel number.
857-164636 / Rev.A
233
Simrad PI32
3
(4) = A second start flash: This signals that the second
digit of the channel number is next.
(5) = None to nine short flashes: The number of short
flashes signifies the second digit of the configured
channel number.
Using a multimeter, check the DC current between the
negative charging lug (A) and the water detector (B).
- With the initial sea water switch and a a fully charged
battery, the current should not exceed 150 µA.
- With a redesigned sea water switch (sacrificial bolt)
and a a fully charged battery, the current should not
exceed 67 µA.
- If you measure 0 µA, check the fuse on your
multimeter.
Testing on land
The sensor can only be tested in water.
Testing in water
1
Use the vessel’s most accurate echo sounder as reference,
and measure the water depth below the keel.
2
Lower the Height sensor over the side of the vessel. Make
sure that the echo sounder transducer faces the bottom.
- Lower it to the same depth as of the vessel’s echo
sounder transducer.
Switch off the vessel’s echo sounders, sonars and other
hydroacoustical equipment to avoid interference.
3
4
5
6
7
8
234
Switch off the PI32’s interference filter, and observe the
numeric display.
- If the interference symbol is not displayed, leave the
interference filter switched off to increase the system’s
range and performance.
Use the PI32 Status display to monitor the sensor’s signal
strength.
- If the interference filter is activated, the spectrum
displayed should be relatively flat (approximately 25
dB with interference filter set at level 9) with a peak
detected in the configured channel.
Check that the depth read-out on the PI32 corresponds to
the actual depth measured by the vessel’s echo sounder.
Hoist and lower the sensor in the water, and observe that
the depth readout changes accordingly.
Turn on the vessel’s echo sounders as well as other
hydroacoustical equipment used during normal fishing
operations.
857-164636 / Rev.A
Sensor test procedures
Note:
857-164636 / Rev.A
9
Switch the PI32 interference filter on and off, and observe
the numeric display. If the interference symbol is not
shown when the filter is off, leave the interference filter
switched off to increase the system’s range and
performance.
10
Use a water-proof pen, write the sensor’s number,
configured channel number and any other pertinent
information on its label.
- A dedicated form has also been provided in the front of
the PI Operator Manual to record this information.
Do not write on the sensor! Such information may be
misunderstood when future service or replacement is performed.
235
Simrad PI32
Spread & Remote sensors test procedure
Tools and equipment required
•
•
•
•
Multimeter
A small piece of wire
PI Service Hydrophone (Order no. 314-204480)
PI System
Initial check and setup identification
On both sensor types, keep the area between the negative
charging lug (A) and the water detector (B) clean to reduce the
risk of activating the sensor. If necessary, apply silicon grease to
disrupt conductive paths.
1
On both sensors, use a multimeter to check the voltage
between the negative charging lug (A) and the water
detector (B). Make sure the sensor is charged:
- Fully discharged: Voltage less than 11.5 Vdc
- Fully charged: Voltage greater than 13.5 Vdc
- Approximately 50% capacity left: 12.8 Vdc
2
With a small piece of wire, complete the circuit between
the sensor’s sea water detector (B) and negative charging
lug (A).
- The sensor will respond by flashing its individual LED
identification codes.
(1) = One long flash: It has a duration of
approximately 1 second.
(2) = One start flash: This signals that the first digit of
the channel number is next.
(3) = None, one, two or three short flashes: The
number of short flashes signifies the first digit of the
configured channel number.
236
857-164636 / Rev.A
Sensor test procedures
3
(4) = A second start flash: This signals that the second
digit of the channel number is next.
(5) = None to nine short flashes: The number of short
flashes signifies the second digit of the configured
channel number.
Using a multimeter, check the DC current between the
negative charging lug (A) and the water detector (B).
- With the initial sea water switch and a a fully charged
battery, the current should not exceed 150 µA.
- With a redesigned sea water switch (sacrificial bolt)
and a a fully charged battery, the current should not
exceed 67 µA.
- If you measure 0 µA, check the fuse on your
multimeter.
Testing on land
1
2
3
4
5
Connect the PI Service Hydrophone to the PI Operator
Unit.
Place the Spread and Remote sensors on a level surface
with their “transversal eyes” pointing towards each other
at a measured distance (one to three meters). Record this
distance.
Place the test hydrophone approximately five meters away
from both the Spread and Remote sensors.
Turn on the PI, and record the distance shown on its
display.
Multiply the recorded physical distance by a factor of 4.5
and compare it to the distance displayed by the PI.
- The physical distance between the two sensors
multiplied by 4.5 and the displayed distance shown on
the PI should be almost identical.
Testing in water
1
2
3
4
857-164636 / Rev.A
Disconnect the PI Service hydrophone, and reconnect the
vessel’s normal hull mounted hydrophone.
Switch off the vessel’s echo sounders, sonars and other
hydroacoustical equipment to avoid interference.
Lower the Spread sensor (A) over the side of the vessel
with its head (C) pointing towards the hydrophone. Lower
it to minimum three meters.
Switch off the PI system’s interference filter, and observe
the numeric display.
- If the interference symbol is not displayed, leave the
interference filter switched off to increase the system’s
range and performance.
237
Simrad PI32
Lower the two
sensors as shown,
and make sure that
the Spread sensor’s
head points towards
the vessel’s
hydrophone (C).
Also, make sure that
there is a free line of
sight for the
transverse
communication (D).
5
On the PI numeric display, verify that the reading is +++.
- This signifes that there is no communication between
the Spread and Remote sensors.
6
Lower the Remote sensor (B) over the opposite side of the
vessel with its head pointing in the same direction as the
Spread sensor. Lower it to the same depth as the Spread
sensor, and ensure that there is a free line of sight for the
transverse communication (D).
- If both sensors are suspended under the vessel at its
widest point, the physical distance between the Spread
and Remote sensors is equivalent to the vessel’s
maximum beam.
7
Note:
238
Observe the PI numeric display. The reading should be the
same as the physical distance (without any compensation)
between the two sensors.
Should any problems arise during this procedure, check that the
type (1 or 2), communication channel and update rate have been
configured for both sensors.
8
Switch on the vessel’s echo sounders and other
hydroacoustical equipment used during normal fishing
operations.
9
Switch the PI32 interference filter on and off, and observe
the numeric display. If the interference symbol is not
shown when the filter is off, leave the interference filter
switched off to increase the system’s range and
performance.
857-164636 / Rev.A
Sensor test procedures
10
Note:
857-164636 / Rev.A
Use a water-proof pen, write the sensor’s number,
configured channel number and any other pertinent
information on its label.
- A dedicated form has also been provided in the front of
the PI Operator Manual to record this information.
Do not write on the sensor! Such information may be
misunderstood when future service or replacement is performed.
239
Simrad PI32
Temperature sensor, test procedure
Tools and equipment required
•
•
•
•
•
Multimeter
A small piece of wire
PI Service Hydrophone (Order no. 314-204480)
Waterproof thermometer
PI System
Initial check and setup identification
Keep the area between the negative charging lug (A) and the
water detector (B) clean to reduce the risk of activating the
sensor. If necessary, apply silicon grease to disrupt conductive
paths.
1
Using a multimeter, check the voltage between the
negative charging lug (A) and the water detector (B).
Make sure the sensor is charged:
- Fully discharged: Voltage less than 11.5 Vdc
- Fully charged: Voltage greater than 13.5 Vdc
- Approximately 50% capacity left: 12.8 Vdc
2
With a small piece of wire, complete the circuit between
the sensor’s sea water detector (B) and negative charging
lug (A).
- The sensor will respond by flashing its individual LED
identification codes.
(1) = One long flash: It has a duration of
approximately 1 second.
(2) = One start flash: This signals that the first digit of
the channel number is next.
240
857-164636 / Rev.A
Sensor test procedures
3
(3) = None, one, two or three short flashes: The
number of short flashes signifies the first digit of the
configured channel number.
(4) = A second start flash: This signals that the second
digit of the channel number is next.
(5) = None to nine short flashes: The number of short
flashes signifies the second digit of the configured
channel number.
Using a multimeter, check the DC current between the
negative charging lug (A) and the water detector (B).
- With the initial sea water switch and a a fully charged
battery, the current should not exceed 150 µA.
- With a redesigned sea water switch (sacrificial bolt)
and a a fully charged battery, the current should not
exceed 67 µA.
- If you measure 0 µA, check the fuse on your
multimeter.
Testing on land
1
2
3
4
Connect the PI Service Hydrophone to the PI Operator
Unit.
Place the sensor on a level surface with its “domed top”
pointing towards the test hydrophone approximately five
meters away.
Use the Status display on the PI to monitor the sensor’s
signal strength.
- If the interference filter is on, the spectrum displayed
should be relatively flat (approximately 25 dB,
interference filter set at level 9) with a peak detected in
the configured channel.
Check that the PI’s displayed temperature corresponds
with the actual ambient temperature.
Testing in water
1
2
3
4
5
857-164636 / Rev.A
Disconnect the PI Service hydrophone, and reconnect the
vessel’s normal hull mounted hydrophone.
Switch off the vessel’s echo sounders, sonars and other
hydroacoustical equipment to avoid interference.
Lower the sensor over the side of the vessel.
Lower the waterproof thermometer over the side of the
vessel, and keep it as close to the sensor as possible.
Switch off the PI system’s interference filter, and observe
the numeric display.
- If the interference symbol is not displayed, leave the
interference filter switched off to increase the system’s
range and performance.
241
Simrad PI32
Note:
Note:
242
Should any problems arise during this procedure, check that the
communication channel and update rate has been configured
correctly.
6
Check that the PI system’s displayed temperature
corresponds with the value from the reference
thermometer.
7
Switch on the vessel’s echo sounders and other
hydroacoustical equipment used during normal fishing
operations.
8
Switch the PI32 interference filter on and off, and observe
the numeric display. If the interference symbol is not
shown when the filter is off, leave the interference filter
switched off to increase the system’s range and
performance.
9
Use a water-proof pen, write the sensor’s number,
configured channel number and any other pertinent
information on its label.
- A dedicated form has also been provided in the front of
the PI Operator Manual to record this information.
Do not write on the sensor! Such information may be
misunderstood when future service or replacement is performed.
857-164636 / Rev.A
Technical specifications
TECHNICAL SPECIFICATIONS
This chapter provides the basic technical specifications.
Topics
→
857-164636 / Rev.A
PI Sensors, page 243
243
Simrad PI32
Sensors
Specifications can be altered without prior notification.
PI Bottom Contact
• PI System: PI32, PI44 or PI54
• Update rates:
- Fast: Every 3,2 second (approx.)
- Normal: Every 5,3 second (approx.)
- Slow: Every 33 second (approx.)
• Default update rate: Normal
• Lifetime between each recharge:
- Fast update rate: 26 hours
- Normal update rate: 40 hours
- Slow update rate: 175 hours
• Communication frequency range: 43,5 to 49,5 kHz
• Default communication channel: 6
• Physical properties:
- Length: 246 mm
- Width: 171 mm
- Thickness: 123 mm
- Weight in air: 4,6 kg (without chain and ground weight)
• Charging time with PI Charger:
- To 70% capacity: 1 hour
- To 100% capacity: 4 hours
• Charging time with PS Charger:
- To 100% capacity: 16 hours
PI Catch & PI Rip
• PI Systems: PI32, PI44 or PI54
• Update rates:
- Fast: Every 5,3 second (approx.)
- Normal: Every 33 second (approx.)
- Slow: Every 125 second (approx.)
• Default update rate: Normal
• Lifetime between each recharge:
- Fast update rate: 35 hours
- Normal update rate: 150 hours
- Slow update rate: 300 hours
244
857-164636 / Rev.A
Technical specifications
• Communication frequency range: 43,5 to 49,5 kHz
• Default communication channel: 4
• Physical properties:
- Length: 246 mm
- Width: 171 mm
- Thickness: 123 mm
- Weight in air: 4,3 kg
• Charging time with PI Charger:
- To 70% capacity: 1 hour
- To 100% capacity: 4 hours
• Charging time with PS Charger:
- To 100% capacity: 16 hours
PI Depth
• PI Systems: PI32, PI44 or PI54
• Update rates:
- Fast: Every 4,5 second (approx.)
- Normal: Every 14 second (approx.)
- Slow: Every 34 second (approx.)
• Default update rate: Fast
• Lifetime between each recharge:
- Fast update rate: 24 hours
- Normal update rate: 75 hours
- Slow update rate: 100 hours
• Communication frequency range: 43,5 to 49,5 kHz
• Default communication channels:
- 100 m depth range: 16
- 300 m depth range: 12
- 1000 m depth range: 10
• Accuracy: 1% of total range
• Depth ranges: 100 m, 300 m and 1000 m
• Physical properties:
-
857-164636 / Rev.A
Length: 246 mm
Width: 171 mm
Thickness: 123 mm
Weight in air: 4,3 kg
245
Simrad PI32
• Charging time with PI Charger:
- To 70% capacity: 1 hour
- To 100% capacity: 4 hours
• Charging time with PS Charger:
- To 100% capacity: 16 hours
PI Height
• PI System: PI32, PI44 or PI54
• Update rates:
- Fast: Every 5,5 second (approx.)
- Normal: Every 14 second (approx.)
- Slow: Every 34 second (approx.)
• Default update rate: Fast
• Lifetime between each recharge:
- Fast update rate: 35 hours
- Normal update rate: 60 hours
- Slow update rate: 250 hours
• Echo sounder frequency: 70 kHz
• Echo sounder range: 0,7 to 60 m
• Communication frequency range: 43,5 to 49,5 kHz
• Default communication channel: 14
• Physical properties:
- Length: 300 mm
- Width: 205 mm
- Thickness: 131 mm
- Weight in air: 6,8 kg
• Charging time with PI Charger:
- To 70% capacity: 1 hour
- To 100% capacity: 4 hours
PI Spread & Remote
• PI Systems: PI32, PI44 or PI54
• Update rates:
- Fast: Every 5,5 second (approx.)
- Normal: Every 14 second (approx.)
- Slow: Every 34 second (approx.)
246
857-164636 / Rev.A
Technical specifications
• Default update rate: Fast
• Lifetime between each recharge:
- Fast update rate: 45 hours
- Normal update rate: 100 hours
- Slow update rate: 150 hours
• Communication frequency rang: 43,5 to 49,5 kHz
• Default communication channel: 2
• Accuracy: 0,2 %
• Maximum range: 350 meters
• Physical properties (Spread/Remote):
- Length: 298 / 248 mm
- Width: 149 / 121 mm
- Thickness: 120 / 98 mm
- Weight in air: 5,7 / 2,9 kg
• Charging time with PI Charger:
- To 70% capacity: 1 hour
- To 100% capacity: 4 hours
• Charging time with PS Charger:
- To 100% capacity: 16 hours
PI Temperature
• PI Systems: PI32, PI44 or PI54
• Update rates:
- Fast: Every 4,5 second (approx.)
- Normal: Every 14 second (approx.)
- Slow: Every 34 second (approx.)
• Default update rate: Fast
• Lifetime between each recharge:
- Fast update rate: 24 hours
- Normal update rate: 75 hours
- Slow update rate: 150 hours
• Communication frequency range: 43,5 to 49,5 kHz
• Default communication channel: 8
• Accuracy: 0,2 %
• Physical properties:
- Length: 246 mm
- Width: 171 mm
- Thickness: 123 mm
- Weight in air: 4,3 kg
857-164636 / Rev.A
247
Simrad PI32
• Charging time with PI Charger:
- To 70% capacity: 1 hour
- To 100% capacity: 4 hours
• Charging time with PS Charger:
- To 100% capacity: 16 hours
248
857-164636 / Rev.A
Operator manual
INDEX
The next pages provide an alphabetical index to this manual.
A
A-Scope, How to: Operational procedures 77
A-SCP, Button description: Getting started 15
AGC
Parameter: References 176
Status: Display modes 40
Bottom expansion, How to: Operational
procedures 75
Bottom trawl, Application example:
Applications 24
C
C/B filter, Parameter: References 176
Alarm
Clearance: References 179
Depth: References 159
Fish: References 158
Sensors: References 178
Setup: References 178
Surface temperature: References 178
Alarm output, Parameter: References 168
Alarm stand-by level, Parameter: References
168
Automatic page rotation, Procedure:
Operational procedures 82
B
B-LCK, Button description: Getting started
15
Calibration, Depth sensor: References 154
Catch sensor
Numeric presentation: Display modes 31
Practical use (PI): Sensors 96
Practical use (PS): Sensors 101
Specifications: Technical specifications 245
Test procedure: Sensor test procedures 228
Catch/Bottom Sensor Filter, Parameter:
References 176
Charger, Description: System description 8
Clearance alarm, Procedure: Operational
procedures 79
Clump sensor, Parameter: References 183
Colour threshold
How to activate: Operational procedures 71
Parameter: References 156
Background colour, How to change on
echogram: Operational procedures 72
Configuration, NMEA Parameter: References
165
Background colour, sensor, How to:
Operational procedures 47
Course
Battery charger
Description: System description 8
Practical use: Battery chargers 146
NMEA Parameter: References 164, 168
Parameter: References 169
D
Bearing, Parameter: References 169
Bottom Contact sensor
Numeric presentation: Display modes 30
Practical use (PI): Sensors 88
Practical use (PS): Sensors 92
Specifications: Technical specifications 245
Test procedure: Sensor test procedures 225
857-164636 / Rev.A
Danish seine, Application example:
Applications 23
Data output, NMEA Parameter: References
165
Data window, Parameter: References 170
Date, Parameter: References 177
249
Simrad PI32
DBK, NMEA Parameter: References 165
Display colours: References 173
DBS, NMEA Parameter: References 165
Display presentations, Overview: Display
modes 28
DBT, NMEA Parameter: References 165
Default settings
Parameters: References 160
Procedure: Operational procedures 83
Demo, Echo sounder: References 159
Depth
Alarm: References 159
Display: References 158, 159
Fish alarm: References 159
Keel: References 158
Transducer: References 158
Depth alarm
Parameter: References 159
Procedure: Operational procedures 78
Depth bars, Parameter: References 161
Depth display, Parameter: References 158,
159
Depth for fish, Parameter: References 159
Depth grid
How to activate: Operational procedures 71
Parameter: References 156, 161
Depth lines: References 156, 161
Depth sensor
How to calibrate: Operational procedures 56
Calibration: References 154
How to adjust offset: Operational procedures
57
Numeric presentation: Display modes 32
Offset: References 171
Practical use (PI): Sensors 105
Practical use (PS): Sensors 110
Specifications: Technical specifications 246
Test procedure: Sensor test procedures 231
Depth sensor calibration, Setup: References
154
Det.thresh., Parameter: References 177
Display text in, Parameter: References 172
Door sensor, Parameter: References 183
DPT, NMEA Parameter: References 165
DT, Parameter: References 177
E
Echo presentation setup: References 155
Echo sounder, Application example:
Applications 26
Echo sounder display, Description: Display
modes 41
Echo sounder frequency, Parameter:
References 156
Echo sounder mode, Parameter: References
159
Echo sounder setup: References 158
ENT, Button description: Getting started 14
EVENT, Button description: Getting started
15
Expansion window, Parameter: References
155
F
Factory settings
Parameters: References 160
Procedure: Operational procedures 83
Fish alarm
Parameter: References 158
Procedure: Operational procedures 78
Footrope sensor, Parameter: References 183
Frequency spectrum, NMEA Parameter:
References 165
G
Detection Threshold, Parameter: References
177
GAIN, Button description: Getting started 15
Display, Depth: References 158, 159
Gain, Parameter: References 155
250
857-164636 / Rev.A
Operator manual
Graphic alarm
How to: Operational procedures 47
Parameter: References 170
Graphic display
Application example: Applications 27
Description: Display modes 36
Graphic setup: References 161
H
Headrope sensor, Parameter: References 183
Height sensor
Numeric presentation: Display modes 33
Practical use: Sensors 115
Specifications: Technical specifications 247
Test procedure: Sensor test procedures 234
How to
A-scope: Operational procedures 77
Access echo sounder parameters: Operational
procedures 70
Access graphic display parameters:
Operational procedures 63
Background colour, sensor: Operational
procedures 47
Bottom expansion: Operational procedures
75
Colour threshold: Operational procedures 71
Define initial presentation pages: Getting
started 11
Depth grid: Operational procedures 71
Depth sensor calibration: Operational
procedures 56
Depth sensor offset: Operational procedures
57
Echogram background colour: Operational
procedures 72
Graphic alarm: Operational procedures 47
Marker lines: Operational procedures 65
Phased range: Operational procedures 73
Ping to ping filter: Operational procedures 71
Range: Operational procedures 73
Scroll speed: Operational procedures 72
Sensor configuration: Operational procedures
49
Sensor mounting: Operational procedures 52
Sensor timer reset: Operational procedures 47
Sensor timers: Operational procedures 47
857-164636 / Rev.A
Signal threshold: Operational procedures 71
Spread sensor offset: Operational procedures
57
Superimpose echo data on graphic display:
Operational procedures 64
Switch power on and off: Getting started 10
Trawl information: Operational procedures
68
Twin spread setup for twin trawl: Operational
procedures 58
View echo data on graphic display:
Operational procedures 64
VRM expansion: Operational procedures 76
Water switch replacement: Operational
procedures 54
White line: Operational procedures 72
Zoom bottom echoes: Operational procedures
75
Zoom pelagic echoes: Operational
procedures 76
Hydrophone, Description: System description
6
I
Interf. filter, Parameter: References 175
Interface setup: References 163
Interference filter, Parameter: References 175
K
Keel depth, Parameter: References 158
Keypad, Introduction: Getting started 14
L
Language
Parameter: References 172
Procedure: Operational procedures 81
Level, Parameter: References 175
Log 1, Parameter: References 174
Log speed calibration, Parameter: References
181
LOG Speed sensor, Parameter: References
181
M
Main menu: Menu system 151
251
Simrad PI32
Introduction: Getting started 13
Numeric setup: References 170
Manual gain, Parameter: References 176
Manual trawl marker, Parameter: References
183
Marker line, Parameter: References 162
Marker line delay, Parameter: References 162
Marker line thickness, Parameter: References
162
O
Offset adjust, Setup: References 171
Operator Unit, Description: System
description 5
Output power, Transmitter: References 159
P
Master reset: References 160
Max sh. speed, Parameter: References 177
Max Shooting Speed, Parameter: References
177
Page rotation
Parameter: References 172
Procedure: Operational procedures 82
MENU, Button description: Getting started
14
Page setup: References 172
Menu language
Pelagic trawl, Application example:
Applications 25
Parameter: References 172
Procedure: Operational procedures 81
Palette, Setup: References 173
Menu system: Menu system 150
Phased range, How to: Operational
procedures 73
Mode, Echo sounder: References 159
PI Charger
MP Filter, Parameter: References 176
MP filter, Status: Display modes 39
MPF level, Parameter: References 176
MTW, NMEA Parameter: References 165
MultiPath filter
Parameter: References 176
Status: Display modes 39
MultiPath Filter Level, Parameter: References
176
N
Navigation, NMEA Parameter: References
164, 165, 168
Navigation display, Description: Display
modes 44
Navigation setup: References 169
Description: System description 8
Practical use: Battery chargers 146
Ping to Ping filter, How to activate:
Operational procedures 71
Ping to ping filter, Parameter: References 156
Position, NMEA Parameter: References 164,
168
Position display, Description: Display modes
45
Power, On/off procedure: Getting started 10
Power output, Transmitter: References 159
Presentation, Define: Getting started 11
Presentation colours: References 173
Presets, Factory: References 160
PS Charger, Description: System description 8
Purse seine, Application example:
Applications 22
PWR, Button description: Getting started 15
NMEA telegrams: References 166
Numeric display, Overview: Display modes
29
252
R
Range
857-164636 / Rev.A
Operator manual
How to: Operational procedures 73
Parameter: References 155
Range start, Parameter: References 155
Receiver setup: References 175
Remote sensor
Practical use: Sensors 124
Practical use with Twin Spread: Sensors 129
Specifications: Technical specifications 247
Test procedure: Sensor test procedures 237
Shear alarm, Parameter: References 178
Signal threshold
How to activate: Operational procedures 71
Parameter: References 156
Sound speed, Parameter: References 156
Speed, NMEA Parameter: References 164,
168
Speed alarm, Procedure: Operational
procedures 78
Reset log: References 174
Speed setup: References 181
Reset sensor timers, Parameter: References
170
Spread sensor
Rip sensor
Practical use: Sensors 119
Specifications: Technical specifications 245
S
Scroll speed
How to adjust: Operational procedures 72
Parameter: References 156
Selector pad, Button description: Getting
started 14
Sensor alarms
Procedure: Operational procedures 79
Setup: References 178
How to adjust offset: Operational procedures
57
Numeric presentation: Display modes 34
Offset: References 171
Practical use: Sensors 124
Specifications: Technical specifications 247
Test procedure: Sensor test procedures 237
Status display, Description: Display modes 39
STND, Button description: Getting started 14
Strength, Fish alarm: References 158
Superimpose echo sounder, Parameter:
References 161
Surface temperature, Description: Display
modes 38
Surface temperature alarm, Procedure:
Operational procedures 79
Sensor charger, Practical use: Battery
chargers 146
Surface temperature marker, Parameter:
References 161
Sensor configuration, How to: Operational
procedures 49
System, Description: System description 3
Sensor definition, NMEA Parameter:
References 165
Sensor Filter, Parameter: References 176
Sensor mounting, How to: Operational
procedures 52
Sensor setup: References 180
Sensor timer, Parameter: References 170
Sensor timer reset, How to: Operational
procedures 47
Sensor timers, How to: Operational
procedures 47
Sensors, Introduction: Getting started 16
857-164636 / Rev.A
T
Technical specifications: Technical
specifications 244
Temperature, NMEA Parameter: References
164, 168
Temperature grid, Parameter: References 182
Temperature marker, Parameter: References
161
Temperature offset, Parameter: References
182
Temperature scale, Parameter: References
161, 182
253
Simrad PI32
Temperature sensor
Numeric presentation: Display modes 35
Practical use (PI): Sensors 134
Practical use (PS): Sensors 140
Specifications: Technical specifications 248
Test procedure: Sensor test procedures 241
Test procedures, Sensors: Sensor test
procedures 224
Time, Parameter: References 177
Transducer depth, Parameter: References 158
Transit, NMEA Parameter: References 165
Transmit power, Parameter: References 159
Transmit pulse length, Parameter: References
159
Trawl info setup: References 182, 183
Trawl marker, Parameter: References 183
Trawl opening mode, Parameter: References
183
TVG, Parameter: References 156
Twin spread, Setup for twin trawl:
Operational procedures 58
Twin Spread sensor, Practical use: Sensors
129
Water temperature, NMEA Parameter:
References 164, 168
White line
How to activate: Operational procedures 72
Parameter: References 155
WIN, Button description: Getting started 14
WIN change interval, Parameter: References
172
X
XTE alarm distance, Parameter: References
169
Z
ZOOM, Button description: Getting started
14
Zoom, How to: Operational procedures 76
U
Units, Parameter: References 184
Units setup: References 184
V
Velocity of sound in water, Parameter:
References 156
VHW, NMEA Parameter: References 165
VRM, Button description: Getting started 14
VRM expansion: Display modes 43
How to: Operational procedures 76
W
Water switch, Replacement: Operational
procedures 54
254
857-164636 / Rev.A
E 2005 Simrad AS
ISBN 82-8066-059-3