1
Operating Instructions
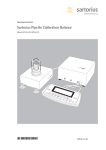
Sartorius Pipette Calibration Balance
Model GPC65-CW
Tare
Tare
1
2
3
4
5
F
CAL
CF
Setup
ABC
6
7
8
9
0
.
98648-015-87
Contents
Intended Use
2
Intended Use
3
Warnings and Safety Instructions
4
General View of the Equipment
The GPC65-CW models are high-resolution weigh cells for precise mass determination and offer weighing capacities
from 0.01 mg to 60 g (with load receptor only).
5
Overview: Display and Control Unit
6
9
9
Installation
Calibrating the GPC65-CW Weigh Cell
Installing the Evaporation Trap
11 Operation
12 Operating Design
13
17
24
27
33
54
Configuration
Parameter Settings (Overview)
Basic Weighing Function
Calibration and Adjustment
Application Programs
Data Output
60
65
66
67
69
Interface Port
Pin Assignment Chart
Cabling Diagram
Additional Functions
MP8 Interface Emulation
70 Error Codes and Messages
72 Care and Maintenance
73 Description of the Keys
This compact weigh cell can be affixed
to any smooth, even surface and thus
enables determination of weight within
a restricted space.
A broad range of special performance
features makes the pipette calibration
balances ideal for use as measuring and
test equipment in ISO or GLP quality
management systems.
These features include:
– isoCAL fully automatic self-calibrating
and adjustment function (time- and
temperature-dependent).
The built-in calibration weight lets you
calibrate and adjust the weigh cell at
any time by pressing a key.
– reproTEST for quick determination of
the standard deviation to check the
repeatability of results
– ISO/GLP-compliant recording capability
for printouts
–
–
–
–
–
–
–
–
–
–
–
Built-in application programs:
Application level 1:
Second weight unit
Counting
Weighing in percent
Animal weighing
Recalculation
Calculation
Density determination
Differential weighing
Air buoyancy correction
Air density determination
Diameter determination
Application level 2:
– Checkweighing
– Time-controlled functions
Application level 3:
– Totalizing
– Formulation
– Statistics
Additional functions:
Second tare memory
Identification codes
Product data memory
SQmin function
Manual data storage in
application level 3
– DKD uncertainty of measurement
–
–
–
–
–
– Password-protected menu lock
75 Specifications
76
76
78
79
81
Overview
Dimensions (Scale Drawings)
Accessories (Options)
Declaration of Conformity
Index
– Display of maintenance |
service intervals when due
The weigh cell meets the highest
requirements placed on the accuracy
and reliability of weighing results
through the following features:
– Easy input of IDs for samples
or other weighed objects
– On request: control using an
external computer
Symbols
The following symbols are used in
these instructions:
– Efficient filtering-out of vibration
– Stable and repeatable results
– Excellent readability under any lighting
conditions
G
indicates required steps
$
indicates steps required only under
certain conditions
>
describes what happens after
a certain step has been perfomed
–
indicates an item in a list
!
indicates a hazard
– Rugged design and durable weighing
system
– Automatic initialization when you
switch on the balance
The weigh cell saves work and speeds
up both simple and complex routine
applications through:
– Ultrafast response times
2
Hotline:
For advice on the use of applications, just call or fax your local
Sartorius office. For the address,
please visit our Internet website at:
www.sartorius.com
Phone: +49 (0) 551.308.4440
Fax: +49 (0) 551.308.4449
Warnings and Safety Precautions
§
Safety Precautions
The weigh cell complies with the
applicable regulations and standards
for electrical equipment, electromagnetic compatibility, and the stipulated
safety requirements. Improper use or
handling can result in damage
and/or injury.
!
!
To prevent damage to the equipment,
read these operating instructions
carefully before using your balance.
Keep these instructions in a safe
place.
Follow the instructions below to
ensure safe and trouble-free
operation of your balance:
!
!
!
!
!
!
!
!
Do not use this equipment in
hazardous areas, zones exposed to
explosive gases or dusts, or areas
exposed to potentially explosive
materials.
Use of the weigh cell in areas where
medical equipment is operated is not
permitted.
!
!
!
Do not expose the equipment to
extreme temperatures, moisture,
shocks, or vibrations.
!
Make sure that the voltage rating
printed on the AC adapter is
identical to your local line voltage
!
If you use electrical equipment in
installations and under ambient
conditions subject to more stringent
safety standards, you must comply
with the provisions as specified in
the applicable regulations for
installation in your country.
If you connect a different weigh cell
or electronics module from Sartorius,
make sure the devices you connect
are made to be operated together.
Check the equipment numbers
before connecting the devices.
Use of the weigh cell in areas where
medical equipment is operated is not
permitted.
If you connect a different weigh cell
or electronics module from Sartorius,
make sure to connect devices that
are made to be operated together.
Check the equipment numbers
before connecting the devices.
!
!
Exposure to excessive electromagnetic interference can cause the
readout value to change. Once the
disturbance has ceased, the instrument can be used again in accordance with its intended purpose.
The equipment may be opened only
by authorized service technicians
who have been trained by Sartorius
and who follow Sartorius’ standard
operating procedures for maintenance
and repair work.
Connect only Sartorius accessories
and options, as these are optimally
designed for use with your weigh cell.
When cleaning your weigh cell,
make sure that no liquid enters the
equipment housing; use only a
slightly moistened cloth to clean
the balance.
Do not open the weigh cell housing.
If the seal is broken, this will result
in forfeiture of all claims under the
manufacturer‘s warranty.
!
!
–
Installation
Any incoming inspection or installation work that does not conform to
the instructions in this manual will
result in forfeiture of all claims
under the manufacturer’s warranty.
All parts of the system must be
grounded (earthed), including any
draft shields that the customer may
use. For this purpose, connect an
equipotential bonding conductor.
Note on installation:
The operator shall be responsible
for any modifications to Sartorius
equipment and for any connections
of cables or equipment not supplied
by Sartorius and must check and, if
necessary, correct these modifications
and connections.
On request, Sartorius will provide
information on the minimum operating specifications (in accordance
with the applicable standards for
immunity to interference).
If any problems occur, disconnect the
device from power before performing
any repair work on the device.
Make absolutely sure to disconnect
the electronics module from power
before you connect or disconnect
any electronic peripheral devices
(e.g., display unit) to or from the
data interfaces.
If there is visible damage to the
equipment or power cord, disconnect
the equipment from power and
replace the weigh cell and electronics
module.
If you have any trouble with your
weigh cell, contact your local
Sartorius office, dealer or service
center.
For technical assistance regarding
the design, specifications and installation of the equipment, please
contact your supplier or the Sartorius
hotline:
Phone: +49 (0) 551.308.4440
Fax: +49 (0) 551.308.4449
3
General View of the Equipment
1
24
2
3
23
4
22
5
21
20
6
19
7
18
8
17
9
10
11
16
12
13
14
15
Pos. Designation
1
2
3
4
5
6
7
8
9
10
11
4
Load receptor
Shield disk
Protective cap/transport locking device
Leveling foot
GPC65-CW weigh cell
Level indicator
Bore hole for connecting an equipotential bonding conductor
Connection cable with male connector for the electronics
module (length: 1 m)
Socket for connecting the weigh cell
Serial printer port (PRINTER)
Electronics module
Pos. Designation
12
13
14
15
16
17
18
19
20
21
22
23
24
Socket for connecting an optional display and control unit
DC jack
Connection cable for optional display and control unit
Display and control unit
Evaporation trap (complete)
Shield disk (exterior)
Shield disk (interior)
Reduction fitting
Pan
Reduction fitting for beaker (21 ml or 6 ml)
Beaker (21 ml or 6 ml)
Evaporation trap
Cover
Overview: Display and Control Unit
1
13
Tare
Tare
2
Setup
12
ABC
1
2
3
4
5
F
CAL
CF
7
6
8
2
3
9
.
0
4
5
11
6
10
7
9
8
Pos. Designation
1
2
3
4
5
6
7
8
9
10
11
12
13
Display
Tare key
Decimal point key
Print key
Numeric keys
Function keys
Toggle key for changing the application program
Calibration key
Clear function key/Setup key for configuring
the weigh cell
SETUP key for application programs
On/off key
Key for alphabetic input
Display and control unit
–
–
–
–
–
–
Equipment supplied
Weigh cell
Electronics module
Operating instructions (this document)
Display and control unit with 0.5m cable
YCP01WZA pipette calibration set
Thermal protective covers
Special accessories, if ordered, as listed on the bill of
delivery or in accordance with specific arrangement.
Tare
Tare
Setup
ABC
1
2
3
4
F
CAL
CF
5
6
7
8
9
0
.
5
Installation
The weigh cells are available in various
versions. If you have ordered special
options, the weigh cells are equipped
with the specified features at the factory.
Storage and Shipping Conditions
– Once the equipment has been removed
from the packaging, it may lose accuracy if subjected to strong vibration.
Excessively strong vibration may compromise the safety of the equipment.
– Do not expose the equipment unnecessarily to aggressive chemical vapors or
to extreme temperatures, moisture,
shocks or vibration.
$ It is a good idea to save the box and all
parts of the packaging until you have
successfully installed your equipment.
Only the original packaging provides
the best protection for shipment.
$ Before packing your equipment, unplug
all connected cables to prevent damage.
$ Do not expose the equipment to
gravitational acceleration in excess of
0 300 m/s2 (unless additional equipment is installed on the load receptor
that enables it to withstand this force).
Incoming Inspection
The customer shall inspect the product
and packaging immediately upon delivery for proper functioning, completeness, and absence of defects. This is to
be performed in an incoming inspection
within 10 days of delivery of the product. The incoming inspection must take
place before the equipment is installed.
Any obvious defects, errors, or incorrect
delivery must be reported in writing.
Defects detected at a later date must be
reported in writing immediately upon
detection.
Be sure to perform the following as part
of the incoming inspection:
– We recommend performing a repeatability test using an auxiliary draft shield
to make sure the weigh cells were not
damaged in transport. You can use the
display and control unit as an aid for
this test.
Installation Instructions
The equipment is designed to provide
reliable results under normal ambient
conditions. If you have any questions
or difficulties when developing your
weighing system, please contact the
specialists at Sartorius. When designing
and setting up your weighing system,
please observe the following so that
you will be able to work with added
speed and accuracy:
– The protective cap is designed to
protect the weigh cell.
Always replace the protective cap/transport locking device before transporting
the weigh cell.
! Following transport, be sure to calibrate
the weigh cell prior to performing any
measurements.
– Avoid exposing the equipment to the
effects of extremely high temperatures;
for example, caused by other electronic
components, heaters or direct sunlight.
– Protect the equipment from drafts that
come from open windows or doors.
– Operate the equipment at a constant
temperature.
– Avoid exposing the equipment to excessive vibrations during weighing; for
example, caused by motors or valves.
– Protect the equipment from aggressive
chemical vapors.
– Do not expose the equipment to
extreme moisture.
– The assembly on the load receptor is
specially designed for pipetting (using
6 ml or 21 ml beakers). Other equipment installed on the load receptor
can interfere with weigh cell functions.
The operator of the equipment accepts
all liability for production release and
the overall specifications of the equipment as connected within the particular
system. The overall specifications
attained by your system may differ from
the specifications listed for the weigh
cell in these instructions.
Conditioning the equipment:
Moisture in the air can condense
on the surface of a cold weighing
instrument or other device whenever
it is moved to a substantially warmer
place. If you transfer the equipment to
warmer area, make sure to condition it
for about 2 hours at room temperature,
leaving it unplugged from AC power.
GPC65-CW:
An equipotential bonding terminal is
provided on the rear of the weighing
cell mounting plate. The screw on this
terminal is designed for wire diameters
of up to 6 mm2 (unifilar) or 4 mm2
(stranded wire). Make sure the equipment
is grounded to the machine framework.
Installing the Leveling Feet
§ Place the weigh cell on its side.
§ Insert and turn the leveling feet to
attach them to the weigh cell.
$ Remove the leveling feet before placing
the weigh cell in the optional accessory
case for the YDB01WZA25 pipette calibration set.
Connecting the Weigh Cell to the
Electronics Module
§ Position the equipment at the location
where it will be used.
§ Plug the connecting cable into the
socket on the electronics module and
the male connector on the weigh cell.
Make sure the components you connect
have identical serial numbers.
6
Connecting the Electronics Module to the Display and Control Unit
Important note: Make sure the electronics module is completely de-energized before
connecting it to the display and control unit.
§ Plug the cable into the socket on the electronics module. Make sure there is no supply
voltage. Then connect the components to one another.
Connecting the Equipment to AC Power
§ Check the voltage rating and the plug design. If they do not match your local rating or
standard, contact your supplier.
Use only
– Original Sartorius AC adapters or power supplies
– AC adapters or power supplies approved by an authorized technician.
§ Insert the right-angle plug from the AC adapter into the jack on the electronics module
and tighten the fastening screw.
§ Connect the equipment to AC power:
Plug the AC adapter into the wall outlet (mains).
$ Power is supplied over the DC jack. If the voltage specified on the label or the plug
design of the AC adapter does not match your local rating or standard, please contact
your nearest Sartorius office or dealer.
$ Using an AC adapter other than that supplied with the equipment:
The device can be operated with a supply voltage of 12 V to max. 26 V.
! The power connection must be made in accordance with the regulations applicable in
your country.
Safety requirements for operation of the evaluation electronics connected to a safety
extra-low voltage (SELV) source:
The external power supply must meet the requirements of EN 61010- 1, Section 6,
“Protection Against Shock Current.” Please also refer to the specifications for classification of electrically operated equipment in EN 61010-1.
2,8
19
,1
Safety Precautions:
The power supply must be rated to safety extra low voltage (SELV) or grounded (earthed)
safety extra low voltage (SELV-E). An AC adapter rated to Class 2 can be plugged into any
wall outlet with no additional safety precautions required. The ground terminal is connected to the weigh cell housing. The electronics module must be grounded for operation.
The data interface is also electrically connected (grounded) to the weigh cell housing.
4
3
2
16
8
29
23
1
M3
0,9
ø 3,2
19
3,3
3
EMC requirements:
The connector is designed for DC connections between equipment/systems that are not
connected to a DC power supply. The cable length must not exceed 3 m.
To use an external power supply, the power source must meet the requirements of
EN61326. The following standards apply:
Fast transients
IEC61000-4-4
Surge voltage
IEC61000-4-5
Conductive HF signals
IEC61000-4-6
10,8
Connecting Electronic Peripheral Devices
§ Make absolutely sure to unplug the weigh cell from AC power before you connect or disconnect a peripheral device (display and control unit or PC) to or from the interface port.
Warmup Time
The amount of warmup time required depends in part on the system in which the equipment is installed. To deliver exact results, the equipment must warm up for at least 4
hours after it is connected to power for the first time. Only after this time will the device
have reached the required operating temperature.
Important note:
To avoid long warmup periods and ensure that the equipment can be put into operation
quickly, we recommend storing and transporting it at a constant temperature of 20°C.
7
§ Remove the protective cap/transport locking device and put it in a safe place for later use.
Important note:
This cap is designed to protect the weigh cell. Always replace the protective cap before
transporting the weigh cell and any time you pack it for shipment or storage.
§ Place the following components onto the weigh cell in the order indicated:
– Shield disk
– Load receptor
Leveling the Weigh Cell in a Portable Weighing System (Leveling Feet)
Purpose:
– To compensate for uneven areas at the place of installation
– To ensure that the weigh cell is placed in a perfectly horizontal position for consistently
reproducible weighing results
– Always level the weigh cell again any time after it has been moved to a different location.
$ Leveling feet are included in the equipment supplied. The following leveling feet are
available:
– Standard individual leveling foot, product no.: 69B20005
– Design leveling feet (in a set of four), product no.: 69MA0195
§ Adjust the leveling feet until the air bubble is centered within the circle on the level
indicator.
8
Calibrating the GPC65-CW Weigh Cell
Before the evaporation trap is installed on the load receptor, the weigh cell must be
calibrated at the location where it will be used and prior to the first measurement.
The evaporation trap together with its lid can be used as a draft shield.
$ The weigh cell is set up at the location where it will be used.
$ The leveling indicator shows that the weigh cell is level.
Tare
Tare
1
2
3
4
5
6
$ The weigh cell has been allowed to warm up sufficiently.
F
CAL
CF
Setup
ABC
7
8
9
0
.
§ For information on calibrating the weigh cell, refer to the chapter entitled
“Calibration and Adjustment”
Installing the Evaporation Trap
Important note:
Be sure to wear gloves (see the Accessories section) before installing the evaporation trap.
Otherwise, moisture, oil and warmth from your hands can be transferred to the individual
parts of the evaporation trap, which could lead to errors in measurement. Keep all parts
clean and dry.
§ Remove the shield disk and load
receptor from the weigh cell
§ Place the exterior shield disk on the
unit.
§ Place the beaker with its reduction
fitting on the weigh cell
§ Place the interior shield disk on the
weigh cell.
§ Place the reduction fitting and weighing pan on the unit.
§ Select a beaker and a reduction fitting:
– Beaker, 21 ml
– Beaker, 6 ml
9
Tare
§ Place the evaporation trap on the unit.
§ Fill the upper ring-shaped pan of the
evaporation trap with water.
Tare
Setup
§ Replace the lid.
Installation is complete.
10
1
2
3
4
5
6
7
8
9
0
.
§ Pull the thermal protective coverings
included in the equipment supplied
over the weigh cell and the evaporation
trap.
Tare
Tare
ABC
1
F
CAL CF
Setup
ABC
2
3
4
F
CAL
CF
5
6
7
8
9
0
.
Important note:
Once the evaporation trap has been
installed, allow the weighing system to
rest for a moment so that the components can acclimatize to the ambient
conditions.
$ You may now begin pipetting.
§ Use the pipette for filling procedures.
Operating Design
The balances in the GPC65-CW Series
consist of a weighing cell and a display
and control unit. In addition to the
choice of power supply (via AC adapter
or external rechargeable battery pack),
your balance also has an interface port
for connecting a printer, computer or
universal remote control switch.
The display and control unit and the
weighing cell can be set up separately.
Operation of GPC65-CW balances follows a uniform “philosophy” which is
described in this manual.
Keys
The functions used most often are
assigned to their own specific keys.
There are additional keys for assignment of other (multiple) functions, in
some cases dependent on the current
operating status (so-called “soft keys”).
Each key is described in detail in the
chapter entitled “Overview” on the
CD-ROM.
Normal Operation
In the operating mode, these four keys
function as c, q, w and v
keys.
Setup
CF CAL
F
Setup Mode
In the setup mode, these keys take on
the function of arrow keys (x, y,
Y and X).
Setup
Soft Key Mode
The ‘soft key’ functions depend on the
current operating status; the current
function is indicated in the text line of
the display. In this example, the soft
keys are used to access Info, Menu and
Input functions.
Setup
CF
Display
The display is divided into six sections:
Line for metrological data
Bar graph
Measured value line
Symbol display
Weight
unit display
Text line
– Line for metrological data:
Metrological specifications of the
weighing platform.
Max ...g
d=...g
Display during use as a legal measuring
instrument:
Max ...g
Min ...g e=...g d=...g
– Bar graph: Display in percent of the
weight on the balance relative to the
maximum capacity and for over/under
checkweighing
– Measured value line: Display of weight
readout or alphanumeric input
Important Note Concerning Verified
Balances Approved for Use as Legal
Measuring Instruments in the EU*:
For verified balances that have
a verification scale interval “e” which
is greater than the scale interval “d,”
the last digit on the display is bordered.
– Weight unit display: Weight unit, other
unit of measure, operating information
The G symbol indicates non-verified
weight values.
– Symbol display: Indicates operating status; application selected
– Text line: Prompts for operator guidance, soft key designations
See the “Data Output” section in the
chapter entitled “Operation” on the
CD-ROM for a detailed description
of the information displayed in each of
these sections.
* including the Signatories of the Agreement on the European Economic Area
11
Input
Numeric Input
To enter numbers:
Press the 1 2 … 0 . keys
To store numbers entered:
Press the soft key
To interrupt/cancel numeric input:
Press c
Alphabetic Input
To enter letters:
First press the a key, then press
a letter soft key (Y or y) repeatedly
until the desired letter or special character is displayed in the text line
Printer
You can configure the print functions
to meet your individual requirements by
selecting the corresponding menu code.
To store a word entered:
Press the soft key
You can have printouts generated automatically, or by pressing p; dependent on or independent of the stability
or time parameters; with
or without IDs; and as standard or
ISO/GLP-compliant printouts.
To interrupt/cancel alphabetic input:
Press c
ISO: International Organization for
Standardization
Configuring Balance Operating Parameters
To set parameter options for configuring your balance, you can select
the desired parameters from a list.
The lists of parameter options comprise
a menu, which has three levels.
GLP: Good Laboratory Practice
See the section on “Data Output Functions” in the chapter entitled “Operation” for a detailed description of data
output options.
For configuration functions:
Press the H key; then press the menu
soft key
To move within a menu level:
Press Y or y
To change to another menu level:
Press x or X
To confirm the selected parameter setting in the 3rd menu level:
Press X “o” indicates the currently set
parameter
The text line provides additional information. All parameters are listed in the
chapter entitled “Configuration” on the
CD-ROM.
To save parameter settings and close
the menu, press H.
To interrupt the parameter setting
process without saving changes:
Press e
12
Data Output
Your GPC65-CW balance is equipped
with a data interface for connecting
your choice of the following:
– Printer
– Peripheral device (e.g., computer)
– Universal remote control switch
Interface Port
Instead of a printer, you may choose
to connect a different peripheral device,
e.g. a computer (PC). With an on-line
PC you can control both the weighing
cell and the display unit of the
GPC65-CW balance.
Request messages are sent via the interface to initiate functions in the weighing cell and in the display unit. Some of
the functions generate response messages.
See the section on “Data Output Functions” in the chapter entitled “Operation” for a detailed description of the
interface port.
Error Codes
If you press a key that has no function,
or which is blocked at a certain point
in an application program, this error is
indicated as follows:
– a double-beep is sounded as an
acoustic signal, and
– where necessary, a message is displayed
for 2 seconds in the text line, after
which the text line returns to the previous display.
The response to an operator error is
identical in all models of the GPC26CW series. See the chapter entitled
“Error Codes” for a detailed description.
Storing Settings
Storing Parameter Settings
The settings configured are stored in
the balance’s non-volatile memory.
The most recent parameter settings are
active when you switch on the balance.
Saving Parameter Settings
You can assign passwords in order to
block access to the “Menu” and “Input”
functions.
Configuration
Purpose
You can configure the pipette calibration balance to meet individual requirements by entering user data and setting
menu parameters in the Setup program.
You can also view balance-specific
data (such as serial number) in the
menu.
1
2
3
4
5
6
Setting the Language
’Info’ Display
Available Features
You can choose from 5 languages
for the information display:
German
English (factory setting)
English with U.S. date/time format
French
Italian
Spanish
Purpose
To have information about the equipment displayed.
Selecting the Language
G Enter the corresponding number
G Press H
–
–
–
–
Features
You can have the following information
displayed:
Program version number for the display
and control unit
Program version for the weighing cell
Balance model
Serial number of the weighing cell
Display Balance Information
G Select the Setup menu: Press H
G Select information:
Press the info soft (q key)
> Readout in measured value line: Version
number of the display and control unit
(see also “Data Output Functions, in the
chapter entitled “Operation” on the
CD-ROM
k Select next item of information:
Press Y
> Readout in measured value line:
Next information
k Select previous information:
Press y
> Readout in measured value line:
Previous information
k Print information: Press %
> Printout (example)
Mod.
GPC...
Ser. no.
60406906
Ver. no.
01-30-13
Software version
(display and control unit)
Ver. no.
00-20-07
Software version (weighing platform)
G Exit the Setup menu:
Press H
> Balance returns to previous status
13
Entering User Data (Input)
Purpose
To display, input or change user data.
You can block access to these data by
assigning a password.
–
–
–
–
–
Features
You can display, input or change the
following user data:
Workstation number* for the balance:
ID (balance ID; max. 20 characters)**
Weighing series number, to designate
a series or lot:
L ID (lot ID; max. 20 characters)**
Weight set number for calibration/
adjustment: W ID (weight ID;
max. 14 characters)**
Exact weight value for calibration/adjustment of the balance (see
the section on “Calibration and Adjustment,” in the chapter entitled
“Operation.”
Password for access to the Setup menu:
Input and Setup:
Menu (max. 8 characters)**
Factory Settings
Password: No designation
If no password has been assigned, anyone can access the “Setup: Input” and
“Setup: Menu” functions without entering a password.
If you assign a password and then forget what the word is, you can use the
General Password (see Appendix) to
access these menus.
Preparation
Display existing user data
G Select the Setup program: Press M
> The soft keys Info, Menu and Input
are displayed in the text line
G Select the user data input function:
Press the Input softkey v
> The password prompt is displayed
Enter/Change Password
G Select the Setup menu:
Press M
> The soft keys Info, Menu and Input
are displayed in the text line
G Select the user data input function:
Press the Input soft key v
If you have already assigned
a password:
> The password prompt is displayed
k Enter the password
k Press the enter passw.
soft key v
G Write down the password here:
Password = ........................................
If you no longer remember the password assigned:
k If access is blocked by a password:
enter the password using the alphanumeric input keys
k Enter the General Password
(see Appendix)
G Display user data:
Press the enter passw. soft key v
> The last 8 digits of a workstation/
balance number (ID no.), if any ID is
assigned, are displayed in the measured
value line
k Press the enter passw.
soft key v
> The last 8 digits of a workstation/
balance number (ID no.), if any ID is
assigned, are displayed in the measured
value line
G Select password setting:
Press y
> Password is displayed
in the text line
> If a password exists, it is now displayed
in the measured value line
G New password: Enter the letters/
numbers for the new password
(8 characters max.)**
The password “none” means that no
password is stored.***
G Confirm input: Press X
*** Only in conjunction with ISO/GLP-compliant printouts (see the section
on “Setting Parameters” in the chapter
entitled “Configuration” under menu
code number 8 10 x).
** A decimal point is displayed together
with its preceding digit or character;
it does, however, count as a separate
character. This also applies when you
enter S ID and NUM as well as to data
entered via the interface.
*** To delete user password:
Enter a decimal point using the . key
and confirm
14
G Exit the Setup menu:
Press M
> Restart the application
Practical Example
Enter “Workstation 234” as Balance ID; Display and Print Other User Data
Step
Key (or instruction)
1. Select Setup menu, then Input;
Display balance workstation ID (in
this example: no ID number exists)
see Preparation
2. Enter the first letter of the balance
workstation ID
a
Display/Output
13th through 20th digits of ID displayed
z(- a -)b
3. Set the letter “W”
ID
y repeatedly, until the W
is in the middle
m
4. Enter the next letter of the balance
workstation ID
a
ma
5. Select the letter “o”
Y repeatedly
me
6. Repeat steps 4 and 5 with
the appropriate letters (display
“longer” values: see “Data Output
Functions” on page 54)
axX
7. Store balance workstation ID
ID soft key (X)
8. Display the 5th through 12th digits
of the balance workstation ID
x
15
9.
Step
Key (or instruction)
Display/Output
Display lot number
(In this example: 09-10-96/ABC1)
Y
13th through 20th digits displayed
10. Display 5th through
12th digits of lot no.
x
11. Display other user data
– Weight set no.
– Exact calibration weight
– Password
xyYX
12. Print user data (example)
p
13. Exit “Setup: Input”
M
16
ID
WORKSTATION 234
L-ID
09-10-96/ABC1
W-ID A-123.456.XY C
Cal.wt.
+2000.02
Parameter Settings (Overview)
Purpose
To configure the balance; i.e., adapt
the balance to individual requirements
by choosing from a list of parameter
options in a menu. You can block
access
to this menu by assigning a password.
Features
The parameter options are divided into
the following groups (1st menu level):
1 Balance functions
Preparation
G Select the Setup menu: Press M
Additional Functions
G Exit the menu: Press M
> The Info, Menu and Input soft keys
are displayed in the text line
> Restart the application
G Select the parameter menu:
Menu soft key w
G Print parameter settings:
– When the 3rd menu level is selected:
Press p
> Password prompt is displayed
G Enter password using the alphanumeric
input keys
> Printout (example)
4 2 Auto print +/2 Off
3 Application parameters
G Confirm password entered:
enter passw. soft key v
– When the 2nd menu level is selected:
Press p
4 +/– parameter
(for over/under checkweighing)
> Measured value line:
1 (1st menu level)
5 Interface parameters
> Text line: Balance functions
6 Print for weighing (print weights)
k Select the next group: Press Y
7 Print for application program
(print app. data)
k Select the next submenu within a group
(2nd menu level): Press X
> Printout (example)
4 Parameter +/------------------4 2 Auto print +/2 Off
4 3 +/- ctrl ports
1 Within ctrl r
8 Additional functions
k Select previous group: Press y
9 Reset menu
k Return to next higher menu level: Press
x
2 Application programs
– When the 1st menu level is displayed:
Press p
> Prints all of the menu parameters that
are currently set
Factory Settings
The factory-set configurations are
marked with an “o” in the chapter
“Parameter Settings” on the CD-ROM.
17
Practical Example
Select the Counting Application Program
Step
1. Select Setup menu
Key (or instruction)
Display/Output
M
info--menu--input
2. Select Balance Functions group code (Menu)
Menu soft key w
3. Select the Application Prog. group
Y
4. Confirm Application Program
(2nd menu level)
X
5. Confirm App. Selection
(3rd menu level shows current
setting; in this case: weighing)
X
6. Select the Counting program
YY
7. Confirm selection of Counting program
X
8. Set other parameters, if desired
xyYX
9. Save settings and exit menu
M
18
Menu
Setup Parameters (Overview)
o
√
Factory setting
User setting
** = setting not applicable in balances verified for use in legal metrology
19
*** = setting not applicable in balances verified for use in legal metrology
20
Tabelle fehlt
* = setting not applicable in balances verified for use in legal metrology
21
l2
ve
Le
l1
ve
Le
Setup menu
for applications
1 to 4
see previous pages
5 Interface
51
52
6 Print for
weighing
see previous page
Parity
o
o
Space
Odd
Even
531
532
54
Handshake
mode
541
543
55
Communication
mode
551
552
554
555
556
557
5 5 10
5 5 11
5 5 14
5 5 15
o
SBI
xBPI
YDP01IS
YDP02
YDP03
YDP01IS Label printer
YDP02IS
YDP02IS Label printer
YDP04IS
YDP04IS Label printer
56
Network address
561
56x
5 6 32
o
Address 0
Addresses 1 to 30
Address 31
61
Print manual/
automatic
611
612
614
615
616
Stop auto print
621
622
o
o
o
1 stop bit
2 stop bits
Software handshake
Hardware handshake,
1 character after CTS
Manual without stability parameter
Manual with stability parameter
Auto print without stability parameter
Auto print at stability
Auto print after weight change
Use
key
Not possible
63
Time-dependent
auto print
631
632
634
637
64
Print ->
autotare
641
642
o
Off
On
71
Print application
parameters
711
712
713
o
Off
All parameters
Only main parameters
72
Line format
721
722
Print net total
Balance menu
* = setting not applicable in balances verified for use in legal metrology
22
522
523
524
No. of stop bits
73
8 and 9
m
ite
nu
e
M
53
62
7 Print for
application
l3
ve
Le
ing
ett
s
ry
cto
Fa
731
732
see next page
1 display update
2 display updates
10 display updates*
100 display updates*
o
o
For raw data
For other applications/GLP
Auto print net
Auto print tare
23
Basic Weighing Function
Purpose
The basic weighing function is always
accessible and can be used alone or
in combination with an application program (Toggle between Weight Units,
Counting, Weighing in Percent, etc.).
Features
– Taring the GPC65
– Assigning IDs to weights
– Printing weights
– Printing ID codes for weights
General Instructions
for “Analytical Weighing”
with Weigh Cells
Handling of Samples and Containers
Samples should be acclimatized to the
temperature of the weigh cell to avoid
negative effects on results, such as
measurement errors and fluctuations
caused by air buoyancy resulting from
convection currents across the surface
of the sample.
These negative effects increase as the
volume and/or surface area of the sample increases. For this reason, the size of
the container should be appropriate for
the sample.
Samples and containers should not be
touched by the operator’s hands, as the
hygroscopic effect of fingerprints and
the effect of the hand’s temperature
can influence the measurement results.
Samples must be applied very carefully,
whether manually (using a forceps) or
automatically (by a robot or filling
system).
When designing a draft shield device,
steps must be taken to keep the increase
in temperature within the weighing
chamber to a minimum (e.g., using
a bypass).
24
Weighing Electrostatically Charged
Samples or Containers
If a sample or container is electrostatically
charged, significant errors may result
during weighing. Materials with low
conductivity, such as glass, plastic or
filters, are particularly susceptible to
static electricity (resulting, e.g., from
friction) because the weighing pan can
discharge the static electricity only very
slowly.
The result is a force action between the
charge on the sample and the permanently installed parts of the weigh cell.
This causes the readout to fluctuate
constantly.
Ionization can be applied to make the
air around the sample conductive. This
allows the charge to be compensated
through the air, or discharged through
the ground (grounded).
Aside from purely mechanical solutions
(e.g., using a special weighing pan to
shield the system), bombarding the
sample with ions of opposing polarity
to neutralize the surface charge is one
of the most effective methods for
eliminating static electricity.
Sartorius can provide ionization devices
for installation in weighing systems.
The area around the weigh cell can also
contain charges that negatively affect
the accuracy of weighing results.
Appropriate steps taken in the design
of a draft shield device can counteract
such effects.
Weighing Magnetic or Magnetizable
Samples
The use of magnetizable materials in
the manufacture of weigh cells is
unavoidable, primarily because the
operating principle of high-resolution
weigh cells is based on compensation
of the load through magnetic forces.
When weighing magnetic or magnetizable samples or containers, interaction
between the sample or container and
certain parts inside the weigh cell may
distort weighing results.
To keep such distortion to a minimum,
we recommend increasing the distance
between the sample/container and the
weighing system using a non-magnetic
material. The force is reduced quadratically with the increase in distance.
Magnetizable or magnetized samples
and the weigh cell itself interact with
magnetic fields and magnetizable or
magnetized parts in the area surrounding the weighing system. The system
can be shielded from external magnetic
fields to some extent using (soft magnetic) plates.
Factory Settings
Tare: After stability (1 5 2)
Preparation
G Turn on the balance: Press e
Print manual/automatic:
Manual after stability (6 1 2)
> All display segments light up briefly
Line format for printout:
For other applications/GLP (7 2 2)
Alphanumeric input of a weight ID:
Keys unblocked (8 3 1)
k To change configurations:
see the chapter entitled “Configuration”
on the CD-ROM
k To load factory-set configurations:
see “Configuration” on the CD-ROM,
parameter 9 1
> The U symbol is displayed when
the balance is zeroed or tared (only on
balances verified for use in legal
metrology)
G Select the parameters “Line format” and
“For other app./GLP” from the Setup
menu: Press M
G Set parameter 7 2 2: See the chapter
entitled “Configuration” on the
CD-ROM
–
–
–
k To tare the balance: Press t
G Select mode: Press the menu soft key
–
–
–
Additional Functions
In addition to the functions:
alphanumeric input,
taring (not during alphanumeric input),
printing, you can also access the following functions from the weighing
application:
calibration (not during alphanumeric
input),
setup,
turning off the balance.
Calibration
G Press q
> See the section on “Calibration/Adjustment” for further instructions.
Setup Menu
G Press M
> See the chapter entitled “Configuration”
on the CD-ROM for further instructions.
Turning Off the Balance
G Press p
> The balance shuts off
> The display goes blank
G Exit the Setup menu: Press M
Practical Examples
Example W1: Simple Weighing
Step
Key (or instruction)
1. If necessary, tare the balance
(U symbol: balance is tared,
– verified balances only)
t
2. Enter sample ID
see Example W2
3. Determine sample weight
(Example)
Place sample on balance
4. Print weight
p
Display/Output
S ID
N
+
ABC123
2231.56 g
25
Example W2
Enter “ABC123” as a sample ID
Note:
– The sample ID generally applies to one weighing operation only
– The ID is deleted after data output
Step
Key (or instruction)
Initial status (balance unloaded)
(ID can also be entered while balance
is loaded)
1. Enter the letter “A”
a
2. Select and enter the letter “B”
a
Softkey B (Key Y)
3. Select and enter the letter “C”
a Softkey . .
(Key Y Y)
4. Enter the numbers “1,” “2” and “3”
123
5. Store the ID
(max. 20 characters)
Press the SP.ID soft key v
– The next printout will include this ID
26
Display/Output
Calibration and Adjustment
Purpose
Calibration is the determination of the
difference between the weight readout
and the true weight (mass) of a sample.
Calibration does not entail making any
changes within the balance.
Available Features
Your balance can be calibrated externally (menu item 1 9 1 or1 9 3) or
internally (1 9 4).
Adjustment is the correction of this
difference between the measured value
displayed and the true weight (mass) of
the sample, or the reduction the difference to an allowable level within the
maximum permissible error limits.
– with the pre-set weight value (1 9 1), or
External calibration can be performed
– with a user-defined weight value (1 9 3)
Adjustment can be performed
– automatically following calibration
(1 10 1); or
– if desired, the adjustment operation can
be started manually after calibration
(1 10 2)
You can also configure whether the
calibration mode
– will be activated according to the
specific setting (by setting 1 9 1, 1 9 3
or 1 9 4), or
– can be selected by the user after
pressing the q key (1 9 12).
You can have the balance automatically
display an adjustment prompt after
a certain time interval has elapsed since
the last calibration/adjustment or when
the ambient temperature changes by
a defined amount.
You can also configure the balance
to perform calibration and adjustment
automatically (isoCAL) when the preset
time and/or temperature limit is
reached (1 15 3 and 1 15 5).
You can have the calibration/adjustment results documented in a ISO/GLPcompliant printout.
27
Preparation
Configure Parameters for Calibration and Adjustment
Step
Key (or instruction)
1. Turn on the balance
e
2. Select the Setup menu
M
3. Select the Balance Functions menu
menu soft key w
Display/Output
info--menu--input
4. Set parameters for:
– Calibration key function 1 9
– Calibration/adjustment
sequence 1 10
– isoCAL self-calibrating and
adjustment function 1 15
See the chapter entitled “Configuration”
xy YX
5. Exit the Setup menu
H
28
Selecting the Calibration/Adjustment
Parameter
The setting 1 9 12 must be selected in
the Setup menu.
You can configure the balance so that
after selecting a calibration procedure
by pressing the q key, you can
choose among the following calibration/adjustment modes:
When making your selection, the available
modes are displayed in cycles; i.e., after
reprotest, def. ext.adj. is displayed
again
– External calibration/adjustment with
the pre-set weight value (Def. Ext.
Adj.)
– External calibration with a user-defined
weight value (user. ext.adj.)
– Internal calibration (int. adjust)
– Reproducibility test (reprotest)
Configure External Calibration and Automatic Adjustment of the Balance in Selection Mode
Step
Key (or instruction)
1. Select the calibration function
q
2. Select external calibration/
adjustment mode
Press the selec.
soft key three times v
3. Confirm external calibration/
adjustment mode
Press the
user. ext.adj. soft key q
4. Place the calibration weight
on the balance (e.g., 4000.00 g)
Minus sign –: Weight too low
Plus sign +:
Weight too high
No plus/minus sign: Weight o.k.
Place weight on balance
Display/Output
This is displayed after calibration:
(on verified balances, the
display shows the difference
between the weight readout
and the actual weight value)
This is displayed after adjustment:
5. Unload the balance
Remove weight(s)
29
External Calibration/Adjustment with
a User-Defined Weight
First set either 1 9 3 or selection mode
(1 9 12) in the menu.
You can define a weight for calibration/
adjustment.
External calibration/adjustment must be
performed with weights that are traceable
to a national standard and that have error
limits which are at least 1/3 of the required
tolerance of the display accuracy.
The balance has a factory-set weight value
(see “Specifications”).
To reset a user-defined calibration/adjustment weight to the original factory setting,
enter the factory-set weight value manually (see “Specifications”) or set menu code
1 9 1 in the Setup menu.
Define the Calibration Weight
Step
Key (or instruction)
1. Select the Setup menu
H
Display/Output
info--menu--input
2. Access the Input Mode
Input soft key v
3. Select input for calibration
weight (currently 3000.00 g)
YYY
4. Enter calibration weight
(e.g., 4000.00 g)
4000.0
0
5. Save weight
… weight soft key v
6. Exit the Setup menu
H
30
Internal Calibration/Adjustment
The menu code setting 1 9 4 must be
selected in the Setup menu.
Inside the balance housing is a built-in,
motorized calibration weight.
The internal calibration/adjustment
sequence is as follows:
G Select the calibration function:
Press q
> The internal calibration weight is
applied automatically
> The balance is calibrated
> If the setting for “Calibration automatically followed by adjustment” (1 10 1)
is selected in the Setup menu, the balance is now automatically adjusted
> The internal calibration weight is
removed
Calibration and Adjustment Sequence
In the Setup menu, you can configure
the balance so that:
– calibration is always followed automatically by adjustment
(cal. -> auto adjust, 1 10 1), or
– you have the choice of ending the
sequence or starting adjustment after
calibration
(cal. -> man. adjust, 1 10 2).
If no deviation is determined during
calibration, or the deviation is within
the tolerance limits dictated by the
degree of accuracy you require, it is not
necessary to adjust the balance. In this
case, you can end the
calibration/adjustment sequence after
calibration. There are 2 soft keys active
at this point:
– ext. adjust or int. adjust
to start adjustment
– end to end the sequence
isoCAL:
Automatic Calibration and Adjustment
Either 1 15 3 or 1 15 5 must be selected in the Setup menu.
In the Setup menu, you can also configure the balance so that it displays an
adjustment prompt,
but does not perform the
calibration/functions automatically
(Only adj. prompt, 1 15 2)
The “isoCAL” display automatically
begins flashing if the ambient temperature has changed in relation to the temperature at the time of the last calibration/adjustment, or after a defined time
interval has elapsed. The balance is
telling you that it wants to self-calibrate and adjust.
This adjustment prompt is activated
when:
– The change in temperature or the
elapsed time interval is greater than
that shown in the table below
– The balance status does not correspond
to Setup configurations
– No number or letter input is active
– The load on the pan has not been
changed within the last 2 minutes
– The balance has not been operated
within the last 2 minutes
– The weight on the pan must be no
more than 2% at the most of the maximum capacity of the balance
When these requirements are met, the
following symbols are displayed:
– C in the measured value line
– isoCAL in the symbol display
– G in the weight unit display
If the balance is not operated and the
load is not changed, internal calibration
and adjustment starts after 15 seconds
have elapsed.
In the Setup menu, you can configure
the balance so that after calibration and
adjustment
– the application program must be
restarted
(On + reset app. 1 15 3), or
– the application program resumes where
it left off (isoCAL on, 1 15 5)
31
Determination of the Repeatability
(reproTEST)
Definition
Repeatability (reproducibility) is the
ability of the balance to display identical readouts when it is loaded several
times with the same weight under constant ambient conditions.
The standard deviation for a given
number of measurements is used to
quantify the repeatability.
Purpose
The “reproTEST” function automatically
calculates the repeatability of results
(based on 6 individual measurements).
In this way, the balance determines one
of the most important quantities in
relation to the place of installation.
The results are displayed with the
balance’s accuracy.
Preparation
G Turn on the balance: Press e
> All display segments light up briefly
G Select reproTEST in the Setup menu:
Press M
G Select Menu:
Press w (menu softkey)
G Select either 1 9 11 (reproTEST)
or 1 9 12 (selection mode):
See “Configuring the Balance.”
G Exit the Setup menu: Press M
Check the Reproducibility of the Balance
Step
Key (or instruction)
1. If parameter 1 9 11 is set
(reproTEST), proceed with step 4.
2. Access the Selection Mode for
calibration/adjustment
q
3. Select reproTEST
selec. soft key v
4. Start reproTEST
Number of measurements
is displayed
6 measurements will now
be performed
q
The standard deviation is displayed
5. End reproTEST
or restart reproTEST
32
End soft key v
reprotest soft key
Display/Output
Application Programs
All application programs can be selected
on balances used as legal measuring
instruments.
Non-metric vales are indicated as
follows:
– Percent
=%
– Piece count (counting) = pcs
– Computed value
=o
Toggle between Weight Units
Purpose
With this application program you
can switch the display of a weight value
back and forth between two weight
units by pressing a soft key.
Available Features
– Toggling the displayed weight
– Setting the display accuracy
– Other features as for the basic weighing
function
Factory Settings
Weight unit 1:
Display accuracy 1
(in the 1st range):
Weight unit 2:
Display accuracy 2
(in the 2nd range):
Grams/g (1 7 2)
All digits (1 8 1)
Grams/g (3 1 2)
Preparation
The following weight units are available in both ranges:
Unit
Grams
Kilograms
Carats*
Pounds*
Ounces*
Troy ounces*
Hong Kong taels*
Singapore taels*
Taiwanese taels*
Grains*
Pennyweights*
Milligrams*
Parts per pound*
Chinese taels*
Mommes*
Austrian carats*
Tola*
Baht*
Mesghal*
Conversion factor
1.00000000000
0.00100000000
5.00000000000
0.00220462260
0.03527396200
0.03215074700
0.02671725000
0.02645544638
0.02666666000
15.43235835000
0.64301493100
1000.00000000000
1.12876677120
0.02645547175
0.26670000000
5.00000000000
0.08573333810
0.06578947436
0.21700000000
Display
g
kg
ct
lb
oz
ozt
tl
tl
tl
GN
dwt
mg
o
tl
o
o
o
o
o
Printout
g
kg
ct
lb
oz
ozt
tlh
tls
tlt
GN
dwt
mg
/lb
tlc
mom
K
tol
bat
MS
All digits (3 2 1)
The following levels of display
accuracy are available in both ranges:
– All digits
– Fewer for weight change
– Last digit off (reduced by 1 digit)
G Turn on the balance: Press e
> All segments of the display light up
briefly
G Configure the “Toggle between Weight
Units” application in the Setup menu:
Press M
G Select the configuration mode: Press
w (menu soft key)
G Set the parameter 2 1 2: See the chapter
entitled “Configuration”
G Exit the Setup menu: Press M
Setting Weight Unit 1
$ Access the Setup menu: select Menu
G Set the parameter for weight
unit 1 (1 7 2 through 1 7 20):
See “Configuration”
G Set display accuracy 1
(1 8 1 through 1 8 5) :
See “Configuration”
Setting Weight Unit 2
k Access Setup: select Menu
G Set the parameter for weight
unit 2 (3 1 2 through 3 1 20):
See “Configuration”
G Set display accuracy 2
(3 2 1 through 3 2 5):
See “Configuration“
G Exit the Setup menu: Press M
* = not applicable in balances verified for
use in legal metrology
33
Additional Functions
In addition to the functions for:
– alphanumeric input,
– taring
(not during alphanumeric input),
printing, you can also access the following functions from this application:
– calibration
(not during alphanumeric input),
– setup,
– turning off the balance.
Calibration/Adjustment
G Press q
> See “Calibration/Adjustment”
for further instructions
Setup (setting parameters)
G Press M
> See “Configuration” for further
instructions
Turning Off the Balance
G Press e
> The balance shuts off
> The display goes blank
Practical Example
Toggle the Display From Grams [g] (1st Unit) to Troy Ounces [ozt] (2nd Unit)
Step
Key (or instruction)
(R1: weight unit 1)
1. Toggle to Troy ounces [ozt]
(R2: weight unit 2)
ozt soft key v
2. Toggle to grams [g]
g soft key v
34
Display/Output
Counting Z
Purpose
With the Counting program you can
determine the number of parts that
each have approximately equal weight.
Available Features
– Reference sample quantity “nRef”
loaded from long-term memory when
you turn on the balance
– Optional balance configuration in the
Setup menu for automatically initializing this application and loading the
most recent reference sample quantity
“nRef” and average piece weight “wRef”
when you turn on the balance (automatic initialization; menu code 3 10 1)
– Minimum load checked when the
balance is initialized (factory setting:
10 display increments; can only be
changed by the Sartorius FastFactory)
– Reference sample quantity “nRef”
entered using the keys
– Average piece weight “wRef” entered
using the keys
– Storage parameter (level of accuracy
with which the average piece weight
“wRef” is stored) for piece count calculation can be configured
– Optional configuration for having the
piece count and average piece weight
output automatically via the data interface port after initialization or reference
sample updating while running the
Counting program (print application
parameters)
– Long-term storage of the last reference
sample quantity “nRef” entered
Factory Settings
Auto-start application (automatic
initialization with reference sample
quantity and average piece weight
loaded from long-term memory):
off (3 10 2)
Counting/percent parameter (accuracy
when storing average piece weights):
display accuracy (3 5 2)
Printout application parameters
(automatic output of application
parameters): off (7 1 1)
Preparation
To calculate a piece count, the average
weight of one piece must be known.
This average piece weight can be
entered into the Counting program in
one of three ways:
– The last reference sample quantity
entered is loaded and displayed when
you turn on the balance. Place the same
number of parts on the balance and
initialize the counting program;
– With automatic initialization switched
on, the balance goes into the “counting”
mode when you turn it on and loads
the last average piece weight and corresponding reference sample quantity
that were entered or calculated;
– Enter the average piece weight using
the numeric keys and store it.
Reference Sample Updating
When the updat soft key is displayed
during counting, this means you can
have the average piece weight updated
(while the piece count is displayed in
the measured value line).
– Long-term storage of the last average
piece weight “wRef” entered with the
corresponding reference sample quantity
“nRef,” by configuring automatic
initialization
The updat soft key is displayed when:
– the balance has reached stability
– Toggling between two weight units by
pressing w
– the current piece count is less than 100
– Counting program initialized again
after using the balance for weighing
(after initialization)
– the current piece count is less than
double the original piece count
– the internally calculated piece count
(e.g., 17.24 pcs) differs from the nearest
whole number (here: 17 pcs) by less
than 0.3
Reference sample updating can be
repeated several times with an approximately doubled piece count.
G To perform reference sample updating:
Press v (updat soft key)
G Turn on the balance: Press e
> All display segments light up briefly
G Select the Counting program in the
Setup menu: Press M
G Select menu:
Press the menu soft key (w)
G Set parameter 2 1 4:
See “Configuration”
G Exit the Setup menu: Press M
Setting Parameters for the Counting
Application
$ Access the Setup menu: Select Menu
G Set parameters for:
– Storage accuracy:
3 5 Count/pct. param.
– Automatic initialization:
3 10 auto-start app.
– Automatic output of parameters to
interface port:
7 1 Print app. param.
See “Configuration”
G Exit the Setup menu: Press M
–
–
–
–
–
–
Additional Functions
In addition to the functions for:
alphanumeric input,
taring
(not during alphanumeric input),
printing,
you can also access the following
functions from this application:
calibration
(not during alphanumeric input),
setup,
turning off the balance.
Calibration/Adjustment
G Press q
> See “Calibration/Adjustment” for
further instructions
Setup (setting parameters)
G Press M
> See “Configuration” for further
instructions
Turning Off the Balance
G Press e
> The balance shuts off
> The display goes blank
35
Practical Example
Counting with: Preset Reference Sample Quantity Weighed In
(Parameter settings: Counting program: 2 1 4; Print all parameters: 7 1 2)
Step
Key (or instruction)
1. Select the counting application
in the Setup menu
see “Preparation”
2. Prepare a container for the parts
Place the empty container
Display/Output
nref=10 pcs start
3. Tare the balance
on the balance
t
nref=10 pcs start
4. Place reference sample quantity
on the balance (example: 10 pcs,
each weighing 2.148 g)
Place the displayed number
of parts in the container
nref=10 pcs start
5. Initialize the balance
(the number of digits following
the decimal point depends
on the balance model)
start soft key v
wref=214800
.
6. If necessary, increase
number of parts and update
the reference sample
(here: 7 more pieces)
Place parts in container
updat soft key v
wref=214300
.
7. Weigh uncounted parts
Place parts to be counted
in container
wref=214300
.
8. If desired, print total piece count
(here: 153 pcs)
p
nRef
wRef
Qnt
36
+
+
+
10 pcs
2.14800 g
153 pcs
Weighing in Percent L
Purpose
This application program allows you
to obtain weight readouts in percent
which are in proportion to a reference
weight.
Factory Settings
Auto-start application (automatic initialization with reference percentage
and reference weight loaded from longterm memory): off (3 10 2)
G Turn on the balance: Press e
> All display segments light up briefly
Available Features
– Reference percentage “pRef” loaded
from long-term memory when you turn
on the balance
Counting/percent parameter (accuracy
when storing reference weights): display
accuracy (3 5 2)
G Select menu:
Press the menu soft key (w)
– Optional balance configuration in the
Setup menu for automatically initializing this application and loading the
most recent reference percentage
“pRef” entered with reference weight
“w100%” when you turn on the balance
– Minimum load checked when the
balance is initialized (factory setting:
10 display increments; can only be
changed by the Sartorius FastFactory)
– Reference percentage “nRef” entered
using the numeric keys
– Reference weight “Wxx%” entered using
the numeric keys
– Storage parameter (rounding-off factor)
for storing the reference weight
“W100%” to calculate the percentage
can be configured
– Configuration of decimal places displayed with a percentage
– Optional configuration for having the
reference weight “Wxx%” and reference
percentage automatically output via the
data interface port after initialization of
the weighing-in-percent program (print
application parameters)
– Long-term storage of the last reference
percentage “pRef” entered
– Long-term storage of the last reference
weight “W100%” entered, by configuring automatic initialization (auto-start)
– Toggle between two weight units by
pressing w
Number of decimal places displayed in
“weighing in percent” mode:
2 decimal places (3 6 3)
Printout application parameters (automatic output of application parameters): off 7 1 1)
Preparation
To calculate a value in percent, the reference percentage must be known. This
value can be entered into the weighingin-percent program in one of three
ways:
– The last reference percentage entered
is loaded and displayed when you turn
on the balance. Place the corresponding
weight on the balance and initialize the
weighing-in-percent program;
– With automatic initialization switched
on, the balance goes into the “weighing
in percent” mode when you turn it on
and loads the last reference percentage
entered as well as the corresponding
reference weight;
– Enter the reference weight using the
numeric keys and store it (W100% soft
key).
G Select the Weighing-in-Percent application in the Setup menu: Press M
G Set parameter 2 1 5:
See “Configuration”
G Exit the Setup menu: Press M
Setting Parameters for the
Weighing-in-Percent Application
k Access the Setup menu: Select Menu
G Set parameters for:
– Storage accuracy:
3 5 Count/pct. param.
– Decimal places displayed:
3 6 decimals f. calc.
– Automatic initialization:
3 10 auto-start app.
– Automatic output of parameters
to interface port:
7 1 Print app. param.
See “Configuration”
G Exit the Setup menu: Press M
Additional Functions
In addition to functions for:
– alphanumeric input,
– taring
(not during alphanumeric input),
– printing,
you can also access the following functions from this application:
– calibration
(not during alphanumeric input),
– setup,
– turning off the balance.
Calibration/Adjustment
G Press q
> See “Calibration/Adjustment”
for further instructions
Setup (setting parameters)
G Press M
> See “Configuration” for further instructions
Turning Off the Balance
G Press e
> The balance shuts off
> The display goes blank
37
Practical Examples
Example P1: Weighing in Percent with Reference Weight Taken from Weight on Balance
Step
Key (or instruction)
1. Select the weighing-in-percent
application in the Setup menu
see “Preparation”
2. Prepare a container for the parts
Place the empty container
on the balance
3. Tare the balance
t
4. Place the reference weight
on the balance
(here: 1821.48 g =100%)
Place weight equal
to reference weight in
the container
5. Initialize the balance
start soft key v
Display/Output
wxx%=182148
.
6. Unload the balance
Remove reference weight
from the container
wxx%=182148
.
7. Determine the percentage
of an unknown weight
Place sample to
be measured in the container
wxx%=182148
.
8. If desired, print percentage
(here: 98.37%)
38
p
pRef
Wxx%
Prc
+
+
+
100 %
1821.48 g
98.37 %
Example P2:
Weighing in Percent with Reference Weight Entered Using the Numeric Keys
Step
Key (or instruction)
1. Select the weighing-in-percent
application in the Setup menu
see “Preparation”
2. Prepare a container for the parts
Place the empty container
on the balance
3. Tare the balance
t
4. Enter the reference weight using
the numeric keys (here: 120 g)
120
Display/Output
W100% pref
5. Store the reference weight
W100% soft key q
6. Determine the percentage
of an unknown weight
Place sample to
be measured in the container
(in this case: 114.78 g)
s-id
39
Net-Total Formulation R
Purpose
With this application program you can
weigh in different components up to a
defined total. You can also print out the
total weight and the individual weights
of the components.
Preparation
G Turn on the balance
> All display segments light up briefly
G Select the Net Total application
in the Setup menu: Press M
Available Features
– Taring
G Select menu:
Press the menu soft key (w)
– Weighing different components
(maximum: 99 components) from “0”
to a defined total component weight
G Set parameter 2 1 6:
See “Configuration”
– Storing component weights
(“Store xx comp.”), with
– display zeroed after value stored, and
– automatic printout (print application
parameters);
either
– of the last component weight
(net value) or
– of the total weight (tare value)
– Display of the transaction counter
“XXth” (referring in each case to the
next component) in the soft key label
display
– Clearing of the component memory
when the weighing series is canceled
c and printout of the total weight
if you have configured the balance for
GLP-compliant printouts; otherwise,
printout of the net value p
– Toggling between component weight
and total weight by pressing w.
– ISO/GLP-compliant printout
of the total of the individual component weights (Tot.cp)
Factory Settings
Automatic printout when component
value stored: print net total (7 3 1)
40
G Exit the Setup menu:
Press M
Setting Parameters for the Net-Total
Application
k Access the Setup menu: Select Menu
G Set the parameter for automatic printout when component stored
7 3 Print net total
See “Configuration”
G Exit the Setup menu: Press M
Additional Functions
In addition to functions for:
– alphanumeric input,
– taring
(not during alphanumeric input),
– printing,
you can also access the following
functions from this application:
– calibration
(not during alphanumeric input),
– setup,
– turning off the balance.
Calibration and Adjustment
G Press q
> See “Calibration and Adjustment”
for further instructions
Setup (setting parameters)
G Press M
> See “Configuration” for
further instructions
Turning Off the Balance
G Press e
> The balance shuts off
> The display goes blank
Practical Example
Weighing in Several Components
(Parameter settings: Net-total application program 2 1 6; print all parameters 7 1 2)
Step
Key (or instruction)
1. Select the net-total application
in the Setup menu
see “Preparation”
2. Prepare a container for the
components
Place the empty container
on the balance
3. Tare the balance
t
4. Add first component
Place the first component
in the container
5. Store component value
1. comp soft key v
6. Add next component
Place next component
in the container
7. Store component value
2. comp soft key v
8. If desired, add further
components
Repeat steps 6 and 7
as needed
9. Display total weight
w
Display/Output
Comp1 +
952.48 g
Comp1 +
Comp2 +
952.48 g
2837.12 g
41
Animal Weighing V
Purpose
Use this program to determine the
weights of unstable samples (e.g., live
animals) or to determine weights under
unstable ambient conditions. In this
program, the balance calculates the
weight as the average of a defined number of individual weighing operations.
These weighing operations are also
known as “subweighing operations.”
Available Features
– Animal weighing started manually or
automatically
– Optional balance configuration in
the Setup menu for automatically
initializing this application when you
turn on the balance
– Minimum load threshold for starting
animal weighing:
– 100 display increments for automatic
start
– 50 display increments for manual start
Factory Settings
Auto-start application (automatic
initialization with automatic start of
animal weighing): off (3 10 2)
Animal activity (3 subweights lie within
a preset range; i.e., animal is calm,
normal or active): normal (3 7 2)
– printing,
you can also access the following
functions from this application:
Print animal weights (automatic printout of weighed or calculated result):
On: animal wt. (3 9 2)
– calibration (not during alphanumeric
input or after animal weighing has been
started),
Preparation
G Turn on the balance: Press e
> All display segments light up briefly
G Select the animal weighing application
in the Setup menu: Press M
G Select menu:
Press the menu soft key (w)
– Number of weighing operations for
calculation of an average mdef can be
set before the beginning of each animal
weighing operation
G Exit the Setup menu: Press M
– Arithmetic average displayed as a result
in the pre-set weight unit (identified by
the G symbol)
k Access the Setup menu: Select Menu
– Toggling between weighed and calculated results by pressing w
– Automatic output via the interface port:
– Number of weighing operations
mDef
– Multiplication factor Mul
– Automatic output of results via the
interface port:
– Weighing result x-Net
– Calculated result x-Res
– Stop limit: Unload threshold
(50 display increments)
– Return to weighing mode by unloading
the balance; i.e., when the load is below
the stop threshold
42
– taring
(not during alphanumeric input),
Start animal weighing:automatic (3 8 2)
Automatic printout of number of
weighing operations used in averaging
and of the calculation factors: off (7 1 1)
– Start range: Automatic start of animal
weighing operation when three successive subweights lie within a userdefined tolerance range (calm = 2%,
normal = 5%, active = 10%)
– Optional multiplication of the arithmetic
average by a user-defined factor mul.
A circle “o” is displayed as weight unit
and mul=xxxx is shown in the text line
Additional Functions
In addition to functions for:
– alphanumeric input (not when automatic start is configured or after animal
weighing has been started),
G Set parameter 2 1 7:
See “Configuration”
Setting Parameters for the Animal
Weighing Application
G Set parameters for:
– Start range:
3 7 Animal activity
– Start animal weighing
3 8 Start animal wgh.
– Printout of results and calculated
results:
3 9 Print animal wts.
– Automatic output to interface port:
7 1 Print app. param.
See “Configuration”
G Exit the Setup menu: Press M
– setup (not after animal weighing has
been started),
– turning off the balance.
Calibration/Adjustment
G Press q
> See “Calibration and Adjustment” for
further instructions
Setup (setting parameters)
G Press M
> See “Configuration” for
further instructions
Turning Off the Balance
G Press e
> The balance shuts off
> The display goes blank
Practical Example
See next page
Practical Example
Determining Animal Weight with Automatic Start of 20 Subweighing Operations for Averaging;
Automatic Printout of the Number of Subweighing Operations and of the Animal Weight
Step
1. Select the animal weighing
application in the Setup menu
Key (or instruction)
Display/Output
see “Preparation”
2. Set the following animal weighing
parameters in the Setup menu:
– Animal activity: Active
– Start animal weighing: Automatic
– Printout: On: anim.wt.*fact.
– Print: All parameters
Setting 3 7 3 in Setup menu
Setting 3 8 2 in Setup menu
Setting 3 9 3 in Setup menu
Setting 7 1 2 in Setup menu
3. Prepare a container (cage)
Place empty cage on
the balance
4. Tare the balance
5. Enter number of subweighing
operations for averaging
mdef= x10
start
mdef= x10
start
t
20
mul
6. Save number
mdef S-id
mdef soft key w
mdef= 20
7. Weigh the first animal
Place 1st animal in cage
weight value fluctuates due to animal activity
mdef= 20
8. Start automatic animal weighing
start
start
start soft key v
M =-20xxxxx---
43
Step
Key (or instruction)
The balance delays starting the
subweighing operation until three
successive subweights lie within
the range defined for an “active” animal
When this criterion is met,
the subweighing series begins
Display/Output
M =x20xxxxxxx
xxx19
xxx18
xxxx...
xxxx1
After 20 subweighing operations
(mdef: no. of subweighs)
Mul: Calculation factor
xnet arithm. average, net value)
mDef
Mul
x-Net
x-Res
8. Unload the balance
+
+
20
1
69.72 g
69.72 o
Remove animal from cage
mdef=x20
9. If desired, weigh next animal
auto
Place animal in cage
M =-20xxxxx--Next weighing series begins automatically
M =x20xxxxxxx
xxx19
xxx18
xxxx...
xxxx1
44
Checkweighing O
Over/Under Checkweighing O
Purpose
This program is used to check whether
a sample corresponds to a pre-set target
value or is within a specific tolerance
range. In addition to the display in the
measured value line, the results are
shown on the bar graph and can also be
routed through the interface port via
control lines for further electronic
processing.
Available Features
– Lower tolerance limit (minimum), target
value and upper limit (maximum) stored
in long-term memory
– Optional balance configuration in the
Setup menu for automatically initializing
this application and loading the values
stored in long term memory for the
target value and the upper and lower
tolerance limits when you turn on the
balance
– Enter target value and limits by placing
a load on the balance or using the
numeric keys
– Control in entering target and tolerance
values, so that the upper limit > the
target > the lower limit > 1 display
increment
– Toggling the display between weight
readout and control (checkweighing)
display by pressing v. If the weight
value exceeds tolerances, the measured
value line shows the weight while the
control display shows “LL” for “too
low” or “HH” for “too high.”
– Toggle the text line display between
weight value and control display, nominal value “setp” and tolerance values
“min” and “max” by pressing the w
key.
– Weight displayed on bar graph in relation to upper and lower limits and target value.
Factory Settings
Auto-start application (automatic
initialization with target value and
tolerance limits loaded from long-term
memory): off (3 10 2)
Automatic output of target value
and tolerance limits via the interface
port (print application parameters):
off (7 1 1)
Auto print +/– (automatic printout
of a weight when it is within the
control range at stability): off (4 2 2)
Control lines +/– on (activating data
output port lines):
Within control range (4 3 1)
– Optional automatic printout of weight
when it is within the control range at
stability (auto print +/-).
After an automatic printout, the balance is blocked. Before you can generate the next printout, you must unblock
the balance by unloading it (weight
must be under 30% of the target) or by
placing a load on the balance (bringing
the weight up to at least 170% of the
target).
– Press c to delete the initialization
parameters and end the over/under
checkweighing program
– Accuracy of a weight readout or keyboard input as target/tolerance value
stored corresponds to the display
accuracy
– Optional balance configuration in
the Setup menu for automatic output
to the interface port (print application
parameters) of target value and tolerance limits when initialization is
completed
– Control range for the balance’s data
output port lines is 30% to 170% of the
target value
– Control range can be set anywhere
from 10% to infinity. Control lines set
when stability is reached within the
control range; deleted only when you
exit this application
– Optional configuration in the Setup
menu for activation of control lines independent of weight value (weight
within control range, stability reached)
45
Preparation
The checkweighing program requires
a target value for comparison to the
current value. This target has a tolerance
range, which is defined by absolute
weight values: upper and lower limits.
These limits can be entered either by
storing weights on the balance or via
key input.
There are four control lines, called data
output port lines, which are activated as
follows: (see also the diagram at the
right):
– lighter
Response of Control Lines During Checkweighing
Configurations:
– always on
– activated at stability
Pin 16: lighter
Pin 17: equal
Pin 18: havier
Pin 19: set
– equal
30% of the
target
– heavier
Upper 170% of the
limit
target
Lower
limit
Target
– set
The control range spans 30% to
170% of the target value. You can configure this parameter in the Setup menu
(4 3 +/- ctrl ports on) to select
whether the control lines are:
– always on
– activated within the control range
Configurations:
– activated within control range
– activated at stability within control range
Pin 16: lighter
Pin 17: equal
Pin 18: heavier
– activated at stability
Pin 19: set
– activated at stability within the control
range
This makes it possible, for example,
to connect a simple indicator for the
weighing results (e.g., three different
colors, one each for the weighing
results: too light, O.K., too heavy).
30% of the
target
Lower
limit
Upper 170% of the
limit
target
Target
Output port specifications
– When not in use, the voltage level is high: >2.4 V/+2 mA
– When in active use, the voltage level is low: <0.4 V/–2 mA.
! The output ports are not protected against short circuits!
46
Control Line Response in
Checkweighing
–
Settings for
– always activated
– activated at stability
–
–
Settings for
– activated within checkweighing range
– activated at stability within checkweighing range
G Turn on the balance: Press e
> All display segments light up briefly
G Select the over/under checkweighing
application in the Setup menu:
Press M
G Select menu:
Press the menu soft key (w)
G Set parameter 2 1 8:
See “Configuration”
G Exit the Setup menu: Press M
Setting Parameters for the Over/Under
Checkweighing Application
k Access the Setup menu: Select Menu
–
–
–
Additional Functions
In addition to functions for:
alphanumeric input
(not during initialization),
taring
(not during alphanumeric input),
printing, you can also access the following functions from this application:
calibration
(not during alphanumeric input or
during initialization),
setup (not during initialization),
turning off the balance.
Calibration/Adjustment
G Press q
> See “Calibration and Adjustment” for
further instructions
Setup (setting parameters)
G Press M
> See “Configuration” for further
instructions
Turning Off the Balance
G Press e
> The balance shuts off
> The display goes blank
G Set parameters for:
– Automatic initialization when
balance switched on:
3 10 auto-start app.
– Automatic printout when weight
value is within limits and balance at
stability:
4 2 auto print +/– Control lines on:
4 3 +/- ctrl ports on
– Automatic output of initialization
values to interface port:
7 1 Print app. param.
– Signal direction for data output port
lines:
8 8 1 input or
8 8 2 output
See “Configuration”
G Exit the Setup menu: Press M
47
Practical Example
Checkweighing samples of 170 g, with an allowable tolerance of –5 g and +10 g. Printout of upper and lower tolerance limits.
Weighed values printed out automatically when stability is reached and weight is within the control range.
Step
Key (or instruction)
1. Select the checkweighing
application in Setup
see “Preparation”
2. Set the following checkweighing
parameters in the Setup menu:
– Auto print +/–: On: values in tol.
– Print app. param.: All parameters
See “Configuration”
3. Prepare a container for the sample
Place empty container
on the balance
Display/Output
plus/minusxxstart
4. Tare the balance
t
plus/minusxxstart
5. Enter initialization values
start soft key v
6. Store target value (here: 170 g)
Place ideal sample
in container
7. Store target value and
unload balance
setp soft key v
Remove ideal sample
from balance
8. Enter value for lower limit
(170 g – 5 g)
165
48
9.
Store lower limit value
min soft key v
10. Enter value for upper limit
(170 g + 10 g)
180
11. Store upper limit value
max soft key v
12. Weigh sample
(in this case 169.48 g)
Place sample in container
Setp
Min
Max
+
+
+
170.00 g
165.00 g
180.00 g
N
+
169.48 g
If the weight had been too low, the
display would have shown the following:
13. In this case, switch to net value
display (in this case: 163.28 g)
net soft key v
14. Weigh next sample (if any)
Place sample in container
49
Recalculation
Purpose
With this application program you can
compensate for over-poured components in formulation.
If a component is over-poured when
weighing in the individual formulation
components, the mixture already poured
cannot be used in its current composition. To avoid having to discard the
materials weighed, you can adjust the
proportions of the formulation to
compensate for the over-pour.
When you use this application,
the recalculation procedure is mainly
performed by the balance.
Available Features
– Individual components (up to 99)
weighed in with a readout showing
from “0” to the desired component
weight
– Transaction counter shows the next
component expected
– Weighed components are stored, followed by automatic printout and taring
– Additive weighing of components with
printout
– Toggle the display between component
weight and total formulation weight
(additive mode) after first component
is stored
– Stored component weight displayed
as true net weight for 2 seconds
– Enter a divisor before or during
component weighing. For example,
if the formulation has a total weight
of 100 g, enter the divisor 10 to weigh
in a total formulation of 1,000 g.
– If a component is over-poured, you
can use the recalculation function to
change the amount of this component
indicated in the formulation by using
plus or minus keys or numeric input.
A factor is then calculated by which all
components amounts are then adjusted.
Factory Settings
Print application parameters (automatic
output of application parameters):
off (7 1 1)
Line format: for other apps/GLP (7 2 2)
– Recalculation factor displayed in the
text line, with a warning symbol if the
factor is not equal to 1.
– All components displayed with number
and the amount (by weight) to be
added in follow-on filling. Components
displayed in sequence by the balance.
– Display of actual net weight during
follow-on filling
– After the amounts of the components
already weighed have been corrected,
weighing continues according to the
adjusted formulation amount.
The readout is recalculated (updated)
according to the divisor.
– You can repeat the over-pour correction
procedure as often as necessary, in case
other components are over-poured.
– After follow-on (corrective) filling,
the total amount differs from that given
for the formulation, but the proportion
of components in relation to each other
is the same.
– You can have the weight printed after
each measurement
Preparation
G Turn on the balance: Press e
> All display segments light up
G Select the Recalculation application in
the Setup menu: Press M
G Select menu:
Press the menu soft key (w)
G Set parameter 2 1 9:
see “Configuration”
G Exit the Setup menu: Press M
Setting Parameters for the Recalculation
Application
$ Access the Setup menu: Select MENU
G Set parameters for:
– Automatic printout:
7 1 Print app. para.
– Line format:
7 2 Line format
see “Configuration”
– Choose whether the current component
weight or the tare value is printed after
each measurement
G Exit the Setup menu: Press M
– Individual component weights are
printed as “Compxx.”
–
–
– Press c to exit the application
program. The component memory is
cleared and the sum of components
printed as “S-Comp.”
–
–
–
–
Additional Functions
In addition to the functions for:
alphanumeric input,
taring (not during alphanumeric input),
and
printing,
you can also access the following
functions from this application:
calibration
(not during alphanumeric input)
setup
turning off the balance.
Calibration/Adjustment
G Press q
> See “Calibration and Adjustment” for
further instructions
Setup (setting parameters)
G Press M
> See “Configuration” for
further instructions
Turning Off the Balance
G Press e
> The balance shuts off
> The display goes blank
50
Practical Example
When weighing in formulation components, the second component is over-poured.
(Parameter settings: Recalculation application: 2 1 9; Print all parameters: 7 1 2)
Step
Key (or instruction)
1. Select the recalculation
application in the Setup menu
see “Preparation”
2. Place container for filling
components on the balance
Place empty container
on the balance
Display/Output
store comp.1
3. Tare
t
store comp.1
4. Add the first component
Weigh the first component
into the container
store comp.1
5. Store component
Press the comp.1
soft key (v)
6. Add the second component
Weigh the second
component into the container
Comp1 +
27.08 g
recal. add. comp.2
7. Start recalculation, because
12.42 g were poured rather
than 12.30 g
recal soft key (q)
minus plus comp.2
8. Either press the minus
key to correct the value...
minus soft key repeatedly
minus plus comp.2
51
... or enter the desired value
12.30
comp.
9. Confirm the new value
or comp. soft key (w)
comp.2 soft key (v)
Comp1 +
Comp2 +
R.div +
sp.id
27.08 g
12.42 g
1.00975
The true net value is displayed
for 2 seconds
store comp.2
Follow-on filling amount for
first component is displayed
r.div.=1.00975 comp.1
10. Follow-on filling of 1st component
up to 0 and store
Weigh the first component
comp.1 soft key (v)
Comp1 +
Comp2 +
R.div.+
RCom1 +
27.08 g
12.42 g
1.00975
27.34 g
The true net value is displayed
for 2 seconds
actual net. comp.1
11. Weigh in further components,
if called for in the formulation
Repeat steps 4 and 5
as needed
12. Toggle to the additive mode,
if required
add. soft key (w)
recal. comp. add.6
13. Add further components,
as required ...
(here, e.g., up to the total weight
of the formulation: 1,000 g)
Add components to container
recal. comp. add.6
52
14. ... and store
(here, e.g., the 6th component)
add.6 soft key (v)
Comp1 +
Comp2 +
R.div.+
RCom1 +
Comp3 +
Comp4 +
Comp5 +
Comp6 +
27.08
12.42
1.00975
27.34
18.39
31.49
107.50
812.61
g
g
g
g
g
g
g
The true net value (of the 6th
component) is displayed for
2 seconds
actual net. Comp.6
Then the total weight is displayed
recal. comp. add.7
15. End the weighing procedure
Total weight is printed
c
Comp1 +
Comp2 +
R.div.+
RCom1 +
Comp3 +
Comp4 +
Comp5 +
Comp6 +
Tot.cp+
27.08
12.42
1.00975
27.34
18.39
31.49
107.50
812.61
1009.75
g
g
g
g
g
g
g
g
Total weight is displayed
Component memory is cleared
recal comp.1
53
Data Output
There are 3 options for data output:
– Output to the display/control unit
– Output to a printer (generate a printout)
– Output to a peripheral device (e.g., computer) via the interface port
Line for metrological data
Bar graph
Weight
Measured value line
unit display
Symbol display
Text line
Output to the Display and Control Unit
The display is divided into 6 sections:
– Line for metrological data
– Bar graph
– Measured value line
– Weight unit display
– Symbol display
– Text line
Line for Metrological Data (when used as a legal measuring instrument)
This line shows:
Max4200 g
– Maximum balance capacity (e.g., 4,200 g)
Min 0.5 g
– Minimum balance capacity; the weight must not go below this limit when
the balance is used in legal metrology (e.g., 10 g)
e= 0.1g
– Verification scale interval of the balance; irrelevant if the balance is not used in legal
metrology (e.g., 0.1 g)
d=0.01g
– Readability: Indicates the actual scale interval (display increment of the balance)
(e.g., 0.01 g)
Bar Graph
In the bar graph, weighing results are displayed either
– as a percentage of the maximum balance capacity, or
– in relation to a target value, with tolerance limits indicated.
Measured Value Line
This line displays:
1234.56
01-30-09
-96-abc1
54
– The current weight readout
(digits bordered with a broken line are invalid in use for legal metrology)
– Information on the balance and display and control unit (e.g., version numbers)
– Data entered by the user (e.g., lot number)
kg
pcs
NET A
o
Weight Unit Display
This line shows:
– Current weight unit (e.g., kg)
– Designation of other units of measure (e.g., piece count)
– Operating status (e.g., net weight; printing)
– Identification of currently selected menu item
Symbol Display
This line shows:
isoCAL
LZVOR
– Indicators and warnings (e.g., isoCAL)
– Symbol of application program selected
Text Line
This line contains:
reprotest
info
menu
input
n
n
n
– Explanatory text for value displayed in measured value line
– Designation of current function of the soft keys (below the arrows)
– Arrows indicating the soft keys designated above
Display of “Longer” Values
You can enter values up to 20 characters in length (e.g., identification numbers).
These are displayed in the measured value line; this line, however, can only show up to 8
characters at a time.
When a 20-character value is displayed, for example, the last 8 characters (13 through
20) are displayed first (in this example, the ID number is:
“Shelf 5, carton 4020”).
elter 25
((_____id________
The text line displays the name of the value (“ID”) and an arrow indicating
the direction of the characters not displayed.
l 5 beha
((_____id______))
Display characters 5 through 12: Press x
rega
_____id______))
Display characters 1 through 4: Press x
55
Printing a Data Record
Purpose
You can generate a printout of weights,
other measured values and identification
numbers for documentation purposes.
You can format the printout to meet
individual requirements.
Available Features
Print manually/automatically:
To print the information contained in
the measured value line (weight readout, calculated value, numeric entry,
alphabetic entry)
Factory Settings
Print manually/automatically: Printout
generated manually (by pressing p)
or automatically, depending on stability
parameter:
Manual after stability (6 1 2)
Line format: You can configure a data
ID code of up to 6 characters for each
of the values printed; this data ID code
is printed at the beginning of the line
Line format:
A data ID code of up to 6 characters
preceding weighed or calculated values:
For other applications/GLP (7 2 2)
Sample ID: You can configure an extra
line for identification of each weighed
or calculated value
Print application parameters:
Print one or more of the initialization
values for the current application program: Off (7 1 1)
Print application parameters:
You can generate a printout of the values configured for initialization of an
application before printing the measured results
ISO/GLP-compliant printout:
To print out parameters relating to
weighing conditions
Auto print: To have a printout generated
automatically when certain conditions
are met, e.g., time elapsed, stability
reached, etc.
Print net-total: For a printout of a
component or total weight when using
the “net-total” application
Print animal weights: For an automatic
printout of animal weight, or of animal
weight plus calculated weight after
averaging
Auto print +/–: for automatic printout
of a weight when it lies within preset
limits at stability
ISO/GLP-compliant printout/data
record: Documentation of weighing
conditions for each series of measurements/each lot: Off (8 10 1)
Auto print:
Automatic printout of weighed/
calculated values:
– not a factory setting; see “Print
manually/automatically” (6 1 2)
– Not possible to stop by pressing p
(6 2 2)
– After 1 display update (6 3 1)
Print net-total:
Printout of component weight (net
weight) or total weight (tare weight):
Auto print net (7 3 1)
Print animal weights:
Automatic printout of animal weight, or
of animal weight plus calculated result:
On: animal wt. (3 9 2)
Auto print +/–:
Automatic printout of weights when
within tolerance at stability: off (4 2 2)
G Parameter settings:
See “Configuration”
56
Print Manually/Automatically
The printout contains the current
value in the measured value display
(weight readout with weight unit;
calculated value; numeric/alphabetic
display)
Line Format
The current value displayed can be
printed with a data ID code of up to 6
characters at the beginning of the line.
You can use this data ID code, e.g.,
to designate a weight readout as a net
weight (N) or a calculated value as a
piece count (Qnt)
+ 1530.000 g
+ 58.5620 ozt
+
253 pcs
+
88.23 %
+
105.78 o
Weight in grams
Weight in Troy ounces
Piece count
Percentage
Calculated value
ID
L ID
ABC123DEF456GH
ABC123DEF456GH
W ID
N
Qnt
Prc
Nom.
ABC123DEF456GH
+ 1530.000 g
+
253 pcs
+
88.23 %
+ 2000.00 g
Identification number*
Lot number (weighing series)*
Weight set number*
Net value
Quantity
Percentage
Exact calibration weight
* = only on ISO/GLP-compliant printouts
Sample ID
You can have each weighed or calculated
value that you print preceded by a line
of text containing numbers and/or
letters. You can either print this ID
immediately as an alphanumeric input
(press p) or store it as the sample ID
(S ID soft key)
Print Application Parameters
You can generate a printout of one
or more of the values configured for
initialization of an application as soon
as you initialize the balance. This can
include such values as nRef, wRef,
pRef, etc.
S ID
ABC123DEF456GH
ABC123DEF456GHI789JK
NUM
12345678
nRef
wRef
pRef
Wxx%
mDef
Mul
Setp
Min
Max
N1
T2
Comp7
Sample ID
(with less than 14 characters)
Sample ID
(with more than 14 characters)
Numeric key output when p is pressed
10
1.23456
80
1200.00
10
pcs
g
%
g
0.00347
+ 1000.035 g
+ 981.054 g
+ 1020.063 g
+
278.11 g
+ 1821.48 g
+
278.11 g
Tot.cp+
Counting: Reference sample quantity
Counting: Average piece weight
Weighing in percent: Reference percentage
Weighing in percent: Reference weight
Animal weighing:
Number of subweighs for averaging
Animal weighing: multiplication factor
Over/under checkweighing: Target weight
Over/under checkweighing: Lower limit
Over/under checkweighing: Upper limit
Net-total: net weight
Net-total: tare weight
Net-total: weight of 7th component
Net-total: total weight of components
(only for ISO/GLP-compliant records)
2117.56 g
57
Auto Print
You can have the weight readout
(or the value displayed in the measured
value line) printed automatically; this
printout can be generated after a certain number of display updates; you
can also configure whether or not the
auto-print function is dependent on the
stability parameter. The display update
frequency depends on both the model
of the balance and the current operating state.
N
S-ID
Stat
Stat
Stat
+ 1530.00 g
12345678901234
L
H
Comp1 +
1821.48 g
Net weight
Sample ID
Display blank
Display underload
Display overload
First net weight
Print Net-Total
When you run the net-total application,
you can have the weight of the last
component weighed (net value) or the
total weight (tare value) printed automatically.
mDef
Print Animal Weights
When using the animal weighing
application, you can have the results
printed automatically upon completion
of the averaging process. You can also
have both the weight and the calculated
result printed.
Auto Print +/–
With the over/under checkweighing
application, you can have the result
printed automatically if it lies within
a defined range (acceptable value).
Data Output Functions
Printing a Data Record
Print for use in legal-for-trade applications:
You can configure the scale operating
menu to generate a printout that
conforms to the regulations for use in
legal metrology (last digit marked) on
a Sartorius printer:
– YDP01IS: 5 5 4
– YDP02:
555
– YDP03:
556
58
10
Mul
x-Net +
x-Res +
N
Setp
Min
Max
N
+
+
+
+
+
0.00347
1530.00 g
5.30 o
1530.000
1000.035
981.054
1020.063
1010.147
g
g
g
g
g
Number of subweighs for averaging
Multiplication factor
Result of averaging
Calculated result
Net weight
Target weight
Lower limit
Upper limit
Printout of acceptable values
–
–
–
–
–
–
–
–
–
–
–
–
–
ISO/GLP-compliant Printout/Record
You can have the parameters pertaining
to the ambient weighing conditions
printed before (GLP header) and after
(GLP footer) the values of a weighing
series.
These parameters include:
Date
Time at the beginning of a weighing
series
Balance manufacturer
Balance model
Model serial number
Software version
Lot ID (weighing series no.)
Time at the conclusion of the weighing
series
Field for operator signature
Operating the Balance with an
ISO/GLP-capable Documentation Device
(Printer)
You can connect a special printer from
Sartorius to your balance for printing
ISO/GLP-compliant records.
This printer, called “Data Printer” (order
no.: YDP03-0CE), offers the following
features:
ISO/GLP function can be switched on
and off
Date/time
ID no. for identification of workstation/
operator
Documentation includes balance-specific
data
-------------------28.06.1997
16:12
SARTORIUS
Mod.
GPC65
Ser.-Nr.
60419914
Vers.-Nr.
01-30-09
ID
12345678901234
-------------------C-ID 12345678901234
nRef
10 pcs
wRef
1.35274 g
Qnt
+
235 pcs
Qnt
+
4721 pcs
S-ID 12345678901234
Qnt
+
567 pcs
-------------------28.06.1