1
HVN93 Product Focus
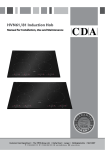
Four zone linear induction hob
Induction hobs excel in terms of their cooking speed and efficiency, as
the technology used transfers heat to the pan itself by electromagnetic
induction; this reduces the losses associated with heat escape and leads
to a reduction in the surface temperature of the hob, when compared with
other types. With good quality induction compatible pans the efficiency of
an induction hob can be as high as 85%.
The HVN93FR has a linear design, meaning that its four cooking
zones are accessible and completes the CDA linear collection
offering this style in gas, ceramic and induction cooking
options. The linear induction hob works beautifully with the 3D9
downdraft extractor, creating a sleek and flowing design.
3D9 Downdraft extractor and HVC93 linear hob
3D9 Downdraft extractor
HVN93 Four zone linear induction hob
Visit our website at www.cda.eu to find your nearest stockist
HVN93 Product Focus
Four zone linear induction hob
FEATURES EXPLAINED
As with all CDA induction hobs, the HCN510 is packed full of features to ensure the best cooking experience,
and to give you peace of mind whilst cooking and when not in use. These features include:
Residual heat indicators
Despite the comparative lack of
heat after cooking on an induction
hob, CDA induction hobs are
still equipped with residual heat
indicators to warn when a zone
is hot after use. These switch on
automatically when the zone is
switched off, and stay on until the
zone reaches a safe temperature
to touch.
Booster
Whilst induction is the most
efficient way to cook on a hob, the
booster function on each zone
makes cooking even quicker,
increasing the power level by 33%
for a maximum of 5 minutes.
Timer
Offering even more flexibility, the
HVN93FR has a timer that can be
set to switch off a cooking zone
automatically
Auto safety switch off
To prevent damage to the hob,
each zone is equipped with a
temperature sensor. This sensor
will automatically switch off the
zone if it reaches too high a
temperature to allow the zone to
cool down.
Induction compatible pans
The only specific requirement for
cooking on an induction hob is that
only ferromagnetic pans will work
(A fridge magnet will stick to the
base of the pan if it is compatible
with induction hobs). High quality,
flat based pans work best with
induction and these will also give
the best efficiency in use, and new
pans will carry this symbol on the
packaging to show they can be
used.
Safety key lock
For peace of mind when
unattended, all CDA induction
hobs have a safety key lock
which switch off the control panel
completely. The key lock can be
used when the hob is switched
off but also during use to prevent
accidental changes to your
cooking plans.
Visit our website at www.cda.eu to find your nearest stockist
HVN93 Induction Hob
Manual for Installation, Use and Maintenance
Passionate about style
1
: 01949 862 012 F : 01949 862 003 E : [email protected] W : www.cda.eu
Important
The CDA Group Ltd cannot be held responsible for injuries or losses caused by incorrect use or installation of this product. Please
note that CDA reserve the right to invalidate the guarantee supplied with this product following incorrect installation or misuse
of the appliance or use in a commercial environment.
This appliance is not designed to be used by people (including children) with reduced physical, sensorial or mental capacity, or
who lack experience or knowledge about it, unless they have had supervision or instructions on how to use the appliance by
someone who is responsible for their safety.
Under no circumstances should any external covers be removed for servicing or maintenance except by suitably qualified
personnel.
Appliance information:
Please enter the details on the appliance rating plate below for reference, to assist CDA Customer Care in the event of a fault with
your appliance and to register your appliance for guarantee purposes.
Appliance Model
Serial Number
CE Declarations of Conformity
This appliance has been manufactured to the strictest standards and complies with all applicable legislation, including Electrical
safety (LVD) 2006/95/EC and Electromagnetic interference compatibility (EMC) 2004/108/EC. Parts intended to come into
contact with food conform to 89/109/EC.
IMPORTANT INFORMATION FOR CORRECT DISPOSAL OF THE PRODUCT IN ACCORDANCE WITH EC DIRECTIVE
2002/96/EC.
At the end of its working life, the product must be taken to a special local authority waste collection centre or to a dealer
providing appliance recycling services.
Disposing of a household appliance separately avoids possible negative consequences for the environment and health. It also
enables the constituent materials to be recovered, saving both energy and resources. As a reminder of the need to dispose of
household appliances separately, the product is marked with a crossed-out wheeled dustbin.
Please note:
s Induction hobs become hot and remain hot during and immediately after use. Do not touch the hob until it has been allowed
to cool.
s Keep children away from the appliance when in use.
s Never use the hob top for storage.
s Pan handles should never stand out beyond the edge of the worktop. This will ensure children cannot reach them.
s Do not lean over the hob when it is in use.
s Follow the cleaning instructions carefully.
s Ensure the base of the saucepan is clean and dry before placing it on the hob.
s Avoid hard shocks from cookware – the vitroceramic glass surface is highly resistant but not unbreakable.
s Do not place hot lids flat on the hob top. A “suction” effect could cause damage to the hob.
s Do not drag cookware across the hob top: in the long term, this could cause damage to the hob.
s Do not store cleaning or flammable products in the unit below the hob.
s Always use appropriate cookware.
2
s Do not cook unopened tins of food directly on the hob.
s Never put cooking foil or plastic materials on the ceramic surface when the hob is hot. These materials could melt
and cause damage to the hob.
s This hob (Class 3) has been designed for use only as a cooking appliance. Any other use should be considered
incorrect and therefore dangerous.
FOR THOSE WITH HEART PACEMAKERS OR ACTIVE IMPLANTS:
The function of this hob conforms to current electromagnetic interference standards and thus is in total compliance
with legal requirements (2004/108/CE directives).
To avoid interference between your hob and a pacemaker, your pacemaker must be designed and programmed in
compliance with the regulations that apply to it. As such, CDA guarantee only that our product is compliant.
With regard to the compliance of the pacemaker or any potential incompatibility, you should obtain information from
the manufacturer or your attending physician.
Important
s Do not use the hob if the glass surface is cracked or damaged to prevent the risk of electric shock. Disconnect it
from the power supply.
s Ensure that the power cable of a connected electrical appliance near the hob is not in contact with the
cooking zones.
Cooking on Induction
The principle of induction cooking is based on magnetic effect.
When you put your cookware on an induction zone and switch it on, the electronic boards in the hob produce induced
currents in the base of the cookware and instantly raise its temperature. This heat is then transferred to the food inside
the cookware.
The best cookware to use with induction cooking has thick flat bases, as the heat will be better distributed so cooking
more evenly.
Most cookware is compatible with induction cooking.
There are three ways to check the suitability of your cookware:
1. Using a magnet to see if the base of the pan is magnetic: if three magnet sticks, then the cookware is compatible.
2. Place the pan on one of the cooking zones and switch the zone on. If the display continues to show the selected
power level then the cookware is compatible. If the display shows , the cookware cannot be used on an
induction hob.
3
Using your Hob
Using your Hob
To switch the zone on
s To switch the power on, touch and hold
show 0.
for approximately two seconds. The hob will beep and all four zone displays will
Please note: If a power level is not set within twenty seconds, the hob will switch off automatically.
2
To set the power level
s
4
s
Touch the zone display for the required zone. The hob will beep and the zone display will show a .(dot) in the bottom
right corner.
Then touch the slider control at the required point, or move up or down the slider until the zone display shows the required
power level from 1 (minimum) to 9 (maximum).
Please note: After zone selection, the zone will remain active for approximately ten seconds. If no key is touched during this
time, the zone will become inactive, and the hob will switch off automatically after a further ten seconds if no zones are in use.
To turn the power off
9
s
Control panel:
1.
2.
3.
4.
5.
6.
7.
8.
9.
10.
Front left 2.3-3kW 200 mm
Centre left 1.4 kW 160 mm
Centre right 1.4 kW 160 mm
Front right 2.3-3kW 200 mm
Power key
Slider control
Booster key
Pause/restart key
Timer key/display
Zone key/displays
10
10
s
Booster
s
5
Fig.1
6
7
The hob is equipped with a booster function on the front left and front right zones, allowing a higher power level than the
maximum for approximately five minutes. To turn on the booster function, touch the zone display for the required zone then
touch . P will show in the zone display whilst the booster is on. To cancel the booster at any time, touch the zone display to
activate the slider, then set the required power level.
8
Auto-heat
The table below offers guidance to each power level:
Power level
4
To switch off a single zone, touch the zone display to make the slider active for the required zone, then set the slider to 0
for the zone no longer required. When all the zones are at 0, the hob will switch off automatically after approximately
twenty seconds.
Alternatively, to switch off the hob immediately, touch and hold
for approximately two seconds.
s
Type of cooking
0
Switched off
1/2
For melting (butter/chocolate) or keeping food warm
2/3
Keeping food hot or to heat small quantities of liquid
3/4
Heat larger quantities of liquid (sauces etc.)
4/5
Slow boiling, e.g spaghetti, soups, stews, potatoes
6/7
Gentle frying
7/8
Browning meats, frying fish, omelettes
9
Fast frying steaks
s
s
s
Every zone is equipped with an auto-heat function, which reduces the warming up time for the zone. To turn on the autoheat function, touch the zone display for the required zone, then set the power level to 9 using the slider control.
Touch the 9 position on the slider control again and the display will alternate between 9 and A.
Then select the power level required. The display will alternate between the set power level and A for a preset period of
time, before reducing the power to the level required.
If no final power level is set, the auto heat is switched off and the zone will remain on power level 9.
5
Timer/minute minder
Safety key lock
The hob is equipped with a timer that allows a finish time to be set for the end of cooking on any zone, between a minimum
of one minute and a maximum of 99 minutes. This timer can be used separately for each zone, and an LED will indicate the
zone positions for each of the active timers. Once the timers are set, the timer display will show the time remaining on the
first zone to finish cooking. The timer can also be used as a minute minder to countdown the time when the zones are not in use.
To prevent accidental use, the hob has a safety key lock which switches off the slider control temporarily or completely.
To set the timer
To switch off the lock whilst the hob is in use, but automatically switch back on once the hob is switched off, turn on the hob,
touch the front right zone display and
simultaneously, then touch the front right zone display. All zones will display 0 and the
hob can now be used as normal.
s
s
s
s
First switch on the hob and set the zone to the power level required.
Touch the timer display. The display will show 0- for approximately ten seconds and the timer display LED will illuminate for
the required zone. If no timer is set, the timer display will become inactive and the zone will continue cooking.
Touch the slider control to set the minutes between 0 and 9. The selection will confirm in approximately 2 seconds, and the
display will show – and the minutes set.
Touch the slider control again to set the tens of minutes between 1 and 9. The selection will confirm in approximately 2
seconds, the timer display will show the timer set and the countdown will start.
To switch on the lock, turn on the hob, touch the front right zone display and
simultaneously, then touch the front right zone
display again. All zones will display L before the hob switches off automatically.
To switch off the lock completely, turn on the hob, touch the front right zone display and
hob will switch off automatically but can now be used as normal
simultaneously, then touch
The
At the end of the timer, the selected zone will switch off and the timer display and the zone timer LED will flash. The hob will
beep for approximately two minutes. To switch off the beep and the flashing displays, touch any key.
Please note: the power level can be adjusted during the countdown using the slider control
To cancel the timer
s
Touch the zone display for the required zone, and then the timer display. The timer display will show 0- and the LED will flash
for approximately ten seconds, then the timer will switch off.
Please note: Cancelling the timer will not switch off the zone. You should switch the zone off manually if required.
The timer can also be used as a minute minder when the hob is not in use. Turn the hob on, and then follow the steps for setting
the timer without first switching on a zone.
Pause/restart
The hob is also equipped with a pause/restart function which pauses cooking and timer countdowns temporarily without switching the power off completely. The hob can be paused for a maximum of ten minutes before automatically switching off. To pause
the hob, touch
and to restart cooking, touch
and then any zone display.
Recall
If the hob is switched off accidentally, it is possible to switch the hob back on quickly and return to the previous cooking settings.
Touch
within six seconds of the hob being switched off. If recall is available, the LED over
will be illuminated. Touch
within six seconds and the previous cooking programmes will resume.
6
7
Efficient Use of your Hob
Care and Maintenance
The hob is equipped with zones of different sizes, designed to accommodate most shapes and sizes of pan. For best results, only
use pans with flat bottoms and choose an appropriate zone depending on the size of the pan. The most efficient use of the hob is
shown below, where the pan and zone are correctly chosen.
Always disconnect the appliance from the power supply before undertaking any cleaning or maintenance.
Use pan lids where possible to minimize the energy usage of your appliance.
Important:
s Steam cleaners must not be used when cleaning this appliance.
s You should use a non-abrasive cleaner to clean the hob top. Any abrasive cleaner (including Cif) will scratch the surface and could
erase the control panel markings.
s Sugar and starch can cause permanent damage to the surface of the hob. Wipe away any spillages immediatly.
Types of residues
Clean with
Cleaning advice
Light
Cleaning sponge and soft cloth
Wipe over the zone to be cleaned with a sponge and hot
water, and then wipe off with a soft dry cloth.
Accumulated baked-on stains/
dirt, sugar spills or melted plastics
Cleaning sponge or glass scraper
and soft cloth
Wipe over the zone to be cleaned with a sponge and hot
water, using a ceramic scraper to remove any large marks
or stains and then wipe off with a soft dry cloth.
Rings and hard water residues
White vinegar and soft cloth
Pour a small amount of warm white vinegar onto the stain,
leave it to stand, and then wipe off with a soft dry cloth.
Shiny metallic streaks
Cleaning agent for vitroceramic
glass etc.)
Use specialist vitroceramic glass cleaner (preferably one
with silicone for its protective properties)
9
fast frying steaks
Fig.2
Zone Size
Minimum Pan Size (mm)
Maximum Pan Size (mm)
160mm
100
180
200mm
180
240
It is very important that the pans used on the hob are made of a suitable material and have the correct type of base. The base of
the pan must be clean and dry before use to prevent any scratches on the hob top.
If your Hob is not working:
1. Check that the control knob is switched on.
2. Check that the mains supply has not been switched off.
3. Check that the fuse in the spur has not blown.
In the event of a fault with the hob, please advise CDA Customer Care of any fault code shown on the display
Contact CDA Customer Care
A : Customer Care Department, The CDA Group Ltd, Harby Road, Langar, Nottinghamshire, NG13 9HY
T : 01949 862 012 F : 01949 862 003 E : [email protected] W : www.cda.eu
8
9
Troubleshooting
Troubleshooting
On first use
In use
You observe that
Possible Causes
What should you do?
You observe that
Possible Causes
What should you do?
The display shows a series of digits and
symbols on first connection
Working normally
Nothing, the hob will be ready to use
within approximately 30 seconds
There was an overflow or an object is in
contact with the control panel
Clean the hob or remove the object,
and begin cooking again
Installation blows a fuse or
only one side of the hob works
The electrical connection of the hob
is incorrect
Check that it is set up properly (see the
Electrical Connection section)
The hob has stopped operating. The
hob beeps and ER03 is displayed on
the zone display
The hob produces an odour during the
first cooking sessions
New appliance
Heat a saucepan full of water on each
cooking zone for 30 minutes
The hob has stopped operating and
the display shows E2, ER21 or ER40
The electronics have overheated
Allow the hob to cool down.
See the Installation section to check the
ventilation requirements have been met
9
fast frying steaks
You observe that
Possible Causes
What should you do?
After turning on a zone, the zone
display shows
The cookware used is not suitable for
induction or is less than 11cm on the 160mm
zones, or 145mm on the 200mm zones
See the section on cookware for
induction
The hob does not work and the lights on
the control panel do not switch on
The hob is not connected to the power
supply or the power supply is faulty
Check the electrical circuit breaker and
fuses
This is normal with some types of cookware.
This is caused by the transfer of energy from
the hob to the cookware
Nothing. There is no risk, neither to
your hob nor to your cookware
The hob is not working and the display
shows a non-standard graphic
The electronics are not functioning
correctly
The saucepans make noise
during cooking or your hob makes a
clicking sound during cooking
Call CDA Customer Care
The fan continues to function for a few
minutes after the hob is turned off
Nothing.
The hob is not working and the display
shows
Cooling of the electronic components.
Working normally
The safety key lock is on
Switch off the safety key lock (see page 7)
On switching on
fast frying steaks
Should any error code other than those listed above show on the zone displays, contact CDA Customer Care for
assistance
iMPORTANT - PLEASE NOTE: In the event of any breakage, crack or cracking – even minimal – of the vitroceramic glass,
immediately disconnect your appliance to prevent a risk of electric shock and contact CDA Customer Care.
10
11
Fitting the Hob
Notes:
s The hob is equipped with an anti-overheating safety device that can
be activated if the hob is installed over an oven that is not sufficiently
ventilated. In the event that this occurs, the control panel will show E2,
ER21 or ER40. We recommend that you increase the ventilation of the
hob by creating an opening in the side of the cabinet (8 cm x 5 cm).
Unpacking the hob:
Take care not to lose or mishandle any parts.
Fitting position of the hob:
This appliance must be installed a minimum of 50mm from any back wall
and a minimum of 180mm away from any adjacent vertical surfaces, e.g.
a tall cupboard end panel. This may be reduced to 100mm if the adjacent
surface is resistant to fire (tiles or steel, for example). These dimensions are
shown in Fig.7.
min 4mm
51
51mm
mm
Ventilation requirements:
This appliance must be installed to allow air to flow freely to the air intake
and from the air outlet. Failure to allow sufficient ventilation could cause
damage to the hob and constitutes incorrect installation, which is not
covered by the warranty.
30mm
mm
30
s Ensure that the top rail is removed prior to installation, and that
no unit cross member is blocking the air outlets.
s If the hob is to be located above a working drawer, we recommend that
the drawer is not used for storing soft items, for example dusters or
towels; this is to minimize the risk of the cooling system air intakes being
obstructed.
Above an oven
Fig.5
How to install the hob
Overall dimensions of the hob:
If fitting a cooker hood above the hob:
If a cooker hood is to be installed above the hob, the height of the hood
above the hob must be at least 600mm (650mm is recommended) (Fig.6).
If the instructions supplied with the hood dictate that the hood must be
installed at a height greater than 600mm, then that height is the minimum
required.
51 mm
Wall furniture requirements:
The minimum height of any cabinet immediately above the hob is 900mm.
The minimum height of any adjacent units (including light pelmets) is
400mm, unless they are manufactured from a material resistant to fire (steel,
for example)
40 mm
1. Make the required hole in the worktop. Before doing this, you must
check the instructions supplied with any cooker hood to ensure that you
will have the required clearance. The cut-out (Fig.7) shows a 60mm gap
from the wall to the cut-out edge. The distance from the hob, when
fitted, to the back wall is 50mm.
600mm
400mm
Width: 900 mm Depth: 350 mm
Worktop cut-out dimensions:
Width: 880 mm Depth: 330 mm
Fig.6
If a splashback/worktop upstand is to be fitted, take this into account when
cutting the hole. The minimum distance that the hob should be positioned
away from the rear wall or splashback is 50mm.
Fig.3
350
510
900
930
Notes:
s Do not position this appliance above a refrigeration unit. The heat
generated may cause the refrigeration unit to fail.
2. Fix the foam seal underneath the appliance by following the outline of
the worktop upon which the hob will rest. This ensures an airtight seal
with the worktop. Do not use silicone type sealant.
s This appliance is designed to be installed into cabinet units capable
of withstanding temperatures of 65°C or greater above ambient
temperature.
50
65
330
490
40
880
900
60
A
40
40 tion
ila
nt ce
ve spa
s Never place perishable foods, cleaning products or flammable items in
the cupboard below the appliance.
Fig.7
~ 2 mm
s If an oven is to be installed below the hob, the thermal safety system on
the hob will not allow the hob to be used at the same time as a pyrolytic
programme on the oven.
Fig.4
12
13
Mains Electricity Connection
Warning! this appliance must be earthed
We recommend that the appliance is connected by a qualified electrician,
who is a member of the N.I.C.E.I.C. and who will comply with the I.E.E. and
local regulations.
This appliance is intended to be connected to fixed wiring and is not
suitable for connection to a 13a plug or 13a supply.
This appliance is intended to be connected to fixed wiring by a double pole
switch, having a contact separation of at least 3mm in all poles. The switch
must be positioned no further than 2m from the appliance.
Please note:
Fig.8
s The mains cable must only be replaced by a qualified electrician or
service engineer and must be of equivalent or better rating (i.e. 2.5mm2,
HO5RR-F).
s This appliance is intended to be connected to the mains supply with
a cable of cross section area 2.5mm2. A larger cable will not fit the
terminal connections.
s The marking of the current rating of the fuse or circuit breaker protecting this
appliance should be marked on the socket outlet.
s Assembly and electrical connection should be carried out by specialised
personnel.
s When installing this product we recommend you seek the help of
another individual.
s Ensure that the brass links are securely fitted. Failure to do so will
prevent the hob from operating correctly.
14
15
To contact our Customer Care Department, or for Service,
please contact us on the details below.
Passionate about style
16
: 01949 862 012 F : 01949 862 003 E : [email protected] W : www.cda.eu