1
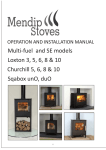
Mendip 8 Multi Fuel Boiler standard and pedestal models 8kW (5.3 water, 3.4 Space) OPERATION, INSTALLATION, COMMISSIONING & SERVICING INSTRUCTIONS Please read these instructions carefully before installing, commissioning and using this appliance. To be retained by the householder HEALTH AND SAFETY INFORMATION FOR THE USER, INSTALLER AND SERVICE ENGINEER Under the Consumer Protection Act 1987 and the Health and Safety at Work Act 1974, it is a requirement to provide information on substances hazardous to health (COSHH Regulations 1998). Eurostove Ltd takes every reasonable care to ensure that its products are designed and constructed to meet these safety requirements when the products are properly installed and used. To fulfil the requirements, products are comprehensively tested and examined before despatch. When working on the appliance, it is the responsibility of the user or engineer to ensure that personal protective clothing or equipment appropriate to parts that could be considered hazardous or harmful is worn. This appliance may contain some of the items below: Insulation and Seals Glass rope, mineral wool, insulation pads, ceramic fibre, glass insulation. When handling, avoid inhalation and contact with eyes. These may be harmful and cause irritation to the skin, eyes, nose or throat. Use disposable gloves, facemasks and eye protection. After handling, wash hands and other exposed areas. When disposing of materials, limit dust and the risk of inhalation by using a water spray. Ensure materials are securely wrapped. Seek urgent medical attention if inhaled or ingested. Exposure to eyes and skin should be followed by immediate cleansing of the affected areas and medical attention if necessary. Glues, Sealants and Paints The glues, sealants and paints used present no known hazards when the appliance is used in the manner for which it is intended. Asbestos If there is a possibility of disturbing any asbestos in the course of installation e.g. in older properties, then please seek specialist guidance and use appropriate protective equipment. 2 CONTENTS Page no. Operation Using the stove Recommended fuels Troubleshooting and maintenance 4 4–6 6–7 7 After-sales advice 8 Installation Regulations / Health & safety / Preparation Siting Technical details Chimneys / flues Air supply Fuel conversion 9 9 10 10 11–12 12 12 Commissioning 12 Servicing Procedure Spares 13 13 13 3 INTRODUCTION OPERATION The Mendip Multi fuel stove has been designed and constructed to give years of trouble-free domestic space heating. These instructions are provided to assist you in obtaining the best performance with the least trouble and cost. Before using the stove, check that the chimney is clear and has been confirmed for soundness. Operate the stove at low outputs for the first few days for glue and paint curing; some odours may be given off during this time, so keep the building well ventilated. To help us provide the highest levels of customer service, it is important that the registration card is completed in full and returned. To ensure you have a clear understanding of the appliance, please take the time to read these instructions. Your stove will become very hot when it is running and so should not be touched with bare hands. A operating tool and a glove are provided for operation of the stove when hot. Solid fuels The stove must be installed by a qualified engineer. Routine cleaning can be carried out by the end user, but the stove should be fully serviced, and the chimney swept, on an annual basis by an approved engineer. Keep all ventilation installed for use with the stove open and clear of obstructions. Ensure the stove is set to burn solid fuel. The bottom grate assembly, fire bricks, throat plate, front grate and ash pan must all be present (see fig 5 for assembly). Note: on cold days it may be necessary to warm the flue using two firelighters. Procedure: Do not put combustible materials close to the stove. Its surface will become very hot during burning, so a suitable fireguard should be used. Some household items, such as photographs, paintings or television screens, may be susceptible to damage from rapidlyfluctuating air temperatures; as such, do not place them above the stove area, where high-temperature air will circulate. Do not use third-party spares with the appliance, or make unauthorised modifications to its design. The stove must not share a chimney with another appliance. Do not use aerosol sprays near the stove when alight. Fig 1 4 Place firelighters, or a liberal coating of kindling material (wood/paper, light paper) among a small quantity of fuel in the combustion chamber. After lighting, set the air regulator wheel to maximum and the air wash to about 50%. To prevent condensation build-up, leave the door partially open until the glass has warmed. With the fire established, open the fire door and fill the combustion chamber to the top of the front grate, sloping upwards to the rear of the chamber. Close the fire door and ensure it is locked. For best efficiency, set the air wash to about 25% and control burning using the air regulator wheel. Wood The highest burning rate is achieved by opening the air regulator wheel to maximum. Excess clinker formation may indicate overfiring. Do not burn waste wood, pre-cut sawn timber, pallet wood or any treated timber. Do not over load your stove. Wood should be split and dry with moisture content of around 20%.. For overnight or daytime slow burning, set the air regulator wheel to be open by one full turn. Experience will determine the settings that produce best results. Place a liberal amount of paper or nontoxic firelighters; add small pieces of wood kindling. Place two smaller logs on top and light. Chemicals or fluids should not be used to start the fire. For lighting set the primary air regulator wheel to maximum and the secondary air wash to 100%. To prevent condensation build-up, leave the door partially open until the glass has warmed. Once fire has established close fire door, allow fire to achieve optimum heat and close primary air regulator wheel to 10% open. Close Secondary air slider to 50%. To reload – open primary and secondary air controls to 100%, open door slowly and load two small split logs weighing 1.4kg approx. Close door fire door fully and allow the stove to burn at maximum output for a few minutes before resetting the air to the operational level. The highest burning rate is achieved by opening the air primary regulator wheel to maximum. For best efficiency, close the primary air regulator wheel and control the burning rate with the secondary air wash. For daytime slow burning, set the air regulator wheel to be open by one full turn. Experience will determine the settings that produce best results. Firing the stove at very low outputs for long periods will increase creosote build-up and reduce the effectiveness of the air wash. When refuelling, first de-ash the fire bed: Riddle the bottom grate by engaging the operating tool on the riddling knob. Pull and push sharply for about 10 strokes, after which the fire should be free of ash. Open the locked fire door with the operating tool and use the tool to remove the ash pan. Empty the ash-pan at regular intervals; do not allow ash to accumulate to the level of the bottom grate, as it may become damaged over time. The presence of shale, stone or clinker in the fire bed will reduce burning rates; to remove, rake the fire upwards with a poker to bring the material to the top, where it can be removed with tongs. To add fuel: Turn the air regulator wheel to fully open, this will establish a bed of hot fuel, onto which new fuel can be placed. Allow the stove to burn at maximum output for a few minutes before setting the air regulator wheel to the desired position. The stove should be allowed to burn at maximum output for around 30 minutes per day. Bituminous fuel Follow the procedure set out for lighting sold fuels, plus: To add fuel: Always refuel to the maximum limit (i.e. to the top of the front grate, sloping upwards to the rear). Open the locked fire door with the operating tool and rake the embers over the fire bed. The fire door must be left slightly ajar until the bed of fuel has flames passing through it. Turn the air wash to fully open; this will establish a bed of hot fuel, onto which new logs can be placed. If the door is closed too early, small explosions can force smoke through the door seals or air inlet into the room being heated. Allow the fire to burn for a few minutes before setting the air wash to the desired position. Do not operate the stove for long periods, or leave it unattended, with the door open; doing so can damage the stove. The stove should be allowed to burn at maximum output for around 30 minutes per day; this will help prevent creosote build-up. When bituminous fuel is used, the fire door glass will have to be cleaned more frequently. 5 Disposal of ashes Wood burning – types of wood The periodic removal of ashes will be required; the time between de-ashings will be determined by the type of fuel used and how much the stove is used. Solid fuel ash will need to be removed more frequently than wood ash. Wood logs and peat blocks may be used, but only outside smoke control areas. The stove will burn most well-seasoned softwoods and hard woods. Softwoods are usually easier to light than hard woods, but the latter will produce less ash, soot and creosote residue, and will burn for longer. Types of hard wood include beech, ash and oak. When burning solid fuel, allow the fire to burn low or go out before removing the ash pan using the tool provided. Ensure wood has been seasoned correctly. Seasoning can take up to 18 months, depending on the tree species, when it was felled, and the drying conditions. Logs can have their seasoning accelerated by being forced dried in a kiln. When burning wood, allow the fire to go out and cool. Remove the front grate and remove the ash with a metal shovel. It is usually advisable to leave a 12.5mm (½") layer of ash in the bottom of the combustion chamber for future lighting. The thermal value of wood depends on its moisture content. As the moisture content increases, the useful energy derived from its burning decreases. This is because energy is used to drive off the excess moisture. Ensure the wood has a moisture content of less than 20%. Assuming a 20% moisture content, 1 kg of wood will have a thermal value of about 4 kWh. Ashes should be placed in a non-combustible container. Before the ashes are disposed of, ensure they have thoroughly cooled. Ashes may contain dormant coals, which can burn for several hours after a recognisable flame has disappeared. No other waste should be placed in the container. Use extreme caution when handling and disposing of ashes. Wood that has not been split and left for a period will contain more moisture. This will reduce the efficiency of the appliance and result in higher fuel consumption. Wood that contains too much moisture also produces more steam and may contribute to incomplete combustion. This can lead to an excess of creosote build-up. Safety advice Always use a BS 8423: 2002 approved fireguard where there is danger of contact between the stove and vulnerable persons, especially children. Wood burning – storage Occasionally, fumes may be detected during refuelling and de-ashing, but during normal running the stove should not emit fumes into the room being heated. See page 7 for troubleshooting. When wood has been cut to an appropriate length and split, it should be stored in a dry area. Stack the logs to expose both ends to the air, as more drying occurs from the ends than the sides. This holds even for wood that has been split. The woodpile should be under cover to prevent its absorbing moisture from rain or snow, but should still be open on the sides to be subject to the drying effect of sun and wind. FUELS Manufactured and natural smokeless fuels are recommended for use with the stove. Outside smoke control areas, bituminous coal briquettes, wood logs and peat blocks may be used. Do not store the wood within the installation clearances of the appliance, or within the space required for loading or ash removal. For a full list of suitable fuels, check with the official solid fuel approvals body, HETAS, or the Solid Fuel Association. Only use fuels approved for use with closed heating stoves. Refer problems about fuel quality or suitability to the fuel supplier. To reduce the impact on the environment, select a local supplier as this reduces the energy required to transport the fuel. Where possible, ensure wood comes from a sustainable source. Buy logs by volume rather than weight, as the influence of moisture content is removed from the calculation. Do not burn liquid fuels, driftwood, manufactured logs (e.g. compressed wood), varnished or plastic-coated wood, wood treated with preservatives, or household waste. Smokeless fuel The stove is suitable for use with manufactured and natural smokeless fuels that have been approved for use with closed heating stoves. Bituminous coal briquettes may be used, but petroleum coke must not. 6 Wood burning – creosote build-up If smoke collects inside the building, close the air regulator wheel and air wash. Open windows and doors to allow the smoke to escape. Do not use the stove until the source of the problem has been repaired. Wood combustion is never 100% complete; wood smoke always contains some unburned material. A little of this will condense on a cool surface, leaving a dark brown or black substance that has an acrid odour. This substance is commonly called creosote. If the exhaust gases condense on cool surfaces such as a cold chimney, they will retain large amounts of water. At higher temperatures, the condensed creosote will resemble tar. Fuel quality Poor quality fuel can lead problems lighting the stove or maintaining a steady burning rate, poor flame with excess smoke, excess dirt build-up, or staining, on the glass and inside the combustion chamber, and reduced life spans for the internal components, such as fire bricks and bottom grate. Creosote generation is highest during low heat outputs common with long, smouldering burns. Creosote generation is lowest during high heat outputs common with intense fires. For best results against creosote build-up, it is recommended that a small, intense fire be used, even though refuelling may need to take place more often. When burning wood, in addition to the above, wet fuel may cause excess creosote build-up in the flue and discoloured chimney smoke. Flue draught Creosote generation is also higher when burning wood with a high moisture content, such as green wood. The moisture in the wood absorbs heat from the fire, cooling it below the point at which the creosote can be consumed. The low-temperature smoke is then cooled further in the chimney. The flue must operate under pressure that is, there should be a constant "pull" up the chimney to allow the hot flue gases to escape safely. The flue draught can be affected by structures that are too close to the flue termination, extreme winds, extreme temperatures, incorrect combustion air, a blocked flue or incorrectlysized flue. Ensure the required ventilation openings are kept permanently free of obstructions. To reduce the likelihood of creosote build-up during periods of low heat demand, it is recommended to fuel the boiler with lower quantities of smaller diameter logs. Matching fuel loads and heat requirements will result in cleaner combustion and higher efficiency. If fuel consumption is too high or overheating occurs, these may be caused by excessive flue draught. If the fire will not light or maintain a steady burning rate, if the heat output is too low, or smoke remains in the combustion chamber, these may be caused by inadequate flue draught. WARNING NOTE Properly installed, operated and maintained this stove will not emit fumes into the dwelling. Occasional fumes from de-ashing and re-fuelling may occur. However, persistent fume emission is potentially dangerous and must not be tolerated. If fume emission does persist, then the following immediate action should be taken:(a) Open doors and windows to ventilate the room and then leave the premises. (b) Let the fire go out. (c) Check for flue or chimney blockage and clean if required (d) Blow-back Blow-back small explosions that force air through the fire door seals or air controls is caused by inadequate combustion air; for example, if the door is closed too early or the air regulator wheel and air wash are not open wide enough after adding new fuel. CO Alarm Your installer should have fitted a CO alarm in the same room as the appliance. If the alarm sounds unexpectedly, follow the instructions given in the section titled “WARNING NOTE”. Do not attempt to relight the fire until the cause of the fume emission has been identified and corrected. If necessary seek expert advice. The most common cause of fume emission is flueway or chimney blockage. For your own safety these must be kept clean at all times If a fire occurs in the chimney, immediately close the air regulator wheel and air wash to cut off the fire's oxygen supply. Evacuate the building and call the fire services; do not use the stove until it has been certified safe by a qualified HETAS engineer, any necessary repairs have been made, and the chimney has been swept. 7 MAINTENANCE Before cleaning the stove, ensure it has fully cooled. Routine maintenance can be carried out by the end user. The throat plate should be removed and cleaned monthly. The flue pipe can be cleaned by using a flexible brush. Only use a damp sponge for external surfaces. Over time, the fire door glass may become dirty; to clean, wipe with a damp cloth and polish with a dry one. The chimney should be swept at least once a year for smokeless fuels and a minimum of twice a year for bituminous coal, wood or any other nonauthorised/Smokey fuel. Where the chimney is believed to have served an open fire installation it is possible that the higher flue gas temperature from a closed appliance may loosen deposits that were previously firmly adhered, with the consequent risk of flue blockage. It is therefore recommended that the chimney be swept a second time within a month of regular use after installation. The stove should be fully serviced and the chimney swept on an annual basis by a qualified engineer. It may eventually become necessary to re-coat the matt black external surfaces of the stove; always use a paint or spray specifically designed to withstand high temperatures. The ideal time for servicing is just after the end of the heating season, as the stove will not be in use. While dormant, the stove should be emptied of ash and fuel, and left with the air regulator wheel and air wash open; this will help prevent condensation build up, which can reduce the stove's life expectancy. The interior can be sprayed with anti-corrosion treatment e.g. WD40 to provide further protection. After a prolonged shutdown, the flue should be checked for blockages before use. Do not modify the appliance; only use spares authorised by the manufacturer. 8 AFTER-SALES SERVICE INFORMATION Important A qualified field service engineer is available to attend a breakdown occurring during the stove's guarantee period. Invoices for attendance and repair work by any third party will not be accepted unless authorised in advance. The stove must be made available for attendance during normal working hours, Monday to Friday. Technical Assistance How to report a fault A team of trained technical advisors is available to discuss any problem with the appliance. In many cases, the problem may be solved over the telephone, eliminating the need for an engineer's visit. Step 1 Contact your installation or service engineer, who should assess the unit and works carried out on the appliance prior to requesting the attendance of an engineer. Before making contact, please have the following information ready: Step 2 The appliance serial number or your unique customer identification number (issued upon registration of the appliance). The serial number is located on the underside of the stove, at the front. A description of the fault and any unusual behaviour by the appliance before the failure occurred. The installation and commissioning dates, and the details of any annual services. Please note that upon attendance by an engineer, a charge will be made where: The engineer finds no fault with the stove. The cause of the breakdown is due to parts of the system not supplied by the manufacturer. The cause of the breakdown is due to incorrectly fitted spare parts, or third-party spares not designed for use with the stove. The appliance has not been installed and commissioned by a qualified engineer as described in these these instructions. Appliance Serial No.: ___________________ Cust. ID No.: ______________________ Installation Date: ____/____/____ The stove has not been serviced annually since installation. The breakdown occurs outside the guarantee period. The appliance has not been maintained correctly. The breakdown occurs due to use of the appliance not sanctioned by these instructions. The breakdown occurs as a result of work on the appliance by an unauthorised third party. Important note: Over 50% of all service calls are found to have no appliance fault. Service Centre and Technical Support Tel: 01934 750500 Hours of Business Monday– Friday: 8:30am – 17:00pm 9 INSTALLATION Regulations The Mendip Multi fuel must be installed by a competent person, preferably HETAS registered. Follow the requirements of all relevant Building Regulations. The installation must comply with all other local, national and European regulations and standards that may apply. Where the regulations conflict with information in this manual, follow the advice of the former. Siting The installation engineer should be aware of his or her responsibilities under the Health and Safety at Work Act and provide where necessary appropriate protection for all persons carrying out the installation. The stove can be installed in a recess if the hearth is level and, with the adjacent walls, conforms to current Building Regulations. The size of the recess is determined by the types of material used. Preparation Before assembling the stove, ensure all packaged parts have been removed from inside. Inspect the stove to ensure no damage has occurred during transit. Ensure all parts have been provided (see fig 6, page 13). Always leave access for future cleaning and servicing of the stove, flue socket and flue. Before installation, ensure the building has a loadbearing rating sufficient for the stove's weight. Suitable measures (e.g. a load distributing plate) should be taken if inadequate. The stove should be placed on a non-combustible hearth that adheres to the clearances in fig 2. The stove, recess hearth and chimney installation should conform to relevant British Codes of Practice, BS 8303, BS EN 15287-1: 2007. Asbestos If there is a possibility of disturbing any asbestos in the course of installation e.g. in older properties, then please seek specialist guidance and use the appropriate protective equipment. All dimensions in mm Minimum Hearth Size Fig 2 10 TECHNICAL SPECIFICATION Smokeless Fuel Wood std pedestal std pedestal Smokeless solid fuel for closed appliances Smokeless solid fuel for closed appliances Seasoned wood with <20% Moisture content Seasoned wood with <20% Moisture content Recommended Refuelling Interval 4 hours 4 hours 1 hour 1 hour Nominal Heat Output 8.3 kW 8.3 kW 8.7 kW 8.7 kW 5.2 kW 5.2 kW 5.3 kW 5.3 kW 3.1 kW 3.1 kW 3.4 kW 3.4 kW Efficiency 68.4% 68.4% 73.8% 73.8% Weight (empty) 93 kg 93 kg 93 kg 93 kg 540 x 530 x 415 780 x 530 x 415 540 x 530 x 415 780 x 530 x 415 152.5mm (6”) 152.5mm (6”) 152.5mm (6”) 152.5mm (6”) 236°C 236°C 273°C 273°C 0.04-0.06 in WG 0.04-0.06 in WG 0.04-0.06 in WG 0.04-0.06 in WG 0.048 in WG 0.048 in WG 0.048 in WG 0.048 in WG Flue gas mass flow 11.6 g/s 11.6 g/s 9.2 g/s 9.2 g/s Hearth (W x D x T) 820 x 865 x 125 820 x 865 x 125 820 x 865 x 125 820 x 865 x 125 Rear 400mm Sides 275mm Rear 400mm Sides 275mm Rear 400mm Sides 275mm Rear 400mm Sides 275mm Recommended Fuels Nominal Heat Output To Water Nominal Heat Output To Space Dimensions (H x W x D) Flue Socket Flue Gas Temperature (at outlet) Flue Draught Requirement Flue draught (nominal output) Minimum Distance To Combustibles 11 MENDIP BOILER STANDARD MODEL All dimensions in mm Fig 3 MENDIP BOILER PEDESTAL MODEL Fig 3.1 All dimensions in mm Chimney For correct operation of the stove, the height of the chimney from its base should not be less than 4.5m and it should terminate above the roof in accordance with current Building Regulations. All requirements as outlined in BS EN 15287-1:2007. Failure to observe the recommended minimum sizes or methods of flue connection may lead to fume emission and reduce burning rates. The diameter of the connecting flue and chimney should at no point narrow to less than the diameter of the appliance flue outlet. Flue layout If the stove is installed in an existing recess directly below a chimney flue, the exhaust end of the flue pipe must extend into the throat of the chimney, at least 150mm into the overhanging brickwork. Any cavities or pockets above the throat plate should be filled. When fitting the stove to an existing chimney, its internal and external condition should be checked before the appliance is installed. The chimney must be swept before installation. The flue must be stable and free from all jointing compounds. Avoid extended horizontal flue runs. Whichever method of installation is used, air must not be allowed to enter the chimney, save through the stove; all joints must be airtight. If the chimney is unlined and there is doubt as to its condition, it should be lined in accordance with current Building Regulations. If the stove is connected via flue pipe to an existing brick chimney, square bends and horizontal runs must not be used. A cleaning door must be included at every bend. See fig 4 below for details. Ensure a new chimney is free of internal projections, such as jointing compounds, before installing the appliance. The stove must not share a chimney with another appliance. Provision must always be made for sweeping the chimney. Cement pipes and fittings must not be used within 2m of the stove outlet. Plain pipe chimneys are not recommended, but propriety makes of insulated chimneys may be suitable; refer to manufacturers' guidance. When using a factory-made insulated chimney, it must comply with BS 4543 Parts 1 and 2. The recommended diameter is 150mm; contact the chimney manufacturer for further advice. Electrical connections The installation of any electrical services during the installation of this boiler and the associated heating system must be carried out by a registered competent electrician and in accordance with the requirements of the latest issue of BS 7671. After deciding whether to use the top or rear exit on the stove, fit the flue socket plate and blanking plates in the required positions, ensuring a good seal is made with fire cement or similar. When using the rear exit, always use an appropriate tee; a 90° elbow should not be used. Advise the end user to have the chimney thoroughly swept at least every twelve months. If bituminous coal or wood is used, the chimney may require more frequent sweeping. CO Alarms Building regulations require that whenever a new or replacement fixed solid fuel or wood biomass appliance is installed in a dwelling a carbon monoxide alarm must be fitted in the same room as the appliance. Further guidance on the installation of the carbon monoxide alarm is available in BS EN 50292 :2002 and from the alarm manufacturer’s instructions. Provision of an alarm must not be considered a substitute for either installing the appliance correctly or ensuring regular servicing and maintenance of the appliance and chimney system 13 Fig 4 Air supply Fuel conversion A permanent, unobstructed air vent is required. It must communicate directly with the outside or an adjacent room which itself has a permanent air vent. The vent 2 must have a minimum effective area of 550mm per kW of rated output above 5kW. Position the vent in a place not liable to accidental blockage. As supplied, the stove will contain all the parts necessary to burn solid smokeless fuels. To convert to wood burning the firebricks, bottom grate assembly and ashpan must be removed, the throat plate and front grate must be present. See fig 5 below. Extractor fans COMMISSIONING If an extractor fan is located close by, it could affect the stove's performance. The supply of air should be such that the operation of the stove and chimney are unaffected when the extractor fan is running. A separate air supply may be required. A flue draught interference test will determine whether the extractor fan is having an effect. Where the fan is in the same room as the appliance, close all windows and doors. Where the fan is in an adjacent room, close all external doors and windows, but leave the internal doors open. Set the extractor fan to full capacity; after the fan has established its normal airflow pattern, perform combustion analyses of the stove at minimum and maximum outputs. Perform similar tests while the fan is switched off. Interference tests should also be carried out if there are other appliances close by that move air to the outside, such as tumble dryers. 14 Ensure all parts are correctly fitted, and that the stove is set for the correct fuel. Check the operation of: the door catch (ensuring it holds the fire door tight); the bottom grate riddling mechanism (using the tool supplied); the air regulator wheel; and the air wash control. Test the flue draught. The minimum draught required is 0.04 in WG; the maximum allowed is 0.06 in WG. Light the stove and allow it to reach a steady burn before checking for fume leakage into the room open the door and carry out a spillage test. Demonstrate the methods of operation to the end user. Explain the need for an annual service and regular maintenance schedule. Record your details in the space provided at the rear of this manual. Ensure these instructions are left in the end user's possession. SERVICING Every year, the stove should be serviced and the chimney swept. Always use a qualified engineer. The best time is just after the end of the heating season, when the stove is not likely to be in use. Allow the stove to cool before the engineer attends. Procedure: Remove the front grate, fire bricks, throat plate, bottom grate and ashpan. Sweep the chimney throroughly from an accessible position (see fig 4, page 11). Clear out any large deposits from inside the combustion chamber and vacuum that which remains. If necessary, scrape off deposits that have attached to the walls of the chamber. Clean the throat plate, bottom grate and front plate with a wire brush. Use a soft brush for the firebricks. Replace any damaged items and re-fit in the reverse order. Remove the door glass and clean with a damp cloth; wipe with a dry cloth. Inspect and replace the door seal if necessary. Check operation of the door catch, ensuring a tight seal is made. Spares Fig 6 15 Plumbing This is clamped on to the main return pipe and should be set between 45°C and 55°C and switches the pump off when the temperature of the water returning the system or hot water cylinder begins to fall. It ensures that cold water does not circulate through the stove as this would: Refer the installer to the current issues of British Standards BS EN 14336:2004: Heating Systems in Buildings. Installation and commissioning of water based heating systems. BS EN 12828: 2003; Heating Systems in Buildings. Design of water based heating systems. BS EN 12831: 2003; Heating Systems in Buildings. Method for calculation of the design heat load. As applicable to the appliance. A) Allow the heating circuit to take heat from the hot water cylinder. B) Cause condensation to form on the inside of the stove boiler and cause premature failure of the stove. Please read these notes prior to installing your stove: C) Create a cold flue/chimney and the associated condensation/tar problems. A boiler stove will have a lower combustion temperature than a dry stove and will not reach the clean burn state as readily. The stove must have a continuos supply of warm/hot water circulating from the boiler to the hot water cylinder, and when the pump is on circulating around the radiators. The stove must be run at a sufficiently high temperature to maintain this. It is important that the boiler’s output is sufficient to achieve this. When calculating the kilowatt room output of where the stove is fitted should also be taken into account. A circulation pump MUST be fitted on the return to the boiler, and must be controlled by pipe thermostats. Do not fit the stove to a fully pumped system, or sealed system. Always use open vent. Ensure the system is fitted with a heat leak radiator, which should be 30% of the total boiler output. Do not plumb under-floor heating directly into the circuit; a buffer tank or thermal store should be used. A buffer tank or thermal store is a very efficient method of providing heat from the store. The stove is fired flat out to heat the buffer tank and then can be allowed to go out. The buffer tank in conjunction with the electric controls will provide mains pressure hot water and circulation water as and when required. The buffer tank can be plumbed directly to the stove with the relevant safety devices, and must be sited a minimum of 1800mm above the boiler. Pipe Thermostats If the stove is intended for use on both domestic hot water and central heating should have an indirect hot water cylinder, a circulating pump and a heat leak radiator see fig’s 8 and 9. The heat leak radiator will protect the system in the event of an electrical power or circulating pump failure. To maintain safety and prolong the life of the boiler, the following three devices should be fitted to the system. Fig 7: Pipe Thermostats – Wiring Diagram 1 High Temperature Pipe Thermostat This is clamped on to main gravity flow water pipe, and switches the pump on when the boilers/pipe temperature rises. The thermostat should be set between 85°C and 95°C to ensure that the cylinder hot water does not boil, but is dissipated around the central heating circuit. 2 Low Temperature Pipe Thermostat 3 Injection Tee (see fig 8) 16 To prevent the 70% of the central heating load from gravitating around the radiator circuit and creating cold water problems when the circulation pump is off. Fig 8 Typical 2 pipe central heating circuit 17 Typical 4 pipe central heating circuit The following information should be provided upon installation of the appliance for householder reference: Installation Engineer: …………………………………………………………….. Company: …………………………………………………………….. Company Address: …………………………………………………………….. …………………………………………………………….. …………………………………………………………….. Company Tel. No: …………………………………………………………….. Fig 9 18 19 Manufactured In the UK Copyright in this brochure and the drawings and illustrations contained within are vested in Eurostove ltd and neither the brochure or any part thereof may be reproduced without prior written consent. Eurostove ltd policy is one of continuous research and development. This may necessitate alterations to this specification. Instructions correct at time of going to print. February 2012 20 Item No. 700466 Iss. No. 1 Rev. 0