1
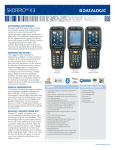
Skorpio™ X3 Four Slot Dock Read this manual carefully before performing any type of connection from the terminal to a host PC using the Four Slot Dock. The user is responsible for any damages caused by incorrect use of the equipment or by inobservance of the indication supplied in this manual. NOTE MOBILE COMPUTER INSERTION/ REMOVAL LED INDICATORS ETHERNET CONNECTION For correct insertion into the cradle, insert the mobile computer from the top of the cradle and push it down until the clip of the cradle clicks Power LED Status Indicator (F) The Ethernet cradle drivers are pre-installed on the Skorpio X3 and initiate automatically when the terminal is placed in a properly connected Four Slot Dock Ethernet. To remove the mobile computer from the cradle, simply pull it upwards while holding the cradle firmly down. Color Green Battery Charging LED Status Indicators (B) Color Off Red Green Red Blinking The Four Slot Dock paired with a Skorpio X3 mobile computer builds a reading system for the collection, decoding and transmission of barcode data. The Four Slot Dock can charge both the terminals and the spare batteries at the same time. The spare batteries can be charged by inserting them into the slots at the back of the cradle. The Four Slot Dock comes in two different models, the Charger (94A150032) and the Ethernet (94A150055). Status Cradle powered When the mobile computer is inserted into the Four Slot Dock Ethernet, the connectivity icon on the taskbar indicates that the mobile computer is connected to a network. Status Battery absent Battery charge in progress Charge completed Error USING THE SPARE BATTERY CHARGER Correctly insert the battery pack into the slot and simply press it into the slot until the battery latch is automatically closed; charging starts automatically. The maximum bandwidth capacity for each Mobile Computer is 12Mbps. NOTE The yellow Link LED blinks to indicate activity, or stays lit to indicate that a link is established. When it is not lit it indicates that there is no link. Connections should always be made with power OFF! The Ethernet model also provides Ethernet connection for data transfer via local area networks. CAUTION . Figure 2 - Mobile Computer Insertion How to connect Connect the Ethernet cradle (Ethernet port 1 - E) to an Ethernet hub or to a port on the host device. Connect the Ethernet cradle (power port - F) to the power supply. Power Supply A B F Each 4SD requires a power supply to be connected to mobile computers. We recommend the power supply 94ACC1385. - A Figure 4 - Spare Battery Insertion To remove the battery, release the latch on the battery pack. F B + C D E C Figure 3 - Power Supply Polarity Figure 6 - Ethernet Connection Key: A) Ethernet 4 Slot Dock B) Power supply without power cord, supplied with the 4SD and country specific power cord C) UTP CAT 5E cable (recommended use) D) Ethernet hub E) Ethernet port 1 F) Power port Figure 1 –Four Slot Dock Key: A) Link LED for Ethernet Port 1,2,3,4 B) Battery charger LED for Slot 1,2,3,4 C) Power supply connector D) Ethernet Port 1 (with integrated Link and Speed LEDs) E) Ethernet Port 2 (with integrated Link and Speed LEDs)** F) Power on LED Figure 5 - Spare Battery Removal 822001262 Used in the Ethernet Four Slot Dock only Available in the Ethernet Four Slot Dock only D E Available in the Ethernet Four Slot Dock only Daisychaining Ethernet Connection DOCK CONTACTS CLEANING PROCEDURE Cleaning the Dock Auxiliary Battery Contacts TECHNICAL FEATURES To connect several cradles to an Ethernet network, the Ethernet cradles may be daisychained. It is recommended not to connect more than 4 cradles in order to maintain the optimal baud rate. All exterior metal contacts/connectors exposed to spills, dirt or debris accumulation require periodic cleaning to ensure best performance during charging and data transmission. 1. Connect the first Ethernet cradle to the Ethernet Switch. Connect the additional cradles as shown in Figure 7. Use a soft, lint-free dry cloth or lens tissue to clean the product (contacts and plastics). An antistatic cloth is preferable but you can also use a cotton cloth. Avoid wool, synthetic cloths or other materials that can cause electrostatic discharges. Electrical Features Power supply * 12 VDC ± 5% @ 5A Consumption Max 5 A Spare slot charge time Skorpio X3 Std 4h 30 Battery Skorpio X3 High 6h 30 (with terminal inserted) Cap Battery 5h (when terminal is not inserted) Communication Features Interface Ethernet ** Baud Rate 10/100BASE-T Physical Features Dimensions 445 x 135 x 105 mm 17.5 x 5,3 x 4.2 in Weight (without 1250 g / 44.1 oz connection cables) Indicators Green power-on LED Bicolored battery charge status LED Environmental Features Working temperature*** -10° to +50°C / 14° to 122°F *** Storage temperature -20° to +70°C / -4° to 158°F Humidity 95% without condensation Electrostatic discharge 4 KV contact / 8 KV air EN 61000-4-2 A B C A C D 3. If the contacts are very dirty, clean them with a soft cloth moistened with a diluted non-aggressive cleaning solution or a diluted isopropyl alcohol solution (20% maximum). A cotton swab may be used only on hard-to-reach contacts. Clean the contacts when you see traces of dirt or when you experience solid connection issues between the terminal and its dock (device not charging or intermittent communications). It is however suggested to clean the contacts every 6 months (more often if the environment is dusty). E Figure 7 - Daisychaining Ethernet Connection Key: A) Power supply without power cord, supplied with the 4SD and country specific power cord B) Ethernet hub C) UTP CAT 5E cable (recommended use) D) Ethernet Port 1 E) Ethernet Port 2 WARNING 2. Remove the power cable and the Ethernet module before cleaning the contacts. Use a soft dry cloth as suggested above. If the product is very dirty, moisten the cloth in a non-aggressive cleaning solution or diluted isopropyl alcohol solution (20% maximum). Gently rub the cloth back and forth ONLY along the contacts, following the directions indicated by the red arrows. Use care not to leave any cloth residue. This is a Class A product. In a domestic environment this product may cause radio interference in which case the user may be required to take adequate measures. If the plastic areas are very dirty use only a cloth dampened with water. 4. Do not use abrasive or aggressive cleaning agents or abrasive pads to clean electric contacts, scan windows or plastics. Use a dry cloth to remove any dirt near the contacts area and to clean the plastic parts. If the plastic parts of the equipment are very dirty, slightly dampen the cloth with only water. Repeat steps 2, 3 and 4 using a clean dry cloth. Allow the cleaning solution to fully evaporate before powering up the product. Cleaning the Dock Contacts * Use only DL approved power adapters. ** Available in the Ethernet Four Slot Dock only *** Skorpio X3 (including spare battery) should be charged at an ambient temperature between 0 - 35º C to achieve the maximum charging rate. Never charge the main device or spare batteries in a closed space (cabinet) where excessive heat can build up. 1. 2. FCC COMPLIANCE CAUTION 3. Remove the power cable before cleaning the contacts. Use a soft dry cloth as suggested above. If the product is very dirty, moisten the cloth in a non-aggressive cleaning solution or diluted isopropyl alcohol solution (20% maximum). Gently rub the cloth back and forth ONLY along the contacts, following the directions indicated by the red arrows. Use care not to leave any cloth residue. 4. 5. 6. Use a dry cloth to remove any dirt near the contacts area and to clean the plastic parts. If the plastic parts of the equipment are very dirty, slightly dampen the cloth with only water. Repeat steps 2, 3 and 4 using a clean dry cloth. Allow the cleaning solution to fully evaporate before powering up the product. 5. 6. This equipment has been tested and found to comply with the limits for a Class A digital device, pursuant to part 15 of the FCC Rules. These limits are designed to provide reasonable protection against harmful interference when the equipment is operated in a commercial environment. This equipment generates, uses, and can radiate radio frequency energy and, if not installed and used in accordance with the instruction manual, may cause harmful interference to radio communications. Operation of this equipment in a residential area is likely to cause harmful interference in which case the user will be required to correct the interference at his own expense. Modifications or changes to this equipment without the expressed written approval of Datalogic could void the authority to use the equipment. This device complies with PART 15 of the FCC Rules. Operation is subject to the following two conditions: (1) This device may not cause harmful interference, and (2) this device must accept any interference received, including interference which may cause undesired operation. ©2012-2013 Datalogic ADC S.r.l. • ALL RIGHTS RESERVED. • Protected to the fullest extent under U.S. and international laws. • Copying, or altering of this document is prohibited without express written consent from Datalogic ADC S.r.l. Datalogic and the Datalogic logo are registered trademarks of Datalogic S.p.A. in many countries, including the U.S.A. and the E.U. Skorpio and the Skorpio logo are trademarks of Datalogic ADC S.r.l. All other brand and product names mentioned herein are for identification purposes only and may be trademarks or registered trademarks of their respective owners.