1
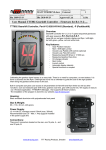
XJR1300 Gear Position Indicator User Instructions
Congratulations on acquiring this gear position indicator (GPi) for your Yamaha XJR1300.
This leaflet is provided to give an insight to how it works, how to install it, how to configure
it and how to set the user settings.
1. How it works
Like most Yamaha motorcycles,
the XJR1300 has a sensor that
indicates when NEUTRAL is
selected but it gives no other
information about selected gear.
Therefore, for this conversion I
produce a sensor that has two
independent outputs, the original
Neutral output that provides a
ground when Neutral is selected
remains unchanged but a
second output is added that will
give an indication for each
selected gear from 1st to 5th.
These sensors I produce by
modifying
NEW
ORIGINAL
YAMAHA Neutral switches and I
supply them complete with a
new O-Ring seal (also Yamaha
original) so that when you
remove your own sensor, you
can just drop this one in and
know that the fit and seal will be
as good as the originally
supplied switch.
The second output gives a different resistance for each gear and it is this changing
resistance that I use for the GPi, using it with a pull-up resistor network to give a varying
voltage that in turn reflects the gear selected. The circuit comprises a single-chip
Microprocessor that constantly monitors this voltage and then displays the relevant
information on a series of LEDs that are mounted below the tachometer dial face.
The stock dial faces have translucent numbers so that the backlighting can effectively
illuminate them at night and it is below these numbers (1 to 5) that I have mounted the
Gear Indicating LEDs.
Depending on the voltage detected, the unit is able to display a corresponding LED for
gears 1 to 5 and it will also display an animated warning pattern for when the side-stand
is in the lowered position. Finally, to aid night-time operation, the LED brilliance of
selected gear is dimmable to one of 5 user selected levels and the side-stand warning
can be selected from a number of patterns or can be turned off altogether.
Yamaha XJR1300 Gear Position Indicator User Instructions
Page 1 of 6
2. How to Install
If you have sent me your clocks with the front and rear plastics in place, fitment is very
straight forward. The clocks will have been returned fully assembled, tested and ready
to fit and there are only two additional wires you need to connect, one purple and one
green. These wires, (included in package) must be connected to the replacement
Neutral switch/gear position sensor and also to the side-stand signal.
Removal and refitting of the clocks is easily achieved by firstly removing the two
headlamp securing cross-head screws that are located at approximately the 4 o’clock
and 8 o’clock positions around the headlamp chrome surround. Once out, you can
remove the headlamp, disconnecting the main and pilot bulb connectors in the process.
The clocks are mounted to the top yoke via two 10mm flanged nuts so undo them,
disconnect the two loom connectors to the clocks and then they can then be removed.
Refitting is a reversal of the removal except that once converted, there will be two
additional wires to connect, one green, one purple and these are pre-fitted with
Japanese type bullet connectors. The purple wire runs to the new output wire on the
neutral switch and the green runs to the output of the side-stand circuit. (more on this
later).
Fitting the supplied converted replacement neutral switch.
•
•
•
•
•
•
•
•
•
•
•
•
Put the bike on the mainstand and lower the side-stand too.
Undo the 10mm headed gearlever fulcrum pinch bolt (A) and pull off fulcrum.
Undo the 2x hex-headed cover retaining bolts (B) and pull off cover.
Undo the 3x 8mm bolts that retain the clutch slave cylinder (C) and remove it. BE
CAREFUL TO NOT PULL CLUTCH LEVER UNTIL IT IS REFITTED.
Undo the 2x hex-bolts that retain the speed sensor in position (D) and its cable
clip.
Undo the 3x hex-head bolts that retain the sprocket cover (E) and remove it for
easier access.
Clean the area of road-dirt / chain grease etc.
Undo the 3x Torx countersunk screws (F) that retain the original neutral switch
and after disconnecting the connecting wire from the screw terminal (G), remove
the switch. NOTE, a small quantity of oil may leak at this point so have a cloth etc
ready to catch / mop it up.
Smear a little oil on the o-ring of the replacement modified sensor and gently
push into position.
Refit the Torx retaining screws, preferably using a mild thread retainer if available.
(I’ve not had one come loose though when fitted without)
Re-connect the original Neutral switch wire to the cross-head screw terminal (G)
That completes the switch/sensor fitment, just the new wires to connect now.
Fitting the two new connection wires supplied.
•
Remove the two side panels and lift at least the rear of the fuel tank by removing
its retaining bolt, or if you are confident, remove the fuel tank completely for
easier access.
Yamaha XJR1300 Gear Position Indicator User Instructions
Page 2 of 6
•
•
•
•
•
•
•
•
Run the two wires, purple and green through the rear of the headlamp bowl back
along the frame, beneath the fuel tank to a position under the rear of the tank
where electrical connectors are located.
The shorter GREEN wire must be connected to the blue/black wire that comes
from the side-stand switch. This passes through a small 2-pin blue connector (H)
and the easiest way to connect to it is to remove the required pin, by releasing
the pin’s retaining clip (J) with say a pin or jewellers screwdriver tip and by pulling
the wire/terminal from the rear of the housing.
Once out, you can bare a small piece of wire approx 10mm from the terminal and
wrap the stripped end of the GREEN wire around it then solder to secure it.
This soldered joint can be insulated by sliding a small piece of the adhesive lined
heatshrink (supplied) over the joint and by heating it to shrink and seal. Do this
far enough away from terminal to still allow the terminal to be inserted. If you get
the joint/heatshrink too close to the terminal it may not fit back in. Please try to
avoid using ‘scotchlok type’ connections as they often introduce additional
problems by not being weatherproof and by damaging the wires over which they
are ‘clipped’.
Re-insert the terminal into the housing (correct way up!) and reconnect the two
halves of the blue sensor connector.
Now run the purple wire down to the newly fitted replacement switch / sensor and
connect the female bullet to the male output connector (K)
I show a possible path for this wire but route as you see fit.
That’s it, all connected – re-assemble as a reverse of the removal/access
process.
3. Configuring your GPI
The unit is supplied tested and pre-programmed against some default test voltage
signals but I have noticed that there are slight differences between sensor outputs, so
now is the time to configure the unit to function with your own sensor – this should only
need doing once.
As power has been removed from the clocks, when you first reconnect the clocks you
may see the needle sweep. This is a normal inbuilt one-time test upon re-connection
and will not occur again until the next time all power is removed (ie. Battery
disconnected). Upon switching the ignition on, all the LEDs will illuminate behind
positions 1-5 on the tacho which indicates correct operation of both LEDs and circuit.
As the process requires starting the motor and cycling through the gears, it is best
accomplished with the bike on a main-stand if fitted. Although it can be achieved also if
you sit on the bike and hold the clutch in, just slightly letting it out enough to engage
gears effectively and positively.
To program the unit, use the following sequence.
a) Set bike on main-stand if fitted and in NEUTRAL and RUN position.
b) Power ignition on and press and hold the RH Trip Reset Button (TRB) whilst the
GPi LED Test sweep is taking place. (this puts the GPi in setup mode)
c) Release button once all LEDs begin to flash. (the GPi is now in setup mode)
Yamaha XJR1300 Gear Position Indicator User Instructions
Page 3 of 6
d) Whilst still in neutral, start the engine – all 5 LEDs should continue to flash.
e) Now press the TRB to store the RUNNING NEUTRAL position
f)
LED 1 will now flash to prompt for 1st gear, so select 1st (hence main-stand) and
once selected (release the clutch) press TRB to store the 1st Gear Position
g) LED 2 will now flash to prompt for 2nd gear, so select 2nd and once selected (clutch
released) press TRB to store the 2nd Gear Position
h) REPEAT for gears 3,4 and 5 after which, it will do another LED test sweep and then
return to show 5th gear as you still have it selected.
It sounds a lot more complicated than it actually is and there is a demo video on
YouTube – just search on ‘XJR1300 Gear Position Indicator’.
4. User settings
When showing the ‘Side Stand Down’ warning, there are several user selectable patterns
to choose from. To switch between them, whilst one is active, repeatedly press the TRB to
cycle through those available. One position will turn this feature off if you decide you do
not want the warning at all. This does not clear your trip mileage as the press is brief and
once set, the selected pattern will remain the default until next changed.
If you think the indicated gear LED is too bright for night-time use, the brilliance can be
user selected to one of 5 preset levels. To do this, whilst in a gear, repeatedly press the
TRB to cycle through the 5 levels and leave it at the desired setting. The warning pattern
brilliance is not user adjustable, remaining bright always and all the user settings are
stored even if battery is flat or removed
If you should have any problems at all with your unit, or perhaps have an idea that you
think you improve its function or operation, do please let me know.
I can be reached at [email protected] or on my mobile when not at home
(07771 868890)
Yamaha XJR1300 GPi Instructions Revision History:
Initial Issue – September 1st 2013
Disclaimer: PerminaTech is not responsible for any direct, incidental or consequential damages arising from or in any
way related to the use or installation of any product manufactured or supplied by PerminaTech. The purchaser or user of
any product manufactured or sold by PerminaTech releases PerminaTech from any and all liability for the use of these
products in any manner. The GPi is supplied with a 12 month warranty against defects in materials and workmanship. If
you have a problem with the unit which cannot be resolved by email or over telephone then PerminaTech will repair or
replace the faulty unit as quickly as possible. The warranty period begins on the date of despatch of the original unit from
PerminaTech and if items need to be returned, additional transit costs/charges may apply.
Yamaha XJR1300 Gear Position Indicator User Instructions
Page 4 of 6
Some pictures to aid with installation.
Yamaha XJR1300 Gear Position Indicator User Instructions
Page 5 of 6
Last few more pics.
Yamaha XJR1300 Gear Position Indicator User Instructions
Page 6 of 6