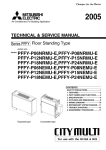
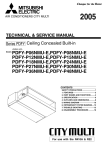
Download Mitsubishi Electric LMAP02-E Specifications
Transcript
1. ELECTRICAL WORK..........................................................................................................................................WR2SD-2 1-1. General Cautions......................................................................................................................................WR2SD-2 1-2. Power Supply for Indoor Unit and Outdoor Unit........................................................................................WR2SD-3 1-3. Power Cable Specifications......................................................................................................................WR2SD-7 1-4. Power Supply Examples...........................................................................................................................WR2SD-8 2. M-NET CONTROL............................................................................................................................................WR2SD-10 2-1. Transmission Cable Length Limitation....................................................................................................WR2SD-10 2-2. Transmission Cable Specifications......................................................................................................... WR2SD-11 2-3. System Configuration Restrictions..........................................................................................................WR2SD-12 2-4. Address Setting.......................................................................................................................................WR2SD-15 3. PIPING DESIGN...............................................................................................................................................WR2SD-25 3-1. R410A Piping Material.............................................................................................................................WR2SD-25 3-2. PQRY-P-T/Y(S)HMU’s Piping Design.....................................................................................................WR2SD-26 3-3. Refrigerant Charging Calcuation.............................................................................................................WR2SD-30 4.INSTALLATION.................................................................................................................................................WR2SD-31 4-1. PQRY-P-T/Y(S)HMU’s Installation..........................................................................................................WR2SD-31 4-2. Installation Space....................................................................................................................................WR2SD-31 4-3. Piping Direction.......................................................................................................................................WR2SD-32 5.CAUTIONS........................................................................................................................................................WR2SD-33 5-1. Refrigerant Properties.............................................................................................................................WR2SD-33 5-2. Confirm the Critical Concentration and Perform Countermeasures........................................................WR2SD-33 WR2-SERIES SYSTEM DESIGN (June 2010) WR2SD-1 WR2-SERIES SYSTEM DESIGN CITY MULTI® WR2-SERIES SYSTEM DESIGN 1. ELECTRICAL WORK WR2-SERIES SYSTEM DESIGN 1-1. General Cautions Follow ordinance of your governmental organization for technical standard related to electrical equipment, wiring regulations, and guidance of each electric power company. Wiring for control (hereinafter referred to as transmission cable) shall be (50mm[1-5/8in] or more) apart from power source wiring so that it is not influenced by electric noise from power source wiring. (Do not insert transmission cable and power source wire in the same conduit.) Be sure to provide designated grounding work to heat source unit. Give some allowance to wiring for electrical part box of indoor and heat source unit, because the box is sometimes removed at the time of service work. Never connect 100V, 208~230V, 460V power source to terminal block of transmission cable. If connected,electrical parts will be burnt out. Use 2-core shield cable for transmission cable . If transmission cables of different systems are wired with the same multiplecore cable, the resultant poor transmitting and receiving will cause erroneous operations. Heat source unit Indoor unit OK 2-core shield cable Remote controller BC controller 2-core shield cable WR2SD-2 Heat source unit NO WR2-SERIES SYSTEM DESIGN (June 2010) Multiplecore cable BC controller Indoor unit Remote controller 1. ELECTRICAL WORK 1-2. Power Supply for Indoor Unit and Outdoor Unit Model PLFY-P06NLMU-E PLFY-P08NLMU-E PLFY-P12NLMU-E PLFY-P15NLMU-E PLFY-P18NLMU-E PLFY-P08NCMU-E PLFY-P12NCMU-E PLFY-P15NCMU-E PLFY-P12NBMU-E PLFY-P15NBMU-E PLFY-P18NBMU-E PLFY-P24NBMU-E PLFY-P30NBMU-E PLFY-P36NBMU-E PMFY-P06NBMU-E PMFY-P08NBMU-E PMFY-P12NBMU-E PMFY-P15NBMU-E PEFY-P06NMAU-E PEFY-P08NMAU-E PEFY-P12NMAU-E PEFY-P15NMAU-E PEFY-P18NMAU-E PEFY-P24NMAU-E PEFY-P27NMAU-E PEFY-P30NMAU-E PEFY-P36NMAU-E PEFY-P48NMAU-E PEFY-P54NMAU-E PEFY-P06NMSU-E PEFY-P08NMSU-E PEFY-P12NMSU-E PEFY-P15NMSU-E PEFY-P18NMSU-E PEFY-P24NMSU-E PEFY-P27NMHU-E PEFY-P30NMHU-E PEFY-P36NMHU-E PEFY-P48NMHU-E PEFY-P54NMHU-E PEFY-P72NMHU-E PEFY-P96NMHU-E Hz 60Hz 60Hz 60Hz 60Hz Symbols: MCA : Min.Circuit Amps (=1.25xFLA) FLA : Full Load Amps IFM :Indoor Fan Motor Output : Fan motor rated output Indoor Unit IFM Volts Voltage range MCA(A) FLA(A) 0.43 / 0.47 0.34 / 0.37 0.43 / 0.47 0.34 / 0.37 188 to 253V 0.43 / 0.47 0.34 / 0.37 0.48 / 0.53 0.38 / 0.42 0.49 / 0.54 0.39 / 0.43 0.29 / 0.29 0.23 / 0.23 0.35 / 0.35 0.28 / 0.28 208 / 230V 0.35 / 0.35 0.28 / 0.28 0.64 / 0.64 0.51 / 0.51 198 to 253V 0.64 / 0.64 0.51 / 0.51 0.64 / 0.64 0.51 / 0.51 0.64 / 0.64 0.51 / 0.51 0.64 / 0.64 0.51 / 0.51 1.25 / 1.25 1.00 / 1.00 208 / 230V 208 / 230V 208 / 230V 188 to 253V 0.25 / 0.25 0.25 / 0.25 0.26 / 0.26 0.33 / 0.33 0.20 / 0.20 0.20 / 0.20 0.21 / 0.21 0.26 / 0.26 198 to 253V 1.05 / 1.05 1.05 / 1.05 1.21 / 1.21 1.45 / 1.45 1.56 / 1.56 2.25 / 2.25 2.49 / 2.49 2.50 / 2.50 3.33 / 3.33 3.41 / 3.41 3.31 / 3.31 0.84 / 0.84 0.84 / 0.84 0.97 / 0.97 1.16 / 1.16 1.25 / 1.25 1.80 / 1.80 1.99 / 1.99 2.00 / 2.00 2.66 / 2.66 2.73 / 2.73 2.65 / 2.65 188 to 253V 0.47 / 0.50 0.47 / 0.50 0.68 / 0.74 1.20 / 1.33 1.20 / 1.33 1.57 / 1.73 1.72 / 1.89 2.08 / 2.29 4.23 / 4.67 4.23 / 4.67 4.29 / 4.73 5.60 / 6.18 7.12 / 7.85 0.32 / 0.31 0.41 / 0.39 0.46 / 0.43 0.47 / 0.45 0.64 / 0.60 0.88 / 0.83 1.37 / 1.51 1.66 / 1.83 3.38 / 3.73 3.38 / 3.73 3.43 / 3.78 4.48 / 4.94 5.69 / 6.28 WR2-SERIES SYSTEM DESIGN (June 2010) WR2SD-3 WR2-SERIES SYSTEM DESIGN 1-2-1. Electrical Characteristics of Indoor Unit WR2-SERIES SYSTEM DESIGN 1. ELECTRICAL WORK Model PCFY-P15NKMU-E PCFY-P24NKMU-E PCFY-P30NKMU-E PCFY-P36NKMU-E PKFY-P06NBMU-E PKFY-P08NBMU-E PKFY-P12NHMU-E PKFY-P15NHMU-E PKFY-P18NHMU-E PKFY-P24NKMU-E PKFY-P30NKMU-E PFFY-P06NEMU-E PFFY-P08NEMU-E PFFY-P12NEMU-E PFFY-P15NEMU-E PFFY-P18NEMU-E PFFY-P24NEMU-E PFFY-P06NRMU-E PFFY-P08NRMU-E PFFY-P12NRMU-E PFFY-P15NRMU-E PFFY-P18NRMU-E PFFY-P24NRMU-E Hz 60Hz 60Hz 60Hz 60Hz Symbols: MCA : Min.Circuit Amps (=1.25xFLA) FLA : Full Load Amps IFM :Indoor Fan Motor Output : Fan motor rated output Indoor Unit IFM Volts Voltage range MCA(A) FLA(A) 0.44 / 0.44 0.35 / 0.35 0.52 / 0.52 0.41 / 0.41 208 / 230V 188 to 253V 1.22 / 1.22 0.97 / 0.97 1.22 / 1.22 0.97 / 0.97 208 / 230V 208 / 230V 208 / 230V 198 to 253V 0.19 / 0.19 0.19 / 0.19 0.38 / 0.38 0.38 / 0.38 0.38 / 0.38 0.37 / 0.37 0.54 / 0.54 0.15 / 0.15 0.15 / 0.15 0.30 / 0.30 0.30 / 0.30 0.30 / 0.30 0.29 / 0.29 0.43 / 0.43 188 to 253V 0.32 / 0.34 0.32 / 0.34 0.34 / 0.38 0.40 / 0.44 0.48 / 0.53 0.59 / 0.64 0.25 / 0.27 0.25 / 0.27 0.27 / 0.30 0.32 / 0.35 0.38 / 0.42 0.47 / 0.51 188 to 253V 0.32 / 0.34 0.32 / 0.34 0.34 / 0.38 0.40 / 0.44 0.48 / 0.53 0.59 / 0.64 0.25 / 0.27 0.25 / 0.27 0.27 / 0.30 0.32 / 0.35 0.38 / 0.42 0.47 / 0.51 0.45 / 0.40 1.22 / 1.10 1.11 / 1.00 2.00 / 1.80 1.67 / 1.50 1.78 / 1.60 2.11 / 1.90 - PVFY-P12E00A PVFY-P18E00A PVFY-P24E00A PVFY-P30E00A PVFY-P36E00A PVFY-P48E00A PVFY-P54E00A 60Hz 208 / 230V 188 to 253V 0.56 / 0.50 1.53 / 1.38 1.39 / 1.25 2.50 / 2.25 2.09 / 1.88 2.23 / 2.00 2.64 / 2.38 PWFY-P36NMU-E-BU PWFY-P36NMU-E-AU PWFY-P72NMU-E-AU 60Hz 208 / 230V 188 to 253V 25 0.09 0.09 WR2SD-4 WR2-SERIES SYSTEM DESIGN (June 2010) 1. ELECTRICAL WORK 1-2-2. Electrical Characteristics of Water-source Unit PQRY-P-T(S)HMU Model Unit Combination PQRY-P72THMU-A PQRY-P96THMU-A PQRY-P120THMU-A PQRY-P144TSHMU-A PQRY-P168TSHMU-A PQRY-P192TSHMU-A PQRY-P216TSHMU-A PQRY-P240TSHMU-A Hz PQRY-P72THMU-A PQRY-P72THMU-A PQRY-P72THMU-A PQRY-P96THMU-A 60Hz PQRY-P96THMU-A PQRY-P96THMU-A PQRY-P96THMU-A PQRY-P120THMU-A PQRY-P120THMU-A PQRY-P120THMU-A Water-source unit Voltage range RLA(A) 12.6/11.4 18.0/16.2 23.6/21.4 12.6/11.4 12.6/11.4 12.6/11.4 208/230V 188 to 253V 18.0/16.2 18.0/16.2 18.0/16.2 18.0/16.2 23.6/21.4 23.6/21.4 23.6/21.4 Volts MCA(A) 16/15 23/21 30/27 16/15 16/15 16/15 23/21 23/21 23/21 23/21 30/27 30/27 30/27 Max.Fuse(A) 25/20 40/30 50/40 25/20 25/20 25/20 40/30 40/30 40/30 40/30 50/40 50/40 50/40 Compressor SC(A) 15 15 15 15 15 15 15 15 15 15 15 15 15 Symbols: MCA : Min.Circuit Amps SC : Starting Current RLA : Rated Load Amps PQRY-P-Y(S)HMU Model PQRY-P72YHMU-A PQRY-P96YHMU-A PQRY-P120YHMU-A PQRY-P144YSHMU-A PQRY-P168YSHMU-A PQRY-P192YSHMU-A PQRY-P216YSHMU-A PQRY-P240YSHMU-A Unit Combination Heat source unit Hz PQRY-P72YHMU-A PQRY-P72YHMU-A PQRY-P72YHMU-A PQRY-P96YHMU-A 60Hz PQRY-P96YHMU-A PQRY-P96YHMU-A PQRY-P96YHMU-A PQRY-P120YHMU-A PQRY-P120YHMU-A PQRY-P120YHMU-A Volts 460V Compressor Voltage range RLA(A) MCA(A) Max.Fuse(A) SC(A) 414 to 506V 5.7 8.1 10.7 5.7 5.7 5.7 8.1 8.1 8.1 8.1 10.7 10.7 10.7 8 11 14 8 8 8 11 11 11 11 14 14 14 15 15 20 15 15 15 15 15 15 15 20 20 20 7 7 7 7 7 7 7 7 7 7 7 7 7 WR2-SERIES SYSTEM DESIGN (June 2010) WR2SD-5 WR2-SERIES SYSTEM DESIGN Symbols: MCA : Min.Circuit Amps SC : Starting Current RLA : Rated Load Amps 1. ELECTRICAL WORK 1-2-3. Electrical Characteristics of BC Controller WR2-SERIES SYSTEM DESIGN Symbols: MCA : Min.Circuit Amps (=1.25 x RLA) RLA : Rated Load Amps BC-Controller for PQRY-P-TGMU Model Hz CMB-P104NU-G CMB-P105NU-G CMB-P106NU-G CMB-P108NU-G CMB-P1010NU-G CMB-P1013NU-G CMB-P1016NU-G 60Hz CMB-P108NU-GA CMB-P1010NU-GA CMB-P1013NU-GA CMB-P1016NU-GA CMB-P104NU-GB CMB-P108NU-GB WR2SD-6 Volts Voltage range 208 / 230V 198 to 253V MCA(A) 0.36 / 0.34 0.45 / 0.40 0.53 / 0.48 0.68 / 0.61 0.84 / 0.75 1.08 / 0.98 1.31 / 1.19 0.68 / 0.61 0.84 / 0.75 1.08 / 0.98 1.31 / 1.19 0.33 / 0.30 0.64 / 0.59 WR2-SERIES SYSTEM DESIGN (June 2010) MOCP 15 / 15 15 / 15 15 / 15 15 / 15 15 / 15 15 / 15 15 / 15 15 / 15 15 / 15 15 / 15 15 / 15 15 / 15 15 / 15 RLA(A) 0.29 / 0.27 0.36 / 0.32 0.42 / 0.38 0.54 / 0.49 0.67 / 0.60 0.86 / 0.78 1.05 / 0.95 0.54 / 0.49 0.67 / 0.60 0.86 / 0.78 1.05 / 0.95 0.26 / 0.24 0.51 / 0.47 1. ELECTRICAL WORK 1-3. Power Cable Specifications Minimum wire thickness (mm2/AWG) Main cable Branch Ground PQRY-P72YHMU-A 2.1/14 2.1/14 Water-source PQRY-P96YHMU-A 2.1/14 2.1/14 unit PQRY-P120YHMU-A 3.3/12 3.3/12 Indoor unit 0.41/22 0.41/22 0.41/22 Model Breaker for current leakage 15A 30mA or 100mA 0.1sec. or less 15A 30mA or 100mA 0.1sec. or less 20A 30mA or 100mA 0.1sec. or less 15A 30mA or 100mA 0.1sec. or less Switch (A) Breaker for Capacity Fuse wiring (NFB) 15 15 15 15 15 15 20 20 20 15 15 15 1. Use dedicated power supplies for the heat source unit and indoor unit. Ensure OC and OS are wired individually. 2. Bear in mind ambient conditions (ambient temperature,direct sunlight, rain water,etc.) when proceeding with the wiring and connections. 3. The wire size is the minimum value for metal conduit wiring. If the voltage drops, use a wire that is one rank thicker in diameter. Make sure the power-supply voltage does not drop more than 10%. 4. Specific wiring requirements should adhere to the wiring regulations of the region. 5. Power supply cords of parts of appliances for heat source use shall not be lighter than polychloroprene sheathed flexible cord (design 245 IEC57). For example, use wiring such as YZW. 6. A switch with at least 3 mm [1/8 in.] contact separation in each pole shall be provided by the Air Conditioner installer. • Be sure to use specified wires for connections and ensure no external force is imparted to terminal connections. If connections are not fixed firmly, heating or fire may result. • Be sure to use the appropriate type of overcurrent protection switch. Note that generated overcurrent may include some amount of direct current. • Some installation sites may require attachment of an earth leakage breaker for the inverter. If no earth leakage breaker is installed, there is a danger of electric shock. • Do not use anything other than a breaker and fuse with the correct capacity. Using a fuse or wire of too large capacity may cause malfunction or fire. WR2-SERIES SYSTEM DESIGN (June 2010) WR2SD-7 WR2-SERIES SYSTEM DESIGN Thickness of wire for main power supply, capacities of the switch and system impedance Minimum wire thickness (mm2/AWG) Switch (A) Breaker for Model Breaker for current leakage Main cable Branch Ground Capacity Fuse wiring (NFB) PQRY-P72THMU-A 3.3/12 3.3/12 20A 30mA or 100mA 0.1sec. or less 20 25 20 Water-source PQRY-P96THMU-A 5.3/10 5.3/10 30A 30mA or 100mA 0.1sec. or less 30 40 30 unit PQRY-P120THMU-A 8.4/8 8.4/8 40A 100mA 0.1sec. or less 40 50 40 Indoor unit 0.41/22 0.41/22 0.41/22 15A 30mA or 100mA 0.1sec. or less 15 15 15 1. ELECTRICAL WORK WR2-SERIES SYSTEM DESIGN 1-4. Power Supply Examples The local standards and/or regulations is applicable at a higher priority. 1-4-1. PQRY-P72, 96, 120THMU/YHMU Note: 1 The transmission cable is not-polarity double-wire. 2 Symbol means a screw terminal for wiring. 3 The shield wire of transmission cable should be connected to the grounding terminal at Heat source unit. All shield wire of M-Net transmission cable among Indoor units should be connected to the S terminal at Indoor unit or all shield wire should be connected together. The broken line at the scheme means shield wire. 4 When the Heat source unit connected with system controller, power-supply to TB7 of the heat source unit(s) is needed. The connector change from CN41 to CN40 at one of the heat source units will enable the heat source unit to supply power to TB7, or an extra power supplying unit PAC-SC51KUA should be used. The transmission cable (above 1.25mm2, shielded, CVVS/CPEVS/MVVS) among Heat source units and system controllers is called central control transmission cable. The shield wire of the central control transmission cable must be grounded at the Heat source unit whose CN41 is changed to CN40. 5 MA R/C transmission cable (0.3-1.25mm2) must be less than 200m in length, while ME R/C transmission cable (0.3-1.25mm2) must be less than 10m in length. But transmission cable to the ME R/C can be extend using a M-NET cable (>=1.25mm2) when the length is counted in the M-Net length. Both Compact MA and ME R/C transmission cables size 0.75~1.25mm2 in thickness. 6 MA remote controller and ME remote controller should not be grouped together. 7 If using 1 or 2 (main/sub) MA remote controller to control more than 1 Indoor unit, use MA transmission cable to connect all the TB15 terminals of the Indoor units. It is called "Grouping". If using 1 or 2 (main/sub) ME remote controller control more than 1 indoor unit, set address to Indoor unit and ME remote controller. For the method, refer to 2-4. "Address Setting". 8 Indoor board consumes power from TB3. The power balance should be considered according to System Design 2-3 "System configuration restrictions". 9 If Transmission booster is needed, be sure to connect the shield wires to the both sides to the booster. 10 The critical current for choosing power source equipment is approximate 1.4 times of total rated current of the Heat source unit(s) or Indoor unit(s). 11 Numbers shown with ( ) indicates a diameter of the compact remote controller. 12 When System controller (SC) is connected to the system, turn the SW2-1 on. 13 The phases of electricity power must be confirmed to be right used. Phase-reverse, or phase-missing could break the controllers. <In the case a system controller is connected.> Note12 Central control transmission cable >=1.25mm2 Shield cable (CVVS, CPEVS MVVS) SC Connector CN41 CN40 HU Note4 Note4 To other HU Breakers for current leakage Switch Power supply 3-phase 3-wire 208-230V 60Hz(THMU) 460V 60Hz(YHMU) Note10,13 TB1 TB3 TB7 (L1,L2,L3) (M1,M2) (M1,M2) TB7 (S) G Note3 To *1 or *2 BC controller *1 (Using MA remote controller) Connecting TB5 terminal. TB02 (M1,M2) TB01 S L,N (Shield) G Pull box Breakers for current leakage Switch Power supply 1-phase 208-230V 60Hz Note10 * Power supply specifications vary with the model of connected indoor units or BC controller Note7 TB5 TB2 TB15 (M1,M2) (L,N) (1,2) S (Shield) IU TB5 TB2 TB15 (M1,M2) (L,N) (1,2) S (Shield) Breakers for current leakage Power supply 1-phase 208-230V 60Hz TB5 TB2 TB15 (M1,M2) (L,N) (1,2) S (Shield) Switch TB1 (R,S) E TB2 TB3 S (Shield) Indoor-heat source transmission cable >=1.25mm2 Shield cable (Shield) Transmission booster Note8 Note9 Note6 Note7 MA R/C S TB5 TB2 TB15 (M1,M2) (L,N) (1,2) S (Shield) G MA R/C MA R/C cable 0.3-1.25mm2 (0.75~1.25mm2) <=200m Note5, Note11 MA R/C BC controller *2 (Using ME remote controller) Connecting TB5 terminal. TB02 (M1,M2) TB01 S L,N (Shield) G Pull box Breakers for current leakage Switch Power supply 1-phase 208-230V 60Hz Note10 * Power supply specifications vary with the model of connected indoor units or BC controller Note7 TB5 TB2 TB15 (M1,M2) (L,N) (1,2) S (Shield) IU TB5 TB2 TB15 (M1,M2) (L,N) (1,2) S (Shield) Breakers for current leakage Power supply 1-phase 208-230V 60Hz TB5 TB2 TB15 (M1,M2) (L,N) (1,2) S (Shield) Switch TB1 (R,S) E TB2 TB3 (Shield) Indoor-heat source transmission cable >=1.25mm2 Shield cable ME R/C Symbol Model BKC OCP Breaker capacity Over-current protector NFB HU IU SC Non-fuse breaker Heat source unit Indoor unit System controller MA R/C MA remote controller ME R/C ME remote controller WR2SD-8 PQRY-P72THMU PQRY-P96THMU PQRY-P120THMU PQRY-P72YHMU PQRY-P96YHMU PQRY-P120YHMU 20 A 30 mA or 100 mA 0.1 sec. or less 30 A 30 mA or 100 mA 0.1 sec. or less 40 A 100 mA 0.1 sec. or less 15 A 30 mA or 100 mA 0.1 sec. or less 15 A 30 mA or 100 mA 0.1 sec. or less 20 A 30 mA or 100 mA 0.1 sec. or less S (Shield) Transmission booster Note8 Note9 Note6 Note7 ME R/C Breakers for current leakage *1, *2 S TB5 TB2 TB15 (M1,M2) (L,N) (1,2) S (Shield) G ME R/C cable 0.3~1.25mm2 (0.75~1.25mm2) <=10m Note5, Note11 ME R/C Switch Switch Minimum Wire thickness BKC <A> OCP*3 <A> (NFB) <A> Power wire <mm2/AWG> 20 30 40 15 15 20 20 30 40 15 15 20 20 30 40 15 15 20 3.3/12 3.3/12 5.3/10 8.4/8 2.1/14 2.1/14 3.3/12 5.3/10 8.4/8 2.1/14 2.1/14 3.3/12 *1 The breakers for current leakage should support Inverter circuit. (e.g. Mitsubishi Electric's NV-C series or equivalent). *2 Breakers for current leakage should combine using of switch. *3 It shows data for B-type fuse of the breaker for current leakage. WR2-SERIES SYSTEM DESIGN (June 2010) G wire <mm2/AWG> 1. ELECTRICAL WORK The local standards and/or regulations is applicable at a higher priority. 1-4-2. PQRY-P144, 168, 192, 216, 240TSHMU/YSHMU Note12 Central control transmission cable >=1.25mm2 Shield cable (CVVS, CPEVS MVVS) SC Connector CN41 CN40 Note4 Breakers for current leakage Switch Power supply 3-phase 3-wire 208-230V 60Hz(THMU) 460V 60Hz(YHMU) Note10,13 Note4 HU TB1 TB1 TB3 TB7 (L1,L2,L3) (M1,M2) (M1,M2) G HU To other HU TB7 (S) TB3 TB7 (M1,M2) (M1,M2) Breakers for (L1,L2,L3) current leakage Switch Power supply 3-phase 4-wire 208-230V 60Hz(THMU) 460V 60Hz(YHMU) Note10,13 TB7 (S) G Note3 Note3 To *1 or *2 BC controller(Main) *1 (Using MA remote controller) Connecting TB5 terminal. TB02 (M1,M2) TB01 S L,N (Shield) BC controller(Sub) TB02 (M1,M2) G TB01 S L,N G Note: 1 The transmission cable is not-polarity double-wire. 2 Symbol means a screw terminal for wiring. 3 The shield wire of transmission cable should be connected to the grounding terminal at Heat source unit. All shield wire of M-Net transmission cable among Indoor units should be connected to the S terminal at Indoor unit or all shield wire should be connected together. The broken line at the scheme means shield wire. 4 When the Heat source unit connected with system controller, power-supply to TB7 of the heat source unit(s) is needed. The connector change from CN41 to CN40 at one of the heat source units will enable the heat source unit to supply power to TB7, or an extra power supplying unit PAC-SC51KUA should be used. The transmission cable (above 1.25mm2, shielded, CVVS/CPEVS/MVVS) among Heat source units and system controllers is called central control transmission cable. The shield wire of the central control transmission cable must be grounded at the Heat source unit whose CN41 is changed to CN40. 5 MA R/C transmission cable (0.3-1.25mm2) must be less than 200m in length, while ME R/C transmission cable (0.3-1.25mm2) must be less than 10m in length. But transmission cable to the ME R/C can be extend using a M-NET cable (>=1.25mm2) when the length is counted in the M-Net length. Both Compact MA and ME R/C transmission cables size 0.75~1.25mm2 in thickness. 6 MA remote controller and ME remote controller should not be grouped together. 7 If using 1 or 2 (main/sub) MA remote controller to control more than 1 Indoor unit, use MA transmission cable to connect all the TB15 terminals of the Indoor units. It is called "Grouping". If using 1 or 2 (main/sub) ME remote controller control more than 1 indoor unit, set address to Indoor unit and ME remote controller. For the method, refer to 2-4. "Address Setting". 8 Indoor board consumes power from TB3. The power balance should be considered according to System Design 2-3 "System configuration restrictions". 9 If Transmission booster is needed, be sure to connect the shield wires to the both sides to the booster. 10 The critical current for choosing power source equipment is approximate 1.4 times of total rated current of the Heat source unit(s) or Indoor unit(s) . 11 Numbers shown with ( ) indicates a diameter of the compact remote controller. 12 When System controller (SC) is connected to the system, turn the SW2-1 on. 13. The phases of electricity power must be confirmed to be right used. Phase-reverse, or phase-missing could break the controllers. Pull box Breakers for current leakage Switch Power supply 1-phase 208-230V 60Hz Note10 * Power supply specifications vary with the model of connected indoor units or BC controller Note7 TB5 TB2 TB15 (M1,M2) (L,N) (1,2) S (Shield) IU TB5 TB2 TB15 (M1,M2) (L,N) (1,2) S (Shield) TB5 TB2 TB15 (M1,M2) (L,N) (1,2) S (Shield) Breakers for Power supply current leakage Switch 1-phase 208-230V 60Hz TB1 (R,S) E TB2 TB3 (Shield) Indoor-heat source transmission cable >=1.25mm2 Shield cable (Using ME remote controller) Connecting TB5 terminal. TB02 (M1,M2) TB01 S L,N (Shield) MA R/C TB02 (M1,M2) G TB01 S L,N G Pull box Note7 TB5 TB2 TB15 (M1,M2) (L,N) (1,2) S (Shield) IU TB5 TB2 TB15 (M1,M2) (L,N) (1,2) S (Shield) TB5 TB2 TB15 (M1,M2) (L,N) (1,2) S (Shield) Breakers for Power supply current leakage Switch 1-phase 208-230V 60Hz TB1 (R,S) E TB2 TB3 (Shield) Indoor-heat source transmission cable >=1.25mm2 Shield cable ME R/C Model Symbol BKC OCP Breaker capacity Over-current protector NFB HU IU SC Non-fuse breaker Heat source unit Indoor unit System controller MA R/C MA remote controller ME R/C ME remote controller MA R/C cable 0.3-1.25mm2 (0.75~1.25mm2) <=200m Note5, Note11 BC controller(Sub) Breakers for current leakage Switch Power supply 1-phase 208-230V 60Hz Note10 * Power supply specifications vary with the model of connected indoor units or BC controller (Shield) MA R/C BC controller(Main) *2 S Transmission booster Note8 Note9 Note6 Note7 MA R/C S TB5 TB2 TB15 (M1,M2) (L,N) (1,2) S (Shield) G PQRY-P72THMU PQRY-P96THMU PQRY-P120THMU PQRY-P72YHMU PQRY-P96YHMU PQRY-P120YHMU S S TB5 TB2 TB15 (M1,M2) (L,N) (1,2) S (Shield) G ME R/C cable 0.3~1.25mm2 (0.75~1.25mm2) <=10m Note5, Note11 (Shield) Transmission booster Note8 Note9 Note6 Note7 ME R/C ME R/C Breakers for current leakage *1, *2 20 A 30 mA or 100 mA 0.1 sec. or less 30 A 30 mA or 100 mA 0.1 sec. or less 40 A 100 mA 0.1 sec. or less 15 A 30 mA or 100 mA 0.1 sec. or less 15 A 30 mA or 100 mA 0.1 sec. or less 20 A 30 mA or 100 mA 0.1 sec. or less Switch Minimum Wire thickness Switch BKC <A> OCP*3 <A> (NFB) <A> Power wire <mm2/AWG> G wire <mm2/AWG> 20 30 40 15 15 20 20 30 40 15 15 20 20 30 40 15 15 20 3.3/12 3.3/12 5.3/10 8.4/8 2.1/14 2.1/14 3.3/12 5.3/10 8.4/8 2.1/14 2.1/14 3.3/12 *1 The breakers for current leakage should support Inverter circuit. (e.g. Mitsubishi Electric's NV-C series or equivalent). *2 Breakers for current leakage should combine using of switch. *3 It shows data for B-type fuse of the breaker for current leakage. WR2-SERIES SYSTEM DESIGN (June 2010) WR2SD-9 WR2-SERIES SYSTEM DESIGN <In the case a system controller is connected.> 2. M-NET CONTROL 2-1-1. Using MA Remote controller Long transmission cable causes voltage down, therefore, the length limitation should be obeyed to secure proper transmission. Max. length via Heat source (M-NET cable) L1+L2+L3+L4, L1+L2+L6+L7, L3+L4+L6+L7 <=500m[1640ft.] 1.25mm2 [AWG16] or thicker Max. length to Heat source (M-NET cable) L1+L8, L3+L4, L6, L2+L6+L8, L7 <=200m[656ft.] 1.25mm2 [AWG16] or thicker Max. length from MA to Indoor a1+a2, a1+a2+a3+a4 <=200m[656ft.] 0.3-1.25 mm2 [AWG22-16] 24VDC to AG-150A n <=50m[164ft.] 0.75-2.0 mm2 [AWG18-14] L8 L1 Group1 OS BC(Main) OC (52) (51) (53) TB3 M1M2 TB3 M1M2 TB02 M1M2 S Group3 IC (04) (01) TB5 M1M2 S Group5 BC(Sub) IC TB15 1 2 TB5 M1M2 S (55) TB15 1 2 TB02 M1M2 S IC IC (05) TB5 M1M2 S (06) TB15 1 2 TB15 1 2 TB5 M1M2 S a2 TB7 M1M2 S A B A B MA MA L2 MA L3 OC (54 ) IC IC BC(Sub) IC (56) (02) (03) (57) (07) TB3 M1M2 TB5 M1M2 S TB02 M1M2 S TB5 TB 15 M1M2 S 1 2 TB15 1 2 TB02 M1M2 S TB15 1 2 TB5 M1M2 S L6 M1 M2 S L4 BC(Main) TB7 a4 a3 a2 A B Shielded wire a2 a1 a1 TB7 M1M2 S A B S a1 Power Supply Unit PAC-SC51KUA V+V-FG L7 A B n AG-150A A B S MA V+V-FG OC, OS: Heat source unit controller; IC: Indoor unit controller; ME: ME remote controller 2-1-2. Using ME Remote controller Long transmission cable causes voltage down, therefore, the length limitation should be obeyed to secure proper transmission. Max. length via Heat source (M-NET cable) L1+L2+L3+L4, L1+L2+L6+L7,L1+L2+L3+L5, L3+L4+L6+L7 <=500m[1640ft.] 1.25mm2 [AWG16] or thicker Max. length to Heat source (M-NET cable) L1+L8, L3+L4, L6, L2+L6+L8, L7, L3+L5 <=200m[656ft.] 1.25mm2 [AWG16] or thicker Max. length from ME to Indoor e1, e2+e3, e4 <=10m[32ft.]*1 0.3-1.25 mm2 [AWG22-16] *1 24VDC to AG-150A n <=50m[164ft.] 0.75-2.0 mm2 [AWG18-14] *1. If the length from ME to Indoor exceed 10m, use 1.25 mm2 [AWG16] shielded cable, but the total length should be counted into Max. length via Heat source. . L1 L8 Group1 Group3 Group5 OS OC BC(Main) IC IC BC(Sub) IC IC (52) (51) (53) (01) (04) (55) (05) (06) TB3 M1M2 TB3 M1M2 TB02 M1M2 S TB7 M1M2 S TB7 M1M2 S TB5 M1M2 S TB02 M1M2 S TB5 M1M2 S e2 TB5 M1M2 S A B Shielded wire L2 ME L3 (54 ) TB7 TB3 M1M2 IC IC BC(Sub) IC (03) (57) (07) TB5 M1M2 S TB5 M1M2 S L6 e4 V+V-FG A B n ME V+V-FG OC, OS: Heat source unit controller; IC: Indoor unit controller; ME: ME remote controller WR2SD-10 ME (02) (103) A B S ME (56) TB02 M1M2 S AG-150A (155) BC(Main) Power Supply Uni t PAC-SC51KUA A B S A B (105) L4 L5 M1 M2 S WR2-SERIES SYSTEM DESIGN (June 2010) TB02 M1M2 S TB5 M1M2 S e3 A B (101) OC L7 WR2-SERIES SYSTEM DESIGN 2-1. Transmission Cable Length Limitation TB5 M1M2 S 2. M-NET CONTROL 2-2. Transmission Cable Specifications Cable size ME Remote controller cables More than 1.25 Remarks Connected with simple remote controller. — [AWG16] MA Remote controller cables Sheathed 2-core cable (unshielded) CVV Shielding wire (2-core) CVVS, CPEVS or MVVS 0.3 1.25 (0.75 1.25 2 2 [AWG22 16] [AWG18 16]) 0.3 1.25 (0.75 1.25 When 10m [32ft] is exceeded, use cables with the same specification as transmission cables. 2 2 [AWG22 16] [AWG18 16]) Max length : 200m [656ft] CVVS, MVVS : PVC insulated PVC jacketed shielded control cable CPEVS : PE insulated PVC jacketed shielded communication cable CVV : PV insulated PVC sheathed control cable WR2-SERIES SYSTEM DESIGN (June 2010) WR2SD-11 WR2-SERIES SYSTEM DESIGN Transmission cables (Li) Type of cable 2. M-NET CONTROL WR2-SERIES SYSTEM DESIGN 2-3. System Configuration Restrictions 2-3-1. Common restrictions for the CITY MULTI system For each Heat source unit, the maximum connectable quantity of Indoor unit is specified at its Specifications table. A) 1 Group of Indoor units can have 1-16 Indoor units; B) Maximum 2 remote controllers for 1 Group; C) 1 LOSSNAY unit can interlock maximum 16 Indoor units; 1 Indoor unit can interlock only 1 LOSSNAY unit. D) Maximum 3 System controllers are connectable when connecting to TB3 of the Heat source unit. E) Maximum 3 System controllers are connectable when connecting to TB7 of the Heat source unit, if the transmission power is supplied by the Heat source unit. F) 4 System controllers or more are connectable when connecting to TB7 of the Heat source unit, if the transmission power is supplied by the power supply unit PAC-SC51KUA. Details refer to 2-3-3-C. *System controller connected as described in D) and E) would have a risk that the failure of connected Heat source unit would stop power supply to the System controller. 2-3-2. Ensuring proper communication power for M-NET In order to ensure proper communication among Heat source unit, Indoor unit, LOSSNAY and Controllers, the transmission power situation for the M-NET should be observed. In some cases, Transmission booster should be used. Taking the power consumption index of Indoor unit sized P06-P54 as 1, the equivalent power consumption index and supply capability index of others are listed at Table 2-3-1 and Table 2-3-2. Table 2-3-1 The equivalent power consumption by index Indoor units, LOSSNAY, controllers BC controller MA RC.LOSSNAY ME Remote Contr. Indoor,OA unit Indoor unit Sized P06-P54 Sized P72,P96 1 7 PAR-21MAA PAC-YT51CRB PAR-FA32MA LGH-RX-E PZ-41SLB 0 CMB 2 Timers, System Contr. PAC-SF44SRA GB-50A PAC-YT34ST AG-150A PAR-F27MEA PZ-52SF 1/4 1/2 3 TC-24 MN Converter PACYT40ANRA GB-24 1/2 1 4 CMS CMS -MNF-B -MNG-E 2 *RC : Remote Controller Table 2-3-2 The equivalent power supply capability index of Trans.Booster, Power supply unit, Connector TB3, TB7 of Heat source unit. Transmission Booster Power supply unit Centralized Controller Expansion controller PAC-SF46EPA 25 GB-50ADA 6 PAC-SC51KUA 5 PAC-YG50ECA 6 Heat source unit Heat source unit Connector TB3 and TB7 total * 32 Connector TB7 only 6 *If PAC-SC51KUA is used to supply power at TB7 side, no power supply need from Heat source unit at TB7, Connector TB3 itself will therefore have 32. With the equivalent power consumption values in Table 2-3-1 and Table 2-3-2, PAC-SF46EPA can be designed into the airconditioner system to ensure proper system communication according to 2-3-2-A, B, C. 2-3-2-A) Firstly, count from TB3 at TB3 side the total quantity of Indoor units and ME remote controller, Timers and System controllers.If the total quantity reaches 40, a PAC-SF46EPA should be set.In this case, Indoor unit sized P72, 96 is counted as 7 Indoor units, but MA remote controller(s), LOSSNAY is NOT counted. 2-3-2-B) Secondly, count from TB7 side to TB3 side the total transmission power consumption index. If the total power consumption reaches 32, a PAC-SF46EPA should be set.Yet, if a PAC-SC51KUA is used to supply power at TB7 side, count from index TB3 side only. 2-3-2-C) Thirdly, count from TB7 at TB7 side the total transmission power consumption index, If the total power consumption reaches 6, a PAC-SF46EPA should be set. System example TB7 TB3 UP TRANSMISSION BOOSTER MODEL PAC-SF46EPA POWER RATING 220-240V:0.7A ~/N 50 WEIGHT 3.4kg MADE IN JAPAN 01 Transmission booster (No.1) 02 ME remote controller TB7 TB3 Heat source unit ME remote controller N1 N2 Within N2, conditions 1,2 should be followed. 1.The total quantity of Indoor units and ME remote controller should not exceed 40. *Indoor unit sized P72, 96 is counted as 7 units. 2.The total equivalent transmission power consumption should not exceed 25. Transmission booster (No.1) should be used, if the total quantity of Indoor units and ME remote controllers reaches 40, (Indoor unit sized P72, 96 is counted as 7); or if the total equivalent transmission power consumption reaches 32. UP TRANSMISSION BOOSTER MODEL PAC-SF46EPA POWER RATING 220-240V:0.7A ~/N 50 WEIGHT 3.4kg MADE IN JAPAN M-NET Power supply unit PAC-SC51KUA WR2SD-12 24VDC LOSSNAY unit CENTRALIZED CONTROLLER AG-150A Centralized controller (AG-150A) PZ-52SF Transmission booster PAC-SF46EPA (No.2) LOSSNAY unit PZ-52SF N4 N3 Transmission booster (No.2) should be used, if the total equivalent transmission power consumption reaches 5. Within N4, the total equivalent transmission power consumption should not exceed 25. WR2-SERIES SYSTEM DESIGN (June 2010) 2. M-NET CONTROL 2-3-3. Ensuring proper power supply to System controller 2-3-3-A. When connecting to TB3 of the Heat source unit and receiving power from the Heat source unit. Maximum 3 System controllers can be connected to TB3. Fig. 2-3-3-A If there is more than 1 Heat source unit, it is necessary to System controller M-NET transmission lines (excluding LMAP02-E) (Indoor-Heat source transmission lines) Heat source unit replace power supply switch connector CN41 with CN40 Group Group on one Heat source unit. TB3 TB7 Replacement of CN41 with CN40 Indoor unit M-NET transmission lines (transmission lines for central controller) Heat source unit MA remote controller Group Group TB3 TB7 Use CN41 as it is. Indoor unit ME remote controller System controller Maximum 3 System controllers can be connected to TB3. 2-3-3-B. When connecting to TB7 of the Heat source unit and receiving power from the Heat source unit. Maximum 3 System controllers can be connected to TB7 and receiving power from the Heat source unit. Fig. 2-3-3-B M-NET transmission lines (Indoor-Heat source transmission lines) It is necessary to replace power supply switch connector Heat source unit Group Group CN41 with CN40 on one Heat source unit. TB3 TB7 Replacement of CN41 with CN40 Indoor unit M-NET transmission lines (transmission lines for central controller) Heat source unit MA remote controller Group Group TB3 TB7 Use CN41 as it is. Indoor unit ME remote controller System controller Maximum 3 System controllers can be connected to TB7. 2-3-3-C. When connecting to TB7 of the Heat source unit but receiving power from PAC-SC51KUA. When using PAC-SC51KUA to supply transmission power, the power supply connector CN41 on the Heat source units should be kept as it is. It is also a factory setting. 1 PAC-SC51KUA supports maximum 1 AG-150A unit due to the limited power DC 24V at its TB3. However, 1 PAC-SC51KUA supplies transmission power at its TB2 equal to 5 Indoor units, which is referable at Table 2-3-2. If PZ-52SF, Timers, System controller, ON/OFF controller connected to TB7 consume transmission power more than 5 (Indoor units), Transmission booster PAC-SF46EPA is needed. PAC-SF46EPA supplies transmission power equal to 25 Indoor units. CAUTION Fig. 2-3-3-D M-NET transmission lines (Indoor-Heat source transmission lines) Heat source unit Group Group TB3 TB7 Use CN41 as it is. Indoor unit M-NET transmission lines (transmission lines for central controller) Heat source unit MA remote controller Group Use CN41 as it is. PAC-SC51KUA Group TB3 TB7 Indoor unit ME remote controller System controller AG-150A/GB-50A/GB-50ADA/GB-24A/TC-24A is recommended to connect to TB7 because these controllers perform back-up to a number of data. In an air conditioner system has more than 1 Heat source units, AG-150A/GB-50A/GB-50ADA/GB-24A/TC-24A receiving transmission power at TB3 or TB7 on one of the Heat source units would have a risk that the connected Heat source unit failure would stop power supply to AG-150A/GB-50A/GB-50ADA/ GB-24A/TC-24A, and disrupt the whole system. When applying apportioned electric power function, AG-150A/GB-50A/GB-24A/TC-24A is necessary to connected to TB7 and has its own power supply unit PAC-SC51KUA.* *Power supply unit PAC-SC51KUA is for AG-150A. WR2-SERIES SYSTEM DESIGN (June 2010) WR2SD-13 WR2-SERIES SYSTEM DESIGN The power to System controller (excluding LMAP03-U) is supplied via M-NET transmission line. M-NET transmission line at TB7 side is called Central control transmission line while one at TB3 side is called Indoor-Heat source transmission line. There are 3 ways to supply power to the System controller . A) Connecting to TB3 of the Heat source unit and receiving power from the Heat source unit. B) Connecting to TB7 of the Heat source unit and receiving power from the Heat source unit. C) Connecting to TB7 of the Heat source unit but receiving power from power supply unit PAC-SC51KUA. 2. M-NET CONTROL WR2-SERIES SYSTEM DESIGN 2-3-4. Power supply to LM adapter LMAP03U 1-phase 208-230V AC power supply is needed. The power supply unit is not necessary when connecting only the LMAP03U. Yet, make sure to change the power supply changeover connector CN41 to CN40 on the LM adapter. 2-3-5. Power supply to expansion controller 1-phase 100-240VAC power supply is needed. The power supply unit PAC-SC51KUA is not necessary. The expansion controller supplies power through TB3, which equals 6 indoor units. (refer to Table 2-3-2) 2-3-6. Power supply to BM ADAPTER 1-phase 100-240VAC power supply is needed. The power supply unit PAC-SC51KUA is not necessary when only BM ADAPTER is connected. Yet, make sure to move the power jumper from CN41 to CN40 on the BM ADAPTER. WR2SD-14 WR2-SERIES SYSTEM DESIGN (June 2010) 2. M-NET CONTROL 2-4. Address Setting Unit address No. setting 01 9 7 8 7 8 01 2 3 9 2 3 45 6 D BC E F 0 12 3456 789A À Address No. of heat source unit, indoor unit and remote controller. The address No. is set at the address setting board. In the case of WR2 system, it is necessary to set the same No. at the branch No. switch of indoor unit as that of the BC controller connected. (When connecting two or more branches, use the lowest branch No.) Á Caution for switch operations Rotary switch Branch No. setting 45 6 In order to constitute CITY MULTI in a complete system, switch operation for setting the unit address No. and connection No. is required. ¥ Be sure to shut off power source before switch setting. If operated with power source on, switch can not operate properly. ¥ No units with identical unit address shall exist in one whole air conditioner system. If set erroneously, the system can not operate. Â MA remote controller ¥ When connecting only one remote controller to one group, it is always the main remote controller. When connecting two remote controllers to one group, set one remote controller as the main remote controller and the other as the sub remote controller. ¥ The factory setting is Main . ON Setting the dip switches 1 2 3 4 The dip switches are at the bottom of the remote controller. Remote controller Main/Sub and other function settings are performed using these switches. Ordinarily, only change the Main/Sub setting of SW1. (The factory settings are all ON .) SW No ON 1 2 3 4 SW contents Main ON OFF 1 Remote controller Main/Sub setting Comment Main Sub 2 When remote controller power turned on 3 Cooling/heating display in AUTO mode Yes No When you do not want to display Cooling and Heating in the Auto mode, set to No . 4 Intake temperature display Yes No When you do not want to display the intake temperature, set to No . Set one of the two remote controllers at one group to Main . Normally on Timer mode on When you want to return to the timer mode when the power is restored after a power failure when a Program timer is connected, select Timer mode . WR2-SERIES SYSTEM DESIGN (June 2010) WR2SD-15 WR2-SERIES SYSTEM DESIGN 2-4-1. Switch operation 2. M-NET CONTROL 2-4-2. Rule of setting address 7 8 4 5 6 10 1 7 8 7 8 7 8 7 8 7 8 4 5 6 4 5 6 7 8 7 8 45 6 45 6 7 8 7 8 45 6 45 6 1 7 8 9 45 6 10 The smallest address of indoor unit in the group + 100 The place of "100" is fixed to "1" The address of main remote controller + 50 The address automatically becomes "200" if it is set as "00" The smallest group No. to be managed + 200 01 7 8 1 01 7 8 9 45 6 7 8 45 6 7 8 9 45 6 45 6 45 6 10 1 0 0 0 100 10 1 0 0 0 100 10 1 0 0 0 100 10 1 9 0 1 9 0 1 Settings are made on the initial screen of AG-150A. Settings are made with setting tool of BM ADAPTER. 2 3 2 3 7 8 100 7 8 Lowest address within the indoor units connected to the BC controller (Sub) plus 50. 45 6 7 8 Please reset one of them to an address between 51 and 99 when two addresses overlap. The address automatically becomes "100" if it is set as "01~ 50" 2 3 0 9 1 4 5 6 4 5 6 2 The address of heat source unit + 1 2 3 10 0 9 1 Fixed The smallest address of indoor unit in same refrigerant system + 50 Assign sequential address numbers to the heat source units in one refrigerant circuit system. OC and OS are automatically detected. (Note 2) Please reset one of them to an address between 51 and 99 when two addresses overlap. The address automatically becomes "100" if it is set as "01~ 50" 1 0 9 1 100 7 8 01 7 8 01 Use the most recent address within the same group of indoor units. Make the indoor units address connected to the BC controller (Sub) larger than the indoor units address connected to the BC controller (Main). If applicable, set the sub BC controllers in an PQRY system in the following order: (1) Indoor unit to be connected to the BC controller (Main) (2) Indoor unit to be connected to the BC controller (No.1 Sub) (3) Indoor unit to be connected to the BC controller (No.2 Sub) Set the address so that (1)<(2)<(3) 45 6 Local remote controller 4 5 6 4 5 6 01 2 3 2 000, 201 ~ 250 201 ~ 250 9 2 3 000, 201 ~ 250 01 10 9 01 1 2 3 PAC-YG50ECA 9 2 3 9 1 0 9 1 000, 201 ~ 250 01 2 3 System controller 4 5 6 4 5 6 1 Fixed 000, 201 ~ 250 2 3 201 ~ 250 000, 201 ~ 250 LMAP03U 10 Fixed GB-50ADA, AG-150A, GB-50A, GB-24A/TC-24A BAC-HD150 9 0 1 10 2 3 ON/OFF remote controller 9 0 1 Fixed 2 3 System remote controller 1 2 3 Group remote controller 10 9 1 2 3 151 ~ 199, 200 9 0 1 2 3 ME, LOSSNAY Remote controller (Sub) 9 0 1 2 3 101 ~ 150 2 3 52 ~ 99, 100 ME, LOSSNAY Remote controller (Main) 1 2 3 BC controller (Sub) 52 ~ 99, 100 9 0 1 10 2 3 BC controller (Main) 2 3 Heat source unit 7 8 9 0 1 51 ~ 99, 100 (Note1) 9 0 1 7 8 9 0 1 01 ~ 50 Note 2 3 WR2-SERIES SYSTEM DESIGN Example 2 3 Indoor unit, Lossnay, PAC-YG63MCA (AI Controller), PAC-YG66DCA (DIDO Controller) Address setting 4 5 6 Unit 10 1 Note1: To set the address to "100", set it to "50" Note2: Heat source units OC and OS in one refrigerant circuit system are automatically detected. OC and OS are ranked in descending order of capacity. If units are the same capacity, they are ranked in ascending order of their address. WR2SD-16 WR2-SERIES SYSTEM DESIGN (June 2010) 2. M-NET CONTROL WR2-SERIES SYSTEM DESIGN 2-4-3. System examples Factory setting Original switch setting of the heat sources, indoors, controllers and LMAP at shipment is as follows. • Heat source unit : Address: 00, CN41: U (Jumper), DipSW2-1: OFF • Indoor unit : Address: 00 • BC controller : Address: 00 • ME remote controller : Address: 101 • LMAP : Address: 247, CN41: U (Jumper), DipSW1-2: OFF Setting at the site • DipSW2-1(Heat source) : When the System Controller is used, all the Dip SW2-1 at the heat source units should be set to "ON". * Dip SW2-1 remains OFF when only LMAP03U is used. • DipSW1-2(LMAP) : When the LMAP is used together with System Controller, DipSW1-2 at the LMAP should be set to "ON". : Change jumper from CN41 to CN 40 at heat source control board will activate central • CN40/CN41 transmission power supply to TB7; (Change jumper at only one heat source unit when activating the transmission power supply without using a power supply unit.) Change jumper from CN41 to CN 40 at LMAP will activate transmission power supply to LMAP itself; Power supply unit is recommended to use for a system having more than 1 heat source unit, because the central transmission power supply from TB7 of one of heat source units is risking that the heat source unit failure may let down the whole central control system. 2-4-3-1. MA remote controller, Single-refrigerant-system, No System Controller <Two heat source units> PQRY-P-TSHMU/YSHMU OC OS 00 CN40 CN41 00 CN40 DipSW2-1 OFF TB3 <One heat source units> PQRY-P-THMU/YHMU OC CN41 DipSW2-1 OFF TB3 00 CN40 CN41 DipSW2-1 OFF TB3 Group 1 BC controller Group 3 Group 4 Indoor unit 00 TB02 Group 2 00 TB5 SRU 00 TB15 TB5 00 TB15 TB5 00 TB15 TB5 00 TB15 TB5 TB15 1* MA R/C MA R/C MA R/C MA R/C (Main) (Sub) 1* Wireless R/C *1 For Wireless R/C and Signal receiver unit (SRU), channel 1, 2 and 3 are selectable and should be set to same channel. NOTE: 1. Heat source units OC and OS in one refrigerant circuit system are automatically detected. OC and OS are ranked in descending order of capacity. If units are the same capacity, they are ranked in ascending order of their address. 2. No address setting is needed. 3. For a system having more than 32 indoor unit (P06-P54), confirm the need of Booster at 2-3 "System configuration restrictions". 4. Indoor units should be set with a branch number. 5. Address setting is required if a sub BC controller is connected. WR2-SERIES SYSTEM DESIGN (June 2010) WR2SD-17 2. M-NET CONTROL WR2-SERIES SYSTEM DESIGN 2-4-3-2. MA remote controller, Single-refrigerant-system, System Controller <Two heat source units> PQRY-P-TSHMU/YSHMU OC OS 51 CN40 CN41 52 CN40 DipSW2-1 ON TB3 <One heat source units> PQRY-P-THMU/YHMU OC CN41 DipSW2-1 TB3 ON 51 CN40 CN41 DipSW2-1 ON TB3 Group 1 BC controller 01 TB5 02 TB15 201 SC Group 3 Group 4 Indoor unit 53 TB02 Group 2 03 TB5 SRU TB15 TB5 04 TB15 TB5 05 TB15 TB5 TB15 1* MA R/C MA R/C MA R/C MA R/C (Main) (Sub) 1* Wireless R/C *1 For Wireless R/C and Signal receiver unit (SRU), channel 1, 2 and 3 are selectable and should be set to same channel. *SC can be connected to TB3 side or TB7 side; Should SC connected to TB7 side, change Jumper from CN41 to CN40 at the Heat source unit module so as to supply power to the SC. NOTE: 1. Heat source units OC and OS in one refrigerant circuit system are automatically detected. OC and OS are ranked in descending order of capacity. If units are the same capacity, they are ranked in ascending order of their address. 2. Address should be set to Indoor units and central controller. 3. For a system having more than 32 indoor unit (P06-P54), confirm the need of Booster at 2-3 "System configuration restrictions". 4. Indoor units should be set with a branch number. WR2SD-18 WR2-SERIES SYSTEM DESIGN (June 2010) 2. M-NET CONTROL 2-4-3-3. MA remote controller, Multi-refrigerant-system, System Controller at TB7/TB3 side, Booster for long M-NET wiring 51 CN40 52 CN41 CN40 DipSW2-1 ON TB3 PQRY-P-TSHMU/YSHMU OC OS TB7 TB7 91 CN41 CN40 DipSW2-1 92 CN41 CN40 DipSW2-1 ON ON TB3 TB3 DipSW2-1 ON ON TB3 TB3 Group 21 02 TB15 TB5 03 TB15 TB5 30 TB15 TB2 TB3 TB5 TB15 Transmission Booster PAC-SF46EPA SRU *1 MA R/C 202 Power supply unit (PSU) (PAC-SC51KUA) *2 CN41 Group 2 01 TB5 PSU CN40 Indoor unit 53 TB02 97 CN41 DipSW2-1 Group1 BC controller PQRY-P-THMU/YHMU OC TB7 WR2-SERIES SYSTEM DESIGN PQRY-P-TSHMU/YSHMU OC OS TB7 TB7 SC*3 MA R/C MA R/C (Main) (Sub) *1 Wireless R/C 000 or 201 SC Group 31 BC controller (Main) Indoor unit 93 41 TB02 TB5 42 TB15 SRU *1 203 SC*3 Group 32 TB5 Group 34 Group 33 LOSSNAY 43 TB5 45 95 TB5 142 143 ME R/C PZ-52SF Group 35 BC controller (Sub1) 46 TB15 MA R/C TB5 TB15 MA R/C MA R/C (Main) (Sub) *1 Wireless R/C *1 For Wireless R/C and Signal receiver unit (SRU), channel 1, 2 and 3 are selectable and should be set to same channel. *2 System controller should connect to TB7 at the Heat source unit and use power supply unit together in Multi-Refrigerant-System. For AG-150A, 24VDC should be used with the PAC-SC51KUA. *3 When multiple system controllers are connected in the system, set the controller with more functions than others as a "main" controller and others as "sub". Make the setting to only one of the system controllers for "prohibition of operation from local remote controller". NOTE: 1. Heat source units OC and OS in one refrigerant circuit system are automatically detected. OC and OS are ranked in descending order of capacity. If units are the same capacity, they are ranked in ascending order of their address. 2. Address should be set to Indoor units, LOSSNAY and system controller. 3. M-NET power is supplied by the Heat source unit at TB3, while Indoor unit and ME remote controller consume the M-NET power for transmission use. The power balance is needed to consider for long M-NET wiring. Details refer to 2-3 "System configuration restrictions". 4. Indoor units should be set with a branch number. 5. Assign an address to each of the sub BC controllers which equals the sum of the smallest address of the indoor units that are connected to each sub BC controller and 50. WR2-SERIES SYSTEM DESIGN (June 2010) WR2SD-19 2. M-NET CONTROL WR2-SERIES SYSTEM DESIGN 2-4-3-4. ME remote controller, Single-refrigerant-system, No system controller <One heat source units> PQRY-P-THMU/YHMU OC <Two heat source units> PQRY-P-TSHMU/YSHMU OC OS 51 CN40 CN41 52 CN40 DipSW2-1 OFF TB3 51 CN41 CN40 DipSW2-1 CN41 DipSW2-1 OFF OFF TB3 TB3 Group 1 Group 2 BC controller Indoor unit 53 01 TB02 02 TB5 Group 3 03 TB5 Group 4 04 TB5 05 TB5 TB5 101 102 104 ME R/C ME R/C ME R/C 105 155 ME R/C ME R/C NOTE: 1. Heat source units OC and OS in one refrigerant circuit system are automatically detected. OC and OS are ranked in descending order of capacity. If units are the same capacity, they are ranked in ascending order of their address. 2. Address should be set to Indoor units, system controller and ME remote controllers. 3. M-NET power is supplied by the Heat source unit at TB3, while Indoor unit and ME RC consume the M-NET power for transmission use. The power balance is needed to consider for long M-NET wiring. Details refer to 2-3 "System configuration restrictions". 4. Indoor units should be set with a branch number. 2-4-3-5. ME remote controller, Single-refrigerant-system, System controller, LOSSNAY <Two heat source units> PQRY-P-TSHMU/YSHMU OC OS 51 CN40 CN41 52 CN40 DipSW2-1 ON TB3 <One heat source units> PQRY-P-THMU/YHMU OC CN41 51 CN40 DipSW2-1 CN41 DipSW2-1 ON ON TB3 TB3 Group 1 BC controller Indoor unit 53 01 TB02 Group 2 02 TB5 TB5 Group 3 Group 4 LOSSNAY 03 TB5 Group 5 04 TB5 05 TB5 201 101 102 103 104 SC ME R/C ME R/C PZ-52SF ME R/C 105 155 ME R/C ME R/C *SC can be connected to TB3 side or TB7 side; Should SC connected to TB7 side, change Jumper from CN41 to CN40 at the Heat source unit module so as to supply power to the SC. NOTE: 1. Heat source units OC and OS in one refrigerant circuit system are automatically detected. OC and OS are ranked in descending order of capacity. If units are the same capacity, they are ranked in ascending order of their address. 2. Address should be set to Indoor units, LOSSNAY central controller, ME remote controllers. 3. For a system having more than 32 indoor unit (P06-P54), confirm the need of Booster at 2-3 "System configuration restrictions". 4. Indoor units should be set with a branch number. WR2SD-20 WR2-SERIES SYSTEM DESIGN (June 2010) 2. M-NET CONTROL 2-4-3-6. ME remote controller, Multi-refrigerant-system, System Controller at TB 7side, LOSSNAY, Booster for long M-NET wiring 51 CN40 52 CN41 CN40 DipSW2-1 ON TB3 PQRY-P-TSHMU/YSHMU OC OS TB7 TB7 91 CN41 CN40 DipSW2-1 CN40 DipSW2-1 ON ON TB3 TB3 ON TB3 TB3 Group 21 02 03 TB5 102 ME R/C ME R/C 41 TB5 130 180 ME R/C ME R/C Group 32 Group 33 Group 34 LOSSNAY 42 TB5 TB3 TB2 TB02 Transmission Booster PAC-SF46EPA Indoor unit 93 30 80 TB5 101 Group 31 BC controller TB02 DipSW2-1 ON BC controller (Sub) TB5 PSU CN41 Group 2 01 53 000 or 201 CN40 Indoor unit TB02 Power supply unit (PSU) (PAC-SC51KUA) *1 96 CN41 DipSW2-1 Group 1 BC controller (Main) PQRY-P-THMU/YHMU OC TB7 92 CN41 WR2-SERIES SYSTEM DESIGN PQRY-P-TSHMU/YSHMU OC OS TB7 TB7 44 43 TB5 Group 35 45 TB5 TB5 TB5 SC 141 142 143 144 ME R/C ME R/C PZ-52SF ME R/C 145 195 ME R/C ME R/C *1 System controller should connect to TB7 at the Heat source unit and use power supply unit together in Multi-Refrigerant-System. . For AG-150A, 24VDC should be used with the PAC-SC51KUA. NOTE: 1. Heat source units OC and OS in one refrigerant circuit system are automatically detected. OC and OS are ranked in descending order of capacity. If units are the same capacity, they are ranked in ascending order of their address. 2. M-NET power is supplied by the Heat source unit at TB3, while Indoor unit and ME RC consume the M-NET power for transmission use. The power balance is needed to consider for long M-NET wiring. Details refer to 2-3 "System configuration restrictions". 3. Indoor units should be set with a branch number. 4. Assign an address to each of the sub BC controllers which equals the sum of the smallest address of the indoor units that are connected to each sub BC controller and 50. When the address assigned to sub BC controller overlaps those of any other units including heat source units (OC/OS) or main BC controller, sub BC controller will be given priority to have the address. 2-4-3-7. Example : BC, BC sub NOTE PQRY-P-TSHMU/YSHMU OS OC 52 51 CN40 CN41 CN40 CN41 DipSW2-1 OFF TB3 DipSW2-1 OFF TB3 • Indoor units should be set with a branch number. • BC (main) address = O/U address + 1 • BC (sub) address = Lowest address within the indoor units connected to the BC controller (sub) + 50 • If applicable, set the sub BC controllers in an PQRY system in the following order: (1) Indoor unit to be connected to the BC controller (Main) (2) Indoor unit to be connected to the BC controller (No.1 Sub) (3) Indoor unit to be connected to the BC controller (No.2 Sub) Set the address so that (1)<(2)<(3) : Piping : M-NET wiring 53 54 BC controllers CMB-NU-GA(main) TB02 01 TB5 02 TB5 03 TB5 04 TB5 Group 2 06 TB5 104 BC controllers CMB-NU-GB(No.2 sub) TB02 05 TB5 101 Group 1 57 BC controllers CMB-NU-GB(No.1 sub) TB02 07 08 TB5 TB5 106 Group 3 WR2-SERIES SYSTEM DESIGN (June 2010) 107 Group 4 WR2SD-21 WR2-SERIES SYSTEM DESIGN 2. M-NET CONTROL 2-4-3-8. TG-2000A+AG-150A/GB-50A AG-150A/GB-50A can control max. 50 indoor units; TG-2000A can control max. 40 pieces of AG-150A*2 or GB-50A; TG-2000A can control max. 2000 indoor units. <Two heat source units> PQRY-P-TSHMU/YSHMU GB-50A OC TB7 000 PSU CN40 (PAC-SC51KUA) OS TB7 51 CN41 CN40 DipSW2-1 TB3 OC TB7 52 CN41 CN41 ON TB3 TB3 Group 2 Group 40 Indoor unit 53 01 TB02 51 DipSW2-1 ON Group 1 HUB CN40 DipSW2-1 ON BC controller <One heat source units> PQRY-P-THMU/YHMU 02 TB15 TB5 03 42 TB15 TB5 TB5 TB15 TB2 TB3 TB5 Transmission Booster PAC-SF46EPA SRU *1 MA R/C PC with TG-2000A TB15 MA R/ C MA R/C (Main) (Sub) *1 Wireless R/C LAN AG-150A PQRY-P-TSHMU/YSHMU 000 TB7 CN40 24VDC OC 91 CN41 CN40 DipSW2-1 PSU (PAC-SC51KUA) TB3 51 CN41 DipSW2-1 ON TB3 Group 21 02 TB5 102 ME R/C ME R/C Group 31 41 30 TB2 42 TB5 TB3 TB5 Transmission Booster PAC-SF46EPA 130 Interlocked LOSSNAY BC controller (Sub) 94 43 TB5 Group 33 TB02 Group 34 44 TB5 45 TB5 141 142 144 ME R/C ME R/C ME R/C 145 WR2-SERIES SYSTEM DESIGN (June 2010) 195 ME R/C ME R/C *1 For Wireless R/C and Signal receiver unit (SRU), channel 1, 2 and 3 are selectable and should be set to same channel. *2 Only AG-150As that are not connected to expansion controllers. WR2SD-22 180 ME R/C ME R/C Group 32 Indoor unit TB5 03 TB5 101 93 TB02 CN40 Group 2 01 TB5 BC controller (Main) CN41 Indoor unit 52 TB02 92 ON Group 1 BC controller OC TB7 DipSW2-1 ON TB3 PQRY-P-THMU/YHMU OS TB7 2. M-NET CONTROL LMAP(01) LMAP can transmission for max. 50 indoor units in single-refrigerant-system or multi-refrigerant-system. identified by Neuron ID (LONWORKS adapter) <Two heat source units> PQRY-P-TSHMU/YSHMU 247 CN40 CN41 OC TB7 DipSW1-2 OFF CN40 OS TB7 51 CN41 CN40 DipSW2-1 OC TB7 52 CN41 CN40 DipSW2-1 OFF TB3 TB3 51 CN41 DipSW2-1 OFF Group 1 BC controller <One heat source units> PQRY-P-THMU/YHMU OFF TB3 Group 2 Group 40 Indoor unit 53 01 TB02 02 TB15 TB5 03 TB15 TB5 TB5 42 TB15 AG-150A Power supply unit (PAC-SC51KUA) 24VDC PSU TB15 Transmission Booster PAC-SF46EPA SRU *1 000 TB3 TB5 TB2 MA R/C MA R/C MA R/C (Main) (Sub) *1 Wireless R/C LONWORKS LMAP(02) identified by Neuron ID 247 CN40 CN41 DipSW1-2 ON PQRY-P-TSHMU/YSHMU OC OS TB7 TB7 CN40 51 CN41 DipSW2-1 ON TB3 BC controller (Main) PC LONWORKS card LONWORKS card LONWORKS card 52 CN41 DipSW2-1 Group 2 01 TB5 02 TB5 102 ME R/C ME R/C Group 31 Indoor unit Group 32 93 41 42 TB5 TB5 03 141 142 ME R/C 92 CN41 CN40 DipSW2-1 96 CN41 DipSW2-1 ON ON TB3 TB3 Group 21 30 80 TB3 TB2 TB5 Transmission Booster PAC-SF46EPA 130 180 ME R/C ME R/C Group 33 LOSSNAY BC controller (Sub) 43 94 TB5 ME R/C CN40 PQRY-P-THMU/YHMU OC TB7 BC controller (Sub) TB02 TB5 101 CN41 ON TB3 TB3 Group 1 91 DipSW2-1 ON BC controller (Main) TB02 CN40 Indoor unit 53 TB02 CN40 PQRY-P-TSHMU/YSHMU OC OS TB7 TB7 TB02 143 PZ-52SF Group 34 Group 35 44 TB5 45 TB5 144 ME R/C 145 195 ME R/C ME R/C For other equipments (Lighting, security, elevator etc.) *1 For Wireless R/C and Signal receiver unit (SRU), channel 1, 2 and 3 are selectable and should be set to same channel. WR2-SERIES SYSTEM DESIGN (June 2010) WR2SD-23 WR2-SERIES SYSTEM DESIGN 2-4-3-9. LMAP LMAP can transmission for max. 50 indoor units; If system controller (SC) is used, DipSW1-2 at LMAP and DipSW2-1 at Heat source unit should set to "ON". Change Jumper from CN41 to CN40 to activate power supply to LMAP itself for those LMAP connected without system controller (SC). 2-4-3-10. BM ADAPTER BM ADAPTER can transmission for max. 50 indoor units; Change Jumper from CN41 to CN40 to activate power supply to BM ADAPTER itself for those BM ADAPTER connected without the power supply unit. Heat source unit (PQHY) Group 1 51 CN41 CN40 TB7 BM ADAPTER 000 DipSW2-1 ON 54 DipSW2-1 ON 01 02 03 101 151 103 BC controller 55 CN41 CN40 TB7 CN41 CN40 DipSW1-2 OFF CN41 CN40 DipSW1-2 OFF DipSW2-1 OFF 51 204 DipSW2-1 OFF 02 03 102 Group 1 Group 2 01 02 03 101 151 103 Group 3 01 02 03 101 102 103 TB3 BC controller 52 CN41 CN40 TB7 Group 2 Group 2 Heat source unit (PQRY) BM ADAPTER 106 Group 1 CN41 CN40 TB7 WR2SD-24 52 51 203 105 TB3 Heat source unit (PQHY) BM ADAPTER CN41 CN40 DipSW1-2 OFF DipSW2-1 OFF 104 101 CN41 CN40 CN41 CN40 DipSW1-2 OFF 06 BC controller BM ADAPTER TB7 05 LOSSNAY Heat source unit (PQRY) 202 04 TB3 51 HUB Group 3 01 CN41 CN40 DipSW2-1 OFF Group 2 Group 1 51 BM ADAPTER TB7 Group 1 TB3 Heat source unit (PQHY) 201 Group 2 TB3 Heat source unit (PQRY) CN41 CN40 BAC net WR2-SERIES SYSTEM DESIGN 2. M-NET CONTROL Group 1 153 Group 2 01 02 03 101 102 152 TB3 WR2-SERIES SYSTEM DESIGN (June 2010) 3. PIPING DESIGN 3-1. R410 Piping Material The maximum operation pressure of R410A air conditioner is 4.30 MPa [623psi] . The refrigerant piping should ensure the safety under the maximum operation pressure. MITSUBISHI ELECTRIC recommends pipe size as Ta ble 3-1, or You shall follow the local industrial standard. Pipes of radical thickness 0.7mm or less shall not be used. Table 3-1. Copper pipe size and radial thickness for R410A CITY MULTI. Size (mm) Size (inch) Radial thickness (mm) Radial thickness (mil) [32] ø6.35 ø1/4" 0.8 [32] ø9.52 ø3/8" 0.8 [32] ø12.7 ø1/2" 0.8 [40] ø15.88 ø5/8" 1.0 [48] ø19.05 ø3/4" 1.2 [40] ø19.05 ø3/4" 1.0 [40] ø22.2 ø7/8" 1.0 [40] ø25.4 ø1" 1.0 [40] ø28.58 ø1-1/8" 1.0 [44] ø31.75 ø1-1/4" 1.1 [48] ø34.93 ø1-3/8" 1.2 [56] ø41.28 ø1-5/8" 1.4 Pipe type Type-O Type-O Type-O Type-O Type-O Type-1/2H or H Type-1/2H or H Type-1/2H or H Type-1/2H or H Type-1/2H or H Type-1/2H or H Type-1/2H or H * For pipe sized ø19.05 (3/4") for R410A air conditioner, choice of pipe type is up to you. * The figures in the radial thickness column are based on the Japanese standards and provided only as a reference. Use pipes that meet the local standards. Flare Due to the relative higher operation pressure of R410A compared to R22, the flare connection should follow dimensions mentioned below so as to achieve enough the air-tightness. A Flare pipe Pipe size A (For R410A) ø6.35 [1/4"] ø9.52 [3/8"] ø12.70 [1/2"] ø15.88 [5/8"] ø19.05 [3/4"] 9.1 13.2 16.6 19.7 24.0 (mm[in.]) Flare nut B Pipe size B (For R410A) ø6.35 [1/4"] ø9.52 [3/8"] ø12.70 [1/2"] ø15.88 [5/8"] ø19.05 [3/4"] 17.0 22.0 26.0 29.0 36.0 WR2-SERIES SYSTEM DESIGN (June 2010) (mm[in.]) WR2SD-25 WR2-SERIES SYSTEM DESIGN Refrigerant pipe for CITY MULTI shall be made of phosphorus deoxidized copper, and has two types. A. Type-O : Soft copper pipe (annealed copper pipe), can be easily bent with human's hand. B. Type-1/2H pipe : Hard copper pipe (Straight pipe), being stronger than Type-O pipe of the same radical thickness. 3. PIPING DESIGN r 3-2-1. IF 16 ports or less are in use, I.e., if only one BC controller is in use with no sub BC controller. Note1. PQRY systems do not require headers. Note2. Indoor units sized P72-P96 should be connected to a BC controller using the Y-shaped CMY-R160-J joint adapter. These indoor units cannot use the same BC controller ports as other units. (They must use their own individual BC controller port.) Note3. As bends cause pressure loss on transportation of refrigerant, the fewer bends in the system, the better it is. Piping length needs to factor in the actual length and equivalent length in which the bends are counted. Note4. Indoor units connected to the BC controller sharing one port cannot operate separately in heating and cooling modes simultaneously; i.e., they must function in either heating or cooling in tandem. Note5. Indoor unit capacities are included in the model name. For example, PEFY-P24NMSU-E has a capacity of 24,000 BTUs. Note6. Total “downstream indoor capacity” is the total of all the indoor units connected downstream. For example, PEFY-P24NMSU-E + PEFY-P12NMSU-E: Total Indoor Unit Capacity = P24 + P12 = P36. HU A For heat source units equal to or larger than a size P120, on the BC controller please ensure CMB-P•NU-GA is used. BC controller H H' a b IU IU (P06-P18) IU CMY-Y102S-G2 (Joint) Reducer (P06~P18) (attached with BC controller) h1 d h2 B CMY-R160-J (Joint) IU c IU (P24-P54) (P72-P96) Max.3 sets for 1 port. Total capacity <= P54 Fig. 3-2-1-1 Piping scheme (m [ft.]) Table 3-2-1-1. Piping length limitation Item Piping in the figure Max. length Total piping length Farthest IU from HU Distance between HU and BC Farthest IU from BC controller Height between HU and IU (HU above IU) A+B+a+b+c+d A+B+d A B+d H *1 165 [541'] 110 [360'] *1 40 [131'] *2 50 [164'] *4 40 [131'] *5 15 [49'] (10 [32']) *3 Height between HU and IU (HU under IU ) H' Height between IU and BC h1 Height between IU and IU h2 Max. equivalent length 15 [49'] (10 [32']) *3 190 [623'] 110 [360'] *1 40 [131'] *2 Table3-2-1-2. Bends equivalent length "M" Heat source Model M (m/bends [ft./bends]) P72THMU,YHMU 0.35 [1.15'] P96THMU,YHMU 0.42 [1.38'] P120THMU,YHMU 0.47 [1.54'] - HU : Heat source Unit ; IU : Indoor Unit ; BC : BC controller *1. Please refer to Fig.3-2-4 *2. Farthest Indoor from BC controller "B+d" can exceed 40m(131ft.) till 60m(196ft.) if no Indoor sized P72, P96 connected. Details refer to Fig.3-2-1-2 *3. Distance of Indoor sized P72, P96 from BC must be less than 10m(32ft.), if any. Pipe length between the main BC controller and farthest indoor unit (m) Fig. 3-2-1-2 Piping length and height between IU and BC controller Pipe length between the main BC controller and farthest indoor unit (ft) WR2-SERIES SYSTEM DESIGN 3-2. Piping Design 70 60 50 40 30 10 0 5 10 15 Height difference between the main BC controller and farthest indoor unit (m) 250 200 150 50 WR2SD-26 0 5 10 15 20 25 30 35 40 (mm [in.]) Pipe(Gas) ø15.88 [5/8"] Table3-2-1-5. Piping "a", "b", "c", "d" size selection rule (mm [in.]) Indoor Unit size Pipe(Liquid) Pipe(Gas) P06 to P18 ø6.35 [1/4"] ø12.70 [1/2"] P24 to P54 ø9.52 [3/8"] ø15.88 [5/8"] P72 ø9.52 [3/8"] ø19.05 [3/4"] P96 ø9.52 [3/8"] ø22.20 [7/8"] 100 0 (mm [in.]) Pipe(Low pressure) ø19.05 [3/4"] ø22.20 [7/8"] ø28.58 [1-1/8"] Table3-2-1-4. Piping "B" size seleciton rule Total down-stream Indoor capacity Pipe(Liquid) P54 or less ø9.52 [3/8"] 20 0 Table3-2-1-3. Piping "A"size selection rule Heat source Model Pipe(High pressure) P72THMU,YHMU ø15.88 [5/8"] P96THMU,YHMU ø19.05 [3/4"] P120THMU,YHMU ø19.05 [3/4"] 45 Height difference between the main BC controller and farthest indoor unit (ft) WR2-SERIES SYSTEM DESIGN (June 2010) 3. PIPING DESIGN 3-2-2. IF more than 16 ports are in use, or if there is more than one BC controller in use for one heat source unit HU IU e A Field supplied BC controller (Main BC) H a h1 b IU IU (P06-P18) IU (P24-P54) h1 BC controller (Sub BC) h3 C CMY-Y102S-G2 (Joint) Reducer (P06-P18) (attached with BC controller) H' D E BC controller (Sub BC) h2 B CMY-R160-J (Joint) (P72-P96) c d IU IU f Max.3 sets for 1 port. Total capacity < = P54 h1 IU HU : Heat source unit, IU : Indoor unit Fig. 3-2-2-1 Piping scheme Table 3-2-2-1. Piping length limitation Item Total piping length Farthest IU from HU Distance between HU and BC Farthest IU from BC controller Height between HU and IU (HU above IU ) Height between HU and IU (HU under IU ) Height between IU and BC Height between IU and IU Height between BC(Main or Sub) and BC(Sub) Piping in the figure A+B+C+D+E+a+b+c+d+e+f A+C+E+f A B+d or C+D+e or C+E+f H H' h1 h2 h3 Table3-2-2-2. Bent equivalent length "M" (m [ft.]) Max. length Max. equivalent length *1 165 [541'] 190 [623'] 110 [360'] *1 110 [360'] *1 40 [131'] *2 40 [131'] *2 50 [164'] *5 40 [131'] *6 15 [49'] (10 [32']) *3 15 [49'] (10 [32']) *3 15 [49'] (10 [32']) *4 - Heat source Model P72THMU,YHMU P96THMU,YHMU P120THMU,YHMU M (m/bends [ft./bends]) 0.35 [1.15'] 0.42 [1.38'] 0.47 [1.54'] HU : Heat source Unit ; IU : Indoor Unit ; BC : BC controlle r *1. Please refer to Fig.3-2-4 *2. Farthest Indoor from BC controller "B+d or C+D+e or C+E+f " can exceed 40m(131ft.) till 60m(196ft.) if no Indoor sized P72, P96 connected. Details refer to Fig.3-2-2-2 *3. Distance of Indoor sized P72, P96 from BC must be less than 10m(32ft.), if any. *4. When using 2 Sub BC controllers, max. height "h3" should be considered. Fig. 3-2-2-2 Piping length and height between IU and BC controller Pipe length between the main BC controller and farthest indoor unit (m) 70 60 50 40 10 0 5 10 15 Height difference between the main BC controller and farthest indoor unit (m) 250 Pipe length between the main BC controller and farthest indoor unit (ft) Pipe(High pressure) ø15.88 [5/8"] ø19.05 [3/4"] ø19.05 [3/4"] Total down-stream Indoor capacity P54 or less 20 200 (mm [in.]) Pipe(Low pressure) ø19.05 [3/4"] ø22.20 [7/8"] ø28.58 [1-1/8"] Pipe(Liquid) ø9.52 [3/8"] (mm [in.]) Pipe(Gas) ø15.88 [5/8"] Table3-2-2-5 . Piping "C", "D", "E" size selection rule Total down-stream Indoor capacity P72 or less P73 to P108 P109 to P126 P127 to P144 P145 to P168 Pipe(Liquid) ø9.52 [3/8"] ø9.52 [3/8"] ø12.70 [1/2"] ø12.70 [1/2"] ø15.88 [5/8"] Pipe(HP Gas) ø15.88 [5/8"] ø19.05 [3/4"] ø19.05 [3/4"] ø22.20 [7/8"] ø22.20 [7/8"] (mm [in.]) Pipe(LP Gas) ø19.05 [3/4"] ø22.20 [7/8"] ø28.58 [1-1/8"] ø28.58 [1-1/8"] ø28.58 [1-1/8"] HP : High pressure, LP:Low pressure 150 Table3-2-2-6 . Piping "a", "b", "c", "d" saize selection rule (mm [in.]) 100 50 0 Heat source Model P72THMU,YHMU P96THMU,YHMU P120THMU,YHMU Table3-2-2-4. Piping "B" size selection rule 30 0 Table3-2-2-3. Piping "A"size selection rule 0 5 10 15 20 25 30 35 40 45 Indoor Unit size P06 to P18 P24 to P54 P72 P96 Pipe(Liquid) ø6.35 [1/4"] ø9.52 [3/8"] ø9.52 [3/8"] ø9.52 [3/8"] Pipe(Gas) ø12.70 [1/2"] ø15.88 [5/8"] ø19.05 [3/4"] ø22.20 [7/8"] Height difference between the main BC controller and farthest indoor unit (ft) WR2-SERIES SYSTEM DESIGN (June 2010) WR2SD-27 WR2-SERIES SYSTEM DESIGN Note1. PQRY systems do not require headers. Note2. Indoor units sized P72-P96 should be connected to a BC controller using the Y-shaped CMY-R160-J joint adapter. These indoor units cannot use the same BC controller ports as other units. (They must use their own individual BC controller port.) Note3. As bends cause pressure loss on transportation of refrigerant, the fewer bends in the system, the better it is. Piping length needs to factor in the actual length and equivalent length in which the bends are counted. Note4. Indoor units connected to the BC controller sharing one port cannot operate separately in heating and cooling modes simultaneously; i.e., they must function in either heating or cooling in tandem. Note5. For sub BC controller CMB-P-NU-GB, the total connectable indoor unit capacity can be 126,000 BTUs or less. If two sub BC controllers are used, the total indoor unit capacity connected to BOTH sub BC controllers also cannot exceed 126,000 BTUs. For sub BC controller CMB-P1016NU-HB the total connectable indoor unit capacity can be 126,000 BTUs or less. However, if two sub controllers are used, the total indoor unit capacity connected to BOTH sub controllers must NOT exceed 168,000BTUs. Note6. Indoor unit capacities are included in the model name. For example, PEFY-P24NMSU-E has a capacity of 24,000 BTUs. Note7. Total "downstream indoor capacity" is the total of all the indoor units connected downstream. For example, PEFY-P24NMSU-E + PEFY-P12NMSU-E: Total Indoor Unit Capacity = P24 + P12 = P36. 3. PIPING DESIGN WR2-SERIES SYSTEM DESIGN 3-2-3. IF more than 16 ports are in use, or if there is more than one BC controller in use for two heat source units Note1. PQRY systems do not require headers. Note2. Indoor units sized P72-P96 should be connected to a BC controller using the Y-shaped CMY-R160-J joint adapter. These indoor units cannot use the same BC controller ports as other units. (They must use their own individual BC controller port.) Note3. As bends cause pressure loss on transportation of refrigerant, the fewer bends in the system, the better it is. Piping length needs to factor in the actual length and equivalent length in which the bends are counted. Note4. Indoor units connected to the BC controller sharing one port cannot operate separately in heating and cooling modes simultaneously; i.e., they must function in either heating or cooling in tandem. Main unit Sub unit h4 F H Heat source Twinning kit (High/Low press.) CMY-Q100VBK The Low press. kit must be placed in the heat source unit that has a larger capacity index of the two, regardless of the relative positions of the heat source units or their addresses. (If heat source units that have the same capacity are used in combination, the distributor can be placed in either heat source unit.) The High press. kit is to be installed in the field. Field supplied BC controller (Main BC) H' D a b IU IU IU (P06-P18) (P24-P54) (P72-P96) h1 BC controller (Sub BC) h3 C CMY-Y102S-G2 (Joint) Reducer (P06-P18) (attached with BC controller) h1 IU e G A H Note5. For sub BC controller CMB-P-NU-GB, the total connectable indoor unit capacity can be 126,000 BTUs or less. If two sub BC controllers are used, the total indoor unit capacity connected to BOTH sub BC controllers also cannot exceed 126,000 BTUs. For sub BC controller CMB-P1016NU-HB the total connectable indoor unit capacity can be 126,000 BTUs or less. However, if two sub controllers are used, the total indoor unit capacity connected to BOTH sub controllers must NOT exceed 168,000BTUs. Note6. Indoor unit capacities are included in the model name. For example, PEFY-P24NMSU-E has a capacity of 24,000 BTUs. Note7. Total "downstream indoor capacity" is the total of all the indoor units connected downstream. For example, PEFY-P24NMSU-E + PEFY-P12NMSU-E: Total Indoor Unit Capacity = P24 + P12 = P36. E h2 BC controller (Sub BC) B CMY-R160-J (Joint) c d IU IU f Max.3 sets for 1 port. Total capacity < = P54 h1 IU IU : Indoor unit Fig. 3-2-3-1 Piping scheme Table3-2-3-1. Piping length limitation Item Total piping length Farthest IU from HU Distance between HU and BC Farthest IU from BC controller Height between HU and IU (HU above IU ) Height between HU and IU (HU under IU ) Height between IU and BC Height between IU and IU Height between BC(Main or Sub) and BC(Sub) Distance between Main unit and Sub unit Height between Main unit and Sub unit Piping in the figure F+G+H+A+B+C+D+E+a+b+c+d+e+f F(G)+A+C+E+f F(G)+A B+d or C+D+e or C+E+f H H' h1 h2 h3 F+G or H h4 (m [ft.]) Max. length Max. equivalent length *1 165 [541'] 190 [623'] 110 [360'] *1 110 [360'] *1 40 [131'] *2 40 [131'] *2 50 [164'] *5 40 [131'] *6 15 [49'] (10 [32']) *3 15 [49'] (10 [32']) *3 15 [49'] (10 [32']) *4 5 [16'] 0.1 [0.3'] - Table3-2-3-2. Bent equivalent length "M" Heat source Model M (m/bends [ft./bends]) P144TSHMU,YSHMU 0.50 [1.64'] 0.50 [1.64'] P168TSHMU,YSHMU P192TSHMU,YSHMU 0.50 [1.64'] P216TSHMU,YSHMU 0.50 [1.64'] P240TSHMU,YSHMU 0.50 [1.64'] HU : Heat source Unit ; IU : Indoor Unit ; BC : BC controller *1. Please refer to Fig.3-2-4 *2. Farthest Indoor from BC controller "B+d or C+D+e or C+E+f " can exceed 40m(131ft.) till 60m(196ft.) if no Indoor sized P72, P96 connected. Details refer to Fig.3-2-3-2 *3. Distance of Indoor sized P72, P96 from BC must be less than 10m(32ft.), if any. *4. When using 2 Sub BC controllers, max. height "h3" should be considered. Fig. 3-2-3-2 Piping length and height between IU and BC controller Table3-2-3-3. Piping "A"size selection rule Heat source Model Pipe(High pressure) ø22.20 [7/8"] P144TSHMU,YSHMU P168TSHMU,YSHMU ø22.20 [7/8"] P192TSHMU,YSHMU ø22.20 [7/8"] P216TSHMU,YSHMU ø28.58 [1-1/8"] P240TSHMU,YSHMU ø28.58 [1-1/8"] (mm [in.]) Pipe(Low pressure) ø28.58 [1-1/8"] ø28.58 [1-1/8"] ø28.58 [1-1/8"] ø28.58 [1-1/8"] ø28.58 [1-1/8"] Table3-2-3-4. Piping "B" size seleciton rule Total down-stream Indoor capacity Pipe(Liquid) P54 or less ø9.52 [3/8"] (mm [in.]) Pipe(Gas) ø15.88 [5/8"] Table3-2-3-5. Piping "C", "D", "E" size selection rule Total down-stream Indoor capacity Pipe(Liquid) P72 or less ø9.52 [3/8"] P73 to P108 ø9.52 [3/8"] P109 to P126 ø12.70 [1/2"] P127 to P144 ø12.70 [1/2"] P145 to P168 ø15.88 [5/8"] Pipe(HP Gas) ø15.88 [5/8"] ø19.05 [3/4"] ø19.05 [3/4"] ø22.20 [7/8"] ø22.20 [7/8"] HP : High pressure, LP:Low pressure Table3-2-3-6. Piping "F", "G", "H" size selection rule (mm [in.]) Heat source Model Pipe(High pressure) Pipe(Low pressure) P72THMU,YHMU ø15.88 [5/8"] ø19.05 [3/4"] P96THMU,YHMU ø19.05 [3/4"] ø22.20 [7/8"] P120THMU,YHMU ø19.05 [3/4"] ø28.58 [1-1/8"] Table3-2-3-7. Piping "a", "b", "c", "d"size selection rule (mm [in.]) Indoor Unit size Pipe(Liquid) Pipe(Gas) P06 to P18 ø6.35 [1/4"] ø12.70 [1/2"] P24 to P54 ø9.52 [3/8"] ø15.88 [5/8"] P72 ø9.52 [3/8"] ø19.05 [3/4"] P96 ø9.52 [3/8"] ø22.20 [7/8"] WR2SD-28 WR2-SERIES SYSTEM DESIGN (June 2010) (mm [in.]) Pipe(LP Gas) ø19.05 [3/4"] ø22.20 [7/8"] ø28.58 [1-1/8"] ø28.58 [1-1/8"] ø28.58 [1-1/8"] 3. PIPING DESIGN 3-2-4. Total piping length restrictions (m) 1000 900 900 Total extended pipe length (m) Total extended pipe length (m) [PQRY-P144, 168, 192, 216, 240TSHMU-A/YSHMU-A] 1000 800 700 600 500 400 300 200 10 20 30 40 50 WR2-SERIES SYSTEM DESIGN [PQRY-P72, 96, 120THMU-A/YHMU-A] 60 70 80 800 700 600 500 400 300 200 90 100 110 10 Distance between heat source unit and BC controller (m) 20 30 40 50 60 70 80 90 100 110 Distance between heat source unit and BC controller (m) 3-2-5. Total piping length restrictions (ft.) [PQRY-P72, 96, 120THMU-A/YHMU-A] [PQRY-P144, 168, 192, 216, 240TSHMU-A/YSHMU-A] 2500 Total extended pipe length (ft.) Total extended pipe length (ft.) 2000 1500 1000 2000 1500 500 30 90 150 210 270 30 330 Distance between heat source unit and BC controller (ft.) 90 150 210 270 330 Distance between heat source unit and BC controller䋨ft.䋩 WR2-SERIES SYSTEM DESIGN (June 2010) WR2SD-29 3. PIPING DESIGN WR2-SERIES SYSTEM DESIGN 3-3. Refrigerant Charging Calculation Sample connection (with 3 BC controller and 6 indoor units) HU (Main unit) HU (Sub unit) H F Heat source Twinning kit (High/Low press.) CMY-Q100VBK: The Low press. kit must be placed in the heat source unit that has a larger capacity index of the two, regardless of the relative positions of the heat source units or their addresses. (If heat source units that have the same capacity are used in combination, the distributor can be placed in either heat source unit.) The High press. kit is to be installed in the field. G e A Field supplied BC controller (Main BC) a IU C c d IU IU 3 : P06 4 : P08 IU 2 : P96 1 : P18 BC controller (Sub BC) E B b CMY-R160-J (Joint) BC controller (Sub BC) D CMY-Y102S-G (Joint) Reducer (P06-P18) (attached with BC controller) IU 5 : P54 f IU 6 : P72 Amount of additional refrigerant to be charged Refrigerant for extended pipes (field piping) is not factory-charged to the heat source unit. Add an appropriate amount of refrigerant for each pipes on site. Record the size of each high pressure pipe and liquid pipe, and the amout of refrigerant that was charged on the heat source unit for future reference. Calculating the amount of additional refrigerant to be charged The amount of refrigerant to be charged is calculated with the size of the on-site-installed high pressure pipes and liquid pipes, and their length. Calculate the amount of refrigerant to be charged according to the formula below. Round up the calculation result to the nearest 0.1kg[4oz]. (i.e., 16.08 kg = 16.1 kg) <Amount of additional refrigerant to be charged> Calculating the amount of additional refrigerant to be charged Additional refrigerant charge = (kg)[oz] + Liquid Piping size Total length of ø 15.88mm[5/8 in] (m) (ft) + + High pressure pipe size Total length of ø 28.58mm[1-1/8 in] (m) 0.36(kg/m) (ft) 3.88(oz/ft) Liquid Piping size Total length of ø 12.7mm[1/2 in] 0.2(kg/m) 2.16(oz/ft) BC controller (Standard / Main) (m) (ft) + High pressure pipe size Total length of ø 22.2mm[7/8 in] (m) 0.23(kg/m) (ft) 2.48(oz/ft) + + Liquid Piping size Total length of ø 9.52mm[3/8 in] 0.12(kg/m) 1.30(oz/ft) (m) (ft) 0.06(kg/m) 0.65(oz/ft) Liquid Piping size Total length of ø 6.35mm[1/4 in] (m) (ft) 0.024(kg/m) 0.26(oz/ft) Charged amount 1 1.0 kg[36oz] Models ~ 27 2.0 kg [71 oz] 2 2.0 kg[71oz] Models 28 ~ 54 2.5 kg [89 oz] Models 55 ~ 126 3.0 kg [106 oz] Models 127 ~ 144 3.5 kg [124 oz] Models 145 ~ 180 4.5 kg [159 oz] Models 181 ~ 234 5.0 kg [177 oz] Models 235 ~ 273 6.0 kg [212 oz] Models 274 ~ 307 8.0 kg [283 oz] + Amount of factory charged refrigerant Total Capacity of Connected Indoor Units Charged amount Models 308 ~ 342 9.0 kg [318 oz] Models 343 ~ 411 10.0 kg [353 oz] Models 412 ~ 12.0 kg [424 oz] Sample calculation Indoor A: ø28.58 [1-1/8"] 40m [131ft.] 1 : P18 a: ø6.35 [1/4"] 5m [16ft.] B: ø9.52 [3/8"] 10m [32ft.] 2 : P96 b: ø9.52 [3/8"] 3m [10ft.] C: 3 : P06 c: ø6.35 [1/4"] 2m [6ft.] 10m [32ft.] ø12.70 [1/2"] 4 : P08 d: ø6.35 [1/4"] 3m [10ft.] D: ø9.52 [3/8"] 5m [16ft.] 5 : P54 e: ø9.52 [3/8"] 3m [10ft.] E: ø9.52 [3/8"] 5m [16ft.] 10m [32ft.] 6 : P72 f : ø9.52 [3/8"] 2m [6ft.] F: ø22.20 [7/8"] 1m [4ft.] G: ø22.20 [7/8"] Total length for each pipe size : ø28.58 A = 40m [131ft.] ø22.20 F+G = 2+1 = 3m [10ft.] ø12.70 C = 10m [32ft.] ø9.52 B+D+E+b+e+f = 36m [116ft.] ø6.35 a+c+d =10m [32ft.] Therefore, additional refrigerant charge = 40 0.36 + 3 0.23 + 10 0.12 + 36 0.06 + 10 0.024 + 9.0 + 2.0 + 6.0 (kg) = 37.69kg = 37.7kg or Therefore, additional refrigerant charge = 131 3.58+10 2.48+32 1.30+116 0.65+32 0.26+318+71+212 (oz) = 1220.1oz = 1220oz Charged amount P72 P96 + + High pressure pipe size Total length of ø 15.88mm[5/8 in] (m) 0.11(kg/m) (ft) 1.19(oz/ft) BC controller (Sub) Total Units 3.0 kg[106oz] Heat source unit Model + High pressure pipe size Total length of ø 19.05mm[3/4 in] (m) 0.16(kg/m) (ft) 1.73(oz/ft) 5.0 kg P120 Limitation of the amount of refrigerant to be charged The above calculation result of the amount of refrigerant to be charged must become below the value in the table below. Heat source unit model P72 P96 P120 P144 P168 P192 P216 Maximum amount of refrigerant *1 kg 26.3 32.8 33.8 45.5 47.0 58.2 67.2 70.9 (oz) 928 1157 1192 1605 1658 2053 2370 2501 *1 Amount of additional refrigerant to be charged on site. WR2SD-30 WR2-SERIES SYSTEM DESIGN (June 2010) P240 4. INSTALLATION 4-1. PQRY-P-T(S)HMU/Y(S)HMU’s Installation Install indoors; avoid exposing the unit to outside elements. Do not install in an area where it could be subjected to direct heat. Avoid installing the unit in a location where the operating sound could be an annoyance. Install on a stable, load-bearing surface. Ensure there is adequate drain flow from the unit when in heating mode; See space requirements for installation and maintenance; Do not install the unit in an environment that may have combustible gas, oil, steam, chemical gas like acidic solutions, sulfur gas, etc. Make sure the declining gradient of the exhaust pipe is higher than 1/100. 4-2. Installation Space In case of a single unit installation, 23-11/16 in. (600mm) or more of clearance space in the front of the unit makes for easier access when servicing the unit. 600 (23-11/16) 450 (17-3/4) Service space (front side) 550 (21-11/16) (530) (20-7/8) 600 (23-11/16) 170 Service space (front side) (6-3/4) 450 (17-3/4) Top view 1100 (43-5/16) 170 (6-3/4) 350 (53) (2-1/8) (13-13/16) 725 (28-9/16) (102) (4-1/16) 880 The space for control box replacement mm (in.) (34-11/16) WR2-SERIES SYSTEM DESIGN (June 2010) WR2SD-31 WR2-SERIES SYSTEM DESIGN 1. 2. 3. 4. 5. 6. 7. 8. 4. INSTALLATION WR2-SERIES SYSTEM DESIGN 4-3. Piping Direction <Model : PQHY, PQRY-P-THMU-A/YHMU-A> 1. Insulation installation With City Multi WY/ WR2 Series piping, as long as the temperature range of the circulating water is kept to average temperatures year-round (29.4°C[85°F] in the summer, 21.1°C[70°F] in the winter), there is no need to insulate or otherwise protect indoor piping from exposure. You should use insulation in the following situations: • Any heat source piping. • Indoor piping in cold-weather regions where frozen pipes are a problem. • When air coming from the outside causes condensation to form on piping. • Any drainage piping. F C A B E G H D F C A B E J H I Main circulating water pipe Y-type strainer Shutoff valve Water inlet (upper) Shutoff valve Drain pipe Water outlet (lower) Water outlet flange (lower) Refrigerant pipes Water intlet flange (upper) 2. Water processing and water quality control To preserve water quality, use the closed type of cooling tower for WY/ WR2. When the circulating water quality is poor, the water heat exchanger can develop scales, leading to a reduction in heat-exchange power and possible corrosion of the heat exchanger. Please pay careful attention to water processing and water quality control when installing the water circulation system. • Removal of foreign objects or impurities within the pipes. During installation, be careful that foreign objects, such as welding fragments, sealant particles, or rust, do not enter the pipes. • Water Quality Processing Depending on the quality of the cold-temperature water used in the air conditioner, the copper piping of the heat exchanger may become corroded. We recommend regular water quality processing. Cold water circulation systems using open heat storage tanks are particularly prone to corrosion. When using an open-type heat storage tank, install a water-to-water heat exchanger, and use a closed-loop circuit on the air conditioner side. If a water supply tank is installed, keep contact with air to a minimum, and keep the level of dissolved oxygen in the water no higher than 1mg/ . Water quality standard Items pH (25°C)[77°F] Electric conductivity (mS/m) (25°C)[77°F] (µS/cm) (25°C)[77°F] Standard items Reference items Chloride ion (mg Cl-/ Sulfate ion (mg SO4 2-/ Acid consumption (pH4.8) (mg CaCO3/ Total hardness (mg CaCO3/ Calcium hardness (mg CaCO3/ Ionic silica (mg SiO2/ Iron (mg Fe/ Copper (mg Cu/ Sulfide ion ) ) ) ) ) ) ) ) (mg S2-/ ) + Ammonium ion (mg NH4 / ) Residual chlorine (mg Cl/ ) Free carbon dioxide (mg CO2/ ) Ryzner stability index Lower mid-range Tendency temperature water system Recirculating Scalewater Make-up [20<T<60°C] water Corrosive forming [68<T<140°F] 7.0 ~ 8.0 7.0 ~ 8.0 30 or less 30 or less [300 or less] [300 or less] 50 or less 50 or less 50 or less 50 or less 50 or less 50 or less 70 or less 50 or less 30 or less 1.0 or less 1.0 or less not to be detected 0.3 or less 0.25 or less 0.4 or less – 70 or less 50 or less 30 or less 0.3 or less 0.1 or less not to be detected 0.1 or less 0.3 or less 4.0 or less – Reference : Guideline of Water Quality for Refrigeration and Air Conditioning Equipment. (JRA GL02E-1994) Please consult with a water quality control specialist about water quality control methods and water quality calculations before using anti-corrosive solutions for water quality management. When replacing a previously installed air conditioning device (even when only the heat exchanger is being replaced), first conduct a water quality analysis and check for possible corrosion. Corrosion can occur in cold-water systems even if there has been no prior signs of corrosion. If the water quality level has dropped, please adjust water quality sufficiently before replacing the unit. WR2SD-32 WR2-SERIES SYSTEM DESIGN (June 2010) 5. CAUTIONS The installer and/or air conditioning system specialist shall secure safety against refrigerant leakage according to local regulations or standards. The following standard may be applicable if no local regulation or standard is available. R410A refrigerant is harmless and incombustible. The R410A is heavier than the indoor air in density. Leakage of the refrigerant in a room has possibility to lead to a hypoxia situation. Therefore, the Critial concentration specified below shall not be exceeded even if the leakage happens. Critical concentration Critical concentration hereby is the refrigerant concentration in which no human body would be hurt if immediate measures can be taken when refrigerant leakage happens. Critical concentration of R410A: 0.30kg/m3 (The weight of refrigeration gas per 1 m3 air conditioning space.); The Critical concentration is subject to ISO5149, EN378-1. For the CITY MULTI system, the concentration of refrigerant leaked should not have a chance to exceed the Critical concentration in any situntion. 5-2. Confirm the Critical Concentration and Perform Countermeasures The maximum refrigerant leakage concentration (Rmax) is defined as the result of the possible maximum refrigerant weight (Wmax) leaked into a room divided by its room capacity (V). It is referable to Fig. 5-1. The refrigerant of Heat source unit here includes its original charge and additional charge at the site. The additional charge is calculated according to the refrigerant charging calculation of each kind of Heat source unit, and shall not be over charged at the site. Procedure 5-2-1~3 tells how to confirm maximum refrigerant leakage concentration (Rmax) and how to take countermeasures against a possible leakage. Heat source unit (No.1) Heat source unit (No.1) Heat source unit (No.2) Flow of refrigerant Flow of refrigerant Indoor unit Flow of refrigerant Indoor unit Maximum refrigerant leakage concentration (Rmax) Rmax=Wmax / V (kg/m3) Maximum refrigerant leakage concentration (Rmax) Rmax=Wmax / V (kg/m 3) W1: Refrigerant weight of Heat source unit No.1 where, Wmax=W1+W 2 W2: Refrigerant weight of Heat source unit No.2 Fig. 5-1 The maximum refrigerant leakage concentration 5-2-1.Find the room capacity (V), If a room having total opening area more than 0.15% of the floor area at a low position with another room/space, the two rooms/space are considered as one. The total space shall be added up. 5-2-2.Find the possible maximum leakage (Wmax) in the room. If a room has Indoor unit(s) from more than 1 Heat source unit, add up the refrigerant of the Heat source units. 5-2-3.Divide (Wmax) by (V) to get the maximum refrigerant leakage concentration (Rmax). 5-2-4.Find if there is any room in which the maximum refrigerant leakage concentration (Rmax) is over 0.30kg/m3. If no, then the CITY MULTI is safe against refrigerant leakage. If yes, following countermeasure is recommended to do at site. Countermeasure 1: Let-out (making V bigger) Design an opening of more than 0.15% of the floor area at a low position of the wall to let out the refrigerant whenever leaked. e.g. make the upper and lower seams of door big enough. Countermeasure 2: Smaller total charge (making Wmax smaller) e.g. Avoid connecting more than 1 Heat source unit to one room. e.g. Using smaller model size but more Heat source units. e.g. Shorten the refrigerant piping as much as possible. Countermeasure 3: Fresh air in from the ceiling (Ventilation) As the density of the refr igerant is bigger than that of the air . Fresh air supply from the ceiling is better than air exhausting from the ceiling. Fresh air supply solution refers to Fig. 5-2~4. Fresh air supply fan (always ON) Refrigerant pipe Indoor space Opening (Floor) Indoor unit Opening Sensor for refrigerant leakage (Oxygen sensor or refrigerant sensor). [At 0.3m height from the floor] Fig.5-2. Fresh air supply always ON to Heat source unit to Heat source unit Indoor unit (Floor) Refrigerant stop valve Refrigerant pipe to Heat source unit Indoor space Refrigerant pipe (high pressure pipe) Fresh air supply fan Fresh air supply fan Fig.5-3. Fresh air supply upon sensor action Indoor space (Floor) Indoor unit Opening Sensor for refrigerant leakage (Oxygen sensor or refrigerant sensor). [At 0.3m height from the floor] Fig.5-4. Fresh air supply and refrigerant shut-off upon sensor action Note 1. Countermeasure 3 should be done in a proper way in which the fresh air supply shall be on whenever the leakage happens. Note 2. In principle, MITSUBISHI ELECTRIC requires proper piping design, installation and air-tight testing after installation to avoid leakage happening. In the area should earthquake happen, anti-vibration measures should be fully considered. The piping should consider the extension due to the temperature variation. WR2-SERIES SYSTEM DESIGN (June 2010) WR2SD-33 WR2-SERIES SYSTEM DESIGN 5-1. Refrigerant Properties WR2-SERIES SYSTEM DESIGN WR2SD-34 WR2-SERIES SYSTEM DESIGN (June 2010)


