1
Owner's Manual
ICRRFTSMRN°J
6.75 HORSEPOWER
21" REAR DISCHARGE
POWER PROPELLED
ROTARY LAWN MOWER
Model No.
917.379610
•
•
•
•
Safety
Assembly
Operation
Maintenance
•
•
Espa_ol
Repair Parts
NOTE: Engines which are cedffied to comply with California and U.S. EPA emission regulations
for SORE (Smatl Off Road Equipment), are certified to operate on regular unleadedgasoline,
and include the following emission control systems: Engine Modification (EM), and Three-way
Catalyst (TWC) (If so equipped).
AVISO: Los motores homologados para cumplir con la reglamentaci6n sobre emisiones de
California y de la Agencia de Protecci6n Ambiental estadounidense (EPA) para equipos
pequefios no cimulantes (SORE) funcionan con gasolina normal sin plomo, e incluyen los
siguientes sistemas de control de emisiones: modificaci6n del motor (EM) y catalizador de triple
acci6n (TWC) (en caso de tenet/o).
The D.O.M. decal includes engine life specifications for the emissions-related useful life period of
your engine. This period relates to the emission compliance life as certified by EPNCARB. To
find theiifa period specification for your engine, please match one of the following letters with the
letter printed on your D.O.M. decal: (C) 125 hours, (B) 250 hours, (A) 500 hours.
La calcomanfa D.O.M. incluya especiflcaciones sobre la duraci6n del motor para el perfodo de
vida util de su motor relaccionado con emisiones, Este periodo se relaciona con la duraci6n en
conformidad con las emisiones seg0n Io cerUficado por EPNCARB. Para hallar la especificaci6n
del perfodo de vida de su motor, mire cudl de las siguientes letras viene impresa en su
calcomanfa D.O.M.: (C) 125 horas, (B) 250 horas, (A) 500 horas.
CAUTION:
Read and follow all Safety Rules and Instructions
before operating this equipment
Sears, Roebuck
Visit our Craftsman
and Co., Hoffman
Estates,
website: www.sears.corn/craftsman
IL 60179
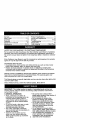
Warranty ................................................
2
Safety Rules ......................................
2-4
Assembly ...............................................
5
Operation ...........................................
6-9
Maintenance Schedule ....................... 10
Maintenance ..................................
10o13
LIMITED TWO YEAR WARRANTY
Product Specifications ......................... 11
Service and Adjustments ..................... 14
Storage ..........................................
15-16
Troubleshooting
.................................. 17
Repair Parts .........................................
35
Parts Ordering ...................... Back Cover
ON CRAFTSMAN
POWER MOWER
For two years from date of purchase, when this Craftsman Lawn Mower is maintained,
lubricated, and tuned up according to the operating and maintenance instructions in
the owner's manual, Sears will repair free of charge any defect in material or workmanship.
If this Craftsman Lawn Mower is used for commercial
applies for only 90 days from the date of purchase.
or rental purposes, this warranty
This Warranty does not cover:
• Expendable items which become worn dudng normal use, such as rotary mower
blades, blade adapters, belts, air cleaners and spark plug.
• Repairs necessary because of operator abuse or negligence, including bent
crankshafts and the failure to maintain the equipment according to the instructions
contained in the owner's manual.
Warranty service is available by returning the Craftsman power mower to the nearest
Sears Service Center/Department
in the United States. This warranty applies only
while this product is in use in the United States.
This Warranty gives you specific legal rights, and you may also have other rights which
vary from state to state.
Sears, Roebuck and Co., D/817 WA, Hoffman Estates, Illinois 60179
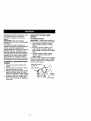
IMPORTANT: This cutting machine is capable of amputating hands and feet and
throwing objects. Failure to observe the following safety instructions could result in
serious injury or death.
I. GENERAL OPERATION
• Be sure the area is clear of other
people be[ore mowing. Stop machine if
• Read, understand, and follow all
anyone enters the area.
instructions on the machine and in the
• Do not operate the mower when
manual(s) before starting. Be thorbarefoot or wearing open sandals.
oughly familiar with the controls and
Always wear substantial foot wear.
the proper use of the machine before
• Do not pull mower backwards unless
starting.
absolutely necessary. Always look
• Do not put hands or feet near or under
down and behind before and while
rotating parts. Keep clear of the
moving backwards.
discharge opening at all times.
• Do not operate the mower without
• Only allow responsible indNiduaJs,
proper guards, plates, grass catcher or
who are familiar with the instructions, to
other safety protective devices in place.
operate the machine.
• See manufacturer's instructions for
• Clear the area of objects such as
proper operation and installation of
rocks, toys, wire, bones, sticks, etc.,
accessories. Only use accessodes
which could be picked up and thrown
2
approved by the manufacturer.
by the blade.
• Stop the blade(s) when crossing gravel
drives, walks, or roads.
• Stop the engine (motor) whenever you
I_ave the equipment, before cleaning
the mower or unclogging the chute.
• Shut the engine (motor) off and wait
until the blade comes to complete stop
before removing grass catcher,
• Mow only in daylight or good artificial
light.
• Do not operate the machine while
under the influence of alcohol or drugs.
• Never operate machine in wet grass.
Always be sure of your footing: keep a
firm hold on the handle and walk; never
run.
• Disengage the self-propelled mechanism or drive clutch on mowers so
equipped before starting the engine
(motor),
• If the equipment should start to vibrate
abnormally, stop the engine (motor)
and check immediately for the cause.
Vibration is generally a warning of
trouble.
• Always wear safety goggles or safety
glasses with side shields when
operating mower.
II. SLOPE OPERATION
Slopes are a major factor related to slip
and fall accidents which can result in
severe injury. All slopes require extra
caution. If you feel uneasy on a slope, do
not mow it.
DO:
• Mow across the face of slopes: never
up and down, Exercise extreme caution
when changing direction on slopes.
• Remove obstacles such as rocks, tree
limbs, etc.
• Watch for holes, ruts, or bumps. Tall
grass can hide obstacles.
DO NOT:
• Do not trim near drop-offs, ditches or
embankments. The operator could lose
footing or balance.
• Do not tdm excessively steep slopes.
• Do not mow on wet grass. Reduced
footing could cause slipping.
III. CHILDREN
Tragic accidents can occur if the operator
is not alert to the presence of children.
Children are often attracted to the
•machine and the mowing activity. Never
assume that children will remain where
you last saw them.
• Keep children out of the trimming area
and under the watchfut care of another
responsible adult.
• Be alert and turn machine off if children
enter the area.
• Before and while walking backwards,
look behind and down for sma_l
children.
• Never allow children to operate the
machine.
• Use extra care when approaching blind
corners, shrubs, trees, or other objects
that may obscure vision.
IV. SERVICE
• Use extra care in handling gasoline
and other fuels. They are flammable
and vapors are explosive.
-Use only an approved container.
- Never remove gas cap or add fuel
with the engine running. Allow
engine to cool before refueling. Do
not smoke.
- Never refuel the machine indoors.
- Never store the machine or fuel
container inside where there is an
open flame, such as a water heater.
• Never run a machine inside a closed
area.
• Never make adjustments or repairs with
the engine (motor) running. Disconnect
the spark plug wire, and keep the wire
away from the plug to prevent accidental starting,
• Keep nuts and bolts, especially blade
attachment bolts, tight and keep
equipment in good condition.
• Never tamper with safety devices.
Check their proper operation regularly.
• Keep machine free of grass, leaves, or
other debris build-up. Clean oil or fuel
spillage. Allow machine to cool before
storing.
• Stop and inspect the equipment if you
strike an object. Repair, if necessary,
before restarting.
• Never attempt to make wheel height
adjustments while the engine (motor) is
running.
• Grass catcher components are subject
to wear, damage, and deterioration,
which could expose moving parts or
allow objects to be thrown. Frequently
check components and replace with
manufacturer's recommended parts,
when necessary.
3
• Mower blades are sharp and can cut.
Wrap the blade(s) or wear gloves, and
[_se extra caution when servicing them.
• Do not change the engine governor
setting or overspeed the engine.
4$Look for this symbol to point out
important safety precautions: it means
CAUTION!!!
BECOMEALERT!H
YOUR
SAFETY IS INVOLVED.
_WARNING:
Engine exhaust, some of its
constituents, and certain vehicle
components contain or emit chemicals
known to the State of California to cause
cancer and birth defects or other
reproductive harm.
_WARNING:
Battery posts, terminals and
related accessories contain lead and
lead compounds, chemicals known to the
State of California to cause cancer and
birth defects or other reproductive harm.
Wash hands after handling.
CAUTION: In order to prevent
accidental starting when setting up,
transporting, adjusting or making repairs,
always disconnect spark plug wire and
place wire where it cannot contact spark
plug.
A CAUTION: Muffler and other engine
parts become extremely hot during
operation and remain hot after engine
has stopped. To avoid severe burns on
contact, stay away from these areas.
These accessories were available when this lawn mower was produced. They are not
shipped with your mower. They are also available at most Sears retail outlets and
service centers. Most Sears stores can also order repair parts for you, when you
provide the model number of your lawn mower. Some of these accessories may not
apply to your lawn mower.
LAWN MOWER PERFORMANCE
CLIPPING DEFLECTOR
FOR REAR DISCHARGE LAWN MOWERS
MULCHER KITS
FOR
REAR DISCHARGE
GRASS
LAWN CATCHERS
MOWERS
FOR
SIDE DISCHARGE
GRASS
LAWN CATCHERS
MOWERS
STABILIZER
<U
GAS CANS
LAWN MOWER
MAINTENANCE
MUFFLERS
BELTS
AIR FILTERS
aLADES
BLADE ADAPTERS
4
SPARK PLUGS
WHEELS
ENGINE OIL
Read these instructions and this manual
in its entirety before you attempt to
assemble or operate your new lawn
mower.
IMPORTANT: This lawn mower is
shipped WITHOUT OIL OR GASOLINE in
the engine.
Your new lawn mower has been assembled at the factory with the exception
of those parts left unassembled for
shipping purposes. All parts such as nuts,
washers, bolts, etc., necessary to complete the assembly have been placed in
the parts bag. To ensure safe and proper
operation of your lawn mower, all parts
• and hardware you assemble must be
tightened securely. Use the correct tools
as necessary to ensure proper tightness.
TO REMOVE LAWN MOWER FROM
CARTON
HOWTO SET UPYOUR
MOWER
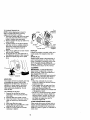
TO UNFOLD HANDLE
LAWN
IMPORTANT: Unfold handle carefully so
as not to pinch or damage control cables.
1. Raise handles until lower handle
section locks into place in mowing
position.
2, Remove protective padding, raise
upper handle section into place on
lower handle and tighten both handle
knobs.
3. Remove handle padding holding
operator presence control bar to
upper handle.
Your lawn mower handle can be adjusted
for your mowing comfort. Refer to "Adjust
Handle" in the Service and Adjustments
section of this manual.
Operator
control bar
1. Remove loose parts included with
mower.
2. Cut down two end comers of carton
and lay end panel down flat.
3. Remove all packing materials except
padding between upper and lower
handle and padding holding operator
presence control bar to upper handle.
4. Roll lawn mower out of carton and
check carton thorougly for additional
loose parts.
Lift u
Mowing
position
Lower handle
5
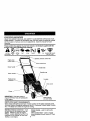
KNOWYOUR
LAWN MOWER
READ THIS OWNER'S MANUAL AND SAFETY RULES BEFORE OPERATING YOUR .
LAWN MOWER, Compare the illustrations with your lawn mower to familiarize yourself
with the location of various controls and adjustments. Save this manual for future
reference.
These symbols may appear on your lawn mower or in literature supplied with the
product. Learn and understand their meaning,
CAUTION
OR WARNING
ENGINE
ON
ENGINE
OFF
FAST
SLOW
CHOKE
FUEL
OIL
DANGER, KEEP HANDS
ANO FEET AWAY
Operator presence control bar
Engine zone
control cable
Drive gontrol lever
Starter handle
Handle knob
Gasoline cap
Grass catcher
Engine oil cap
w/dipstick
Housing
Drive cover
Primer
IMPORTANT: This lawn mower is
shipped WITHOUT OIL OR GASOLINE
in the engine.
Wheel adjuster
(on each wheel)
MEETS CPSC SAFETY REQUIREMENTS
Sears rotary walk-behind power lawn mowers conform to the safety standards of the
American National Standards Institute and the U.S. Consumer Product Safety Commission. The blade turns when the engine is running.
Operator presence control bar - must
be held down to the handle to stad the
engine. Release to stop the engine.
Primer - pumps additional fuel from the
carburetor to the cylinder for use when
stading a cold engine.
6
Starter handle - used for starting the
engine.
Drive control lever - used to engage
power-propelled forward motion of lawn
mower.
. S,_"rf 0L_SU
Theoperation
ofanylawn
mower
can resultin
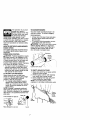
TO CONVERT MOWER
Yourlawn mower was shipped ready to be
used as a mulcher. To convert to bagging :
REAR BAGGING
foreign objects thrown into
the eyes, which can result
in severe eye damage.
Always wear safety glasses or eye
shields while operating your lawn mower
or performing any adjustments or repairs.
We recommend a wide vision safety
mask over spectacles or standard safety
glasses.
HOWTO USEYOUR
ENGINE SPEED
• Lift rear door of the lawn mower and place
the grasscatcher frame hooks ontothe
door pivot pins.
• To convertto mulchingoperation, remove
grass catcher and close rear door.
_,CAUTION:
Do not run your lawn mower
without clipping deflector or approved
grass catcher in place. Never attempt to
operate the lawn mower with the rear
door removed or prepped open.
LAWN MOWER
The engine speed was set at the factory
for optimum performance. Speed is not
adjustable.
ENGINE ZONE CONTROL
.._
_I,CAUTION: Federal regulations require
an engine control to be installed on this
lawn mower in order to minimize the risk
of blade contact injury. Do not under any
circumstances attempt to defeat the
function of the operator control. The blade
turns when the engine is running.
• Your lawn mower is equipped with an
operator presence control bar which
requires the operator to be positioned
behind the lawn mower handle to start
and operate the lawn mower.
TO ADJUST CUTTING HEIGHT
Raise wheels for low cut and lower
wheels for high cut, adjust cutting height
to suit your requirements. Medium
position is best for most lawns.
• To change cutting height, squeeze
adjuster lever toward wheel. Move
wheel up or down to suit your requirements. Be sure all wheels are in the
same setting.
NOTE: Adjuster is properly positioned
when plate tab inserts into hole in lever.
Also, g-position adjusters (if so equipped)
allow lever to be positioned between the
plate tabs.
PlateTab
Lowe_.._rWheelsforHigh
Cut
r._
Catcher frame hoar
i _-.
TO EMPTY GRASS CATCHER
1. Open door and lift up on grass catcher
using the frame handle.
2. Remove grass catcher with clippings
from under lawn mower handle.
3. Empty clippings from bag using both
frame handle and bag handle.
NOTE: Do not drag the bag when
emptying; it will cause unnecessary wear.
Grass
catcher
frame
handle
_.._
Bag
handle
Raise Wheels for Low Cut
Pivot pins
Grass
catcher
handle
Lever
7
DRIVE CONTROL
• _elf-propelling is controlled by holding
the operator presence control bar down
to the handle and pushing the drive
control lever forward until it clicks; then
releasing the lever.
• Forward motion will stop when the
operator presence control bar is
released. To stop forward motion
without stopping engine, release the
operator presence control bar slightly
until the drive control disengages. Hold
operator presence control bar down
against handle to continue mowing
without self-propelling.
• To keep drive control engaged when
turning corners, push down on handle
and lift front wheels off ground while
turning lawn mower.
Drive
Operator presence control bar
control
To engage
drive control
BEFORE STARTING
ADD OIL
ADD GASOLINE
• Fill fuel tank. Use fresh, clean, regular
unleaded gasoline with a minimum of
87 octane. Do not mix oil with gasoline. Purchase fuel in quantities that
can be used within 30 days to assure
fuel freshness.
_WARNING:
Experience indicates that
alcohol blended fuels (called gasohol or
using ethanol or methanol) can attract
moisture which leads to separation and
formation of acids during storage. Acidic
gas can damage the fuel system of an
engine while in storage. To avoid engine
problems, the fuel system should be
emptied before storage of 30 days or
longer. Drain the gas tank, start the
engine and let it run until the fuel lines
and carburetor are empty. Use fresh fuel
next season. See Storage Instructions for
additional information. Never use engine
or carburetor cleaner products in the fuel
tank or permanent damage may occur.
CAUTION= Fill to bottom of gas tank
filler neck. Do not overfill. Wipe off any
spilled oil or fuel. Do not store, spill or
use gasoline near an open flame.
Gasoline
filler cap
control
disengaged
ENGINE
Your lawnmower is shipped without oil in
the engine. Engine holds 20 oz. of oil.
For type and grade of oil to use, see
"ENGINE" in Maintenance section of this
manual.
1. Be sure lawnmower is level and area
around oil fill is clean.
2. Remove engine oil cap and fill to the
full line on the dipstick. Pour oil slowly.
Do not over fill.
NOTE: Allow oil to settle down into engine
for accurate reading. To read proper level,
tighten engine oil cap, then remove it to
read the dipstick.
3. Reinstall engine oil cap and tighten.
• Check oil level before each use. Add
oil if needed. Fill to full line on dipstick.
• Change the oit after every 25 hours of
operation or each season. You may
need to change the oil more often
under dusty, dirty conditions.
Engine
c_Icap
TO START ENGINE
NOTE: Due to protective coatings on the
engine, a small amount of smoke may be
present during the initial use of the
product and should be considered
normal.
1. To start a cold engine, push primer
three (3) times before trying to start.
Use a firm push. This step is not
usually necessary when starting an
engine which has already run for a
few minutes.
2. Hold operator presence control bar
down to the handle and pull starter
handle quickly. Do not allow starter
rope to snap back.
8
TO STOP ENGINE
• To stop engine, release operator
presence control bar.
NOTE: In cooler weather it may be
necessary to repeat priming steps. In
warmer weather over priming may cause
flooding and engine will not start. If you do
. flood engine, wait a few minutes before
attempting to start and do not repeat
priming steps.
MOWlNGTIPS
• Under certain conditions, such as very
tall grass, it may be necessary to raise
the height of cut to reduce pushing
effort and to keep from overloading the
engine and leaving clumps of grass
clippings. It may also be necessary to
reduce ground speed and/or run the
lawn mower over the area a second
time.
• For extremely heavy cutting, reduce the
width of cut by overlapping previously
cut path and mow slowly.
• For better grass bagging and most
cutting conditions, the engine speed
should be set in the fast position.
• When using a rear discharge lawn
mower in moist, heavy grass, clumps of
cut grass may not enter the grass
catcher. Reduce ground speed
(pushing speed) and/or run the lawn
mower over the area a second time.
• If a trail of clippings is left on the right
side of a rear discharge mower, mow in
a clockwise direction with a small
overlap to collect the clippings on the
next pass.
• Pores in cloth grass catchers can
become filled with dirt and dust with use
and catchers will collect less grass. To
prevent this, regularly hose catcher off
with water and let dry before using.
• Keep top of engine around starter clear
and clean of grass clippings and chaff.
This will help engine air flow and
extend engine life.
MULCHING
MOWINGTIPS
IMPORTANT: For best performance,
keep mower housing free of built-up
grass and trash. See "Cleaning" in
Maintenance section of this manual.
• The special mulching blade will recut
the grass clippings many times and
reduce them in size so that as they fall
onto the lawn they will disperse into the
grass and not be noticed. Also, the
mulched grass will biodegrade quickly
to provide nutrients for the lawn.
Always mulch with your highest engine
(blade) speed as this will provide the
best recutting action of the blades.
• Avoid cutting your lawn when it is wet.
Wet grass tends to form clumps and
interferes with the mulching action.
The best time to mow your lawn is the
early afternoon. At this time the grass
has dried and the newly cut area will
not be exposed to the direct sun.
• For best results, adjust the lawn mower
cutting height so that the lawn mower
cuts off only the top one-third of the
grass blades. If the lawn is overgrown
it will be necessary to raise the height
of cut to reduce pushing effort and to
keep from overloading the engine and
leaving clumps of mulched grass. For
extremely heavy mulching, reduce your
width of cut by overlapping previously
cut path and mow slowly.
• Certain types of grass and grass
conditions may require that an area be
mulched a second time to completely
hide the clippings. When doing a
second cut, mow across or perpendicular to the first cut path.
• Change your cutting pattern from week
to week. Mow north to south one week
then change to east to west the next
week. This will help prevent matting
and graining of the lawn.
Max 1/3
9
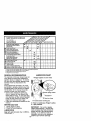
MAINTENANCE
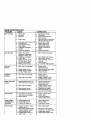
SCHEDULE
FILL IN DATES
AS YOU COMPLETE
REGULAR SERVICE
;ERVICE DATES
Check for Loose Fasteners
Clean/Inspect Grass Catcher
(If Equipped)
Clean Lawn Mower
Clean Under Drive Cover
(Power-Propelled Mowers)
Check drive belt/ ulleys
(Power-Propelle_Mowers)
Check/Sharpen/Replace
IJ/
i/
I/'
If
I_
i/
¥1
It/
Blade
t,/ 3
Lubrication Chart
Clean SatteP//Rechar e
fElectdc Start Mowerrl
if
I_
1#/4
_Check En_gine Oil Level
Change Engine Oil
_#'t,2
Clean Air Filter
Inspect Muffler
_
Clean or Replace Spark Plug
I
Replace Air Filter Paper Cartndge
I
2
1_2
1- Change ri_oreoften when operating under a heavy load or in high ambient temperatures.
2 - Se_Wce more often when operating _ndirty or dusty conditions¸
3 - Replace blades more often when mowing in sandy SOil.
4 - Charge 4_ hours at end of season.
GENERAL
RECOMMENDATIONS
LUBRICATIONCHART
The warranty on this lawn mower does not
cover items that have been subjected to
operator abuse or negligence. To receive
full value from the warranty, operator must
maintain mower as instructed in this
manual.
Some adjustments will need to be made
periodically to properly maintain your unit.
Alt adjustments in the Service and Adjustments section of this manual should be
checked at least once each season.
• Once a year, replace the spark plug,
clean or replace air filter element and
check blade for wear. A new spark plug
and clean/new air filter element assures
proper air-fuel mixture and helps your
engine run better and last longer.
* Follow the maintenance schedule in this
manual,
BEFORE
EACH USE
1. Check engine oil level
2. Check for loose fasteners.
LUBRICATION
Keep unit werl lubricated (See "LUBRICATION CHART").
_) Wheel adjuster(on each wheel)
_) Brake spring bracket
(J) Engine oil
(_ Rear door hinge
(_ Handle bracket mounting
_)
_)
Refer to maintenance
Spray lubricant
pins
"Engine"
section,
IMPORTANT:
Do not oil or grease
plastic wheel bearings, viscous lubricants will attract dust and dirt that will
shorten the life of the self-lubricating
bearings, if you feel they must be
lubricated, use only a dry, powdered
10graphite type lubricant sparingly.
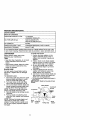
PRODUCT
SPECIFICATIONS
SERIALNUMBER
DATE
OFPURCHASE
GASOLINE CAPACITY/TYPE:
1.5 QUARTS
UNLEADED REGULAR
OILTYPE (API-SF-SJ):
OIL CAPACITY:
SAE 30 (ABOVE 32°F)
SAE 5W-30 (BELOW 32°F)
20 OZS.
SPARK PLUG (GAP: .045")
BLADE BOLT TORQUE:
CHAMPION RESISTOR TYPE RJ t 9LM4
35-40 FT. LBS.
The model and serial numbers will be found on a decal attached to the rear of the
lawn mower housing• Record themand date of purchase in space provided above.
LAWN MOWER
TO REPLACE BLADE
Always observe safety rules when
performing any maintenance.
TIRES
• Keep tires free of gasoline, oil, or insect
control chemicals which can harm
rubber.
• Avoid stumps, stones, deep ruts, sharp
objects and other hazards that may
cause tire damage.
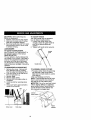
1. Position the blade adapter on the
engine crankshaft. Be sure key in
adapter and crankshaft keyway are
aligned.
2. Position blade on the blade adapter
aligning the two (2) holes in the blade
with the raised lugs on the adapter.
3. Be sure the trailing edge of blade
(opposite sharp edge) is up toward
the engine.
4. Install the blade bolt with the lock
washer and hardened washer into
blade adapter and crankshaft.
5. Use block of wood between blade and
lawn mower housing and tighten the
blade bolt, turning clockwise.
• The recommended tightening torque is
35-40 ft. Ibs.
IMPORTANT: Blade bolt is grade 8 heat
treated.
BLADE CARE
For best results, mower blade must be
kept sharp. Replace bent or damaged
blades.
TO REMOVE BLADE
1. Disconnect spark plug wire from spark
plug and place wire where it cannot
come in contact with spark plug.
2. Turn lawn mower on its side. Make
sure air filter and carburetor are up.
3. Use a wood block between blade and
mower housing to prevent blade from
turning when removing blade bolt.
NOTE= Protect your hands with gloves
and/or wrap blade with heavy cloth•
4. Remove blade bolt by turning counterclockwise.
5. Remove blade and attaching hardware (bolt, lock washer and hardened
washer).
NOTE: Remove the blade adapter and
check the key inside hub of blade
adapter. The key must be in good condi• tion to work properly• Replace adapter if
damaged.
Blade adapter
Crankshaft
keyway
Key_
Lockwasher
Crank
bolt
11
Hardened
washer
Tra)))ng edge
Blade
adapter
TO SHARPEN BLADE
NOTE: We do not recommend sharpening'blade - but if you do, be sure the
blade is balanced.
Care should be taken to keep the blade
balanced. An unbalanced blade will
cause eventual damage to lawn mower
or engine.
• The blade can be sharpened with a file
or on a grinding wheel. Do not attempt
to sharpen while on the mower.
• To check blade balance, ddve a nail
into a beam or wall. Leave about one
inch of the straight nail exposed. Place
center hole of blade over the head of
the nail. If blade is balanced, it should
remain in a horizontal position. If either
end of the blade moves downward,
sharpen the heavy end until the blade
is balanced.
GRASS CATCHER
• The grass catcher may be hosed with
water, but must be dry when used.
• Check your grass catcher often for
damage or deterioration.
Through
normal use it will wear. If catcher
needs replacing, replace only with a
manufacturer approved replacement
catcher. Give the lawn mower model
number when ordering.
DRIVE WHEELS
Check front drive wheels each time
before you mow to be sure they move
freely.
The wheels not turning freely means
trash, grass cuttings, etc. are in the drive
wheel area and must be cleaned to free
drive wheels.
Jfnecessary to clean the drive wheels,
check both front wheels.
1. Remove hubcaps, hairpin cotters and
washers.
2. Remove wheels from wheel adjusters.
3. Remove any trash or grass cuttings
from inside the dust cover, pinion and/
or drive wheel gear teeth.
4. Put wheels back in place.
NOTE: If after cleaning, the drive wheels
do not turn freely, contact a Sears or other
qualified service center,
GEAR CASE
• To keep your drive system working
propedy, the gear case and area
around the drive should be kept clean
and free of trash build-up. Clean under
the drive cover twice a season.
• The gear case is filled with lubricant to
the proper level at the factory. The only
time the lubdcant needs attention is if
service has been performed on the
gear case.
• If lubricant is required, use only Texaco
Starplex Premium I Grease, Part No.
750369. Do not substitute.
ENGINE
LUBRICATION
Use only high quality detergent oil rated
with API service classification SF-SJ.
Select the oil's SAE viscosity grade
according to your expected operating
temperature.
NOTE: Although multi-viscosity oils
(5W30, 10W30 etc.) improve starting in
cold weather, these multi-viscosity oils
will result in increased oil consumption
when used above 32"E Check your
engine oil level more frequently to avoid
possible engine damage from running
low on oil.
Change the oil after every 25 hours of
operation or at least once a year if the
lawn mower is not used for 25 hours in
one year.
Check the crankcase oil level before
starting the engine and after each five (5)
hours of continuous use. Tighten oil plug
securely each time you check the oil
level.
12
TO CHANGE ENGINE OIL
NOTE: Before tipping lawn mower to
' drain oil, drain fuel tank by running
engine until fuel tank is empty,
1. Disconnect spark plug wire from spark
plug and place wire where it cannot
come in contact with spark plug.
2. Remove engine oil cap; lay aside on a
clean surface.
3. Tip lawn mower on its side as shown
and drain oil into a suitable container,
Rock lawn mower back and forth to
remove any oil trapped inside of
engine.
4. Wipe off any spilled oil on lawn mower
and on side of engine.
5. Fill engine with oi!. (See "Add oir' in
the Operacion section of this manual,)
6, Reconnect spark plug wire to spark
plug.
Turn
Collar
clockwise
to remove
Slot
Air filter
Tab
Air filter cover
Turn
ctockwise
to tighten
MUFFLER
Inspect and replace corroded muffler as it
could create a fire hazard and/or damage.
SPARK PLUG
Replace spark plugs at the beginning of
each mowing season or after every 100
hours of operation, whichever occurs first.
Spark plug type and gap setting are
shown in "PRODUCT SPECIFICATIONS"
in Maintenance section of this manual.
CLEANING
Container
AIR FILTER
Your engine will not run properly and may
be damaged by using a dirty air filter,
Replace the air filter every 100 hours of
operation or every season, whichever
occurs first. Service air cleaner more
often under dusty conditions. Do not
wash air filter.
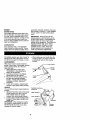
TO CHANGE AIR FILTER
1. Remove the air filter by turning
ctockwise to the stop and pull away
from collar.
2. Remove filter from inside of cover.
3. Clean the inside of the cover and the
collar to remove any dirl accumulation.
4. Insert new filter into cover.
5. Put air filter cover and filter into collar
aligning the tab with the slot.
6. Push in on cover and turn counterclockwise to tighten.
IMPORTANT: For best performance,
keep mower housing free of built-up
grass and trash. Clean the underside of
_our mower after each use,
CAUTION: Disconnect spark plug wire
from spark plug and place wire where it
cannot come in contact with the spark
plug.
• Clean the underside of your lawn
mower by scraping to remove build-up
of grass and trash.
• Clean engine often to keep trash from
accumulating. A clogged engine runs
hotter and shortens engine life.
• Keep finished surfaces and wheels free
of al! gasoline, oil,etc.
• We do not recommend using a garden
hose to clean lawn mower unless the
electrical system, muffler, air filter and
carburetor are covered to keep water
out. Water in engine can result in
shortened engine life.
CLEAN UNDER DRIVE COVER
Clean under drive cover at least twice a
season. Scrape underside of cover with
putty knife or similar tool to remove any
build-up of trash or grass on underside of
drive cover.
13
_,CAUTION:
Before performing any
service or adjustments:
t. Release control bar and stop engine.
2. Make sure the blade and all moving
parts have completely stopped,
3. Disconnect spark plug wire from spark
plug and place where it cannot come
in contact with plug.
LAWN MOWER
TO ADJUST CUTTING HEIGHT
See "TO ADJUST CUTTING HEIGHT" in
the Operation section of this manual.
REAR DEFLECTOR
The rear deflector, attached between the
rear wheels of your mower, is provided to
minimize the possibility that objects will
be thrown out of the rear of the mower
into the operator mowing position, if the
deflector becomes damaged, it should be
replaced.
TO REMOVE/REPLACE
DRIVE BELT
1. Remove drive cover. Remove belt
from gearcase pul)ey by pushing
down on pulley and rolling belt off it.
2. Turn lawn mower on its side with air
filter and carburetor up.
3. Remove blade.
4. Remove debris shield.
5. Remove belt from engine pulley on
crankshaft.
6. Install new belt by reversing above
steps.
7. Always use factory approved belt to
assure fit and long life.
Bert
TO ADJUST HANDLE
The upper handle may be adjusted to
four (4) different height positions.
1. Loosen both handle knobs only
enough to allow the upper handle to
pivot to the desired adjustment
position.
2. Tighten both handle knobs securely.
Handle
Knob
Handle Knob
TO ASSEMBLE
GRASS CATCHER
1. Put grass catcher frame into grass bag
with rigid part of bag on the bottom.
Make sure the frame handle is outside
of the bag top.
2. Slip vinyl bindings over frame.
NOTE: If vinyl bindings are too stiff, hold
them in warm water for a few minutes. If
bag gets wet, let it dry before using.
_CAUTION:
Do not run your lawn mower
without clipping deflector or approved
grass catcher in place. Never attempt to
operate the lawn mower with the rear
door removed or propped open,
Catcher
7
Frame
Drive cover
Push down
opening
14
ENGINE
ENGINE SPEED
Your engine speed has been factory set.
Do not attempt to increase engine speed
or it may result in personal injury. If you
believe that the engine is running too fast
or too slow, take your lawn mower to a
Sears or other qualified service center for
repair and adjustment.
CARBURETOR
Your carburetor has a non-adjustable
fixed main jet for mixture control, if your
engine does not operate propedy due to
Immediately prepare your lawn mower for
storage at the end of the season or if the
unit will not be used for 30 days or more.
LAWN MOWER
When lawn mower is to be stored for a
period of time, clean it thoroughly, remove
all dirt, grease, leaves, etc, Store in a
clean, dry area.
1. Clean entire dawn mower (See
"CLEANING" in the Maintenance
section of this manual).
2. Lubricate as shown in the Maintenance section of this manual.
3. Be sure that all nuts, bolts, screws,
and pins are securely fastened.
Inspect moving parts for damage,
breakage and wear. Replace if
necessary.
4. Touch up all rusted or chipped paint
surfaces; sand lightly before painting.
HANDLE
YOUcan fold your lawn mower handle for
storage.
1. Squeeze the bottom ends of the lower
handle toward each other until the
lower handle clears the handle
bracket, then move handle fonvard.
2. Loosen upper handle mounting bolts
enough to allow upper handle to be
folded back.
IMPORTANT: When folding the handle
for storage or transportation, be sure to
fold the handle as shown or you may
damage the control cables.
suspected carburetor problems, take your
lawn mower to a Sears or other qualified
service center for repair and/or adjustment.
IMPORTANT: Never tamper with the
engine governor, which is factory set for
proper engine speed. Overspeeding the
engine above the factory high speed
setting can be dangerous. If you think the
engine-govemed high speed needs
adjusting, contact a Sears or other
qualified service center, which has
proper equipment and experience to
make any necessary adjustments.
• When setting up your handle from the
storage position, the lower handre will
automatically lock into the mowing
position.
Sq_
bracket
Hairpin
cotter
Operator I
control bar
Upper
Lower
Fold
backward
Mowing
position
15
ENGINE
ENGINE OIL
FUEL SYSTEM
IMPORTANT: it is important to prevent
gum deposits from forming in essential
fuel system parts such as carburetor, fuel
rifler, fuel hose, or tank during storage.
Also, experience indicates that alcohol
blended fuels (called gasohol or using
ethanol or methanol) can attract moisture
which leads to separation and formation
of acids during storage. Acidic gas can
damage the fuel system of an engine
while in storage.
1. Drain the fuel tank.
2. Start the engine and let it run until the
fuel lines and carburetor are empty.
• Never use engine or carburetor cleaner
products in the fuel tank or permanent
damage may occur.
• Use fresh fuel next season.
NOTE: Fuel stabilizer is an acceptable
alternative in minimizing the formation of
fuel gum deposits during storage. Add
stabilizer to gasoline in fuel tank or
storage container. Always follow the mix
ratio found on stabilizer container. Run
engine at least 10 minutes after adding
stabilizer to allow the stabilizer to reach
the carburetor. Do not drain the gas tank
and carburetor if using fuel stabilizer.
Drain oil (with engine warm) and replace
with clean engine oil. (See "ENGINE" in
the Maintenance section of this manual).
CYLINDER
1. Remove spark plug.
2. Pour one ounce (29 ml) of oil through
spark plug hole into cylinder.
3. Pull starter handle slowly a few times
to distribute oil.
4. Replace with new spark plug.
OTHER
• Do not store gasoline from one season
to another.
• Replace your gasoline can if your can
starts to rust. Rust and/or dirt in your
gasoline will cause problems.
• If possible, store your unit indoors and
cover it to give protection from dust and
dirt.
• Cover your unit with a suitable protective cover that does not retain moisture. Do not use plastic. Plastic cannot
breathe which allows condensation to
form and will cause your unit to rust.
IMPORTANT: Never cover mower while
engone and exhaust areas are still warm.
CAUTION:Never store the lawn mower
with gasoline in the tank inside a building
where fumes may reach an open flame or
spark. Allow the engine to cool before
storing in any enclosure.
16
TROUBLESHOOTING
CHART
CAUSE
PROBLEM
Does not start
Dirty air filter.
Oyt of fuel.
Stale fuel.
1.
2.
3.
14,
Water in fuel.
4.
8.
9,
position.
Control bar defective,
9.
Replace control bar.
1.
Rear of lawn mower
1.
Set to "Higher Cut" position,
2.
3.
4,
Set to "Higher Cut" position.
Clean/replace air filter.
Clean underside of mower
6.
Too much oil in engine.
Walking speed too fast,
5.
6.
housing.
Check oil level,
Cut at slower walking speed.
1.
Worn, bent or loose blade.
1,
2.
3.
Wheel heights uneven.
Buildup of grass, leaves
and trash under mower,
2.
3.
1.
Worn. bent or loose blade.
1.
2.
Bent engine crankshaft.
2,
6,
7,
2.
3.
4.
5.
Poor cut uneven
Excessive
vibration
housing or cutting blade
dragging in heavy grass.
Cutting too much grass.
Dirty air filter,
Buildup of grass, leaves,
and trash under mower.
5.
6.
7.
Clean/replace air filter.
Fill fuel tank.
Drain tank and refill with
fresh clean fuel.
Drain fuel tank and carburetor,
refill tank with fresh gasoline.
Connect wire to plug.
Replace spark plug.
Tighten blade bolt or
replace blade adapter.
Depress control bar to
handle.
Spark plug wire is disconnected.
Bad spark plug,
Loose blade or broken
blade adapter.
Control bar in released
5.
Loss of power
CORRECTION
1.
2.
3.
8.
Replace blade.
Tighten blade bolt.
Set all wheels at same height,
Clean underside of
mower housing.
Replace blade.
Tighten blade bolt.
Contact a Sears or other
qualified service center.
Starter rope hard
to pull
1.
Engine flywheel brake is on
when control bar is released.
1.
2.
Bent engine crankshaft.
2.
Depress control bar to
upper handle before
pulling starter rope.
Contact a Sears or other
3.
4.
Blade adapter broken.
Blade dragging in grass.
3.
4.
qualified service center.
Replace blade adapter,
Move lawn mower to cut
grass or to hard surface.
Lose of drive
1,
2.
Ddve wheels not turning
_V_thdrive control engaged.
Bert not ddving.
1. Adjust or replace ddve
control cable.
2. Put belt on pulleys or
replace belts if broken.
1,
2.
3.
Cutting height too low.
Lift on blade worn off.
Catcher not venting air.
1.
2.
3.
Raise cutting height.
Replace blade.
Clean grass catcher.
Gross is too high or wheel
height is too low.
2,
Rear of lawn mower housing
or blade dragging in grass.
'3. Grass catcher too full.
4. Handle height position not
1.
Raise cutting height.
2.
Raise rear of lawn mower
3.
4.
housing one (1) setting higher.
Empty gross catcher.
Adjust handle height to suit.
Grass catcher
not filling (if so
!equipped)
Hard to push
1.
I
dght for you,
17
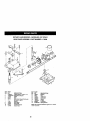
ROTARY LAWN MOWER--
MODEL NO. 917.379610
GEAR CASE ASSEMBLY PART NUMBER
175258
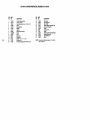
17
KEY
NO.
PART
NO,
I
2
3
4
6
17490416
175,?.48X(X)4
137053
57072
48373
7
8
9
10
11
77881
137051
175257
57079
131484
DESCRIPTION
Tapping Screw 1/4-20 x 1-1/4
Engagement Bracket
Shifter
Seal
Gear Case Halves Kit (Includes
Key Nos. 4, and 7)
Beadeg
WormShaft
Ddve Shaft
Hardened Washer
Clutch Yoke
KEY
NO.
PART
NO.
DESCRIPTION
12
13
14
15
16
17
18
19
700343
8_147
137050
750436X
750_69
12000003
850848
81585X004
Bushing
Plug
Helical Gear
Clutch Jaw
Grease
E-Rtng
Hi-proKey
Spdng Bracket
NOTE: All component dimensions given in U.S. Inches.
1 inch = 25.4 mm
35
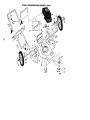
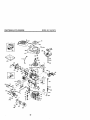
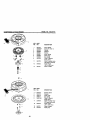
ROTARY LAWN MOWER MODEL NUMBER 917.379610
1
-24
4
31
35
5
13
8
32
44
30
43
28
46
45
25
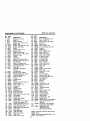
ROTARY LAWN MOWER MODEL NUMBER 917.379616
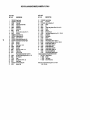
KEY PART
NO. NO.
G3
1
2
3
4
5
6
7
8
9
10
11
12
13
14
15
16
17
18
19
20
21
22
23
175391)(479
175245X479
169780
156577
171407
136376
51793
66426
175794
128415
175069X479
175070X479
17060410
175576X479
17557"7X479
175243
175244
63601
153638
178.398
88652
85543
87677
84
.....
25
26
27
28
29
30
31
150406
83923
177320
160828
57143
175574X004
161961
DESCRIPTION
Uppe/Han_e
Lower Handle
ControlBar
Engine Zone ControICai_e
Handle Bolt
Han_e Knob
Hai_n Cotter
WireTie
Rear Door Kit (Incl. Key #16 & 17j
Pop Rivet
Support Bracket LH
Support Bracket RH
Screw 14-20 x 5/8
Han_e Bracket Assembly (Left)
Handle Bracket Assembly (Right)
SpnngLH
SpnngRH
Keps LOCknut 1/4-20
Rope Guide
Rear Sldrt
Hinge Screw 1/4-20 x 1-1/4
Engine Pulley
HI-Pro Key #505
Engine-Cra ftsman-Model NO. 143.016714
Hex Head Thread Rolling Srew 3/6-16 x 1-1/8
Hex Flange Nut
Whesi
Shoulder Bolt 5/16-18 x .33
WaveWasher
Axle Arm Assembly RR
Selector Knob
KEY PART
NO. NO.
DESCRIPTION
32
33
34
35
36
37
38
39
43
44
45
46
47
48
49
5O
78
79
8O
81
175053X004 Selector Spdng
63124
Nut 5/16-18
175575X004 Axle Arm Assemsiy LR
177321
Hubcap
165912
Bolt
150078
Thread CuftJng Screw w/S'ems 5/16-18 x 3/4
176185
Washer
176235
Push Nut
175083
Bottom Belt Cover
176289
Lawn Mower Housing (InCl. Key #1 O, 11, 12& 45)
85463
Danger Deal
851514
BJadeAdapter
175064
Blade21"
851074
Hardened Washer
85O_63
Helical Washer 3/8-24 x 1-3/8 Gr. 8
851084
Hex Head Machine Screw 3/8-24 x 1-3/8 Gr. 8
170954
Handle Adjuster, Outside, LH
170953
Handle Adjuster, Inside, LH
170554
Haodle Adjuster Spdng
170955
Handle Adjuster, Inside, RH
170956
Handle Adjuster, Outside, RH
161058
Warning Decal (Not Shown)
- 177323
Owner's Manusi (EnglisiYS panish)
Available accessories not included wi_ lawn mower:
-D/98 33314 ClippingDeflector
-71 33623
Gas Can
-71 33500
Fuel Stabilzer
-71 33300
SA_ 30W Oil (20 oz.)
NOTE:
All component dimensions given in U.S. inches
1 inch = 28.4 mm
11
/
14
14
41
8
13
12
16
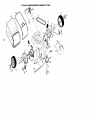
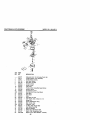
ROTARY LAWN MOWER MODEL NUMBER 917.379610
KL=Y pART
NO. NO.
1
3
4
5
6
8
9
11
12
13
14
15
16
18
26
145755
751152
158755
175436
150495
17501,2
145212
150340
12000058
137(To4
88080
88118
67725
701037
175262
DESCRIPTION
Control Cable Assembly
Locknut #10-24
Hex Washer Head Screw
V-Belt
Spring Retainer
1/4-20 x 2.12
Habcap
Locknut
Wheel & Tire Assembly
E-Ring
Pinion
Dust Cover
Felt Washer
WaSher 1/2 x %1/2 x ,134
SeleCtor Knob
Pan Head Tapping Screw #10-24 x 2-3/4
K_-Y
NO.
PART
NO.
DESCRIPTION
28
31
32
35
36
37
38
40
41
54
56
57
175065
132010
133'052
151521
175258
137090
63601
75192
151520
175084
175739
175058
Drive Cover
Hex Flange Nut
Drive Pulley
Wheel Adjuster Assembly (Left)
Gear Case Assembly
Spdng
Locknut 1/4-20
Spring
Wheel Adjuster ASSembly (Right)
Grassbag Assembly
DriveshaftCover
Frame
NOTE:
All component dimensions
1 inch = 25.4 mm
given in U.S. inches
CRAFTSMAN
4-CYCLE ENGINE
MODEL NO. 143.016/'14
400
135
119
125
275.
309A
311A
4O
,
CRAFTSMAN
4-CYCLE ENGINE
KEY
NO.
DESCRIPTION
PART
NO.
1 37465
2 26727
6 33734
7 36557
12 36775
12A 36558
12B 36694
14 28277
15 30589
16 34839A
17 31335
18 651018
19 36281
20 32600
30 37464
40 40027
41 40042
42 40006
43 20381
45 36777
46 32610A
48 27241
50 37460
Cylinder (Incl. 2 & 20)
Dowel Pin
Breather Element
Bmatber Ass'y. (Incl. 6 & 12A)
Breather Tube
Breather Cover/Tube (lecL 12B)
Breather Tube Elbow
Washer
Governor Rod (Incl. 14)
Governor Lever
Governor Lever Clamp
Screw, Torx T-15, 8-32 x 19/64"
Extension Spring
Oil Seal
Crankshaft
Piston, Pin & Ring Set (Std.)
Piston/Pin Ass'y, (Std.) (Incl. 43)
Ring Set (Std.)
Piston Pin Retaining Ring
Connecting Rod Ass'_ (Incl. 46)
Connecting Rod Bolt
Valve Lifter
Camshaft Exhaust (MCR)
(Inc.104)
52 29914
Oil Pump Ass'y.
69 37609
* Mounting Flange Gasket
70 37608
Mounting Flange (Incl. 72-83)
72 37615
Oil Drain Plug (Incl. 73)
73 28833
Drain Plug Gasket
75 27897
Oil Seal
80 30574A
Governor Shaft
81 30590A
Washer
52 30591
Governor Gear Ass'y. (Incl. 81)
83 30586A
Governor Spool
86 650488
Screw, 1/4-20 x 1-1/4"
89 611004
Flywheel Key
90 611112
Flywheel
92 650615
Belleville Washer
93 650816
Flywheel Nut
100 34443C Solid State ignition
101 610118
Spark Plug Cover
103 651007
Screw, Torx T-15, 10-24 x 15/16"
104 37480
Cam Bushing
110 37047
Ground Wire
119 36787 * Cylinder Head Gasket
120 36825
Cylinder Head
125 36780
Exhaust Valve, 1/32" Oversize
(Includes Key Number 151)
125 37288
Exhaust Valve (Std.) (Incl. 151)
126 37289
Intake Valve (Std.) (Incl. 151)
130 6021A
Screw, 5/16-18 x 1-1/2"
135 37598
Resistor Spark Plug (RJI9LM4)
150 31672
Valve Spring
151 31673
Valve Spring Cap
151A 40017
Intake Valve Seal
169 36783 * Valve Cover Gasket
172 36784
Valve Cover
174 30200
Screw, 10-24 x 9/16"
MODEL NO. 143.016714
KEY
NO.
PART
NO.
DESCRIPTION
178
182
164
185
186
189
191
195
207
216
223
224
238
239
241
245
260
260
261
262
263A
275
277
285
287
290
292
298
300
301
305
306
307
309
309A
310
311A
313
347
355
370A
370C
370R
380
390
400
416
29752
Nut & Lock Washer, 1/4-29
6201
Screw, 1/4-28 x 7/8"
26756 * Cart). To intake Pipe Gasket
37466
Intake Pipe
32653
Governer Link
650839
Screw, 1/4-20 x 3/8"
36559A S.E. Brake Bracket (Incl. 195)
610973
Terminal
34336
Throttle Link
33086
R.RM. Adjusting Lever
650451
Screw, 1/4-20 x 1"
36786 * intake Pipe Gasket
660932
Screw, 10-32 x 49/64"
34336 * Air Cleaner Gasket
36919
Air Cleaner Collar
36905
Air Cleaner Filter
37122
Air Cleaner Cover
36980
Blower Housing
30200
Screw, 10-24 x 9/16"
650831
Screw, 1/4-20 x 1/2"
37184
Starter Gdll
37462
Muffler
650988
Screw, 1/4-20 x 2-5/16"
35000A Starter Cup
650926
Screw, 8-32 x 21/64"
29774
Fuel Line
26460
Fuel Line Clamp
28763
Screw, 10-32 x 35/64"
36916
Fuel Tank (Incl. 292 & 301)
36246
Fuel Cap (Black)
35647
Oil Fill Tube
37610
*"O'-Ring
35499
"O"-Ring
650562
Screw, 10-32 x 1/2"
650793 Screw, 10-24 x 3/4"
35648
Dipstick
37611
Hold Down Bracket
34080
Spacer
651038
Screw, 10-32 x 51/84"
590701
Starter Handle
36261
Lubrication Decal
37318
Primer Decal (3 X)
37317
Warning Decal
640271
Carburetor (Incl. 184)
690739
Rewind Starter
36792B Gasket Set (Incl. items Marked *)
36085
Spark Arrestor Kit (IncL 417)
(Optional)
417 650760
Screw, 8-32 x 3/8" (Optional)
900 -- -- -Rep]ecement Engine NONE
900
750865
Replacement S/B
(Order from 71-999)
RPM High 2900 to 3200
NOTE:
590702
NOTE:
inches.
41
This engine could have been built with
starter.
All component dimensions given in U.S.
1 inch = 25.4 rnm
CRAFTSMAN
4-CYCLE ENGINE
MODEL
_m_7
,o
KEY
NO.
PART
NO.
---1
2
4
5
6
7
16
17
18
20
20A
25
27
28
29
30
31
35
36
36A
37
40
44
47
48
60
640271
31615
31767
631184
631183
640070
650506
631807
651025
630766
640027
640200
631867
631024
632019
631028
631021
631022
640259
640080
632766
632547
640030
27110A
630748
631027
632760B
DESCRIPTION
*
*
•
*
•
*
*
*
•
•
Carburetor (Incl. 184 of Engine Parts List)
Throttle Shaft & Lever Assembly
Throttle Return Spring
Dust Seal Washer
Dust Seal (Throttle)
Throttle Shutter
Shutter Screw
Fuel Fitting
Throttle Crack Screw/Idle Speed Screw
Tension Spring
Idle Restrictor Screw
Idle Restrictor Scrwe Cap (Black)
Float Bowl
Float Shaft
Float
Float Bowl "O" Ring
Inlet Needle, Seat, & Clip (Incl. 31)
Spring Clip
primer Bulb/Retainer Ring
Main Nozzle Tube
Carburetor Tube
"O" Ring, Main Nozzle Tube
High Speed Bowl Nut
Bowl Nut Washer
Welch Plug, Idle Mixture Well
Welch Plug, Atmospheric Vent
Repair kit (Incl. Items Marked * in Notes)
42
NO. 143.016714
CRAFTSMAN
MODEL
4-CYCLE ENGINE
13/
4
KEY
NO.
PART
NO,
1
2
3
4
5
6
7
8
590702
590599A
590600
690696
590601
590697
590698
590699
590700
11
590703
12
590535
13
590701
NO. 143.016714
DESCRIPTION
Recoil Stader
Spring Pin (Incl. 4)
Washer
Retainer
Washer
Brake Spring
Starter Dog
Dog Spring
Pulley & Rewind
Spring Ass'y
Starter Housing Ass'y.
(40 degree grommet)
Starter Rope
( 98" X 9/64" dia.)
Starter Handle
m5
O--2
]__14
KEY PART
NO. NO.
----590739
3
590740
6
590616
7
590617
8
590618A
II
11
590638
12
590535
13
14
590701
590760
II -_
43
DESCRIPTION
Rewind Starter
Retainer
Starter Dog
Dog Spring
Pulley & Rewind
Spring Ass'y
Starter Housing Ass'y
(40 degree grommet)
Starter Rope
( 98" x 9/64" dia.)
Starter Handle
Spring Clip
Get it fixed, at your home or ours!
For repair of major brand appliances in your own home...
no matter who made it, no matter who sold it!
1-800-4-MY-HOME
sMAnytime,
day or night
(1-800-469-4663)
www.sears.com
To bring in products such as vacuums,
lawn equipment and electronics for repair, call for
the location of your nearest Sears Parts & Repair Center.
1-800-488-1222
A°y_ir_,
dayo,
night
www.sears.com
For the replacement parts, accessories and owner's manuals
that you need to do-it-yourself, call Sears PartaDirectSM!
1-800-366-PART
(1-800-366-7278)
6ar.- 11p.mCST,
7 days a week
www.sears.com/par tsdirect
To purchase or inquire about a Sears Service Agreement:
1-800-827-6655
7 am - 5 pm. CST,Mon.- Sat
Para pedir serviciode reparacibn a domicilio,
y para ordenar piezas con entrega a domicilio:
1-888-SU-HOGAR
s_
(1-888-784-6427)
O Sears,
'-=R_',_d
_,._m_-_,-._,
• of_)_ 1_Op.q_nd
co.
® Marca _/
Marca_'rFdbrica de Seats, RoebUckand Co.
Roebuck and Co.
177323 Rev. 2 01.31.01
Au Canada pourservice en fraPRais:
1-877-LE-FOYER
s"
(1-877-533-6937)
BY
Printed in U,S.A.