1
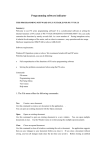
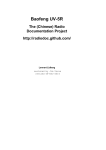
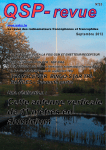
File No.: PUXING-PG-777
Date of Issue: 2008-06-30
v.1.00
Guide to Programming Radio Model PX-777
1. Install Procedures
1.1 Plug RS232 COM port of program cable to a Computer
1.2 Install the software from a CD-ROM
1) Double click “PX6IN1.EXE” file and click NEXT NEXT…to finish
(You may input any word as a Serial Number )
2) Click the software icon “PX6IN1” on desktop and select a Eng. Version
3) Select Product: Select PX-777/328 CH128 MSK+CCIR only (or select Ch128(V2))
Note:
1) Don’t select others, your radio may not have these features, the unfit software version may
damage your radio!
2) If you ensure your radio have a two tone paging function, you must use “PX777/328 CH128+2
TONE”.
4) After confirm the select, press OK to next step.
3) Connect the programming cable to your radio.
4) Select a communication port.
Right-click My Computer -> Properties -> Hardware -> Device Manager, to view the detailed
information. As shown in the below figure, COM1 is the communication port for RS232
programming cable.
1
5) Make sure your software is also in COM1
(Click Port to set the COM)
6) Turn on your radio and click READ to read the radio’s default factory parameters.
(or click “Program”Æ”Read From Radio”)
Note: After read the parameter, you sometime found that the “Field” may not same as actual
unit in your hand, Example, your radio is a UHF 400-470mhz, but the “Field” displays
136-174Mhz, this is not a problem
2.
Version information
Click “Help”Æ “About PUXING” you will read the version information.
2
3. List and describe of programming Menu
Type: The radio’s model numbers
Field: The radio’s frequency band
Note: Not all bands are available for your radio
Tx Power Rank: To select different power level from 0 to 9.
0: Lowest power level, 9: Highest power level
Manual Setting: To enable/disable switch between Channel and Frequency mode
Open: Press and hold ENTER key while turn ON power, the radio will switch between Channel and
Frequency mode.
Close: To disable the switchable function.
CH: Display the channel number
Receive (MHz): Receive frequency
Transmit (MHz): Transmit frequency
Rx Tone: CTCSS & DCS tone (QT/DQT) in Receive
CTCSS: 50
DCS: 104 (normal and invert)
Tx Tone: CTCSS & DCS tone (QT/DQT) in Transmit
CTCSS: 50
DCS: 104 (normal and invert)
W/N: Wide Channel space (25khz) and Narrow Channel space(12.5khz)
W: The maximum modulation less than 5KHz
N: The maximum modulation less than 2.5KHz
Scan: “Yes” or “No” option
Yes: The radio will scan this channel when you set radio to scan
No: The radio will not scan this channel
TX Power: High and Low
When you want to save the battery power you can select “Low”, otherwise, set “High”
When you set High, the radio will transmit in High power, otherwise Low power.
Opt Signal: MSK, DTMF and CCIR (Detailed operation refer to “ID Operation” below)
3
PTT ID: Set ON to display PTT ID on radio’s LCD.
BusyLock: Busy Channel/Tone Lockout, there are OFF, Carrier and QT/DQT option
Off: This function disables
Carrier: The transmit disable while other radio is transmitting, until other radio stop transmitting.
QT/DQT: When your radio has same setting of frequency & tone, transmit will be disable, it can
transmit while your radio have a different tone (CTCSS/DCS).
Name: To edit channel name, capital alphanumeric only
Note: To display channel name you must set “NAME?” ON by keypad
(Press MENU,ENTER and rotate channel selector to “NAME? 15” then press ENTER, rotate selector to
select ON, press ENTER confirm and press twice VFO/MR to exit)
3. Program Menu function
Click “Program” to enter the items.
Read from Radio/Write to Radio: For read and write operate.
Test Mode:
Note: This function is temporarily unavailable; please don’t try to use this function
Optional Features:
a) Function Set
3.1 Time out Time (TOT)
The preset transmit time limit, there are “off” to “600s” option. When you press PTT continuously for the
preset value, the transmit will be block
3.2 Squelch Level(SQ)
From “0” to “9” option, when you set SQ to “0”, it may open squelch even if no signal input
3.3 Language Choose
Voice guide for your each operation, it is useful for side keys operation or operate in dark.
English or Chinese language options
3.4 Vox Gain Level: Off, 1-9 levels option
Off: Close this function
Level 1: lowest sensitivity, Level 9: highest sensitivity
3.5 Priority Channel: To set certain channel as priority scan channel, the radio will always scan this
priority channel each scan. Examples, you set channel 5 as priority channel, it always scans as this:
5-1, 5-2, 5-3, 5-4, 5-6, 5-7, 5-8 etc..
Note: you can set radio to priority scan by keypad (press MENU,2PRI,ENTER)
4
3.6 Beep: A tone to come with your operation.
Enable: To activate alert tone for Low Power, Blank frequency, Power On and Pressing operation.
Disable: To inactivate the function
3.7 Battery Save: to save the battery duration time
When set this On, the Rx will automatically enter into “Save Power” status in case of no operate on your
radio.
3.8 Scrambler Activation
Scrambler is a function to prevent unauthorized person from hearing your communication, when you
set this function On, those who is in same frequency will not hear your talk.
Note: Your partner also needs to turn Scrambler On then you can talk clearly.
b) ID Operation
MSK: A signaling which be send as ANI and display PTT ID.
The first blank is the MSK tone code (At most four numbers) which emit before transmit voice (TX),
“ID” is MSK PTT ID (At most Six alphanumeric) which will display on LCD after you release PTT(To display
PTT ID and talk to your partner, you must press and hold PTT until the code tone is end).
Note: To display MSK PTT ID you must:
1) Set “MSK” in “Opt Signal” column
2) Set “ON” in “PTT ID” column
3) You must marked “Begin of TX” and “End of Tx” (See pic.below)
4) After each programming and unplug the program cable, you MUST turn “ANI” on by keypad
(Press MENU,0ANI,ENTER and rotate channel selector to set ON, then press ENTER confirm and
press twice VFO/MR to exit)
5) The Call ID, Check ID, Kill ID, Listen ID is option, your radio may not have these function.
6) Opt Signal In Frequency Mode allow you to display MSK PTT ID in frequency mode.
CCIR: A signaling same as MSK, but LCD display only digital, not letter.
5
ID: “ID” is MSK PTT ID (At most Eight digitals) which will display on LCD after you release PTT
Call ID: a tone in CCIR format (At most Eight digitals).
Note: To display CCIR PTT ID you must
1) Set “CCIR” in “Opt Signal” column
2) Set “ON” in “PTT ID” colume
3) Marked “Begin of Tx’’ and “End of Tx”
4) After each programming and unplug the program cable, you MUST turn “ANI” on by keypad
(Press MENU,0ANI,ENTER and rotate channel selector to set ON, then press ENTER confirm and
press twice VFO/MR to exit)
5) The Call ID, Check ID, Kill ID, Listen ID is option, your radio may not have these function.
6) Opt Signal In Frequency Mode allow to display CCIR PTT ID in frequency mode.
7) The numbers on “ ID” column must be DIFFERENT with receive radio, otherwise bell chime
8) The CCIR cannot use for a SelCall operation
DTMF
Two Tone signaling: (This features are option, ask your seller for details)
To use two tone encode/decode you can operate as follow:
1. Set “Opt Signal” to “2-Tone” and “PTT ID” to ON
2. Double click “More” to set Call 1 and Decode 1.(“1” is equal to the “Num”)
3. Enter tone frequency on “Tone1 Fre” and “Tone2 Fre” (Range from 300hz to 3khz)
4. Make sure the tone delay time is exactly same for Encode and Decode
5. After programming you can write the data to your radios.
Now you cannot open squelch while pressing PTT, you should press and hold Orange button until
another radio bell ring. Then you can talk freely.
Note: Before press and hold Orange button, you should set the “ANI” ON by keypad. (Press
EnterÆ0ANIÆEnterÆONÆEnterÆVFO/MR)
6
7. Print Preview
After programming you can click “FileÆPrint Preview” to check all setting before save or print
out.
8. CTCSS/DCS list
7