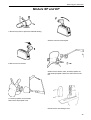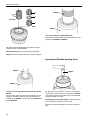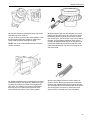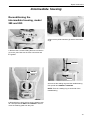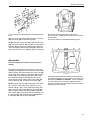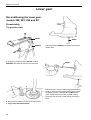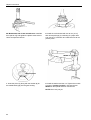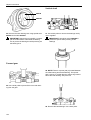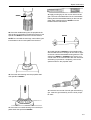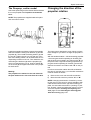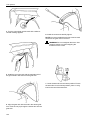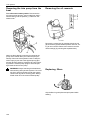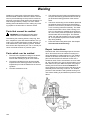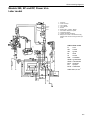
1
Workshop Manual
Drives
BC
2(0)
280, 280-DP, 285, 290, 290-DP
SP-A, SP-C, DP-A, DP-B, DP-C
Drives
AQ 280, AQ 280-DP, AQ 285, AQ 290, AQ 290-DP
SP-A, SP-C, DP-A, DP-B, DP-C
Contents
General Information ......................................................... 3
Safety Information ........................................................ 3
Introduction ............................................................. 3
Important ................................................................ 3
General Information ..................................................... 6
About the Workshop Manual .................................. 6
Spare parts ............................................................. 6
Repair Instructions ....................................................... 7
Our joint responsibility ........................................... 7
Tightening torques ................................................. 7
Angular torque ....................................................... 8
Lock nuts ................................................................ 8
Strength classes ..................................................... 8
Sealant ................................................................... 8
Safety instructions for fluororubber ........................ 9
Special tools ................................................................... 10
Chemicals .................................................................. 14
Drive models and generations ...................................... 15
Design and function ....................................................... 19
Model 280 .................................................................. 19
Models 290-DP, DP-A, DP-B, DP-C ........................... 20
Removing the sterndrive ............................................... 21
Models 280, 285 and 290 .......................................... 21
Models SP and DP ..................................................... 25
Repair instructions ........................................................ 29
Upper gear housing ................................................... 29
Removal ............................................................... 29
Disassembly, models 280, 285 and 290 .............. 30
Assembly, models 280, 285 and 290 ................... 35
Disassembly, models 290A, SP and DP .............. 46
Assembly, models 290A, SP and DP ................... 50
Reconditioning the universal joint ............................. 62
Reconditioning the shift mechanism ......................... 64
Types of shift mechanisms ................................... 64
Shift mechanism type 1 .................................. 64
Shift mechanism type 2 .................................. 66
Shift mechanism type 3 .................................. 68
Intermediate housing ................................................. 73
Reconditioning the intermediate housing,
model 280, 285 and 285A ................................... 73
Assembly ........................................................ 75
Reconditioning the intermediate housing,
model 290 and 290A ............................................ 77
Assembly ........................................................ 79
Reconditioning the intermediate housing,
models SP and DP ............................................... 82
Lower gear ................................................................. 86
Reconditioning the lower gear,
models 280, 285, 290 and SP ............................. 86
Disassembly ................................................... 86
Assembly ........................................................ 90
The propeller shaft ......................................... 93
Shimming ........................................................ 94
Final assembly ............................................... 98
Reconditioning the lower gear,
models 280-DP, 290-DP and DP ......................... 99
Disassembly ................................................... 99
Inner propellershaft .................................... 102
Outer propeller shaft .................................... 102
Propeller shaft bearing box ......................... 103
Forward gear ............................................... 104
Vertical shaft ................................................ 104
Assembly ..................................................... 105
Shimming the lower gear to the intermediate
housing ................................................................... 120
Shimming the upper gear to the intermediate
housing ................................................................... 122
Pressure and vaccum testing ................................. 124
1
Contents
Installing the sterndrive ..............................................
Models 280 and 285 ...............................................
Checking and adjusting controls ......................
Checking the retaining pawl when
test running ........................................................
Oil filling .............................................................
Propeller installation .........................................
Installing a ‘long hub’ type of propeller ........
Installing a ‘short hub’ type of propeller .......
The duoprop (earlier model) .......................
Changing the direction of the propeller
rotation ..............................................................
The electro-mechanical sterndrive
tilting device (model 280) ..................................
Repair instructions ......................................
Reconditioning the tilting device .................
Model 290, SP and DP ...........................................
Adjusting the retaining pawl (model 290) .........
Oil filling .............................................................
Propeller installation .........................................
Installing a ‘long hub’ type of propeller ........
Installing a ‘short hub’ type of propeller .......
Changing the direction of the propeller
rotation ..............................................................
Adjustment of the trim fin ...................................
Twin engine installation ....................................
125
125
127
127
128
128
128
128
129
129
130
130
131
132
137
137
138
138
138
139
140
140
Transom shield ............................................................
Changing trim cylinders, model 290, SP and DP ...
Chanching steering helmet ....................................
Removal ............................................................
142
142
147
147
Trim system .................................................................
Changing the sending unit .....................................
Changing the trim system gear rack .......................
Changing the trim system gear wheel ....................
The power trim pump ..............................................
Removing the trim pump from the boat .............
Removing the oil reservoir ................................
Replacing filters ................................................
Removing the electric motor .............................
150
150
151
153
155
156
156
156
157
2
Installing the elctric motor .................................
Replacing adapter and pump assembly ...........
The relief valve assemblies ..............................
Installing the trim pump in the boat ...................
Venting system ..................................................
Test ....................................................................
Adjusting the trim instrument ..................................
Checking the trim figure ....................................
Adjusting the trim figure ....................................
157
157
158
158
158
158
158
159
159
Sterndrive extensions ................................................
Installation instructions for 1” and 4” extensions ....
The 4” extension ...............................................
The 1” extension ...............................................
160
160
160
161
Welding .........................................................................
Parts that cannot be welded ...................................
Parts which can be welded .....................................
Repair instructions ..................................................
162
162
162
162
Painting ........................................................................ 163
Preparing the sterndrive ......................................... 163
Painting the underwater hull ................................... 163
Electrical wiring diagrams ..........................................
Model 280 Tilting device .........................................
Model 280, Power trim ............................................
Model 290, Power trim (earlier model) ...................
Models 290, SP and DP, Power trim (later model) ..
164
164
165
166
167
Technical data .............................................................
Models 280, 280T, 280PT, 285, 285A and 290 ......
Models 280-DP, 280-DP/PT, 290-DP
and 290A-DP ..........................................................
Models SP-A, SP-A1, SP-A2 and SP-C ..................
Models DP-A, DP-A1, DP-A2, DP-B, DP-B1,
DP-C and DP-C1 ....................................................
168
168
170
173
174
References to Service Bulletin .................................. 176
Safety Information
Introduction
The Workshop Manual contains technical data, descriptions, and repair instructions for the designated
Volvo Penta products or product versions. Make sure
that the correct workshop literature is used.
Read the following safety information and the
General Information and Repair Instructions in
the Workshop Manual carefully before starting
service work.
Important
The following special warning symbols are used in the
Workshop Manual and on the product.
WARNING! Warns of risk of bodily injury, serious damage to product or property, or that a serious malfunction can occur if the instructions
are not followed.
IMPORTANT! Used to attract attention to things
that can cause damage or malfunction to product or property.
NOTE! Used to attract attention to important information, to simplify work procedures or handling.
The following list provides an overview of the risks
and cautionary procedures that should always be observed.
Prevent the engine from being started by disconnecting the power with the main switch
(switches) and locking it (them) in disconnected
mode before the service work is begun. Attach
a warning sign in the cabin.
As a rule, all service work should be performed
on an idle engine. Some work, e.g. certain adjustments, require the engine to be running.
Approaching an engine that is running is a
safety risk. Remember that loose clothes or
long hair can fasten in rotating parts and cause
severe injury.
A careless movement or dropped tool while
working in the vicinity of an engine that is running, can in the worst case lead to injury. Observe caution on hot surfaces (exhaust pipe,
turbo, charge air pipe, starter element etc.) and
hot fluids in the lines and hoses of an engine
that is running, or has just been started. Refit
all guards dismantled during service work before starting the engine.
Make sure that the warning or information decals on the product are always clearly visible.
Replace labels that have been damaged or
painted over.
Never start the engine unless the air filter is fitted. The rotating compressor wheel in the turbo
can cause severe injury. Foreign objects in the
inlet pipe can also damage the machine.
Never use starter spray or the like. Explosion
risk in the inlet pipe. Risk of personal injury.
Avoid opening the coolant filler cap when the
engine is hot. Steam or hot coolant can spray
out, and built up pressure will be lost. Open the
filler cap slowly and release the overpressure
in the cooling system if the filler cap or cock
must be opened, or if a plug or coolant pipe
must be removed when the engine is hot.
Steam or hot coolant can flow out in an unpredicted direction.
Hot oil can cause burn injuries. Avoid skin contact with hot oil. Make sure that the oil system
is not pressurised before working on it. Never
start, or run the engine with the oil filler cap removed in view of the risk of ejecting oil.
3
General Information
Stop the engine and close the bottom valve before working on the cooling system.
Only start the engine in a well-ventilated area.
Exhaust fumes and crankcase gases should be
led out of the engine compartment or workshop
when working in closed environments.
Always use protective glasses for work where
there is a risk of splintering, sparks, or splashing of acid or other chemicals. The eyes are
extremely sensitive, and an injury can cause
blindness!
Avoid skin contact with oil! Prolonged or frequent skin contact with oil can degrease the
skin, resulting in irritation, drying out, eczema,
and other skin complaints. Used oil is more dangerous than new oil from the health care point of
view. Use protective gloves and avoid oil
drenched clothes and rags. Wash your hands
regularly, especially before meals. Use special
hand cream to counteract drying out, and to
simplify cleaning the skin.
The majority of chemicals intended for the
product (e.g. engine and timing gear oils, glycol, petrol and diesel oil) or chemicals for workshop use (e.g. degreasing agent, enamels and
solvents) are hazardous to health. Read the instruction on the pack carefully. Always follow
the given safety instructions (e.g. the use of
breathing protection, protective glasses, or
gloves, etc.) Make sure that other personnel
are not exposed to hazardous substances, e.g.
by inhaling the air. Make sure there is adequate ventilation. Handle consumed and surplus chemicals in the prescribed manner.
Observe extreme caution when tracing fuel
leaks in fuel systems and when testing fuel
nozzles. Wear protective glasses. The jet from
a fuel nozzle has a very high pressure and
penetrating force. The fuel can penetrate deeply into bodily tissue and cause serious injury.
Risk of blood poisoning.
All fuels, in similarity with chemicals, are inflammable. Make sure that naked flames, or
sparks, cannot lead to ignition. Petrol, certain
thinners, and hydrogen from batteries, are extremely inflammable and explosive when mixed
with air. Smoking is prohibited! Ventilate well
and take the necessary precautions before
conducting welding or grinding work in the immediate vicinity. Always have a fire extinguisher handy in the workshop.
Make sure that rags drenched in oil and petrol,
including old fuel and lubricant filters, are
stored safety. Oil drenched rags can in certain
conditions self-ignite. Old fuel and oil filters are
environmentally hazardous waste, and together
with spent lubricant, contaminated fuel, paint
residue, solvent, degreasing agent and suds,
should be handed in to a waste handling unit
for destruction.
Batteries must never be exposed to naked
flames or electrical sparks. Never smoke in the
vicinity of batteries. Hydrogen develops when
batteries are charged, which in combination
with air forms an explosive gas. This gas is
highly inflammable and very explosive. One
spark from connecting the batteries incorrectly
is sufficient to cause the battery to explode and
cause injury. Do not touch the connection when
starting (risk of spark) and do not lean over the
batteries.
Never confuse the plus and minus terminals
when fitting the batteries. This can cause serious damage to the electrical equipment. Check
the wiring diagram.
Always use protective glasses when charging
and handling batteries. The battery electrolyte
contains strongly corrosive sulphuric acid. On
skin contact, wash with soap and plenty of water. If battery acid gets into the eyes, rinse immediately with water, and contact a doctor without delay.
Stop the engine and switch off the power with
the main switch (switches) before working on
the electrical system.
Adjustment of the clutch should be conducted
when the engine is idle.
4
General Information
Use the lifting hooks mounted on the engine/
reverse gear when lifting the drive unit. Always
check that the lifting equipment is in good condition and has the correct capacity for the lift
(weight of engine plus reverse gear and extra
equipment where appropriate).
For safe handling, and to avoid damaging the
components mounted on top of the engine, the
engine should always be lifted with a lifting bar
adjusted to the engine. All chains or wires
should run in parallel with each other and as
perpendicular to the top of the engine as possible.
Special lifting equipment may be required to
ensure the right balance and safe handling if
other equipment connected to the engine alters
its centre of gravity.
Never carry out work on an engine only supported by lifting equipment.
Never work alone when heavy components are
to be dismantled, even when safe lifting (e.g.
lockable block and tackle) equipment is used.
In most cases, two persons are required even
when lifting equipment is used: one to handle
the equipment and one to make sure that components are not damaged. When working onboard a boat always make sure in advance that
there is sufficient space to allow dismantling in
situ, without the risk of personal injury or damage to materials.
WARNING! The components in the electrical
system and in the fuel system on Volvo Penta
products are designed and manufactured to
minimise the risks of explosion and fire. The
engine must not be run in environments surrounded by explosive media.
When cleaning with high-pressure wash, observe the following: Never point the jet of water
at seals, rubber hoses, or electrical components. Never use the high-pressure function
when washing the engine.
NOTE! Pressure pipes must not bent, turned,
or exposed to other strain. Replace damaged
pressure pipes.
Always use Volvo Penta recommended fuel.
See the instruction handbook. The use of inferior quality fuel can damage the engine. The use
of inferior fuel in a diesel engine can cause the
control rod to jam and the engine to overspeed,
with the risk of personal injury or damage to the
machine. Inferior fuel can also lead to higher
maintenance costs.
5
General Information
About the Workshop Manual
Spare parts
This Workshop Manual contains technical information,
descriptions, and repair instructions for the standard
versions of the drive units 280, 280T, 280PT, 285,
285A, 290, 290A, 280-DP, 280-DP/PT, 290-DP,
290A-DP, SP-A, SP-A1, SP-A2, SP-C, DP-A, DP-A1,
DP-A2, DP-B, DP-B1, DP-C and DP-C1.
Spare parts for the electrical and fuel systems are
subject to different national safety requirements, e.g.
U.S. Coast Guard Safety Regulations. Volvo Penta
Genuine Spare Parts comply with these requirements. All types of damage resulting from the use of
non genuine Volvo Penta spare parts for the product
in question will not be regulated by the warranty
undertakings of Volvo Penta.
The Workshop Manual can show operations carried
out on any of the drives listed above. As a result the
illustrations and pictures in the manual that show certain parts on the drives, do not in some cases apply
to all the drives listed. However the repair and service operations described are in all essential details
the same. Where they are not the same this is stated
in the manual and where the difference is considerable the operations are described separately. The
Drive Designations and Series Number (PZ-No.) can
be found on the product plate. Please always include
both the drive designation and the PZ number in all
correspondence.
The Workshop Manual is primarily produced for
Volvo Penta service workshops and their qualified
personnel. It is therefore assumed that persons using
this manual have a basic knowledge of marine drive
systems, and can perform the relevant work of a
mechanical and electrical nature.
Volvo Penta continuously develops its products, and
therefore reserves the right to introduce modifications. All the information in this manual is based on
product data available prior to publication. Any
amendments or service methods of essential importance that have been introduced for the product after
this date are confirmed in the form of Service Bulletins.
6
Repair Instructions
The work methods described in the Workshop Manual
are applicable for a workshop environment. The drive
has removed from the boat and is installed in an
overhaul fixture. Unless otherwise stated reconditioning work which can be carried out with the drive in
place follows the same working method.
The warning symbols used in the Workshop Manual
(see Safety Information for implication),
WARNING!
IMPORTANT!
NOTE! By no means cover everything since the
service work is conducted under a wide range of different conditions, and it is obviously impossible to
foresee everything. All that can be done is to point
out the risks that can occur from incorrect handling
when working in a well-equipped workshop with work
methods and tools approved by Volvo Penta.
Where Volvo Penta special tools can be used for
work procedures, these are described in the Workshop Manual. The object of special tools is to ensure
the safest and most rational work method possible. If
other tools or work methods are used than those recommended by Volvo Penta, then it is incumbent on
the person using them to ensure that there is no risk
of personal injury, damage, or malfunction.
In some cases, there are special directions and user
instructions for the tools and chemicals named in the
Workshop Manual. These directions should always
be followed even if there is no special mention of
them in the Workshop Manual.
Most risks can be prevented by means of taking elementary precautions and using common sense. A
clean workplace and a clean drive will eliminate
many risks of both personal injury and drive malfunction.
Above all when working with bearing unions and
sealing unions, it is extremely important to prevent
dirt or foreign objects from getting in, since this can
result in malfunction or reduce the life span of the repair.
Our joint responsibility
Every engine consists of a large number of co-ordinated systems and components. The deviation of one
component from the technical specification can dramatically increase the impact on the environment from
what is otherwise a good engine. It is therefore extremely important to maintain the given tolerances, to
implement the correct adjustments where applicable,
and to use Volvo Penta Genuine Parts. The time
schedule in the engine’s maintenance schedule must
be followed.
Certain systems, e.g. components in the fuel system,
may require special competence and special testing
equipment. For environmental reasons certain components are sealed at the factory and must not be
worked on by unauthorised persons.
Remember that most chemical products when incorrectly used can be damaging to the environment.
Volvo Penta recommends the used of biologically decomposing degreasing agents for all cleaning of engine components, unless otherwise stated in the
Workshop Manual. When working onboard boats
special care must be observed to prevent oils and
suds etc. unintentionally ending up the nature, e.g.
via the bilge water.
Tightening torques
Tightening torque for vital unions, which should be
tightened with a torque multiplier, are indicated in the
Workshop Manual, Technical data, Tightening torques and the manual’s work descriptions. All torque
readings are applicable for clean threads, screw
heads and mating surfaces. The torque readings refer to lightly oiled or dry thread. If lubricants, locking
fluids or sealant are required for screw union, then
the type is indicated in the work description. For unions where special torque denotations are not indicated, the general tightening torque is applicable according to the table below. The torque readings are
guide values, and unions do not need to be tightened
with a torque multiplier.
7
General Information
Size
Tightening torque, Nm (lb.ft)
M5 ......................................................
6
(4.4)
M6 ...................................................... 10
(7.4)
M8 ...................................................... 25 (18.4)
M10 .................................................... 50 (36.9)
M12 .................................................... 80 (59.0)
M14 .................................................... 140 (103.3)
Safety instructions for
fluororubber
Fluororubber is a common material used in sealing
rings for shafts and O-rings.
Hydrofluoric acid is formed when fluororubber is
exposed to high temperatures (over 300°C/572°F),
and is strongly corrosive. Contact with the skin, eyes,
or respiratory passages, can lead to severe injury.
WARNING! Observe extreme caution when
working on engines that may have been exposed to high temperatures, e.g. overheating
during seizing or fire. Seals must never be
burned off during dismantling, or burned up in
uncontrolled circumstances.
Angular torque
For angular tightening the screw union is first tightened with a given torque, after which tightening continues at a predetermined angle. Example: for 90°
angular torque the union is tightened an addition ¼
turn after the given tightening torque has been
achieved.
Lock nuts
Dismantled lock nuts should not be reused but replaced with new ones, since the locking properties
become inferior or non existent after multiple use.
For lock nuts with plastic inserts, e.g. Nylock® , the
tightening torque indicated in the table should be reduced if the Nylock® nut has the same nut height as
a standard solid metal hex nut. The tightening torque
is reduced by 25 % for screw sizes of 8 mm or more.
For Nylock® nuts with higher nut size, where the solid metal thread is the same height as a standard hex
nut, the tightening torque as per the table is applicable.
Strength classes
Screws and nuts are divided into different strength
classes. Their classification is indicated on the screw
head. A high number on the marking represents a
stronger material, e.g. a screw marked 10-9 is
stronger than a screw marked 8-8. It is therefore important when a screw union is dismantled to return
the screws to their original positions. See the spare
parts catalogue when replacing screws to ensure
that the correct version is used.
8
●
Always use chloroprene gloves (for handling
chemicals) and protective glasses.
●
Handle the removed seal in the same way a corrosive acid. All residue, including ash, can be
strongly corrosive. Never use compressed air to
blow clean.
●
Place the remains in a sealed plastic container
with warning label. Wash gloves under running
water before taking off.
The following seals are in all probability manufactured of fluororubber.
Sealing rings for crankshaft, camshaft, and intermediate shafts.
O-rings, irrespective of position. O-rings for cylinder
lining seals are almost always made of fluororubber.
Note that seals that have not been exposed to
high temperatures can be handled normally.
General Information
Sealant
A number of different types of sealant and locking fluids are used on the engine. The sealant has different
properties for different union strengths, temperature
ranges, resistance to oil and chemicals, and for the
different materials and slot sizes in the engine.
It is therefore important to use the correct type of
sealant and locking fluid for those unions that require
them, in order to ensure satisfactory service work.
The Workshop Manual indicates in the relevant
chapters the compounds used when the drives were
manufactured.
The same compound, or a compound with equivalent
properties but of other manufacture, should be used
during the service work.
Anaerobic compounds. These compounds harden
on the absence of air. The compound is used when
two solid parts, e.g. cast components, are fitted
together without a gasket. A common application is
also to secure and seal plugs, thread on studs, cocks,
and oil pressure sensors etc. Hardened anaerobic
compound is transparent and therefore the
compounds are dyed to make them visible. Hardened
anaerobic compounds are very resistant to solvents
and old compound cannot be removed. Before
refitting they are carefully degreased, after which new
sealant is applied.
The following anaerobic compounds are mentioned in
the Workshop Manual:
When using sealant and locking fluids it is important
that the surfaces are free from oil, grease, paint and
anti-rust agent, and that they are dry.
Volvo Penta part no. 1161053-2 (alternative Loctite®
243)
Volvo Penta part no.1161351-0 (alterantive Loctite®
603).
Always follow the manufacturer’s instructions concerning application temperature and hardening times
etc. for the product.
Polymeric compounds. The following polymeric
compounds are mentioned in the Workshop Manual:
Different basic types of sealant are used on the drive
and are characterised by:
Volvo Penta part no. 1141570-0, Sealant.
RTV compound (Room Temperature Vulcanising).
Often used together with gaskets, e.g. sealing of
gasket joints or applied on gaskets. RTV compound
is clearly visible when the part has been dismantled,
and old RTV compound must be removed before the
union is sealed again.
NOTE! Permatex® is a registered trademark for Permatex
Corporation.
Loctite® is a registered trademark for Loctite Corporation.
The following RTV compounds are mentioned in the
Workshop Manual:
Volvo Penta part no. 1161099-5
(alternative Permatex® no. 3).
Old sealant is removed with denatured spirit.
9
Special tools
In all cases where it has been practically possible tools have been punched with their tool number, excluding
the last digit. The last digit (after the hyphen) is a check number.
839643
884161
884265
854668
884168
873058
884241
884140
884259
884143
884263
884266
839643-4
Drive repair welding rod (aluminum electrode)
884241-1
Tool to install the needle bearing of the
vertical shaft – lower
854668-1
Prop wrench for 16 mm bolt cone
884259-3
873058-2
Prop wrench for 20 mm bolt cone
Drift, bearing installer/remover – intermediate
884140-5
Expander, dismantling of bearings – intermediate
884263-5
884143-91)
Standard handle, pointed – lower and intermediate
Drift for the assembly of bearings on propeller shaft and input gear wheel in upper
gear
884265-0
884161-1
Tool to remove propeller bearing and lower intermediate shaft
Sleeve for removing gear wheel and bearing on propeller shaft
884266-8
884168-6
Bearing press drift – upper, intermediate
and lower
Drift for the assembly of bearing on vertical shaft
1)
Used together with special tools 884281, 884140 and 884381
10
Special tools
884267
884283
884316
884298
884348
884387
884381
884483
884573
884311
884385
884502
884789
884312
884386
884521
884792
884793
884267-6
Tool, dismantling vertical shaft
884386-4
884283-3
Drift for the installation of sealing rings in
propeller bearing housing and of propeller
shaft needle bearing
Sleeve, dismantling and installing gear
wheels in upper gear
884387-2
Attachment plate for upper gear housing
884483-9
884298-1
Puller, propeller shaft needle bearing. Included in complete tool 884316-1
Clamp bolt for the collarring of the double
bearing box
884502-6
884311-2
Tool for dismantling and installing the
steering spindle
Alignment wedge, engine to transom
shield
884521-6
884312-0
Drift for sealing ring, double bearing box
Tool for installation of sterndrive to transom shield
884316-1
Puller, complete, propeller shaft needle
bearing
884573-7
Socket wrench for the tightening of hose
clamps
884348-4
Spanner tool for taper roller bearing, vertical shaft
884789-9
Puller
884792-3
Bearing install tool, lower
884381-5
Dismantling tool for vertical shaft needle
bearing
884793-1
Seal install tool, upper
884385-6
Installation tool vertical shaft needle
bearing
11
Special tools
884794
884795
884799
884807
884801
884830
884932
884796
884802
884831
884933
884797
884803
884832
884936
884938
884798
884806
884874
884941
884794-9
Puller, forward bearing race remover, lower
884831-9
Press fixture, bearing race remover, lower
884795-6
Bearing install tool, lower
884832-7
Drift set, tube gear race remover, lower
884796-4
Drift, bearing remover, lower
884874-9
884797-2
Press tool, bearing & seal, lower
Support, dismantling the sterndrive from
the transom shield
884798-0
Install tool, prop shaft bearing
884932-5
884799-8
Installer, lower press fixture, lower
Disassembly tool for the outer bearing
races of the double bearing box
884801-2
Press tool, bearing & seal installer, lower
884933-3
Assembly tool for the outer bearing races
of the double bearing box
884802-0
Shaft puller, duoprop – lower
884936-6
884803-8
Drift, tube gear bearing & seal remover –
lower unit
Yoke, holding the sterndrive while installing the clamps for the bellows. Models
280 & 285
884938-2
884806-1
Drift, tube gear bearing installer – lower
Sleeve for the disassembling of gear
wheels in upper gear
884807-9
Large protective sleeve/ring, black – lower
884941-6
Attachment, duoprop prop shaft runout,
lower
884830-11)
Socket – vertical shaft
1)
Earlier part no. 884264
12
Special tools
884975
884976
885009
885043
885148
885197
884978
885127
885149
885207
884982
885008
885143
885146
885153
885192
885209
885208
885226
885227
884975-41)
Installation tool
885148-7
Pin remover, intermediate
884976-21 )
Protection sleeve
885149-5
Drilling jigg, duoprop, lower
884978-8
Trim cylinder removal tool, intermediate
885152-9
Kit containing tools 884387 and 885153
884982-0
Disassembly tool for outer bearing race.
Intermediate housing, extension.
885153-7
Spacer ring, mounting plate, upper
885192-5
Suspension fixture
885008-3
Allen wrench, upper, intermediate & lower
gears
885197-4
885009-1
Cap wrench
885043-0
Torx 50 bit – Input gear
885127-1
Installation/dismantling tool – propellers
885143-8
Yoke, holding the sterndrive while installing the clamps for the bellows. Models
290, SP, DP
885146-12)
Suspension tool
Hook spanner, power steering cylinder
3)
Hook spanner, power steering cylinder
3)
885209-7
Sleeve, power steering cylinder
885226-1
Drift, bearing remover, lower
885227-9
Spacer ring
885207-1
885208-9
3)
1)
Included in kit no. 884977
2)
Earlier part no. 884862
Tool, duoprop, threaded screw, lower
3)
These special tools have been designed for the overhaul of the
power steering cylinder. The overhaul procedure is described in
the Installation instruction, publ. no. 7734865-4, included in
the overhaul kit part no. 872697-8. The tool can be ordered on the
usual parts form.
13
Special tools
3810105
3810152
3850598
3856761
3855876
9985494
3850608
3858578
9991801
9992520
3810105-1
Pin installer, intermediate
3856761-6
Holding plate, shift mechanism
3810152-3
Drive pressure tester
3858578-2
Drive vacuum tester
3850598-8
Spline socket, upper & lower
9985494-5
Spring gauge/scale, upper
3850608-5
Snap ring plyers, upper
9991801-3
Standard shaft
3855876-3
Tool, new type of propeller nut
9992520-8
Stand
Chemicals
Volvo Penta
part no.:
1141570-0
Sealant for drives
1161053-2
Thread locking compound
1161099-5
Sealing compound
1161351-0
Bushing installation adhesive
14
Drive models and generations
AQ 280
AQ 280T
Power trim/tilt
Oil:
Same as engine
Qty: 2.6 liters (2.74 qts)
Ratio:
1.61:1
1.89:1
2.15:1
Oil:
Same as engine
Qty: 2.6 liters (2.74 qts)
Ratio:
1.61
AQ285
AQ 285A
AQ 280 PT
Power trim
Electro mechanical tilt
Power steering
Oil:
Same as engine
Qty: 2.6 liters (2.74 qts)
Ratio:
1.61:1
1.89:1
Oil:
Same as engine
Qty: 2.6 liters (2.74 qts)
Ratio:
1.61:1
15
Drive models and generations
AQ 280-DP/PT
AQ 280-DP
Dual hydraulic cylinders
Oil: 1)
API GL-5, SAE 90
Qty: 2.7 liters (2.85 qts)
Ratio:
1.95:1
2.30:1
1)
Ratio:
1.95:1
2.30:1
AQ 290
AQ 290A
AQ 290-DP
AQ 290A-DP
New transom shield
Hook up fork
Transom shield
Double bearing box
Hook up fork
Oil:
Same as engine
Qty: 2.6 liters (2.74 qts)
Oil:
Same as engine
Qty: 2.6 liters (2.74 qts)
Oil: 1)
API GL-5, SAE 90
Qty: 2.7 liters (2.85 qts)
Ratio:
1.61:1
1.89:1
2.15:1
Oil: 1)
API GL-5, SAE 90
Qty: 2.7 liters (2.85 qts)
Ratio:
1.95:1
2.30:1
SP-A
SP-A1
Top cover
Shift cover
Top cover
Intermediate shaft and nut
Intermediate housing
Ball bearing
Universal joint
Spline sleeve
Prop shaft with nut
Gears
Line cutter
Ratio:
1.61:1
1.89:1
2.15:1
Oil:
Same as engine
Qty: 2.6 liters (2.74 qts)
Ratio:
1.61:1
1.89:1
2.15:1
NOTE! If the drive was manufactured before 1986, for a 30- or 40-engine and has previously been operated with engine oil in the drive,
then engine oil should also be used in the future.
16
Drive models and generations
SP-C
SP-A2
Sliding sleeve (steel)
Sliding sleeve (brass)
Intermediate housing
Cover
Hydraulic cylinder
Hook up fork
Support plate
Sliding sleeve
(brass)
Gear set
Sliding sleeve (steel)
Cover
Gear set
Oil:
Same as engine
or
Fully synthetic
API GL-5 SAE 75W–90
Qty: 2.6 liters (2.74 qts)
Ratio:
1.61:1
1.89:1
Oil:
Same as engine
(all SP-C drives)
or
Fully synthetic
(ratio 1.61:1, 1.89:1)
API GL-5 SAE 75W–90
Qty: 2.6 liters (2.74 qts)
DP-A1
DP-A
Sliding sleeve (brass)
Cover
Ball bearing
Universal joint
Spline sleeve
Intermediate shaft
Intermediate housing
Nut (intermediate
shaft)
Top cover
Shift cover
Oil: 1)
API GL-5, SAE 90
Qty: 2.7 liters (2.85 qts)
Ratio:
1.95:1
2.30:1
Oil: 1)
API GL-5, SAE 90
Qty: 2.7 liters (2.85 qts)
Sliding sleeve (steel)
Sliding sleeve (steel)
Cover
Gear set
1)
Ratio:
1.78:1
1.95:1
2.30:1
Ratio:
1.78:1
1.95:1
2.30:1
DP-B
DP-A2
Oil:
Fully synthetic
API GL-5 SAE 75W–90
Qty: 2.7 liters (2.85 qts)
Ratio:
1.61:1
1.89:1
2.15:1
Oil:
Fully synthetic
API GL-5 SAE 75W–90
Qty: 2.7 liters (2.85 qts)
Ratio:
1.78:1
1.95:1
2.30:1
NOTE! If the drive was manufactured before 1986, for a 30- or 40-engine and has previously been operated with engine oil in the drive,
then engine oil should also be used in the future.
17
Drive models and generations
DP-B1
DP-C
Sliding sleeve (steel)
Cover
Intermediate housing
Hydraulic cylinder
Hook up fork
Transom shield
Cover
Ball bearing
Universal joint
Intermediate housing
Oil:
Fully synthetic
API GL-5 SAE 75W–90
Qty: 2.7 liters (2.85 qts)
Ratio:
1.78:1
1.95:1
2.30:1
DP-C1
Propeller shaft
Propeller cone
Oil:
Fully synthetic
API GL-5 SAE 75W–90
Qty: 2.7 liters (2.85 qts)
18
Ratio:
1.78:1
1.95:1
2.30:1
Oil:
Fully synthetic
API GL-5 SAE 75W–90
Qty: 2.7 liters (2.85 qts)
Ratio:
1.78:1
1.95:1
2.30:1
Design and function
Model 280
Section through the sterndrive
1. Steering arm
2. Electro-mechanical tilting
device
3. Steering yoke
4. Rubber cushion
5. Universal joint
6. Steering helmet
7. Input gear
8. Forward/reverse gear
9. Forward/reverse cone
10. Upper gear housing
11. Coupling box
12. Shift mechanism
13. Shift plate
14. Vertical shaft
15. Intermediate housing
16. Trim tab
17. Circulation pump
18. Propeller shaft
19. Propeller shaft gear
20. Water intake
21. Lower gear housing
22. Retaining pawl
23. Exhaust bellows
24. Transom shield
25. Supporting rubber cushion
26. Drive shaft
27. Damper plate
28. Flywheel
19
Design and function
Models 290-DP, DP-A,
DP-B, DP-C
Section through the sterndrive, showing model DP
1.
2.
3.
4.
5.
6.
7.
8.
10.
11.
12.
13.
14.
15.
16.
17.
18.
19.
20.
Transom shield
Trim cylinder
Hook up fork
Steering yoke
Steering helmet
Universal joint
Input gear
Forward/reverse gear
Upper gear housing
Shift mechanism
Shift plate
Vertical shaft
Intermediate housing
Trim tab
Porpeller shaft gear
Outer propeller shaft
Inner propeller shaft
Lower gear housing
Water intake
8
4
5
1
10
6
11
7
3
12
2
13
14
20
19
15
16
17
18
20
Removing the sterndrive
Models 280, 285 and 290
B
A
Alt 2
Alt 1
1. Remove the propeller of the Singleprop sterndrive
according to the picture.
A-propeller
2. Remove the propellers of the Duoprop sterndrive
according to the picture. (The picture shows the earlier
model.)
B-propeller
NOTE! Never mix propellers from different drives.
21
Removing the sterndrive
3. Remove the Allen-head bolts holding the zinc ring
and remove it.
5b. Sterndrive model 290: Remove the cover over
the shift mechanism and disconnect the shift cable
from the shift plate and remove the swivel. Remove
the screws holding the locking plate, then push the
locking plate down.
1
4. Remove the oil drain plug and drain off the oil. Also
remove the oil dipstick to facilitate the oil drainage.
Replace the O-ring on the drain plug and on the oil
dipstick.
2
884936
6a. Sterndrive models 280 and 285:
IMPORTANT! Carefully check the rubber bellows for possible damage and also check that
the hose clamps are properly tightened.
NOTE! The universal joint bellows and its hose
clamps should be replaced every other year. Contact
an authorized service workshop and let them do the
checking and replacing of the rubber bellows.
5a. Sterndrive models 280 and 285: Remove the
cover (1) over the shift mechanism and disconnect
the shift cable from the shift plate and remove the
swivel. Then remove the shift cable locking plate (2).
22
Removing the sterndrive
WARNING! Never start working on the rubber
bellows of the sterndrive until you have secured
it in its raised position and then in a way which
definitely keeps it up. A sterndrive ‘falling’ down
can cause severe bodily injuries.
The suspension tool 884936, when properly installed,
prevents the sterndrive from ‘falling’ down. The suspension tool locks the sterndrive in its raised position.
Install the suspension tool as follows:
Press the retaining pawl (1) by hand downwards and
lift the sterndrive, also by hand, to its fully raised position. Hold the sterndrive in this position while installing the suspension tool (2) as indicated in the
picture.
NOTE! Do not overload the suspension tool by for
example standing on the raised sterndrive!
It is also possible to raise the sterndrive by operating
the sterndrive tilting motor sufficiently to allow the
disassembly and assembly respectively of the rubber
bellows.
WARNING! Never start working on the sterndrive rubber bellows or on the hydraulics until
the sterndrive is securely locked in its raised
position in a way that it cannot ‘fall’ down. A
sterndrive ‘falling’ down can cause severe bodily injuries. The suspension tool when properly
installed, prevents the sterndrive from ‘falling’
down.
The suspension tool 885143 locks the sterndrive in its
raised position. Install the suspension tool as follows:
Press the retaining pawl (1) by hand downwards and
lift the sterndrive, also by hand, to its fully raised position. Hold the sterndrive in this position and install
the suspension tool (2) on the starboard side in accordance with the picture.
NOTE! Do not overload the suspension tool by for
example standing on the raised sterndrive!
NOTE! Secure the sterndrive in its raised position to
prevent it from ‘falling’ down!
2
885143
1
6b. Sterndrive models 290 and 290A:
IMPORTANT! Carefully check the rubber bellows for possible damage and also check that
the hose clamps are properly tightened.
NOTE! The universal joint bellows and its hose
clamps should be replaced every other year.
Contact an authorized service workshop and let
them do the checking and replacing of the rubber bellows.
7a. Sterndrive models 280 and 285: Remove the
steering helmet and the universal joint rubber bellows
from the upper gear housing (1), the exhaust bellows
from the intermediary housing (2) and the cooling water hose from the cooling water connection (3). The
universal joint rubber bellows must be replaced every
other year.
23
Removing the sterndrive
7b. Sterndrive model 290: Remove the steering helmet and the universal joint rubber bellows from the upper gear housing (1), the exhaust bellows from the intermediate housing (2) and the cooling water hose
from the cooling water connection (3). The universal
joint rubber bellows must be replaced every other
year.
8a. Sterndrive models 280 and 285: Remove the two
locking screws holding the shaft journals in the transom shield. Support the sterndrive from underneath
and pull out the shaft journals, using special tool
884874. A brass drift can also be used. Lift off the
sterndrive and place it in a suitable cradle.
NOTE! Always replace the bushings (1).
24
8b. Sterndrive model 290: Remove the two locking
screws holding the shaft journals in the transom
shield. Support the sterndrive from underneath and
knock out the shaft journals using a brass drift or
some similar tool. Lift off the sterndrive and place it in
a suitable cradle.
NOTE! Always replace the bushings (1).
Removing the sterndrive
Models SP and DP
1. Disconnect power to prevent accidental starting.
4. Move control to forward gear.
2. Move control to reverse.
5. Remove the aft line cutter, forward propeller nut,
and forward propeller. Return the shift control to neutral.
3. Loosen propeller cone lock bolt.
Remove the aft propeller cone.
6. Remove the shift linkage cover.
25
Removing the sterndrive
1
3
2
7. Remove the cotter pin and washer from the shift
cable end. Remove the end pivot pin from the cable.
9. Remove the two screws (1) holding the steering pin
to the upper gear head (2). Using two M6 screws (3)
30 mm or longer, install into the threaded holes of the
steering pin. As the screws are turned in, the steering
pin will be forced out of the steering pin socket and
steering helmet bushing.
884573
8. Loosen screw holding the shift cable clamp and release shift cable.
26
10. Using special tool 884573, remove the clamp
around the u-joint bellows.
Removing the sterndrive
885143
885143
11. Remove the cotter pin on the trim cylinder pin. Remove the trim cylinder pin. Raise the drive manually
and insert special tool 885143.
13. Remove the clamp on the raw water hose. Remove the raw water hose. Remove special tool
885143 and carefully lower the drive.
884573
12. Using special tool 884573, disconnect the exhaust
bellows.
14. Remove the hook-up fork pin lock bolt. Using Pin
removal tool 885148, pull the pin half way out of the
transom shield.
WARNING! Do not remove the pins completely,
the sterndrive will fall off the boat.
27
Removing the sterndrive
885146
15. Install special tool 885146 and remove the sterndrive from the transom shield.
28
Repair instructions
Upper gear housing
Removal
1
1. Place a drain pan under the sterndrive. Remove the
drain plug (1) and drain oil from drive. Reinstall the
drain plug after the oil has drained.
3. Remove two retaining nuts from upper gear head
studs.
2. Remove cotter pin and washer from gear shift linkage, and remove the linkage.
4. Remove two allen head retaining bolts. Remove the
gear head.
29
Repair instructions
Disassembly, models
280, 285 and 290
1. Remove the shift rod (1) from the shift plate (2). Remove the screws (3) and the nuts (4) holding the intermediate housing to the upper housing. Use a rubber mallet to knock the housings apart. Knock carefully.
2. Keep check on the number of shims (1) between
the different housings and for all the gear sets in case
neither the gears, housing nor the bearings need to
be replaced. In this case the same shim thickness is
to be used.
3. Remove the 7 screws holding the lower gear housing to the intermediate housing. Use a rubber mallet
and knock the housings carefully apart. Lift off the
splines sleeve (1).
NOTE! On sterndrives of later manufacture the 4 bigger-sized screws are installed with stainless steel
washers. Take care of these washers.
884264
884830
4. Install the upper gear housing in the special tool
884264. This tool, of later manufacture, carries the
part number 884830.
30
Repair instructions
5. Remove the 4 screws holding the shift mechanism
and remove the mechanism.
NOTE! Be sure to remove the shift shoe (1) with the
shift mechanism.
7. Remove the 4 screws holding the gear housing cover and remove the cover.
NOTE! The front right hand screw (1) is a hollow
screw with an O-ring seal. Take care of the shims
(2).
1
6. Remove the 4 Allen-head screws holding the
clamping ring (1) and pull out the universal joint and
the double bearing box.
8. Remove the left hand threaded nut (1) on the vertical shaft. Use special tool 884830 as a counter-hold
on the splines shaft when removing the nut.
NOTE! Take care of the shims (2).
31
Repair instructions
1
2
9. Lift out the upper gear and the bearing box as well
as the engagement sleeve.
11. Remove the needle bearings (1) and the spacer
rings (2) from the upper and lower gear sets.
NOTE! The needle bearings are matched in pairs and
must not be mixed!
1
2
884259
884386
10. Lift off the upper gear housing from the special
tool. Dismantle the lower gear set and the shaft by removing the split locking ring (1) and the washer (2).
Mark the gears to ensure the same location when assembling.
NOTE! Handle the engagement sleeve and gear wheel
cones with utmost care to avoid scratching them.
32
12. Remove by pressing out the upper and lower of
the bearing sleeves. Use special tools 884386 and
884259.
Repair instructions
884265
884386
13. Press out the bearings of the bearing sleeves.
Use special tools 884386 and 884265.
15. Remove the collar washer (1) from the double
bearing box.
NOTE! Take care of the shims (2).
Input gear (Double bearing box)
16. Remove the locking ring (1) and the sealing (2).
NOTE! Always replace the sealing!
884259
14. Remove the Allen-head screw (1) and the collar
washer (2) in the center of the universal joint shaft.
Pull out the universal joint and push out the double
bearing box (3) from the clamping ring (4). Use a
rubber mallet if necessary.
NOTE! Do not damage or lose the shims!
884386
17. Press out the input gear. Use special tools 884386
and 884259.
33
Repair instructions
18. If required press off the roller bearing (1) from the
gear using a knife puller. The bearings (1) and (4)
can be changed separately. When changing the outer races of the bearings, these must be ”knocked”
off. Knock evenly all around. Always replace the oil
deflector washer together with the outer races.
Wash the parts and check for wear. Replace parts
when necessary.
NOTE! Gears with cones are sold in sets in order to
obtain the correct gear contact.
34
Repair instructions
Assembly,
models 280, 285 and 290
NOTE! When assembling the upper gear housing it is
very important that the gears are correctly positioned
in relation to each other. This applies not only to the
backlash between the gear teeth but also to the gear
teeth contact. Correct gear teeth contact spreads the
load to which the gears are subjected over a larger
area of the gear tooth. This preventing gear breakdown and abnormal wear and at the same time providing a quiet operation.
3. Rotate the bearings a couple of turns to allow them
to ”set”. Check the prestressing with a spring scale
and a piece of string, tied around the bearing housing.
The prestressing should be 5–10 Nm (3.69–
7.38 lb.ft.). Should the prestressing be too low, press
the roller bearing carefully a bit harder and if the prestressing is too high, release the roller bearing somewhat.
884263
NOTE! With run-in bearings the prestressing should
be 2.5–5 Nm (1.84–3.69 lb.ft.).
1. Press the larger roller bearing (1) onto the gear (2).
Use special tool 884263.
884263
2. Install the input gear (1) in the double bearing box
(2) and press on the smaller roller bearing (3) in a way
that a slight prestressing is obtained. Use special tool
884263.
NOTE! Protect the tips of the gear teeth.
4. Determine the measurement “B” (fig. under point 5)
as follows: Use a depth micrometer and read the
measurement “C” between the edge of the double
bearing box and the inner ring of the bearing and
measurement “D” between the edge of the double
bearing box and the edge of the gear. Then calculate
the difference.
35
Repair instructions
Forward and reverse gears
884265
1
3
2
884168
4
5
5. Measure the depth of the recess in the collar washer “E” and add to this measurement a number of
shims (5) that the measurement “B” is obtained.
7. Lubricate the bearings (1) and press the bearings
into their respective bearing boxes (2).
NOTE! Turn the bearings with the recesses in the
bearing races (3), for the assembly of the balls, facing away from the gear wheels. Use special tool
884168. Then press on the bearings and the bearing
boxes onto the gear wheels (4). Use special tool
884265.
NOTE! Protect the gear cup (5) during the compression to avoid that it is being deformed.
884483
2
6. Place the collar washer in position and tighten the
double bearing box. Use special tool 884483 and the
universal joint screw.
NOTE! Coat the screw with Loctite locking fluid or its
equivalent. The tightening torque should be 75 Nm
(55 lb.ft.). Rotate the double bearing box a few turns
and check once more the prestressing (5–11 Nm,
3.69–8.11 lb.ft.). Should the prestressing be too high,
remove the recessed washer and press back the gear
wheel somewhat. Then add more shims underneath
the recessed washer. On the other hand should the
prestressing be too low, reduce the number of shims.
Then tighten the double bearing box again with the
screw and the special tool 884483 and check the prestressing.
36
1
8. Always start by adjusting the forward gear. If the
previously dismantled gears are to be used, it is important not to mix forward and reverse gears with each
other when assembling. On sterndrives having left
hand rotating propeller as standard, the lower gear is
the ‘forward’ gear (1). Sterndrives having right hand
rotating propeller as standard, the upper gear is the
‘forward’ gear (2).
Repair instructions
Shimming the forward and reverse
gears
Method 1
B88
C78
11. Only the decimal values of the “B” and “C” dimensions are stamped into the upper gear housing.
The nominal value for both “B” and “C” is 61.00 mm
(2.40”). Add this value to the value stamped into the
gear to calculate shims for the forward and reverse
gears.
The shim calculations can be seen in the example below:
Measurement “A”:
62.05 mm
+ 0.05 mm
9. Measurement “A” is fixed at 62.05 mm (2.443").
(Fixed Dimension)
(Gear Etching 1))
62.10 mm
“C” Stamping:
- 61.78 mm
0.32 mm
(Stamped 2))
(0.013”)
The shim thickness for the forward gear is 0.32 mm
(0.013”).
The shim thickness for the reverse gear is calculated
the same way, only using the “B” stamping.
1)
Only +5 is etched.
2)
Only 88 (B) respectively 78 (C) is stamped.
+0.05 mm
10. Add or subtract the plus or minus marking (1) of
the gear.
NOTE! a + 5 marking = +0.05 mm (0.002”).
37
Repair instructions
NOTE! When calculating the shim thickness for the
forward and reverse gears, remember:
Checking the gear backlash and
contact pattern
The upper gear housing nominal dimension has
two values.
If the stamped number is 50 or more, use the lower
nominal value, 61.00 mm.
If the stamped number is 49 or less, use the higher
nominal value, 62.00 mm.
Example:
Stamping 50 or more
“C” stamping: 78
= 00.78 mm
Use Nominal Dimension = 61.00 mm
61.78 mm
Example:
Stamping 49 or less
“C” stamping: 43
= 00.43 mm
Use Nominal Dimension = 62.00 mm
13. Install the forward gear with the calculated shims
into the gear housing. Insert the needle bearings and
the vertical shaft. Install reverse gear into the gear
housing using the needle bearings as a guide.
62.43 mm
Then follow the procedure in chapter Checking the
gear backlash and contact pattern.
1
Method 2
2
14. Install the washer (2) and the split locking ring (1)
and tighten the nut at the opposite end of the vertical
shaft.
1
12. Insert a 0.2 mm (0.008") shim (1) under both forward and reverse gears as a starting point. The shim
value is a number derived from experience.
Then follow the procedure in chapter Checking the
gear backlash and contact pattern.
38
Repair instructions
884387
15. Brace the special tool 884387 in a vice and install
the gear housing in the tool.
17. Install the clamp ring and the cover with sufficient
number of shims to ensure a proper compression of
the bearings. There must be a clearance (1) between
the housing and the clamp ring. See also the picture
under point 19.
16. Install the preassembled double bearing box with
0.4 mm (0.016") shims.
18. Install a dial indicator to measure backlash. The
correct backlash should be 0.15–0.25 mm (0.006–
0.010"). Should the backlash be too small, more
shims must be added between the double bearing box
and the gear housing. If the backlash is excessive,
shims must be removed. A shim thickness of
0.10 mm (0.004") is a safe adjustment value.
NOTE! The guide pin (1) in the double bearing box
must be turned to face downwards and pressed into
the corresponding groove in the clamp ring. Special
tool 884483 is still being used.
39
Repair instructions
19. When the correct backlash has been obtained,
dismantle the double bearing box and the clamp ring.
In order to obtain a clear picture of the contact pattern, the gear teeth are coated with a thin coating of
marking dye. Once again assemble the double bearing box and the clamp ring.
NOTE! The cover must still be installed with an excess number of shims (1).
20. Rotate the gear in the correct direction of rotation
(clockwise) while at the same time braking the gear
forcefully by wedging a wooden brace against the
gear cone. The marking dye is then pressed away
from the contact surface thus giving a picture of the
width and location of the teeth contact.
40
21. Dismantle the gear set and compare the contact
pattern to that of the picture “A”. This picture shows
the desired pattern for the drive side of the forward
and reverse gear. The drive side is the convex side of
the gear. The dye pattern should be nearly oval in
form and be positioned half way up on the gear tooth.
It should be displaced towards the small end of the
tooth (towards the gear cup) but not running off the
end of the tooth.
22. If the dye pattern reflects a contact pattern as
shown in picture “B” the shim thickness underneath
the drive gear (double bearing box) must be reduced.
The drive gear then moves towards the driven gears.
The driven gears must then be shimmed out the
same amount to maintain the correct backlash.
Repair instructions
Final assembly
23. If the dye pattern reflects a contact pattern as
shown in picture “C” the shim thickness underneath
the drive gear (double bearing box) must be increased.
The drive then moves away from the center.
NOTE! If the drive is moved in or out respectively,
also the gears must be moved in or out in order to
maintain the correct backlash. Having obtained the
correct backlash and dye pattern, the upper gear
must be dismantled and the marking dye removed.
All bearings and screws must be lubricated prior to
assembly, which is carried out after the reconditioning of the universal joint.
1. Install the lower gear along with the calculated
number of shims.
2. Install the washer (1), the locking ring (2), the
spring (3) and the engagement sleeve (4) onto the
shaft (5).
NOTE! The end of the engagement sleeve marked
‘TOP’ must be facing upwards on the shaft. On earlier models there is a drilled recess, which must be
turned upwards. The engagement sleeve must rest
lightly on the spring. Feel by hand to make certain.
41
Repair instructions
1
1
884830
2
3. Install the needle bearings (1) and the spacer ring
(2) between the bearings in the lower gear and insert
the shaft in the gear.
NOTE! The needle bearings are matched in pairs and
must not be mixed up.
5. In order to obtain the correct axial shaft clearance
there are 3 left hand threaded nuts (1) with different
steps available. Select a nut and tighten it (tightening
torque: 120 Nm (88.5 lb.ft.). Use special tool 884830
as a counter hold.
NOTE! Lubricate the treads to prevent the nut from
galling.
4. Install the upper gear wheel with its calculated
number of shims in the gear housing. Install the needle bearings with the spacer ring in between and the
lower locking ring on the shaft.
NOTE! Carefully inspect the condition of the brass
washer and replace if necessary.
42
6. Measure the clearance between the nut and the
bearing. The axial clearance should be between 0.1–
0.5 mm (0.004–0.020"). Should it prove impossible to
obtain the correct clearance with either of the nuts,
the bearing is probably defective.
Repair instructions
9991801
884312
7. Measure the shim thickness between the clamp
ring and the gear housing as follows:
Hold the double bearing box as indicated in the picture
with its calculated number of shims (see point 16,
page 39).
8. Remove the recessed washer and the shims in it.
Press the new sealing ring against the collar in the
double bearing box, with the open part against the
bearing. Use special tools 9991801 and 884312.
NOTE! The guide pin! Add a sufficient number of
shims to the clamp ring to obtain a clearance of max.
0.10 mm (0.004") between the clamp ring and the
gear housing. Push the clamp ring into its position by
hand and use a feeler gauge and measure the clearance all around.
9. Install the locking ring (1) and the recessed washer
(2) along with shims and install the O-ring (3) in the
groove of the recessed washer. Use grease to get attachment.
43
Repair instructions
10. Install the shims and the 2 new O-rings on the
double bearing box.
12. Apply Volvo Penta part no. 1161099-5, Permatex®
no. 3 on the surfaces between the clamp ring and gear
housing.
Install the double bearing box along with the universal
joint in the gear housing. The guide pin in the double
bearing box should be turned downwards. Lock the
screws with thread locking compound, Volvo Penta
part no. 1161053-2 and tighten them with a torque of
35 Nm (25.8 lb.ft.).
If necessary, recondition the universal joint. See
chapter Reconditioning the universal joint, pages
62–63.
11. Install the clamp ring and the double bearing box
on the universal joint.
NOTE! The guide pin (1) must fit the groove in the
clamp ring. Install the washer (2) and the screw (3).
At final assembly always use a new screw! Coat the
screw with Volvo Penta part no. 1161053-2, locking
fluid and tighten with a torque of 75 Nm (55 lb.ft.).
13. Install shims under the cover to obtain a clearance
of max 0.1 mm (0.004") between the cover and the
gear housing. Install the cover and push it into its position and measure the clearance with a feeler gauge
all around.
44
Repair instructions
14. Coat the contact surface with Volvo Penta part no.
1141570-0 sealant and install the sealing ring (1) in a
way that the sealing for the front right hand screw
aligns with the corresponding recess in the cover.
15. Install the calculated number of shims and tighten
the cover.
NOTE! The front right hand screw is a hollow screw
and shall be provided with an O-ring (1) under its
head. Tighten the screws with a torque of 15 Nm
(11 lb.ft.). Tighten diagonally!
45
Repair instructions
Disassembly, models
290A, SP and DP
NOTE! The illustrations show drives model DP, but
the working methods are the same as for models
290A and SP.
3. Loosen and remove the 4 allen head bolts holding
the double bearing box.
884264
884830
1
1. Install the upper gear housing on special tool
884830. This special tool, of earlier manufacture, also
carries the part no 884264.
4. Pull out the double bearing box by pulling and turning simultaneously. Use strap wrench 9999179 to rotate the double bearing box.
IMPORTANT! Do not damage or lose the shims.
1
2. Remove the 4 screws holding the shift mechanism
and remove the mechanism.
NOTE! Be sure to remove the shift shoe (1) with the
shift mechanism.
46
Repair instructions
7. Remove the left hand thread nut on the vertical
shaft. Use special tool 884830 and the spline shaft as
a counter-hold while removing the nut.
5. Remove the 4 screws holding the gear housing cover.
1
2
8. Lift out the upper bearing assembly along with the
sliding sleeve and the spring.
1
2
6. Remove the cover.
NOTE! The front right hand screw (1) is a hollow
screw with an O-ring. Do not damage or lose the
shims (2) for the cover.
9. Lift out the upper gear housing from the special
tool. Disassemble the bearing assembly and shaft by
lifting the shaft enough to remove the split locking ring
(1), then the thrust washer (2).
NOTE! Do not scratch the sliding sleeve or the gear
cups while removing them.
47
Repair instructions
1
884259
1
2
SP & DP
1
290A
884938
11b. Drives without intgrated bearings:
Press out the bearings from the bearing sleeves. Use
special tools 884938 and 884265.
10. Remove the needle bearings (1) from the upper
and lower gear cup assemblies.
Model 290A only: Also remove the spacerring (2).
NOTE! Do not mix upper and lower needle bearings.
Input gear (Double bearing box)
884259
885043
884938
11a. Drives with intgrated bearings (SP-A1, DP-A1,
DP-B1):
Press out the upper and lower gear wheels from the
bearings. Mount the bearing and gear assembly in
holding fixture 884938, use special tools 884259 with
handle 9991801.
12. Brace the universal joint in a vice. Use soft jaws
to protect the universal joint. Use special tool 885043
to remove the TX50 torx head screw and the tapered
washer; discard the screw.
NOTE! Sterndrives model 290A have an Allen head
screw instead of a TX50 torx head screw.
Remove the double bearing box from the universal
joint.
48
Repair instructions
884263
3850608
1
2
3
13. Use special tool 3850608 to remove the locking
ring (1), remove the shoulder washer (2).
NOTE! The seal ring (3) can be removed at a later
time.
15. Turn over the double bearing box and press out
the seal ring along with the roller bearing. Use special
tool 884263.
NOTE! The bearing will be damaged if removed, only
remove if a new bearing will be installed.
884266
884266
884938
14. Press out the input gear. Use special tools 884938
and 884266. Remove the crush sleeve and discard.
16. Use a “knife puller” to remove the roller bearing
from the gear (if necessary). Also use special tool
884266.
49
Repair instructions
9991801
884933
Assembly, models
290A, SP and DP
NOTE! When assembling the upper gear housing it is
very important that the gears are correctly positioned
in relation to each other. This applies not only to the
backlash between the gear teeth but also to the gear
teeth contact. Correct gear teeth contact spreads the
load to which the gears are subjected over a larger
area of the gear tooth. This preventing gear breakdown and abnormal wear and at the same time providing a quiet operation.
884938
17. When replacing the outer bearing races, the bearing races must be pressed out. Use special tool
9991801 handle with 884938 and 884933 holding fixture. If necessary, recondition the universal joint. See
chapter Reconditioning the universal joint, pages
62–63.
884932
1. Install the outer bearing race. Use special tool no
884932.
NOTE! Make sure that the double bearing box is positioned horizontally. Turn the special tool when installing the other bearing race.
50
Repair instructions
884263
9991801
884932
1
884938
2. Install the bigger roller bearing on the gear wheel by
pressing it on. Use special tool 884263.
NOTE! Protect the gear teeth. Then install a new
clamping sleeve (1).
4. Press down the sealing ring to the shoulder. Use
special tool 884932 with handle 991801 and special
tool 884938. Then install the locking ring with special
tool 3850608.
884263
1
3. Install the input gear in the double bearing box and
press on the smaller roller bearing in a way that a
1 mm (0,0394"), approximatively, clearance is obtained. Use special tool 884263.
5. Coat the O-ring (1) with grease and insert it in its location. Push the shoulder washer into its location
against the universal joint.
NOTE! Protect the gear teeth.
51
Repair instructions
885043
9985494
6. Insert the universal joint into the double bearing box
and brace the universal joint in a vice. Install the conical washer and tighten the screw by hand.
NOTE! Apply thread locking compound, Volvo Penta
part no. 1161053-0 or Loctite® 243 on the screw. Use
a new screw. Use special tool 885043 to tighten the
TX50 torx head screw with short intervals. Check the
pre-stressing between each interval, see under the following point) and rotate the bearings continuously to
allow them to ‘set’.
Model 290A has an Allen head screw instead of a
TX50 torx head screw.
52
7. Check the pre-stressing of the bearings between
the tightening intervals and then use a spring type of
scale, special tool 9985494. Pre-stressing new bearings: 10–15 N (2,20–3,30 lbs).
Prestressing used bearings: 7,5–10 N (1,6–2,2 lbs).
NOTE! If the screw is tightening to much and the prestressing becomes too high, the double bearing box
must be disassembled and the crush sleeve replaced.
Repair instructions
Forward and reverse gears
2
884265
1
3
2
1
884168
4
5
8a. Drives without integrated bearings:
Lubricate the bearings (1) and press the bearing into
their respective bearing boxes (2).
NOTE! Turn the bearings with the recesses in the
bearing races (3), for the assembly of the balls, facing away from the gear wheels. Use special tool
884168. Then press on the bearings and the bearing
boxes onto the gear wheels. Use special tool
884265.
9. Always start by adjusting the forward gear. If the
previously dismantled gears are to be used, it is important not to mix forward and reverse gears with each
other when assembling.
On sterndrives having left hand rotating propeller as
standard, the lower gear is the forward gear (1). On
sterndrives having right hand rotating propeller as
standard, the upper gear is the forward gear (2).
NOTE! Protect the gear cup during the compression
to avoid that it is being deformed.
8b. Drives with integrated bearings.
From models SP-A1, DP-A1 on
Lubricate the bearings with synthetic gear lube API
GL-5. Press the bearing onto their respective gears.
Use special tool 884168.
NOTE! Protect the gear cup during the compression
to avoid that it is being deformed.
53
Repair instructions
Shimming the forward and reverse
gears
Method 1
B88
C78
12. Only the decimal values of the “B” and “C” dimensions are stamped into the upper gear housing.
The nominal value for both “B” and “C” is 61.00 mm
(2.40”). Add this value to the value stamped into the
gear to calculate shims for the forward and reverse
gears.
The shim calculations can be seen in the example below:
Measurement “A”:
62.05 mm
+ 0.05 mm
10. Measurement “A” is fixed at 62.05 mm (2.443").
(Fixed Dimension)
(Gear Etching1))
62.10 mm
“C” Stamping:
- 61.78 mm
0.32 mm
(Stamped 2))
(0.013”)
The shim thickness for the forward gear is 0.32 mm
(0.013”).
The shim thickness for the reverse gear is calculated
the same way, only using the “B” stamping.
+0.05 mm
11. Add or subtract the plus or minus marking (1) of
the gear.
NOTE! a + 5 marking = +0.05 mm (0.002”).
54
1)
Only +5 is etched.
2)
Only 88 (B) respectively 78 (C) is stamped.
Repair instructions
NOTE! When calculating the shim thickness for the
forward and reverse gears, remember:
Checking the gear backlash and
contact pattern
The upper gear housing nominal dimension has
two values.
If the stamped number is 50 or more, use the lower
nominal value, 61.00 mm.
If the stamped number is 49 or less, use the higher
nominal value, 62.00 mm.
Example:
Stamping 50 or more
“C” stamping: 78
= 00.78 mm
Use Nominal Dimension = 61.00 mm
61.78 mm
Example:
Stamping 49 or less
“C” stamping: 43
= 00.43 mm
Use Nominal Dimension = 62.00 mm
14. Install the forward gear with the calculated shims
into the gear housing. Insert the needle bearings and
the vertical shaft. Install reverse gear into the gear
housing using the needle bearings as a guide.
62.43 mm
Then follow the procedure in chapter Checking the
gear backlash and contact pattern.
Method 2
1
2
15. Install the washer (2) and the split locking ring (1)
and tighten the left hand nut at the opposite end of
the vertical shaft. Use special tool 3850598.
13. Insert a 0.2 mm (0.008") shim (1) under both forward and reverse gears as a starting point. The shim
value is a number derived from experience.
Then follow the procedure in chapter Checking the
gear backlash and contact pattern.
55
Repair instructions
884387
885153
16 a. Drives with integrated bearings
From models SP-A1 and DP-A1 on
Brace the special tool 884387 plate and ring 885153
(tool kit 885152) in a vise and install the gear housing
in the tool.
18. Use sufficient number of shims to create clearance of max. 0.1 mm (0.004”) between the top cover
and the upper gear housing as shown in the picture.
Install the cover and tighten the cover screws.
16 b. Drives without integrated bearings
Up to models SP-A1 and DP-A1
Brace the special tool 884387 plate in a vise and
install the gear housing in the plate.
19. Install a dial indicator to measure backlash. The
correct backlash should be 0.15–0.25 mm (0.006–
0.010”). On 2.15 and 2.30 ratio drives (only model
290A) the backslash should be 0.08–0.18 mm (0.003–
0.007”).
17. Install the preassembled double bearing box with
0.4 mm (0.0157”) shims. Make sure not to squeeze
the shims in the O-ring groove. Tighten the 4 Allenhead screws.
56
If the backlash is too tight, shims must be added between the double bearing box and the gear housing. If
the backlash is too loose, shims must be removed
from the double bearing box. A shim thickness of
0.10 mm (0.004”) is a safe adjustment step.
Repair instructions
20. Remove the double bearing box when the correct
backlash has been obtained.
To gain a clearer picture of the contact pattern, coat
the gear teeth with a thin coating of marking dye.
Then install the double bearing box again.
NOTE! The cover is still installed with an excessive
number of shims!
21. Rotate the gears in the normal direction of rotation
(clockwise) while at the same time braking the gear
forcefully by wedging a wooden brace against the
gear cups. The marking dye will be pressed away
from the point of contact on the gear tooth face,
which will show a picture of the contact pattern.
22. Dismantle the gear set and compare the contact
pattern to that of the picture “A”. This picture shows
the desired pattern for the drive side of the forward
and reverse gear. The drive side is the convex side of
the gear. The dye pattern should be nearly oval in
form and be positioned half way up on the gear tooth.
It should be displaced towards the small end of the
tooth (towards the gear cup) but not running off the
end of the tooth.
23. If the dye pattern reflects a contact pattern as
shown in picture “B” the shim thickness underneath
the drive gear (double bearing box) must be reduced.
The drive gear then moves towards the driven gears.
The driven gears must then be shimmed out the
same amount to maintain the correct backlash.
57
Repair instructions
Final assembly
24. If the dye pattern reflects a contact pattern as
shown in picture “C” the shim thickness underneath
the drive gear (double bearing box) must be increased. The drive then moves away from the center.
NOTE! If the drive is moved in or out respectively,
also the gears must be moved in or out in order to
maintain the correct backlash. Having obtained the
correct backlash and dye pattern, the upper gear
must be dismantled and the marking dye removed.
All bearings and screws must be lubricated prior to
assembly, which is carried out after the reconditioning of the universal joint.
1. Install the lower gear along with the calculated
number of shims.
2
1
3
4
5
TOP
2. Install the washer (1), the locking ring (2), the
spring (3) and the engagement sleeve (4) onto the
shaft (5).
NOTE! The end of the engagement sleeve marked
‘TOP’ must be facing upwards on the shaft. On earlier models there is a drilled recess, which must be
turned upwards. The engagement sleeve must rest
lightly on the spring. Feel by hand to make certain.
58
Repair instructions
1
2
SP & DP
1
1
290A
SP & DP
1
290A
1
2
1
3. Install the needle bearings (1) and the spacer ring
(2, model 290A only) between the bearings in the
lower gear and insert the shaft in the gear.
NOTE! The needle bearings are matched in pairs
and must not be mixed up.
5. Place the upper gear wheel with the calculated
shims in the gear housing. Install the needle bearings
(1) along with the spacer ring (2, model 290A only)
between the bearings.
1
4. Install the brass washer and the split locking ring.
Then place the gear housing in the splines sleeve
884830.
NOTE! Carefully inspect the condition of the brass
washer and replace if necessary.
6. In order to obtain the correct axial clearance, there
are three left hand threaded nuts with shoulders of different thicknesses (1). Select a nut and tighten it with
a tightening torque of 120 Nm (88.3 lb.ft.).
NOTE! Lubricate the threads to prevent the nut from
galling.
59
Repair instructions
7. Measure the clearance between the nut and the
bearing. The axial clearance should be 0.1–0.5 mm,
0.00394–0.0197"). If it should not be possible to obtain the correct clearance with any of the nuts, most
probably the bearing is defective.
9. Coat the surfaces between the double bearing box
and the gear housing with sealing compound, Volvo
Penta part no. 1161099-5 or Permatex® no. 3.
Install the double bearing box with the universal joint
in the gear housing.
Coat the screws with thread locking compound, Volvo
Penta part no. 1161053-2 or Loctite® 243 and tighten
them with a torque of 35 Nm (25.8 lb.ft.).
8. Install the shims and the new O-ring on the double
bearing box.
60
10. Install a sufficient number of shims underneath
the cover to obtain a clearance of max 0.1 mm
(0.004") between the cover and the gear housing. Locate the cover and push it lightly into position and
measure the clearance all around with a feeler gauge.
Repair instructions
11. Coat the cover with sealant, Volvo Penta part no.
1141570-0 and install the sealing ring (1) so that the
sealing for the front, right hand screw ends up in the
recess of the cover, provided for it.
12. Insert the calculated shims and tighten the cover.
NOTE! The front, right hand screw is a hollow screw,
to be installed with an O-ring underneath the head of
the screw. Tighten the screws with a torque of
15 Nm (11.04 lb.ft.) in diagonal sequence.
61
Repair instructions
Reconditioning the universal joint
1
1. Remove the locking rings (1) holding the needle
bearing in the yoke.
NOTE! To avoid having the locking rings “jump out”
and getting lost, hold a rag over the universal joint
when removing the locking rings.
3. Try to ease out the bearing using a pair of pliers or
Channel Lock® pliers. If this is unsuccessful the bearing can be driven out by using a hammer and a drift
punch. Once the bearings are removed, remove the
spider from the yoke.
4
3
1
2
5
2. Hold the universal joint in your hand and strike with
a hammer until the bearing emerges from the yoke.
WARNING! Do not strike the splines or sealing
surfaces. The universal joint will be damaged
and must be replaced.
6
4. Inspect the spider (1) and needle bearings for play
in the yokes (2, 3, and 4) and possible wear marks in
the bearing races (5). If faulty, the spider (1) and needle bearing caps (5) must be replaced as a complete
unit.
NOTE! DO NOT install new bearings and caps onto a
used spider or vice-versa.
If the bearing caps (5) are found to have play in the
yokes (2, 3, and 4), the yokes must also be replaced.
Install new seal washers (6) on the spider. Feed the
spider in the yoke.
62
Repair instructions
5. Use a small amount of water resistant EP bearing
grease, Volvo Penta part no. 1161246-2, to retain the
needle bearings in the cap. Push the spider through
the yoke in one direction to allow the needle bearing to
align with the spider. Push the needle bearing cap into
the yoke with the spider inside the needle bearing cap
to keep the needle bearings in place. Press the needle
bearing cap into the yoke far enough to allow the lock
ring to be installed. Install the remaining needle
bearing caps in the same manner.
WARNING! Be extremely careful when pressing
the needle bearing caps into place. The needle
bearings may come loose and fall to the bottom
of the bearing cap. DO NOT force the needle
bearing caps onto the spider. If the locking
groove for the needle bearings caps do not
readily align, a bearing may have come loose
and fallen to the bottom of the cap.
63
Repair instructions
Reconditioning the shift mechanism
Types of shift mechanisms
Shift mechanism type 1
For the models 280, 290, 285, 285A and 290A there
are 3 different types of shift mechanism. The first
type was installed up to and including serial no PZ
2829528. As from serial number PZ 2829529 the second type – where the ball, spring and the locking wire
were removed – was installed. There is a somewhat
different dismantling and assembly sequence for each
type.
The third type and the shift mechanism for models DP
and SP are described on pages 68–72.
7
1
NOTE! The upper gear head does not have to be removed from the intermediate housing, nor the sterndrive from the transom shield, to replace the shift
mechanism.
1. Remove the shift mechanism from the upper gear
head.
64
5
3
4
2
6
2. Knock out the load pin (1, figure above) and pull out
the pin (2). Remove the locking wire (3), the springs
(4) and the balls (5) and pull out the excentric piston
(6). Remove the sealing ring (7). Wash the parts and
check for wear and replace parts where necessary.
Repair instructions
Assembly
Oil all moving parts prior to the assembly.
3. Lubricate the sealing ring abundantly and install it
with the steel edge (small clearance} facing inwards
the gear housing.
4. Insert the excentric piston (1). Install the pin (2) and
lock it with the load pin (3). Make sure that the load
pin centers in the excentric piston.
5. Install the balls and the springs (1). Insert a locking
wire (2) in the groove of the cover and compress the
springs as indicated in the picture. Cut off and turn
down the end into the cover recess. The only function of the locking wire is to hold the spring in position while the shift mechanism is being installed in
the gear housing.
6. Install the spring (1), the shift shoe (2) and the
O-ring (3) and coat the contact surfaces with sealing
compound, Volvo Penta part no. 1161099-5 or
Permatex® no. 3.
65
Repair instructions
Shift mechanism type 2
1
4
2
3
7. Install the shift mechanism in the gear housing in a
way that the screw (1) will be displaced towards starboard.
NOTE! Make sure that the sliding shoe (2) is turned
to a position corresponding the one in the picture.
The shift mechanism will not function if the sliding
shoe is turned the opposite way. Now install the shift
mechanism in the sterndrive.
Set the shift mechanism in neutral and remove all
adjustment pads (3) and tighten the screw. Now the
vertical shaft in the upper gear housing cannot be
turned. Insert a shim at the time on the screw until it
is possible to turn the shaft.
Models 290 and 290A: Add one more shim to the
screw (1).
Coat the shim/shims and the screw with sealing
compound, Volvo Penta part no. 1161099-5, or
Permatex® no. 3 when the adjustment is done and
then tighten the screw.
66
8. Knock out the load pin (1, figure above) and pull out
the pin (2) and the excentric piston (3). Remove the
sealing ring (4). Wash the parts and check for wear.
Replace parts if necessary.
Repair instructions
Assembly
Oil all moving parts prior to assembly.
9. Lubricate the sealing ring abundantly and install it
with the steel edge (small clearance) facing inwards
the gear housing.
11. Install the spring (1), the sliding shoe (2) and the
O-ring (3) and coat the contact surfaces with sealing
compound, Volvo Penta part no. 1161099-5, or
Permatex® no. 3.
10. Install the excentric piston (1). Install the pin (2)
and lock it with the load pin (3). Make sure that the
load pin centers in the excentric piston.
12. Install the shift mechanism in the gear housing in
a way that the screw (1) is displaced towards starboard.
NOTE! Make sure that the sliding shoe (2) is turned to
a position corresponding the one in the picture. The
shift mechanism will not function if the sliding shoe is
turned the opposite way.
67
Repair instructions
Shift mechanism type 3
13. Set the shift mechanism in a position between forward and neutral or between reverse and neutral. The
pin (1) should be positioned on one of the ‘cams’. Install the shift mechanism in the sterndrive.
1
2
3
15. Remove the sliding shoe (1) and the spring (2) and
the O-ring (3).
14. Remove all adjustment shims (1) and tighten the
screws. Now it is not possible to turn the vertical shaft
in the upper gear housing. Insert an adjustment shim
at the time on the screw until the shaft can be turned
again without any sort of resistance.
Models 290 and 290A: Add one more shim to the
screw (1).
When the adjustment is done, coat the shims and the
screw with sealing compound, Volvo Penta part no.
1161099-5, or Permatex® no. 3 and tighten the screw.
68
Repair instructions
1
1
19. Tap the eccentric piston lightly on a wooden surface to remove the spring pin (1). Inspect the eccentric piston for scoring, distortion, or damage that may
cause it to leak or bind in the housing.
16. Knock in the load pin as far as necessary to free
the pin (1).
20. Using a screwdriver, pry out the eccentric piston
seal. Clean all surfaces and check for damage that
may cause leaks. Replace parts as necessary.
17. Pull out the pin.
Assembly, models
280, 285, 285A, 290 and 290A
Oil all moving parts prior to assembly.
18. Pull out the excentric piston.
21. Install a new eccentric piston seal with the steel
edge facing inward, as shown. Use special tool
884793.
69
Repair instructions
1
2
3
22. Install the eccentric piston (1) in the housing. Do
not damage the seal! Push in the locating pin (2).
Align the hole with the housing. Lock it in place with a
new spring pin (3).
24. Install the shift mechanism in the gear housing in
a way that the screw (1) is displaced towards starboard.
NOTE! Make sure that the sliding shoe (2) is turned
to a position as indicated in the picture. The shift
mechanism will not function if the sliding shoe is
turned in the opposite direction.
1
2
3
23. Install a new O-ring (3) and insert the spring (2)
and the sliding shoe (1). Coat the contact surface with
Volvo Penta part no. 1141570-0 sealant.
25. Set the shift mechanism in a position between
forward and neutral or between reverse and neutral.
(The pin (1) shall rest on one of the ‘cams’). Install the
shift mechanism in the sterndrive.
70
Repair instructions
1
2
3
28. Install the eccentric piston (1) in the housing. Do
not damage the seal! Push in the locating pin (2).
Align the hole with the housing. Lock it in place with a
new spring pin (3).
26. Remove all adjustment shims (1) and tighten the
screw. Now it is no longer possible to turn the vertical
shaft in the upper gear housing. Insert an adjustment
shim at the time on the screw until the shaft can be
turned again without any sort of resistance.
1
Models 290 and 290A: Add one more shim to the
screw.
2
When the adjustment is done, coat the shims and the
screw with sealing compound, Volvo Penta part no.
1161099-5, or Permatex® no. 3 and then tighten the
screw.
3
Assembly, models SP and DP
Oil all moving parts prior to assembly.
29. Install a new O-ring (3), then insert the spring (2)
and shift shoe (1). Coat the contact surface with Volvo Penta part no. 1141570-0 sealant.
27. Install a new eccentric piston seal with the steel
edge facing inward, as shown. Use special tool
884793.
30. Remove the shim screw and install the assembly
in the upper gear head. Make sure the long edge of
the shift shoe is toward the right side of the housing
as viewed from the top.
71
Repair instructions
3856761
With the special tool installed, add one shim to the
shimming screw (1) and install finger tight while rotating the propeller shaft by hand. If propeller shaft
binds, repeat this step, adding one shim at a time, until no resistance is felt through 360° of rotation.
NOTE! Do not attempt to rotate the propeller shaft
with any leverage devices (e.g., propellers or pliers).
This will damage the sliding sleeve and/or the shift
shoe.
After the proper amount of shims have been established add one more shim to the shimming screw.
1
31. Do not attempt to mount the special tool 3856761
on any raised portion or raised lettering on the shift
housing. The tool shall be mounted closed to the
housing.
Install the special tool under the two starboard side
retaining screws, as shown.
NOTE! Alternatively the special tool can be mounted
on the port side, but after the gear shift rod is
dismounted.
72
Coat the shimming screw threads with Volvo Penta
sealing compound, part no. 1161099-5, and install.
Tighten the shimming screw to 14–16 Nm (10–12
lb.ft.).
32. Remove the special tool and install the shift linkage.
Repair instructions
Intermediate housing
Reconditioning the
intermediate housing, model
280 and 285
3. Remove the plastic washers (1) and the wear washer (2).
1. Remove the 2 screws holding the hose connection
(1) on the yoke. Remove the hose connection and
the gasket.
9991801
9991801
884311
884259
4. Press out the sealing rings and the needle bearing.
Use special tool 884259 and 9991801.
NOTE! There is a sealing ring on each side of the
needle bearing.
2. Dismantle the yoke by driving out the steering spindle. Use special tools 884311 and 9991801. Then remove the retaining pawl from the yoke.
73
Repair instructions
884259
7. Dismantle the axial bearing race. Use special tools
884140 and 884143. Also replace the O-rings (1).
One at each end of the tube.
5. Press out the bushing (1). Use special tool 884259.
6. Should the shift yoke need to be replaced, remove
the cotter pin (1). Then it is possible to pull out the
shaft (2) and the shift yoke (3).
8. The retaining pawl is dismantled, when necessary,
as follows:
Remove the shaft journals (48). Remove the spring
(57), the spring (49) and the springs (58).
NOTE! Hold the spring shaft (50). Remove the nuts
(55) and the spring catches (52) and (54) and the
spacer washers (44) and the retaining pawl (42). Lift
out the bearing (43) and the shaft (53) and the push
rod (45). Wash the parts and check for wear. Replace parts if necessary.
74
Repair instructions
Assembly
Oil all moving parts and the screws prior to assembly.
10. Paint the retaining pawl with a thin layer of
‘touch-up paint’. Painting is hard to do when the pawl
is assembled.
The picture reflects an assembled retaining pawl.
9991801
884259
9. Install the shaft (53) on one of the retaining pawls
(42) and the spacer washer (44) and the spring catch
(52). Install one of the nuts (55) on the shaft. Then
place the push rod (45) on the stop shaft (56) and insert the bearing (43) in the retaining pawl half. Then
install the remaining retaining pawl (42) and the
spring catches (54) along with the spacer washer
(44) on the shaft (53) and the bearing (43). Install the
remaining nut (55).
NOTE! Tighten the nuts (55) completely. Then ease
them off approx. 1/8 turn in order to make the spring
catches movable without adding a play. Then install
the locking yoke (47) and the shaft journals (48)
along with the spring (57) and the washer (51) in the
bearing (43). Install the spring shaft (50) with the assistance of the springs (58) and install the spring (49)
between the bearing (43) and the stop shaft (56).
11. Grease the needle bearing (1) with an universal
type of grease and press it into the center of the yoke.
Use special tool 884259 and 9991801. Turn the
bearing in a way that the tool is pressing against the
side where the material is at the thickest, (where the
text is stamped into the material).
75
Repair instructions
12. Press in both sealing rings. Use special tool
884259.
NOTE! The sealing rings are to seal against water
and thus have to be installed ”facing” each other.
14. Install the retaining pawl in the yoke and place the
yoke with the retaining pawl in its location in the intermediate housing.
NOTE! Insert the wear washer (1) between the lower
attachment of the yoke and the intermediate housing
and the two plastic washers (2) with one on each
side of the bearing. Then press in the steering spindle until the collar bottoms. Be very careful during the
installation of the steering spindle in order to avoid
damaging the lower sealing ring.
13. Glue the bushing to the yoke.
Use bushing installation adhesive, Volvo Penta part
no. 11161351-0 or Loctite® 603 . The flange must be
turned downwards against the retaining pawl.
15. Install the hose connection with its gasket on the
yoke. Coat the sealing surfaces with sealing
compound, Volvo Penta part no. 1161099-5 or
Permatex® no. 3.
NOTE! On sterndrive model 280 the hose connection
must be pointing straight forwards.
76
Repair instructions
Reconditioning the
intermediate housing, model
290 and 290A
16. Install the shift yoke (3) and push in the shaft (2)
and lock it with the cotter pin (1).
NOTE! A washer must be installed on either side of
the cotter pin.
1. Remove the 2 screws holding the hose connection.
Remove the hose connection and the gasket.
9991801
884311
2. Remove the yoke by driving out the steering spindle. Use special tools 884311 and 9991801. Lift up the
attachment device of the trim cylinders and remove
the retaining pawl, the two wear washers, the plastic
washer and the guide washer from the steering yoke.
77
Repair instructions
9991801
884259
3. Press out the sealing rings and the needle bearing.
Use special tools 884259 and 9991801.
5. Should the shift yoke be in need of being replaced,
remove the cotter pin (1). Then pull out the shaft (2)
and remove the shift yoke (3).
NOTE! There is a sealing ring on each side of the
needle bearing.
9991801
884259
4. Press out the bushing. Use special tools 884259
and 9991801.
78
6. Remove the bearing race of the axial bearing. Use
special tools 884140 and 884143. Also replace the
O-rings (1). One in each end of the oil tube.
Repair instructions
7. If necessary the retaining pawl is dismantled as follows:
Remove the shaft journals (42). Remove the spring
(43) the spring (40) and the springs (44).
9. Paint the retaining pawl with a thin layer of
”touch-up paint”. Painting is hard to do when the pawl
is assembled.
The picture reflects an assembled retaining pawl.
NOTE! Hold the spring shaft (45). Remove the nuts
(38) and spring catches (34) and (37) and the spacer
washers (36) as well as the retaining pawl (33). Remove the bearing (32) and the shaft (35). Clean the
parts and check for wear. Replace parts if necessary.
9991801
Assembly
Oil all moving parts and the screws prior to assembly.
8. Install the shaft (35, picture above) on one of the
retaining pawls (33) and install the spacer washer (36)
and the spring catch (34). Install one of the nuts (38)
on the shaft. Then place the stop shaft (39) and the
bearing (32) in the retaining pawl half. Then install
the remaining retaining pawl (33) and the spring
catch (37) the spacer sleeve (36) on the shaft (35)
and the bearing (32). Install the second nut (38).
NOTE! Tighten the nuts (38) completely. Then ease
off a 1/8 turn to allow the spring catches to move
without adding a play. Then install the locking yoke
(41) and the shaft journals (42) with the spring (43)
and the washer (46) in the bearing (32). Install the
spring shaft (45) in its location with the assistance of
the springs (44) and install the spring (40) between
the bearing (32) and the stop shaft (39).
884259
10. Grease the needle bearing with an universal type
of grease and press it into the center of the yoke. Use
special tools 884259 and 9991801. Turn the bearing
in a way that the tool is pressing against the side
where the material is at the thickest (where the text is
stamped into the material).
79
Repair instructions
11. Press in both sealing rings. Use special tool
884259.
NOTE! The sealing rings are to seal against water
and thus have to be installed ”facing” each other.
13. Place the yoke and the wear washer (1) on the intermediate housing and push in the steering spindle
(2) as far as to hold the wear washer.
NOTE! Be careful not to damage the lower sealing
rings.
9991801
884259
12. Press the bushing into the yoke. Use special tool
884259 and 9991801.
14. Insert the retaining pawl into the intermediate
housing. Then insert the plastic washer (1) and the
guide washer (2) between the retaining pawl and the
intermediate housing. Then push in the steering spindle as far as to hold the plastic washer.
80
Repair instructions
15. Insert the wear washer (1) between the steering
yoke and the intermediate housing and push in the
steering spindle until the collar bottoms.
17. If the trim cylinder attachment is in need of repair
or in need of being replaced, remove the 2 collar
screws. Use a socket wrench (17 mm) as a counter
hold. Then install the new cylinder attachment.
NOTE! Use the same screws, washers and nuts unless they are damaged.
16. Install the hose connection and the gasket on the
yoke. Coat the surfaces with sealing compound,
Volvo Penta part no. 1161099-5 or Permatex® no. 3.
18. Install the shift yoke (3) and push in the shaft (2)
and lock it with the cotter pin (1).
NOTE! Install a washer on each side of the cotter
pin!
81
Repair instructions
Reconditioning the
intermediate housing, models
SP and DP
9991801
884259
3. Press out the lower steering spindle bushing. Use
special tools 884259 and 9991801.
1. Remove the 2 screws holding the hose connection.
Remove the hose connection and the gasket.
9991801
9991801
884311
884259
2. Remove the hook up fork by driving out the steering
spindle. Use special tools 884311 and 9991801.
82
4. Press out the upper steering spindle bushing using
special tool 884259 and 9991801.
Repair instructions
9991801
884259
5. Should the shift fork require replacement, remove
the cotter pin (1). Remove the shaft (2) and remove
the shift yoke (3). To install reverse procedure.
NOTE! Always use a new cotter pin when reinstalling.
7. Grease the lower hook up fork bushing with Volvo
Penta part np. 828250-1 water resistant grease. Using
special tool 884259 and 9991801, press in the bushing.
9991801
884259
6. Remove the bearing race of the axial bearing. Use
special tool 884140 and 884143. Also replace the Orings (1). One on each side of the oil tube.
8. Press the bushing into the hook up fork. Use special tools 884259 with handle 9991801.
83
Repair instructions
9. Place the wear washer (1) on the intermediate
housing and push the steering spindle (2) in far
enough to hold the wear washer.
11. Insert the plastic wear washer (1) between the intermediate housing and the hook up fork. Push the
steering spindle in until the collar bottoms.
10. Push the steering spindle (1) through the intermediate housing exhaust port (2) stopping short of the
upper hook up fork bushing.
12. Install the O-ring and the hose connection on the
yoke. Use a small amount of Volvo Penta part no.
828250-1 water resistant grease to hold the O-ring in
place while installing the hose connection.
84
Repair instructions
13. Install the shift yoke (3). Align the shift yoke with
the shaft hole in the intermediate housing. Push the
shaft (2) through and lock it with a new cotter pin (1).
85
Repair instructions
Lower gear
Reconditioning the lower gear,
models 280, 285, 290 and SP
Disassembly
The propeller shaft
885192
9992520
1. Install the suspension fixture 885192 in stand
99922520 and brace the lower unit in the stand.
3
1
884830
3. Use special tool 884830 and install the lower gear
upside down.
884161
2
4. Remove the 2 screws holding the propeller bearing
housing. Remove the propeller shaft and the propeller bearing housing. Use special tool 884161. Remove the special tool once the propeller bearing
housing is free and pull out the bearing housing by
hand.
2. Remove the oil strainer (1) and the O-rings (2 and
3, only models 280, 285 and 290).
86
Repair instructions
884168
1
5. Remove the 6 nuts holding the washer (1) and
knock the propeller shaft out of the bearing housing.
Use a copper mallet or its equivalent in order not to
damage the threads.
7. Press off the gear wheel and the bearing from the
propeller shaft simultaneously. Use special tool
884168.
1
3
3
2
1
6. Fold down the locking washer (1) remove the round
nut (2).
2
8. Remove the locking ring (1) and the oil deflector (2)
from the gear wheel.
NOTE! In order not to damage the oil deflector during the dismantling, apply the bending tool close to
the 2 carrier pins (3). (This is valid for sterndrives of
earlier manufacture). On sterndrives of later manufacture the carrier pins have been replaced by a load
pin.
87
Repair instructions
1
9. Knock out the 2 sealing rings (1) off the propeller
bearing housing.
11b. Models 280, 290 of later manufacture: Lift the
gear housing off the special tool and place it back in
the work stand. Remove the nylock® nut with a hook
spanner wrench.
The vertical shaft
1
10. Fold down the tab on the locking washer (1) and
remove the nut holding the pinion to the vertical drive
shaft.
884267
884830
12. Use special tools 884267 and 884830 to remove
the pinion.
2
1
3
11a. Models 280 and 290 of earlier manufacture
and model SP: Fold down the tab of the locking
washer (1) and remove the round nut (2). Remove the
locking washer and the spacer ring (3).
88
Repair instructions
884381
884143
1
2
3
13. Lift out the pinion (1) and the needle bearing washer (2).
NOTE! The needle bearing is a full needle type of
bearing with loose needles (3). Remove all 27 needles.
15. Press (knock) off the outer ring of the needle bearing. Use special tools 884381 and 884143. Insert the
tool from underneath and the shaft from above.
1
14. Carefully lift off the lower gear housing from the
vertical drive shaft.
16. Press off the ball and roller bearings from the vertical shaft (against the frame of the press).
NOTE! Take care of the shims (1).
NOTE! There are spacer pads between the bearings.
89
Repair instructions
Assembly
Oil all moving parts and the screws prior to assembly.
884316
1
17. Should the needle bearing of the propeller shaft be
damaged, use special tool 884316 to remove it. Insert the puller into the needle bearing in a way that
the barbs of the puller end up at the backside of the
needles. Then tighten the puller forcing the barbs
apart and pull out the bearing.
1. Fill up with grease between the two sealing rings (1)
and press them home in the propeller bearing housing.
Use special tools 884283 and 9991801.
NOTE! Turn the sealing rings correctly. They are to
seal against the oil in the gear housing as well as
against water.
9991801
884283
18. Remove the bearing race on the propeller shaft by
cracking it. Clean all parts and check them for wear.
Replace parts if necessary.
NOTE! The gear wheels are sold in matched pairs in
order to obtain the correct contact pattern.
2. Install the needle bearings for the propeller shaft.
The side of the needle bearing carrying the description must be turned facing aft. Use special tools
884283 and 9991801.
90
Repair instructions
1
884266
1
3. Grease abundantly the outer race (1) with grease
and insert the 27 needles, well cleaned, into the ring
letting the grease hold them. Insert special tool 84385
in the bearing and insert the bearing from underneath
into the gear housing. Then install the special tool
884241 from above and pull the bearing into its seat in
the gear housing.
5. Install the spacer pad (1) on the ball bearing and
press on the roller bearing. Use special tool 884266.
3
1
The vertical shaft
2
884266
1
6a. Models 280 and 290 of earlier manufacture and
model SP: Install the spacer ring (1), the locking
washer (2) and the round nut (3) on the vertical shaft.
Tighten the nut.
NOTE! Don’t lock the nut with the washer just yet.
4. Press on the ball bearing on the vertical shaft. Use
special tool 884266.
NOTE! Install the ball bearing according to figure in a
way that the balls (1) become visible.
91
Repair instructions
1
6b. Models 280, 290 of later manufacture: Install the
thick spacer ring and tighten the plastic insert locknut.
Use a hook spanner wrench.
8. Install the vertical shaft with a 0.35 mm (0.14")
thick shims package (1) consisting of a paper shim
0.25 mm (0.01") between two metal shims 0.05 mm
(0.002") each.
884830
1
2
3
7. Insert the pinion (1) along with the washer (2) for
the needle bearing (3) into the gear housing.
9. Install the washer and the nut. Tighten the nut with
a torque of 160 Nm (118 lbf.ft.). Use special tool
884830 on the splined end as a counter hold.
NOTE! Don’t lock just yet.
92
Repair instructions
The propeller shaft
884140
884143
1
2
3
10. Remove the conical roller bearing race in the intermediate housing (if the old bearing can still be used).
Use special tools 884140 and 884143.
12. Install the oil deflector (1) and the locking ring (2)
on the gear wheel (3).
NOTE! Make sure that the two holes on the oil deflector coincide with the carrier pins (on sterndrives of earlier manufacture). On sterndrives of later manufacture
a load pin acts as carrier of the oil deflector.
1
11. Insert the bearing race on the roller bearing on the
lower gear housing and install the spanner tool
884348. Insert if necessary shims between the bearing race and the tool to prevent the vertical shaft from
moving axially. Tighten the spanner tool with two
screws and nuts.
13. Press on the bearing race (1) on the propeller
shaft (in case it has been dismantled).
93
Repair instructions
884263
3
884265
2
1
16. Install the locking washer (1) and the round nut
(2). Tighten the nut and lock it with the locking washer
(3).
14. Press on the gear wheel on the propeller shaft.
Use special tools 884265 and 884263.
Shimming
Method 1
B
884168
C
884265
2
1
F
G
15. Install the locking washer (1) and press on the ball
bearing (2). Use special tools 884265 and 884168.
NOTE! Install the bearing in a way that the recess in
the bearing races (for the insertion of the balls) is
turned facing the propeller.
94
1. The lower gear housing is stamped with a
‘F’-measurement (center vertical shaft – contact surface of the propeller bearing box), the propeller bearing box is stamped with a ‘G’-measurement (shoulder of the propeller bearing – contact surface of the
propeller bearing box). Add these measurements together.
Repair instructions
Method 2
1
2. The gear length is fixed at 5.85 mm (0.230"). Add
or subtract the plus or minus marking of the gear
wheel. Subtract from this sum the sum of the ‘F’ and
‘G’ measurements. The sum thus obtained denotes
the thickness of the shim.
3. Insert the 0.2 mm (0.008") shim (1) in the propeller
bearing housing. This is a value of experience.
NOTE! On some gear housings for instance the figures 03 can be stamped or some other figure. In
these cases add the number 5.00 to that of the
‘F’-measurement and the figure 1.00 to that of the
‘G’-measurement. Then the ‘F’-measurement ends
up being for instance 5.03 or some other measurement above 5 mm and the ‘G’-measurement for instance 1.03 or some other measurement above 1.0
mm*.
If the sum obtained does not coincide with available
shims, select the closest five – or ten – number. How
to calculate the shim thickness can be seen in the
following example:
Measurement ‘F’*
4.97 (0.195") stamped
*
+0.98 (0.039") stamped
Measurement ‘G’
5.95 (0.234") 5.95
Gear wheel
Gear wheel marking
5.85 (0.230") fixed
+0.04 (0.002") etched**
5.89 ....
Calculated sum always positive!
5.89
0.06 (0.002")
4. Install the propeller shaft along with bearings in the
gear housing. Be careful so that the bearing does not
end up obliquely in the bearing housing or that the
sealing rings are damaged. Make sure that the six
holes in the washer coincide with the screws. Insert
the nuts before the bearing is pushed home completely in the bearing box. Tighten the six nuts.
As per this example a 0.05 mm (0.002") shim is inserted between the propeller bearing box and the
propeller thrust bearing. Carry on according to points
4–12 below!
* These measurements are examples.
** Only the figure 4 is etched on the gear wheel
95
Repair instructions
2
1
5. Install the propeller shaft with its bearing box in the
gear housing. Tighten the screws with a torque of
40 Nm (29.5 lb.ft.).
NOTE! The two O-rings (1) on the bearing housing
should not be installed.
1
7. If the backlash is found not to be correct, adjust as
follows:
If the method 1 has been used: If the backlash is
too small, increase the shim thickness underneath
the ball bearing (1) and if the backlash is too big, decrease the shim thickness.
If method 2 has been used: If the backlash is too
small decrease the shim thickness in the propeller
bearing housing (2) and if the backlash is too big, increase the shim thickness.
6. Check the gear backlash and measure it directly
against the vertical splines shaft. The clearance
should be 0.06–0.10 mm (0.002–0.004") resulting in a
gear backlash of 0.15–0.25 mm (0.006–0.020").
8. Remove the screws and pull out the propeller shaft.
Coat the gear teeth of the gear wheel and the pinion
with marking dye. Then install the propeller shaft with
the bearing box in the gear housing. Tighten the
screws with a torque of 40 Nm (29.5 lb.ft.).
96
Repair instructions
884830
11. Should the contact pattern correspond to that of
picture “B”, reduce the shim thickness for the vertical
shaft and the propeller shaft.
9. Install special tool 884830 onto the splines end and
turn the gear in the set direction of rotation, clockwise
for left handed propeller. At the same time brake the
movement on the propeller shaft, as forcefully as possible.
Contact pattern
12. Should the contact pattern correspond to that of
picture “C”, increase the shim thickness for the vertical shaft and the propeller shaft.
NOTE! If the pinion is moved the gear wheel must be
moved correspondingly in order not to alter the gear
backlash.
10. Check that the contact pattern on the teeth surfaces of the drive side coincide with that of the picture
“A”, which is correct. The contact pattern should be
positioned in the middle of the tooth but displaced towards the small end.
97
Repair instructions
Final assembly
884830
1
1. Dismantle pinion and gear and clean parts from
marking dye and then assemble with the calculated
shims. Then install the spacer ring, the locking ring
and the nut on the vertical shaft. Tighten the nut and
lock with the locking washer. Use special tool
884830 as a counter hold.
3. Install the O-rings (1) in the propeller bearing housing. Coat the contact surfaces and the screws with
sealing compound, Volvo Penta part no. 1161099-5 or
Permatex® no. 3. Install the propeller bearing housing
in the gear housing and tighten the 2 Allen-head
screws.
NOTE! Turn the vertical shaft somewhat to allow the
gears to engage. Tightening torque 40 Nm
(29.5 lb.ft.).
1
2. Tighten the pinion nut with a torque of 160 Nm
(118 lb.ft.). Then lock the nut with the locking washer
(1). Use special tool 884830 applied at the splines
shaft end as a counter hold.
98
Repair instructions
Reconditioning the lower gear,
models 280-DP, 290-DP and DP
885192
Disassembly
1. Clean the sterndrive externally.
9992520
1
4. Install the suspension fixture 885192 in stand
99922520 and brace the lower unit in the stand.
2. Drain the oil by removing the screw (1), if not already drained in previous steps.
NOTE! Place a drain pan under the sterndrive. Tilt the
sterndrive all the way down to allow all the oil to drain.
3a. Models 280-DP and 290-DP: Remove the lower
gear from the intermediate housing (7 screws).
5a. Models 280-DP and 290-DP: Take care of the
spline sleeve (1), the oil strainer (5) and the -ring (2).
5b. Model DP: Remove the spline sleeve (1) and the
O-rings (2 and 3). Remove the spacer sleeve along
with the O-ring (4) and the oil strainer (5).
3b. Model DP: Remove the shift mechanism cover
and remove the 5 bolts holding the lower unit on the
intermediate housing. (Two bolts are inside the shift
mechanism cover.)
6. Remove the two screws holding the anode to the
lower unit.
99
Repair instructions
10. Install special tool 885197 on the inner propeller
shaft.
7. Remove the two Allen-head screws from the propeller bearing housing. Key width: 3/8”.
884802
884789
884161
8. Install special tool 884789 on the outer propeller
shaft. Using special tool 884161 with a slide hammer, remove the outer propeller shaft and bearing
housing.
11. Install special tool 884802 over the inner propeller
shaft. Add the washer and nut from tool 885197. The
slot in the end of the tool should face the pinion gear.
Tighten the nut until the shaft is extracted from the
forward gear. Use a 30 mm wrench.
1
885143
9. Remove the 2 O-rings (1) from the propeller shaft
housing. Discard the O-rings.
100
12. Brace special tool 884830 in a vise and place the
lower unit upside down in the tool.
Repair instructions
2
1
3
13. Remove the nut from the pinion gear.
Use a 23 mm wrench.
NOTE! Do not discard the nut. Put it aside for use in
the shimming procedure later.
14b. NOTE! Sterndrives model 280 and 290 of earlier
manufacture have a lock washer (1) and a round nut
(2) instead of a Nylock® nut. Knock down the locking
tab of the washer and remove the round nut with a
hook spanner wrench.
Remove the lock washer and the spacer ring (3).
884830
884267
14a. Lift the gear housing off the special tool and
place it back in the work stand. Remove the Nylock®
nut with a hook spanner wrench.
15. Install special tool 884267 on the vertical shaft.
Attach special tool 884830, and turn counter clockwise until the shaft can be lifted out of the lower unit
gear housing. Remove the tool from the shaft. Remove the shims from under the vertical shaft bearing.
NOTE! Be sure not to damage the shims! Save
them for use later in the assembly process.
101
Repair instructions
Inner propeller shaft
884797
16. Remove the pinion gear and the front gear from
the lower unit housing. The forward gear should be
free to remove from the housing with the forward bearing attached to the gear.
19. Press off the roller bearing from the propeller
shaft, using special tool 884797.
884794
NOTE! Take care of the shims.
Outer propeller shaft
884161
17. Remove the forward gear bearing outer race from
the lower unit, using special tool 884794 and slide
hammer 884161. Remove the shims from the housing.
NOTE! Be careful not to damage the shims! Save
them for use later.
884789
1
884831
884143
885226
20. Insert the shaft in special tool 884831. Install puller halves between the shaft and the special tool. Install special tool 884789 on the shaft to protect the
shaft during pressing operations. Press off the bearing
race.
WARNING! Do not use a knife puller or other,
similar tool to remove this bearing race. Such
tools may scratch the sealing surfaces of the
shaft (1) and result in water leaking into the
sterndrive.
18. Use special tool 885226 with handle 884143. Drive
the needle bearing from the lower unit gear housing.
102
Repair instructions
1
23. Remove the inner needle bearing and seals using
special tools 884803 and 884143. Install special tool
884789 to protect the propeller shaft threads.
NOTE! If you only want to replace the seals, it is still
easier to remove the seals along with the bearings.
21. Install a knife puller on the outer propeller shaft
roller bearing. Using a press, remove the roller bearing.
IMPORTANT! Make sure the sealing surfaces
(1) of the shaft are not damaged during the process!
Propeller shaft bearing box
884797
884832
22. Install special tool 884832 under the intermediate
bearing outer race. Insert handle 884143 to expand
the bearing tool. Press out the intermediate bearing
outer race from the rear propeller shaft gear.
24. Remove the O-rings from the propeller shaft bearing housing and discard. Using special tool 884797 to
press out the seals and needle bearings.
WARNING! Center the tool carefully. Locate a
pair of wooden blocks underneath the bearing
box to protect the bearing box. Always use new
seals and O-rings during final assembly.
103
Repair instructions
Vertical shaft
884796
9991801
25. Remove the outer bearing race using special tools
884796 and handle 9991801.
IMPORTANT! Center the tool carefully. Locate a
pair of wooden blocks underneath the bearing
box to protect the bearing box while pressing out
the bearing race.
27. Use a knife puller to remove the bearings one by
one or together.
IMPORTANT! Use spline socket 3850598 to
protect the splines when pressing off the
bearings
Forward gear
28. NOTE! There is a spacer pad (1) located between
the roller bearing and the ball bearing. This spacer
pad, however, is smaller than the spacer ring located
above the roller bearing. See point 14b.
26. Use a knife puller to press off the front roller bearing from the gear.
29. Remove the ball bearings. Use a knife puller.
104
Repair instructions
NOTE! When calculating the shim thickness for the
lower unit gears, remember:
The lower unit gear housing nominal dimension
has two values:
If the stamped number is 50 or more, use the lower
nominal value: 60.00 mm.
If the stamped number is 49 or less, use the higher
nominal value: 61.00 mm.
Example:
Stamping is 50 or more:
“G”-stamping: 85 =
30. Check the bearing race. Replace as necessary,
using a knife puller. Clean and check all parts for
wear.
Use Nominal Dimension =
“G”-measurement
00.85 mm
+60.00 mm
60.85 mm
Stamping 49 or less:
“G”-stamping: 02 =
Assembly
Use Nominal Dimension =
“G”-measurement
00.02 mm
+61.00 mm
61.02 mm
Shimming the front bearing
1. Find the “G”-marking on the parting plane of the
lower gear housing.
2. The nominal height of the bearing is 20.85 mm
(0.821”).
Only the decimals of the “G”-marking are stamped into
the gear housing. In this case, the “G”-stamping is 85.
The nominal value of the “G”-measurement is
60.00 mm. Add 60.00 and 0.85, which yields 60.85.
NOTE! The front and rear roller bearings are different
and must not be mixed.
105
Repair instructions
1
3. The nominal measurement of the forward gear is
39.50 mm. The tolerance (±) is engraved on the gear.
All engraved numbers are decimal millimeters. In this
instance, “-10” equals -0.10 mm. The real measurement of the gear is 39.50 - 0.10 = 39.40 mm.
884793
Add the height of the forward roller bearing to the real
measurement of the forward gear:
Add:
Roller Bearing =
20.85 mm
Forward Gear =
+ 39.40 mm
Total forward gear length
60.25 mm
This sum should be subtracted from the
“G”-stamping resulting in a shim thickness for the
front bearing:
G-measurement
Total forward gear length
Shim Thickness =
4. Lubricate the bearing position before assembly.
Place the calculated shim thickness in the gear housing and install the outer bearing race (marked 30209)
with special tool 884795.
NOTE! The plastic disk (1) should be pressed as far
in as possible on the tool.
60.85 mm
- 60.25 mm
00.60 mm
884801
5. Press on the front roller bearing onto the forward
gear. Use special tool 884801. Use special tool
884797 to protect gear teeth.
106
Repair instructions
884793
884263
8. Press a new inner bearing race onto the vertical
shaft. Use special tool 884793.
884799
6. Use special tool 884263 to press the gear and bearing assembly onto the propeller shaft. Use special tool
884799 to protect the bearing.
WARNING! Do not press on by using the
bearing race!
884266
Shimming the vertical shaft
9. Press a new ball bearing onto the vertical shaft
special tool 884266.
864241
NOTE! Install the bearing so that the thick part of the
inner race faces up.
884266
884792
1
7. Grease the bearing location. Carefully align the needle bearing when installing it in the gear housing.
Use special tool 884792 in combination with 884241.
Turn the bearing to allow the tool 884792 to press
against the text on the bearing. Tighten the screw
until the bearing bottoms.
10. Place the thin spacer pad (1) on the ball bearing
press on the roller bearing. Use special tool 884266.
107
Repair instructions
11a. Sterndrives model 280 and 290 of earlier manufacture:
Install the thick spacer ring (1), the locking washer (2)
and the round nut (3) on the vertical shaft.
NOTE! Install the nut with the even side facing upwards. Tighten the nut but don’t lock it with the washer. Use a hook spanner wrench.
12. Find the “H”-marking on the parting plane of the
lower gear housing. The “H”-stamping in this instance
is 37. Remember, the stamping is in hundreds of millimeters. The nominal “H”-measurement is 277. Add
the “H”-stamping to the nominal dimension of 277. The
sum will be 277.37 mm.
Add:
“H”-Nominal
277.00 mm
“H”-Stamping
+00.37 mm
“H”-Measurement
277.37 mm
11b. Sterndrives model 280 and 290 of later manufacture and sterndrives model DP:
Install the thick spacer ring and tighten the plastic insert locknut. Use a hook spanner wrench.
13. Find the marking on the pinion gear. In this instance the pinion etching is -5. Remember, the etching is in hundreds of millimeters. This etching is -0.05
mm. The nominal measurement of the pinion gear is
60.00 mm. Subtract the pinion gear etching from the
nominal measurement for a difference of 59.95 mm.
108
Repair instructions
14. The nominal measurement of the vertical shaft is
217.75 mm. This measurement is added to the calculated pinion measurement of 59.95 mm. This combined distance equals 277.70 mm, as illustrated below:
Add:
Vertical Shaft Nominal
217.75 mm
Pinion Calculated
+59.95 mm
Vertical Shaft Calculated
277.70 mm
Subtract the “H”-stamping dimension from the Vertical Shaft Calculated (277.70 mm) to arrive at the
shim thickness:
Subtract:
Vertical Shaft Calculated
16. Place the calculated shim thickness (1) in the
gear housing. In this case, it is 0.33 mm. With one
hand, hold the pinion gear and the original pinion gear
nut in the gear together in the housing.
277.70 mm
“H”-Measurement
- 277.37 mm
Calculated Shims
0.33 mm
15. Place the propeller shaft with gear installed in the
gear housing.
17. Center the pinion gear and nut carefully; then, with
the other hand, install the vertical shaft.
NOTE! The groove of the nut must face the pinion
gear.
Install the nut on the vertical shaft.
NOTE! A new nut must be used for final assembly.
109
Repair instructions
18. Hold the pinion nut with a 23 mm socket. Use special tool 884830, or 3850598 as an alternative, and a
torque wrench. Torque the vertical shaft to 110 Nm
(81.5 lb.ft.).
WARNING! Be careful not to allow the
counter-hold wrench to damage the lower gear
housing. Use a piece of soft wood to brace the
wrench and protect the housing while applying
torque to the pinion nut.
20. Find the stamping “C” on the bearing box. In this
case, “C”=25. Again, the stamping is in decimal millimeters. The nominal dimension for the bearing box
is 19.00 mm. Add the “C”-stamping to the nominal dimension to get the “C”-measurement.
Add:
Shimming the bearing box
“C”-nominal
19.00 mm
“C”-stamping
+ 0.25 mm
“C”-measurement
19.25 mm
Now subtract the “C”-measurement from the
“F”-measurement.
Subtract:
“F”-measurement
79.91 mm
“C”-measurement
- 19.25 mm
Aft gear bearing location
19. The nominal dimension of the “F”-measurement is
80.00mm ±0.10 mm. Figures between 90 and 99 are
stamped into the lower gear housing indicating the
amount of variation from nominal that the housing is
machined. When the “F”-stamping is between 90 and
99, add 79.00 mm to the figure. If the “F”-stamping is
between 00 and 10, add 80.00 mm to the figure. In
this case, the “F”-stamping is 91. Add 0.91 to the
nominal figure of 79.00. The sum for the
“F”-measurement is 79.91.
110
60.66 mm
Repair instructions
Shimming the outer propeller shaft
23. Add the gear measurement to the bearing nominal
dimension.
Add:
Gear measurement
Nominal bearing height
Total aft gear dimension
+10
39.60 mm
+ 20.75 mm
60.35 mm
Now subtract the total aft gear dimension from the
bearing box location.
Subtract:
21. The nominal measurement of the aft gear is
39.50 mm. Find the variation marking on the gear. In
this case it is +10. Remember, hundreds of millimeters only!
“C”-measurement
Gear dimension
Bearing box shims
60.66 mm
- 60.35 mm
0.31 mm
Add:
Gear nominal
39.50 mm
Gear marking
+0.10 mm
Gear measurement
39.60 mm
884795
22. The nominal bearing height is 20.75 mm.
NOTE! The forward and aft gear bearings have
different nominal dimensions by 0.10 mm. DO NOT
mix them up.
24. Grease the bearing location with propeller shaft
grease and insert the calculated bearing box shims
from the previous step (0.31 mm). Install the bearing
race using special tool 884795.
For the aft bearing, make sure that the inner bearing
race is marked BK-358X and the outer bearing race is
marked K354X.
Installing the bearings in the wrong location will cause
incorrect lower unit gear contact patterns, incorrect
bearing preload, and shorten gear life.
111
Repair instructions
27. Now add the front and rear gear shims.
Add:
Forward gear shims
884797
Aft gear shims
0.60 mm
+ 0.31 mm
0.91 mm
Add nominal value
+ 120.00 mm
120.91 mm
The shim thickness is obtained by subtracting:
Subtract:
25. Turn the bearing box over. Use special tool
884797, install the needle bearing in the bearing box.
Make sure the bearing marking is facing the tool.
121.51 mm
- 120.91 mm
Intermediate bearing shim
0.60 mm
Shimming the intermediate bearing
26. Start by adding the “F”-measurement and
“G”-measurement.
Add:
“G”-measurement
60.85 mm
“F”-measurement
+ 79.91 mm
884797
140.76 mm
Now subtract the “C”-measurement of the propeller
bearing box.
Subtract:
“F” and ”G” combined
140.76 mm
“C”-measurement
- 19.25 mm
121.51 mm
112
28. Press the bearing race into the aft gear. Use special tool 884797.
Repair instructions
884806
29. Press the needle bearing into the propeller shaft
with the text on the bearing turned facing the tool. Use
special tool 884806. Press the tool until it bottoms.
32. Apply marking dye on the convex side of the aft
gear. Place the calculated shims for the intermediate
bearing and the intermediate bearing on the inner propeller shaft. Install special tool 885197 onto the
threads until the tool bottoms.
884798
NOTE! Do not install the seal rings, wait until the gear
tooth clearance and contact pattern are checked.
33. Install special tool 884798 on the propeller shaft
with the washer and nut. Using a 30 mm wrench, tighten the nut until the intermediate bearing bottoms. Use
special tool 884830 or 3850598 and a wrench as a
counter hold on the vertical shaft. After the intermediate bearing is pressed on completely, remove the
special tools from the propeller shaft.
30. Press the roller bearing onto the propeller shaft.
Use special tool 884801.
34. Coat the convex side of the aft gear with marking
dye. Insert the gear assembly onto the inner propeller shaft.
31. Press the inner needle bearing race onto the propeller shaft. Use special tool 884801.
113
Repair instructions
884348
B
35. Grease the bearing box and install on the lower
unit. Tighten the allen bolts to 40 Nm (29 lb.ft.).
37. Using a depth gauge, measure “B” in special tool
884348. Subtract measurement “A” from measurement “B”.
B – A = positive result ( clearance dimension)
B – A = negative result (preload)
Tolerances: Max. allowed clearance dimension
0.05 mm (0.002”)
Max. allowed preload 0.02 mm (0.0008”)
A clearance dimension of 0.02 mm (0.0008”) shall be
aspiring to attain. When a clearance dimension is
reached, shims shall be added according to the following example:
Example:
Measurement “B”
10.02 mm
Measurement “A”
– 9.78 mm
+ 0.24 mm
( clearance dimension)
A 0.24 mm shim should be placed on the outer bearing race. This will give a remaining play of 0.04 mm
(0.0016”) which is within the tolerances.
A
36. Place the outer bearing race on the vertical shaft
roller bearing and hold it steady in position. Use a
depth gauge to measure the height of the bearing assembly “A.” Note this dimension.
114
884348
38. Insert the bearing race on the vertical shaft roller
bearing. Install shims between the bearing race and
the special tool to prevent the bearing from moving
axially. Install special tool 884348. Tighten the special
tool with two screws and nuts finger tight to prevent
axial movement but not enough to preload the vertical
shaft.
Repair instructions
Checking preload
Checking backlash
Propeller Nut
39. After calculating the shims required according to
points “A” and “B”, place the calculated shim on top
of the bearing race and install special tool 884830 on
the vertical shaft. Use torque gauge 9999177 and
turn the shaft one revolution per second. The minimum preload value should be 1.2 Nm (10.6 lb.ft.)
and maximum preload value should be 2.3 Nm
(20.3 lb.ft.).
If the preload is too high, the shim thickness on top
of the bearing race should be reduced.
If the preload is too low, the shim thickness on top of
the bearing race should be increased.
Slack in the propeller shaft
41. Lock the vertical shaft to prevent it from being
turned. Install Duoprop propeller nuts and or cone on
the propeller shafts. Rig a dial indicator gauge against
the wings of the rear nut as far out on the wing as
possible. Check the flank clearance of the front gear
by turning the propeller shaft (both ways) by hand to
check the backlash. The clearance at the wing should
be 0.08–0.17mm (0.003–0.007"), which results in a
clearance of 0.15–0.30mm (0.006–0.013") at the gear.
Propeller Cone
1
40. Install tool 884941 on the tubular shaft (until it bottoms on the shaft). Tighten screw (1) on the tool and
then slide a dial gauge into the tool. Turn the shaft
one turn and read the run-out on the dial gauge. The
run-out must not exceed 0.07 mm (0.0027"). To measure slack in the propeller shaft, press the shaft towards and away from the dial gauge while you read off
the bearing slack. Turn the shaft to different positions
and read off each time. Bearing slack must not exceed 0.03 mm (0.0012").
42. If the rear propeller is locked with a propeller cone,
measuring the gear backlash must be done the same
way as when measuring using the propeller nut.
The only difference is that the measuring must be
done 8 mm (0.315") in from any of the tips of the
cone’s wings, and towards the propeller shaft center.
The measuring is done at the same radius from the
propeller shaft center as when measuring is done on
the propeller nut.
115
Repair instructions
884795
43. Move the dial indicator gauge to the outer nut.
Measure the backlash of the rear gear the same way
as the front gear. The clearance should be 0.15–
0.27 mm (0.006–0.010”), which is 0.20–0.35 mm
(0.008–0.014”) at the gear.
45. Turn the vertical shaft both ways. Use the spline
sleeve 884830 while applying braking action.
Contact Pattern
2
1
1
3
4
44. If it is necessary to increase the backlash
without changing the contact pattern, shims must be
removed from the front and rear gears (1) and shims
must be added under the vertical shaft (2) to
compensate the play.
Add the shim thickness corresponding to that
removed from gears (1) to the bearing (3) to maintain
preload.
If the backlash needs to be reduced remove shims
from gear (3) and add corresponding shim thickness
to gears (1). Compensate by reducing shim thickness
under the vertical shaft (2).
Earlier models: If new shims are installed, place
shims underneath the bearing (3). If old shims are reinstalled place the shims under the bearing race in
position (4).
116
46. Remove the special tool and propeller shaft bearing box. Check the contact pattern on the gear wheel.
Also check the front gear wheel inside the gear housing. The contact pattern should be located towards
the big end with a slight displacement toward the root
of the tooth (“A”).
Repair instructions
Final assembly
47. If the contact pattern is toward the root of the
tooth and at the big end, the shims should be increased under the front and rear roller bearing (1, figure under point 44). To maintain correct bearing
preload, reduce the shims under the intermediate
bearing (3) by a corresponding amount. To maintain
the correct backlash, increase the shims under the
vertical shaft ball bearing (2).
48. If the contact pattern is too far toward the top of
the tooth and toward the small end, reduce the shim
thickness for under the front and rear roller bearing (1,
figure under point 44). To maintain proper bearing
preload, increase the shim thickness correspondingly
under the intermediate bearing (3). To maintain the
correct backlash, decrease the shim thickness under
the vertical shaft ball bearing (2).
1. After the correct preload, backlash, and contact
pattern have been obtained, remove the preload tool
and tighten the vertical shaft nut. Remove the bearing box and outer propeller shaft.
2. Remove and discard the old pinion gear nut.
Grease the threads of the vertical shaft. Install a new
nut with the groove against the pinion gear. Tighten to
110 Nm (81 lb.ft.).
117
Repair instructions
884975
884976
1
3. Grease the new seal rings and install in the propeller shaft. Turn the steel edge (1) facing forward. Use
special tool 884975. Turn the broad shoulder against
the seal ring. Press until it bottoms.
6. Insert the protective ring 884976 into the outer
propeller shaft seals so that the seal lips are protected
during installation.
7. Carefully insert the outer propeller shaft in the gear
housing. Remove the seal protector.
4. Turn the tool over and press in the “single lip” seal
ring. Turn the spring facing aft. Press until it bottoms.
884807
884801
8. Install seal protector 884807 in the bearing box to
protect the seal during installation.
5. Grease the seal rings and install in the bearing box
with the springs facing away from each other. Use
special tool 884801. Press until it bottoms.
118
Repair instructions
1
9. Install new O-rings (1) on the bearing box. Coat the
entire sealing surface and O-rings with Volvo Penta
part no. 1141570-0 sealant. Install the bearing box in
the gear housing.
12. Install the zinc ring on the lower gear housing.
Check to make sure that the contact surfaces are
clean and there is a good electrical contact.
An ohmmeter may be used to ensure there is little or
no resistance between the zinc ring and the lower unit
housing.
For more detailed information about Electrochemical
Corrosion, what causes it and how to prevent it, consult publication 7733534-7, Marine Electrical Systems available from Volvo Penta.
10. Tighten the bolts to 40 Nm (30 lb.ft.).
11. Remove the seal protector (1) when the bearing
box has been installed and tightened. Clean off any
excess sealing compound.
119
Repair instructions
Shimming the lower gear to the
intermediate housing
884168
A
3. Press the outer race of the vertical shaft bearing
with the calculated shims into the intermediate housing. Use special tool 884168.
1. Place the bearing race on the bearing and hold in
position. Using a depth gauge, measure the bearing
height above the lower unit parting plane “A”.
B
2. Using the depth gauge, measure the measurement
“B” in the intermediate housing .
Subtract measurement “A” from measurement “B”.
B – A = positive result ( clearance dimension)
B – A = negative result (preload)
Tolerances: Max. allowed clearance dimension
0.05 mm (0.002”)
Max. allowed preload 0.02 mm (0.0008”).
For calculation of shims see point 37 on page 114.
120
4. Insert the oil strainer (5) into the lower gear housing. Check that the spacer sleeve (4) is provided with
an O-ring. Use new O-rings (3) and (4). Install the
spline sleeve (1) on the vertical shaft with the groove
in the up position. Coat the contact surfaces with a
thin coating of Volvo Penta part no. 1141570-0 sealant.
Repair instructions
5. Use new screws and washers. Coat the screw
threads with thread locking compound, Volvo Penta
part no. 1161053-2, or Loctite® 243.
Tighten the 4 larger screws diagonally and in sequence with a torque wrench to 38 Nm (28 lb.ft.). Use
special tool 885008. Tighten the 3 smaller screws to
15 Nm (11 lb.ft.).
280 drives:
Earlier 280 drives do not have washers while later versions do. Both versions of the 280 drive shall always
have washers fitted to all bolts between the lower and
intermediate housing when overhauling. Tightening
torque; see above.
290 drives:
All production 290 drives have washers fitted. Tightening torque; see above.
121
Repair instructions
Shimming the upper gear to the
intermediate housing
B
mm
-A
mm
Clearance
mm
+ 0.06
mm
Shims Required
mm
3. Subtract the upper gear head bearing thickness (A,
figure under point 1) from the intermediate housing
measurement to find the bearing clearance. Add
enough shims to take up the clearance plus 0.06 mm
shim to preload the upper gear head bearing.
1. Measure the distance from the bottom of the upper
gear housing to the top of the outer bearing race (A).
Record the measurements in the table below.
NOTE! The shift mechanism must be in neutral (if installed) to achieve and accurate measurement.
2. Measure the distance from the top of the intermediate housing and the upper gear head lower bearing
outer race seat. (B). Record the measurement in the
table below.
122
Apply a light coating of Volvo Penta part no. 1141570
sealant to the mating surfaces of the intermediate
housing and the upper gear head. Install the upper
gear head on the intermediate housing with the calculated shims in place.
4. Install the splines sleeve (1) on the vertical drive
shaft and the O-ring (2) plus the shims calculated
under point 2 (3) on the intermediate housing.
Check to make sure that the O-ring (4) for the spacer
sleeve is properly in its location. The contact surfaces
have to be coated with sealing compound, Volvo
Penta part no. 1161099-5 or Permatex® no. 3.
Repair instructions
1
7. Install the shift linkage rod, washer and cotter pin.
5. Install the O-ring (1) on the upper gear.
WARNING! Always use a new cotter pin. Never
reuse a cotter pin that has been removed.
2
1
885009
3
885008
6. Install the upper gear housing on the intermediate
housing. Use new Allen bolts (1, 2 pcs), washers (2,
2 pcs) and nyloc nuts (3). Many drives do not have
washers under the bolt heads. When overhauling
however, washers shall always be fitted. This applies
to all drives. Apply some grease to the Allen bolt and
stud threads, and to the contact faces of the nuts and
washers. Tighten the screws and nuts in diagonal
sequence and evenly all around and with a torque of
38 Nm (28 lb.ft). Use tool 885008 and 885009.
123
Repair instructions
Pressure and vacuum testing
Before filling the drive with gear oil, it must be pressure and vacuum tested to verify proper sealing during
assembly.
a) Connect a pressure tester 3810152 to the drain hole
and pressurise the drive to 21–35 kPa. Turn the propeller shaft(s) and the drive shaft universal joint to
check for tightness. If any pressure loss is indicated,
use a soapy water solution, or dip the drive into water
to find the leakage point. Do the necessary repairs
and then repeat the test.
b) If no pressure loss is indicated, increase the pressure to 110–124 kPa. Again use a soapy water solution or dip the drive to find the leakage point if the
drive looses pressure. Do the necessary repairs and
then repeat the test. The drive must hold its pressure
before the vacuum test is done, and must not loose
more than 7 kPa in 3 minutes.
Pressure/vacuum test the drive as follows:
1. Remove the drain plug and drain the oil from the
drive. If the drive has not been used for some time, a
small amount of water can run out (a few drops). If the
drive has been used in the previous few days, it can
be more difficult to observe a small amount of water.
2. Please refer to chapter Technical Data for the
correct tightening torques for the upper gear housing,
intermediate housing and lower gear housing.
3. Remove the drain plug and screw the dipstick with
O-ring back into the upper housing.
124
c) Connect a vacuum tester 3858578 to the drain hole
and evacuate the drive to 10–17 kPa (75–125 mm
Hg). Turn the propeller shaft(s) and the drive shaft universal joint to check for tightness. If the drive can not
hold its vacuum, apply thick oil along the joint surfaces to find the leakage point. The oil is sucked in at the
leakage point and when the joint is subsequently taken apart, the oil is visible on the sealing surface (gasket). Do the necessary repairs and then repeat the
test. No loss of vacuum must occur during the test.
d) If no vacuum loss is indicated, increase the vacuum to 47–54 kPa (355–405 mm Hg). Apply a new film
of thick oil to find the leakage point if the drive does
not hold vacuum. Do the necessary repairs and then
repeat the test. The drive must not loose more than
25 mm Hg (3.4 kPa) during 3 minutes.
Repair the leak and retest the unit.
NOTE! Do not fill the drive with oil unless it passes
both the pressure test and the vacuum test.
Repair instructions
Installing the sterndrive
Models 280 and 285
There are 2 types of exhaust bellows. One type with
an exhaust valve and one without. The exhaust bellows with an exhaust valve installed should be used
on sterndrives not having a rubber exhaust flap installed on the exhaust outlet in the cavitation plate.
Otherwise exhaust bellows without exhaust valve
should be installed.
IMPORTANT! When using an exhaust bellows
with built-in flaps, make sure that the flaps are
opening/closing horizontally. Furthermore
check that the bellows is installed with the
drainage hole pointing downwards.
1. Install new rubber bellows for the through-hull exhaust (1) and the universal joint (2). Use special tool
884936. Connect the cooling water hose (3) between
the transom shield and the sterndrive.
NOTE! The cooling water hose is marked ‘engine’ at
the end to be connected to the transom shield.
Check to make sure that the hose clamps are well
tightened to avoid water leaking into the boat. Use
the flexible screwdriver 884573 to tighten the clamps.
2. Check to make sure that the hole in the suspension
yoke for the push rod is chamfered. The chamfer
should be 1 mm × 45° (0.004" × 45°) to prevent the
thrust washer of the lifting device to deform the edges of the hole when tilting the sterndrive. In case the
thrust rod is jamming in the hole, the sterndrive will
kick up when put in reverse. Should this happen,
push down the push rod and adjust the chamfer.
3. Put the sterndrive in front of the transom shield.
Block it from underneath to align it heightwise with the
transom shield. As an alternative the special tool
884521 can be used. Insert the shift cable (1) in the
sterndrive.
125
Repair instructions
4. Hang the hose clamp for the rubber bellows of the
universal joint on the “neck” of the gear housing.
Grease the splines of the universal joint and those of
the shaft with grease. Push the sterndrive gently
against the drive shaft. Turn simultaneously the universal joint to allow the shaft splines to find the corresponding female splines of the joint more easily.
NOTE! Be careful during the assembly not to damage
either splines thus making the mating more difficult.
Install the two plastic bushings (2, figure under point
1) in the holes of the suspension yoke. Grease the
shaft journals (4) with grease or Molycote.
Insert the sterndrive suspension yoke into the transom shield and align it to allow the shaft journals to
be pushed into the holes of the yoke. Turn the shaft
journals to allow the locking screws (5) to be installed. Tighten the locking screws.
6a. Sterndrives of later manufacture:
Lower the steering helmet and grease the ‘attachment
bolt’ with grease. Turn the recessed holes facing
outwards.
Then push home the ‘attachment bolt’ into the helmet
and center it so that the two Allen-head screws can be
tightened.
Tightening torque: 35 Nm (26.25 lb.ft.).
Prior to the tightening, grease the threads of the
screws with grease. In order to be able to turn and
center the ‘attachment bolt’ screw holes, the screws
must be installed in the holes marked (1). Then the
‘attachment bolt’ can be turned.
6b. Sterndrives of earlier manufacture:
Lower the steering helmet and tighten the tapered
locking screw (6) in figure under point 3, in the upper
gear housing.
Tightening torque: 50–60 Nm (37.5–45 lb.ft.).
5. Attach the universal joint bellows to the sterndrive.
Locate the hose clamp in such a way that its tightening screw (1) ends up on the underside of the bellows. Check to make sure that the bellows is correctly installed and tighten the clamp. Use a flexible
screwdriver, special tool 884573.
Tighten the clamp so as to avoid water leaking into
the boat. Hang on the hose clamps for the exhaust
bellows and the cooling water hose. The tightening
screw on the cooling water hose must be located two
o’clock of the hose (2).
The tightening screw for the exhaust bellows must be
turned pointing at 6 o’clock, (3). The picture reflects
the correct positioning of the hose clamps.
Test by turning the sterndrive from one side to the
other and check thereby that the clamps do not
interfere with the sterndrive nor that they chafe
against and thus damage close by hoses.
126
Install the locking plate (7) in figure under point 3, for
the shift cable in a way that it is locking in the groove
of the cable.
Repair instructions
Checking and adjusting
controls
Then push the sterndrive forwards against the adjusting pin and check that the upper end of the push rod
(3) does not touch the thrust plate of the lift device.
The lifting device (1), when tilting, will disengage the
retaining pawl. The retaining in the adjusting pin of the
retaining pawl is checked by first pulling the sterndrive
backwards and then in the two outer positions.
Then check that the electromechanical lifting device
(1) when tilting the sterndrive will release the retaining
pawl from the adjusting pin. With the sterndrive fully
lowered and with the adjustment pin in the innermost
position there should be a safe clearance between the
thrust plate of the lifting device and the retaining pawl
push rod.
7. Check that the control lever and the shift lever of
the sterndrive both are in a neutral position. Remove
the locking nut for the shift yoke (11) and turn the
yoke on the thread of the shift rod (10) in a way that it
gives the retaining pawl rod (6) at the connection to
the shift lever such a position that it will touch (without
pressing against) the yoke of the retaining catch at
“A”.
Lock the yoke (11) with the locking nut in this position.
8. Check the retaining pawl clearance as follows:
Push the sterndrive forwards and hold the retaining
pawl in this position. Then push the sterndrive backwards and check that the retaining pawl does not hook
up on the adjustment pin.
Checking the retaining pawl
when test running
NOTE! The retaining pawl rod (6) is not permitted to
have an axial play.
Install the locking nut and the swivel on the shift cable. Adjust the swivel (9) of the shift cable (7) so that
is easily will enter the hole on the shift plate.
Push the control lever to the forward position and
check that the corner “C” on the shift plate (8) does
not touch the housing.
Pull down the retaining pawl against the stop
shoulders on the bearing and remove the stop nut on
the thrust sleeve (2).
Adjust the sleeve with the retaining pawl still pulled
down so that the sleeve becomes level or maximum
0.5 mm (0.020") under the contour “B” of the yoke.
Lock the thrust sleeve and the counter nut with
locking compound, Volvo Penta part no. 1161053-2.
NOTE! Earlier the thrust sleeve was locked only with
the counter nut. However, from sterndrive serial no.
PZ 2813853 it is also locked with locking compound,
Volvo Penta part no. 1161053-2. Adjustment afterwards is seldom necessary as the retaining pawl is
adjusted at the time of delivery.
9. Pull the sterndrive backwards so that the spring
catches of the retaining pawl engages the adjusting
pin.
a)
Check that the retaining pawl touches the underside of the adjusting pin. If it doesn’t probably
the counter nut of the thrust sleeve is incorrectly
adjusted or the push rod might be deformed.
b)
Check to make sure that there is a full overlap
between the shoulders of the locking yoke and
the stopping surface of the spring catches (5)
when the shift is in the reverse position.
c)
The clearance between the shoulders of the
locking yoke and the stop surface of the spring
catch in neutral position should be approx. 2 mm
(0.08") “F”.
127
Repair instructions
Oil filling
1. Install the oil drain plug with a new O-ring.
Installing a ‘short hub’ type of
propeller (B)
1.
Grease the propeller shaft with a thin layer of
grease.
2.
Install the fishing line deflector (5, figure on previous page).
Tighten the fill plug to 35 Nm (26 lb.ft.).
3.
Install the propeller.
Lower the sterndrive and check the oil level with the
dipstick. If necessary, Top off the sterdrive with oil
through the dip stick hole.
4.
Alternative 1: (Threaded hole in the propeller
shaft center). Insert the plastic washer (3).
2. Tilt the sterndrive to the full up position. Remove
the fill plug and fill with approx. 2.2 liters of gear oil.
See Technical Data. Install the fill plug with a new
gasket.
Alternative 2: (No threaded hole in the propeller
shaft center). Insert the folding washer (4).
3. Install the shift mechanism cover.
5.
Install the spacer ring, (2).
6.
Install and tighten the propeller cone (1).
7.
Alternative 1: Install and tighten the center
screw.
Alternative 2: Fold the washer (4) against the
spacer ring (2).
Propeller installation
NOTE! The sterndrive model 280B, ratio 1.61:1, is
different from model 280D and model 270, ratio
2.15:1. The difference is to be found in the fact that
the propellers have ‘long hubs’ and ‘short hubs’ respectively. See the picture.
NOTE! Short hub propellers (folding washer and cone)
will be replaced by long hub propellers (plastic washer,
cone, center bolt). When installing long hub propellers
on older sterndrives, the propeller shaft must be drilled
and tapped for use of cone with center bolt.
On propellers of earlier manufacture the propeller cone
is locked by a folding washer and on propellers of later
manufacture the cone is locked by a locking screw
through the center of the cone.
Installing a ‘long hub’ type of
propeller (A)
1.
Grease the propeller shaft with a thin layer of
grease.
2.
Install the fishing line deflector (5).
3.
Install the propeller.
4.
Install the plastic washer.
5.
Install the propeller cone (1) and tighten it.
6.
Install and tighten the center screw.
128
Use drill jigg 885149 to drill the propeller shaft eliminating the need to remove the shaft from the drive unit
as follows:
1.
Install drill jigg on propeller shaft.
2.
Drill a 6.5 mm (0.255”) hole to a depth of 20 mm
(0.787”). Use cutting oil to cool shaft. Clean thorougly.
3.
Usa a 5/16”-18 UNC taps to thread shaft. Clean
thorougly.
4.
Install propeller, plastic washer, cone and center
bolt. Torque: cone = 110 Nm (81 ft.lb.), bolt =
22 Nm (16 ft.lb.).
Repair instructions
The Duoprop, earlier model
Check the speed range of the relevant boat and select
the correct propeller. See Propeller recommendations.
Changing the direction of the
propeller rotation
NOTE! The propellers are supplied matched in pairs
and must not be mixed.
Install the propellers as follows: Grease the propeller
shaft and install the fishing line deflector (1) and the
propeller (2). Then install the folding washer (3) and
the nut (4). Tighten the nut in a way that any of the
tabs of the folding washer can be folded into the corresponding recesses of the nut. Then install the second fishing line deflector (5) and the propeller (6),
which is locked with the nut (7). Insert a washer (8)
on the screw (9) and tighten the screw in the propeller shaft center.
Marking:
The propellers are marked on the hub side with
the part number and a size code from A1 to A10.
The upper gear is designed in a way it does not have
to be changed if you want to change the propeller rotation.
With the standard rotation – left hand rotating propeller
– the lower gear wheel is operating as ‘forward’ gear
and the shift rod is located in accordance with ”A” on
the picture. With a right hand rotating propeller the upper gear wheel is operating as ”forward” gear and the
shift rod is located in accordance with ”B” on the picture.
In order to reverse the rotation the shift rod between
the yoke (3) and the lever (1) on the shift mechanism
must be moved as follows:
a)
Remove the cover over the shift mechanism.
b)
Move the shift rod 2 from position ”A” to ”B”.
NOTE! Changing the direction of rotation by reversing the levers in the control is strictly forbidden. With
a left hand as well as with a right hand rotating propeller, the shift cable movement is ”pushing” in position ”forward”. Check and adjust the control in accordance with chapters Checking and adjusting controls, page 127 and Checking the retaining pawl
when test running, page 127!
129
Repair instructions
The electro-mechanical
sterndrive tilting device,
model 280/285
Install the overload circuit breaker as follows:
Install the overload circuit breaker (1) on the transom, close to the sterndrive tilting device. Remove
the minus wire (earth), (blue), from the flywheel
housing sufficiently to allow the wire to be connected
to the overload circuit breaker and then back to the
flywheel housing. Cut the wire and connect two terminals (2). Install the minus wire (earth) to the flywheel housing.
Repair instructions
Operating failures of the sterndrive tilting device can
be caused either by electrical or mechanical faults.
Below we deal with 2 examples of electrical faults and
1 mechanical fault.
1a. Overheating the electrical motor
Avoid running the sterndrive up and down repeatedly.
Such operation can cause over-heating of the electrical motor. The built-in overheating cut-out switch is
being released when the motor temperature reaches a
certain value. If the over-heating switch has been released, the electrical motor has to cool down (approx.
½ an hour) before the tilting device can be operated
again.
1b. Burnt electrical motor
If the tilt motor is operated too long after the sterndrive has reached its top position, the motor can
burn. To avoid this an overload circuit breaker can be
installed on the transom.
NOTE! On sterndrives of later manufacture this overload circuit breaker is standard equipment.
130
130
Repair instructions
1c. Mechanical fault
Checking after reconditioning
Check to make sure that the cover does not press
against the limit switch by removing the cover and
testing the function of the tilting device. If the tilting
device functions with the cover removed but not with
the cover installed, remove part of the cover over the
limit switch, pressing on the switch. Check the clearance between the cover and the limit switch.
Check after the installation that the tilt and retaining
pawl mechanism function properly. When tilting, the
tilting device should release the retaining pawl completely from the adjusting pin prior to tilting the sterndrive. Adjust the push rod length in accordance with
point 7 page 127.
Reconditioning the tilting device
1.
Remove the cover and remove the limit switch
(37, fig. on previous page) and the bracket with
the relays (35) and (36).
2.
Remove the nuts and the electrical motor (22).
3.
Remove the locking washer (11) and the shoulder screw (10) and the sealing nut (9).
4.
Remove the upper part (4) and lift out the gear
rod (5) the spring (21), the bearings (14) and the
worm gear (7).
5.
Pull out the guide sleeve (18) and the worm
screw (8) along with the bearing (15).
6.
Wash the parts and check the wear. Replace
parts if necessary.
When lowering the sterndrive, run the tilt motor until it
is automatically cut off and the warning light goes
out.
In case the sterndrive should not stay in the ‘up’ position, the spring (21, fig. on previous page) is not
stretched sufficiently. Insert a washer underneath the
spring. Should it not be possible to depress the
sterndrive by hand (approx. 75 Kilos, 145 lbs) at the
trim tab, the upper part (4) must be eased off a bit.
NOTE! There is no need to lock the upper part. The
spring pressure is locking it.
7. Assemble the tilting device in the reversed order.
Grease the parts in an universal type of grease at the
assembly. Also fill the upper housing with grease.
Connect the minus (earth) wire (2) and (3) as indicated in the picture and the wire harness (1) to the control switch.
131
Repair instructions
Models 290, SP and DP
1. Install the exhaust bellows on the transom shield.
Turn the hose clamp so that the tightening screw
ends up at two o’clock with the head pointing downwards.
NOTE! Turn the drainage hole in the bellows facing
downwards.
3. Remove the locking screw and remove the suspension pin. Grease the suspension pins with Volvo
Penta low temperature grease 1161417-9 and install in
the transom shield flush with the interior face to the
transom shield. Grease the locking bolt with Volvo
Penta low temperature grease 1161417-9. Put the
locking bolts aside for installation later.
885146
2. Hang on the hose clamp and install the universal
joint bellows. Locate the tightening screw at
3 o’clock.
132
4. Install the yoke 885146 in the transom shield.
Repair instructions
885146
5. Remove the cover over the shift mechanism.
Hang a hose clamp on the sterndrive and install the
yoke on the sterndrive. Then lift up the sterndrive
and hang it in the tool 885146.
7. Install the plastic bushings (1) in the holes (2) of
the suspension yoke.
UP
8. Push the sterndrive forwards against the engine
primary shaft and turn the universal joint simultaneously to better allow the primary shaft splines to enter the universal joint. A small guide in the joint facilitates the finding of the correct position.
NOTE! Install the bellow with the “UP” marking up.
6. Push the shift cable as far into the sterndrive as
to allow the locking to lock the cable in its groove in
the cable cover. Tighten the locking plate with the 2
stainless steel screws. Key width 11 mm.
133
Repair instructions
9. Push the sterndrive forwards. Lift up the trim cylinders simultaneously and continue to push the
sterndrive forwards.
11. Use a screwdriver to turn the dowels so that the
locking grooves coincide with the locking screw holes
in the ears of the transom shield. Tighten the locking
screws. Prior to the tightening of the screws, grease
them with low temperature grease, Volvo Penta part
no. 1141644-3.
NOTE! Don’t forget the washer under the screw
heads.
Tighten torque: 24 Nm (17 lb.ft).
Remove the installation tool.
10. Push the sterndrive suspension yoke into the
transom shield and align the yoke with the suspension dowels in the shield. Knock the dowels into position and use a rubber mallet.
NOTE! Don’t use a hammer in order to avoid damaging the dowels thus not making the future dismantling
more difficult.
884573
12. Push the rubber bellows on to the neck of the upper gear housing. Check to make sure that the bellows is installed correctly and push on the hose
clamp and tighten it with the tightening screw located
on the underside of the bellows. Use special tool
884573.
134
Repair instructions
885143
13. Pull down the retaining pawl and lift up the sterndrive sufficiently to allow the installation of special
tool 885143 between the transom shield and the suspension yoke.
Hang the hose clamp on to the cooling water hose and
connect the hose to the hose attachment on the
suspension yoke.
IMPORTANT! Turn the hose clamp so that the
tightening screw ends up at two o’clock on the
starboard side. This is important. Should the
hose clamp be installed incorrectly, this can
damage any of the other bellows.
14. Hang on the hose clamp for the exhaust bellows
and push it onto the neck of the sterndrive. Turn the
hose clamp into the position indicated by the picture.
See also point 15.
15. Check to make sure that all bellows and hoses
have been installed correctly and well tightened.
Tilt the sterndrive and turn it fully both ways and
check simultaneously that the tightening screws of
the bellows do not touch neither the sterndrive, the
transom shield nor the bellows. Adjust if necessary.
Use special tools 885143 and 884573.
The above picture reflects the correct positioning of
the hose clamps.
16. Center the cylinder attachment holes and the cylinders. Grease the trim cylinder bolts and install
them.
135
Repair instructions
17. Install the cotter pins (1). Fold the ‘legs’ backwards carefully.
1
2
18. Lower the steering helmet and align the helmet
bushing with the recessed hole of the upper gear
head. Grease the attachment (2) with low temperature
grease, Volvo Penta part no. 1161417-9.
Install the attachment in the helmet bushing with the
recessed holes vertical (one hole over the other).
While moving the sterndrive slightly from side to side,
push home the attachment until it bottoms in the
upper gear head recessed hole. Install the two allen
head bolts (1).
Tightening torque: 35 Nm (25 lb.ft).
WARNING! Be sure the attachment is aligned in
the upper gear recess before tightening the allen
head bolts.
136
19. Before connecting the shift cable be sure that if
the remote control moves forward, the shift cable extends from the cable housing, (i.e. cable pushes for
forward gear, pulls for reverse gear). Set the sterndrive shift lever to horozontal making shure that it is in
the neutral detent position. Set the remote control
shift lever to neutral. Push the shift cable in as far as
possible. Using a fiber tip marker or suitable substitute, mark the position of the cable at the cable housing (A). Pull the control cable as far out as possible.
Note the distance between the cable housing and the
marked postition on the cable. Push the cable into the
housing half the distance to the mark (A2). Install the
swivel onto the shift cable to the point it will attach to
the shift lever without moving the lever for attachment. Install the washer and cotter pin. Bend the tabs
backwards onto the swivel.
Repair instructions
Oil filling
1
1. Install the oil drain plug with a new O-ring (1).
Adjusting the retaining pawl,
model 290
a)
Set the control lever in the ‘Forward’ position and
check that the lever (8) does not touch the housing. See position “C” on the picture.
Check with the control lever in ‘Forward’,
‘Reverse’ and in ‘Neutral’ that the swivel (9) and
the cable attachment (7) does not strain in the
shift plate (8).
Adjust by easing off the locking nut and then by
altering the position of the swivel (9) on the shift
cable. Tighten the nut after the adjustment.
b)
Set the control lever in ‘Neutral’ and check that
the rod (6) has a position that it will touch the
yoke of the retaining pawl at “A”. However, without pressing against it.
Adjust if necessary the yoke (11). If a second
adjustment is made, also point a) has to be adjusted once again.
2. Tilt the sterndrive to the full up position. Remove
the fill plug (1) and fill with approx. 2.2 liters of GL-5
synthetic gear oil. See Techical Data. Install the fill
plug with a new gasket.
Tighten the fill plug to 35 Nm (26 lb.ft.).
Lower the sterndrive and check the oil level with the
dipstick. If necessary, Top off the sterdrive with oil
through the dip stick hole.
3. Install the shift mechanism cover.
137
Repair instructions
Propeller installation
Locking the propeller cone on sterndrives of earlier
manufacture is done by a folding washer and on sterndrives of later manufacture by a locking screw through
the cone center.
Installing a ‘long hub’ type of
propeller (A)
1.
Grease the propeller shaft with a thin layer of
grease.
2.
Install the fishing line deflector (5).
3.
Install the propeller.
4.
Insert the plastic washer (3).
5.
Install and tighten the propeller cone (1).
6.
Install and tighten the center bolt, (6).
Installing a ‘short hub’ type of
propeller (B)
1.
Grease the propeller shaft with a thin layer of
grease.
2.
Install the fishing line deflector (5).
3.
Install the propeller
4.
Insert the plastic washer (3).
138
5.
Install the spacer ring (2).
6.
Install and tighten the propeller cone (1).
7.
Install and tighten the center bolt (6).
NOTE! Sterndrive model 290B ratio 1.61:1 is different from sterndrive model 290D ratio 2.15:1. The difference consists of propellers with long and short
hub respectively. See the picture!
NOTE! Short hub propellers (folding washer and cone)
will be replaced by long hub propellers (plastic washer,
cone, center bolt). When installing long hub propellers
on older sterndrives, the propeller shaft must be drilled
and tapped for use of cone with center bolt.
Use drill jigg 885149 to drill the propeller shaft eliminating the need to remove the shaft from the drive unit
as follows:
1.
Install drill jigg on propeller shaft.
2.
Drill a 6.5 mm (0.255”) hole to a depth of 20 mm
(0.787”). Use cutting oil to cool shaft. Clean thorougly.
3.
Use a 5/16”-18 UNC taps to thread shaft. Clean
thorougly.
4.
Install propeller, plastic washer, cone and center
bolt. Torque: cone = 110 Nm (81 ft.lb.), bolt =
22 Nm (16 ft.lb.).
Repair instructions
Changing the direction of the
propeller rotation, SP drives
On the propeller hub there is a ‘L’ for left hand rotating
and a ‘R’ for right hand rotating propeller. Also the size
of the propeller is stamped into the hub, for instance
15×19 where 15 denotes the diameter in inches and
19 the pitch, also in inches. This is not valid for Duoprop propellers.
The sterndrives are supplied adjusted for left hand rotation ‘A’. In some cases, however, it can be of advantage in a twin installation to have right hand rotating starboard propeller ‘B’. It’s possible, by a rather
simple adjustment, to change from standard left hand
rotating propeller to a right hand rotating one by simply
moving the shift rod from ‘A’ to ‘B’. Check to make
sure that the adjustment of the retaining pawl and the
shift mechanism is still intact. Install the shift mechanism cover.
NOTE! There is no need to alter the direction of rotation on the Duoprop sterndrive in a twin installation.
The pitch is the theoretical lengthwise movement of
the propeller during one full turn.
139
Repair instructions
Adjustment of trim fin
The trim fin is factory set at 5 ° towards port side. After installation the adjustment of the trim fin should
be checked and, if necessary, corrected according to
figures below. This is a basic adjustment. An exact
adjustment can only be done after a test run with the
servo unit disconnected.
SP = Single prop
DP = Double prop
LH = Left hand
RH = Right hand
Twin engine installation
In a twin installation the ‘Toe-out’ angle between the
sterndrives must be adjusted until an operation free
from cavitation has been obtained. Increase the angle between the sterndrives on a boat with a deeper
V-hull. Adjust the sterndrives in accordance with the
picture. If the measurement at the transom shield is
‘A’, the measurement at the screw head of the trim
tab must be ‘A’ minus 15–25 mm (9/16"–1").
NOTE! Push the sterndrives apart by hand when
measuring.
NOTE! The figures show the boat drive from above.
Tightening torque: 14–17 Nm (10–12 lbf.ft.).
140
Repair instructions
NOTE! that later propellers, both A and B propellers,
are painted black. To identify the two types, the rear
propeller has a sticker on the front end of the hub.
Propellers with a green/yellow sticker (A propellers)
shall only be used with diesel engines.
Propellers with a red/yellow sticker (B propellers)
shall only be used with petrol/gasoline engines.
Duoprop (later model)
Check which speed range the boat in question operates in, and select the correct propeller. Refer to propeller recommendations.
NOTE! The propellers are supplied in pairs and must
not be mixed. Use special tool 885127. Install the
propellers as follows: grease the propeller shaft and
fit the fishing line protection (1) and the propeller (2).
Duoprop propellers are available in two versions as
follows:
A-marked propellers shall only be used with diesel
engines.
B-marked propellers shall only be used with petrol/
gasoline engines.
WARNING! A and B propellers must never be
mixed.
WARNING! The line cutters (1 and 6) have very
sharp edges. Be careful to avoid cuts. Then fit
the plastic washer (3), the tab washer (4) and
nut (5). Tighten the nut so that the locking
washer’s tabs can be bent into the nut’s recesses. Thereafter, install the other fishing line
protection (6) and the propeller (7). Place a
plastic washer (8) on the nut (9) or propeller
cone (10) and tighten the propeller with the nut.
When the locking cone (10) is fitted, a spacer
ring (11) shall be fitted for A-propellers. The
spacer ring shall not be used for B-propellers.
Place a washer (12) on bolt (13) and tighten
the propeller shaft centre bolt.
NOTE! The line cutters (1 and 6) are now replaced by
thrust washers. Never mount line cutters together with
thrust washers.
Propeller identification
Markings:
Earlier propellers are only marked on the side of the
hub with the part No. and size code, from A1 to A10
or from B1 to B8.
On later propellers the part No. and propeller size
marking on the side of the hub is complemented with
the following data stamped on the rear end of the
hub:
1 = Part No.
2 = Propeller size
3 = Date of vulcanizing
4 = Final manufacture date of the propeller
5 = Tool No. used for the vulcanizing
141
Transom shield
Changing trim cylinders,
models 290, SP and DP
Trim cylinders, later models
B
C
D
A
1. Remove the sterndrive when the boat is on land.
Also remove the exhaust bellows and the universal
joint bellows. Remove if necessary barnacles etc and
clean the shield.
Trim cylinders, earlier models
4. Remove the 2 hoses (A) from the starboard cylinder. If only the port cylinder is to be replaced, remove
the pipe connections on that cylinder (B).
WARNING! Be sure to catch any oil which will
leak when the hydraulic lines are disconnected.
2. Remove the 2 hoses and the pipes from the starboard cylinder. If only the port trim cylinder is to be replaced, remove the pipe connections. Watch out for
oil running out.
WARNING! Be sure to catch any oil which will
leak when the hydraulic lines are disconnected.
5a. Port Cylinder:
If the port cylinder is to be removed, remove the
ground strap terminal (C, figure above) and insert from
the transom shield.
3. Remove the plastic plug with a 5 mm Allen-head
key.
142
5b. Starboard Cylinder:
Remove the plastic plug (D, figure above) adjacent to
the trim cylinder attachment pin.
Transom shield
Trim cylinders, all models
Part no.
940194
6. Install a grease nipple where the ground terminal
bushing (late models) or plastic plug (early models)
was removed.
8. Use a grease gun and inject grease into the grease
nipple. The dowel pin will then be pushed out and the
trim cylinder can be removed.
Use grease nipple, Volvo Penta part no. 940194.
884978
1
2
7. Remove the locking bolt for the trim cylinder dowel
pin. Key width 10 mm.
9. If the dowel pin will not come out by using a grease
gun, special tool 884978 should be used as follows:
Remove the grease fitting.
Fill the tool with grease.
Screw the tool into the transom shield and carefully
tighten.
Unscrew the locking trim cylinder pin locking bolt (1)
approx. 10 mm (¼”).
Hit the tool piston (2) with a hammer so that the trim
cylinder pin is forced against the locking bolt.
Unscrew the locking bolt completely. Force the pin the
rest of the way out of the hole.
143
Transom shield
11. Always use a new O-ring (1) on the dowel pin during reassembly. Check the pin hole and pin for
scratches or other damage. Position (2) is the locking
bolt.
IMPORTANT! The transom must have cutouts
called for on the transom template to allow sufficient clearance for the pins to be removed. If
the cutouts are not made, the transom shield
must be removed from the boat to enable trim
cylinder pin removal.
12. Remove the grease fitting that was used to
remove the attachment pin.
Grease and install the trim cylinder dowel pin.
Install the new trim cylinder.
Remove the attachment bolt from the end of the pin
and lock the pin in position with the bolt.
10. NOTE! The locking bolt can be installed in the
dowel pin. Then apply a pair of pliers and pull out the
dowel pin.
144
Transom shield
Trim cylinders, earlier models
Trim cylinders, later models
B
C
D
A
13. Remove any shipping plugs installed in the new
trim cylinder.
14. Remove any shipping plugs installed in the new
trim cylinder.
Install the pipes and the hoses on the new trim
cylinder.
Install the pipes and the hoses on the new trim
cylinder. Hoses to starboard cylinder (A) and port
cylinder (B).
WARNING! Make sure all the pipes and hose fittings are attached finger tight before torquing
any of the fittings. Final tightening of any of the
fittings before all fittings are started could cause
cross-threaded fittings and damage the cylinder.
Install the sterndrive according to chapter Installing
the Sterndrive.
Raise and lower the sterndrive several times to bleed
any air trapped in the hydraulic system.
WARNING! Make sure all the pipes and hose fittings are attached finger tight before torquing
any of the fittings. Final tightening of any of the
fittings before all fittings are started could cause
cross-threaded fittings and damage the cylinder.
15a. Port cylinder:
Remove the block off plugs from the old cylinder and
install in the same holes of the new cylinder.
Install the ground strap insert (C), attach the ground
strap to the insert.
WARNING! Be sure there is good electrical contact (low resistance) between the trim cylinders
and the transom shield. High resistance between the transom shield and the trim cylinders
will result in corroded trim cylinders. For more
information on electrochemical corrosion, consult publication 7733534-7 Marine Electrical
Systems available from Volvo Penta parts.
15b. Starboard cylinder:
Install the plastic plug (D).
Install the sterndrive according to chapter Installing
the Sterndrive.
Raise and lower the sterndrive several times to bleed
any air trapped in the hydraulic system.
145
Transom shield
Trim cylinders, all models
Trim
pump,
earlier
model
Trim
pump,
earlier
model
Trim
pump,
later
model
IMPORTANT! The hydraulic pump must be installed vertically, as reflected by the picture.
16. Remove the oil filler/indicator plug to check the oil
level. Top up if necessary. Install the sterndrive in the
transom shield. Raise and lower the drive simultaneously to facilitate the topping up and to make sure
that the system is properly filled up. The oil level
should be level with the oil filler hole. Use the same oil
quality as for the engine or ATF oil. See below.
18. Should the low pressure hoses (1) and high pressure hoses (2) need to be disconnected for any reason it is vital that they be reconnected to the correct
hose connection.
Trim
pump,
later
model
The figures above show how the hoses shall be connected on the inside and outside of the transom
shield.
NOTE! The outer low pressure hose (3) is marked
white and the outer high pressure hose (4) is marked
red.
17. Oil level, hydraulic pump – power trim:
Trim in the drive as far as possible. Check that the oil
level is between the max and min. marks on the
reservoir. Top up if necessary with ATF oil.
NOTE! Early production drives were filled with engine
oil and have that recommendation in the Owner’s
Manual. Late production drives have ATF oil filled.
IMPORTANT! We recommend the use of ATF
oil. Observe strict cleanliness so that dirt is not
drawn in by the oil.
ATF oil and engine oil must never be mixed.
If ATF oil is to be used, the engine oil must first
be drained from the system. If the system has
been drained, fill up with new oil and trim the
drive 6 to 10 times in and out to purge air from
the system. Check the oil level and top up if
necessary.
146
Transom shield
Changing steering helmet
Steering Fork
Steering Helmet
21. Loosen the tiller arm set screw using a 5/32 allen
wrench.
A
To ensure the integrity of the steering system the
steering helmet is not serviceable as a separate part
from the steering fork. If there is a problem with the
steering helmet or the steering fork, they must be replaced as a unit.
WARNING! The bolted joints steering helmet –
steering fork (A) shall not be dismounted.
Removal
19. Remove the sterndrive according to procedure
elsewhere in this book.
22. Gently pry the steering fork down from the
transom shield.
20. Disconnect the power steering (A) if equipped.
Disconnect and remove the trim sending unit.
147
Transom shield
25. Make sure the square/the splines on the steering
fork and the tiller arm are aligned.
23. Install a new bushing (8) into the new steering
fork.
26. Using a rubber mallet tap on the steering fork into
position
24. Align the square/the splines on the steering fork
with the square in the tiller arm and install into the
transom shield.
27. Lock the setscrew with a 5/32 in. allen wrench.
148
Transom shield
28. Install a new seal (9) and O-ring (7) on the gear
wheel.
Install the trim sending unit, gear wheel and gear rack.
See chapter Trim System.
149
Trim system
Changing the sending unit
1. Lower the sterndrive to the full down position. Turn
the helm full starboard. Using a 13 mm wrench, remove the trim sender holding bracket and the trim
sender. Unplug the sender from the wiring harness.
3. Install the sending unit housing into the steering
shaft on the transom shield. Rotate the sending unit
slightly to align the drive coupling with the gear wheel.
NOTE! Do not force the sending unit into the hole.
This may damage the sending unit and/or the gear
wheel.
Install the trim sender bracket and hold down screw.
Finger tight only, do not tighten until all adjustments
have been made.
2. Plug the new sending unit into the wiring harness.
Align the white notch on the drive coupling with the
white notch on the sending unit housing.
4. Lower the sterndrive to its bottom position. Ensure
the sterndrive is at its lowest position, place a 15 kg
load on the rear of the sterndrive.
150
Trim system
Changing the trim system gear
rack
5. -4 should be shown in the instrument window for a
12º transom angle. Move the sending unit in either
direction until the correct number is displayed on the
trim gauge. Other transom angle settings are as follows:
Transom angle
Instrument indication
10°
-2
11°
-3
12°
-4
13°
-5
14°
-6
15°
-7
6. Tighten the trim sender bracket hold down screw.
Be sure the sending unit does not move when the
bracket is tightened.
1. Remove the damaged gear rack by removing the
screw.
2. Bend the gear rack up slightly to clear the nut and
pull it out from the steering helmet.
151
Trim system
3. Turn the gear wheel until the tooth with a white recessed marking appears.
6. Install the screw and carefully tighten.
NOTE! It is recommended that a new screw be used
whenever the gear rack is removed.
WARNING! Do not overtighten the screw. Use
extreme caution to prevent stripping the
threads from the screw.
4. Install the new gear rack with the marked tooth of
the gear wheel in the first slot of the gear rack.
7. Lower the sterndrive to its bottom position. Ensure
the sterndrive is at its lowest position, place a 15 kg
load on the rear of the sterndrive.
5. Align the gear rack with the hole in the steering helmet. Push the nut (1) through the helmet and into the
gear rack.
152
Trim system
Changing the trim system gear
wheel
1. Remove the sterndrive according to the section installation and removal.
8. -4 should be shown in the instrument window for a
12º transom angle. Move the sending unit in either
direction until the correct number is displayed on the
trim gauge. Other transom angle settings are as follows:
Transom angle
Instrument indication
10°
-2
11°
-3
12°
-4
13°
-5
14°
-6
15°
-7
2. Pull the steering helmet aft far enough to clear the
gear wheel. Turn the gear wheel so that the digital trim
instrument indicates -4.
9. Tighten the trim sender bracket hold down screw.
Be sure the sending unit does not move when the
bracket is tightened.
3. Pull the gear wheel straight down. There will be
some resistance because of the retaining pawl in the
bushing. Note the position of the drive end of the shaft
when removing it. This will ease installation of the new
shaft in the same position.
NOTE! Always use a new O-ring whenever the gear
wheel is removed.
153
Trim system
4. Grease the new gear wheel shaft and O-ring liberally with Volvo Penta Propeller shaft grease 828250-1.
Install the new gear wheel with the marked tooth pointing starboard just enough aft to be visible from under
the steering fork. If the shaft will not fit easily into
place, rotate the gear wheel slightly in either direction
to engage the gear wheel shaft and the trim sender
coupling. Be sure the gear is completely seated before trying to engage the gear rack on the steering helmet.
6. Push the steering helmet into position with the
marked tooth of the gear wheel engaging the first
notch of the gear rack. Push the steering helmet as
far forward as possible. Install the sterndrive according to the installation section earlier in this chapter.
Check the trim adjustment according to adjusting the
trim instrument section.
7. -4 should be shown in the instrument window for a
12º transom angle. Move the sending unit in either
direction until the correct number is displayed on the
trim gauge. Other transom angle settings are as follows:
5. Position the gear wheel as shown.
154
Transom angle
Instrument indication
10°
-2
11°
-3
12°
-4
13°
-5
14°
-6
15°
-7
Trim system
8. After all adjustments are made, tighten the trim
sender bracket hold down screw. Be sure the sending
unit does not move when the bracket is tightened.
The power trim pump
The parts illustrated are those available as replacement parts or complete assemblies. The following instructions cover the replacement of parts making up
the trim pump unit.
1 Motor assembly
2 Motor, incl. mounting studs
3 Coupling
4 O-ring
5 Adapter and basic pump assembly1)
6 Filter
7 Reservoir assembly
8 Reservoir seal
9 Reservoir cap
10 Reservoir
11,12,13 Screw, spacer, O-ring assy
14 Thermal relief valve1)
15 High pressure relief valve1)
16 Low pressure relief valve1)
A B C Original factory fitted valve assy
1)
Non-serviceable part. Replace as complete unit.
Note! Do not disassemble the valve or adapter assemblies, as this will disturb the factory settings and
may cause pump malfunction.
WARNING! Use great care when working with
this hydraulic system. Be sure your work area is
clean. Do not allow dirt to enter the system. Use
lint-free rags. Fill with clean recommended oil
only.
155
Trim system
Removing the trim pump from the
boat
Removing the oil reservoir
Turn off the main battery switch. Disconnect the
trim pump wiring harness, ground cable from the flywheel housing, and the positive (+) cable from the
starter motor.
Remove the center bolt (1), together with the O-ring
(2) and sleeve (3) that holds the plastic reservoir, using an 8 mm socket. Remove the reservoir and the
rubber seal (8) (fig. showing the exploded view).
Note how the hydraulic hoses are connected to the
pump. Place a clean drain pan under the pump assembly. Disconnect the hydraulic hoses. Install protective caps (1) over the hoses (2) and pump (3) to
prevent dirt from entering. Unbolt the oil pump mounting bracket. Hold the pump upright to avoid oil spillage. Drain the oil from the pump.
WARNING! Always exercise great cleanliness
when working with hydraulic systems. Do not allow dirt or other impurities to enter the system.
Use lint-free rags when cleaning parts. Always
fill with clean oil of the recommended quality.
Replacing filters
Grip the filter ring with pliers and pull upward while
twisting.
156
Trim system
Replacing adapter and pump
assembly
To install a new filter, place a 5/8" socket over the filter and gently tap it down using a hammer.
Removing the electric motor
The adapter and pump assembly contain no serviceable parts and are replaced as a complete unit.
Remove the oil reservoir, motor and coupling.
Remove the valve assemblies using a 7/16" wrench.
The original factory fitted valves cannot be
installed in a new adapter/pump assembly.
Install new replacement valve assemblies, from the
factory, on the new adapter/pump assembly. See
Relief valve assemblies.
Remove the two studs (1) using an 8 mm socket (see
exploded view on page 155). Lift the motor off the
adapter assembly. Be sure the coupling (3) is positioned on the pump shaft with the wide groove up. See
exploded view, pos (3), on page 155.
Install the oil reservoir.
Apply water resistant grease to the pump shaft and install coupling on the shaft. (Be sure the wide groove is
facing the motor.) Inspect the O-ring. Replace, if necessary (4). Tighten using a 8 mm wrench.
NOTE! The electric motor does not need to be removed to replace the thermal, high and low pressure
relief valve assemblies.
Installing the electric motor
Apply water resistant grease to the coupling (3, fig.
above). Be sure that coupling is installed correctly. Inspect the O-ring and replace if necessary (see exploded view, pos (4), on page 155). Place the O-ring on
the motor. Install the motor on the adapter assembly,
ensuring the drive shaft engages the coupling. Tighten
the two studs.
157
Trim system
The relief valve assemblies
Venting system
If the original factory fitted valves have to be removed, this will alter the factory setting, and new
valves will have to be installed.
Reconnect main battery switch and operate the trim
pump (system is self-bleeding). Re-check the oil level
and add if necessary.
NOTE! Replacement valves are set from the factory
and must not be opened.
Test
Once the system has been vented, operate the trim
pump for proper operation. Check pump and hose connections for leaks.
Adjusting the trim instrument
Duoprop
The replacement relief valves have a different design
than the original factory installed valves. See exploded view, pos (A, B, C), on page 155. Use a 7/16"
wrench to remove and install valves.
Singleprop
WARNING! Place wrench on lower part of valve
to avoid altering the setting when tightening.
Installing the trim pump
Mount trim pump and bracket. Remove the protective
plugs from the pump and hoses. Connect the hoses to
their respective connections on the pump. (A, fig.
above) is the high pressure connection and (B, fig.
above) is the low pressure connection.
Connect the wiring harness, the ground (-) and positive (+) cables.
Fill the reservoir with recommended oil to the proper
level (between MIN and MAX marks).
The trim instrument is always delivered together with
Duoprop drives. It is set to a trim limit of 6° and the
switch is sealed. Refer to the enlarged view for the
Duoprop drive where switch 4 in ON.
NOTE! No other trim limit is permitted for the Duoprop
drive. The seal must not be broken.
However, if the instrument is mounted to a Singleprop
drive, the seal must be broken and the instrument reset to 12° trim limit. Refer to the enlarged view for the
Singleprop drive where switch 4 down and switch 2 is
ON.
158
Trim system
Checking the trim figure
1. Turn the ignition key to the ignition position (the
lights are on).
4. The instrument, when trimmed down and with a
known transom angle, shows the following figures,
see table below:
Transom angle
Instrument indication
10°
-2
11°
-3
12°
-4
13°
-5
14°
-6
15°
-7
2. Trim down the drive to its bottom position.
NOTE! Push the switch upwards.
5. If the instrument shows a different figure than that
stated in the table, then action as described below must
be taken.
Adjusting the trim figure
3. To ensure that the drive rests against the adjusting
rod it should be loaded with approx. 15 kp (33 lb.).
6. Loosen the trim sender’s fixing bracket (A) and turn
the trim sender housing (B) until the instrument shows
the correct figure according to the table.
Then retighten the fixing bracket for the sender and remove the load from the drive.
159
Sterndrive extensions
1" extension
4" extension
Tightening torques:
A-G-K = 33 Nm
B-F-M = 18 Nm
Installation instructions for 1"
and 4" extensions:
Press in the outer bearing race of the axial bearing in
the extension. See under Shimming the intermediate housing and the lower gear housing.
Drain the oil from the sterndrive.
NOTE! Measure the measurement ‘B’ on the extension!
Remove the cover over the shift mechanism.
Remove the screws (and washers) holding the lower
gear housing to the intermediate housing. Use a rubber mallet and carefully knock the housing apart. Remove the splines sleeve.
NOTE! When installing a 1" extension the washers will
be used again and on the 4" extension the screws as
well as the washers.
Use special tool 884982 in combination with special
tool 884316 to remove the outer bearing race of the
axial bearing from the intermediate housing.
Clean the contact surfaces of the housing carefully.
Check the O-ring and replace it if necessary.
160
The 4" extension
Coat the contact surface with a sealant, Volvo Penta
part no. 1141570-0. Use the 3 new O-rings and the oil
pipe from the extension kit. Install the extension on
the lower gear housing. Tighten the bolts ‘A’ and ‘B’ in
diagonal sequence. Tightening torques – see the
picture!
NOTE! Use washers ‘C’ underneath the 4 larger
screws. Then install the existing splines sleeve on the
lower vertical shaft and then the extension shaft and
the new splines sleeve.
Sterndrive extensions
The 1" extension
Tightening torques – see the picture!
Coat the contact surfaces with a sealant. Use the 3
new O-rings and the oil pipe from the extension kit. Install the extension on the lower gear housing.
Install the cover over the shift mechanism.
Install the locking ring in the splines sleeve. Turn the
end with locking ring downwards and then install the
sleeve on the lower vertical shaft.
Fill up with lubrication oil. Regarding oil quantity and
oil quality, see chapter Technical Data. Check the oil
level with the sterndrive fully lowered. Let a few minutes pass after you have shut down the engine before
you start checking the oil level. Push down the oil dipstick as far as possible, however, without tightening it.
Lift up the oil dipstick and register the oil level. Top-up
if necessary.
Install the stud screws ‘D’ in the intermediate housing
‘E’.
Coat the contact surfaces with a sealant and place
the intermediate housing on the extension.
NOTE! Do not forget the O-rings! Tighten the bolts ‘F’
and nuts ‘G’ (1" extension) evenly and in diagonal sequence. Use the existing washers ‘H’ on the nuts. On
the 4" extension the screws ‘K’ and the washers ‘L’
are used instead of nuts and washers.
If the paint has been damaged, use touch-up paint to
repair. See under Accessories – Aquamatic.
NOTE! Do not forget the small O-ring underneath the
oil dipstick head.
161
Welding
Welding on certain parts of the sterndrive and the
transom shield is allowed. Extreme caution must be
used to prevent damage to the precision machined
surfaces or precision parts used in the sterndrive (i.e.
near bearing locations). Always use Volvo Penta
welding electrode 839643-4 when making any welding repairs to the sterndrive or transom shield.
4.
The exhaust channel in the intermediate housing
except at the steering spindle and around the upper and lower bearing positions of the vertical
shaft.
5.
The lower unit housing on the cavitation plate and
the exhaust channel except around the bearing
positions. The lower fin provided no more that 2/
3 of it is missing measured vertically. The water
intake channel at the front of the housing, however, it is important to maintain the channel profile. The correct profile is important to prevent restricted water flow to the engine. The exhaust
outlet, trim tab and propeller cone may be welded. It is important to protect the rubber exhaust
flap during welding.
6.
Pressurize the housing after repair. See chapter
Pressure and vacuum testing.
Parts that cannot be welded
WARNING! The following parts are safety
related and are not allowed to be welded.
The steering fork, steering helmet, clamp ring, tiller
arm, suspension yoke and exhaust elbows, trim cylinders, trim cylinder attachment, power steering cylinder attachment, power steering cylinder, and the
area around the suspension pins. On or around precision machined surfaces or precision parts.
Repair instructions
Parts which can be welded
1.
The neck of the flywheel housing for the attachment of the rubber bellows. Grind the neck
smooth after welding to get an even surface.
2.
The transom shield except on and around the
suspension ears, steering journals, around the
suspension pins and the attachment of the trim
cylinders.
3.
The shift mechanism cover.
162
Dismantle and clean the damaged part of the sterndrive. Grind the area to be welded according to industry standard for welding aluminum. The welding
should not be done at less than 20 ºC (68 ºF). If a
part has been broken off and hasn’t been lost, it
should be used. Even if the surfaces are to be welded, there should be a V groove approximately 45º on
both sides of the joint. Make the repair using Argon
welding and Volvo Penta electrode 839643-4. Always pressure and vacuum test the sterndrive as an
assembly before returning to service. The shaded
portions of the sterndrive and flywheel housing indicate where welding is permitted except where noted
above.
Painting
Painting the sterndrive and
underwater hull
General
Most countries have introduced legislation controlling
the use of anti-fouling agents. In some cases these
agents are completely forbidden for use on leisure
craft. In these cases ask your Volvo Penta dealer
for advice about alternative methods.
Underwater hull
Anti fouling agent containing copper oxide can
increase the risk of galvanic corrosion and therefore
should never be used.
IMPORTANT! Never paint all the way forward to
the shield, this can increase the risk of galvanic
corrosion. Leave an area of 10 mm (1/2”) around
the shield unpainted.
IMPORTANT! Find out what regulations apply to
the use of anti-fouling agents.
Sterndrive
The paintwork is part of the drive’s anti-corrosion
protection and it is therefore important that any
paintwork damage is remedied.
Sand down metal surfaces lightly using a 120 grade
paper and a finer grade for painted surfaces. Wash off
using thinners or similar. Any pores in the surface
should be filled and sanded down.
Paint using Volvo Penta original primer and topcoat.
Let the paint dry.
The drive should be painted with Volvo Penta antifouling to prevent fouling. Apply according to the
instructions on the packaging.
IMPORTANT! The sacrificial anodes on the
drive must not be painted.
163
Electrical wiring diagrams
R 1.5
Model 280, tilting device
Up
R 1.5
Gas
Diesel
BR 1.5
GN / Y 1.5
BL 1.5
BL 1.5
Down
GN / Y 1.5
No
No
Y 1.5
GN 1.5
BL 1.5
BR 1.5
GN 1.3
GN / Y 1.5
SB 1.5
SB 1.3
SB 1.3
Com
GN / Y 1.3
References:
1. Relay box
2. Relay
3. Limit switch
4. Push rod, retaining pawl
5. Connector
6. Electrical motor
7. Switch
8. Warning light
9. Key switch
10. Connected to 30 (+) on the
starter motor
11. Connected to engine (-)
12. Connector
13. Fuse, 20 Amps
R 1.5
USA model
Up
R 1.5
Down
Cable colour codes
BL 1.5
BR 1.5
BL 1.5
BR 1.5
GN / Y 1.5
Y 1.5
= red
= black
= green
= blue
= brown
= green/yellow
= yellow
SB 1.5
R
SB
GN
BL
BR
GN/Y
Y
SB 2.5
R 2.5
R 2.5
BR 1.5
BR 2.5
SB 1.5
SB 2.5
SB 2.5
SB 2.5
R 2.5
SB 2.5
R6
164
Y 1.5
75
75
Electrical wiring diagrams
Model 280, Power trim
SB
GN
Down
GN
R
Ground
BL
Up
OR
PU
W
R
R
IV/SB
GN/R
SB
Attach to flywheel housing
GN/Y
SB
PU
To engine fuse
battery side
Power lead
1.
2.
3.
4.
5.
Pump motor
Relay
Fuse
Switch
Body
6.
7.
8.
9.
10.
Trim gauge
Sender
Relay
Bypass switch
Trim limit switch
Battery
Cable colour codes
R
SB
GN
BL
W
GN/R
GN/Y
IV/SB
PU
= red
= black
= green
= blue
= white
= green/red
= green/yellow
= ivory/black
= purple
Cable area 1,5 mm2
165
Electrical wiring diagrams
Model 290, Power trim
Earlier model
1.
2.
3.
4.
5.
6.
7.
8.
9.
10.
Cable colour codes
Oil pump
Fuse 55 amps
Trim sender
Trim indicator
Switch
Switch-relay, position ”Beach”
Connection instrument panel
Instrument lighting
Throttle hook-up (optional)
Fuse 5 amps
R
SB
GN
BL
W
R/W
GN/W
SB/W
BL/R
PU
BL/W
3
= red
= black
= green
= blue
= white
= red/white
= green/white
= black/white
= blue/red
= purple
= blue/white
Cable area 1,5 mm2
9
Down
1
Up
6
Low
pressure
High
pressure
10
2
4
5
1
2
3
4
8
166
7
=
=
=
=
Up
Positive (+)
Down
Override button
Electrical wiring diagrams
Models 290, SP and DP, Power trim
Later model
1.
2.
3.
4.
5.
6.
7.
8.
9.
10.
Oil pump
Fuse 55 amps
Trim sender
Trim indicator
Switch
Switch-relay, position ”Beach”
Connection instrument panel
Instrument lighting
Throttle hook-up (optional)
Relays the arrows in the electric wiring
diagram refer to the trimming function up/
down.
Cable colour codes
R
SB
GN
BL
W
R/W
GN/W
SB/W
BL/R
PU
BL/W
= red
= black
= green
= blue
= white
= red/white
= green/white
= black/white
= blue/red
= purple
= blue/white
Cable area 1,5 mm2
167
Technical data
Models 280, 280T, 280PT, 285, 285A and 290
General Data
Type designation .....................................................................
Aquamatic 280, 285 & 290
Shift Mechanism .....................................................................
Self adjusting Silent Shift type of cone clutch,
servo assisted disengagement. Direction of rotation adjustable.
Maximum propeller diameter ...................................................
16"
Tilting angle ............................................................................
60°
Tilting device, model 280, 280T, 285 & 285A ..........................
Electro mechanical tilting device
Power trim & tilting device, models 280PT, 285PT & 290 .......
Steering angle, max ................................................................
“Power Trim”
30°
Overall gear ratio
Model 280, 280 B1), 290 ..........................................................
1)
1.61:1
Model 280, 280 C , 290 ..........................................................
1.89:1
Model 280, 280 D1), 290 ..........................................................
2.15:1
Model 280T .............................................................................
1.61:1
Model 280PT ...........................................................................
1.61:1, 1.89:1
Model 285, 285A .....................................................................
1.61:1
Model 290A .............................................................................
1.61:1
Model 290A .............................................................................
2.15:1
Weight
Model 280 ...............................................................................
52 kg (114.6 lb.)
Model 290 ...............................................................................
54 kg (119 lb.)
Gear backlash
Upper gear, measured directly on the gear wheels,
ratio 1.61:1 ........................................................................
0.15–0.25 mm (0.006–0.010")
ratios 1.89:1 and 2.15:1 ....................................................
0.08–0.18 mm (0.003–0.007")
Lower gear, measured on the intermediate shaft splines joint ..
1)
0.06–0.10 = 0.15–0.25 mm gear backlash in the
gear (0.002–0.004")
On certain 280 drives the gear ratio is given by the marking B, C, or D.
168
Technical Data
Lubricating system
Pump, type .............................................................................
Circulation pump for distribution of oil to all lubrication points
Oil quality ................................................................................
Engine oil
Viscosity .................................................................................
Multigrade SAE 10W-30 aft. 10W-401)
Oil quality, approx ...................................................................
2.6 liters (US Qts. 2 3/4)
Oil quantity, 1" extension, approx. ..........................................
2.6 liters (US Qts. 2 3/4)
Oil quantity, 4" extension, approx. ..........................................
2.8 liters (US Qts. 3.0)
Oil capacity between min. and max. marks, approx. ...............
0.15 liters (US Qts. 0.16)
Power Trim,
oil quality ..........................................................................
ATF oil2)
oil quantity ........................................................................
1.0 liters (1.1 US Qts.)
Tightening torques
Nm
Lb. ft.
Upper nut vertical shaft (upper gear) .......................................
125
92
Tightening universal joint .........................................................
1253)
923)
Assembly double bearing box – gear housing .........................
35
26
Assembly of top cover to upper gear housing .........................
15
11
Lower nut vertical shaft ...........................................................
160
118
Bearing box with propeller shaft in gear housing ......................
40
30
4)
Intermediate housing – lower gear housing ..............................
38
284)
Oil drain plug ...........................................................................
10
7.5
Oil filler plug ............................................................................
35
25
Intermediate housing – upper gear housing .............................
38
28
Steering helmet ‘attachment bolt’, Earlier model .....................
50–60
36–44
Steering helmet ‘attachment bolt’, Later model ........................
35
25
Pre-stressing
Input gear in double bearing box, 280–290 ..............................
5–10 N (1.102–2.205 lb.)
Input gear in double bearing box, run-in gears, 280–290 ..........
2.5–5 N (0.55–1.102 lb.)
Input gear in double bearing box, 290A ...................................
10–15 N (2.20–3.30 lb.)
Input gear in double bearing box, run-in gears, 290A ...............
7.5–10 N (1.65–2.2 lb.)
1)
Alt. Volvo Penta oil for petrol or diesel engines. See Owners Manual.
2)
Early production drives were filled with engine oil and have that recommendation in the Owner’s Manual. Late production drives have ATF
oil filled. We recommend the use of ATF oil. Observe strict cleanliness so that dirt is not drawn in by the oil.
NOTE! Never mix ATF oil with engine oil, as this will cause foaming and possible pump failure.
3)
As from PZ number 2721099 the following tightening torque should be applied: 75 Nm (55.2 lb. ft.)
4)
The tightening torque for the three thinner bolts (two long and one short) is 15 Nm (10 lb. ft.). This applies to all drives.
169
Technical data
Models 280-DP, 280DP/PT, 290DP and 290A-DP
General Data
Type designation .....................................................................
Aquamatic DuoProp
Shift mechanism .....................................................................
Self adjusting Silent Shaft type of cone clutch,
servo assisted disengagement. Direction of rotation adjustable.
Maximum propeller diameter ...................................................
16"
Maximum tilt angle, approx .....................................................
60°
Power Trim & tilting device .....................................................
“Power Trim”
Steering angle, max ................................................................
30°
Overall gear ratio
Model 280-DP, 280DP G1), 290-DP .........................................
1)
1.95:1
Model 280-DP, 280DP H , 290-DP ..........................................
2.30:1
Model 280-DP/PT ....................................................................
1.95:1, 2.30:1
Model 290A-DP .......................................................................
1.78:1, 1.95:1, 2.30:1
Weight
Model Duoprop ........................................................................
58 kg (127.9 lb.)
Gear backlash
Lower gear,
measured on the wings of the inner propeller shaft nut ......
measured on the wings of the outer propeller shaft nut .....
0.08–0.17 = 0.15–0.30 mm backlash in the gear
(0.003–0.007”)
0.11–0.34 = 0.20–0.35 mm backlash in the gear
(0.008–0.014”)
Upper gear, measured directly on the gear,
1)
ratio 1.95:1 and 1.78:1 ......................................................
0.15–0.25 mm (0.006–0.010")
ratio 2.30:1 ........................................................................
0.08–0.18 mm (0.003–0.007")
On certain 280DP drives the gear ratio is given by the marking G or H.
170
Technical Data
Lubricating system
Pump, type .............................................................................
Circulation pump for distribution of oil to all lubricating points
Oil quality ................................................................................
API GL51)
Viscosity .................................................................................
SAE 90 or 80W90
Oil quantity, approx .................................................................
2.7 liters (2.8 US Qts.)
Oil quantity, 1" extension, approx. ..........................................
2.7 liters (2.8 US Qts.)
Oil quantity, 4" extension, approx. ..........................................
2.9 liters (3.0 US Qts.)
Oil quantity between min. & max. marks .................................
0.15 liters (0.16 US Qts.)
Power Trim,
oil quality ..........................................................................
ATF oil2)
oil quantity ........................................................................
1.0 liters (1.1 US Qts.)
Tightening torques
Nm
Lb. ft.
Upper nut on vertical shaft (upper gear) ...................................
125
92
Tightening universal joint .........................................................
75
55
Assembly double bearing box – gear housing .........................
35
26
Assembly of top cover to upper gear housing .........................
15
11
Lower nut on vertical shaft ......................................................
110
81
Bearing box with propeller shaft in gear housing ......................
40
30
3)
Interm. housing – lower gear housing ......................................
38
283)
Oil drain plug ...........................................................................
10
7.5
Oil filler plug ............................................................................
35
25
Interm. housing – upper gear housing ......................................
38
28
Steering helmet attachment bolt ..............................................
35
25
Pre-stressing
Input gear in double bearing box 280–290 ...............................
5–10 N (1.102–2.205 lb.)
Input gear in double bearing box run-in gears, 280–290 ...........
2.5–5 N (0.55–1.102 lb.)
Input gear in double bearing box, 290A ...................................
10–15 N (2.20–3.30 lb.)
Input gear in double bearing box, run-in gears, 290A ...............
7.5–10 N (1.65–2.2 lb.)
Lower gear ..............................................................................
1.2–2,3 N (0.265–0.507 lb.)
1)
Synthetic oil 75W90 is recommended for commercial duty (corresponding to the requirements for GL5 oil).
2)
Early production drives were filled with engine oil and have that recommendation in the Owner’s Manual. Late production drives have ATF
oil filled. We recommend the use of ATF oil. Observe strict cleanliness so that dirt is not drawn in by the oil.
NOTE! Never mix ATF oil with engine oil, as this will cause foaming and possible pump failure.
3)
The tightening torque for the three thinner bolts (two long and one short) is 15 Nm (10 lb. ft.). This applies to all drives.
171
Technical data
Models SP-A, SP-A1, SP-A2 and SP-C
GeneralData
Type designation .....................................................................
Aquamatic SP-A, SP-A1, SP-A2 & SP-C
Shift mechanism .....................................................................
Self adjusting Silent Shaft type of cone clutch,
servo assisted disengagement.
Maximum Propeller diameter ...................................................
16”
Maximum tilt angle, approx. ....................................................
60"
Power Trim & tilting device .....................................................
“Power Trim”
Steering angle, max. ...............................................................
30°
Overall gear ratio
Model SP-A ............................................................................
1.61:1, 1.89:1, 2.15:1
Model SP-A1 ...........................................................................
1.61:1, 1.89:1, 2.15:1
Model SP-A2 ...........................................................................
1.61:1, 1.89:1
Model SP-C ............................................................................
1.61:1, 1.89:1, 2.15:1
Weight
Models SP ..............................................................................
58 kg (127.9 lb.)
Gear backlash
Upper gear, measured directly on the gear wheel,
ratio 1.61:1 ........................................................................
0.15-0.25 mm (0.006-0.010")
ratio 1.89:1 ........................................................................
0.08–0.18 mm (0.003–0.007“)
ratio 2.15:1 ........................................................................
0.08–0.18 mm (0.003–0.007“)
Lower gear, measured on the intermediate shaft spline joint ....
0.06-0.10 = 0.15-0.25 mm gear backlash in the
gear (0.002-0.004 in)
Lubrication System
Pump, type .............................................................................
Circulation pump for distribution of oil to all
lubricating points
Oil quality ................................................................................
API-GL51)
Viscosity .................................................................................
SAE 90 or 80W90
Oil quantity, approx. ................................................................
2.6 liters (2.75 US Qts.)
Oil quantity, 1 in. extension, approx. ......................................
2.6 liters (2.75 US Qts.)
Oil quantity, 4" extension, approx. ..........................................
2.8 liters (3.0 US Qts.)
Oil quantity between min. & max. marks .................................
0.15 liters (0.16 US Ots.)
Power Trim, oil quality .............................................................
ATF oil
1)
Synthetic oil grade 75W90 corresponding to API GL5 requirements is recommended for commercial use.
172
Technical Data
Tightening torques
Nm
Lb. ft.
Upper nut on vertical shaft (upper gear) ...................................
125
92
Tightening universal joint .........................................................
75
55
Assembly double bearing box - gear housing ..........................
35
26
Assembly of top cover to upper gear housing .........................
15
11
Lower nut on vertical shaft ......................................................
110
81
Bearing box with propeller shaft in gear housing ......................
40
30
Interm. housing - lower gear housing .......................................
15
11
Oil drain plug ...........................................................................
10
7.5
Oil filler plug ............................................................................
35
25
Interm. housing - upper gear housing ......................................
20
15
Steering helmet 'attachment bolt’ ............................................
35
25
Pre-stressing
Input gear in double bearing box ..............................................
5-10 N (0.5-1.0 kp/1.102-2.205 lb.)
Input gear in double bearing box, run-in gears .........................
2.5-5 N (0.25-0.5 kp/0.55-1.102 lb.)
173
Technical data
Models DP-A, DP-A1, DP-A2, DP-B, DP-B1, DP-C and DP-C1
General Data
Type designation .....................................................................
Aquamatic DUOPROP
Shift mechanism .....................................................................
Self adjusting Silent Shaft type of cone clutch,
servo assisted disengagement.
Maximum tilt angle, approx .....................................................
60"
Power Trim & tilting device .....................................................
“Power Trim”
Steering angle, max ................................................................
30°
Overall gear ratio
Model DP-A ............................................................................
1.95:1, 2.30:1
Models DP-A1, DP-A2, DP-B, DP-B1, DP-C and DP-C1 .........
1.95:1, 2.30:1, 1.78:1
Weight
Models DP-A, DP-A1, DP-A2, DP-B, DP-B1, DP-C, DP-C1 ....
58 kg (127.9 lb.)
Gear backlash
Lower gear, measured on the wings of the inner
propeller shaft nut ...................................................................
0.08-0.17 = 0.15-0.30 mm (0.003-0.007 in.)
backlash in the gear
Lower gear, measured on the wings of the outer
propeller shaft nut ...................................................................
0.11-0.34 = 0.20-0.35 mm (0.008-0.014 in.)
backlash in the gear
Upper gear, measured directly on the gear,
ratio 1.95:1 and 1.78:1 ......................................................
0.15-0.25 mm (0.006-0.010")
ratio 2.30:1 ........................................................................
0.08-0.18 mm (0.003-0.070")
Lubrication System
Pump, type .............................................................................
Circulation pump for distribution of oil to all lubricating points
Oil quality ................................................................................
API-GL51)
Viscosity .................................................................................
SAE 90 or 80W90
Oil quantity, approx. ................................................................
2.7 liters (2.8 IS Qts.)
Oil quantity, 1 in. extension, approx ...................................... .
2.7 liters (2.8 US Qts.)
Oil quantity, 4" extension, approx. ..........................................
2.9 liters (3.0 US Qts.)
Oil quantity between min. & max. marks .................................
0.15 liters (0.16 US Ots.)
Power Trim, oil quality .............................................................
ATF oil
1)
Synthetic oil grade 75W90 corresponding to API GL5 requirements is recommended for commercial use.
174
Technical Data
Tightening torques
Nm
Lb. ft.
Upper nut on vertical shaft (upper gear) ...................................
125
92
Tightening universal joint .........................................................
75
55
Assembly double bearing box - gear housing ..........................
35
26
Assembly of top cover to upper gear housing .........................
15
11
Lower nut on vertical shaft ......................................................
110
81
Bearing box with propeller shaft in gear housing ......................
40
30
Interm. housing - lower gear housing .......................................
15
11
Oil drain plug ...........................................................................
10
7.5
Oil filler plug ............................................................................
35
25
Interm. housing - upper gear housing ......................................
20
15
Steering helmet 'attachment bolt’ ............................................
35
25
Prestressing
Input gear in double bearing box ..............................................
5-10 N (1.102-2.205 lb.)
Input gear in double bearing box, run-in gears .........................
2.5-5 N (0.55-1.102 lb.)
Lower gear ..............................................................................
1.2-2.3 N (0.265-0.507 lb.)
175
References to Service Bulletins
Group
No.
Date
Concerning
.........................................................................................................................................................................................
.........................................................................................................................................................................................
.........................................................................................................................................................................................
.........................................................................................................................................................................................
.........................................................................................................................................................................................
.........................................................................................................................................................................................
.........................................................................................................................................................................................
.........................................................................................................................................................................................
.........................................................................................................................................................................................
.........................................................................................................................................................................................
.........................................................................................................................................................................................
.........................................................................................................................................................................................
.........................................................................................................................................................................................
.........................................................................................................................................................................................
.........................................................................................................................................................................................
.........................................................................................................................................................................................
.........................................................................................................................................................................................
.........................................................................................................................................................................................
.........................................................................................................................................................................................
.........................................................................................................................................................................................
.........................................................................................................................................................................................
.........................................................................................................................................................................................
.........................................................................................................................................................................................
.........................................................................................................................................................................................
.........................................................................................................................................................................................
.........................................................................................................................................................................................
.........................................................................................................................................................................................
.........................................................................................................................................................................................
.........................................................................................................................................................................................
.........................................................................................................................................................................................
.........................................................................................................................................................................................
.........................................................................................................................................................................................
.........................................................................................................................................................................................
.........................................................................................................................................................................................
176
Report form
Do you have any complaints or other comments about this manual. Please
make a copy of this page, write your comments down and send them to us. The
address is at the bottom. We would prefer you to write in English or Swedish.
From: ............................................................................
......................................................................................
......................................................................................
......................................................................................
Refers to publication: .............................................................................................................................................
Publication No.: ............................................................. Date of issue: .................................................................
Proposal/motivation: ..............................................................................................................................................
..............................................................................................................................................................................
..............................................................................................................................................................................
..............................................................................................................................................................................
..............................................................................................................................................................................
..............................................................................................................................................................................
..............................................................................................................................................................................
..............................................................................................................................................................................
..............................................................................................................................................................................
Date: ................................................................
Signed: .............................................................
AB Volvo Penta
Technical Information
Dept. 42200
SE-405 08 Göteborg
Sweden
7731624-8 English 06–2003