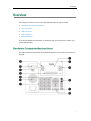
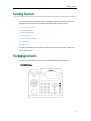
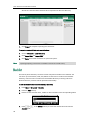
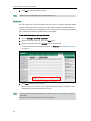
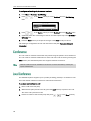
1
v Copyright © 2014 YEALINK NETWORK TECHNOLOGY CO., LTD. Copyright © 2014 Yealink Network Technology CO., LTD. All rights reserved. No parts of this publication may be reproduced or transmitted in any form or by any means, electronic or mechanical, photocopying, recording, or otherwise, for any purpose, without the express written permission of Yealink Network Technology CO., LTD. Under the law, reproducing includes translating into another language or format. When this publication is made available on media, Yealink Network Technology CO., LTD. gives its consent to downloading and printing copies of the content provided in this file only for private use but not for redistribution. No parts of this publication may be subject to alteration, modification or commercial use. Yealink Network Technology CO., LTD. will not be liable for any damages arising from use of an illegally modified or altered publication. THE SPECIFICATIONS AND INFORMATION REGARDING THE PRODUCTS IN THIS GUIDE ARE SUBJECT TO CHANGE WITHOUT NOTICE. ALL STATEMENTS, INFORMATION, AND RECOMMENDATIONS IN THIS GUIDE ARE BELIEVED TO BE ACCURATE AND PRESENTED WITHOUT WARRANTY OF ANY KIND, EXPRESS OR IMPLIED. USERS MUST TAKE FULL RESPONSIBILITY FOR THEIR APPLICATION OF PRODUCTS. YEALINK NETWORK TECHNOLOGY CO., LTD. MAKES NO WARRANTY OF ANY KIND WITH REGARD TO THIS GUIDE, INCLUDING, BUT NOT LIMITED TO, THE IMPLIED WARRANTIES OF MERCHANTABILITY AND FITNESS FOR A PARTICULAR PURPOSE. Yealink Network Technology CO., LTD. shall not be liable for errors contained herein nor for incidental or consequential damages in connection with the furnishing, performance, or use of this guide. Hereby, Yealink Network Technology CO., LTD. declares that this phone is in conformity with the essential requirements and other relevant provisions of the CE, FCC. This device is marked with the CE mark in compliance with EC Directives 2006/95/EC and 2004/108/EC. This device is compliant with Part 15 of the FCC Rules. Operation is subject to the following two conditions: 1. This device may not cause harmful interference. 2. This device must accept any interference received, including interference that may cause undesired operation. Note: This equipment has been tested and found to comply with the limits for a Class B digital device, pursuant to part 15 of the FCC Rules. These limits are designed to provide reasonable protection against harmful interference in a residential installation. This equipment generates, uses and can radiate radio frequency energy and, if not installed and used in accordance with the instructions, may cause harmful interference to radio communications. However, there is no guarantee that interference will not occur in a particular installation. If this equipment does cause harmful interference to radio or television reception, which can be determined by turning the equipment off and on, the user is encouraged to try to correct the interference by one or more of the following measures: 1. Reorient or relocate the receiving antenna. 2. Increase the separation between the equipment and receiver. 3. Connect the equipment into an outlet on a circuit different from that to which the receiver is connected. 4. Consult the dealer or an experienced radio/TV technician for help. To avoid the potential effects on the environment and human health as a result of the presence of hazardous substances in electrical and electronic equipment, end users of electrical and electronic equipment should understand the meaning of the crossed-out wheeled bin symbol. Do not dispose of WEEE as unsorted municipal waste and have to collect such WEEE separately. We are striving to improve our documentation quality and we appreciate your feedback. Email your opinions and comments to [email protected]. vii Yealink SIP-T42G IP phone firmware contains third-party software under the GNU General Public License (GPL). Yealink uses software under the specific terms of the GPL. Please refer to the GPL for the exact terms and conditions of the license. The original GPL license, source code of components licensed under GPL and used in Yealink products can be downloaded online: http://www.yealink.com/GPLOpenSource.aspx?BaseInfoCateId=293&NewsCateId=293&CateId=293. About This Guide Thank you for choosing the SIP-T42G IP Phone, an ultra-elegant gigabit IP Phone which is exquisitely designed to provide business telephony features, such as Call Hold, Call Transfer, Busy Lamp Field, Multicast Paging and Conference over an IP network. This guide provides everything you need to quickly use your new phone. First, verify with your system administrator that the IP network is ready for phone configuration. Also be sure to read the Packaging Contents and Regulatory Notices sections in this guide before you set up and use the SIP-T42G IP phone. Shared Line, Network Directory and Network Call Log features are hidden for IP phones in the neutral firmware, which are designed for the BroadWorks environment. Please contact your system administrator for more information. Note Topics provided in this guide include: Chapter 1 Overview Chapter 2 Getting Started Chapter 3 Customizing Your Phone Chapter 4 Basic Call Features Chapter 5 Advanced Phone Features This section describes the changes to this guide for each release and guide version. The following section is new: Optional Accessories on page 10 Major updates have occurred to the following sections: DSS Keys on page 46 Appendix A - Time Zones on page 133 v User Guide for the SIP-T42G IP Phone The following sections are new: BLF List on page 101 Call Completion on page 74 Major updates have occurred to the following sections: LED Instructions on page 4 Ring Tones on page 26 Anonymous Call on page 96 Anonymous Call Rejection on page 97 Multicast Paging on page 108 Troubleshooting on page 121 Appendix A - Time Zones on page 133 Major updates have occurred to the following sections: Documentations on page 8 Packaging Contents on page 9 The following section is new: Call Completion on page 74 Major updates have occurred to the following sections: LED Instructions on page 4 Backlight on page 19 Anonymous Call on page 96 Major updates have occurred to the following sections: vi Icon Instructions on page 3 DSS Keys on page 46 Dial Plan on page 58 About This Guide Anonymous Call on page 96 Troubleshooting on page 121 Major updates have occurred to the following sections: Phone Status on page 14 Directory on page 28 Remote Phone Book on page 39 vii User Guide for the SIP-T42G IP Phone viii Table of Contents About This Guide ...................................................................... v In This Guide .................................................................................................................... v Summary of Changes ...................................................................................................... v Changes for Release 73, Guide Version 73.40 ............................................................ v Changes for Release 73, Guide Version 73.16 ........................................................... vi Changes for Release 72, Guide Version 72.2 ............................................................. vi Changes for Release 72, Guide Version 72.1 ............................................................. vi Changes for Release 71, Guide Version 71.120 ......................................................... vi Changes for Release 71, Guide Version 71.90 .......................................................... vii Table of Contents ..................................................................... ix Overview .................................................................................. 1 Hardware Component Instructions ................................................................................. 1 Icon Instructions ............................................................................................................... 3 LED Instructions ................................................................................................................ 4 User Interfaces ................................................................................................................. 5 Phone User Interface .................................................................................................... 6 Web User Interface ....................................................................................................... 6 Documentations ............................................................................................................... 8 Getting Started ......................................................................... 9 Packaging Contents ......................................................................................................... 9 Optional Accessories.................................................................................................. 10 Phone Installation........................................................................................................... 11 Phone Initialization ......................................................................................................... 14 Phone Status................................................................................................................... 14 Basic Network Settings .................................................................................................. 16 Registration .................................................................................................................... 17 Idle Screen ..................................................................................................................... 17 Customizing Your Phone ......................................................... 19 General Settings ............................................................................................................ 19 Backlight...................................................................................................................... 19 Language .................................................................................................................... 20 Time & Date................................................................................................................. 20 ix User Guide for the SIP-T42G IP Phone Administrator Password ............................................................................................. 22 Key as Send ................................................................................................................ 23 Phone Lock .................................................................................................................. 23 Audio Settings ................................................................................................................ 26 Volume......................................................................................................................... 26 Ring Tones ................................................................................................................... 26 Contact Management ................................................................................................... 28 Directory ...................................................................................................................... 28 Local Directory ............................................................................................................ 30 Blacklist........................................................................................................................ 38 Remote Phone Book .................................................................................................... 39 Call History Management ............................................................................................. 42 System Customizations .................................................................................................. 43 Headset Use ............................................................................................................... 43 DSS Keys ..................................................................................................................... 46 Account Management ............................................................................................... 56 Dial Plan ...................................................................................................................... 58 Emergency Number.................................................................................................... 63 Live Dialpad ................................................................................................................ 64 Hotline ......................................................................................................................... 65 Basic Call Features ................................................................. 67 Placing Calls ................................................................................................................... 68 Answering Calls ............................................................................................................. 70 Ending Calls ................................................................................................................... 71 Redialing Numbers ........................................................................................................ 71 Recent Call In Dialing .................................................................................................... 72 Auto Answer ................................................................................................................... 73 Auto Redial ..................................................................................................................... 73 Call Completion ............................................................................................................. 74 Recall .............................................................................................................................. 75 Call Mute ........................................................................................................................ 76 Call Hold/Resume .......................................................................................................... 76 Do Not Disturb (DND) .................................................................................................... 77 Call Forward................................................................................................................... 81 Call Transfer ................................................................................................................... 86 Call Waiting .................................................................................................................... 87 Conference..................................................................................................................... 88 Local Conference........................................................................................................ 88 Network Conference .................................................................................................. 89 Call Park ......................................................................................................................... 91 Call Pickup...................................................................................................................... 92 Anonymous Call ............................................................................................................. 96 Anonymous Call Rejection ............................................................................................. 97 x Table of Contents Advanced Phone Features ..................................................... 99 Busy Lamp Field (BLF).................................................................................................... 99 BLF List .......................................................................................................................... 101 Call Recording.............................................................................................................. 103 Hot Desking .................................................................................................................. 105 Intercom ....................................................................................................................... 106 Outgoing Intercom Calls .......................................................................................... 106 Incoming Intercom Calls ........................................................................................... 107 Multicast Paging .......................................................................................................... 108 Sending RTP Stream ................................................................................................. 109 Receiving RTP Stream ............................................................................................... 112 Music on Hold .............................................................................................................. 113 Automatic Call Distribution (ACD) .............................................................................. 114 Messages ..................................................................................................................... 116 Voice Mail.................................................................................................................. 116 Message Waiting Indicator (MWI) .......................................................................... 117 Troubleshooting .....................................................................121 Regulatory Notices ................................................................129 Service Agreements .................................................................................................... 129 Limitations of Liability .................................................................................................. 129 Safety Instructions ........................................................................................................ 129 Appendix A - Time Zones ......................................................133 Index ......................................................................................137 xi User Guide for the SIP-T42G IP Phone xii Overview This chapter provides the overview of the SIP-T42G IP phone. Topics include: Hardware Component Instructions Icon Instructions LED Instructions User Interfaces Documentations If you require additional information or assistance with your new phone, contact your system administrator. The main hardware components of the SIP-T42G IP phone are the LCD screen and the keypad. 1 User Guide for the SIP-T42G IP Phone Hardware component instructions of the SIP-T42G IP phone are: Item Description Shows information about calls, messages, soft keys, time, date and other relevant data: • Call information—caller ID, call duration ① LCD Screen • Icons (for example, ) • Missed call text or second incoming caller information • Prompt text (for example, "Saving config file!") • Time and date ② Power Indicator LED ③ Line Keys Indicates phone power and some feature statuses. Use these keys to activate up to twelve accounts and assign various features. Mute Key Toggles and indicates mute feature. Headset Key Toggles and indicates the headset mode. Message Key Accesses voice mails. Redial Key Redials a previously dialed number. ⑤ Speakerphone Key Toggles the hands-free speakerphone mode. ⑥ Volume Key ⑦ Keypad ④ Adjusts the volume of the handset, headset, speaker, and ringer. Provides the digits, letters, and special characters in context-sensitive applications. Scroll through the displayed information. ⑧ Confirms actions or answers incoming calls. Cancels actions or rejects incoming calls. ⑨ Soft Keys ⑩ Speaker Label automatically to identity their context-sensitive features. Provides ringer and hands-free (speakerphone) audio output. Secures the handset in the handset cradle when the IP ⑪ Hookswitch Tab phone is mounted vertically. For more information on how to adjust the hookswitch tab, refer to Yealink Wall Mount Quick Installation Guide for T4X IP Phones . Picking up the handset from the handset cradle, the ⑫ Hookswitch hookswitch bounces and the phone connects to the line, laying the handset down on the handset cradle, the phone disconnects from the line. 2 Overview Icons appearing on the LCD screen are described in the following table: Icon Description Network is unavailable Registered successfully Register failed Registering Hands-free speakerphone mode Handset mode Headset mode Voice Mail Auto Answer Do Not Disturb Call Hold Call Mute Ringer volume is 0 Phone Lock Alphanumeric input mode Numeric input mode Multi-lingual lowercase letters input mode Multi-lingual uppercase letters input mode Multi-lingual uppercase and lowercase letters input mode Call Forward/Forwarded Calls 3 User Guide for the SIP-T42G IP Phone Icon Description Missed Calls Received Calls Placed Calls Recording box is full A call cannot be recorded Recording starts successfully Recording cannot be started Recording cannot be stopped Power Indicator LED LED Status Description Solid red The phone is initializing. Fast flashing red (300ms) The phone is ringing. Slow flashing red (1s) The phone receives a voice mail. The phone is powered off. The phone is idle. Off The phone is busy. The call is placed on hold or is held. The call is muted. Line key LED LED Status Solid green 4 Description The line is seized. The line is in conversation. Fast flashing green The line receives an incoming call. Slow flashing green The call is placed on hold. Off The line is inactive. Overview Line key LED (configured as a BLF key or BLF List key) LED Status Description Solid green The monitored user is idle. Fast flashing red (200ms) The monitored user receives an incoming call. Solid red The monitored user is busy. The call is parked against the monitored user’s Slow flashing red (1s) phone number. The monitored user’s conversation is placed on hold (This status requires server support). Off The monitored user does not exist. Line key LED (used as a page switch key) LED Status Solid red Solid green Fast flashing green Fast flashing red Off Note Description There is a parked call on the line key of the non-current page. There is a call on the line key of the non-current page. The line receives an incoming call on the non-current page. The monitored user receives an incoming call on the non-current page. Line keys on every page are idle. The above introduces the default LED status. The statuses of the power indicator LED and BLF key are configurable via web user interface. For more information, refer to Yealink_SIP-T4X_IP_Phones_Administrator_Guide . Two ways to customize configurations of your SIP-T42G IP phone: The user interface on the IP phone. The user interface in a web browser on your PC. The hardware components keypad and LCD screen constitute the phone user interface, which allows the user to execute all call operation tasks and basic configuration changes directly on the phone. In addition, you can use the web user interface to access all configuration settings. In many cases, it is possible to use either the phone user interface and/or the web user interface interchangeably. However, in some cases, it is only possible to use one or the other interface to operate the phone and change settings. 5 User Guide for the SIP-T42G IP Phone You can customize your phone by pressing the Menu soft key to access the phone user interface. The Advanced option is only accessible to the administrator, and the default administrator password is “admin” (case-sensitive). For more information on customizing your phone with the available options from the phone user interface, refer to Customizing Your Phone on page 19. In addition to the phone user interface, you can also customize your phone via web user interface. In order to access the web user interface, you need to know the IP address of your new phone. To obtain the IP address, press the OK key on the phone when the phone is idle. Enter the IP address (e.g., http://192.168.0.10 or 192.168.0.10) in the address bar of a web browser on your PC. The default administrator user name and password are both “admin” (case-sensitive). The options you can use to customize the IP phone via phone user interface and/or via web user interface are listed in the following table: Options Phone User Interface Web User Interface √ √ Status --IP Address --MAC --Firmware --Network --Phone --Accounts Basic Phone Settings 6 --Backlight √ --Language √ --Time & Date √ --Administrator Password √ --Key as Send √ -- Phone Lock √ --Ring Tones √ --Contact Management × --Directory × --Local Directory √ --Blacklist √ --Remote Phone Book × --Call History Management √ --DSS Keys √ √ Overview Options Phone User Interface --Account Registration √ --Dial Plan × --Emergency Number × --Live Dialpad × --Hotline √ Web User Interface Basic Call Features --Recent Call In Dialing × --Auto Answer √ --Auto Redial √ --Call Completion √ --Recall √ -- Do Not Disturb (DND) √ --Call Forward √ --Call Transfer √ --Call Waiting √ --Conference × --Call Park √ --Call Pickup √ --Anonymous Call √ --Anonymous Call Rejection √ √ Advanced Phone Features --Busy Lamp Field (BLF) √ --BLF List × --Call Recording √ --Hot Desking √ --Intercom √ --Multicast Paging × --Music on Hold × --ACD √ --Messages √ √ SIP Account --User Options × --Activation √ --Label √ --Display Name √ --Register Name √ --User Name √ --Password √ --SIP Server1/2 √ --Server Option --Registrar Port √ × × 7 User Guide for the SIP-T42G IP Phone Options Note Phone User Interface --Outbound Status √ --Outbound Proxy √ --NAT Traversal × --STUN Status √ --STUN Server √ Web User Interface The table above lists most of the feature options. Please refer to the relevant sections for more information. The following table shows documentations available for the SIP-T42G IP phone. Name Contents Where found Language In the package English On the website English Basic call features Quick Start Guide and phone customizations Phone/Web user interface settings User Guide Basic call features and advanced phone features Note 8 You can also download the latest documentations online: http://www.yealink.com/SupportDownloadfiles_detail.aspx?CateId=312&flag=142 . Getting Started This chapter provides the following basic installation instructions and information for obtaining the best performance with the SIP-T42G IP phone. Topics include: Packaging Contents Phone Installation Phone Initialization Phone Status Basic Network Settings Registration Idle Screen If you require additional information or assistance with your new phone, contact your system administrator. The following components are included in your SIP-T42G IP phone package: SIP-T42G IP Phone 9 User Guide for the SIP-T42G IP Phone Phone Stand Handset & Handset Cord Ethernet Cable Quick Start Guide Check the list before installation. If you find anything missing, contact your system administrator. The following items are optional accessories for your SIP-T42G IP phone. You need to purchase them separately if required. 10 Getting Started Wall Mount Bracket Power Adapter Headset Wireless Headset Adapter EHS36 If your phone is already installed, proceed to Phone Initialization on page 14. This section introduces how to install the phone: 1) Attach the stand or the optional wall mount bracket 2) Connect the handset and optional headset 3) Connect the network and power 11 User Guide for the SIP-T42G IP Phone 1) Attach the stand or the optional wall mount bracket Desk Mount Method Wall Mount Method (Optional) Note The wall mount bracket should be purchased separately. For more information on how to attach the wall mount bracket, refer to Yealink Wall Mount Quick Installation Guide for SIP-T4X IP Phones. 2) Note Connect the handset and optional headset The headset and wireless headset adapter EHS36 should be purchased separately. EHS36 is used for connecting the phone and a compatible wireless headset. For more information on how to use the EHS36, refer to Yealink EHS36 User Guide. 12 Getting Started 3) Connect the network and power You have two options for power and network connections. Your system administrator will advise you which one to use. AC power (Optional) Power over Ethernet (PoE) AC Power (Optional) To connect the AC power: 1. Connect the DC plug on the power adapter to the DC5V port on the phone and connect the other end of the power adapter into an electrical power outlet. 2. Connect the included or a standard Ethernet cable between the Internet port on the phone and the one on the wall or switch/hub device port. Power over Ethernet With the included or a regular Ethernet cable, the SIP-T42G IP phone can be powered from a PoE-compliant switch or hub. 13 User Guide for the SIP-T42G IP Phone To connect the PoE: 1. Connect the Ethernet cable between the Internet port on the phone and an available port on the in-line power switch/hub. Note If in-line power is provided, you don’t need to connect the phone to the power adapter. Make sure the switch/hub is PoE-compliant. The phone can also share the network with another network device such as a PC (personal computer). This is an optional connection. Important! Do not remove power to the phone while it is updating firmware and configurations. After your phone is powered on, the system boots up and performs the following steps: Automatic Phone Initialization The phone finishes the initialization by loading the saved configuration. The LCD screen displays "Initializing…please wait" during this process. DHCP (Dynamic Host Configuration Protocol) The phone attempts to contact a DHCP server in your network to obtain valid IPv4 network settings (e.g., IP address, subnet mask, default gateway address and DNS address) by default. Note If your network does not use DHCP, proceed to Basic Network Settings on page 16. You can view phone status via phone user interface or web user interface. Available information of phone status includes: 14 Getting Started Network status (e.g., IPv4 status, IP address mode and MAC address). Phone status (e.g., device model, hardware version, firmware version, product ID and device certificate status). Note Account status (e.g., register status of SIP accounts). You can view device certificate status via phone user interface only. To view the phone status via phone user interface: 1. Press , or press Menu->Status. 2. Press or to scroll through the list and view the specific information. To view the phone status via web user interface: 1. Open a web browser on your computer. 2. Enter the IP address in the browser’s address bar, and then press the Enter key. 3. Enter the user name (admin) and password (admin) in the login page. 4. Click Confirm to login. 15 User Guide for the SIP-T42G IP Phone The phone status is displayed on the first page of the web user interface. If your phone cannot contact a DHCP server for any reason, you need to configure network settings manually. The IP phone can support either or both IPv4 and IPv6 addresses. To configure the IP address mode via phone user interface: 1. Press Menu->Settings->Advanced Settings (default password: admin) ->Network->WAN Port. 2. Press or , or the Switch soft key to select IPv4, IPv6 or IPv4 & IPv6 from the IP Mode field. 3. Press the Save soft key to accept the change or the Back soft key to cancel. To configure a static IPv4 address via phone user interface: 1. Press Menu->Settings->Advanced Settings (default password: admin) ->Network->WAN Port. 16 2. Press to select IPv4 and then press the Enter soft key. 3. Press to select Static IP Client and then press the Enter soft key. 4. Enter the desired values in the IPv4, Subnet Mask, Default Gateway, IPv4 Pri.DNS Getting Started and IPv4 Sec.DNS fields respectively. 5. Press the Save soft key to accept the change or the Back soft key to cancel. To configure a static IPv6 address via phone user interface: 1. Press Menu->Settings->Advanced Settings (default password: admin) ->Network->WAN Port. 2. Press to select IPv6 and then press the Enter soft key. 3. Press to select Static IP and then press the Enter soft key. 4. Enter the desired values in the IPv6 IP, Prefix, Default Gateway, IPv6 Pri.DNS and IPv6 Sec.DNS fields respectively. 5. Note Press the Save soft key to accept the change or the Back soft key to cancel. Wrong network settings may result in inaccessibility of your phone and may also have an impact on your network performance. For more information on these parameters, contact your system administrator. Generally, your phone will be deployed with multiple other phones. In this case, your system administrator will configure the phone parameters beforehand, so that after you start up your phone, the phone will be registered and ready for use. The SIP-T42G IP phone supports up to 12 accounts. If your phone is not registered, you may have to register it. For more information on how to register your phone, refer to Account Management on page 56. If the phone has successfully started up, the idle LCD screen will be displayed as below. 17 User Guide for the SIP-T42G IP Phone The idle screen displays the label of the current account, time and date, and four soft keys. 18 Customizing Your Phone You can customize your SIP-T42G IP phone by personally configuring certain settings, for example, time & date and ring tones. You can add contacts to the phone’s local directory manually or from call history. You can also personalize different ring tones for different callers. This chapter provides basic operating instructions for customizing your phone. Topics include: General Settings Audio Settings Contact Management Call History Management System Customizations If you require additional information or assistance with your new phone, contact your system administrator. You can configure the backlight to adjust the brightness of the LCD screen. Backlight status on the LCD screen can be configured from the following options: Always On: Backlight is on permanently. 15s, 30s, 60s, 120s, 300s, 600s or 1800s: Backlight is turned off when the phone is inactive after the designated time (in seconds). To configure the backlight via phone user interface: 1. Press Menu->Settings->Basic Settings->Display->Backlight. 2. Press or , or the Switch soft key to select the desired value from the Backlight Time field. 3. Press the Save soft key to accept the change or the Back soft key to cancel. 19 User Guide for the SIP-T42G IP Phone Backlight is configurable via web user interface at the path Settings->Preference. The default language of the phone user interface is English. If the language of your web browser is not supported by the phone, the web user interface will use English by default. You can change the language for the phone user interface and the web user interface respectively. To change the language for the phone user interface: 1. Press Menu->Settings->Basic Settings->Language. 2. Press 3. Press the Save soft key to accept the change. or to select the desired language. Text displayed on the phone user interface will change to the selected language. To change the language for the web user interface: 1. Click on Settings->Preference. 2. Select the desired language from the pull-down list of Language. 3. Click Confirm to accept the change. Text displayed on the web user interface will change to the selected language. The time and date are displayed on the LCD screen when the phone is idle. You can configure the phone to obtain the time and date from the Simple Network Time Protocol (SNTP) server automatically, or configure the date and time manually. If the phone cannot obtain the time and date from the SNTP server, contact your system 20 Customizing Your Phone administrator for more information. To configure the SNTP settings via phone user interface: 1. Press Menu->Settings->Basic Settings->Time & Date->SNTP Settings. 2. Press or , or the Switch soft key to select the time zone that applies to your area from the Time Zone field. The default time zone is "+8 China(Beijing)". 3. Enter the domain names or IP addresses in the NTP Server1 and NTP Server2 fields respectively. 4. Press or , or the Switch soft key to select the desired value from the Daylight Saving field. 5. Note Press the Save soft key to accept the change or the Back soft key to cancel. Please refer to Appendix A - Time Zones for the list of available time zones on the IP phone. To configure the time and date manually via phone user interface: 1. Press Menu->Settings->Basic Settings->Time & Date->Manual Settings. 2. Enter the specific time and date. 3. Press the Save soft key to accept the change. The date and time displayed on the LCD screen will change accordingly. To configure the time and date format via phone user interface: 1. Press Menu Settings->Basic Settings->Time & Date->Time & Date Format. 2. Press or , or the Switch soft key to select the desired time format (12 Hour or 24 Hour) from the Time Format field. 3. Press or , or the Switch soft key to select the desired date format from the 21 User Guide for the SIP-T42G IP Phone Date Format field. 4. Press the Save soft key to accept the change or the Back soft key to cancel. There are 7 available date formats. For example, for the date format “WWW DD MMM”, “WWW” represents the abbreviation of the weekday, “DD” represents the two-digit day, and “MMM” represents the first three letters of the month. The date formats available: Date Format Example (2014-7-26) WWW MMM DD Sat Jul 26 DD-MMM-YY 26-Jul-14 YYYY-MM-DD 2014-07-26 DD/MM/YYYY 26/07/2014 MM/DD/YY 07/26/14 DD MMM YYYY 26 Jul 2014 WWW DD MMM Sat 26 Jul Time and date are configurable via web user interface at the path Settings->Time & Date. The Advanced Settings option is only accessible to the administrator. The default administrator password is “admin”. For security reasons, you should change the default administrator password as soon as possible. To change the administrator password via phone user interface: 1. Press Menu->Settings->Advanced Settings (default password: admin) ->Set Password. 2. Enter the current password in the Current PWD field. 3. Enter the new password in the New PWD field. 4. Re-enter the new password in the Confirm PWD field. 5. Press the Save soft key to accept the change or the Back soft key to cancel. Administrator password is configurable via web user interface at the path Security->Password. 22 Customizing Your Phone You can set the "#" or "*" to perform as a send key while dialing. To configure key as send via phone user interface: 1. Press Menu->Features->Key as Send. 2. Press or , or the Switch soft key to select # or * from the Key as Send field, or select Disabled to disable this feature. 3. Press the Save soft key to accept the change or the Back soft key to cancel. Key as send is configurable via web user interface at the path Features->General Information. You can lock your phone temporarily when you are not using it. This feature helps to protect your phone from unauthorized use. Phone lock consists of the following: Menu Key: The Menu soft key is locked. You cannot access the menu of the phone until unlocked. Function Keys: The function keys are locked. You cannot use the MESSAGE, REDIAL, MUTE, OK, X, navigation keys, soft keys and line keys until unlocked. All Keys: All keys are locked, except the Volume, Headset, Speakerphone and digit keys. You are only allowed to dial emergency numbers, reject or answer incoming calls, and cancel a call. Note The emergency number setting, if desired, must be made before lock activation. For more information, refer to Emergency Number on page 63. 23 User Guide for the SIP-T42G IP Phone To activate the phone lock via phone user interface: 1. Press Menu->Settings->Advanced Settings (default password: admin) -> Phone Lock. 2. Press or , or the Switch soft key to select Enabled from the Phone Lock Enable field. 3. Press or , or the Switch soft key to select the desired type from the Lock Type field. 4. Press the Save soft key to accept the change. Long press to lock the phone immediately when the phone is idle. The LCD screen prompts “Phone locked.” and displays the icon . You can configure the interval (in seconds) to automatically lock the phone instead of long pressing . To configure the interval of automatic phone lock via web user interface: Note 1. Click on Features->Phone Lock. 2. Enter the desired time in the Phone Lock Time Out (0~3600s) field. 3. Click Confirm to accept the change. The default timeout is 0 second, that is, you can long press to lock the phone only. Interval of automatic phone lock is configurable via web user interface only. 24 Customizing Your Phone To unlock the phone, you must know the phone unlock PIN of the phone. The default phone unlock PIN is “123”. To change the phone unlock PIN via phone user interface: 1. Press Menu->Settings->Basic Settings->Change PIN. 2. Enter the desired values in the Current PIN, New PIN and Confirm PIN fields respectively. 3. Note Press the Save soft key to accept the setting or the Back soft key to cancel. The unlock PIN length must be within 15 digits. To unlock the phone via phone user interface: 1. Press any locked key, the LCD screen prompts “Please Enter PIN”. 2. Enter the PIN in the Phone Unlock PIN field. 3. Press the OK soft key to unlock the phone. The icon disappears from the LCD screen. You can long press or wait for a period of time (if configured) to lock the phone again. Note You can also unlock the phone by entering administrator password. When you enter the administrator password to unlock the phone, the phone will turn to the Reset Phone PIN interface. To deactivate the phone lock via phone user interface: 1. Press Menu->Settings->Advanced Settings (default password: admin) ->Phone Lock. 25 User Guide for the SIP-T42G IP Phone 2. Press or , or the Switch soft key to select Disabled from the Phone Lock Enable field. 3. Press the Save soft key to accept the change. Phone lock is configurable via web user interface at the path Features->Phone Lock. You can press the volume key to adjust the ringer volume when the phone is idle. You can also press the volume key to adjust the receiver volume of currently engaged audio devices (handset, speakerphone or headset) when the phone is in use. To adjust the volume when the phone is idle: 1. Note Press to adjust the ringer volume. If the ringer volume is adjusted to minimum, the icon will appear on the LCD screen. To adjust the volume when the phone is during a call: 1. Press to adjust the volume of currently engaged audio device (handset, speakerphone or headset). Ring tones are used to indicate incoming calls. You can select different ring tones to distinguish different accounts registered on your phone, or to distinguish your phone from your neighbor’s. 26 Customizing Your Phone To select a ring tone for the phone via phone user interface: 1. Press Menu->Settings->Basic Settings->Sound->Ring Tones->Common. 2. Press 3. Press the Save soft key to accept the change or the Back soft key to cancel. or to select the desired ring tone. A ring tone for the phone is configurable via web user interface at the path Settings->Preference->Ring Type. To select a ring tone for the account via phone user interface: 1. Press Menu->Settings->Basic Settings ->Sound->Ring Tones. 2. Press or to select the desired account and then press the Enter soft key. 3. Press or to select the desired ring tone. If Common is selected, this account will use the ring tone selected for the phone. 4. Press the Save soft key to accept the change or the Back soft key to cancel. A ring tone for the account is configurable via web user interface at the path Account->Basic->Ring Type. To upload a custom ring tone for your phone via web user interface: 1. Click on Settings->Preference. 27 User Guide for the SIP-T42G IP Phone 2. Click Browse to locate a ring tone file (the file format must be *.wav) from your local system. 3. Note Click Upload to upload the file. The ring tone for an incoming call on the phone may be different. For example, when the phone receives an incoming call from a contact stored in the local directory, it will play the ring tone assigned to the contact in the local directory (refer to Adding Contacts). If no ring tone is assigned to the contact, the phone will play the ring tone assigned to the associated group (refer to Adding Groups). Otherwise, the phone will play the ring tone assigned to the account. If no ring tone is assigned to the contact, the associated group or account, the phone will play the ring tone assigned to the phone. All custom ring tone files must be no greater than 100KB. Uploading custom ring tones for your phone is configurable via web user interface only. This section provides the operating instructions for managing contacts. Topics include: Directory Local Directory Blacklist Remote Phone Book Directory provides easy access to frequently used lists. The lists may contain Local Directory, History, Remote Phone Book and LDAP. To configure the directory via web user interface: 1. Click on Directory->Setting. 2. In the Directory block, select the desired list from the Disabled column and then click . The selected list appears in the Enabled column. 28 Customizing Your Phone 3. Repeat step 2 to add more lists to the Enabled column. 4. To remove a list from the Enabled column, select the desired list and click 5. To adjust the display order of enabled lists, select the desired list and click or . . The LCD screen will display the list(s) in the adjusted order. 6. Note Click Confirm to accept the change. Directory is configurable via web user interface only. To view the directory via phone user interface: 1. Press the Directory soft key when the phone is idle. The LCD screen displays the enabled list(s) in the directory. If there is only one list in the directory, press the Directory soft key to enter this list directly. Note If remote phone book and LDAP are not configured in advance, you cannot see remote phone book and LDAP lists on the phone user interface. For more information on remote phone book, refer to Remote Phone Book on page 39. For more information on the LDAP, refer to Yealink_SIP-T4X_IP_Phones_Administrator_Guide. 29 User Guide for the SIP-T42G IP Phone The built-in phone directory can store the names and phone numbers of your contacts. You can store up to 1000 contacts and 50 groups in your phone's local directory. There are four default groups in the local directory: All Contacts, Company, Family and Friend. You can add new groups and contacts, edit, delete or search for a contact, or simply dial a contact number from the local directory. To add a group to the local directory: 1. Press the Directory soft key. The IP phone enters the local directory directly as there is only Local Directory enabled in the directory by default. If the Local Directory is removed from the directory, press Menu->Directory->Local Directory to enter the local directory. 2. Press the Add soft key. 3. Enter the desired group name in the Name field. 4. Press or , or the Switch soft key to select the desired ring tone from the Ring field. If Auto is selected, this group will use the ring tone specified for the contact. If no ring tone is specified for the contact, it will then play the ring tone specified for the account. For more information on the ring tone for the account, refer to Ring Tones on page 26. 5. Press the Add soft key to accept the change or the Back soft key to cancel. You can also edit or delete the Company, Family, Friend and any newly added contact groups. 30 Customizing Your Phone To edit a group in the local directory: 1. Press the Directory soft key. The IP phone enters the local directory directly as there is only Local Directory enabled in the directory by default. If Local Directory is removed from the directory, press Menu->Directory->Local Directory to enter the local directory. 2. Select the desired contact group. 3. Press the Option soft key and then select Detail from the prompt list. 4. Press 5. Press the Save soft key to accept the change or the Back soft key to cancel. or to highlight the group information and then edit. To delete a group from the local directory: 1. Press the Directory soft key. The IP phone enters the local directory directly as there is only Local Directory enabled in the directory by default. If Local Directory is removed from the directory, press Menu->Directory->Local Directory to enter the local directory. 2. Select the desired contact group. 3. Press the Option soft key and then select Delete from the prompt list. 31 User Guide for the SIP-T42G IP Phone The LCD screen prompts the following warning: 4. Press the OK soft key to confirm the deletion or the Cancel soft key to cancel. You can also delete all groups by pressing the Option soft key, and then select Delete All. You can add contacts to the local directory in one of the following ways: Manually From call history From a remote phone book Adding Contacts Manually To add a contact to the local directory manually: 1. Press the Directory soft key. The IP phone enters the local directory directly as there is only Local Directory enabled in the directory by default. If Local Directory is removed from the directory, press Menu->Directory->Local Directory to enter the local directory. 2. Select the desired contact group and press the Enter soft key. 3. Press the Add soft key. 4. Enter the name and the office, mobile or other numbers in the corresponding fields. 5. Press or , or the Switch soft key to select the desired account from the Account field. If Auto is selected, the phone will use the first available account when placing calls to the contact from the local directory. 6. Press or , or the Switch soft key to select the desired ring tone from the Ring field. If Auto is selected, the phone will play the ring tone assigned to the group when receiving incoming calls from this contact. 32 Customizing Your Phone 7. Note Press the Add soft key to accept the change or the Back soft key to cancel. If the contact already exists in the directory, the LCD screen will prompt “Contact name existed!”. Adding Contacts from Call History To add a contact to the local directory from call history: 1. Press the History soft key. 2. Press 3. Press the Option soft key, and then select Add to Contacts from the prompt list. 4. Enter the contact name. 5. Press the Save soft key to accept the change. or to highlight the desired entry. The entry is successfully saved to the local directory. Adding Contacts from Remote Phone Book To add a contact to the local directory from a remote phone book: 1. Press Directory->Remote Phone Book. If Remote Phone Book is removed from the directory, press Menu->Directory->Remote Phone Book to enter the remote phone book. 2. Select the desired remote group and press the Enter soft key. 3. Press 4. Press the Option soft key, and then select Add to Contacts from the prompt list. 5. Press the Save soft key to save the contact to the local directory. or to highlight the desired entry. If the contact already exists in the local directory, the LCD screen will prompt "Overwrite the original contact?". Press the OK soft key to overwrite the original contact in the local directory or the Cancel soft key to cancel. For more information on remote phone book operating, refer to Remote Phone Book on page 39. To edit a contact in the local directory: 1. Press the Directory soft key. The IP phone enters the local directory directly as there is only Local Directory 33 User Guide for the SIP-T42G IP Phone enabled in the directory by default. If Local Directory is removed from the directory, press Menu->Directory->Local Directory to enter the local directory. 2. Select the desired contact group and press the Enter soft key. 3. Press 4. Press the Option soft key, and then select Detail from the prompt list. 5. Press 6. Press the Save soft key to accept the change or the Back soft key to cancel. or or to highlight the desired contact. to highlight the contact information and then edit. To delete a contact from the local directory: 1. Press the Directory soft key. The IP phone enters the local directory directly as there is only Local Directory enabled in the directory by default. If Local Directory is removed from the directory, press Menu->Directory->Local Directory to enter the local directory. 2. Select the desired contact group and press the Enter soft key. 3. Press 4. Press the Option soft key, and then select Delete from the prompt list. or to highlight the desired contact. The LCD screen prompts the following warning: 5. Press the OK soft key to confirm the deletion or the Cancel soft key to cancel. You can also delete all contacts by pressing the Option soft key, and then select Delete All. To place a call to a contact from the local directory: 1. Press the Directory soft key. The IP phone enters the local directory directly as there is only Local Directory enabled in the directory by default. 34 Customizing Your Phone If Local Directory is removed from the directory, press Menu->Directory->Local Directory to enter the local directory. 2. Select the desired contact group and press the Enter soft key. 3. Press 4. Do one of the following: - or to highlight the desired contact. If only one number for the contact is stored in the local directory, press the Send soft key to dial out the number. - If multiple numbers for the contact are stored in the local directory, press the Send soft key to display a list of numbers. Press or to highlight the desired number. Press the Send soft key to dial out the number. To search for a contact in the local directory: 1. Press the Directory soft key. The IP phone enters the local directory directly as there is only Local Directory enabled in the directory by default. If Local Directory is removed from the directory, press Menu->Directory->Local Directory to enter the local directory. 2. Press the Search soft key. 3. Enter a few continuous characters of the contact name or continuous numbers of the contact number (office, mobile or other number) using the keypad. The contacts whose name or phone number matches the characters entered will appear on the LCD screen. You can dial from the result list. You can search for a contact from the desired lists when the phone is in the dialing screen. The lists can be Local Directory, History, Remote Phone Book and LDAP. To configure search source list in dialing via web user interface: 1. Click on Directory->Setting. 2. In the Search Source List In Dialing block, select the desired list from the Disabled column and click . The selected list appears in the Enabled column. 35 User Guide for the SIP-T42G IP Phone 3. Repeat step 2 to add more lists to the Enabled column. 4. To remove a list from the Enabled column, select the desired list and click 5. To adjust the display order of the enabled lists, select the desired list and click or . . The LCD screen will display search results in the adjusted order. 6. Note Click Confirm to accept the change. Search source list in dialing is configurable via web user interface only. To search for an entry in the enabled search source lists: 1. Pick up the handset, press the speakerphone or press the line key. 2. Enter a few continuous characters of the entry’s name or continuous numbers of the entry’s phone number (office, mobile or other number) using the keypad. The entries in the enabled search source lists whose name or phone number matches the characters entered will appear on the LCD screen. You can press or to scroll to the desired entry, and then place a call to the entry. You can manage your phone’s local directory via phone user interface or web user 36 Customizing Your Phone interface. But you can only import or export the contact list via web user interface. To import an XML contact list file via web user interface: 1. Click on Directory->Local Directory. 2. Click Browse to locate a contact list file (the file format must be *.xml) from your local system. 3. Click Import XML to import the contact list. The web user interface prompts "The original contact will be covered, Continue?". 4. Click OK to complete importing the contact list. To import a CSV contact list file via web user interface: 1. Click on Directory->Local Directory. 2. Click Browse to locate a contact list file (the file format must be *.csv) from your local system. 3. (Optional.) Check the Show Title checkbox. It will prevent importing the title of the contact information which is located in the first line of the CSV file. 4. Click Import CSV to import the contact list. 5. (Optional.) Mark the On radio box in the Delete Old Contacts field. It will delete all existing contacts while importing the contact list. 6. (Optional.) Select the contact information you want to import into the local directory from the pull down list of Index. 37 User Guide for the SIP-T42G IP Phone At least one item should be selected to be imported into the local directory. 7. Click Import to complete importing the contact list. To export a contact list via web user interface: 1. Click on Directory->Local Directory. 2. Click Export XML (or Export CSV). 3. Click Save to save the contact list to your local system. Note Importing/exporting contact lists is available via web user interface only. The built-in phone directory can store names and phone numbers for a blacklist. You can store up to 30 contacts, add, edit, delete or search for a contact in the blacklist directory, and even call a contact from the blacklist directory. Incoming calls from blacklist directory contacts will be rejected automatically. To add a contact to the blacklist directory manually: 1. Press Menu->Directory->Blacklist. 2. Press the Add soft key. 3. Enter the name and the office, mobile or other numbers in the corresponding fields. 4. Press or Account field. 38 , or the Switch soft key to select the desired account from the Customizing Your Phone If Auto is selected, the phone will use the first available account when placing calls to the contact from the blacklist directory. 5. Press the Add soft key to accept the change or the Back soft key to cancel. To add a contact to the blacklist directory from the local directory: 1. Press Directory soft key. The IP phone enters the local directory directly as there is only Local Directory enabled in the directory by default. If Local Directory is removed from the directory, press Menu->Directory->Local Directory to enter the local directory. 2. Select the desired contact group and press the Enter soft key. 3. Press 4. Press the Option soft key and then select Add to Blacklist from the prompt list. or to highlight the desired contact. The LCD screen prompts "Move selected to blacklist?". 5. Press the OK soft key to confirm the setting. For operating instructions on editing, deleting, placing calls to and/or searching for contacts in the blacklist, refer to the operating instructions of Local Directory on page 29. You can add new contacts to the local directory, search for a contact, or simply dial a contact number from the remote phone book. You can configure your new phone to access up to 5 remote phone books. The phone supports up to 5000 remote phone book entries. For the access URL of the remote phone book, contact your system administrator. To configure an access URL for a remote phone book via web user interface: 1. Click on Directory->Remote Phone Book. 2. Enter the access URL in the Remote URL field. 39 User Guide for the SIP-T42G IP Phone 3. Enter the name in the Display Name field. 4. Click Confirm to accept the change. Note An access URL for a remote phone book is configurable via web user interface only. To access your remote phone book via phone user interface: 1. Press Directory->Remote Phone Book. If Remote Phone Book is removed from the directory, press Menu->Directory->Remote Phone Book to enter the remote phone book. 2. Select the desired remote group, and then press the Enter soft key. The phone then connects to the remote phone book and proceeds to load it. The contacts in the remote phone book are displayed on the LCD screen. 3. Press the Back soft key to back to the previous interface. To search for a contact in the remote phone book: 1. Press Menu->Directory->Remote Phone Book. If Remote Phone Book is added to the directory, press Directory->Remote Phone Book to enter the remote phone book. 2. Select the desired remote group, and then press the Enter soft key to load the remote phone book. 3. 40 Press the Search soft key. Customizing Your Phone 4. Enter a few continuous characters of the contact name or continuous numbers of the contact number using the keypad. The contacts whose name or phone number matches the characters entered will appear on the LCD screen. You can place a call from the result list. To place a call from the remote phone book: 1. Press Menu->Directory->Remote Phone Book. If Remote Phone Book is added to the directory, press Directory->Remote Phone Book to enter the remote phone book. 2. Select the desired remote group, and then press the Enter soft key to load the remote phone book. 3. Select the desired contact in the remote phone book. 4. Press the Send soft key. In addition, you can enable the phone to present the caller identity stored in the remote phone book when receiving a call. To enable the presentation of a caller identity stored in remote phone book via web user interface: 1. Click on Directory->Remote Phone Book. 2. Select Enabled from the pull-down list of Incoming/Outgoing Call lookup. 3. Enter the desired refresh period in the Update Time Interval (Seconds) field. The default value is 21600 seconds. 4. Click Confirm to accept the change. 41 User Guide for the SIP-T42G IP Phone The SIP-T42G IP phone maintains call history lists of Placed Calls, Received Calls, Missed Calls and Forwarded Calls. Call history lists support up to 400 entries. You can view call history, place a call, add a contact or delete an entry from the call history list. History record feature is enabled by default. If you don’t want to save the call history, you can disable the feature To disable history record via phone user interface: 1. Press Menu->Features->History Setting. 2. Press or , or the Switch soft key to select Disabled from the History Record field. 3. Press the Save soft key to accept the change or the Back soft key to cancel. To view call history: 1. Press the History soft key. The LCD screen displays all call records. 2. Press or to switch between all, placed, received, missed and forwarded or to select the desired entry. call lists. 3. Press 4. Press the Option soft key, and then select Detail from the prompt list. The detailed information of the entry appears on the LCD screen. To place a call from the call history list: 1. Press the History soft key. 2. Press or to switch between all, placed, received, missed and forwarded or to select the desired entry. call lists. 3. Press 4. Press the Send soft key. To add a contact to the local directory (or blacklist directory) from the call history list: 1. Press the History soft key. 2. Press or to switch between all, placed, received, missed and forwarded or to select the desired entry. call lists. 3. 42 Press Customizing Your Phone 4. Press the Option soft key, and then select Add to Contacts (or Add to Blacklist) from the prompt list. 5. Enter the desired values in the corresponding fields. 6. Press the Save soft key to accept the change. For more information, refer to Contact Management on page 28. To delete an entry from the call history list: 1. Press the History soft key. 2. Press or to switch between all, placed, received, missed and forwarded or to select the desired entry. call lists. 3. Press 4. Press the Delete soft key. To delete all entries from the call history list: 1. Press the History soft key. 2. Press or to switch between all, placed, received, missed and forwarded call lists. 3. Press the Option soft key, and then select Delete All from the prompt list. 4. Press the OK soft key. The LCD screen prompts "Delete all the call records?". 5. Press the OK soft key to confirm the deletion or the Cancel soft key to cancel. If you want to use a headset, physically connect your headset and activate the headset mode for use. For more information on physically connecting a headset, refer to Phone Installation on page 11. 43 User Guide for the SIP-T42G IP Phone To activate the headset mode: 1. Press on the phone. The headset key LED illuminates solid green when the headset mode is activated. Press the line key or the Answer soft key to answer an incoming call. The call will be connected to your headset automatically. Enter the desired number and press the Send soft key, the phone will then place a call using the headset automatically. For more information on using the headset to place a call, refer to Placing Calls on page 68. To deactivate the headset mode: 1. Press again on the phone. The headset key LED goes out when the headset mode is deactivated. You can use headset in priority when headset prior feature is enabled. This feature is especially useful for permanent or full-time headset users. To enable headset prior via web user interface: 44 1. Click on Features->General Information. 2. Select Enabled from the pull-down list of Headset Prior. 3. Click Confirm to accept the change. Customizing Your Phone To use headset prior, you should activate the headset mode in advance: 1. Physically connect the headset. 2. Press Note to activate the headset mode. If headset prior is enabled, the headset mode will not be deactivated until you press the HEADSET key again. If headset prior is disabled, the headset mode can be deactivated by pressing the speakerphone key or the HEADSET key. Headset prior is configurable via web user interface only. You can use two headsets when dual headset feature is enabled. To use this feature, you must physically connect headsets to the headset jack and handset jack respectively. Once the phone connects to a call, the headset connected to the headset jack will have full-duplex capabilities, while the one connected to the handset jack will only be able to listen. To enable dual headset via web user interface: Note 1. Click on Features->General Information. 2. Select Enabled from the pull-down list of Dual-Headset. 3. Click Confirm to accept the change. Dual headset is configurable via web user interface only. 45 User Guide for the SIP-T42G IP Phone There are two types of DSS keys: Line Keys and Programmable Keys. Details will be introduced in the following. The SIP-T42G IP phone supports 15 line keys. You can assign predefined functionalities to line keys. You can also define a label for a line key feature which will appear on the LCD screen. Line keys allow you to quickly access features such as recall and voice mail. The line key LEDs will indicate the monitored status when line keys are assigned with particular features, such as BLF. The default key type of line key 1-12 is Line. The default key type of line key 13-15 is N/A, which indicates that this line key provides no functionality until configuration. To assign functionality to a line key via phone user interface: 1. Press Menu->Features->DSS Keys. 2. Select the desired line key, and then press the Enter soft key. 3. Select the desired key type from the Type field. 4. (Optional.) Select the desired key event type from the Key Type field. 5. (Optional.) Select the desired line from the Account ID field. 6. (Optional.) Enter a string that will appear on the LCD screen in the Label field. 7. (Optional.) Enter the corresponding value in the Value field. 8. (Optional.) Enter the corresponding value in the Extension field. 9. Press the Save soft key to accept the change or the Back soft key to cancel. Line key is configurable via web user interface at the path DSSKey->Line Key. Note When the phone is idle, you can also long press the line key to configure it directly on the phone. You can assign functionalities to 15 line keys. These 15 line keys are indicated on three pages. When you assign functionality to line key 1-6, labels of line keys are indicated on the first page. The following figure shows an example: When you assign functionalities to line key 7-15, labels of the line key 6-10 are indicated on the second page, and labels of the line key 11-15 are indicated on the third page. The right bottom line key is used to switch pages. 46 Customizing Your Phone The following figure shows an example: You can configure the page icon and page switch key LED to indicate different statuses. This feature is disabled by default. The following table lists the page icon and status: Icons/Status Indicates the current page of line keys. 1 2 Description 3 Indicates the non-current page of line keys. The BLF monitored user receives an incoming call on the Fast flashing non-current page. The line on the non-current page receives an incoming call. There is a hold call on the line on the non-current page. For more information on the page switch key LED status, refer to LED Instructions on page 4. To configure the page icon to indicate status via web user interface: Note 1. Click on DSSKey->Line Key. 2. Select Enabled from the pull-down list of Enable Page Tips. 3. Click Confirm to accept the change. The page icon status is configurable via web user interface only. 47 User Guide for the SIP-T42G IP Phone Line key features are explained in the following subchapters in detail: Line Speed Dial Voice Mail Directed Pickup Group Pickup DTMF Prefix Local Group XML Group XML Browser LDAP Conference Forward Transfer Hold DND Group Listening Zero Touch URL Phone Lock Directory For the features not listed above, refer to Basic Call Features on page 67 and Advanced Phone Features on page 99. For more information, contact your system administrator. Line You can use this key feature to accept incoming calls, place active calls on hold or resume a held call. It performs in the same way as a hard line key. Dependencies: Type (Line) Account ID (the account this feature will be applied to) Label (key label displayed on the LCD screen) Value (Default/Lock/Float) Usage: When receiving an incoming call, the DSS key LED flashes green: 48 1. Press the DSS key to accept the incoming call. 2. Press the DSS key to place a new call and the active call is placed on hold. 3. Press the DSS key again to resume the held call. Customizing Your Phone If you select Lock from the Value field, the line keys located in the same position of the other page will be automatically assigned the line key feature with Lock filled in the Value field. Then you can use this key on every page. This feature is only applicable to line key 1-3. If you select Float from the Value field, the phone will automatically switch to the page the line key located when the line key receives an incoming call. If you select Default from the Value field, you can only use this key on the current page. Speed Dial You can use this key feature to speed up dialing the numbers frequently used or hard to remember. Dependencies: Type (Speed Dial) Account ID (the account this feature will be applied to) Label (key label displayed on the LCD screen) Value (the number you want to dial out) Usage: Press the DSS key to dial out the number specified in the Value field, using the account selected from the Account ID field. Voice Mail You can use this key feature to quickly connect a voice mail. For more information, refer to Voice Mail on page 116. Dependencies: Type (Key Event) Key Type (Voice Mail) Account ID (the account this feature will be applied to) Label (key label displayed on the LCD screen) Value (the voice mail access code) Usage: Press the DSS key to dial out the voice mail access code. Then follow the voice prompt to listen to voice mails. Directed Pickup You can use this key feature to answer someone else’s incoming call on the phone. Dependencies: Type (Key Event) Key Type (DPickup) Account ID (the account this feature will be applied to) Label (key label displayed on the LCD screen) Value (the directed pickup code followed by the target phone number) Usage: Press the DSS key on your phone when the target phone number receives an incoming call. The call is then answered on your phone. Group Pickup 49 User Guide for the SIP-T42G IP Phone You can use this key feature to answer incoming calls in a group that is associated with their own group. Dependencies: Type (Key Event) Key Type (GPickup) Account ID (the account this feature will be applied to) Label (key label displayed on the LCD screen) Value (the group pickup feature code) Usage: Press the DSS key on your phone when a phone number in the group receives an incoming call. The call is answered on your phone. DTMF You can use this key feature to send the specification of arbitrary key sequences via DTMF. Dependencies: Type (Key Event) Key Type (DTMF) Label (key label displayed on the LCD screen) Value (DTMF sequence) Note DTMF sequence can only contain "0-9", "*", "#" and "A-D". Usage: Press the DSS key during an active call to send the key sequence specified in the Value field. Prefix You can use this key feature to add a specified prefix number before the dialed number. Dependencies: Type (Key Event) Key Type (Prefix) Label (key label displayed on the LCD screen) Value (the prefix number) Usage: Press the DSS key when the phone is idle, the phone will then enter the pre-dialing screen and display the prefix number that you specified in the Value field. You can enter the remaining digits and then dial out. Local Group You can use this key feature to quickly access a contact group in the local directory. For more information, refer to Local Directory on page 29. Dependencies: Type (Key Event) Key Type (Local Group) Local Group (the contact group name you want to access) 50 Customizing Your Phone Label (key label displayed on the LCD screen) Usage: Press the DSS key to access the contact group specified in the Local Group field. XML Group You can use this key feature to quickly access a remote group in your remote phone book. You should configure remote phone book in advance. For more information, refer to Remote Phone Book on page 39. Dependencies: Type (Key Event) Key Type (XML Group) PhoneBook Name (the remote group name you want to access if the remote phone book is configured) Label (key label displayed on the LCD screen) Usage: Press the DSS key to access the remote group specified in the XML Group field. XML Browser You can use this key feature to quickly access a XML browser. The XML browser allows you to create custom services which meet your functional requirements on the server. You can customize practical applications, such as weather report, stock information, Google search, etc. Dependencies: Type (Key Event) Key Type (XML Browser) Label (key label displayed on the LCD screen) Value (the access URL for XML browser) Usage: Press the DSS key to access the XML browser specified in the Value field. LDAP You can use this key feature to quickly access a LDAP search screen. Dependencies: Type (Key Event) Key Type (LDAP) Label (key label displayed on the LCD screen) Usage: 1. Press the DSS key to access the LDAP search screen. 2. Enter a few continuous characters of the contact name or continuous numbers of the contact number using the keypad. The contacts whose name or phone number matches the characters entered will appear on the LCD screen. Conference You can use this key feature to set up a conference call. For more information, refer to Conference on page 88. 51 User Guide for the SIP-T42G IP Phone Dependencies: Type (Key Event) Key Type (Conf) Label (key label displayed on the LCD screen) Value (the number you want to add to the conference) Usage: Press the DSS key during an active call to set up a conference with the number specified in the Value field. Note If the Value field is left blank, the DSS key performs the same as the Conf soft key during a call. Forward You can use this key feature to forward an incoming call to someone else. For more information, refer to Call Forward on page 81. Dependencies: Type (Key Event) Key Type (Forward) Label (key label displayed on the LCD screen) Value (the number you want to forward to) Usage: Press the DSS key to forward an incoming call to the number specified in the Value field. Note If the Value field is left blank, the DSS key performs the same as the Forward soft key when receiving an incoming call. When call forward is activated, the forward key LED will illuminate solid green. Transfer When there is an active call on the phone, you can use this key feature to handle the call differently depending on the transfer mode assigned to the DSS key. Dependencies: Type (Key Event) Key Type (Transfer) Label (key label displayed on the LCD screen) Value (the number you want to transfer to) Usage: When the transfer mode via DSS key is Blind Transfer, press the DSS key to complete the blind transfer to the number specified in the Value field. When the transfer mode via DSS key is Attended Transfer, press the DSS key to dial out the number specified in the Value field, and then perform the attended or semi-attended transfer. 52 When the transfer mode via DSS key is New Call, press the DSS key to place a new Customizing Your Phone call to the number specified in the Value field. Note Transfer mode via DSS key is configurable via web user interface at the path Features->Transfer->Transfer Mode Via Dsskey. If the Value field is left blank, the DSS key performs the same as the Transfer soft key during a call. Hold You can use this key feature to place an active call on hold or retrieve a held call. Dependencies: Type (Key Event) Key Type (Hold) Label (key label displayed on the LCD screen) Usage: 1. Press the DSS key during an active call to place the call on hold. 2. Press the DSS key again to retrieve the held call. DND You can use this key feature to activate or deactivate the DND mode. You can also use this key feature to access the custom DND screen. For more information, refer to Do Not Disturb (DND) on page 77. Dependencies: Type (Key Event) Key Type (DND) Label (key label displayed on the LCD screen) Usage: When DND is in phone mode: 1. Press the DSS key to activate DND. 2. Press the DSS key again to deactivate DND. When DND is in custom mode: 1. Press the DSS key to access the custom DND screen. You can activate or deactivate DND for one or all accounts. Note When DND is activated, the DND key LED will illuminate solid green, and the incoming calls will be rejected automatically. Group Listening You can use this key feature to activate the Speakerphone and Handset/Headset mode at the same time. It is suitable for the group conversations which have more than one person present at one end. You are able to speak and listen through the handset/headset, while the others nearby can only listen through the speaker. Dependencies: Type (Key Event) 53 User Guide for the SIP-T42G IP Phone Key Type (Group Listening) Label (key label displayed on the LCD screen) Usage: 1. During a call, press the DSS key to activate the group listening mode. You can then speak and listen through the handset/headset, while other people at your side can only listen through the speaker at the same time. 2. Press the DSS key again to deactivate the group listening mode. Zero Touch You can use this key feature to quickly configure auto provision and network parameters. Dependencies: Type (Key Event) Key Type (Zero Touch) Label (key label displayed on the LCD screen) Usage: 1. Press the DSS key to access the zero touch screen. 2. Press the OK soft key within a few seconds. 3. Configure the network parameters in the corresponding fields. 4. Press the Next soft key. 5. Configure the auto provision parameters in the corresponding fields. 6. Press the OK soft key. The phone will reboot to update configurations. URL You can use this key feature to trigger the phone to send an HTTP GET request containing a specific URL. Dependencies: Type (URL) Label (key label displayed on the LCD screen) Value (the URL contained in the HTTP GET request) Usage: Press the DSS key to trigger the phone to send an HTTP GET request containing the URL specified in the Value field. Phone Lock You can use this key feature to immediately lock your phone instead of long pressing . For more information, refer to Phone Lock on page 23. Dependencies: Type (Key Event) Key Type (Phone Lock) Label (key label displayed on the LCD screen) Usage: Press the DSS key to immediately lock your phone instead of long pressing 54 . Customizing Your Phone Directory You can use this key feature to easily access frequently used lists. For more information, refer to Directory on page 28. Dependencies: Type (Key Event) Key Type (Directory) Label (key label displayed on the LCD screen) Usage: Press the DSS key to immediately access frequently used lists. Note The DSS key performs the same function as the Directory soft key when the phone is idle. You can customize the soft keys, navigation keys and function keys. To customize programmable keys via web user interface: 1. Click on DSSKey->Programmable Key. 2. Customize specific features for these keys. 3. Click Confirm to accept the change. You can click Reset to default to reset custom settings to defaults. Then you can press the keys on the phone to perform the features you configured. For example: Switch Account Up You can press this key to switch default account. Dependencies: Type (Switch Account Up) Usage: Press the programmable key to scroll up the account list to select the desired default account. 55 User Guide for the SIP-T42G IP Phone Switch Account Down You can press this key to switch default account. Dependencies: Type (Switch Account Down) Usage: Press the programmable key to scroll down the account list to select the desired default account. Note Programmable keys are configurable via web user interface only. You can register one or multiple accounts on the SIP-T42G IP phone. You can also configure each line key to associate with an account or configure multiple line keys to associate with an account. To register an account via phone user interface: 1. Press Menu->Settings->Advanced Settings (default password: admin) ->Accounts. 2. Select the desired account and then press the Enter soft key. 3. Select Enabled from the Activation field. 4. Enter the desired values in Label, Display Name, Register Name, User Name, Password and SIP Server1/2 fields respectively. Contact your system administrator for more information. 5. Press the Save soft key to accept the change or the Back soft key to cancel. You can repeat steps 2 to 5 to register more accounts. The following figures demonstrate single or multiple accounts registered on the phone: Single account: 56 Customizing Your Phone Multiple accounts: To disable an account via phone user interface: 1. Press Menu->Settings->Advanced Settings (default password: admin) ->Accounts. 2. Select the desired account and then press the Enter soft key. 3. Select Disabled from the Activation field. 4. Press the Save soft key to accept the change or the Back soft key to cancel. Registering an account is configurable via web user interface at the path Account->Register. You can configure multiple line keys to associate with an account. This enhances call visualization and simplifies call handling. If this is the case, the LCD screen will resemble the following figure: Incoming calls to this account will be distributed evenly among the available line keys. Outgoing calls will be distributed similarly. Your phone can be configured to have a combination of accounts with a single line key and accounts with multiple line keys. 57 User Guide for the SIP-T42G IP Phone Dial plan is a string of characters that governs the way your SIP-T42G IP phone processes the inputs received from your phone keypad. The SIP-T42G IP phone supports the following dial plan features: Replace Rule Dial-now Area Code Block Out Basic expression syntaxes you need to know: Syntax Description The dot "." can be used as a placeholder or multiple placeholders for . any character. Example: "12." would match "123", "1234", "12345", "12abc", etc. x An "x" can be used as a placeholder for any character. Example: "12x" would match "121", "122", "123", "12a", etc. The square brackets "[]" can be used as a placeholder for a single [] character which matches any of a set of characters. Example: "91[5-7]1234" would match "9151234", "9161234", "9171234". The parentheses "( )" can be used to group together patterns, for () instance, to logically combine two or more patterns. Example: "([1-9])([2-7])3" would match "923", "153", "773",etc. The “$” should be followed by the sequence number of a parenthesis. The “$” plus the sequence number means the whole character or characters placed in the parenthesis. The number directs to the right parenthesis when there are more than one. Example: $ A replace rule configuration, Prefix: "001(xxx)45(xx)", Replace: "9001$145$2". When you dial out "0012354599" on your phone, the IP phone will replace the number with "90012354599". “$1” means 3 digits in the first parenthesis, that is, “235”. “$2” means 2 digits in the second parenthesis, that is, “99”. You can configure one or more replace rules (up to 100) to remove the specified string and replace it with another string. You can configure a pattern with wildcards (refer to the expression syntax in the table above), so that any string that matches the pattern will be replaced. This feature is convenient for you to dial out a long number. For example, a replace rule is configured as "Prefix: 1" and "Replace: 1234", when you try to dial out the number “1234”, you just need to enter “1” on the phone and then press the Send soft key. 58 Customizing Your Phone To add a replace rule via web user interface: 1. Click on Settings->Dial Plan->Replace Rule. 2. Enter the string (e.g., 1) in the Prefix field. 3. Enter the string (e.g., 1234) in the Replace field. 4. Enter the desired line ID in the Account field or leave it blank. 5. Click Add to add the replace rule. When you enter the number “1” using the keypad and then press the Send soft key, the phone will dial out “1234” instead. Note The valid values for the Account field can be one or more digits among 1-12. Every two digits must be separated by a comma. For example, when you enter the value “1, 2” in the Account field, this replace rule will apply to account 1 and account 2. If you leave the Account field blank or enter 0, the replace rule will apply to all accounts. To edit a replace rule via web user interface: 1. Click on Settings->Dial Plan->Replace Rule. 2. Select the desired replace rule by checking the checkbox. 3. Edit values in the Prefix and Replace fields. 4. Enter the desired line ID in the Account field or leave it blank. 5. Click Edit to accept the change. To delete one or more replace rules via web user interface: 1. Click on Settings->Dial Plan->Replace Rule. 2. Select the one or more replace rules by checking the checkbox(es). 59 User Guide for the SIP-T42G IP Phone 3. Note Click Del to delete the replace rule(s). Replace rule is configurable via web user interface only. You can configure one or more dial-now rules (up 100) on your phone. When the dialed number matches the dial-now string, the number will be dialed out automatically. For example, a dial-now rule is configured as "2xx", any entered three-digit string beginning with 2 will then be dialed out automatically on the phone. To add a dial-now rule via web user interface: 1. Click on Settings->Dial Plan->Dial-now. 2. Enter the desired value (e.g., 2xx) in the Rule field. 3. Enter the desired line ID in the Account field or leave it blank. For more information on the valid values for the Account field, refer to Replace Rule on page 58. 4. Click Add to add the dial-now rule. When you enter the number “234” using the keypad, the phone will dial out “234” automatically without the pressing of any key. Note You can also edit or delete the dial-now rule, refer to Replace Rule on page 58 for more information. Dial-now rule is configurable via web user interface only. 60 Customizing Your Phone Delay Time for Dial-Now Rule You can configure the interval for dial-now rules. That is, you can configure your phone to automatically dial out the phone number which matches a dial-now rule, after the designated period of time. To configure the delay time for dial-now rule via web user interface: 1. Click on Features->General Information. 2. Enter the time between 1 and 14 (seconds) in the Time-Out for Dial-Now Rule field. 3. Click Confirm to accept the change. Note Delay time for dial-now rule is configurable via web user interface only. Area codes are also known as Numbering Plan Areas (NPAs). They usually indicate geographical areas in a country. This feature is necessary when dialing a phone number outside the code area. For example, an area code is configured as "Code: 0592, Min Length: 1, Max Length: 15". When you dial out the number "56789" (the length of the number is between 1 and 15), the phone will add the area code and dial out the number "059256789". You can only configure one area code rule on your phone. To configure the area code and lengths via web user interface: 1. Click on Settings->Dial Plan->Area Code. 2. Enter the desired values in the Code, Min Length (1-15) and Max Length (1-15) fields. 3. Enter the desired line ID in the Account field or leave it blank. 61 User Guide for the SIP-T42G IP Phone For more information on the valid values for the Account field, refer to Replace Rule on page 58. 4. Note Click Confirm to accept the change. The default values of minimum and maximum length are 1 and 15 respectively. Area code is configurable via web user interface only. You can block specific numbers (up to 10) from being dialed on your phone. When you dial a block out number on your phone, the dialing will fail and the LCD screen will prompt "Forbidden Number". To add a block out number via web user interface: 62 1. Click on Settings->Dial Plan->Block Out. 2. Enter the desired value in the BlockOut Number field. 3. Enter the desired line ID in the Account field or leave it blank. Customizing Your Phone For more information on the valid value of the Account field, refer to Replace Rule on page 58. 4. Note Click Confirm to add the block out number. Block out number is configurable via web user interface only. Public telephone networks in countries around the world have a single emergency telephone number (emergency services number), that allows a caller to contact local emergency services for assistance when necessary. The emergency telephone number may differ from country to country. It is typically a three-digit number so that it can be easily remembered and dialed quickly. Some countries have a different emergency number for each of the different emergency services. You can specify the emergency telephone numbers on the IP phone for contacting the emergency services in an emergency situation. Note Contact your local phone service provider for available emergency numbers in your area. To specify emergency numbers via web user interface: 1. Click on Features->Phone Lock. 63 User Guide for the SIP-T42G IP Phone 2. Enter the emergency number in the Emergency field. For multiple emergency numbers, enter a comma between every two numbers. The default emergency numbers are 112, 911 and 110. 3. Note Click Confirm to accept the change. Emergency number is configurable via web user interface only. You can enable live dialpad on the SIP-T42G IP phone, which enables the IP phone to automatically dial out a phone number without the pressing of the send key. You can also configure a delay, where the phone will dial out the phone number automatically after the designated period of time. To enable live dialpad via web user interface: 64 1. Click on Settings->Preference. 2. Select Enabled from the pull-down list of Live Dialpad. Customizing Your Phone 3. Enter the desired delay time in the Inter Digit Time (1~14s) field. The default delay time is 4s. 4. Note Click Confirm to accept the change. Live dialpad is configurable via web user interface only. You can dial a hotline number immediately upon lifting the handset, pressing the speakerphone key or the line key. You can also configure a delay, where the phone will dial out the hotline number automatically after the designated period of time. To configure the hotline number via phone user interface: 1. Press Menu->Features->Hot Line. 2. Enter the desired number in the Number field. 3. Enter the delay time (in seconds) in the Hotline Delay field. The valid values range from 0 to10. 4. Press the Save soft key to accept the change or the Back soft key to cancel. Hotline is configurable via web user interface at the path Features->General Information. 65 User Guide for the SIP-T42G IP Phone 66 Basic Call Features The SIP-T42G IP phone is designed to be easily used like a regular phone on a public switched telephone network (PSTN). You can place calls, answer calls, transfer a call to someone else, or conduct a conference call. This chapter provides basic operating instructions for the SIP-T42G IP phone. Topics include: Placing Calls Answering Calls Ending Calls Redialing Numbers Recent Call In Dialing Auto Answer Auto Redial Call Completion Recall Call Mute Call Hold/Resume Do Not Disturb (DND) Call Forward Call Transfer Call Waiting Conference Call Park Call Pickup Anonymous Call Anonymous Call Rejection If you require additional information or assistance with your new phone, contact your system administrator. 67 User Guide for the SIP-T42G IP Phone You can place a call in one of three ways using your SIP-T42G IP phone: Using the handset Using the speakerphone Using the headset You can also dial the number first, and then choose the way you want to speak to the other party. You can also search and dial a contact from call history, local directory or remote phone book. For more information, refer to Contact Management on page 28 and Call History Management on page 42. During a call, you can alternate between Speakerphone, Headset, or Handset mode by pressing the Speakerphone key, the Headset key, or by picking up the handset. The call duration of the active call is visible on the LCD screen. In the figure below, the call to the number”1006” has lasted 12 seconds. To place a call using the handset: 1. Pick up the handset. 2. Enter the desired number using the keypad. 3. Press , , or the Send soft key. The # key is configured as a send key by default. You can also set the * key as the send key, or set neither. For more information, refer to the Key as Send on page 23. Note You can also dial using the SIP URI or IP address. To obtain the IP address of a phone, press the OK key when the phone is idle. The maximum length of SIP URI or IP address length is 32 characters. For example, SIP URI: [email protected], IP: 192.168.1.15. Your phone may not support direct IP dialing. Contact your system administrator for more information. To place a call using the hands-free speakerphone mode: Do one of the following: - With the handset on-hook, press or the line key to obtain a dial tone. Enter the desired number using the keypad. Press 68 , or the Send soft key. Basic Call Features - With the handset on-hook, enter the desired number using the keypad. Press , , or the Send soft key. To place a call using the headset: Do one of the following: - With the optional headset connected, press to activate the headset mode. Press the line key to obtain a dial tone. Enter the desired number using the keypad. Press - , , or the Send soft key. With the optional headset connected, press to activate the headset mode. Enter the desired number using the keypad. Press Note , , or the Send soft key. To permanently use the headset mode, refer to Headset Prior on page 44. The SIP-T42G IP phone can handle multiple calls at a time. However, only one active call (the call that has audio associated with it) can be in progress at any given time. The SIP-T42G IP phone can handle a maximum of 6 calls at one time. To place multiple calls: You can have more than one call on your SIP-T42G IP phone. To place a new call during an active call, do one of the following: - Press the line key. The active call is placed on hold. Enter the desired number using the keypad. Press - , , or the Send soft key. Press the Hold soft key to place the original call on hold. Press the New Call soft key. Enter the desired number using the keypad. Press You can press , , or the Send soft key. or to switch between calls, and then press the Resume soft key to retrieve the desired call. Note If multiple accounts are registered on the phone, you can first press the desired line key in the idle screen or press the Line soft key in the dialing screen, and then you can use the selected account to place a call. 69 User Guide for the SIP-T42G IP Phone When you are not in another call, you can answer a call in one of three ways: Using the handset Using the speakerphone Using the headset Note You can reject incoming calls by pressing the X key, or the Reject soft key. You can also activate Do Not Disturb mode to reject the incoming calls without ringing on your phone. For more information, refer to Do Not Disturb (DND) on page 77. You can forward incoming calls to someone else by pressing the Forward soft key. For more information, refer to Call Forward on page 81. Answering When Not in Another Call Call duration and destination will always appear on the LCD screen for the active call. To answer a call using the handset: 1. Pick up the handset. To answer a call using the hands-free speakerphone mode: Do one of the following: - Press . - With the handset on-hook and the headset mode deactivated, press the Answer soft key. - With the handset on-hook and the headset mode deactivated, press the line key (the line key LED flashes green). To answer a call using the headset: Do one of the following: - Press - With the headset mode activated, press the Answer soft key. - With the headset mode activated, press the line key (the line key LED flashes green). 70 . Basic Call Features Answering When in Another Call If you have an active call, and an incoming call arrives on the phone, do one of the following: - Press the Answer soft key. The incoming call is answered and the original call is placed on hold. - Press to access the new call. Press or the Answer soft key. The incoming call is answered and the original call is placed on hold. To end a call: Do one of the following: - If you are using the handset, press the End Call soft key or hang up the handset. - If you are using the headset, press the End Call soft key. - If you are using the speakerphone, press Note or the End Call soft key. When a call is placed on hold, you cannot press to end it. You should press the Resume soft key to resume the call, and then press to end it. To redial the last dialed number from your phone: 1. Press twice. A call to your last dialed number is attempted. To redial a previously dialed number from your phone: 1. Press 2. Press when the phone is idle. or to select the desired entry from the placed calls list, and then 71 User Guide for the SIP-T42G IP Phone press or the Send soft key. To view the placed calls list when the phone is in the pre-dialing interface, you should enable recent call in dialing in advance. To enable recent call in dialing via web user interface: 1. Click on Directory->Setting. 2. Select Enabled from the pull-down list of Recent Call In Dialing. 3. Click Confirm to accept the change. Note Recent call in dialing is configurable via web user interface only. To view placed calls list when the phone is in the pre-dialing interface: 1. Pick up the handset, press the speakerphone or press the line key. The LCD screen displays the placed calls list. 72 Basic Call Features You can use auto answer to automatically answer an incoming call on a line. Auto answer is configurable on a per-line basis. To configure auto answer via phone user interface: 1. Press Menu->Features->Auto Answer. 2. Press or , or the Switch soft key to select the desired line from the Account or , or the Switch soft key to select Enabled from the Status field. field. 3. Press 4. Press the Save soft key to accept the change or the Back soft key to cancel. The icon appears on the LCD screen. Auto answer is configurable via web user interface at the path Account->Basic. Note Auto answer is only applicable when there is no other call in progress on the phone. You can enable auto redial to automatically redial a phone number when the called party is busy. You can also configure the number of auto redial attempts and the time to wait between redial attempts. To configure auto redial via phone user interface: 1. Press Menu->Features->Auto Redial. 2. Press or , or the Switch soft key to select Enabled from the Auto Redial field. 3. Enter the desired time (in seconds) in the Redial Interval field. The default time interval is 10 seconds. 4. Enter the desired number of redial attempts in the Redial Times field. The default value is 10. 5. Press the Save soft key to accept the change or the Back soft key to cancel. 73 User Guide for the SIP-T42G IP Phone Auto redial is configurable via web user interface at the path Features->General Information. To use auto redial: When the called party is busy, the LCD screen prompts the following: 1. Press the OK soft key to activate auto redial. The LCD screen prompts the following: 2. Wait for the designated period of time or press the OK soft key to redial the phone number. The phone will retry as many times as configured until the called party is idle. You can use call completion to notify the caller who failed to reach a desired party when the party becomes available to receive a call. To configure call completion via phone user interface: 1. Press Menu->Features->Call Completion. 2. Press or , or the Switch soft key to select Enabled from the Call Completion field. 3. Press the Save soft key to accept the change or the Back soft key to cancel. Call completion is configurable via web user interface at the path Features->General Information. 74 Basic Call Features To use call completion: When the called party is busy, the following prompt will appear on the LCD screen of the phone: 1. Press the OK soft key, the phone returns to the idle screen and call completion is activated. When the called party becomes idle, the following prompt appears on the LCD screen of the phone: 2. Note Press the OK soft key to redial the number. Call completion is not available on all servers. For more information, contact your system administrator. You can press a recall key to place a call back to the last incoming call. To configure a recall key via phone user interface: 1. Press Menu->Features->DSS Keys. 2. Select a desired DSS key. 3. Press or , or the Switch soft key to select Key Event from the Type field. 4. Press or , or the Switch soft key to select ReCall from the Key Type field. 5. (Optional.) Enter a string that will appear on the LCD screen in the Label field. 6. Press the Save soft key to accept the change or the Back soft key to cancel. Recall key is configurable via web user interface at the path DSSKey->Line Key. 75 User Guide for the SIP-T42G IP Phone You can mute the microphone of the active audio device during an active call so that the other party cannot hear you. Call mute applies to all modes (Handset, Headset and Speakerphone). To mute a call: 1. Press during an active call. The LCD screen indicates that the call is now muted. The mute key LED illuminates solid red when the call is muted. To un-mute a call: 1. Press again to un-mute the call. The mute key LED goes out. You can place an active call on hold. Only one active call can be in progress at any time. Other calls can be made and received while placing the original call on hold. When you place a call on hold, your IP PBX may play music to the other party while waiting. To place a call on hold: 1. Press the Hold soft key during a call. The line key LED flashes green. The LCD screen indicates that the call is on hold. Note The phone will beep softly every 30 seconds to remind you that you still have a call on hold. To resume a held call: 1. 76 Press the Resume soft key. Basic Call Features Multiple Calls on Hold: If multiple calls are placed on hold, do one of the following: Press - or to switch between the calls, and then press the Resume soft key to retrieve the desired call. Press the corresponding line key to retrieve the call. - If more than one call is placed on hold, a numbered prompt appears on the LCD screen, for example "2/3", indicating that this is the second call out of three calls. You can use DND to reject incoming calls automatically on the phone. The prompt message "n New Missed Call(s)" ("n" indicates the number of missed calls) will appear on the LCD screen, and callers will receive a busy message. All calls you receive while DND is enabled are logged to your missed calls list. Note The prompt message will display only if Missed Call Log for the line is enabled. Missed call log is configurable via web user interface at the path Account->Basic. Do not disturb is local to the phone, and may be overridden by the server settings. For more information, contact your system administrator. You can enable/disable DND for the phone system, or you can customize DND for each or all accounts. Two DND modes: Phone (default): DND is effective for the phone system. Custom: DND can be configured for each or all accounts You can receive incoming calls from authorized numbers when DND is enabled. To configure the DND mode via web user interface: 1. Click on Features->Forward & DND. 77 User Guide for the SIP-T42G IP Phone Note 2. In the DND block, mark the desired radio box in the Mode field. 3. Click Confirm to accept the change. DND mode is configurable via web user interface only. To activate DND in phone mode: 1. Press the DND soft key when the phone is idle. The icon on the idle screen indicates that DND is enabled. Incoming calls will be rejected automatically and "n New Missed Call(s)" ("n" indicates the number of missed calls) will prompt on the LCD screen. Note 78 When DND and busy forward are enabled in phone mode, calls will be sent to the configured destination number. For more information on busy forward, refer to Call Forward on page 80. Basic Call Features To activate DND in custom mode for a specific account: 1. Press the DND soft key when the phone is idle. The LCD screen displays a list of accounts registered on the phone. 2. Press or to select the desired account and then press the Enter soft key. 3. Press or , or the Switch soft key to select Enabled from the DND Enables field. 4. Press the Save soft key to accept the change. If you activate DND for the default account, the associated line icon will change to , and the icon will appear on the status bar. If you activate DND for the non-default account, only the associated line icon will change to . Incoming calls on the specific line will be rejected automatically, and the LCD screen prompts "n New Missed Call(s)" ("n" indicates the number of missed calls). Note When DND and busy forward are enabled for a specific account, calls from the specific account will be sent to the configured destination number. For more information on busy forward, refer to Call Forward on page 80. To activate DND in custom mode for all accounts: 1. Press the DND soft key when the phone is idle. The LCD screen displays a list of accounts registered on the phone. 2. Press the All On soft key to activate DND for all accounts. 79 User Guide for the SIP-T42G IP Phone 3. Press the Save soft key to accept the change. The icon appears on the idle screen, and all line icons change to . Incoming calls will be rejected automatically and "n New Missed Call(s)" ("n" indicates the number of missed calls) will be prompted on the LCD screen. To configure the DND authorized numbers via web user interface: 1. Click on Features->Forward & DND. 2. Select Enabled from the pull-down list of DND Emergency. 3. Enter the numbers in the DND Authorized Numbers field. For multiple numbers, enter a comma between every two numbers. 4. Click Confirm to accept the change. When DND is enabled on the phone, the phone can still receive incoming calls from the numbers specified in the DND Authorized Numbers field. Note DND authorized number is configurable via web user interface only. When the phone receives a voice mail, the voice mail prompt window will pop up by default, if you want to disable the feature, contact your system administrator for more information. 80 Basic Call Features You can configure your phone to forward incoming calls to another party through static forwarding. You can also forward incoming calls while your phone is ringing; refer to the dynamic forwarding. Static Forwarding Three types of static forwarding: Always Forward: Incoming calls are immediately forwarded. Busy Forward: Incoming calls are immediately forwarded if the phone is busy. No Answer Forward: Incoming calls are forwarded if not answered after a period of time. You can enable/disable call forward for the phone, or you can customize call forward for each or all accounts. Two call forward modes: Phone (default): Call forward is effective for the phone system. Custom: Call forward can be configured for each or all accounts. To configure the call forward mode via web user interface: Note 1. Click on Features->Forward & DND. 2. In the Forward block, mark the desired radio box in the Mode field. 3. Click Confirm to accept the change. Call forward mode is configurable via web user interface only. 81 User Guide for the SIP-T42G IP Phone To enable call forward in phone mode: 1. Press Menu->Features->Call Forward. 2. Press or to select the desired forwarding type, and then press the Enter soft key. 3. Depending on your selection: a.) If you select Always Forward: 1) Press or , or the Switch soft key to select Enabled from the Always Forward field. 2) Enter the destination number you want to forward all incoming calls to in the Forward to field. 3) (Optional.) Enter the always forward on code or off code respectively in the On Code or Off Code field. b.) If you select Busy Forward: 1) Press or , or the Switch soft key to select Enabled from the Busy Forward field. 2) Enter the destination number you want to forward all incoming calls to when the phone is busy in the Forward to field. 3) (Optional.) Enter the busy forward on code or off code respectively in the On Code or Off Code field. c.) If you select No Answer Forward: 1) Press or , or the Switch soft key to select Enabled from the No Answer Forward field. 2) Enter the destination number you want to forward all unanswered incoming calls to in the Forward to field. 82 Basic Call Features 3) Press or , or the Switch soft key to select the ring time to wait before forwarding from the After Ring Time field. The default ring time is 12 seconds. 4) (Optional.) Enter the no answer forward on code or off code respectively in the On Code or Off Code field. 4. Press the Save soft key to accept the change or the Back soft key to cancel. The icon on the idle screen indicates that the call forward is enabled. To enable call forward in custom mode: 1. Press Menu->Features->Call Forward. 2. Press or to select the desired account, and then press the Enter soft key. 3. Press or to select the desired forwarding type, and then press the Enter soft key. 4. Depending on your selection: a.) If you select Always Forward, you can enable it for a specific account. 1) Press or , or the Switch soft key to select Enabled from the Always Forward field. 2) Enter the destination number you want to forward all incoming calls to in the Forward to field. 3) (Optional.) Enter the always forward on code or off code respectively in the On Code or Off Code field. You can also enable always forward for all accounts. After always forward was enabled for a specific account, do the following: 1) Press or to highlight the Always Forward field. 2) Press the All Lines soft key. The LCD screen prompts “Copy to all lines?”. 3) Press the OK soft key to accept the change or the Cancel soft key to cancel. 83 User Guide for the SIP-T42G IP Phone b.) If you select Busy Forward, you can enable it for a specific account. 1) Press or , or the Switch soft key to select Enabled from the Busy Forward field. 2) Enter the destination number you want to forward incoming calls to when the phone is busy in the Forward to field. 3) (Optional.) Enter the busy forward on code or off code respectively in the On Code or Off Code field. You can also enable busy forward for all accounts. After busy forward was enabled for a specific account, do the following: 1) Press or to highlight the Busy Forward field. 2) Press the All Lines soft key. The LCD screen prompts “Copy to all lines?”. 3) Press the OK soft key to accept the change or the Cancel soft key to cancel. c.) If you select No Answer Forward, you can enable it for a specific account. 1) Press or , or the Switch soft key to select Enabled from the No Answer Forward field. 2) Enter the destination number you want to forward all unanswered incoming calls to in the Forward to field. 3) Press or , or the Switch soft key to select the ring time to wait before forwarding from the After Ring Time field. The default ring time is 12 seconds. 4) (Optional.) Enter the no answer forward on code or off code respectively in the On Code or Off Code field. You can also enable no answer forward for all accounts. After no answer forward was enabled for a specific account, do the following: 1) Press 84 or to highlight the No Answer Forward field. Basic Call Features 2) Press the All Lines soft key. The LCD screen prompts “Copy to all lines?”. 3) Press the OK soft key to accept the change or the Cancel soft key to cancel. 5. Press the Save soft key to accept the change or the Back soft key to cancel. If you activate call forward for the default account, the associated line icon will change to , and the icon will appear on the status bar. If you activate call forward for the non-default account, only the associated line icon will change to . Call forward is configurable via web user interface at the path Features->Forward & DND. Note You can also enter the SIP URI or IP address in the Forward to field. For more information on using the SIP URI or IP address, refer to Placing Calls on page 68. Call forward is local to the phone, and may be overridden by the server settings. Call forward on code or off code may be different between servers. For more information, contact your system administrator. To disable call forward in phone mode: 1. Press Menu->Features->Call Forward. 2. Press or to select the desired forwarding type, and then press the Enter or , or the Switch soft key to select Disabled to disable the call soft key. 3. Press forward. 4. Press the Save soft key to accept the change. To disable call forward in custom mode for a specific account: 1. Press Menu->Features->Call Forward. 2. Press or to select the desired account, and then press the Enter soft key. 3. Press or to select the desired forwarding type, and then press the Enter or , or the Switch soft key to select Disabled to disable the call soft key. 4. Press forward. 5. Press the Save soft key to accept the change. 85 User Guide for the SIP-T42G IP Phone Dynamic Forwarding To forward an incoming call to another party: 1. When the phone is ringing, press the Forward soft key. 2. Enter the number you want to forward the incoming call to. 3. Press , , or the Send soft key. The LCD screen prompts a call forward message. Note When the phone forwards a call, the forward call prompt window will pop up by default, if you want to disable the feature, contact your system administrator for more information. You can transfer a call to another party in one of three ways: Blind Transfer: Transfer a call directly to another party without consulting. Semi-Attended Transfer: Transfer a call when the target phone is ringing. Attended Transfer: Transfer a call with prior consulting. To perform a blind transfer: 1. Press the Transfer soft key during a call. 2. Enter the number you want to transfer the call to. 3. Press the Transfer soft key to complete the transfer. Then the call is connected to the number to which you are transferring. To perform a semi-attended transfer: 86 1. Press the Transfer soft key during a call. 2. Do one of the following: - Enter the number you want to transfer the call to. - Press the Directory soft key, and then select Local Directory. Select the desired Basic Call Features group and search for the contact (Directory should be configured in advance. Refer to Directory on page 28 for more information). - Press the Directory soft key, and then select History. Select the desired list and press or to select the entry (Directory should be configured in advance. Refer to Directory on page 28 for more information). - Press the Directory soft key, and then select Remote Phone Book. Select the desired group and search for the contact (Directory and Remote Phone Book should be configured in advance. Refer to Directory on page 28 and Remote Phone Book on page 39 for more information). 3. Press or to dial out. 4. Press the Transfer soft key to complete the transfer when receiving ringback. To perform an attended transfer: 1. Press the Transfer soft key during a call. 2. Do one of the following: - Enter the number you want to transfer the call to. - Press the Directory soft key, and then select Local Directory. Select the desired group and search for the contact (Directory and Remote Phone Book should be configured in advance. Refer to Directory on page 28 for more information). - Press the Directory soft key, and then select History. Select the desired list and press or to select the entry (Directory should be configured in advance. Refer to Directory on page 28 for more information). - Press the Directory soft key, and then select Remote Phone Book. Select the desired group and search for the contact (Directory and Remote Phone Book should be configured in advance. Refer to Directory on page 28 and Remote Phone Book on page 39 for more information). 3. Enter the number you want to transfer the call to. 4. Press 5. After the party answers the call, press the Transfer soft key to complete the transfer. or to dial out. If you are using a handset, the transfer can be completed by hanging up the handset. You can cancel the transfer before the call is connected by pressing the Cancel soft key. You can enable or disable call waiting on the phone. If call waiting is enabled, you can receive another call while there is already an active call on the phone. Otherwise, another incoming call is automatically rejected by the phone with a busy message when there is an active call on the phone. You can also enable or disable the phone to play a warning tone when receiving another call. 87 User Guide for the SIP-T42G IP Phone To configure call waiting via phone user interface: 1. Press Menu->Features->Call Waiting. 2. Press or , or the Switch soft key to select Enabled from the Call Waiting or , or the Switch soft key to select Enabled from the Play Tone field. field. 3. Press 4. (Optional.) Enter the call waiting on code or off code respectively in the On Code or Off Code field. 5. Press the Save soft key to accept the change or the Back soft key to cancel. Call waiting is configurable via web user interface at the path Features->General Information. You can create a conference with other two parties using the phone’s local conference. You can create a conference between an active call and a call on hold by pressing the Conf soft key. The SIP-T42G IP phone also supports network conference. Note Network conference is not available on all servers. For more information, contact your system administrator. The SIP-T42G IP phone supports up to 3 parties (including yourself) in a conference call. This is the default method of conference called Local Conference. To set up a local conference call: 1. Place a call to the first party. 2. When the first party answers the call, press the Conf soft key to place a new call. The active call is placed on hold. 3. 88 Enter the number of the second party and press , , or the Send soft key. Basic Call Features 4. When the second party answers the call, press the Conf soft key again to join all parties in the conference. To join two calls in a conference: 1. Place two calls using two different accounts on the phone (for example, place the first call using account 1, and then place the second call using account 2). 2. Press or to select the call for conference and ensure that the call is active (for example, select the call on account 1). 3. Press the Conf soft key to join the two calls in the conference on account 1. During the conference call, you can do the following actions: - Press the Hold soft key to place the conference on hold. - Press the Split soft key to split the conference call into two individual calls on hold. - Press the Manage soft key, and then press or to select the desired party: Press the Far Mute soft key to forbid the party from speaking. The muted party can hear everyone, but no one can hear the muted party. Press the Remove soft key to remove the party from the conference call. Press the New Call soft key to place a new call. Press the Back soft key to return to the previous interface. - Press to mute the conference call. - Press the End Call soft key to drop the conference call. You can use network conference on the SIP-T42G IP phone to conduct a conference with multiple participants. This feature allows you to perform the following: Join two calls together into a conference call. Invite another party into an active conference call. To use this feature, contact your system administrator for the network conference URI in advance. To configure network conference via web user interface: 1. Click on Account->Advanced. 2. Select Network Conference from the pull-down list of Conference Type. 89 User Guide for the SIP-T42G IP Phone 3. Enter the conference URI (e.g., [email protected]) in the Conference URI field. 4. Note Click Confirm to accept the change. Network conference is configurable via web user interface only. To set up a network conference call: 1. Place a call to the first party. 2. Press the Conf soft key to place a new call. The active call is placed on hold. 3. Enter the number of the second party and press , , or the Send soft key. 4. When the second party answers the call, press the Conf soft key to add the second party to the conference. 5. Press the Conf soft key to place a new call. The conference is placed on hold. 6. Enter the number of the new party and then press , , or the Send soft key. 7. When the new party answers the call, press the Conf soft key to add the new party to the conference. 8. Repeat steps 5 to 7 until you have added all intended parties. The procedures to set up a network conference call on specific servers may be different from that introduced above. Contact your system administrator for more information. 90 Basic Call Features You can use call park to place a call on hold, and then retrieve the call from another phone in the system (for example, a phone in another office or conference room). You can park an active call by pressing the call park key on the phone. If the call is parked successfully, the response is either a voice prompt confirming that the call was parked, or a visible prompt on the LCD screen. Note Call park is not available on all servers. Contact your system administrator for more information. To configure a call park key via phone user interface: 1. Press Menu->Features->DSS Keys. 2. Select the desired DSS key. 3. Press or , or the Switch soft key to select Key Event from the Type field. 4. Press or , or the Switch soft key to select Call Park from the Key Type field. 5. Press or , or the Switch soft key to select the desired line from the Account ID field. 6. (Optional.) Enter the string that will appear on the LCD screen in the Label field. 7. Enter the call park code in the Value field. 8. Press the Save soft key to accept the change or the Back soft key to cancel. Call park key is configurable via web user interface at the path DSSKey->Line Key. To use call park: 1. User on phone A places a call to phone B. 2. User on phone A wants to take the call in a conference room for privacy, and so presses the call park key on phone A. 3. User on phone A walks to an available conference room where the phone is designated as phone C. The user dials the call park retrieve code to retrieve the parked call. The system establishes call between phone C and B. Note The call park code and call park retrieve code are predefined on the system server. Contact your system administrator for more information. If the parked call is not retrieved within a period of time assigned by the system, the phone performing call park will receive a call back. 91 User Guide for the SIP-T42G IP Phone You can use call pickup to answer someone else’s incoming call on your phone. The SIP-T42G IP phone supports directed call pickup and group call pickup. Directed call pickup is used for picking up a call that is ringing at a target phone number. Group call pickup is used for picking up a call that is ringing at any phone number in a certain group. The pickup group should be predefined, contact your system administrator for more information. You can pick up an incoming call by using the DPickup/GPickup soft key. To use call pickup, you need to configure the call pickup code beforehand on a global or per-line basis via web user interface. Note If there are many incoming calls at the same time, pressing the GPickup soft key on the phone will pick up the call that rings first. Directed Call Pickup To enable directed call pickup and configure the directed call pickup code on a global basis via web user interface: 1. Click on Features->Call Pickup. 2. Select Enabled from the pull-down list of Directed Call Pickup. 3. Enter the directed call pickup code in the Directed Call Pickup Code field. 4. Click Confirm to accept the change. To configure the directed call pickup code on a per-line basis via web user interface: 92 1. Click on Account. 2. Select the desired account from the pull-down list of Account. Basic Call Features 3. Click on Advanced. 4. Enter the directed call pickup code in the Directed Call Pickup Code field. 5. Click Confirm to accept the change. To pick up a call directly: 1. Pick up the handset and press the More soft key. The DPickup soft key appears on the LCD screen. 1. Press the DPickup soft key on your phone when the target phone receives an incoming call. 2. Enter the phone number which is receiving an incoming call. 3. Press the DPickup soft key again. The call is answered on your phone. You can also configure a DSS key as directed pickup key via phone user interface or web user interface. Once configured, you can pick up a call by pressing the directed pickup key directly. 93 User Guide for the SIP-T42G IP Phone Group Call Pickup To enable group call pickup and configure the group call pickup code on a global basis via web user interface: 1. Click on Features->Call Pickup. 2. Select Enabled from the pull-down list of Group Call Pickup. 3. Enter the group call pickup code in the Group Call Pickup Code field. 4. Click Confirm to accept the change. To configure the group call pickup code on a per-line basis via web user interface: 94 1. Click on Account. 2. Select the desired account from the pull-down list of Account. 3. Click on Advanced. Basic Call Features 4. Enter the group call pickup code in the Group Call Pickup Code field. 5. Click Confirm to accept the change. To pick up a call in the group: 1. Pick up the handset. The GPickup soft key appears on the LCD screen. 2. Press the GPickup soft key on your phone when a phone in the group receives an incoming call. The call is answered on your phone. You can also configure a DSS key as group pickup key via phone user interface or web user interface. Once configured, you can pick up a call by pressing the group pickup key directly. Note The directed call pickup code and group call pickup code are predefined on the system server. Contact your system administrator for more information. The call pickup code configured on a per-line basis takes precedence over that configured on a global basis. 95 User Guide for the SIP-T42G IP Phone You can use anonymous call to block your identify and phone number from appearing to the called party when you call someone. For example, you want to call to consult some services, but don’t want to be harassed. Anonymous call is configurable on a per-line basis. You can also configure the phone to send anonymous call on/off code to the server to activate/deactivate anonymous call on the server side. Note Anonymous call is not available on all servers. Contact your system administrator for the anonymous call on code and off code. To configure anonymous call via phone user interface: 1. Press Menu->Features->Anonymous Call. 2. Press or , or the Switch soft key to select the desired line from the Account or , or the Switch soft key to select Enabled from the Local ID field. 3. Press Anonymous field. 4. (Optional.) Press or , or the Switch soft key to select the desired value from the Send Anonymous Code field. 5. (Optional.) Enter the anonymous call on code and off code respectively in the On Code and Off Code field. The phone will send the configured on code or off code depending on your selection when you enable or disable anonymous call feature on the phone. 6. Press the Save soft key to accept the change or the Back soft key to cancel. Anonymous call is configurable via web user interface at the path Account->Basic. To place an anonymous call: 1. Using the specific line on the phone to place a call to phone B. The LCD screen of phone B prompts an incoming call from anonymity. 96 Basic Call Features You can use anonymous call rejection to reject incoming calls from anonymous callers. Anonymous call rejection automatically rejects incoming calls from callers who deliberately block their identities and numbers from being displayed. Anonymous call rejection is configurable on a per-line basis. You can also configure the phone to send anonymous call rejection on/off code to the server to activate/deactivate anonymous call rejection on the server side. To configure anonymous call rejection via phone user interface: 1. Press Menu->Features->Anonymous Call. 2. Press or , or the Switch soft key to select the desired line from the Account ID field. 3. Press or to scroll to the Local Anonymous Rejection field. 4. Press or , or the Switch soft key to select Enabled from the Local Anonymous Rejection field. 5. (Optional.) Press or , or the Switch soft key to select the desired value from the Send Anonymous Rejection Code field. 6. (Optional.) Enter the anonymous call rejection on code and off code respectively in the On Code and Off Code field. The phone will send the configured on code or off code depending on your selection when you enable or disable local anonymous rejection feature on the phone. 7. Press the Save soft key to accept the change or the Back soft key to cancel. Anonymous call rejection is configurable via web user interface at the path Account->Basic. 97 User Guide for the SIP-T42G IP Phone 98 Advanced Phone Features This chapter provides operating instructions for the advanced features of the SIP-T42G IP phone. Topics include: Busy Lamp Field (BLF) BLF List Call Recording Hot Desking Intercom Multicast Paging Music on Hold Automatic Call Distribution (ACD) Messages If you require additional information or assistance with your new phone, contact your system administrator. You can use BLF to monitor a specific line for status changes on the phone. For example, you can configure a BLF key on the phone to monitor the status of a friend’s line (busy or idle). The BLF key LED illuminates solid red when the friend’s line is in use. For more information on BLF key LED indications, refer to LED Instructions on page 4. You can press a BLF key to dial out the monitored phone number when the monitored line is idle. You can receive a visual or/and an audio alert (if enabled), and also pick up calls that are received on the monitored line. For more information, contact your system administrator. To configure a BLF key via phone user interface: 1. Press Menu->Features->DSS Keys. 2. Select the desired DSS key. 3. Press or , or the Switch soft key to select BLF from the Type field. 4. Press or , or the Switch soft key to select the desired line from the Account 99 User Guide for the SIP-T42G IP Phone ID field. 5. (Optional.) Enter a string that will appear on the LCD screen in the Label field. 6. Enter the phone number or extension you want to monitor in the Value field. 7. (Optional.) Enter the pickup code in the Extension field. 8. Press the Save soft key to accept the change or the Back soft key to cancel. BLF key is configurable via web user interface at the path DSSKey->Line Key. You can enable audio alert feature for BLF pickup on the phone. This allows the monitoring phone to play a warning tone when the monitored line receives an incoming call. You can also enable visual alert feature for BLF pickup on the phone. This allows the LCD screen of the monitoring phone to display the caller ID when the monitored line receives an incoming call. To enable visual and audio alert features via web user interface: 1. Click on Features->Call Pickup. 2. Select Enabled from the pull-down list of Visual Alert for BLF Pickup. 3. Select Enabled from the pull-down list of Audio Alert for BLF Pickup. 4. Click Confirm to accept the change. Note Visual and audio alert features are configurable via web user interface only. When the monitored line receives an incoming call, the following occurs on your phone: 100 The phone plays a warning tone (if enabled). The BLF key LED flashes red. The caller ID appears on the LCD screen (if enabled). Advanced Phone Features In the following figure, the LCD screen shows an incoming call from 1001 on the monitored line. Note If your phone is locked and the type of the phone lock is configured as Function Keys or All keys, you cannot use the Pickup, Send, New Call and Cancel soft keys until unlocked. When there is an active call on the IP phone, you can transfer the active call to the monitored phone number directly by pressing the BLF key. The phone handles the active call differently depending on the transfer mode on DSS key. For more information on the transfer mode on DSS key, refer to transfer in DSS Keys section on page 46. You can use the BLF List feature to monitor a list of users defined by your system administrator. For example, your system administrator enables BLF List, and creates a BLF List URI (e.g., [email protected]) including a list of user1, user2 on the server. The BLF List keys on the IP phone can present the status of user1 and user2. The key LEDs illuminate either flashing or solid depending on the status of those users. For more BLF List key LED indications, refer to LED Instructions on page 4. You can use the BLF List keys in the following ways: When the monitored user is idle, press the BLF list key to dial out the phone number. When there is already an active call on the IP phone, you can transfer the active call to the monitored user by pressing the BLF List key. The phone handles the active call differently depending on the transfer mode on DSS key. For more information on the transfer mode on DSS key, refer to Transfer on page 52. When the monitored user receives an incoming call, press the BLF list key to pick up the call directly. Before picking up an incoming call, ensure that the directed pickup code has been configured in advance. If the directed pickup code is not configured, the phone will place a call to the monitored user instead of picking up the incoming call of the monitored user when you press the BLF List key. When there is a conversation on the monitored user, press the BLF list key to barge in and set up a conference call. Before barging in an active call, ensure that the barge-in code has been configured in advance. If the BLF list barge in code is not configured, the phone will place a call to the monitored user instead of barging in an active call of the monitored user when you press the BLF List key. When a call is being parked against the monitored phone, press the BLF List key to retrieve the parked call from the monitored user. Before retrieving the parked call, 101 User Guide for the SIP-T42G IP Phone ensure that the BLF List Retrieve call parked Code has been configured in advance. If the code is not configured, the phone will place a call to the monitored user instead of retrieving the parked call when you press the BLF List key. To configure BLF List settings via web user interface: 1. Click on Account->Advanced. 2. Select the desired account from the pull-down list of Account. 3. Enter the BLF List URI in the BLF List URI field. 4. (Optional.) Enter the directed pickup code in the BLF List code field. 5. (Optional.) Enter the barge-in code in the BLF List Barge In Code field. 6. (Optional.) Enter the call park retrieve code in the BLF List Retrieve call parked Code field. 7. Note Click Confirm to accept the change. For more information on BLF List URI/BLF List Code/BLF List Barge In Code/BLF List Retrieve Call Parked Code, contact your system administrator. According to the response message from the server, the IP phone will automatically configure the BLF List keys beginning from the first unused line key. Once any linekey is seized, the IP phone will skip to configure the next line key. 102 Advanced Phone Features You can receive a visual or/and an audio alert (if enabled) on your phone when the monitored user receives an incoming call. For more information, refer to Busy Lamp Field (BLF) on page 99. Note The pickup code is used in the following order of preference: BLF List Code (Account->Advanced)>Directed Call Pickup Code (Account->Advanced)>Directed Call Pickup Code (Features->Call Pickup). If all of them are not configured, pressing the BLF List key will directly call the monitored user when he/she receives an incoming call. For more information about pickup Code, refer to Call Pickup on page 92. You can record calls by pressing a record key on the phone. The SIP-T42G IP phone supports record and URL record. Two ways of call recording: Record: The phone sends a SIP INFO message containing a specific header “Record: on/off” to trigger a recording. URL Record: The phone sends an HTTP URL request to trigger a recording. Contact your system administrator for the predefined URL. Note Call record is not available on all servers. Contact your system administrator for more information. To configure a record key via phone user interface: 1. Press Menu->Features->DSS Keys. 2. Select the desired DSS key. 3. Press or , or the Switch soft key to select Key Event from the Type field. 4. Press or , or the Switch soft key to select Record from the Key Type field. 5. (Optional.) Enter a string that will appear on the LCD screen in the Label field. 6. Press the Save soft key to accept the change or the Back soft key to cancel. To configure a URL record key via phone user interface: 1. Press Menu->Features->DSS Keys. 2. Select the desired DSS key. 103 User Guide for the SIP-T42G IP Phone 3. Press or , or the Switch soft key to select URL Record from the Type field. 4. (Optional.) Enter a string that will appear on the LCD screen in the Label field. 5. Enter the URL (e.g., http://10.1.2.224/phonerecording.cgi) in the Value field. 6. Press the Save soft key to accept the change or the Back soft key to cancel. Record and URL Record keys are configurable via web user interface at the path DSSKey->Line Key. The Record and URL Record keys control the recording function, and are available: During an active call When calls are on hold or muted During a blind or attended transfer During a conference call When the phone prompts you to answer an incoming call The Record and URL Record keys are not available when: There are no connected calls on your phone You place a new call To record a call: 1. Press the Record or URL Record key during a call. If the recording starts successfully, the recording icon will appear on the LCD screen and the Record or URL Record key LED will flash green. 2. Press the Record or URL Record key again to stop recording. The recording icon disappears from the LCD screen and the Record or URL Record key LED goes out. Recording status indications you need to know: Circumstance Icons on the LCD screen A recording is started appears on the LCD screen A recording cannot be started appears for 1 second A recording cannot be stopped appears for 1 second, then goes back The recording box is full appears for 1 second The call cannot be recorded appears for 1 second You can listen to the recordings stored on your server system. For example, you can dial 104 Advanced Phone Features an access code to listen to the recordings. Note The way in which you listen to the recordings may be different depending on the server. Contact your system administrator for more information. Hot desking originates from the definition of being the temporary physical occupant of a work station or surface by a particular employee. A primary motivation for hot desking is cost reduction. This feature is regularly used in places where not all the employees are in the office at the same time, or not in the office for very long, which means that actual personal offices would be often vacant, consuming valuable space and resources. You can use hot desking on the SIP-T42G IP phone to log out of existing accounts and then log into a new account. As a result, many users can share the phone resource at different times. To use this feature, you need to configure a hot desking key in advance. Note Hot desking is not available on all servers. Contact your system administrator for more information. To configure a hot desking key via phone user interface: 1. Press Menu->Features->DSS Keys. 2. Select the desired DSS key. 3. Press or , or the Switch soft key to select Key Event from the Type field. 4. Press or , or the Switch soft key to select Hot Desking from the Key Type field. 5. (Optional.) Enter a string that will appear on the LCD screen in the Label field. 6. Press the Save soft key to accept the change or the Back soft key to cancel. Hot desking key is configurable via web user interface at the path DSSKey->Line Key. 105 User Guide for the SIP-T42G IP Phone To use hot desking: 1. Press the hot desking key when the phone is idle. The LCD screen prompts the following warning: 2. Press the OK soft key, registration configurations of all accounts on the phone will be cleared immediately. The login wizard will be displayed as below: 3. Enter the login information in each field. 4. Press the Save soft key to login or the Back soft key to cancel. Intercom is a useful feature in an office environment to quickly connect with the operator or the secretary. You can press the intercom key to automatically connect with a remote extension for outgoing intercom calls, and the remote extension will automatically answer incoming intercom calls. Note Intercom is not available on all servers. Contact your system administrator for more information. To configure an intercom key via phone user interface: 106 1. Press Menu->Features->DSS Keys. 2. Select the desired DSS key. 3. Press 4. Select the desired line from the Account ID field. or , or the Switch soft key to select Intercom from the Type field. Advanced Phone Features 5. (Optional.) Enter the string that will appear on the LCD screen in the Label field. 6. Enter the remote extension number in the Value field. 7. Press the Save soft key to accept the change or the Back soft key to cancel. Intercom key is configurable via web user interface at the path DSSKey->Line Key. To place an intercom call: 1. Press the intercom key when the phone is idle. The phone is automatically connected to the extension specified in the Value field. 2. Press the intercom key again or the Cancel soft key to end the intercom call. The SIP-T42G IP phone supports automatically to answer an incoming intercom call by default. The phone automatically plays a warning tone when it receives an incoming intercom call. In addition, you can enable the phone to mute the microphone when it automatically answers an incoming intercom call. You can also enable the phone to automatically answer an incoming intercom call while there is already an active call on the phone. The active call is then placed on hold. Intercom features you need to know: Intercom Feature Accept Intercom Intercom Mute Intercom Tone Description Enable or disable the IP phone to automatically answer an incoming intercom call. Enable or disable the IP phone’s microphone for intercom calls. Enable or disable the IP phone to play a warning tone when it receives an incoming intercom call. Enable or disable the IP phone to automatically Intercom Barge answer an incoming intercom call while there is already an active call on the phone. To configure intercom features via phone user interface: 1. Press Menu->Features->Intercom. 2. Make the desired changes. 3. Press the Save soft key to accept the change or the Back soft key to cancel. These specific parameters are configurable via web user interface at the path 107 User Guide for the SIP-T42G IP Phone Features->Intercom. Accept Intercom You can enable or disable the phone to automatically answer an incoming intercom call. If Accept Intercom is enabled, the phone will automatically answer an incoming intercom call. If Accept Intercom is disabled, the phone will reject incoming intercom calls and send a busy message to the caller. Accept Intercom is enabled by default. Note Your administrator can set a period of delay time before the phone automatically answers intercom calls. Contact your system administrator for more information. Intercom Mute You can mute or un-mute the phone’s microphone for intercom calls automatically. If Intercom Mute is enabled, the microphone will be muted for intercom calls. If Intercom Mute is disabled, the microphone will work for intercom calls. Intercom Mute is disabled by default. Intercom Tone You can enable or disable the phone to play a warning tone when receiving an intercom call. If Intercom Tone is enabled, the phone will play a warning tone before answering the intercom call. If Intercom Tone is disabled, the phone will automatically answer the intercom call without warning. Intercom Tone is enabled by default. Intercom Barge You can enable or disable the phone to automatically answer an incoming intercom call while there is already an active call on the phone. If Intercom Barge is enabled, the phone will automatically answer the intercom call and place the active call on hold. If Intercom Barge is disabled, the phone will handle an incoming intercom call like a waiting call. Intercom Barge is disabled by default. You can use multicast paging to quickly and easily forward out time sensitive announcements to people within the multicast group. You can configure a multicast paging key or a paging list key on the phone, which allows you to send a Real Time Transport Protocol (RTP) stream to the pre-configured multicast address(es) without involving SIP signaling. You can configure the phone to receive an RTP stream from pre-configured multicast listening address(es) without involving SIP signaling. You can specify up to 10 multicast listening addresses. 108 Advanced Phone Features To configure a multicast paging key via phone user interface: 1. Press Menu->Features->DSS Keys. 2. Select the desired DSS key. 3. Press or , or the Switch soft key to select Key Event from the Type field. 4. Press or , or the Switch soft key to select Paging from the Key Type field. 5. (Optional.) Enter the string that will appear on the LCD screen in the Label field. 6. Enter the multicast IP address and port number (e.g., 224.5.6.20:10008) in the Value field. The valid multicast IP addresses range from 224.0.0.0 to 239.255.255.255. 7. Press the Save soft key to accept the change or the Back soft key to cancel. Multicast paging key is configurable via web user interface at the path DSSKey->Line Key. To configure a paging list key via phone user interface: 1. Press Menu->Features->DSS Keys. 2. Select the desired DSS key. 3. Press or , or the Switch soft key to select Key Event from the Type field. 4. Press or , or the Switch soft key to select Paging List from the Key Type field. 5. (Optional.) Enter the string that will appear on the LCD screen in the Label field. 6. Press the Save soft key to accept the change or the Back soft key to cancel. Paging list key is configurable via web user interface at the path DSSKey->Line Key. To configure paging list via phone user interface: 1. Press the paging list key when the phone is idle. 2. Press or to select a desired paging group. 109 User Guide for the SIP-T42G IP Phone The default tag is Empty if it is not configured before. 3. Press the Option soft key. 4. Press the Edit soft key. 5. Enter the multicast IP address and port number (e.g., 224.5.6.20:10008) in the Address field. The valid multicast IP addresses range from 224.0.0.0 to 239.255.255.255. 6. Enter the group name in the Label field. 7. Press the Save soft key to accept the change. 8. Repeat the step 2-7, you can add more paging groups. Paging list is configurable via web user interface at the path Directory->Multicast IP. To delete paging group via phone user interface: 1. Press the Paging list key when the phone is idle. 2. Press 3. Press the Option soft key. 4. Press the Delete soft key. 5. Press the OK soft key to accept the change or the Cancel soft key to cancel. or to select a desired group. If you want to delete all paging group, you can press the Delete All soft key. You can also configure the phone to use a default codec for sending multicast RTP stream via web user interface. To configure a default codec for multicast paging via web user interface: 110 1. Click on Features->General Information. 2. Select the desired codec from the pull-down list of Multicast Codec. Advanced Phone Features The default codec is G722. 3. Note Click Confirm to accept the change. If G722 codec is used for multicast paging, the LCD screen will display the indicate that it is providing high definition voice. icon to Default codec for multicast paging is configurable via web user interface only. To send RTP stream via a multicast paging key: 1. Press the multicast paging key when the phone is idle. The phone sends RTP to a preconfigured multicast address (IP: Port). Any phone in the local network then listens to the RTP on the preconfigured multicast address (IP: Port). For both sending and receiving of the multicast RTP, there is no SIP signaling involved. The multicast paging key LED illuminates solid green. The following figure shows a multicast RTP session on the phone: Note 2. Press the Hold soft key to place the current multicast RTP session on hold. 3. Press the End Call soft key to cancel the multicast RTP session. Multicast RTP is one way only from the sender to the multicast address(es) (receiver). For outgoing RTP multicasts, all other existing calls on the phone will be placed on hold. 111 User Guide for the SIP-T42G IP Phone To send RTP stream via a paging key list: 1. Press the paging list key when the phone is idle. 2. Press or 3. Press or the Paging soft key to send RTP. 4. Press the Hold soft key to place the current multicast RTP session on hold. 5. Press the End Call soft key to cancel the multicast RTP session. to select the desired group. You can configure the phone to receive a Real Time Transport Protocol (RTP) stream from the pre-configured multicast address(es) without involving SIP signaling. You can specify up to 10 multicast addresses that the phone listens to on the network. How the phone handles incoming multicast paging calls depends on Paging Barge and Paging Priority Active parameters configured via web user interface. Paging Barge The paging barge parameter defines the priority of the voice call in progress. If the priority of an incoming multicast paging call is lower than that of the active call, it will be ignored automatically. If Disabled is selected from the pull-down list of Paging Barge, the voice call in progress will take precedence over all incoming multicast paging calls. Valid values in the Paging Barge field: 1 to 10: Define the priority of the active call, 1 with the highest priority, 10 with the lowest. Disabled: The voice call in progress will take precedence over all incoming paging calls. Paging Priority Active The paging priority active parameter decides how the phone handles incoming multicast paging calls when there is already a multicast paging call on the phone. If enabled, the phone will ignore incoming multicast paging calls with lower priorities, otherwise, the phone will answer incoming multicast paging calls automatically and place the previous multicast paging call on hold. If disabled, the phone will automatically ignore all incoming multicast paging calls. To configure multicast listening addresses via web user interface: 112 1. Click on Directory->Multicast IP. 2. Select the desired value from the pull-down list of Paging Barge. Advanced Phone Features 3. Select the desired value from the pull-down list of Paging Priority Active. 4. Enter the multicast IP address(es) and port number (e.g., 224.5.6.20:10008) which the phone listens to for incoming RTP multicast in the Listening Address field. 5. Enter the label in the Label field. Label will appear on the LCD screen when receiving the multicast RTP stream. 6. Note Click Confirm to accept the change. The priorities of listening addresses are predefined: 1 with the highest priority, 10 with the lowest. Both the multicast paging sender and receiver’s phones play a warning tone when establishing a multicast paging call. Multicast listening addresses are configurable via web user interface only. Music on hold (MoH) is the business practice of playing recorded music to fill the silence that would be heard by the party placed on hold. To use this feature, you should specify a SIP URI pointing to a Music on Hold Server account. When a call is placed on hold, the phone will send a SIP INVITE message to the Music on Hold Server account. The Music on Hold Server account automatically answers the SIP INVITE messages and immediately plays audio from some source located anywhere (LAN, Internet) to the held party. Contact your system administrator for the SIP URI. To configure music on hold server via web user interface: 1. Click on Account. 2. Select the desired account from the pull-down list of Account. 3. Click on Advanced. 113 User Guide for the SIP-T42G IP Phone 4. Enter the SIP URI (e.g., sip:[email protected]) in the Music Server URI field. 5. Click Confirm to accept the change. When you have placed a call on hold, the held party can hear the music. Note For this feature to function, all involved parties cannot use encrypted RTP (SRTP). Music on hold server is configurable via web user interface only. ACD is often used in offices for customer service, such as call center. The ACD system handles large volumes of incoming calls from callers who have no need to talk to a specific person but who require assistance from any of multiple persons at the earliest opportunity. ACD on the SIP-T42G IP phone allows the ACD system to distribute large volumes of incoming calls to the registered ACD users. To use this feature, you should configure an ACD key in advance. Note Make sure ACD is enabled on your IP phone. For more information on enabling ACD, contact your system administrator. To configure an ACD key via phone user interface: 114 1. Press Menu->Features->DSS Keys. 2. Select the desired DSS key. Advanced Phone Features 3. Press or , or the Switch soft key to select ACD from the Type field. 4. (Optional.) Enter the string that will appear on the LCD screen in the Label field. 5. Press the Save soft key to accept the change or the Back soft key to cancel. ACD key is configurable via web user interface at the path DSSKey->Line Key. To log into the ACD system: 1. Press the ACD key when the phone is idle. The LCD screen prompts you the following information: User ID: the identity used to log into the queue. Password: the password used to log into the queue. 2. Note Press the Login soft key to log in. Contact your system administrator for the User ID and Password to access the ACD system. After configuring an ACD key, you can press the ACD key to log into the ACD system. After logging in, you are ready to receive calls from the ACD system. You can press the ACD key to show your current ACD user status. You can press the Available/Unavailable soft key to change your ACD user status. ACD user status synchronizes on both IP phone and ACD system. When you set the ACD user status to be available, the ACD key LED illuminates solid green, and then the server begins distributing calls to your phone. When you set the ACD user status to be unavailable, the ACD key LED flashes green, and then the server temporarily stops distributing calls to your phone. To log out of the ACD system, press the Logout soft key. Note It is recommended you configure no more than one ACD key per phone. At any time, at most one ACD key can be in progress on your phone. 115 User Guide for the SIP-T42G IP Phone You can leave voice mails for someone else using the SIP-T42G IP phone. You can also listen to voice mails that are stored in a voice mailbox. When receiving a new voice mail, the phone will play a warning tone, and the power indicator LED will slow flash red. The LCD screen will prompt that the phone receives a new message and display an icon. If the voice mail pop-up message box disappears, it won't pop up again unless the user receives a new voice mail or the user re-registers the account that has unread voice mail(s). Note Voice mail is not available on all servers. You can configure the phone not to display the pop-up prompt, contact your system administrator for more information. To leave a voice mail: You can leave a voice mail for someone else when he/she is busy or inconvenient to answer the call. Follow the voice prompt from the system server to leave a voice mail, and then hang up. To configure voice mail access codes via phone user interface: 1. Press Menu->Message->Voice Mail->Set Voice Mail. 2. Press the navigation keys to highlight the account which you want to set. 3. Press the 123 soft key to select the proper input mode and then enter the voice mail access code (e.g., *88). 4. Note 116 Press the Save soft key to accept the change or the Back soft key to cancel. Voice mail access codes must be predefined on the system server. Contact your system administrator for the more information. Advanced Phone Features To listen to voice mails: 1. When the LCD screen prompts that the phone receives a new voice mail and the power indicator LED slow flashes red, press or the Connect soft key to dial out the voice mail access code. 2. Note Follow the voice prompt to listen to your voice mails. Before listening to voice mails, make sure the voice mail access code has been configured. When all new voice mails are retrieved, the power indicator LED will go out. To view the voice mail via phone user interface: 1. Press Menu->Message->Voice Mail->View Voice Mail. The LCD screen displays the amount of new and old voice mails. 2. Select an account and then press the Connect soft key to listen to voice mails. The SIP-T42G IP phone supports MWI feature when receiving a new voice message. If someone leaves you a voice mail, you will receive a message waiting indicator. MWI will be indicated in three ways: a warning tone, an indicator message (including a voice mail icon) on the LCD screen, and the power indicator LED slow flashes red. This will be cleared when you retrieve all voice mails or delete them. The MWI service is unsolicited for some servers, so the SIP-T42G IP phone only handles the MWI messages sent from the server. But for other servers, the MWI service is solicited, so the SIP-T42G IP phone must enable subscription for MWI. Note MWI service is not available on all servers. Contact your system administrator for more information. The MWI subscription parameters you need to know: Options Subscribe for MWI Description Enable or disable a subscription for MWI service. Period of MWI subscription. The IP phone sends a MWI Subscription Period refresh SUBSCRIBE request before initial SUBSCRIBE expiration. 117 User Guide for the SIP-T42G IP Phone Options Description Enable or disable a subscription to the voice mail Subscribe MWI To Voice number for MWI service. Mail To use this feature, you should also configure the voice mail number. Note The phone will send SUBSCRIBE messages for the MWI service to the account or the voice number MWI service depending on the server. Contact your system administrator for more information. To configure subscribe for MWI via web user interface: 1. Click on Account. 2. Select the desired account from the pull-down list of Account. 3. Click on Advanced. 4. Select Enabled from the pull-down list of Subscribe for MWI. 5. Enter the period time in the MWI Subscription Period (Seconds) field. 6. Click Confirm to accept the change. The IP phone will subscribe to the account number for MWI service by default. 118 Advanced Phone Features To enable Subscribe MWI to Voice Mail via web user interface: 1. Click on Account. 2. Select the desired account from the pull-down list of Account. 3. Click on Advanced. 4. Select Enabled from the pull-down list of Subscribe MWI To Voice Mail. 5. Enter the desired voice mail number in the Voice Mail field. 6. Click Confirm to accept the change. The IP phone will subscribe to the voice mail number for MWI service using Subscribe MWI to Voice Mail. Note MWI subscription is configurable via web user interface only. 119 User Guide for the SIP-T42G IP Phone 120 Troubleshooting This chapter provides general troubleshooting information to help you solve the problems you might encounter when using your SIP-T42G IP phone. If you require additional information or assistance with your new phone, contact your system administrator. Why is the LCD screen blank? Ensure that the phone is properly plugged into a functional AC outlet. Ensure that the phone is plugged into a socket controlled by a switch that is on. If the phone is plugged into a power strip, try to plug it directly into a wall outlet instead. If the phone is powered from PoE, ensure that you use a PoE-compliant switch or hub. Why does the phone display "Network Unavailable"? Ensure that the Ethernet cable is plugged into the Internet port on the phone and the Ethernet cable is not loose. Ensure that the switch or hub in your network is operational. Why doesn’t the phone display time and date correctly? Check if you have configured the phone to obtain the time and date from the SNTP server automatically. If the phone fails to connect to the SNTP server, you need to configure the time and date manually. How do I find the basic information of the IP phone? Press the OK key when the IP phone is idle to check the basic information of the IP phone, such as IP address and firmware version. For more basic information, refer to Phone Status on page 14. How to obtain the MAC address of a phone when the phone is not powered on? Three ways to obtain the MAC address of a phone: You can ask your supplier for the shipping information sheet which includes MAC addresses according to the corresponding PO (Purchase Order). You can find the MAC address on the label of the carton box. You can also find the MAC address from the phone’s bar code on the back of the phone. 121 User Guide for the SIP-T42G IP Phone Why can’t I get a dial tone? Check for any loose connections and that the phone has been installed properly. For the installation instructions, refer to Phone Installation on page 11. Switch between the Handset, Headset (if present) or Hands-Free Speakerphone to check whether the dial tone is present for one of the audio modes. If the dial tone exists on another audio mode, connect a different handset or headset to isolate the problem. Why doesn’t the phone ring? Check the ringer volume on the phone. To adjust the ringer volume setting, press the Volume key when the phone is on-hook and idle. For more information, refer to Volume on page 26. Why can’t I receive calls? Check the SIP registration with your system administrator. Check that DND (Do Not Disturb) mode is deactivated on your phone. Refer to Do Not Disturb (DND) on page 77. Check that call forward is disabled on the phone. Refer to Call Forward on page81. Check whether the caller number is stored in the blacklist directory. Refer to Blacklist on page 38. Why is my handset not working? Check that the handset cord is fully connected to both the handset jack on the phone and handset. Refer to Phone Installation on page 11. Why is my headset not working? Check that the headset cord is fully connected to the headset jack on the phone. Refer to Phone Installation on page 11. Check that the headset mode is activated. Refer to Headset Use on page 43. Check that the headset volume is adjusted to an appropriate level. Refer to Volume on page 26. What is the difference between user name, register name and display name? Both user name and register name are defined by the server. A user name is used to identify the account, while a register name matched with a password is used for authentication if the server requires. Display name is the caller ID that will be displayed on the callee’s LCD screen. Server configuration may override the local configuration. 122 Troubleshooting Why does the phone play a tone when hold? How to disable it? When there is a call is on hold, the phone will play a hold tone every 30 seconds. Play hold tone is enabled by default. Play hold tone and the interval of playing a hold tone are configurable via web user interface only. To configure the call hold tone and call hold tone delay via web user interface: 1. Click on Features->General Information. 2. Select Enabled or Disabled from the pull-down list of Play Hold Tone. 3. Enter the desired time in the Play Hold Tone Delay field. 4. Click Confirm to accept the change. How to change the user password? To change the user password via web user interface: 1. Click on Security->Password. 2. Select User from the pull-down list of User Type. 3. Enter the new user password in the New Password field and Confirm Password field. 123 User Guide for the SIP-T42G IP Phone 4. Click Confirm to accept the change. You can also contact your system administrator for help. Note If logging into the web user interface of the phone with user credentials, you need to enter the current user password in the Old Password field. User password is configurable via web user interface only. How to make a call using SRTP? You can enable SRTP to encrypt the audio stream(s) of phone calls. The parties participating in the call should enable SRTP. You can configure SRTP on per-line basis. To enable SRTP via web user interface: Note 1. Click on Account. 2. Select the desired account from the pull-down list of Account. 3. Click on Advanced. 4. Select the desired type from the pull-down list of RTP Encryption (SRTP). 5. Click Confirm to accept the change. SRTP is not available on all servers. Contact your system administrator for more information. SRTP is configurable via web user interface only. 124 Troubleshooting How to reboot the phone? To reboot the phone via web user interface: 1. Click on Settings->Upgrade. 2. Click Reboot to reboot the IP phone. Note Any reboot of the phone may take a few minutes. How to export PCAP trace? We may need you to provide a PCAP trace to help analyze your problem. To export a PCAP trace via web user interface: 1. Click on Settings->Configuration. 2. Click Start to begin capturing signal traffic. 3. Recreate the error to be documented in the trace. 4. Click Stop to stop the capture. 5. Click Export to open file download window, and then save the file to your local system. 125 User Guide for the SIP-T42G IP Phone How to export system log? We may need you to provide the phone configurations to help analyze your problem. In some instance, you may need to import configurations to your phone. To export the system log to a local PC via web user interface: 1. Click on Settings->Configuration. 2. Select 6 from the pull-down list of System Log Level. The default system log level is 3. 3. Click Confirm to accept the change. 4. Mark the Local radio box in the Export System Log field. 5. Click Export to open file download window, and then save the system log file to your local system. You can also export the system log to a syslog server. Contact your system administrator for more information. Note It is recommended to reset the syslog level to 3 after exporting the system syslog. How to export/import the phone configurations? We may need you to provide the phone configurations to help analyze your problem. In some instance, you may need to import configurations to your phone. To export the phone configurations via web user interface: 1. 126 Click on Settings->Configuration. Troubleshooting 2. In the Export or Import Configuration block, click Export to open file download window, and then save the file to your local system. To import the phone configurations via web user interface: 1. Click on Settings->Configuration. 2. In the Export or Import Configuration block, click Browse to locate a configuration file from your local system. 3. Note Click Import to import the configuration file. The file format of configuration file must be *.bin. How to upgrade firmware? To upgrade firmware via web user interface: 1. Click on Settings->Upgrade. 2. Click Browse to locate the required firmware from your local system. 3. Click Upgrade to upgrade the firmware. The web user interface prompts “Firmware of the SIP Phone will be updated. It will take 5 minutes to complete. Please don't power off!”. 127 User Guide for the SIP-T42G IP Phone 4. Click OK to confirm upgrading. How to reset the phone? Reset the phone to factory configurations after you have tried all troubleshooting suggestions but do not solve the problem. You need to note that all customized settings will be overwritten after reset. To reset the phone via phone user interface: 1. Press Menu->Settings->Advanced Settings (default password: admin) ->Reset to Factory. 2. Press the Enter soft key. The LCD screen prompts the following warning: 3. Press the OK soft key. The LCD screen prompts the following: Resetting… 4. Please Wait! The LCD screen prompts the following: Welcome 5. Initializing...please wait The phone will be reset to factory settings sucessfully after startup. Note 128 Reset of your phone may take a few minutes. Do not power off until the phone has started up successfully. Regulatory Notices Contact your Yealink Authorized Reseller for information on service agreements applicable to your product. TO THE FULL EXTENT ALLOWED BY LAW, YEALINK EXCLUDES FOR ITSELF AND ITS SUPPLIERS ANY LIABILITY, WHETHER BASED IN CONTRACT OR TORT (INCLUDING NEGLIGENCE), FOR INCIDENTAL, CONSEQUENTIAL, INDIRECT, SPECIAL, OR PUNITIVE DAMAGES OF ANY KIND, OR FOR LOSS OF REVENUE OR PROFITS, LOSS OF BUSINESS, LOSS OF INFORMATION OR DATA, OR OTHER FINANCIAL LOSS ARISING OUT OF OR IN CONNECTION WITH THE SALE, INSTALLATION, MAINTENANCE, USE, PERFORMANCE, FAILURE, OR INTERRUPTION OF ITS PRODUCTS, EVEN IF YEALINK OR ITS AUTHORIZED RESELLER HAS BEEN ADVISED OF THE POSSIBILITY OF SUCH DAMAGES, AND LIMITS ITS LIABILITY TO REPAIR, REPLACEMENT, OR REFUND OF THE PURCHASE RICE PAID, AT YEALINK’S OPTION. THIS DISCLAIMER OF LIABILITY FOR DAMAGES WILL NOT BE AFFECTED IF ANY REMEDY PROVIDED HEREIN SHALL FAIL OF ITS ESSENTIAL PURPOSE. Save these instructions. Read these safety instructions before use! The following basic safety precautions should always be followed to reduce the risk of fire, electrical shock, and other personal injury. General Requirements Before you install and use the device, read the safety instructions carefully and observe the situation during operation. During the process of storage, transportation, and operation, please always keep the device dry and clean. During the process of storage, transportation, and operation, please avoid collision and crash of the device. Please do not attempt to dismantle the device by yourself. In case of any discrepancy, please contact the appointed maintenance center for repair. Without prior written consent, no organization or individual is permitted to make any change to the structure or the safety design of the device. Yealink is under no circumstances liable to consequences or legal issues caused by such changes. Please refer to the relevant laws and statutes while using the device. Legal rights of others should also be respected as well. 129 User Guide for the SIP-T42G IP Phone Environmental Requirements Place the device at a well-ventilated place. Do not expose the device under direct sunlight. Keep the device dry and free of dust. Place the device on a stable and level platform. Please do not place heavy objects on the device in case of damageand deformation caused by the heavy load. Keep at least 10 cm between the device and the closest object for heat dissipation. Do not place the device on or near any inflammable or fire-vulnerable object, such as rubber-made materials. Keep the device away from any heat source or bare fire, such as a candle or an electric heater. Keep the device away from any household appliance with a strong magnetic field or electromagnetic field, such as a microwave oven or a refrigerator. Operating Requirements Do not let a child operate the device without guidance. Do not let a child play with the device or any accessory in case of accidental swallowing. Please only use the accessories provided or authorized by the manufacturer. The power supply of the device must meet the requirements of the input voltage of the device. Please use the provided surge protection power socket only. Before plugging or unplugging any cable, make sure that your hands are completely dry. Do not spill liquid of any kind on the product or use the equipment near water, for example, near a bathtub, washbowl, kitchen sink, wet basement or near a swimming pool. Do not tread on, pull, or over-bend any cable in case of malfunction of the device. During a thunderstorm, stop using the device and disconnect it from the power supply. Unplug the power plug and the Asymmetric Digital Subscriber Line (ADSL) twisted pair (the radio frequency cable) to avoid lightning strike. If the device is left unused for a rather long time, disconnect it from the power supply and unplug the power plug. When there is smoke emitted from the device, or some abnormal noise or smell, disconnect the device from the power supply, and unplug the power plug immediately. Contact the specified maintenance center for repair. Do not insert any object into equipment slots that is not part of the product or auxiliary product. Before connecting a cable, connect the grounding cable of the device first. Do not disconnect the grounding cable until you have disconnected all other cables. Cleaning Requirements 130 Regulatory Notices Before cleaning the device, stop using it and disconnect it from the power supply. Use a piece of soft, dry and anti-static cloth to clean the device. Keep the power plug clean and dry. Using a dirty or wet power plug may lead to electric shock or other perils. 131 User Guide for the SIP-T42G IP Phone 132 Appendix A-Time Zones Time Zone −11:00 −10:00 −09:30 −09:00 −08:00 −08:00 −08:00 −07:00 −07:00 −07:00 −07:00 −06:00 −06:00 −06:00 −06:00 −05:00 −05:00 −05:00 −05:00 −04:30 −04:00 −04:00 −04:00 −04:00 −04:00 −04:00 −03:30 −03:00 −03:00 −03:00 −03:00 −02:30 −02:00 −01:00 0 0 0 0 0 0 0 0 +01:00 +01:00 +01:00 +01:00 +01:00 +01:00 +01:00 +01:00 +01:00 Time Zone Name Samoa United States-Hawaii-Aleutian French Polynesia United States-Alaska Time Canada(Vancouver, Whitehorse) Mexico(Tijuana, Mexicali) United States-Pacific Time Canada(Edmonton, Calgary) Mexico(Mazatlan, Chihuahua) United States-Mountain Time United States-MST no DST Canada-Manitoba(Winnipeg) Chile(Easter Islands) Mexico(Mexico City, Acapulco) United States-Central Time Bahamas(Nassau) Canada(Montreal, Ottawa, Quebec) Cuba(Havana) United States-Eastern Time Venezuela(Caracas) Canada(Halifax, Saint John) Chile(Santiago) Paraguay(Asuncion) United Kingdom-Bermuda(Bermuda) United Kingdom(Falkland Islands) Trinidad&Tobago Canada-New Foundland(St.Johns) Denmark-Greenland(Nuuk) Argentina(Buenos Aires) Brazil(no DST) Brazil(DST) Newfoundland and Labrador Brazil(no DST) Portugal(Azores) GMT Greenland Denmark-Faroe Islands(Torshavn) Ireland(Dublin) Portugal(Lisboa, Porto, Funchal) Spain-Canary Islands(Las Palmas) United Kingdom(London) Morocco Albania(Tirane) Austria(Vienna) Belgium(Brussels) Caicos Chad Spain(Madrid) Croatia(Zagreb) Czech Republic(Prague) Denmark(Kopenhagen) 133 User Guide for the SIP-T42G IP Phone Time Zone +01:00 +01:00 +01:00 +01:00 +01:00 +01:00 +01:00 +01:00 +02:00 +02:00 +02:00 +02:00 +02:00 +02:00 +02:00 +02:00 +02:00 +02:00 +02:00 +02:00 +02:00 +02:00 +03:00 +03:00 +03:00 +03:30 +04:00 +04:00 +04:00 +04:00 +04:00 +04:30 +05:00 +05:00 +05:00 +05:00 +05:30 +05:45 +06:00 +06:00 +06:30 +07:00 +07:00 +08:00 +08:00 +08:00 +08:00 +08:45 +09:00 +09:00 +09:00 +09:30 +09:30 +10:00 +10:00 +10:00 134 Time Zone Name France(Paris) Germany(Berlin) Hungary(Budapest) Italy(Rome) Luxembourg(Luxembourg) Macedonia(Skopje) Netherlands(Amsterdam) Namibia(Windhoek) Estonia(Tallinn) Finland(Helsinki) Gaza Strip(Gaza) Greece(Athens) Israel(Tel Aviv) Jordan(Amman) Latvia(Riga) Lebanon(Beirut) Moldova(Kishinev) Russia(Kaliningrad) Romania(Bucharest) Syria(Damascus) Turkey(Ankara) Ukraine(Kyiv, Odessa) East Africa Time Iraq(Baghdad) Russia(Moscow) Iran(Teheran) Armenia(Yerevan) Azerbaijan(Baku) Georgia(Tbilisi) Kazakhstan(Aktau) Russia(Samara) Afghanistan(Kabul) Kazakhstan(Aqtobe) Kyrgyzstan(Bishkek) Pakistan(Islamabad) Russia(Chelyabinsk) India(Calcutta) Nepal(Katmandu) Kazakhstan(Astana, Almaty) Russia(Novosibirsk, Omsk) Myanmar(Naypyitaw) Russia(Krasnoyarsk) Thailand(Bangkok) China(Beijing) Singapore(Singapore) Australia(Perth) Russia(Irkutsk, Ulan-Ude) Eucla Korea(Seoul) Japan(Tokyo) Russia(Yakutsk,Chita) Australia(Adelaide) Australia(Darwin) Australia(Sydney, Melbourne, Canberra) Australia(Brisbane) Australia(Hobart) Appendix A-Time Zones Time Zone +10:00 +10:30 +11:00 +11:00 +11:30 +12:00 +12:00 +12:45 +13:00 +13:30 +14:00 Time Zone Name Russia(Vladivostok) Australia(Lord Howe Islands) New Caledonia(Noumea) Russia(Srednekolymsk Time) Norfolk Island New Zealand(Wellington, Auckland) Russia(Kamchatka Time) New Zealand(Chatham Islands) Tonga(Nukualofa) Chatham Islands Kiribati 135 User Guide for the SIP-T42G IP Phone 136 Index E A About This Guide v Account Management 56 Account Registration 56 Adding Contacts 32 Administrator password 22 Anonymous Call 96 Anonymous Call Rejection 97 Answering Calls 70 Area Code 61 Attaching Stand 11 Audio Settings 26 Auto Answer 73 Auto Redial 73 Automatic Call Distribution 114 B Backlight 19 Basic Network Settings Blacklist 38 Block Out 62 Busy Lamp Field (BLF) BLF List 101 16 99 C Call completion 74 Call Forward 80 Call Mute 76 Call History Management 42 Call Hold/Resume 76 Call Park 91 Call Pickup 92 Call Recording 101 Call Transfer 86 Call Waiting 87 CE Mark Warning vi Conference 88 Contact Management 28 Copyright v Customizing Your Phone 19 D Declaration of Conformity vi Deleting Contacts 34 Dial-now 60 Dial Plan 58 Do Not Disturb (DND) 77 Documentation 8 DSS Keys 46 Directory 28 Editing Contacts 33 Emergency Number 63 Ending Calls 71 G General Settings 19 Getting Started 9 H Hardware Component Instructions 1 Headset Use 43 Headset Mode Activation/Deactivation 44 Hotline 65 Hot Desking 105 I Icon Instructions 3 Idle screen 17 Importing/Exporting Contact lists In This Guide v Incoming Intercom Calls 107 Intercom 106 36 K Key as Send 23 L Language 20 LED Instructions 4 Limitation of Liability 129 Line Keys 46 Live Dialpad 64 Local Conference 88 Local Directory 29 M Message Waiting Indicator 117 Messages 116 Multicast Paging 108 Multiple Line Keys per Account 57 Music on Hold 113 N Network Conference Network Connection 89 11 P Packaging Contents 9 Phone Initialization 14 137 User Guide for the SIP-T42G IP Phone Phone Installation 11 Phone Status 14 Phone Lock 23 Phone User Interface 6 Placing Calls 68 Placing Calls to Contacts 34 Programmable Keys 55 O Outgoing Intercom Calls 106 Overview 1 Optional Accessories 10 R Recall 74 Recent Call In Dialing 72 Redialing Numbers 71 Registration 17 Regulatory Notices 129 Remote Phone Book 39 Replace Rule 58 Ring Tones 26 S Safety Instructions 129 Search Source List in Dialing Searching for Contacts 35 Service Agreements 129 Summary of Changes v System Customizations 43 T Time & Date 20 Time Zones 133 Troubleshooting 121 V Voice Mail 116 Volume 26 W Warranty vi Web User Interface WEEE Warning vii 138 6 35