1
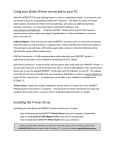
Click <OK> to close the HANDIMARK® properties window. Close the Devices and Printers window 3. Placing the HANDIMARK® Printer into Peripheral Mode For the HANDIMARK®system to communicate with the PC the printer needs to be placed into peripheral mode: Press the 2nd key and then the Online key The screen on the HANDIMARK® will now read Peripheral Mode 4. Connecting the HANDIMARK® Printer to the PC Plug the RJ45 (phone jack style) connector into the back of the HANDIMARK®. Plug the opposite end with the 9 pin serial connector directly into your PC or into the Serial‐to‐ USB adapter. Congratulations! Your HANDIMARK® Printer Driver is now properly installed and the system is ready to print labels through your labeling software installed on your PC.