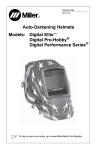
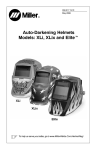
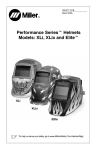
1
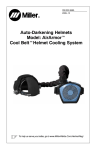
OM-262 902A
®
2013−04
CoolBandtII Integrated
Headgear Cooling System
To help us serve you better, go to MillerWelds.com/CoolerNow
TABLE OF CONTENTS
SECTION 1 − HELMET COOLER SAFETY
PRECAUTIONS − READ BEFORE USING . . .
1
1-1.
Symbol Usage . . . . . . . . . . . . . . . . . . . . . . . . . 1
1-2.
Hazards . . . . . . . . . . . . . . . . . . . . . . . . . . . . . . 2
1-3.
Proposition 65 Warnings . . . . . . . . . . . . . . . . 4
1-4.
Principal Safety Standards . . . . . . . . . . . . . . . 4
SECTION 2 − BATTERY SAFETY PRECAUTIONS
− READ BEFORE USING . . . . . . . . . . . . . . . . . . 5
2-1.
Symbol Usage . . . . . . . . . . . . . . . . . . . . . . . . . 5
2-2.
Hazards . . . . . . . . . . . . . . . . . . . . . . . . . . . . . . 6
2-3.
Proposition 65 Warnings . . . . . . . . . . . . . . . . 8
2-4.
Principal Safety Standards . . . . . . . . . . . . . . . 8
SECTION 3 − HEADGEAR COOLING
SYSTEM . . . . . . . . . . . . . . . . . . . . . . . . . . . . . . . . . . . .
3-1.
9
Headgear Cooling System Specifications . . 11
3-2.
Installing Headgear . . . . . . . . . . . . . . . . . . . . . 13
3-3.
Installing Head Shroud . . . . . . . . . . . . . . . . . . 14
3-4.
Charging The Battery . . . . . . . . . . . . . . . . . . . 16
3-5.
Installing The Battery . . . . . . . . . . . . . . . . . . . 18
3-6.
Installing The Filter . . . . . . . . . . . . . . . . . . . . . 19
3-7.
Removing Air Deflector To Adjust Air Flow . . 20
3-8.
Operating The Controls . . . . . . . . . . . . . . . . . 22
3-9.
Checking Headgear Cooling System Before
Use . . . . . . . . . . . . . . . . . . . . . . . . . . . . . . . . . . 24
SECTION 4 − MAINTENANCE . . . . . . . . . . . . .
26
4-1.
Adjusting Headgear . . . . . . . . . . . . . . . . . . . . . 26
4-2.
Replacing Fabric Headband . . . . . . . . . . . . . . 28
4-3.
Maintenance And Storage . . . . . . . . . . . . . . . 29
4-4.
Headgear Cooling System Troubleshooting . 30
SECTION 5 − PARTS LIST . . . . . . . . . . . . . . . .
32
SECTION 1 − HELMET COOLER SAFETY
PRECAUTIONS − READ BEFORE USING
Protect yourself and others from injury — read, follow, and save
these important safety precautions and operating instructions.
1-1.
Symbol Usage
Helmet Cooler 2011−10
DANGER! − Indicates a hazardous situation which, if not
avoided, will result in death or
serious injury. The possible hazards are shown in the adjoining
symbols or explained in the text.
Indicates a hazardous situation
which, if not avoided, could result in death or serious injury.
The possible hazards are shown
in the adjoining symbols or explained in the text.
. Indicates special instructions.
This group of symbols means
Warning! Watch Out! ELECTRIC
SHOCK, MOVING PARTS, and
HOT PARTS hazards. Consult
symbols and related instructions
below for necessary actions to
avoid the hazards.
NOTICE − Indicates statements not related to personal injury.
OM-262 902 Page 1
1-2.
Hazards
Only qualified persons should install, operate, maintain, and repair this
unit.
READ INSTRUCTIONS.
D
D
D
Read and follow all labels and the Owner’s Manual carefully before installing, operating, or servicing unit. Read the safety information at the beginning of the manual and in each section.
Use only genuine replacement parts from the manufacturer.
Perform maintenance and service according to the Owner’s Manuals, industry
standards, and national, state, and local codes.
HELMET COOLER MISUSE can be hazardous.
Welding produces fumes and gases. Breathing these fumes and
gases can be hazardous to your health.
D
Read and follow these instructions and the safety labels carefully. This product
is intended for use as a cooling device only. It is not a respiratory protective device and does not protect the user from airborne contaminants. Have an
industrial hygienist test the air in your facility to determine if respiratory protection is required to provide adequate protection from contaminants in your
environment. With cooling system-equipped helmet on your head and cooling
system operating, also test the air inside the helmet to determine if respiratory
protection is required. If you have questions about the type of respiratory
protection equipment required, consult your safety director and a certified Industrial Hygienist.
OM-262 902 Page 2
D
D
D
D
D
D
D
D
D
D
D
Do not use this product where there is danger of fire or explosion.
Do not use this product in windy conditions or negative pressure inside the
hood may draw in contaminants from the outside air.
Do not use this product without a properly installed spark guard unless the unit
is designed and intended to be used without one. Without the spark guard (on
applicable products), welding sparks may ignite the filter or damage the filter.
This product does not supply oxygen. Do not use this product where oxygen
levels are 19.5% or lower, where contaminant levels are unknown or are immediately dangerous to life or health (IDLH), or where the contaminant levels
exceed the equipment specifications.
Do not enter a work area until you are sure the equipment is correctly assembled, working properly, and properly worn.
Before each use, inspect the equipment for damage and verify it operates properly.
Dangerous contaminants may not smell or be visible. Leave the area immediately if you notice the following:
. . . . Breathing becomes difficult.
. . . . You experience dizziness, impaired vision, or eye, nose, or mouth irritation.
. . . . The equipment is damaged.
Do not repair, modify, or disassemble this product or use with parts or accessories not supplied by the manufacturer.
Do not operate unit without properly installed filter(s). Replace damaged or
clogged filters. Do not wash or reuse filters. Do not clean filters by tapping or
with compressed air or filter elements may be damaged.
Do not restrict or alter helmet cooler air flow. Do not block air inlet or outlet. Be
sure safety glasses, hair, weld cap, and other objects do not block air flow.
This product contains electrical parts which have not been evaluated as an ignition source in flammable or explosive atmospheres by MSHA/NIOSH.
OM-262 902 Page 3
1-3.
Proposition 65 Warnings
Welding or cutting equipment produces fumes or gases which contain
chemicals known to the State of California to cause birth defects and, in
some cases, cancer. (California Health & Safety Code Section 25249.5 et
seq.)
This product contains chemicals, including lead, known to the state of
California to cause cancer, birth defects, or other reproductive harm.
Wash hands after use.
1-4.
Principal Safety Standards
Safety in Welding, Cutting, and Allied Processes, ANSI Standard Z49.1, is available
as a free download from the American Welding Society at http://www.aws.org or purchased from Global Engineering Documents (phone: 1-877-413-5184, website:
www.global.ihs.com).
Safe Practice For Occupational And Educational Eye And Face Protection, ANSI
Standard Z87.1, from American National Standards Institute, 25 West 43rd Street,
New York, NY 10036 (phone: 212-642-4900, website: www.ansi.org).
OM-262 902 Page 4
SECTION 2 − BATTERY SAFETY PRECAUTIONS −
READ BEFORE USING
Protect yourself and others from injury — read, follow, and save
these important safety precautions and operating instructions.
2-1.
Symbol Usage
Small Batt 2011−10
DANGER! − Indicates a hazardous situation which, if not
avoided, will result in death or
serious injury. The possible hazards are shown in the adjoining
symbols or explained in the text.
Indicates a hazardous situation
which, if not avoided, could result in death or serious injury.
The possible hazards are shown
in the adjoining symbols or explained in the text.
. Indicates special instructions.
This group of symbols means
Warning! Watch Out! ELECTRIC
SHOCK, MOVING PARTS, and
HOT PARTS hazards. Consult
symbols and related instructions
below for necessary actions to
avoid the hazards.
NOTICE − Indicates statements not related to personal injury.
OM-262 902 Page 5
2-2.
Hazards
Only qualified persons should install, operate, maintain, and repair this
unit.
BATTERY ACID can BURN SKIN and EYES.
D
D
D
Replace damaged battery.
Do not touch materials from inside a damaged battery.
Flush eyes and skin immediately with water.
READ INSTRUCTIONS.
D
Read and follow all labels and the Owner’s Manual carefully
before before using the battery or battery charger. Read the
safety information at the beginning of the manual and in each
section.
D
Dispose of battery according to local, state, and federal requirements. Do
not dispose of battery in fire or water.
D
Contact the equipment manufacturer if you have any questions about the
battery.
OM-260 902 Page 6
FIRE OR BATTERY EXPLOSION hazard.
D
D
D
D
D
D
D
D
D
D
D
D
D
D
During operation keep everyone, especially children, away.
Do not install or place charger on, over, or near combustible
surfaces.
Do not charge battery near flammables.
Examine the battery before first use. Return battery to the manufacturer if battery is damaged, dirty, or emits an unusual odor.
Use battery only with equipment with which it was supplied. Replace battery
only with battery specified in Owner’s Manual. Use of another battery may
present a risk of fire or explosion.
Keep battery dry.
Do not use or store the battery in extremely hot or humid conditions. See the
Owner’s Manual for specific operating and storage information.
Keep battery away from fire, out of direct sunlight, and away from other
sources of heat.
Do not use or charge the battery if it has been dropped or damaged.
Do not open, puncture, repair, disassemble, or modify the battery.
Charge battery only with supplied charger in an open, well−ventilated location out of direct sunlight and according to supplied instructions.
Do not overcharge a battery or charge battery longer than specified (if charger is not equipped with automatic shutoff). See the Owner’s Manual for specific information on battery charging.
Do not charge battery by connecting directly to AC receptacle. Do not connect battery charger to automobile auxiliary power receptacle.
Do not connect (short circuit) battery terminals to each other. Do not allow
tools, conductive materials, or other objects to touch both battery terminals at
the same time.
OM-262 902 Page 7
2-3.
Proposition 65 Warnings
Welding or cutting equipment produces fumes or gases which contain
chemicals known to the State of California to cause birth defects and, in
some cases, cancer. (California Health & Safety Code Section 25249.5 et
seq.)
This product contains chemicals, including lead, known to the state of
California to cause cancer, birth defects, or other reproductive harm.
Wash hands after use.
2-4.
Principal Safety Standards
Safety in Welding, Cutting, and Allied Processes, ANSI Standard Z49.1, is available
as a free download from the American Welding Society at http://www.aws.org or purchased from Global Engineering Documents (phone: 1-877-413-5184, website:
www.global.ihs.com).
Safe Practice For Occupational And Educational Eye And Face Protection, ANSI
Standard Z87.1, from American National Standards Institute, 25 West 43rd Street,
New York, NY 10036 (phone: 212-642-4900, website: www.ansi.org).
OM-260 902 Page 8
SECTION 3 − HEADGEAR COOLING SYSTEM
Read and follow these instructions and the safety labels carefully. This
product is intended for use as a cooling device only. It is not a respiratory protective device and does not protect the user from airborne contaminants. Have
an industrial hygienist test the air in your facility to determine if respiratory
protection is required to provide adequate protection from contaminants in
your environment. With cooling system-equipped helmet on your head and
cooling system operating, also test the air inside the helmet to determine if
respiratory protection is required. If you have questions about the type of respiratory protection equipment required, consult your safety director and an
Industrial Hygienist.
. Use the cooling system only with compatible Miller welding helmets (MP-10t,
Pro-Hobbyt, Performancet, Elitet, Titaniumt series helmets). See the welding
helmet Owner’s Manual for information on helmet operation.
The CoolBandt headgear cooling system draws in air and blows it to the front of the welding helmet through a flexible tube. The system also generates a positive air pressure to
help prevent contaminants from entering the helmet. The system must include and/or be
used with the equipment listed below:
D
D
D
Helmet and cowl (head shroud)
Blower assembly with properly-installed filter
Battery charger
The headgear cooling system operates at temperatures from 14° to 131° F (−10° to 55°
C) The Battery Level red light flashes and blower assembly pulses on and off when battery
power is low.
OM-262 902 Page 9
. To better show components and features, the headgear cooling system
is shown without welding helmet.
OM-262 902 Page 10
3-1.
Headgear Cooling System Specifications
Application
Fits Most Miller Welding Helmets
Weight
Approx. Total Weight With Battery: 455 Grams
Approx. Added Weight To Helmet: 330 Grams
Air Filter
Use Miller Filter Only (Miller Part No. 243 932)
. Filter is required for proper operation of equipment, but does not provide
respiratory protection.
NOTICE −Operating cooling system without a filter will damage fan motor and void warranty.
Operating Temperature
14° to 131° F (−10° to 55° C)
Storage Temperature
(For Up To Six Months Storage With Battery 50%
Charged)
Acceptable: 23° to 95° F (−5° to 35° C)
Preferred: 68° to 86° F (20° to 30° C)
Battery Type
Rechargeable Lithium, 1600 mAh, 7.4 V (Rated) 8.4
V (Fully Charged) (Miller Part No. 243 927)
Battery Charging Time
About 3.5 hours (Typical); 4.5 hours (max.)
Battery Charging Temperature
32° to 104° F (0° to 40° C)
OM-262 902 Page 11
Battery Life
New Battery: 6 Hours Run Time (Typical); 5.3 hours
(Min.)
. Battery retains about 80% of original battery life
after 300 charges. Battery may be recharged
about 500 times.
Cowl (Head Shroud) Service
Life
Replace After 50 Washings
Battery Charger
Input:
100-240 VAC 4.5W 50/60 Hz
Output: 5.5-8.6 VDC 500mA (charging)−0mA(full)
Compliant to FCC Part 15 Class B
OM-262 902 Page 12
3-2.
Installing Headgear
3
2
1
Tilt
Resistance
Knob
2
O−Ring
3
Washer
Remove
knobs,
o−
rings, and washers
from helmet headgear.
Remove helmet headgear. Install cooling
system headgear and
secure with knobs,
o−rings, and washers.
1
Retain old headgear
for future use.
. See Section 4 for
helmet
adjustment information.
OM-262 902 Page 13
3-3.
Installing Cowl (Head Shroud)
.
3
1
After installing shroud,
make sure there are no
gaps between shroud
and helmet edge.
1
Cowl (Head Shroud)
2
Knob
3
Shroud Slots
Slide slots on right and left side
of shroud over knobs.
Stretch shroud over helmet.
. Shroud
must be used
when cooling system is
on. Remove shroud from
helmet when using helmet with the cooling system turned off.
2
OM-262 902 Page 14
Notes
OM-262 902 Page 15
3-4.
Charging The Battery
3
2
1
4
OM-262 902 Page 16
3-4.
.
.
.
Charging The Battery (Continued)
Charge battery
only with supplied charger in
an open, well−
ventilated location.
Do not allow
battery to get
wet. Do not attempt to open
the
battery
case.
Keep
battery
away from fire
or heat.
. Charge
battery
before first use or
if battery has not
been used for
five days.
. Dispose
of battery at a desig-
nated collection
facility.
Place battery in charger.
automatically
stops when battery
is
fully
charged.
NOTICE − Do not
press on battery with
excessive force when
battery is in charger.
. Battery charging
. Remove
tape
from battery terminals
before
charging battery.
1
Battery
2
Battery Charger
3
120 Volt 15 A AC
Receptacle
Remove battery from
blower assembly (see
Section 3-5).
Extend prongs on
back of charger and
plug charger into AC
receptacle.
4
Battery
LEDs
Charge
LED(s) light to indicate approximate battery charge [1 LED =
approx. 25%, 2 LEDs=
approx. 50%, 3 LEDs=
approx. 75%, 4 LEDs
= approx 90% (continue 0.5-1 hr to 100%
charge)]
Charging
normally
takes
between 3.5 hours
(typical) and 4.5 hours
(max.)
OM-262 902 Page 17
3-5.
Installing The Battery
2
1
.
.
Do not allow
battery to get
wet. Do not attempt to open
the
battery
case.
Keep
battery
away from fire
or heat.
OM-262 902 Page 18
. To
1
2
better show
components and
features,
the
headgear cooling system is
shown without
welding helmet.
Access Door
Battery
Open battery access
door. Slide battery into
blower assembly until
terminals touch back
of battery compartment.
. Install
battery
with terminals facing headgear
cooling system
as shown.
Close door.
3-6.
Installing The Filter
.
Do not use the headgear cooling system without the filter installed.
.
Replace damaged or dirty filter.
Do not wash filter, clean with
compressed air, or reuse dirty
filter.
NOTICE − Operating cooling system
without a filter will damage fan motor
and void warranty.
. Filter is required for proper operation of equipment, but does not
provide respiratory protection.
2
1
3
1
Filter Cover
2
Filter
3
Finger Tab
Grip finger tab to pull cover away from
blower assembly. Install filter. Reinstall
cover so it fits tightly around filter area.
. Filter is shaped to fit only one way
in blower assembly. Be sure filter
is installed correctly.
OM-262 902 Page 19
3-7.
Removing Air Deflector To Adjust Air Flow
1
2
D
D
Air Deflector
Manifold
With air deflector installed, air is
directed to upper part of face.
Remove deflector to direct air to
lower part of face. Save air
deflector for later use.
2
1
OM-262 902 Page 20
Notes
OM-262 902 Page 21
3-8.
Operating The Controls
1
2
.
Read and follow these instructions and the safety labels carefully. This
product is intended for use as a cooling device only. It is not a respiratory
protective device and does not protect the user from airborne contaminants. Have an industrial hygienist test the air in your facility to determine
if respiratory protection is required to provide adequate protection from
contaminants in your environment. With cooling system-equipped helmet
on your head and cooling system operating, also test the air inside the helmet to determine if respiratory protection is required. If you have questions
about the type of respiratory protection equipment required, consult your
safety director and an Industrial Hygienist.
OM-262 902 Page 22
3-8.
.
1
Operating The Controls (Continued)
Do not restrict or
alter
headgear
cooling system air
flow. Do not block
air holes (including upper and
lower holes). Be
sure
safety
glasses,
hair,
weld cap, and other objects do not
block air flow.
Power Button
To Start: Press Power
button. Blower assembly
starts when button is released.
long as battery charge is
above 25 percent.
To Stop: Press Power
button again.
When battery charge
falls below 25 percent,
light flashes red once
per second.
. Use light pressure
on Power button to
turn unit off.
2
Battery Level Light
When powered up, light
turns on green for two
seconds and then flashes once per second as
When the battery charge
is depleted, the fan
stops running and the
red light flashes constantly. See Section 3-4
for battery charging information.
OM-262 902 Page 23
3-9.
Checking Headgear Cooling System Before Use
.
4
3
2
1
OM-262 902 Page 24
Read and follow these instructions and the safety labels carefully. This product is
intended for use as a cooling
device only. It is not a respiratory protective device and
does not protect the user
3 from airborne contaminants.
Have an industrial hygienist
test the air in your facility to
determine
if
respiratory
protection is required to provide adequate protection
from contaminants in your
environment. With cooling
system-equipped helmet on
5
your head and cooling system operating, also test the
air inside the helmet to determine if respiratory protection
is required. If you have questions about the type of respiratory protection equipment
required, consult your safety
director and an Industrial Hygienist.
3-9.
Checking Headgear Cooling System Before
Use (Continued)
.
Do not restrict or alter headgear cooling system air flow.
Do not block air
holes (including upper
and
lower
holes). Be sure
safety glasses, hair,
weld cap, and other
objects do not block
air flow.
Before using the headgear
cooling system, check the
following items:
1
Filter
. Filter is
required for
proper operation of
equipment, but does
not provide respiratory protection.
NOTICE −Operating cooling
system
without a filter
will damage
fan motor and
void warranty.
Verify the filter is undamaged, properly assembled,
and securely connected to
the blower assembly.
2
Flexible Tube
Be sure the tube is undamaged and properly connected to the manifold and
blower assembly.
3
Battery
Verify the battery is fully
charged and secured in
the battery compartment.
4
Power Switch
Turn on blower assembly
and test air flow.
5
To adjust direction of air
flow, remove air deflector
(see Section 3-7).
6
Shroud (Not Shown)
Inspect the shroud and replace if damaged. See
Troubleshooting (Section
4-4) if air is not being supplied to front of helmet.
Put on helmet and adjust
headgear so helmet fits
snugly on head. Verify
shroud is properly installed
on helmet.
. See Section 4 (Miller
helmet) or the welding helmet Owner’s
Manual for helmet adjustment information.
Air Deflector
OM-262 902 Page 25
SECTION 4 − MAINTENANCE
4-1.
Adjusting Headgear
1
3
5
4
2
OM-262 902 Page 26
4-1.
Adjusting The Headgear (Continued)
. There
are five
headgear adjustments: headgear
top,
tightness,
angle
adjustment, distance
adjustment, and
tilt/resistance.
1
Headgear Top
Adjustment
Straps
Adjust both headgear
straps
for proper
depth on the head to
ensure correct balance and stability.
2
Headgear Tightness
To adjust, turn left or
right to desired tightness.
3
Distance Adjustment
Adjusts the distance
between the face and
the lens. To adjust,
press tabs and slide
forward or back to desired position. Release tabs (Both sides
must be equally positioned for proper vision.)
4
Tilt Adjustment
Is located on the right
side of head gear, and
is used to adjust forward tilt of the helmet.
To adjust, press tab
and slide clockwise to
position lens closer to
face. Slide tab counterclockwise to position lens further from
the face.
5
Tilt/Resistance
Turn clockwise to increase resistance.
OM-262 902 Page 27
4-2.
Replacing Fabric Headband
2
3
1
Slide Bracket
1
Right Side Manifold Tab
Push in and up.
2
Left Side Manifold Tab
Push in and up.
OM-262 902 Page 28
3
Manifold Bracket
With both side tabs
free, slide manifold
bracket to right side
and pull straight away
from front of headband.
Remove fabric headband and clean or replace. Reinstall fabric
headband, manifold
bracket, and manifold
in reverse order of
disassembly.
4-3.
Maintenance And Storage
Replace damaged or dirty filter. Do not wash filter, clean with compressed air,
or reuse dirty filter.
Never use solvents or abrasive cleaning solutions to clean the headgear cooling system. Keep water and other fluids out of blower assembly.
Replace cowl (head shroud) (part no. 261971) after 50 washings. Shroud loses
its fire retardant properties with repeated washing.
For best performance clean the equipment after each use. Use a soft cloth dampened with
a mild soap and water solution to wipe all external surfaces clean. Allow to air dry.
Product usage, workplace contamination levels, and other factors affect the life of the filter. Replace filter if air flow is reduced due to a dirty filter (see Section 3-6).
Inspect flexible tube and replace if damaged or if inside of tube is extremely dirty.
If the headgear cooling system will not be used for an extended period, remove the filter
and battery and store in a clean, dry place free of solvent-based vapors them and at a
temperature of −4° to 86° F (−20° to 30° C). Charge battery to 50 percent capacity before
storage.
OM-262 902 Page 29
4-4.
Headgear Cooling System Troubleshooting
Trouble
Blower assembly does
not supply air to helmet.
Remedy
Press Power button.
Dead battery; recharge battery (see Section 3-5).
Remove tape from battery terminals (new battery only).
Verify battery contacts are clean and free of obstructions.
Remove blockage from blower assembly outlet and tube.
Blower assembly runs
for short time even
though battery is fully
charged.
Be sure battery is properly connected to battery charger.
Replace battery.
Replace charger.
Battery Level red light
is on or flashing.
Charge or replace the battery. The blower assembly will
operate for about 15 minutes after the light starts flashing.
Blower assembly is
pulsing on and off.
Charge or replace the battery. The blower assembly will
operate for about 15 minutes after the light starts flashing.
OM-262 902 Page 30
Battery run time is too
short.
Replace battery.
Check filter and replace if necessary (see Section 3-6). A
clogged filter element reduces battery life.
Air supplied to helmet
smells and tastes unusual; eyes and throat
irritation.
Discontinue wearing the headgear cooling system and
leave the area immediately. Check contamination level of
filter, and replace filter if necessary.
Check flexible tube connection to blower assembly and
manifold.
Have Safety Director and an Industrial Hygienist determine if you are using the proper equipment for the work
environment.
Blower assembly supplies insufficient air to
helmet.
Check filter and replace if necessary (see Section 3-6).
Check flexible tube connection to blower assembly and
manifold.
Remove blockage from blower assembly outlet and/or
tube.
NOTICE −Do not use compressed air to clean blower assembly. Compressed air will damage fan and
void warranty.
OM-262 902 Page 31
SECTION 5 − PARTS LIST
1
2
3
13
12
11
8
10
7
6
5
9
Figure 5-1. CoolBand Headgear Cooling System
OM-262 902 Page 32
4
Item
No.
Part
No.
Description
Quantity
Figure 5-1. CoolBand Headgear Cooling System
1 . . . . 261970 . . . . CoolBand II Unit (Entire System − Helmet Not Included) . 1
2 . . . . 261971 . . . . Cowl (Shroud, Head) . . . . . . . . . . . . . . . . . . . . . . . . . . . . . . 1
3 . . . . 261975 . . . . Tubing, Stretch . . . . . . . . . . . . . . . . . . . . . . . . . . . . . . . . . . . 1
4 . . . . 243930 . . . . Deflector, Air . . . . . . . . . . . . . . . . . . . . . . . . . . . . . . . . . . . . . 1
5 . . . . 261972 . . . . Manifold . . . . . . . . . . . . . . . . . . . . . . . . . . . . . . . . . . . . . . . . . 1
6 . . . . 261973 . . . . Bracket, Manifold . . . . . . . . . . . . . . . . . . . . . . . . . . . . . . . . . 1
7 . . . . 770249 . . . . Headband, Fabric . . . . . . . . . . . . . . . . . . . . . . . . . . . . . . . . . 1
8 . . . . 261974 . . . . Headgear Set (Includes Knobs, Springs, Headbands,
Mounting Gears, Screws, And Manifold Bracket) . . . . . . . 1
9 . . . . 261976 . . . . Charger, Battery . . . . . . . . . . . . . . . . . . . . . . . . . . . . . . . . . . 1
10 . . . 243927 . . . . Battery, Rechargeable . . . . . . . . . . . . . . . . . . . . . . . . . . . . . 1
11 . . . 262685 . . . . Filter Holder . . . . . . . . . . . . . . . . . . . . . . . . . . . . . . . . . . . . . . 1
12 . . . 243932 . . . . Filter (Pack of 10) . . . . . . . . . . . . . . . . . . . . . . . . . . . . . . . . . 1
13 . . . 261977 . . . . Battery Door . . . . . . . . . . . . . . . . . . . . . . . . . . . . . . . . . . . . . 1
OM-262 902 Page 33
SECTION 6 − LIMITED WARRANTY
LIMITED WARRANTY – Subject to the terms and conditions below.
Miller Electric Mfg. Co., Appleton, Wisconsin, warrants to its original
retail purchaser that the new Miller equipment sold after the effective date of this limited warranty is free of defects in material and
workmanship at the time it is shipped by Miller. THIS WARRANTY
IS EXPRESSLY IN LIEU OF ALL OTHER WARRANTIES, EXPRESS OR IMPLIED, INCLUDING THE WARRANTIES OR MERCHANTABILITY AND FITNESS.
The headgear cooling system is warranted for one year from the
date of purchase. The battery is warranted for 90 days from the date
of purchase and the warranty covers manufacturing defects only.
Proof of purchase is required for warranty transactions so it is
imperative that a copy of the original invoice or sales receipt be
retained.
For warranty transactions, contact your Miller Distributor.
Effective January 1, 2013
OM-235 369 Page 34
Visit our website at
www.MillerWelds.com
®
Miller Electric Mfg. Co.
An Illinois Tool Works Company
1635 West Spencer Street
Appleton, WI 54914 USA
ORIGINAL INSTRUCTIONS
© 2013 Miller Electric Mfg. Co.