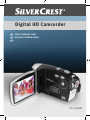
1
Digital HD Camcorder GB IE User manual and service information CY DV-5100HD DV-5100HD Contents Contents Important Notice 6 Safety Instructions........................................................................... 6 Children and Persons with Disabilities ........................................... 8 Charger and Rechargeable Battery ............................................... 9 Cables ........................................................................................... 10 Repair and Maintenance ............................................................... 10 Intended Use................................................................................. 11 Conformity..................................................................................... 12 Disposal of Old Devices ................................................................ 12 Introduction 13 Package Contents......................................................................... 13 Controls and buttons ..................................................................... 14 Front Panel .................................................................................. 14 Rear Panel ................................................................................... 14 Left Panel..................................................................................... 15 Right Panel .................................................................................. 15 Top View ...................................................................................... 16 Bottom.......................................................................................... 16 Opening the Display...................................................................... 17 Getting Started .............................................................................. 18 v 2.7 English - 1 Contents DV-5100HD Charging the Battery.................................................................... 18 Inserting the Battery..................................................................... 19 Inserting an SD Card ................................................................... 20 Write-Protecting the Memory Card .............................................. 21 Switching the Camcorder On and Off .......................................... 21 Switching the Operating Mode..................................................... 22 Setting the Menu Language......................................................... 22 Setting Date and Time ................................................................. 23 Recording 24 Recording Video Clips .................................................................. 24 Capturing Pictures ........................................................................ 26 The Video Light............................................................................. 28 Histogram ..................................................................................... 28 Macro Mode.................................................................................. 29 Playback 30 Playing Back Video Clips .............................................................. 30 Playing Back Photos ..................................................................... 33 The Main Menu............................................................................. 35 Beep ............................................................................................ 36 Histogram .................................................................................... 36 Auto power off ............................................................................. 36 TV Standard ................................................................................ 36 2 - English DV-5100HD Contents Format.......................................................................................... 37 Default.......................................................................................... 37 Language ..................................................................................... 37 Frequency .................................................................................... 37 Date/Time .................................................................................... 37 Video Menu ................................................................................... 38 White Balance (WB)..................................................................... 38 Resolution .................................................................................... 39 Effect............................................................................................ 39 Night Mode................................................................................... 39 Stabilizer ...................................................................................... 40 Capture Mode .............................................................................. 40 Video Playback Menu ................................................................... 40 Delete one.................................................................................... 41 Delete All...................................................................................... 41 Protect.......................................................................................... 41 Autoplay ....................................................................................... 42 Photo Menu................................................................................... 42 White balance .............................................................................. 42 Resolution .................................................................................... 43 Effect............................................................................................ 43 Night Mode................................................................................... 43 Self- timer..................................................................................... 43 Photo Playback Menu ................................................................... 44 Delete one.................................................................................... 44 Delete All...................................................................................... 45 English - 3 Contents DV-5100HD Protect ......................................................................................... 45 Autoplay....................................................................................... 45 DPOF........................................................................................... 45 Connectors and Ports 46 Viewing Recordings on a Television Screen................................. 46 Connecting via the HDMI Cable .................................................. 47 Connecting via the USB/AV Cable .............................................. 47 Transferring Recordings to the Computer..................................... 48 Using the USB port ...................................................................... 48 Using a Card Reader ................................................................... 49 Software 50 System Requirements .................................................................. 50 Installing the Software .................................................................. 50 Uninstalling the Software ............................................................. 51 The Main Dialog............................................................................ 51 Select language ........................................................................... 52 Registration and Upgrades .......................................................... 52 Editing Recordings........................................................................ 53 Viewing Recordings ..................................................................... 53 Importing Recordings................................................................... 54 Selecting the Navigation View ..................................................... 55 Preview Window .......................................................................... 55 4 - English DV-5100HD Contents Toolbar .......................................................................................... 56 Import........................................................................................... 56 Merge files ................................................................................... 56 Creating an AVCHD Disk ............................................................. 57 Cutting Video Clips ...................................................................... 57 Upload to YouTube ...................................................................... 58 Upload to Facebook ..................................................................... 58 Photo Album ................................................................................ 59 Album page.................................................................................. 59 Appendix 60 Technical Specifications................................................................ 60 Troubleshooting ............................................................................ 61 Details of Guarantee ..................................................................... 62 English - 5 Introduction DV-5100HD Important Notice This icon denotes important information for the safe operation of the product and for the user’s safety. This symbol denotes further information on the topic. Safety Instructions Before you use this device for the first time, please read the following notes in this manual and heed all warnings, even if you are familiar with handling electronic devices. Always check that the product works correctly. Keep this manual with the instructions in a safe place for future reference. If you sell the device or pass it on, it is essential you hand over this manual also. Do not try to open the housing or reassemble the product. You are at risk of receiving an electric shock. Maintenance and repairs should only be carried out by qualified technicians. Do not look at the sun or other sources of intense light. Doing so may damage your eyesight. Keep the device away from water and other liquids. Do not operate the device with wet hands and do not use it in rain or snow. Dampness can cause danger through fire or electric shock. Keep the device out of the reach of children and animals to avoid accidents or damage. 6 - English DV-5100HD Introduction Switch the device off immediately if you notice it emitting smoke or strange noises. Contact customer service. Never try to repair the device yourself. Only use the supplied charger cradle Scope DJ04V20500A to recharge the product battery. Only use this device with the supplied rechargeable battery (PAC-0040) in order to avoid overheating, deformation of the cover, fire, electric shocks, explosion and other dangers. Unplug the power cord from the mains outlet before you remove the rechargeable batteries from the charger or separate the charger from the power cord. In the event of a defect of the product or its accessories, unplug the power cord from the mains immediately. Also, when there is the possibility of thunderstorms, unplug the power cord from the wall outlet. Never try to heat, disassemble or short-circuit the rechargeable battery. Do not throw the rechargeable battery into fire. Warning: Notice concerning separation from the mains In order to completely disconnect the charger from the mains, unplug the power cord from the wall outlet. The wall outlet where the device is connected must be easy to access so that the power cord can be pulled out quickly in case of emergency. Unplug the power cord from the mains when you will not be using it for a long while (e.g. when going on holiday) in order to avoid the danger of fire. Do not hold the power cord with wet hands. The device is not for use in rooms with a high temperature or humidity and must be kept free of dust. Position the device on a stable, even surface and do not place any objects on the device. Always make sure that: no direct heat sources (e.g. heating) can affect the device; English - 7 Introduction DV-5100HD no direct sunlight or bright artificial light reaches the device; contact with spray, dripping water and corrosive liquids must be avoided and the device should never be operated near water, and it must especially never be immersed (do not place any objects filled with liquids such as vases or drinks near the device); no fire sources (e.g. burning candles) are placed on or near the device; no foreign bodies are introduced into the device; the device must not be subject to any great temperature changes as this may cause moisture through condensation; the device should not be subject to excessive shock and vibrations. Children and Persons with Disabilities Do not allow children or persons with disabilities to use electrical devices when not under supervision. These people may not comprehend the presence of potential risks. Rechargeable batteries and small parts represent potential choking hazards. Keep batteries out of reach of children. If a rechargeable battery is swallowed, seek medical help immediately. Keep all packaging away from children as this may cause suffocation. 8 - English DV-5100HD Introduction Charger and Rechargeable Battery Insert the rechargeable battery with the correct polarity. Never throw a rechargeable battery into fire. Remove the rechargeable battery when the device is not to be used for a long time. Danger of Explosion! Non-intended use may cause explosion and danger to life. Only replace the rechargeable battery with an equivalent or a type recommended by the manufacturer. Never replace any batteries in an explosion-sensitive environment. While inserting or removing the batteries a spark may be produced causing an explosion. Explosion-sensitive areas will normally (but not always) be labelled. These include any fuel storage areas such as below deck on a boat, fuel line or tank areas, environments where the air contains inflammable substances (e.g. cereals, metal dust or powder, etc.) and any areas where you should normally switch off your car engine. Respect the environment. Old rechargeable batteries do not belong in with domestic waste. They must be handed in to a collection point for old batteries. English - 9 Introduction DV-5100HD Cables Always hold cables by the plug and never pull on the cable itself. Never hold the power cord with wet hands as this may cause a short circuit or electric shock. Never place the device, heavy objects or furniture on the cable and make sure that the cord does not bend too much, especially at the plug and sockets. Never make knots in the cable and do not tie it together with other cords. All cables should be positioned so that nobody can trip over them or be obstructed by them. A damaged power cord can cause a fire or an electric shock. Inspect the power cord from time to time. Do not use any adapter plug or extension cable that does not meet the required safety standards. Repair and Maintenance Repairs are required when this device has been damaged in any way: for example, when the charger or the housing of the DV5100HD is damaged, when liquid or objects have entered the device, when the product has been exposed to rain or moisture, when the product does not work normally or if the product has been dropped. If you notice any smoke, unusual noise or strange smells, switch off the device immediately and unplug the power cord from the power supply. In this case the device should not be used further and should be inspected by authorized service personnel. Please contact qualified personnel when servicing is needed. 10 - English DV-5100HD Introduction Intended Use Your camcorder is a Consumer Electronics device and designed for recording and playing back videos and pictures only. Any use other than that mentioned above does not correspond to the intended use. It may only be used for private use, not industrial or commercial purposes. In its default configuration, this product has not been designed for medical, lifesaving, rescue or life-maintaining purposes. Only connection cables and external devices may be used that comply with safety standards and the electromagnetic compatibility and shielding quality of this device. This device fulfils all that relates to CE Conformity, relevant standards and Directives. Any changes to the equipment other than the recommended changes by the manufacturer may lead to the result that these directives are not met any more. Only use the accessories recommended by the manufacturer. If you are not using the device within the Republic of Germany, you must observe the regulations and laws in the country of use. English - 11 Introduction DV-5100HD Conformity This device and its supplied accessories have been tested and approved for compliance with the basic and other relevant requirements of the EMC Directive 2004/108/EC, as well as the Low-voltage Directive 2006/95/EC. Disposal of Old Devices Devices marked with this symbol are subject to the European Directive 2002/96/EC. All electric and electronic devices must be disposed of separately from household waste at established bodies. Avoid hazards to the environment and dangers to your personal health by disposing of the device properly. For further information about proper disposal, contact your local government, disposal bodies or the shop where you bought the device. Respect the environment. Old rechargeable batteries do not belong in with domestic waste. They must be handed in to a collection point for old batteries. 12 - English DV-5100HD Introduction Introduction Package Contents Camcorder DV-5100HD SD memory card, 2GB 2x Rechargeable battery PAC-0040 Charger Scope DJ04V20500A Power cord USB/AV cable HDMI cable CD-ROM (not shown) Carrying strap (not shown) User's manual (not shown) English - 13 Introduction Controls and buttons Front Panel 1 Lens 2 Self-timer lamp 3 Video lamp 4 Microphone Rear Panel 5 Power indicator 6 PLAY button 7 Menu navigation 8 HDMI, USB and AV port 9 Mode selection switch 10 RECORD button 14 - English DV-5100HD DV-5100HD Introduction Left Panel 11 Speaker 12 Display button 13 Menu button 14 On/Off button 15 Card reader Right Panel 16 Macro switch English - 15 Introduction Top View 17 Picture (photo) shutter button 18 Zoom swivel button Bottom 19 Tripod mount 20 Battery compartment 16 - English DV-5100HD DV-5100HD Introduction Opening the Display Open the display and then rotate it according to your needs. You can also rotate the display so it faces the front. In this case, the picture orientation will be adjusted automatically. The rotated display can be folded completely until it touches the camera housing. English - 17 Introduction DV-5100HD Getting Started The camcorder is powered by a rechargeable Lithium-Ion (PAC0040) battery. On delivery, the battery is not charged. Please charge the battery before first use of the device. Charging the Battery Insert the rechargeable battery in the charger cradle Scope DJ04V20500A so that the contacts [+] and [-] correspond to the rechargeable battery and charging tray markings. Make sure that the battery clicks into place on the charger. Next connect the power cord to the charger and plug the power cord to a wall outlet. To supply power to the camera, only use the rechargeable Lithium-Ion battery PAC-0040 or 4x 1.5V AAA batteries (LR03). Remove the rechargeable battery from the camera when the device is not to be used for a long time. During charging, the rechargeable battery and charging device will become warm. This is not a malfunction. 18 - English DV-5100HD Introduction The status indicator of the charging cradle will light orange whilst the battery is charging. When the charging process is completed, the status indicator will light green. Now you can insert the rechargeable battery into the camcorder. Depending on the charge level, the charging cycle can take up to 2 hours. If, after inserting the rechargeable battery, the indicator remains green, this means the rechargeable battery is already charged or it is not correctly inserted. In this case, check the polarity. Inserting the Battery When the battery is fully charged, insert it into the camcorder as below. To do this, open the battery compartment by gently pushing on the marking and sliding it outwards (see figure 1). 1 2 3 4 Next insert the battery into the camera, as shown in figure 2. Close the battery compartment by placing the cover on it and sliding it inwards until it clicks into place (see figures 3 and 4). You may optionally power the camcorder by using conventional batteries. To do so use four AAA-sized batteries, 1.5V. Insert the conventional batteries instead of the rechargeable battery into the battery compartment. Always pay attention to the polarity. The polarity is indicated with the symbols + and – on the batteries and on the inside of the battery compartment cover. English - 19 Introduction DV-5100HD Inserting an SD Card Power the device off before you insert or remove the memory card. By using the supplied SD memory card you can increase the camcorder storage capacity for saving your videos and photos.. When a memory card is inserted, all the recorded contents will be saved onto it. If there is no memory card inserted, your photos and videos will be saved to the internal memory of the camera. Open the display and then open the memory card compartment by sliding the cover in the direction of the arrow. 1 2 Then insert the memory card with the metal contacts facing forward into the card slot. The label must face upwards. Slide the card fully into the slot opening until the card clicks into place. Close the memory card compartment by sliding the cover in the opposite direction. To remove the memory card, open the memory card compartment and gently press on the inserted card. This will protrude a little so that you can get a hold of it and remove it. 20 - English DV-5100HD Introduction If the memory card or the internal memory is full, the message Memory full will appear on the display. Write-Protecting the Memory Card The memory card features a write-protection tab. When the write protection is enabled (see the figure right below) you will be able to view existing videos and pictures only, but not be able to delete or edit them. Also, it will not be possible to record any new videos or pictures onto the memory card. Write protection disabled Write protection enabled If you attempt to record a video or take a picture while the write protection is enabled, when you press the shutter button the message SD card is locked will appear on the display and a sound will be heard. Switching the Camcorder On and Off Press the On/Off button [14] to power the camcorder on. The power indicator [5] will light green. Press the On/Off button [14] and keep it pressed down for approximately 1 second to turn the camcorder off. Power indicator [5] stops lighting. English - 21 Introduction DV-5100HD When opening the display, the camcorder will power on automatically. As soon as you close the cover, it will power off. Switching the Operating Mode Rotate the mode selector switch [9] to toggle between the modes Movie, Photo and Setup. To do this, position the corresponding icon to the top marking. Settings Photo mode Movie mode Setting the Menu Language Open the camcorder display. The device powers on automatically. Rotate the mode selector switch [9] to the SET position. Use the Down navigation button [7] to move the highlight to the Language option. Press the navigation button. Use the Up or Down navigation button to select the desired menu language. Confirm the selection by pressing the navigation button 22 - English DV-5100HD Introduction Setting Date and Time Open the camcorder display. The device powers on automatically. If the display was already open but the device was off, press the On/Off button [14]. Rotate the mode selector switch [9] to the SET position. Use the Down navigation button [7] to move the highlight to the Date / Time option. Press the navigation button. Use the navigation button to toggle between the year, month, day, hours and minutes fields. Press the navigation button. The colour of the selected item will change from yellow to red. Use the navigation button to select a different value for the current setting. Then press the navigation button again. Repeat these steps until you have finished setting the date and time. icon and press the navigation button to save Navigate to the the settings. English - 23 Recording DV-5100HD Recording Recording Video Clips Open the display and then rotate it according to your needs. The device powers on automatically. If the current mode is not set to video recording, select it by using the mode selector switch [9]. Move the navigation button [7] to adjust exposure compensation to a positive or negative value. The set value is indicated on the display. Press the record button [10] to start recording. During recording the power indicator [5] will blink red. If necessary, use the zoom swivel button [18] to select a larger to smaller scene area. Move the swivel button to the right to zoom in or move the swivel button to the left to zoom out. Press the record button [10] to stop recording. The power indicator [5] will light solid green. During recording, different icons may appear on the display informing you about the current settings. 24 - English DV-5100HD Recording 1 Zoom indicator 2 Exposure Compensation 3 Effect 4 Night mode 5 White balance 6 Remaining memory available 7 Current memory type 8 Video lamp 9 Resolution 10 Battery status 11 Histogram display 12 Macro mode 13 Video mode English - 25 Recording DV-5100HD Capturing Pictures Open the display and then rotate it according to your needs. The device powers on automatically. If the current mode is not set to photo capturing, select it by using the mode selector switch [9]. Move the navigation button to adjust exposure compensation to a positive or negative value. The set value is indicated on the display. If necessary, use the zoom swivel button [18] to select a larger to smaller scene area. Move the swivel button to the right to zoom in or move the swivel button to the left to zoom out. Press the shutter button [17] to capture a picture. During saving the power indicator [5] will light red. The photo taken will be shown on the display for a few seconds. Then the device returns to capture mode and the power indicator turns green again. In photo mode, different icons may appear on the display informing you about the current settings. 26 - English DV-5100HD 1 0003 Recording Remaining number of shots 2 Exposure Compensation 3 Effect 4 Night mode 5 White balance 6 Current memory type 7 Video light on 8 Resolution 9 Battery status 10 Histogram display 11 Macro mode 12 Self timer 13 Photo mode 14 Zoom indicator English - 27 Recording DV-5100HD The Video Light In dark environments you can enable the built-in video lamp [3] for video or photo recording. To do this, press the navigation button [7]. Pressing this button again will turn the video lamp off. While the icon will appear on the display. video lamp is enabled, the Histogram The histogram is the graphical representation of the brightness distribution of an image. If the graphic is accentuated on the left, the picture is very dark; if it is accentuated on the right, the picture is very bright. Dark picture Average picture Bright picture You can enable or disable the histogram display (see page 36). 28 - English DV-5100HD Recording Macro Mode This device features a macro function allowing you to focus on very close subjects. This allows you to position the lens as close as 20cm (4 inches) from the subject. The macro switch [16] is located on the lateral panel of the device. Slide the switch to the front to enable the macro mode. Slide the switch to the back to disable the macro mode. While the macro mode is enabled, the display. icon will appear on the English - 29 Playback DV-5100HD Playback Depending on the selected mode you can use the Play button [6] to switch to the corresponding playback mode. Playing Back Video Clips In video mode you can use the Play button [6] to switch to playback mode. Press this button once again to return to video mode. The icon in the upper-left corner of the display shows the current mode. The following options are available: Move the navigation button [7] up or down to choose a recording. To start or stop playback, press the navigation button. Press the display button [12] to show or hide additional information on the display. You can also play recorded videos on your computer. Therefore you will need to install the bundled software for the required video codec (see also on page 50). 30 - English DV-5100HD Playback During playback you will see further information on the display: 1 100-0004 Video file name 2 0001/0001 Current video number/ total number of videos 3 Playback volume with indicator bar (displays only when pressing the zoom adjustment and hides after three seconds) 4 Current memory type 5 00:01:15 Current and total playback time 6 Playback icon 7 Battery status 8 File protection 9 Playback mode English - 31 Playback DV-5100HD During video clip playback you can increase or decrease the playback speed or pause the video. To do this, use the following buttons. The record button [10] pauses the current playback. Pressing the button again resumes playback. You can use the navigation button to fast forward or rewind. Move the navigation button downwards for fast forward playback or upwards to rewind. Press the navigation button briefly to resume playback. Use the Zoom swivel button [18] to increase or decrease the volume. 32 - English DV-5100HD Playback Playing Back Photos In Photo mode you can use the Play button [6] to switch to the picture playback mode. Press this button once again to return to capture mode. The icon in the upper-left corner of the display shows the current mode. The following options are available: Move the navigation button [7] up or down to choose a picture. Move the Zoom swivel button [18] to the left to obtain a thumbnail overview of all pictures. Use the navigation button to select a picture. The current picture will be highlighted with a red border. Press the navigation button to show the picture in full-screen mode. Move the Zoom swivel button [18] to the right to enlarge a section of the current picture. You can zoom it up to 8x. Press the navigation button to move the enlarged section of the picture. You can change the direction of movement by pressing the navigation button. Press the display button [12] to show or hide additional information on the display. English - 33 Playback DV-5100HD During picture playback you will see further information on the display: 1 2 DPOF 0001/0001 3 4 Current picture number/ total number of pictures Current memory type 100-0001 Picture file name 5 Battery status 6 File protection 7 Playback icon 34 - English DV-5100HD Menus The camcorder uses different menus that offer multiple settings under each operating mode. Furthermore there is a main menu allowing you to set the preferences for your camcorder. The Main Menu Rotate the mode selector switch [9] to the SET position (see also on page 22 - Switching the Operating Mode). This menu consists of three pages that you can open by using the navigation button [7]. Main Menu 1 Main Menu 2 Main Menu 3 Use the navigation button [7] to select one of the settings and then press the navigation button to confirm. Use the navigation button to adjust one of the possible values and press it again to confirm. In the following we describe the available options: English - 35 Menus DV-5100HD Beep Here you can determine if a sound is output when pressing any button. This option enables or disables the power-on sound at the same time. Histogram The histogram offers helpful information about the picture's brightness (see page 28), but it may disturb the view on the screen. You can therefore turn the histogram off when needed. Auto power off You can have the device power off automatically after a certain time to save battery power. If no operation is performed during the preset time, the device will power off. To power the camcorder back on, press the On/Off button [14]. You can choose between the power-off times of 1 minute, 5 minutes or disable the automatic power-off function. The icons have the following meanings: Auto PowerOff disabled Power off after 1 minute Power off after 5 minutes TV Standard Choose between the TV systems PAL or NTSC. NTSC is the colour system used in America and Japan, PAL is used in Europe. This setting only applies when playing back using the video cable. 36 - English DV-5100HD Menus Format This function lets you delete all contents from your memory card and internal memory and renew the file saving structure (formatting). Warning! All saved videos and pictures will be erased and cannot be restored. Make sure that all recordings that you want to keep have been backed-up on a different medium. Default All device parameters will be reset to their factory-default values. This will not erase any data from your memory card. Language Select the desired display menu language (see also page 22 – Setting the Menu Language). Frequency Select the mains frequency to avoid any interference caused by fluorescent lighting. A mains frequency of 50 Hz is used across Europe, in America the mains uses a frequency of 60 Hz. Date/Time Set the date and time (see also page 23 – Setting the Date and Time). English - 37 Menus DV-5100HD Video Menu To open the Video menu, press the Menu button [13] while in video mode. Use the navigation button [7] to select one of the settings and then press the navigation button to confirm. Use the navigation button to adjust one of the possible values and press it again to confirm. In the following we describe the available options: White Balance (WB) White balance is used to determine a colour temperature suitable for the current lighting conditions. Select one of the preset options or use the Automatic setting. The icons have the following meanings: Automatic Daylight Cloudy Fluorescent Tungsten light 38 - English DV-5100HD Menus Resolution The resolution determines the size of the recording in pixels. As a general rule: The higher the resolution, the more storage space is required. The following settings are available: Designation Resolution in pixels Description 1080P 1440 x 1080 High quality 720P 1280 x 720 Average quality WVGA 848 x 480 Normal quality QVGA 320 x 240 Low quality (recommended for Internet applications) Effect You can record contents by using the settings Default, Black and White, and Sepia. To do this, select the corresponding icon. Night Mode In order to obtain properly exposed recordings in dark environments, select Night mode. This will improve the quality of any night recordings. The icon will appear. English - 39 Menus DV-5100HD Stabilizer The stabilizer uses smart electronics to smoothen your video recordings. Any abrupt movements of the camcorder will be slowed-down electronically resulting in a smoother scene. While the stabilizer is enabled, DIS will appear on the display. Capture Mode This item allows you to enable the microphone (voice-recording) mode. In this case, only the sound will be recorded, therefore you can use your camcorder as a dictaphone. To play the recordings, proceed as for playing back videos. The icons have the following meanings: Microphone recording Video recording Video Playback Menu To open the Video playback menu, press the Menu button [13] while in video playback mode. This menu consists of one page. 40 - English DV-5100HD Menus Delete one Use this option to delete a single video recording. Use the navigation button [7] to select the video that you want to delete. Press the navigation button to confirm the deletion process. Warning! After a recording has been erased, it cannot be restored. Delete All All saved video recordings can be deleted at once. Any captured pictures will not be erased. To erase, select the icon or select to cancel. Warning! After a recording has been erased, it cannot be restored. Protect Here you can protect one or more recordings to avoid accidental deletion. Proceed as follows: Enable the Lock function by confirming with the navigation button [7]. The display will then toggle to the video view. Press the navigation button to protect the currently displayed icon will appear. Press the navigation button once video. The again to unprotect. If required, use the navigation button to select another recording and repeat these steps. Press the Menu button [13] to toggle to the Video playback menu. English - 41 Menus DV-5100HD Autoplay This function allows you to play all recorded videos in sequence. icon to enable auto playback or cancel this process Confirm the icon. with the When playing a recording from the playback mode, all subsequent recordings will be played back too. To finish playback, press the Menu button [13]. Photo Menu To open the Photo menu, press the Menu button [13] while in photo mode. Use the navigation button [7] to select one of the settings and then press the navigation button to confirm. Use the navigation button to adjust one of the possible values and press it again to confirm. In the following we describe the available options: White balance This setting is equivalent to the White balance setting for video recording (see page 38). 42 - English DV-5100HD Menus Resolution The resolution determines the size of the recording in pixels. As a general rule: The higher the resolution, the more storage space is required. The following settings are available: Designation Resolution in pixels Description 3M 2048 x 1536 Normal quality 5M 2592 x 1944 Average quality 12M 4000 x 3000 Best quality When selecting 12M, the higher resolution will be obtained by interpolation. Effect This setting is equivalent to the Effect setting for video recording (see page 39). Night Mode This setting is equivalent to the Night mode setting for video recording (see page 39). Self- timer The self-timer delays the capture for a preset time after pressing the shutter button [17]. This allows you to participate in the scene (e.g. for a group photo). Proceed as follows: Select the self-timer with a 5-second or 10-second delay. The corresponding icon will show on the display. English - 43 Menus DV-5100HD Point the camcorder at the subject and make sure to position it on a stable surface (or better still, a tripod). Press the shutter button (17). The self-timer indicator [2] on the front panel flashes and a counter will appear on the display. After the preset time, the picture is taken automatically. After the picture has been taken, the self-timer will be disabled. You may continue using your camcorder normally. Photo Playback Menu To open the Photo playback menu, press the Menu button [13] while in photo playback mode. Delete one This allows you to erase a single picture. This function is operated the same way as the Delete function for video playback (see page 41). Warning! After a picture has been erased, it cannot be restored. 44 - English DV-5100HD Menus Delete All All saved pictures can be deleted at once. Any captured videos will not be erased. This function is operated the same way as the Delete function for video playback (see page 41). Protect This setting is equivalent to the Lock setting for video playback (see page 41). Autoplay Here you can start the automatic playback (slideshow) for all captured pictures. The pictures will be played back repeatedly with an interval of approx. 3 seconds after each photo. To start the function, press the navigation button [7]. To pause the slide show at any time, press the Playback button [6]. Pressing the Playback button again resumes the slide show. Press the Menu button [13] to exit this display mode and return to the Photo playback menu. DPOF DPOF (Digital Print Order Format) allows you to mark individual pictures for later output on a compatible printer. To do this, press the navigation button [7] to confirm the DPOF icon is displayed on the screen. function. The DPOF can be applied to pictures stored on the memory card only. Any pictures stored in the internal memory cannot be marked. English - 45 Connectors and Ports DV-5100HD Connectors and Ports Viewing Recordings on a Television Screen Any recordings that you can view on the camcorder display can also be played back on a regular TV set. For this, your television set must have an appropriate Video In connector. Depending on the connectors available on the TV set, you can use the USB/AV cable or the HDMI cable. The HDMI cable will provide digital picture and sound and therefore offers the best quality. Simply operate the device as usual. For instance, enable the Autoplay (slideshow) function to view all pictures in sequence (see also the previous page - Autoplay) HDMI jack USB/AV connector 46 - English DV-5100HD Connectors and Ports Connecting via the HDMI Cable Please make sure that your camcorder is powered off. Open the port cover and insert the smaller connector of the HDMI cable into the HDMI port [4] of your camcorder (see the picture on the previous page). Plug the larger connector of the HDMI cable into the HDMI receptacle of your TV set. Select the HDMI channel corresponding to the above input connectors on your TV set. If necessary, read the User Manual of your TV set for more information on how to do this. Press the On/Off button [14] to power the camcorder on. The device display remains off while the picture will be shown on the TV Screen. Connecting via the USB/AV Cable Please make sure that your camcorder is powered off. Open the port cover and insert the connector of the USB/AV cable into the USB/AV port of your camcorder (see the picture on the previous page). Insert the AV connector into the corresponding inputs of your TV set (yellow connector to VIDEO IN, white connector to AUDIO IN). The USB connector on the same end of the cable is not needed for this connection type. Please also consult the User Manual of your TV set for more information. Select the AV channel corresponding to the above input connectors on your TV set. If necessary, read the User Manual of your TV set for more information on how to do this. Press the On/Off button [14] to power the camcorder on. The device display remains off while the picture will be shown on the TV Screen. English - 47 Connectors and Ports DV-5100HD Transferring Recordings to the Computer There are two possible ways to copy recordings from the camcorder to a computer: by connecting the device to a computer via the USB/AV cable by inserting the memory card into a card reader Be careful when renaming any folders and files. Do NOT try to change the folder or file names stored on the device from the computer otherwise you may not be able to play back any files contained here with your camcorder. After you have copied your files or folders to the computer, you can rename or edit them on the computer. Using the USB port Windows® XP, Windows Vista® and Windows® 7 operating systems will detect the camcorder automatically as a mass storage device. Please make sure that your camcorder is powered off. Open the port cover and insert the connector of the USB/AV cable into the USB/AV port of your camcorder. Plug the USB connector into a free USB port on your poweredon computer. Press the On/Off button [14] to power the camcorder on. The computer will detect the built-in memory and the memory card (if any) as a removable disk and will create a new drive with the next available driver letter. A third removable disk contains all necessary setup files for the supplied software. The camcorder display remains off and the power indicator [5] lights green. Open My Computer on your PC and double-click on the new removable disk drive. All recorded files can be found in the folder “DCIM” on this disk drive. 48 - English DV-5100HD Connectors and Ports Now you can copy the recorded files from the camcorder into a folder of your choice on the computer’s hard disk. Using a Card Reader If your computer features a card reader supporting SD memory cards, you can read the memory card’s contents directly. To do this, power the camcorder off and remove the memory card (see page 20 - Inserting the SD Card). Insert the memory card into the card reader of your computer (normally labelled SD/MMC). The PC will add the memory card contents under the drive letter in My Computer representing the card reader. Open My Computer on your PC and double-click on the disk drive representing the card reader. All recorded files can be found in the folder “DCIM” on this disk drive. Now you can copy the recorded files from the camcorder into a folder of your choice on the computer’s hard disk. English - 49 Software DV-5100HD Software The supplied software allows you to edit and play your recordings. System Requirements Operating system: Windows® XP or Windows Vista® or ® Windows 7 CPU: Intel/AMD Dual-Core processor or higher RAM: At least 1GB Graphics Adapter: DirectX 9 or DirectX 10-compatible (recommended) Interface: USB 1.1 or higher Hard Disk: Min. 2GB available hard disk space Installing the Software The bundled software is contained on the supplied CD-ROM. To be able to install the software, you first need to connect the camcorder to the computer by using the USB cable. Use the USB cable to connect the camcorder to your computer. Then power the camcorder on. Insert the supplied CD-ROM into the CD or DVD drive of your computer. The CD will launch automatically. Then follow the on-screen instructions to install. If the setup programme does not start automatically or you have cancelled it accidentally, you can launch the file “TotalMedia HDCam.exe” manually. 50 - English DV-5100HD Software Uninstalling the Software To uninstall the software, please use the Uninstall Wizard found in the Control Panel of your operating system. The Main Dialog 1 Navigation bar with multiple display options 2 The preview window shows previews and further information. 3 Toolbar for accessing the most common functions English - 51 Software DV-5100HD Select language Here you can change the language of the software interface. From the main dialog, click: >Options >Preferences Select the desired language from the list and click “OK” to confirm. The software will prompt you that it will be necessary to restart it. Click "OK" to confirm the message. Then start the application again. Registration and Upgrades From the software main dialog, click on the Information Center. icon to open the Select between the options Patches, Upgrade, Special Download, Promotion and Registration. If any downloads are available, these will be listed. Then click on the desired download and follow the on-screen instructions. These functions require an Internet connection. To exit the Information Center, click the “Close” button. 52 - English DV-5100HD Software Editing Recordings Viewing Recordings Use the USB cable to connect the camcorder to your computer. Then power the camcorder on. 4 Disk drives display and selection 5 Recordings stored on the selected disk The following options are available: From the navigation (4), select the disk drive for which you want to display the contents. to rate the current recording. Click on the star icon to show further information on the Click on the info icon current recording. To display a recording in a new window, double-click on it. In the display window, click the arrow icons , or use the arrow keys on your keyboard to display the previous or next recording. To view a video recording, double-click on it. The video window and Pause . Click the contains the icons Stop , Play arrow icons , or use the arrow keys on your keyboard to display the previous or next video recording. English - 53 Software DV-5100HD To delete a recording, click the Trash icon . The ensuing prompt needs to be confirmed with “OK” in order to execute the deletion. Importing Recordings To archive your recordings, you can use the Import function. The recordings will be copied to your computer. After you have imported your recordings, you will not need to connect the camcorder to view them. Select all recordings that you want to import from the currently selected disk drive and click "Import" on the bottom toolbar. A window with a user prompt will appear. To import the selected recordings, select the "Import selected scenes“ option. You can choose to import all or only all new recordings. If necessary, enter a folder name or use the default name. Click "OK" to confirm. Depending on the number of recordings, the copying of files can take a while. 54 - English DV-5100HD Software Selecting the Navigation View There are different ways to open your imported recordings. In the libraries, you can sort them by folder name or date. to sort by folder name. Click on the folder icon to sort by folder date. Click on the calendar icon To open My Computer, click the button. Here you can find all the disk drives installed in your computer. For example, this allows you to access any recordings stored on a CD-ROM. Preview Window The preview window offers multiple options for sorting and editing your recordings. Shows all recordings according to their rating. Shows all recordings that haven’t been imported yet. Here you can filter to display only pictures, only videos or all recordings. Drag the slider to adjust the display size for your recordings. Shows the recordings only. Shows the recordings together with other information. Here you can enter a keyword to search for. English - 55 Software DV-5100HD Toolbar Import Imports all recordings from any connected devices. Merge files Creates movies from your video recordings. Create AVCHD Burns your video files onto an AVCHD disk. Upload to YouTube Uploads video recordings to your YouTube account. Photo album Creates a photo album from your pictures. Album page Creates a page (e.g. an invitation card) from your pictures. Upload to Facebook Uploads video recordings to your Facebook account. Import See page 54 - Importing Recordings. Merge files Merge files lets you merge multiple video clips to a movie. Click the merge file icon to show the video editing timeline. Drag the desired video clips onto the timeline at the bottom of the window. Click the "Next" button to start the process. Specify the storage path on your computer or on the camcorder and then click “Save”. 56 - English DV-5100HD Software Creating an AVCHD Disk AVCHD (Advanced Video Codec High Definition) is an innovative digital standard with high resolution and brilliant picture and sound quality. This format allows you to record onto writeable DVD disks and playback on suitable Blu-ray players. It is a good addition to an HDTV television set. Not all players support playback from self-recorded AVCHD disks. Insert a DVD±R, DVD±R DL, DVD±RW or DVD-RAM disk into your CD drive. to open the disk Click the Create AVCHD Disk icon compilation workspace. Drag the desired video clips onto the timeline at the bottom of the window. Click the "Next" button to start the process. Select the drive and folder from your hard disk and click “OK”. To be able to use this function your computer must feature a DVD drive capable of writing one of the following media types: DVD±R, DVD±R DL, DVD±RW or DVD RAM Cutting Video Clips You can remove any undesired sections from your video clips. From the video recordings overview, click on the scissor icon . The playback window with the currently selected recording will appear. Navigate to the beginning of the scene that you want to cut. . Then click English - 57 Software DV-5100HD Navigate to the end of the scene that you want to cut. Then click . Start cutting by clicking the confirmation icon . The title will be cut and a new clip without the selection will be created. Upload to YouTube Click on the YouTube upload icon . Drag the desired video recording onto the timeline at the bottom of the window. Click on “Next”. Enter the user name and password for your account and then click “Login”. Follow the YouTube on-screen instructions. Upload to Facebook Click on the Facebook upload icon . Drag the desired video recording onto the timeline at the bottom of the window. Click on “Next”. Enter your email address and password and click "Login". Then follow the Facebook on-screen instructions. 58 - English DV-5100HD Software Photo Album With this option you can create an album consisting of multiple pictures. There are also several templates that you may use. Click the Photo Album icon . Drag the desired pictures onto the bar at the bottom of the window. Click on “Next”. The "ArcSoft Print Creations" programme will launch automatically. Choose a category and then a template from the application. To do this, double-click on the desired template. Album page With this option you can create an album page consisting of one or multiple pictures. There are also several templates that you may use. Click the Album Page icon . Drag the desired pictures onto the bar at the bottom of the window. Click on “Next”. The programme "ArcSoft Print Creations” will launch automatically. Choose a category and then a template from the application. To do this, double-click on the desired template. English - 59 Appendix DV-5100HD Appendix Technical Specifications Capture sensor Lens Colour LCD Display Shutter speed File format White balance Effects Self-timer Video lamp Memory TV Out Power Supply Charger 60 - English 5 megapixels CMOS Fixed lens Focus range: f = 7.5 mm Aperture: F = 3.2 7.5cm TFT 2s ~ 1/2000s Video: MOV Photo: JPEG Automatic, Daylight, Cloudy, Fluorescent, Tungsten Normal, Black and white, Sepia 5s, 10s LED light 128 MB internal flash memory (partially used by the operating system) SD card reader max. 8 GB, SD(HC) PAL, NTSC, HDMI Rechargeable Li-Ion battery, PAC-0040 3.7 V, 1100 mAh or 4x 1.5V AAA batteries (LR03) Manufacturer: Scope Technology Co. Ltd. Model: DJ04V20500A Input voltage: 100-240V AC, 50/60Hz Output voltage: 4.2 V 600 mA DV-5100HD Operating temperature Operating humidity Microphone Speaker Dimensions Weight Appendix 0 °C - 35 °C max. 85 % rel. humidity Integrated Integrated 41 x 68 x 111 mm (W x H x D) 227g (without battery) Troubleshooting Unable to power the camcorder on. Charge the battery pack or insert four batteries. The camcorder does not record any pictures. Check if there is enough space available on the inserted memory card. Insert an empty memory card or delete some recordings. Check if the memory card has been formatted properly. Format the memory card or try with a different memory card. The picture is distorted or blurred. The subject was located outside the camcorder focus range. Change your position relative to the subject. Use the Macro mode when capturing very close subjects. The picture is blurred. Hold the camcorder still while taking the picture. No connection to the computer is established after connecting the USB cable. Unplug the USB connector from the computer and insert it again. You may also try a different USB port. English - 61 Appendix Details of Guarantee 62 - English DV-5100HD DV-5100HD Appendix English - 63 Declaration of Conformity We: Targa GmbH Lange Wende 41 59494 Soest, Germany declare our responsibility that the product: model: Camcorder SilverCrest DV-5100HD is confirmed to comply with the requirements set out in the Council Directive on the Approximation of the Laws of the Member States relating to Electromagnetic Compatibility 2004/108/EC and the Council Directive relating to Low Voltage 2006/95/EC. The measurements were carried out in accredited laboratories. For the evaluation of above mentioned Council Directives for Electromagnetic Compatibility and for Low Voltage standards were consulted: EMC: EN 55024:1998 + A1:2001 + A2:2003 EN 55022: 2006 limit class B EN 61000-3-2:2006 EN 61000-3-3:1995 + A1:2001+A2:2005 Safety: EN 60950-1:2006 th Soest, 14 of Aug. 2009 authorised signature ______________________________ Matthias Klauke, Managing Director 154 1 230 TARGA GmbH Lange Wende 41 D-59494 Soest www.silvercrest.cc 6