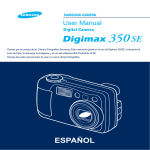
Download Samsung Digimax350 SE Specifications
Transcript
CONTENTS
Ⅰ. S P E C C I F I C A T I O N
1. SPECIFICATION ……………………………………………………………………………………………… 4
2. SYSTEM REQUIRMENT ……………………………………………………………………………………… 4
Ⅱ . F A Q s ……………………………………………………………………………………………………………5
Ⅲ. EXPLODED VIEW AND PARTS LIST
1. BODY ASSEMBLY ………………………………………………………………………………………… 18
2. BODY ASSEMBLY ……………………………………………………………………………………… 20
3. FRONT COVER ASSEMBLY ……………………………………………………………………………22
4. BACK COVER ASSEMBLY ………………………………………………………………………………… 24
5. PACKING ITEM ………………………………………………………………………………………………26
Ⅳ. PRODUCTS CONSTRUCTION
1. PARTS ARRANGEMENT & TROUBLESHOOTING FOR EACH PCB ASS’Y
1) MAIN PCB ASSEMBLY ……………………………………………………………………………………28
2) POWER PCB ASSEMBLY …………………………………………………………………………………32
3) LCD PCB ASSEMBLY ……………………………………………………………………………………34
4) STROBO PCB ASSEMBLY ………………………………………………………………………………36
5) CCD F PCB ASSEMBLY …………………………………………………………………………………37
6) LENS F PCB ASSEMBLY …………………………………………………………………………………38
7) DIAL F PCB ASSEMBLY …………………………………………………………………………………38
2. BLOCK DIAGRAM…………………………………………………………………………………………… 39
3
Ⅰ. SPECIFICATIONS
Image Sensor
Lens
1/1.8" CCD, Approx. 3.2Mega pixels(Effective Pixels)
f=7.0∼21.0mm(35mm film equivalent 34∼102mm)
F 2.6 ~ F4.7
Digital Zoom
Still image mode : 1.5x, 2x
Play mode : Large(1.5~5x) / Medium(1.5~3x) / Small(1.5x)
View Finer
Real Image Zoom Optical Viewer
LCD Monitor
1.5" TFT Color LCD Monitor(117,600dots, 490x240)
Focusing
TTL autofocus/fixed focus(1.0m, 2.5m, infinity)
Focus Range
Normal : 0.8m∼infinity, Macro : 20cm ~ 80cm
Shutter
Mechanical & Eelctronic shutter
Shutter Speed
4 ~ 1/2,000 sec.
Exposure
Control: Program AE(Center Weighted Average / Center)
Compensation: -2 ~ 2EV(0.5EV steps)
ISO Equivalent
100, 200, 400, Auto
Flash
Mode : Auto/Red-eye reduction/Slow sync/Fill-in/Flash off
Range(ISO AUTO): WIDE: 0.2 ~ 3.0m, TELE: 0.2 ~ 2.0m
Charging TIme : about 7sec
Sharpness
Soft/Normal/Hard
Effect
Color/B&W/sRGB/Sunset
White Balance
Auto/Daylight/Fluorescent/Tungsten
Shooting
Still Iimage : Single/Continuous
Night Scene : Portrait/Landscape
Movie Clip : With voice/Size 320x240
Self-timer
10sec.
Storage
CF Card
File Format
Still Iimage: JPEG(DCF), DPOF Movie Clip: AVI(MJPEG)
Image Size
Large : 2048x1536 Pixels, Medium : 1024x768 Pixels
Small : 512x384 Pixels, Photo : 2048x1360 Pixels
Capacity(16MB)
Large : Super fine 9, fine : 19, Normal : 29
Medium : Super fine 38, fine : 75, Normal : 110
Small : Super fine 163, fine : 269, Normal : 377
Photo : Super fine 10, fine : 22, Normal : 32
Image Play
SIngle, Thumbnail, Slide show
Interface
Digital output connector :USB
Video output : NTSC/PAL(User selectable)
Audio : Mono
DC power input connector : 6V
Power Source
4x AA Alkalinr/ 4x Ni-MH/2x CR-V3batteries
AC adaptor(option)
Dimensions(WxHxD)
114x70.7x49.9mm
Weight
240g(Without batteries and CF card)
Software
Camera Driver : Storage Driver(WIN 98/98SE/ME/2000/XP,
MAC OS 9.x or above)
Application : MGI PhotoSuite, Digimax Viewer
4
Ⅱ. FAQs
Ⅰ. Digimax 350SE software introduction
▶ USB Storage Driver
USB Storage Driver makes digital camera operate as USB connection cared reader device.
If you set up driver, you can see and copy pictures of digital camera in PC directly.
In case of this camera, USB Storage Driver is supported for only Windows.
Driver for Macintosh is not supported additionally, but you can use in Mac OS 9.X.
▶ Digimax Viewer
In this program, You are able to check image-stored in Camera-automatically through PC
monitor.Also, you can use various functions ; file copy, move, delete and image
enlargement,curtailment and so on.
This software is supported for only windows.
▶ MGI PhotoSuite Ⅲ SE
In this program, you can edit and store still image downloaded from camera.
This software is supported for only Windows.
Ⅱ . System specification
▶For Windows
Computer
- personal computer with MMX Pentium 200Hz processor or better
Operating System
- Microsoft Windows 98, 98SE, 2000, ME, XP
Memory
- RAM with 32MB at least(128MB with WIN XP)
Others
- USB Port, Hard disk with more than 140MB of space left
16 bit color display adapter or compatible monitor,
screen resolution of 900 X 600 pixels
(24bit color display adapter and true color display are recommended)
▶ For Macintosh
Computer
- Power Mac G3 or later with USB Port
Operating System
- Mac OS 9.X above
- QuickTime 4.0 or more installed
Memory
- 64MB or more storage left
Ⅲ . Program Installation
▶ For Windows
Refer to the manual for detailed informatio n on installation.
USB Storage Driver : p 105 -106
Adobe PhotoDeluxe : p 107
▶ For Macintosh
Separated Driver or editing software is not supplied.
Driver for Macintosh use is automatically installed when the camera is turned on at the PC mode.
5
Ⅱ. FAQs
< For Windows >
- Our company aren't responsible for case of using Personal Computer isn't guaranteed from manufacturer
like assembled PC.
▶ When installing
Q1. How can I check of the USB Interface available in my PC?
A1. First, Check if the USB ports located in the back of the body or keyboard to
connect the USB cable as shown in the figure.
Second, Check if [Universal Serial Bus(USB) Controller] located in the System
Device Manager. Check as follows,
Click「Start → Setting → Controller → System → Device Manager
→ Universal Serial Bus Controller」sequentially.
Then there should be the USB Host Controller and USB root hub
in the USB controller.
Third, Check the OS installed in PC.
The USB Interface is enabled in Windows 98 or later(Windows 98, 98SE, 2000, ME),
Windows 95 OSR 2.1 or later.
It should be met with the following three requirements.
For other details about USB, see http://www.usb.org.
Q2. Though the Driver CD inserted in CD-ROM Drive, Auto Installation screen is not operate.
How can I install the program?
A2. First, It might be occurred if [Auto insert notification], the option to run Auto installation Screen
when the CD inserted was not set.
Set「Auto insert notification」as follows.
If selecting「Start → Setting → Controller → System → Device Manager → CDROM」
(see Fig. 1), the installed CD-ROM appears. Double click this and then select the setting,
the following frame(see Fig. 2) will be shown.
Select「Auto insert notification」from the options and reboot the PC.
<Fig. 1>
<Fig. 2>
6
Ⅱ. FAQs
Second, You need 5~10seconds for running the automatic setup program according to the capaility of
the computer. If the frame is not displayed even after this, run the「Windows Explorer」and
select「Samsung.exe」in the CD-ROM drive root directory.
Third, Without running the Auto Installation Screen, run the「Windows Explorer」and install the S/W
directly at the desired program folder of CD-ROM root directory.
- USB Storage Driver : Run「Setup.exe」in the「Camera Driver Setup file」folder
- Digimax Viewer :Run「Setup.exe」in the「Digimax Viewer」
- MGI PhotoSuite Ⅲ SE :Run「Setup.exe」in the「MGI PhotoSuite Ⅲ SE」
Q3. Can we use normal USB Cable ?
A3. Necessarily, you must use supported USB cable when purchasing product.
Q4. When I connects USB cable with not like first USB port, [New hardware found wizard] operates
again. Of course, I have ever used this driver after setting up. Why does it happen ?
A4. Drivers are controlled by USB port and connected to each USB port. Therefore, if you connect
another
port, [New hardware found] can recognize it as new connected device.
There is no fault on your system, just follow direction comes out on your monitor.
Q5. I set up driver with supported CD, but screen came out like below. What should I do?
A5. Though Driver was set up already, if you click USB Storage Driver of set up screen again,
that kind of problem comes out.
At this time, if you choose [Confirm], be careful not to remove a driver.
And in case of using camera continuously, choose [cancel].
7
Ⅱ. FAQs
Q6. How can I check if the USB Storage driver has been installed successfully?
A6. Connect camera to the PC with the provided USB cable and turn it on at the PC mode.
Then the following is shown.
(1) Removable disk appears.
(2) In the system properties, the device state is indicated as 'The device is working properly'.
< Win 98/98SE >
- Disk drives : SAMSUNG REMOVABLE DISK
- Universal Serial Bus(USB) controller :
Samsung USB Mass Storage Device
- USB Port driver :
Samsung Mass Storage Class Adapter
8
Ⅱ. FAQs
< Win ME >
- Disk drives : Samsung Removable Disk
- Universal Serial Bus controller :
Samsung USB Mass Stroage Device
- Storage device : USB Disk
< Win 2K / XP >
- Disk drives :
Samsung Removable Disk USB Device
- Universal Serial Bus controller :
Samsung USB Mass Storage Device
- storage volume : general volume
(3) Please check as belows files are installed or not.
< Windows 98 / 98SE >
chiosmsd.inf, D350SE.inf : Windows/inf/other
chiosmsd.pdr : Windows/system/iosubsys
coachmsd.sys : Windows/system
< Win ME / 2K/ XP >
D350SE.inf : Windows/inf
usbstor.sys : Windows/system32/drivers
9
Ⅱ. FAQs
Q7. I connected camera to computer by PC mode but warning message came out; can't find a
driver fitted for device and set up as unknown device. What should I do?
A7. USB Storage Driver for Digimax 350 is not set up or set up by wrong way.
After preferring manual page 111~112, set up USB Storage Driver correctly.
Also, first connecting a camera, if you are trying to set up driver, this problem happens.
After you must USB Storage Driver, connect a camera and use it.
In case of you set up by wrong way and XP, refer below direction.
(1) Wrong set up(based on Win XP)
If error happens in setting up, this kind of
problem comes out ; "! DSC" or "unknown
device" in device manager when connecting the
camera.
After clicking right mouse button, press remove
button.
Disconnect camera from PC.
(2) Caution when setting up XP
In setting up Windows XP, in case of related
massage like side, choose "continue" and finish
setting up. This is just massage about you are not
accepted by Microsoft "Logo" certification.
You have no problem to use a camera.
In above screen, in case of choosing "stop set up", camera set up will not finish normally.
After referring (1), do set up again.
10
Ⅱ. FAQs
Q8. Power on camera, after connecting to computer, computer doesn't work when power on computer.
A8. Depend on computer, at the moment of Power is on, may not work with outer device.
In this case, after power on computer, connect USB cable and power on camera, then convert to
computer connect mode
Q9. If using the VIA chipset
A9. If using the VIA chipset, USB communication might not operate normally in some case.
The patch file of USB Filter Driver is also registered in the website of VIA Technology Inc.
Install the patch file and then use it. You can find the patch file in the following URL.
http://www.viatech.com/drivers or samsungcamera.com
Q10. If using AMD processor and VIA USB Controller
AMD Processor more than 350MHz, USB controller of VIA Technologies
A10. It has been known that there being the problem in the USB operation between Microsoft Windows
98SE version and the above hardware, so the patch file is registered in the Microsoft Website.
Download and install the patch file.
You can find the patch file in the following URL.
http://support.microsoft.com/support/kb/articles/Q240/0/75.asp
(Ref) It has been modified in Windows ME(Millennium Edition).
Q11. Using Intel chipset
A11. The patch file concerning the Intel chipset is registered in the Intel website.
Download the required file from the following website and then upgrade the system.
http://developer.intel.com/design/software/drivers/platform/inf.htm
11
Ⅱ. FAQs
▶ When playing moving image
Q1. When opening the moving image photographed by camera, it is not open.
A1. The video decoder for Digimax 350SE was not installed.
Please install the video decoder.
However, video decoder is installed automatically during installing Storage Driver of Driver-CD.
<Method 1>
Put the provided Driver-CD into CD-ROM Drive.
Play the「Windows Explorer」and then click「JPEG-Decoder」folder in the CD-ROM Drive folder.
The frame below is displayed when you select「Jpegcode.inf」in「JPEG-Decoder」folder and then press
the right button on your mouse. When you select「Install」, the video compression codec is automatically
set up.
If the following display shown during installation, do as follows.
12
Ⅱ. FAQs
If pressing「OK」button, the screen will be displayed as shown in the following figure. This time,
if pressing「OK」button, installation is automatically completed.
If Auto Installation does not operate, select Copy files from as「JPEG-Decoder」folder and then
press「OK」button.
If installed normally,「JPEGCODE[JPEG]」and「JPEGCODE[MJPG]」will be displayed on
「Video Compression codecs」in「Multimedia properties」.
To show the following screen, press 「Start → Setting → Controller → Multimedia → Device」
sequentially.
Only, windows 98, 98SE-based.
13
Ⅱ. FAQs
<Method 2>
Please install the QuickTime for replaying AVI files.
You can download QuickTime from http://www.apple.com/quicktime/download for free, and it is
trademark of Apple Computer, Inc.
▶ USB Storage Driver use (Removable disk usual)
Q1. When trying to use camera as Removable disk connecting with PC, screen comes out as below.
A1. The camera doesn't have memory card. After inserting memory card, use it.
Q2. I connect a camera to PC, but "Removable disk" icon doesn't come out or when double-clicking "
removable disk" icon, error message comes out. Why does it happen ?
A2.
(1) Doesn't set up PC mode of camera. Adjust mode dial to PC mode.
(2) Has problem in power supply. Check about connecting AC adapter correctly or battery remainder.
(3) Has a problem in Card.
Check to see image in camera monitor.
(4) Has a problem in USB cable connecting a camera to PC.
Use supported USB cable with camera.
Q3. One of files in PC, I did copy download file to memory card of camera, but I couldn't check it in PLAY
mod of camera.
A3. It may happens in case of recording file from computer to camera and file in memory card
aresame. So, though it has same file name in memory card like (ex. S350001.JPG /S350001.AVI),
it displays in order JPG -> AVI, only one file in play mode of camera.
Also, in case of deleting displayed file from camera, can be deleted another file of same file name.
So, when recording photographing image from computer to camera, be careful not to add with file
name of memory card.
14
Ⅱ. FAQs
Q4. When I record random file not to photograph with Digimax 350SE from computer to
camera, what should I do?
A4. When you record random file not to photograph with this camera from computer to camera,
message "Wrong file" displays in screen view, appears black in Thumbnail. It can be
impossible to check in Camera.
Q5. I copied a file from computer to camera, but it wasn't recorded in camera.
A5. Because you operate a camera during you are working on PC.
So, when operating works; copying file of Removable disk to computer, deleting and copying
file in computer to portable disk, green lamp of side view finder of camera is on and off.
When green lamp is off completely, it means operating work finish correctly. Before this,
not to do another work ; USB cable disconnect, mode dial adjust, disconnect camera
through [hardware disassemble and put out].
Specially, be careful below problem in Windows 2000.
1. Case of Deleting files of Removable disk : After done deleting a file in PC, green lamp is
off in 10 seconds.
2. Case of moving file of Removable disk to PC and copying file of PC to Removable disk :
First step, green lamp is off, in 15-20 seconds, second green lamp is off again.
Case of 1, 2, when all green lamp are off completely, operating work finishes normally.
& Operating camera during working with PC, it may cause media damage and data loss.
So, after green lamp is usually off, operate camera.
Q6. When transmitting amounts of image data, what is required detail?
A6. When transmitting amounts of image data, it may not have enough virtual memory of system..
For this, increase virtual memory like this.(based on Win 98SE)
1. [Start]->[Settings]->[Control Pad].
2. Click the [System], open "system register information".
3. In "Efficiency", "Advanced Settings" Press "Virtual memory" button.
4. Press "User manage virtual memory setting directly" of virtual meomory.
5. In virtual memory screen, increase each minimum(MB) and maximum(MB).
6. If you press "OK" button, it finish virtual memory settings.
15
Ⅱ. FAQs
Q7. When moving image is playing in Removable disk, it looks like photograph cutting off.
A7. If image is playing in memory directly, it may cause photograph cut off.
Before you see photograph, copy files to hard disk of PC and play it.
▶ Digimax Viewer Use
Q1. If camera is connected, Viewer program operates automatically, but it didn't operate for me.
What should I do?
A1. (1) Check to adjust PC mode of camera.
(2) Check to set up Digimax Viewer program.
(3) Check Digimax Viewer icon on Start Menu working line, and confirm to check "Auto
launch when connected". If it does, operate automatically.
Or, check "Auto launch when connected in Setting Menu of Viewer program.
▶ USB Storage Driver removal
Necessarily, referring manual page 136-137, remove USB Storage Driver.
< Reference > Method to search device manage for OS
1. Windows 98/98SE/ME
Settings → ontrol Pad → System → Device Manager
2. Windows 2000
Settings → Control Pad → System → Hardware → Device Manager
3. Windows XP
(1) Control Pad → Efficiency and maintenance manage → operation choose :
Basic information about computer → Hardware → Device manager
(2) Control Pad → Efficiency and maintenance manage → Control pad icon choose :
System
* For Windows 2000/ME/XP , Driver file, usbstor.sys is supported System file from OS,
Do not remove.
16
Ⅱ. FAQs
<For Macintosh>
- When purchsing Macintosh computer, check installed over MacOS 9.0 and USB Mass
StorageSupport 1.3.5
- Not guarantee of USB operating in PC has Mac OS and Mac OS USB Mass Storage
Support upgrading.
Q1. Is Driver supported for Macintosh ?
A1. It is not additionally for Macintosh, but you can use this driver in over Mac OS 9.X
Connect a camera to Macintosh with USB cable, after power on, it is recognized as Unknow name
disk automatically.
Q2. When installing USB Storage Driver, QuickTime 4.0 or better is shown in the system requirements.
QuickTime is not included in the Driver CD. How can I install USB Storage Driver?
A2. QuickTime 4.0 or better has more on the image comparing to the preceding version.
If you take advantage of this, the camera image can be shown more effectively.
Therefore be sure to install it.
If you go to http://www.apple.com/quicktime, you can download the up-to-date version.
Q3. How can I check the USB version in iMac?
A3. Click in the order of "Apple System Profiler - Device and volume" and the USB version is shown.
If the USB version is 1.0.1, updating is needed. But if it 1.1, you can use it without updating.
http://developer.apple.com/hardware/usb/, you can download the Mac OS USB DDK 1.5.5.
17


